What do you get after a few years of iterations, advancements in batteries and a near perfect track record of building personal electric riding devices? I’m not exactly sure but the Segway Ninebot E3 Pro electric scooter is a great step in the right direction.
Featuring an 800W Motor with a 40km range and 25km/h top speed (32 km/h in Sport Mode), the Ninebot E3 series is the perfect sized scooter for daily commutes and weekend cruises around town. It folds up for easier storage and includes enough bells and whistles to satisfy most RGB LED enthusiasts.
I’ve averaged over 10km each the half dozen times I’ve taken it out so far and every time I’ve realized that it’s likely the best mid size electric commuter scooter I’ve used so far.
Stay with me while I reminisce to the simpler push powered days of scooters and why electrics are so much more fun before I get into the review proper. Feel free to skip the next section for the review proper.
My Love of Scooters Backstory
Long before electric scooters were a thing and Lime, Bird and their rental fleet ilk were still a far off dream, our family were using push scooters to get around locally. When our oldest was not much older than a toddler, we bought him a scooter and I can vividly remember asking Micki if I should get one too.
Back then there weren’t many options but I eventually found an adult sized push one (that I still enjoy to this day) and we would often head out together. Car trips across the country would often include us throwing the scooters in the back and the amount of laps we’ve done in the nearby parks over the years would make a Nascar racer jealous.
A few years later Micki decided she wanted in on the action so we got another one. As our daughter got bigger, we bought her a small one and when both kids got older, we swapped theirs out for adult sized ones as well.
Fast forward a few more years and electric scooters are everywhere. Now found in most North American and European cities, love them or hate them, the truth is they’re out there, they’re a great way to get around and much easier on the environment (and cheaper) than jumping in a Taxi or even taking an Uber.
While they’ve changed over the years, the Segway Ninebot series have always been considered a solid electric scooter. So, where does the current iteration stand? Let’s take the Segway Ninebot E3 Pro out and see how it fares.
Segway E3 Pro Electric Scooter Review
Receiving the large box the Segway E3 Pro scooter came in was surprising. A bit larger and heavier than I expected, I wasn’t sure how much assembly I would need to do. Luckily, as I opened the box, I quickly realized that Segway had put assembly instructions on everything from the box itself telling how to lift it out to nicely labelling every part it came with.
To be honest, there really wasn’t a lot to assemble. Basically just a few screws using the included 3 way hex key. Opening the box itself, the scooter was folded over and included a large velcro band securing everything together. Unfortunately, I was so excited to get it set up that I forgot to take a few pictures of the unpacking process…
That said, it literally comprised of pulling the scooter out, undoing the velcro strap, adjusting the steering then putting a few screws in. That’s it!
Segway E3 Pro Features
Standing back, I admired the flashing lights as I hit the power button.
Instantly you realize the Segway E3 Pro includes handlebar mounted turning lights, a bright brake light, a headlight, colored undermount deck LEDs plus a nice central speedometer with battery and mode indicator. There are even a few thoughtfully placed stickers telling you how to run the scooter if you just want to jump on and take it for a ride.
The Segway E3 Pro features 4 riding modes that you can switch between by double pressing the Power button. You can either do it while traveling or while the scooter is stationary. The nice and bright 3 inch display will switch between W, E, D or S so you’ll always know which mode you’re in.
Like most e-scooters, each mode has it’s own max speed and ride lengths. Essentially, the faster you go, the quicker your battery drains and the lower your max distance will be so if you’re hoping for a longer distance or, if your battery is draining quickly and you still have a ways to go, drop the mode down.
Walking mode: A slow max 6km/h (4mph) top speed designed to match a fast walking pace. (Perfect for riding next to a walking friend or spouse.)
Eco Mode: Max speed is 15km/h (10mph)and estimated ride lengths of up to 55 km (35 miles). This is the one if you’re driving through the park with a lot of people around or need to really extend your driving distance as it has by far the longest run times.
Default Mode: Max speed is 25km/h (16mph) and ride lengths of up to 40km (25 miles). This is the default mode and suits the E3 Pro just fine for most users who are comfortable on a scooter. Great for side streets and just fooling around.
Sport Mode: Max speed is 32km/h (20mph) and ride lengths of up to 25km (16 miles). This is the fastest mode and great for those riders who have a bit more experience or crave a bit more speed. Note that this could be higher than legal speed in some jurisdictions.
Most of my 10km+ rides have been in Sport mode and I’m usually left with around 60% battery when I return home however do note that I ride in a hilly city. My 25km/h 10km drive had over 75% remaining as I was taking it easy and keeping to somewhat flat areas so those numbers above don’t seem far off. Of course, these speeds and max distances will vary with rider weight (max 120kg or 260lbs), driving style and terrain so your own mileage may differ.
The bonus is that the E3 Pro rolls decently even when power is off so pushing it home if you exceeded your range is doable. (I went up and down my street testing it out and was surprised how well it pushed like this.)
Segway E3 Pro On Road Tests
The 800W max power motor can easily handle slopes up to 18% and on my third trip I hit a local hill that had a very steep mid 20’s incline. It dropped me down to 22km/h on the steepest parts but never slowed beyond that so I was overall impressed with the power of the E3 Pro on the hills.
Heading back down the hill, the front drum brake and rear electric regenerative braking handled braking just fine and the 10 inch tubeless tires coupled with the front and rear suspension handled the small road bumps like a champ. It did make me wish I had the F3 or even the G3 so I could really let loose on those back hills but this E3 Pro model was never intended for that style of driving.
On my way back that day I hit a few gravel paths and the Ninebot E3 Pro actually handled it better than I expected. I dropped the speed down and I wouldn’t recommend it for rough gravel however if there’s patches of smooth gravel you need to cross on your daily commute, the E3 isn’t bad. The suspension kept me in control however on the rough gravel with larger bumps again I wished for the more expensive F3 Pro or even G3 Pro Ninebot model with their higher end suspension.
Power wise, the Segway is quick to accelerate but you can tell the designers opted for a smooth acceleration rather than the raw power some cheaper brands provide. What this means is that inexperienced or younger drivers won’t be overwhelmed the first time they get on the E3 Pro. The only time I really craved faster acceleration was after stopping at a long red light and having a car impatiently waiting to turn as i jumped back on. I didn’t feel that it was bad at any other intersections so all in all I’m not really complaining.
In fact, the inclusion of the turning lights on the handlebars actually gave me more confidence in traffic than other electric scooters I’ve used in the past. Signaling my intentions let drivers know what I was doing and you could see the relief in their eyes when I behaved more like a car and not a drunk madman barreling down the sidewalk not caring who I cut off in the process.
The Segway E3 Pro handled both on street and rough sidewalk driving well and has a good weight balance to power ratio for a scooter in this class. It did remind me of a rental scooter in how solid it felt (not a bad thing) and the people I let test it out confirmed it drove similar to a few rentals they’ve used except the E3 Pro seemed a bit peppier.
Comfort wise, the grips have a nice feel and the deck feels solid without a lot of bounce. When I pushed it a little harder and jumped off a few curbs I never felt I was in danger or that the Segway couldn’t handle it. Everything feels nice and tight like a new scooter should.
The folding mechanism is straightforward if not a bit stiff. You really need to give it a solid kick with your foot to fold it. While it can be a bit tough, it also means it’s not going to accidently fold on you.
I will say the locking method in folded mode could be a bit better as, while it makes carrying it in folded mode possible, it never truly locks and I felt it could unlock on me if I wasn’t paying attention. That said, most people won’t be walking with it folded for great distances and there are tweaks you can find online to make it a little better if that’s a mode you carry it in often.
Segway E3 Pro App
Like all the newer Ninebot series, the Segway E3 Pro can be connected via Bluetooth to your phone. While there are several things you can do to control certain settings directly via the brake and power button (and various combinations of presses thereof), there is no touch screen or control stick on the scooter itself.
Changing everything from start up speed (how fast you need to push off for the motor to start being engaged) to brake regeneration amounts can all be tweaked in the Segway app. You can also change the undercarriage LED light patterns for each driving mode as well as set the brake light to solid or blinking. It also lets you easily switch from Imperial to Metric.
The app also provides a battery and speedometer on a nice dashboard if you want to mount your phone to the handlebars plus it can tell you information about everything from motor temperature to distance remaining to current firmware. The latter also lets you update the firmware in case there have been tweaks or updates since you purchased it.
I really appreciate having the distance traveled (last trip) plus total mileage being monitored as well. This would be great information to know for second hand purchasers to see how much real wear and tear the scooter has seen. It can also be a great way to see how the battery is fairing.
The app can also let you lock the Segway scooter and set alerts including a Find Me option. This is great if you’re planning to do some shopping and need to leave you scooter outside for a bit. While there is no dedicated chain lock loop on the scooter itself, the app can tell you if the scooter is moving away or has suddenly gone out of range.
Final Thoughts on the Segway E3 Pro Scooter
The Segway E3 Pro is a great daily commuter scooter for in city action. It also makes a great scooter for driving around the neighborhood, heading to the park or tackling the pavement trails. The 800w motor and 25km/h max speed (16mph) are a great combo on a scooter at this weight and price point and you get a lot of features from a major brand.
My only real gripe with the scooter is the folding mechanism lock (or lack thereof) and the fact it can’t do 40 km/h but that’s just wishful thinking at this pricepoint. The max 32km/h (20mph) in Sport Mode is a nice bonus for this model and is even higher than many jurisdictions in Canada and the USA allow. That said, I had no problem passing some light green colored rental e-scooters and definitely beat others off the start so the E3 Pro is no slouch.
While this Segway E3 Pro scooter was provided for me, I have zero problems recommending it to people. It sits at the sweet spot for price to power to feature list and Segway scooters are the most popular brand of scooters in North America for a reason. The quality is top notch and I suspect I’ll be putting on hundreds more kilometers on this thing over the next few years.
Welcome to the TPT Travel Guide to BACOLOD! In this article, we’ll share with you tips on which area to stay in Bacolod, how to get there from Manila, and how to get around. You’ll also find a sample itinerary with budget breakdown.
There are places that you will remember not because of what you saw but how it made you feel. Bacolod is one of those places.
Bacolod doesn’t have the spectacular sights that other destinations in the Philippines boldly and loudly brag about. But what it lacks in visual treats, it makes up for by delighting the other senses. It’s in good company, too. Bacolod may not have the sweeping landscapes, but its posse have more than their share. Neighbor Murcia makes a splash with her waterfalls. Silay and Talisay have lots of stories to tell. And just 4-5 hours away are Kabankalan, Cauayan, and Sipalay, all waiting to showcase their natural splendor to those who go the extra mile.
Before we dive into the details, here’s a checklist of travel essentials if you are traveling to Bacolod. You’ll also find links to some of our recommended hotels, tours, and attractions for easy reference in the future.
Bacolod Travel Essentials
Top Bacolod Day Tours
✅ You can also visit our The Poor Traveler Masterlist. Here, we compiled travel essentials, including all our recommended hotels and attractions. Just visit this page: TPT Masterlist. Then, scroll until you see the section about Bacolod. We also have a compilation for other destinations around the world.
UNDERSTANDING BACOLOD
Bacolod is widely known for three things: sweets, smiles, and the Masskara Festival. Oh, and chicken inasal. So okay, make that four things. Haha. It is the capital of Negros Occidental, one of the biggest provinces in the country in terms of land area and population. Yet, a big part of its territory remains unknown to non-residents.
Negros Occidental has 13 cities (including independent Bacolod) and 19 municipalities. That’s a lot of cities in just one province. But before you conjure up images of skyscrapers, know that Bacolod is the only one that is highly urbanized. The others are more like small towns, more laid-back and still pretty rustic.
Other info you need to know:
Language: Hiligaynon (Ilonggo). English and Tagalog are widely understood.
Timezone: GMT+8 (Philippine Standard Time), year-round. No daylight saving time observed. Same time zone as Beijing, Singapore, and Malaysia. One hour behind Japan.
Mode of Payment: Cash. ATMs are all around Bacolod, but they turn much fewer in other cities and municipalities. If you’re exploring other parts of Negros Occidental from Bacolod, you might want to withdraw money while you’re in the capital. Credit cards are often accepted in upscale establishments in Bacolod, but cash is still preferred.
WHERE TO STAY IN BACOLOD
In general, because there are plenty of transportation options, if you’re staying within the city center of Bacolod, you should be fine. But we usually use Lacson Street as our reference line because many of the city’s most popular attractions are located along this road. The closer you are to Lacson Street, the better. If you want something more specific, I like using Calea as the reference point because I always find myself craving their cakes when I’m in the city.
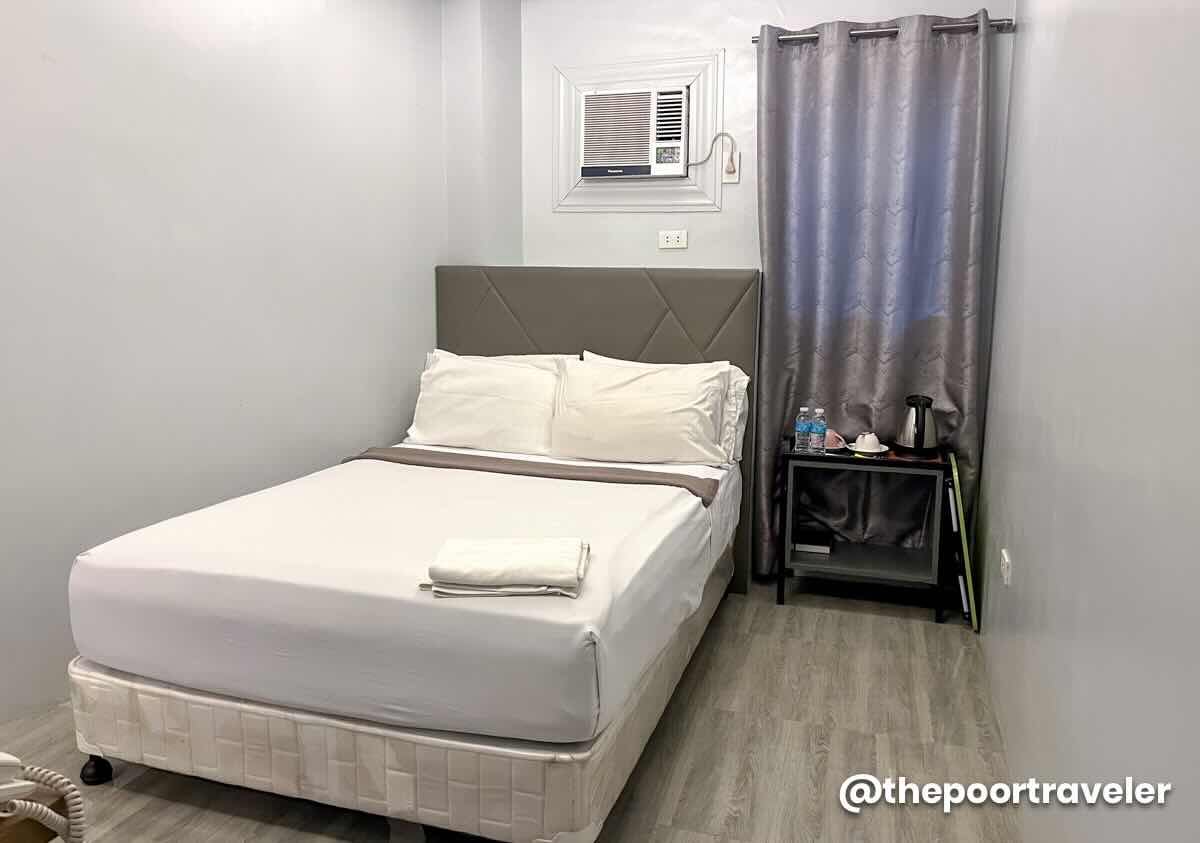
We have stayed at six different hotels across Metro Bacolod, but here are a couple of properties that we were able to try recently. First, UrbanView @ Lacson Street Bacolod City by RedDoorz, which is centrally located. Yes, it stands very close to Calea, Felicia’s, and the Negros Occidental Provincial Capitol. You’ll also find a branch of both Bongbong’s and Merczi pasalubong shops nearby.
UrbanView @ Lacson Street Bacolod
We stayed in a deluxe room with air-conditioning, WiFi, TV, in-room telephone, foldable bed table, electric kettle, and complimentary bottled water. As for the bathroom, basic toiletries were provided, the water heater was working well, and the water pressure was good. The room was good for two guests. It’s a budget hotel, and we only paid P1616.45 per night, which I think is a good deal! That’s only P808 per person.
The room is quite cramped, and it doesn’t have an elevator. But the staff were very helpful with the luggage and attentive to requests. If you’re a budget traveler and it’s your first time in Bacolod, UrbanView is a good place to start.
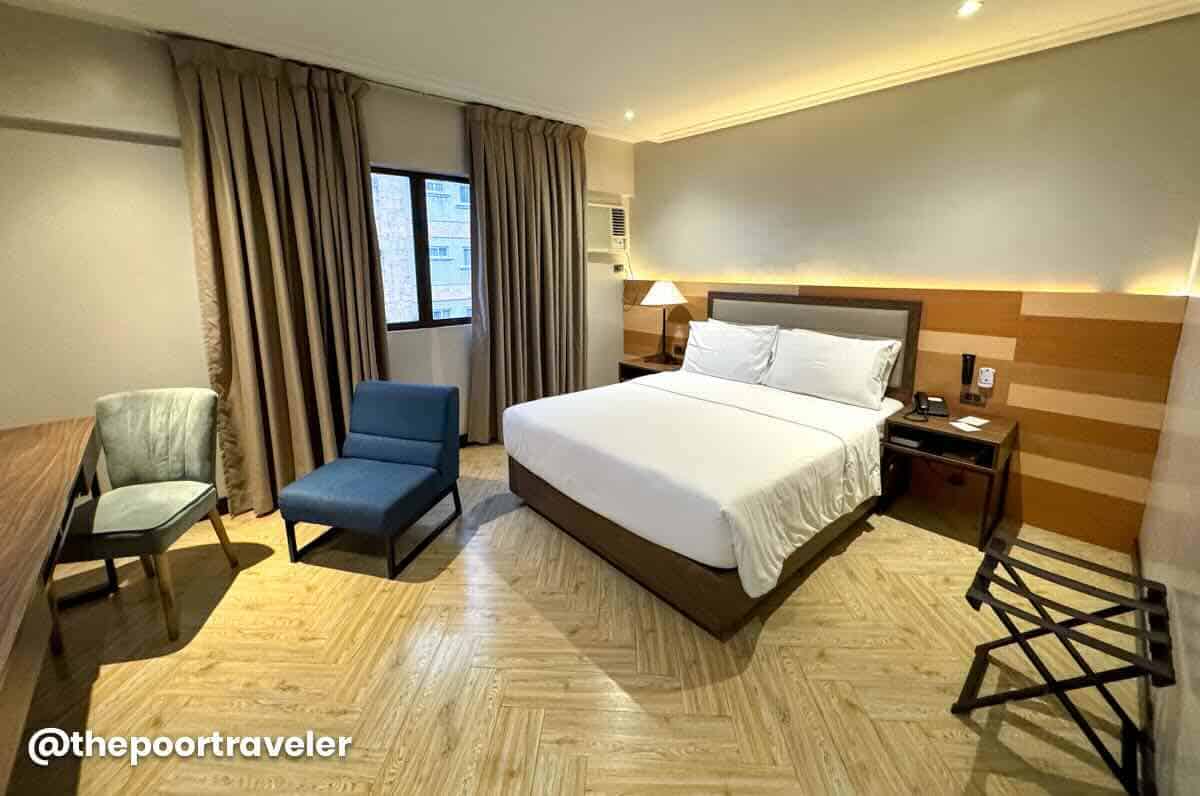
But if you want a proper full-service hotel close to the port or SM City Bacolod or SMX Convention Center, maybe Acacia Hotel Bacolod is the place for you. All their rooms are very spacious, have air-conditioning, free WiFi, safes, flat screen TV, refrigerator, electric kettle, and daily housekeeping. It is generally clean, and the service was great. It is also home to the city’s first wave pool — fun, family-friendly, and perfect for lounging.
Acacia Hotel Bacolod
The bar below offers buy-one-take-one cocktails, but the breakfast was so-so at best. We didn’t mind because, like we always say, we’re not big breakfast people.
It’s in a secluded area away from the main streets, but not far from the action and still very accessible. You can hail a tricycle, no problem.
It’s quiet in theory. The AC in our room, however, was rumbling a bit too loudly. But for PHP 2595 per night, I think it’s a good value for money.
Top Hotels in Bacolod
Here are some of the top-rated hotels in Bacolod City according to online traveler reviews.
🔥🔥🔥 Use AGODATPT for 10% off on select hotels! 🔥🔥🔥
The Poor Traveler readers and followers can now use a special discount code to score 10% discount, up to USD 100 (roughly PHP 5700)! To apply and avail of the promo code, visit AGODATPT Promo Code.
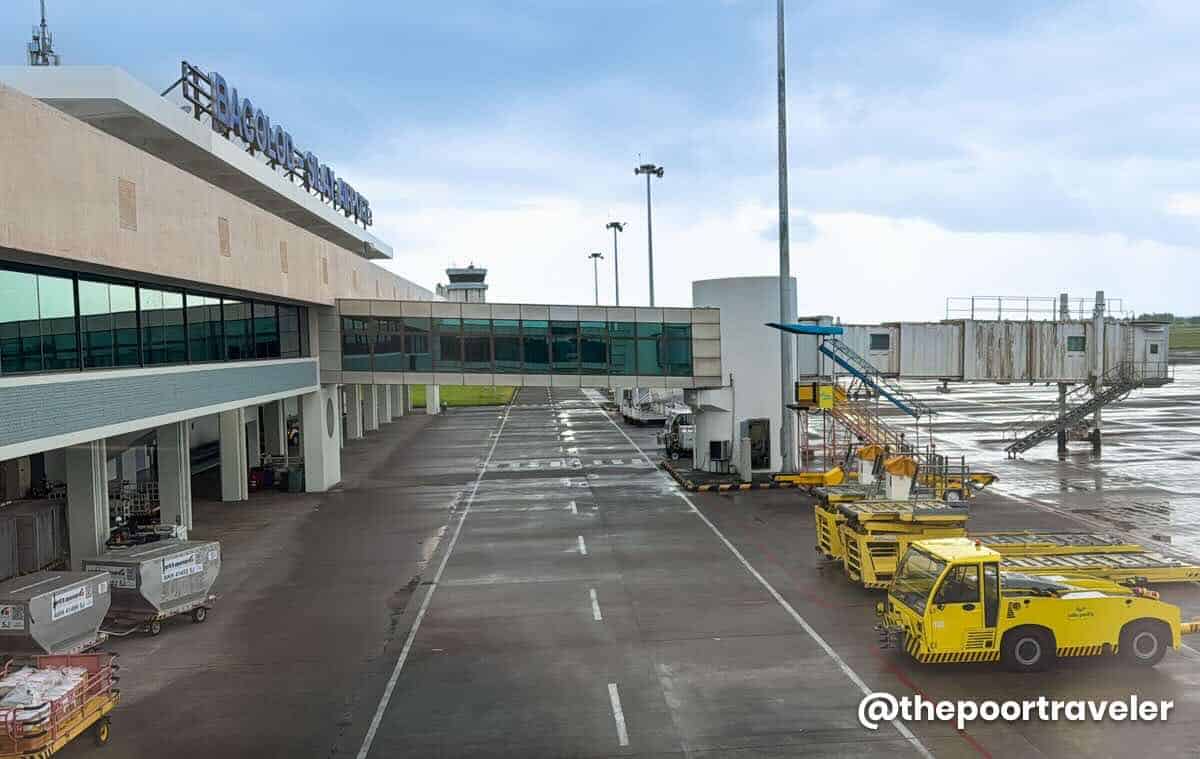
The Bacolod-Silay International Airport (BCD) is the gateway to the province. Although it has Bacolod in its name, it is entirely located in the city of Silay.
Bacolod – Silay International Airport
There are direct flights to and from this airport from Manila, Cebu, and Davao via the following airlines:
Manila to Bacolod
Philippine Airlines
Cebu Pacific
AirAsia
Cebu to Bacolod
Philippine Airlines
Cebu Pacific
Davao to Bacolod
If you book in advance, usual one-way fares are around PHP 1400 and can go as low as PHP 1200. Even lower when there is a SALE. That’s for off-peak season.
Bacolod-Silay Airport to Bacolod City Center
From the airport, you can reach Bacolod in 30 to 45 minutes. There are vans (shuttles) that can take you there directly for PHP 200-250 per passenger, depending on your stop and luggage.
But if you’re a group, it will be more cost-efficient to just book a Grab car. We were a group of three and paid only PHP 487, or roughly P162 per person. That’s cheaper than taking the van.
Travel Time: 30-45 minutes Fare: Van, P200-250 per pax; Grab, P400-500 per ride
HOW TO GET AROUND BACOLOD
As a highly urbanized city, Bacolod offers a lot of transportation options to its residents and visitors.
Jeepney
The cheapest is the traditional jeepney, which costs PHP 11 for short distances. The e-Jeep or electric jeepney is slightly costlier at PHP 15 per person. Either way, you need to be mindful of the route that the jeep will be taking to make sure you’re on the right path. You can wait for a jeepney by the roadside. And to get off, just say “Lugar lang,” which is their equivalent of “Para po.” The vehicle will then stop and wait for you to alight.
If you’re confused or you feel like you’re lost, just ask the driver or fellow passengers. Bacolod locals are some of the friendliest we have met, and I’m sure they will help you sort things out.
Fare: Regular Jeepney, PHP 11; E-Jeep, PHP 15
Tricycle ride (Left), eJeep/Modern Jeep (Top Right), and Traditional Jeep (Bottom Right)
Tricycle
Tricycles are also available, although not as popular or as common. A “special ride” usually costs PHP 50 for short distances. But there was an instance wherein we were charged PHP 150, which turned out much higher than Grab price.
Fare: PHP 50-150 (special ride)
Grab
We ended up taking Grab instead when we’re in a hurry. Based on experience, these are the usual Grab fares for most common tourist routes:
BCD Airport to City Center: P400-500
Within Bacolod to City Center: P80-P130
Bacolod City Center to The Ruins: P200
El Ideal to The Ruins: P330
Bacolod to Silay City Center (El Ideal): P350
Silay City Center to BCD Airport: P160
Bacolod City Center to BCD Airport: P400-500
Taxis also operate within the city. We were told InDrive was also available, but we never tried it here, so we can’t confirm.
If you’re going to Mambukal, make your way to Mambukal-Bacolod Bus Terminal in Libertad. The fare is 60/head, and the travel time is 1 – 1.5 hours. The bus terminates right at the entrance of Mambukal Hot Spring Resort.
If your itinerary involves visiting other destinations in the province, you can take the bus at either the North Terminal or South Terminal.
Note: Silay City, including the airport, Carbin Reef in Sagay, and Lakawon Island in Cadiz, are situated north of Bacolod; while Sipalay and Cauayan, including Danjugan Island, are in the south.
THINGS TO DO IN BACOLOD
Bacolod may be known as the City of Smiles, but its charm goes way beyond the friendly locals and the famous chicken inasal. When exploring the area, don’t just limit yourself to Bacolod proper — Metro Bacolod also includes the nearby cities of Talisay and Silay, plus surrounding towns that offer even more attractions. From heritage tours to food trips and nature escapes, here are some of the best things to do when you’re in and around Bacolod.
This is just a quick run down to get you started. For a more detailed version with additional information, check out our full article here: TOP THINGS TO DO IN BACOLOD
If you prefer a hassle free trip, you can simply purchase your tickets or book your tours via your trusted booking sites.
If you’re more comfortable using Klook services, please use our promo code THEPOORTRAVELERKLOOK for up to P300 OFF or TPTKLOOK5 for up to P500 OFF. These codes might change in the future, so best to just visit thepoortraveler.net/klook to redeem updated discount codes!
MassKara Festival
If you time your visit in October, you’ll get to experience Bacolod’s biggest event — the MassKara Festival. Expect vibrant street dances, parades of smiling masks, live concerts, and food fairs all over the city. It’s crowded and chaotic, but it’s also one of the most colorful and unforgettable festivals in the Philippines.
The Ruins
Located in nearby Talisay City, The Ruins is the skeletal remains of a grand mansion built in the early 1900s by a sugar baron for his late wife. At sunset, the structure glows beautifully, making it one of the most photogenic spots in the province.
Mambukal Resort
Warm Dipping Pool
If you’re looking for nature and relaxation, Mambukal Resort in Murcia is a top choice. The resort is famous for its seven waterfalls, hot sulfur springs, and lush forest setting. It’s a refreshing escape from the city and a favorite for both locals and tourists.
Mambukal is about an hour away from Bacolod City, with direct buses from Libertad. If you are a big group and traveling with kids and elderly people, consider booking a tour with Klook! This is inclusive of round-trip transfers, insurance, local guide/driver, and entrance fee.
Hofileña Ancestral House (TL), Balay Negrense (TM), Jalandoni Ancestral House (TR), Gamboa Ancestral House (BL), Morada Ancestral House (BM), and Golez Ancestral House (BR)
Silay City is a treasure trove of ancestral houses and cultural landmarks. Many of these heritage homes have been preserved and turned into museums, giving you a glimpse of the opulent lifestyle during the sugar boom era. The city itself is charming, with walkable streets lined with history at every corner.
Jojo Vito Designs Gallery
For something more artistic, check out the Jojo Vito Designs Gallery in Bacolod. The gallery showcases colorful, handcrafted masks and home décor pieces that reflect Bacolod’s creative spirit. It’s also a great place to shop for unique souvenirs, especially if you want to take home a piece of MassKara artistry.
Negros Museum
The Negros Museum houses exhibits that tell the story of Negros Island’s history, culture, and art. You’ll find a mix of artifacts, contemporary works, and even old sugar industry relics. It’s a good stop for anyone wanting to understand the island’s rich heritage beyond the festivals and food.
Capitol Park and Lagoon
At the heart of Bacolod lies the Capitol Park and Lagoon, a spacious public park with a man-made lagoon guarded by iconic carabao statues. It’s a popular spot for families, joggers, and even street performers. The surrounding area also has cafes and food stalls, making it a nice place to unwind.
San Sebastian Cathedral and Public Plaza
For a dose of history and spirituality, visit the San Sebastian Cathedral, one of Bacolod’s most important landmarks. Right across is the Bacolod Public Plaza, a lively hangout spot for locals and a great place to people-watch. Both sites are central to Bacolod’s cultural and religious life.
Food Trip
Chicken Inasal Pechopak, Grilled Chicken Liver, and Isaw
Of course, no Bacolod trip is complete without a food trip. From the iconic chicken inasal to sweet treats like piaya and cakes, Bacolod is a foodie paradise. On that note, let’s continue discussing this delightful topic in the next section.
Lakawon Island Day Trip
Lakawon Island lies off the coast of Cadiz, which is about one-hour drive north of Bacolod City. It is known for its white sand beaches, crystal clear waters, and a sandbar. It also hosts Lakawon Island Resort & Spa, offering water activities and amenities, including a restaurant, a beachfront bar, and one of the largest floating bars in Asia.
The jump-off point is Cadiz Viejo Port. It’s important to note that the last boat back to the mainland leaves at 3PM. From Bacolod’s North Bus Terminal, get on a bus bound for Cadiz City. Alight at Burgos Public Market, then hail a tricycle to the port. If you prefer a hassle-free trip, you can just book a day trip package from Bacolod via Klook!
The good thing about Bacolod? You surely won’t leave without tasting delicious, perfectly grilled chicken inasal. But this smoky, tangy goodness isn’t the only must-try food in Bacolod. We’ve been to Bacolod several times, and most of our trips, our main motivation is none other than…FOOD! From the city’s famed chicken inasal to its decadent sweet treats, Bacolod never fails to satisfy our craving — from appetizers to desserts!
We made a more detailed version of this article, where we listed down our favorite places to eat in Bacolod. You can check it here: WHERE TO EAT IN BACOLOD
SAMPLE BACOLOD ITINERARY & BREAKDOWN
Here are two sample itineraries for Bacolod with budget breakdown. The figures indicated are per person. But both of these itineraries assume you’re a party of two travelers, splitting all costs, and taking public transportation for the most part. Public transportation fares (jeepney, bus) are overestimated (rounded off) to be on the safe side. We chose Grab in instances when it makes more practical and financial sense.
As always, feel free to make the necessary adjustments to match your schedule and preferences.
Bacolod 4-Day, 3-Night Itinerary (Relaxed Option)
Pre-trip Booking: Hotel – P2430 (P1620/night x 3 nights, divided by 2 pax)
DAY 1 – ARRIVAL & CITY TOUR 08:30 AM – Arrival in Bacolod 09:00 AM – Grab/Van to City Center, P250/pax 10:00 AM – Hotel check-in 11:00 AM – Sharyn’s Cansi, P300 12:30 PM – Calle Luna Halo-Halo, P130 01:45 PM – Jeep/Grab/Walk to Negros Museum 02:00 PM – Negros Museum, P150 03:30 PM – Capitol Park & Lagoon 04:10 PM – San Sebastian Cathedral 04:50 PM – Bacolod Public Plaza 06:00 PM – Sugba Sugba or Chicken House, P300 08:00 PM – Calea, P250 09:00 PM – Back to hotel, P25 Day 1: P1,405
DAY 2 – MAMBUKAL 06:30 AM – Transfer to Mambukal-Bacolod Bus Terminal-Libertad, P25 07:00 AM – Bus to Mambukal, P60 08:00 AM – Arrival at Mambukal Resort, P140; Access to Japanese Ofuro, P100 11:00 AM – Lunch, P200 02:00 PM – Bus to Bacolod, P60 03:30 PM – Jojo Vito Design Gallery, P160 05:00 PM – Dinner at Lion’s Park, P250 07:15 PM – Grab to Buttery, P60 07:30 PM – Buttery Bacolod, P250 09:00 PM – Back to hotel, P25 Day 2: P1,330
DAY 3 – SILAY & TALISAY 08:00 AM – Jeepney to North Terminal, P15 08:30 AM – Ceres Bus to Silay, P25 09:15 AM – San Diego Pro-Cathedral 09:45 AM – Bernardino Jalandoni Museum*, P150 10:45 AM – Hofileña Ancestral House*, P150 11:45 AM – Cinco de Noviembre Marker, FREE 12:00 PM – El Ideal Lunch, P300 02:00 PM – Bus to Honda/Pepsi, P25 02:45 PM – Tricycle to The Ruins, P50 03:00 PM – The Ruins, P150; Sugarcane Juice, P100 07:00 PM – Grab to Gina’s Seafoods, P100 (P200/2pax) 07:30 PM – Gina’s Seafoods, P300 09:00 PM – Back to hotel, P25 Day 3: P1,390
DAY 4 – DEPARTURE 10:00 AM – Check out 10:30 AM – Pasalubong Shopping 12:00 PM – Quick Lunch, P200 02:00 PM – Grab to Airport, P250 03:00 PM – Flight check-in Day 4: P450
TOTAL: PHP 7,005 (USD 123, EUR 104, SGD 157)
Bacolod 3-Day, 2-Night Itinerary (Budget Option)
This itinerary will take you to almost all the attractions in the previous 4-day version, but made more compact.
In addition, since you will only be spending two nights in the city, we’re assuming you don’t have much baggage. Hence, you should be able to explore Silay on the last day without needing to leave it elsewhere.
Pre-trip Booking: Hotel – P1620 (P1620/night x 2 nights, divided by 2 pax)
DAY 1 – ARRIVAL & CITY TOUR 08:30 AM – Arrival in Bacolod 09:00 AM – Grab/Van to City Center, P250/pax 10:00 AM – Hotel check-in 11:00 AM – Sharyn’s Cansi, P300 12:30 PM – Calle Luna Halo-Halo, P130 02:00 PM – Negros Museum, P150 03:30 PM – Capitol Park & Lagoon 04:10 PM – San Sebastian Cathedral 04:50 PM – Bacolod Public Plaza 06:00 PM – Sugba Sugba or Chicken House, P300 08:00 PM – Calea, P250 09:00 PM – Back to hotel, P25 Day 1: P1,405
DAY 2 – MAMBUKAL & RUINS 06:30 AM – Transfer to Mambukal-Bacolod Bus Terminal-Libertad, P25 07:00 AM – Bus to Mambukal, P60 08:00 AM – Arrival at Mambukal Resort, P140 11:00 AM – Lunch, P200 02:00 PM – Bus to Bacolod, P60 03:30 PM – Jeep to Pepsi, P25 + Trike, P50; Alternatively, Grab to the Ruins, P100 (P200/2pax) 04:00 PM – The Ruins, P150 07:30 PM – Grab to Gina’s Seafood, P100 (P200/2pax) 08:00 PM – Gina’s Seafoods, P300 09:00 PM – Back to hotel, P25 Day 2: P1,135
DAY 3 – SILAY & DEPARTURE 07:30 AM – Early check out 08:00 AM – Jeepney to North Terminal, P15 08:30 AM – Ceres Bus to Silay, P25 09:15 AM – San Diego Pro-Cathedral 09:45 AM – Bernardino Jalandoni Museum*, P150 10:45 AM – Hofileña Ancestral House*, P150 11:45 AM – Cinco de Noviembre Marker, FREE 12:00 PM – El Ideal Lunch, P300 02:00 PM – Grab to Airport, P80 (P160/2 pax); If van, P100/pax 02:30 PM – Flight check-in Day 3: P720
TOTAL: PHP 4,880 (USD 85, EUR 73, SGD 109)
*Entrance fees to the Hofileña Museum and Bernardo Jalandoni Museum are assumed to be P150. In our experience years ago, it was less than P100. Online reviews claim it’s P150. Unfortunately, both were closed when we last visited, so we couldn’t confirm it. We just set it at P150 to be safe.
The total fees are inclusive of the hotel stay as indicated but exclusive of flights, pasalubong/souvenirs, and incidental expenses, since these widely vary and are highly dependent on your circumstances and preferences.
But please add at least P1000 more to the budget to cover price movements and other possible expenses we might have missed.
If you have more days, you can just insert other destinations or activities. For example, you can include a day trip to Lakawon Island in Cadiz. Or if you have extra two days, you can stay overnight on Danjugan Island in Cauayan or in Sipalay City, where you’ll find lots of noteworthy places to visit.
FREQUENTLY ASKED QUESTIONS ABOUT BACOLOD
When is the best time to visit Bacolod?
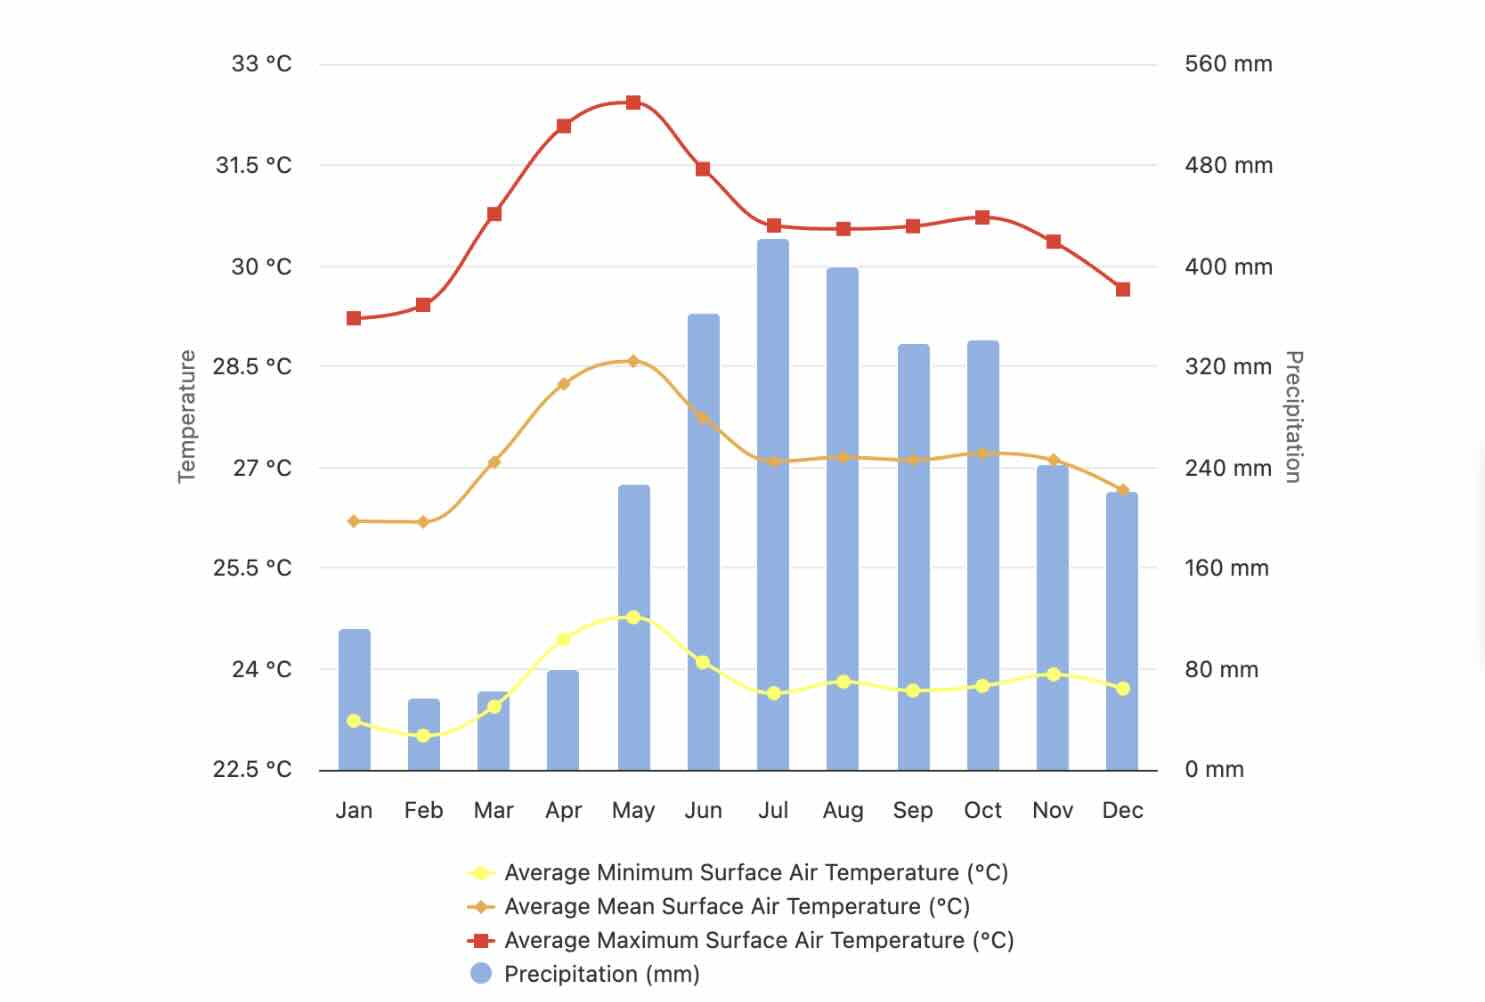
Weather-wise, definitely January to April. You’ll get plenty of sunshine for your food crawls, sightseeing, and side trips without worrying about the rain ruining your outfit. The shoulder months of November, December, and May are also pretty pleasant.
Just a warning: if you come between March and May, the heat can get intense, you’ll basically be marinating in your own sweat. On the bright side, it’s the perfect excuse to down halo-halo after halo-halo.
Photo Credit: World Bank Climate Knowledge Portal
Does that mean you should completely avoid June to October? No, not really. Yes, it’s the peak of the rainy season, but it doesn’t mean downpours happen all day, every day. In fact, our most recent Bacolod trip happened in JULY, but it never rained at all. Not even a little drizzle.
Now, if you’re the type who doesn’t mind a little risk, you could luck out, too. On the plus side, hotel rates drop, and you won’t be elbowing your way through crowds. Just pack an umbrella and maybe some patience, and make your itinerary as flexible as you can make it.
If you want to experience Bacolod in full party mode, come in October for the MassKara Festival. Picture Mardi Gras, but with more smiles, more food, and just as much traffic. It’s the city’s loudest, busiest, most colorful time of the year.
The downside? Hotel prices skyrocket, and restaurants get packed. If you want to experience MassKara, book as early as you possibly can.
What type of power plug / socket is used in Bacolod?
The standard voltage in the Philippines is 220V at a frequency of 60Hz. Generally, the plug and socket type used is Type A, which has two flat parallel pins.
Is Bacolod safe?
Yes, Bacolod is generally safe.
Again, Bacolod locals are some of the friendliest we have met. But it’s still best to be mindful of your surroundings. Always keep an eye on your belongings and don’t leave them unattended.
You can take note of these emergency contact numbers:
Photo Credit: Bacolod City Government Official Website
Updates Log
2025 9 25 – First uploaded
Additional Words by: Asta Alvarez (Lakawon Island & FAQs – Electricity Info & Safety)
We’ve wrecked more pairs of shoes than we’d like to admit on the road.
There was the time my sandals gave out in the middle of a jungle trail in Costa Rica. The soles literally peeling off with every muddy step until I was half sliding my way back to the car.
Then there was my “genius” idea to wear cute but flimsy flats through Madrid. After a day of cobblestones and standing in line, I swear my feet were plotting revenge.
And let’s not forget the endless search for good hiking shoes in Ecuador.
Charles’ hiking shoes wore out just as we reached Ecuador, and with the Galapagos on our radar, he was desparate to buy a new pair. Unfortunately, he’s hard to fit, and we searched high and low for quality shoes that could handle hiking. It took us endless trips to local malls, and Google searches, but we finally found a pair.
He used them for another five years! Some of the best shoes he ever owned.
If you travel long enough, you’ll realize your shoes become one of your most important pieces of gear. They carry you through airports, hikes, city explorations, and those days when you somehow end up walking 20,000 steps even though you swore it would be an “easy day.”
So it makes sense that people start to wonder: where are these things actually made?
Take Hike Footwear, for example. A quick search will turn up plenty of people asking, “Are Hike shoes made in China?” The short answer is: sometimes, yes. But the longer answer is much more interesting, and honestly, a lot more normal than most of us think.
Designed at Home, Built Around the World
Hike Footwear is a U.S. brand that designs all of its shoes around barefoot principles: wide toe boxes, zero-drop soles, and flexible construction that lets your feet move naturally. The design work and brand management are all done in the USA.
But when it comes to actually making the shoes? Like almost every footwear brand out there, the production happens overseas in factories that specialize in minimalist and barefoot footwear. These aren’t fly-by-night operations. They’re places with decades of experience, skilled workers, and the infrastructure to turn designs into durable, travel-ready shoes.
Why Global Manufacturing Is the Norm
Here’s the thing: if you check the tags on your sneakers, hiking boots, or even high-end barefoot shoes like Vivobarefoot, you’ll almost always see a “Made in Vietnam,” “Made in China,” or “Made in Indonesia” label. It’s not because brands are hiding something shady. It’s because the global footwear industry is set up that way.
The expertise, supply chains, and materials for large-scale shoe production are concentrated in specific parts of the world. These factories have been building shoes for decades. They know how to handle the flexible materials and designs that barefoot shoes require.
In other words, it’s less about cutting costs and more about going where the skills and resources already exist.
What Hike Footwear Focuses On
Instead of trying to do everything in-house, Hike Footwear puts its energy into:
Design and quality standards: Shoes are tested for comfort, durability, and barefoot design principles before they ever hit your feet.
Ethical partnerships: The factories they work with are vetted for worker safety and fair practices.
Sustainability: Materials are chosen to balance performance with long-term environmental impact.
That’s the kind of thing most travelers care about. Not just a label, but whether the shoes are made well, last through the miles, and are created responsibly.
Why It Matters Less Than You Think
At the end of the day, the country stamped on your shoe isn’t what determines whether it holds up through a rainy trek in Ireland or a day wandering the backstreets of Bangkok. What matters is the design, the oversight, and the care that goes into making them.
Almost all of us are wearing globally made shoes, whether we realize it or not. The real difference comes down to transparency and values. And in Hike Footwear’s case, they’re clear: designed in the U.S., produced by skilled international partners, and made to last for travelers who actually put their gear to the test.
We’ve been to Bacolod several times, and most of our trips, our main motivation is none other than…FOOD! From the city’s famed chicken inasal to its decadent sweet treats, Bacolod never fails to satisfy our craving — from appetizers to desserts.
In this article, we’ll be sharing the dishes, restaurants, and food spots we tried and loved during our most recent visit. This list is arranged in no particular order. Also, our choices and opinions may differ from yours, as taste is subjective. We are in no way food experts; we simply love eating and discovering good food.
WAIT, WAIT, WAIT! If you have a trip soon, please also visit our The Poor Traveler Masterlist. Here, we compiled travel essentials, including immigration requirements and all our recommended hotels and attractions. Just visit this page: TPT Masterlist. We also have a compilation for other destinations around the world.
When we asked our three Bacolod-based friends what they thought was the best chicken inasal in the city, we got three very different answers. Somehow, we weren’t surprised. Given the sheer number of great inasal places in the City of Smiles, it seems everyone has their own favorite spot — and they’ll defend it with the same passion people usually reserve for love teams, BTS, or Taylor Swift.
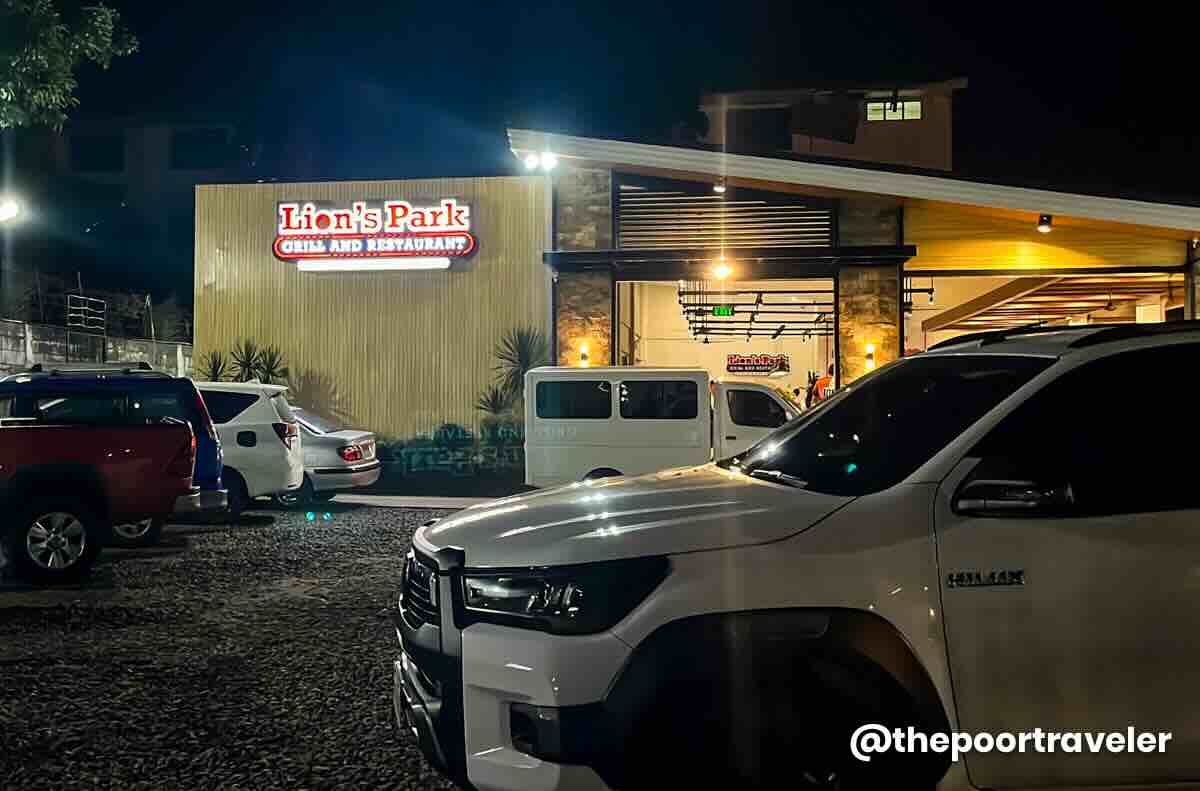
Lion’s Park Grill and Restaurant Lizares Branch
That’s the good thing about Bacolod — you surely won’t leave without tasting delicious, perfectly grilled chicken inasal. On our previous trips, we usually ate at Manokan Country. We’ve already tried Aida’s and Nena’s Rose, so this time we wanted something different. Our friend Mark highly recommended Lion’s Park Grill Haus, a local institution that has been serving inasal since 1981.
Its original location was at the famous Manokan Country, which was demolished and rebuilt as part of SM City Bacolod. But we ate at the site along Lizares Avenue. Not sure if it transferred to this spot or it’s an additional branch. Most of the tables are in the open-air area, but it does have an air-conditioned section now. Either way, the smell of grilled chicken hits you before you even sit down.
Chicken Inasal Pechopak, Grilled Chicken Liver, and Isaw
Aside from the cut (pechopak is the best, still), it also offers native chicken variant. Both options are smoky, flavorful, and best paired with rice drowned in chicken oil and sinamak (spiced vinegar).
We also enjoyed its isaw, locally called isaw/tinae, which was cut open and thoroughly cleaned, so there was no funky aftertaste. We also had chicken liver or atay and pork sisig, both of which were your usual fare — good enough but won’t exactly steal the spotlight from the inasal.
It’s funny because on our last Bacolod trip, there were also three of us in the group, and each had our own favorite and a different take on which one was the best. For Vins, Lion’s Park is his top pick, while our teammate Asta (@ganitofriend) and I placed our bets on other chicken inasal contenders.
Chicken House got the highest mark on Asta’s scorecard. The chicken inasal that we tried here had a tastier marinade, with the vinegar being more intense and balancing out the saltiness.
Chicken Inasal Pechopak and Pork BBQ
The serving was smaller, though, and the piece Vins got was a bit on the dry side. The chicken we had at Lion’s Park was juicier, making it Vins’s top preference, but only by a slim margin.
We also had grilled squid or inihaw na pusit, which was perfectly grilled and not chewy at all. The lemongrass stuffing helped tone down the strong seafood taste of the squid. As for the pork barbecue, it was just okay.
Address: Chicken House Main Branch, 24th Lacson Street, Bacolod, 6100 Negros Occidental Opening Hours: Monday to Friday, 11:00 AM – 10:00 PM; Saturday, 11:00 AM – 12:00 AM; Sunday, 12:00 AM – 10:00 AM; 11:00 AM – 10:00 PM What We Ordered: Chicken Inasal Pecho, P140; Grilled Squid, P160; Pork BBQ, P50/stick
Sugba Sugba Inasal & Seafood
For me, the best inasal I tried on our most recent trip was from Sugba Sugba Inasal & Seafood. Actually, it was tied for #1 with Vins’s pick. We just made him pick only one.
Of all the chicken inasals we tried on this trip, this was by far the juiciest and the most flavorful. It was also the cheapest, at P115-125 apiece. But it wasn’t just the inasal. Every single dish that was served on our table was fantastic.
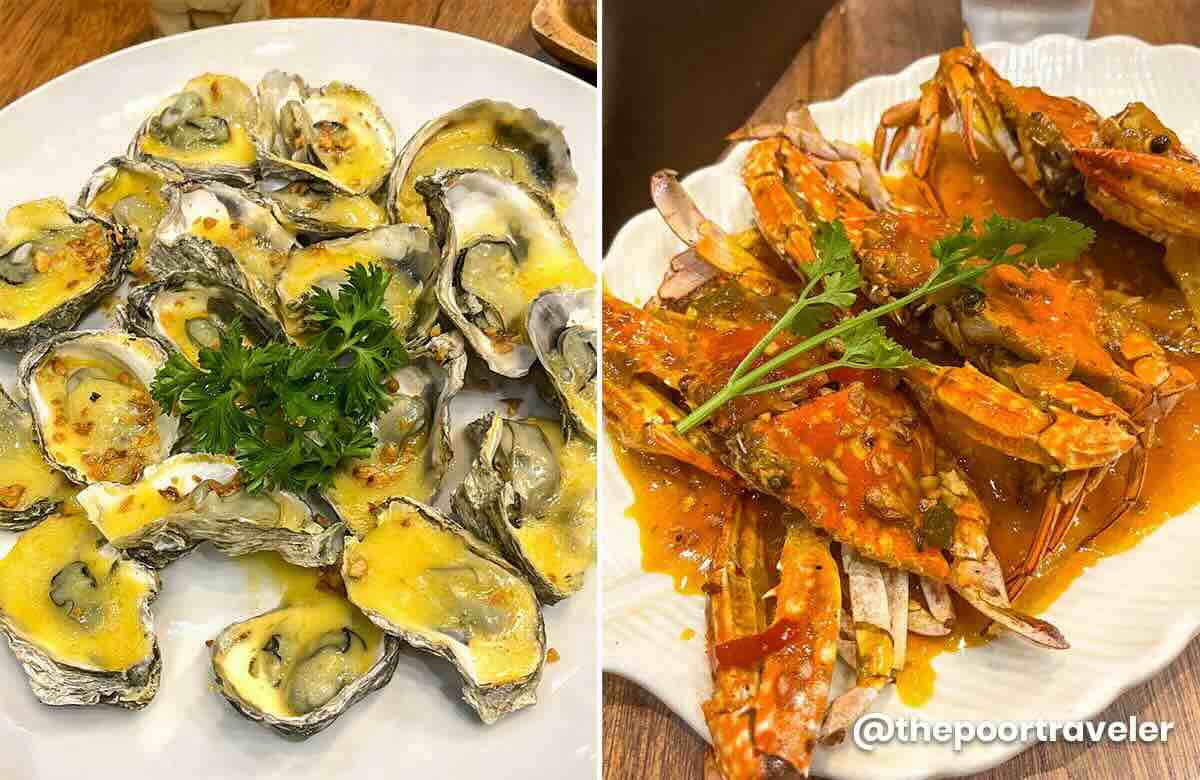
Baked Oysters and Chili Garlic Crabs
From the usual grilled innards like isaw and atay to its seafood bestsellers. The chili garlic crabs were so fresh, made even tastier by the sauce, which was like a mix of sweet chili and sarciado. And of course, the baked oysters. The oyster meat was small, but there were 20 of them, profusely complemented by the rich, cheesy sauce. This was our best meal in Bacolod on this trip.
The place was also air-conditioned, so we dined comfortably even when it was really hot outside.
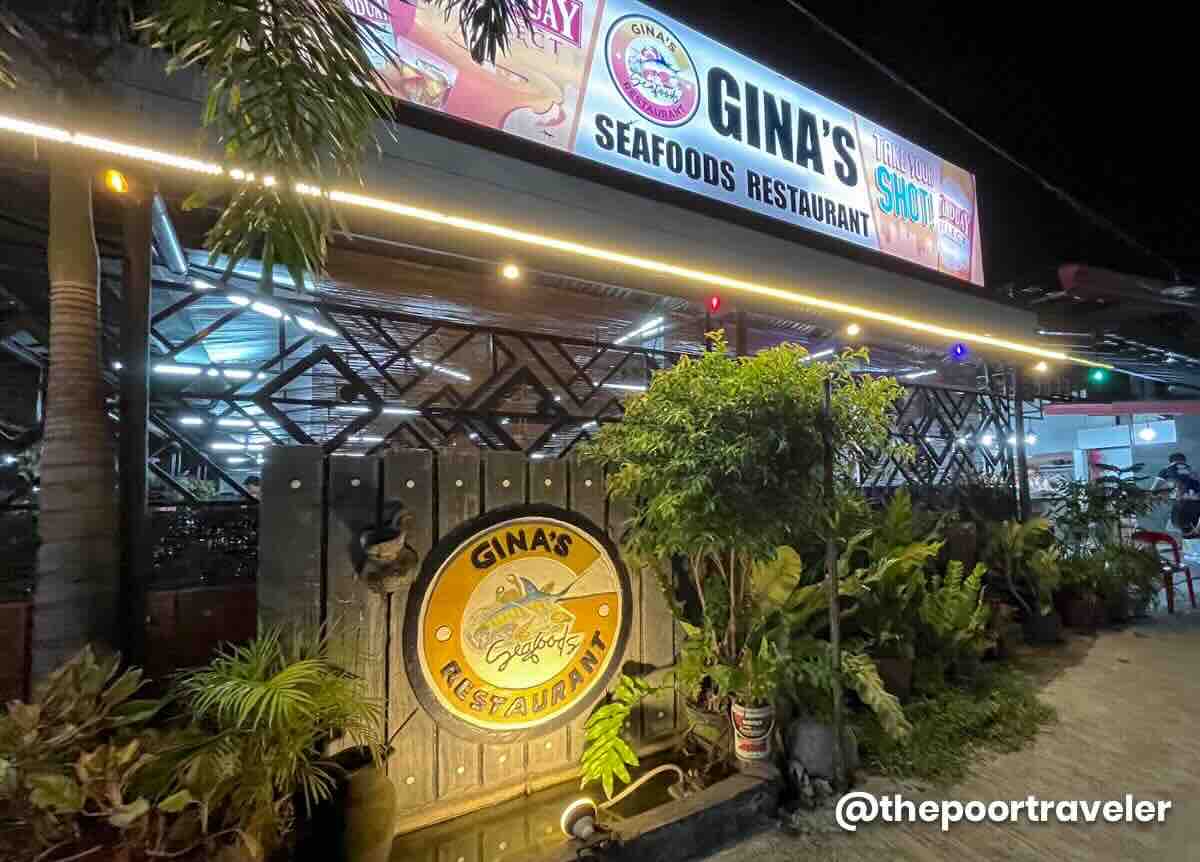
If you want more fresh ocean bounty, look no further than Gina’s Seafoods Restaurant. It’s a spacious open-air restaurant, fronted by a parade of squid, shrimps, prawns, and various types of fish. Diwal or angel wing clams were also on the menu. It’s my favorite, but it was not available at the time.
Gina’s is a paluto restaurant, where you pick your seafood then decide how you want it cooked (grilled, steamed, sizzling, sweet and sour, sinigang, etc).
We asked the staff for their bestsellers, and they mentioned grilled blue marlin, garlic butter shrimp, and sizzling squid, so that’s exactly what we ordered.
Garlic Butter Shrimps (Top Left), Grilled Blue Marlin (Bottom Left), and Sizzling Squid (Right)
Every single thing we ordered was so fresh. There was no funny or funky smell or aftertaste at all. They were also perfectly cooked. The blue marlin was tender. It was easy to appreciate its natural flavors; we didn’t even need a dip or sauce for it. Meanwhile, the shrimp dish didn’t disappoint either. The garlic made the crustaceans sing. But our unanimous standout pick here was the sizzling squid! Technically, it was cuttlefish or pusit lumot, which made me nervous because it could easily turn rubbery, but this one didn’t. It was very soft, and its sauce had the right blend of sweet and salty.
Address: Gina’s Seafoods, San Juan Street, Bacolod, 6100 Negros Occidental Opening Hours: Daily, 10:00 AM – 11:00 PM What We Ordered: Blue Marlin, P275 for 1/4 kg; Shrimps Steamed with Garlic Butter, P225 for 1/4 kg; Squid, P225 for 1/4 kg
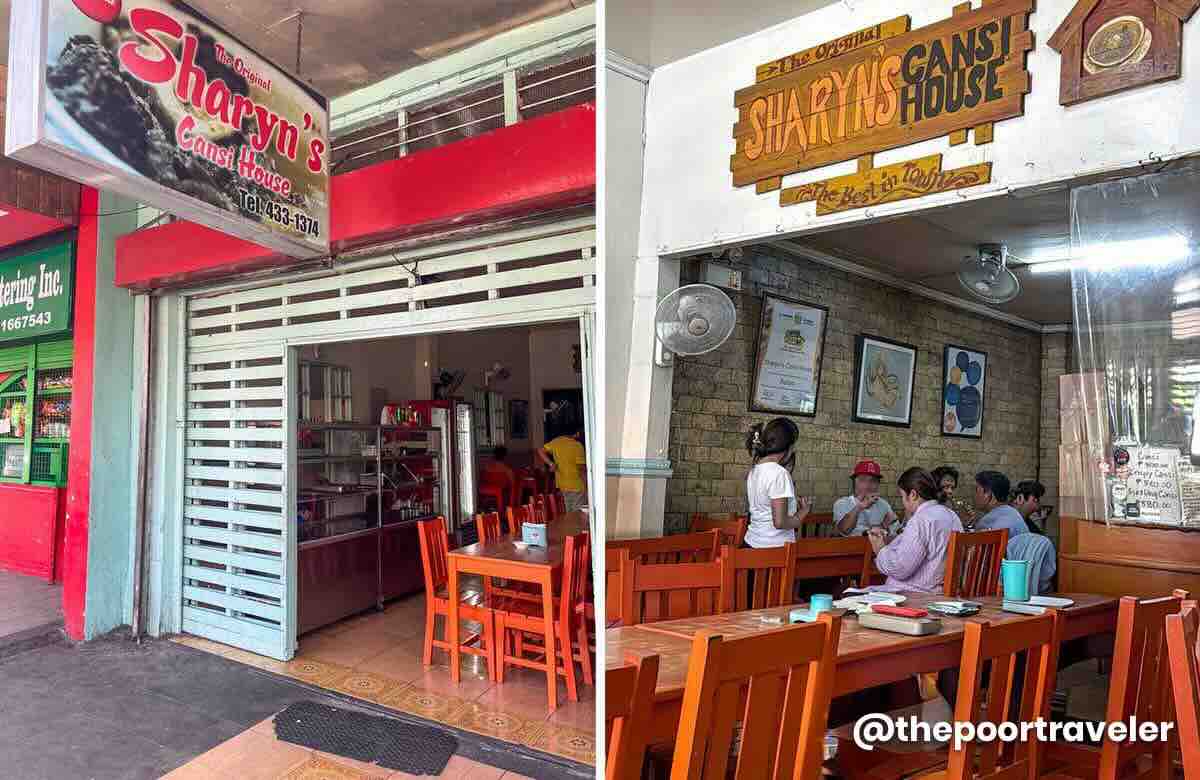
Sharyn’s Cansi House
If there’s one place in Bacolod you want to go for a bowl of cansi, Sharyn’s is it. Located on Narra Avenue, Barangay Villamonte, this no-frills eatery has been serving up its signature beef soup since 1985, and in 2017 it was even recognized by the World Street Food Congress as one of the Top 50 Street Food Masters in the world.
The beef shank is stewed until it’s fall-off-the-bone tender, the broth is deeply beefy, and there’s a sour kick from batuan, a souring fruit native to Negros and Panay, which gives the soup its distinct flavor. Every order is good for a group, usually served in a big bowl with extra mugs of soup for refill. If you’re going solo, I doubt you’d be able to finish it.
On our recent visit, the first thing the staff told us as we entered was that they didn’t have bone marrow anymore. We really appreciated them informing us before we could even sit down or order. But we still went ahead. This was our third time here, and while the bone marrow takes it to another level of richness, we’re totally fine without. When we had our first sip, we were reminded why we came back! Their cansi is really comforting.
Sharyn’s Cansi House
We also ordered their “crispy” version of cansi, which is basically the cansi’s shank meat deep fried until it’s crunchy. But to be honest, the crispy cansi in our memory was better than what we got this time. This one was much tougher than I remember.
If you decide to visit, manage your expectations. It’s basically a specialized carinderia. It’s simple, modest, and not air-conditioned. It’s casual and often busy, especially around lunch or dinner.
Address: Sharyn’s Cansi House, Narra Avenue, Barangay Villamonte, Bacolod, 6100 Negros Occidental Opening Hours: Daily, 8:00 AM – 8:00 PM What We Ordered: Cansi, P500; Crispy Cansi, P580
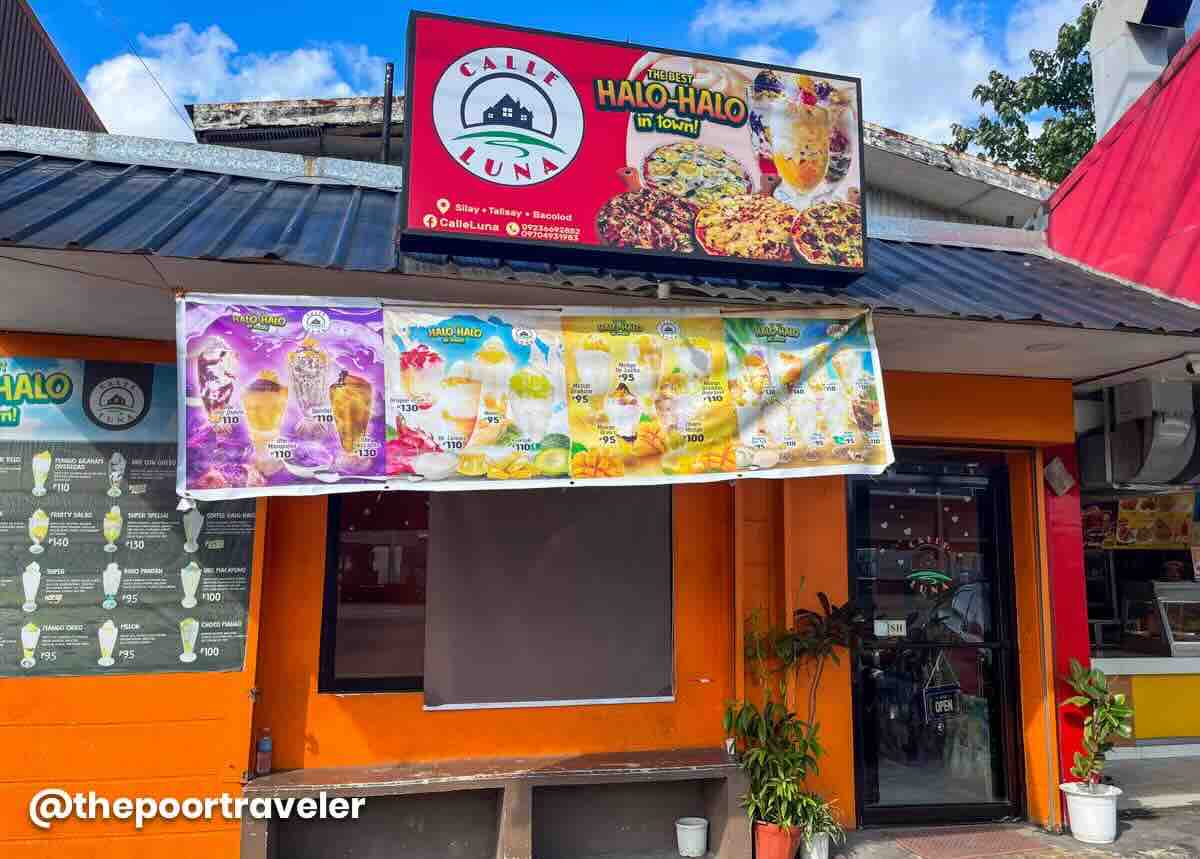
Calle Luna Halo-Halo
Just a short walk from Sharyn’s stands Calle Luna, a dessert spot originally from Silay City, with a branch also in Talisay and Bacolod. It’s known mostly for its wide, wide selection of halo-halo and other icy desserts.
What sets it apart from the typical halo-halo is that it uses so-called milky ice, which is finer, smoother and milkier. Instead of the usual basic shaved ice drizzled with evaporated milk, the milk is more infused in the ice.
Vins ordered their bestseller called Super Special, which has sweetened banana, sweet buko strips, jelly bits, corn kernels, mango, ube halaya, and then topped with ube ice cream, leche flan, and cheese. According to him, it was good — very creamy, with well-balanced ingredients. Nothing was overpowering. It was just a bit unusual for him to have mango in halo-halo, but once he got used to it, it turned out okay.
De Langka Halo-Halo (Left), Super Special Halo-Halo (Middle), and Mango de Leche Halo-Halo (Right)
Meanwhile, Asta got the De Langka. This flavor is seasonal, but thankfully, it was available that time. Of course, langka or jackfruit took the spotlight, as it should. It also came with sweetened banana, buko or coconut, corn, and crowned with vanilla ice cream.
I ordered Mango de Leche, which has mango caramel syrup and jelly bits, then topped with mango ice cream and leche flan. I liked it but didn’t really live for the mango ice cream as it overpowered the natural flavor of the real mango. I enjoyed Asta’s Langka and Vins’s Super Special halo-halo much better. But overall, it was very satisfying, especially after a bowl of cansi. It was also scorching hot that day!
We also wanted to try La Arte’s halo-halo, but it was out of the way, and we didn’t have much time, so we just skipped it for now. Maybe next time!
Address: Calle Luna Halo-Halo, BS Aquino Drive, Bacolod, 6100 Negros Occidental Opening Hours: Daily, 11:30 AM – 7:00 PM What We Ordered: Super Special Halo-Halo, P130; De Langka, P110; Mango de Leche, P110
21 Restaurant
Located at 21 Lacson Street, corner 21st Street (hence the name), 21 Restaurant used to be a humble merienda spot but has evolved into one of Bacolod’s more upscale casual dining spots. A few years ago, I first visited this place with Vins and Asta, and we ordered a lot. I remember we had a great meal overall.
Signature Batchoy Special
But this time around, I came alone, and I came for one thing and one thing only — a bowl of its signature batchoy! The broth isn’t clear-clear but not opaque either, but surprisingly packed with flavor! It’s simmered until it soaks up all the umami goodness, then layered with noodles, tender bits of meat, and generous slices of liver, and then sprinkled crunchy chicharón on top. It’s less rich and less garlicky than the ones I tried in Iloilo and more refined than usual, but still very comforting.
Although I went for the batchoy, I also ordered its Lola Nitang’s Bibingka, which was a bit inconspicuous in the menu. But I’m obsessed with bibingka in general, so I just had to try it. And my gosh, this was really good. It was soft, moist, and tasty. It had just the right amount of sweetness.
Address: 21 Restaurant, 21 Lacson Street corner 21st Street, Bacolod, 6100 Negros Occidental Opening Hours: Daily, 10:00 AM – 10:00 PM What We Ordered: Batchoy Special , P180 (w/ egg, +P25); Lola Nitang’s Bibingka, P170
Café Bobs
And since we’re already talking about sweets, let’s cross to the next item, literally. Located just across the street from 21 Restaurant sits the flagship store of Café Bobs. Honestly, it was our first time hearing about it, so we’re not too familiar with its legacy. Apparently, it started back in 2003, so it’s been part of Bacolod’s food scene for over 20 years, serving specialty coffee, pastries, and casual café culture in the city. The name “Bobs” comes from owner Bobby Magalona and his wife’s passion for baking and coffee.
Café Bobs Flagship Store
We asked the staff for their bestsellers on the iced drinks menu, and they recommended the Iced Spanish Latte. Normally, this drink is quite sweet because of the condensed milk, but their version — as Tito it may sound — was not too sweet at all. It was just right, with the espresso and milk really standing out.
We also got a slice of Burnt Cheesecake. The burnt-ness adds extra flavor and makes it more complex, but since it didn’t have a crust, it tasted a bit one-dimensional and it lacked the texture to cut through its richness. It did get quite overwhelming after a while.
Choco Carrot Cake and Burnt Cheesecake
We also had a piece of Choco Carrot Cake, and we actually enjoyed this more than the burnt cheesecake. We love carrot cake, so by default, it was a “yes” for us. This one was moist, with a layer of chocolate icing. And maybe it’s just us, but we picked a strong cinnamon notes, which we really liked.
But if cakes are what you’re really after, you should also check out the next two items on this list.
Address: Café Bobs, 21 Lacson Sreet, Bacolod, 6100 Negros Occidental Opening Hours: Monday to Thursday, 8:00 AM – 10:00 PM; Friday to Sunday, 8:00 AM – 11:00 PM What We Ordered: Iced Spanish Latte, P175; Burnt Cheesecake, P135; Choco Carrot Cake, P120
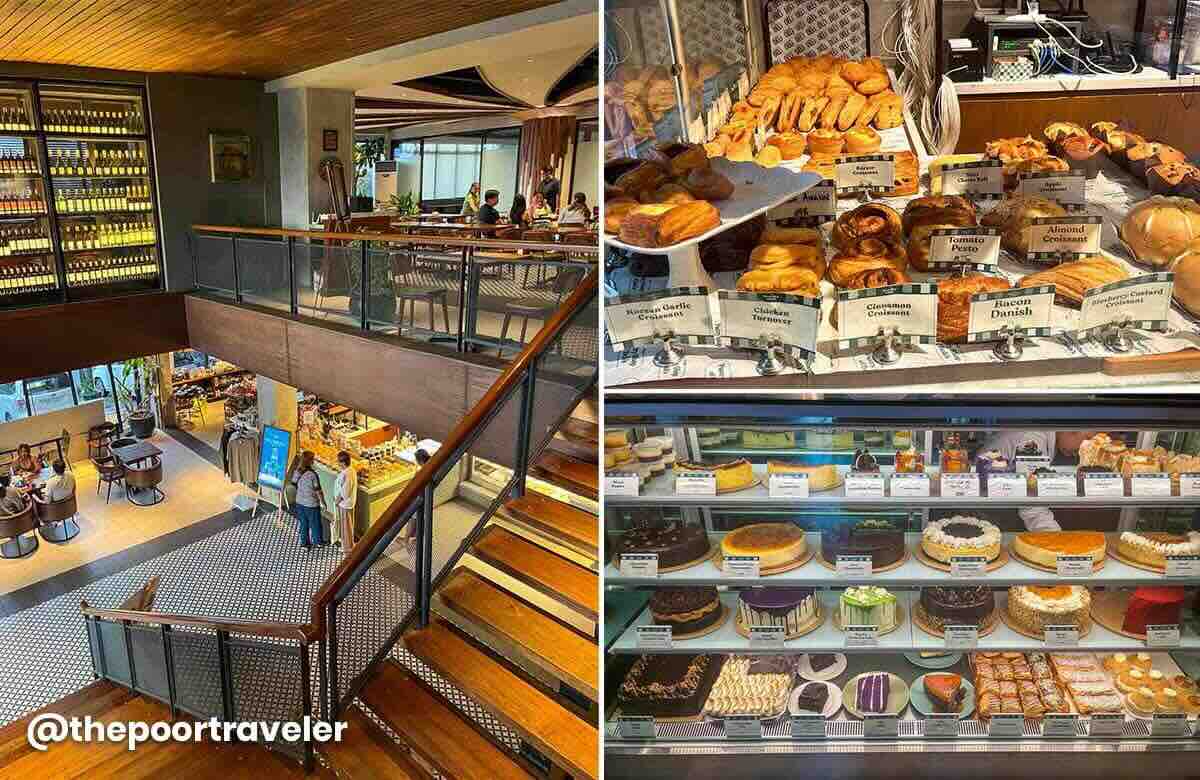
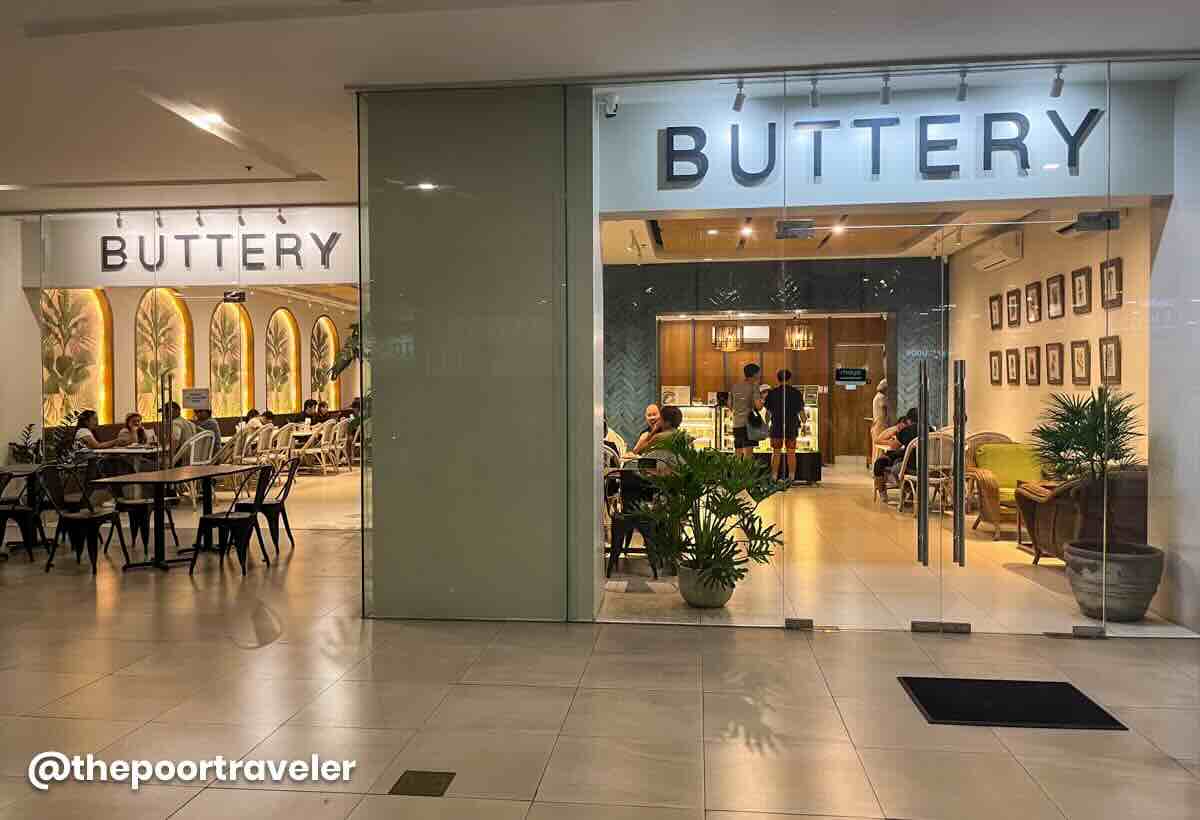
Buttery Negros
We had a hard time here at Buttery, not because we didn’t like anything, but because we couldn’t decide what to order. Their cakes were on full display near the cashier, and we wanted to taste them all. They all looked so good!
When we asked the staff, they recommended the Lemon Chill and Pistachi-oh Craze cakes. But I also ordered Galleta de Leche for good measure. As someone who likes my cakes simple, it really appealed to me, and I was also told it was a signature creation of theirs too.
The Lemon Chill was a combination of calamansi cake and lemon square with creamy lemon mousse in between and topped with pieces of almond. Meanwhile, the Pistachi-oh Craze was composed of crunchy lumpia wrapper coated in Nutella, covered in pistachio mousse and pistachio cream, sitting on an Oreo crust and drizzled with more Nutella and dark chocolate, and sprinkled with more pistachio bits. I was a bit skeptical in the beginning because these cakes sound like they’re too complicated and too decadent for their own good. But because we always follow staff recommendations, we did just that, and they didn’t disappoint. They were truly delicious!
Lemon Chill and Pistachi-oh Craze
But the Galleta de Leche was my favorite. It’s basically just creamy caramel flan on a salty cracker crust, topped with whipped cream. I appreciated the simplicity of it! The richness and sweetness were just right, not saturated.
Oh, we also ordered the Ube Cheesecake. Told you we couldn’t make up our minds, so we ended up ordering a lot. This is ube-flavored cheesecake sitting on polvoron crust and topped with queso de bola.
Ube Cheesecake (Left), Galleta de Leche (Top Right), and Matcha Tiramisu (Bottom Right)
Here at Buttery, we were accompanied by our college friend Ry, who is a Bacolod local. He had the Matcha Tiramisu, which is green tea-flavored tiramisu with white chocolate and almonds. We also got a taste of it because we all shared cakes. Both the ube cheesecake and matcha tiramisu delivered, too. We ended up having a different favorite!
Buttery’s roots can be traced back to Dumaguete, but the Bacolod locals had embraced it, and no surprise there, really. Every single thing on our plates was unforgettable.
But if you’re looking for desserts that are truly local and homegrown, then the place to be is…
Address: Buttery, Lacson Street corner C.L. Montelibano Avenue, Bacolod, 6100 Negros Occidental Opening Hours: Daily, 9:00 AM – 9:00 PM What We Ordered: Lemon Chill, P130; Pistachi-oh Craze, P180; Galleta de Leche, P130; Ube Cheesecake, P150; Matcha Tiramisu (P120)
Calea
Calea is one of Bacolod’s iconic bakery-cafés, located along Lacson Street. Every time we’re in Bacolod, we visit to get at least three slices from its massive selection of cakes, ice cream cakes, and cheesecakes. But prior to our visit last month, it had been years since we last set foot here, so as always, we asked the staff for recommendations. They suggested the Choco Mud Pie, Imported Chocolate Cake, and Blueberry Cheesecake.
Chocolate Mud Pie and Imported Chocolate Cake
The Imported Chocolate Cake is among their bestsellers. It’s the very first item on their cake menu. It’s a dark chocolate cake with rich custard filling and covered in dark chocolate icing. It’s so moist, we couldn’t stop digging in. It’s dark chocolate, but still pretty sweet. We always order this when we’re here, and it never fails to delight us!
But it was our first time trying their Chocolate Mud Pie. It’s a big chunk of chocolate ice cream sitting on Oreo crust, clad in fudge, bits of almond, and Oreo powder.
Blueberry Cheesecake (Left), White Chocolate Cheesecake (Top Right), and Fruity Cheesecake (Bottom Right)
But I was most excited about the cheesecake. In the past, I tried their White Chocolate Cheesecake (P120) with raspberry sauce and Fruity Cheesecake (P110), which was topped with blueberries, raspberries, and strawberries. Both were delectable! I was expecting this Blueberry Cheesecake to be similar, but no, it was much more delightful! First of all, the crust was different. It had a lot more texture, which was great because it complemented the smooth and rich cheesecake.
After all these years, Calea is still the same dessert powerhouse that I remember. Big servings and spectacular tastes at affordable prices. Please don’t change, Calea! Honestly, if we’re going to rank our favorite spood spots in Bacolod, Calea sits comfortably on top.
Address: Calea, Balay Quince, Lacson Street corner 15th Street, Bacolod, 6100 Negros Occidental Opening Hours: Monday to Thursday, 9:00 AM – 9:30 PM; Friday to Sunday, 9:00 AM – 10:00 PM What We Ordered: Choco Mud Pie, P130; Imported Chocolate Cake, P125; Blueberry Cheesecake, P125
Where to Stay in Bacolod
The capital of Negros Occidental, Bacolod City makes an excellent base for exploring Metro Bacolod and its neighboring towns. It offers a wide range of accommodations across different budgets and types, so you’ll never run short of options. Here are some of the top-rated hotels in Bacolod City according to online traveler reviews.
🔥🔥🔥 Use AGODATPT for 10% off on select hotels! 🔥🔥🔥
The Poor Traveler readers and followers can now use a special discount code to score 10% discount, up to USD 100 (roughly PHP 5700)! To apply and avail of the promo code, visit AGODATPT Promo Code.
Craving inasal and something sweet? Bacolod is waving with a big, welcoming smile! Prepare to indulge not only in signature grilled chicken and irresistible desserts, but also in the rich culture and history. And if you’re up for more, sprinkle in a dash of adventure as you give in to the warm invitation of the Philippines’ “City of Smiles.”
In this article, we’ll take you through the top things to do and tourist spots in and around Metro Bacolod, which covers Bacolod City (the provincial capital of Negros Occidental), Talisay, and Silay. This list also includes other noteworthy attractions in nearby municipalities.
WAIT, WAIT, WAIT! If you have a trip soon, please also visit our The Poor Traveler Masterlist. Here, we compiled travel essentials, including immigration requirements and all our recommended hotels and attractions. Just visit this page: TPT Masterlist. We also have a compilation for other destinations around the world.
No trip to Bacolod is complete without sinking your teeth into its signature dish — chicken inasal. Treat yourself to the smoky, tangy flavor of original Bacolod inasal.
On our visit in 2017, Manokan Country was the place to be for an authentic experience. It was a complex that housed 24 stalls serving chicken inasal and other grilled delicacies. After serving locals and tourists for over 40 years, it was demolished in February 2025 to give way to a redevelopment project. The original tenants were relocated to SM Bacolod’s North Wing Parking Hub, just across its original site.
Popular restaurants and eateries, which locals swear by, are Aida’s, Nena’s, Lion’s Park, Chicken House, and Sugba Sugba Inasal & Seafood, to name a few. We’ve tried most of them, and we’ll share more details on each of them in a separate food-centric Bacolod article.
If you want to fully immerse yourself in chicken inasal goodness, time your visit in May, when the city celebrates the Bacolod Chicken Inasal Festival.
Sweets & Desserts
Bacolod is a haven for sweet tooth and dessert lovers. With so many cafés and dessert places around the city, you’ll never run out of choices! Swing by local favorites like Calea for their cakes, Felicia’s for their pastries, and Cafe Bob’s for their classic sweet bites.
Calea (Left), Bob’s Cafe (Top Right), and Felicia’s (Bottom Right)
If dessert hopping is in your itinerary, you’re in the right place! So, go ahead and give in to the tempting array of sugary delights and baked goodies. And, maybe it’s just us, pastries and confections are often much cheaper here compared to Manila! Again, we’ll list down all the cafés and dessert spots we’ve tried and will share more information in a separate article.
Cansi
When in Bacolod, make sure to warm up your belly with cansi! Even in the heat of summer, this Negrense specialty is worth every drop of your sweat. A steaming bowl of cansi is the go-to comfort food of the locals. Its flavor is a marriage between bulalo and sinigang.
Sharyn’s Cansi House
Whenever our team visits Bacolod, a stop (sometimes two) at Sharyn’s Cansi House is non-negotiable. Aside from the classic version, we always go for the crispy cansi too. And our tummies always approve!
San Sebastian Cathedral
The 19th-century San Sebastian Cathedral is more than just a religious structure — it’s a historical landmark found in the heart of Bacolod. The original church, built in 1825, was made of wood, but the structure we see today dates back to 1882. It features a coral-stone facade and two bell towers, which underwent reconstruction in the 1960s. The bells have since been relocated to the Centennial Belfry in the churchyard.
Address: 1755 Rizal Street, Bacolod, 6100 Negros Occidental Opening Hours: Monday to Saturday, 6:00 AM – 7:00 PM; Sunday, 5:00 AM – 8:30 PM Mass Schedule: For updated schedules, check the official Facebook page of San Sebastian Cathedral.
Bacolod Public Plaza
Just across San Sebastian Cathedral sits the Bacolod Public Plaza, a two-hectare green space where locals love to unwind — whether students hanging out after class, workers taking a breather, or friends and families enjoying the outdoors. It also hosts various events, including the MassKara Festival.
At the heart of the plaza stands the music-themed Bandstand, a gazebo-like structure that serves as the centerpiece. Nearby, you’ll spot the huge “BACOLOD” ground-level marker, where tourists can have their photo ops. You’ll also find the “Welcome Bacolod City” Arch and a couple of fountains.
If you want to dive deeper into the region’s culture and history, drop by the Negros Museum. Inaugurated in 1996, it was originally housed in the building now occupied by the Provincial Capitol. In 2003, it moved to its present home — the former Provincial Agriculture Building, a neoclassical building built in 1925.
The museum’s first level usually hosts temporary art exhibits featuring both local talents and foreign artists based in the region. Meanwhile, the second level showcases permanent displays highlighting local history, including the island’s sugar industry, and items that reflect Negrense lifestyle and culture.
Since the museum is privately managed, an entrance fee applies. Walk-ins are welcome!
Capitol Park lies in front of the Negros Occidental Provincial Capitol — the seat of the provincial government and the core of the Capitol Central, previously named Negros Occidental Provincial Capitol Complex.
Besides the Capitol Building, this verdant urban park is dotted with several other landmarks and attractions, such as the sprawling man-made lagoon flanked by a pair of sculptures, an open-air auditorium, a children’s playground, the Paghimud-os Monument, and the Negros Occidental Kilometer 0 Marker.
On any given day, you’ll find locals jogging, feeding fish, picnicking, or simply hanging out with friends. Expect it to be especially lively on weekends.
Before you leave Bacolod, don’t forget to shop for pasalubong! If you still can’t get enough of the sweets, stock up on Negrense delicacies like napoleones, piaya, and barquillos from BongBong’s and Merczi, two staple names when it comes to Bacolod souvenir shops. You’ll find numerous branches of both shops scattered around Metro Bacolod — even at the airport!
Masskara Festival
If you’re visiting in October, brace yourself for a festive and colorful time as the city celebrates the annual MassKara Festival, one of the biggest cultural festivals in the Philippines! Witness the city abuzz with upbeat music, exciting activities, art and trade exhibitions, vibrant street parades, and of course, a flood of kaleidoscopic smiling masks!
Kick-started in the 1980s, the festival served as the city’s beacon of hope during a tough economic crisis, when sugar, the province’s main source of livelihood, hit rock-bottom prices. What started as a way to uplift people’s spirits has since grown into one of the country’s most anticipated festivals, drawing both local and international tourists.
So, let this celebration fill your trip with fun and excitement. After all, Bacolod is not called the “City of Smiles” for nothing!
Reminder! When planning your visit, remember to check the official Masskara Festival Facebook page for the calendar of events.
TALISAY CITY
The Ruins
The Lacson Ruins, most famously known as The Ruins, is a tangible ode to Don Mariano Lacson’s beloved wife, Maria Braga Lacson. In the early 1900s, the patriarch spearheaded the construction of the mansion on the family’s vast sugar plantation to honor her memory. Don Mariano tapped local engineer Luis Puentevella to work together with one of his sons, Felipe, whom he asked to supervise the construction. The mansion was inspired by Italian architecture, with its Neo-Romanesque columns.
During the early years of the Second World War, local guerrillas were forced to burn the mansion down to prevent the Japanese forces from making it their headquarters. The mansion’s skeletal frame remains standing to this day and is now widely called “The Ruins”.
Today, you can visit and marvel at the former mansion’s architecture and structure. If you’re looking for keepsakes, a gift shop is conveniently located inside. As you wander through the interiors, keep your eyes peeled for these interesting details:
Veranda Lighting (Top Left), Small Arched Window (Top Right), Floor Tiles (Bottom Left), and Belvedere (Bottom Right)
A-Grade Concrete. This was the material used for the foundations and walls of the mansion.
Veranda Lighting/Chandeliers. The original electrical pipes were embedded in the ceiling, the same technique we use today, leaving no exposed wires.
Small Arched Window. This used to connect the kitchen to the dining area for the smooth handling and delivery of food.
Wooden Floors. The floorings were long-span, two-inch thick hardwood planks, stretching continuously from the main entrance (facing the fountain) to the dining room.
Floor Tiles. All tiles you see in the mansion are original.
Belvedere. This used to be an upstairs room facing west — a great spot for the family to view the sunset.
Beyond the mansion, you’ll find an expansive garden with a fountain, a grotto, a café, and The Ruins marker. Near the main entrance lies the beautifully landscaped Marapara Garden, where you can relax and snap more photos. You can also try the fresh sugarcane juice for P100. The stall is located near the entrance, between the café and the mansion’s ruins.
Garden Fountain (Left) and Marapara Garden (Right)
The Ruins is not just a tourist attraction but also a sough-after venue for weddings, photoshoots, and other events.
Address: Don Mariano L. Lacson Highway, Barangay Zone 15, Talisay, 6115 Negros Occidental Opening Hours: Daily, 9:00 AM – 8:00 PM. This may change, so it’s best to check the official Facebook page for announcements before going. Entrance Fee: Adults, P150; Senior/PWD, P100; Students, P80; Children (Below 8y/o), FREE.
How to Get to The Ruins: From Bacolod City, take a modern/traditional Jeep to Bata. Alight at Acropolis Garden, then hail a tricycle to Octagon Village. Tell the driver you are going to The Ruins. Alternatively, you can just book a Grab ride for P150 – P200.
Campuestohan Highland Resort
About an hour from Bacolod city center, Campuestohan Highland Resort is a popular family-friendly destination in the cool highlands of Talisay. Combining the concepts of a theme park and a mountain getaway, it boasts swimming pools, playgrounds, rides, and zip lines. Officially opened in May 2014, it was recognized by the Department of Tourism in 2023 as one of the top destinations in the region.
The resort park is marked by gigantic structures — the most iconic of which is the Manok ni Cano Gwapo hotel, which bagged the Guinness World Record for the largest building in the shape of a chicken on September 8, 2024. It measures 34.931m in height, 12.127m in width, and 28.172m in length.
You can either do a day trip or stay overnight in one of the cabins. If you’re only going on a day trip and you prefer to travel conveniently, you can book a tour from Klook! This already includes the round-trip transportation between Bacolod and Campuestohan, driver/guide, insurance, and bottled water.
You can use our promo code THEPOORTRAVELERKLOOK for up to P300 OFF or TPTKLOOK5 for up to P500 OFF. These codes might change in the future, so best to just visit thepoortraveler.net/klook to redeem updated discount codes!
Address: Sitio Campuestohan, Barangay Cabatangan, Talisay, 6115 Negros Occidental Day Trip Hours: Daily, 7:00 AM – 6:00 PM Day Trip Entrance Fee: Regular (3y/o and above), P20/head; Children (2y/o and below), FREE. This covers the use of the swimming pool and children’s playground. Overnight Rates and Other Fees: Check the official Facebook Page. As of writing, the rates for day trip cottages, activities/rides, and overnight accommodations are listed in the cover photo.
How to Get to Campuestohan Highland Resort: Head to IMART Caltex East, where the terminal for the Campuestohan Shuttle services is located. The fare is P90 per person. Travel time is about an hour. Check the resort’s Facebook page for the updated trip schedules.
SILAY CITY
Silay Ancestral Houses
Rizal Street, Silay City Center
If you are flying to Bacolod, chances are you’ll first set foot in Silay, since the airport is situated here. You might as well explore the city, right? Silay is like a living open-air museum, with its remarkable collection of well-preserved ancestral houses and historical landmarks.
Walking the streets of Silay, especially the city center, gives you a glimpse of the opulent lifestyle of sugar barons in the early 1900s. In fact, more than thirty ancestral houses have been declared historical landmarks, making Silay a worthy destination for history enthusiasts. Here’s a list and map from the official Silay Tourism Office Facebook page. On our last visit, we were short on time, so we only managed to see the following:
Photo Credit: Silay Tourism Office Facebook Page
Balay Negrense Museum, or Victor Fernandez Gaston Ancestral House. The Gaston family lived here from 1901 to 1927. It was inaugurated as the Balay Negrense Museum on October 6, 1990, and later declared a National Historical Landmark by the National Historical Institute in 1994. Since 2023, the museum has been temporarily closed for renovation.
Bernandino Lopez Jalandoni Ancestral House (Museum). Completed in 1908, it was declared a National Historical Landmark on November 6, 1993. Entrance Fee: Regular, P150. Opening Hours: Tuesday to Sunday, 9:00 AM – 5:00 PM.
Manuel Severino Hofileña Ancestral House (Museum). Built in the 1930s, it was the first house in Silay to open its doors to the public back in 1962. It was inscribed as a National Historical Landmark on April 6, 1993. Entrance Fee: Regular, P150. Opening Hours, Tuesday to Sunday, 9:30 AM – 4:00 PM.
Hofileña Ancestral House (TL), Balay Negrense (TM), Jalandoni Ancestral House (TR), Gamboa Ancestral House (BL), Morada Ancestral House (BM), and Golez Ancestral House (BR)
Cesar Lacson Locsin Ancestral House (El Ideal)
Josefita Tionko Lacson Ancestral House
Manuel De La Rama Locsin Ancestral House
Carlos Arceo Ledesma Ancestral House
Kapitan Marciano Montelibano Lacson Ancestral House
Maria Ledesma Golez Ancestral House
Generoso Reyes Gamboa Ancestral House
Digna Locsin Consing Ancestral House
Teodoro Pig-ao Morada Ancestral House
Benita Hara Ancestral House
Herardo Sigaton Gaston Ancestral House
Next time, we’ll make it our goal to complete the list. Some of the houses, particularly those along Rizal Street, are leased to businesses. Other notable buildings on the main road are:
Lino-Lope Severino Building
Cine Silay
Lino-Lope Severino Building
How to Get to Silay City: From Bacolod city center, take a modern/traditional jeep (via Bata, Mandalagan, or Northbound) to the North Bus Terminal (P15-20). Then, take a Ceres bus to Silay (P35). Alternatively, if you want to travel conveniently, you can just book a Grab for around P350.
Cinco de Noviembre
This historical marker commemorates the Negros Revolution, also known as Cinco de Noviembre, which ended Spanish rule on the island in 1898. The Farmacia Locsin, which used to stand on this site, served as the secret headquarters of the natives who plotted the revolution, which led to the establishment of a short-lived republic governed by the Negrense people. The republic came to an end in February 1899 with the arrival of the American forces.
The marker also bears the names of the revolutionary leaders:
Nicolas Golez
Leandro Locsin
Timoteo Unson
Melecio Severino
Vicente Gamboa
Olympia Severino
Address: Cinco de Noviembre Street, Silay City Heritage Zone, Silay, 6116 Negros Occidental
San Diego Pro Cathedral
The San Diego Pro-Cathedral stands as a testament to Silay’s deep Catholic heritage. It is the only domed church in Negros Occidental and the only pro-cathedral outside Metro Manila, making it a must-visit landmark in the city. Its designation as a pro-cathedral was made official in December 1994.
The present Romanesque structure was completed in 1927 through the initiative of sugar baron Don Jose Ledesma, who also employed Italian architect Lucio Bernasconi to design the church.
Address: Zamora Street corner Rizal Street, Silay City Heritage Zone, Silay, 6116 Negros Occidental Opening Hours: Monday to Saturday, 6:00 AM – 6:00 PM; Sunday, 5:00 AM – 7:00 PM Mass Schedule: For updated schedules, check the official Facebook page of San Diego Pro-Cathedral.
El Ideal
Housed in Cesar Lacson Locsin Ancestral House, El Ideal is the oldest bakery in Silay. It still serves homemade products and other local delicacies, including their signature guapple pie — a combination of guava and apple pie. You can also buy pasalubong here!
Address: 118 Rizal Street, Silay City Heritage Zone, Silay, 6116 Negros Occidental Opening Hours: Daily, 8:00 AM – 6:30 PM
If you want to cover the highlights of Metro Bacolod in one go, you can book a tour via Klook!
This includes entrance fees, lunch, bottled water, guide/driver, basic insurance, and round-trip transfers. The stops include:
Provincial Capitol Building & Lagoon
Balay Negrense
Ramon Hofileña Ancestral Home
Silay Pro Cathedral and Mini Ruins
Lunch at Manokan Country or Balaring Floating Restaurant
Mambukal Resort & Wildlife Sanctuary is geographically situated in the municipality of Murcia, but is governed and managed by the Negros Occidental Provincial Government. Nestled at the foot of Mount Kanlaon, the resort is famous for its therapeutic hot springs.
The highlights are the Warm Sulfur Dipping Pool, the Japanese Ofuro, and the nearly century-old Ishiwata Bathhouse (built in 1927), which won a Pillar Award at the 1st Philippine Tourism Awards (PTA) of the Department of Tourism (DOT) on September 8, 2025. The bathhouse is temporarily closed for renovation.
Kiddie & Adult Pool (Left) and Small Pool (Right)
Other attractions include seven waterfalls, a boating lagoon, a kiddie and adult pool, and a small pool. You’ll also find amenities, such as camping grounds, picnic areas, Convention Hall & Hotel, Spa Natura, food park, day trip huts, overnight accommodations, and a clinic.
Mambukal is about an hour away from Bacolod City, with direct buses from Libertad. If you are a big group and traveling with kids and elderly people, consider booking a tour with Klook! This is inclusive of round-trip transfers, insurance, local guide/driver, and entrance fee.
Address: Barangay Minoyan, Murcia, 6129 Negros Occidental Day Trip Hours: Daily, 7:00 AM – 8:00 PM Entrance Fee: Adults, P140/head; Children (11y/o and below), 80. The rates already include the 20-peso environmental fee and the use of the swimming pools and the dipping pool. If you want to access the Japanese Ofuro, you need to pay an additional P100 per person. Overnight Rates and Other Fees: Check the official Facebook Page for the updated rates.
How to Get to Mambukal Resort: Make your way to the Mambukal – Bacolod Bus Terminal in Libertad. It’s across Savemore Libertad. Board a bus bound for Mambukal. The bus stops right at the entrance gate of the resort. The fare is P60 per head, and the travel time is over an hour. Note: The last trip for the bus heading back to Bacolod City is 5PM.
Don Salvador Benedicto
Looking for mountain views and pine trees just 40 minutes from Bacolod City? Welcome to Don Salvador Benedicto, the Summer Capital of Negros Occidental! Our friend, Mark Roa, who hails from Bacolod, suggested this destination when we asked for recommendations. Sadly, we couldn’t squeeze it into our last trip due to time constraints, but that gives us the perfect excuse to visit again! Have you been here? We’d love to hear your thoughts in the comments.
WHERE TO STAY IN BACOLOD
The capital of Negros Occidental, Bacolod City makes an excellent base for exploring Metro Bacolod and its neighboring towns. It offers a wide range of accommodations across different budgets and types, so you’ll never run short of options. Here are some of the top-rated hotels in Bacolod City according to online traveler reviews.
🔥🔥🔥 Use AGODATPT for 10% off on select hotels! 🔥🔥🔥
The Poor Traveler readers and followers can now use a special discount code to score 10% discount, up to USD 100 (roughly PHP 5700)! To apply and avail of the promo code, visit AGODATPT Promo Code.
We all know that Hong Kong can be expensive, so if you are traveling there and looking for ways to save money, you might want to explore its numerous FREE attractions. In this article, we’ll list them down; however, note that when we say free attractions, we meant those without entrance fees. Of course, you still have to pay for the transportation to get there.
And if you want to buy anything, whether food or souvenir, that will come from your own pocket. This list only covers attractions you can visit in Hong Kong without admission fees. Also, the number is not an indication of any particular ranking and is only for easy reference.
WAIT, WAIT, WAIT! If your are looking for hotels and other attractions in Hong Kong, please also visit our The Poor Traveler Masterlist. Here, we compiled travel essentials, including immigration requirements and all our recommended hotels and attractions. Just visit this page: TPT Masterlist. Then, scroll until you see the section about Hong Kong. We also have a compilation for other destinations around the world.
Did you know that Victoria Peak in Hong Kong has no entrance fee?
When people think of Victoria Peak, they often imagine the Peak Tram and the pricey Sky Terrace 428. But here’s a secret: you don’t need to pay a single cent to get to the peak and enjoy the same world-famous view. There is no entrance fee for it. What people are usually paying for is the ticket to the tram. But there are other ways to get there.
If you’re on a budget and you’re coming from Central, instead of hopping on the tram, you can take Bus #15 from Exchange Square and alight at The Peak. The bus Fare is HKD 9.80, just a tiny fraction of the HKD 82 Peak Tram price. But the travel time is 41 minutes.
Taking the mini-bus is faster. Find the mini-bus terminal in Central, and look for Mini-Bus #1. The Octopus card is accepted. It will take you straight to the Peak Galleria. The fare is HKD 11.8, and the travel time is 20 minutes.
Better yet, if you’re into hiking, take the Morning Trail from the Mid-Levels. It’s a steady uphill walk that doubles as free cardio, but might be challenging on hot, humid summer afternoons.
Once you’re up there, you’ll find a lot of viewpoints that do not require an entrance fee. Of course, most tourists are drawn to the Sky Terrace 428, and the view here is really breathtaking. But if budget is an issue, you can totally skip it and go to Peak Galleria instead. It is a shopping mall right across the Peak Tower, and yes, it has a viewing deck too, and access is completely free of charge.
From the ground floor, you can take the elevator to the top floor. But recently, this has always been out of service. In that case, go inside the mall and find your way to the top. Just beside the Monopoly Dreams is a lookout. From here, you can also enjoy a fantastic view of Hong Kong’s skyline and Victoria Harbour with the iconic tram in the foreground.
Other viewpoints around the area include Lugard Road Lookout and Lions Pavilion.
How to Get to Victoria Peak
Peak Tram: From Central Terminal to The Peak Terminal. Fare: HKD 82 | ✅ Get Your Peak Tram Ticket Here! Travel Time: 10 minutes
Bus #15: From Central’s Exchange Square to The Peak Fare: HKD 9.80 Travel Time: 41 minutes
Mini-Bus #1: From Central to Peak Galleria Fare: HKD 11.8 Travel Time: 20 minutes
Morning Trail: From Mid-Levels Trailhead to Victoria Peak
2. Avenue of Stars
As a film enthusiast, this is the first attraction that I visited on my very first time in Hong Kong. Think of the Avenue of Stars as Hong Kong’s love letter to its film industry. Inspired by the Hollywood Walk of Fame, this promenade along the Tsim Sha Tsui waterfront pays tribute to the city’s cinematic icons.
You’ll spot bronze handprints from local stars, a statue of the legendary Bruce Lee striking his signature martial arts pose, and another of Cantopop queen Anita Mui. Also nearby stands the Clock Tower, the only thing that remains of the former Kowloon rail station. And yes, walking around here is completely FREE.
But I think most tourists come here for the stunning view of Victoria Harbour. By day, you get a clear line of sight to Hong Kong Island’s skyscrapers, framed by mountains in the background. By night, the whole skyline transforms into a neon wonderland that makes you wonder if Hong Kong runs on electricity and caffeine alone.
View of Central from Avenue of Stars
And if you time it right, you’ll get the ultimate freebie: the Symphony of Lights. Every night at 8PM, more than 40 buildings on both sides of the harbor synchronize their lights, lasers, and projections into a 10-minute show. The best part? You don’t need tickets or reservations. Just grab a spot along the railings, maybe with milk tea or coffee in hand, and enjoy the spectacle.
Address: Avenue of Stars, Tsim Sha Tsui, Kowloon, Hong Kong Nearest MTR Station: East Tsim Sha Tsui Station
3. Tsz Shan Monastery
While the Tian Tan Buddha often graces Hong Kong’s postcards, another gigantic structure of a Buddhist divinity can be found in the city’s Tai Po District. Here at the Tsz Shan Monastery, all eyes are on the 76-meter tall statue of Guan Yin, one of the most revered deities in Buddhism. Like the Big Buddha, it is made of bronze but this one is coated in stunningly white fluorocarbon self-cleaning paint.
The colossal Guan Yin clutches a vase in her left hand, symbolizing purification, and a pearl in the other, representing wisdom. It stands on a three-tier lotus flower, crowning the Buddhist Art Museum, which showcases an impressive collection of Buddhist images, relics, and other artifacts.
The monastery was officially opened in 2015 as a sanctuary that offers spaces for tranquility, meditation, and spiritual purification. Hence, the number of visitors allowed is limited to only 400 per day. Advance registration is required, and it can be done online by visiting this page.
Address: 88 Universal Gate Road, Tai Po, New Territories, Hong Kong Operating Hours: 9:30 AM – 5:00 PM How to Get to Tsz Shan Monastery: Take the MTR East Rail Line to Tai Po Market Station. Then, take Bus 75K bound for Tai Mei Tuk. Alight at San Tau Kok stop. Fare is HKD 6.40. Walk for 10 minutes along Tong Tsz Road until you reach Universal Gate Road. Turn right and walk for 20 minutes.
4.Big Buddha & Po Lin Monastery (Ngong Ping)
Ngong Ping is another noteworthy attraction on Lantau Island. Most tourists associate it with the cable car ride known as Ngong Ping 360. But Ngong Ping actually refers to the area where you’ll find the Po Lin Monastery and the Tian Tan Buddha.
Po Lin Monastery is a Buddhist site built in 1906. Meanwhile, the Tian Tan Buddha, also referred to as Big Buddha, is a 34-meter bronze statue that has become Hong Kong’s icon. Both are popular destinations for casual tourists and Buddhists making a pilgrimage. And yes, both can be visited free of charge, although donations are appreciated.
You can actually see Big Buddha all the way from Ngong Ping Village, located right beside the cable car station, and which you can also explore for free!
What really costs a lot here is the cable car ride. But there are other ways to get here. It’s much cheaper if you take the bus from Tung Chung, which is close to the cable car station. The fare is only HKD 20.4, which is much more affordable compared to the cable car, which costs HKD 172 (one-way).
We’ve tried this option before, and the experience was okay. Of course, it was not as scenic as a cable car ride, but if you are really on a budget, this is your best bet. The only downside is that it takes longer. Travel time is roughly an hour, one way.
But if money is not an issue and you’re pressed for time, go for the cable car because, honestly, it’s worth it. The views are stunning, especially those gondolas with a glass floor. If you prefer this option, you can book it on Klook!
You can use our promo code THEPOORTRAVELERKLOOK for up to P300 OFF or TPTKLOOK5 for up to P500 OFF. These codes might change in the future, so best to just visit thepoortraveler.net/klook to redeem updated discount codes!
Location: Ngong Ping, Lantau Island, New Territories, Hong Kong Nearest MTR Station: Tung Chung Station.
How to Get to Ngong Ping
Option 1: From Tung Chung Station, board Bus 23. Fare: HKD 20.4 Travel Time: Around 1 hour
Option 2: From Tung Chung Station, take Ngong Ping 360 for overlooking scenic views of the surroundings. Fare: One way, HKD 172 Travel Time: 25 minutes
5. Tai-O Fishing Village
If you want a taste of “old Hong Kong,” head to Tai O Fishing Village on Lantau Island, famous for its stilt houses — wooden homes propped up above the tidal flats — that look like something straight out of a postcard. Wandering through the narrow alleys and bridges gives you a glimpse of what life used to be like in a traditional fishing community.
Just being here is free. You can stroll around the waterfront, watch fishermen mend their nets, and soak up the laid-back atmosphere that’s so different from Central or Tsim Sha Tsui. The markets are a whole experience too — piles of dried seafood, shrimp paste jars, and snacks you’ve probably never seen before. Even if you don’t buy anything, it’s like walking through a living museum of local culture.
If you want to splurge a little, you can hop on a boat ride to spot the elusive pink dolphins or cruise past the stilt houses, but honestly, just exploring on foot is already rewarding. Pairing Tai O with a trip to Ngong Ping makes for a full day of adventure: morning with the Big Buddha and afternoon in a fishing village. Don’t worry — there’s a bus connecting the two sites.
But if you have moolah to spare, you can also book the Ngong Ping Tai-O Pass from Klook! This package includes a roundtrip cable car ride, a roundtrip bus between Ngong Ping and Tai-O Village, a boat tour, and meal vouchers.
Location: Tai-O Fishing Village, Lantau Island, New Territories, Hong Kong How to Get to Tai-O Fishing Village: From Ngong Ping bus terminal, take the New Lantao Bus 21 to Tai-O bus terminal. The fare is HKD 7.9. Travel time is 15-20 minutes.
6. Nan Lian Garden
Nan Lian Garden
On a separate occasion, we were also able to drop by Nan Lian Garden, a peaceful 3.5-hectare oasis in the middle of the vast urban jungle that is Kowloon.
The garden is designed in classical Tang dynasty fashion. It is adorned with manicured trees surrounding the tranquil “Blue Pond” that is straddled by a vermillion bridge that leads to a small pagoda called the “Pavilion of Absolute Perfection”.
Inside its buildings are various exhibits, including the Chinese Timber Architecture Gallery, which showcases the traditional way of building timber houses during the Tang dynasty.
The garden is situated just next to Chi Lin Nunnery, so keep quiet within the vicinity. Big group photos are also prohibited inside.
Address: Nan Lian Garden, Fung Tak Road, Diamond Hill, Kowloon, Hong Kong Operating Hours: 7:00 AM – 9:00 PM, but the exhibits are open from 10:00 AM to 5:00 PM. How to Get to Nan Lian Garden: Take the MTR Tuen Ma Line to Diamond Hill Station. Entrance to the Nan Lian Garden is roughly 350 meters from here (about 4-minute walk).
7. Man Mo Temple
Man Mo Temple
Tucked between modern buildings in Sheung Wan, Man Mo Temple is one of Hong Kong’s oldest and most atmospheric temples — and it won’t cost you a thing to enter. Built in the mid-1800s, it was dedicated to two deities: Man Cheong, the god of literature, and Kwan Tai, the god of war and brotherhood. Back in the day, locals would come here to pray for success in civil exams, and even today, students sometimes drop by before a big test.
Step inside and you’ll feel instantly transported. The air is thick with the scent of incense, as giant spiral coils burn slowly from the ceiling. The light filtering through creates a moody, almost cinematic atmosphere that makes you forget the busy streets just outside.
Best of all, it’s right in Central, so you can easily pop in during a day of sightseeing or shopping. There are several Man Mo temples in Hong Kong, but this one in Sheung Wan is the largest and was declared as a historic building and monument.
Address: Man Mo Temple, 124-130 Hollywood Road, Sheung Wan, Central, Hong Kong Island, Hong Kong Opening Hours: Daily, 8:00 AM – 6:00 PM Nearest MTR Station: Sheung Wan Station How to Get to Man Mo Temple: Take the MTR Island Line to Sheung Wan Station. Walk to your destination.
8. Central-Mid Levels Escalator
Only in Hong Kong would you find the world’s longest outdoor covered escalator system — and yes, you can ride it for free. Stretching over 800 meters, the Central–Mid-Levels Escalator isn’t just a way to get around; it’s practically a sightseeing tour on conveyor belts. It connects the busy streets of Central to the more residential Mid-Levels, saving locals from trudging up those brutally steep hills.
For travelers, though, it’s more than just transport. Riding the escalators takes you past buzzing neighborhoods filled with restaurants, cafés, and street art. You’ll glide through SoHo (South of Hollywood Road), one of Hong Kong’s trendiest dining spots, and past old tong lau buildings that give you a glimpse of the city’s past. The view changes with every section, making it feel like a moving balcony over Central’s urban jungle.
Here’s a tip: in the mornings, the escalator runs downhill to help commuters get to work. But from late morning until midnight, it switches and goes uphill, so time your ride accordingly. Whether you’re using it as a shortcut or just for the novelty of saying you’ve ridden the world’s longest outdoor escalator, this quirky urban attraction is a free, fun way to see Hong Kong from a different perspective.
Location: Central-Mid Levels Escalator, Central and Mid Levels, Hong Kong Island, Hong Kong Opening Hours: Dowhill – Monday to Sunday, 6:00 AM – 10:00 AM; Uphill – Monday to Sunday, 10:30 AM – 12:00 AM. Note that the schedule may change without prior notice. Nearest MTR Station: Central Station, Hong Kong Station, or Sheung Wan Station
9. Street Art & Historical Trail
Hong Kong may be best known for its towering skyline and neon-drenched nights, but scratch beneath the surface and you’ll find another side of the city: bold, colorful street art. One of the most recognizable pieces sits on the side of Hotel Madera Hollywood in Central: a massive mural, with its vibrant pop-art style and larger-than-life characters.
Not far away is Shing Wong Street, a steep staircase-turned-art canvas. Instead of plain grey steps, you’ll find bursts of painted patterns that make climbing the hill a lot more fun (and a lot more Instagrammable). The street itself is quiet compared to nearby Hollywood Road, so you can slow down, snap photos, and take in the creativity without the usual city chaos buzzing around you.
This spot is also part of the Sun Yat Sen Historical Trail, which weaves through the neighborhood, marked by bronze plaques, signs, and installations that highlight the revolutionary leader’s time in Hong Kong. Following the trail gives you a sense of how the city shaped Sun Yat Sen’s early years while also letting you discover tucked-away corners that most tourists miss. Pair that with the surrounding murals, and you’ve got this unique mash-up of modern street culture and deep-rooted history — something very “Hong Kong” in its own right.
The beauty of exploring this area is that it’s always changing. Street art gets refreshed, new murals pop up, and the energy evolves with each visit. It costs nothing to wander through, but the mix of visuals, stories, and atmosphere makes it one of the most rewarding ways to spend an afternoon in the city.
Location: Central, Hong Kong Island, Hong Kong
10. Mong Kok
If you love shopping or just being surrounded by frenetic energy, don’t miss Mong Kok. Walking through its streets feels like plugging yourself straight into the city’s electric pulse.
The area is famous for its street markets, each with its own personality. The Ladies’ Market is packed with souvenirs, knock-off handbags, and quirky trinkets. Sneakers Street (Fa Yuen Street) is paradise if you’re into shoes, lined with shop after shop of the latest releases and hard-to-find kicks.
Then there’s the Goldfish Market, which is exactly what it sounds like — an entire street dedicated to aquarium fish and pets, with plastic bags of colorful goldfish hanging like decorations.
At night, the neon signs kick in, and Mong Kok transforms into the classic Hong Kong scene you’ve seen in movies and travel posters.
The good news? It’s completely free to experience — unless, of course, you get tempted by the endless shopping stalls. Even if you don’t buy a thing, it’s a visual overload you won’t forget. Between the buzzing crowds, flashing lights, and the constant aroma of street food, the whole area feels like a free attraction in itself. It’s chaotic, it’s overwhelming, and it’s absolutely unmissable.
Location: Mong Kok, Kowloon, Hong Kong
11. Sham Shui Po
On Hong Kong’s Kowloon side, most tourists only get to explore Tsim Sha Tsui, Yau Ma Tei, and Mong Kok. But north of Mong Kok lies Sham Shui Po, which is brimming with compelling attractions on its own.
Some of the places worth checking out include:
Sam Tai Tsz and Pak Tai Temple
We were also able to visit the Jockey Club Creative Arts Centre (JCCAC), which was originally built in 1977 as a complex of tiny family-run factories but was transformed into an artist village.
Jockey Club Creative Arts Centre
Location: Sham Shui Po, Kowloon, Hong Kong Nearest MTR Station: Sham Shui Po Station How to Get to Sham Shui Po: Take the MTR to Sham Shui Po Station (on Tsuen Wan Line). Most attractions are within walking distance from the MTR Station.
12. Peng Chau
Tai Lei Island off Peng Chau
Aside from the peninsula, Hong Kong also covers several outlying islands off its coast. One of them is Peng Chau or “flat island”. The island is quite small, spanning only one square kilometer. But some of its main attractions include:
Lung Mo Temple
Lung Mo Temple, dedicated to the Chinese goddess of water, who is revered by local residents.
Tai Lei, a small island connected to Peng Chau by a bridge with a jagged offshoot called “Turtle Rock” and a sandy mini-beach.
Tung Wan Beach, a long sandy stretch close to the temple.
Fook Yuen Leather Factory, the island’s most visited attraction, thanks to the heritage building that houses it and its history. It’s no longer functioning as a workshop but an creative “secret garden” which features various installations and graffiti.
Bridge scene filming location of “Under Parallel Skies”
If you’ve seen the film Under Parallel Skies, starring Janella Salvador and Metawin Opas-iamkajorn, you’ll probably find some of its key attractions familiar like the Peng Chau Bridge and a small Asian ingredient store.
Location: Peng Chau Island, Islands District, New Territories, Hong Kong How to Get to Peng Chau: From the MTR Hong Kong Station, make your way to Central Pier No. 6. Catch a ferry to Peng Chau. Travel time is 30-40 minutes.
13. Cheung Chau
Cheung Chau Observation Deck
If you wish to go off the beaten path, another outer island that you might want to include in your itinerary is Cheung Chau, south of Lantau Island.
With an area of three square kilometers, Cheung Chau is bone-shaped, which looks like two separate islands connected by a narrow beach-laced strip of settlement. Among Hong Kong locals who wish to escape the constant jolt of the city, it is known for its hiking trails and relaxing beaches.
Lucky buns at Guo Jinji Bakery
On our day trip in Cheng Chau, we were able to visit the following:
Location: Cheung Chau Island, Islands District, New Territories, Hong Kong
How to Get to Cheung Chau
From Hong Kong city center: Take the MRT to Hong Kong Station and make your way to Central Pier No. 5. Catch a ferry to Cheung Chau. Fare: HKD 14.80 – HKD 42.30 (depending on the vessel and day of the week) Travel Time: 35-60 minutes (depending on the vessel) See schedule and more details here
From Ngong Ping/Po Lin Monastery: It’s possible to visit the Big Buddha/Ngong Ping 360 and Cheung Chau on the same day. Just board Lantau Bus #2, which makes a stop at Mui Wo ferry pier. Then catch the inter-island ferry to Cheung Chau.
14. Sha Tau Kok
Of all the towns within Hong Kong, Shau Tau Kok is perhaps the most curious. For many outsiders, it is almost unheard of. It is the territory’s northernmost settlement. And it is a closed town.
Wait, what? A “closed” town? What does it mean?
Located just south of the boundary with Shenzhen, Shau Tau Kok is within a regulated border zone called Frontier Closed Area. According to the South China Morning Post, it was closed off by the British colonial government in the 1950s in an effort to combat smuggling, espionage, and illegal immigration.
It is the last remaining major town in the zone, and is accessible only to local residents and those with the proper permit. Hence, unsurprisingly, only a limited number of tourists get to see and step into it, and they are allowed to stay in the area from 7:00 AM to 9:00 PM only.
But what’s in Sha Tau Kok? Novelty, mostly. Don’t expect exciting theme parks, giant shopping malls or vibrant food markets. What’s waiting for you here:
Chung Ying Street Garden
Sun Moon Pavilion, a simple bayside nook where you could spend a quiet morning.
Fish Lantern Square, where mascots Enggue Pup and Arttie Kitty stand, symbolizing the Sha Tau Kok fish lantern dance, which has been traditionally performed for over 300 years and has been declared a national intangible heritage.
Chung Ying Street, which straddles the border with Shenzhen. One part of it is in Hong Kong while the other in mainland China. A garden next to it if often a tour stop, as it is a good spot to watch the street.
Murals are all around town — on the walls, in the corners, on the ground — depicting mostly festivals and characters.
Salmon House, built in 1988 as relocation for many indigenous residents.
Shau Tau Kok Pier, the longest pier in Hong Kong, spanning 280 meters. It was constructed in the 1960s. It is also the gateway to Lai Chi Wo, which I will be discussing in the next section.
To manage your expectations: None of these are particularly exhilarating, overwhelming or dramatic. But altogether, they represent a side of Hong Kong that one could say is often overlooked, almost forgotten, and near isolated, away from the chaos of downtown. They also lend a cultural look into closed border towns that many people get to see.
Location: Sha Tau Kok, North District, New Territories, Hong Kong
Reminders
Sha Tau Kok is open to visitors but only if they have a Tourism Closed Area Permit, which is FREE of charge.
You can apply for one online on Hong Kong Police Force’s official website at least three working days before your intended arrival. The online application system opens at the start of each month for visits scheduled in the following month. (For example, slots for February visits are made available starting January 1.) It’s on a first come, first served basis.
15. Lai Chi Wo
Established around 400 years ago, Lai Chi Wo is one of the oldest but best preserved Hakka settlements in Hong Kong. At one point in its history, the village’s prosperity started to decline, so the feng shui masters recommended constructing walls around it to keep good fortune in and bad fortune out. Today, this walled village encircles over 200 houses neatly arranged in rows.
Because of its remote location, much of the rural settlement has not changed, as though it’s been frozen in time. Just outside its walls, the Hok Shan Monastery and Hip Tin Temple remain standing.
Hip Tin Temple and Hok Shan Monastery
You can go inside the village and walk down its centuries-old alleys, follow the Lai Chi Wo Nature Trail and admire the mangroves surrounding it. You can also just explore and get wrapped in its old-world charm or join a guided tour to learn more about Hakka history and culture.
In 2020, the village was awarded a UNESCO Special Recognition for Sustainable Development for promoting cultural conservation. It’s also part of the Hong Kong UNESCO Global Geopark.
Location: Lai Chi Wo, North District, New Territories, Hong Kong
How to Get to Lai Chi Wo
From Downtown Hong Kong: Catch a train on the MTR East Rail Line to University Station and take Exit B. Hop onto Bus 272K and alight at Ma Lui Shui Pier, the first stop. Travel on foot for 100 meters to Ma Liu Shui Landing No. 3 and board the kaito ferry bound for Lai Chi Wo. Alternatively, you can also just walk straight from the MTR University Station to the pier to catch the same ferry, which should take roughly 12 minutes. Kaito ferries are available on Saturdays and Sundays. Ferry travel time: 1.5 hours.
From Sha Tau Kok: If you’re visiting Sha Tau Kok and Lai Chi Wo on the same day trip, you can board a ferry from Sha Tau Kok Public Pier straight to Lai Chi Wo. Ferries from here are available daily. Travel time: 30 minutes. Note that a Closed Area Permit is required to access Sha Tau Kok and its pier.
Where to Stay in Hong Kong
For more details about different areas to stay in Hong Kong, you can check out our Where to Stay in Hong Kong article. But you may also check out these top accommodations in Hong Kong based on online user reviews for recommendations.
Getting a travel insurance is optional, but we highly recommend this, especially when traveling abroad. Travel can be unpredictable, and though we hope we’ll never use it, having it gives us peace of mind in case of unexpected delays, cancellations, or emergencies.
For international destinations, consider PGA Sompo’s TravelJOY Plus insurance. You can GET IT HERE. Don’t forget to use WORTHIT for a special affordable rate.
So, you have decided to visit Hong Kong Disneyland! You now have a list of the rides and attractions you want to experience. It’s a very long list, and you want to try as many as you can. Which ride should you go on first? What’s the best way to go about it? In this article, we’ll share with you what we feel is the best Hong Kong Disneyland itinerary to help you make the most of your time at the happiest place on earth.
We have been to Hong Kong Disneyland six times. And I’m not saying this to brag. I’m saying it, so you know that the itinerary I’m about to share with you is based on real, personal experience. Almost every time we visit, we get to experience at least 11 rides. Sometimes 12, sometimes 14 or 15, but never below 11.
Note: We’re not saying that following this itinerary will make you experience all of the rides because that still depends on a whole lot of variables, such as wait times, weather, and show schedules. Think of it as more like a route. You need to make your own decisions when you’re already there, given the circumstances.
Before we share with you the itinerary, there are some things you need to do BEFORE you even visit:
Have a good breakfast. First of all, before going to Disneyland, make sure you have good, sufficient breakfast. Walking around any Disney park isn’t like any other walk in the park. It can be pretty exhausting, especially when it’s hot and sunny, so come prepared with enough energy. Also, it’s best to eat before entering Disneyland because, as we have established in our previous videos, food inside the park is darn expensive.
Download the Hong Kong Disneyland app. It will show you not just the map of the park and directions but also the wait time for each attraction, which will be crucial in making decisions. Yes, we follow this itinerary we’re about to share, but feel free to adjust. If the wait time for an attraction is too long, you can rearrange a few items on this itinerary.
Visit on a weekday. To ensure you get to try as many rides as possible, avoid the weekends, Mondays, and holidays. Tuesday to Thursday is the best period. It’s cheaper too!
Familiarize yourself with the park’s layout. Be familiar with the lay of the land, so you won’t be going around in circles.
Hong Kong Disneyland Zones
Hong Kong Disneyland is the smallest Disney resort in the world, but it has eight themed areas or zones that you can explore: [HK DL map]
Main Street, U.S.A. A turn-of-the-century American street where vintage charm meets souvenir shopping and parade views. This is the first zone that will greet you immediately after the entrance.
Adventureland. A lush jungle escape with river cruises, tribal drums, and Tarzan’s treehouse.
Fantasyland. Classic fairytales come alive with whimsical rides, royal castles, and magical meet-and-greets.
Tomorrowland. A sleek sci-fi playground packed with Marvel action and intergalactic adventures.
Toy Story Land. Step into Andy’s backyard and feel like a toy among giant props and playful rides.
Grizzly Gulch. A wild west mining town with runaway mine trains and bear-sized surprises.
Mystic Point. A mysterious land of optical illusions, jungle gardens, and the legendary Mystic Manor.
Arendelle: World of Frozen. A snowy Scandinavian kingdom where Frozen comes to life through rides and immersive scenery. This is the newest and currently the most popular.
Early Park Entry
One thing you have to know is, currently, Hong Kong Disneyland is offering an Early Park Entry add-on on top of the regular ticket. For an additional fee, around HKD 100, this pass will allow you to access the World of Frozen zone one hour earlier than the official opening time of the park. So, let’s say the park opens at 10AM, you can already explore World of Frozen as early as 9AM. That’s just one hour, but that’s a big head start. It should be enough to explore the zone.
This sample itinerary will still work even without the Early Park Entry, so you don’t really have to get it if you don’t want to spend more. But if your budget allows, go for it because it’s worth it.
You can use our promo code THEPOORTRAVELERKLOOK for up to P300 OFF or TPTKLOOK5 for up to P500 OFF. These codes might change in the future, so best to just visit thepoortraveler.net/klook to redeem updated discount codes!
If you have this pass, arrive at Hong Kong Disneyland at least an hour before the scheduled opening time. Then look for staff members holding signs because they have a special entrance route for those who avail of the pass. Once in, you’ll get to see Disneyland without the crowd, too, as you make your way to World of Frozen on the other end of the park.
If you don’t have an Early Park Entry Pass, that’s OK. Show up early and make your way to World of Frozen just the same.
By the way, if your are looking for hotels and attractions in Hong Kong, please also visit our TPT Masterlist. Here, we compiled all our recommended hotels and attractions. Just visit and scroll until you see the section about Hong Kong. We also have a compilation for other destinations around the world.
1. World of Frozen
You might be asking, “But Yosh, if I don’t have an early park entry pass, why would I go to World of Frozen first? That’s literally on the other side of the park from the entrance!”
Frozen Ever After
Because it is one of the most popular zones right now, especially this ride: Frozen Ever After. And the line here just keeps getting longer as the day progresses, until maybe the late afternoon. But by then you’ll probably be too tired to return to it. So for me, it’s best to prioritize it because it is really, really good — arguably the hottest ride at Hong Kong Disneyland these days — and it’s really a crowd drawer. Just get it out of the way first.
Here, you’ll go on a boat cruise across a charming snowy village while the animatronics of Elsa, Anna, Kristoff, and Olaf sing the movie’s iconic soundtrack. But beware, it has a few surprises up its sleeves. Not too wild, but it’s so much fun.
Wandering Oaken’s Sliding Sleighs
And while you’re already here in Arendelle, take the time also to try the Wandering Oaken’s Sliding Sleighs, a family-friendly roller coaster also inspired by Frozen.
If you still have time left…
Once you’re done with Frozen, make your way out to Fantasyland. If you still have time left within the one-hour head start, go ride whatever you can here, like Dumbo Flying Elephant and Many Adventures of Winnie the Pooh, since they are already open as well.
But if you already used up your first hour, just keep walking south until you see a giant statue of Woody…
2. Toy Story Land
Welcome to Toy Story Land!
RC Racer
Toy Story Land has only three rides. The one we suggest that should be on top of your priority list is RC Racer — and let me tell you, this one looks way friendlier than it feels. It’s basically a giant orange half-pipe where you’re strapped into RC, Andy’s car, and launched back and forth until you’re dangling almost vertically at the top. Think Anchors Away at Enchanted Kingdom, but way wilder.
My stomach dropped with every swing, and half the time I couldn’t decide if I should scream or laugh. I did both at the same time! That’s how insane it was for me. We want you to prioritize this because the line here moves the slowest. It’s also the most fun.
Toy Soldier Parachute Drop
Then walk to Toy Soldier Parachute Drop. You get strapped in with the Green Army Men and lifted up high before bouncing down like a parachute in training. It’s not as terrifying as RC Racer, but the slow climb builds up just enough suspense, and the view of the park from the top is actually pretty sweet. The drops give you that fun little tummy tickle—like being on a kiddie-free-fall ride but with better theming.
It’s also very popular, so expect the lines to be long and they move incredibly slow too. If you’re taking this on alone, good. You can easily bypass the line because this is the only ride at Hong Kong Disneyland that has a special solo-rider lane. This is how it works: Every gondola has six seats, and sometimes, when the riders on the main line are settled, some seats remain vacant. The staff members fill them out by getting solo riders. And normally, there are very few solo riders, so the wait times for them are significantly shorter.
If you’re a party of two or more, you can still take advantage of it. But know that you will be separated from your group. If you want to save time, go for it.
Slinky Dog Spin
Right across from the Parachute Drop is the Slinky Dog Spin, which is the tamest and mildest of the three. Very demure. It’s just Slinky trying to catch his tail. It’s super fun for small kids, but I, as a grown man, don’t enjoy this, to be honest with you. It’s giving me nothing. Zero thrills at all. I always just get dizzy.
Once you’re done with all three, continue walking forward to the next zone…
3. Mystic Point
You’ll know you’ve stepped into Mystic Point because it is a drastic change from Toy Story Land or even Fantasyland.
Garden of Wonders
The air seems thicker here, the trees shadier, and everywhere you look, there are strange statues and odd relics, especially at the Garden of Wonders, where optical illusions make statues twist and contort depending on where you stand.
Mystic Manor
But at the heart of it all looms the grand Mystic Manor, the home of Lord Henry Mystic, Hong Kong Disneyland’s very own eccentric explorer. I love this ride, one of my all-time favorites. It’s so family-friendly and so, so fun. It’s storytelling at its finest. It’s also an original concept, not some familiar Disney movie retelling.
The second you board the trackless carriage, the magic begins. The story unfolds as Lord Henry proudly shows off his artifacts, while his pet monkey Albert, curious as ever, fiddles with a mysterious music box. Suddenly, the whole collection springs to life. Paintings move, statues dance, and entire rooms transform before your eyes. With the trackless ride system, every turn feels unpredictable, like the mansion itself is leading you on a wayward detour. And it’s indoors, so it will give you a break from the sun.
Mystic Point is one of the smallest zones here at Disneyland, so just walk a few minutes and you’ll be out of it. Then, you’ll be greeted by a mining town. Enter…
4. Grizzly Gulch
This themed land can only be found in Hong Kong Disneyland. Walking in, you’ll see clapboard buildings, dusty props, and a big, rocky mountain. You’ll pass by the very tempting Lucky Nugget Saloon, which is a restaurant that has a takeout counter. As appetizing as it may be, don’t pay attention to it for now. You don’t want to fill your tummy before braving our next ride, which is…
Big Grizzly Mountain Runaway Mine Cars
At first glance, Big Grizzly Mountain Runaway Mine Cars looks like a classic runaway mine train. I hopped on expecting the usual twists and turns, but this coaster is full of surprises. Midway through the ride, the track literally shifts beneath you, sending your cart backwards into the dark before shooting you forward again at high speed. And just when you think it’s over, a couple of grizzly animatronics pop up, causing even more “accidents” that push the ride into pure chaos. It’s thrilling, hilarious, and completely different from the coasters you’ll find in other Disney parks.
Lunch Break
Once you’ve conquered it, then you can have lunch. Walk back to the Lucky Nugget Saloon and grab something to eat. It’s best to keep your lunch light, as we still have a lot of rides to try, and you don’t want a party in your tummy. This food stall is okay because they have chicken, fries, Caesar salad, and pasta salad.
We’re not recommending this because of the taste or flavor, but only because it’s the closest one in the area, and it’s more convenient than a proper restaurant. Also, because they sell Hong Kong milk tea slush with soft serve (HKD 62, PHP 450), which is my favorite!
Just find a bench or table in the vicinity. Looking for a completely shaded area? You can walk to this bridge, and under it you’ll find a set of benches.
If you don’t like the menu at the Lucky Nugget Saloon, don’t worry. Close to this bridge, you’ll find Karibuni Grill, which serves Honey Soy Sticky Chicken Wings, Elote “Corn on Cob” Tajin, Cheddar Cheese Hot Dog, and Korean Squid. They also sell those giant turkey legs (HKD 160, PHP 1165). Lots of options in this area, which is why we love having lunch here.
But at this point, we have already stepped into another themed land.
5. Adventureland
Welcome to Adventureland!
This is Disneyland’s version of a wild, tropical paradise. The entire place is wrapped in lush greenery and jungle sounds and the echoing of the drums. This is great because it’s high noon or early afternoon at this point, and you would want to escape the sun. And we have the best solution for that.
Festival of the Lion King
This is the Theater in the Wild, where you can catch the Festival of the Lion King, an indoor live Broadway-ish musical with acrobats, fire dancers, and larger-than-life costumes and floats. It’s a 30-minute show, and it’s really great, so be sure to see it.
Attention! The Festival of the Lion King is temporarily suspended from September 3, 2025 onwards. Check the official website for updates.
Again, feel free to adjust your itinerary. If you finish your Runaway Mine Carts ride before noon and you’re not hungry yet, catch the noontime performance and grab your lunch later instead.
They fill the entire theater, so there are usually no long lines, and if there are, they can usually accommodate everyone.
Jungle River Cruise
After the show, head over to the Jungle River Cruise. It’s campy, it’s funny, and somehow it never gets old, especially with the little surprises the skippers throw in along the way. This is also a great afternoon ride because the heat isn’t too harsh here as you’re surrounded by trees and water.
Tarzan’s Treehouse
Across the land, towering above the treetops, is Tarzan’s Treehouse. It’s more of an exploration play area than a ride. You can climb up the rope bridges and wooden walkways, which provide little vignettes from Tarzan’s story. I haven’t visited this in a long time, as I usually skip it. I’ve seen it once before, and I felt like that was enough, so we don’t have any recent footage. And as of writing, this attraction is still closed until further notice. It’s best to check the official website for the announcement regarding the reopening.
Once you’ve had your dose of jungle fever, it’s time to re-enter Fantasyland.
6. Fantasyland
If there’s one place in Hong Kong Disneyland that screams “classic Disney,” it’s Fantasyland. Here, you’ll be surrounded by carousels, pastel facades, and the kind of whimsical soundtrack that makes you feel like you’ve stepped into a childhood dream.
It’s the heart of the park, and honestly, it’s impossible not to feel a little giddy here, especially as you stare at Castle of Magical Dreams, looming above you. Originally Sleeping Beauty’s Castle, it was completely reimagined into a soaring, multi-towered centerpiece that represents 13 Disney princesses. Each tower reflects a different princess, from Ariel’s seashells to Mulan’s cherry blossoms.
At this point, forget about the order and play it by ear. Go where the line is the shortest. But there are two attractions that I want to highlight.
Mickey’s PhilharMagic
First is Mickey’s PhilharMagic, a 4D musical show where Donald Duck gets into trouble with Mickey’s magical orchestra. With water sprays, scents, and a whirlwind of Disney movie scenes, it’s the perfect spot to sit down, cool off, and be swept up in some nostalgia. I absolutely love this show! I always watch it when I visit any Disneyland theme park.
The Many Adventures of Winnie the Pooh
Second is The Many Adventures of Winnie the Pooh, a family-friendly dark ride that’s surprisingly popular. If you see that the wait time here is not that bad, grab the chance because the line here fills up fast. Here, you hop into a honey pot and follow Pooh and friends through the Hundred Acre Wood. It’s cute, cozy, and a little bit trippy.
Kid-Approved Rides
Fantasyland is also quite small, but it is packed with attractions, although most of them are for small children, but adults are also welcome, of course. If you have kids, then you won’t have a choice. Your kids WILL insist on riding:
Cinderella Carousel. This is basically just that — a grand carousel.
Mad Hatter Tea Cups. A ride where you can spin yourself silly under colorful lanterns.
Dumbo the Flying Elephant. Here, you hop onto your own Flying Dumbo. It’s like a carousel, but you soar in the air and you control how high or how low you go. I actually quite enjoy the Dumbo ride, even as an adult.
But often, when I visit, I usually just skip these three rides.
It’s a Small World
And of course, as you exit Fantasyland, don’t miss to make a stop at It’s a Small World! The ride takes you on a boat through colorful sets filled with dolls in traditional costumes from all over the world. Hong Kong’s version is extra special because it includes Disney characters woven into the scenes. Spot Mulan in China, Aladdin and Jasmine in the Middle East, and even Lilo & Stitch in Hawaii. And the Philippines is featured here, too!
And yes — the song will get stuck in your head. But not for too long because soon you’ll be replacing it with other Disney songs.
7. Main Street, U.S.A.
When you exit Fantasyland, you’ll find yourself close to the front of the castle and Main Street, U.S.A. There are two events that you might want to catch here.
Disney Friends Live: Party at the Castle!
First, Disney Friends Live: Party at the Castle! This is a 15-minute high-energy concert-style show featuring Mickey and Friends, Duffy and Friends, and of course some of our fave Disney Princesses like Belle, Tiana, and Aurora. The schedules vary daly, so it’s best to check this page for the exact times: Disney Friends Live: Party at the Castle Schedule.
I actually saw the 11:30 AM performance before, but it’s way too hot, so what I’m recommending is to catch the late afternoon or even the evening performance, which I feel is a more comfortable choice.
Friendtastic! Parade
Same with the Friendtastic! Parade, which you can also catch from Main Street, U.S.A. This is the biggest parade in Hong Kong Disneyland history, showcasing 11 larger-than-life floats, featuring Mickey and friends and your favorite characters from Toy Story, Zootopia, Encanto, Monsters Inc., Up, and of course, Inside Out. Over 100 performers make the atmosphere really grand and festive!
As of writing, it only happens once daily, falling between 1:00 PM and 2:30 PM. Other months or seasons have late afternoon or evening schedules, too. You can go to this page for the show’s exact time: Friendtastic! Parade Schedule.
I saw the 1PM parade before, but I feel like the late afternoon or the evening schedule is better to avoid the sun.
After the parade, it’s time to enter another dimension. Well, sort of.
8. Tomorrowland
Walking into Tomorrowland feels like stepping into a sleek, futuristic sci-fi city. It’s like you’ve time-traveled.
Hyperspace Mountain
What I recommend that you prioritize here is Hyperspace Mountain because it draws in the biggest crowd. This is a Star Wars-themed indoor roller coaster. You start in almost pitch darkness, then you weave through tie fighters and laser blasts. The soundtrack booms, the turns are sharp, and by the end, you’re screaming and cheering. It’s easily one of the most exhilarating rides in the whole park.
Iron Man Experience
After this, walk all the way to the other end, and you’ll find the Iron Man Experience, which also happens to be Marvel’s very first Disney ride in the world. You strap into a “StarkVision” flight vehicle, slip on your 3D glasses, and suddenly you’re soaring over Hong Kong with Iron Man himself, blasting drones and dodging explosions. It’s part simulator, part action movie, and seeing familiar Hong Kong landmarks in the middle of the battle gives it a really cool local twist.
Ant-Man and The Wasp: Nano Battle
Then just next door is Ant-Man and The Wasp: Nano Battle, which is basically a high-tech shooting game turned ride. You shrink down to the size of an ant, grab a laser blaster, and help the heroes fight off swarms of Hydra bots. It’s frantic, fun, interactive, and also competitive because you can compare scores with your seatmate. This is also suitable for kids and seniors, as it doesn’t have drops and twists.
Orbitron
Lastly, Orbitron, where you pilot your own retro-styled spaceship. I’ve tried it just once before. But now I always skip it, probably because it’s too similar to the Dumbo ride. Also, because I’m usually completely exhausted at this point. And to me, it looks like I’m not the only one.
I have explored Tomorrowland in the morning and early afternoon too, and no, it wasn’t too crowded. But even less so in the late afternoon or early evening. In fact, at the Iron Man and Ant-Man rides, I virtually just walked straight into the ride because the lines were too short. It happened to us twice.
Dinner Time
If you’re hungry, you can grab dinner here at Starliner Diner, which offers burgers and fried chicken with fries. We had Marvel burger meal (HKD 140, PHP 1020) and 2-pc fried chicken meal (HKD 140, PHP 1020)
9. Momentous Nighttime Spectacular
And once you had your dinner, make your way back to Main Street or the area in front of the castle to catch the Momentous Nighttime Spectacular, which happens at either 8:00 PM, 8:30 PM, or 9:00 PM, depending on the season.
This is HK Disneyland’s jaw-dropping evening show. Think of it as Disney’s greatest hits album brought to life: the castle transforms into a massive projection screen, scenes from classics like The Lion King and Mulan, all the way to Frozen and Coco, play out with music that gives you goosebumps.
Fireworks explode overhead, fountains dance in sync, lasers cut through the night sky, and — the cherry on top, this year as it celebrates its 20th anniversary — hundreds of drones form dazzling shapes above the park.
10. Exit HK Disneyland
As soon as Momentous Nighttime Spectacular is over, people will start flooding out of the park. You can join them, or you can stay a little bit and let the madness pass, so you can exit more peacefully.
The last train leaves the Disney Resort Station at 12:40 AM, way past midnight, as of writing. So there’s really no need to hurry or join the crowd, unless you need to be elsewhere that night.
Reminders
If at any point you want to buy a souvenir, go for it. There’s usually a store at the exit point of every ride.
As you can imagine, this itinerary is so packed. It is possible if you’re visiting on a weekday of an off-peak season. But it might be challenging on a weekend.
Keep an eye on the wait times and decide based on those. If you feel like you’re running short of time, feel free to skip some of these and again, play it by ear.
Hong Kong Disneyland Itinerary Summary
Here’s a quick rundown of the route and itinerary. As always, you can customize or tweak this to suit your interests and preferences.
World of Frozen 1: Frozen Ever After 2: Wandering Oaken’s Sliding Sleighs
Toy Story Land 3: RC Racer 4: Toy Soldier Parachute Drop 5: Slinky Dog Spin
Mystic Point 6: Garden of Wonders 7: Mystic Manor
Grizzly Gulch 8: Big Grizzly Mountain Runaway Mine Cars
Lunch
Adventureland 9: Festival of the Lion King 10: Jungle River Cruise 11: Tarzan’s Treehouse
Fantasyland 12: Mickey’s PhilharMagic 13: The Many Adventures of Winnie the Pooh 14: Cinderella Carousel 15: Mad Hatter Tea Cups 16: Dumbo the Flying Elephant 17: It’s a Small World
Main Street, USA 18: Disney Friends Live: Party at the Castle 19: Friendtastic! Parade
Tomorrowland 20: Hyperspace Mountain 21: Iron Man Experience 22: Ant-Man and The Wasp: Nano Battle 23: Orbitron
Dinner
Castle of Magical Dreams/Main Street, USA 24: Momentous Nighttime Spectacular
Exit HK Disneyland: Last train leaves at 12:40 AM.
Where to Stay Near Hong Kong Disneyland
For an even more magical Disney experience, book your stay at one of the Disney hotels at Hong Kong Disneyland Resort. Below are the three hotels to choose from.
Disney Explorer’s Lodge
Where to Stay in Hong Kong
Outside of Disneyland, the closest area to Disneyland is Tung Chung and Hong Kong SkyCity. These areas are also near the airport. However, if you’re also exploring other parts of Hong Kong during your trip, you may also consider other areas like Tsim Sha Tsui or Central.
For more details about different areas to stay in Hong Kong, you can check out our Where to Stay in Hong Kong article. But you may also check out these top accommodations in Hong Kong based on online user reviews for recommendations.
Getting a travel insurance is optional, but we highly recommend this, especially when traveling abroad. Travel can be unpredictable, and though we hope we’ll never use it, having it gives us peace of mind in case of unexpected delays, cancellations, or emergencies.
For international destinations, consider PGA Sompo’s TravelJOY Plus insurance. You can GET IT HERE. Don’t forget to use WORTHIT for a special affordable rate.
We’ve been travel blogging for the past 15 years, and yes, we adore theme parks, especially Disney parks! And in this article, we’re sharing with you the Top 15 rides in Hong Kong Disneyland that we were able to try.
Note: We ranked these rides based on our personal experience and preference, so this list is purely subjective. Our choices and opinions might differ from yours, and that’s totally fine! We’d love to know which rides make your top three. Sound off in the comment section!
You can purchase your tickets at the Hong Kong Disneyland Park’s Main Entrance Ticket Booths and Guest Relations, but it is highly recommended and more convenient to get your tickets in advance online. You can follow the link below for the ticket packages on Klook.
You can use our promo code THEPOORTRAVELERKLOOK for up to P300 OFF or TPTKLOOK5 for up to P500 OFF. These codes might change in the future, so best to just visit thepoortraveler.net/klook to redeem updated discount codes!
Top 15 HK Disneyland Rides & Attractions
#15: The Many Adventures of Winnie the Pooh
Location: Fantasyland
The Many Adventures of Winnie the Pooh is a charming dark ride located in Fantasyland. Here, you can board one of the whimsical “Hunny Pot” vehicles and journey through the beloved tales of A.A. Milne, the author who created Winnie the Pooh. This family-friendly attraction brings the Hundred Acre Wood to life with colorful scenes and motion-enhanced effects — from bouncing along with Tigger to getting caught in a dream full of Heffalumps and Woozles. It doesn’t have drops or sudden movements. The ride is gentle and steady, great for all ages, especially little kids and seniors.
This ride is not exclusive to Hong Kong Disneyland. We have also tried it at Magic Kingdom in Orlando. Shanghai Disneyland also has a version of it. There are subtle differences, but the overall experience is very similar. It’s not the flashiest ride in the park, but it’s pure, comforting Disney magic—soft, sweet, and straight from the heart.
Personal Take: But as much as I adore the nostalgia and whimsy of Winnie the Pooh, this ride ranks lower on my personal list of favorites at Hong Kong Disneyland because it doesn’t quite deliver the thrill or wow factor that other attractions in the park serve up. It’s not very memorable. You remember I mentioned earlier that I made sure to ride this again? It’s because I barely remember it. Even today, before recording, I had to rewatch my videos again to remind myself.
The storytelling is cute and the visuals are warm and fuzzy, but if you’re the type who craves heart-racing excitement or cutting-edge effects, this one might feel a bit too mellow. It’s nice, but not necessarily what you’ll rave about after leaving the park.
Safety and Accessibility
Indoor Ride
Good for all ages.
No height restrictions.
Wheelchair-accessible.
Guest Policy: Children below 7 years old must be accompanied by a guardian age 16 years or older.
#14: Dumbo the Flying Elephant
Location: Fantasyland
Dumbo the Flying Elephant is a Disney classic through and through. It’s basically like a carousel but in the air and lets you pilot your very own Dumbo as you glide in circles over Fantasyland. With a simple lever, you can control your flying elephant’s altitude, adding a playful sense of control that younger riders absolutely love. The views are surprisingly lovely too, especially on a sunny day when you can spot the Cinderella Carousel, the castle, and the bustling park below.
Personal Take: Still, as charming as it is, Dumbo is more of a quick, feel-good moment than a showstopper. It’s just a simple ride, without an immersive storyline, cutting-edge effects, or much variations. Its short duration and relatively slow pace mean it’s not going to wow thrill-seekers, and in peak hours, the wait time can feel a bit long for what you actually get.
But still, I enjoyed it every time, especially on our last visit when we got to share the ride with Mickey and Minnie!
Safety and Accessibility
Outdoor Ride
Good for all ages.
No height restrictions.
Need to transfer from wheelchair to ride.
Guest Policy: Children below 7 years old must be accompanied by a guardian age 16 years or older.
#13: Jungle River Cruise
Location: Adventureland
Jungle River Cruise delivers a vivid, immersive safari-style adventure right in the heart of Adventureland. You board a charming tramp-steamer-style boat and drift past Tarzan’s Treehouse, through dense, tropical scenery teeming with animatronic wildlife — elephants, gorillas, hippos, crocodiles, and headhunters using blow-darts — against the lush forest backdrop.
The ride stands out for its dramatic finale, where the mythical fire and water gods engage in an impressive spectacle of steam, flame, and water effects. I usually do this ride in the afternoon to escape the heat of the sun. Nothing’s more refreshing than being surrounded by cold water!
Personal Take: The boat driver/tour guide is integral in the ride. And what they’re doing is not easy, delivering both information and humor at the right time, sometimes in multiple languages. The guides sometimes rush through the script, which can affect how much you’ll enjoy this attraction. And while the theming is rich, some thrill-seekers might find the pace a touch too tame compared to more immersive attractions.
Safety and Accessibility
Outdoor Ride
Good for all ages.
No height restrictions.
Wheelchair-accessible.
Sign Language service is available.
Guest Policy
Children below 7 years old must be accompanied by a guardian age 16 years or older.
This ride has the surprise factor.
#12: It’s a Small World
Location: Fantasyland
It’s a Small World is one of Hong Kong Disneyland’s largest indoor attractions, offering a peaceful 9-minute boat cruise through vibrant, stylized scenes that celebrate global cultures and unity. It’s heartfelt, timeless, and visually enchanting.
It’s a dark ride. And in the theme park world, the term “dark ride” refers to attractions where guests travel in a guided vehicle through a series of scenes, usually with special lighting, sound effects, animatronics, and projections to tell a story. The “dark” part doesn’t mean it’s scary (though it can be, sometimes). But it just refers to the ride being enclosed and using controlled lighting to set the mood. And Small World is like that.
Inspired by the original Disneyland version, this edition uses a canal-style ride system and showcases the artistic vision of Mary Blair, with iconic, colorful figures crafted from papier-mâché, glitter, textiles, and authentic costumes.
Personal Take: We have also seen the Magic Kingdom version of it in Orlando, and we very much prefer Hong Kong’s take on it, perhaps because of its expanded Asian segment, including a brief feature on the Philippines! A bahay kubo sets the stage, with dolls dressed in traditional Filipino attire. But compared to other rides, it still remains very low-key.
Safety and Accessibility
Indoor Ride
Good for all ages.
No height restrictions.
Wheelchair-accessible.
Guest Policy: Children below 7 years old must be accompanied by a guardian age 16 years or older.
#11: Antman and the Wasp: Nano Battle!
Location: Tomorrowland
Now we’re talking! Ant-Man and The Wasp: Nano Battle! is a shooting dark ride launched in March 2019, nestled within Tomorrowland, a Marvel-themed expansion of the park. Yes, I said “shooting dark ride.” Emphasis on shooting.
Guests board an Omnimover-style vehicle with laser-based blasters. Riders are tasked with helping Ant-Man and The Wasp fend off Hydra’s swarmbots by shooting at animated targets while immersed in stunning visuals and score. As early as the start of the queue, you’ll be sucked into the story featuring the cast of the movie. Yes, you’ll be surrounded by images of Paul Rudd, which is a treat in itself.
Inside the ride, you’re “shrunk” to ant-size to fight swarmbots from a micro-perspective. You shoot targets as you coast along, and the more targets you hit the higher your score. You can even have a mini-contest with your companion to see who’s the better shot, making it high-energy and interactive.
Personal Take: While the competitive shooting feature adds gaming flair, those seeking more immersive scenes or edge-of-your-seat thrills might find the gameplay focus a touch repetitive or dated. I like it. But not enough to make it to our Top 10.
Safety and Accessibility
Indoor Ride
Good for all ages.
No height restrictions.
Wheelchair-accessible. Note: This service is temporarily suspended from August 15, 2025 until further notice. Check the official website for updates.
Guest Policy: Children below 7 years old must be accompanied by a guardian age 16 years or older.
#10: Theater in the Wild
Location: Adventureland
At the heart of Adventureland stands the Theater in the Wild. And more often than not, the main feature is the Festival of the Lion King, a spectacular, 30-minute Broadway-style stage show, retelling Simba’s story through Elton John and Tim Rice’s iconic songs, acrobats, fire dancers, dynamic choreography, and striking production design. Love the giant characters that look like parade floats. The Hong Kong version shines with its central turntable stage, which allows dramatic presentations.
But it’s not always The Lion King. A couple of years ago, we chanced upon a completely different show called Let’s Get Wicked, featuring Disney’s devilish but beloved villains like Ursula, Cruella deVille, Dr. Facilier, Mother Gothel, Gaston, and of course, Maleficent. If Lion King dazzles with its heartfelt storytelling, the villains amp up the comedy and choreography.
Personal Take: I always try to catch the Festival of the Lion King show whenever I’m in Disneyland because I really, really enjoy it. Usually, I choose the showtimes around lunch time so I can escape the scorching sun. Or the rain, on a couple of occasions.
Safety and Accessibility
Indoor Attraction
Good for all ages.
No height restrictions.
Wheelchair-accessible.
Assistive Listening, Sign Language, and Video Captioning services are available.
Attention! The Festival of the Lion King is temporarily suspended from September 3, 2025 onwards. Check the official website for updates.
Guest Policy: Some scenes may be a little intense and may feel frightening for young viewers.
#9: Mickey’s PhilharMagic
Location: Fantasyland
Located in Fantasyland, this 12-minute 4D film spectacular is one of my favorites! It’s pure nostalgia. It makes me feel like a kid again.
Although it’s called Mickey’s PhilharMagic, the mischievous Donald Duck steals the show, quite literally. By stealing Mickey’s hat and then losing it, he embarks on an adventure through many of Disney’s most loved classics like The Little Mermaid, The Lion King, Peter Pan, and Aladdin. It has been enchanting guests since the park’s opening, and I don’t think it’s going anywhere. In fact, they recently updated and upgraded it, adding a number featuring Coco’s El Poco Loco and extending some parts.
Personal Take: The 4D effects and larger-than-life projection make it especially appealing on hot days or for families needing a restful, air-conditioned moment. It also flips fast because they fill the theater every run.
Safety and Accessibility
Indoor Ride
Good for all ages.
No height restrictions.
Wheelchair-accessible.
Assistive Listening service is available.
Guest Policy: Children below 7 years old must be accompanied by a guardian age 16 years or older.
If this 4D ride is too mild for you, the next item on our list might scratch that nastier virtual reality itch!
#8: Iron Man Experience
Location: Tomorrowland
The Iron Man Experience is a 3D motion-simulator ride located in Tomorrowland’s “Stark Expo” area. It’s the first-ever Marvel-themed ride in any Disney park, offering guests an immersive flight alongside Iron Man. Riders don StarkVision glasses and board the Expo Edition Iron Wing, a motion vehicle, for a thrilling journey over Hong Kong. Yes, the ride will take you above and through Hong Kong’s cityscape, making the suspension of disbelief stronger.
Tony Stark battles Hydra, and you’re right there with him, navigating the skies and battling robotic invaders across iconic landmarks. The queue itself is part of the show, but to be honest, I never got to pay attention to it because every time I’m here (usually in the late afternoon), there’s almost always NO LINE at all, which is surprising, given how popular Ironman is. I usually walk right into the ride.
Personal Take: Despite its blockbuster appeal, it’s still a simulator — not a physical roller coaster — so thrill-seekers craving high-speed drops might find it tamer than expected. But the reason it’s only #8: I always get dizzy on this ride. I don’t know why. It doesn’t happen at most other simulator rides.
Safety and Accessibility
Indoor Ride
Rider must be at least 102 cm (40in) or taller.
Need to transfer from wheelchair to ride.
Guest Policy
Children below 7 years old must be accompanied by a guardian age 16 years or older.
Rider should be in good health and without conditions such as high blood pressure, heart, back or neck problems, motion sickness, or other conditions that could be affected by this ride.
Pregnant women are strongly advised not to ride.
Service animals are not permitted.
#7: Hyperspace Mountain
Location: Tomorrowland
Also located in Tomorrowland, Hyperspace Mountain is Hong Kong Disneyland’s thrilling indoor roller coaster. It used to be known as Space Mountain before being permanently reimagined with a Star Wars overlay.
The ride propels guests through a pitch-dark, space-themed course with amplified visuals. The Star Wars twist places riders in the midst of a Rebel versus Imperial dogfight, launching into an adrenaline-pumping hyperspace battle. That blend of speed, surprise, and cinematic tension makes it one of the park’s most exhilarating attractions, especially if you’re a big Star Wars fan.
Personal Take: That said, the ride can feel rattly and less smooth. It’s hard to explain, but if you’ve tried similar but newer rides like the Guardians of the Galaxy ride at EPCOT or Tron Lightcycle Power Run at Magic Kingdom, you’ll know what I mean. It also lacks a big drop that gives that fluttering feeling in the tummy. And if that feeling of weightlessness is what you’re after, you should pay a visit to Toy Story Land.
Safety and Accessibility
Indoor Ride
Rider must be at least 102 cm (40in) or taller.
Need to transfer from wheelchair to ride.
Guest Policy
Children below 7 years old must be accompanied by a guardian age 16 years or older.
Rider should be in good health and without conditions such as high blood pressure, heart, back or neck problems, motion sickness, or other conditions that could be affected by this ride.
Pregnant women are strongly advised not to ride.
Service animals are not permitted.
#6: Toy Soldiers Parachute Drop
Location: Toy Story Land
Toy Soldiers Parachute Drop is a parachute jump–style attraction that drops riders down an 80-foot (roughly 25-meter) tower. Guests board six-person parachute-shaped gondolas. From the top, you could have an expansive view of the surrounding areas, but I doubt you’ll be focusing on the view while you’re here. The ride then gently ascends then descends multiple times, creating those much-chased butterflies in the stomach.
Personal Take: This ride gives a nice rush with its ascending and plunging motion, but stays light enough for many ages, even kids. It’s also great for thrill-seekers who prefer something a bit extreme but not too much. But be warned that wait times can run long, especially in peak seasons.
This ride tends to draw big crowds, sometimes hitting 120 minutes. We found a workaround, though. This is one of those rides with a separate single-rider line, so take advantage of it. You’ll be separated from your group, but you’ll be breezing through it, and you can even ride multiple times as a single rider.
Safety and Accessibility
Outdoor Ride
Rider must be at least 81 cm (32in) or taller.
Need to transfer from wheelchair to ride.
Guest Policy
Children below 7 years old must be accompanied by a guardian age 16 years or older.
Rider should be in good health and without conditions such as high blood pressure, heart, back or neck problems, motion sickness, or other conditions that could be affected by this ride.
Pregnant women are strongly advised not to ride.
Service animals are not permitted.
Just next to the Parachute Drop stands the next attraction on our list…
#5: RC Racer
Location: Toy Story Land
RC Racer is a thrilling steel shuttle ride themed after the iconic RC car from Toy Story. This totally exhilarating ride launches guests back and forth along a giant U-shaped “half-pipe” track, reaching heights of about 25 meters (82 feet). Think Enchanted Kingdom’s Anchor’s Away, but crazier. Much crazier.
Drawing inspiration from Hot Wheels tracks, the ride offers a fun, dynamic experience, building speed in each pass to create that gravity-defying sensation or “hang time”, holding you at steep angles, which is especially thrilling if you’re seated in the back. And yes, I was seated at the back! At one point, I thought the ride malfunctioned and catapulted us into the air, only to be pulled back to earth, then get swung up again. I loved, loved, loved it! If you don’t want to be too overwhelmed, sit in the middle part.
Personal Take: The Toy Story theming is impeccable. The station mimics a toy garage, and the queue resembles a toy racetrack. However, it has a limited throughput — only one car runs at a time. Hence, wait times can be too long at times. Just be prepared for potentially long lines and an intense ride that’s more adrenaline than storytelling.
Safety and Accessibility
Outdoor Ride
Rider must be at least 120 cm (48in) or taller.
Need to transfer from wheelchair to ride.
Guest Policy
Children below 7 years old must be accompanied by a guardian age 16 years or older.
Rider should be in good health and without conditions such as high blood pressure, heart, back or neck problems, motion sickness, or other conditions that could be affected by this ride.
Pregnant women are strongly advised not to ride.
Service animals are not permitted.
OK, we’re down to the final four. And to be honest with you, we had a hard time ranking numbers 2 to 4 because we kept changing our minds. These 3 attractions are very different. Virtually, it’s a triple tie. But as of writing, here’s how things stand.
#4: Momentous Nighttime Spectacular
Location: Main Street, U.S.A.
Ah, the ever-so-famous fireworks display at the end of every day — Momentous Nighttime Spectacular. Actually, fireworks display may not be the right term for it because compared to its previous version years ago, there are fewer fireworks now. But that doesn’t mean it’s less spectacular. If anything, they really dialed it up!
Projected right onto the Castle of Magical Dreams and the fountain in front of it, this spectacular blends breathtaking visuals, powerful music, lasers, and fireworks into one seamless, emotional show. It takes you on a journey through beloved Disney and Pixar stories — one minute you’re feeling the warm fuzzies with heartfelt scenes, the next you’re gripping your chest during epic, action-packed sequences. It’s like the ultimate Disney highlight reel, only bigger, brighter, and paired with a soundtrack that could make a grown man tear up (don’t ask me how I know).
As if that wasn’t enough, for the park’s 20th anniversary, they’ve added an extra layer of magic — drones. Hundreds of them light up the sky in stunning formations, creating massive shapes, icons, and symbols that complement the castle projections below and push the wow factor through the roof.
Personal Take: We decided to put it at number 4 because, of course, a show this epic comes with a few realities. First, you’ll want to stake out your spot early if you want the best view. And by early, we mean HOURS early. If the show starts at 8PM, you should already secure a spot at around 5 or 6PM because it gets crowded pretty quickly. And other guests can easily block your sightline or ruin your experience.
Weather can also play the villain. Heavy rain or strong winds may force changes or cancellations. But on a perfect night, when everything aligns, Momentous, especially with its dazzling drone addition, is one of those rare theme park experiences that sticks with you long after the lights fade.
Safety and Accessibility
Outdoor Attraction
Good for all ages.
No height restrictions.
Wheelchair-accessible.
Guest Policy: Some parts may have the surprise factor or may be a little intense for those with photophobia or sensitive to flashing or blinding lights.
#3: Big Grizzly Mountain Runaway Mine Cars
Location: Grizzly Gulch
The best roller coaster in Hong Kong Disneyland! Located in the Wild West–themed Grizzly Gulch and unveiled in July 2012, Big Grizzly Mountain Runaway Mine Cars takes riders on a gold rush, following animatronic bears. But it’s not really the narrative that makes it special. It’s the unexpected twists: a lift hill and a surprise launch that sends you rolling backward!
Personal Take: Just like Hyperspace Mountain, it also feels rough, but I didn’t really mind because its bumpiness matches the mine theme of the ride. But prepare to wait a long time for your turn, as it is also very popular, but the line moves slowly.
Safety and Accessibility
Outdoor Ride
Rider must be at least 112 cm (44in) or taller.
Need to transfer from wheelchair to ride.
Guest Policy
Children below 7 years old must be accompanied by a guardian age 16 years or older.
Rider should be in good health and without conditions such as high blood pressure, heart, back or neck problems, motion sickness, or other conditions that could be affected by this ride.
Pregnant women are strongly advised not to ride.
Service animals are not permitted.
#2: Mystic Manor
Location: Mystic Point
Mystic Manor is Hong Kong Disneyland’s crown jewel. For the longest time, I firmly believed it was the most imaginative ride here.
It is a ride that is unique to Hong Kong Disneyland because it’s an original story and not based on any existing Disney film. And yet, even though none of the characters are familiar, it’s very easy to be invested in its narrative. The story is centered around Lord Henry Mystic and his very naughty pet monkey named Albert. It is set in a lavish Victorian-style mansion, and using a trackless ride system, you glide from room to room, each brought to life by realistic animatronics, jaw-dropping special effects, elaborate set pieces, and a beautiful score. The mix of physical props and high-tech projections creates an unforgettable experience. This is STORYTELLING at its finest.
Personal Take: Aside from its overall creativity and originality, what makes us put it so high on the list is its inclusivity. It’s not a scary ride. Not at all. Despite its name, it’s not a horror train, unlike the Haunted Mansion in other Disney parks. Instead, it’s a whimsical, mysterious, and hilarious adventure that both kids and adults will surely enjoy. Even my mom has this as her favorite Disney ride.
I hope they adapt this into a proper movie someday!
Safety and Accessibility
Indoor Ride
Good for all ages.
No height restrictions.
Wheelchair-accessible.
Guest Policy: Children below 7 years old must be accompanied by a guardian age 16 years or older.
And for our #1…
#1: Frozen Ever After
Location: World of Frozen
This may be a controversial take. Most publications put Mystic Manor or Big Grizzly Mountain or even Hyperspace Mountain at the very top. But hear me out.
As a ride, Frozen Ever After feels like a relaxing boat ride across a charming village in the beginning. But just when you’re caught up in the sparkly snow and “aaaw” feelings, it catches you off-guard with a couple of delightful thrills and surprises. Nothing wild, but just enough to make you cling to your seat. It’s a perfect blend of family-friendly storytelling and just the right amount of excitement.
Personal Take: I know, it’s not unique to Hong Kong Disneyland. Tokyo Disney Sea has its own Frozen attraction. We’ve also experienced this exact same ride at EPCOT in Walt Disney World in Florida. But Hong Kong’s version made a few little improvements that made all the difference. The ride was much smoother and more thrilling overall. And most of all, it has all the elements that I’m looking for in anything Disney, be it a ride or a film: a compelling narrative, a strong sense of nostalgia, grand set design, fantastic effects, and a wonderful soundtrack.
Sure, the line can get long too especially that the novelty has not worn off yet, but it is absolutely worth the wait.
Safety and Accessibility
Indoor Ride
Good for all ages.
No height restrictions.
Wheelchair-accessible.
Attention! The Frozen Ever After ride is temporarily closed from August 31 to September 19, 2025. Check the official website for updates.
Guest Policy
Children below 7 years old must be accompanied by a guardian age 16 years or older.
This ride has the surprise factor.
Pregnant women are strongly advised not to ride.
Beyond the Top 15
Here are the other rides that didn’t make it to our Top 15:
Wandering Oaken’s Sliding Sleighs (World of Frozen). For some reason, despite multiple visits since it opened, we still never got to try it. Our first time, it was closed. Second time, the line was too long and we got too lazy to return to it.
Cinderalla Carousel (Fantasyland). It’s fun, but it is just that. A carousel.
Slinky Dog (Toy Story Land). Both Vins and I found it meh. It was more dizzying than thrilling.
House de Villains. This is a fashion-themed show featuring Disney’s most iconic villains led by Cruella deVille. We only got to see it once, but it’s no longer available now.
Where to Stay Near Hong Kong Disneyland
For an even more magical Disney experience, book your stay at one of the Disney hotels at Hong Kong Disneyland Resort. Below are the three hotels to choose from.
Disney Explorer’s Lodge
Where to Stay in Hong Kong
Outside of Disneyland, the closest area to Disneyland is Tung Chung and Hong Kong SkyCity. These areas are also near the airport. However, if you’re also exploring other parts of Hong Kong during your trip, you may also consider other areas like Tsim Sha Tsui or Central.
For more details about different areas to stay in Hong Kong, you can check out our Where to Stay in Hong Kong article. But you may also check out these top accommodations in Hong Kong based on online user reviews for recommendations.
Getting a travel insurance is optional, but we highly recommend this, especially when traveling abroad. Travel can be unpredictable, and though we hope we’ll never use it, having it gives us peace of mind in case of unexpected delays, cancellations, or emergencies.
For international destinations, consider PGA Sompo’s TravelJOY Plus insurance. You can GET IT HERE. Don’t forget to use WORTHIT for a special affordable rate.
Updates Log
2025 9 2 – First uploaded
Photos by: Mariah Cruz, Yosh Dimen, and Asta Alvarez
We have just wrapped up another trip to Taipei, yes, not even a year after our last one because we just felt like there was still a lot about the city that we had not explored yet.
In this article, we’re listing out the most IG-worthy attractions or the trendiest spots that are a hit among locals and tourists alike, or both!
Note: This is not in any particular order. The numbers are just there for easier reference.
When I first saw photos of this place online, it took me a while before I realized it was located in Taipei. It looks a bit like a Studio Ghubli scene, a bit like a K-drama location, and a bit like our very own Batanes. But this is Qingtiangang Grassland. And yes, it really is within the Taipei City limits.
Perched about 800 meters above sea level in Yangmingshan National Park, Qingtiangang Grassland is a sprawling plateau formed by ancient volcanic lava flows. But today, this is a scenic park where locals gather for picnics, tourists enjoy a leisurely stroll, and cows peacefully graze. Yes, you’ll find lots of cows here, often lowkey but sometimes photobombing tourist selfies.
They say that these almost endless green hills are in its most aesthetic state when slightly covered in fog, fostering a more cinematic atmosphere. When we visited, however, it was clear and sunny as clear and sunny could be, but it was still wonderful because it meant sweeping views of the surrounding mountains and the concrete jungle that is Taipei City in the distance.
There’s also a well-maintained walking trail that scribbles the grassland, perfect for casual walkers, reluctant hikers, and people who packed cute outfits instead of trekking gear for that slightly-leaning-on-the-fence poses. Just don’t expect a quiet moment on weekends, when it gets packed. For fewer crowds and clearer paths, aim for a weekday morning like we did! We visited on a Wednesday morning and it was pretty chill.
How to Get to Qingtiangang Grassland
From Taipei City Center: Take the MRT or bus to Jiantan Station. From the station, catch Bus S15 to Qingtiangang. Then, walk to the park. Travel Time: 1-1.5 hours
From Yangmingshan Bus Terminal: Board Bus 108, then hop off at the Qingtiangang stop. Travel Time: around 35 minutes
If public transpo feels like too much work, a taxi or Uber can take you straight to the trailhead.
2. Datun Falls
This is still part of the Yangmingshan National Park. To be honest with you, our intended destination here was the Yangmingshan Flower Clock, a giant clock artwork in the garden by the western entrance. However, during our visit, they had just removed the flowers to replace it for the next season. Thankfully, there’s another picturesque site not too far away. Enter Datun Falls, a multi-tiered waterfall tucked into Yangmingshan’s back trails.
To get here, you’ll have to walk for 10 minutes, and along the way, you’ll see a platform, which is a great lookout. Then, after that, you’ll stroll through an enchanting mossy arcade that will make you feel like you’re stepping into another world.
It’s not a single waterfall but a charming series of cascades, each tumbling over boulders. The main upper falls tumble nearly three stories high, while lower tiers are perfect for dramatic close-ups or even daring foot dips. It looks best in the rainy season but since it was peak summer when we visited, it wasn’t as splashy as usual. But it’s still so photogenic, especially the arch bridge straddling it. And you can also use this bridge as your vantage point for shots with the falls in the backdrop. Either way, they make for fantastic photos.
You can reach Datun Falls via public transport. Take bus lines 128, 129, S8, S9, or the 260 series to the Yangmingshan Park area, then walk to the falls. It’s a very easy trail.
How to Get to Datun Falls: Make your way to Yangmingshan Bus Terminal, then catch Bus S8 or S9 to Yangmingshan Park area (Hushan Road Sec 2). Travel on foot for 10 minutes to Datun Falls. You’ll find plenty of signs along the way.
3. Bamboo Lake
If Qingtiangang and Datun Falls can be described as vibey and moody, Bamboo Lake, also known as Zhuzihu, is the total opposite. It’s an explosion of color, like a pastel garden fiesta — flower power at its most Instagrammable. Tucked into a volcanic valley, this former lava-formed lake is now a lush field occupied by independently run gardens. Some grows calla lilies, some cosmos, hydrangeas, daylilies, and more, on rotation depending on the season.
From March to May, white calla lilies dominate the scene. Then, from May to June, violet hydrangeas and orange daylilies paint the valley in brighter hues. We visited in July, and it was mostly hydrangeas. At Liang Chien Garden, you can follow a path in between hydrangeas. Other gardens have their own installations for photos too, some even have their own café. Entrance fee is usually NTD 100 per garden.
But if you want a proper meal, head over to nearby Shanzhongyuan Wild Herb Restaurant, which serves mostly Taiwanese favorites including Hakka stir-fry, which is pork belly, dried tofu, leeks or spring onions, and garlic in soy sauce; pineapple shrimp balls, which are battered and fried shrimps with pineapples, drizzled with tasty mayonnaise and spinkled with, uhm, oddly enough, sprinkles, it’s like a party plate.
We also enjoyed the stir-fried white water snowflake stems. It’s like water spinach or morning glory, but firmer and thinner, and had a nice crunch to it and retains the flavor of its sauce really well. We also had mapo tofu, which we also liked because it wasn’t overpowered by Sichuan peppers.
How to Get to Bamboo Lake: From Yangmingshan Bus Terminal, catch Buses S8 or S9. Travel Time: 40–60 minutes
4. Taipei Botanical Garden
The first three I mentioned are all in Yangmingshan National Park and within the city limits, but if you’re looking for something within the city center, look no further than the Taipei Botanical Garden.
It’s so green and tranquil inside that it’ll be hard to believe you haven’t left the bustling city. Yet, here we are, surrounded by nature right smack in the heart of Taipei. Established as a nursery in 1896 and officially becoming Taiwan’s first botanical garden in 1921, this eight-hectare oasis now hosts over 2,000 plants scattered along well-marked paths and wooden boardwalks through 17 themed zones, usually by plant type. There’s also a Buddhism garden. But the main attractions here are its lotus ponds, which lie just next to the National Museum of History.
On the other end of the park stands the Guest House for the Imperial Envoy, which is a historical landmark. Unfortunately, it’s temporary closed, so we could only admire its beautifully painted gates for now.
Whether you’re after a botanical immersion or a bit of history or just some good old peace and quiet, the Taipei Botanical Garden can give you a city escape packed with scenery.
In case you need a drink, you’ll be glad to know that just outside the garden are a couple of good coffee shops: the library-esque Peloso Coffee Roasters and the understated FF.Coffeeholic. We’ll discuss these in detail in a separate Where to Eat in Taipei article.
How to Get to Taipei Botanical Garden: Take the MRT to Xiaonanmen Station (Exit 3), then walk for 10 minutes.
5. Dihua Street
This is said to be Taipei’s oldest street, dating back to the 1850s! This wasn’t our first time here, we’d been here just a couple of years ago. But this is our first time exploring it in style! And by style, I mean wearing traditional attires, which you can use for FREE. Just head to the Dadaocheng Visitor Center, then you just need to give a deposit worth NTD 1000, which is refundable as long as you return the garments without damage.
You can choose from any of their wide selection of attires, and you also get an accessory, which can be a bag, a pipe, or a hat. And while in your period drama era, explore the historic street, which is flanked by shophouses selling traditional medicine, tea, herbs, fabric, and more. It has always been like this for centuries! But today, you’ll also find more modern cafes and milk tea stalls.
One of the largest buildings here houses the Yongle Market. Built in 1896, this kaleidoscope of textiles spans multiple floors filled with silks, satins, lace, and tailor services. The street-level wet market is where you’ll find freshest produce, herbal teas, and snacks, too.
On the 8th floor of the same building, you’ll find Dadaocheng Theater, a branch of the Taipei Cultural Center. This is a great venue for performances, and even to this day, you can catch traditional puppet plays here. There’s also a mini-museum showcasing the various types of puppets and the history of puppetry in Taipei.
Then, just down the street is the small but extremely popular Xia Hai City God Temple. Completed in 1859 in honor of the the City God, Chenghuang, who ensures local peace and prosperity. Later on, a statue of his wife was added. Today, many visitors, especially tourists come here to pray for a happy love life.
So whether you’re hunting delicate fabric rolls, seeking divine romantic luck, or slipping into vintage threads for a retro shoot, Dihua Street is the place for you — with layers of culture, color, and charisma.
Traditional Attire Use: Rental Fee, NONE/FREE; Deposit, NTD 1000 (refundable)
6. Dadaocheng Wharf
Depending on which part of Dihua Street you’re coming from, walk for 5-10 minutes westward and you’ll eventually find Dadaocheng Wharf Plaza. From its origins as a bustling trade pier on the Tamsui River to its 21st-century renaissance as a riverside hangout, it mixes history with modern fun.
The murals on its super lengthy wall are top-notch, depicting various scenes of Taipei. You can even bike alongside it. YouBike stations and bike rental shops are available, offering an easy way to explore the 18 km riverside cycling route, which leads to Guandu or back to the city. Bike rental costs NTD 80 per hour. YouBike is much cheaper. By the way, Guandu is another underrated attraction in the city. You can read more of that and other under-the-radar places in Taipei here.
If biking isn’t your thing, how about a boat cruise? Here, you can hop on a sunset‐time river cruise heading upriver toward Tamsui and beyond. A ride offers a scenic drifting shot of iconic bridges, lush riverside parks, and of course, Taipei’s skyline, which is magnificent at sunset. You can even spot Taipei 101 from here! And it’s surprisingly affordable too, at only NTD 300 for an hour-long cruise.
It’s best to visit in late afternoon and evening, when the wharf really comes to life, especially at the Pier-5 Container Food Park, where you’ll find dozens of stalls pumping out craft beer, boba, burgers, seafood, Thai, Korean, and Italian. Grab a table seat (some atop containers!), let the river breeze flow, and snap those casual food shots as city lights glimmer across the water.
Bike Rental: NTD 80/hour Boat Cruise: NTD 300/hour Closest MRT Stations: Beimen or Daqiaotou Station
How to Get to Dadaocheng Wharf:
From either Beimen or Daqiaotou Station, you can get there on foot in five minutes.
From Dihua Street, it’s a 5-10-minute walk.
7. Huashan 1914 Creative Park
Once a 1914 winery turned art-lovers’ playground, Huashan 1914 Creative Park is Taipei’s ultimate blend of industrial charm, indie creativity, and pop-culture chic. Wandering through its weathered brick warehouses and green lawns, you’ll find everything from laid-back cafes and indie cinemas to spontaneous performances and street-art backdrops — an endless scroll of photo ops waiting to happen.
And it changes a lot! Last year, when we visited, there was a completely different set of pop-up stores and attractions. This time around, Doraemon was dominating the site. There was an ongoing 100% Doraemon and Friends exhibition and a gigantic 12-meter inflatable Doraemon attracting kids and kids at heart alike.
Next door, a whimsical Tomica toy car pop-up revved up nostalgia with mini-streets and model-display zones. Our new friend Andrea also brought us to Legacy, the park’s signature music venue inside one of the old red-brick warehouses. She said don’t expect a mainstream club or pop scene, though, because it mostly showcases homegrown indie rock bands and performers.
Just a stone’s throw away is Syntrend Creative Park, Taipei’s go-to gadget mall packed with tech stalls selling phones, tablets, cameras, drones, and even home appliances. And when you need a caffeine recharge, Simple Kaffa Huashan Flagship is the chicest pick. Again, we’ll be discussing this more in a separate article.
8. Xinzhongshan Linear Park & Chifeng Street
Another site that we made sure to return to this trip is the Xinzhongshan Linear Park. On the surface, it’s adorned with sculptural benches, floating walkways, and seasonal blooms. But underneath is a whole new world. Welcome to the Zhongshan Underground Book Street, a hidden treasure trove of literary finds, mostly in Chinese but you’ll also find English books.
Then right across is the Eslite Underground Music Store (anchoring the Eslite Spectrum Nanxi mall), which is a paradise for music lovers looking for specific records. There are vinyls, CDs, DVDs, and others, ranging from contemporary pop acts like Taylor Swift, Sabrina Carpenter and Chappel Roan to legends like Michael Jackson and David Bowie. There’s Milli Vanilli, too!
A few steps off the path lies Chifeng Street, once the town’s auto-parts alley but has reinvented itself as a hipster sanctuary of vintage boutiques and indie cafés. Andrea highly recommended her favorite shop here called PAR Store, which sells garments, accessories, and music records. We also visited Mitty, which sells pre-loved vintage clothes.
But the real reason we came back here was the FOOD! One of the most iconic here is Mian Xian Ding, which serves bowl after bowl of piping hot mee sua or rice flour noodles and Master Spicy Noodle Zhongshan Restaurant, famous for its well, spicy noodles and beef noodle soup.
Also within the area is the highly underrated Tiao Tong, which is Taipei’s “Little Tokyo” as it is lined with Japanese restaurants, ramen bars, izakayas and even kawaii-culture and trinket shops like Gacha Hunter (扭蛋獵人), with wall-to-wall gachapon or capsule vending machines and blind-box collectibles on display.
The Xinzhongshan Linear Park and Chifeng Street is sandwiched by the MRT Zhongshan and Shuanglian Stations, so depending on your target attraction, either could do. Tiaotong and Underground Book Street is closer to Zhongshan Station.
Closest MRT Stations: Underground Book Street (Zhongshan Station); Chifeng Street (Zhongshan or Shuanglian Station); Tiao Tong (Zhongshan)
9. Ximending
This list won’t be complete without the OG IG paradise — Ximending. I mean, I can’t think of any other free site that attracts more social media natives than the rainbow six crosswalk right by the entrance to Ximen Walker. And it’s not difficult to understand why.
Ximending is where Taipei shows up in full color — think Harajuku with a Taiwanese twist. It’s loud, it’s crowded, it’s chaotic…and it’s a vibe! This pedestrian zone is packed with fashion shops, sneaker stores, street food, and more selfie backdrops than your phone can handle. Yes, it’s gotten so touristy these days — but let’s be real, it’s trendy for a reason.
This is where local teens still hang out, artists perform, cosplayers gather, and subcultures thrive in full technicolor. But that’s not to say there are no quiet corners.
Just walk a bit further and you’ll reach Taipei Cinema Park, a chill spot with street art-covered walls, outdoor installations, and an open space where skaters, dancers, and lowkey photographers hang out. It’s way less crowded than the main square and gives off serious indie-cool energy.
There are lots of food spots, too!
Closest MRT Station: Ximen Station
10. Taipei 101 and Xinyi District
You can’t visit Taipei and not see Taipei 101. This 508-meter, bamboo-inspired mega-skyscraper once held the title of tallest building in the world, and it’s still the undisputed icon of the city. Whether you want to take photos of it or take photos from it, Taipei 101 is going to be involved in your camera roll one way or another.
Inside, 101’s lower floors are decked out with luxury brands, art installations, and one of the world’s fastest elevators that’ll shoot you to the top in just 37 seconds.
I remember my very first visit climbing to the 89th floor observatory more than a decade ago. It was mostly the view and the tuned mass damper, that 660-ton golden ball which holds the building together in shaky times. But these days, the observation deck is also bursting with installations and photo spots and it changes every time I visit.
If you wish to go up to the observation deck, you can secure your ticket in advance online through accredited booking sites like Klook!
Outside, cross the road to the Xinyi Shopping District, which is a complex of malls, bursting at the seams with all sorts of shops and restaurants. This pedestrian-friendly zone is lined with gleaming malls like ATT 4 FUN, Breeze, Shin Kong Mitsukoshi, and Eslite Spectrum, where you can shop, dine, and strut. And oh, the Apple Store at Xinyi A13 is also just around the corner. Two stories of minimalist shop with floor-to-ceiling glass walls, floating staircases, and those crisp, clean displays that make you want to splurge.
By the way, Taipei is a bona-fide shopping destination. It’s not just the number of malls or the diversity of the shops, but also the competitive prices. We always find that the costs here — be it perfumes, luxury items, or even the usual chains — are much lower than in most other countries. Yes, cheaper than the Philippines, too.
And I almost forgot, don’t leave without getting that “mandatory” low-angle shot of Taipei 101!
Where to Stay in Taipei
Here’s a list of the hotels and hostels we tried in Taipei:
Getting a travel insurance is optional, but we highly recommend this, especially when traveling abroad. Travel can be unpredictable, and though we hope we’ll never use it, having it gives us peace of mind in case of unexpected delays, cancellations, or emergencies.
For international destinations, consider PGA Sompo’s TravelJOY Plus insurance. You can GET IT HERE. Don’t forget to use WORTHIT for a special affordable rate.
Ninoy Aquino International Airport (NAIA), also known as the Manila International Airport, is the busiest airport in the Philippines. And with Metro Manila’s notorious traffic, just getting there can feel like a trip on its own.
While taxis and ride apps are an option, they can get pricey. Public transport works too, but it’s not always the easiest with luggage and multiple transfers. Enter UBE Express — a premium P2P bus service that offers direct and affordable rides to and from NAIA, not just around Metro Manila, but also in places like Santa Rosa in Laguna and Imus in Cavite.
Here’s everything you need to know about the UBE Express Bus service — available routes, tickets, schedules, and frequently asked questions.
As of writing, UBE Express has seven available routes — five in Metro Manila, one in Santa Rosa, Laguna, and another one in Imus, Cavite. These are the following:
UBE Express Bus Routes – Metro Manila
NAIA – PITX
NAIA – Victory Liner Pasay
NAIA – Robinsons Place Manila
NAIA – Araneta City Cubao
NAIA – Vista Terminal Exchange Alabang
UBE Express Bus Route – Laguna
NAIA – Robinsons Santa Rosa
UBE Express Bus Route – Cavite
NAIA – The District Imus
NOTES:
Routes to and from One Ayala, Robinsons Galleria, and Ayala Malls Manila Bay used to be available, but they’re temporarily suspended until further notice.
Schedules and route availability are subject to change, so it’s best to check the official Facebook page, which is very active and posts updates daily.
UBE Express NAIA Loop
UBE Express buses heading to NAIA from any of the seven available routes mentioned above also run the NAIA Loop route. Meaning, they go around all the NAIA terminals, picking up and dropping off passengers throughout the day.
The free inter-terminal shuttle buses are only for passengers with connecting flights. If you are landing at Terminal 1 or 2 and need to get to Terminal 3, but you have no connecting flight, the UBE Express NAIA Loop is your best option.
Operating Hours
Daily, 4:00 AM – 8:00 PM
As of: 26 August 2025 Fare: P50/person Payment Method: Cash and Beep Card
Across Bay 12 – NAIA Terminal 3
There’s no fixed departure time for this route, though. Buses run within operating hours, and the wait time can be anywhere from 30 minutes to an hour. Here’s how the route goes:
ORIGIN: PITX | Victory Liner Pasay | Robinsons Place Manila | Araneta City Cubao | Vista Terminal Exchange Alabang | Robinsons Santa Rosa | The District Imus
1ST STOP: NAIA Terminal 1 Arrivals Area, Beyond Bay B6 – Near Grab Booth
2ND STOP: NAIA Terminal 2 Arrivals Area, Across Bay 18
3RD STOP: NAIA Terminal 4 As of June 2025, Closed for Renovation
FINAL STOP: NAIA Terminal 3 Arrivals Area, Across Bay 12
REMINDERS!
The last stop on the NAIA Loop is always NAIA Terminal 3. From there, you can transfer to another UBE Express Bus to reach your intended location.
If you’re coming from Terminal 3 and need to transfer to Terminal 1 or 2, you’ll need to take a taxi or book a ride through apps like Grab, InDrive, or JoyRide. UBE Express currently doesn’t offer this reverse route.
NAIA – PITX
The Parañaque Integrated Terminal Exchange (PITX) is the first landport in the Philippines. It’s your main gateway if you’re heading out of Metro Manila by land to almost anywhere in the country. PITX is also very accessible, with a direct connection to LRT-1 and just a short distance from NAIA.
PITX to NAIA 1, 2 & 3
04:45 AM
05:45 AM
07:15 AM
08:45 AM
10:00 AM
11:20 AM
01:30 PM
02:30 PM
04:15 PM
05:00 PM
06:45 PM
07:45 PM
As of: 26 August 2025 Boarding Platform: PITX Gate 5, Bus Bay 32 (Near Entrance 2 and Concierge)
Fare: P150 Payment Method: Cash and Beep Card. You can also purchase your ticket in advance online through the UBE Express official website or through the link below:
As of: 26 August 2025 Boarding Platform: NAIA Terminal 3, Arrivals Area, Bay 12 (Outer Lane)
Fare: P150 Payment Method: Cash and Beep Card. You can also purchase your ticket in advance online through the UBE Express official website or through the link below:
Victory Liner is one of the top bus lines connecting Metro Manila to provinces in the north, with several terminals located around the city, including one in Pasay. From here, you can catch a ride to places like Baguio, Olongapo, Iba, Santa Cruz, Dagupan, Lingayen, Santiago, Cauayan, and Tuguegarao.
This route has no fixed departure time. The bus will run during operating hours and passengers should anticipate a waiting time of 30 minutes to an hour.
Operating Hours
As of: 26 August 2025 Boarding Platform: Across Passenger Entrance, Victory Liner Pasay Bus Terminal, 712 EDSA, Barangay 143, Zone 15, Pasay City
Fare: P150 Payment Method: Cash and Beep Card. You can also purchase your ticket in advance online through the UBE Express official website or through the link below:
Robinsons Place Manila, also known as Robinsons Ermita, is the biggest branch of the retail chain in the country. It first opened its Main Mall in 1980, then added the Padre Faura Wing in 2000 and the Midtown Wing in 2008.
Sitting right in the middle of everything — government offices, schools, hospitals, hotels, tourist spots, and even nightlife, the mall draws in both locals and tourists.
Robinsons Place Manila to NAIA 1, 2 & 3
07:30 AM
10:30 AM
03:00 PM
06:30 PM
As of: 26 August 2025 Boarding Platform: Midtown Wing Mall Entrance (Beside Arya Restaurant)
Fare: P150 Payment Method: Cash and Beep Card. You can also purchase your ticket in advance online through the UBE Express official website.
NAIA Terminal 3 to Robinsons Place Manila
06:00 AM
09:00 AM
01:00 PM
04:20 PM
As of: 26 August 2025 Boarding Platform: NAIA Terminal 3, Arrivals Area, Bay 12 (Outer Lane)
Fare: P150 Payment Method: Cash and Beep Card. You can also purchase your ticket in advance online through the UBE Express official website.
NAIA – Araneta City Cubao
Araneta City in Cubao, formerly known as Araneta Center, is one of the busiest transport hubs in Metro Manila. It has everything: bus terminals, MRT and LRT-2 stations, malls, restaurants, condos, and even concert venues. Situated right at the intersection of EDSA and Aurora Boulevard, it’s a major spot for both daily commuters and travelers heading to the provinces or catching flights at NAIA.
Araneta City Cubao to NAIA 1, 2 & 3
06:00 AM
07:00 AM
09:00 AM
11:00 AM
12:30 PM
03:00 PM
04:30 PM
06:30 PM
08:00 PM
As of: 26 August 2025 Boarding Platform: Araneta City Bus Port, G/F Manhattan Heights, General Romulo Avenue, Cubao, Quezon City
Fare: P200 Payment Method: Cash and Beep Card. You can also purchase your ticket in advance online through the UBE Express official website or through the link below:
As of: 26 August 2025 Boarding Platform: NAIA Terminal 3, Arrivals Area, Bay 12 (Outer Lane)
Fare: P200 Payment Method: Cash and Beep Card. You can also purchase your ticket in advance online through the UBE Express official website or through the link below:
The site where Starmall Alabang used to stand is now home to The Terminal, an open-air mall with chill dining spots and shops to explore. And right next to it is Vista Terminal Exchange Alabang, or simply VTX Alabang.
VTX is now a major transport hub down south, connecting folks from Muntinlupa, Las Piñas, Cavite, Laguna to other parts of Metro Manila and provinces, including South Luzon, Bicol, and even as far as Iloilo, Samar, and Davao. The terminal hosts buses, jeepneys, and modern jeepneys.
VTX Alabang to NAIA 1, 2 & 3
07:00 AM
10:30 AM
04:00 PM
08:30 PM
As of: 26 August 2025 Boarding Platform: Entrance Area, Vista Terminal Exchange Alabang
Fare: P200 Payment Method: Cash and Beep Card. You can also purchase your ticket in advance online through the UBE Express official website or through the link below:
As of: 26 August 2025 Boarding Platform: NAIA Terminal 3, Arrivals Area, Bay 12 (Outer Lane)
Fare: P200 Payment Method: Cash and Beep Card. You can also purchase your ticket in advance online through the UBE Express official website or through the link below:
Situated at the corner of Aguinaldo Highway and Daang Hari Road, The District Imus is the go-to spot in Cavite for catching up with friends, spending time with family, or just taking a break after work. Whether you’re here to shop, chill, or grab a bite, this place has you covered. This area’s super urbanized, making it a great pit stop for commuters, including those heading to or from NAIA.
The District Imus to NAIA 1, 2 & 3
05:00 AM
06:30 AM
09:30 AM
11:30 AM
02:30 PM
04:00 PM
06:30 PM
08:30 PM
As of: 26 August 2025 Boarding Platform: Mall Main Entrance (Near UV Express Terminal)
Fare: P200 Payment Method: Cash and Beep Card. You can also purchase your ticket in advance online through the UBE Express official website or through the link below:
As of: 26 August 2025 Boarding Platform: NAIA Terminal 3, Arrivals Area, Bay 12 (Outer Lane)
Fare: P200 Payment Method: Cash and Beep Card. You can also purchase your ticket in advance online through the UBE Express official website or through the link below:
Located along the National Highway in Barangay Tagapo, Robinsons Santa Rosa is a no-frills, three-level mall that’s perfect for bargain hunters and anyone looking to get some errands done. It’s right in the middle of one of the busiest areas in Laguna.
This UBE P2P Bus station also boasts the very first Airport Transport Express Passengers’ Lounge.
Robinsons Santa Rosa to NAIA 1, 2 & 3
05:00 AM
06:00 AM
07:00 AM
08:45 AM
09:30 AM
11:00 AM
12:00 AM
01:00 PM
02:00 PM
03:30 PM
04:30 PM
05:30 PM
06:30 PM
07:30 PM
09:00 PM
10:00 PM
As of: 26 August 2025 Boarding Platform: Mall Main Entrance Driveway
Fare: P300 Payment Method: Cash and Beep Card. You can also purchase your ticket in advance online through the UBE Express official website or through the link below:
As of: 26 August 2025 Boarding Platform: NAIA Terminal 3, Arrivals Area, Bay 12 (Outer Lane)
Fare: P300 Payment Method: Cash and Beep Card. You can also purchase your ticket in advance online through the UBE Express official website or through the link below:
Can I get off the bus before it reaches the designated bus stop?
Since UBE Express runs on a point-to-point system, the bus only stops at NAIA and its assigned drop-off point. That means, no getting off just anywhere along the way. So make sure you’re on the right route before hopping on!
Do the buses leave exactly on schedule?
Not always. Things like weather, traffic, or road conditions can cause delays, so departure times might shift a bit. It’s best to allot extra time for unforeseen events.
How early should I be at the airport?
For domestic flights, aim to be there two to three hours ahead of your departure time. For international, give yourself four to five hours. Better to be early and relaxed than rushing — or worse, missing your flight!
Are the routes always available?
Routes or trips can change or get canceled for the day due to things like mechanical issues. To stay updated, it’s best to check the official UBE Express Facebook page before your trip! For other inquiries, you can reach out to them through any of the following contact info:
Social Media Accounts: UbeExpress (Facebook) | @ubeexpress (IG and Twitter) | @ubenatayo (TikTok)
Where can I get tickets?
Simply proceed to the bus stop or boarding platform and pay your fare upon boarding or when the conductor/driver comes around to collect the payment. Both cash and Beep card (reloadable stored-value card) are accepted.