This discount is only available for Agoda app users. To download the official app, use the links below:
If you don’t have an Agoda account yet, you can use the app to sign up for one.
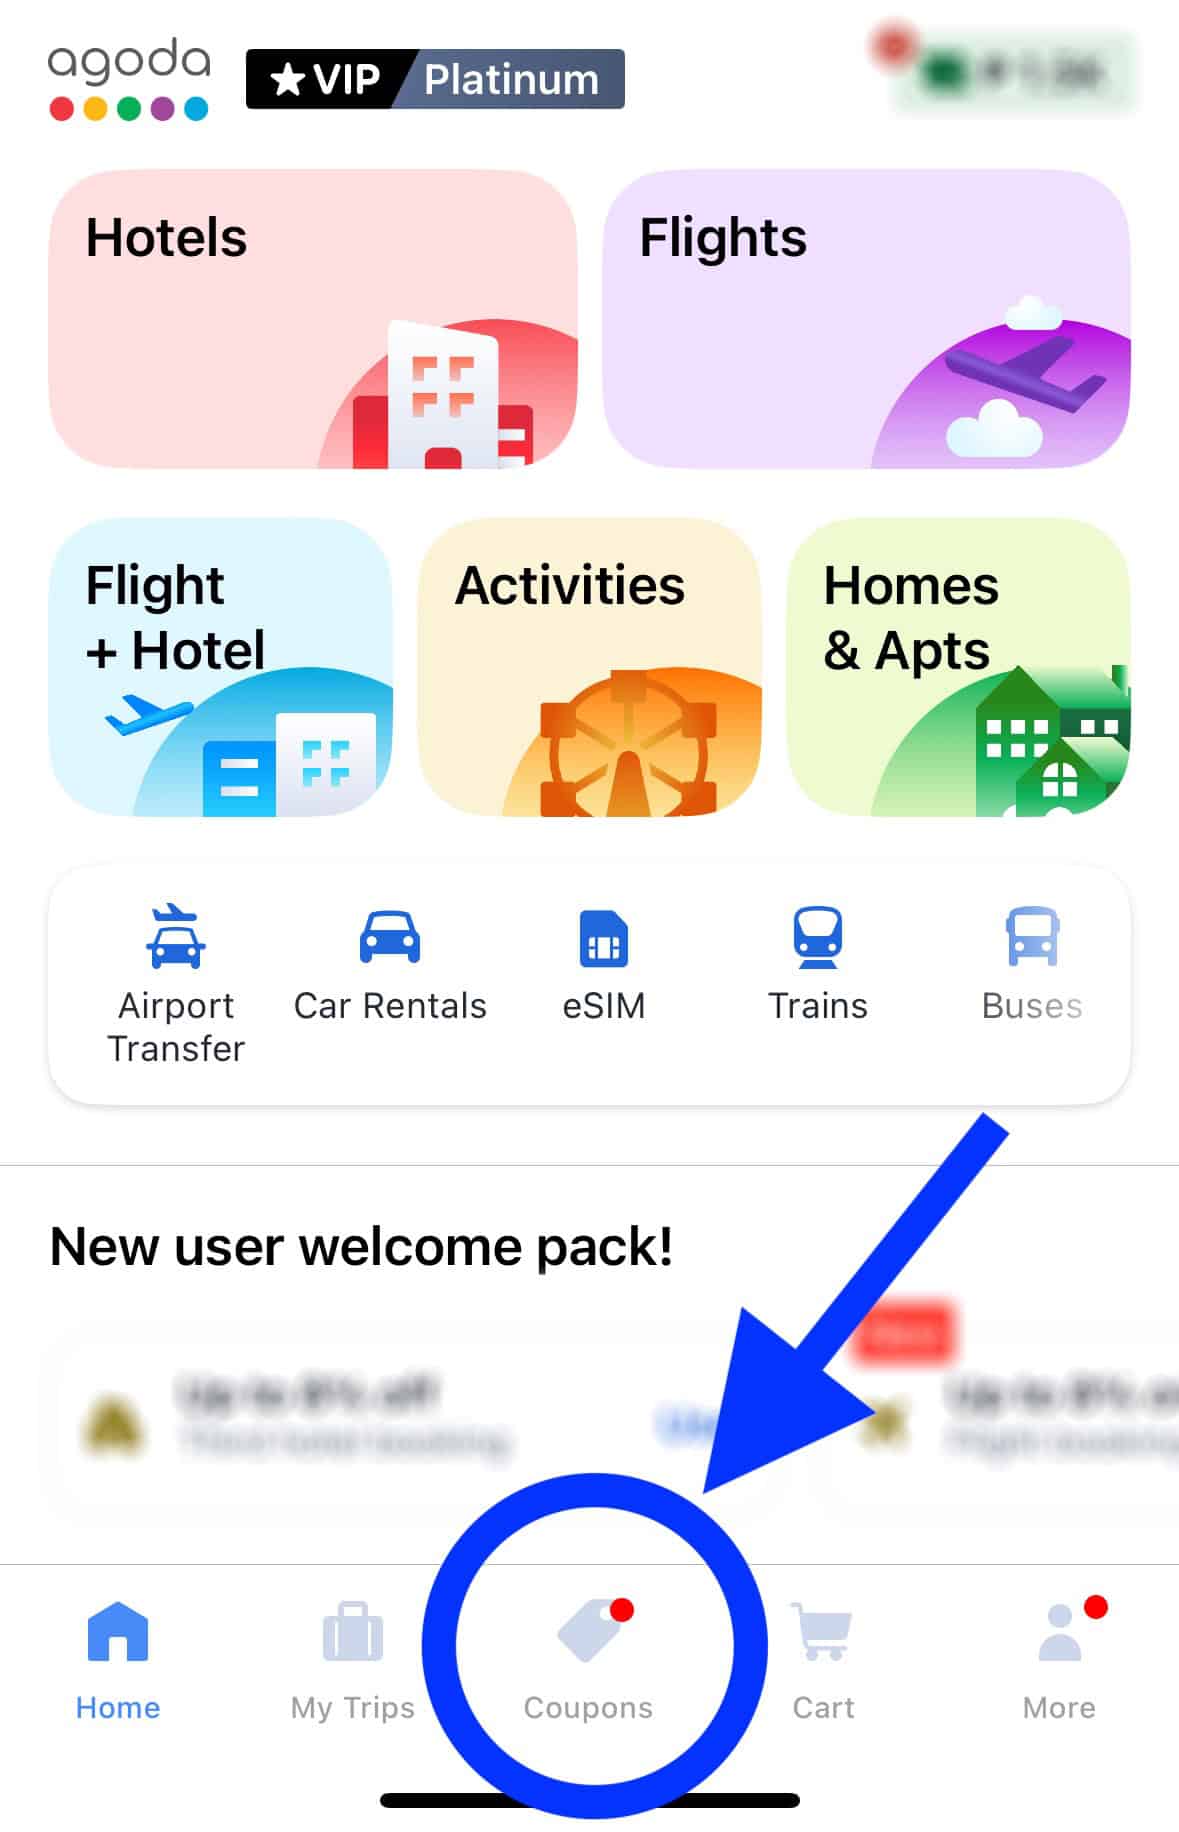
Once you have an account, go to the DEALS page of the Agoda app. This is usually the default landing page. If not, just tap on the COUPONS icon on the bottom of the page. In other versions, this button is labeled DEALS. They’re the same. Under the COUPONS tab, enter AGODATPT. Then, tap on the checkmark.
The promo code will be added to your Agoda account.
If you wish to book a hotel or activity, just search and select as usual. For hotels, it usually works like this:
Enter a destination, city or a specific hotel, and your travel dates.
Once you’ve found a hotel you want, click on it and choose a room.
Once you come to a decision, enter the number of rooms/beds and click BOOK NOW to make a reservation.
You will be taken to the Agoda Booking Form.
Fill out this form by supplying your name and contact details.
When you scroll down, just above the PRICE, you’ll find the COUPONS section with a field asking for a PROMO CODE. Enter the promo code again: AGODATPT.
You can also select from the list of codes saved in your account, but it’s generally easier to type the promo code again.
The discount amount for the coupon code and the actual price paid after the discount should be applied and displayed in the PRICE section below it.
Click on the NEXT: FINAL STEP button.
On the next page, you’ll be asked for payment details.
Kansai International Airport is your gateway to one of the most wonderful regions of Japan, including Kansai’s most energetic and delicious city — Osaka. But how do you get to Osaka’s city center from here?
So, let’s say you’ve just arrived at the airport. your legs are numb, your brain is running on airplane meals, and now you’ve got one mission — get to Osaka’s city center without a hitch and without accidentally ending up in, say, Kobe or Wakayama.
But hey, you’ve got options — albeit a little too many. So many, it can get really overwhelming and confusing sometimes, especially for first timers. You got train, bus, taxi, and private transfer — each with its own pros and cons. Should you take the super-efficient train? The super-chill airport bus? Or just throw your luggage in a taxi and worry about expenses later? Spoiler alert: Not the taxi. It’s way too expensive, we’re not even gonna discuss it here. We’ll be focusing on just the train and the bus.
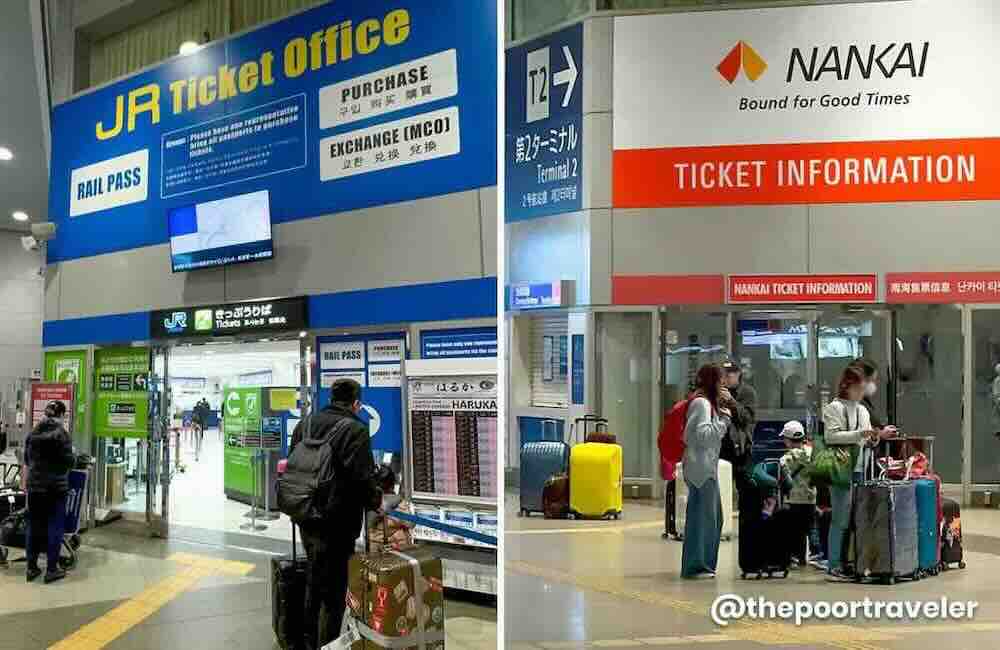
Just right in front of Terminal 1 is the Kansai Airport Train Station, which serves two railway companies: JR and Nankai. And you’ll also find buses close to the Arrival Hall.
First, let’s break it down. Osaka’s city center is roughly an hour to an hour-and-a-half away from Kansai Airport. But where in the city center are you going? There are three areas in particular that we think are most ideal for tourists, especially first-timers in the city: Namba, Umeda, and the area surrounding Shin-Osaka Station.
Kansai Airport to Namba
The Namba District refers to the bustling area that straddles the border of Naniwa Ward and Chuo Ward. “Chuo” means center or middle in Japanese, but think of Namba as the southern counterpart of Umeda. It is here that you’ll find two places that I bet, if you’re the one planning the trip, you have heard of or read about before: Dotonbori and Shinsaibashi.
These two districts are attractions on their own. These areas are always lively, crowded, and full of energy. They lie next to and are within walking distance of each other.
By Train
Nankai has a direct train line to Namba and they operate two main types of trains: the Nankai Airport Express and the Nankai Limited Express Rapi:t (Rapit).
NANKAI AIRPORT EXPRESS
The Nankai Airport Express is the regular train. It’s cheaper but also 10 minutes slower. But it’s not complicated at all. Just board the train and find a seat. No seat reservation needed. But on super peak hours, you might end up standing through the entire journey.
Travel Time: About 45 minutes Fare: ¥970 (P375)
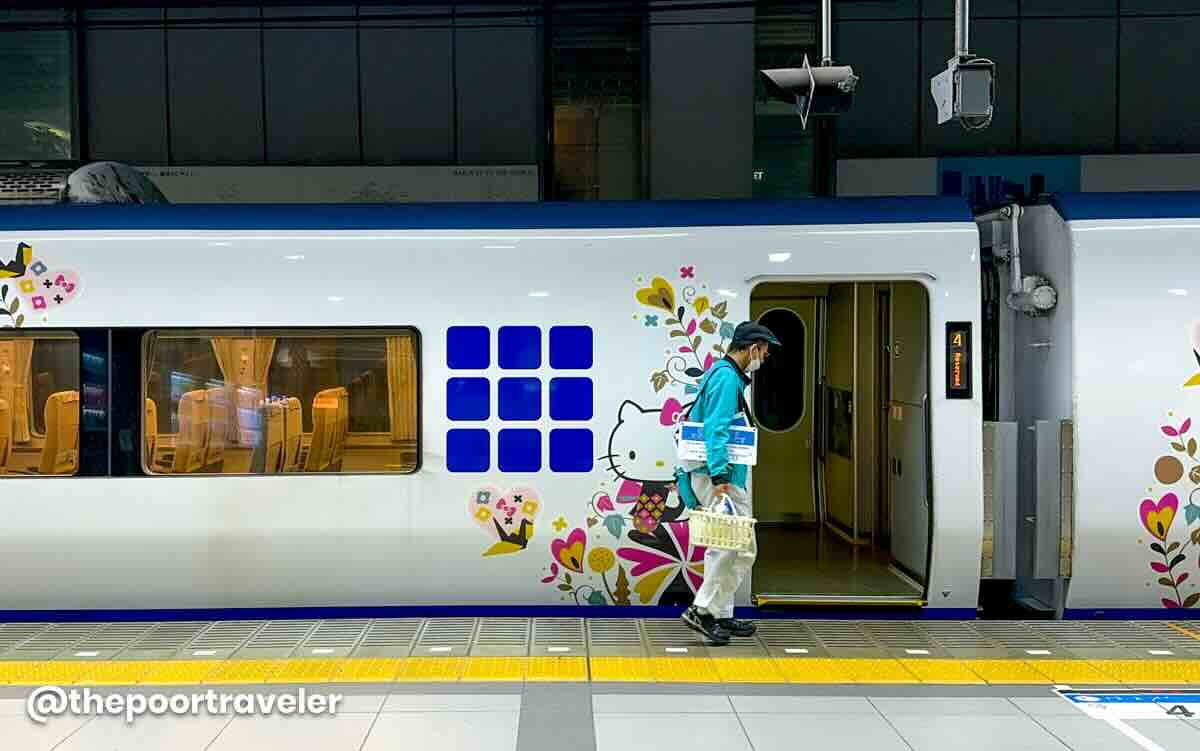
NANKAI LIMITED EXPRESS RAPI:T
The other Nankai train that can take you straight to Namba is the Nankai Limited Express RAPI:T. It’s called RAPIT but stylized as RAPI:T. It’s faster, more convenient, more high end. It’s easy to identify too. It’s glaringly blue, and it kind of looks like it has arrived from the future. If you prefer this upscale train instead, know that you’ll also need to settle an additional seat fee, which costs ¥520.
Both these trains can take you directly to Namba Station and are covered by the Kansai Railway Pass (formerly known as Kansai Thru Pass), which works on most NON-JR Trains in Osaka and the region. This is different from the JR Kansai Area Pass. But unlike the JR counterpart, this pass can be used on non-consecutive days, making it more flexible.
Note that while the Kansai Railway Pass can be used on the Limited Express RAPI:T, the 520-yen seat or reservation fee is not covered.
By the way, if you’re interested in the Kansai Railway Pass, you can book with Klook. You can use our promo code THEPOORTRAVELERKLOOK for 5% OFF, capped at P300 pesos. You can also redeem discount vouchers at www.thepoortraveler.net/300discount and www.thepoortraveler.net/500discount
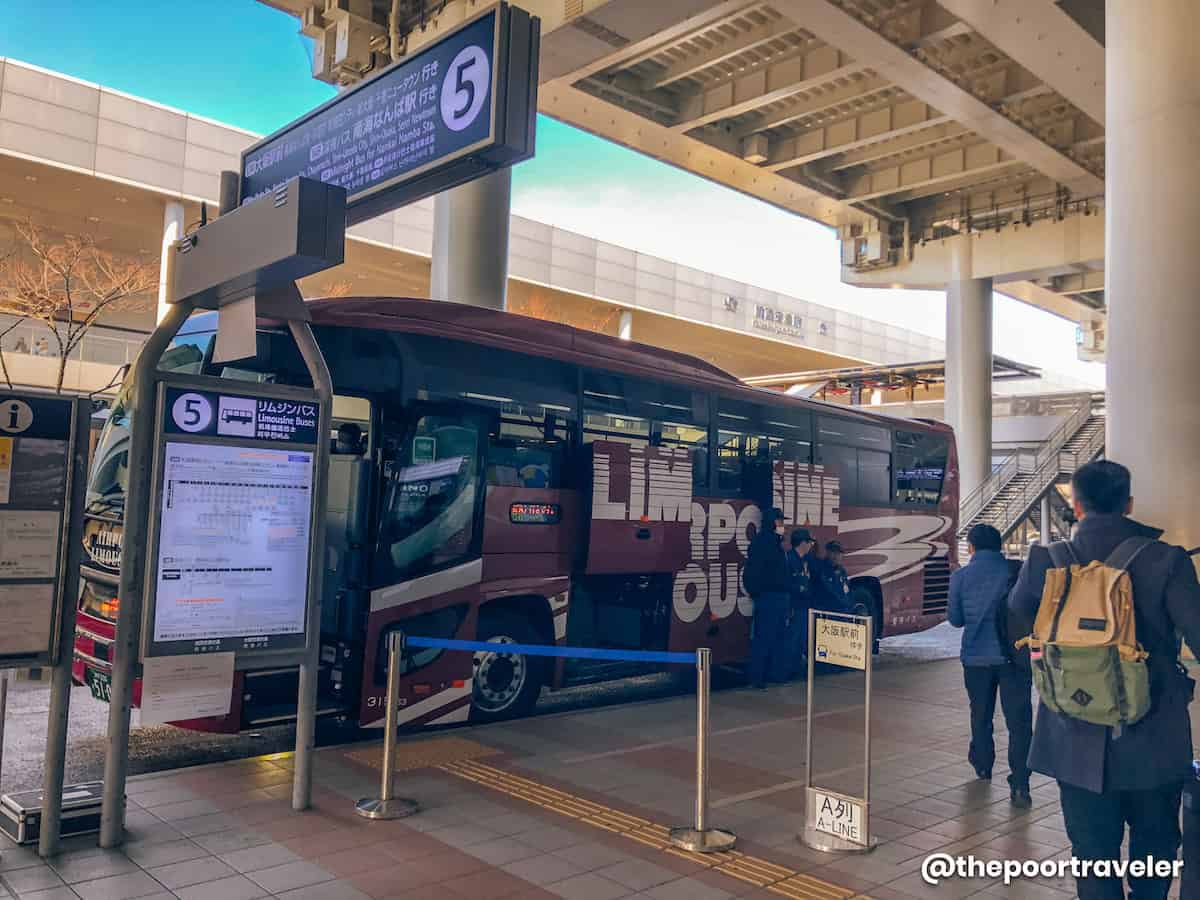
If you’d rather take the bus to Namba, find one that will take you to the Osaka City Air Terminal (OCAT), which is Namba’s main bus terminal. When you arrive at the airport, proceed to the counter for OCAT Airport bus located at the Arrival Hall of Terminal 1.
It usually takes about an hour, sometimes longer, depending on traffic condition. You’ll find the schedule here.
Travel Time: About 1 hour Trip Schedule: First Trip, 6:10 AM; Last trip, 10:40 PM Fare: ¥1300 (P503)
Where to Stay in Namba
If you are still looking for hotels in Osaka, especially around the Namba area, here are some of the top-rated accommodations reviewed by travelers online.
🔥🔥🔥 Use AGODATPT for 10% off on select hotels! 🔥🔥🔥
Kansai Airport to Umeda (Osaka Station)
By Train
The Umeda District is one of the busiest in Osaka. It is here that you’ll find Umeda Station and Osaka Station, two of the most widely connected train hubs in the region. That’s why even though it’s located in Kita Ward or North Ward, it is often regarded as the heart of the city.
JR KANSAI AIRPORT LINE
If your hotel is in Umeda or close to Osaka Station, you can take the JR Kansai Airport Line (JR Kansaikuko Line). For the regular train, you only need to pay the fare. No seat reservation required. This train can take you directly to Osaka Station in about 75 minutes. It’s slow but you’ll reach your destination regardless.
But if for whatever reason you want to reach the city fast or you’re holding a JR Pass anyway, you can hop onto the JR Limited Express HARUKA train. It stops at Osaka Station.
Fare is significantly higher. Haruka trains have RESERVED and NON-RESERVED SEATS. The price is the same. To reserve a seat, you can use the machines close to the entrance gates.
The Haruka Train is covered by most JR Kansai pass like the JR Kansai Area Pass, JR Kansai Area WIDE Pass, and JR Sanyo San’in Pass. Klook promo codes don’t work on JR Passes, but I’ll still add the links to the TPT Masterlist, where we compile all our travel essentials and recommendations.
Travel Time: 46 minutes Fare: ¥2940 (P1137)
By Bus
You can also board the Airport Limousine Bus to Umeda. There are three stops just around Osaka Station. All of these stops are at hotels, but you don’t need to book a room at these hotels to be able to ride these buses. Just figure out which of these three hotels is closest to your destination. Here are the stops:
Hotel New Hankyu (Osaka Station)
Hotel Hankyu Respire (Yodobashi Umeda Tower)
Herbis Osaka (Osaka Station)
Some buses skip stops, so to be sure to consult the ever-reliable Google Maps or visit this page.
Travel Time: 60-75 minutes Fare: ¥1800 (P696)
Where to Stay in Umeda
If you prefer to stay in Osaka, and are still looking for a place to stay, here are some of the top hotels in Umeda based on user reviews online.
🔥🔥🔥 Use AGODATPT for 10% off on select hotels! 🔥🔥🔥
Kansai Airport to Shin-Osaka Station
By Train
If you intend to travel to other prefectures by Shinkansen or bullet train, an ideal place to stay is the area surrounding the Shin-Osaka Station. Emphasis on SHIN, which means NEW in Japanese.
On top of the regular trains, this station also serves bullet trains. In contrast, Osaka Station – without SHIN – is NOT a Shinkansen Station.
JR LIMITED EXPRESS HARUKA
Shin-Osaka is also easily accessible from the airport. It can be reached directly by taking the same JR Limited Express Haruka train that I mentioned earlier.
It takes 52 minutes and only three stops. No transfers needed, but the fare is considerably higher — more than double the regular train at times.
If you’re on a budget, you can also go the same route to Osaka Station. Take the JR Airport Line, but after you alight at Osaka Station, transfer to another train to Shin-Osaka Station.
When we first posted on Instagram that we were in New Zealand, two of the first messages we received were “How much should we spend?” and “What’s your itinerary?” And no surprise there, really. New Zealand may be one of the dreamiest and cinematic destinations on earth, but it’s not the most affordable or the easiest to get to.
So, in this article, we’ll walk you through our full New Zealand itinerary and give you a breakdown of all our actual expenses — from transportation and accommodations to food, activities, and the occasional “treat yourself” moment.
Go through the airport arrival process. First things first. Before our flight, we made sure to accomplish the New Zealand Traveller Declaration Form, and declared any of the risk items we were bringing in. We flew in from Melbourne with JetStar, and landed at Auckland International Airport at around 5:30 AM. And to be honest, we only had chocolates with us so we breezed through the Customs. The Immigration Officer at the counter was also the friendliest Immigration Officer I had encountered anywhere in the world. So that was a pretty delightful start of our New Zealand journey.
Travel to the city center. Upon emerging at the Arrival Hall, I withdrew some backup cash, although we didn’t get to use a lot of it because New Zealand is mostly cashless. Just outside the terminal, we looked for Bus Stop E, where we would catch the Sky Drive Airport Bus, which would take us straight to the city center. We struggled to find it at first, but know that when you get out of the terminal building, it should be to your left. According to Google Maps, the Sky Drive bus takes 25-45 minutes to reach downtown, depending on traffic conditions. But because it was pretty early, our bus made in just 20 minutes. The fare is NZD 20 (P678).
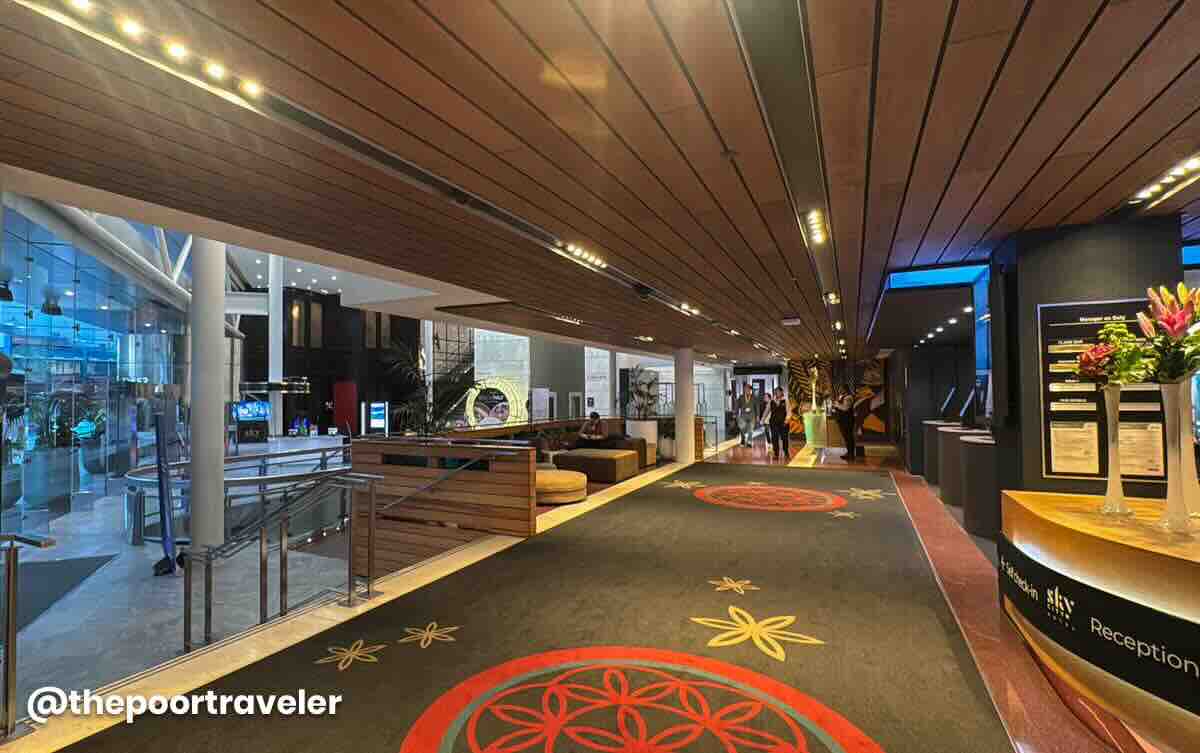
Check in at our hotel. The hotel we booked was SkyCity Hotel Auckland, just next to the iconic Sky Tower. When we reserved our room, the rate was NZD 170 (USD 102, PHP 5763) per night. Because we arrived hours ahead of the standard check-in time, our room was not ready yet, but they kept our bags while we spend the next hours exploring the city.
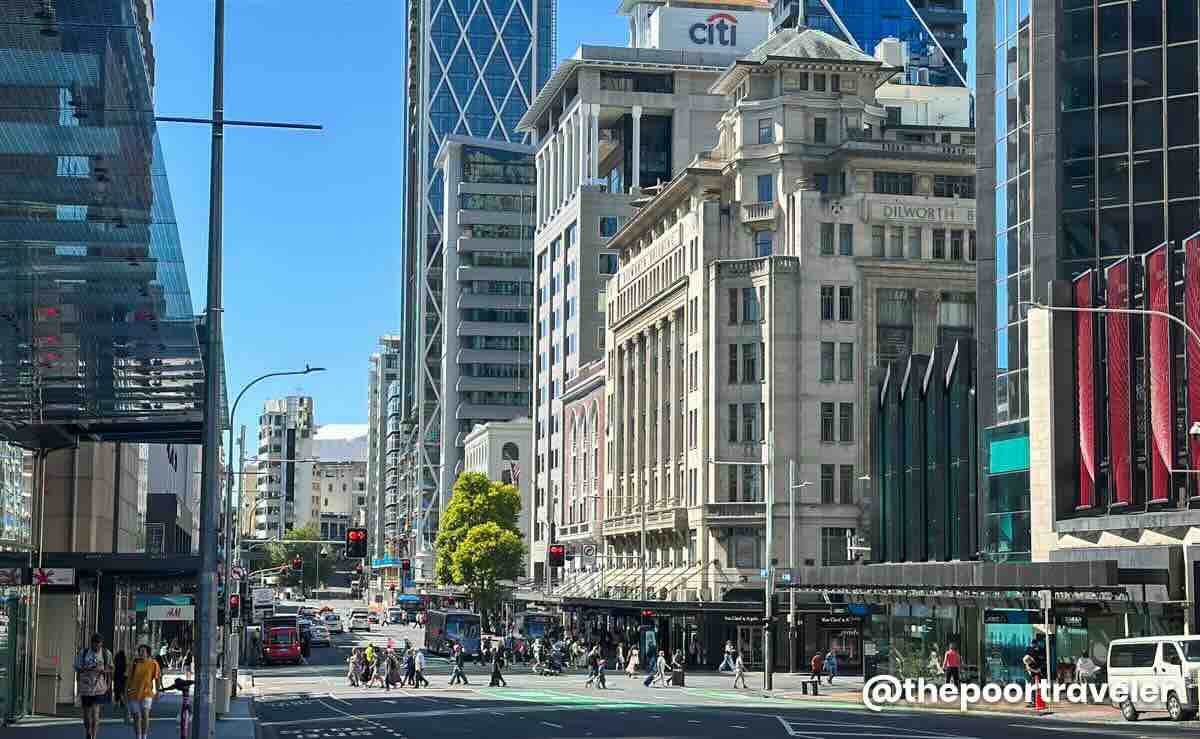
Auckland Foreshore Heritage Walking Trail
Auckland is New Zealand’s largest city, but it’s not as bustling or as overwhelming as other big cities in other countries. It still retains a pretty laidback atmosphere. For now, we decided to go sightseeing by following a section of Auckland’s foreshore heritage walking trail.
The city’s shoreline has changed a lot after a series of reclamations starting in the 19th century. Today’s seaboard is almost unrecognizable, but you can still trace the original coastline by following this walking trail, punctuated with 25 points of interest from Point Erin in the west all the way to Parnell Baths in the east. Some of these stops include heritage buildings and streets. Don’t worry — these sites are marked with information plaques so you can better appreciate their history and significance. The whole trail takes at least three hours.
Settle In and Recharge
We had a quick lunch before heading back to the hotel to check in. Our room was spacious and clean. We didn’t have a good view, but it was equipped with the usual full-service hotels staples — TV, mini-fridge, heater, air conditioning, working desk, toiletries, and whatnot.
Because we barely had any sleep, we decided to take a nap. Context: We flew in from Melbourne, where we had our week-long wedding trip and toured our families and friends. So yes, this is sort of a honeymoon trip, but with a couple of friends. We’ll have a more proper honeymoon later this year.
With all the wedding preparations and organizing the tours, we were exhausted at this point. So we really need to get some sleep.
If you book with AGODA, use our promo code AGODATPT for 10% discount.
If you prefer Klook, please use our promo code THEPOORTRAVELERKLOOK for up to P300 OFF or TPTKLOOK5 for up to P500 OFF. These codes might change in the future, so best to just visit thepoortraveler.net/klook to redeem updated discount codes!
Don’t worry, you don’t need to memorize all these codes and links. We compiled all the NEW ZEALAND TRAVEL ESSENTIALS including a list of all the hotels and hostels we tried in the TPT Masterlist. Just visit and scroll until you see the section about New Zealand. We also have a compilation for other destinations around the world.
Reconnect and Chill
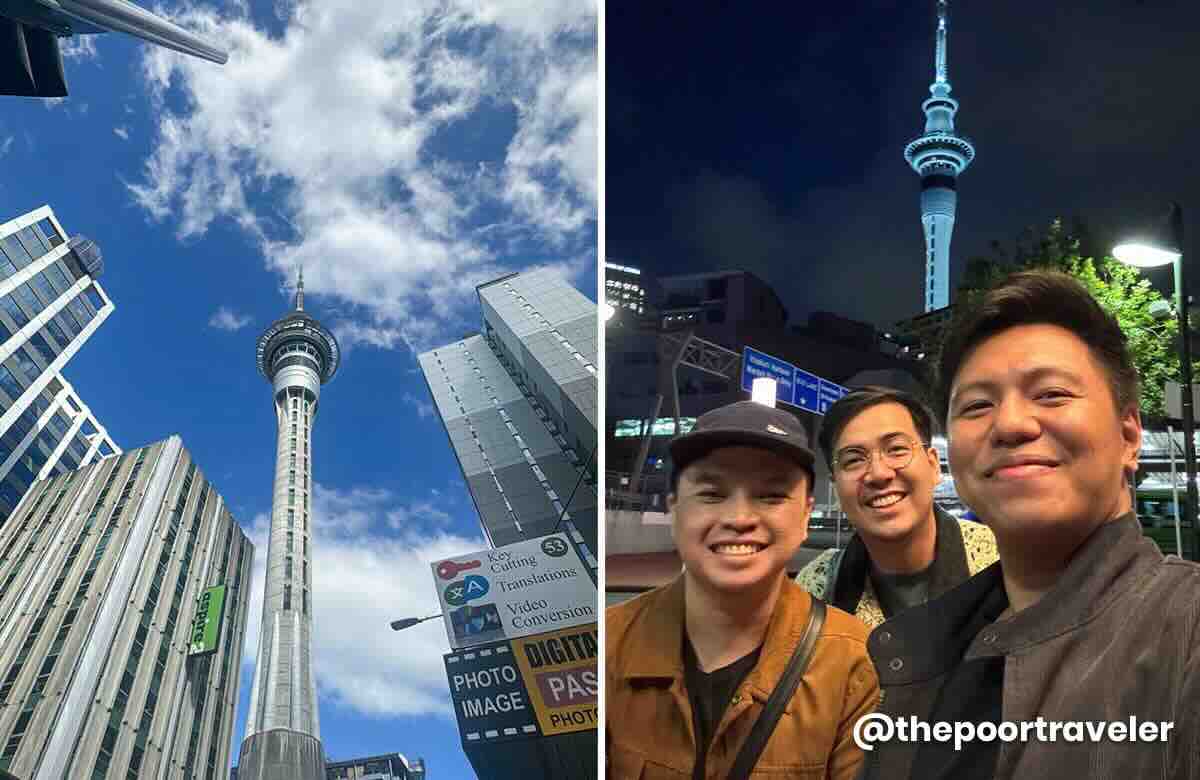
At around 4PM, we got up and prepared to go out. Our original plan was to climb to the observation deck of the Sky Tower, but our Auckland-based friend Jerwin invited us to a rooftop cocktail bar, and of course, we chose shots over sights.
But if you intend to go to the Sky Tower, the entrance fee is NZD 45 if you buy online or NZD 47 for walk-in guests. If you prefer to reserve your ticket via Klook, we found this one.
Sky Tower Auckland Address: Victoria Street West, Auckland Central, Auckland 1010, New Zealand Online Ticket: NZD 45 (P1526) On-site Ticket: NZD 47 (P1594)
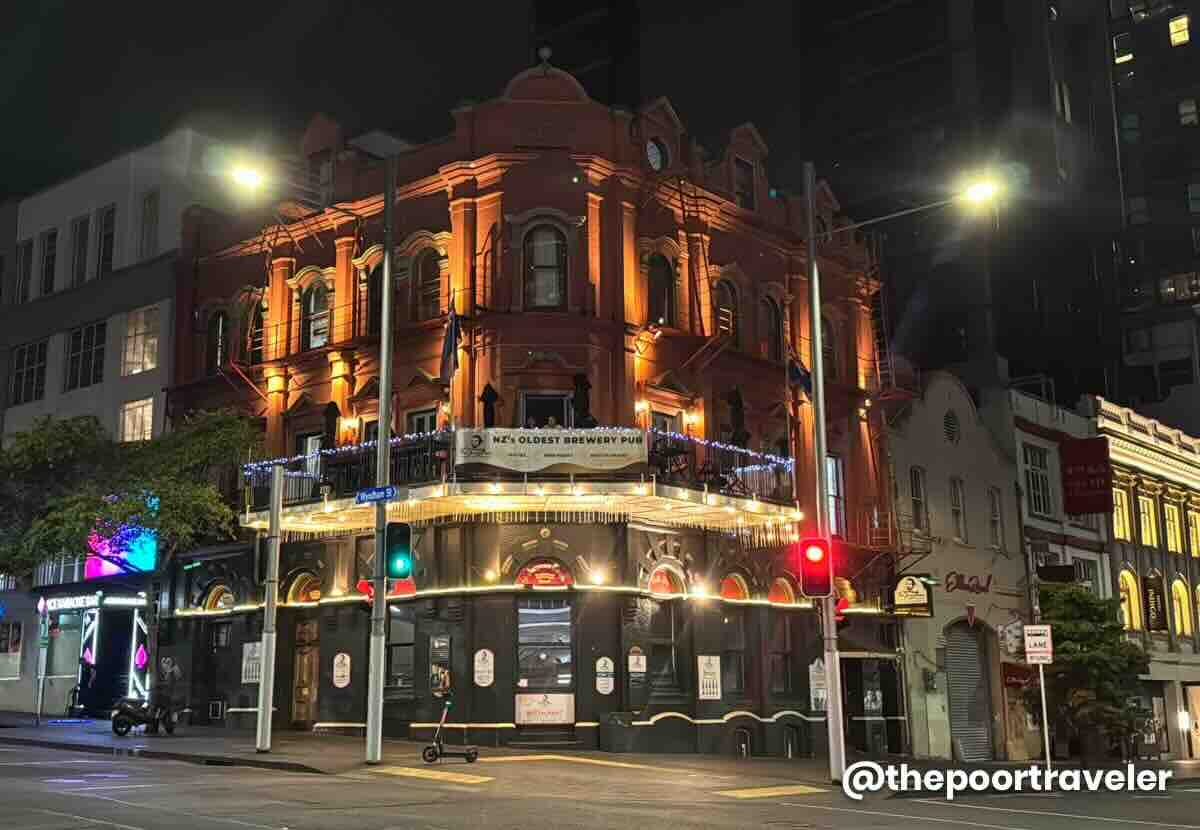
After hours of catching up with Jerwin, it was time to meet up with our other friends who will be joining us on this trip across New Zealand: Jax, Ivan, and Krisa. We ended the night with a round of beer at the iconic Shakespeare Hotel, which houses Auckland’s oldest microbrewery pub.
Vins downed a glass of the crisp and clean pilsner nicknamed the Jester, while I, as always, opted with something darker — the Gravedigger, which is a porter beer made from dark malt and had delicious bitter notes of coffee. We then called it a night and headed back to the hotel.
Shakespeare Brewery Address: Shakespeare Hotel, 61 Albert Street, Auckland Central, Auckland 1010, New Zealand Shakespeare Beer on Tap: Per Glass, NZD 14.58 (PHP 495)
DAY 2: HOBBITON & REDWOODS
Auckland to Matamata iSite
We started our second day early. Like, really early. That’s because the Hobbiton Movie Set Tour schedule that we got was at 11AM. It was the only slot available when we booked. Hobbiton is two hours from Auckland, and we had yet to secure a car rental, so we were up as early as 6AM just to be on the safe side.
The car we rented was good for five passengers, including the driver and four suitcases, which was perfect because Jax did not bring luggage as he would go back to Auckland after our Hobbiton tour, while the rest of us would head straight to Rotorua.
Europcar Rental Per Day: NZD 318.87 (PHP 10,816) Maximum Capacity: Good for 5 pax
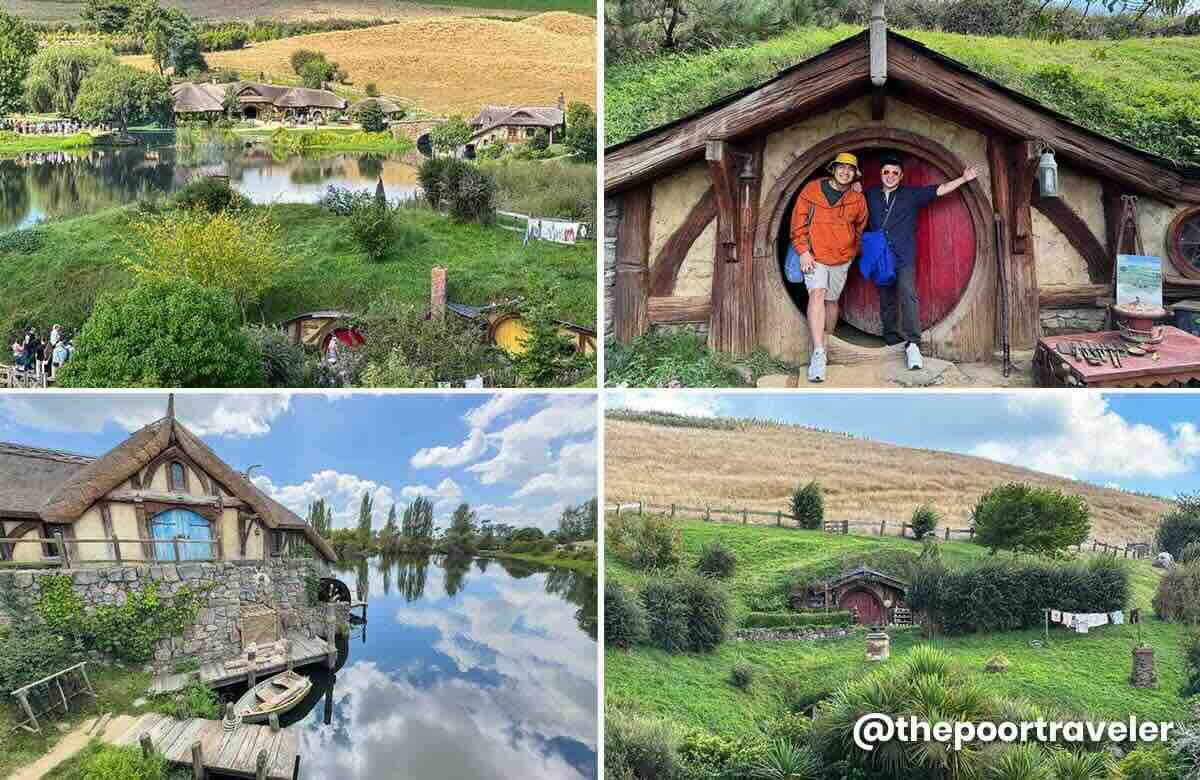
Hobbiton Movie Set Tour
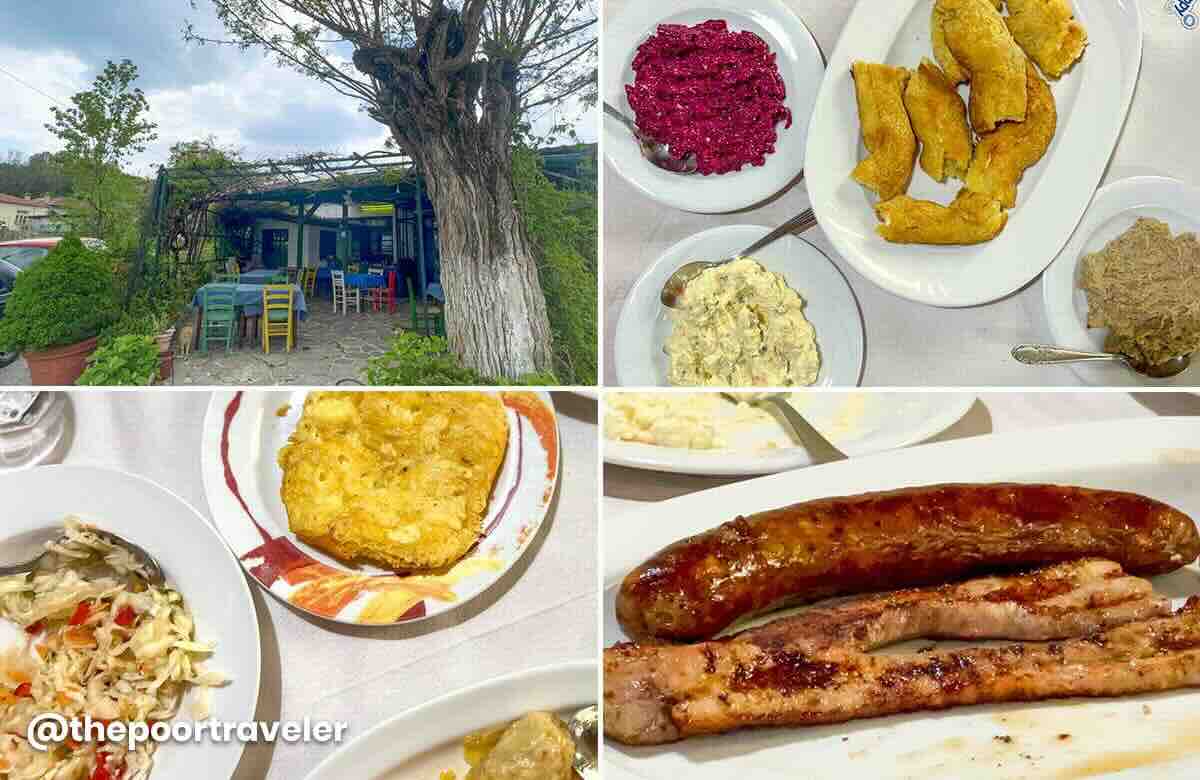
The tour that we booked would be picking up guests at the Matamata iSite. iSite is the term used for official tourist information centers here in New Zealand. Because we arrived early, we decided to grab breakfast from the many food spots along the main road. Jax and Vins shared a pie, while I had meat on skewers.
After a quick photo op with the Hobbiton signage, we boarded the bus to the movie set. On the way there, the TV screen inside the bus showed mini-documentaries about the site. By 11:45 AM, we were at the entrance to the set.
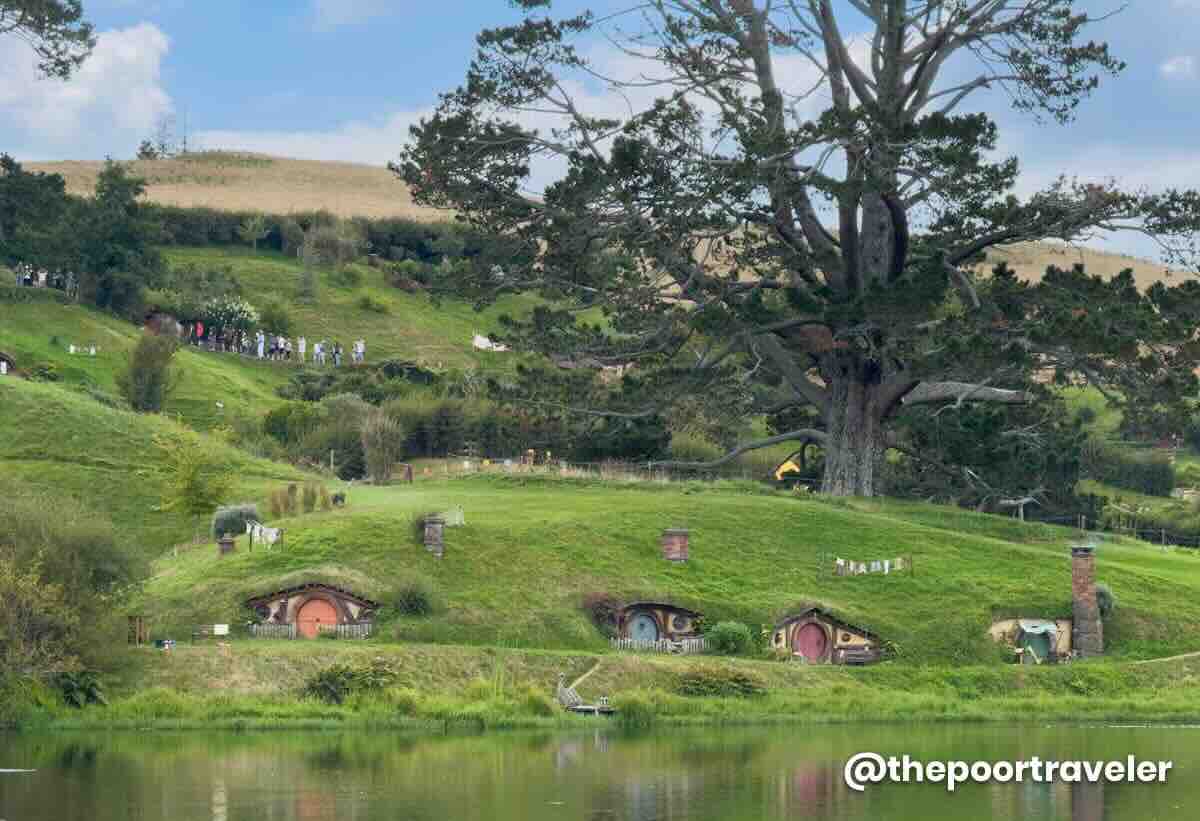
The only way to explore the site is by joining a guided tour, and you must stick to your group all the time. Along the way, the guide would be sharing interesting facts about how the site was chosen and built, and how the films were made. Vins and I had seen both the Lord of the Rings and The Hobbit trilogies multiple times, so we were beyond thrilled to walk on the same ground as Bilbo, Frodo, and Sam.
The site was used for exterior shots only. At the time of filming, all interior scenes were shot in a studio elsewhere. Today, however, there are two hobbit houses that visitors can enter and explore. Think of it as a mini-museum. But these were not used in the movies.
One of the most fascinating bit was that the incredibly cinematic giant oak tree above was completely fake. The trunk and branches were made of fiberglass while the leaves silk. There was also a snack stop in the middle of the tour, where we enjoyed a complimentary drink. This can be a stout, amber ale, apple cider or ginger beer.
After the tour, the bus took us to the Shire’s Rest Café, which was the more usual jump-off point to Hobbiton. They also had a souvenir shop on site.
We then boarded another bus back to Matamata iSite. The tour itself lasted two hours. Including the bus transfers from Matamata iSite and the stop at Shire’s Rest, allow around four hours in your itinerary. At least six hours, if including transfers to and from Auckland or Rotorua.
If you want to secure your slot ahead of time, you can check out packages from Klook! You can choose if you want ticket only or with transfers from Auckland or Rotorua. You can also add a Waitomo Glow Worm Caves stop.
Address: 501 Buckland Road, Hinuera, Matamata 3472, New Zealand Tour Rate: NZD 120 (PHP 4070)
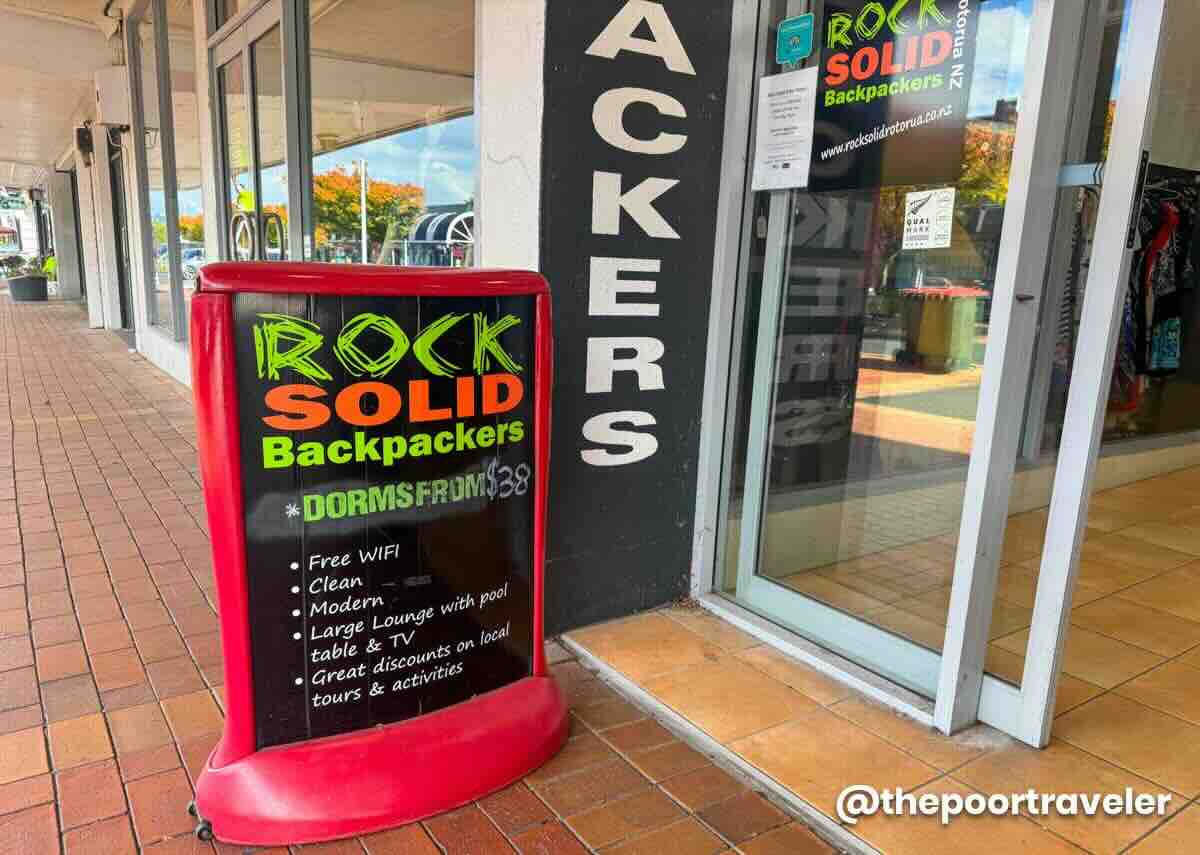
Rotorua Hostel Check-In
After parting ways with Jax, we then drove to our hostel in Rotorua called Rock Solid Backpackers. It was a no-frills hostel, but we had in the room a table, mini-fridge, and an ensuite toilet and bath. It was a fan room, which wasn’t a problem since New Zealand’s climate is generally relatively mild, even in the summer.
We paid PHP 5466 per night, and we’re staying for two nights. Yes, for a fan room. That’s how expensive rooms are here. For the updated prices, you can Check Rates & Availability Here! ✅
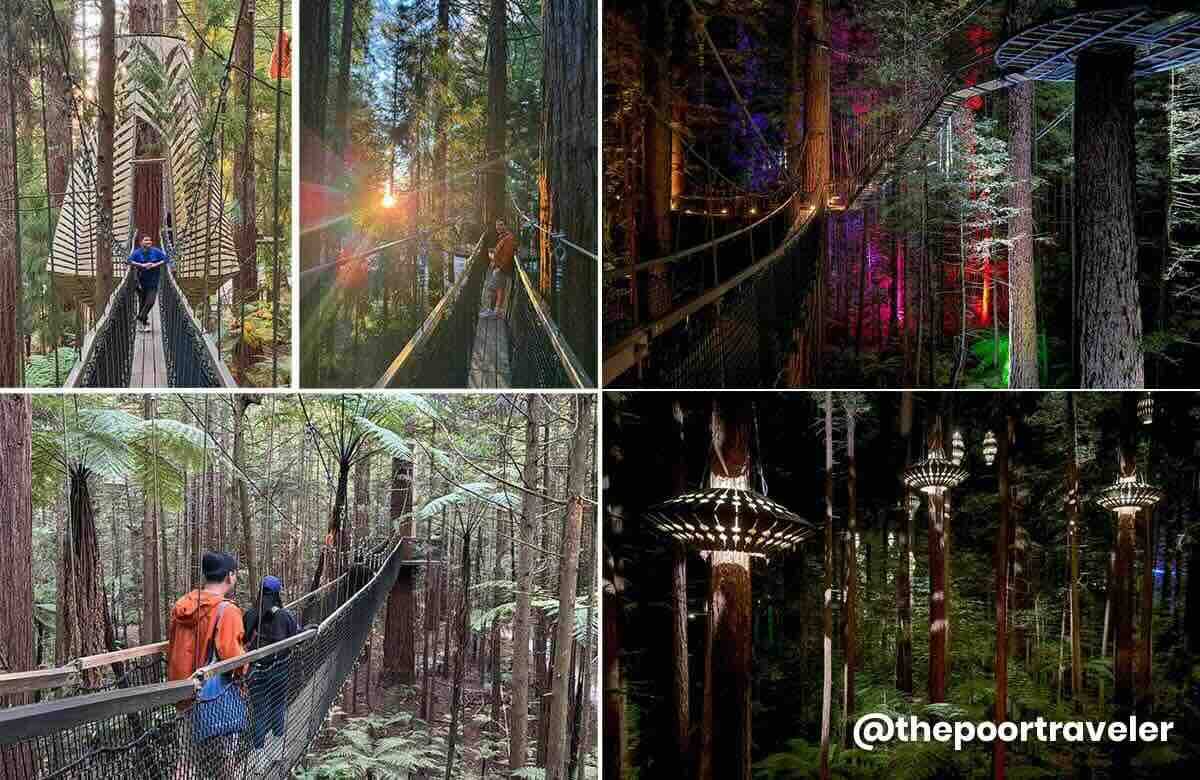
Redwoods Treewalk
After dropping our bags and freshening up a bit, it was time to head to the Whakarewarewa Forest for an elevated hike, literally. This is the Redwoods Treewalk, a collection of 28 suspension bridges spanning 700 meters, making it the longest living tree walk in the world. You must follow the path and you only get one round. You can enjoy it in the daytime or at night, each requiring a separate ticket at NZD 40, unless you avail of the combo ticket which costs NZD 60, giving you a 20-dollar discount.
We purchased the combo ticket. Under the daylight and just before sunset, it had this enchanting atmosphere. It was like communing with nature with a bit of excitement. But at night, when the illuminations were on, it gave off a more otherworldly feel.
And oh, don’t miss the ice cream sold on site for NZD 12.15. It was soooo good!
You can book your Redwoods Treewalk experience in advance on Klook! This package includes Altitude, Treewalk Day Tour, and Treewalk Night Tour with Fast Pass entry.
Address: 1 Long Mile Road, Tītokorangi Drive access off Tarawera Road, Whakarewarewa, Rotorua 3010, New Zealand Entrance Fee: Day or Night Ticket, NZD 40 (PHP 1357); Combo Ticket, NZD 60 (PHP 2035) Redwoods Ice Cream: NZD 12.15 (PHP 412)
DAY 3: ROTORUA TOUR
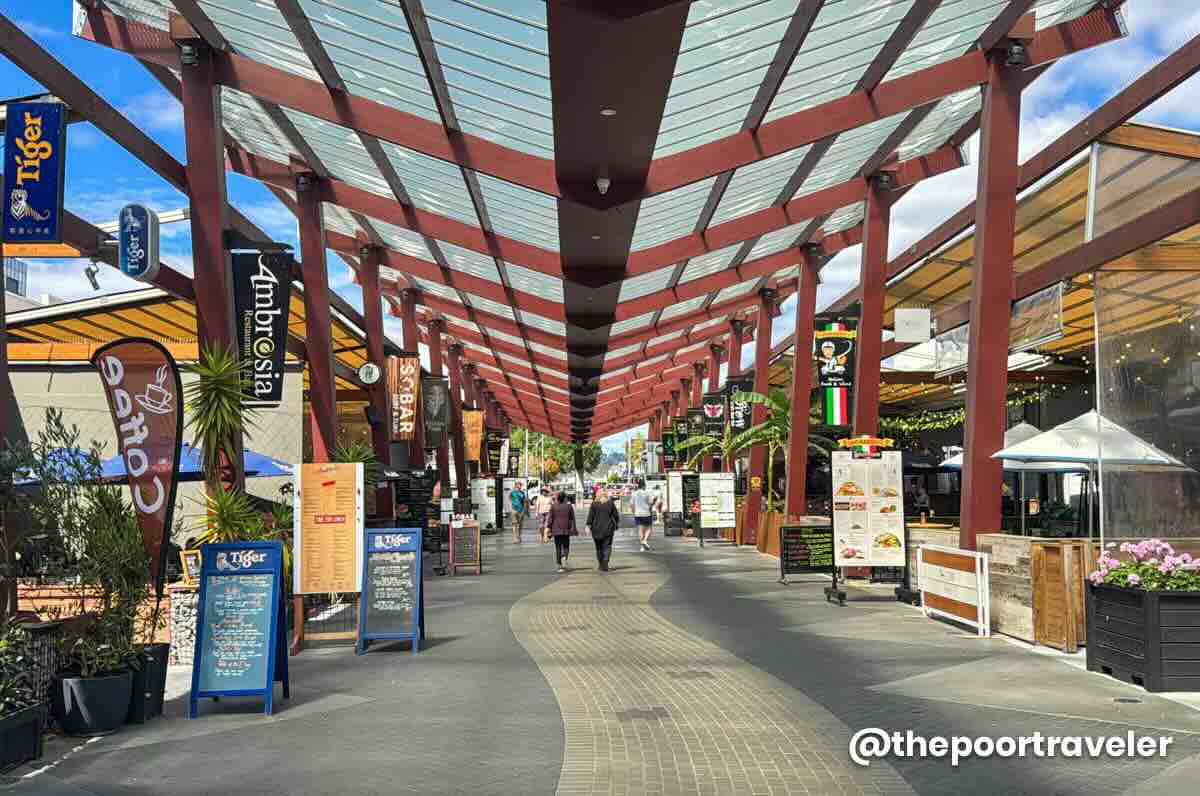
Eat Streat
For the third day, our original plan was to be amazed by the Waitomo Glowworm Caves. But the night before, we agreed to ditch this plan because Krisa, our designated captain of the car, was not comfortable driving for two and a half hours to the caves. We also took this opportunity to finally get some decent sleep. Although this was only our third day in New Zealand, if you count our stay in Australia, this was already our Day 10 and prior to this, we had never gotten any sleep longer than four hours. And we really took advantage of it.
The gang met up for lunch at Eat Streat, a collection of the city’s most popular restaurants. Vins and I shared cuts of lamb chops (NZD 34) and BBQ bourbon pork ribs (NZD 32). New Zealand is famous for its big population of sheep, so lamb was a no-brainer for us. We also ordered pork, just in case the lamb was too gamey for our own taste.
Address: Tutanekai Street, Rotorua 3010, New Zealand
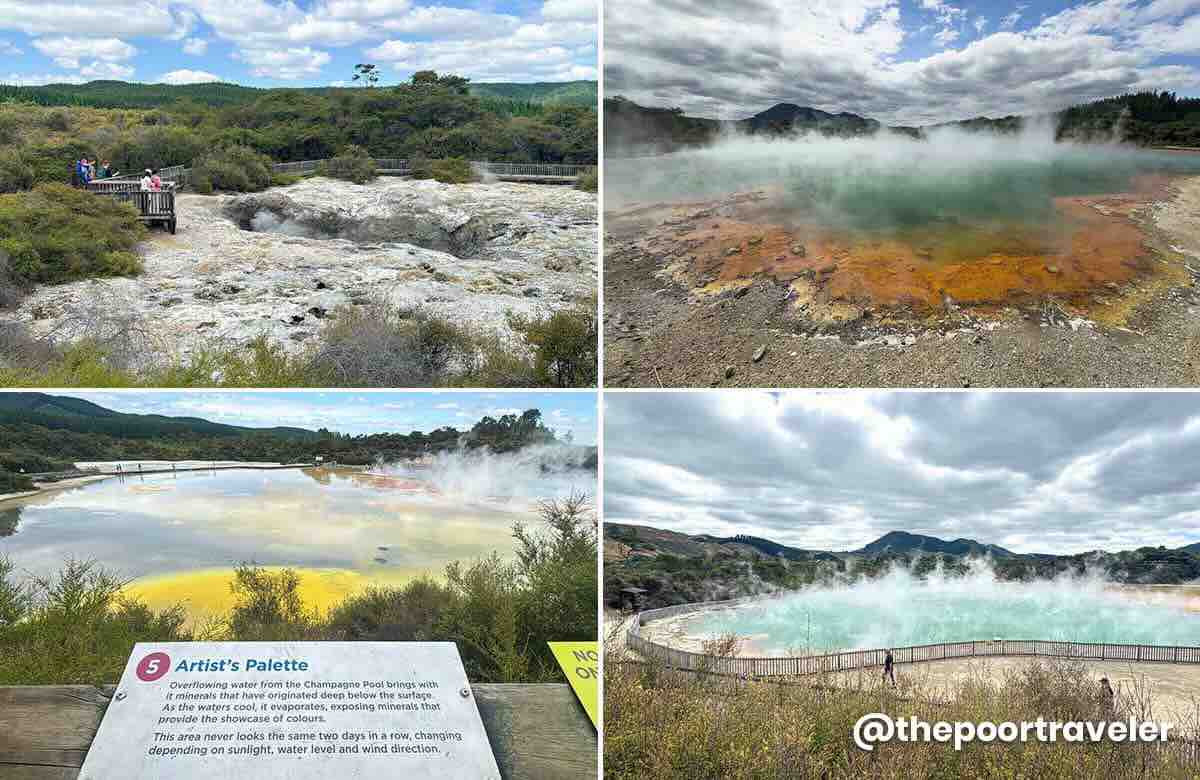
Wai-o-Tapu Geothermal Wonderland
Then, we drove to Wai-o-Tapu Geothermal Wonderland, one of New Zealand’s most colorful and surreal natural attractions. Wai-O-Tapu, which means “Sacred Waters” in Māori, is a volcanic park famous for its bubbling mud pools, steaming craters, and the iconic Champagne Pool. Next to it is the Artist’s Palette, a rainbow-colored terrace that looks like someone spilled watercolors everywhere.
It’s not just pretty, though — it smells like sulfur (think rotten eggs), so come prepared with a strong nose or a sense of humor.
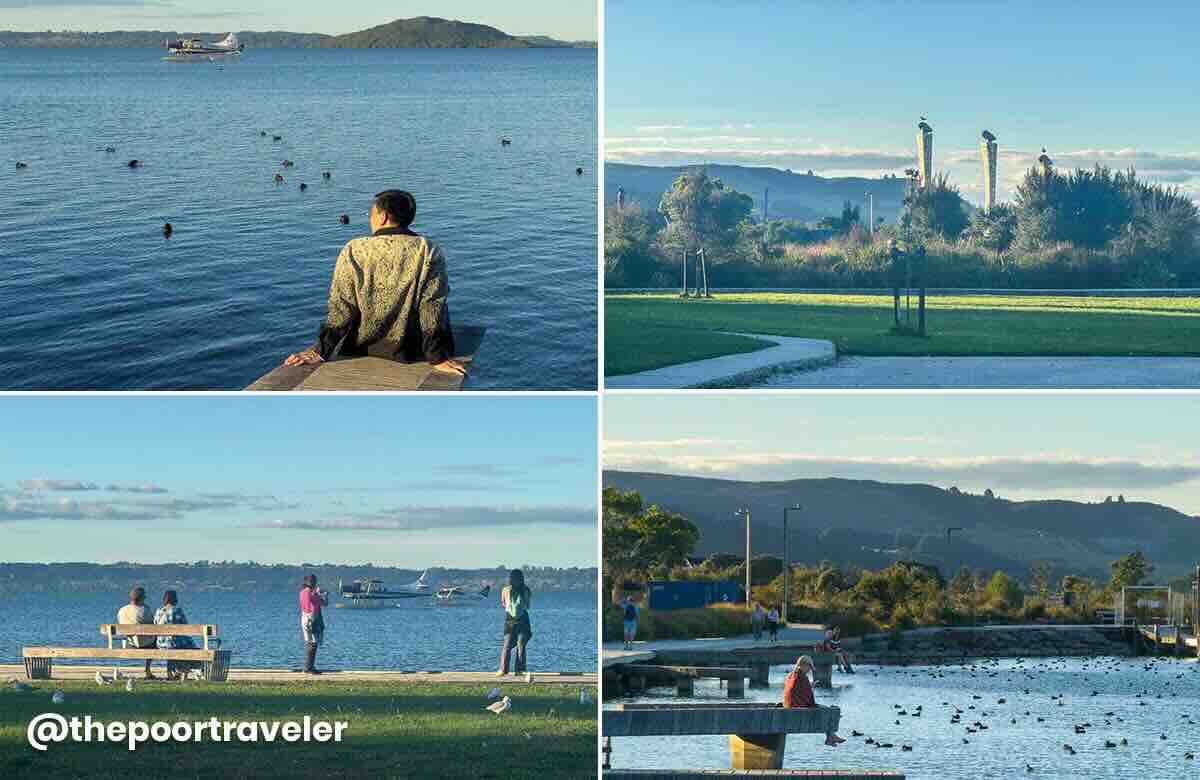
After taking care of something at the Rotorua Airport, we then drove to Rotorua Lakefront Boardwalk on the coast of Lake Rotorua. We spent over an hour here, just relaxing and absorbing the surroundings, before returning to Eat Streat for dinner.
Address: Lakefront Drive, Ohinemutu, Rotorua 3010, New Zealand
Dinnertime
We chose to dine at Atticus Finch this time around. But the real highlight here was the ice cream at Lady Janes. Each of us had double scoop, worth NZD 10.80. The fig and manuka honey flavor was incredible!
Lady Janes Address: 1092 Eat Streat, Tutanekai Street, Rotorua 3010, New Zealand Price: Double Scoop, NZD 10.80 (PHP 366)
DAY 4: ROTORUA TO CHRISTCHURCH
Christchurch Airport to City Center
Although Rotorua has its own airport, flights to Christchurch from here are significantly pricier than from Auckland, so we headed back to the big city.
We stopped at a gas station, returned the rental car at Europcar international site, and then walked 1.2 km to the domestic terminal. We grabbed lunch, and then flew to Christchurch.
We arrived in New Zealand’s Garden City at around 5:30 PM. Just outside the airport, we boarded the bus (Bus #8 or #29) to the city center which set us back NZD 4 (PHP 136) per person.
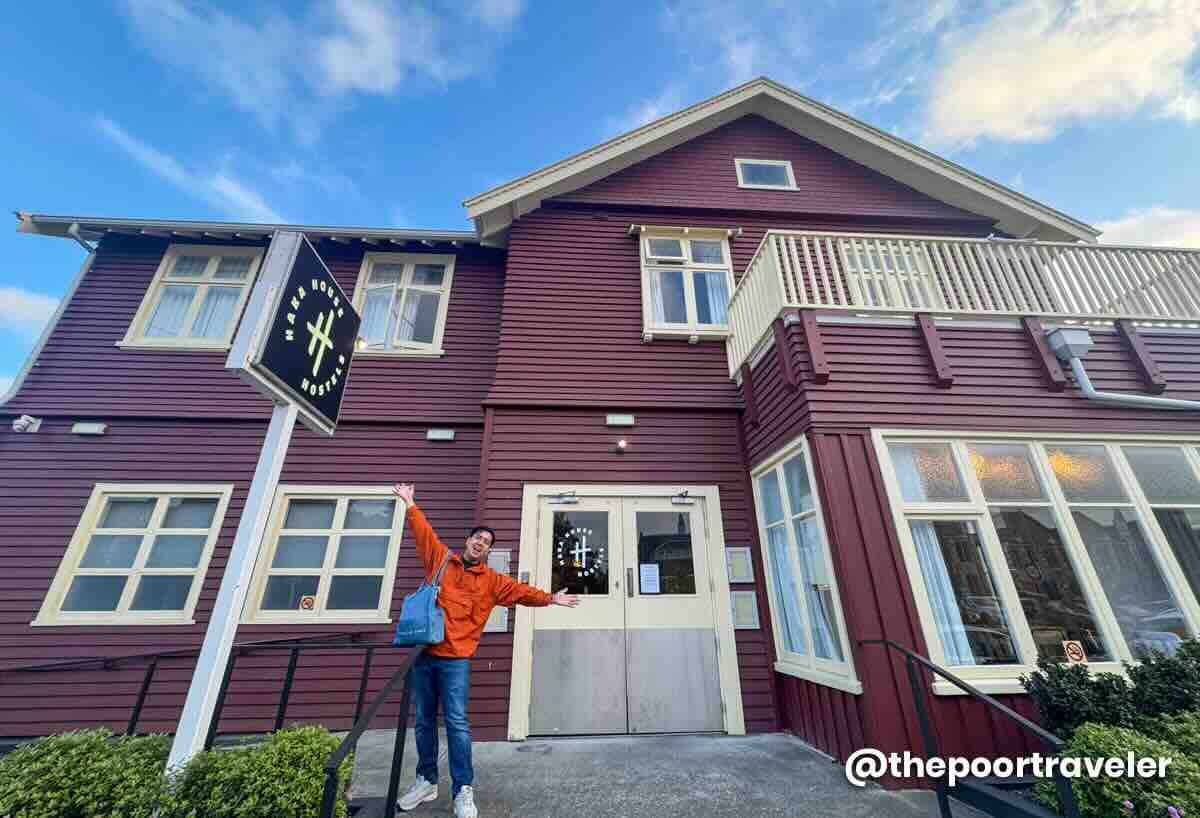
Christchurch Guesthouse Check-In
Here in Christchurch, we’d be spending two nights at Haka House, a 19th century building transformed into a guesthouse. It’s newly renovated so it felt more like a boutique hotel than a hostel. We shelled out PHP 5895 per night for a private room with ensuite toilet and bath. They had no elevator though, so it can be challenging if you have heavy luggage.
If you want a hotel that is close to most points of interest including the Botanical Garden and Riverside Market, this is a viable option. You can Check Rates & Availability Here! ✅
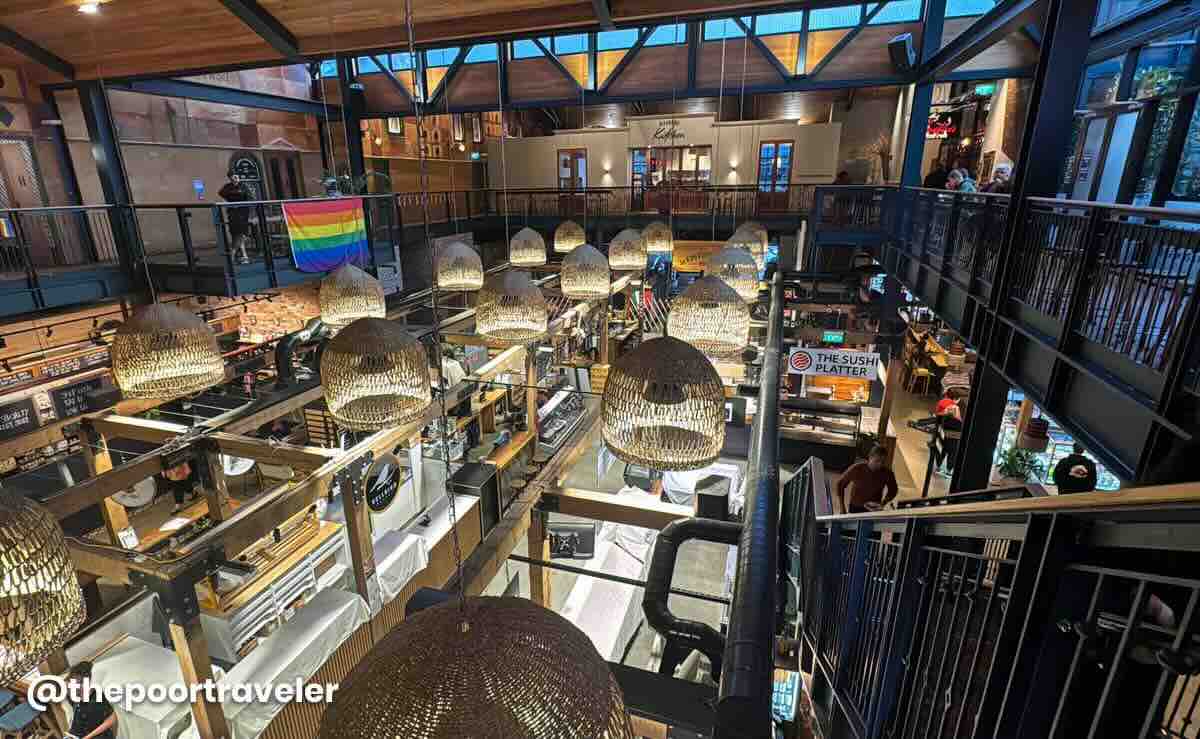
Riverside Market
We basically just dropped off our bags and immediately went out for dinner at Riverside Market, which is a fantastic, diverse food hall. Category is international cuisine. Vins had Thai, while I had Malaysian.
We also had Ben and Jerry Ice Cream here to remind ourselves of the taste of non-New Zealand ice cream, but feel free to skip it since you can find it everywhere.
At this point we had only been in Christchurch for a few hours but we were already liking the vibe. Even at night, we could tell that it was full of charm and character.
Address: 96 Oxford Terrace, Christchurch Central City, Christchurch 8011, New Zealand
DAY 5: CHRISTCHURCH TOUR
Christchurch Walking Tour
Our fifth day was all about Christchurch. At 10AM, we were already at the Christchurch Arts Centre, the starting point of the city walking tour. Our guide was Craig, a local and a prolific traveler himself, and for the next three hours, he showed us around his hometown.
Yes, three hours of walking, hopping from one notable site to another, appreciating heritage buildings, and getting inspired by how the city built itself up after the catastrophic 2011 earthquake.
Needless to say, we were exhausted by the end of it. Good thing, the tour ended at the Canterbury Earthquake National Memorial, which was just a block away from the Riverside Market, where we had lunch. This time, Vins went Mexican and I chose this Indian lunch platter from Dosa Kitchen with two types of curries, rice and naan bread for only NZD 18 (P612).
Christchurch Walking Tour Fee: NZD 25 (PHP 848) per person
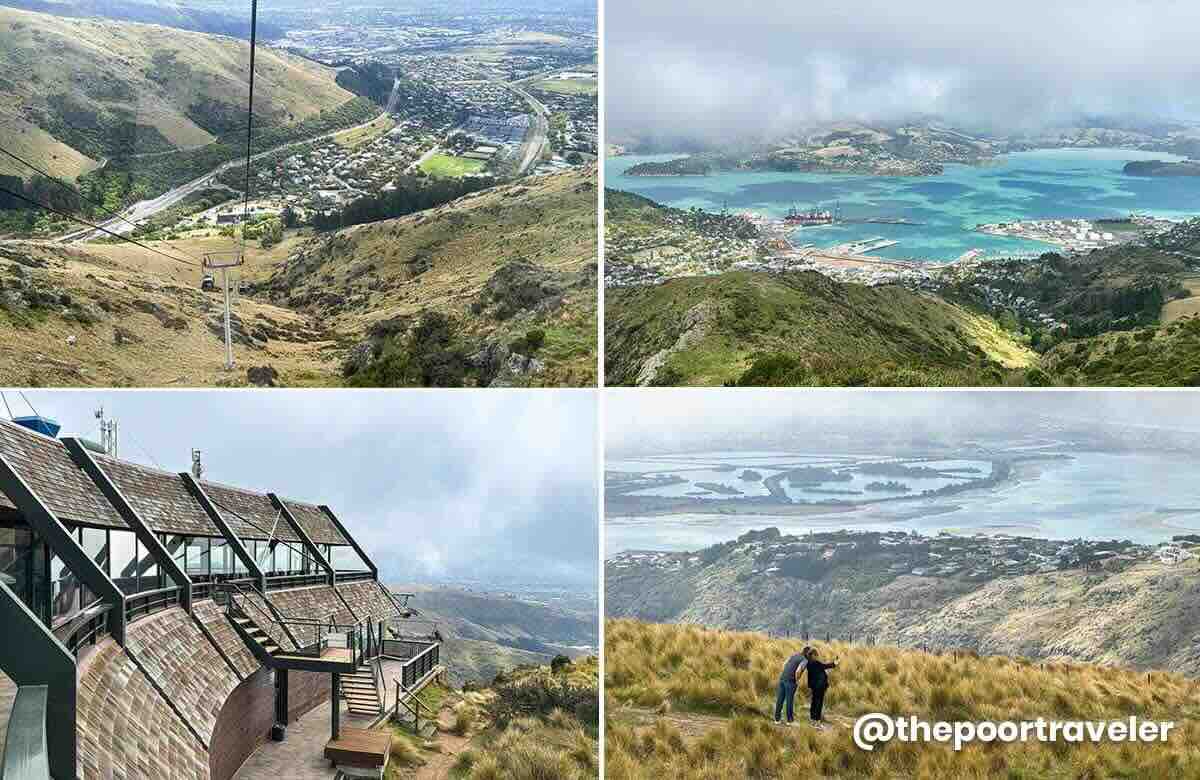
Christchurch Gondola
After the walking tour, we really wanted to just chill and take a break from all that galloping, so we set our sights on the Christchurch Gondola. You can take the bus for NZD 4 (or NZD 2 if you have their local card), but since we were a group of four, hailing an Uber wasn’t that bad, which cost us NZD 26 or NZD 6.5 per person.
The Christchurch Gondola’s admission ticket is NZD 42 per person. We hopped into a cable car and enjoyed the 10-minute, 1000-meter journey to the top of Mount Cavendish. At 445 meters above sea level, the top station offers breathtaking panoramic views of the city, the Canterbury Plains, the Southern Alps and even the Pacific Ocean.
The building is also home to Red Rock Café. We all decided to get coffee to keep our spirits up. I got myself a flat white for NZD 6.5. And since we had not had dessert yet, Vins and I shared a cookie for NZD 6.
After a couple of hours, we rode the cable car down to the base and boarded Bus #8 back to the city center.
Address: 10 Bridle Path Road, Heathcote Valley, Christchurch 8022, New Zealand Opening Hours: Daily, 10:00 AM – 4:00 PM Entrance Fee: NZD 42 (PHP 1427)
Botanic Gardens
This time, we were to explore the Botanic Gardens. You can join a guided tour onboard a caterpillar shuttle. But we decided to explore it on foot and on our own instead.
Address: Rolleston Avenue, Christchurch Central City, Christchurch 8013, New Zealand Opening Hours: Daily, 7:00 AM – 6:30 PM
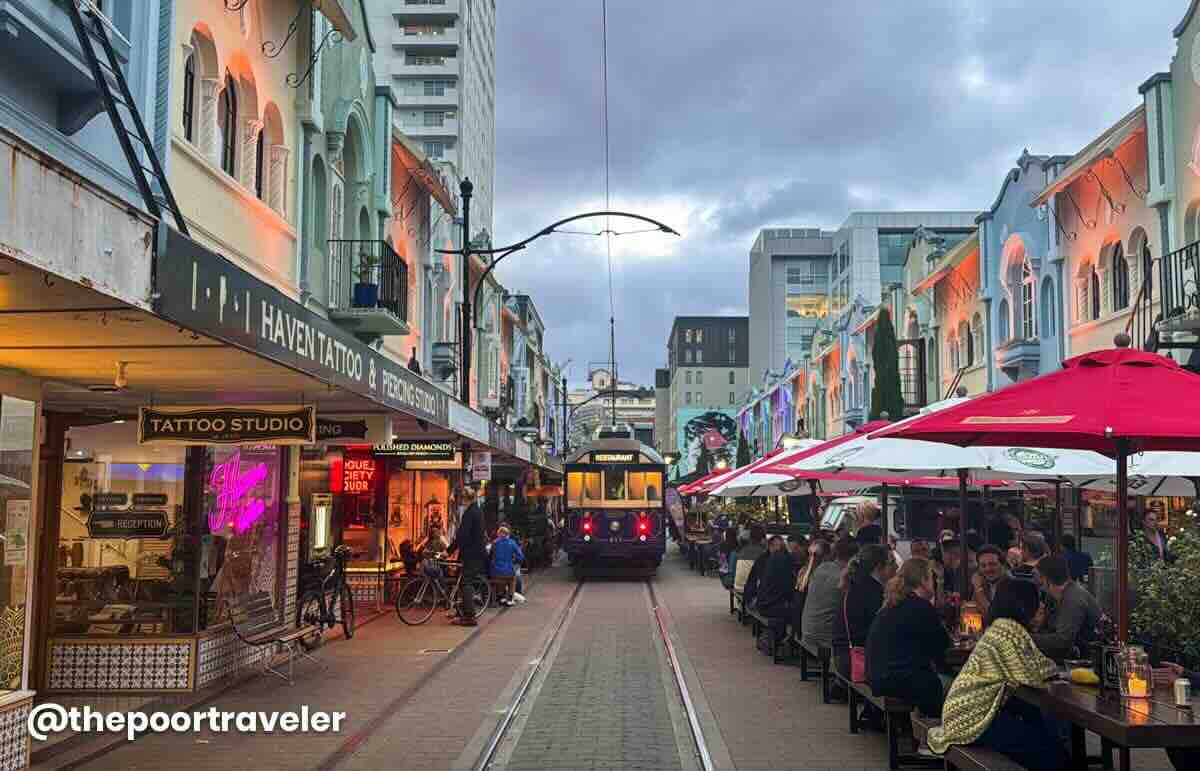
New Regent Street
For dinner, we opted to return to New Regent Street. We passed through the area during the walking tour and we wanted to burn more time here. We also had another dose of ice cream, this time from Rollickin’, a local favorite. I had a scoop of Biscoff the Charts and Hokey Tokey Pokey.
Rollickin’ Address: 35 New Regent Street, Christchurch Central City, Christchurch 8011, New Zealand Gelato Price: Single Scoop, NZD 7.20 (PHP 244); Double Scoop, NZD 10.50 (PHP 356)
DAY 6: LAKE TEKAPO & MOUNT COOK
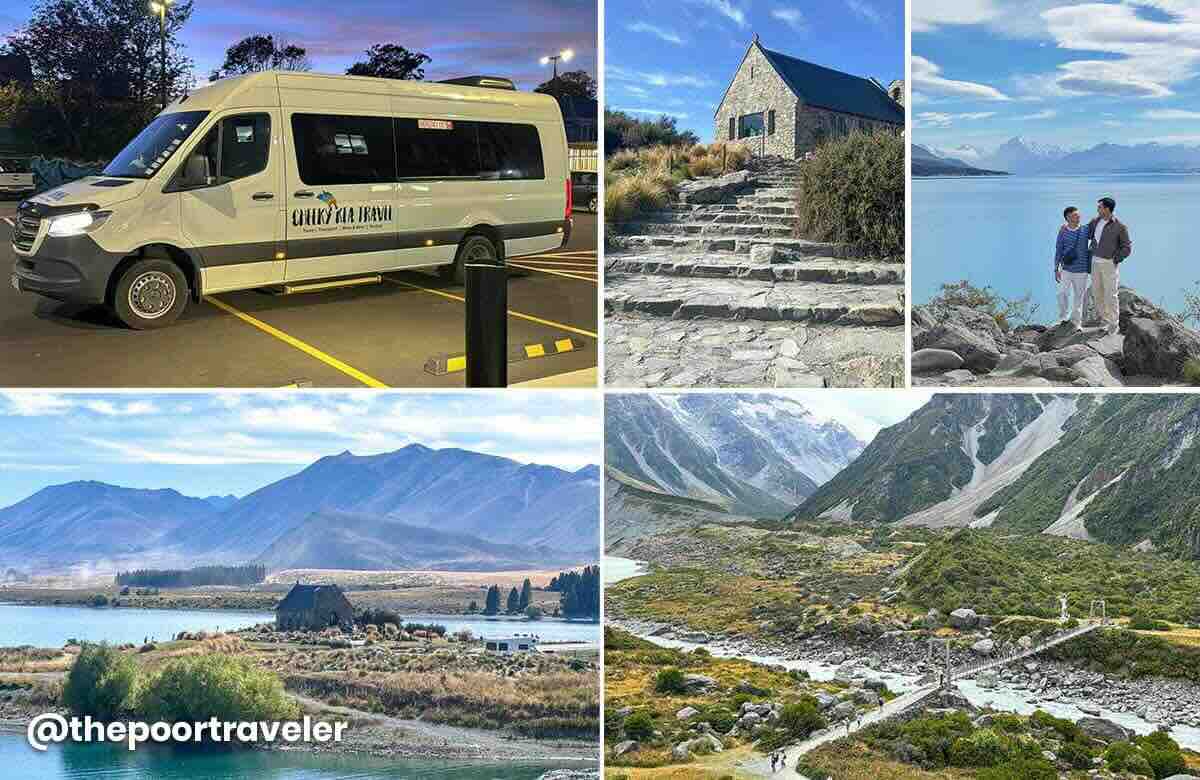
Christchurch-Queenstown One-Way Tour
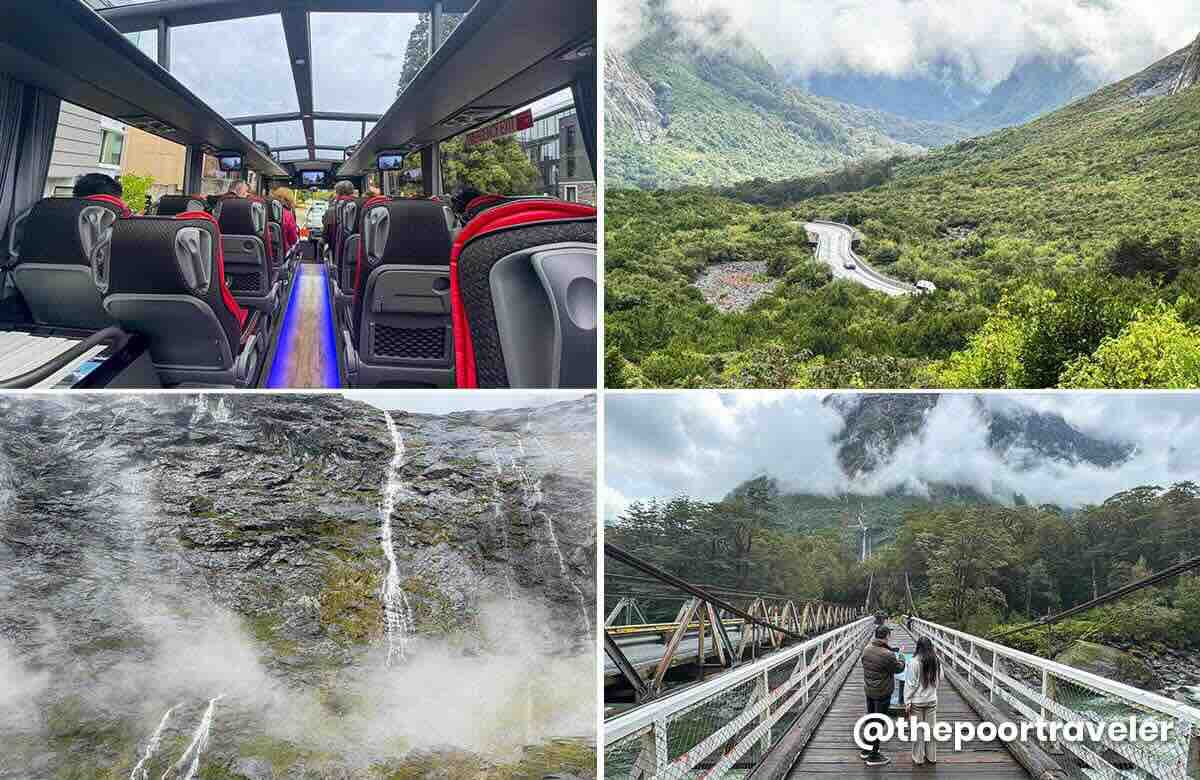
It’s time to head to Queenstown. But instead of flying or taking a direct bus, we opted to join a one-way tour instead.
When you book a one-way tour, the shuttle will pick you up in one city and the tour will end in another, making stops along the way. In our case, we were picked up in Christchurch at 6:30 AM, toured the Lake Tekapo and Mount Cook areas, and then dropped us off in Queenstown. It’s like tour and transfer in one. The vehicle also had a trailer for luggage. Packed lunch is also included. The journey usually takes 13-14 hours.
We stopped at Geraldine for coffee and breakfast, admired the quaint Church of the Good Shepherd standing next to Lake Tekapo, sampled salmon dishes at High Country Salmon and fruit ice cream at Jackson Orchards, and marveled at stunning roadside views of Lindis Pass, took plenty of photos at Lake Pukaki, and hiked along the Hooker Valley Trail. We only got to reach the bridge because of the limited time, but we still had a blast.
In case you’re wondering, yes — this tour is available on Klook!
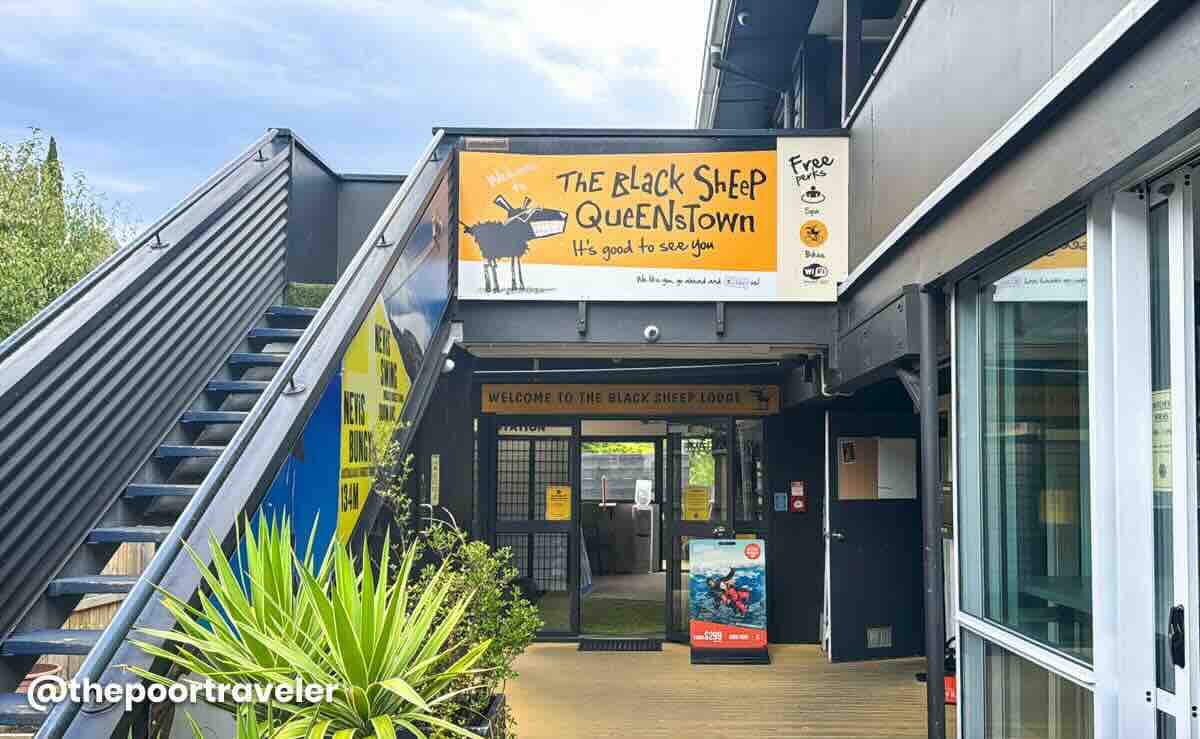
They dropped us off at our lodge, the Black Sheep Backpackers Hostel, where we would be spending the next four nights at around NZD 215 (USD 128, PHP 7293) per night. And that’s for a private fan room without its own toilet and bath. But this was the cheapest accommodation we found at the time. You can Check Rates & Availability Here! ✅
Fergburger
After checking in and dropping our bags in the room, we immediately went out for dinner. The most famous food spot here is probably Fergburger. We ordered its signature burger with beef patty and something more offbeat — a pork belly burger. And truth be told, to me, the signature burger was just alright, but the pork belly one was absolutely delicious. Servings were humongous, too.
I wouldn’t call myself a daredevil and I don’t really describe myself as adventurous. But we’re jumping off a plane on our seventh day. Yes, I went skydiving in New Zealand! There were three main reasons why I decided to finally do it here in Queenstown. First, my friend Krisa really wanted to do it and she needed a companion. Both Ivan and Vins won’t ever do it even if you put a gun to their heads.
Second, because it’s relatively affordable here. Emphasis on relatively. Skydiving is generally expensive. In Siquijor and in Cebu, you’ll be shelling out PHP 24,500 per person, including photos and videos. In Switzerland, the cheapest we found was CHF 450 (PHP 30,200). In Namibia, it’s NAD 4700 (PHP 14,200), excluding video documentation. In Cape Town, it’s ZAR 3950 (PHP 12,200) without video. In Australia, it’s AUD 389 (PHP 13,950) without video. In Dubai, it can set you back AED 2199 (PHP 33,300), including video.
Here in Queenstown, the most budget-friendly option is 9000-ft, which costs NZD 345 (PHP 11,400). If you’re just after the experience, you can totally go for just that. If you want to capture the experience, their photo and video package costs NZD 209 (PHP 6890). So that’s a total of NZD 554 (PHP 18,290). Still cheaper than most options out there.
And the third reason, I thought it was quite fitting to go skydiving in a destination that many regard as the “Adventure Capital of the World”. It’s a nickname that the city has earned and deserved. First, this is where you’ll find the world’s first permanent commercial bungee jumping site — at Kawarau Gorge Suspension Bridge. And over the years, it became a venue for more and more extreme sports.
Anyway, the meetup place was at the NZONE office in the city center, just within walking distance of our hostel. At the last minute, Krisa and I decided to upgrade to 12,000 feet (NZD 430; PHP 14,200).
After a short briefing, we were then transferred to the drop zone, where I stepped into a jumpsuit and met Elliot, who would be diving with me. For the next several minutes, my life was in his hands.
It was glorious! I don’t think I’ll be doing it again in the near or distant future, but it was a hell lot of fun.
Patagonia Ice Creamery and Chocolaterie
After lunch, we had dessert at the famous Patagonia Ice Creamery and Chocolaterie, where I had its signature and award-winning hazelnut cremino, but the flavor that really won me over was its dulce de leche.
Address: 2 Rees Street, Corner of the Mall, Queenstown 9300, New Zealand Prices: Single Scoop, NZD 7.50 (P254); Double Scoop, NZD 11 (P372)
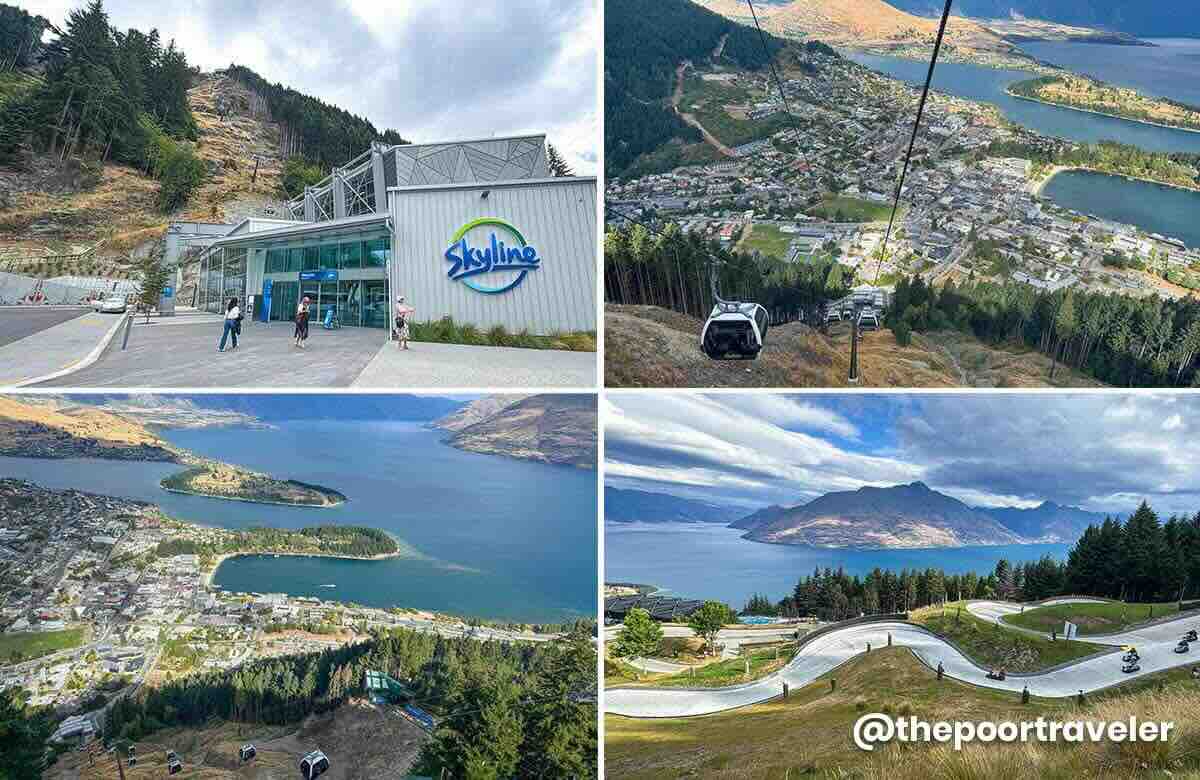
Skyline Queenstown
We then walked to Skyline Queenstown to ride a cable car to a lookout which affords awesome views of the city, Lake Wakatipu, and the surrounding areas.
This wasn’t our first luge ride. We’d tried it in Singapore and at Misibis Bay, but this was definitely the most scenic and exhilarating. The view alone as you zoom down the slope and negotiate the curves was phenomenal! We did it three times, but we felt like we should have booked the six-ride package instead.
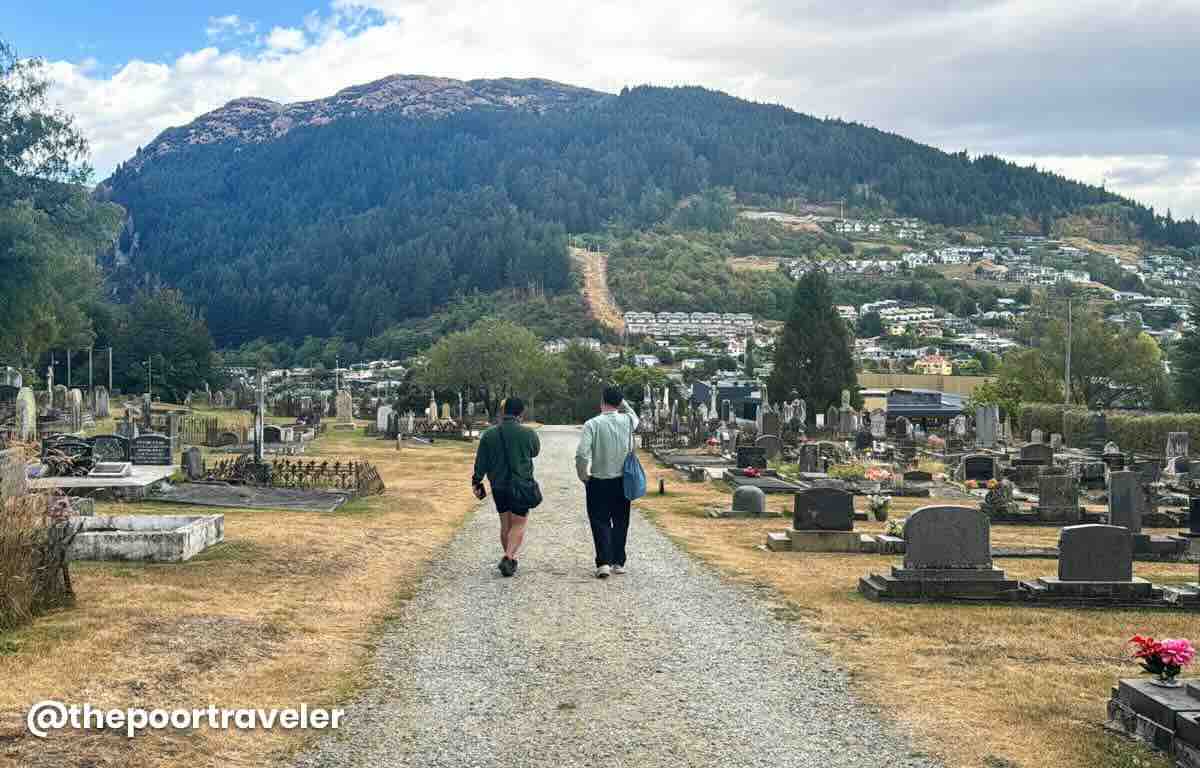
We boarded the gondola back down, and along the way, we passed by a cemetery. I love cemeteries so I convinced Ivan to check it out and explore with me. Apparently, this also marked the start of the popular Tiki Hiking Trail.
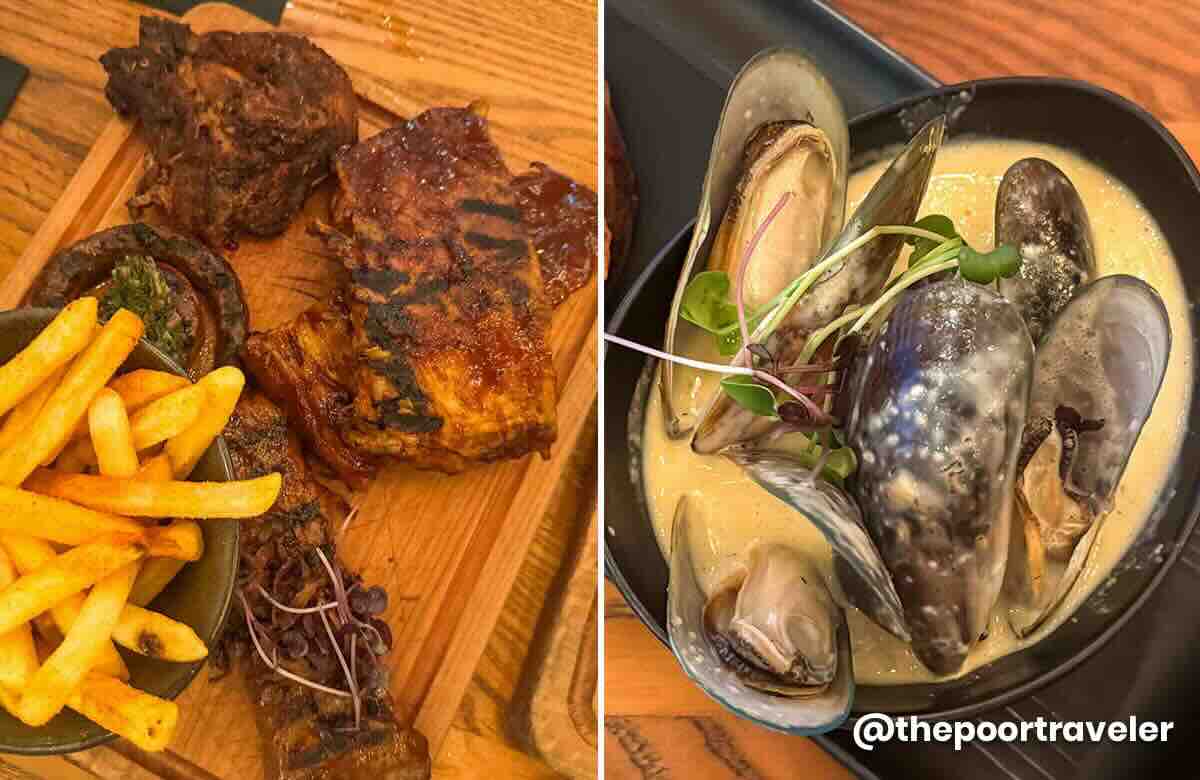
Back at the Steamer Wharf, after checking out souvenir shops and trying to get a table at the city’s top restaurants (most of which were fully booked that night), we ended up here at Flame Bar and Grill, which serves local New Zealand and also South African dishes. Its bestseller is the sticky ribs.
We ordered its Flame Mixed Grill platter. It was composed of signature ribs, sirloin steak, rotisserie peri-peri chicken and homemade Boerewors sausage.
Now, it was marked as good for one person, but I had a feeling it was too much for a single soul. So even if this restaurant had a one-meal-per-person policy, we asked if Vins and I could just share instead, and the staff said OK since I also added a small bowl of New Zealand’s native green-lipped mussels as appetizer.
At this point we had gotten used to the large serving sizes here in New Zealand, but we weren’t prepared for this one. It was a feast! Vins and I shared, right? But we still struggled to finish it all. We did finish, but the struggle was real. But it was our best meal in New Zealand. Every single thing on the table, even Krisa’s Mozambique prawns, was delectable.
This was the day we’d all been waiting for! Milford Sound is probably South Island’s most talked-about attraction, and we were really excited to finally see it. We joined a group tour which used a bus with glass ceiling for full appreciation of the scenery.
Milford Sound is part of the Fiordland National Park and is roughly four hours away from Queenstown. So yes, we spent a lot of time on the bus, but with several stops along the way, including Tutoko Suspension Bridge, with a view of Mount Tutoko. But I think my favorite was the Hundred Falls at the Milford Valley Lookout. It was my first time to be surrounded by countless cascades all around. It was so surreal and magical.
Way past noon, we finally arrived at the Visitor Center by the pier, where we boarded a boat and began our cruise along the fjord, bombarding us with waterfall after waterfall after waterfall. At first we stayed on the top deck for the view, but when things got splashy, we decided to climb down to the cafeteria, where we had lunch, which was included in the package.
The whole cruise lasted almost two hours, from boarding to disembarkation. As soon as we hit land again, we were herded back to the bus to start our journey back to Queenstown.
We booked this on Klook. Below is the exact tour we booked.
It took us some time to find a dinner place because most restaurants were packed, but we ended up here at Mapo 88, a Korean restaurant tucked in one of the inner alleys. We had kimchi fried rice, honey soy chicken, and rabokki. Everything was for sharing, so we split the bill.
It’s our last full day in Queenstown, and today it’s just Vins and I. Krisa and Ivan had flown out earlier this morning. Our itinerary was more laidback today.
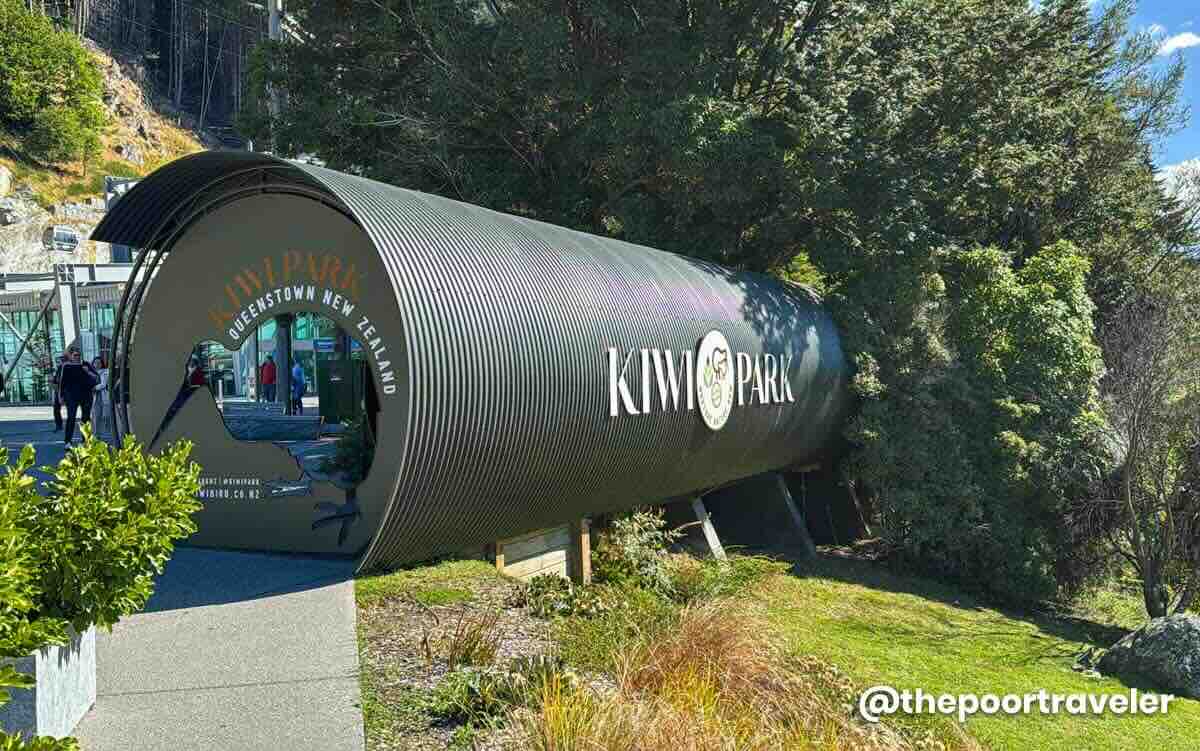
We realized, after nine days, we still had not seen any kiwi, which is perhaps New Zealand’s biggest icon. This morning, our main attraction is the Kiwi Park, which is just beside the Skyline Gondola Station. If you have fewer days, you can visit both Kiwi Park and Skyline within the same day. We didn’t do it that way because we were a bit hesitant as we’re not big fans of animal attractions. But in the end, we decided to still check it out.
Kiwi Park is a family-owned wildlife center. Established in 1986 on what was once an unofficial rubbish tip, the park has been transformed into a lush, five-acre haven. According the staff, the center is dedicated to the conservation of New Zealand’s unique native species, including, but not limited to, the kiwi.
There was a 30-minute conservation show, introducing some of its resident birds. But the kiwis were sheltered in a blacked-out building where photography was prohibited, so we didn’t have any pics or footage. Some of the birds were kept in enclosures, so if you don’t like animals in captivity, this might not be for you. But the place was informative and insightful.
We then spent the rest of the day walking around the Queenstown Mall, shopping for souvenirs, and pigging out at the Yum Hub, which is a collection of parked food trucks serving diverse international plates. We tried FOGO (a Brazilian BBQ spot), Yonder (a popular café and restaurant), Cookie Time (a snack bar famous for its, well, cookies and hot chocolate).
We also returned to Patagonia to try another flavor of their famous ice cream.
Address: Rees Street and Camp Street, Queenstown 9300, New Zealand
DAY 10: DEPARTURE
Our flight out of New Zealand was scheduled at 7:00 AM, so we were up and about as early as 3AM. The airport terminal didn’t open until 4:00 AM, so we had to wait a bit before we could enter. The whole check in, immigration, and boarding processes were all so smooth and uneventful.
NEW ZEALAND BUDGET BREAKDOWN
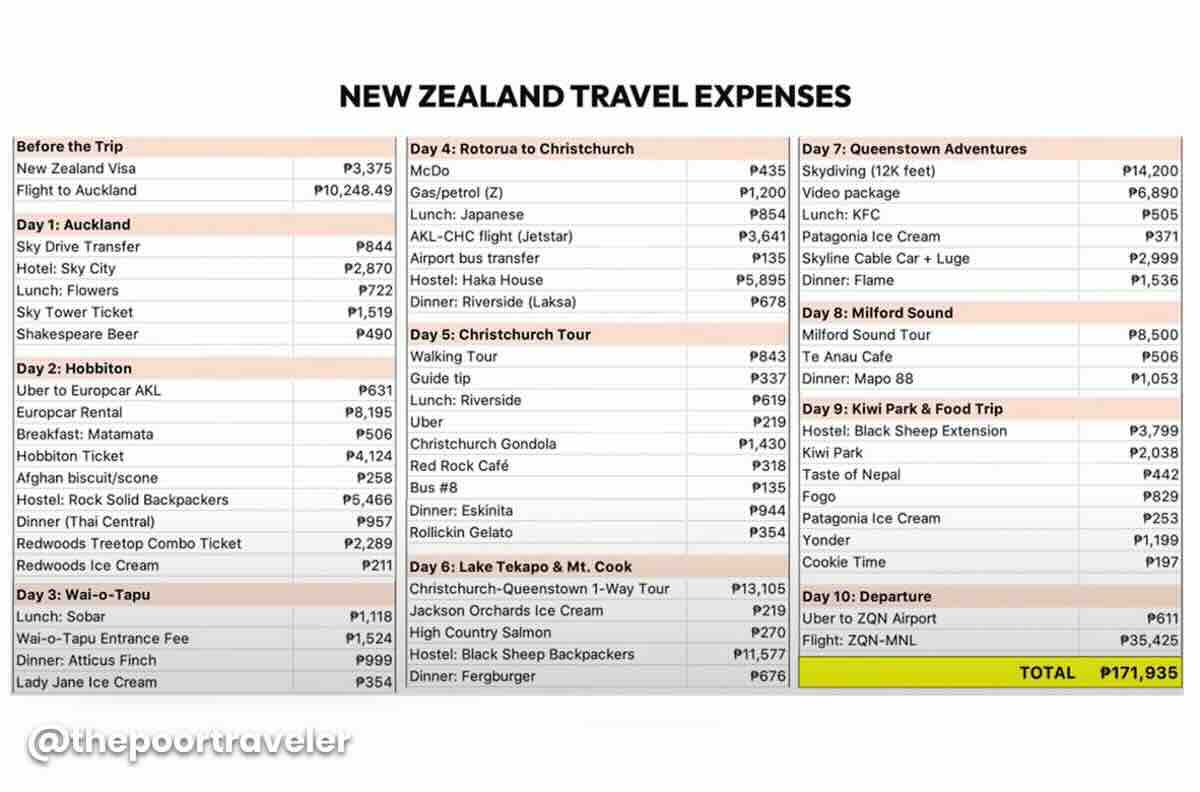
So, how much did we spend? By this time, you’ve probably noticed that it’s really expensive in New Zealand. I expected the cost of travel to be high, but I was still surprised because I didn’t think it would be this high.
For this itinerary, we spent a total of around P172,000 per person, inclusive of flights, hotels, tours, meals, and transfers. This was for 10 days, covering four cities and three additional day trips to other destinations. So, it was quite a packed schedule.
Almost P50,000 went to flights or airfares, and nearly P30,000 went to hotels. Again, this is per person. So, for hotels, we booked rooms for two and then split the cost between Vins and me.
Meanwhile, our friend Ivan had a different computation and ended up spending more because there were hotels where he didn’t have anyone to split the cost with. Also, we had different flights — his was MANILA-NEW ZEALAND-MANILA, which cost around P75,000. Ours, on the other hand, was MELBOURNE-NEW ZEALAND-MANILA since this trip was part of a greater Australia-New Zealand trip itinerary, so our flights only cost P49,000. But if we had taken the same route and flights as Ivan, our total would have been around P198,000, which is more expensive because our stay was also one day longer.
By the way, the conversions we’re showing you vary because we used different cards for our expenses — some were on Vin’s credit card, some on mine, and sometimes on my GCash. Whatever conversion rate we were charged, that’s what we recorded. When we couldn’t find the exchange rate, we used 33.7 to convert.
We also didn’t include souvenirs and alcoholic drinks in the computation. Hahaha! If you are a drinker, then you might want to add more to your budget.
You might have noticed too that we ate out often because there were a lot of restaurants we wanted to try. If you’re on a budget, you can still cut costs by sticking to cheaper dining options, buying food from the supermarkets, or grabbing quick eats from convenience stores.
Again, all the tours and hotels we booked and recommend are compiled in the TPT Masterlist for your easy reference. Just visit www.thepoortraveler.net/masterlist.
Have Peace of Mind While Traveling!
Getting a travel insurance is optional, but we highly recommend this, especially when traveling abroad. Travel can be unpredictable, and though we hope we’ll never use it, having it gives us peace of mind in case of unexpected delays, cancellations, or emergencies.
For international destinations, consider PGA Sompo’s TravelJOY Plus insurance. You can GET IT HERE. Don’t forget to use WORTHIT for a special affordable rate.
ALPAKA Elements Travel Backpack & Flow Satchel – A Month of Real-World Travel Testing
When a new bag shows up in our lives, it doesn’t just sit in the corner waiting for a photo shoot.
It gets dragged through airports, jostled on trails, wedged under café tables, and occasionally used to haul a zucchini or two home from the farmers market.
A Month On the Road with ALPAKA
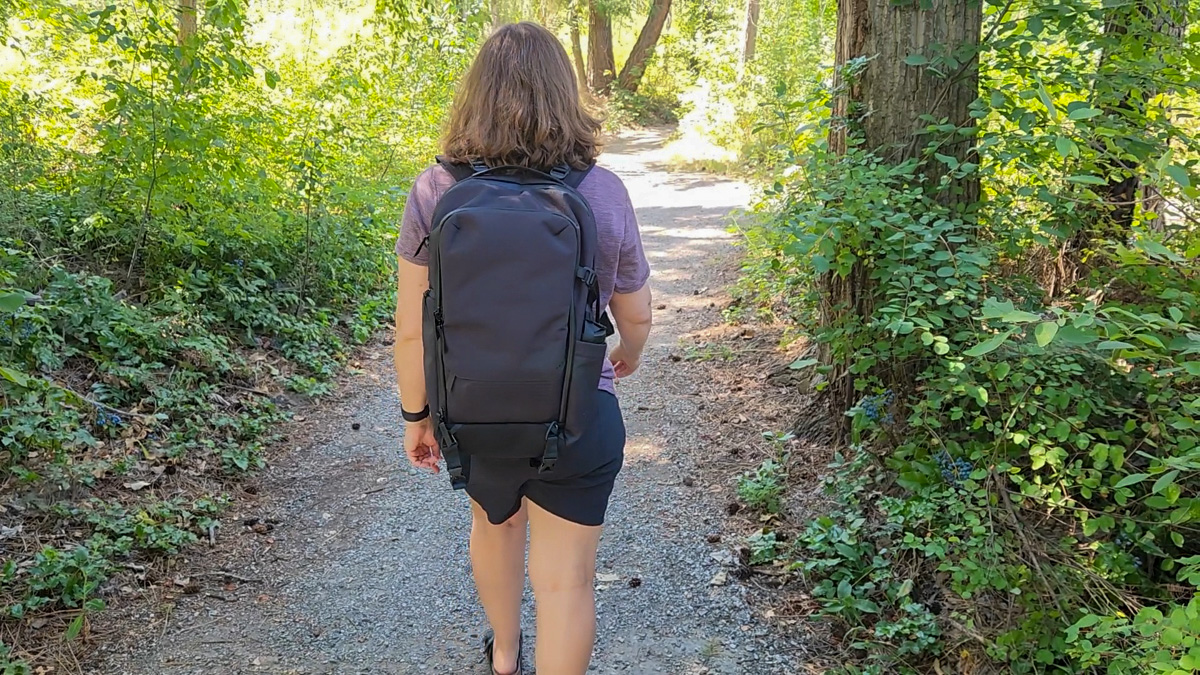
That’s exactly what happened when we started testing the ALPAKA Elements Travel Backpack and ALPAKA Flow Satchel. Over the past month, Charles and I have used them for city errands, trail hikes, and even a flight.
Here’s how they’ve held up.
ALPAKA has a deal on right now for Free Shipping on all ALPAKA bags with orders over $95!Get the Deal on ALPAKA here
ALPAKA has a reputation for sleek, modern design, and both bags nail that balance of style and function.
No flashy logos, no weird color panels, just clean lines, thoughtful features, and weather-resistant materials that feel built to last.
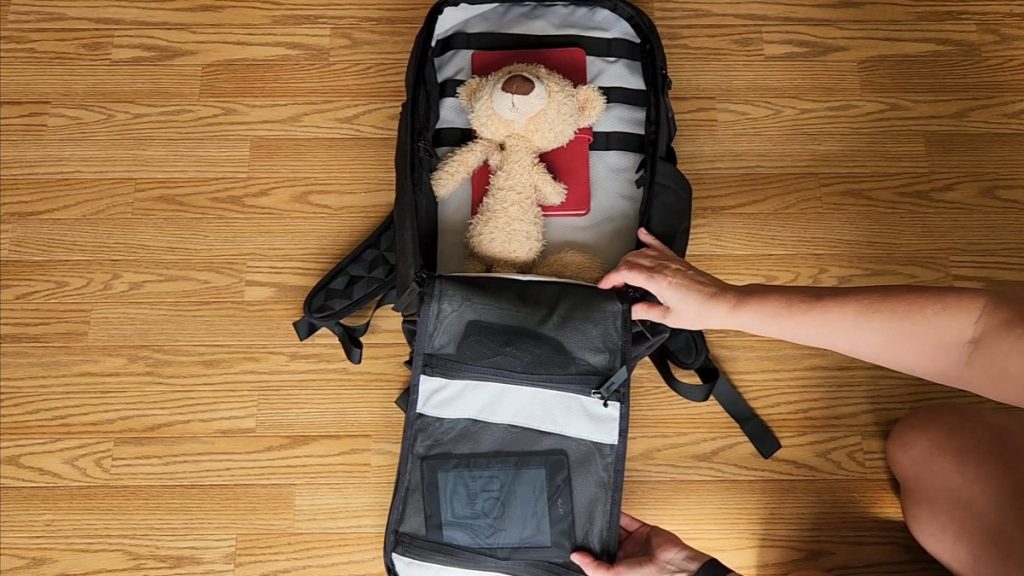
Elements Travel Backpack – Storage & Use
The Elements Travel Backpack is a clamshell-style bag, which means it opens up flat, which is a big win for organized packing.
Inside, one side has a mesh zip panel perfect for clothes or packing cubes. The other side has a padded laptop sleeve, space for chargers, and smaller pockets for quick to grab essentials.
The water bottle pocket is deep (no bottles launching themselves onto the pavement), and there are extra stash spots for things like snacks or a small camera.
We also tested it with the included waist belt. It was a little fiddly to attach the first time, but once in place, it shifted weight off my shoulders and onto the hips, which is a lifesaver for long travel days.
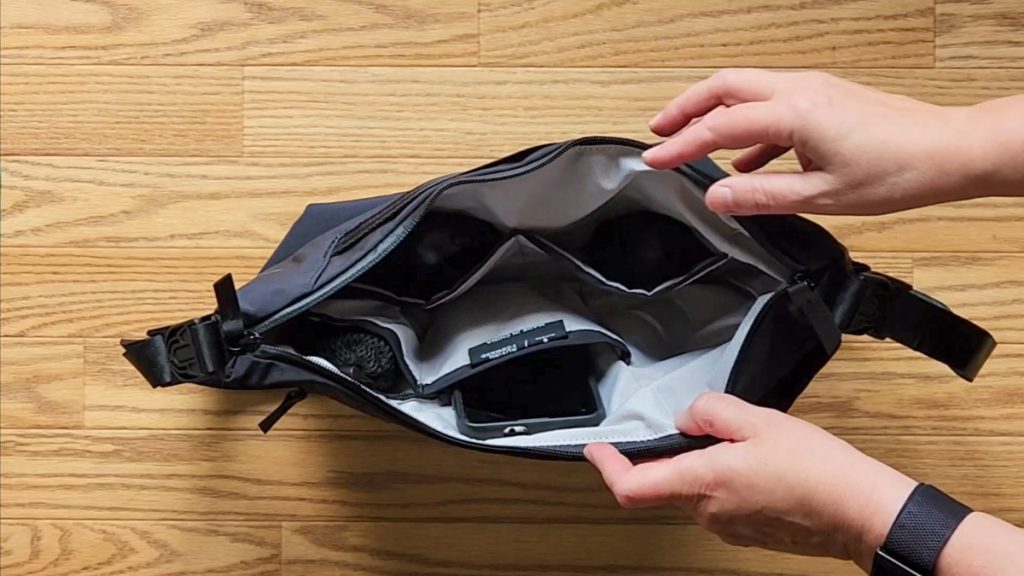
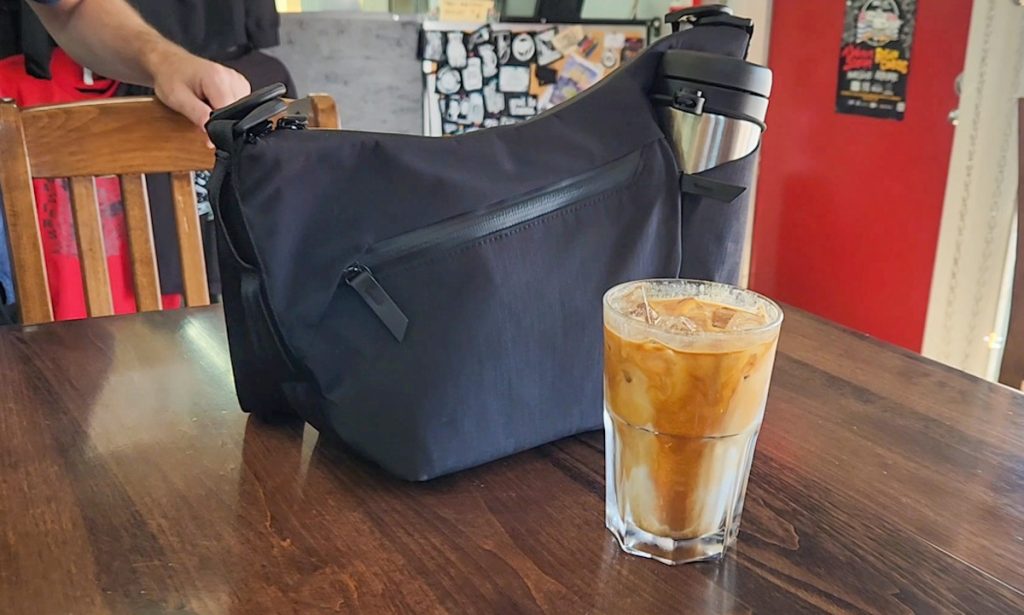
Flow Satchel – Small But Mighty
The Flow Satchel is a minimalist crossbody bag, but don’t let the size fool you. The main compartment holds a Kindle, notebook, small camera, snacks, and a water bottle without feeling crammed.
Inside, there’s a magnetic key clip. It’s one of our favorite touches. No more digging for keys at the bottom of the bag. The strap connection hardware is also well-designed: easy to clip on and off, but completely secure in use.
On the outside, a quick-access front pocket makes grabbing a transit card or lip balm effortless, and the magnetic closure is strong yet easy to open with one hand.
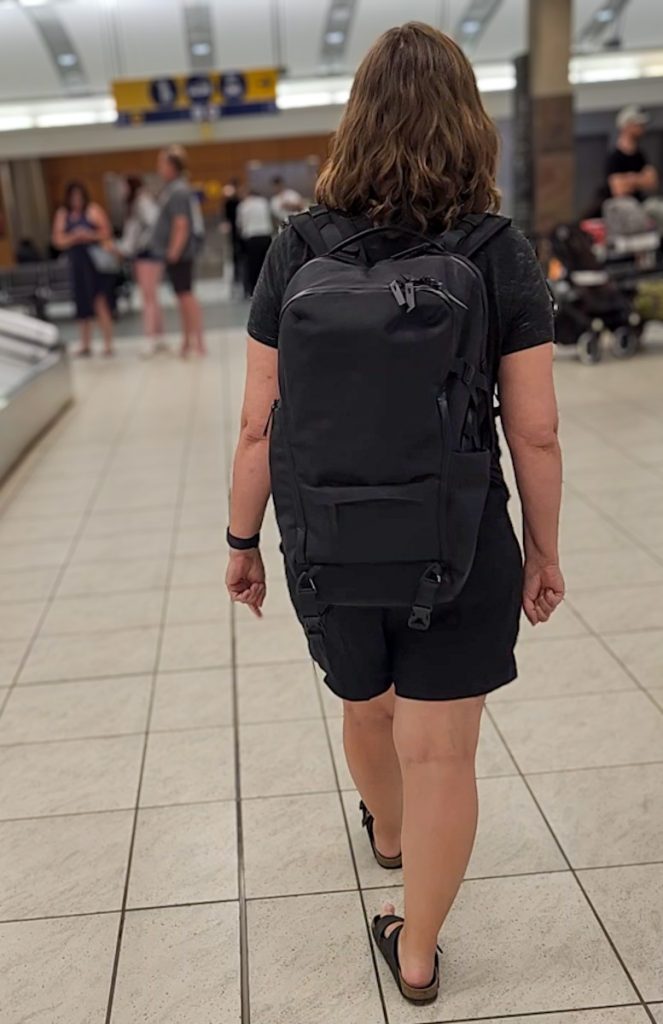
Airport, City, and Trail Testing
These bags have been everywhere with us this month:
Airport: The backpack slid easily under the seat as my personal item, and the satchel kept my passport and boarding pass close at hand.
City: From farmers markets to coffee shops, the satchel carried just enough without tempting us to overpack.
Trail: The backpack handled dusty paths and light rain without complaint, and the satchel proved comfortable even on short hikes.
Build Quality & Weather Resistance
After a month of use, both bags still look brand new. The stitching is even and tight, the zippers are smooth, and the fabric is nicely water-resistant. Light rain beads right off, and the waterproof zippers add extra peace of mind for electronics.
Pros & Cons
What We Love:
Clean, minimalist design
Durable, weather-resistant fabric
Smart storage layouts
Magnetic key clip in the satchel
Comfortable straps (and waist belt for longer carries)
What Could Be Better:
Waist belt is fiddly to attach
Not ultralight – built more for durability than shaving grams
Final Thoughts
The ALPAKA Elements Travel Backpack and Flow Satchel aren’t the cheapest bags out there, but they feel like buy-once-and-use-for-years investments. If you want gear that can move seamlessly from trail to city to airport, these are well worth a look.
Free Shipping on all ALPAKA bags with orders over $95+! Shop ALPAKA here
If you’re Bali-bound, you probably know that there’s a LOT to see and do in this province of Indonesia. Supporting much of the province’s income is its appeal to tourists as it’s an ideal spot for travelers seeking nature, culture, and adventure.
It’s difficult not to get over-excited with the natural attractions you’ll find across its map. So much so that sometimes we tend to overlook the other aspects of a trip that could lead us to making bad decisions.
This article gives you a rundown of mistakes you should avoid when traveling to Bali.
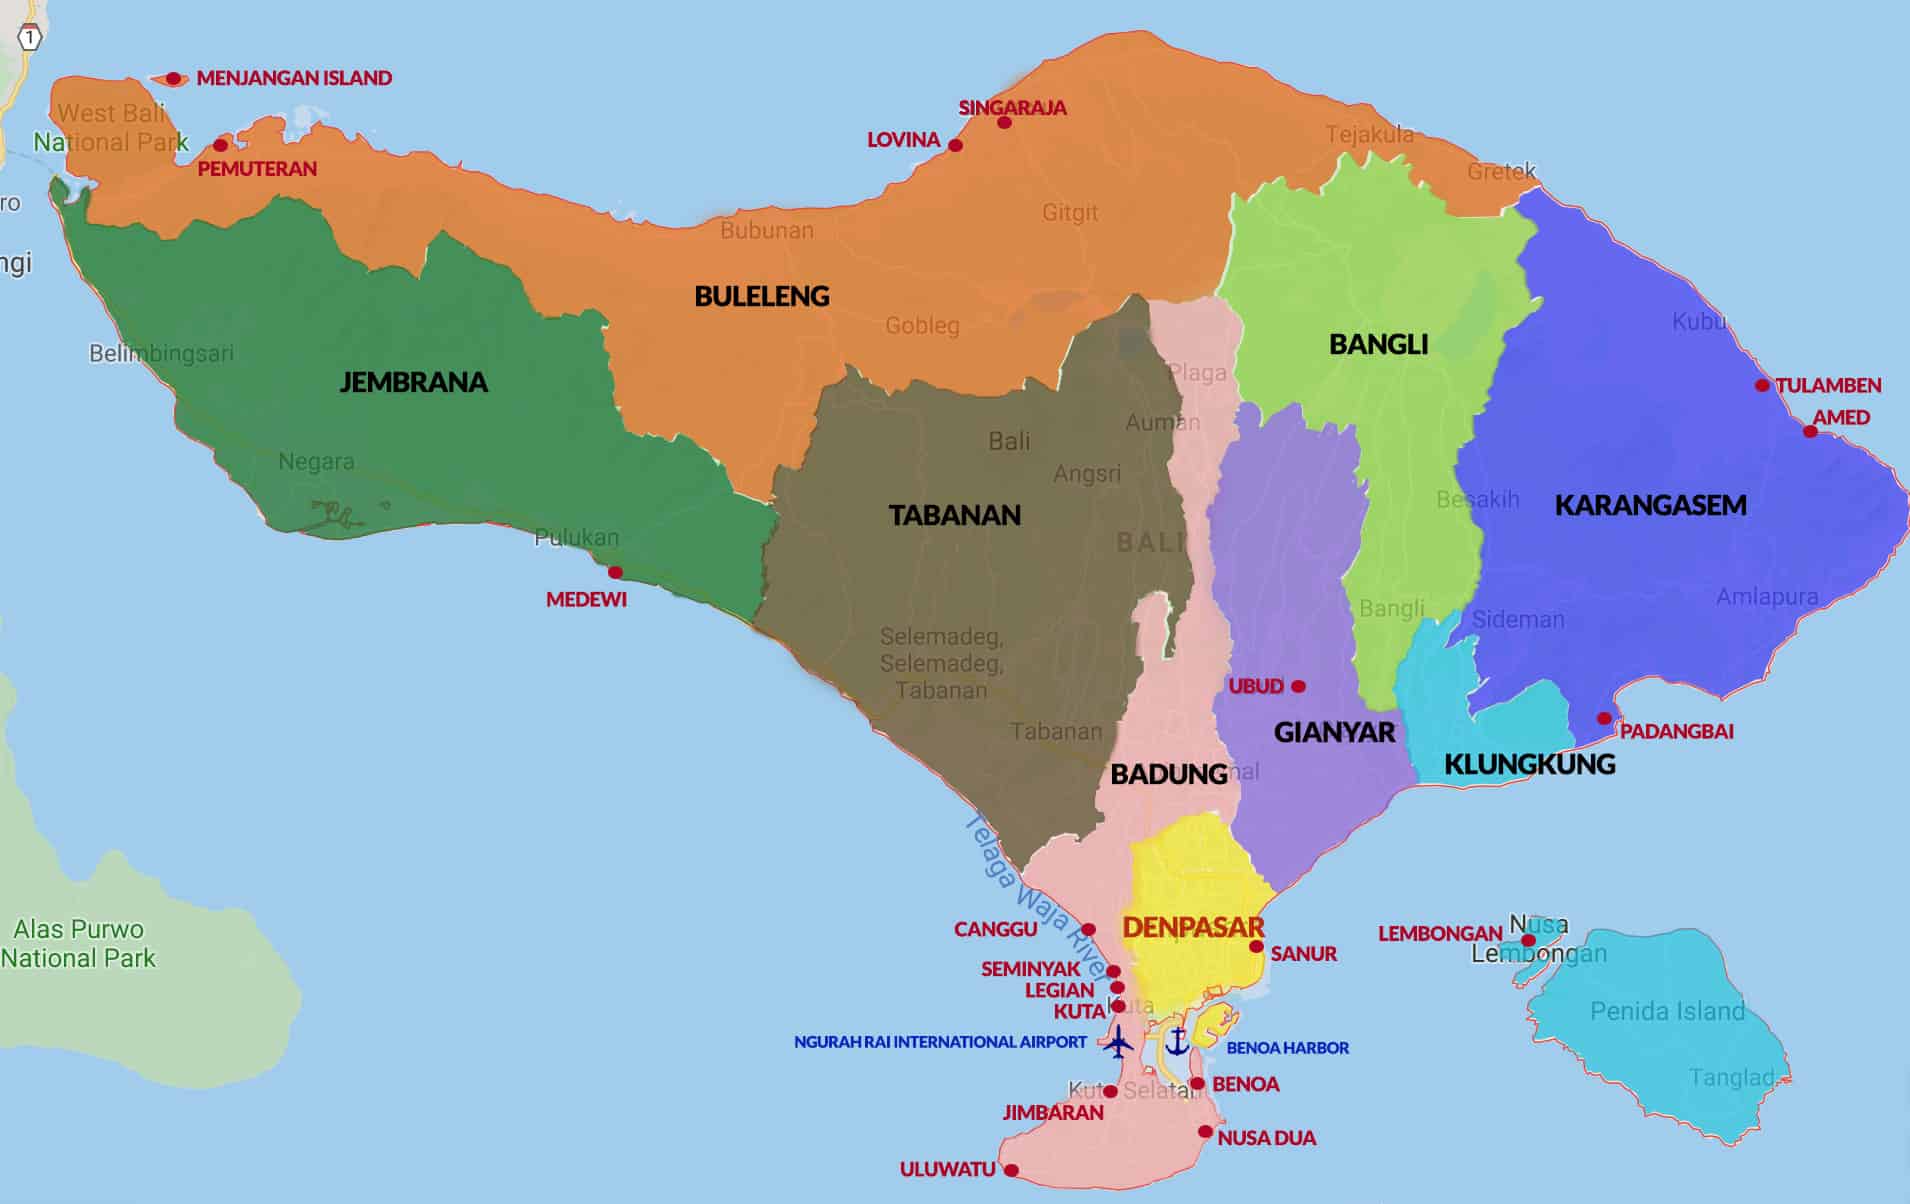
I made my first mistake even before I arrived in the island. For some reason, I assumed that Bali is just as small as Phuket or Santorini or Singapore. My friends, Bali is a hell of a lot bigger than that. It is huge! It is eight times bigger than Singapore, 10 times bigger than Phuket, 64 times bigger than Santorini, 500+ times larger than Boracay! (But it’s more comparable to the entire Cebu or Leyte Island.)
Keep that in mind when building your itinerary. Don’t schedule your activities immediately after another if they’re in different parts of the island. For example, getting from Kuta to Ubud does not take just a few minutes. It takes a couple of hours. And those faraway temples like Lempuyang or Ulun Danu, much longer. Depending on your itinerary and what you’re in Bali for to begin with, you need to pick the most ideal area to stay so you won’t waste too much time on the road. Speaking of the best area to stay…
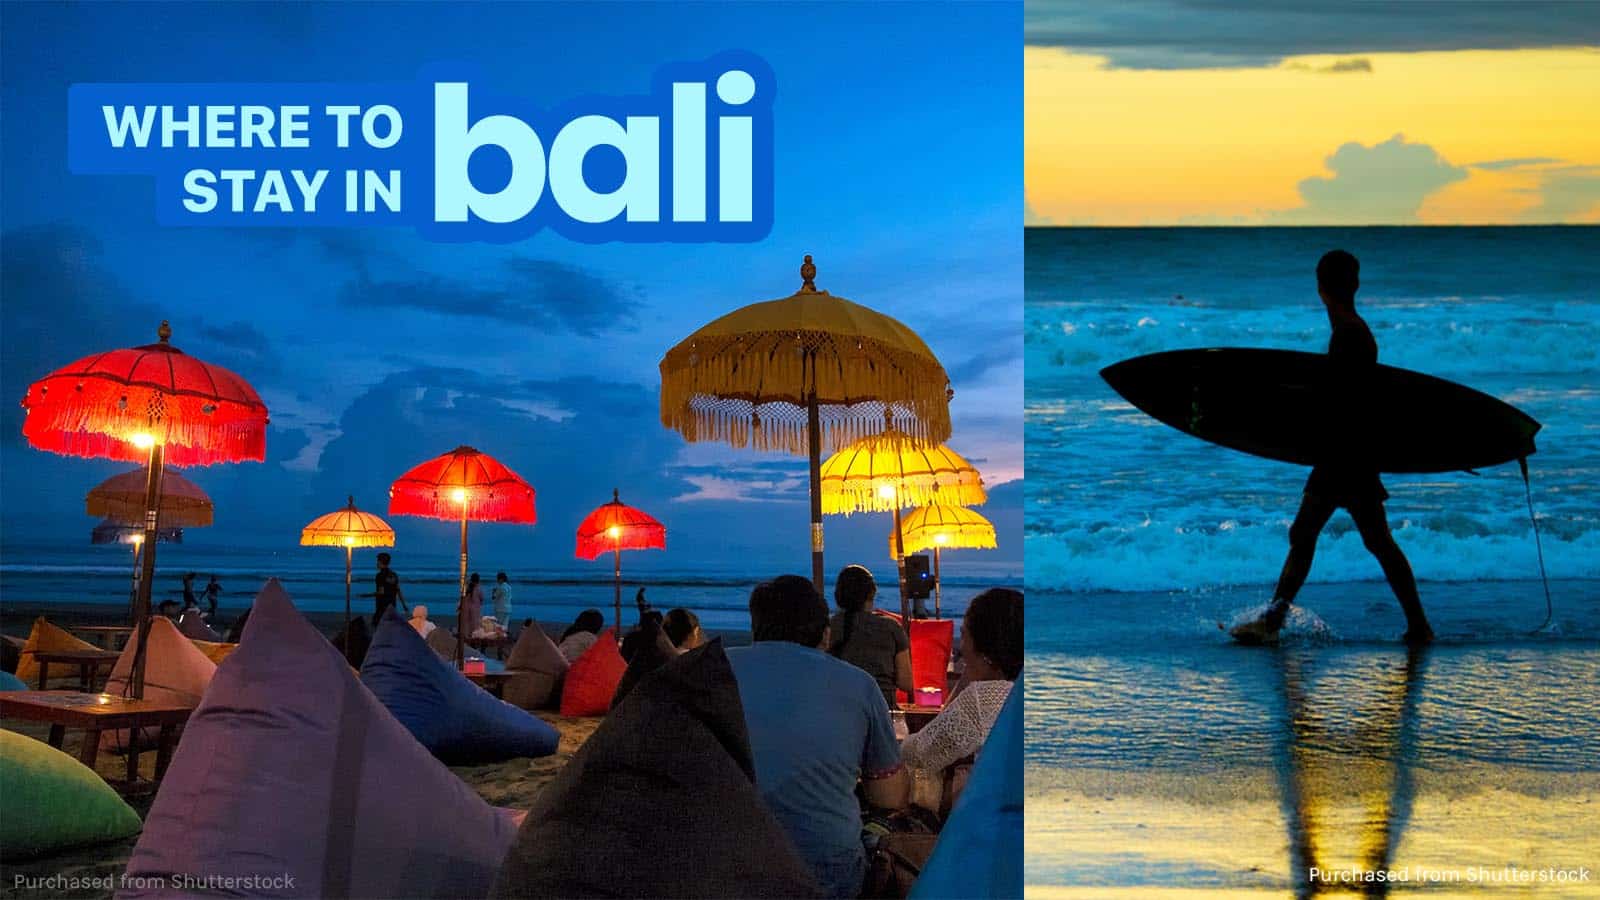
2. Don’t pick the wrong area to stay.
The Kuta-Seminyak area seems to be the busiest and the epicenter of most of the action in the island. It probably has the highest concentration of lodging and dining establishments. But is it the best area? Well, not really. The best place to stay depends on why you’re in Bali in the first place.
If you’re after a relaxing time, you’re not gonna find it in Kuta. It’s not even the most central location. That distinction belongs to Ubud, which is at the geographic center of the island. From Ubud, it’s easier to see the temples, terraces, and waterfalls of the north and the east. And while the city center gets busy too, it is still much less chaotic than Kuta and Seminyak. Many of the scenic rentals you see on Instagram are situated around Ubud. But note that there’s no beach here.
For that, maybe Uluwatu and Nusa Dua are worth considering. Most properties here are pretty upscale, but they offer a quieter, more romantic beach experience.
If you are staying in Bali long term, check out the rental properties in Canggu (Changgu). This is a favorite among digital nomads because it’s more affordable here.
If you’re a foodie, however, Denpasar seems to be a great base because you could have a great selection of not only Balinese fare, but also other Indonesian and other Southeast Asian cuisines.
Again, the best place to stay in Bali largely depends on your reason for visiting. If you decide to stay in the Kuta/Seminyak area, there’s another thing you shouldn’t underestimate: the traffic.
3. Don’t underestimate the traffic.
Bali welcomes millions and millions of visitors per year. In fact, in 2024, it has recorded almost 6.4 million foreign tourist arrivals, the highest recorded in the past decade. And a great fraction of them chose to stay in and around Kuta and Seminyak, and most of them do not use public transportation, which is not as reliable as one could hope.
Most tourists prefer a private tour by car or booking Grab or Gojek to get from one place to another. It’s no wonder traffic buildup is a constant occurrence here. So if you have a tour, a show, or a flight to catch, it’s always best to have plenty of lead time.
Traffic is not as bad in other areas, though. But I also noticed traffic jams in Ubud’s city center, too!
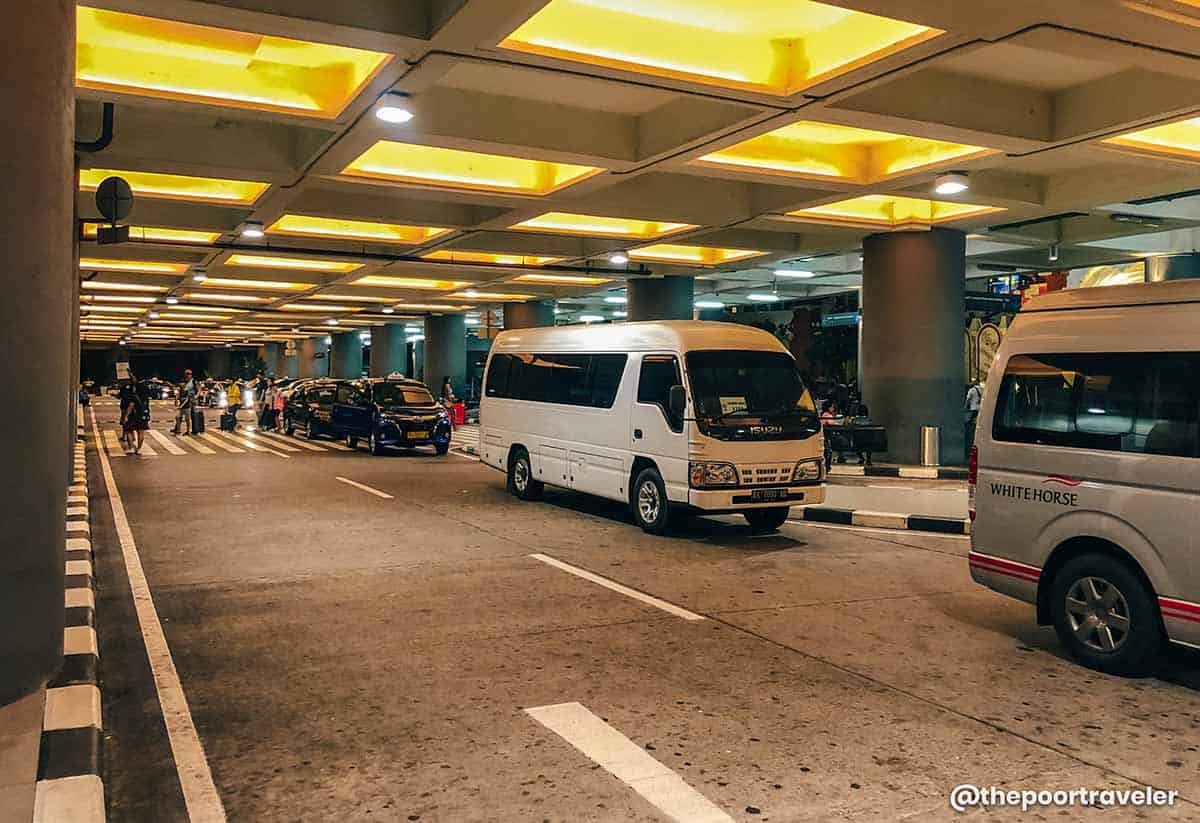
4. Don’t fall for taxi and motorbike scams.
Overpricing taxis are rampant in Bali. In fact, we have been told by the locals we met to not hail a cab, but use Grab or GoJek instead. And if we must, only ride BlueBird, the only reputable taxi company on the island. If coming from the airport, you may also pre-arrange a pickup service online.
Bali Airport Pre-arranged Transfer
If you prefer traveling by motorbike, beware of scams, too. I don’t rent motorcycles abroad so this isn’t something I’m concerned about. But I had been warned about rental shops that would charge you for pre-existing damages on the bike. Police scams are said to be prevalent too. They say that some officers would just stop motorbike drivers for whatever reason they could think of just so you could pay them to let you go.
But if you insist on renting a motorbike, make sure you have the proper driving license and always wear a helmet!
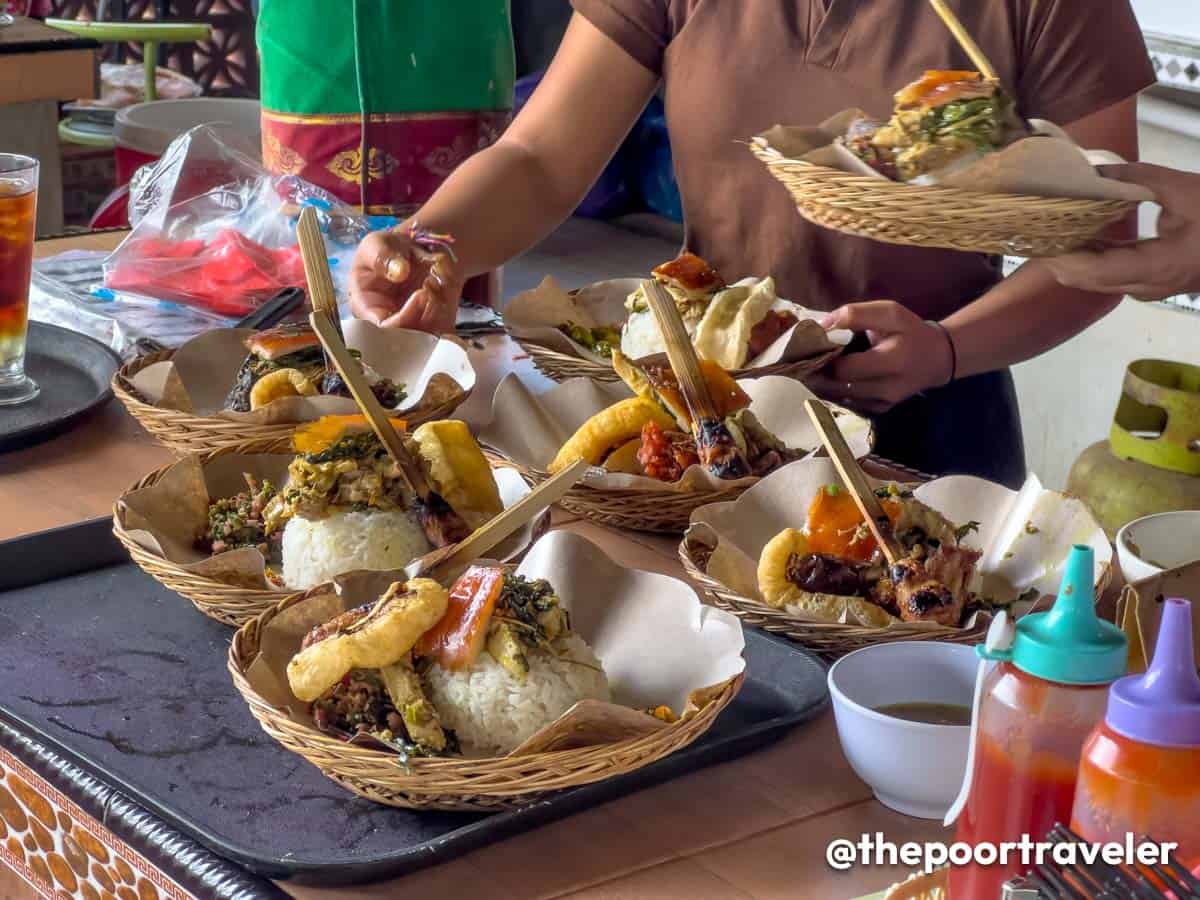
5. Don’t dismiss local cuisine.
Partly because of the many expats who call this island home, Bali has a vibrant international food scene! Before coming to Bali, my friends told me I should try a myriad of restaurants with the best burgers, or the best tacos, or even the best Greek food. Lots of fast food chains and cafes too. And that’s great and all, but don’t leave without digging into local food.
Babi guling from Babi Guling Bu Desak Pejeng
Balinese cuisine is spectacular to say the least — from the mouthwatering babi guling (spit-roasted pork, similar to lechon) to the ubiquitous sate and nasi campur to traditional cakes. The best part, they’re everywhere, too! You’ll find them at high end restaurants to humble warung (small family-run eateries). Most of them serve homey, hearty meals.
But if you want the insider scoop, best to book a guided food tour! By joining a food tour, you’ll get to know the local favorites and sample them while learning more about the Balinese food culture and other tips.
We personally booked an Authentic Food Tour from Ubud with GetYourGuide and it did not disappoint! Our guide Jon K. was polite, friendly, and knowledgeable and could communicate in English really well. He brought us to a babi guling place outside the city center and to Gianyar Night Market where he introduced to us more traditional dishes like betutu and an assortment of desserts! In between food stops, we dropped by rice terraces and Tirta Empul, one of the holiest temples in the island.
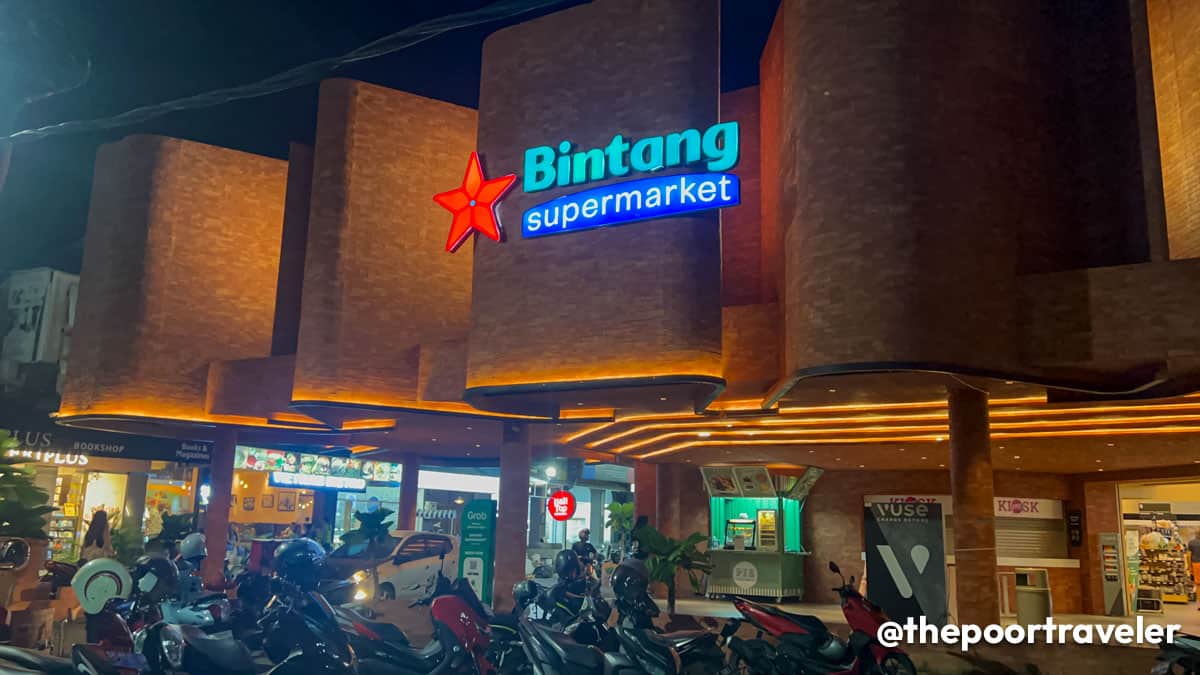
While we’re on the subject of food, I can’t stress this enough: do not drink tap water! Not even the locals do this and they highly discouraged me too. Most accommodations provide filtered water. If not, head to the grocery and buy those giant containers and just refill your reusable bottle every now and then.
Just one of the supermarkets in Indonesia where you can buy potable water
Why? Because tap water in Bali is gonna whoop your insides like it did mine. I never really believed in the term “Bali belly” until it was happening to me. I spent an entire night in the toilet, without coming out, because every 15 minutes something inside me was starting a revolution. So no, don’t drink tap water.
And don’t forget to bring anti-diarrhea meds!
7. Don’t trust street ATMs easily.
And by street ATMs, I mean those cash machines that you see in the streets, out in the open and can easily be tampered with. If you need to withdraw from an ATM, choose a machine that is inside a bank or other guarded or enclosed establishments like malls. But the bank is your best bet, and you’ll find a lot of various reputable banks throughout the island.
If you must withdraw from one on the street ATMs, always double check for signs of tampering. When in doubt, don’t do it and just find another way to pay or get cash. Speaking of cash…
8. Don’t overpay by mistake.
In Bali, the official currency is the Indonesian rupiah. And 100 USD is roughly 1.6 million rupiah. (And 100 pesos is roughly 28,000 rupiah.) The highest denomination is 100,000 rupiah. Yes, that’s 1 followed by five zeroes.
Banknotes of the Indonesian rupiah
For those who are familiar with the currency, the notes can be easily differentiated by the size and the color. 100,000 is big and red; 50,000 is blue; 20,000 is green, and so on. But for us who aren’t used to seeing that many zeroes, it can be a bit confusing especially because these zeroes don’t have a thousands separator. No period, no comma, no space. So it’s easy to think that 10,000 is 100,000. It was so easy to make that mistake. And just like any other destination, you may run into someone who is willing to take advantage when the opportunity presents itself.
It was already my fourth day when I finally got the hang of it. But maybe I’m just slow in general. LOL.
But thankfully, I never really had to pay cash that much. Most of my tours had been pre-booked, and I usually paid by card when available. Fortunately, the supermarket in front of our hotel accepted credit cards.
9. Don’t hold your phone up in the streets.
Bali is generally safe and has a relatively low crime rate, considering how busy and touristy it is. But like many other tourist hotspots, petty crimes do exist in Bali especially within developed areas like Kuta.
Don’t hold your phone, purse, or wallet out in the open when walking or standing by the road because someone on a motorbike might just snatch it away. Keep it away from other people’s reach. And don’t leave them unattended on the beach or use them to reserve a table at a food court. This is not Japan, Dubai, or Singapore.
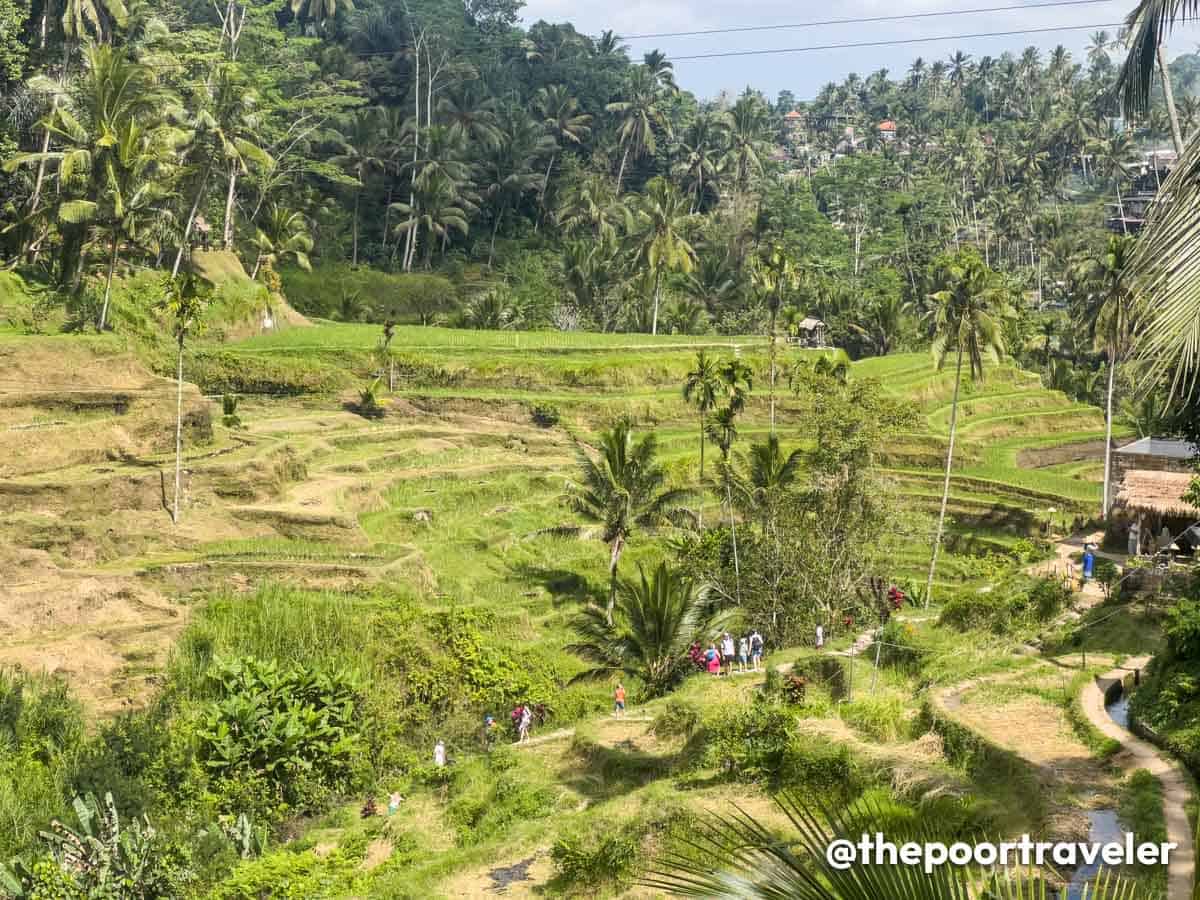
10. Don’t get trapped in similar attractions.
Before you book multiple day tours, check the itinerary first. Most tours in Bali have similar attractions. There’s often a stop at Tegallalang Rice Terraces, a coffee farm where you could taste a variety of coffee and tea flavors, and Instagrammable sites with giant swing and the like. And to be honest, if you’ve experienced one of each kind, you’ve experienced them all.
Tegallalang Rice Terraces
So if you’re booking more than one private tour, ask your contact or guide if you could replace some of these spots to avoid a repetitive journey and you could experience more of Bali. We’ve done it before and every guide obliged because it’s not difficult to find another point of interest along the route.
11. Don’t expect too much from Bali’s beaches.
When we think of Bali, images of its beaches instantly come to mind. Growing up, I thought of Bali as a beach paradise. But when I was there, I realized that Bali’s biggest assets are not its sandy shores, but its well-preserved culture and inland natural attractions. I was much more awed by its temples and waterfalls and cuisine than by its beaches.
The beaches here are not bad. Not at all. But just to manage your expectations, if you’ve been to other beaches in Indonesia (or Thailand or the Philippines for that matter) and you’re expecting Bali to give you the same sparkling beachscape, then you’ll be underwhelmed. That’s not to say that you shouldn’t come to Bali because you definitely should, you must! But there’s so much more to Bali than its shores.
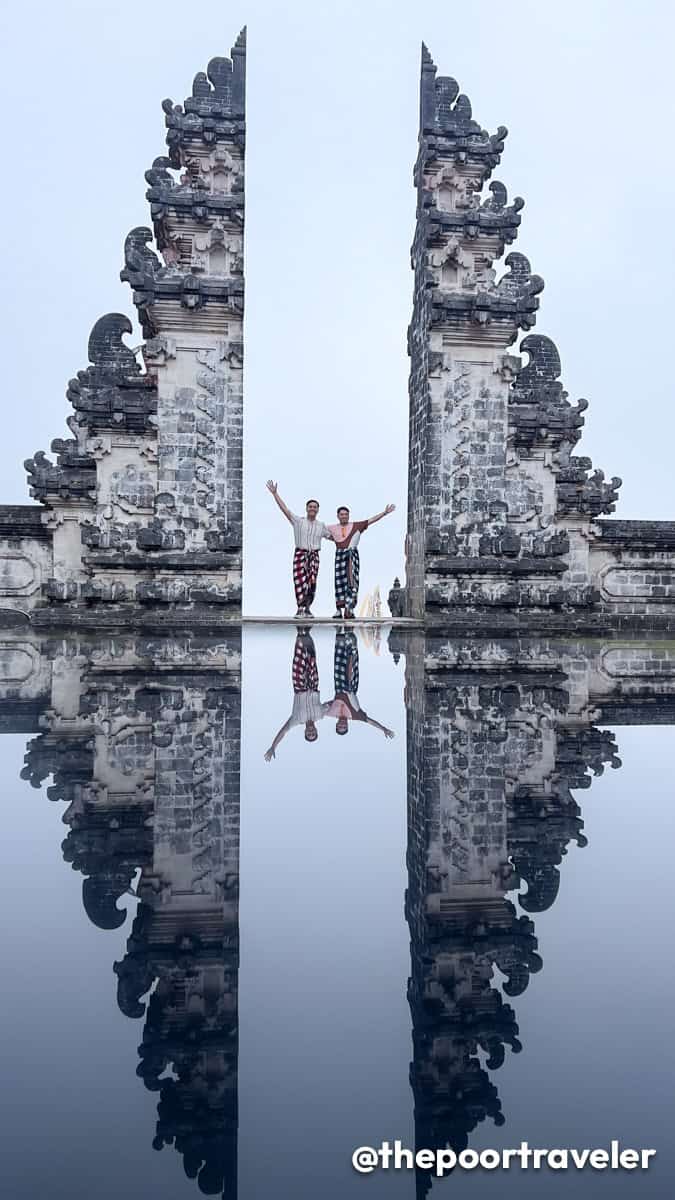
12. Don’t disregard the queuing times at Instagram spots.
Of all the destinations I had set foot in, Bali is perhaps the most Instagram or IG-worthy. It’s just bursting with pciture-worthy spots, both natural and man-made.
Vins and I at the Gate of Heaven at Lempuyang Temple in East Bali
By now, you probably know about the Gate of Heaven at Lempuyang Temple. And you might already be aware that the reflection created is a mirror trick and that there is no body of water on site. But that’s not the only thing you should be aware of. You see, it’s so popular that the line for this photo can get crazy long. We’re talking about up to three hours of waiting time for just a minute of photo session.
On our last trip, we arrived in the afternoon — just in time for the sunset — and we waited two and a half hours! They say that to avoid waiting times, go in the early morning. My teammate Pycan did just that, in time for sunrise. They were second in line.
But even if your timing is right, don’t expect everything to be picture perfect. Most photos you see were either taken under the best conditions or enhanced digitally. Often, the skies don’t cooperate. It’s more likely that you’ll get a plain white backdrop because the mountain is hiding behind the clouds or fog.
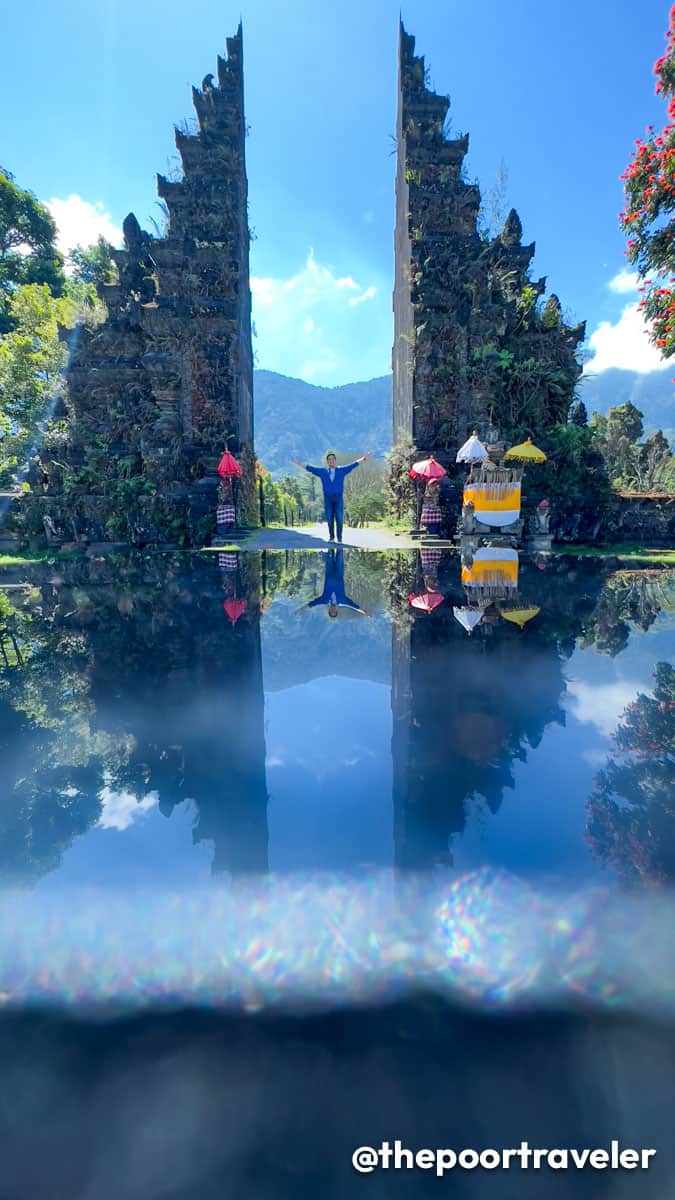
Posing at the Handara Gate in North Bali
A look-alike can be found in the north — the Handara Gate. This also has the same effect. It’s not as popular as the Gate of Heaven, but you could still end up waiting 40 minutes to an hour for your turn.
Personally, I don’t mind the waiting times because I know how to keep myself busy. I usually spend the time chatting with our guide and other locals. But if you’re not really into IG-worthy spots and you want to maximize your stay, you might just be wasting a lot of time queuing. There are other picturesque but less crowded attractions elsewhere in the island. But if you really want those shots you see on the internet, go ahead. You’re already in Bali, might as well experience the full package, queues and all.
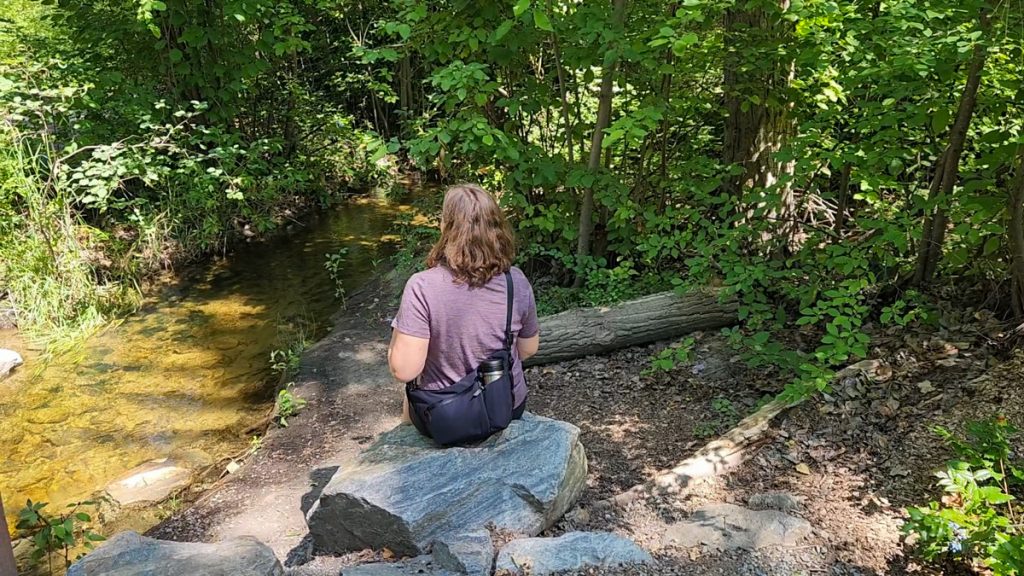
13. Don’t forget to bring mosquito repellent.
Mosquitos are common in Bali, so it’s best to be prepared. We didn’t think of it until we checked in to our hotel, which provided a mosquito repellent spray, free to use. And we realized some places and some months are more prone than others. But to be on the safe side, just bring one with you when touring.
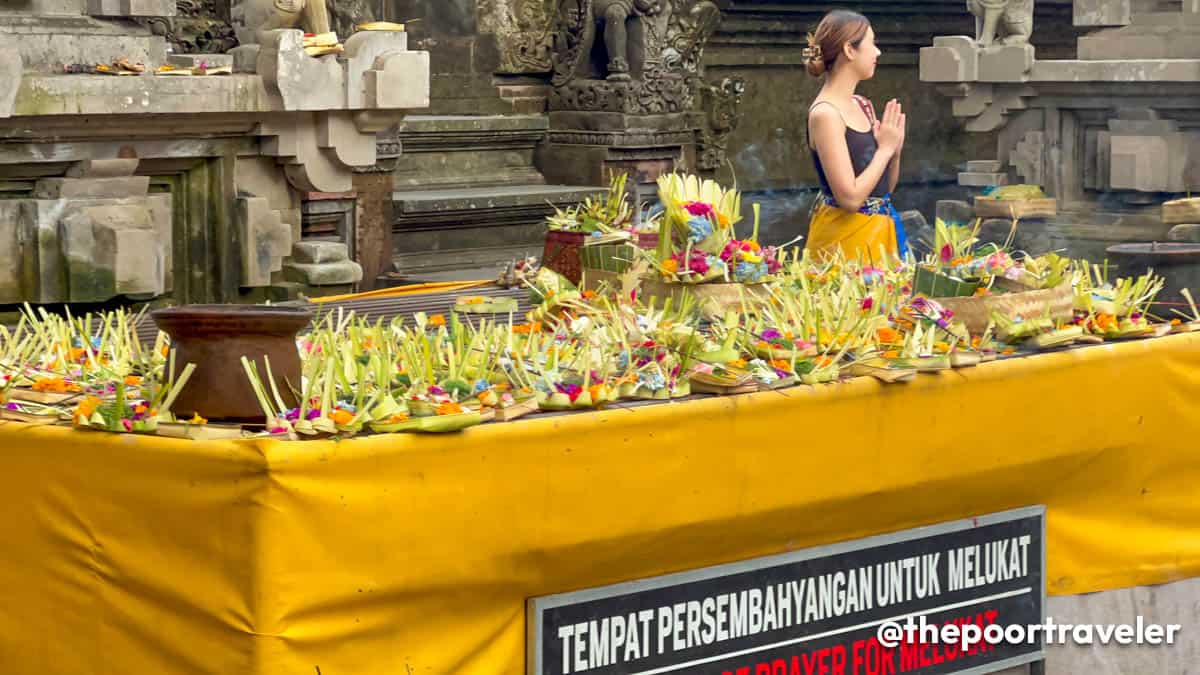
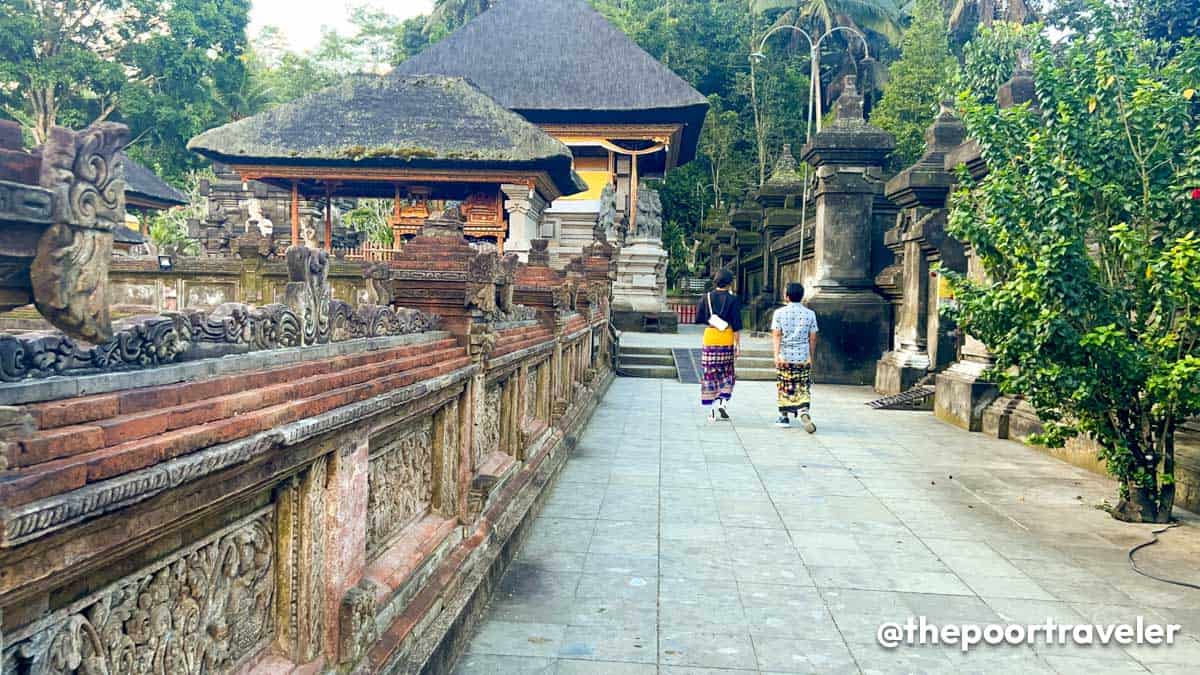
14. Don’t disrespect the local culture.
If you are into temple-hopping, know that you must dress modestly within the vicinity. Some temples provide sarongs that you may borrow, but to be safe, just wear something that covers your shoulders, upper arms, and legs. This applies to men and women. If you’re bleeding — say, you have an open wound or, for women, if currently menstruating, you should not enter the temples.
Visitors, regardless of gender, are urged to dress modestly within temples.
Even when there’s a lot of tourism activity in the island, Bali remains religious, conservative, and traditional. It’ll become apparent to you on your first day, just by taking a short walk.
In front of the houses and on the sidewalk, you’ll see small palm trays with flowers and food. These are canang sari (chanang sari), which are daily offerings to the Supreme God of Indonesian Hinduism (Sang Hyang Widhi Wasa) as a symbol of gratitude. So, watch your step and make sure you don’t walk on them.
Canang sari, which are daily offerings to Sang Hyang Widhi Wasa
Also, when handing out something to a local, always use your right hand. Your left hand is considered dirty and is for toilet duties. And never touch anyone’s head, which is considered a sacred part of the body.
15. Don’t do illegal drugs.
I know it sounds obvious, but it is very important that you know this.
First of all, don’t do drugs anywhere you travel to, but especially here in Bali because Indonesia has some of the strictest laws when it comes to drugs.
Possession is punishable by imprisonment for 4 to 12 years or, if the amount is big enough, you can be imprisoned for life, plus fines of up to 8 billion rupiah. For trafficking, the death penalty may be imposed.
That’s not the kind of adventure you want to experience abroad.
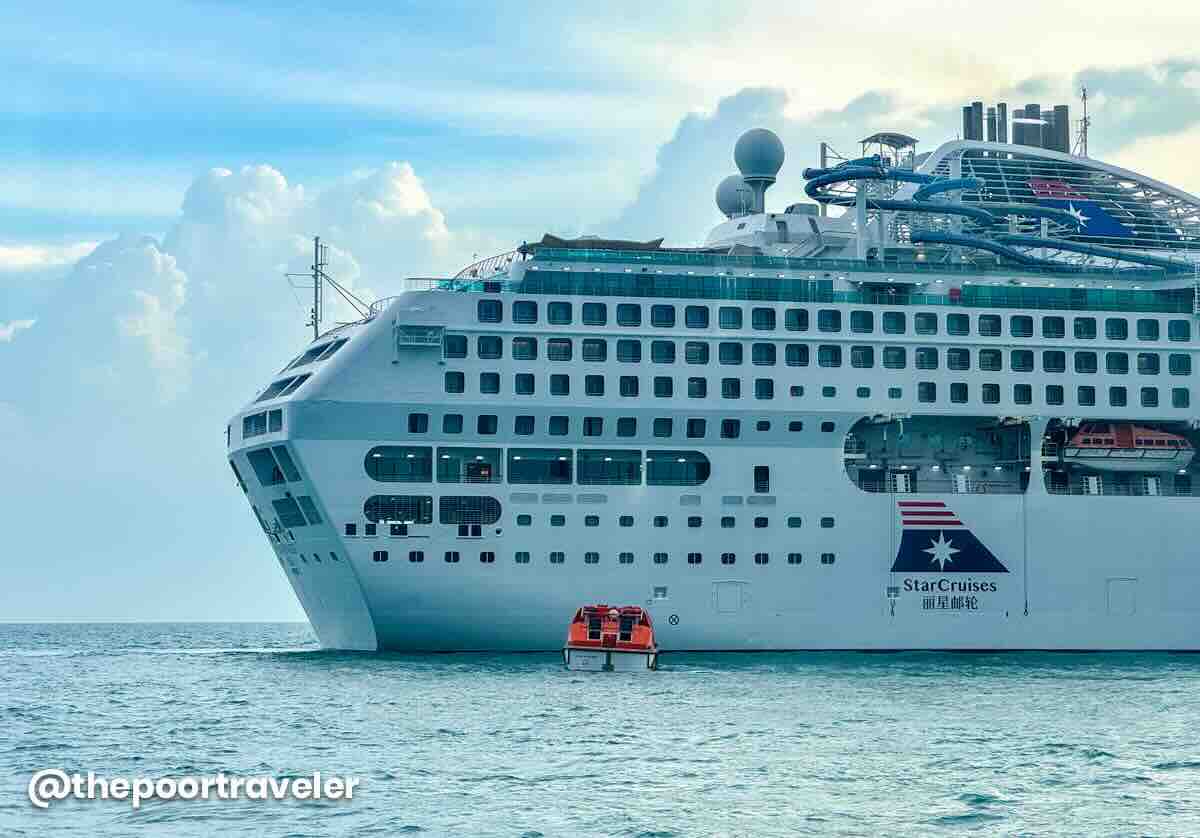
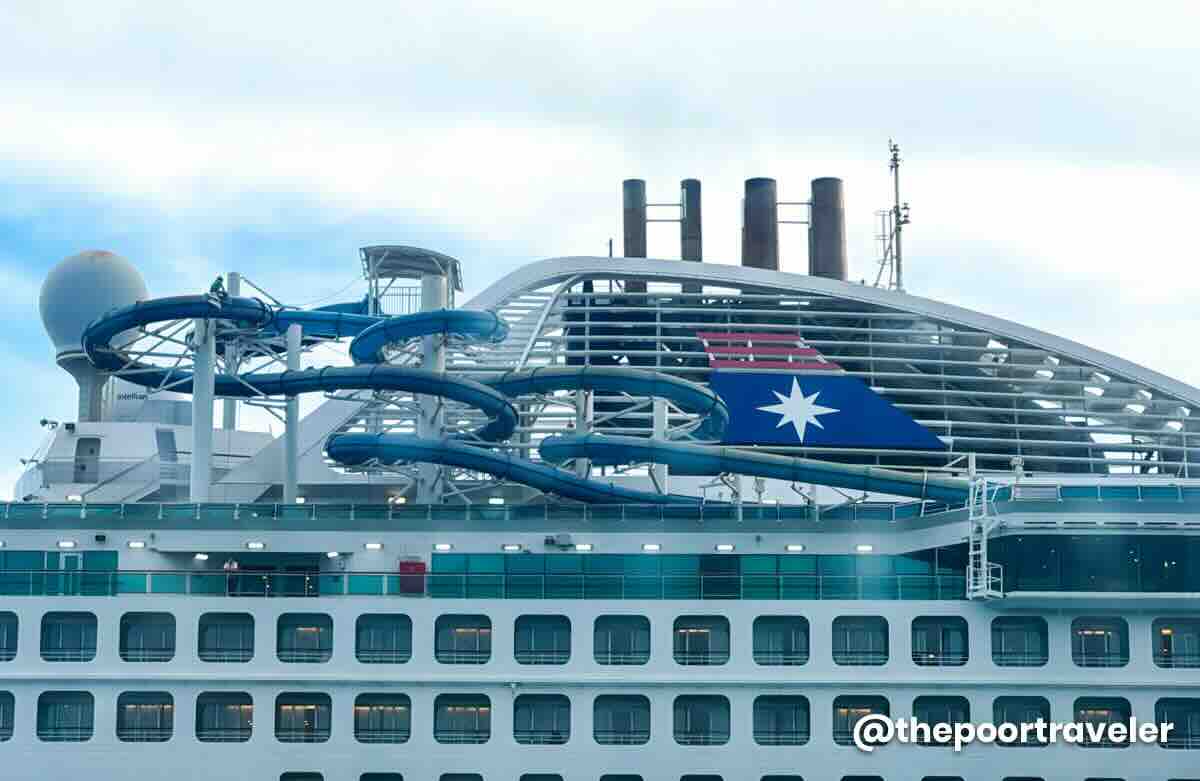
StarCruises continues to provide affordable and accessible cruise experience as its newly revamped legacy vessel, Star Voyager, calls Hong Kong its new homeport!
From June 27 to November 2025, Star Voyager is cruising from Hong Kong to some of Asia’s top destinations, including Taiwan, Japan, China, Vietnam, and the Philippines! It’s the perfect way to visit multiple countries in one trip, minus the usual travel stress. Here’s another plus point: if you’re holding a passport that normally needs a visa for Japan or China, you might be able to skip that requirement when you cruise with them.
Whether you’re a first-time cruiser or just itching for a new kind of getaway, this is your chance to have a hassle-free journey across Asia, with everything you need already on board! Keep reading to learn more about the ship, discover the perks, and get tips on how to make the most of your cruise experience.
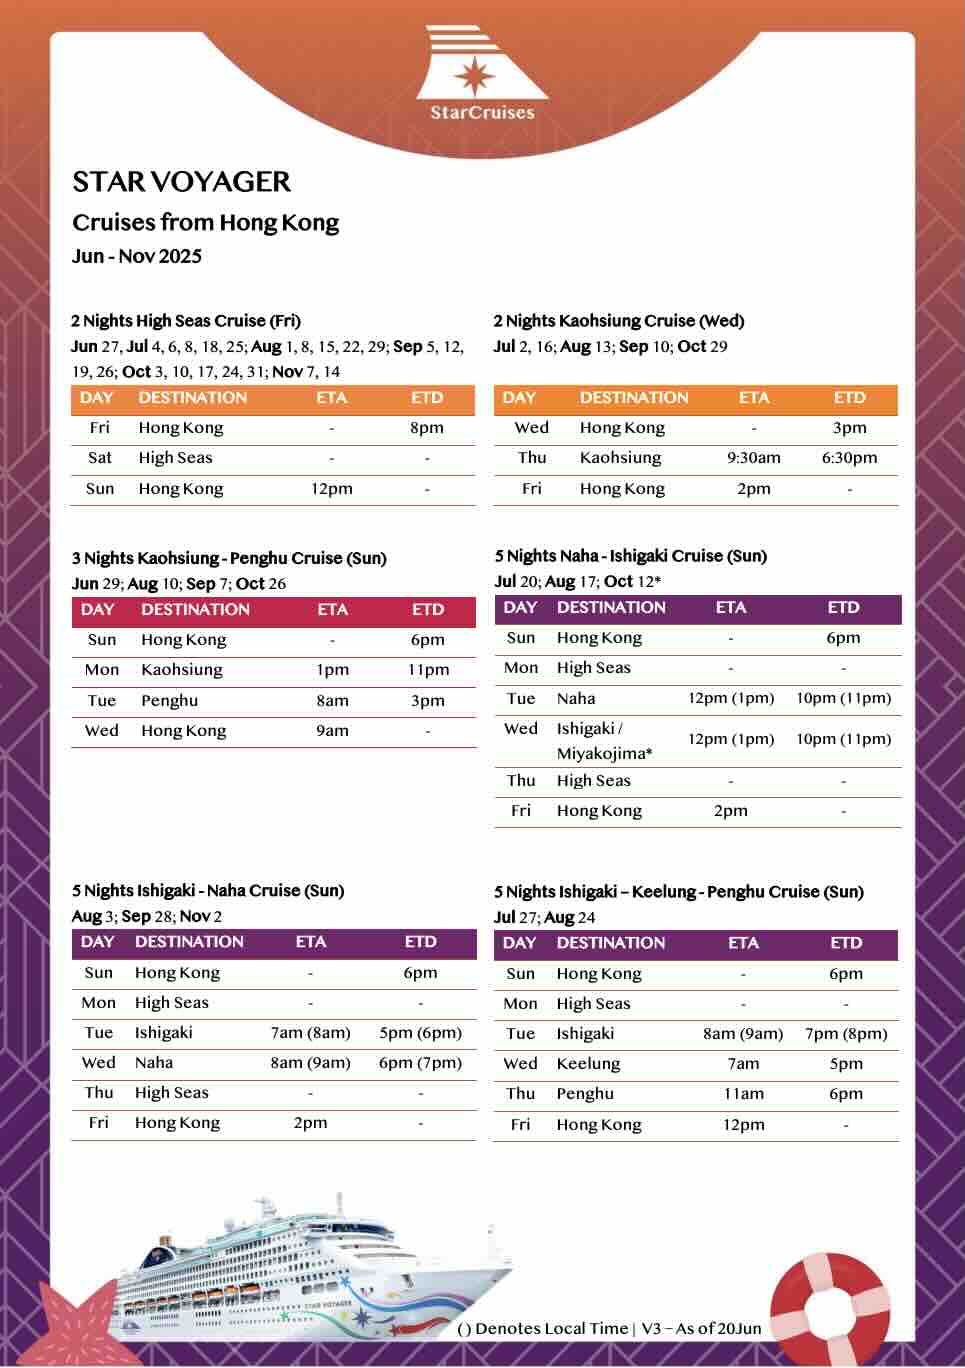
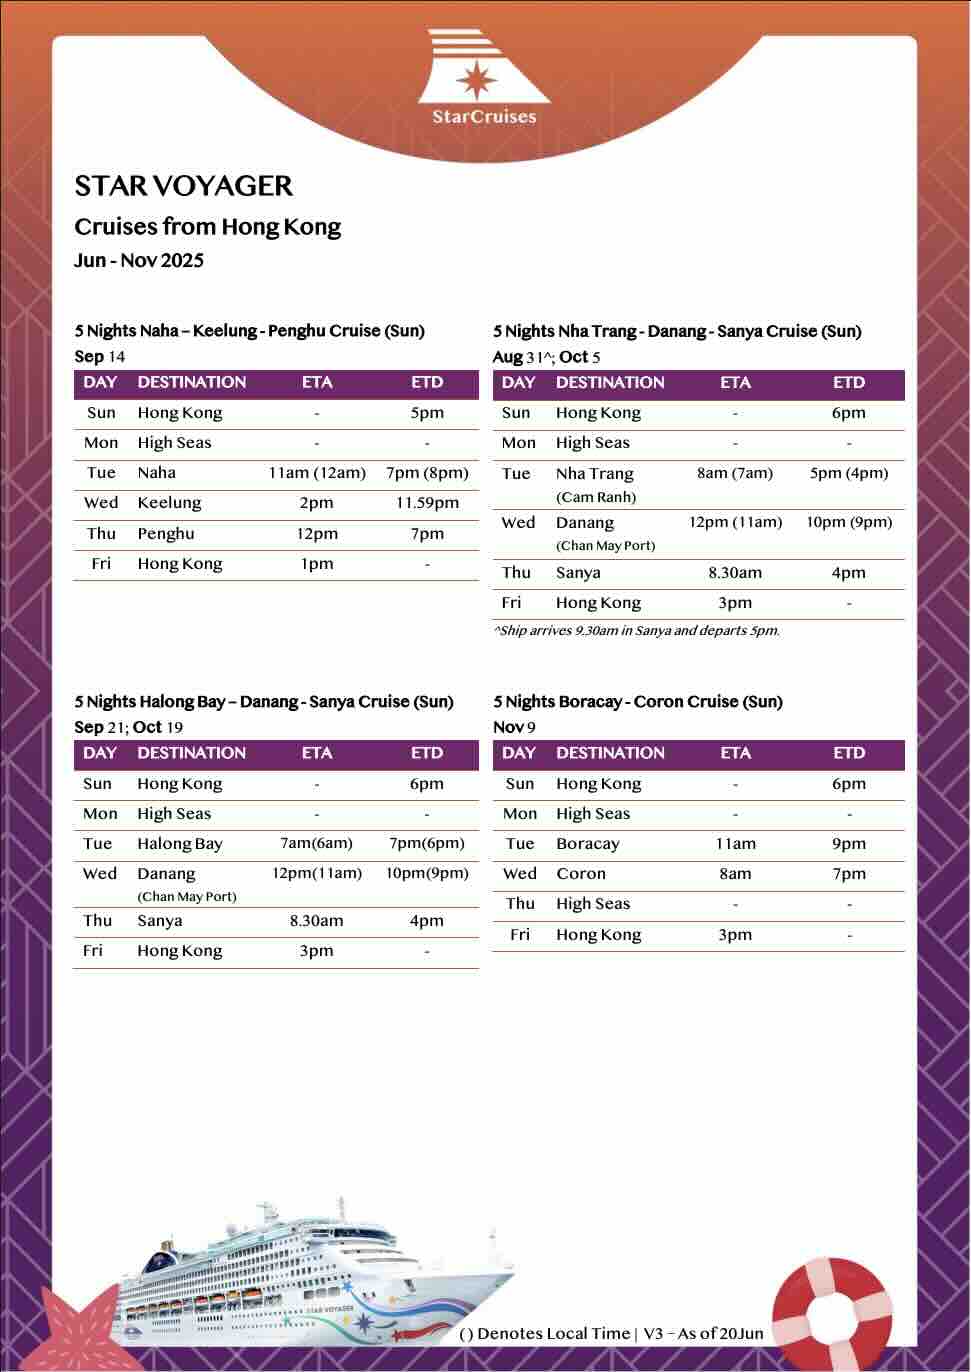
Below are the itineraries for sailings departing from Hong Kong from June 27, 2025 to November 2025. For the updated timetable, visit the official website.
It all comes down to your budget and what kind of cruise experience you’re after. Whether you are cruising on a budget or going all out for luxury, Star Voyager has a room to match your preference.
Different Types of Accommodations
There are four main types of staterooms with different sizes and features.
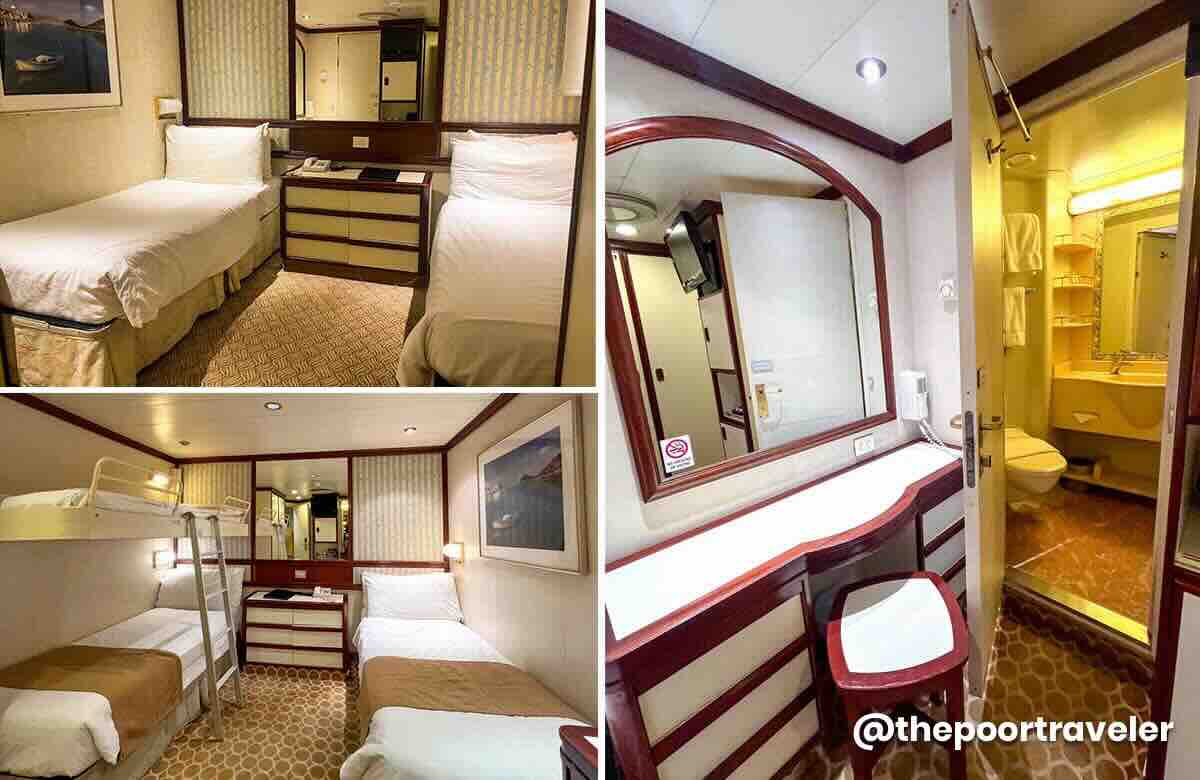
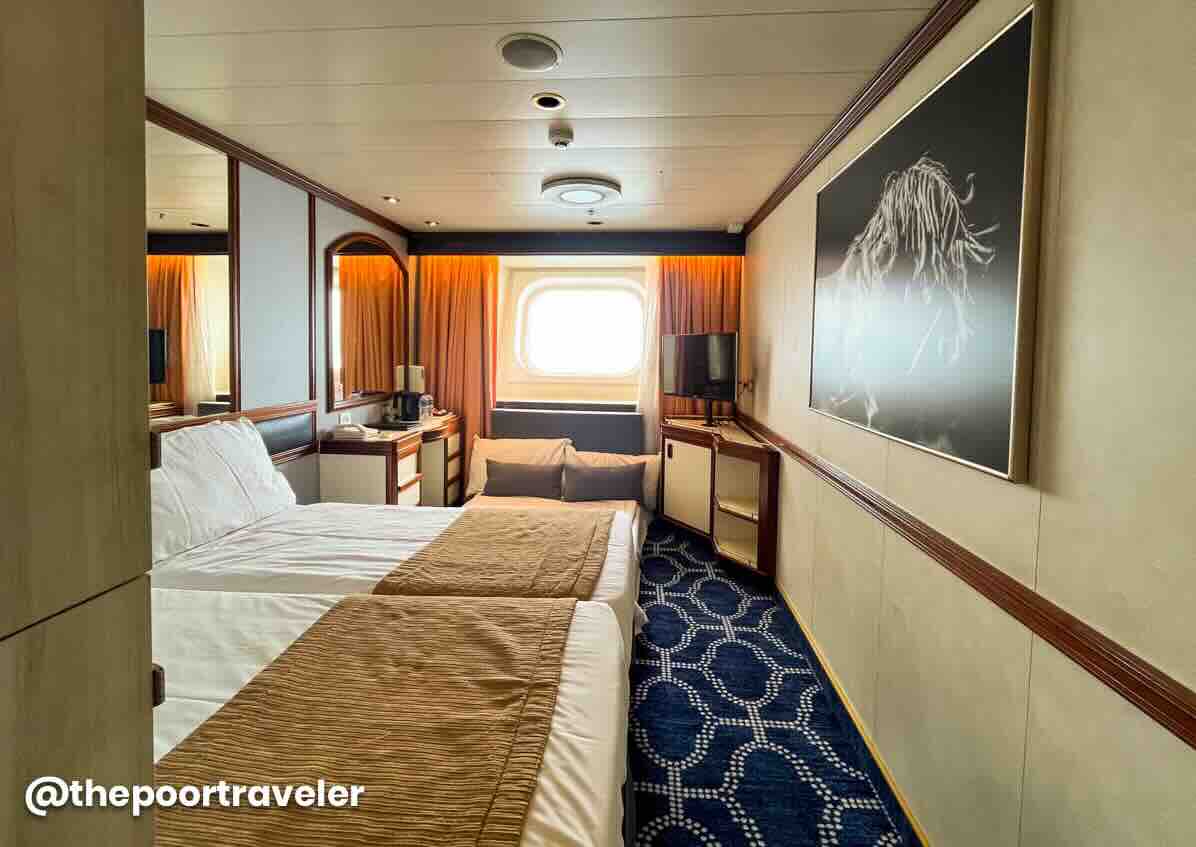
Interior Stateroom
If you plan to spend most of your time exploring the ship and want the most practical option, go for the Interior Stateroom. It’s simple, economical, and gives you all the essentials without breaking the bank. This is the most budget-friendly option. It’s cozy, compact, and windowless.
Maximum Capacity: 2-4 pax
Interior Room with Twin Beds (Top Left) and Interior Room with Bunk Bed (Bottom Left)
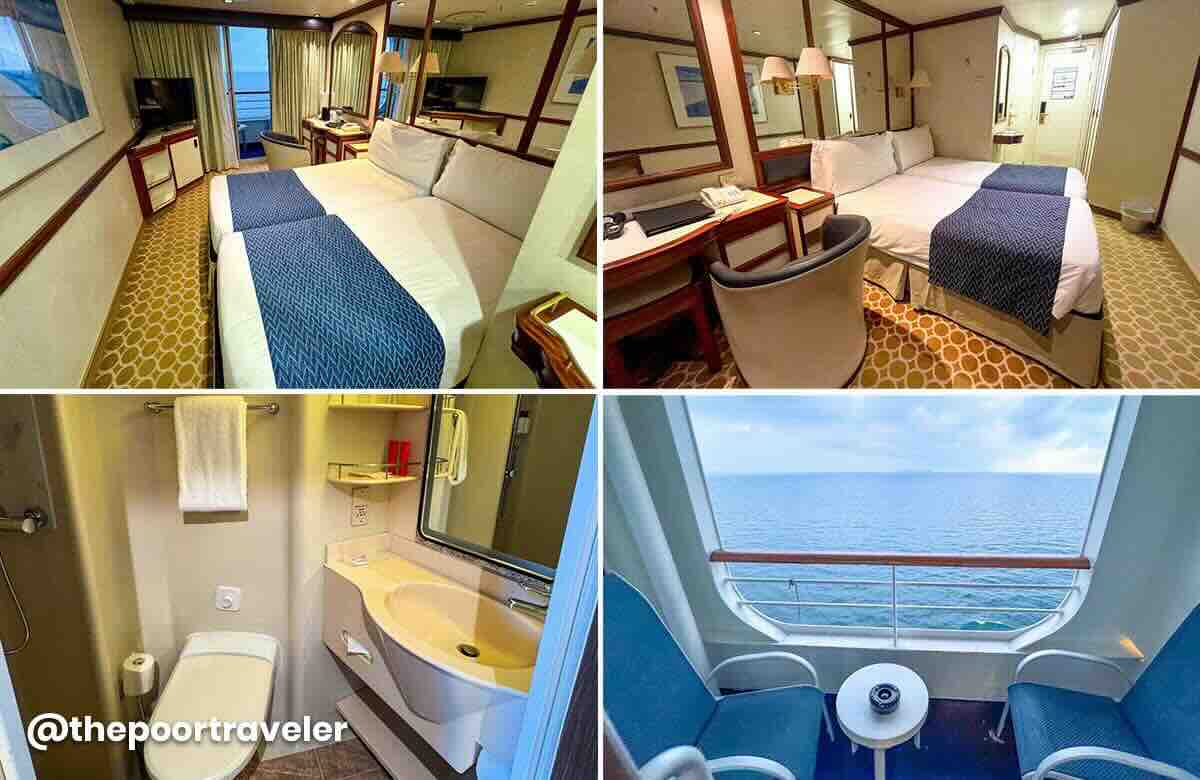
Balcony/Balcony Deluxe Stateroom
If you’re looking for a bit more comfort and value, the Balcony Stateroom strikes a great balance. You’ll enjoy a spacious cabin and your own private balcony. This also comes with two lounge chairs and a small table.
Maximum Capacity: Balcony Deluxe, 2-3 pax; Balcony, 2-4 pax
Oceanview Stateroom
The Oceanview Stateroom is ideal if you’re after a sea view but don’t necessarily need a balcony. It’s a nice middle ground between price and experience. This room has no balcony, but you’ll get a window with a view.
Maximum Capacity: 2-4 pax
The Palace Suites
Thinking of treating yourself? The Palace is an all-suite section, offering upscale rooms with upgraded perks and services.
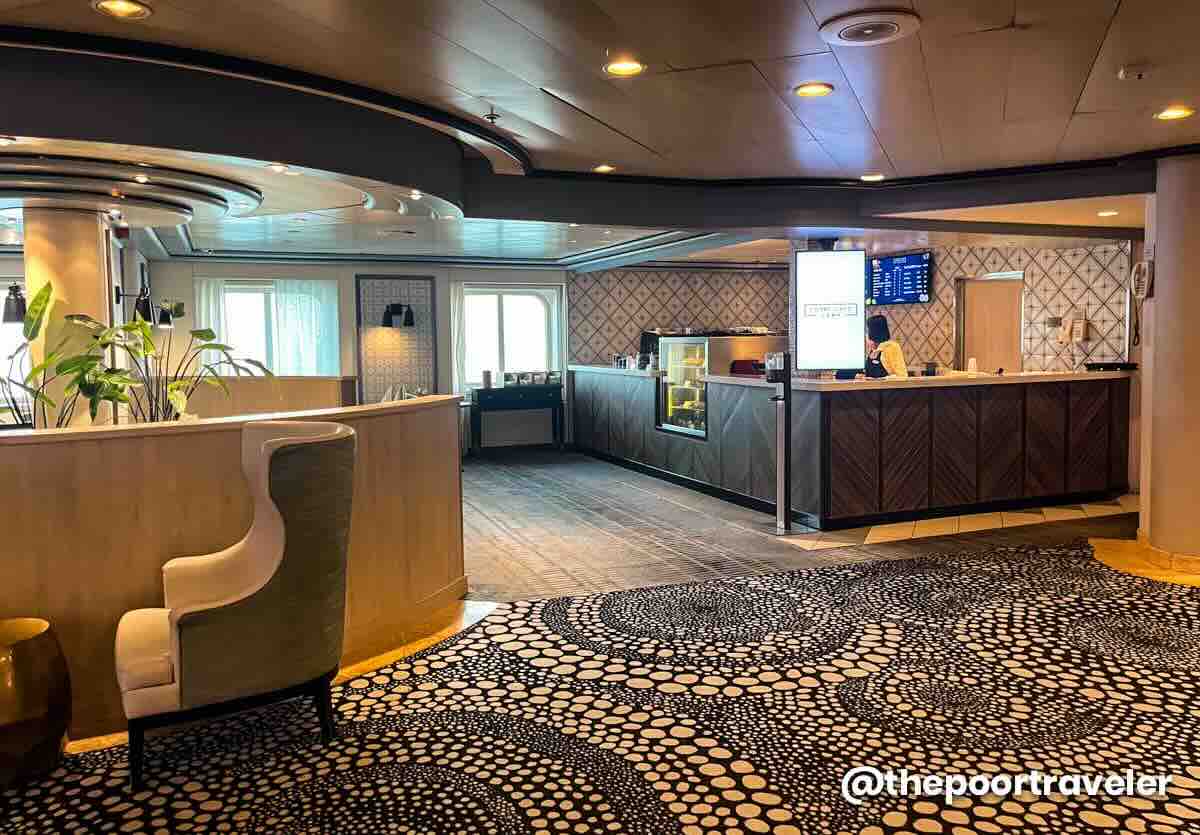
Guests staying in The Palace suites enjoy exclusive access to The Palace Restaurant, curated menus at designated specialty dining restaurants, and priority services throughout the ship. Take a peek inside one of Star Voyager’s The Palace suites here:
All cabins, no matter what type, are provided with these essentials: toiletries, towels, a hairdryer, a mini fridge, an in-room safe, a water kettle, complimentary bottled water, and packets of tea, coffee, and sugar.
If you are staying in The Palace, expect extra comforts, upgraded amenities, and added touches of luxury.
Daily housekeeping is available across all room types.
What to prepare before the cruise?
For a smooth embarkation process, these are the things you need to prepare prior to your cruise.
Online Check-in
Once you receive your ‘Booking Reservation’, don’t forget to go to the web check-in page to complete the mandatory online check-in. You’ll also find the link conveniently included in your ‘Cruise Ticket’. Just a heads-up: online check-in closes 48 hours before your cruise departs. If you failed to do this, you can still check in manually at the terminal on the day of sailing.
Travel Documents
Here are the documents you need to secure:
Valid Passport. This must be valid for at least six (6) months.
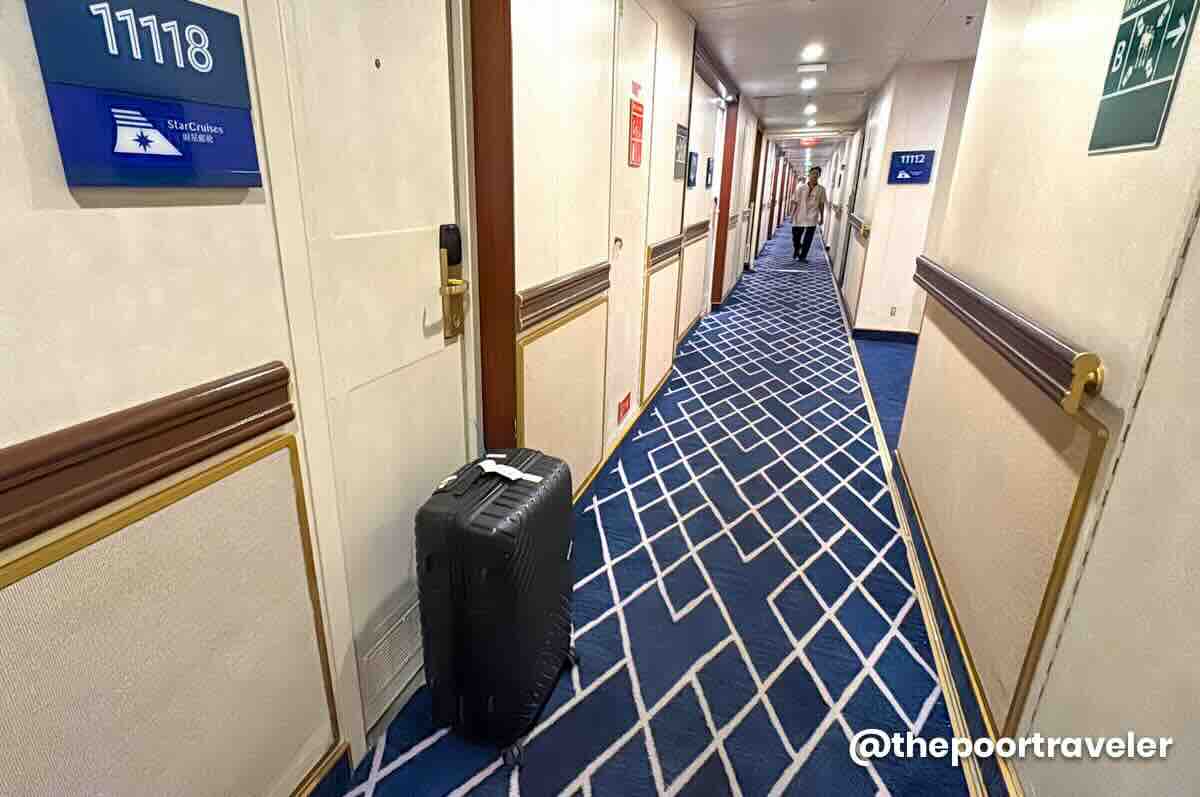
Photocopy of your passport’s bio page. This will be your copy. Upon boarding, a staff member will collect your passport and secure them throughout the duration of the cruise. Don’t worry — it will be returned a day before disembarkation.
Cruise ticket (printed or digital copy). You’ll have to show this when dropping off your luggage and checking in at the cruise terminal.
Visa (if applicable). Philippine passport holders don’t need a visa since the home port is Hong Kong. If your chosen itinerary includes stops in Japan or China destinations, you still won’t need to secure a visa, BUT a tourist arrival fee applies to those joining a shore excursion.
Onboard Currency and Time
Currency. Since Star Voyager sails out of Hong Kong, all onboard transactions are in Hong Kong Dollars (HKD). Credit cards are widely accepted for hassle-free purchases, but it’s still a good idea to bring cash just in case.
Time. The ship follows Hong Kong time, which is the same as the time in the Philippines, Taiwan, and China. However, note that Vietnam is an hour behind, while Japan is an hour ahead. We know it’s a bit tricky. Here’s our suggestion: turn off the ‘Set Automatically’ option on your devices and manually set it to Hong Kong time.
Pack Your Luggage
Clothes & Outfits. A good rule of thumb is to pack two sets of outfits per day — casual wear for daytime activities and dressy attire for evening shows or fine dining. And of course, don’t forget to pack proper swimwear for pools and waterslides.
For footwear, bring a pair of closed-toe shoes or comfortable sneakers if you’re planning to try out activities like zip line, rope obstacles, and wall climbing.
Toiletries. Every stateroom is stocked with shampoo, conditioner, shower gel, lotion, toothpaste, toothbrush, shaving kit, and tissues, so you don’t have to bring your own. However, feel free to do so if that’s what you prefer. You’ll also find bath towels, hand towels, bathrobes, and hotel slippers.
Universal Socket Adapter. Lastly, be sure to include a universal adapter in your to-pack list. The ship uses China-style power outlets, so you’ll encounter Type A (two flat parallel pins), Type C (two round parallel pins), or Type I (three flat pins in a V shape). Your cabin also comes with USB ports for more charging options.
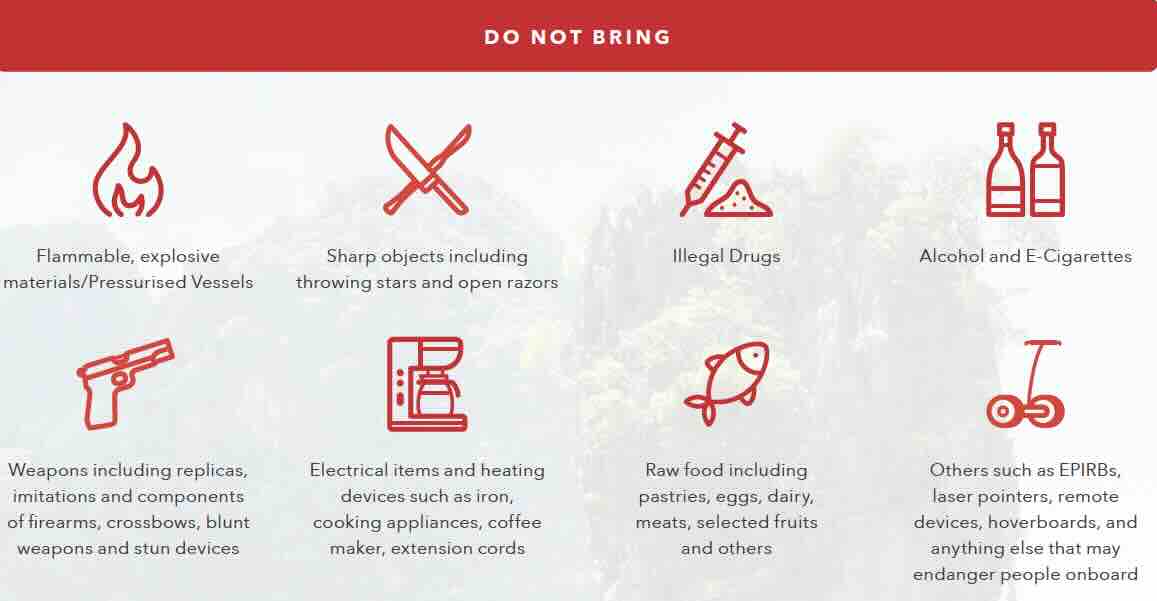
Prohibited Items
For safety and security, these items are not allowed on board the Star Voyager:
Photo Credit: StarCruises (formerly Resorts World Cruises)
Flammable materials and explosives
Pressurized containers
Sharp objects
Illegal drugs and substances
Alcoholic beverages
E-cigarettes/vapes
Weapons, firearms, and ammunition (including replicas, stun devices, and blunt weapons)
Electrical items and heating devices (like clothes iron, coffee maker, and cooking appliances)
Extension cords
Raw food (such as dairy, meats, eggs, pastries, fruits, etc.)
Other objects that could pose a risk to fellow passengers (like hoverboards and laser pointers)
Travel Insurance
This is optional, but we highly recommend this, especially when traveling abroad. Travel can be unpredictable, and though we hope we’ll never use it, having it gives us peace of mind in case of unexpected delays, cancellations, or emergencies.
For this cruise, you can avail of PGA Sompo’s TravelJOY Plus insurance. You can GET IT HERE. Don’t forget to use WORTHIT for a special affordable rate.
Where to Stay in Hong Kong?
Flight delays and other travel setbacks can eat up your time, and might even cause you to miss your cruise. For a smoother trip, we highly recommend flying into Hong Kong at least a day before the ship sets sail.
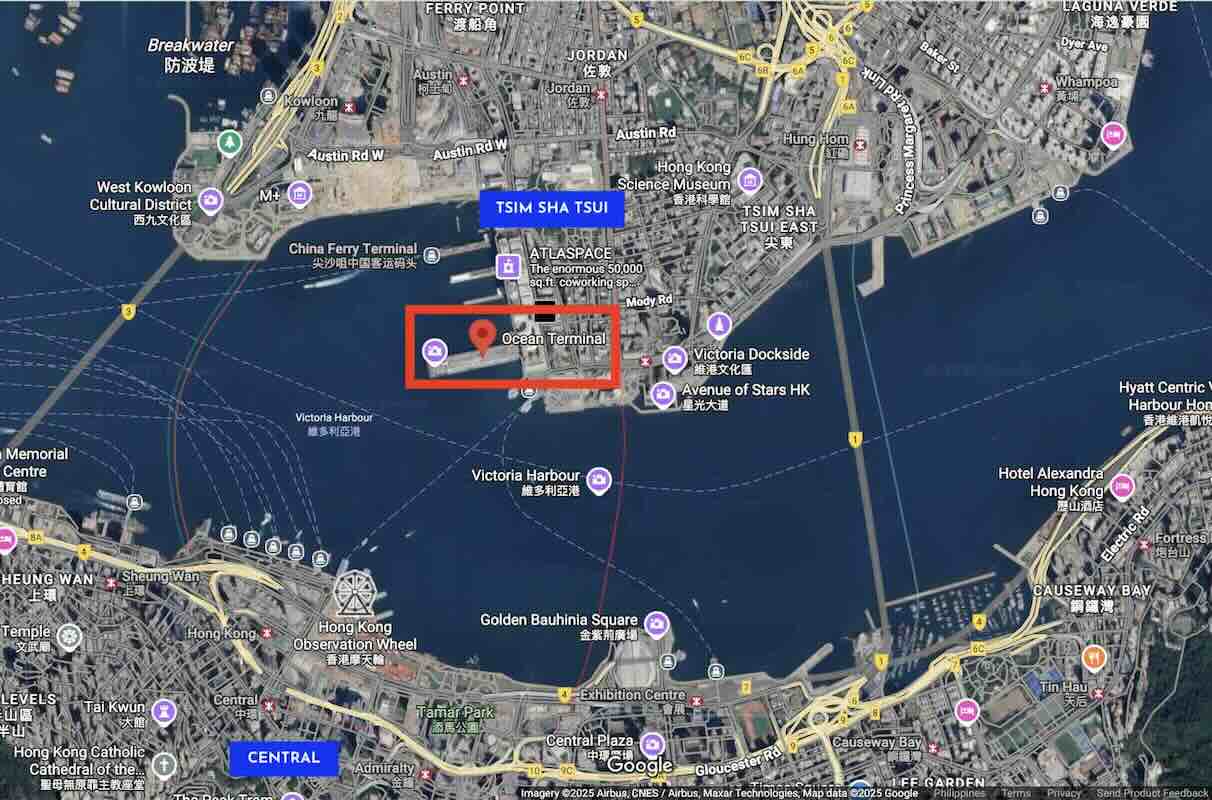
The Star Voyager departs from Ocean Terminal, located at the southern tip of the Kowloon Peninsula, right by Victoria Harbour. Staying at a hotel nearby can make things easier and more convenient on embarkation day.
That said, anywhere in the city center works well, whether you’re staying in Central on Hong Kong Island or in Tsim Sha Tsui on Kowloon. Just be sure to give yourself plenty of time to get to the terminal on your sailing day. Here are some top-rated options based on online user reviews.
Make sure to check your cruise’s departure time and final boarding time. To avoid any rush or delays, plan to arrive at the terminal at least two hours before gate closes. This gives you enough time to go through the entire embarkation process.
Here’s a step-by-step guide to boarding Star Voyager from Hong Kong:
1. Head to Ocean Terminal.
This is where Star Voyager departs — not to be confused with Kai Tak Cruise Terminal in Kowloon Bay. The nearest MRT stop is the Tsim Sha Tsui Station (Tsuen Wan Line). You can also take a taxi or Uber. Landmarks nearby are Hong Kong Cultural Centre, Time Ball Tower, Hong Kong Space Museum, Hong Kong Museum of Art, and Avenue of Stars.
💡 Address: Harbour City, 3-27 Canton Road, Tsim Sha Tsui, Hong Kong
2. Hand over your luggage at the bag-drop counter.
Head to the departure area and search for the baggage drop counter. Show your cruise ticket so staff can tag your luggage with your deck and stateroom number. Your bags will be delivered to your cabin later.
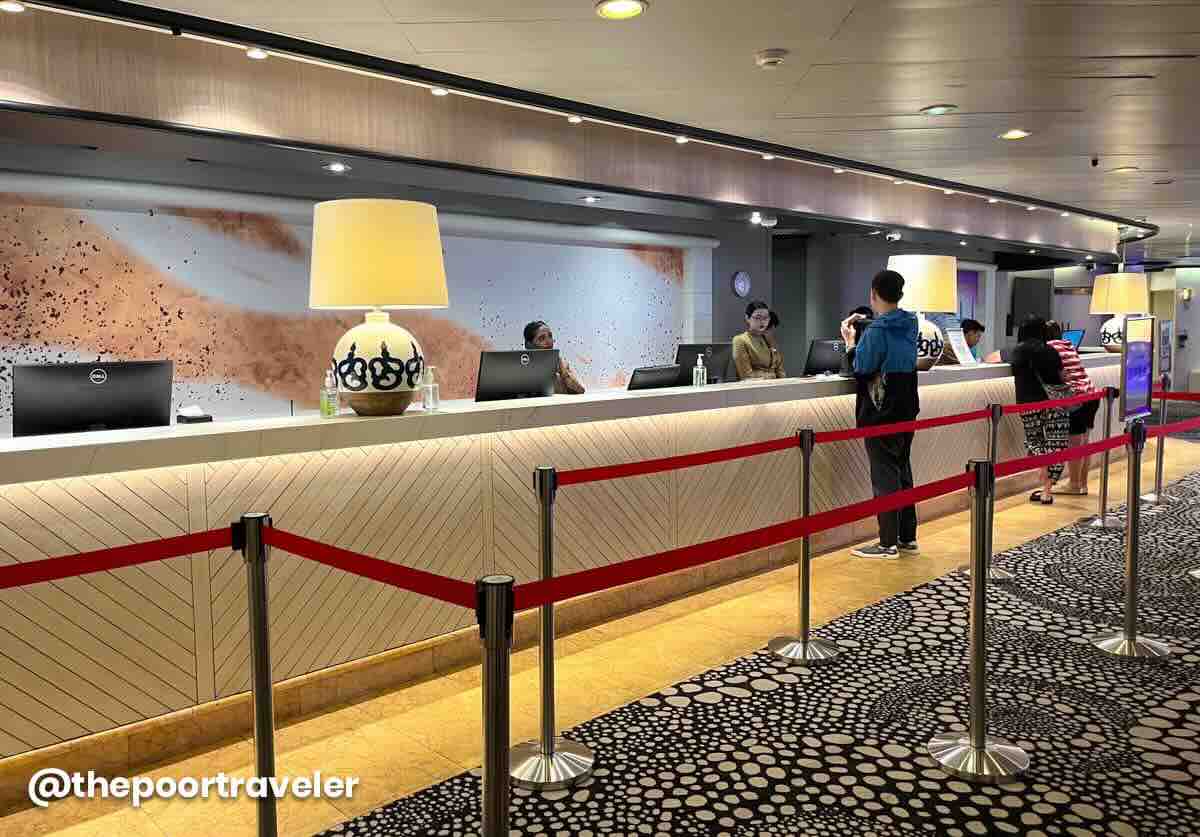
3. Check in and get your sea pass card.
Balcony and Palace guests check in on the ground floor, while Interior and Oceanview guests do it on the second floor. Present your passport and cruise ticket to get your sea pass card, which serves as your cabin key and payment tab for onboard purchases.
4. Clear immigration and customs.
Proceed through immigration, then have your hand-carry items scanned at the security checkpoint.
5. Surrender your passport.
This is standard procedure, so don’t fret. You will have your passport back the day before disembarkation.
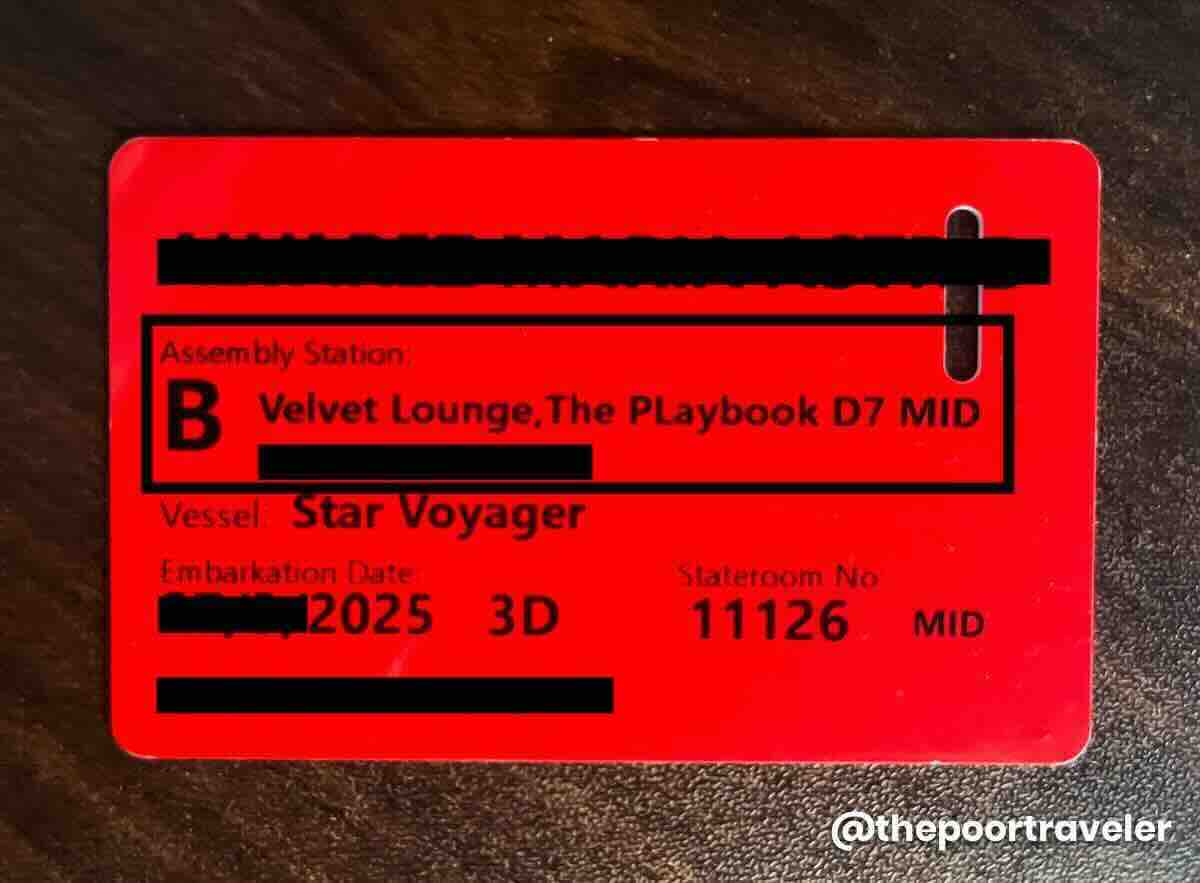
6. Board through your Assembly Station.
Your sea pass card reflects your assigned Assembly Station. It will be scanned as you board, and you’ll be encouraged to watch/attend the safety or muster drill.
7. Welcome aboard Star Voyager!
Enjoy exploring the ship and its amenities — try different activities, stuff your face with delicious food, take a relaxing dip in the pool, watch world-class shows, join fun events and games, and more!
What to do after boarding?
These are typically what guests do right after boarding the ship:
Watch/Attend the safety drill. Follow instructions to watch or attend the safety briefing. Use this time to get familiar with the ship’s layout and know the emergency exit locations.
Eat or explore. While waiting for your cabin to be ready, you can start exploring the ship or — if you’re already hungry — eat in one of the exclusive restaurants.
Settle in your cabin. Check if your luggage has arrived. You might find it already waiting for you outside your door. If there’s a delay, you can ask the Reception for an update.
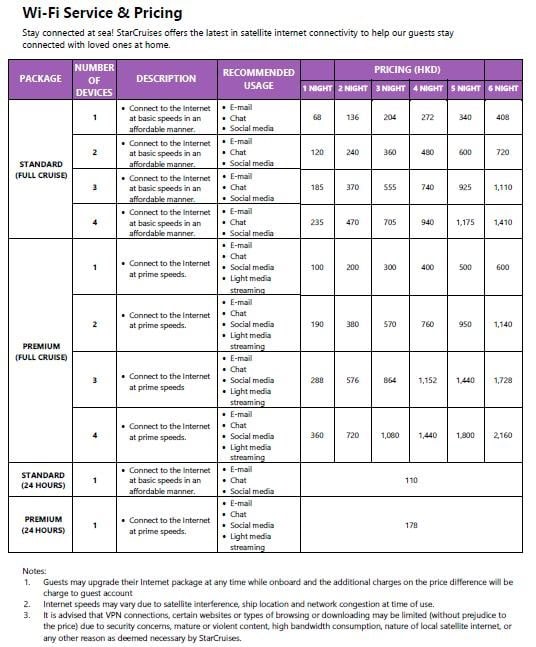
Is there a WiFi on board?
Yes! WiFi is available on board. Stay connected at sea by choosing from two internet packages:
Standard. Ideal for browsing, checking e-mails, messaging apps, and scrolling through social media
Premium. Includes everything in Standard, plus support for video streaming and faster speeds.
Rates depend on the number of devices, the number of days, and your chosen plan.
Photo Credit: StarCruises
What are the things to do while cruising?
Whether you’re craving action, relaxation, or family-friendly fun, Star Voyager has something for every kind of traveler. From adrenaline-pumping activities to laid-back leisure, there’s no shortage of things to do — indoors or outdoors. And yes, kids and teens are covered too, with many spaces and programs designed just for them. Here’s a quick look at what’s in store:
Complimentary Activities and Amenities
All guests have free access to these onboard attractions and amenities:
Waterslides and Aqua Park
Make a splash at the onboard water park, where both kids and grown ups can enjoy slides and the water zones. Don’t forget to wear proper swimwear, follow the rules, and listen to the staff’s instructions.
Location: Deck 15, Aft
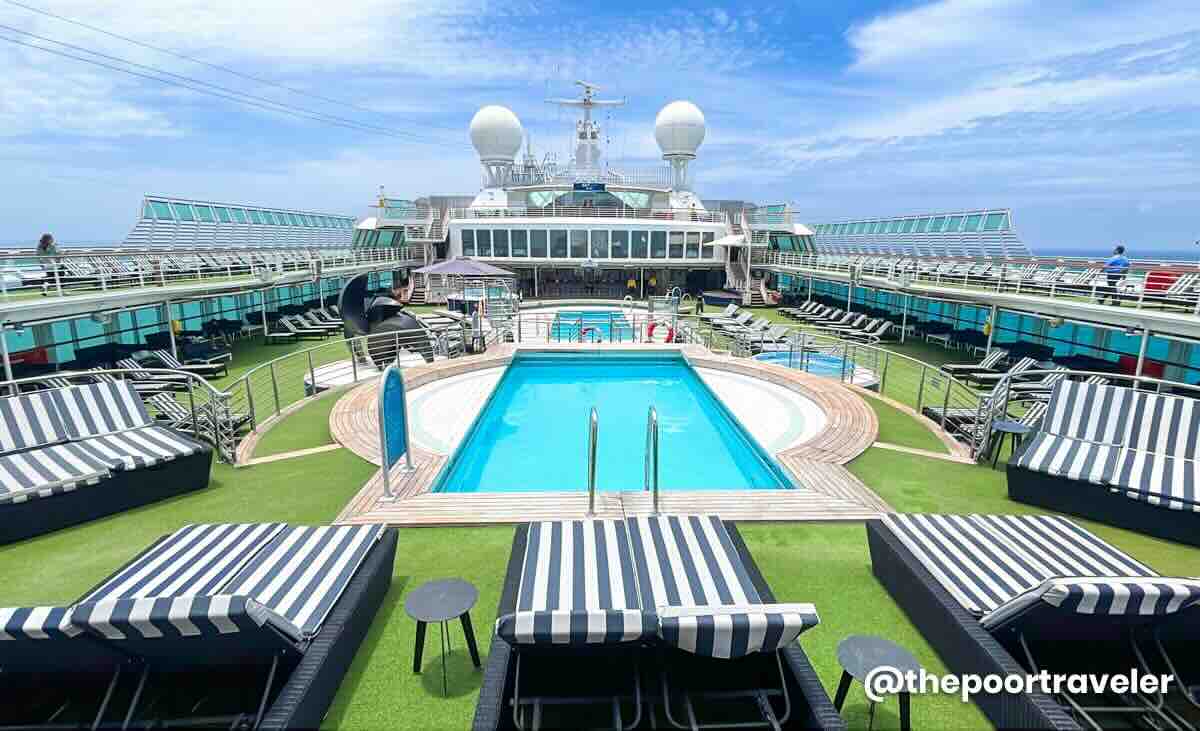
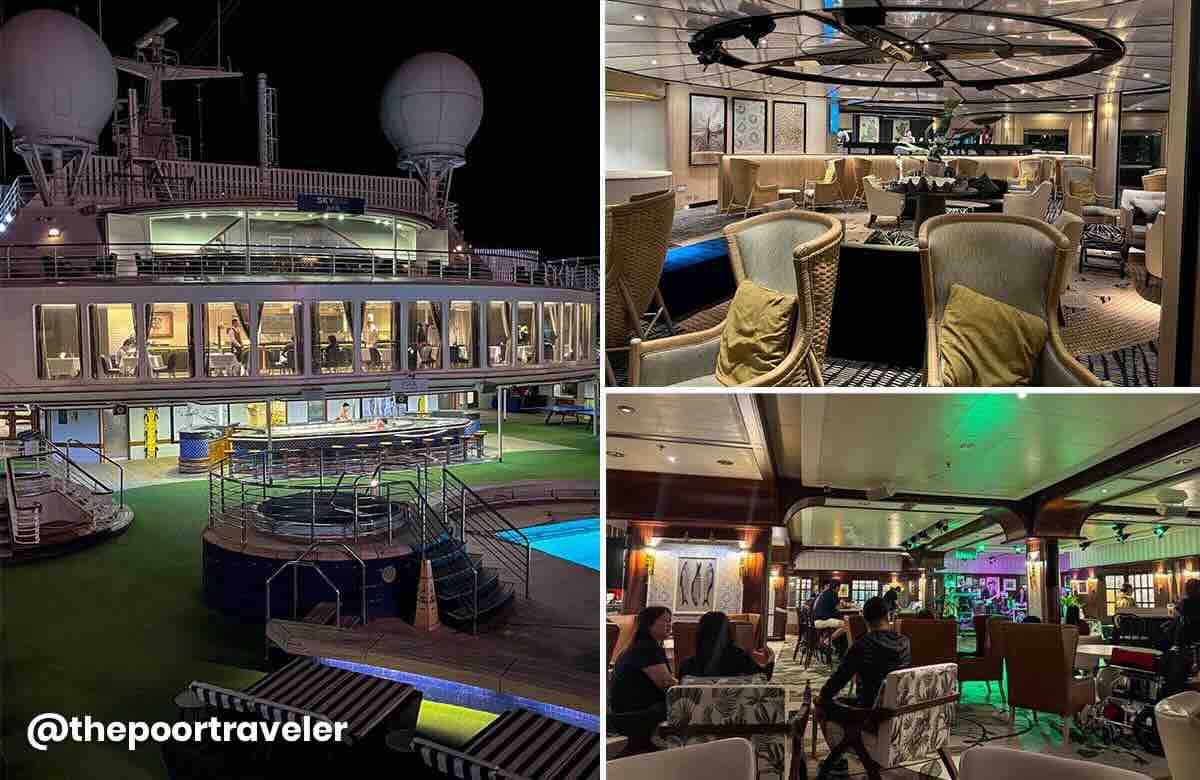
Main Pool Area
Cool off or soak it up with two swimming pools and two hot tubs. This is perfect for either family fun or quiet lounging.
Location: Deck 12, Midship
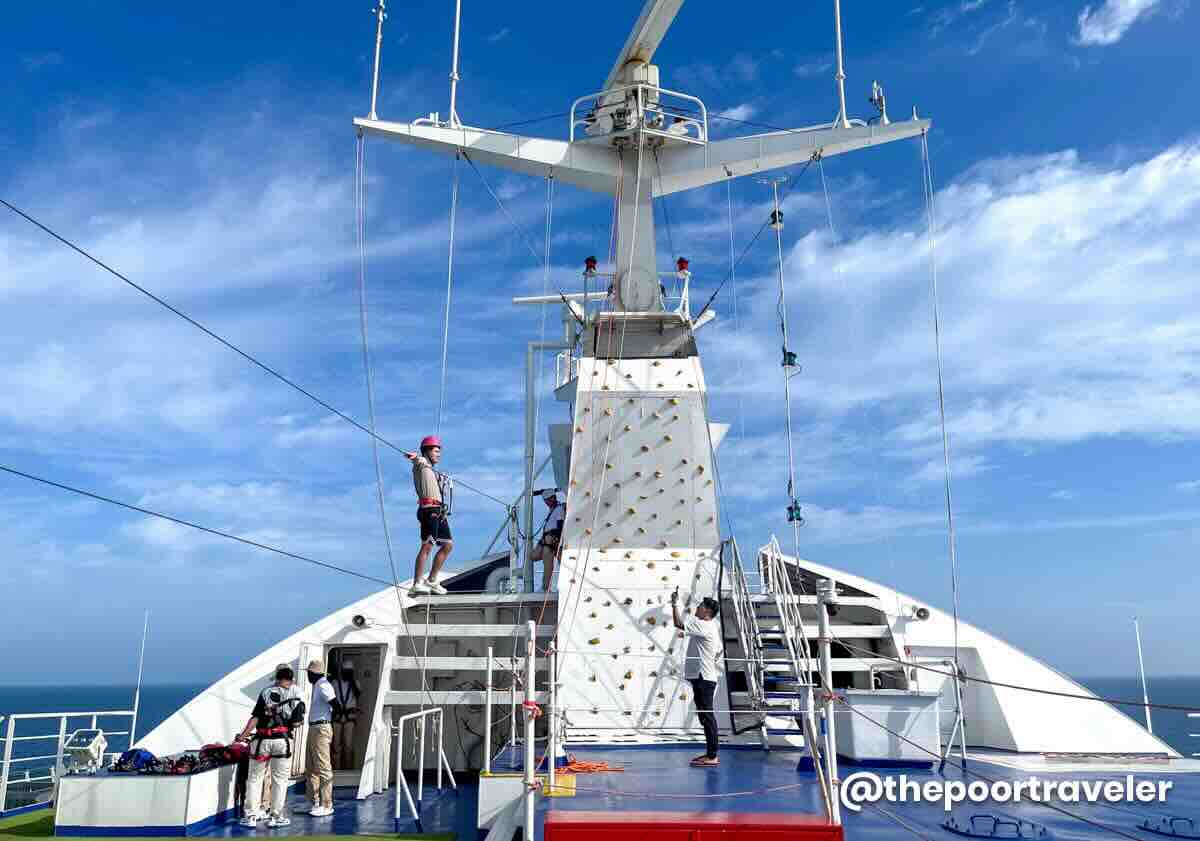
Adventure Park
Thrill-seekers, Adventure Park is for you! Test your courage with Wall Climbing, Walk the Plank, and Zip Line for that adrenaline rush.
Location: Deck 12 & 14, Midship
Symphony Gym
Stick to your fitness goals while at sea. The Symphony Gym offers a full range of equipment to help you stay on track. Note that operating hours apply, so check first before going.
Location: Deck 12, Aft
Shows and Events
Odyssey (Left) and Hong (Right)
Catch dazzling live performances at Zodiac Theater (Deck 7, Forward), featuring a variety of production shows. Plus, don’t miss out on fun pop-up events, workshops, and game shows happening throughout the cruise.
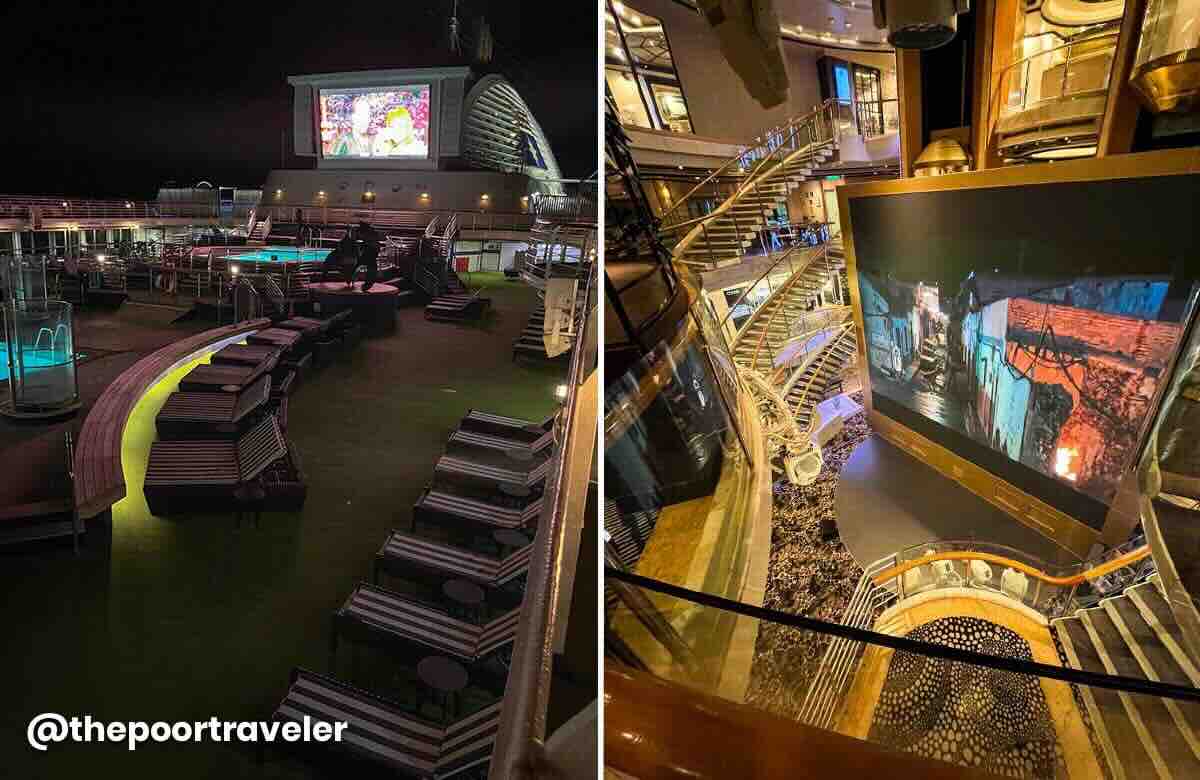
Cinema at Sea
Cinema at Sea: Main Pool Area (Left) and Lobby (Right)
Movie night, reimagined. Depending on the schedule, the Lobby (Deck 5, Midship) and the Main Pool Area (Deck 12, Midship) transform into pop-up cinemas!
Lawn Bowls/Bowling
No traditional lanes? No problem! Have casual fun with lawn bowling in a relaxed setting.
Location: Deck 11, Aft
Paid Activities and Amenities
Beyond the thrills and entertainment, Star Voyager also invites you to recharge and enjoy a little indulgence on board.
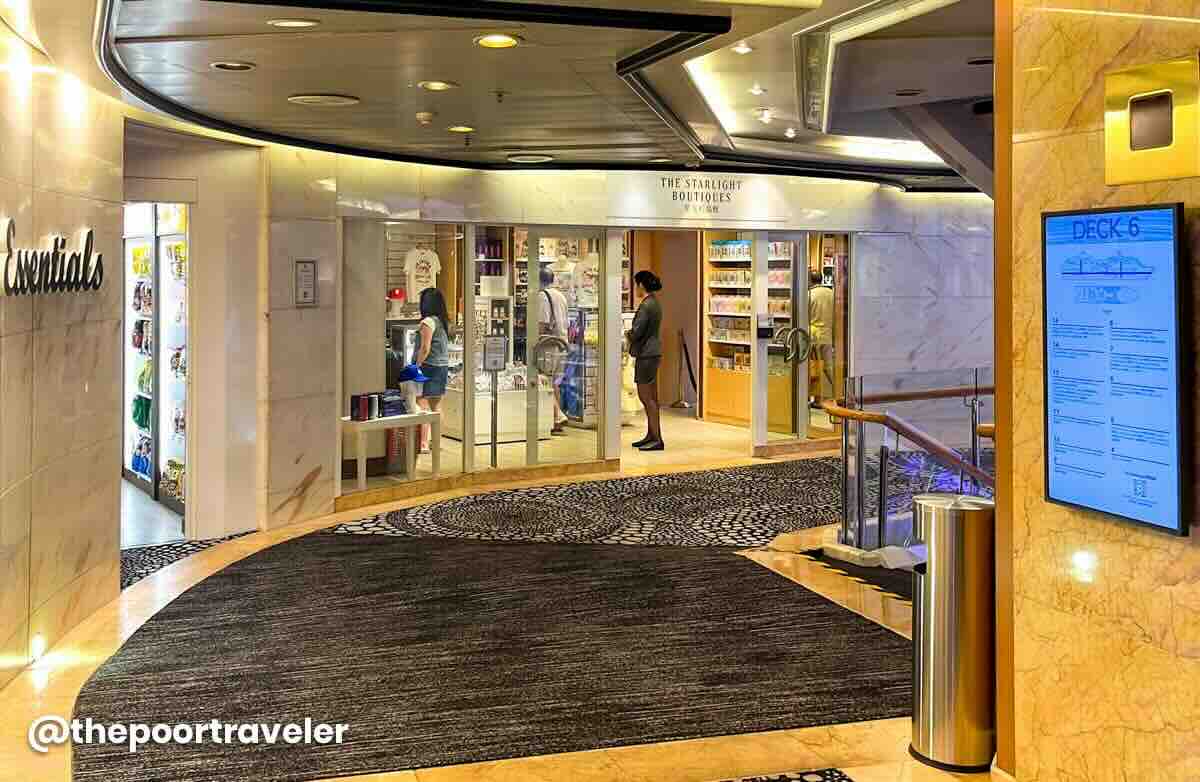
Shopping
In the mood for some retail therapy? Browse through duty-free finds, souvenirs, and gifts at The Starlight Boutiques for duty-free goodies and souvenirs. This is a good way to treat yourself or pick up something special for home.
Location: Deck 6, Midship
Little Dreamers Club and Vibe Check Arcade
These fun zones are packed with games, activities, and excitement for kids, teens, and the young at heart.
Location: Deck 12, Aft
Beauty and Wellness
Time to pamper yourself! Whether you’re up for a soothing massage or a fresh cut, the spa and salon are both conveniently tucked into one peaceful space. Location: Deck 12, Aft
What are the dining options on board?
When it comes to dining on Star Voyager, you’ve got choices — lots of them! Dining spots come in two categories: inclusive restaurants, which are covered by your cruise fare, and specialty restaurants, which come with an extra charge.
Inclusive Restaurants
No need to spend extra when dining at these onboard restaurants, so you can eat to your heart’s content!
North Star Dining Restaurant
Steamed Orange Roughy Fish (Top Left), Stir Fried Prawn Meat (Top Right), Shandong Style Braised Duck (Bottom Middle), and Marinated Baby Octopus with Cucumber (Bottom Right)
Specializing in Chinese set menus, North Star Dining Restaurant also offers Western-style set menus for breakfast. Open for breakfast, lunch, and dinner, this is a go-to spot for full-course meal throughout the day.
Location: Deck 5, Midship
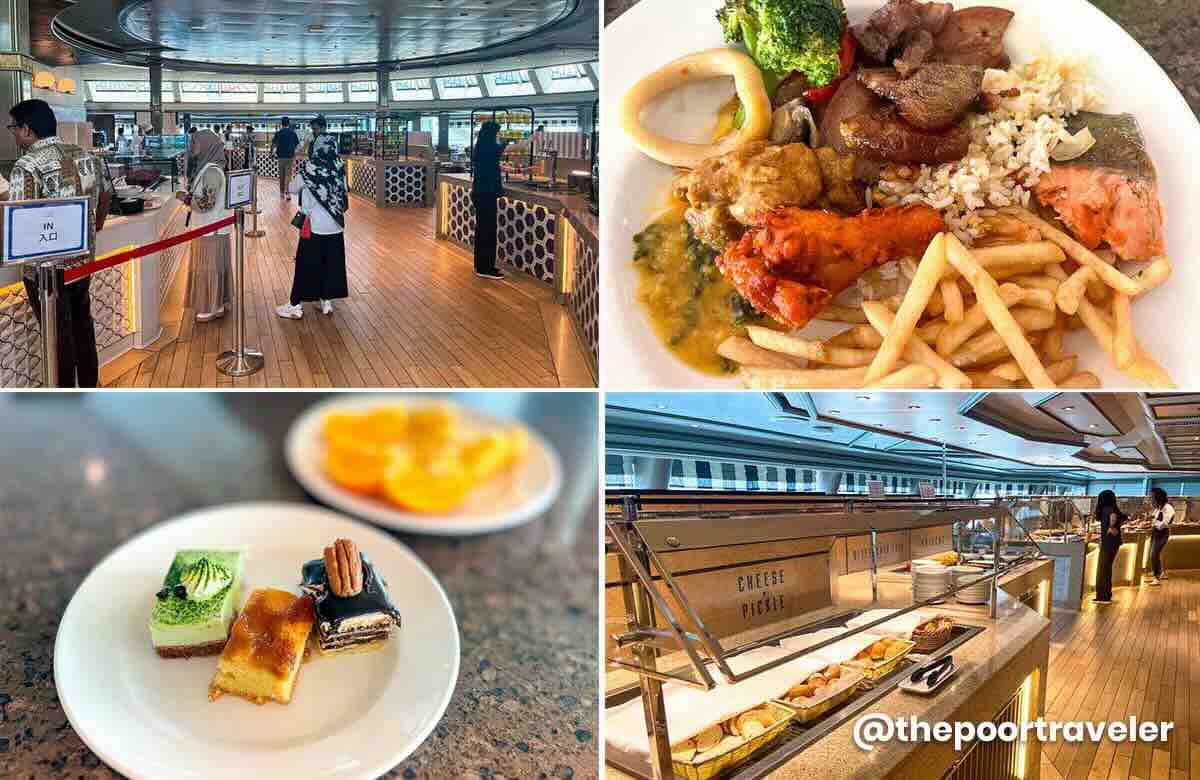
The Lido Buffet
Buffet Meal
The Lido is definitely a crowd favorite, offering a wide selection of Asian and international buffets, including Halal and vegetarian options. Open for breakfast, lunch, dinner, and even snack times (morning and afternoon).
Location: Deck 14, Forward
Sophia
Taking the place of the former Bistro, Sophia now serves up a variety of international dishes.
Location: Deck 6, Midship
Specialty Restaurants
These restaurants are not included in your cruise fare, but they are worth checking out if you’re in the mood for something extra special. Dining at specialty restaurants offers a more elevated cruise experience.
This is a 24-hour cafe, serving breakfast to midnight snacks and meals.
Location: Deck 14, Forward
Red Tail Café
Drinks, Pastries, and more!
Location: Deck 8, Midship
Gelateria
Homemade Gelato.
Location: Deck 12, Midship
Bars and Clubs
Looking to meet fellow cruisers or just chill with a drink? Whatever your vibe, there’s a perfect spot onboard to end the night right. Here are the bars and clubs you can check out:
Sky Bar and Pool Bar (Left), Ocean Bar (Top Right), and Palm Court (Bottom Right)
Sky Bar: Deck 15, Forward
Oasis Bar: Deck 14, Aft
Pool Bar: Deck 12, Midship
Ocean Bar: Deck 7, Forward
Palm Court: Deck 7, Forward
Velvet Lounge: Deck 7, Midship
What other onboard services are available?
Star Voyager Reception
Clinic: Deck 4, Aft
Reception: Deck 5, Midship
Palace Reception: Deck 5, Midship
Shore Excursion (Shorex)
One of the best things about cruising? Ypu get to explore multiple destinations without giving up the comforts of the ship. From June 2025 to November 2025, Star Voyager by StarCruises offers two- to five-night sailings departing from Hong Kong, with ports of call (stops) in Taiwan, Japan, China, Vietnam, and the Philippines.
Sailings with Ports of Call
2N KAOHSIUNG CRUISE -Hong Kong –Kaohsiung (Taiwan) -Hong Kong
2N XIAMEN CRUISE -Hong Kong –Xiamen (China) -Hong Kong
3N KAOHSIUNG – PENGHU CRUISE -Hong Kong –Kaohsiung (Taiwan) –Penghu (Taiwan) -Hong Kong
5N NAHA – ISHIGAKI CRUISE -Hong Kong -High Seas –Naha (Japan) –Ishigaki/Miyakojima (Japan) -High Seas -Hong Kong
5N ISHIGAKI – NAHA CRUISE -Hong Kong -High Seas –Ishigaki (Japan) –Naha (Japan) -High Seas -Hong Kong
5N ISHIGAKI – KEELUNG – PENGHU CRUISE -Hong Kong -High Seas –Ishigaki (Japan) –Keelung (Taiwan) –Penghu (Taiwan) -Hong Kong
5N NAHA – KEELUNG – PENGHU CRUISE -Hong Kong -High Seas –Naha (Japan) –Keelung (Taiwan) –Penghu (Taiwan) -Hong Kong
5N NHA TRANG – DA NANG – SANYA CRUISE -Hong Kong -High Seas –Nha Trang (Vietnam) –Da Nang (Vietnam) –Sanya (China) -Hong Kong
5N HALONG BAY – DA NANG – SANYA CRUISE -Hong Kong -High Seas –Halong Bay (Vietnam) –Da Nang (Vietnam) –Sanya (China) -Hong Kong
5N BORACAY – CORON CRUISE -Hong Kong -High Seas –Boracay (Philippine) –Coron (Philippines) -High Seas -Hong Kong
Shorex vs DIY Tour
At every stop or port of call along your cruise, you have two ways to explore:
Join a Shorex Tour. Star Voyager offers guided group tours in partnership with trusted local tour operators. They arrange everything for you, including transportation, itinerary, and often lunch too. All you have to do is be on time. You can book these tours at Shorex kiosk on Deck 5, Midship.
Go D-I-Y. Prefer to explore at your own pace? A do-it-yourself trip gives you the freedom to create your own itinerary. And this is usually the cheaper option. However, keep in mind that the ship departs on schedule, so make sure to return to the port on time, or earlier, to avoid being left behind.
No matter how you choose to explore, you’ll be provided with essential disembarkation info, including return instructions, port name, and port address, so you’ll always know how to get back on board.
Reminders
Don’t forget to bring your Sea Pass Card and a photocopy of your passport bio page. You’ll need to show your card when leaving and re-entering the ship.
Carefully check the itinerary of the tours. Some tours involve long walks or intense physical activity. Be sure to review the activities and consider your comfort and fitness level before booking.
Tours may be canceled. This can happen due to weather conditions, low participation, or other unexpected reasons. Always have a backup plan just in case.
What to do before the cruise ends?
Here are a few things to take care of before disembarkation:
How to disembark?
When it’s time to leave the ship, disembarkation is done in an orderly manner to ensure everything goes well. Just follow these steps:
1. Head to your assigned departure area.
The Disembarkation Notice indicates the designated location and time for you to leave the ship. Make sure to follow the your schedule.
2. Present your sea pass card.
Scan your sea pass card at the exit pont. If there are any unpaid charges on your account, you will be asked to go to the Reception on Deck 5 to settle them before disembarking.
3. Go through immigration.
Head to the immigration counters for arrival clearance, and have your passport ready for inspection.
4. Pick up your luggage.
Claim your check-in luggage at the Baggage Claim Area. Inspect and check the bag tag to make sure you are taking the right one.
5. Proceed to customs area.
After collecting your luggage, you will pass through the customs check before exiting the terminal.
IMPORTANT! Accomplish the eTravel Pass before DEPARTING from and ARRIVING in the Philippines.
More About StarCruises
With over 30 years of legacy, the redefined StarCruises focuses on providing affordable yet premium lifestyle-driven cruising experiences to new generations. It features two cruise ships — Star Voyager (formerly Star Scorpio) and Star Navigator (previously Resorts World One).
When you think of Greece, what’s the first image that comes to mind? Perhaps it’s the sun-kissed Greek isles, the ancient ruins of Athens, or a scene straight out of Greek mythology. While these iconic destinations are undoubtedly breathtaking, there’s one gem that often gets overlooked, yet it’s one you should definitely add to your travel list — Kastoria.
Nestled in the middle of a picturesque lake, this charming city doesn’t always make it to the top of the list for most travelers. But it should. With its serene beauty, fascinating history, and stunning natural surroundings, Kastoria is a place that promises to captivate those who seek to explore beyond the typical tourist spots. And in this article, we’ll share with you some of the things you need to know about this city, along with some tips. Hopefully, you can fall in love with it the way we did!
Kastoria can refer to two things: one is the regional unit in Greece, something like a prefecture, and another is its capital city. In this article, we’ll primarily be referring to the city.
Located in the region of Western Macedonia in northern Greece, near the border with Albania, Kastoria sits gracefully in the middle of the stunning Lake Orestiada. In photographs, it might seem like an island, but it’s actually perched on a promontory that juts out into the water.
Kastoria is perhaps best known for its rich collection of Byzantine churches and its once-thriving fur industry, which played a major role in its economy for many years. However, in recent times, the city’s other attractions have started to draw more attention, opening it up to tourism. While some of its wonders may not be traditionally associated with Greek culture, they’re definitely worth experiencing. With its unique charm and historical significance, Kastoria is a destination that should be on every traveler’s radar.
Language: Greek. Greece has its own alphabet, which can be a bit intimidating at first, especially if you’re not familiar with it. While there may be a slight language barrier, the good news is that many locals speak English well. Additionally, most street signs are written in both Greek and English, so getting around is fairly easy and straightforward.
Timezone: UTC+02:00 (EET – Eastern European Time). Daylight saving time is observed from the last Sunday in March to last Sunday in October, pushing it an hour ahead (+03:00). So depending on the time of the year, it’s six or five hours ahead of the Philippines, Singapore, and Malaysia.
Modes of Payment: Cash is still the most common, but credit card payments are accepted in some establishments.
Electricity Info: 230 V, 50 Hz. Power sockets are Type F, which also accept Type C plugs.
By the way, Greece is part of the Schengen Agreement, which means that travelers from most countries, including the Philippines, will need to secure and present a Schengen Visa to enter. Make sure to plan ahead and get your visa sorted before your trip to avoid any hiccups along the way! We’ll be updating our Schengen Visa article, so make sure to check our website regularly.
Where to Stay in Kastoria
Let’s start by getting familiar with the geography of Kastoria. As mentioned, the city is nestled on a peninsula that extends into Lake Orestiada, almost entirely surrounded by water except for its western part. The easternmost tip is marked by limestone peaks, creating a striking landscape. While the city also spans parts of the mainland, its heart and soul lie on the narrow strip of land near the peninsula’s neck.
Despite its hilly terrain, Kastoria is a small city, and you can easily walk from one end to the other — whether that’s from coast to coast or north to south. No matter where you stay, you’ll find that most places are within easy walking distance.
Top Hotels in Kastoria
During our time there, we had the chance to visit three remarkable hotels that offer a mix of comfort and unique experiences.
Hotel Orologopoulou Mansion. Built in the 19th century, this 250-year-old mansion has been transformed into a 9-room hotel that mixes modernity and history. It’s located in the Doltso area, near Doltso Square, in the southeastern side of the city proper, which is very convenient. Around the area are restaurants and cafes, and even the lakeside is just a quick stroll away. A room costs around EUR 89 per night, inclusive of breakfast. Check Rates & Availability! ✅
Vergoula’s Mansion. One of the oldest hotels in the city, it was constructed around 200 years ago. It is perched on a cliff, overlooking the lake, offering one of the best views in the city. A stay here costs EUR 81 a night, inclusive of breakfast. Check Rates & Availability! ✅
Esperos Place Luxury and Spa Hotel. Located in the Chloe area, outside the peninsula but still close to key attractions. It is modern, elegant, and grand, housing 54 spotless and spacious rooms, 14 of which are suites, each filled with many conveniences you’d expect from five-star properties — from anatomical beds to fragrant toiletries to bathrobes. Check Rates & Availability! ✅
Hotel Orologopoulou Mansion
These three are the properties that our hosts and other locals we talked to sang highest praises for, but there are more options.
Afkos Grammos Boutique Hotel Resort. If you’re heading to Nestório for the iconic River Party music festival or simply want to explore the area in comfort, this hotel is a great option This four-star gem offers a luxurious retreat with sweeping views of both the Aliakmonas River and the Grammos Mountain. The rooms are tastefully appointed, and the on-site restaurant serves up hearty, traditional Greek dishes. Don’t miss the terrace — it’s the perfect spot to soak in the scenery. Check Rates & Availability! ✅
Krystal Resort. Kastoria also makes a great stop if you’re on a Balkan adventure! If you’re planning to cross the Greece–Albania border, consider spending a night in the peaceful village of Krystallopigi. Krystal Resort is a great option. The rooms here are spacious and the in-house restaurant is perfect for grabbing a satisfying meal before continuing your journey across the region. Check Rates & Availability! ✅
Top Budget Hotels & Guesthouses in Kastoria
For budget travelers, you’ll find pocket-friendly properties for as low as EUR 40 per night for a double or twin room. Here are some options on Booking.com and Hotels.com.
The nearest airport to Kastoria is the Kastoria Airport Aristotle (KSO), located in the nearby town of Argos Orestiko. However, it only serves a limited number of domestic flights, mostly from Athens, and flights aren’t available every day. If you happen to find a flight that fits your schedule, this is the quickest way to get there.
If not, your next best option is Thessaloniki Airport (SKG), located about 145 km away. It’s the closest international airport, offering more flight options and better connectivity.
Thessaloniki Airport to Kastoria
Since we flew in from Manila, we had to make a connection in Athens. From there, we caught a domestic Sky Express flight to Thessaloniki. Our host family kindly arranged a pick-up at the airport, so we didn’t have to worry about transfers. However, if you’re planning to use public transportation, here’s what we found from each agency’s official websites.
Take Bus 01X or Bus 01XN to the Makedonia Intercity Bus Station (operated by KTEL). Trip Frequency: – Bus 01X: Every 20-25 minutes from 6:10 AM to 10:40 PM – Bus 01N: Every 30 minutes from 11:10 PM to 5:55 AM Travel Time: 50-55 minutes Fare: €1.80
Catch a KTEL bus bound for Kastoria. Trip Frequency: There are only 5-6 journeys per day. The earliest bus is scheduled at 9:00 AM, and the last bus leaves the station at 8:30 PM on most days, or 9:30 PM on Friday and Sunday. Travel Time: 3 hours Fare: €17.60
This schedule might change, so double check by visiting KTEL website and click “Itineraries Outside the Prefecture”.
Athens to Kastoria
If you’re coming from Athens, the fastest option is, as mentioned, by taking a flight to Kastoria Airport. However, if flying isn’t an option for you, you can also take the bus as an alternative way to reach Kastoria. You have the option between a direct bus and a bus via Kosani.
DIRECT BUS
Frequency: Once a day
Schedule: 9:30 AM
Travel Time: 12 hours, 30 minutes
Via/Stops: Lamia, Larissa, Kozani
Fare: €48.50
BUS VIA KOZANI
This is a much more complicated route since you’ll have to take another bus to Kastoria. You’ll also have to take into consideration the layover waiting time when you take this option because buses are few and far between.
Athens to Kozani: 7 hours
Kozani to Kastoria: 75 minutes
Note: Total travel time might still equal the direct bus, depending on your timing.
What are the Top Things to Do in Kastoria
Kastoria is brimming with attractions that are absolutely worth your time and energy! Whether you’re into nature, history, or culture, this enchanting lakeside city has something for you. From mystical limestone caves to panoramic hilltop viewpoints, and from neolithic sites to centuries-old Byzantine churches, Kastoria is a treasure trove waiting to be explored. Every corner seems to whisper a story, and you’ll find yourself constantly discovering something new and fascinating. It’s a small city, yes — but it’s packed with big experiences.
Lake Orestiada
Nestled in the heart of Kastoria, Lake Orestiada, also known as Kastoria Lake, is a natural wonder over 10 million years in the making, fed by springs and rivulets. Rooted in ancient myth, its name comes from the mountain nymphs of Greek legend, and its beauty shifts with the season: fiery foliage in autumn, a frozen wonderland in winter, and tranquil waters in warmer months.
Home to over 200 bird species and edged by scenic walking paths, it’s a haven for birdwatchers and peace-seekers alike. Whether you’re snapping photos, feeding ducks, or sipping coffee by the shore, the magic of Orestiada is impossible to miss.
Dragon’s Cave
One of the most captivating attractions by Lake Orestiada is Dragon’s Cave, a natural wonder steeped in legend and shaped by nature over millions of years. Named after a local myth about a dragon that once lived inside, the cave stretches about 300 meters into the limestone hill by the lake. It features striking rock formations, underground lakes, and chambers lined with stalactites and stalagmites.
Discovered only in the 1940s, it has revealed ancient secrets, including cave bear bones over 10,000 years old. Easily accessible with a well-maintained trail, it’s a magical, walkable adventure right at the edge of Kastoria.
Location: Sougaridi, Kastoria 521 00, Greece Official Website: www.spilaiodrakoukast.gr/en/index
Byzantine Churches
When we first drove around Kastoria, it wasn’t the lake or grand mansions that caught our eye. It was the abundance of tiny, timeworn chapels scattered across the city. “Byzantine churches,” our guide said, and as we explored further, they kept appearing — nearly 80 in total, each one telling a story of faith, history, and heritage.
Some are grand and frescoed, others modest and privately cared for, but all are deeply woven into the city’s identity. Highlights include Panagia Koubelidiki, Agios Stefanos, and Agioi Anargyroi, among others. And just outside the center, the newly built Saint Nicanor church adds a modern flourish to this ancient spiritual landscape.
The Hill of Prophet Elias
One of the best spots for panoramic views in Kastoria is the Hill of Prophet Elias, home to a peaceful church and the Profitis Ilias Lounge Café. Perched above the city, this cozy café with glass walls and comfy couches offers stunning views of the lake — rain or shine.
We dropped by on a gloomy day, but the misty atmosphere only made it more magical. We warmed up with three kinds of hot chocolate (yes, three!), served with a smile by Kristos, the friendly owner. It’s a must-visit for a quiet escape and a scenic coffee break.
Food Trip
Out of all the Balkan cities we visited, Kastoria stood out for its incredible food. It’s fresh, flavorful, and rooted in tradition. Local staples like sarmades or stuffed pickled cabbage rolls, giant Kastorian beans which are baked in herbs and tomato, and batzo or cheese fried saganaki-style are just the start.
Carnivores will love the grilled meat platters loaded with lamb, pork, beef, and even wild boar. And for dessert? Don’t miss the candied fruits or fruit confit, especially the lime-infused cake we tried in Krystallopigi near the Albanian border — simple, sweet, and unforgettable. We’ll cover the restaurants and food spots we tried in the next section.
These are just some of the highlights. If you want a more detailed post with more suggestions, you can read our Top 12 Things to Do in Kastoria article.
Where to Eat in Kastoria
Kastoria might not be the first place that comes to mind when you think of foodie destinations in Greece, but it should be! Among all the stops on our Balkan trip, this idyllic lakeside city served up some of the most unforgettable meals we had. Every single ingredient — from the famed Florina peppers to the melt-in-your-mouth lamb chops — was bursting with flavor and freshness. The quality? Top-notch.
Here are some of the places you shouldn’t miss when you visit Kastoria. We also included the opening hours as of writing, but make sure to check the updated schedules before you go.
Palia Poli
This lovely mansion-turned-restaurant is a hidden gem that blends history, flavor, and a touch of romance. Its cozy courtyard offers the perfect setting for al fresco dining. The menu highlights traditional Kastorian cuisine, starting with comforting classics like sarmades (€5.50), which are pickled cabbage leaves stuffed with minced meat and rice, and Kastorian butter beans (€4.50), baked with herbs, carrots, and tomatoes. Don’t miss the batzo (or bajo) (€5.00), a brined cheese seared saganaki-style and topped with a fried egg.
For something lighter, the Kraneia salad is a refreshing surprise. It’s a vibrant mix of arugula, spinach, and lettuce, with sun-dried tomatoes, pomegranate seeds, and slices of crab apple — all drizzled with a tangy cranberry sauce that ties everything together beautifully.
And as a bonus? The restaurant sits just steps away from the lake, so after your meal, you can stroll along the waterfront and soak in the postcard-worthy views.
Speaking of stunning views, few spots in Kastoria can compete with the panorama from Prophet Elias Lounge Café. Perched atop a hill, this cozy café boasts plush couches lined up beside expansive glass walls, offering an unobstructed, postcard-perfect view of the entire peninsula. Whether you’re here for a quick caffeine fix or a long, slow afternoon, the setting is nothing short of magical.
This café ticks all the right boxes: great coffee, delectable desserts, and a serene atmosphere. We sampled their strawberry, cookies-and-cream, and classic hot chocolate, each one rich and satisfying. It’s the kind of place that invites you to slow down. Honestly, if we had more time, I would’ve happily spent hours here, with a good book on one hand and a warm drink on the other.
Location: Aristeidi Aggelidi, Kastoria 521 00, Greece Opening Hours: Daily, 11:00 AM – 12:00 AM
Diacheirós kai sti Ladókolla – Souvlákia
If you’re looking for a delicious yet budget-friendly meal in Kastoria, Diacheiros kai sti Ladokovolla Souvlakia is a must-visit. Believe it or not, many of their mouthwatering skewers, including pork kebab, chicken kebab, and sausage, are just €1 each! Even sides like crispy fries and creamy tzatziki sauce go for just €1 per order.
But don’t let the price fool you. The flavor is anything but cheap. Each bite is packed with savory goodness, making this spot a true hidden gem for foodies on a budget. It’s the perfect place for a quick snack or a satisfying meal that won’t break the bank.
Location: Arti 11, Kastoria 521 00, Greece
Taverna Ammoudara
During our stay in Kastoria, one of the most memorable meals we had was at Taverna Ammoudara, a humble yet exceptional eatery located in the village of Ammoudara, about 20 minutes from the city center. While it’s a bit off the beaten path, it ended up being our favorite meal of the entire trip, mostly because of the authentic, homecooked charm.
The taverna serves traditional northern Greek or Macedonian dishes, but each plate had a little something extra — a heartwarming quality that made the meal feel incredibly special. We started with a cheese-filled pita that was so delicious we could have easily called it a meal on its own. Then came the sarmades (cabbage rolls), which were the best we’d ever tried, a bit more sour than usual.
We were also treated to a variety of salads: eggplant salad, Russian salad and beetroot salad with yogurt and walnuts. All three were fantastic. The cabbage salad, which was soaked in salt for months and mixed with bell peppers, celery, and dill, was also refreshing. And for a bit of contrast, we also had batzo, which was a bit oily but wonderfully flaky and crispy.
As if that wasn’t enough, the main course brought a smorgasbord of grilled meats, but the standout was definitely the pancetta — smoky and cooked to perfection. The meatballs were incredibly tender, bursting with fresh flavor and no processed taste. We were also served a unique wild boar sausage, reminiscent of Filipino longganisa with its rich, fatty bite.
All in all, our lunch at Taverna Ammoudara was a standout not only in Kastoria but throughout the entire Balkan region. It was a feast full of heart, flavor, and warmth. Surely, one we’ll never forget!
Kastoria might not be known for its wild nightlife, but there are still a few places where you can unwind and enjoy a drink. One of the best spots for this is Nautical Hall, a modern bar-club-restaurant nestled by the lake. This cozy venue blends nostalgic decor with muted lighting, creating a relaxed and intimate atmosphere.
At Nautical Hall, you’ll find an impressive selection of drinks — from wines and beers to their signature cocktails. The bar food is also tasty, though it’s a bit on the pricier side compared to other places in the city. If you want to take in the view, step out onto the terrace and you’ll be treated to a stunning sight of the city lights shimmering on the serene lake below. It’s the perfect place to enjoy a drink and soak in the quiet beauty of Kastoria at night.
Location: Sougaridi 1, Kastoria 521 00, Greece Opening Hours: Monday to Tuesday, CLOSED; Wednesday to Thursday, 6:00 PM – 12:00 AM; Friday to Sunday, 10:00 AM – 4:00 AM Facebook: www.facebook.com/NauticalHallKastoria (Nautikos Omilos – Kastoria) Instagram: nautikos_omilos_kastoria
When is the Best Time to Visit Kastoria
We visited Kastoria in May, and it turned out to be the perfect time for our trip. The weather was lovely, with a comfortable temperature. And since it was before peak season, we enjoyed affordable prices.
We were also lucky enough to witness the glorification ceremony for Saint Sophia, a newly proclaimed saint in the Greek Orthodox Church, held every May 6 at the Moni Panagias Kleisouras Monastery, which has stood for over 700 years.
However, locals assured us that Kastoria is a fantastic destination all year round. May is considered a shoulder month leading into the summer season, which, while bringing slightly higher prices and more tourists, still offers a great experience compared to other popular Greek spots.
If you visit during the summer, you’ll also get to experience the River Party in Nestorio, Kastoria’s music festival, where 50,000 people gather for a massive celebration by the river in August.
But Kastoria’s charm doesn’t stop there. While we were strolling around, we couldn’t help but imagine how stunning the city must look in autumn, with maple trees lining the lakeshore and the surrounding hills covered in deciduous forests.
And during winter, the city transforms into a winter wonderland — the lake freezes over, creating a magical scene. For those looking for winter adventures, the Vitsi Ski Resort attracts beginners. There’s also Ragoutzaria, a wild winter festival in early January that celebrates Dionysus, the ancient Greek god of wine, festivity, pleasure, and ecstacy!
It’s clear that Kastoria offers something unique for every season!
Have Peace of Mind While Traveling!
Getting a travel insurance is optional, but we highly recommend this, especially when traveling abroad. Travel can be unpredictable, and though we hope we’ll never use it, having it gives us peace of mind in case of unexpected delays, cancellations, or emergencies.
For international destinations, consider PGA Sompo’s TravelJOY Plus insurance. You can GET IT HERE. Don’t forget to use WORTHIT for a special affordable rate.
Updates Log
2025 8 11 – First uploaded
Written by: Yosh Dimen and Mariah Cruz Photos by: Yosh Dimen Edited by: Asta Alvarez
Among all the destinations we’ve visited in Greece, we can confidently say that Kastoria gave us the most wonderful time.
For much of its history, the city built its identity and economy around a single product: fur. Once hailed as the fur capital of Greece, Kastoria was a city of furriers — skilled artisans who crafted, repaired, and sold fur garments. Many believe that the city’s very name is derived from kastoras, the Greek word for “beaver”, which was a primary source of fur.
For generations, fur was the lifeblood of Kastoria’s economy. Walk around today and you’ll still spot fur stores and workshops scattered across the city — some family-run like Almahats, and others larger in scale, such as Vitaniolis or Soulis. But while the legacy lives on, the once-booming industry has slowed significantly. We were told that as of our 2023 visit, only 16 masters remained who could perform one of the most intricate tasks in the trade: skin matching, a skill that takes years, even decades, to perfect.
With the world moving away from fur, many locals have begun shifting to new opportunities, and one promising avenue is tourism.
Set on a stunning lakeside peninsula in Northern Greece, Kastoria may be a bit out of the way, but it’s that very fact that makes it so special. Travelers who go off the beaten path are rewarded with a peaceful, authentic experience filled with natural beauty, deep-rooted culture, and historic charm. As word spreads, it won’t be long before more tourists discover what this captivating city has to offer, so now is the perfect time to visit. Here are just some of the best places to visit in Kastoria.
Because it lies at the very heart of the Kastoria regional unit, Lake Orestiada is often referred to simply as Kastoria Lake or the Lake of Kastoria. But its more poetic name, Orestiada, harks back to Greek mythology, specifically the oriades — mountain nymphs believed to dwell in the highlands. And honestly, standing by its shores, it’s easy to believe there’s still a touch of magic lingering in the air.
This lake is nothing short of enchanting in every season. In autumn, the trees along its banks explode in fiery colors, making it a dream for photographers and leaf-peepers alike. In winter, it freezes over, turning into a silvery sheet of ice, while spring and summer welcome boats gliding across its glassy surface and locals gathering at its edges to soak in the scenery.
Fed by nine small rivulets and underground springs, the lake is ancient — formed over 10 million years ago — and teeming with life. It’s home to over 200 bird species, from elegant silver pelicans to mute swans, mallards, herons, and more, making it a haven for birdwatchers. There’s even a charming little spot where you can feed ducks, adding a touch of whimsy to your stroll.
Some of our favorite moments in Kastoria were the simplest — walking along the lakeside with a coffee in hand. In a world increasingly overrun by mass tourism, Kastoria offers a rare kind of serenity, and Lake Orestiada embodies that peace in every ripple and breeze.
Dragon’s Cave
One of the must-see lakeside attractions in Kastoria is the awe-inspiring Dragon’s Cave, easily one of the city’s most fascinating natural wonders. Its name stems from a local legend, which tells of a dragon that once made the cave its lair — and fittingly, one of the rock formations inside even resembles the mythical beast!
But the real story here is geological. Nature has been working on this cave for millions of years, carving it about 300 meters deep into the limestone hill by the lake. Surprisingly, it wasn’t discovered until the 1940s, when the adjacent road was constructed. Since then, scientists have uncovered a hidden world within — underground lakes, tunnels, and majestic chambers adorned with stalactites and stalagmites. It appears untouched by humans until its modern discovery, but researchers did find bones of cave bears, believed to have gone extinct over 10,000 years ago.
The best part? You don’t need to be an experienced hiker to explore it. The entrance is right by the road, and the entire cave has a well-maintained visitor’s trail, making it accessible and safe for just about anyone. It’s like stepping into a fantasy realm right in the heart of Kastoria.
Monastery of Panagia Mavriotissa
If you take a leisurely 10-minute lakeside walk northeast from the Dragon’s Cave, you’ll find yourself standing before one of Kastoria’s most historically significant sites — the Monastery of Panagia Mavriotissa. Kastoria is home to 72 churches and chapels, many dating back to the Byzantine era, but this particular gem is among the oldest and most storied.
Constructed in the 11th century, the monastery was built during the reign of Byzantine Emperor Alexios I Komnenos. It served as a tribute to the Virgin Mary, in gratitude for the victory of Commander George Palaiologos over Norman forces in 1083. Its main structure is a timber-roofed basilica.
Inside, you’ll be captivated by centuries-old frescoes, including a haunting depiction of the Apocalypse. Although the interior artwork has been well-preserved, the exterior frescoes, dating to the 13th century, suffered damage during the Ottoman era. Notably, many of the painted figures had their eyes deliberately scratched out, a heartbreaking reminder of the site’s turbulent past.
Just across the monastery, you’ll also meet an ancient companion to this holy site: a 900-year-old plane tree. With a circumference of 8.5 meters and standing 67 meters tall, it towers like a silent sentinel, bearing witness to nearly a millennium of history, devotion, and change. It’s a peaceful and powerful stop that beautifully captures the soul of Kastoria.
Byzantine Churches
When we first drove around Kastoria, it wasn’t the lake or the mansions that grabbed our attention but the small, weathered chapels that seemed to have frozen in time. Our guide Haris told us that they have almost 80 Byzantine churches and chapels.
Honestly, we initially thought that he meant eighteen, but the city itself would clarify that for us as we wandered deeper into its neighborhoods. The chapels kept appearing until our informal count easily surpassed eighteen. That’s when it hit us: Kastoria’s soul is etched in the walls of its 80 churches, not only serving as a religious but also historic and cultural monuments.
Some are grand and open to the public, while others are modest and closed off, still cherished as private places of worship by families who have passed them down through generations. Whether elaborately frescoed or humbly bare, they all tell pieces of the same story: a city where faith, history, and identity intertwine seamlessly, standing strong through time.
Aside from Panagia Mavriotissa, here are other Byzantine churches:
Panagia Koubelidiki or Kastriotissa (10th century)
Agios Stefanos (Mid-9th century)
Agioi Anargyroi (10th century)
Agios Georgios Omorfokklisias (12th century)
Monastery of Pammegistoi Taxiarches of Tsouka (13th century)
Church of the Dormition at Zevgostasi (15th century)
Another postcard-perfect stop is the Holy Church of Saint Nicanor, a newly built gem near Esperos Palace Hotel. Our friend Ces even found joy picking flowers in a nearby empty lot — just one of those quiet, charming moments that Kastoria surprises you with.
The Hill of Prophet Elias
All around Kastoria, there are peaceful corners and hilltop lookouts offering sweeping views of the lake wrapping around the city. But one of the most accessible is the Hill of Prophet Elias, named after the miracle-working saint and patron of tailors and fur traders.
The most striking structure here is the Church of Prophet Elias, a serene spot that overlooks the entire city. But the complex is not just for prayer. Near the church is the Profitis Ilias Lounge Café, a cozy hilltop hideout with panoramic glass walls and plush couches.
Despite the rain during our visit, the view was still breathtaking and the moody weather only added to the charm. Thanks to Kristos, the friendly owner, we warmed up with three kinds of hot chocolate: classic, strawberry, and cookies and cream. It’s a gem of a spot and you shouldn’t miss it if you’re in town.
Agios Athanasios
Agios Athanasios offers an even higher vantage point, where you can see the Church of Prophet Elias in the foreground, the shimmering lake in the middle, and the peninsula stretching out in the background, making a beautiful composition of layers. We were lucky to visit in spring, when the hillside bursts into color with a blanket of yellow flowers.
You’ll know you’re in the right place when you spot Gaitanis Meat House, a go-to spot for carnivores craving burgers and steaks. Right next to it is a dramatic stack of boulders, which is an epic photo spot, but do tread carefully! Just a short walk away, you’ll also find the Mountain Theater (Theatro Vounou), a charming open-air amphitheater that occasionally hosts performances.
Dispilio
Let’s head back down from the mountains and drive about 20 minutes outside Kastoria to Dispilio, a quiet village with a truly ancient past. Nestled on the banks of Lake Orestiada, it is home to one of the most important archaeological sites — the oldest known lake settlement in Europe, dating all the way back to 5260 BCE. Meaning it existed during the Middle Neolithic age, and it was estimated to be home to about 3,000 individuals.
Discovered by a group of fishermen in 1932 after a drought revealed some of its remnants, the site has since unearthed thousands of artifacts, including bones, ceramics, and the intriguing Dispilio tablet, which a wooden plaque inscribed with markings. Today, visitors can explore a reconstructed lakeside village, complete with thatched huts, in an open-air museum that feels both educational and immersive. We even shared the site with a bunch of schoolkids on a field trip! Before you leave, swing by the little shop by the exit for a souvenir.
Nestorio
Farther southwest lies the neighboring village of Nestorio, a place steeped in myth and history. According to legend, it was founded by Nestor, son of King Agamemnon, who fled here at the foot of Grammos Mountain with his brother Orestes. Archaeological finds point to Neolithic origins, and some even believe that a young Alexander the Great was once hosted here, learning the art of war.
Much like Kastoria, Nestorio is dotted with historic churches, but we made our way up to the Church of the Holy Spirit, perched on a hill with sweeping views. The climb was worth it — not just for the peaceful chapel but also for the panoramic scenery of the village. From here, you can spot spot some of its landmarks, including the four-star Afkos Grammos Boutique Hotel Resort.
Church of the Holy Spirit (Left) and Afkos Grammos Boutique Hotel Resort (Right)
This upscale hotel boasts a restaurant that serves delicious traditional Greek dishes, a terrace with panoramic views, and well-appointed rooms perfect for unwinding, especially when the village gets busy. And when does that happen, you ask? Two words: River Party.
River Party (River Aliakmon)
River Party is the biggest music festival in all of Greece, and it all goes down right here in Nestorio, along the picturesque banks of the Aliakmon River. Every year in August, this sleepy mountain village comes alive as around 50,000 music lovers gather to dance, sing, and celebrate under the summer sky.
But the beauty of the river doesn’t fade when the crowds leave. On our visit, we were lucky to be joined by Architect Haris Mintzias, whose father built the now-iconic stone bridge that stands as a symbol of the event. When it needed to be reinforced years later, Haris took on the task himself. He even gave us a little demo on proper stone skipping, though, let’s just say, it’s harder than it looks!
Moni Panagias Kleisouras
On the far side of Lake Orestiada, deep in the mountains and reached via winding roads, lies the Moni Panagias Kleisouras Monastery in the municipality of Kleisoura. Built in the 14th century, this historic site once doubled as a fortress, but it is best known in the Greek Orthodox faith as the home of Saint Sophia.
It is believed that the Virgin Mary, or the Panagia, appeared to Saint Sophia multiple times and eventually led her to this very monastery. She lived a humble life here, even sleeping in the fireplace of the kitchen, and was known for performing miracles that drew pilgrims to the site. After her passing on May 6, 1974, the monastery became her final resting place, and her relics remain enshrined here.
We were incredibly lucky because our visit happened to fall on May 6, so we got to witness the annual glorification ceremony held in her honor.
Paraskevi Dragota Church
Back in the city center, we stumbled upon another charming chapel — the Saint Paraskevi Sint Paraskevi Dragota Orthodox Church. While it’s not one of the famed 80 Byzantine churches, it still holds over 120 years of history, built in 1899 and nestled quietly in a residential corner just a few blocks from the lake.
It wasn’t on our original itinerary, but our host, Sonia, brought us here, which is one of her favorite spots in the city. She’d often pass by, admiring it from the outside, captivated by the candle always lit by the families who look after the church. We were about to leave when the kind caretaker, Sir Giorgos, invited us in and gave us a tour! He shared stories about the church’s past and even let us peek into the sanctuary behind the iconostasis, and pointed out the original columns that are still standing. The interior, adorned with beautiful icons and artwork, was absolutely captivating.
This is what makes Kastoria so special. Everywhere you turn, there’s a piece of history quietly waiting to be discovered.
Food Trip
Out of all the places we explored in the Balkans, Kastoria gave us some of the best meals we’ve ever had. The ingredients here are just on another level — from the prized Florina peppers to the succulent lamb chops, everything tasted incredibly fresh and full of flavor.
If you’re planning to eat your way through the city, here are some traditional dishes you absolutely must try:
Sarmades. These are pickled cabbage leaves stuffed with minced meat and rice. It’s a staple in many households, and no two versions are exactly the same. Each family or taverna has its own twist, so it’s worth trying more than once!
Kastorian Giant Beans. These massive legumes are also a local staple you shouldn’t miss, and yes, they really are giant. They have a thin skin, but they need to be soaked overnight to reach the right softness. Once prepped, they’re typically baked with herbs, tomatoes, and meat.
Batzo (or Bajo). This is a brined cheese that’s often prepared saganaki-style. This is one of our absolute favorites. Some restaurants top it with a fried egg, while others fry it to a crisp. No matter how it’s cooked, its distinct salty flavor always steals the show.
And those are just the appetizers! For the main course, don’t expect a lot of seafood here. Kastoria is all about the meats. A platter loaded with grilled goodies is the go-to. Lamb, beef, chicken, pork, and even wild boar. Think juicy souvlaki, smoky kebabs, savory sausages — all grilled to perfection. It’s an absolute meat feast and a must-try for carnivores!
For dessert, one thing we noticed is that candied fruits or fruit confit are quite popular, both in homes and restaurants. It’s a traditional way of preserving fruits like cherries, oranges, and even citron or lime, which was the highlight of a signature cake we tried in Krystallopigi, near the Albanian border. It’s a sweet treat that you definitely shouldn’t miss!
Best Hotels in Kastoria
While we were in Kastoria, we were able to check out three of its best hotels. Two of them are historic and traditional, both over 200 years old, while one is more modern and minimalist. We also included a few properties in other villages outside of the city center but near some attractions.
Hotel Orologopoulou Mansion
Hotel Orologopoulou Mansion, a 250-year-old mansion converted into a hotel with modern room amenities in the city center. Check Rates & Availability! ✅
Vergoula’s Mansion, a short walk from Orologopoulou and one of the oldest hotels in Kastoria. Check Rates & Availability! ✅
Esperos Place Luxury and Spa Hotel, a contemporary and elegant property in the city center. Check Rates & Availability! ✅
Afkos Grammos Boutique Hotel Resort, a great option if you’re heading to Nestório for the iconic River Party music festival. Check Rates & Availability! ✅
Krystal Resort, tucked in a peaceful village of Krystallopigi, perfect for those planning to cross the Greece–Albania border. Check Rates & Availability! ✅
Getting a travel insurance is optional, but we highly recommend this, especially when traveling abroad. Travel can be unpredictable, and though we hope we’ll never use it, having it gives us peace of mind in case of unexpected delays, cancellations, or emergencies.
For international destinations, consider PGA Sompo’s TravelJOY Plus insurance. You can GET IT HERE. Don’t forget to use WORTHIT for a special affordable rate.
Visiting Disneyland is a bucket list item for many of us, whether you grew up watching Disney movies or you simply want to experience the magic of the happiest place on earth. And if you’re Filipino, Hong Kong Disneyland is where you’ll probably see fairy tales come to life for the first time. Located on Lantau Island, Hong Kong Disneyland is roughly a two-and-a-half-hour flight away from Manila.
If you’re planning a visit to this magical theme park, this guide is for you! Whether it’s your first time or you’re coming back after a few years, this post will help you plan your trip and make the most of your visit to Hong Kong Disneyland. We’ll take you through everything you need to know, including ticket prices, must-see attractions, food options, and some tips for your most magical Disneyland experience!
Hong Kong has a subtropical climate, so it can get really hot and humid. If you want to visit during the cooler months, the best time would be between November to April when the temperature ranges from around 10 to 20°C. Meanwhile, May to October are the hottest months with temperatures reaching up to 30°C. However, it’s important to note that these months also experience more rainfall, so if your trip will be within these months, make sure to pack not only sun protection, but rain gear as well.
Weekends are generally busier in the park, so if you can, plan your visit on a weekday to possibly avoid large crowds. Also, remember that the park will likely be crowded as well during holidays like Christmas and Chinese New Year.
Where to Get Tickets
There are different types of park tickets, but for tourists or short-term visitors, the best options are the 1-day or 2-day tickets.
Hong Kong Disneyland Ticket Rates
1-Day Ticket: General Admission, HK$ 849; Child (3-11 y/o) and Senior, HK$ 639
2-Day Ticket: General Admission, HK$ 859 to HK$ 1039; Child (3-11 y/o) and Senior, HK$ 669 to HK$ 805
Note: If you purchase a 2-day ticket, your park visits must be two consecutive days.
Hong Kong Disneyland Add-Ons
Aside from the admission tickets, you can also purchase add-ons like the early park entry pass or Disney Premier Access.
Early Park Entry Pass: HK$ 199
Disney Premier Access: HK$ 199 to HK$ 749
Early Park Entry Pass
The Early Park Entry Pass allows you to enter Hong Kong Disneyland up to one hour prior to the official opening time, giving you an opportunity to experience the popular areas, such as the World of Frozen and Fantasyland, before the general crowd rushes in.
During this time, you can enjoy the following attractions:
Cinderella Carousel
Dumbo the Flying Elephant
The Many Adventures of Winnie the Pooh
Frozen Ever After
Wandering Oaken’s Sliding Sleighs
Disney Premier Access
Meanwhile, Disney Premier Access serves as a fast pass that will give you one-time priority entry or allow you to skip the lines at select attractions and/or give you access to designated viewing areas for select shows, depending on the package you avail. If you want to secure a perfect viewing spot for the “Momentous: Party in the Night Sky”, you can purchase a package that covers this show/experience.
Walk-in vs Online Purchase
You can purchase your tickets at the Hong Kong Disneyland Park’s Main Entrance Ticket Booths and Guest Relations, but it is highly recommended and more convenient to get your tickets in advance online. Guests are also required to make a reservation for their park visit after purchasing tickets. We’ll discuss how to make a reservation in the next section of this article. For discounted tickets, book by clicking the link below.
Once you’ve purchased a ticket, you need to make a reservation for your visit date on Disneyland Hong Kong’s official website. This is a requirement for all guests. However, if you book through third-party merchants like Klook or KKDay, park visit reservations might already be included in the package. So make sure to read the package details carefully when you book a ticket to find out whether or not you need to make a reservation on Disneyland’s website.
You can make a reservation as early as 90 days prior to your intended date of visit. This is Hong Kong Disneyland’s measure to manage the number of people entering the park on any given day. Once their quota is full, reservations will be closed. Those who don’t have a prior reservation may be refused entry into the park once the full capacity is reached.
Photo Credit: Hong Kong Disneyland Official Website
Here’s how you can make a reservation:
Visit Disneyland’s reservation website. Click “Next” to start your registration.
Create a MyDisney HK account by clicking the “Create Account” button. Then, enter the following details: Last Name, First Name, Birthday, Place of Residence, Mobile Number, Email Address, and Password. Once you’re done, agree to the terms of use and click “Create Account”.
Once you’re account is set up, go back to the park reservation page. Click “Reserve”.
On the Ticket Registration page, click “Register Now”. Select the admission type and enter your ticket reference number.
Choose your preferred date. Finally, confirm your reservation.
How to Get to Hong Kong Disneyland
With Hong Kong’s efficient transportation system, getting to Disneyland is easy peasy. When taking public transportation, you have the option to take the bus or the train. To help you navigate, you can easily use Google Maps or the MTR app or website. For reference, here’s how you can get to Hong Kong Disneyland from the airport, Central, and Tsim Sha Tsui.
From the Airport
Via Airport Express
Board the train at Airport Platform 2 towards Hong Kong.
Get off at Tsing Yi Station and transfer to Tung Chung Line. Hop on the train at Platform 3 towards Tung Chung.
Get off at Sunny Bay Station. Transfer to Disneyland Resort Line on Platform 3.
Alight at Disneyland Resort Station.
Via Bus
At the Airport Ground Transportation Centre, board a bus bound for Lantau Link Bus – Bus Interchange. These are bus routes that starts with ‘A’, serviced by CityBus or Long Win Bus. During our trip, we hopped on the A11 bus.
Alight at Lantau Link Bus – Bus Interchange. This is two stops away from the airport.
Board the R8 bus to Hong Kong Disneyland. The bus stop for the R8 bus is at the far end of the interchange, near the stairs going to the underpass.
Get off at Hong Kong Disneyland stop.
From Central
Via MTR
Get on the Tung Chung Line at Hong Kong Station. Board the train at Platform 3 or 4 towards Tung Chung.
Alight at Sunny Bay Station and transfer to the Disneyland Resort Line.
Ride the train at Sunny Bay Station Platform 3 and hop off at Disneyland Resort Station.
From Tsim Sha Tsui
Via MTR
Board the Tsuen Wan Line at Tsim Sha Tsui Station. Hop on the train at Platform 1 towards Tsuen Wan.
Alight at Lai King Station, then transfer to a Tung Chung-bound train on the Tung Chung Line.
Get off at Sunny Bay Station. Transfer to the Disneyland Resort Line and board a train to Disneyland Resort Station.
Hong Kong Disneyland Opening Hours
Hong Kong Disneyland’s usual operating schedule is 10:00AM to 9:00PM. However, opening hours varies depending on different factors. To know the exact park opening hours on your intended time of visit, you may check Disneyland’s park calendar.
Things to Do at Hong Kong Disneyland
Hong Kong Disneyland has eight themed areas that you can explore: Main Street, U.S.A., Tomorrowland, Fantasyland, World of Frozen, Adventureland, Toy Story Land, Mystic Point, and Grizzly Gulch. Each zone has rides, attractions, shops, and food spots that you can try and check out during your visit. Here’s a rundown of what you will find in each zone.
Main Street, U.S.A.
This zone welcomes you as you enter the park. Along this street is where you can catch the “Friendtastic!” Parade, where you will see many Disney characters parading on floats and cast members dancing along.
Attractions & Experiences
Art of Animation
Animation Academy
Main Street Vehicles
Hong Kong Disneyland Railroad – Main Street Station
Tomorrowland
Tomorrowland is Disneyland’s futuristic zone. This is where sci-fi themed attractions and rides are located. If you’re a marvel or star wars fan, this is the zone for you!
Rides & Attractions
Hyperspace Mountain
Ant-Man and the Wasp: Nano Battle!
Iron Man Experience
Iron Man Tech Showcase
Fantasyland
This is where your fairytale dreams will come true at Disneyland. Towering over this zone is the most iconic structure in Disneyland — the Castle of Magical Dreams. Surrounding the castle are rides and attractions inspired by classic Disney characters.
Rides & Attractions
Mad Hatter Tea Cups
The Many Adventures of Winnie the Pooh
Cinderella Carousel
Dumbo the Flying Elephant
Mickey’s PhilharMagic
It’s a Small World
Mickey and the Wondrous Book
Fairy Tale Forest
Fantasy Gardens
World of Frozen
Hong Kong Disneyland’s newest themed zone is the World of Frozen. When you enter this zone, you’ll feel like you are transported to Arendelle. This is also one of the most, if not the most, popular zones in Hong Kong Disneyland right now, so expect longer wait times on the frozen rides.
Rides & Attractions
Frozen Ever After
Wandering Oaken’s Sliding Sleighs
Playhouse in the Woods
Adventureland
Adventureland is an island-themed area. There are a few rides and attractions located here including shows you can watch.
Rides & Attractions
Jungle River Cruise
Moana: A Homecoming Celebration
Festival of the Lion King
Liki Tikis
Toy Story Land
Here in Toy Story Land, Andy’s toys come to life. Not only are the rides toy-themed, but this whole area is also decorated with toys from the famous Disney franchise. You’ll even get to meet toy soldiers walking around this zone!
Toy Soldier Parachute Drop (Left) and RC Racer (Right)
Rides & Attractions
RC Racer
Toy Soldier Parachute Drop
Slinky Dog Spin
Barrel of Fun
Mystic Point
Mystic Point is a section exclusively made for Hong Kong Disneyland. It is home to Mystic Manor, which, for us, is one of the park’s best attractions. On this ride, you’ll learn about the story of Mystic Manor and meet a monkey named Albert.
Rides & Attractions
Mystic Manor
Garden of Wonders
Mystic Point Freight Depot
Grizzly Gulch
This zone is inspired by the American frontier or the Old West similar to the Frontierland in Disneyland in Anaheim, California. In Hong Kong Disneyland, Grizzly Gulch is home to only one ride — a thrilling rollercoaster-type that will take you around a mountain and a gold mine.
Rides & Attractions
Big Grizzly Mountain Runaway Mine Cars
Geyser Gulch
Wild West Photo Fun
Most Popular Rides
If you’re visiting Hong Kong Disneyland for the first time and you’re looking for recommendations for rides you shouldn’t miss, here are the most popular attractions in the park.
Frozen Ever After (Left), Jungle River Cruise (Top Right), and Mystic Manor (Bottom Right)
Frozen Ever After
Location: World of Frozen Type: Indoor Reminder! Children below 7 years old must be accompanied by a person 16 years old and above. Pregnant women should not ride.
Mystic Manor
Location: Mystic Point Type: Indoor Reminder! Children below 7 years old must be accompanied by a person 16 years old and above.
Big Grizzly Mountain Runaway Mine Cars
Location: Grizzly Gulch Type: Outdoor, Thrill Reminder! Not recommended for: (1) guests with high blood pressure, heart, back or neck problems, motion sickness, or other conditions; (2) guests with a height of 112cm and below; (3) pregnant women. Children below 7 years old must be accompanied by a person 16 years old and above.
Hyperspace Mountain
Location: Tomorrowland Type: Indoor, Thrill Reminder! Not recommended for: (1) guests with high blood pressure, heart, back or neck problems, motion sickness, or other conditions; (2) guests with a height of 102cm and below; (3) pregnant women. Children below 7 years old must be accompanied by a person 16 years old and above.
Iron Man Experience
Location: Tomorrowland Type: Indoor Reminder! Not recommended for: (1) guests with high blood pressure, heart, back or neck problems, motion sickness, or other conditions; (2) guests with a height of 102cm and below; (3) pregnant women. Children below 7 years old must be accompanied by a person 16 years old and above.
RC Racer
Location: Toy Story Land Type: Outdoor, Thrill Reminder! Not recommended for: (1) guests with high blood pressure, heart, back or neck problems, motion sickness, or other conditions; (2) guests with a height of 120cm and below; (3) pregnant women. Children below 7 years old must be accompanied by a person 16 years old and above.
Toy Soldier Parachute Drop
Location: Toy Story Land Type: Outdoor, Thrill Reminder! Not recommended for: (1) guests with a height of 81cm and below; (2) pregnant women. Children below 7 years old must be accompanied by a person 16 years old and above.
It’s a Small World
Location: Fantasyland Type: Indoor Reminder! Children below 7 years old must be accompanied by a person 16 years old and above.
Jungle River Cruise
Location: Adventureland Type: Outdoor Reminder! Children below 7 years old must be accompanied by a person 16 years old and above.
Other Activities
Parades and Shows. Parades and shows will complete your magical experience in Disneyland, so you shouldn’t miss them. Among the shows you should watch is the Disney Friends Live: Party at the Castle, which happens at the Castle Stage multiple times throughout the day. You can also see more Disney characters at the “Friendtastic!” Parade along Mainstreet, U.S.A. The parade happens twice daily (1:00 PM and 5:15 PM). And of course, the highlight show of Hong Kong Disneyland is Momentous: Party in the Night Sky, which happens at 8:30 PM and is the best end to your Disneyland adventure.
Meet Disney Characters. If you want to get up close to your favorite Disney character, you can meet them during character greetings. You can interact and take photos with them at designated areas around the park. Keep in mind that these usually have specific schedules too, so you’ll need to check the schedule first. Check the Hong Kong Disneyland app for the schedule and location of the character experiences.
Souvenir Shopping. During your trip, if you want to grab a souvenir for yourself and pasalubong for your loved ones, there are multiple shops throughout the park. Along Main Street, you’ll find a few stores you can go to for different Disney merchandise. Each themed zone and some attractions also has their own souvenir stores.
Where to Eat
When you get hungry while you’re at the park (and for sure, you will), there are many food options available. You’ll find various restaurants, food stalls, snack carts, and cafes to choose from. But keep in mind that, like other theme parks and tourist destinations, food and drinks in Hong Kong Disneyland are on the pricier side. If you’re on a budget and still want to complete your Disneyland experience, grab a snack or two!
Marvel Burger Meal (Left) and Two-Piece Fried Chicken Meal (Right)
Another experience you can add to your Disneyland adventure is the Arendelle Royal Breakfast Buffet. Here, you’ll enter the park an hour earlier to enjoy breakfast at World of Frozen. If you or your kids are Frozen fans, this is the best addition because you’ll also get to meet Anna and Elsa and the Royal Arendellian Troubadours. You can book this breakfast buffet and other dining packages by following the link below.
Here’s a list of restaurants and cafés across the park and their location. This includes quick service or fast-food type restaurants and table service or casual dining. There are also various food kiosks or outdoor carts in different zones, so if you’re in need of a quick snack, it won’t be hard to find.
Table Service/Casual Dining Restaurants
Main Street Corner Cafe Location: Main Street, U.S.A.
Plaza Inn Location: Main Street, U.S.A.
Explorer’s Club Restaurant Location: Mystic Point
River View Cafe Location: Adventureland
Quick Service/Fast Food Restaurants
Main Street Bakery Location: Main Street, U.S.A.
Market House Location: Main Street, U.S.A.
Comet Cafe Location: Tomorrowland
Starliner Diner Location: Tomorrowland
Golden Crocus Inn Location: World of Frozen
Tahitian Terrace Location: Adventureland
Royal Banquet Hall Location: Fantasyland
Clopin’s Festival of Food Location: Fantasyland
Other Tips and Reminders
To help ensure that you can make the most out of your trip, here are some tips and reminders to help you plan your trip.
Check the park calendar before your trip. Disneyland’s opening hours often vary. Before your trip, make sure to double-check the park calendar to see the park hours, especially if you plan on being there as soon as it opens.
Download the Hong Kong Disneyland App. This app has everything you will need during your Disneyland visit. It has a map where you can find the locations of restaurants, shops, bathrooms, and of course, the attractions. But aside from the location, you can also see the wait times of each attraction in real time, which can help you decide which attraction to go to next. Schedules of shows and parades are also available. You can even purchase a Disney Premiere Access Pass for attractions on the app if you decide last minute.
Avail Early Park Entry Pass or Disney Premiere Access Pass. If you think you won’t have enough time to explore Disneyland with a regular ticket during regular park hours, you can avail of these add-ons to maximize your time.
Bring a reusable water bottle. As mentioned earlier, food and beverages at the park are on the pricey side. A bottled water or soda, for example, is usually HK$ 30. To save money, bring a reusable water bottle and refill it at the drinking fountains across the park.
Wear Comfortable Clothing. Let this be your warning: you’ll do A LOT of walking. Keep your feet from hurting and avoid blisters by wearing your most comfortable shoes. If you’re visiting during summer, wear light clothing and don’t forget to use sun protection too! And if your visit is during the rainy season, make sure to bring a rain jacket with you.
For an even more magical Disney experience, book your stay at one of the Disney hotels at Hong Kong Disneyland Resort. These are the three hotels to choose from:
Where to Stay in Hong Kong
Outside of Disneyland, the closest area to Disneyland is Tung Chung and Hong Kong SkyCity. These areas are also near the airport. However, if you’re also exploring other parts of Hong Kong during your trip, you may also consider other areas like Tsim Sha Tsui or Central.
For more details about different areas to stay in Hong Kong, you can check out our Where to Stay in Hong Kong article. But you may also check out these top accommodations in Hong Kong based on online user reviews for recommendations.
Getting a travel insurance is optional, but we highly recommend this, especially when traveling abroad. Travel can be unpredictable, and though we hope we’ll never use it, having it gives us peace of mind in case of unexpected delays, cancellations, or emergencies.
For international destinations, consider PGA Sompo’s TravelJOY Plus insurance. You can GET IT HERE. Don’t forget to use WORTHIT for a special affordable rate.
Updates Log
2025 7 30 – First uploaded
Photos by: Mariah Cruz, Yosh Dimen, and Asta Alvarez
If you’re like me, finding clothing that honors your roots and fits your style isn’t always easy. As a Korean-American who values both identity and aesthetics, I’m always on the lookout for brands that speak to who I am—without turning culture into a trend. That’s exactly why KORELIMITED stood out to me.
This Los Angeles–based streetwear brand blends Korean heritage with modern design in a way that feels fresh, intentional, and authentic. Here’s my full KORELIMITED review after wearing several of their pieces—and why I think they’re worth checking out. Plus, you can save 15% on your order with code: NIENIE15
This site contains affiliate links to products. We may receive a commission for purchases made through these links. Support my blog here
First Impressions
I first discovered KORELIMITED while scrolling through Instagram. Their products immediately caught my attention. From there, I fell down the rabbit hole (aka their website) and was impressed by the clean aesthetic, bold cultural references, and inclusive messaging. The brand felt like it was made for people like me: Korean diaspora who want to wear their heritage with pride, not perform it for trendiness.
When my first package arrived, I could already tell it wasn’t your typical streetwear. The packaging was minimal but thoughtful, and the fabric quality was noticeable from the moment I opened it.
Key Takeaways
Designs blend Korean history and symbolism with streetwear edge
High-quality, long-lasting materials with great fit
Ideal for Korean-Americans or anyone interested in thoughtful, cultural fashion
Design and Aesthetic
KORELIMITED doesn’t just throw a few Hangul characters on a shirt and call it a day. Their designs reference real cultural moments—like the March 1st Movement, Hangeul Day, and traditional Korean motifs like Mugunghwa (the national flower). There’s intentionality behind every drop.
I picked up a taeguk hoodie, the bunsik club tee and a snapback embroidered with the Korean flag on it. The look is effortlessly cool: clean lines, subtle colorways, and heritage-infused typography that doesn’t scream for attention—but still turns heads.
Whether you’re heading to a café in Seoul or a farmer’s market in the US, the design fits in—and stands out.
Material and Durability
Let’s talk quality. One of my biggest pet peeves is investing in a brand only to have the shirt pill after two washes. KORELIMITED exceeded my expectations here.
Fabric: The cotton is thick and soft, especially on the hoodies—almost heavyweight but still breathable.
Stitching: Clean and reinforced, no loose threads or uneven seams.
Prints: Screenprinting is sharp and hasn’t cracked or faded after multiple washes.
For a streetwear brand, they’ve clearly prioritized both form and function, which I appreciate as someone who wants their wardrobe to last more than one season.
Fit and Comfort
I ordered everything true to size and appreciated the relaxed, slightly oversized fit—ideal for layering. If you’re into that laid-back, Seoul-meets-LA vibe, their sizing and cuts deliver.
Hoodies: Roomy but not sloppy, with a structured hood that actually stays up.
T-Shirts: Unisex sizing with a drop-shoulder silhouette—great for a streetwear feel.
Hats: Adjustable snapbacks with a firm, structured crown.
Whether I’m running errands, traveling, or just lounging at home, their pieces are wearable and comfortable all day long.
Cultural Significance
What really makes KORELIMITED stand out is the depth behind the design. This isn’t a fast-fashion “Korean aesthetic”—this is intentional storytelling.
As someone who grew up between cultures, wearing pieces that reflect real history—like the Hangul alphabet or references to Korean independence—feels empowering. KORELIMITED isn’t just about looking good; it’s about feeling connected.
They also partner with Korean-American creatives and highlight causes related to Asian representation, which makes me feel even better about supporting the brand.
Value and Pricing
Compared to other premium streetwear brands, KORELIMITED is competitively priced, especially given the quality.
Item Type
Price Range
T-Shirts
$38 – $52
Hoodies/Sweatshirts
$78 – $110
Accessories (hats, socks, bags)
$20 – $45
Shipping was fast (especially within the U.S.), and they offer regular drops and limited edition collections if you’re looking for something more exclusive.
They don’t offer a full-blown lifetime warranty like some travel brands, but return and exchange policies are reasonable—and customer service was responsive when I had a sizing question.
Why KORELIMITED Works for Me
As someone who’s always packing for the next adventure and navigating multiple identities, I want clothing that’s more than just trendy. KORELIMITED fits my style, my story, and my standards.
It’s not about performative culture or slapping Korean lettering on a tee for clout. It’s thoughtful, intentional, and proudly Korean-American—just like I strive to be.
Final Thoughts on KORELIMITED
If you’re looking for streetwear that goes beyond surface-level “aesthetic,” KORELIMITED is worth a spot in your wardrobe. Their pieces are well-made, culturally rich, and versatile enough to wear anywhere—from a trip to Seoul to your favorite neighborhood café.
It’s not just a brand—it’s a statement. One I’m proud to wear.