When people think of Europe, the first destinations that often come to mind are France, Italy, Germany, Spain, and maybe Switzerland. However, Europe is home to dozens of countries, and one of the most underrated regions for travelers is the Balkans. While there’s no universal agreement on which countries belong to the Balkans, the region generally includes Albania, Bosnia and Herzegovina, Croatia, Bulgaria, Greece, Kosovo, Montenegro, North Macedonia, and Serbia, with Romania and Slovenia sometimes considered part of it as well.
Despite being overlooked by many tourists, the Balkans offer stunning landscapes, rich history, and vibrant cultures — all at a fraction of the cost compared to Western Europe. While some places may still be pricey by Filipino standards, they are generally more budget-friendly than their Western European counterparts. If visiting the Balkans is on your travel bucket list, keep reading as we share how we planned our unforgettable Balkan adventure in this article!
As mentioned earlier, the Balkan region generally consists of 11 countries. However, not all of them are part of the Schengen Area.
Schengen Balkan Countries
Only five countries in the Balkan region are included in the Schengen Area. These are the following:
Greece
Croatia
Slovenia
Bulgaria
Romania
Note: Bulgaria and Romania currently only accept Schengen visas at their sea and air borders.
Among the Schengen countries in the Balkans, Greece is the most practical choice for Filipino travelers. Here are the reasons:
Greece has its own embassy in the Philippines, making visa processing more straightforward.
Athens Airport is well-connected, with affordable flights available from many destinations.
Greece is a stunning travel destination, so it’s well worth adding to your itinerary!
Alternatively, you can also apply for a Schengen visa through Slovenia, which is processed by the Belgian Embassy in the Philippines.
TIP! Design an itinerary that requires multiple Schengen entries, making your multiple-entry visa application more justifiable. See sample itinerary in the next section.
Non-Schengen Balkan Countries
Here are the Balkan countries outside of the Schengen Area:
Albania
Bosnia and Herzegovina
Kosovo
Montenegro
North Macedonia
Serbia
If you’re traveling to any of these countries, you’ll need a separate visa specific to that country. For instance, if you’re only visiting Albania, you’ll need to apply for an Albanian visa. Fortunately, there’s a workaround: if you have a multiple-entry Schengen visa, you won’t need a separate visa for many Balkan states.
To take advantage of this, you can apply for a multiple-entry Schengen visa through Greece, Croatia, Slovenia, Bulgaria, or Romania — as long as your itinerary justifies multiple entries. Additionally, many non-Schengen Balkan countries accept a used multiple-entry Schengen visa, meaning you must enter a Schengen country at least once before using it to visit other Balkan states.
2. Plan your route wisely.
Careful route planning is essential — not only to save time, money, and energy but also to justify the need for a multiple-entry Schengen visa.
Creating Your Itinerary
As mentioned earlier, only five Balkan countries are part of the Schengen Area, while the rest require separate visas. However, with a multiple-entry Schengen visa, you can enter many non-Schengen Balkan countries without needing additional visas.
This is why the itinerary you submit to the embassy is crucial. Below is a simplified version of our Balkan travel route. It was more complicated in reality, but this gives you an example of how you can plan your itinerary.
Greece
Romania
Bulgaria
North Macedonia
Kosovo
Albania
Montenegro
Croatia
Bosnia and Herzegovina
Croatia
Spain
This itinerary required us to enter the Schengen Area three times, which strengthened our justification for a multiple-entry visa.
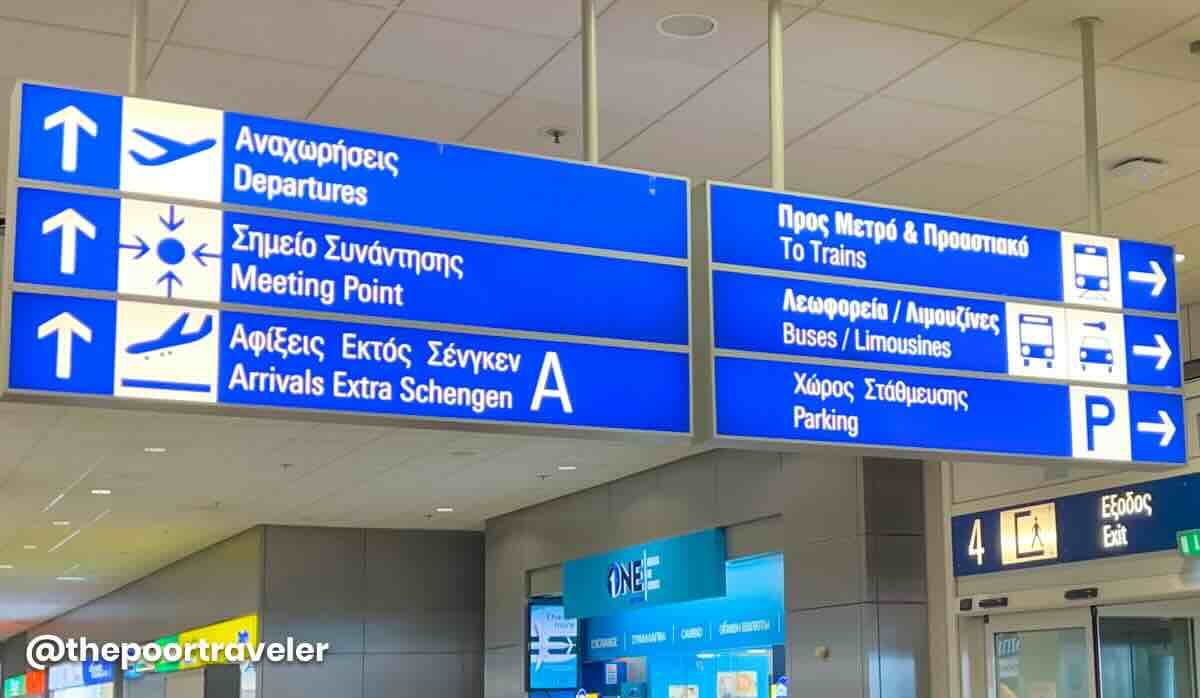
Arrival at Athens Airport
First Entry: Arriving in Greece (Schengen).
Second Entry: Exiting the Schengen Area from Bulgaria to North Macedonia, then re-entering when arriving in Croatia.
Third Entry: Taking a side trip to Bosnia and Herzegovina and Montenegro, then re-entering Croatia.
With three Schengen entries, a multiple-entry visa was justified, allowing us to travel through the non-Schengen Balkan countries without needing separate visas.
Choosing the Best Mode of Transportation
Beyond visas, planning your route wisely also means considering transportation availability. Google Maps is a great tool to check the most logical route between the countries you want to visit. Researching bus routes can help you avoid unnecessary flights, making your trip more budget-friendly and efficient.
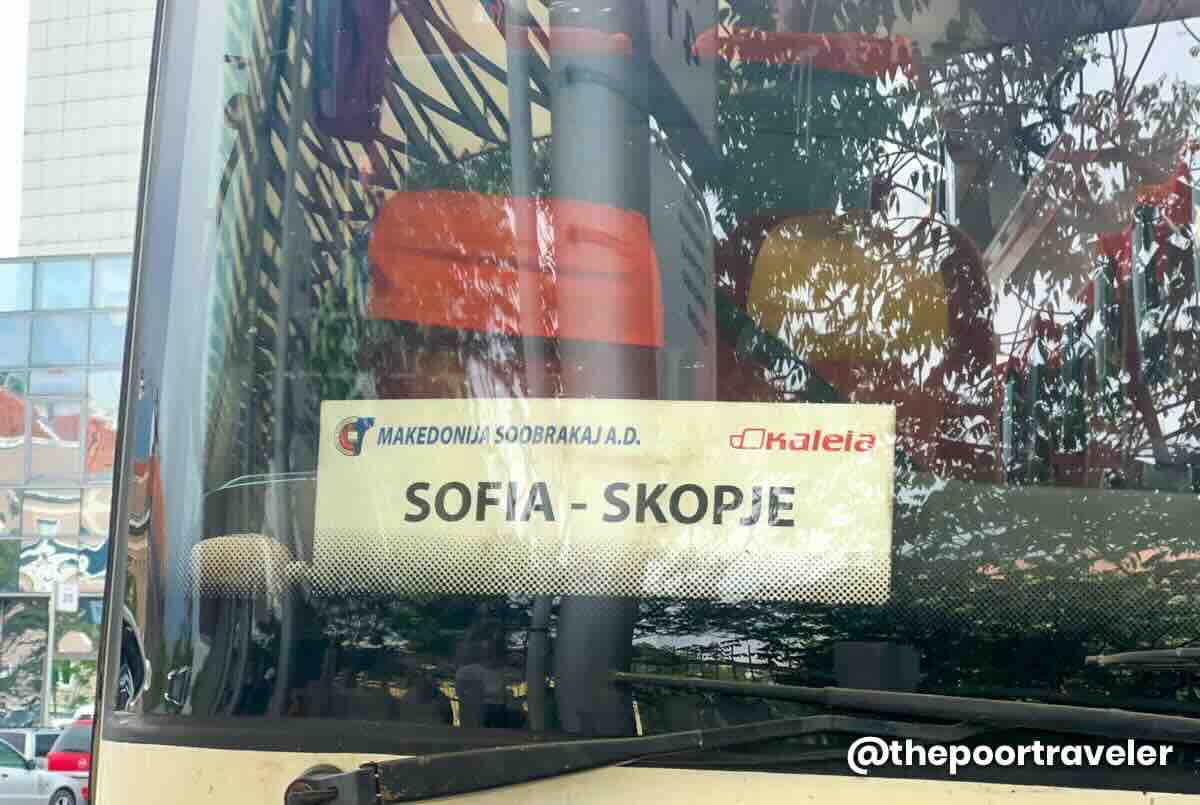
Bus from Sofia in Bulgaria to Skopje in North Macedonia
During our Balkan backpacking trip, we primarily traveled by bus. Not only was it the most affordable option, but it also made for a more immersive and adventurous experience.
Checking the Political Landscape
Another critical factor when planning your itinerary is the political landscape of the Balkan region, as some countries have border restrictions due to diplomatic conflicts. For example, Serbia apparently does not allow entry from Kosovo due to conflicts. While this policy may change over time, we took extra precautions when planning our route. Instead of traveling from Kosovo to Serbia, we entered Serbia from Bulgaria first, then later traveled to Kosovo from North Macedonia to avoid potential issues.
By being strategic with your route, you can make your Balkan adventure smoother, more cost-effective, and visa-efficient — all while enjoying the incredible diversity of this fascinating region!
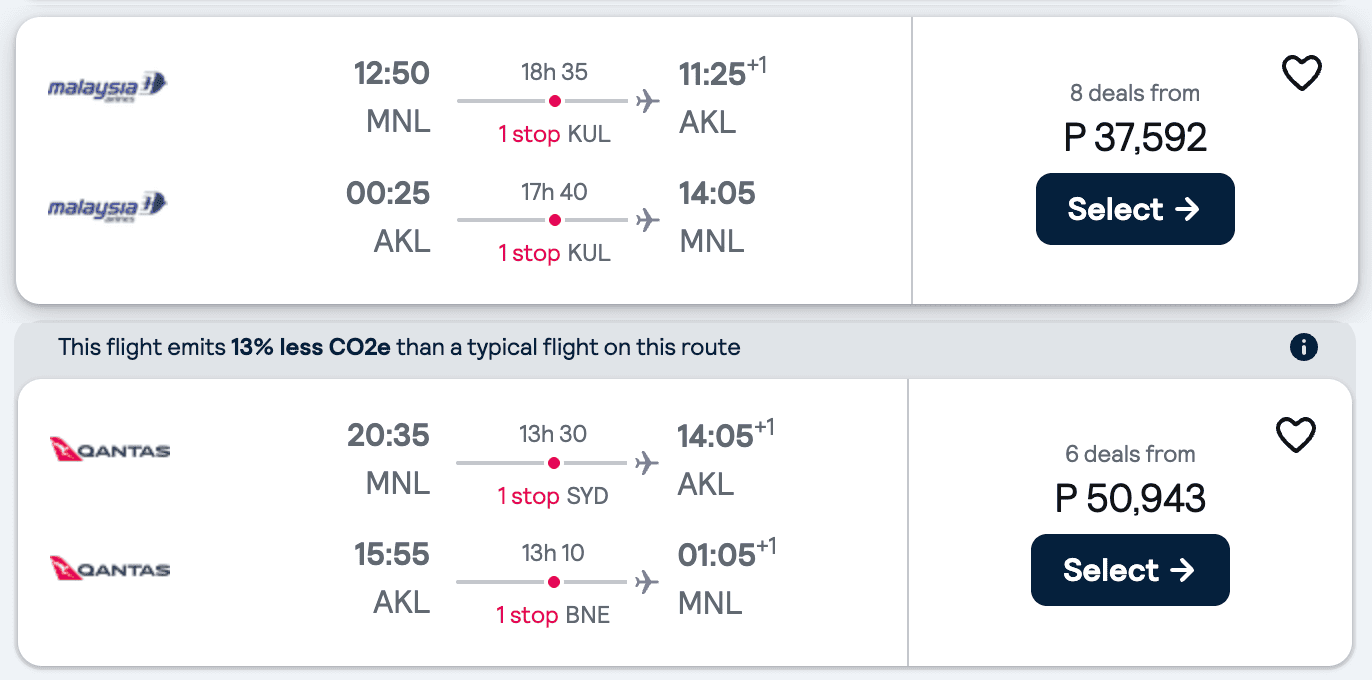
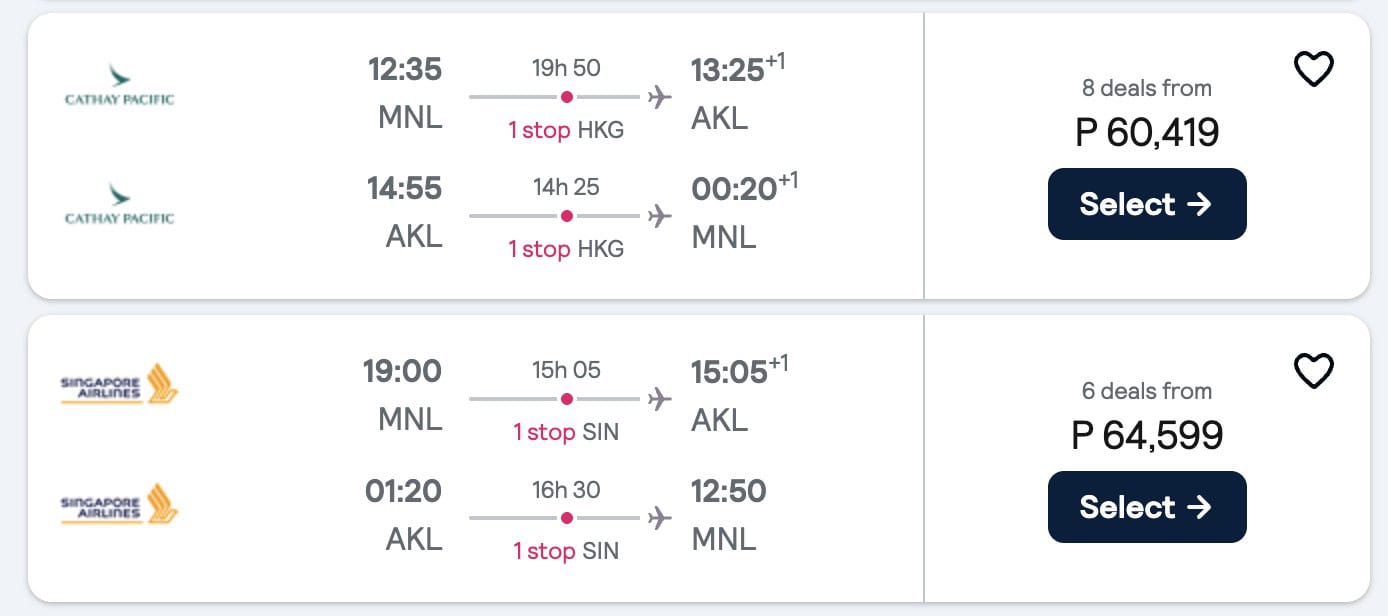
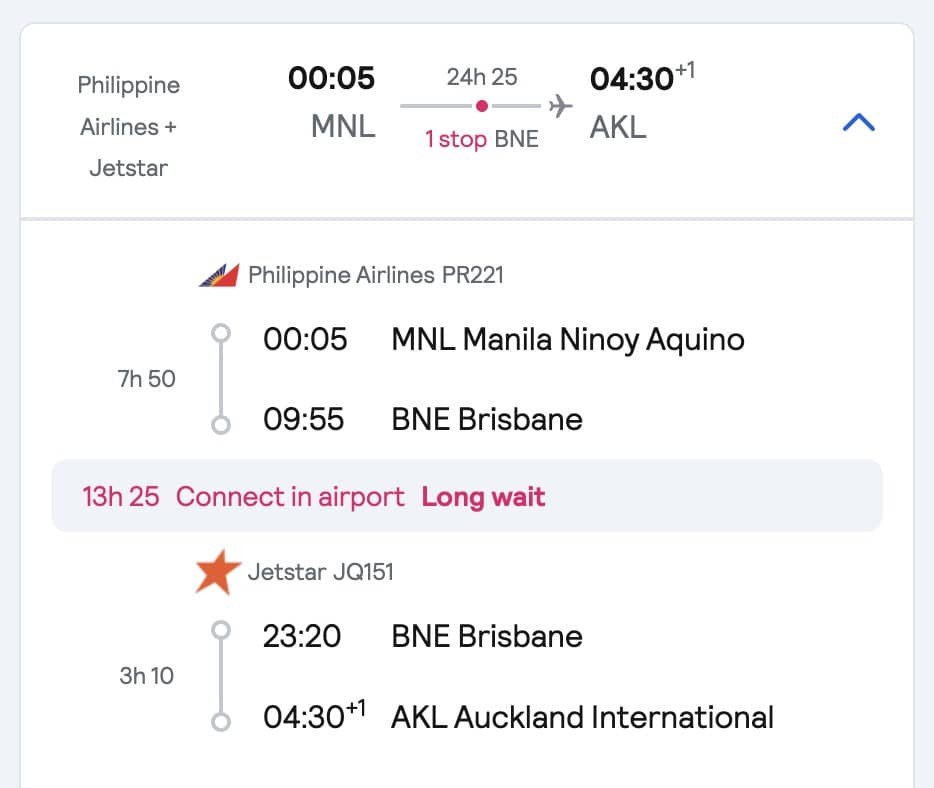
3. Search for affordable flights.
When planning our Balkans trip, we chose Greece as our entry point because it offered the cheapest flights. If you’re booking well in advance or during seat sales, one of the most budget-friendly options from Manila to Athens is SCOOT, which operates flights with a stopover in Singapore. In fact, we’ve flown to Greece with Scoot on previous trips.
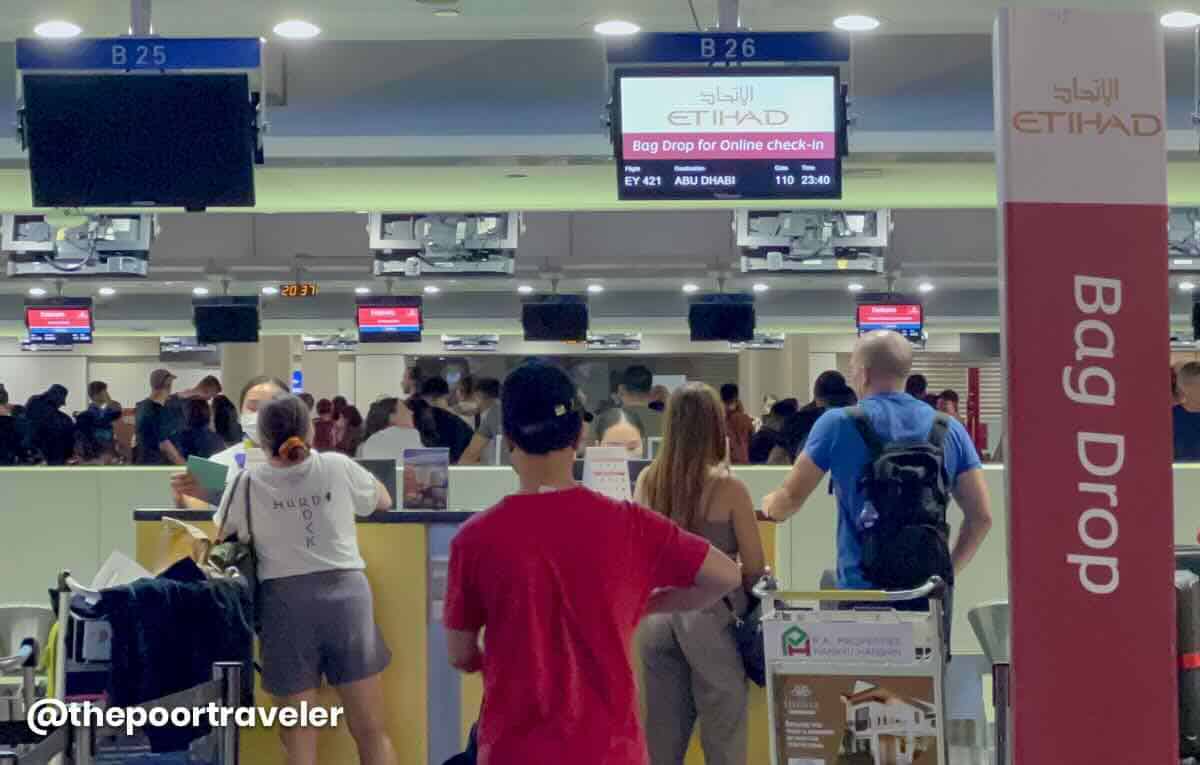
However, don’t limit your search to just budget airlines. It’s always worth checking full-service carriers too. Sometimes, you’ll find flights that are either cheaper or only slightly more expensive than low-cost airlines but come with added benefits. For example, when we booked our flight for our Balkans trip, we chose Etihad with a stop in Abu Dhabi. At the time, it was only about ₱5,000 more expensive than Scoot, but that price already included add-ons.
If you noticed in our sample itinerary, our final stop before returning to the Philippines was Spain, even though it’s not part of the Balkan region. The reason? Flight prices. At the time, the cheapest flight back to Manila was from Barcelona. Even after factoring in the cost of a connecting flight from Croatia to Barcelona, the total expense was still lower than flying directly from the Balkans. That’s why we decided to include Spain in our route!
It’s important to note that when applying for a Schengen visa, you don’t need to book your flights yet. Instead, you’ll need a flight reservation, which serves as a temporary booking without requiring full payment. Some people refer to it as a “dummy ticket”, it sounds phony so we avoid using that term. But whatever you call it, what’s important is that embassies recognize flight reservations.
For our visa applications, we get our flight reservations from Gazelle Travel and Tours. If you need one, you can visit this page, fill out the order form, and check the pricing and turnaround time. Once your visa is approved, you can proceed with finalizing your actual flight booking.
4. Consider the season and the weather.
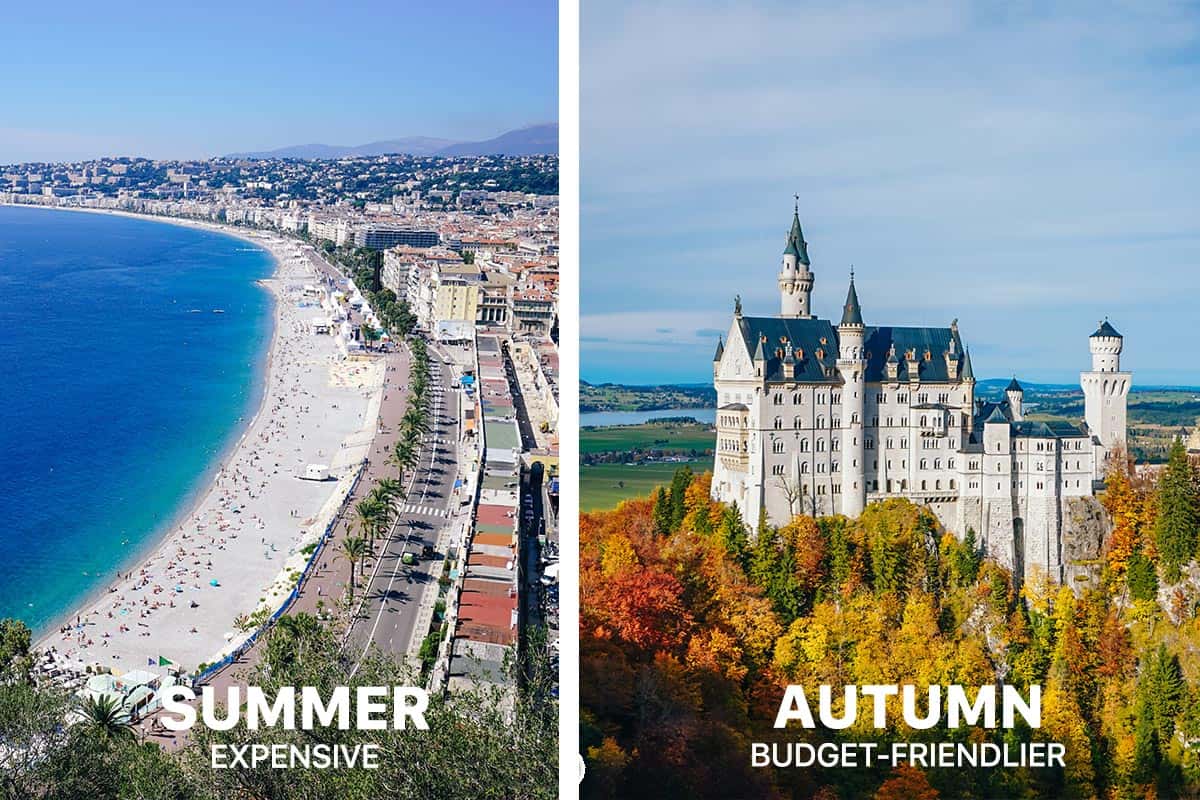
Timing plays a crucial role when planning a trip to Europe, including the Balkan region. We’ve traveled to the Balkans during late spring to early summer and again from late summer to autumn, and we can confidently say — the difference in price is huge.
The summer months (June to September) are considered peak season, meaning higher prices for flights, accommodations, and tours. For example, when we visited Croatia, we noticed that as soon as October arrived, tour prices dropped significantly. This trend applies to hotels and flights as well.
Out of all the seasons we’ve experienced, autumn was the most breathtaking. The weather was comfortably cool — neither too hot nor too cold — and the landscapes were painted in stunning fall colors, making it an unforgettable sight.
Beyond pricing and scenery, seasonal weather also determines what you need to pack. The Balkans have diverse climates, so temperatures can vary greatly depending on where you go. For example, the weather in Romania is different from Croatia’s Dalmatia Region.
Meanwhile, coastal cities along the Adriatic and Aegean Seas — like Split and Dubrovnik in Croatia — have a Mediterranean climate. Inland regions, such as Sofia in Bulgaria and Brașov in Romania, experience a humid continental climate, meaning colder winters and more significant seasonal changes.
If you’re backpacking through multiple countries, expect the weather to shift from place to place. Be sure to research each destination’s climate in advance and pack accordingly to stay comfortable throughout your journey.
5. Don’t assume everything’s the same.
The Balkan region is incredibly diverse, not just in terms of climate but also in culture, language, history, and governance. While there are similarities between countries, each nation has its own distinct identity. The alphabet, religion, political systems, and even cuisines can vary dramatically as you cross borders.
History
This diversity is also reflected in the region’s complex history. Many neighboring countries have long-standing political tensions, which sometimes become evident when speaking with locals. Even historical tours can present conflicting narratives, depending on where you are. For example, North Macedonia and Bulgaria, Serbia and Bulgaria, Serbia and Kosovo, and even Bosnia and Herzegovina all have different perspectives on historical events — and you’ll likely sense this when visiting heritage sites or engaging in conversations.
Cuisine
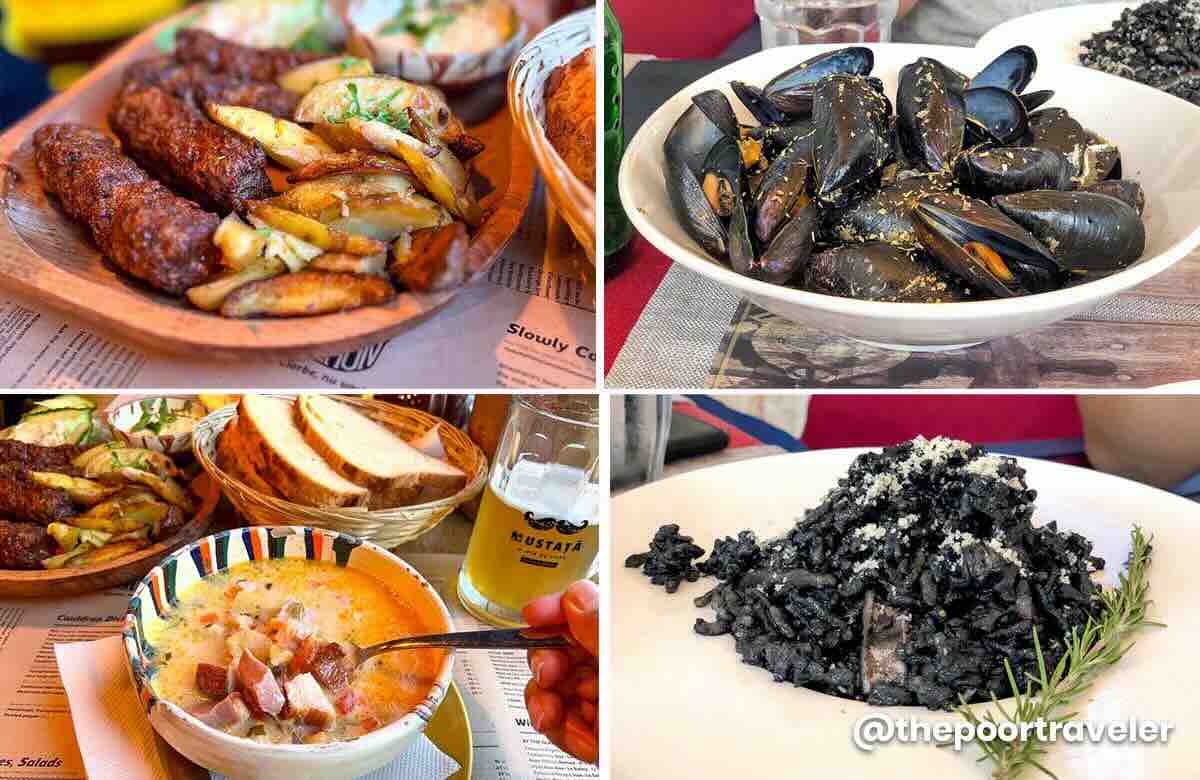
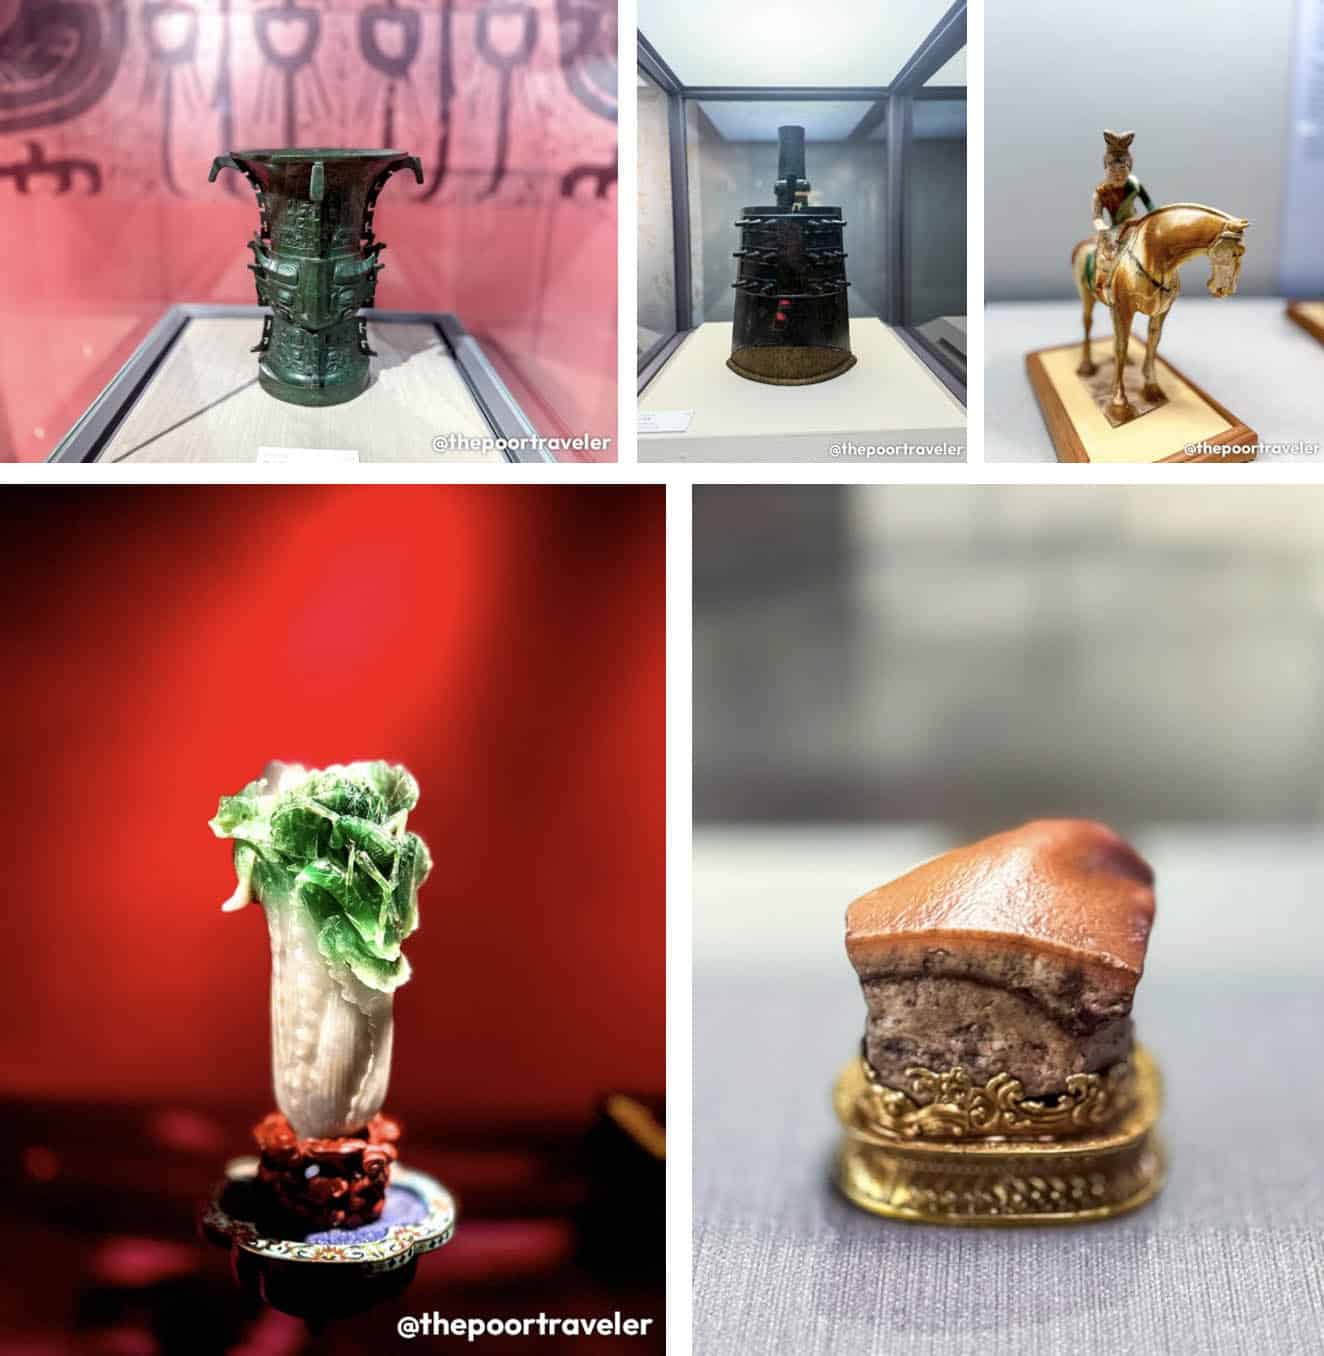
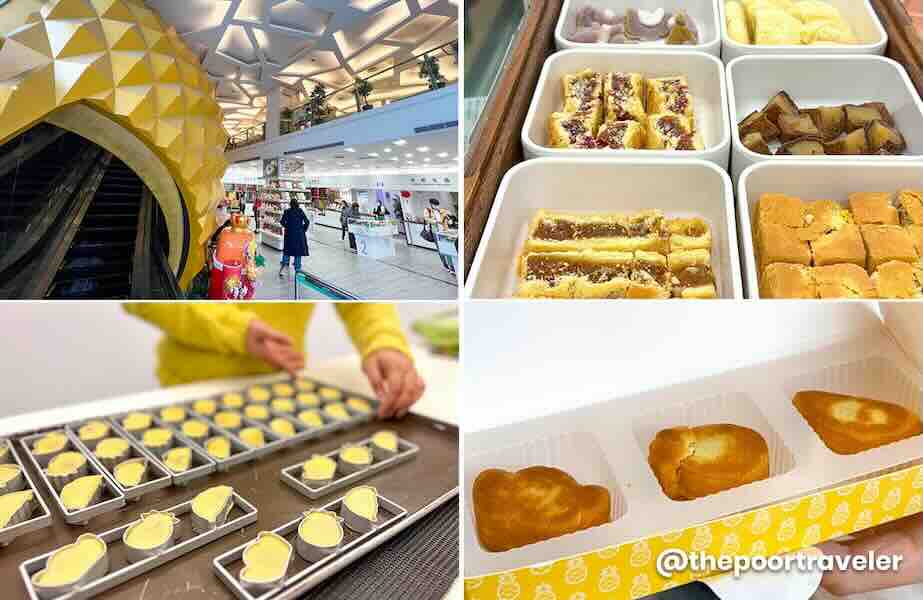
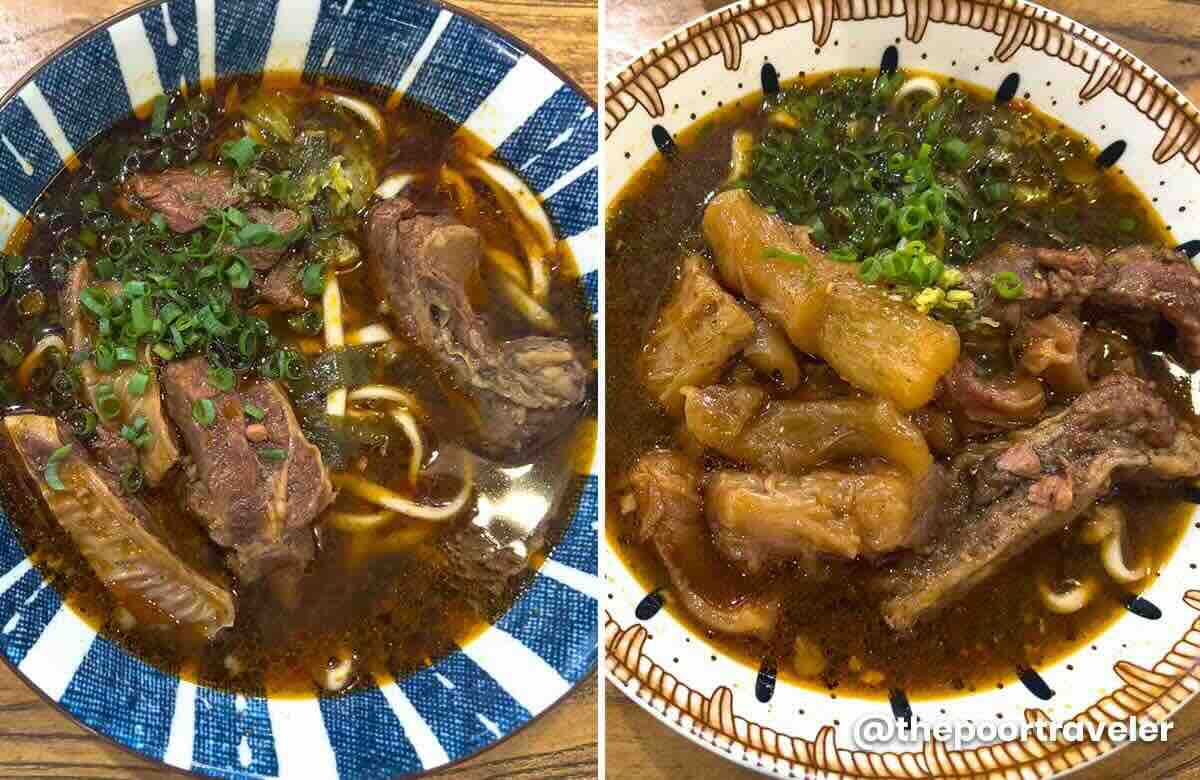
Each country in the Balkans offers a unique cuisine as well. For example, in Dubrovnik and Montenegro, seafood dominates the cuisine, whereas Romania, Bulgaria, and Serbia favor meat-heavy dishes.
Some of the dishes we tried in Brasov, Romania (Top and Bottom Left) and Kotor, Montenegro (Top and Bottom Right).
Religion
When it comes to religion, countries like Kosovo and Albania are predominantly Muslim, while Croatia is largely Catholic. Meanwhile, Greece, Bulgaria, Serbia, Montenegro, and Romania follow Eastern Orthodox Christianity, each with their own branches — Greek Orthodox, Bulgarian Orthodox, and Serbian Orthodox.
Language
The linguistic diversity is also fascinating. For example, Romanian is a Latin-based language that uses the Latin alphabet, whereas Bulgarian is a Slavic language that uses the Cyrillic script. Greek, of course, has its own distinct Greek alphabet.
Vibe and Personality
Every destination has its own personality. Beyond cultural differences, each city or town exudes its own unique charm. Brașov (Romania) feels like a quaint, fairy-tale town. Sofia (Bulgaria) and Tirana (Albania) have the bustling energy of big cities. Meanwhile, Split and Dubrovnik (Croatia) are straight out of Game of Thrones, serving serious King’s Landing vibes. And Mostar (Bosnia and Herzegovina) and Prizren (Kosovo) look like giant, open-air museums with their well-preserved historical sites.
Affordability
Prices also vary between destinations. While much of the Balkans is known for being budget-friendly, there are notable exceptions. Dubrovnik and Split are among the most expensive cities in the region. When we first visited these parts of Croatia a few years ago, they were already pricey, but during our most recent trip, we noticed prices had skyrocketed, likely due to the influx of tourists. If you plan to visit, be prepared to spend more compared to other Balkan destinations.
The more places you explore, the more you’ll appreciate the region’s incredible diversity. Every stop reveals something new, making the Balkans a truly fascinating place to visit.
6. Inspect your accommodations online.
One of the best things about traveling in the Balkans is the abundance of budget-friendly accommodations. However, price isn’t the only factor to consider when choosing where to stay. We always use two key criteria when booking: central location and accessibility.
We prefer accommodations near the Old Town or city center, within walking distance of key attractions and starting points for walking tours. It’s also important that our lodging is close to major transportation hubs, such as train stations or bus terminals, for easier transfers between destinations.
Finding accommodations that fit these criteria was fairly easy, except in Dubrovnik, where we faced a unique challenge: most budget-friendly rooms only accommodated two people — we were a group of three. As a result, we ended up booking apartments for most of our stay.
By the way, these are all the promo codes that you can use. We have discounts for hotels, tours, and eSIM for internet connection. We even have special rates for travel insurance, exclusive for TPT subscribers.
Beyond location and affordability, it’s also crucial to check the building’s facilities, especially if you’re staying in an apartment within the Old Town. Some buildings are older and lack elevators, which can be a problem if you’re carrying heavy luggage or have mobility problems.
For example, in Brașov, Romania, we stayed at Zinne Apartments, a charming place just two blocks from the main square. However, it was on the second floor, which is third floor for us Pinoys, and since it was in an older building, there was no elevator. Similarly, in Skopje, North Macedonia, we booked Apartment Emilija, which had an amazing location — we could see the main square right from our window. The unit itself was spacious and comfortable, but it was on the fourth floor, which is fifth floor by our standards, with no elevator.
Zinne Apartments in Brasov, Romania.
Before finalizing your accommodation, always check which floor your unit is on and whether the building has an elevator. This small detail can make a big difference in your comfort, especially after a long day of exploring. And, again:
If Klook is your go-to booking site, please use our promo code THEPOORTRAVELERKLOOK for up to P300 OFF or TPTKLOOK5 for up to P500 OFF. These codes might change in the future so best to just visit thepoortraveler.net/klook to redeem updated discount codes!
If you prefer to book via AGODA, use our promo code AGODATPT for 10% discount.
7. Beware of scams and secure mandatory travel insurance.
Like many major cities in Europe, scams exist in the Balkans. Although they are not as rampant as in Paris, Barcelona, or Berlin, scams still exist here. The most common type of scam travelers encounter here usually involves taxis.
We personally experienced a taxi scam in North Macedonia. We usually prefer public transportation, but sometimes, especially when arriving late at night, taking a taxi is the only option. Since there were three of us, we figured splitting the fare wouldn’t be too bad.
Before getting in the taxi, we agreed on a price with the driver. However, when we arrived at our destination, he suddenly demanded more money. When we refused, other taxi drivers surrounded us, trying to intimidate us.
Unfortunately, taxi scams happen in other cities too. If you suspect a driver is overcharging, walk away and find another taxi. To avoid this, you can ask your accommodation host for an estimate of the usual fare from the station to your stay. Many hosts even recommend a trusted transfer service to ensure you’re not overcharged. For example, our host in Skopje went the extra mile to personally take us to the bus station so we wouldn’t have to deal with taxi scams.
In our six weeks of traveling in the Balkans, we only encountered two scams and fell for one. However, there are other scams that travelers have reported, such as as the money collector scam and overpriced menu scam. Thankfully, we didn’t encounter these, but researching common scams before your trip can help you recognize and avoid them.
Since we’re talking about safety, remember that when applying for a Schengen visa, having travel insurance is mandatory. Not just any insurance — it must be Schengen-accredited. For reliable coverage, you can book TravelJoy Plus through PGA Sompo. This ensures you’re protected throughout your trip.
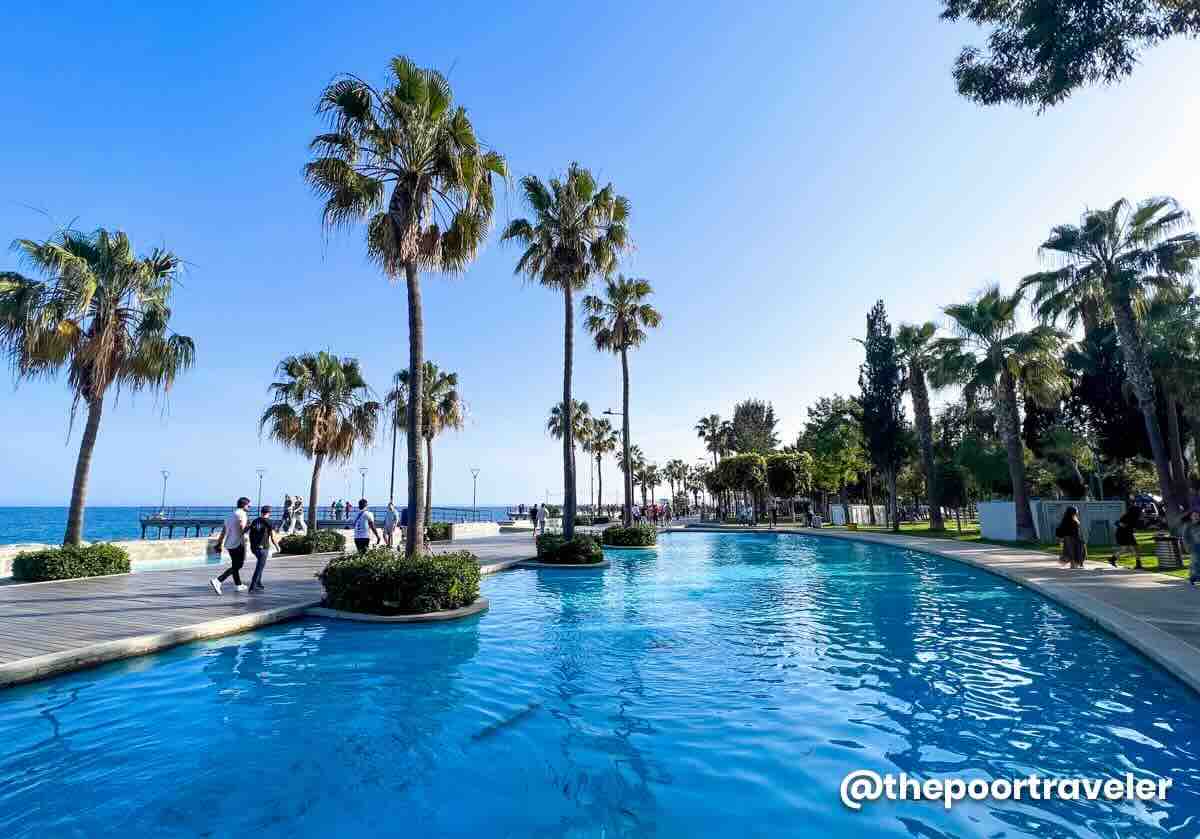
Limassol, the vibrant coastal city on the southern edge of Cyprus, is one of the most popular destinations in the country. If Cyprus is part of your European trip, chances are, you’ll be landing at Larnaca International Airport, the main gateway to the island. So, how exactly do you get from Larnaca Airport to Limassol?
In this post, we’ll walk you through your transportation options and break down everything you need to know to get to Limassol.
Before we dive into the transport details, here are a few key things to know that might come in handy for your trip to Limassol from Larnaca in Cyprus:
Currency: Cyprus uses the euro (€) as its official currency. So all fare prices and travel costs we’ll mention in this post are in euro.
Language: Greek. The official language is Greek, but don’t worry — English is widely understood, especially in tourist-friendly areas. You might hit a small language barrier in some local spots, but it’s usually easy to get by.
Main Airport: The main entry point for most international travelers is Larnaca International Airport (LCA), also on the southern coast. From here, Limassol is just about an hour southwest.
How to Get to Limassol from Larnaca
Limassol is nestled along the southern coast of Cyprus. It’s the second-largest city on the island, just next to the capital Nicosia. You have two options to get to Limassol from Larnaca Airport: by Public Bus and by Direct Airport Shuttle or Airport Bus.
Upon landing at the airport, you’ll need to go through the usual arrival formalities like immigration and customs inspection. After picking up your luggage, you’ll be exiting into the Arrival Hall. Your next steps will depend on the transportation you’ll choose.
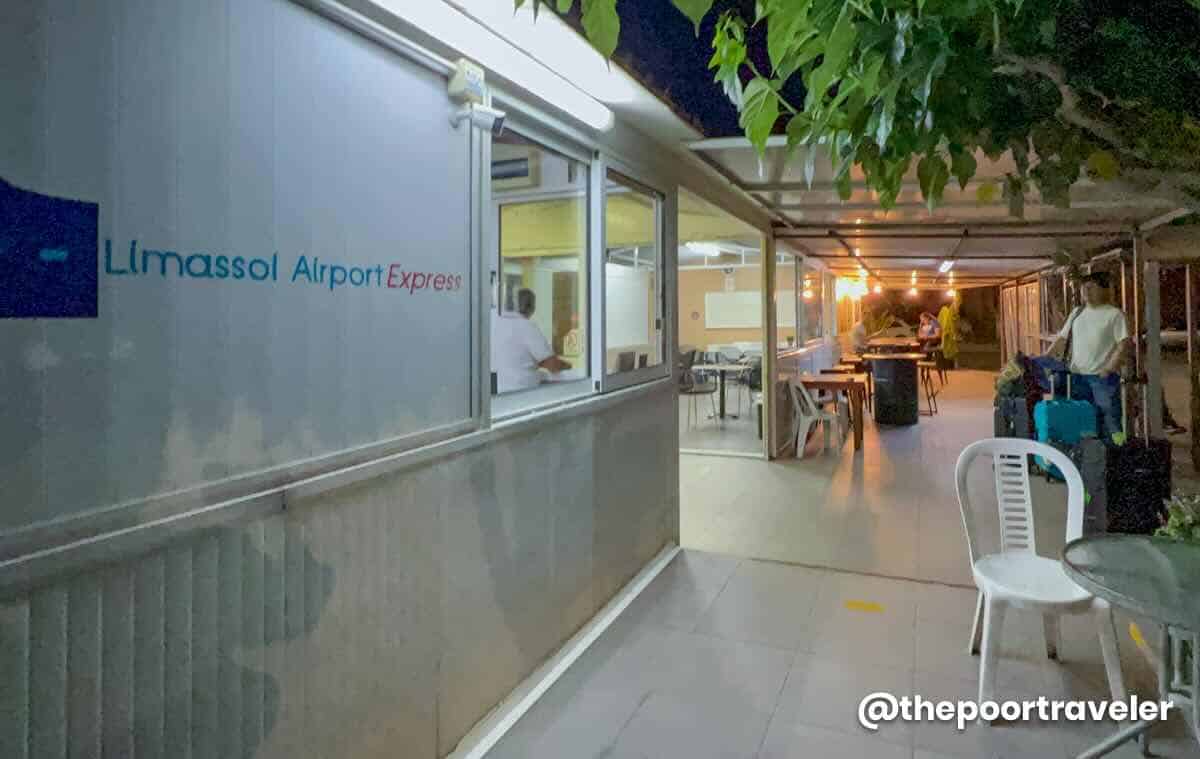
Larnaca Airport to Limassol By Direct Airport Bus
1. Go to the Airport Shuttle Counter.
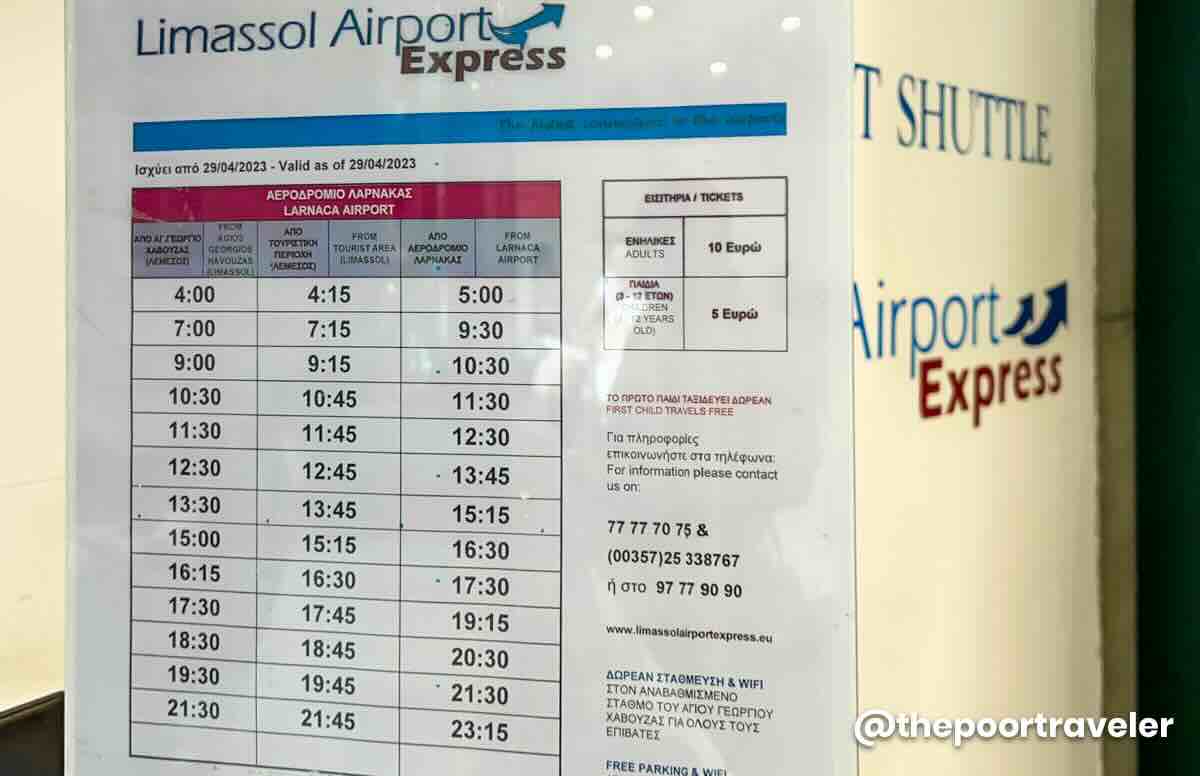
Once you exit into the Arrival Hall, turn left. Then, walk all the way to the far end of the terminal. Just before you reach the exit doors, you’ll spot a ticket counter. Heads-up! It’s not possible to reserve a seat in advance for the Limassol Airport Express. Just buy your ticket when you arrive at the airport.
There’s only one direct bus service from Larnaca Airport to Limassol, and it’s run by Limassol Airport Express. It runs from 5:00 AM to 11:15 PM, making a total of 13 trips at varying intervals. As of our last visit in 2023, here’s the schedule:
This is hands down the fastest, most convenient, and hassle-free way to get to Limassol. The journey takes just around 50 minutes, with no transfers and only one quick stop before reaching its final destination.
First stop: Tourist Area, near the St. Raphael Resort, Grand Resort, and Kanika Elias Beach
Second and Final stop: Limassol Airport Express Station at the Agios Georgios Havouzas Station in Limassol’s city center.
2. At Agios Georgios Havouzas Station in Limassol, get a ride to your accommodation.
You’ve got a few options to reach your hotel: you can hail a taxi or use a ride-hailing app. If you prefer using an app, BOLT and CABCY are both popular ride-hailing options in Cyprus. We personally used Bolt, and a driver was assigned to us almost instantly! It was super easy and efficient. If your hotel is located at the Molos area, near Pier Beach, expect to pay around EUR 12.
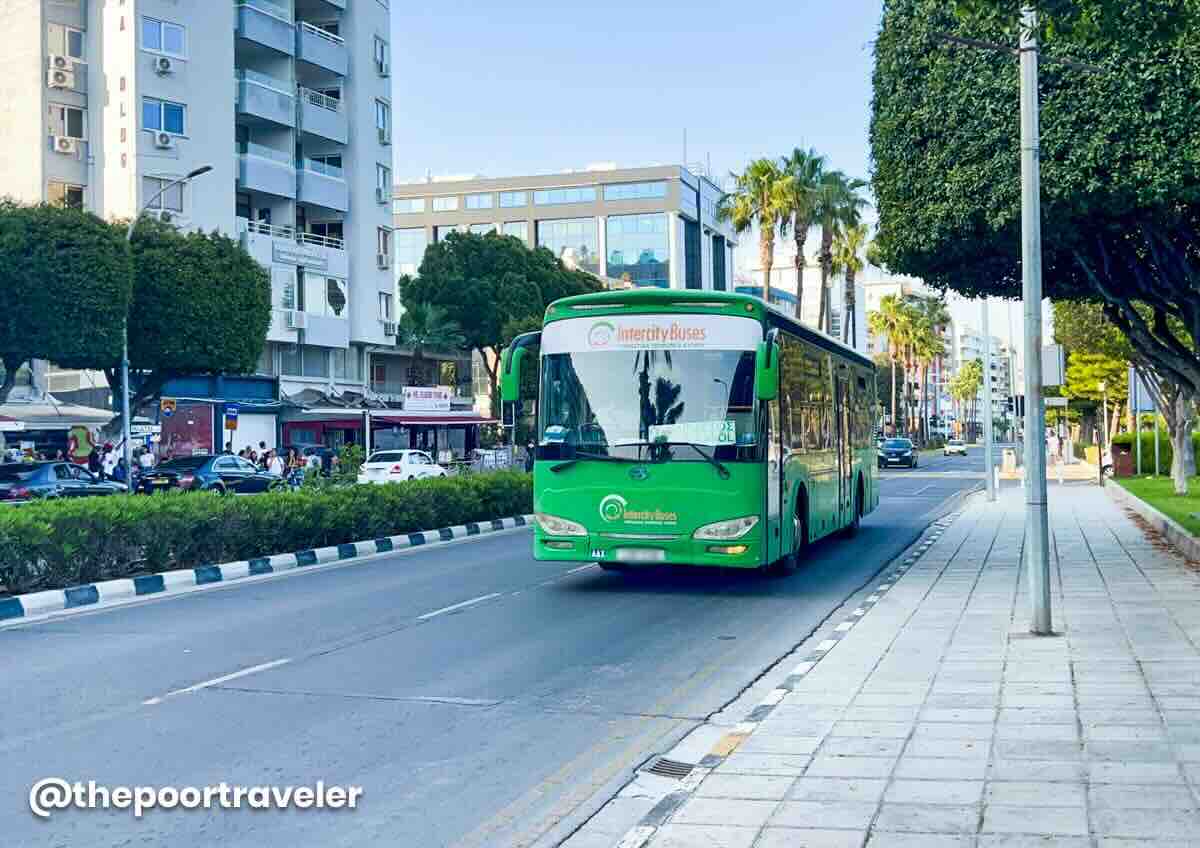
There’s also an intercity bus that passes by, but unfortunately, we weren’t able to get detailed info about its schedule or route.
By the way, if you get hungry, no worries! You’ll find a few great food spots right beside the station. Here are some of them:
Bean Around. A cozy café, perfect if you’re in the mood for coffee or something light.
Feedos. Check it out if you’re craving something more filling, which is a really good burger joint.
Vending Machines. There are also vending machines scattered around the area, selling drinks and snacks in case you need a quick grab-and-go option.
Larnaca Airport to Limassol By Public Bus
1. Head to the City Bus Boarding Platform.
If you decide to take the public bus route, turn right once you get to the arrival hall. This will lead you to the area where city buses depart. This is the cheaper option, but it takes longer and involves a transfer.
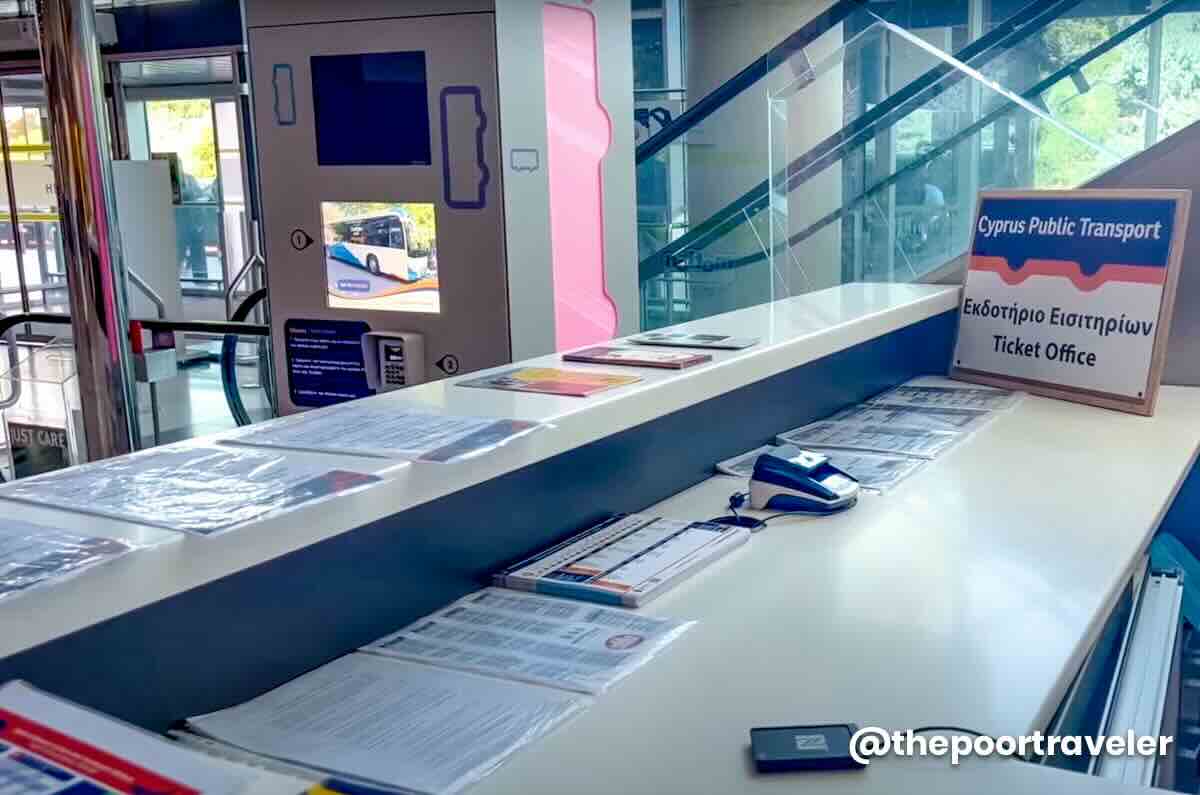
Now, we didn’t try this option ourselves, but we did gather some handy info. Just before the exit, there’s a public transport info desk. We spoke with the friendly lady there, and she explained exactly how to reach Limassol using the public bus system. Here’s what she told us:
From Larnaca Airport, take BUS 425, bound for Dekelia Power Station. A bus leaves the airport every 20 minutes from 6:30 AM until 11:50 PM. Fare is EUR 1.50 during the day and EUR 2.5 at night. Get off at the Old Hospital, which is the 6th stop from the airport.
Transfer to the InterCity Bus to Limassol. The fare is EUR 4. Travel time is one hour 30 minutes.
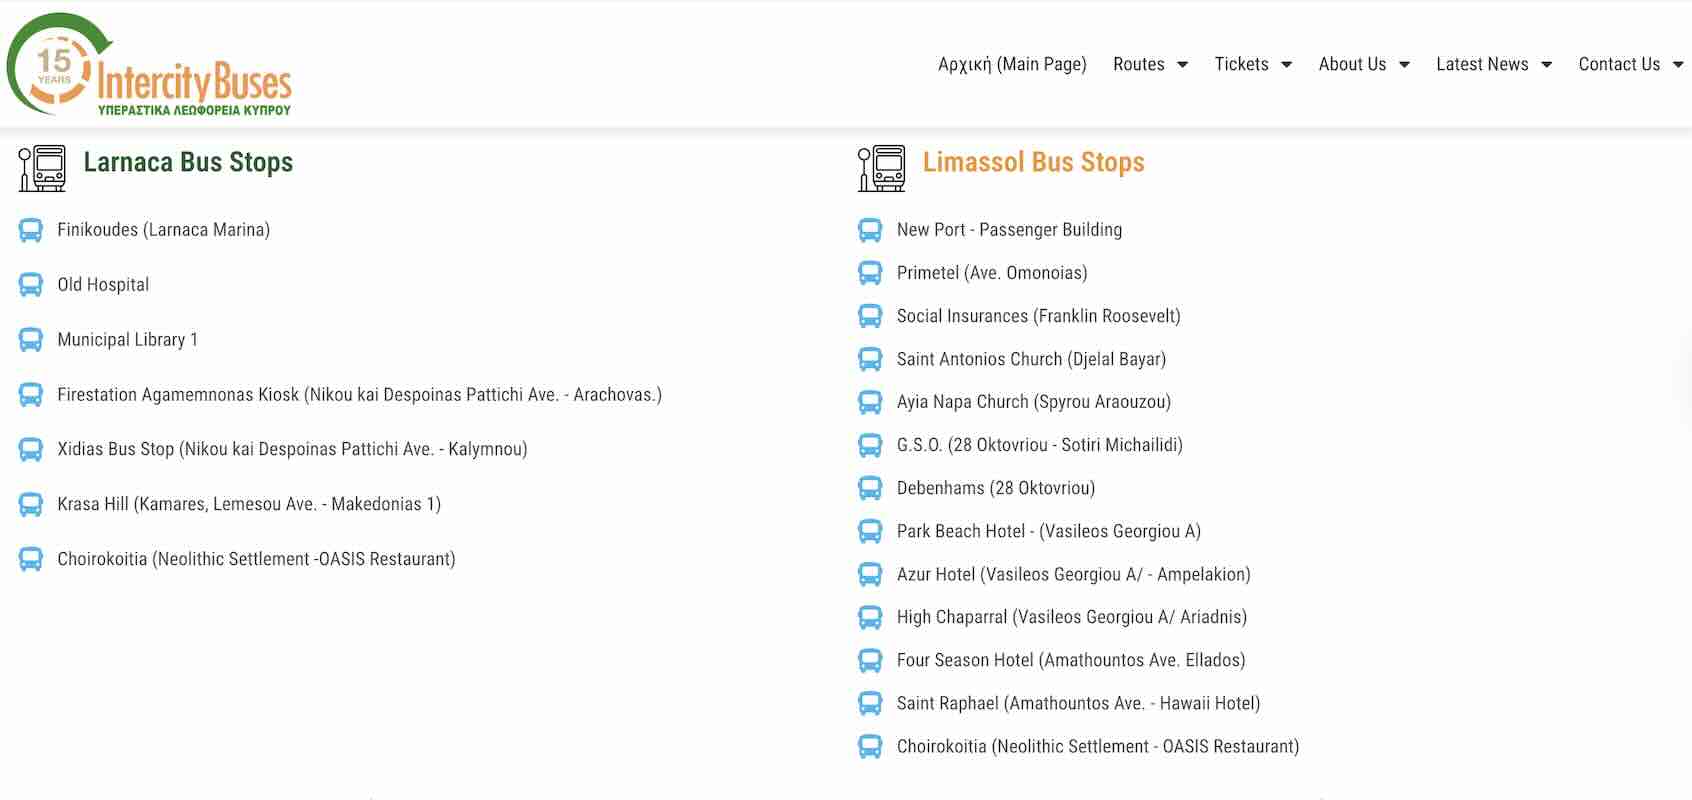
2. Alight at the Old Hospital and switch to an InterCity Bus to Limassol.
Before your trip, find out which stop is closest to your hotel or destination so you know where to alight. From there, you may hail a cab on site or use an app like Bolt or Cabcy. These are the stops:
Photo Credit: Cyprus InterCity Bus Official Website
The city center is also home to the Old Town of Limassol and the Limassol Marina, making it an ideal base for tourists. Aside from the numerous accommodation options, the area is also dotted with restaurants and is close to several attractions. Here are some of the top-rated hotels according to user reviews online.
For our trip to Larnaca Airport from Limassol, we also took the Limassol Airport Express and simply retraced our steps. But here’s the catch: our flight was scheduled for 5:00 AM, and the first bus leaves Limassol at 5:00 AM, too. Obviously, that wouldn’t work.
So, we decided to take the last bus the night before and spend the night at the airport. Check-in opened at 2:00 AM anyway, so it made sense. At first, we were a bit concerned about availability and even tried calling to reserve seats, but they told us there was no need to reserve — just show up and buy our tickets on-site.
Limassol Airport Express booth at Agios Georgios Havouzas Station
We arrived at Agios Georgios Havouzas Station by 8:30 PM via taxi and bought our tickets for €10 each. The last bus was scheduled to depart at 9:30 PM.
We hadn’t had dinner yet, but thankfully, Feedos, the burger food truck right next to the station, was still open. So of course, we grabbed some burgers — and wow, they totally hit the spot!
The bus departed right on time at 9:30 PM. It was just us and one other passenger, so the ride was super quiet and relaxed. Around 50 minutes later, we arrived at Larnaca Airport, well ahead of time. From there, we just waited for the check-in counters to open.
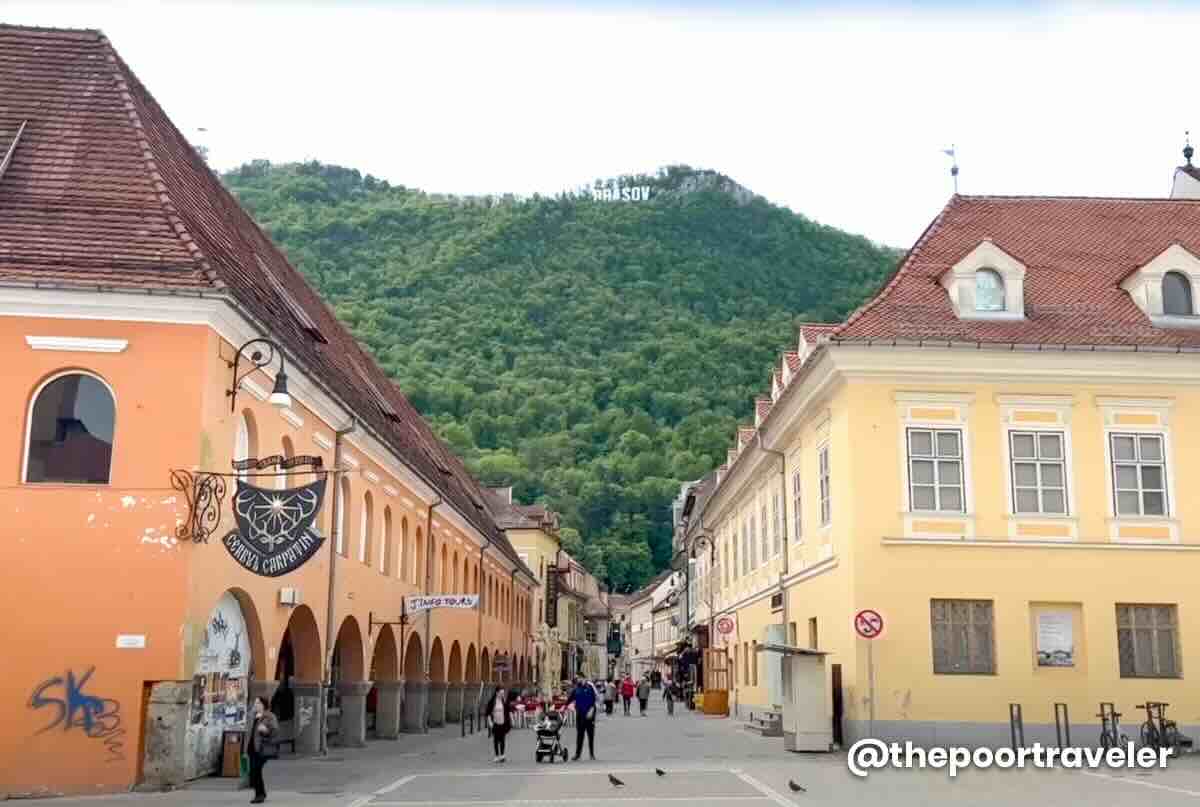
When Romania first popped up on our radar during our Europe trip planning, our eyes immediately zeroed in on Transylvania. And right away, we knew Brasov would be our home base. It just made sense — it’s close to a lot of the attractions we wanted to visit, it’s fairly easy to get to, and let’s be honest, its Old Town is straight-up stunning. One look and it’s really hard to say no.
If you’re flying into Romania, you’ll likely land in Bucharest, which is the capital city and is served by two airports. The smaller and older one is Aurel Vlaicu International Airport (BBU), also known as Băneasa or Bucharest City Airport. Not a lot of flights land here, and most of the ones that do are seasonal.
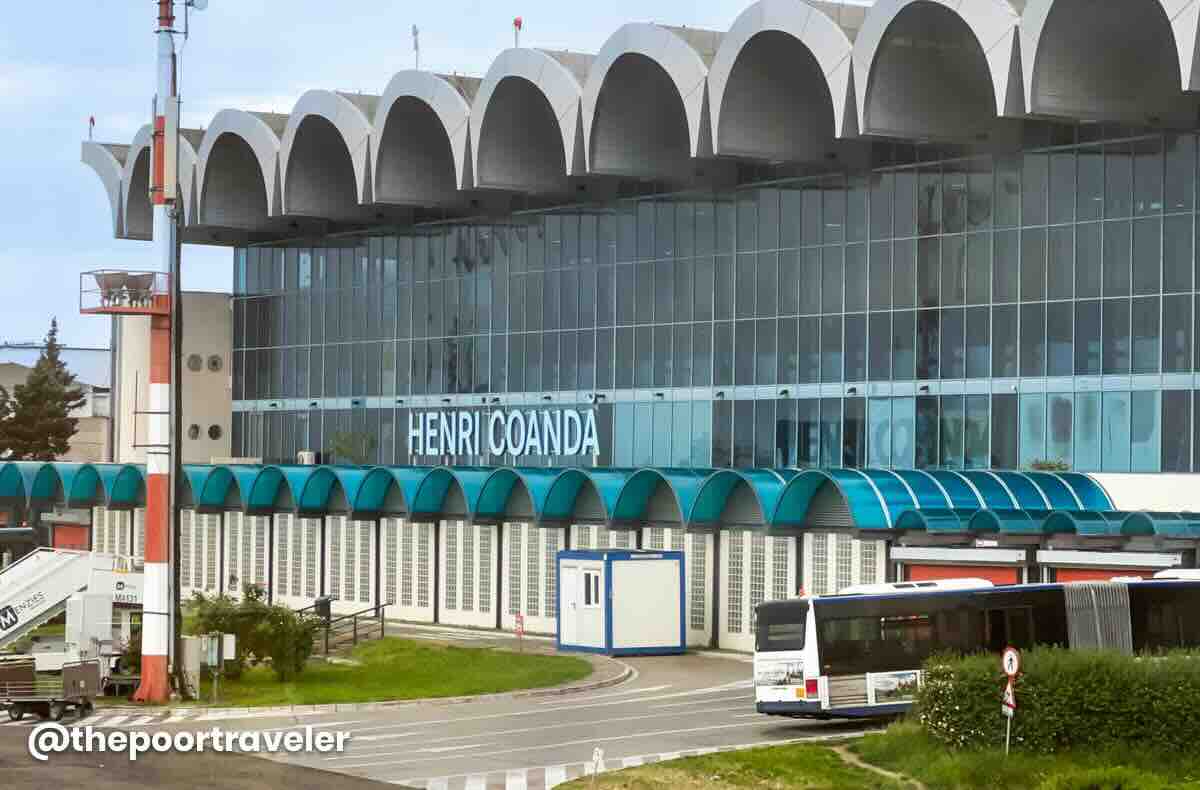
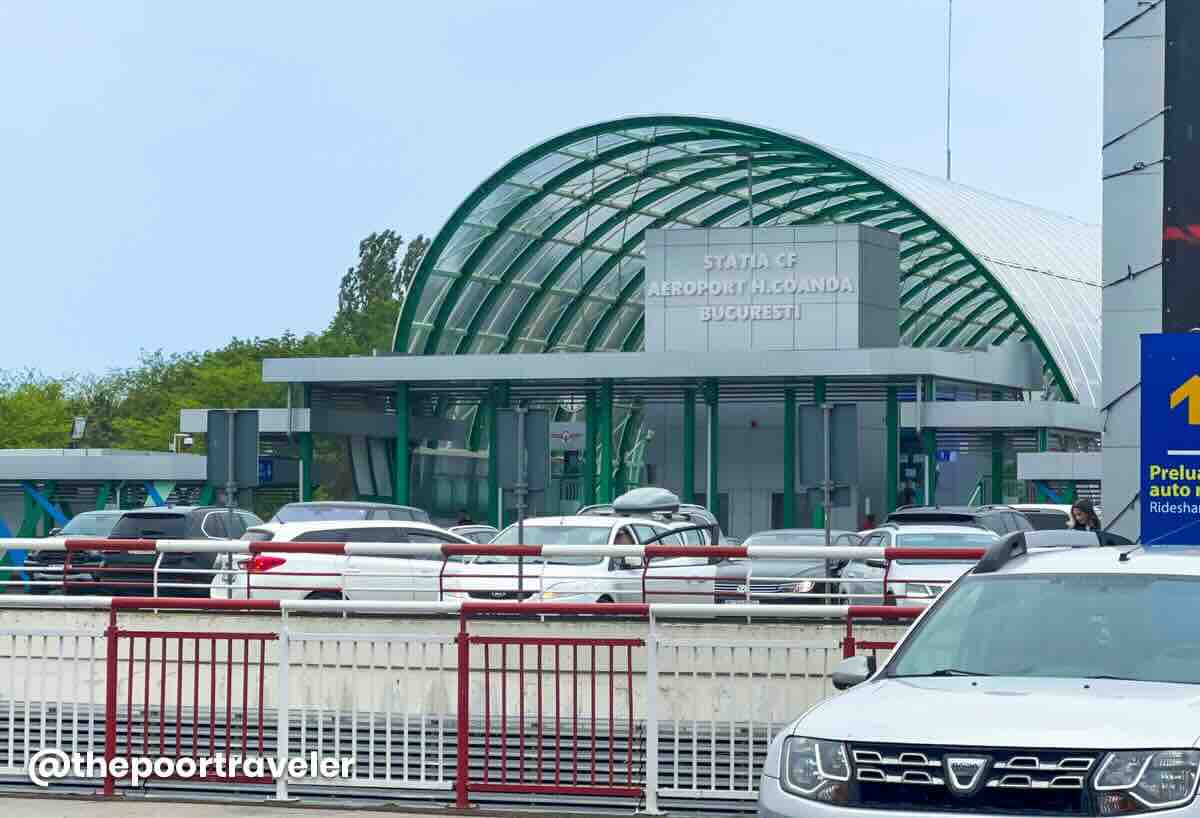
The main airport — and the one most travelers use — is Henri Coandă International Airport (OTP). It’s also commonly called Otopeni Airport because it’s located in the town of Otopeni, just north of Bucharest. But since it’s the biggest and busiest in the country, most booking sites simply refer to it as Bucharest Airport. So, just a heads-up: when we say “Bucharest Airport” in this post, we mean Henri Coandă (OTP).
Now, while Bucharest itself has plenty of cool things to see and do, if you’re like us and want to head straight to Brasov, no worries — it’s super doable. There are two main ways to get there from Otopeni Airport: by bus or by train. Easy options, depending on your travel style and schedule.
The easiest way to get from the airport to Brasov? Definitely by bus. There are direct trips that go all the way from Bucharest Otopeni Airport straight to Brasov’s Bus Terminal, which, conveniently, is not too far from the Old Town — perfect if that’s where you’re staying.
One of the most popular options is a company called Direct Aeroport. They use smaller vehicles like mini-buses or mini-vans, which makes for a more relaxed and less crowded ride. We booked with them, which was pretty straightforward. We even managed to reserve seats online ahead of time.
Henri Coanda International Airport
How to Book a Seat
Head over to Direct Aeroport website. Switch the language to English (there’s a toggle at the top). Most of the booking process is in English, although there’s one part that still shows up in Romanian. It’s not too hard to navigate though — Google Translate will get you through.
Enter your origin and destination. Choose “Otopeni Aeroport” as your origin and “Brasov” as your destination, and you’ll see a list of available departure times. The buses run 24 hours a day, with intervals ranging from 1.5 to four hours. The trip takes around three hours and costs 100 RON per person — not bad for a comfy ride straight to the heart of Brasov.
Pay for your bus ticket. You can choose to either pay for your Direct Aeroport bus ticket online or simply reserve a seat without making a payment right away. For our trip, we initially opted for the latter. We made a reservation first, thinking it would be the most convenient option. But we decided to cancel our reservation and take the scenic route instead — by train.
Direct Aeroport Mini-Bus
Availability: 24 hours at 1.5- to 4-hour intervals Travel time: 3 hours Fare: 100 lei (RON) per person
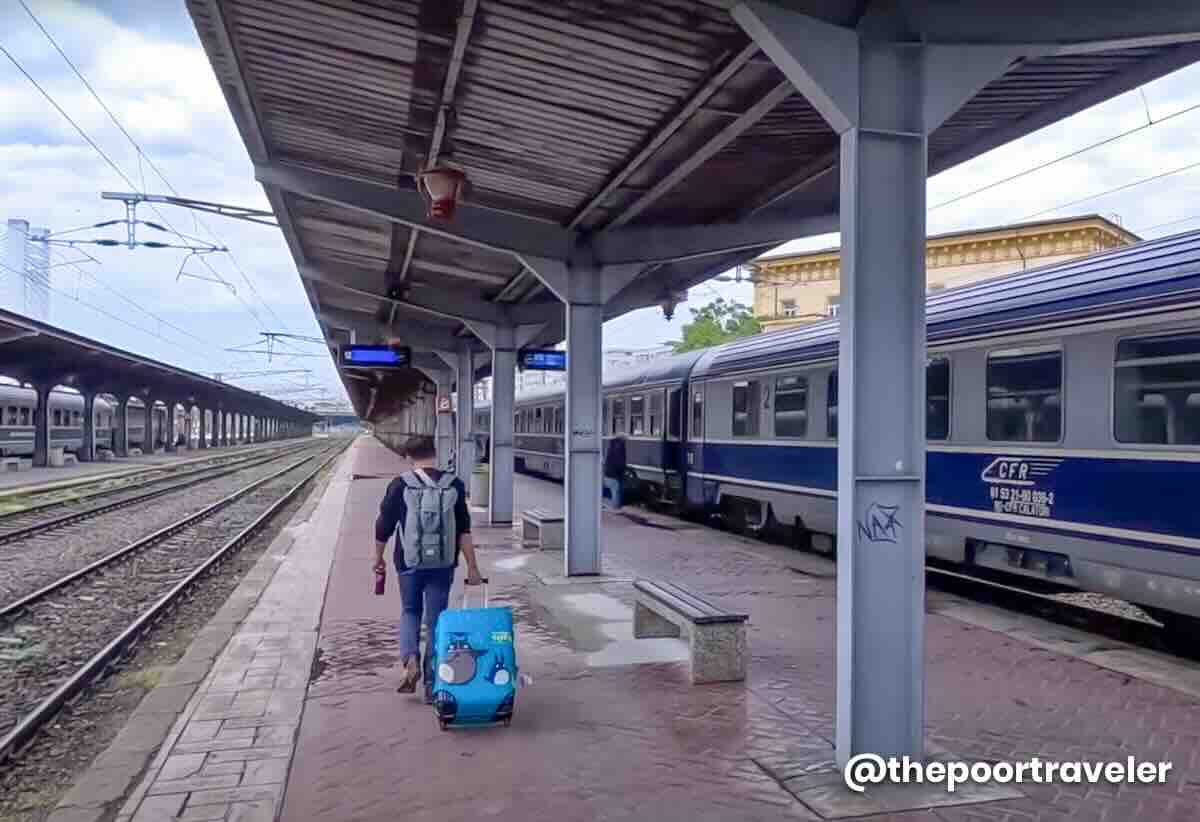
Bucharest Airport to Brasov By Train
Getting from Bucharest Airport to Brasov by train is a two-part journey, but it’s fairly straightforward and comes with the bonus of scenic views along the way.
The first leg takes you from Henri Coandă Airport (OTP) to Bucharest Nord Station. From there, you’ll hop on another train that will take you all the way to Brasov. Multiple companies operate this route, and while it’s possible to buy tickets at the station, booking online in advance is highly recommended — not only to secure a seat, but also to enjoy discounted fares.
Aeroport Henri Coandă T1 Train Station
Here’s a step-by-step guide on how to get to Brasov from Aeroport Henri Coanda by train:
1. Buy tickets online.
From Bucharest Airport to Bucharest Nord
Head over to the official CFR website. CFR is Romania’s national railway operator.
Once you’re on the homepage, switch the language to English from the top menu. The translation isn’t perfect across the site, but it’s good enough to guide you through the process.
For your origin, enter Aeroport Henri Coanda, and for your destination, type in Brasov. Select your travel date, and the site will show you available journeys, most of which involve a quick transfer at Bucharest Nord Station.
Bucharest Airport to Bucharest Nord
Availability: Hourly train departure Travel time: 25 minutes Fare: 6.75 RON lei (RON) per person
From Bucharest Nord to Brasov
Choose the train that best suit your budget and itinerary. For the second leg — the train ride from Bucharest Nord to Brasov — get ready for a long list of options. When picking your train, pay close attention not just to the departure time, but also to the train type and duration. Sometimes paying a bit more for a quicker, more comfortable ride is totally worth it. More about this later.
Select the coach and your seat. Once you’ve selected your train, you’ll also be able to choose the specific coach and exact seat, which is super handy if you’re traveling with someone or just want to secure a window spot.
Create an account on the CFR website. After that, you’ll need to create an account and verify your email. Then, enter all passenger details, including full names — exactly as they appear on your passport. This is important because they do check names on board against the ticket.
Proceed to the payment section. Once everything looks good, go ahead and pay using a credit card. When the payment goes through, you’ll receive a confirmation email with a QR code on the upper left corner. Save a digital copy on your phone and print one out just in case.
Reminders
Now, here are the things to consider when choosing the train:
Not all trains are created equal. Some are quick and efficient, while others take much longer. The faster trains can get you to Brasov in as little as two hours and 14 minutes, while slower ones may take up to 4.5 hours.
So, don’t just look at departure times. Make sure to check how long the journey will take and what time you’ll actually arrive in Brasov. This is especially important if you’re trying to catch daylight or if you have hotel check-ins to consider.
Fares also vary, depending on two main things: train type and class. For our trip to Brasov, we rode second class, but on our way back to Bucharest, we upgraded to first class just to compare — and we definitely felt the difference.
First class is roomier, with just three seats per row, compared to second class’s four. That extra bit of space makes a huge difference when you’re sitting for a couple of hours. It’s not just about comfort. It’s also about the atmosphere. First class is noticeably quieter, simply because there are fewer passengers. It’s a big plus if you’re hoping to catch some sleep or just enjoy a peaceful ride. Oh, and the luggage racks? They’re bigger too — ideal if you’re carrying bulkier bags or backpacks.
We paid 81 RON (16.35 EUR) for the first class seats, while the second class seats cost us 56.3 RON (11.35 EUR).
Three Types of Trains from Bucharest to Brasov
Here’s another thing: not all trains are priced the same. Some fares are noticeably higher, while others, especially the slower ones, are significantly cheaper. And that’s mostly because Romania has several types of trains, each catering to a different kind of travel experience.
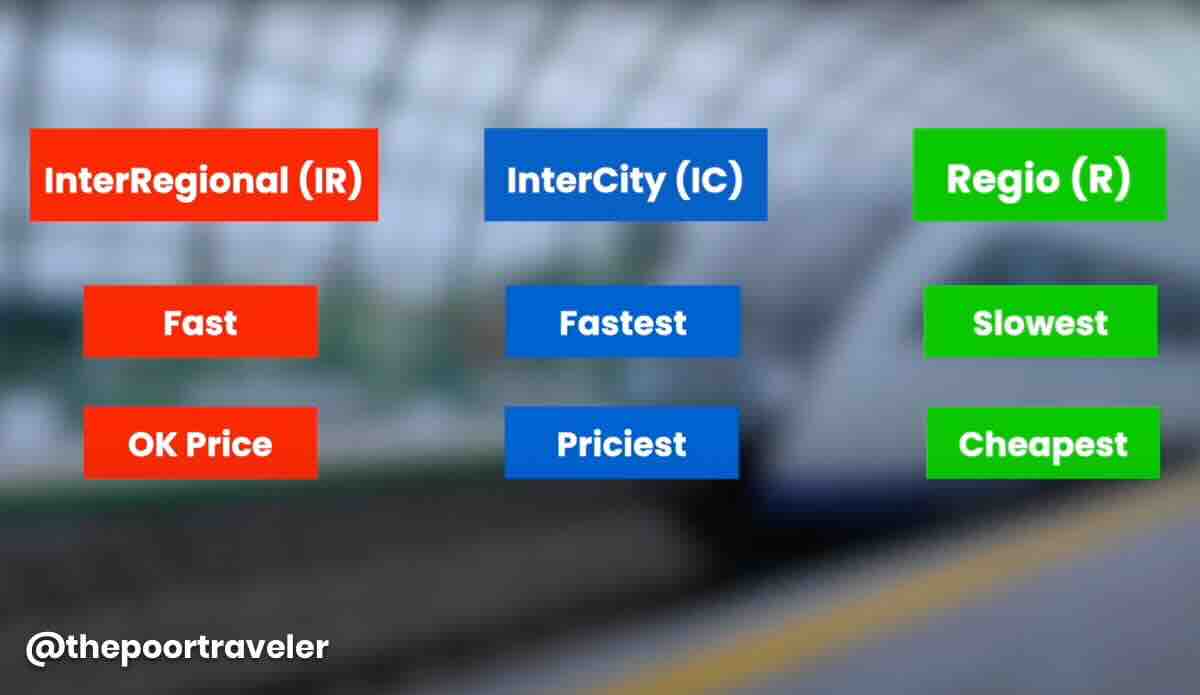
For the Bucharest to Brasov route, you’ll most likely come across three main types:
InterCity (IC). IC trains link Bucharest to the smaller cities and towns across Romania. These are the fastest, which means shorter travel times, but they also come with the highest fares. It took us only two hours and 16 minutes to get to Brasov using this train. If you’re after comfort and speed, and don’t mind paying a bit extra, this is your best bet.
InterRegional (IR). These are long-distance trains that serve regional routes across Romania. They’re not as fast as IC trains, but they’re pretty reliable and strike a good balance between price and efficiency.
Regio (R). Formerly Personal, these are your local commuter trains and the slowest of the bunch. They stop at almost every single station along the route, which really drags out the travel time. Using this train to Brasov can take up to three hours and 40 minutes. But the upside? They’re super cheap. These are a solid choice if you’re on a tight budget and not in a rush.
2. Board the train to Bucharest Nord Station.
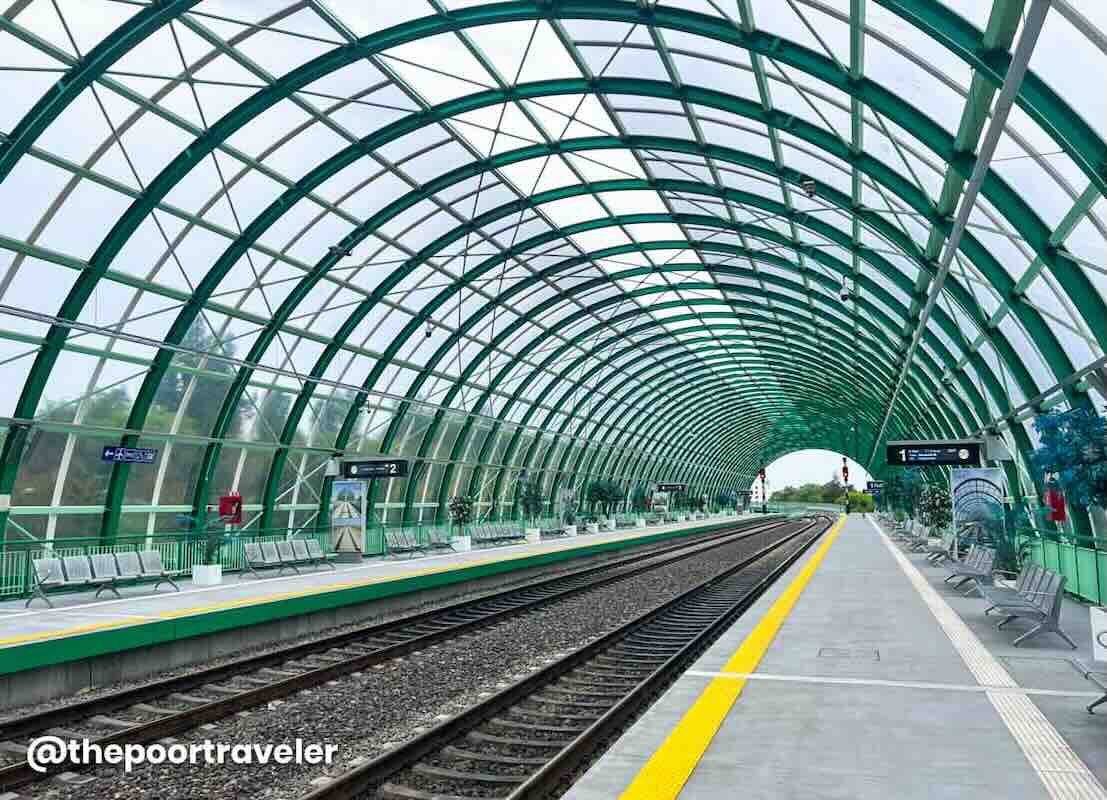
As soon as you step out of the arrivals hall at Otopeni Airport, the train station is hard to miss — it’s just right across the street. Walk a few steps, cross over, and you’ll find yourself at the stunning terminal.
Aeroport Henri Coandă T1 Train Station Platform
Since you’ve already booked your ticket online, you can skip the machines and queues. Just head straight to the platform and wait for your train. But make sure you have your digital ticket and your passport ready. A train inspector will come by to check your booking, and they’ll scan the QR code on your ticket. They’ll also verify if the name matches the one on your passport, so double check everything before the trip.
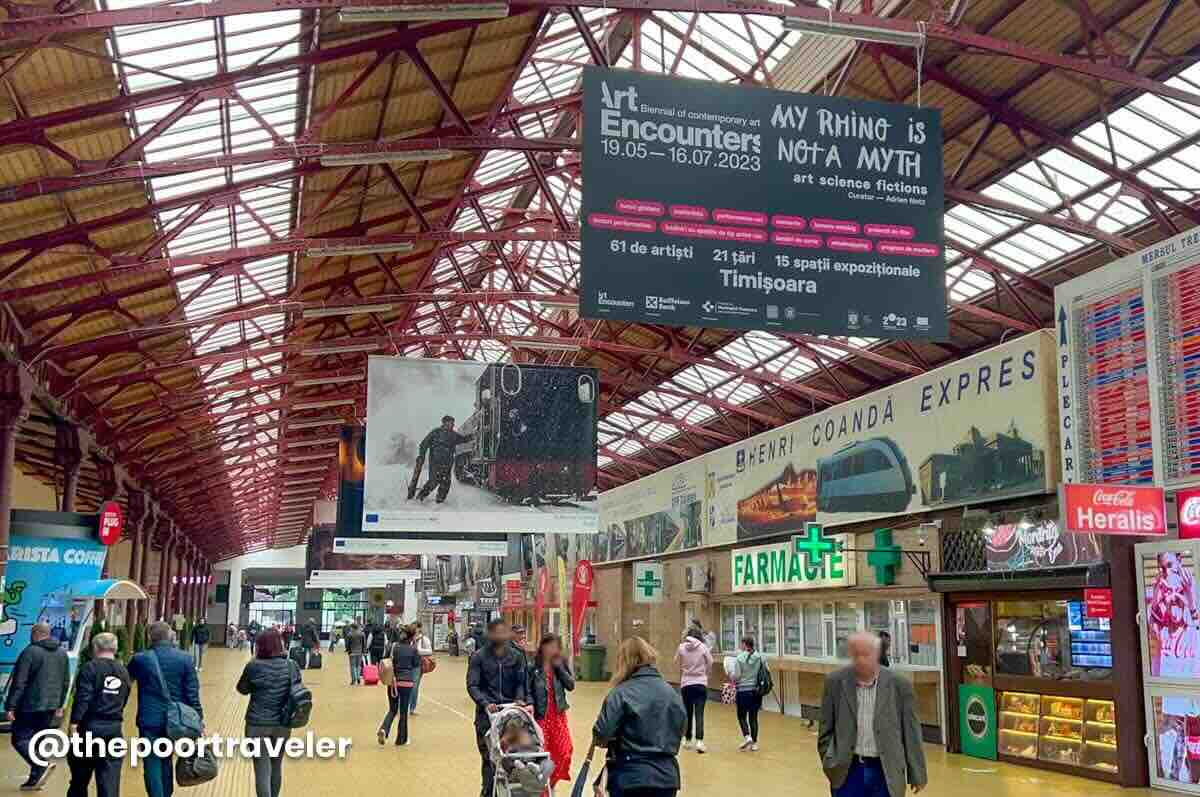
3. Alight at Bucharest Nord Station.
If your train to Brasov is about to depart, all you need to do is find the right platform and wait. But if you have a bit more time before your train arrives, you can easily pass the time at one of the cafés or fast food spots nearby.
For those needing to use the restroom, you’ll find pay-to-use toilets in the station, but there’s also a free option inside the McDonald’s. Just keep in mind that you’ll need to make a purchase first, and the toilet code is printed on your receipt. It’s a simple system, so grab a quick bite and take care of your business before catching your train!
4. Transfer to your Brasov Train.
Make sure to allow plenty of lead time before your boarding time as finding your assigned car can be a bit tricky. From our experience, train cars are numbered, but the actual number you’re looking for is often written on a piece of white bond paper haphazardly stuck to the window. If you’re unsure, don’t hesitate to ask a train staff member for help.
Once you’re on the right car, find your designated seat number. If you have luggage, there are overhead racks or luggage spaces near the doors where you can store your bags. Keep in mind that most trains don’t terminate at Brasov, so you’ll need to keep an eye on the station. It’s a good idea to start preparing to leave as you get closer to Brasov to avoid missing your stop.
5. Take Uber to your Hotel.
Brasov Station is smaller compared to Bucharest Nord, so it’s easy to navigate. As soon as you step out of the terminal, you’ll be greeted by taxi drivers. However, we highly recommend using Uber instead. Some taxi drivers in the area have been known to take advantage of unsuspecting tourists, which is why our host suggested Uber as the safer option. Plus, it’s quite affordable in Brasov.
For instance, our apartment was located right within the Old Town, and we only paid 13.96 RON (around 2.82 EUR) for the ride. Since we were a group of three, that’s just about 1 EUR per person. Definitely a great deal for convenience and peace of mind!
Where to Stay in Brasov
If, like us, you decide to make Brasov your base, you’ll find plenty of accommodation options in the Old Town and the Centrul Nou. These two areas are close to the popular attractions and transportation stations. Here are some of the top-rated hotels according to user reviews online.
When it’s time to head back to Bucharest or Bucharest Airport, it’s just as important to book your train tickets online in advance. Follow the same process mentioned earlier, then simply retrace your steps:
Take an Uber to Brasov Station.
Catch a train to Bucharest Nord.
Transfer to another train to the airport.
TIP! Always allot plenty of time for your transfers, as delays are not uncommon in Romania. It’s wise to give yourself a few hours of buffer time, especially if you have a flight, bus, or another train to catch. In our case, our train to Bucharest was delayed by over an hour, so it’s better to be safe than sorry!
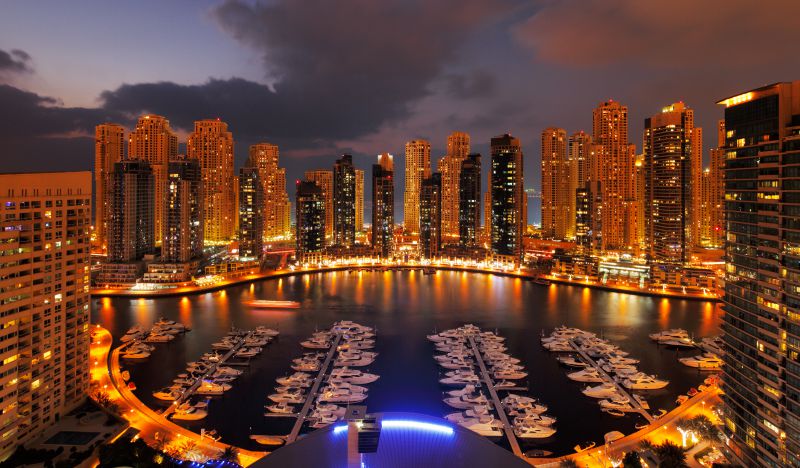
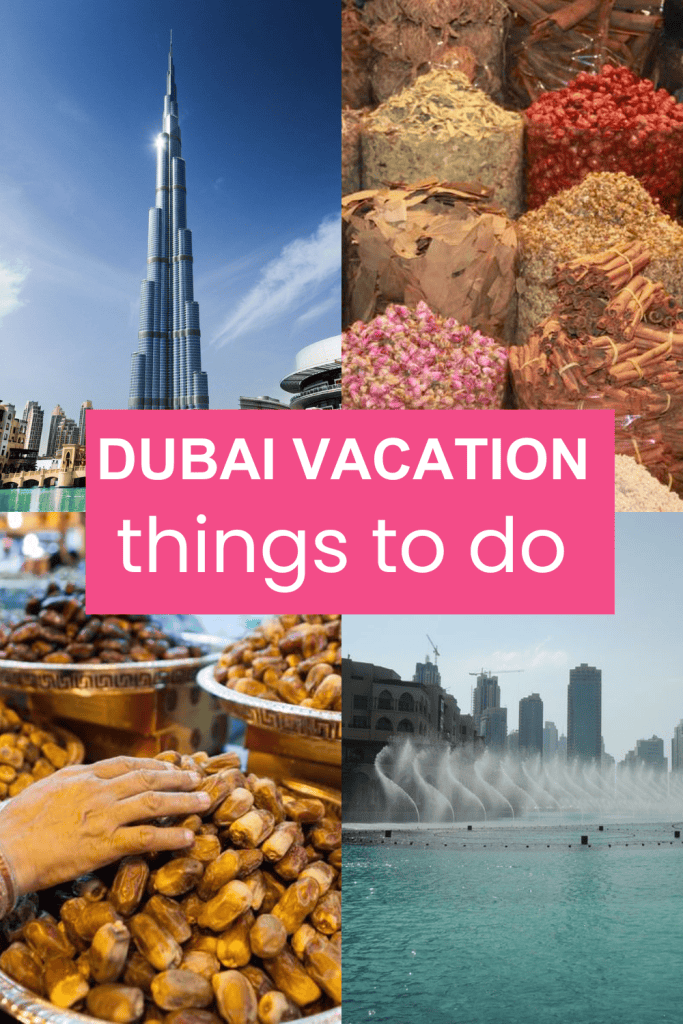
Planning a trip to Dubai and wondering what’s actually worth your time (and money)?
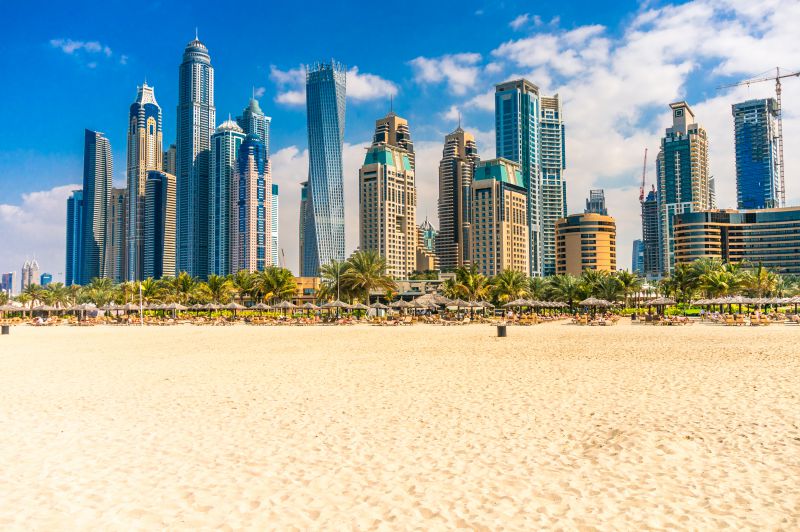
Dubai Marina at night
Whether you’re heading there with friends, kids in tow, traveling solo, or just want to see if Dubai lives up to the hype, this list has you covered. From desert safaris to indoor ski slopes to gold-drenched facials, here’s your cheat sheet for the best things to do in Dubai.
Bonus: We’ve added tips to save cash, avoid crowds, and link you to deep dives from our Dubai travel archives.
Hit the Big Attractions (Yes, They’re Worth It)
Let’s be honest. When you land in Dubai, you’re stepping into a city that doesn’t do subtle. And that’s half the fun.
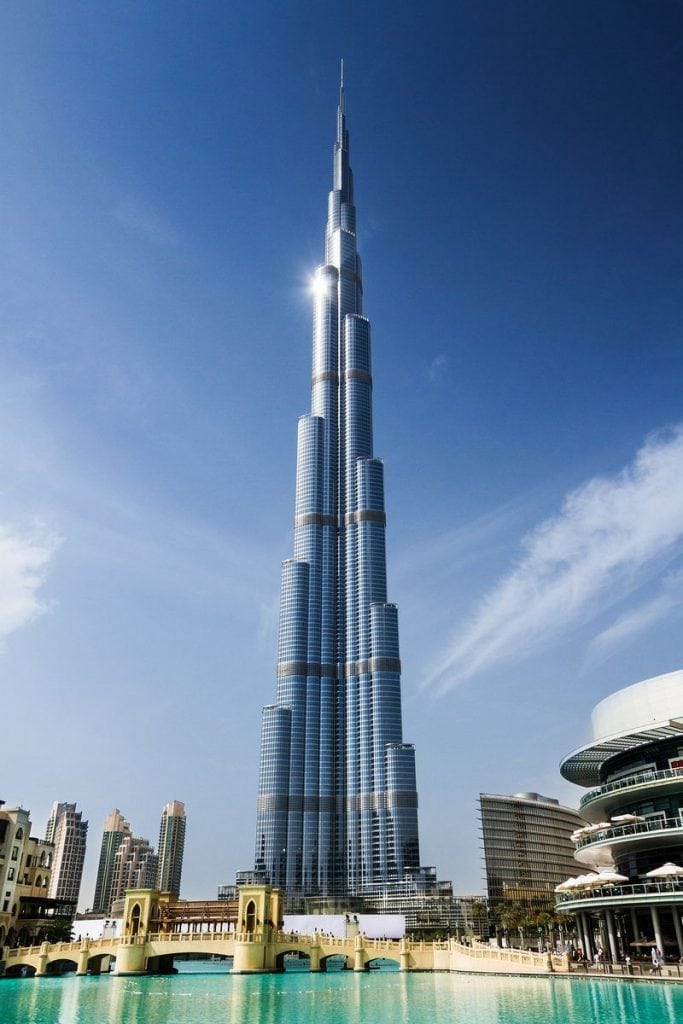
Burj Khalifa – The world’s tallest skyscraper. It’s iconic, and yes, it’s worth standing at the base and craning your neck skyward. If you want the view, try to book your visit early in the day or around sunset for the best experience.
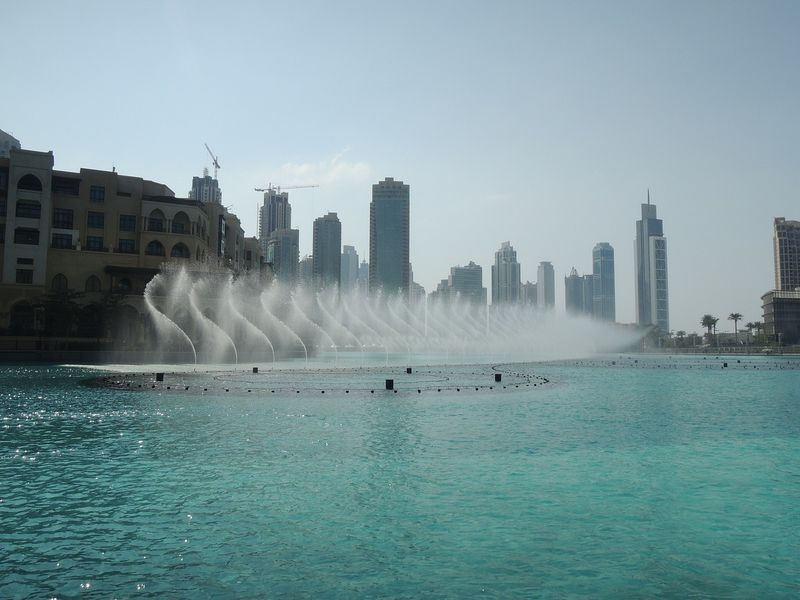
Dubai Fountain Show – Located right below the Burj Khalifa, this water and light show is one of the best free things in the city. More free things to do in Dubai tips here.
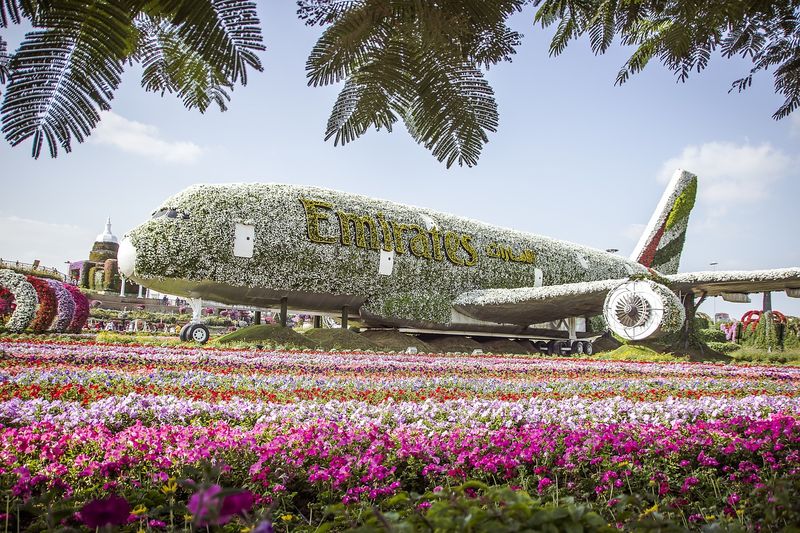
Dubai Miracle Garden – Over 50 million blooming flowers arranged in whimsical shapes, think giant teddy bears made of petals. Perfect with kids, or just if you’re craving a color overload.
Ain Dubai – The world’s largest observation wheel. Go in the evening for glittering skyline views.
Add a Bit of Quirk (The Unusual Stuff)
Dubai is great at taking things to the extreme (in the best way).
Ski Dubai – A massive indoor ski hill inside the Mall of the Emirates. Where else can you ski, bobsled, or hang with penguins in the middle of the desert?
Chillout Lounge – A café built from ice, down to the chairs. They hand you a parka and serve soup, sandwiches, and steaming mocktails. It’s kitschy and fun, especially if it’s +42°C outside.
Global Village – A seasonal multicultural theme park with food, shows, and shopping from 90+ countries. Think Epcot, but with more shawarma.
Dubai is a shopper’s paradise, and yes, you can find something cool beyond fridge magnets.
Camel Milk Chocolate – Sounds weird. Tastes amazing. Al Nassma is the go to brand.
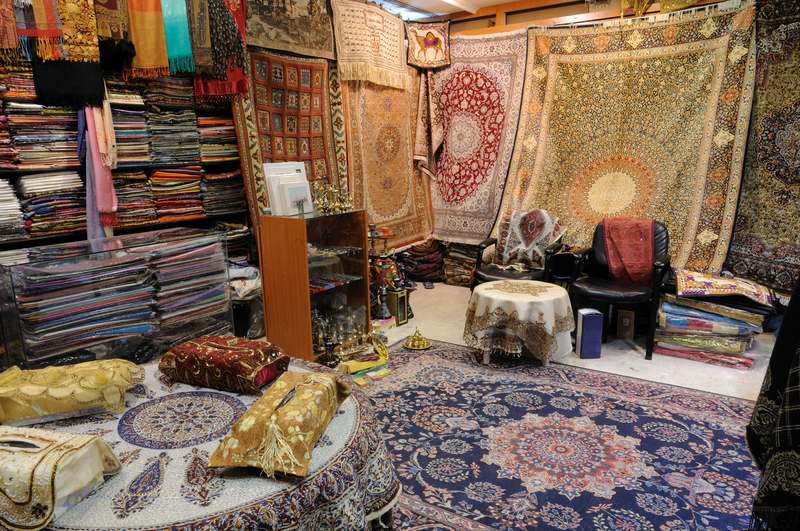
Pashmina Shawls – Real pashmina is super soft and lightweight (and comes with bragging rights). Watch out for fake acrylics.
Arabic Coffee Sets – Perfect if you’ve fallen in love with cardamom laced coffee.
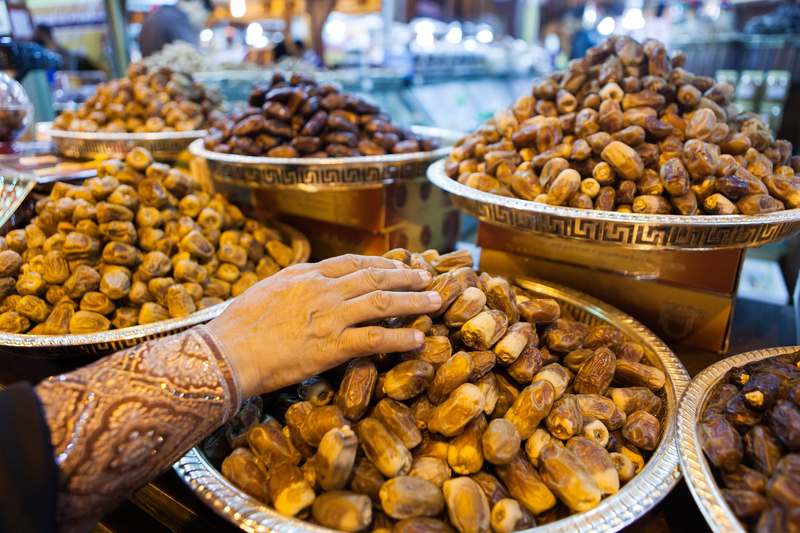
Spices and Dates – Stock up on saffron, za’atar, and plump Medjool dates from the myriad of souks around the city.
Miniature Burj Khalifas – Yes, they’re a bit touristy, but they’re fun. Especially the gold-plated ones.
You’ll find most of these in the Gold, Spice, and Textile Souks or at the massive Dubai Mall. For more ideas, check out our guide to the best things to buy in Dubai.
When Should You Go to Dubai?
Here’s the short answer: November to March. Warm days, cool nights, and everything’s open.
Shoulder seasons like April or October? Great if you like heat and shorter lines. Summer? It’s doable, but prepare for a sauna experience. A lot of outdoor attractions shut down and you’ll live in air conditioning.
Wi-Fi is everywhere, including malls, beaches, even the Metro. Bring a VPN just in case.
Public transport is efficient, clean, and safe. Use the Metro for longer distances and ride-sharing apps for short hops.
Dress code – Dubai’s pretty relaxed, but modest clothing is appreciated in public areas. Think shoulders and knees covered.
The Takeaway
Dubai is one of those rare cities where you can ski, shop, sandboard, and sip saffron tea, all in the same day. It’s flashy, yes, but it’s also filled with warmth, color, and creativity.
Whether you’re planning a week of family fun, a romantic getaway, or an offbeat solo trip, Dubai has something unexpected waiting for everyone.
Still planning? Save this post for later and check out these posts of ours next:
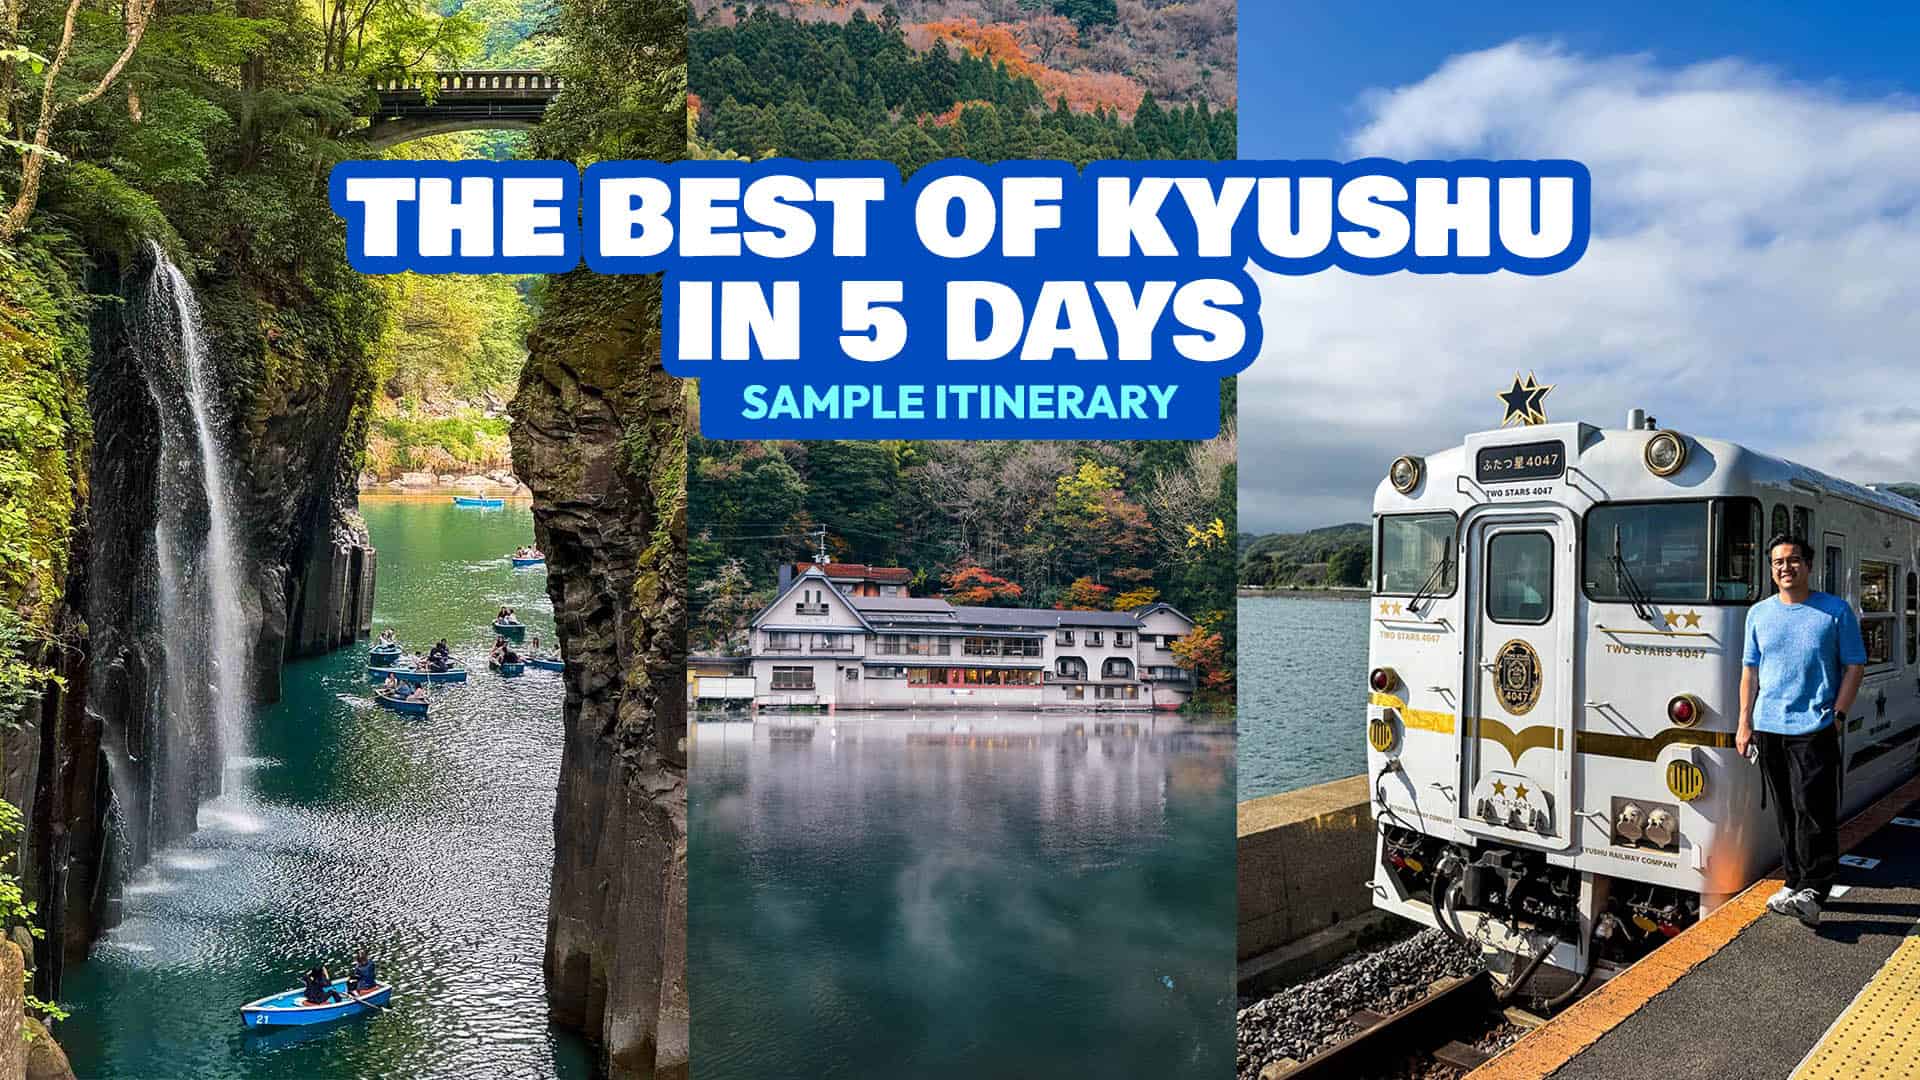
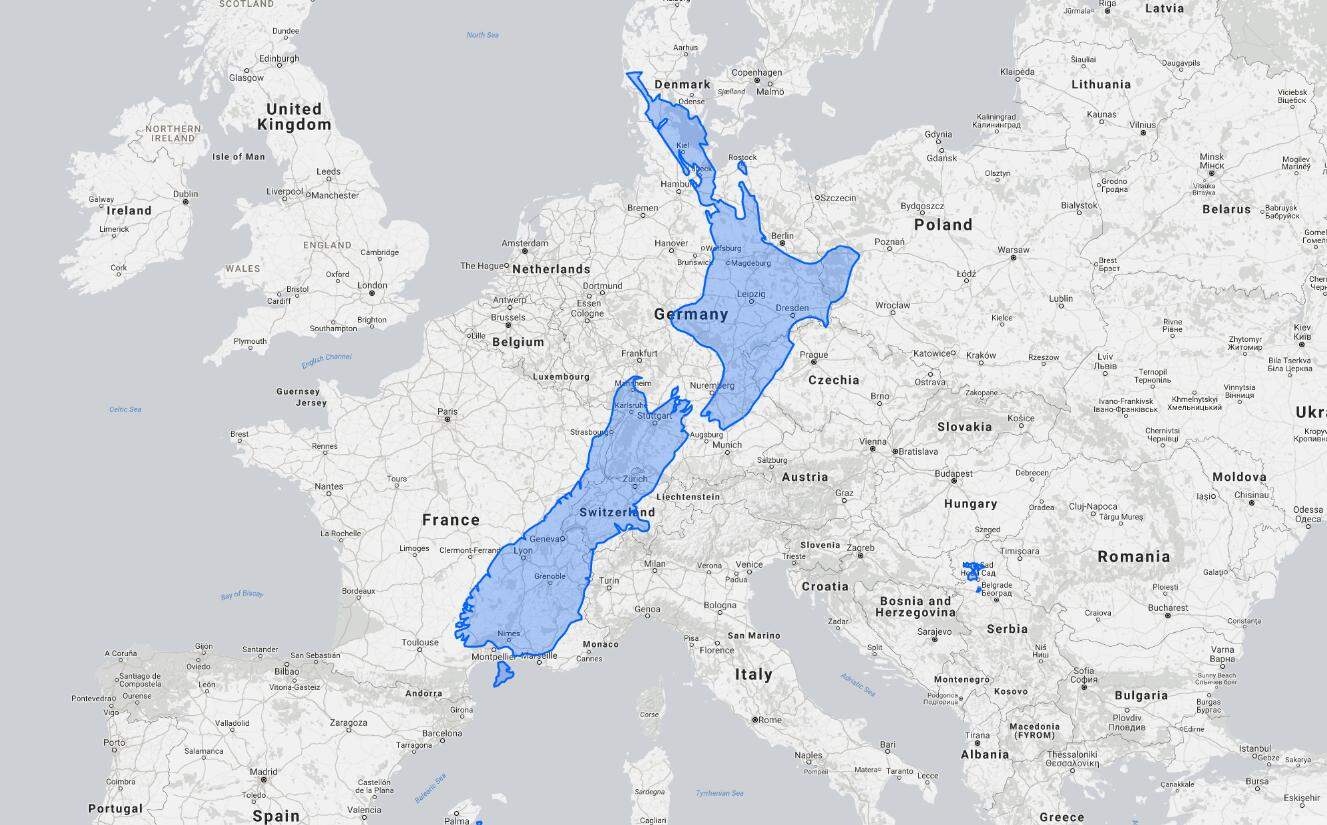
Fukuoka might be the face of Kyushu for many travelers, but here’s the thing: it’s just one city in a region that spans over 36,000 square kilometers and includes seven distinct prefectures. That’s a lot of ground—and a lot of culture, cuisine, and jaw-dropping scenery—to pack into a single island. To treat Kyushu as “just Fukuoka” is like watching the trailer and skipping the movie or ordering just the appetizer when there is an entire feast for the taking.
Fukuoka City is a fantastic starting point, no doubt. It’s lively, accessible, and loaded with good food. I mean, it’s hard to disagree when you have your face full of tonkotsu ramen. But zoom out on the map, and you’ll see how small a dot it is compared to everything else around it.
Kyushu is one of Japan’s four main islands, yet it often flies under the radar. It doesn’t boast the constant buzz of Tokyo or the flashy charm of Kyoto. But that’s exactly where its appeal lies. Here, diversity comes naturally. The geography alone is wild in the best way: active volcanoes, steaming hot springs, subtropical coastlines, and lush mountain ranges that shift dramatically as you move from one prefecture to the next. This underrated region has all the right ingredients to be a tourism powerhouse, so plan a visit as soon as you can because it’s only a matter of time before it becomes crazy popular.
The best part: you can visit all seven prefectures conveniently, thanks to its impressive railway system and a cost-efficient pass: the JR Kyushu Rail Pass.
If you plan on traveling to multiple destinations throughout Kyushu, make sure to purchase a JR Kyushu Rail Pass before flying to Japan. This pass comes in 3 main types:
Northern Kyushu: 3 days, 5 days
Southern Kyushu: 3 days only
All Kyushu: 3 days, 5 days, 7 days
If you want to go as far as Miyazaki and Kagoshima, then the All Kyushu variant is for you. This pass will grant you access to local trains, limited express trains, Kyushu Shinkansen (Hakata – Kagoshima-chuo) and Nishi Kyushu Shinkansen (Takeo-onsen – Nagasaki). For more information about these passes, check out this page!
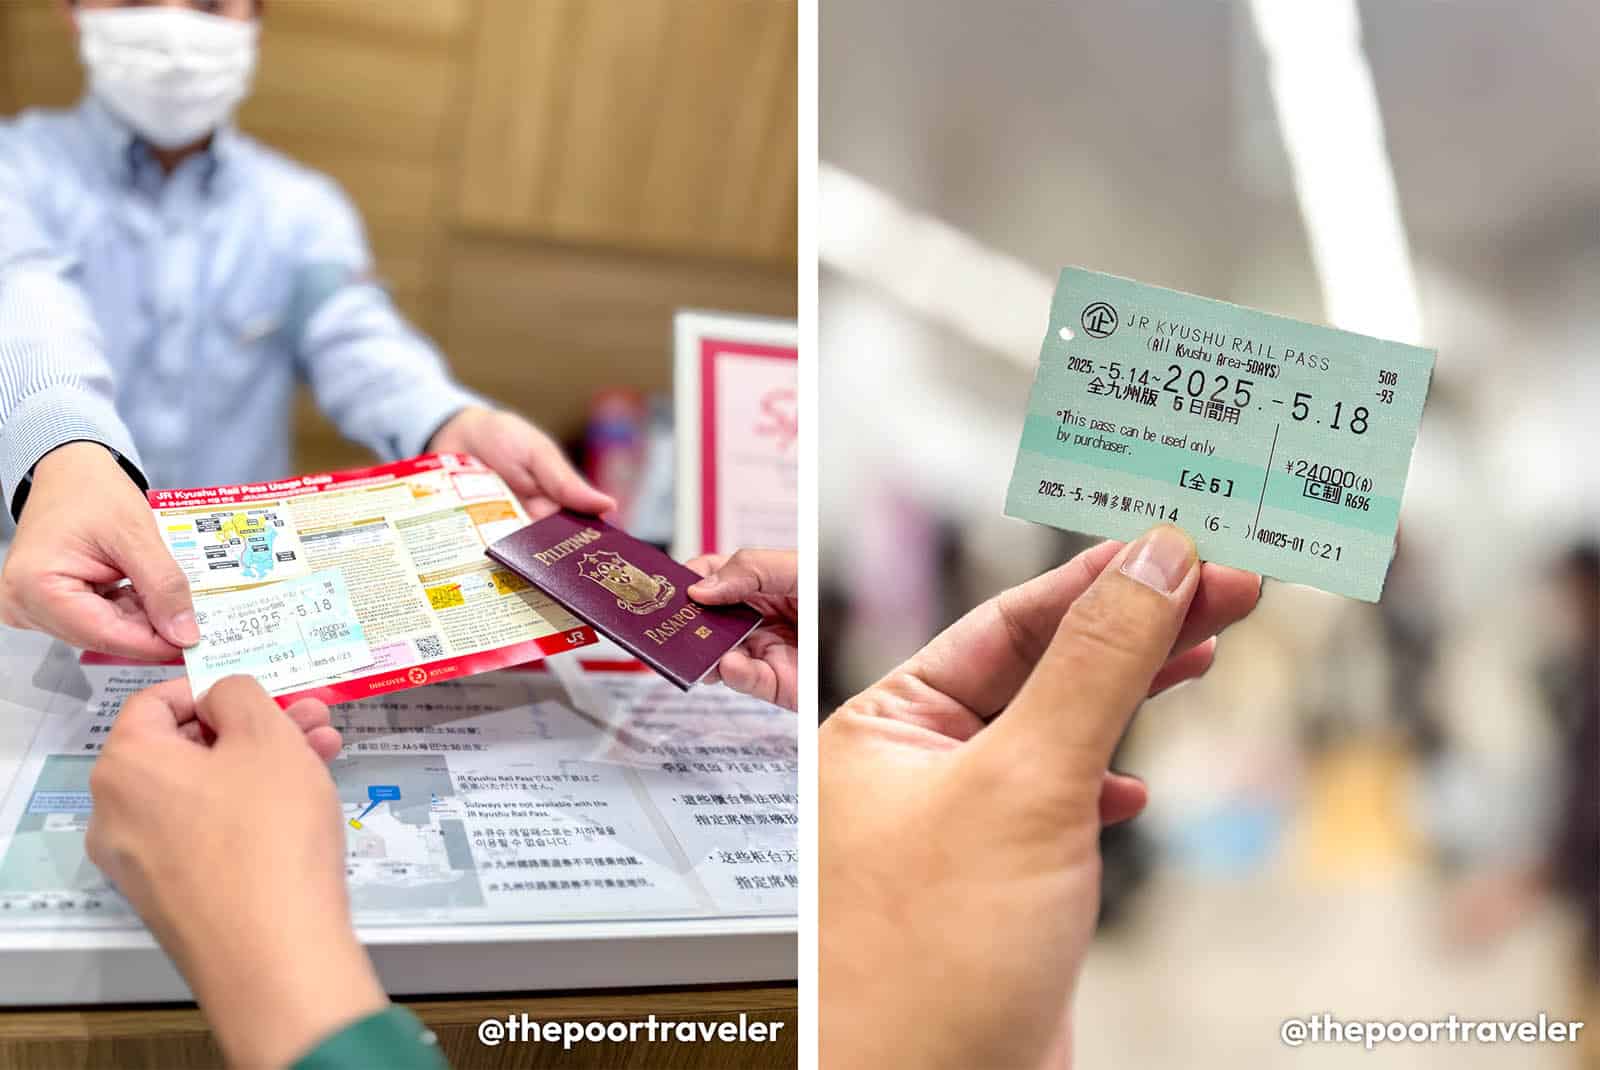
Upon arrival, exchange your online voucher with the actual pass. The most convenient place to do this is the JR Kyushu Rail Pass Exchange Counter at Fukuoka Airport. It’s easy to find. Upon emerging in the Arrival Hall from the baggage carousel area, turn left. You’ll see a lane of counters, but the one you need is at the very end.
The counter is open from 9:00 AM to 5:00 PM. If your arrival time is outside these operating hours, you can claim your pass at Hakata Station instead.
But is it really possible to visit all seven Kyushu prefectures in five days using this pass? Yes, of course. How do we know? We’ve just done it very recently. And in this article, we’re going to show you exactly how.
DAY 0: ARRIVAL IN FUKUOKA
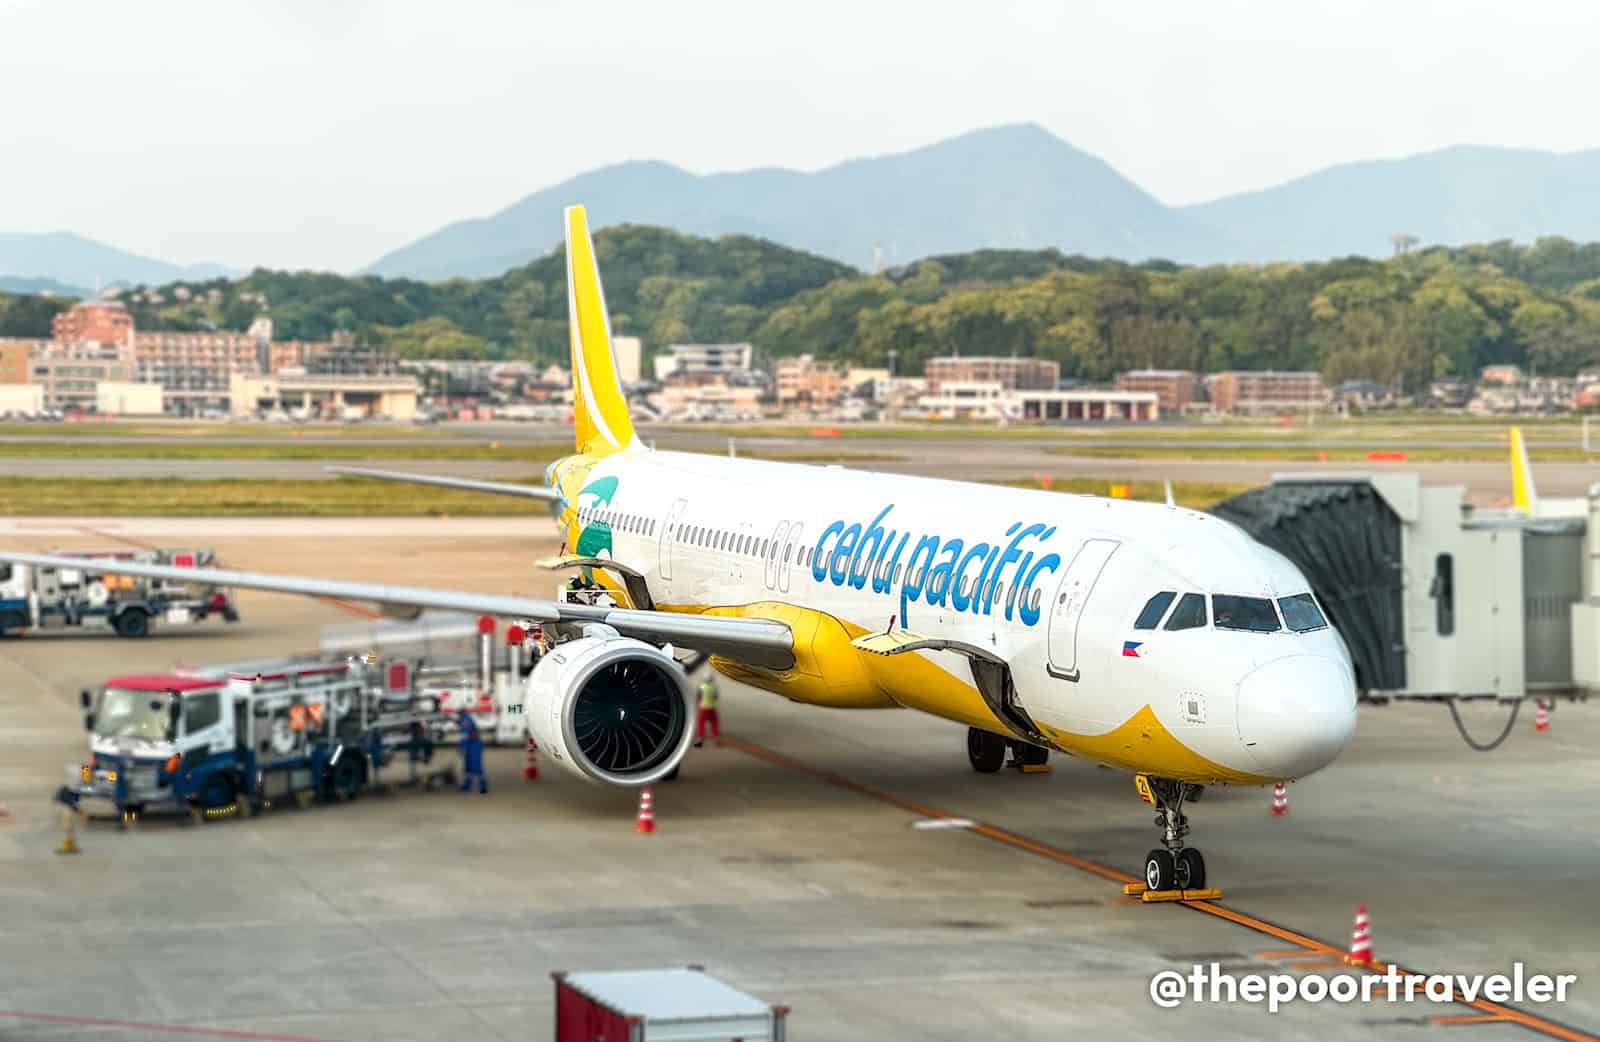
If you’re coming from the Philippines, the most budget-friendly flights are offered by Cebu Pacific, which flies directly from Manila to Fukuoka daily. CEB uses a brand new A321neo for their Manila-Fukuoka flights, and our most recent journey with them has been delightful.
When booking with Cebu Pacific, you’ll be presented with three options: GoBasic, GoEasy, and GoFlexi. Both GoEasy and GoFlexi come with seat selection and check-in baggage allowance. But if you think there’s a chance your plans could still change, go with GoFlexi so you could easily cancel your flight, convert it to Travel Fund, and book another flight in the future.
We’ve been flying with Cebu Pacific to Fukuoka for years now, and it’s always a great experience. But it’s only on our most recent trip that we got to try their new in-flight meals. But their beef adobo and chicken char siu really impressed us and are perfect for the Pinoy palate. Book with Cebu Pacific here!
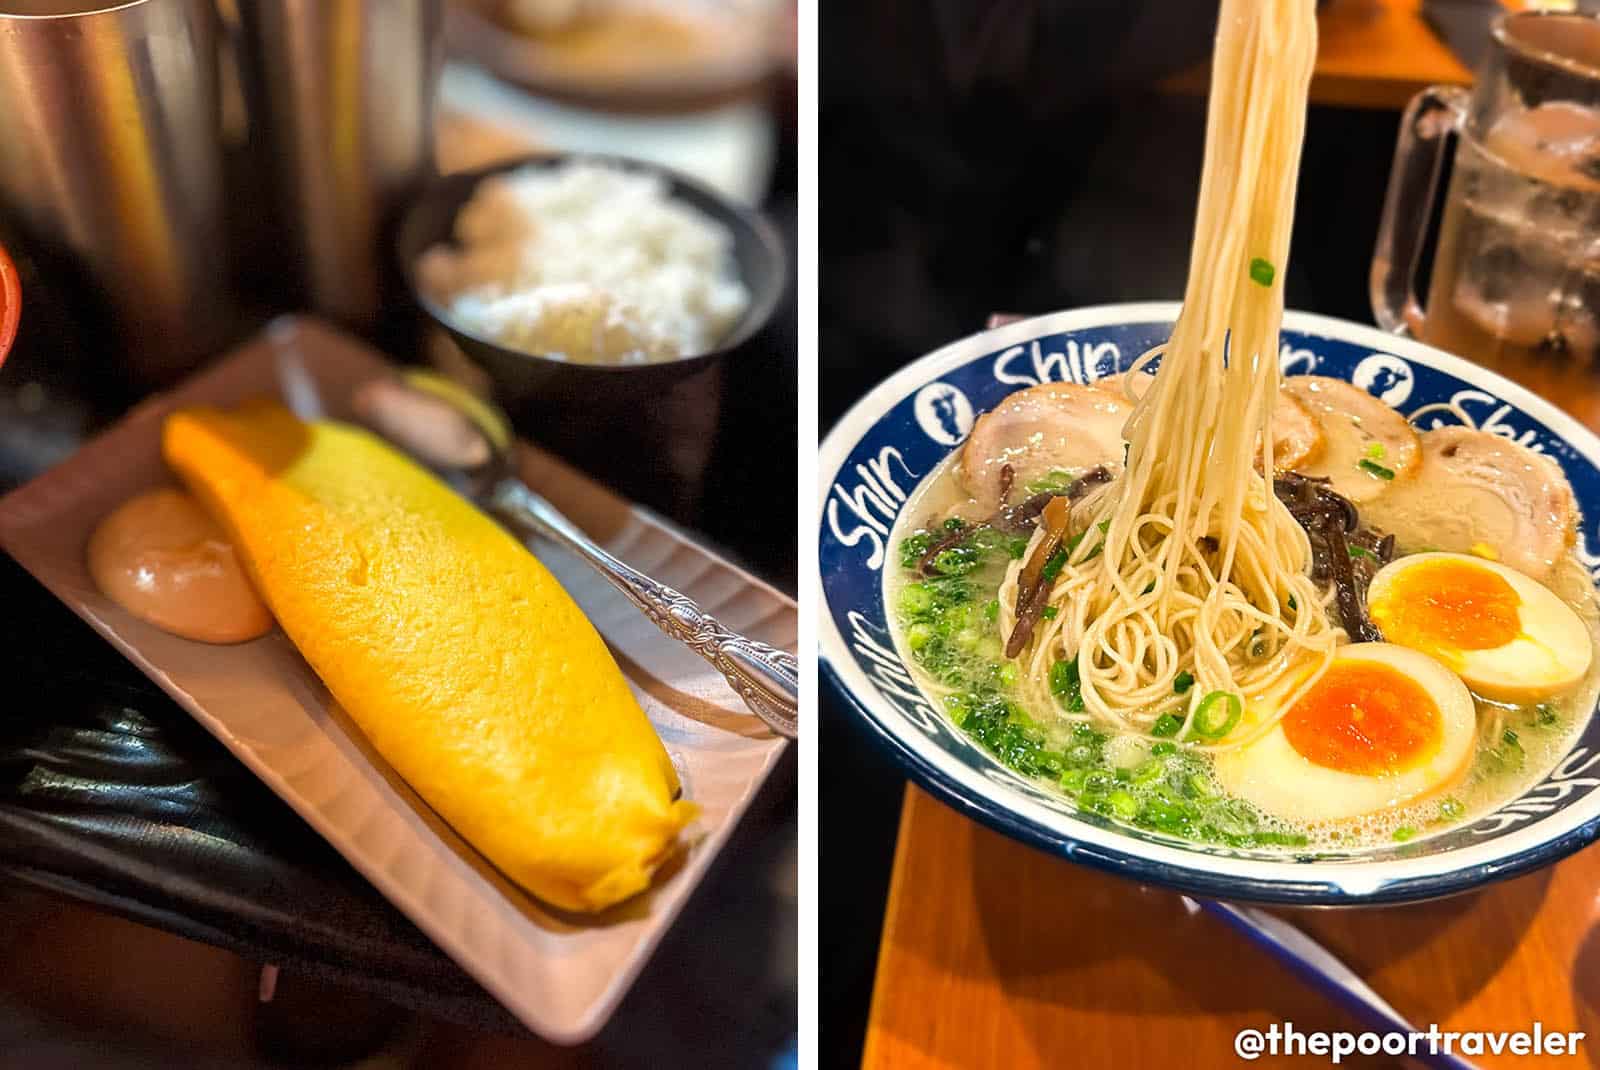
The flight arrives in Fukuoka at 7:00 PM. You can take the bus or the cab to your hotel and check in. Then spend the night enjoying exactly what this city is known for: FOOD! Fukuoka is where Japan’s obsession with tonkotsu ramen began. This is the home of rich pork-bone broth, served steaming hot and slurp-worthy. But what really sets the city apart is its rare street food culture. While most of Japan leans toward sit-down dining, Fukuoka keeps things casual and lively with its iconic yatai —- open-air food stalls that pop up after sundown. Locals flock to them for after-work bites, cold drinks, and easy banter.
Or if you want something less cozy, you can try other ramen spots in the city like Shin Shin, Hakata Issou Honten, and Canal City’s Ramen Stadium.
Call it a night because you’re gonna be starting your day early tomorrow.
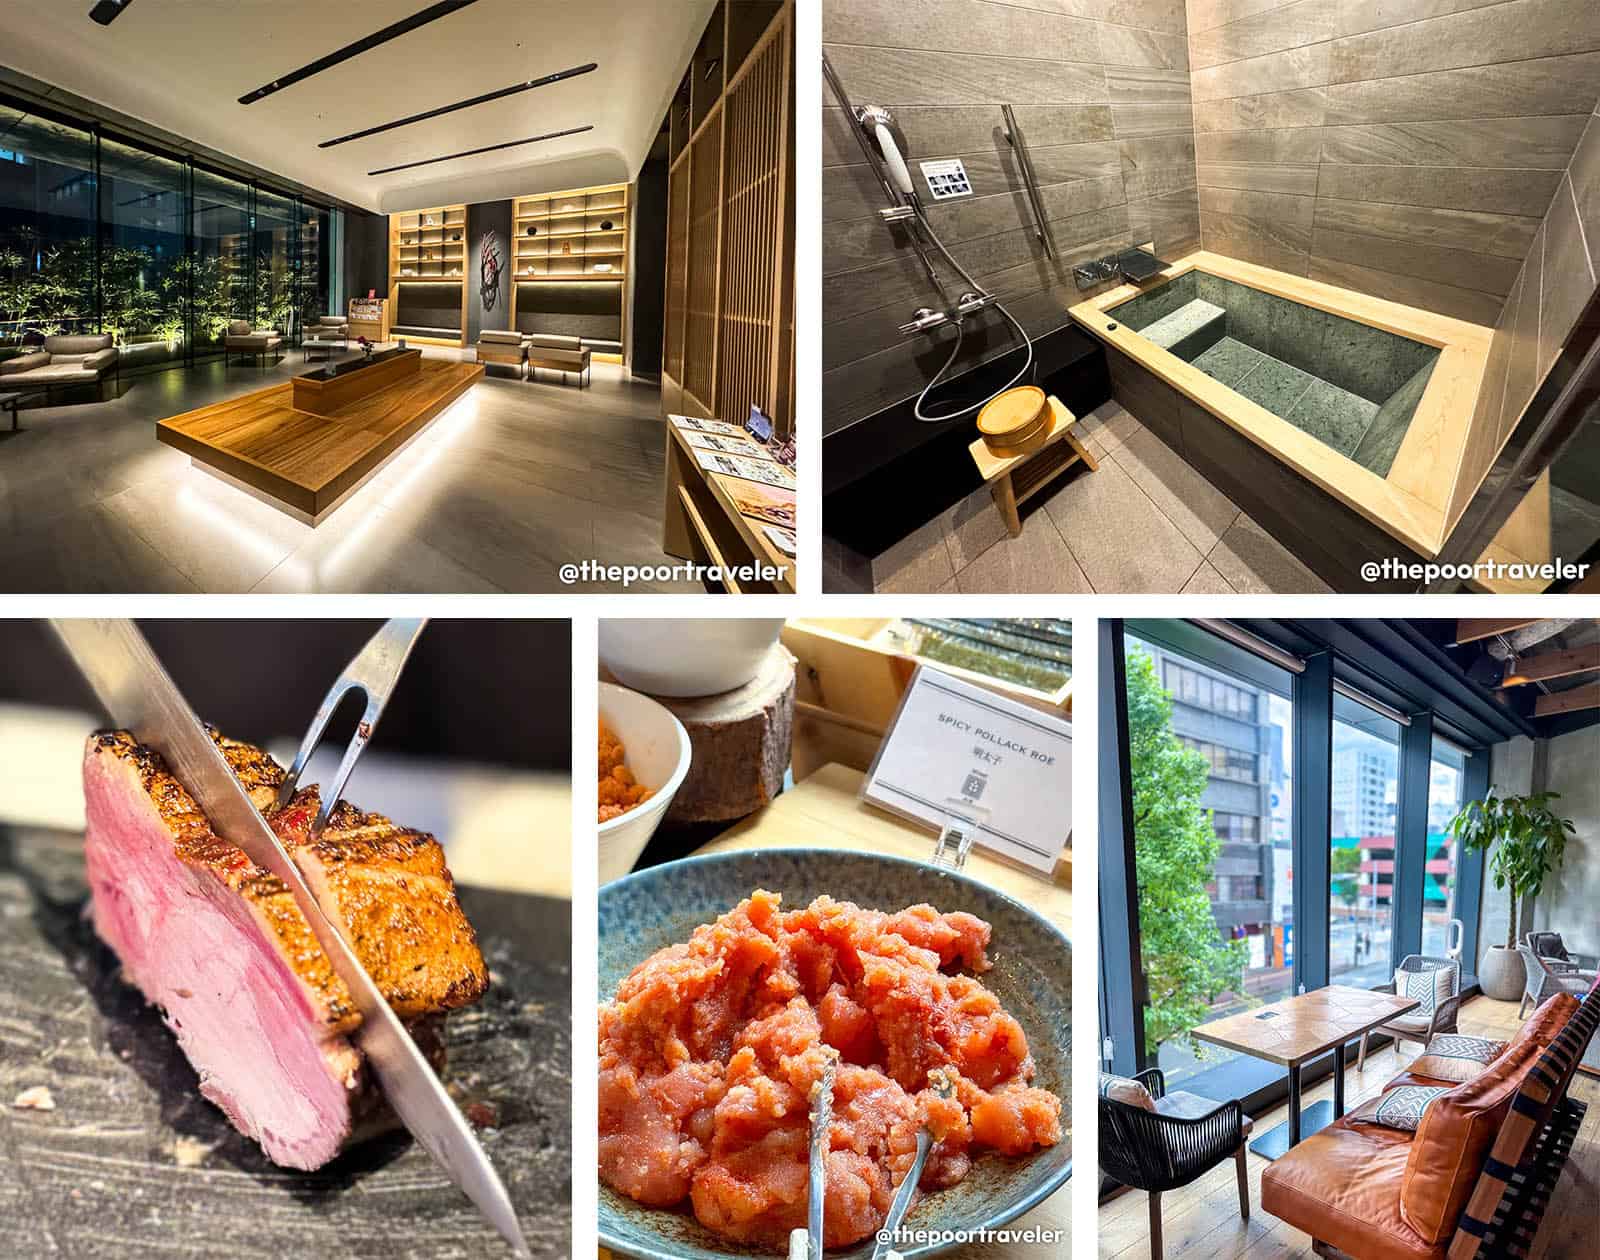
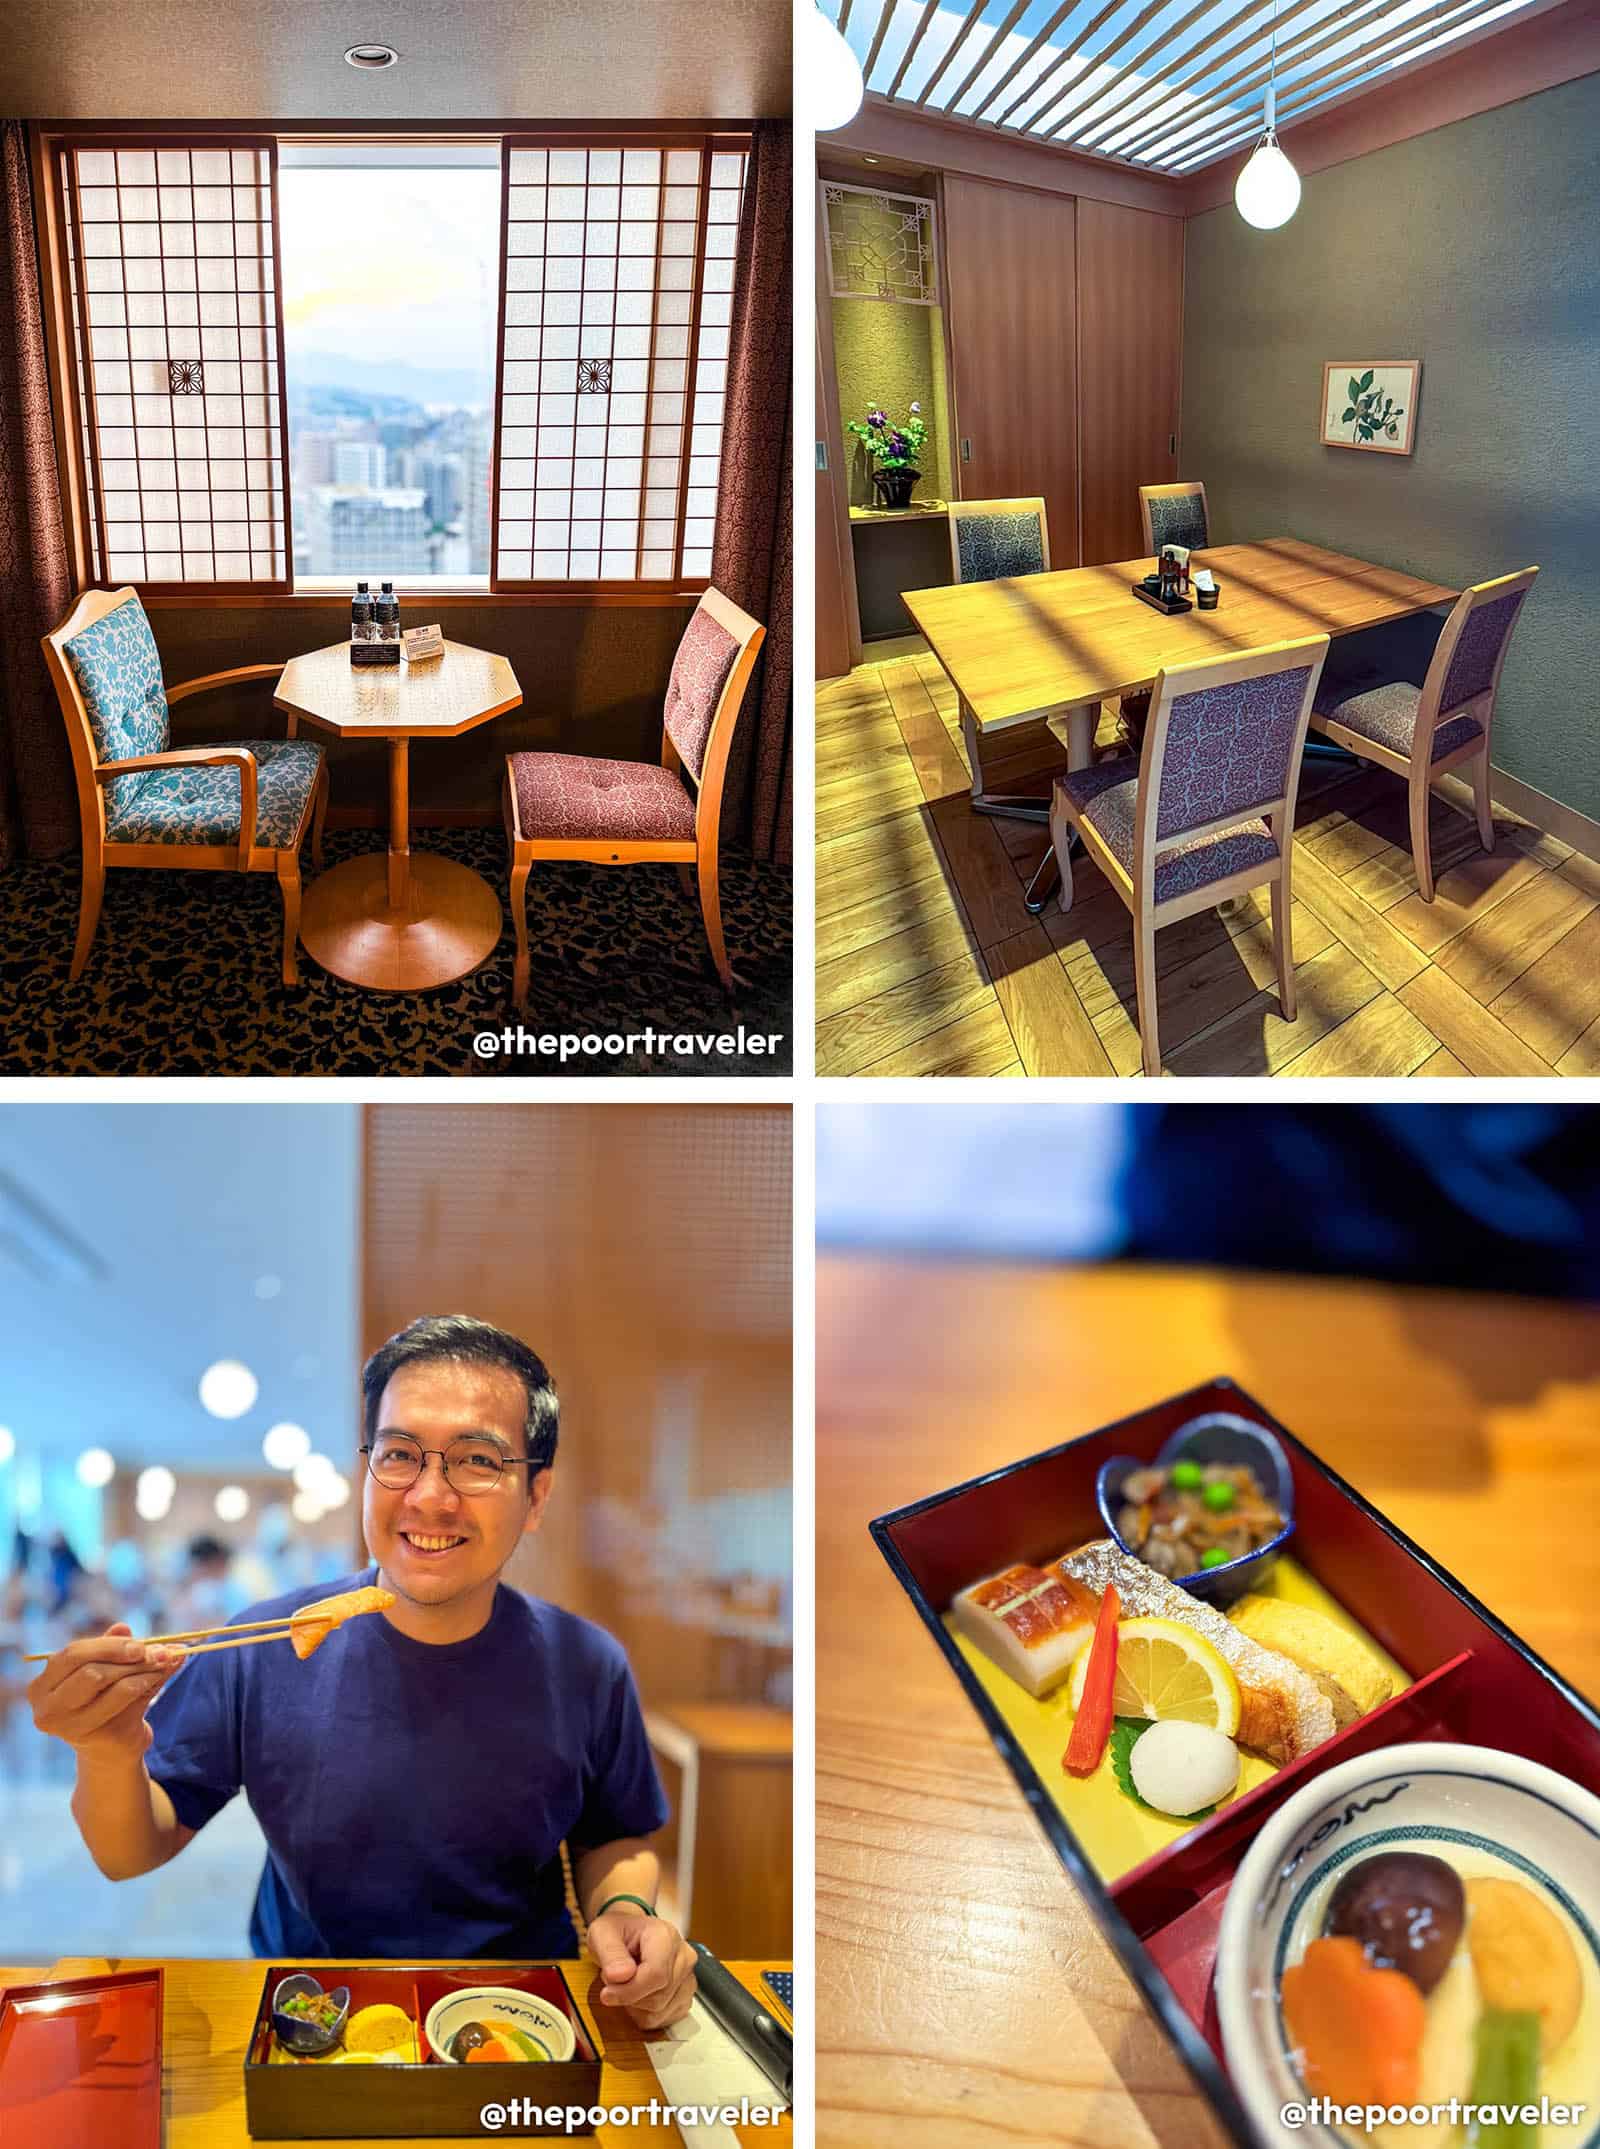
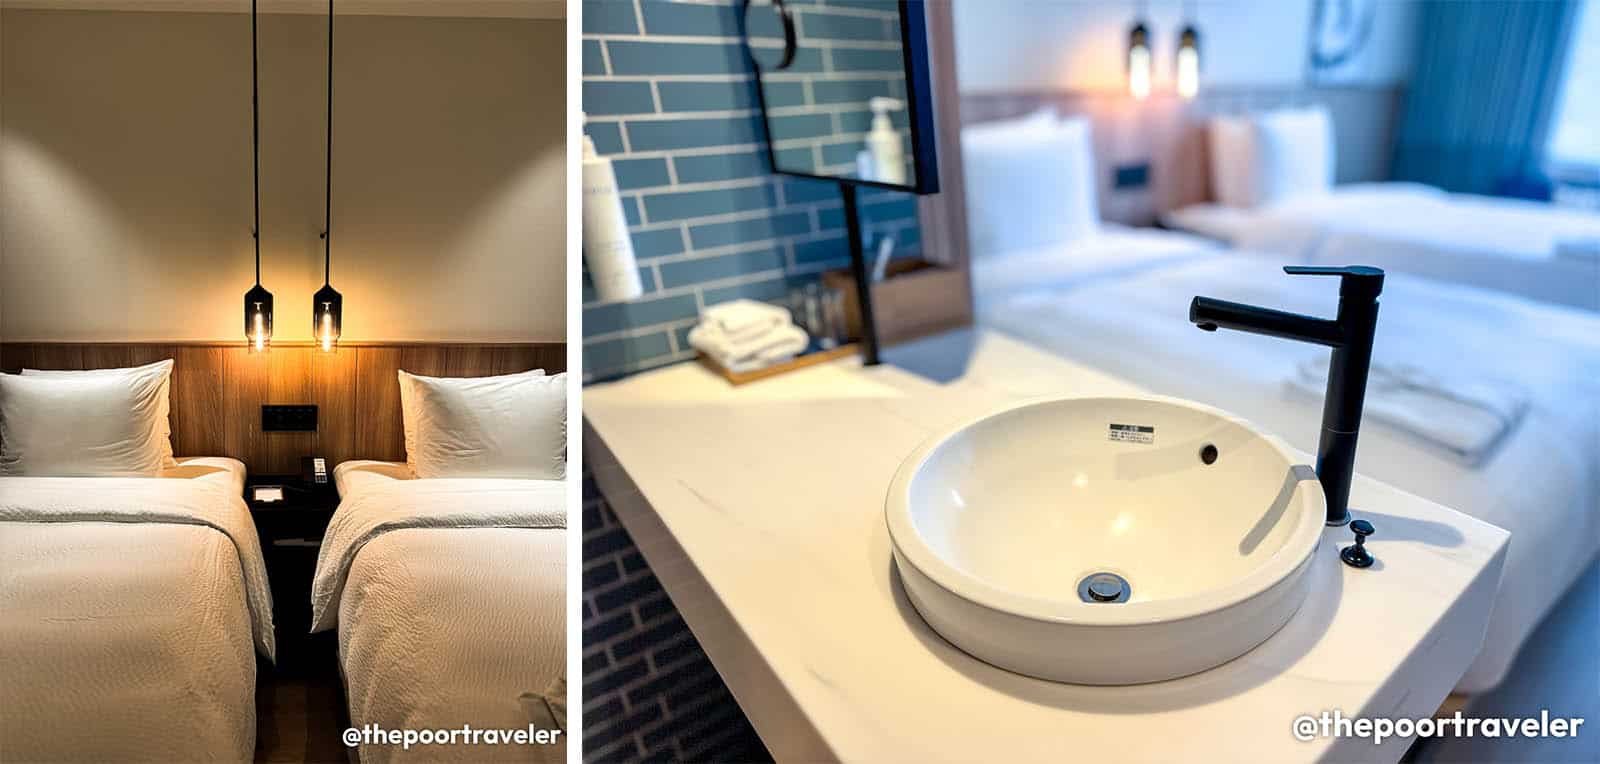
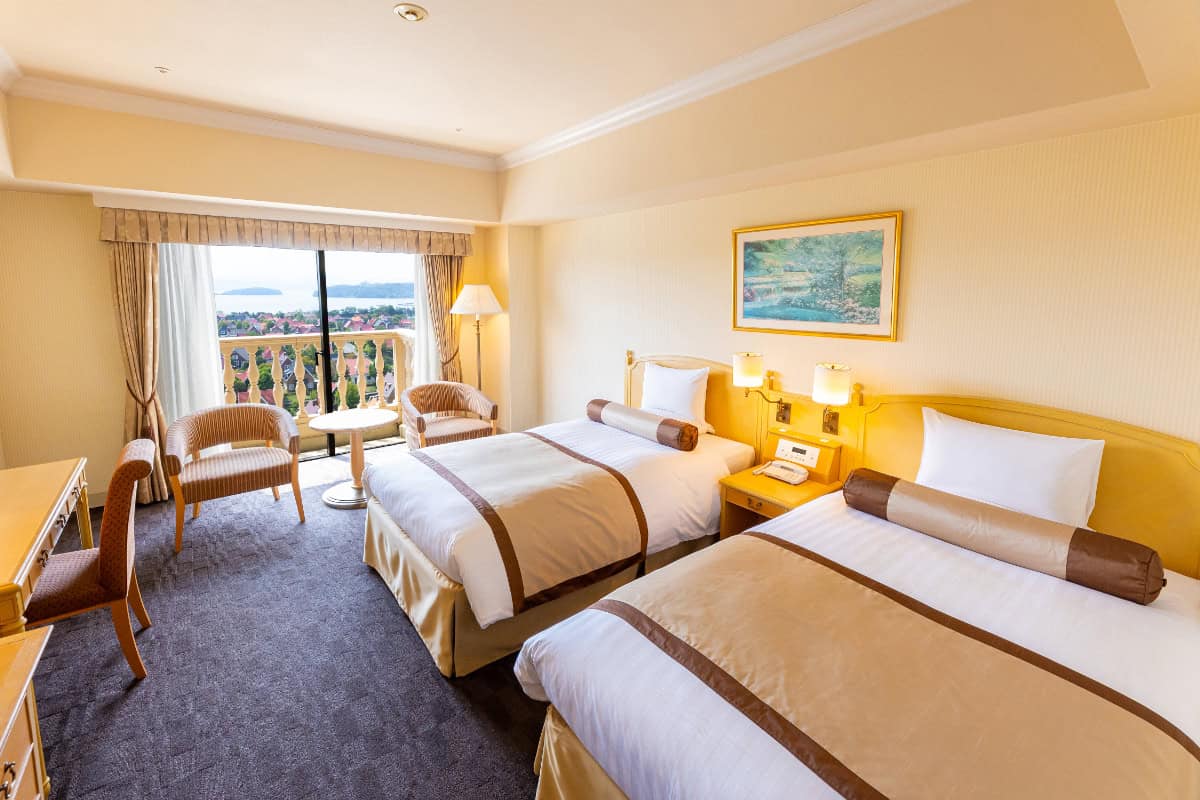
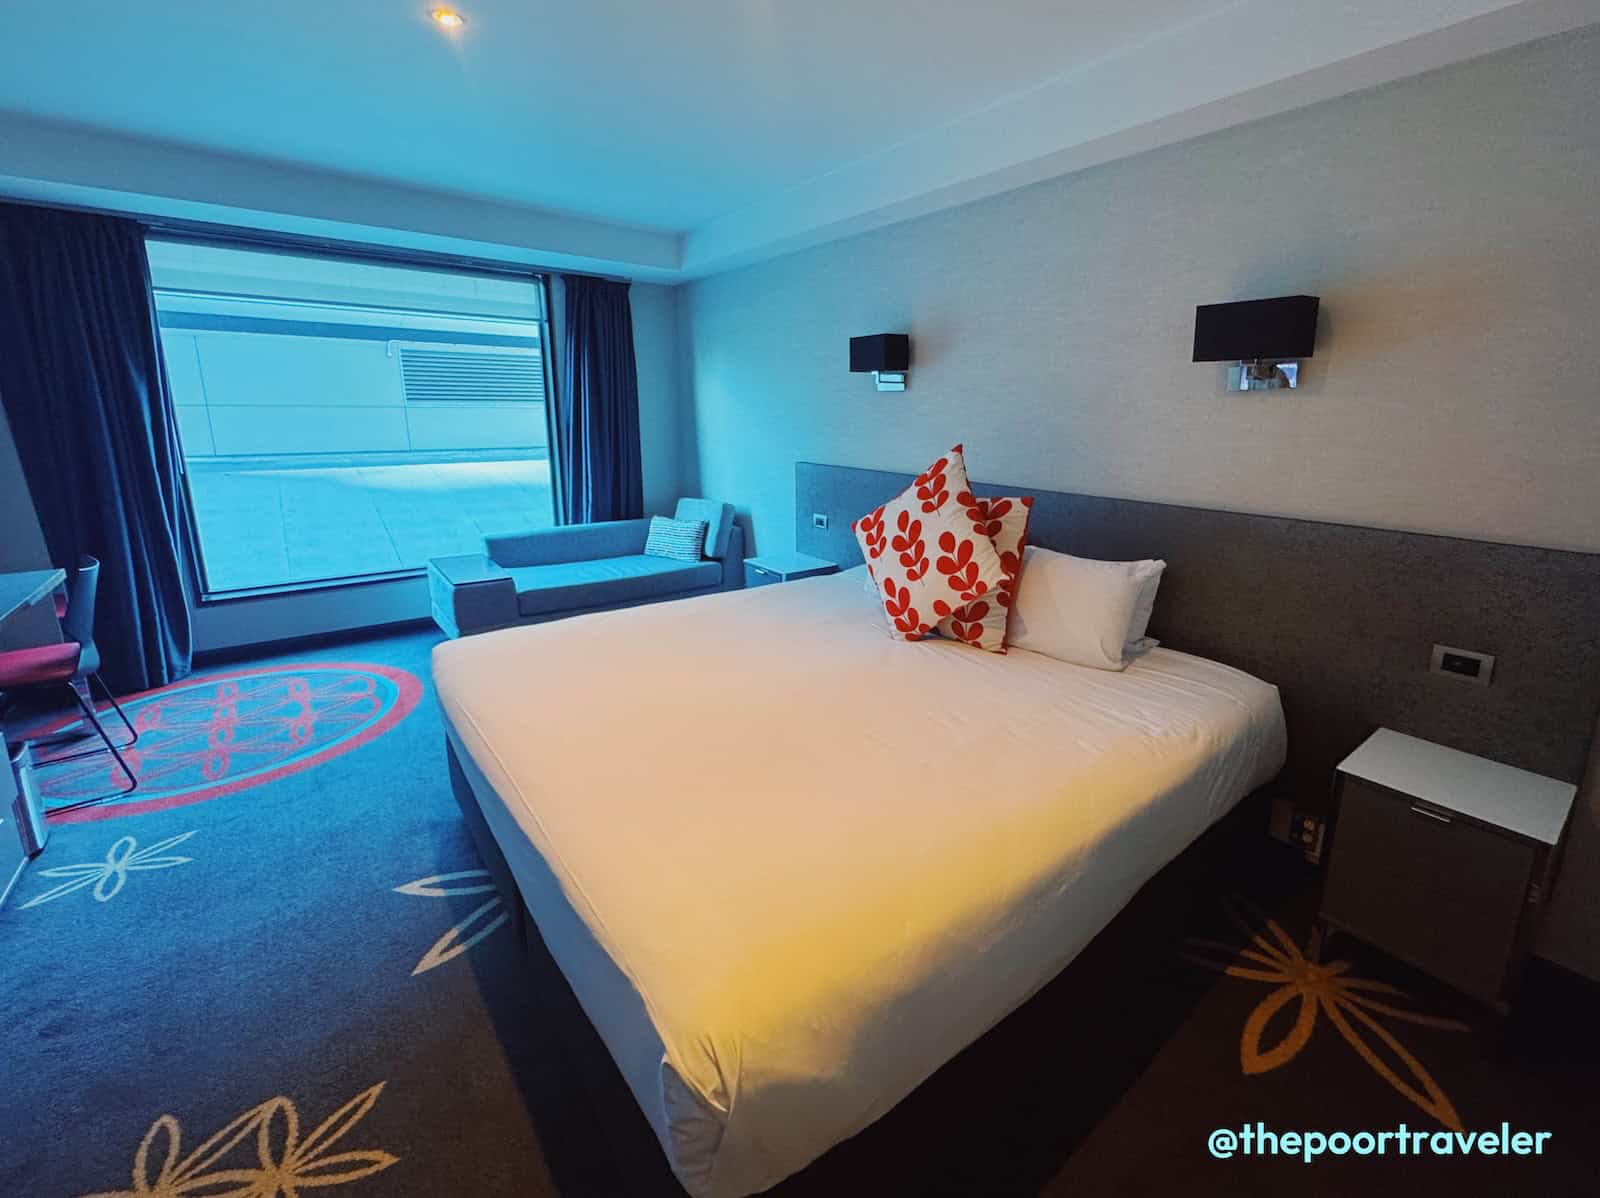
Where to Stay:THE BLOSSOM HAKATA Premier is a stylish hotel situated between the JR Hakata Station (just a 7-minute walk from the station!) and Nakasu River, which makes it a good base to explore the city. It features 238 rooms designed with traditional Hakata textiles and modern comforts.
The attention to detail here is very thoughtful. We particularly liked its Japanese-style bathtub using Towada stone (*only on selected floors), a rare volcanic ash rock found exclusively in Mount Yakushi-mori in Akita Prefecture. It gave us a feeling that we are in an onsen, even though we’re just in our hotel room! And since we stayed in a HAKATA Premium King Room, we also enjoyed the mist shower which had a relaxing effect.
Images courtesy of JR Kyushu Hotels & Resorts
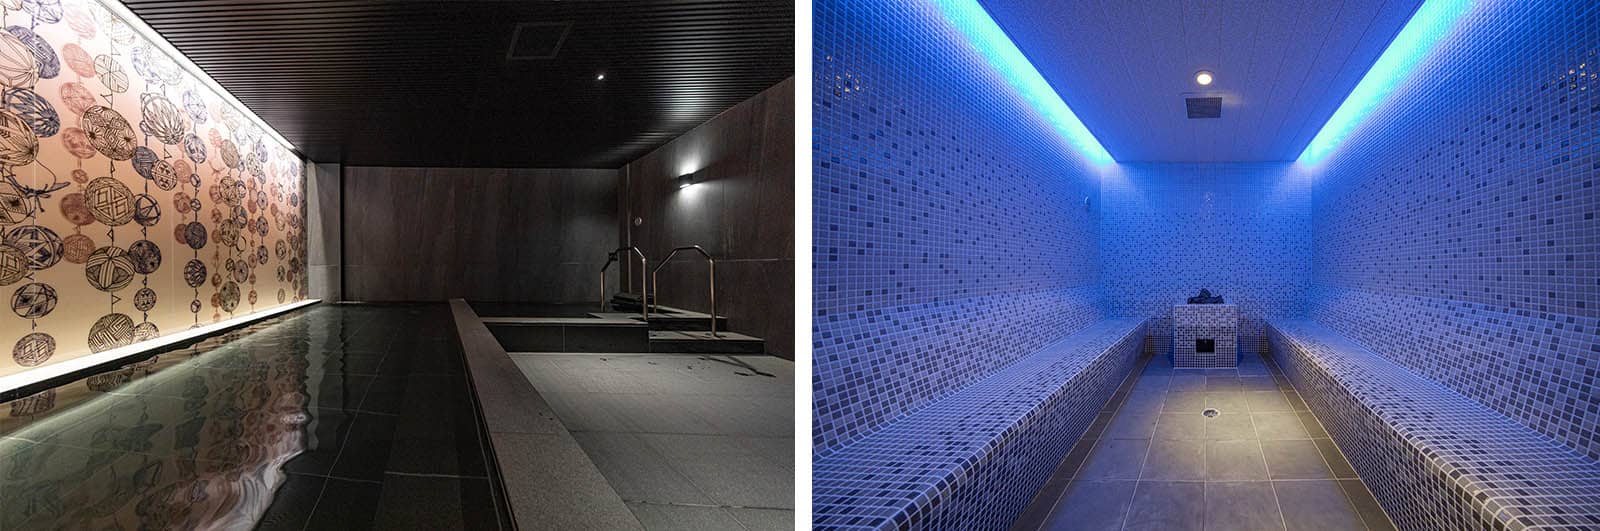
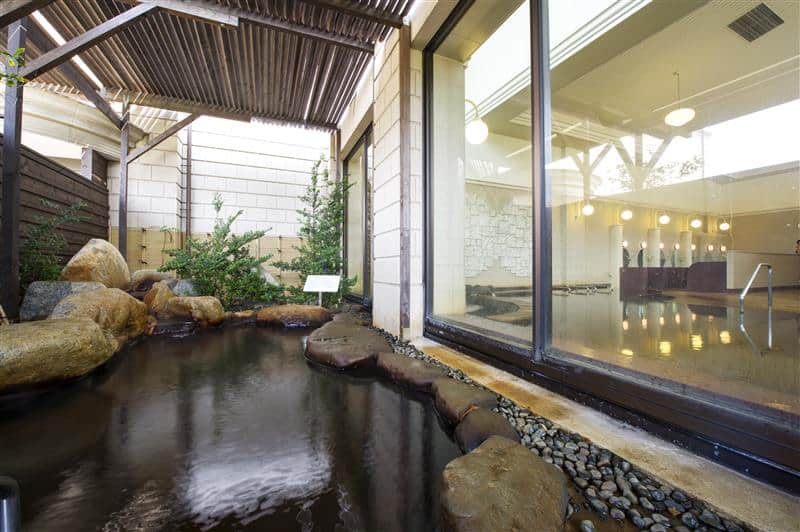
Guests can also indulge at its restaurant serving Kyushu-inspired dishes made from local ingredients and complimentary men’s and women’s baths including sauna with Fukuoka cultural themes and a fitness room, too.
DAY 1: OITA
Today, our first destination is Yufuin Onsen in neighboring Oita Prefecture. But before you get too excited about where you’re going, you should also consider how you’re getting there. In style, preferably.
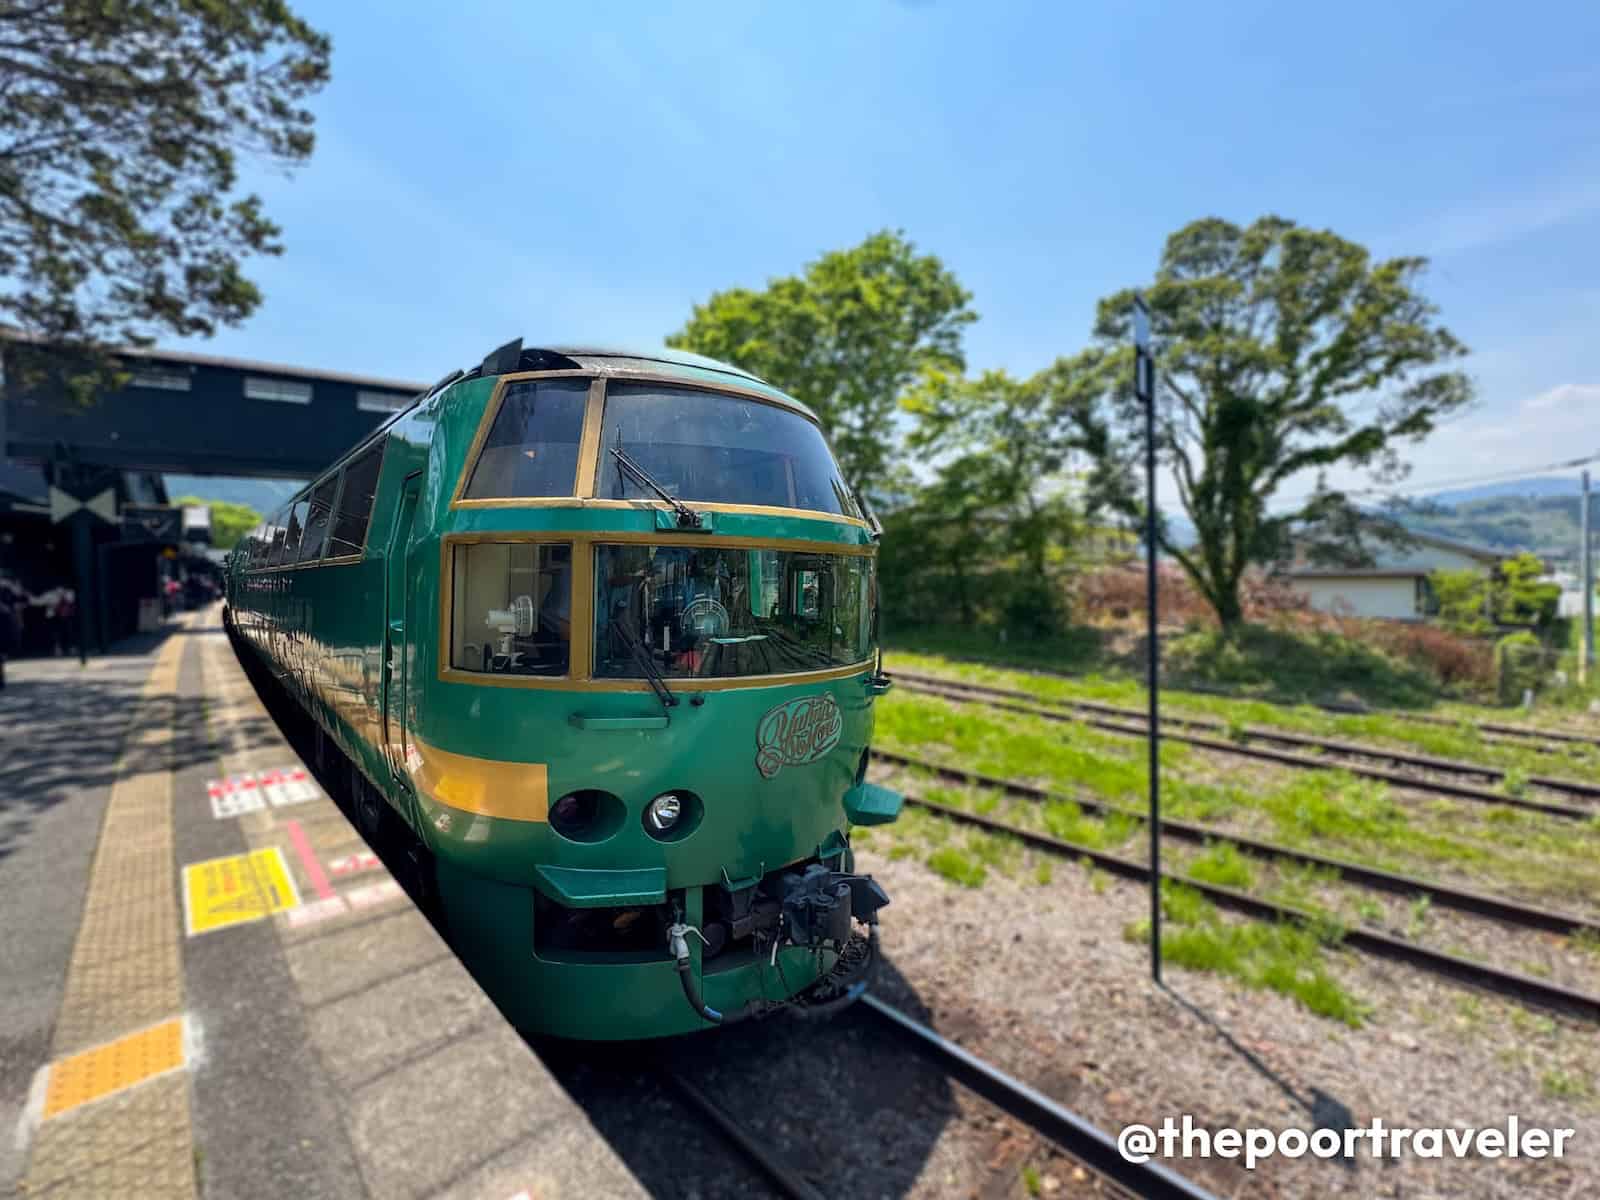
Yufuin No Mori
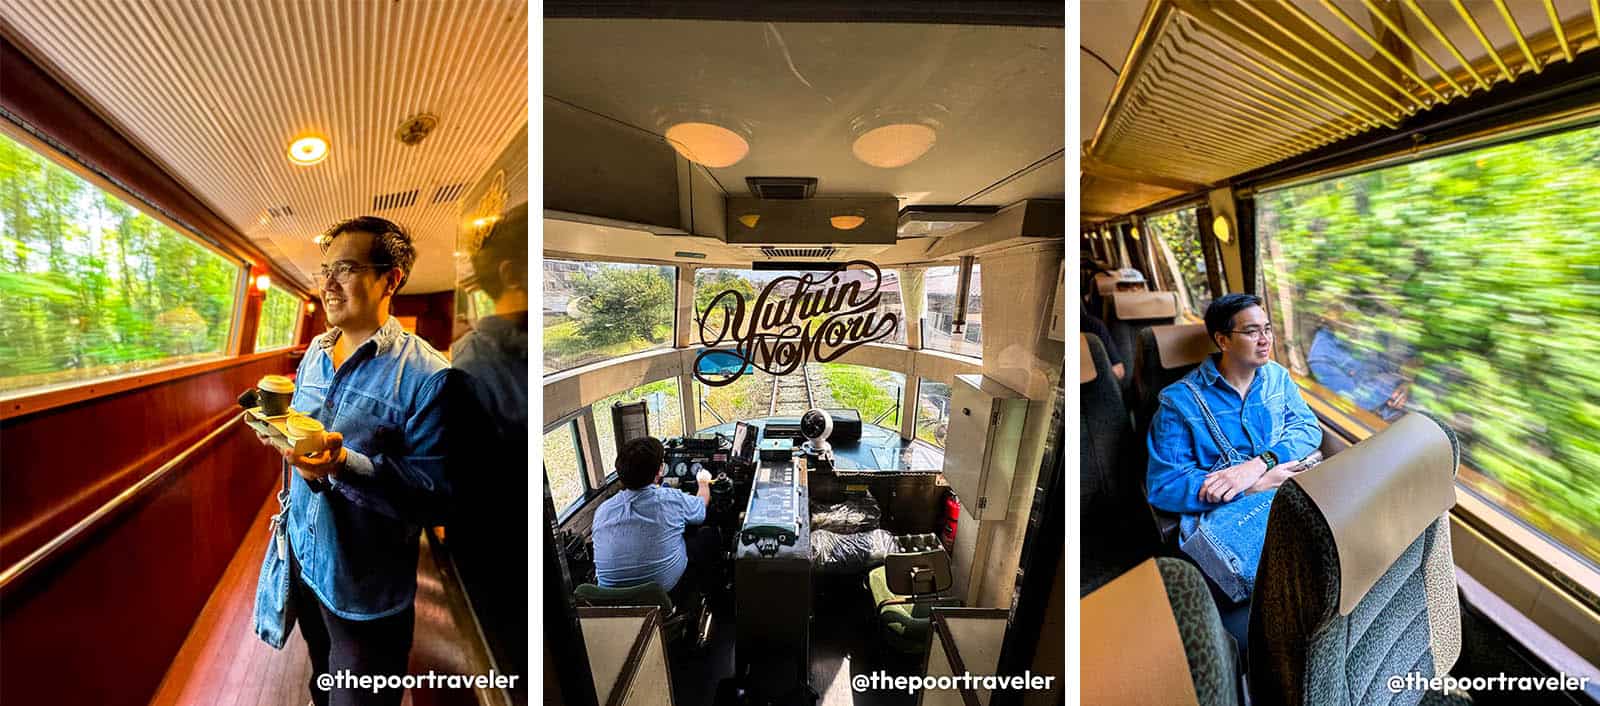
You see, JR Kyushu has some of the most beautiful trains in Japan, and one of them is Yufuin No Mori, a special forest-themed nostalgia-filled train that can take you to Yufuin. It connects Hakata Station to Yufuin and Beppu in Oita. Since its debut in 1989, this train has attracted countless travelers with its elegant design and immersive travel experience. Even I gets fascinated by it because it makes me feel like I’m in a steampunk anime when I’m on it.
Inside, it has a warm wooden motif, creating a natural and inviting atmosphere. It is also equipped with window-facing seats for optimal sightseeing. We also got to try the snacks sold in the buffet car, which sells regional specialties, including bento boxes crafted by local chefs, Yufuin’s renowned sweets, and desserts like kabosu ice cream. Kabosu is a type of citrus fruit (similar to calamansi but less sour). We totally became obsessed with their kabosu sorbet!
Yufuin Onsen
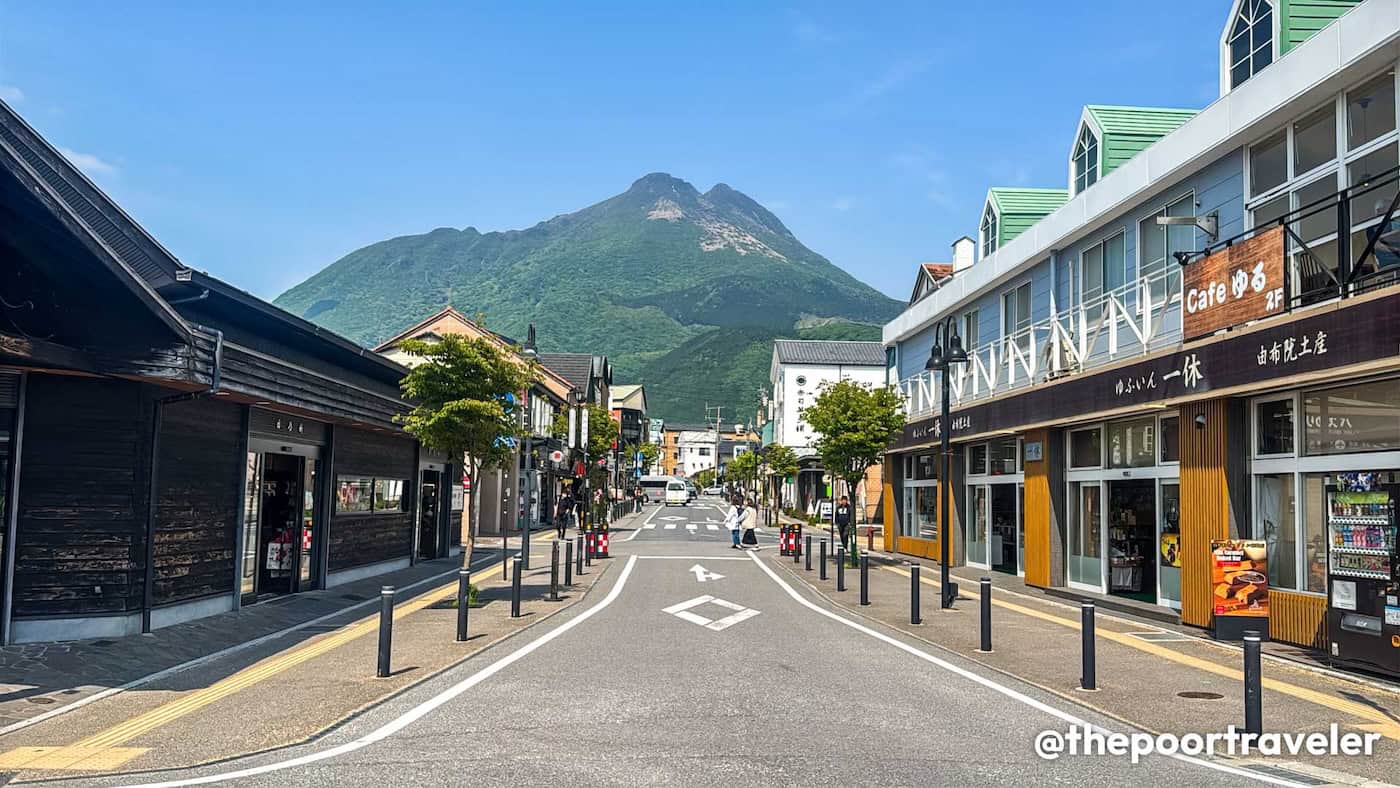
From Yufuin Station, travel on foot to Yu No Tsubo, Yufuin’s main street, lined with cozy cafés, playful attractions, and boutique shops selling everything from handmade sweets to whimsical souvenirs. It’s the kind of place where you can wander without a plan—and still end up with a full camera roll and a bag of local treats. Some standout stops include Yufuin Floral Village, a themed attraction inspired by European countryside charm. There’s even a corner styled after Heidi in the Alps.
Another worthy stop is the Yufuin Showa Museum is a retro-themed attraction that recreates life in Japan during the Showa era (1926–1989), especially the 1950s and ’60s. It features over 20 evocative exhibits, including old-school classrooms, candy shops, and vintage electronics, that visitors can interact with, making it a fun, immersive throwback experience.
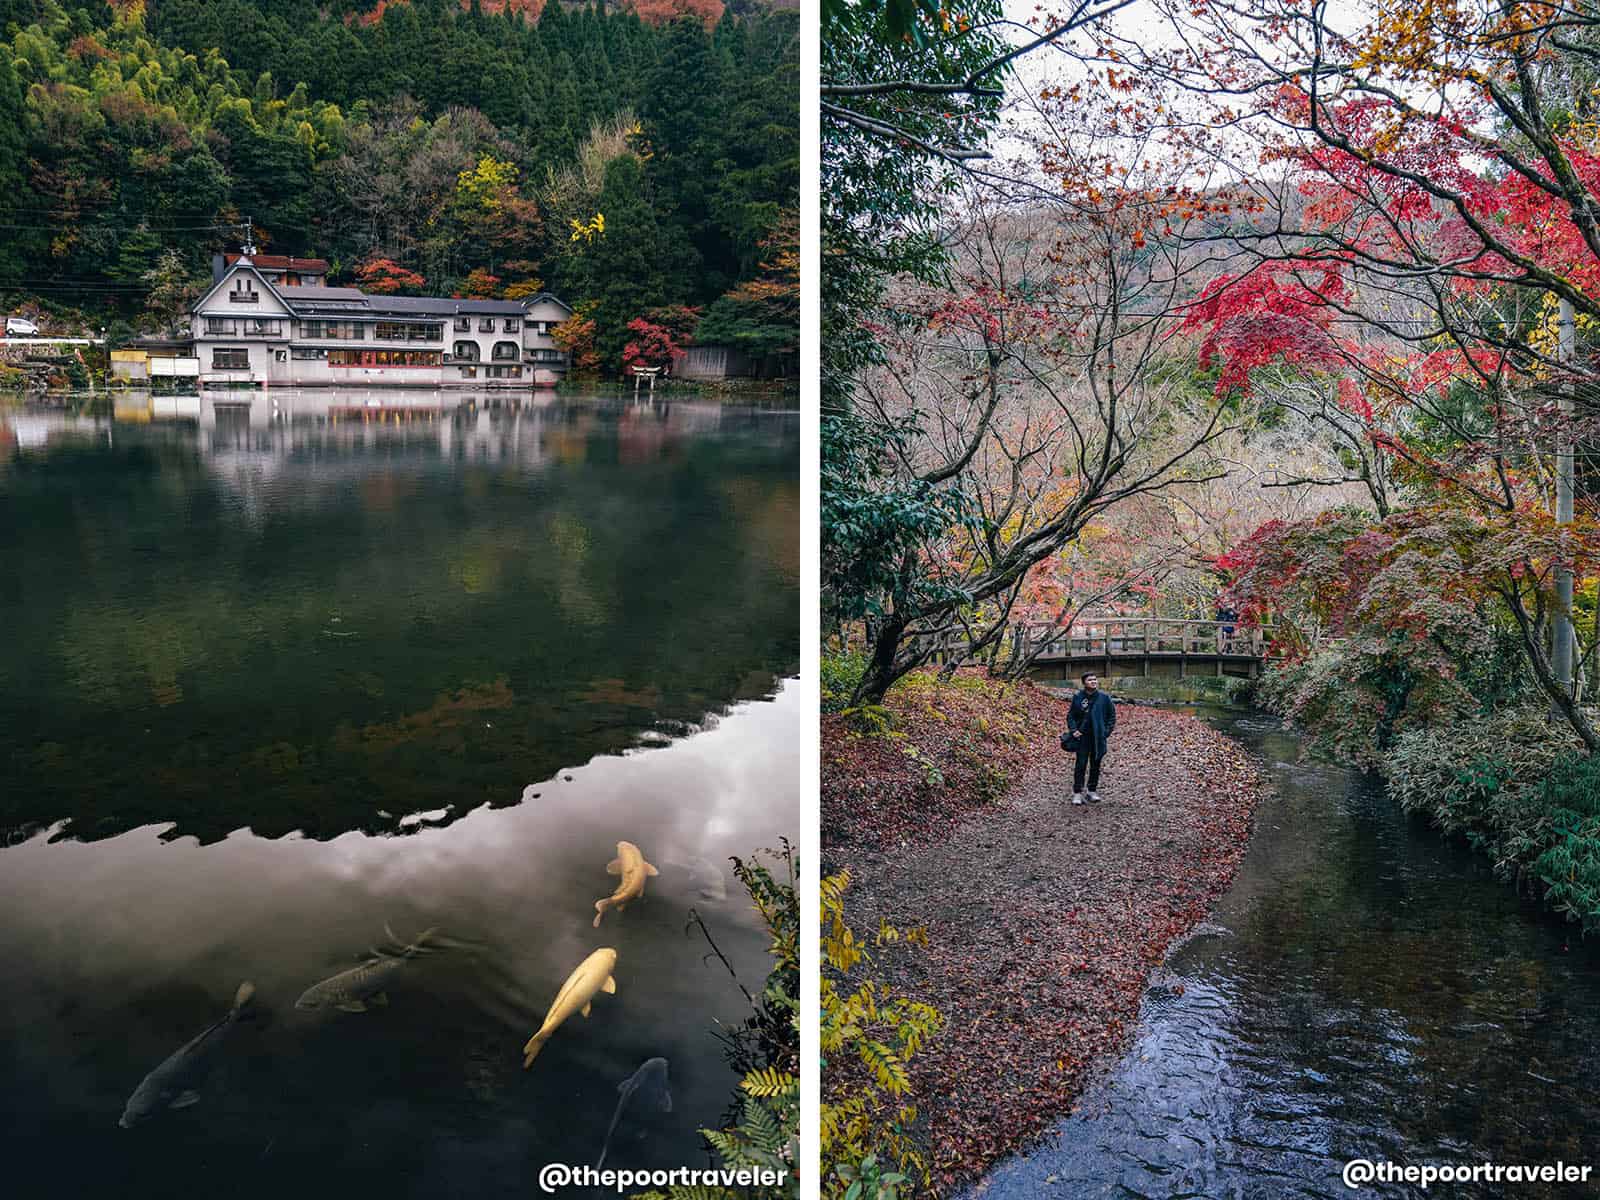
Follow the signs and eventually, you’ll reach Lake Kinrin, a small, tranquil pond often veiled in mist, formed where hot and cold springs meet. Its still, glassy surface reflects the surrounding landscape like a painting, occasionally rippling as golden-hued fish glide just beneath. It’s this glowing illusion at sunset that earned the lake its name: Kinrin, meaning “golden scale.”
This was our second time visiting. The first time was in autumn, and it was magical. Trees are clad in shades of crimson and amber. Be sure to pause on one of the charming pedestrian bridges nearby—it’s the perfect spot to take in the view (and snap a few photos you’ll definitely want to post).
After this, walk back to Yufuin Station and catch another train (Yufu Limited Express, in our case) to one of Japan’s most iconic hot spring destinations – Beppu.
Beppu
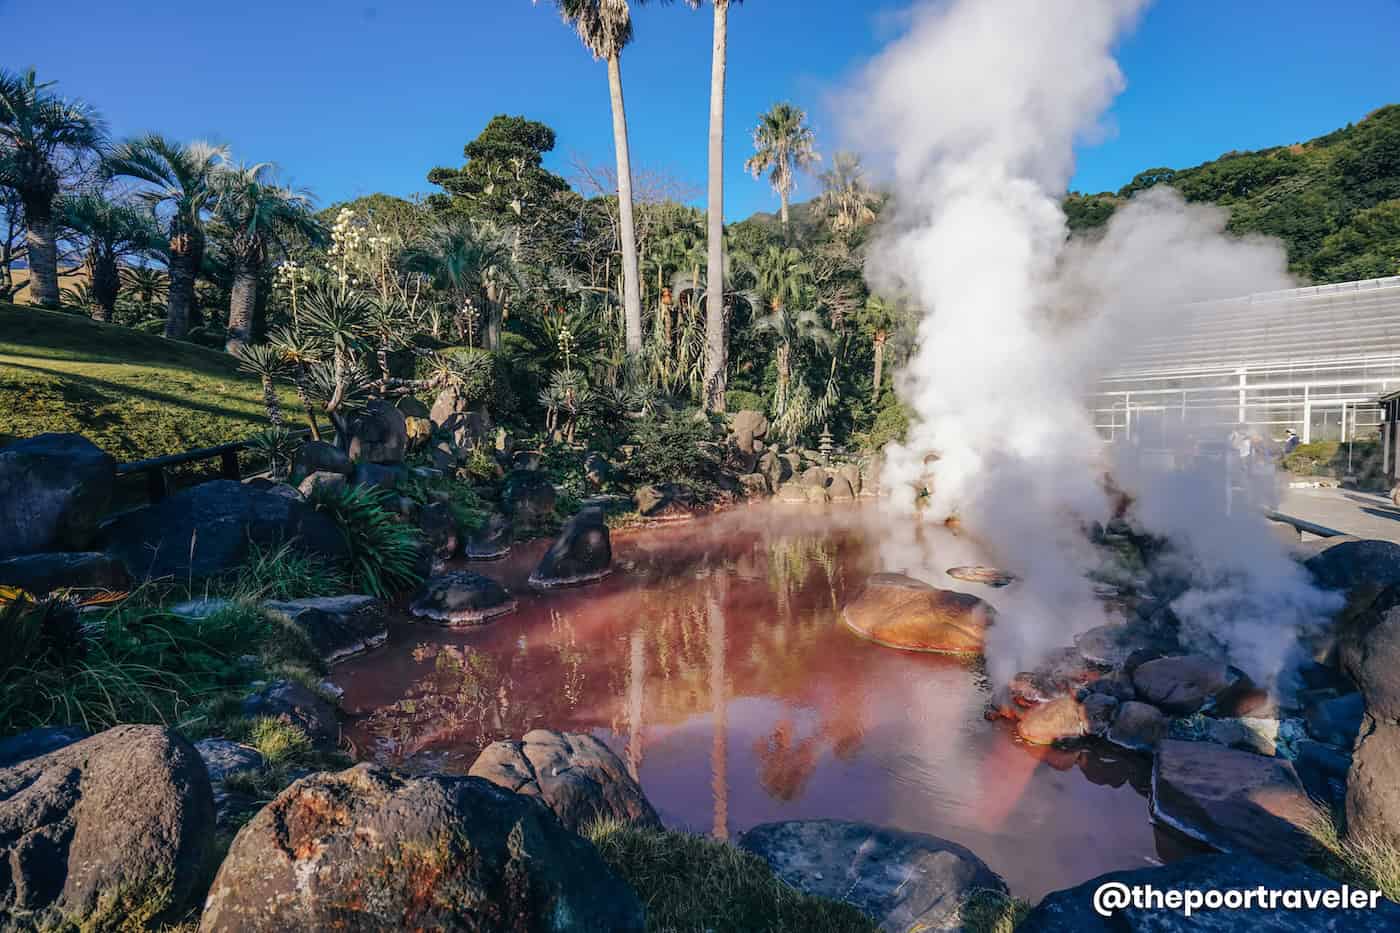
Beppu is famous for offering just about every kind of onsen experience you can imagine. But its most unique attraction? The Hells of Beppu, a collection of hot springs that are meant for viewing, not bathing.
In Japan, these dramatic geothermal spots are called jigoku, or “hells,” not because they’re scary, but because of the boiling waters, rising steam, and otherworldly colors that give them an intense, almost supernatural vibe. There are several of these “hells” scattered mainly across the Kannawa and Shibaseki districts. You can visit them on a self-guided tour or join a sightseeing group to hit all the highlights in one go.
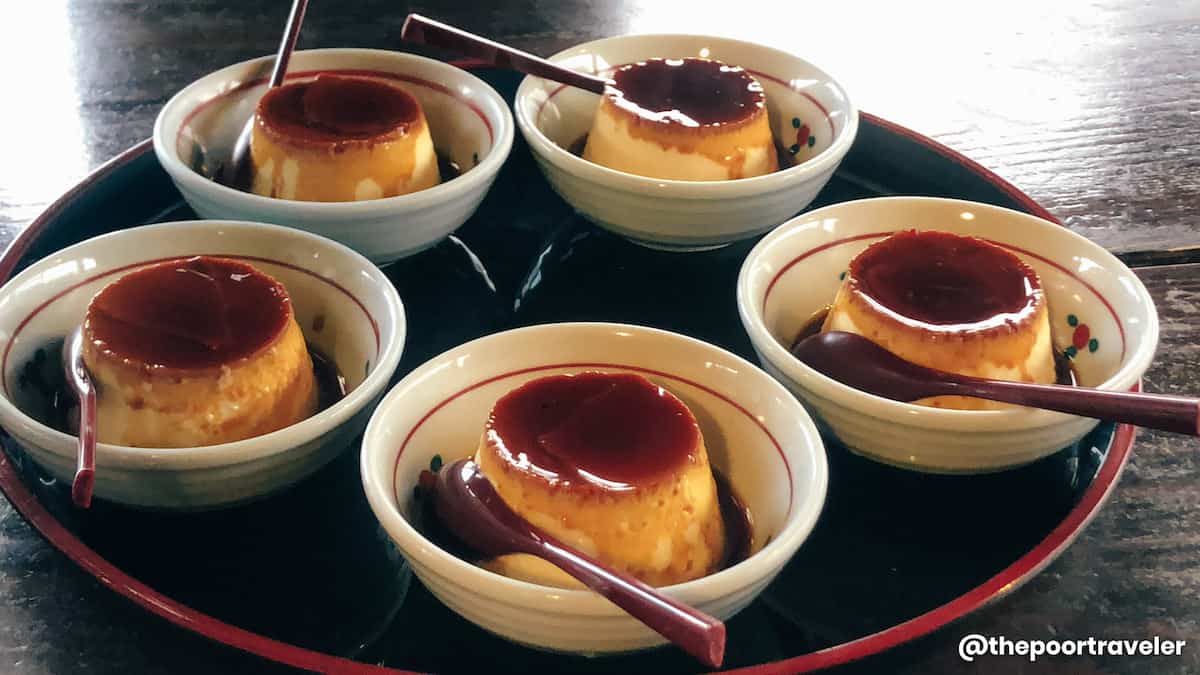
And while you’re exploring, don’t miss out on the local specialty: jigokumushi, or “hell-steamed” dishes! The pudding is a fan favorite—soft, sweet, and cooked by the natural steam from the hot springs.
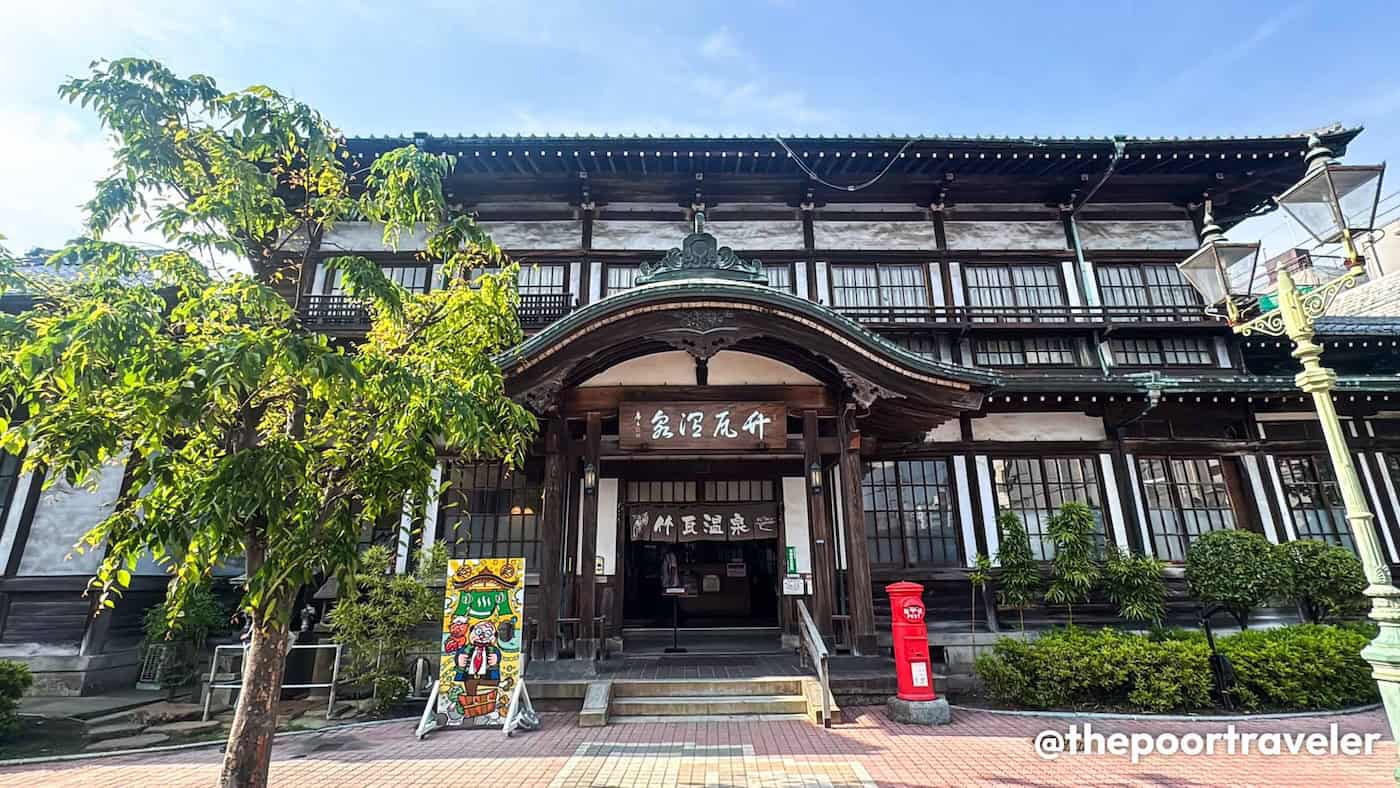
But if you’d rather relax, go to Takegawara Onsen instead. Established in 1879, it is renowned for its distinctive karahafu (curved gable) roof, added during a 1938 renovation.
But more than the architecture, people come here to experience unique bathing experiences. You can choose between a traditional hot spring bath and the rare sand bath (sunayu). In the sand bath, guests don a yukata and are gently buried up to the neck in naturally heated sand, promoting relaxation and detoxification.
You can spend the night here in Beppu if you so wish, but you can also proceed to Oita City so it’ll be easier for you the next morning.
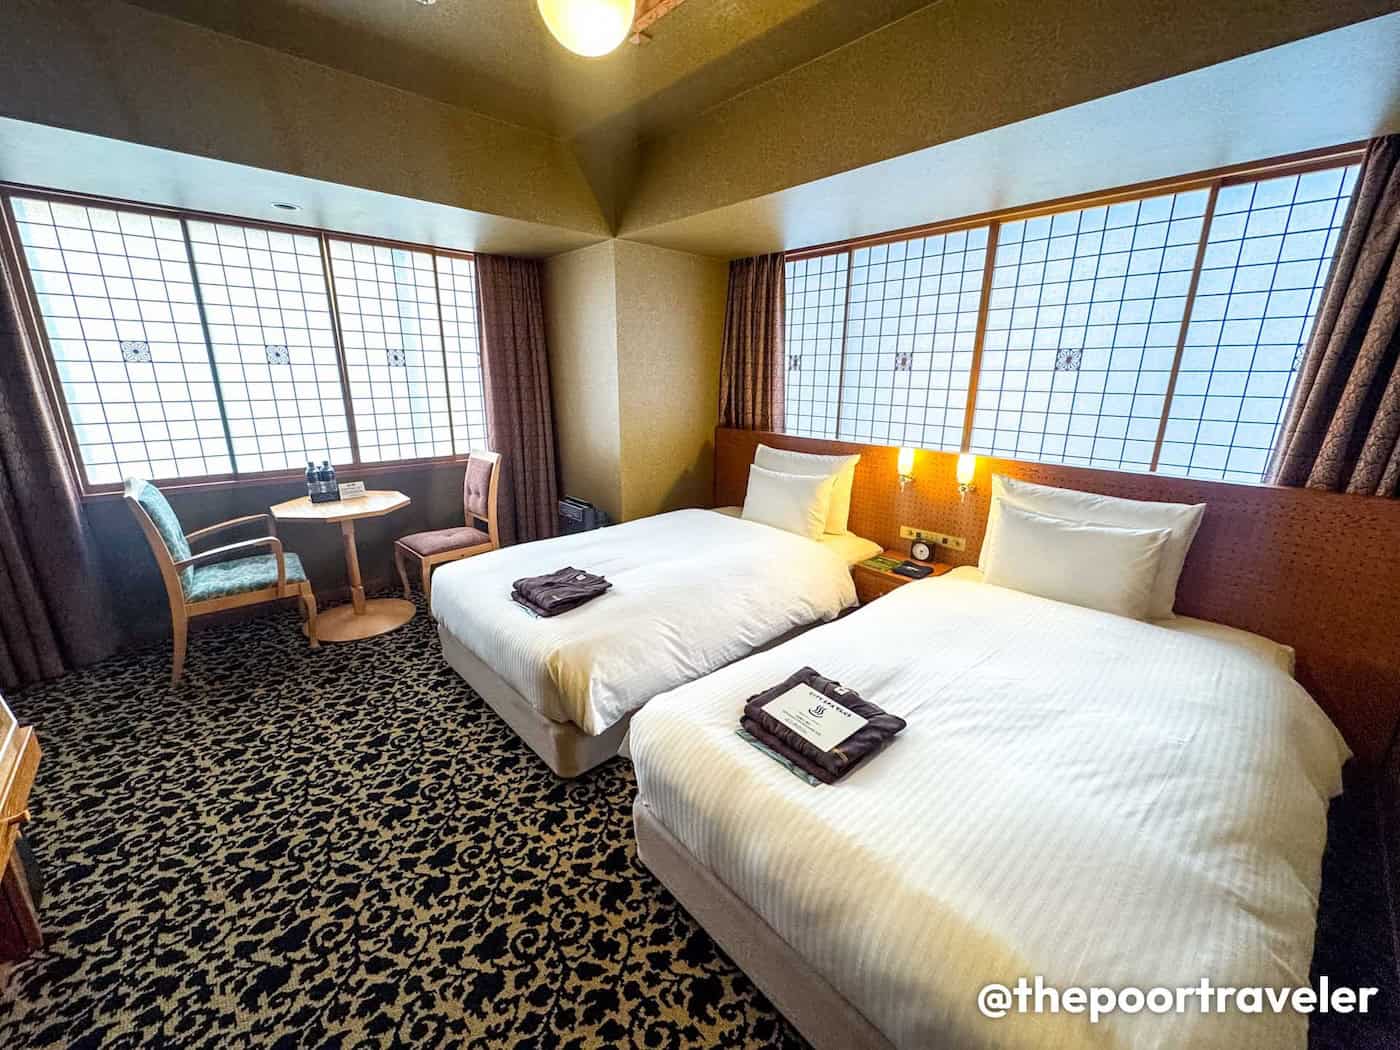
Where to Stay: JR Kyushu Hotel Blossom Oita offers an excellent stay right next to JR Oita Station, which is just a minute walk from the ticket gates. All rooms are on the 9th floor or higher, enabling a view not just of Oita City but also the mountains and Beppu Bay on the horizon! It’s especially gorgeous at sunset!
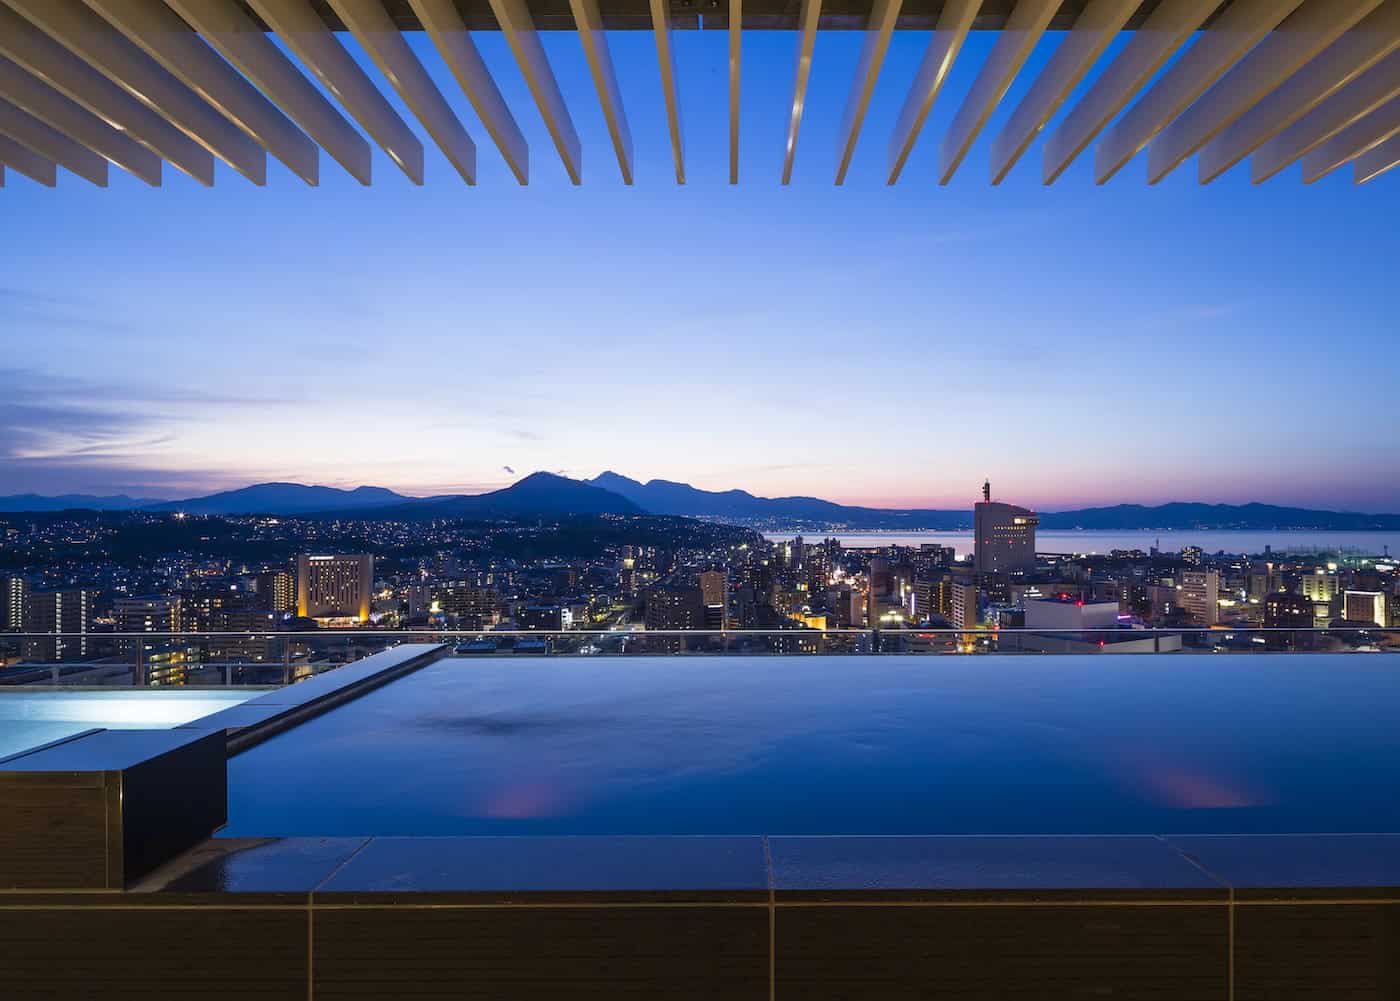
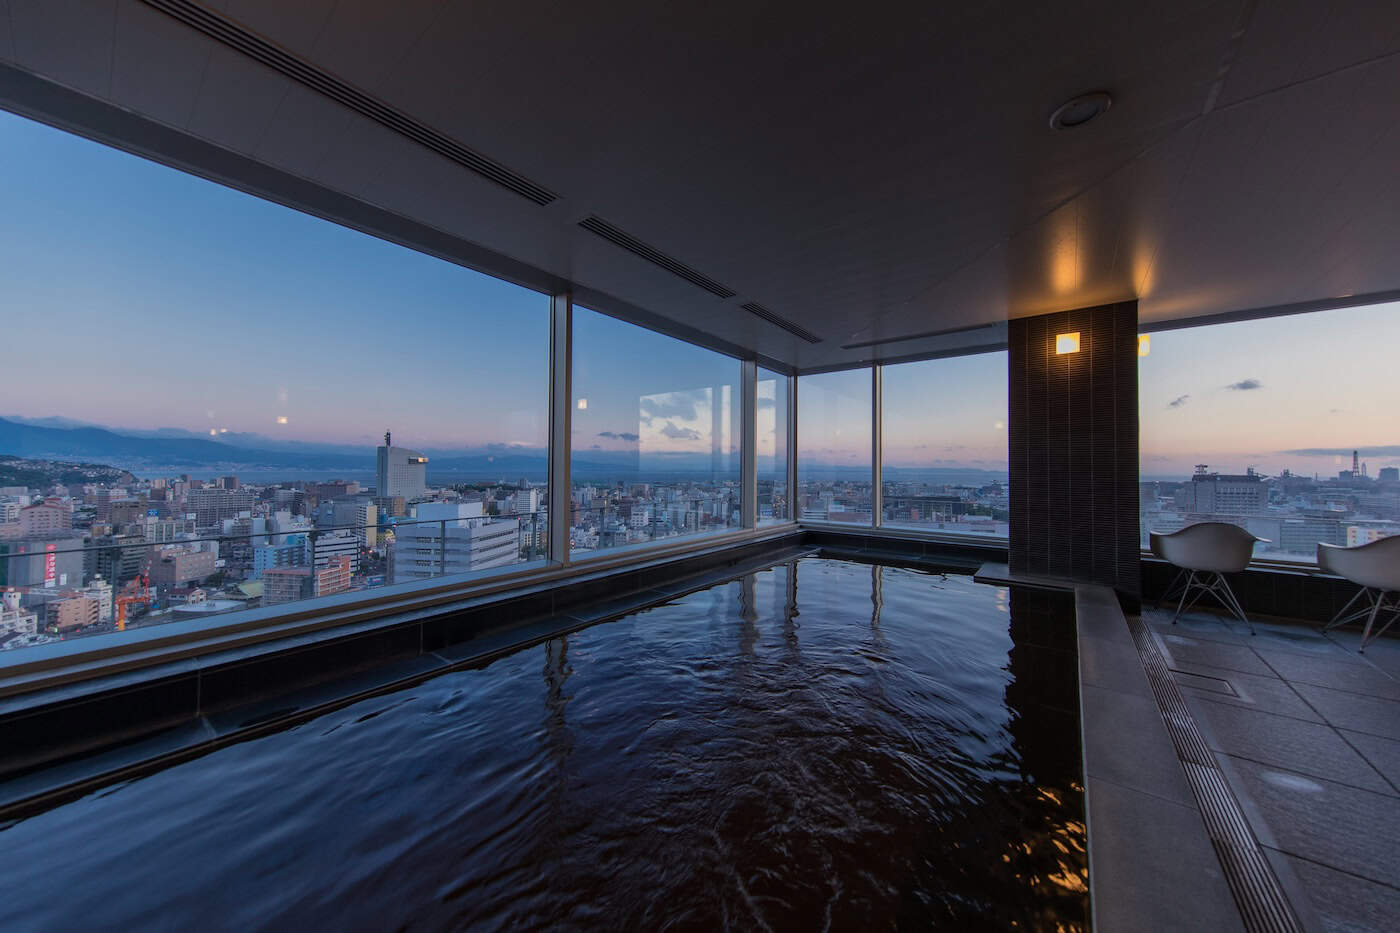
Design-wise, it blends modern comfort with Japanese styles using wood, fostering a warm, homey ambiance. But one of the highlights is the rooftop hot spring, City Spa Tenku, where guests can enjoy even more stellar panoramic views of the city. You’ll also find an open-air onsen, a full-fledged sauna, and a healing spa (bedrock bath), which you can experience for an additional fee. All these will give you luxurious rejuvenating and healing time, especially after a full day of sightseeing.
Dining at the on-site restaurant features seasonal Japanese cuisine with a tranquil vista of a peaceful garden. Its convenient location makes it an excellent base for exploring Oita and the surrounding areas.
Guests holding a JR Kyushu Rail Pass can enjoy special preferred rates at the hotel. To avail of this benefit, reservations must be made by phone, and the pass must be presented at check-in. Please note that these special rates are subject to availability and may vary depending on the date.
DAY 2: MIYAZAKI
At Oita Station, we boarded the Limited Express Sonic 3 train to Nobeoka Station in Miyazaki Prefecture. Travel time was roughly two hours. Then we took the bus to Takachiho Bus Center, where we caught another bus to Iwato Bus Stop, which is just beside our first destination for the day.
Amano Iwato Shrine & Amano Yasukawara
Miyazaki Prefecture is one of Kyushu’s underrated gems — a place where dramatic coastlines, lush mountains, and deep-rooted mythology all come together. And it is most evident at Amano Iwato Shrine, dedicated to that very cave where Amaterasu is said to have hidden called Amano Yasukawara.
The shrine complex is tucked away in a serene forest by the river, maintaining a mysterious and sacred atmosphere. To get here, you’ll be climbing down a gorge and crossing the river on a short but incredibly picturesque arch bridge.
The shrine is often visited during the early morning or late afternoon when the light filters through the trees, creating an almost otherworldly ambiance. It also hosts seasonal festivals celebrating the myths and legends tied to Amaterasu.
Keep an eye on your watch while you’re here as you’ll need to catch the next bus back to Takachiho Bus Stop. From here, you can walk or take a cab to our lunch stop.
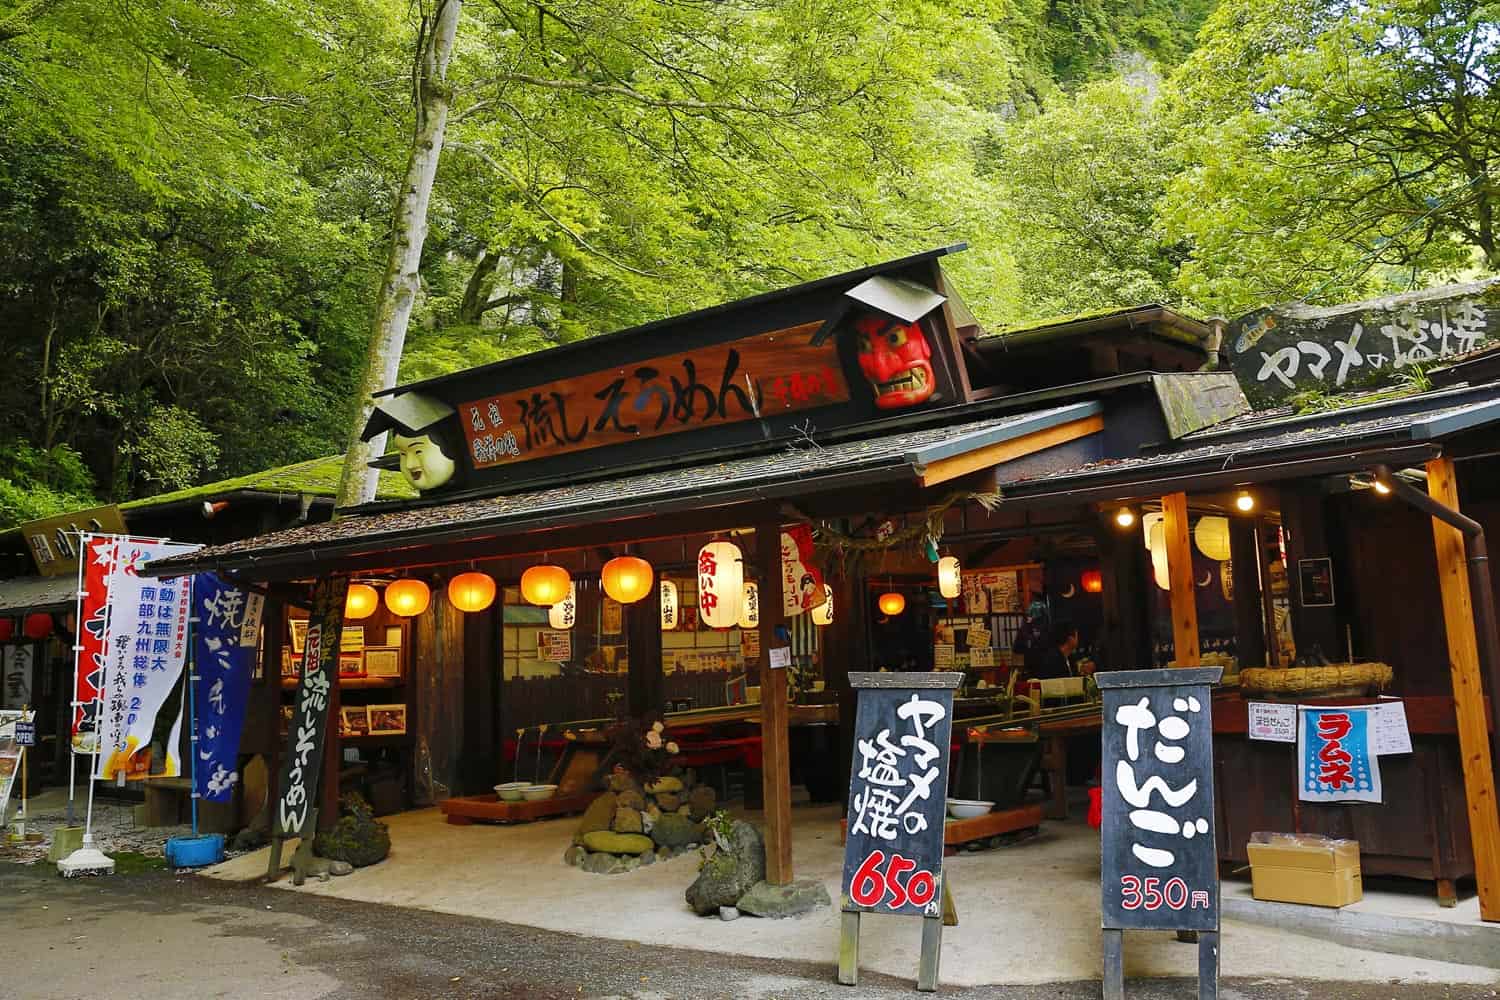
Chiho no Ie
Image courtesy of Chiho no Ie
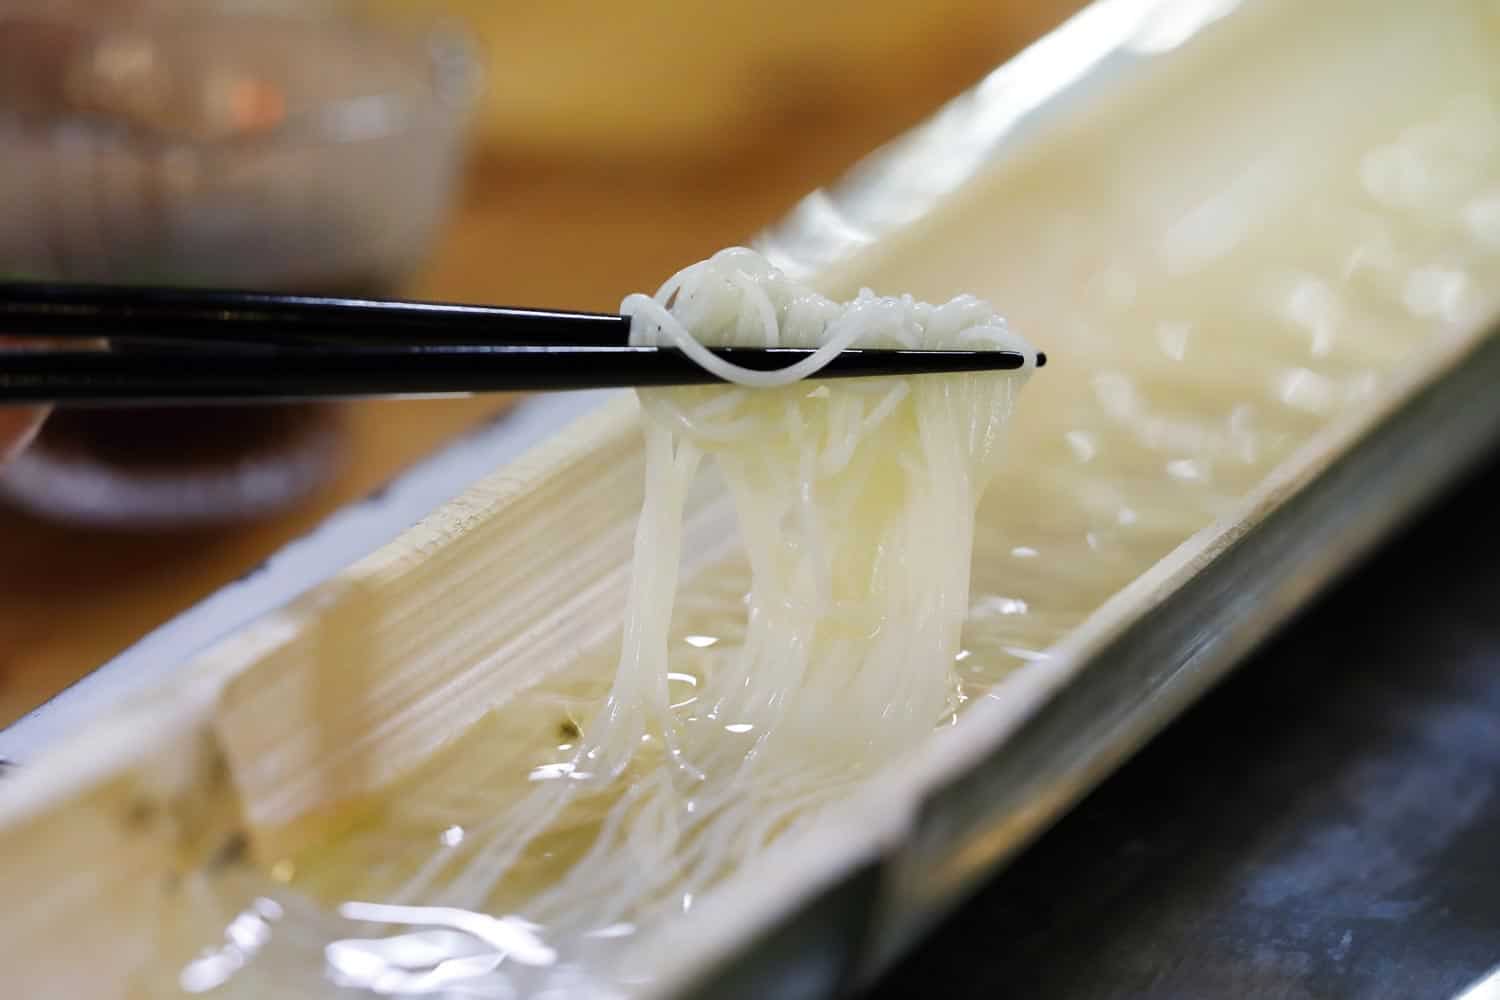
Chiho no Ie is a historic restaurant located at the entrance to Takachiho Gorge. Established in 1955, it is renowned as the birthplace of nagashi somen, a unique dining experience where diners catch thin somen noodles as they flow down a bamboo chute filled with cold spring water. This method was inspired by the traditional practice of cooling boiled noodles in the fresh waters of nearby Tamatare Falls. You then dip the noodles in a flavorful shiitake mushroom-based broth.
Image courtesy of Chiho no Ie
It’s a fun way to eat delicious noodles. But don’t worry, anything you fail to catch is collected in a strainer bowl at the end of the bamboo. You can still eat that so nothing really goes to waste.
Once you’re full and happy, it’s time for the main event.
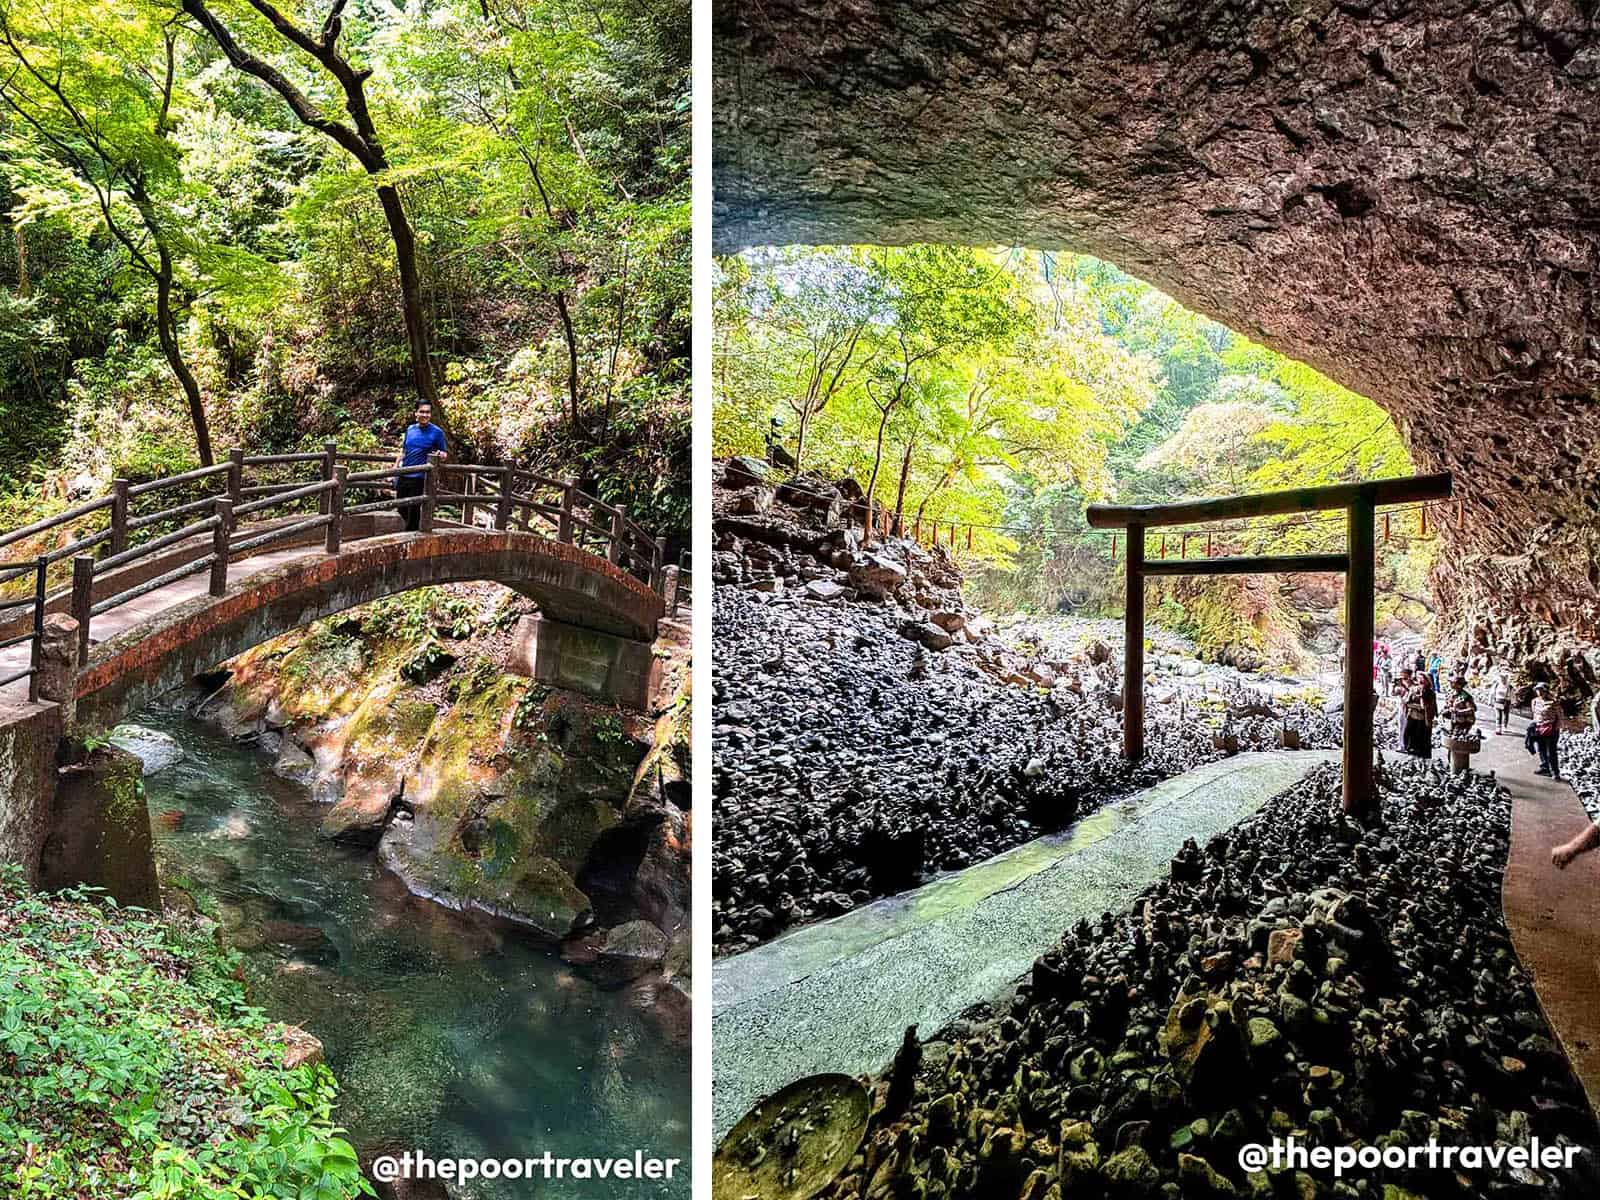
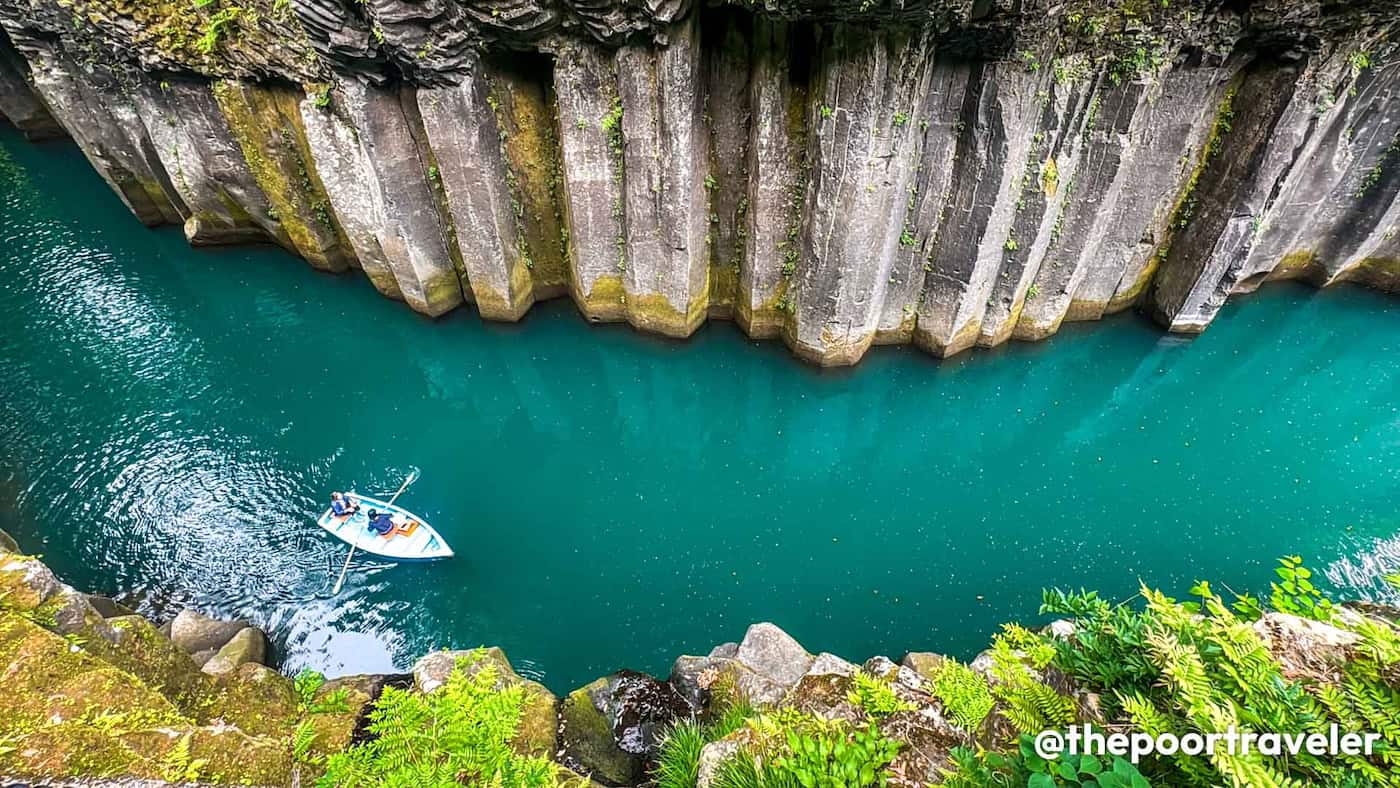
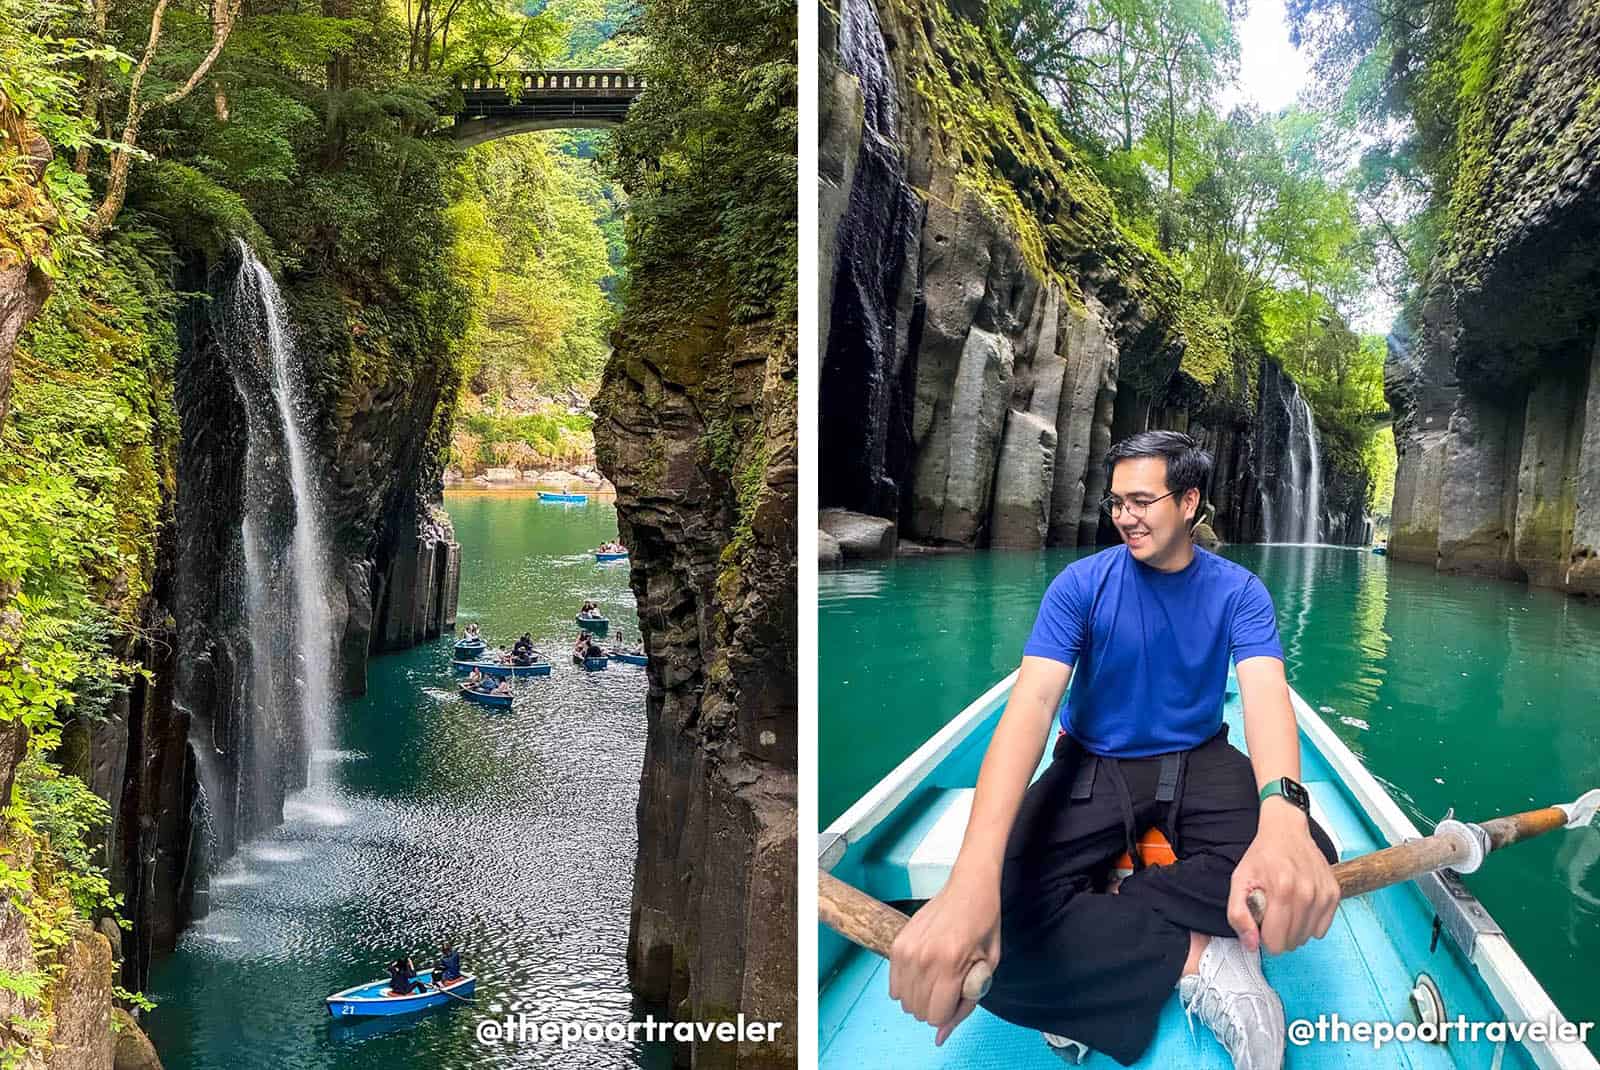
Takachiho Gorge
A visit to Takachiho Gorge is like stepping into a living painting. This narrow, 7-kilometer volcanic canyon was carved out by the Gokase River cutting through layers of basalt rock, creating dramatic cliffs that soar 80 meters high on either side. The gorge’s signature feature is the stunning Manai Falls, a 17-meter cascade that spills down into emerald-green waters below.
You can take in the vista from various lookout points along the cliffside or on the bridge straddling the gorge. But you can also go closer by is by renting a rowboat and paddling along the calm river, letting you get up close to the basalt cliffs and waterfalls. It’s an experience both peaceful and awe-inspiring.
It is recommended that you reserve online prior to your visit to guarantee a slot. While there are same-day tickets available, according to the staff that we talked to, often these tickets sell out as early as 10 or 11AM.
Once done, make your way back to Takachiho Bus Center. If you still have the energy, you can travel on foot, but be aware that it’ll be mostly uphill. You can also hail a taxi, as an alternative.
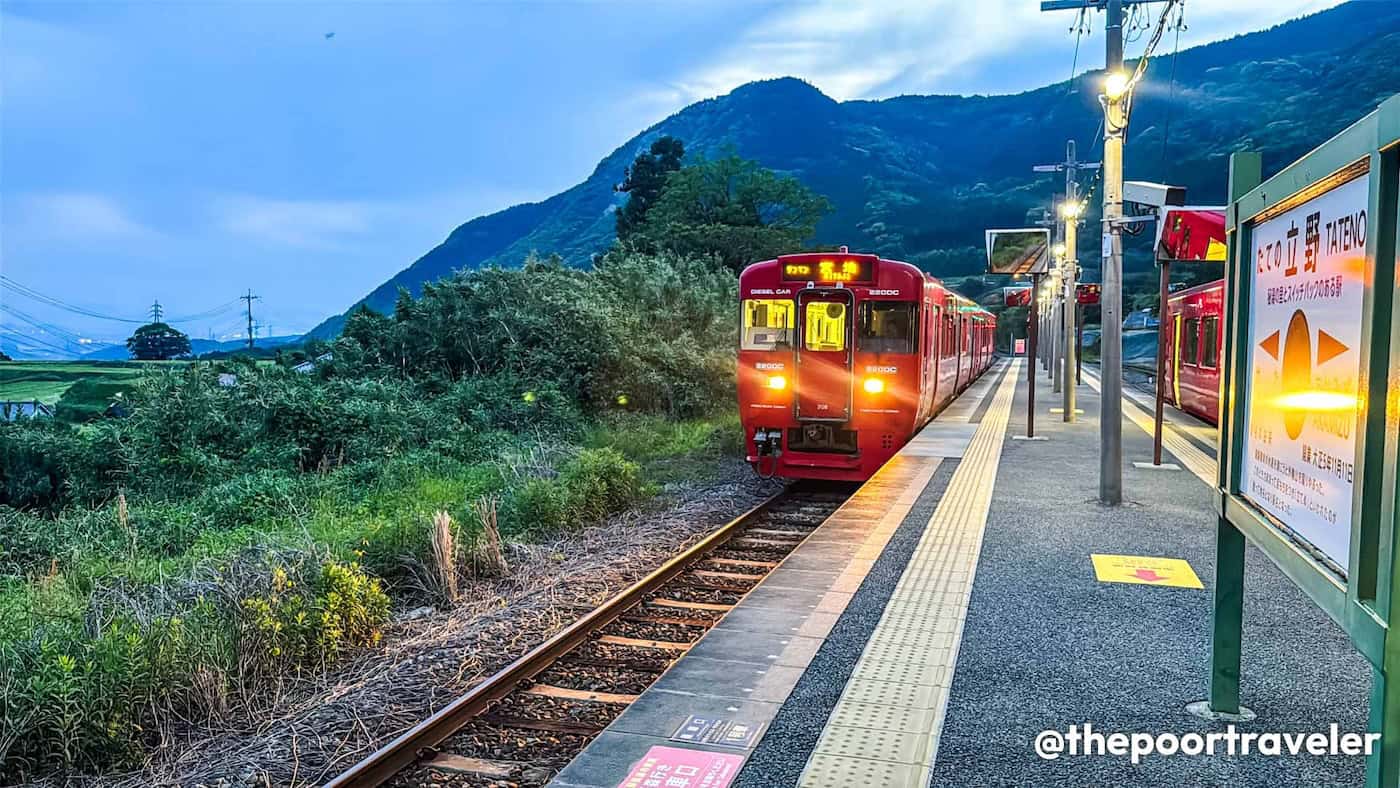
At Takachiho Bus Center, you can catch a bus to Takamori Station, where you’ll transfer to Minami Aso Railway to Tateno Station. Then, you’ll be switching trains again to Aso Station. Spend the night at a hotel in this area. And oh, by the way, you’re now in Kumamoto Prefecture.
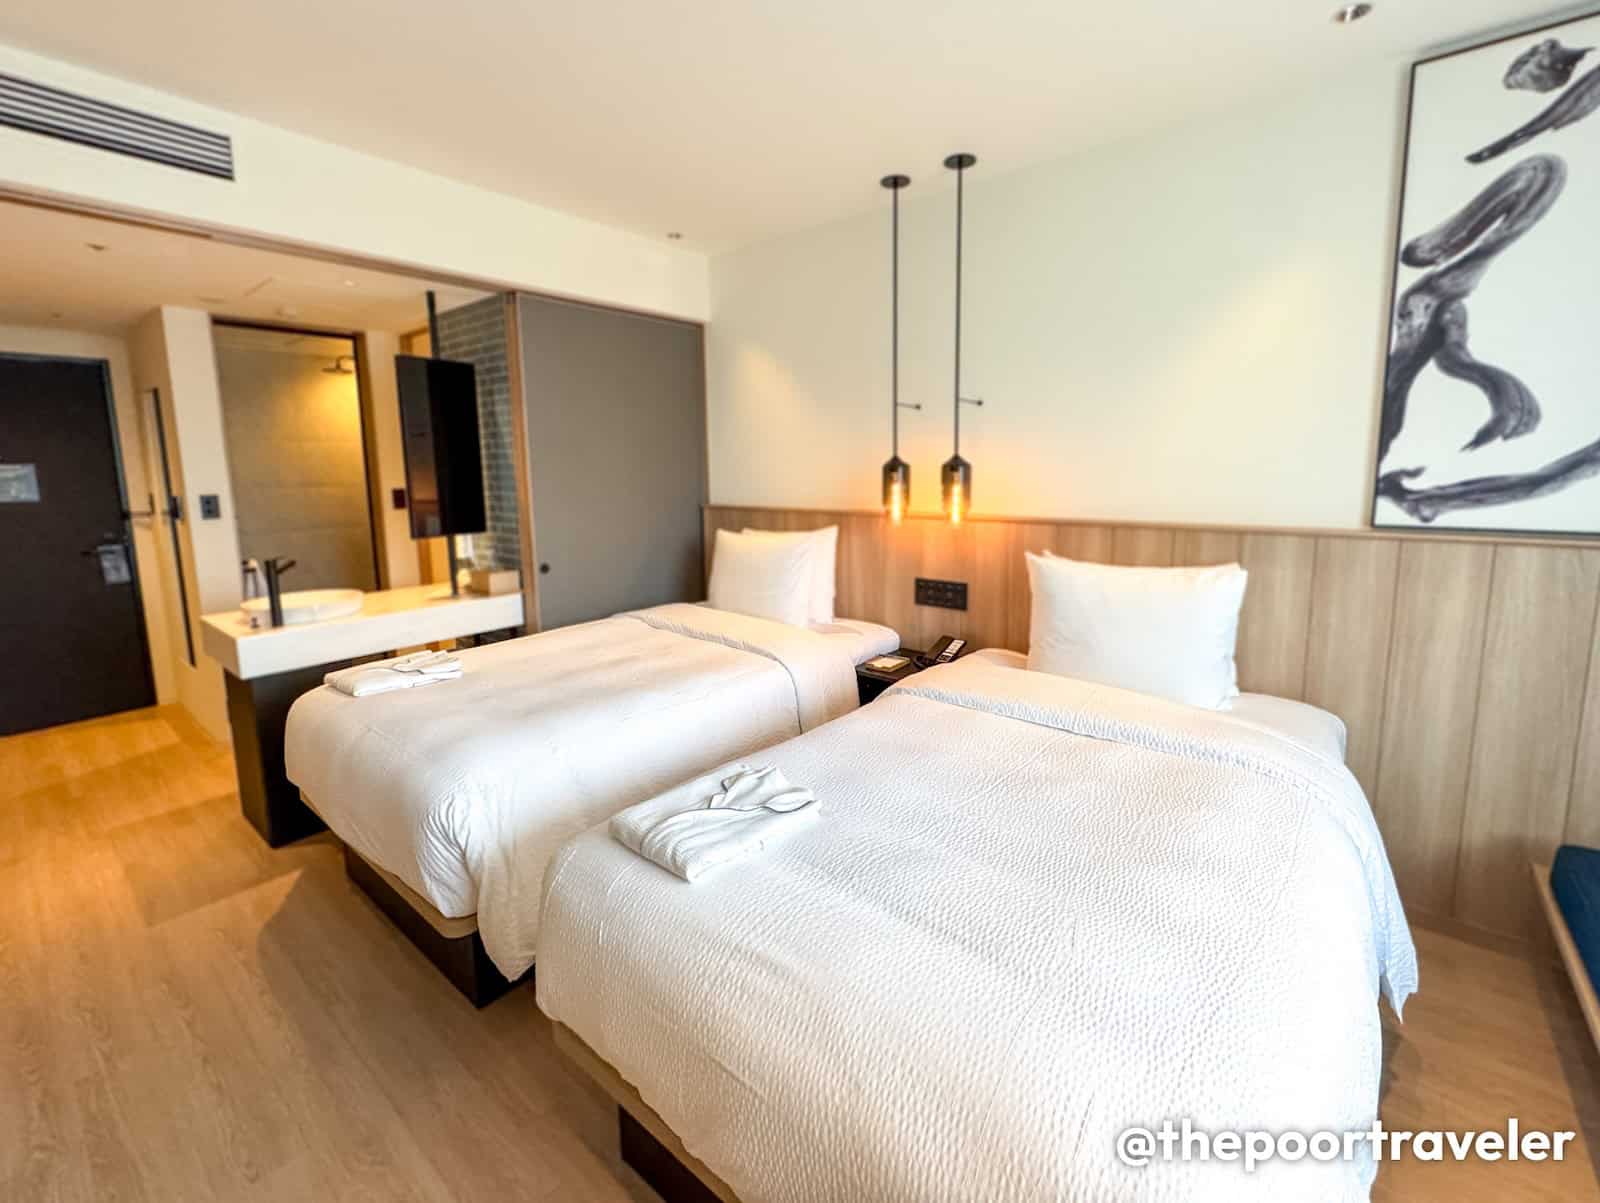
Where to Stay: Fairfield by Marriott Kumamoto Aso offers modern accommodations just right in front of Aso Station, a convenient base for exploring the natural beauty of the region including Mount Aso, Daikanbo, and Kusasenri.
The hotel features 93 well-appointed rooms, each equipped with Simmons beds, rain showers, free Wi-Fi, and essential amenities such as mini-fridges and electric kettles. While there is no on-site restaurant, guests can enjoy complimentary coffee and tea in the 24-hour lobby lounge, which also offers a microwave, toaster oven, and vending machines. A reservation-only breakfast box featuring local ingredients is available. And it’s also within walking distance to several izakaya and convenience stores.
With its blend of comfort, convenience, and access to local attractions, Fairfield by Marriott Kumamoto Aso is an excellent choice for visitors to the area.
DAY 3: KUMAMOTO & KAGOSHIMA
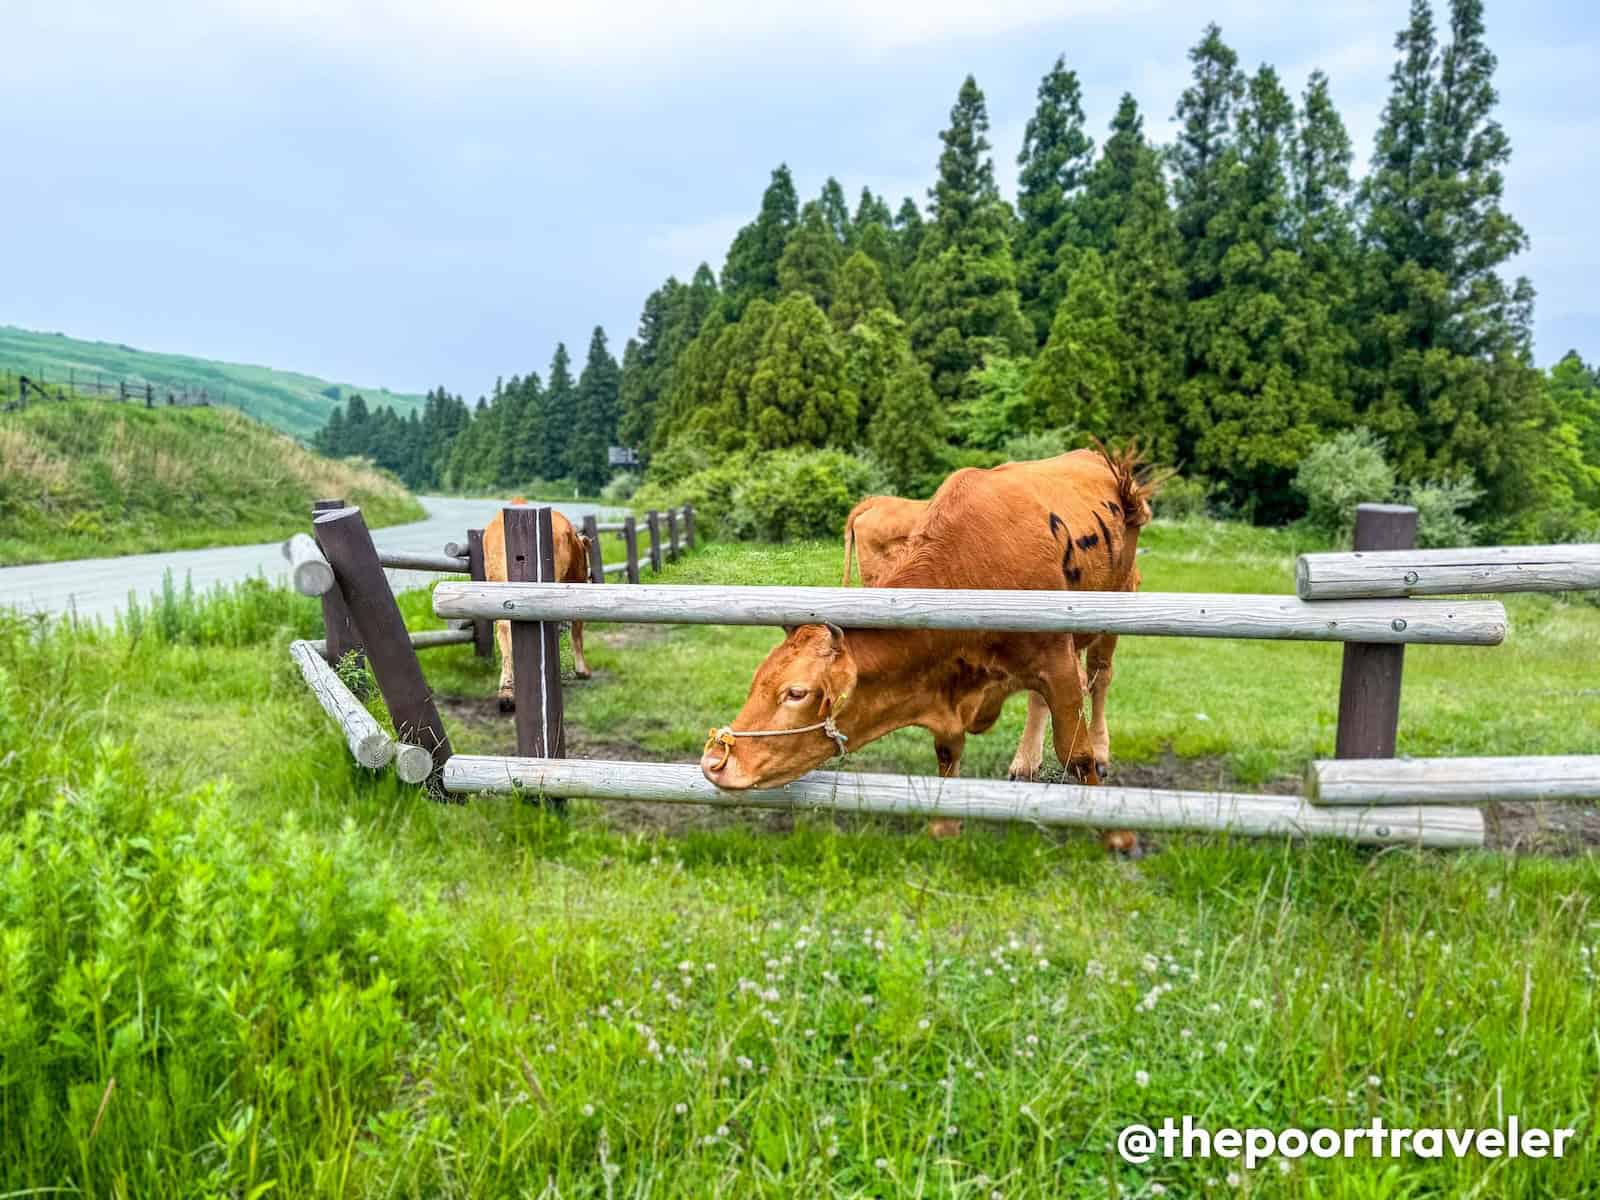
Rise and shine early because we’ll be taking on two main destinations today, starting with Kusasenri in Kumamoto Prefecture.
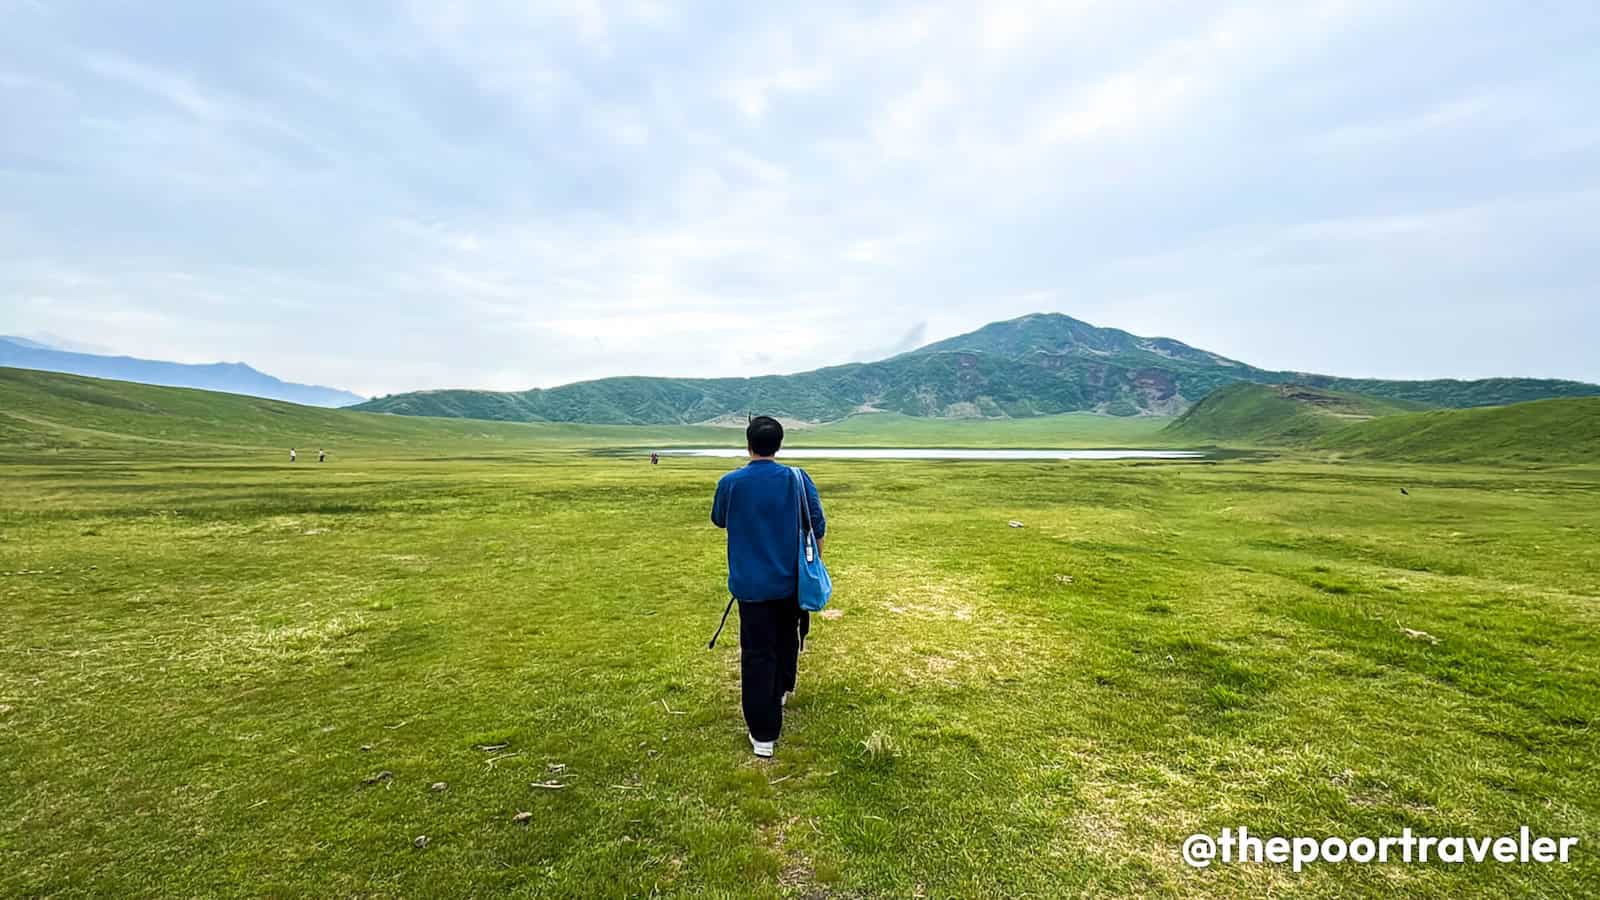
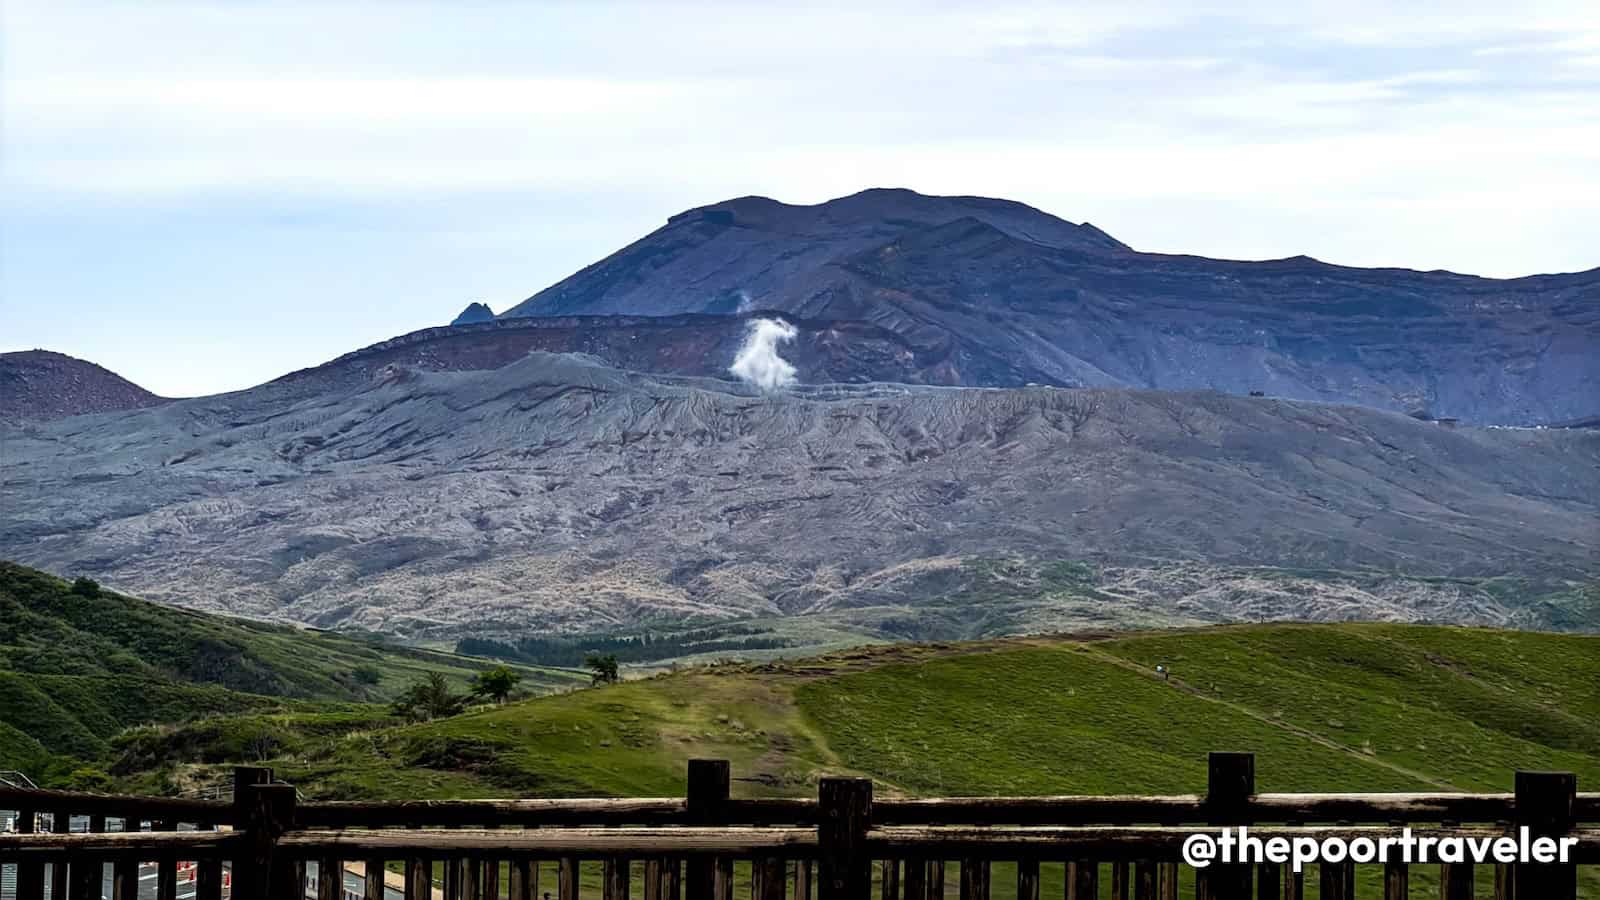
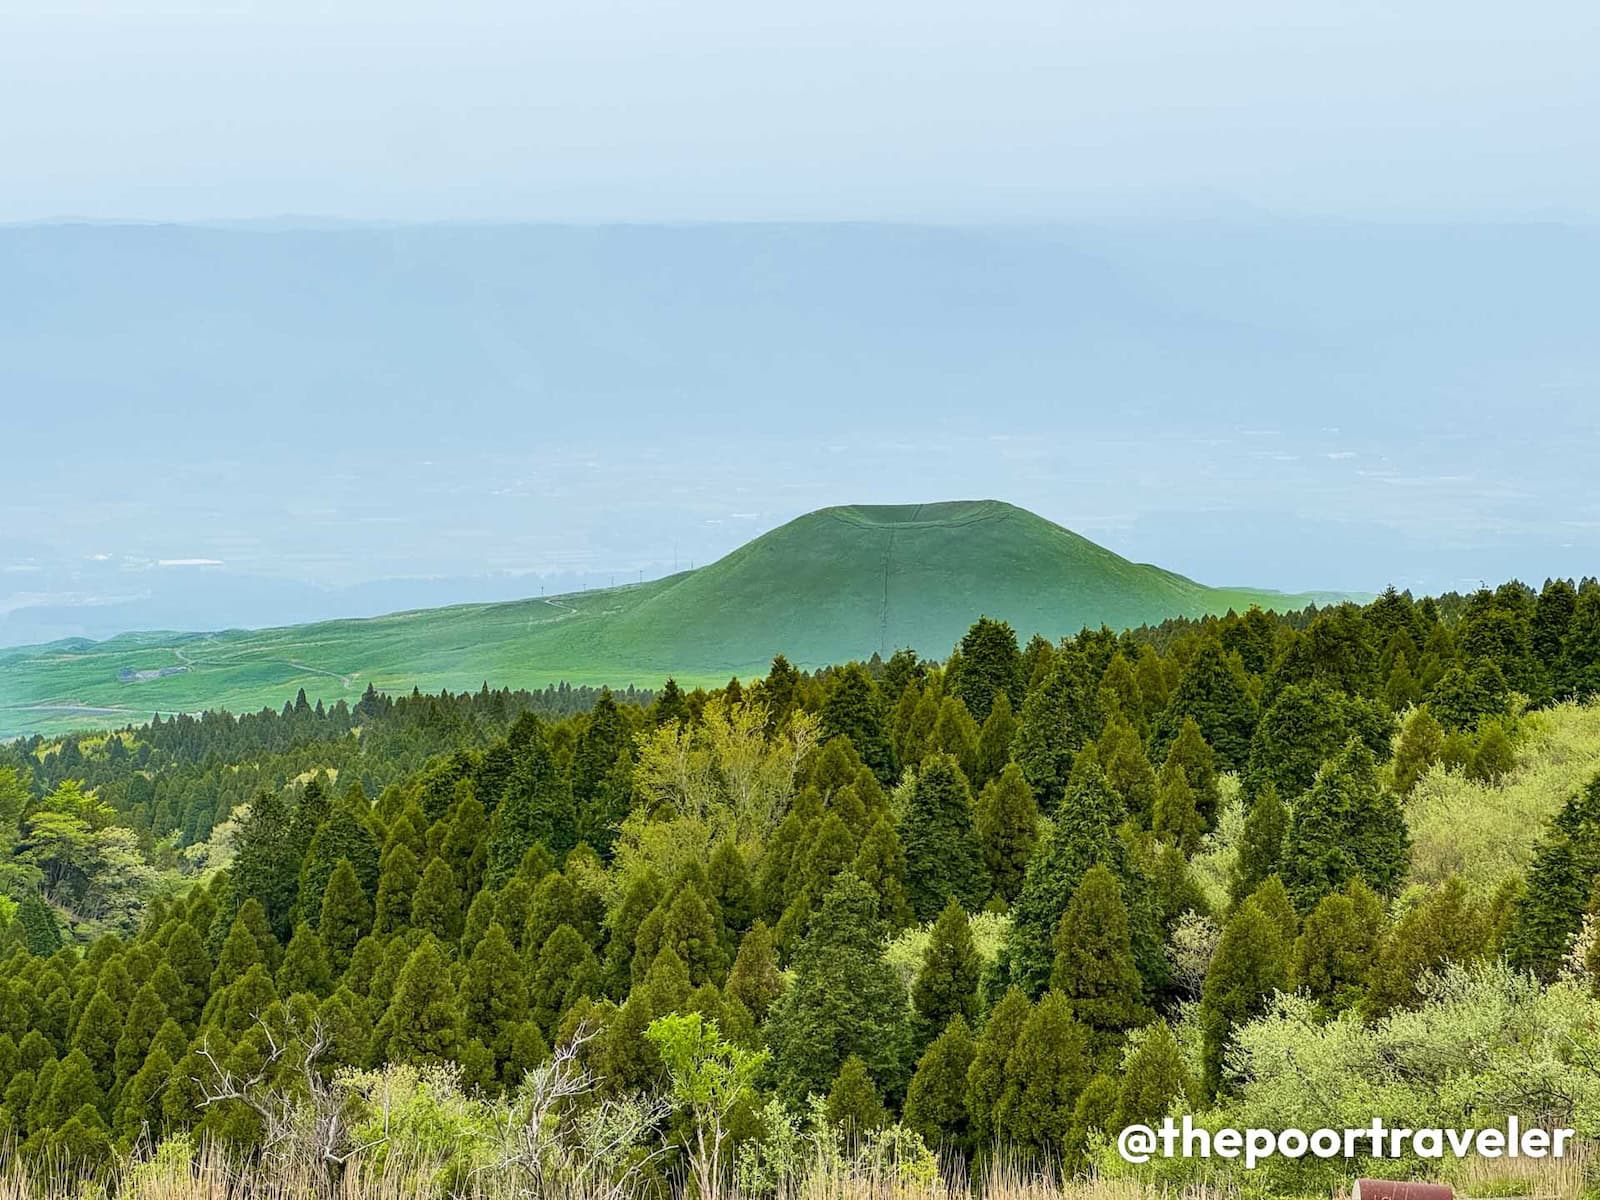
Kusasenri
Kusasenri is a sweeping grassland plateau located on the slopes of Mount Aso in Kumamoto Prefecture. It’s part of the larger Aso Kuju National Park, which surrounds one of the world’s largest active volcanic calderas – the Aso Caldera. The plateau sits right near Mount Nakadake, an active volcano. From Kusasenri, you get a perfect view of the smoking crater (when access isn’t restricted due to volcanic activity), creating a striking contrast between lush nature and raw geological power. There’s also a museum, café, and observatory nearby.
The Aso Caldera looks vibrantly verdant in spring and summer as grass covers the ground, providing sustenance to the prized akaushi (literally meaning “red cow” in Japanese), a specific breed of Japanese Brown cattle, sought-after for its high-quality beef with balanced marbling. It’s one of the four main Wagyu breeds in Japan, alongside the more famous Kuroge Washu (Japanese Black).
In autumn, the area turns golden-brown. I’ve seen them both now, and both sights are breathtaking for me. Last time, we were at Daikanbo on the opposite side of the ridge.
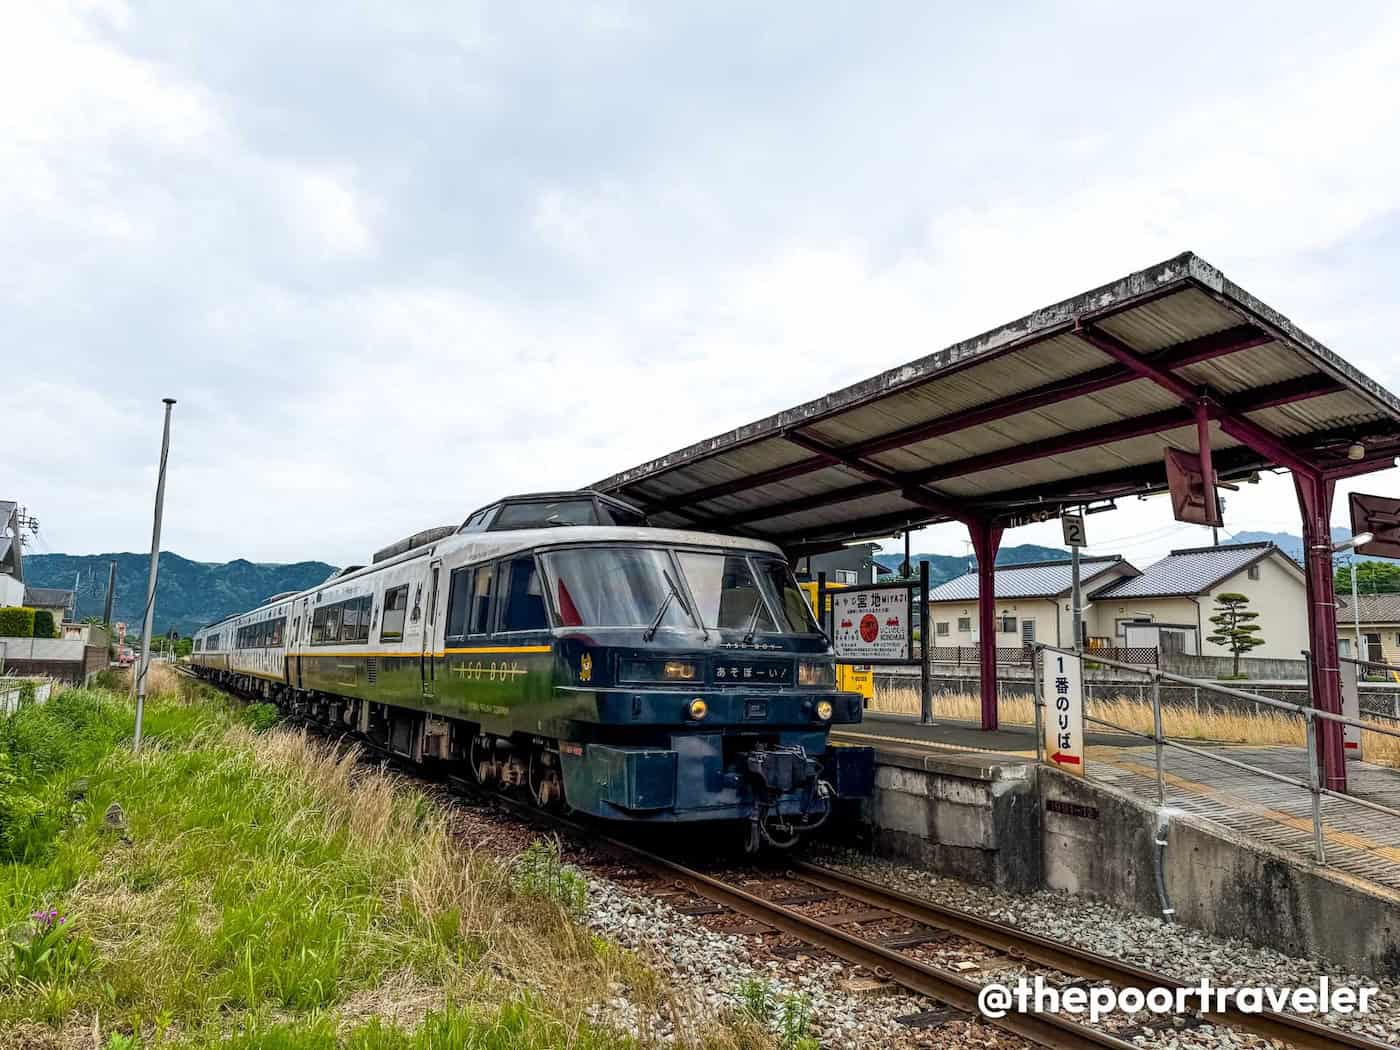
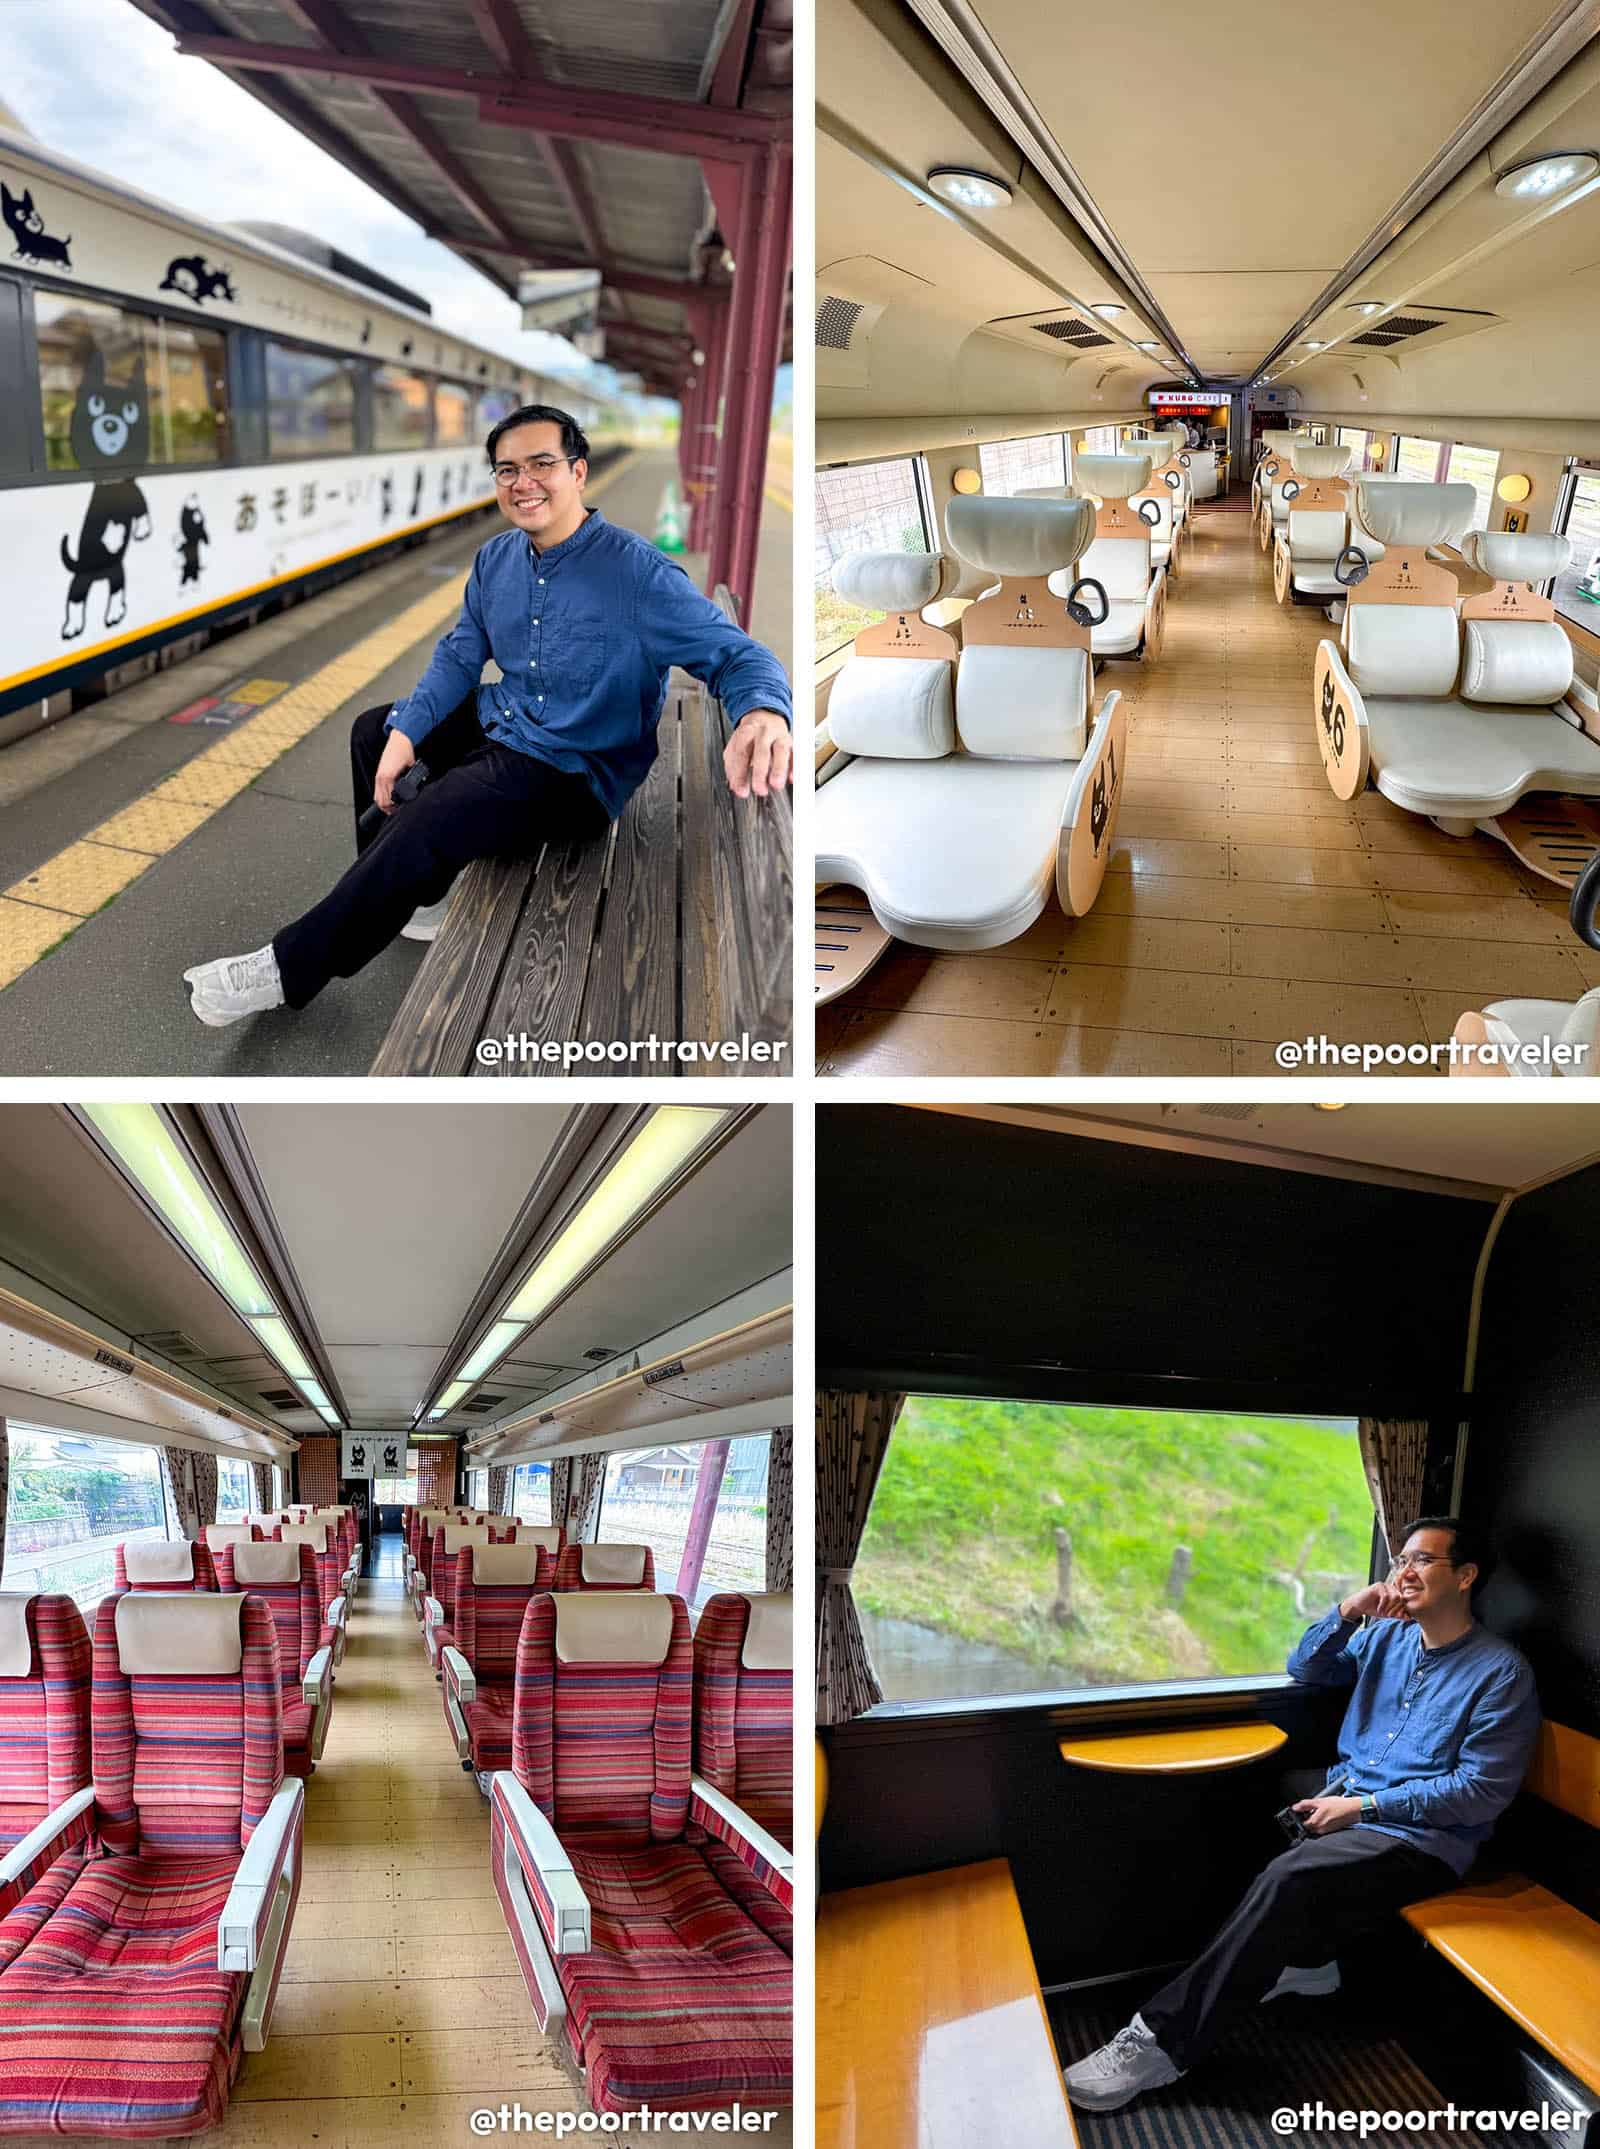
Aso Boy!
The Limited Express Aso Boy! is a quirky and fun sightseeing train connecting Kumamoto and Miyaji via the scenic landscapes of Mount Aso. Designed with families in mind, it offers a unique travel experience that combines comfort, entertainment, and breathtaking views. It’s very child-friendly.
Car 3 has parent-child seating arrangement (next to each other). There’s also a play area for kiddos and a mini-library. The café on board was named after its mascot, which is a black dog named Kuro.
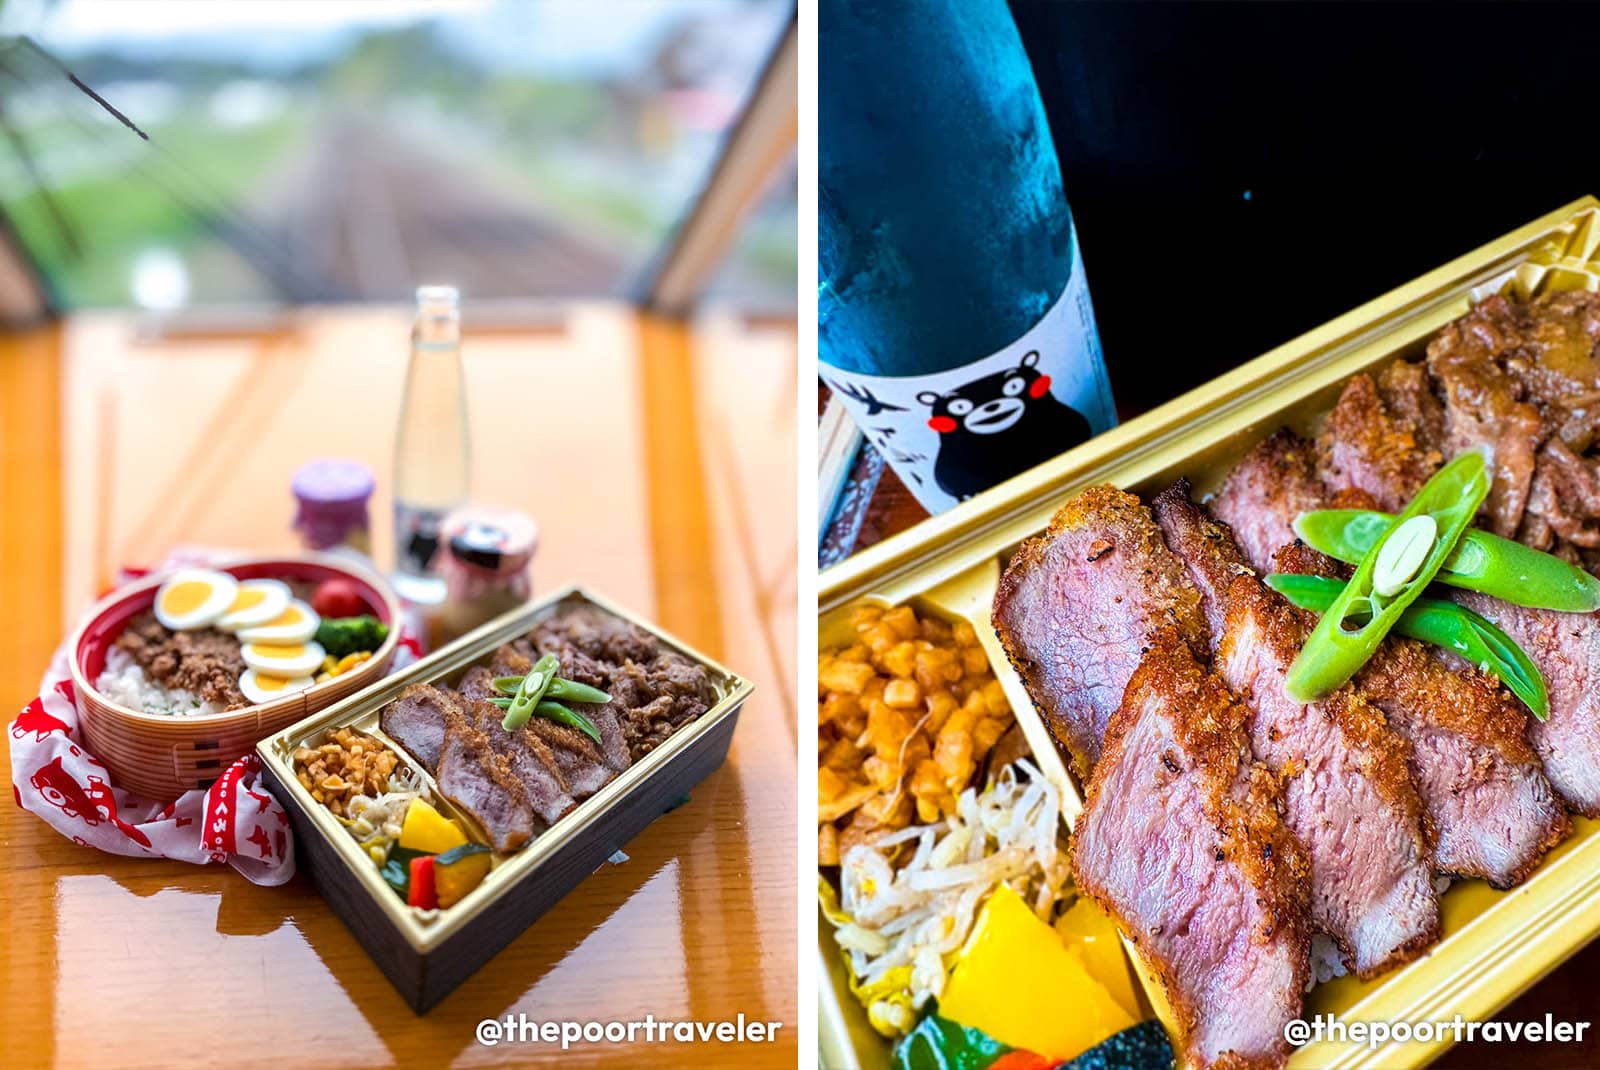
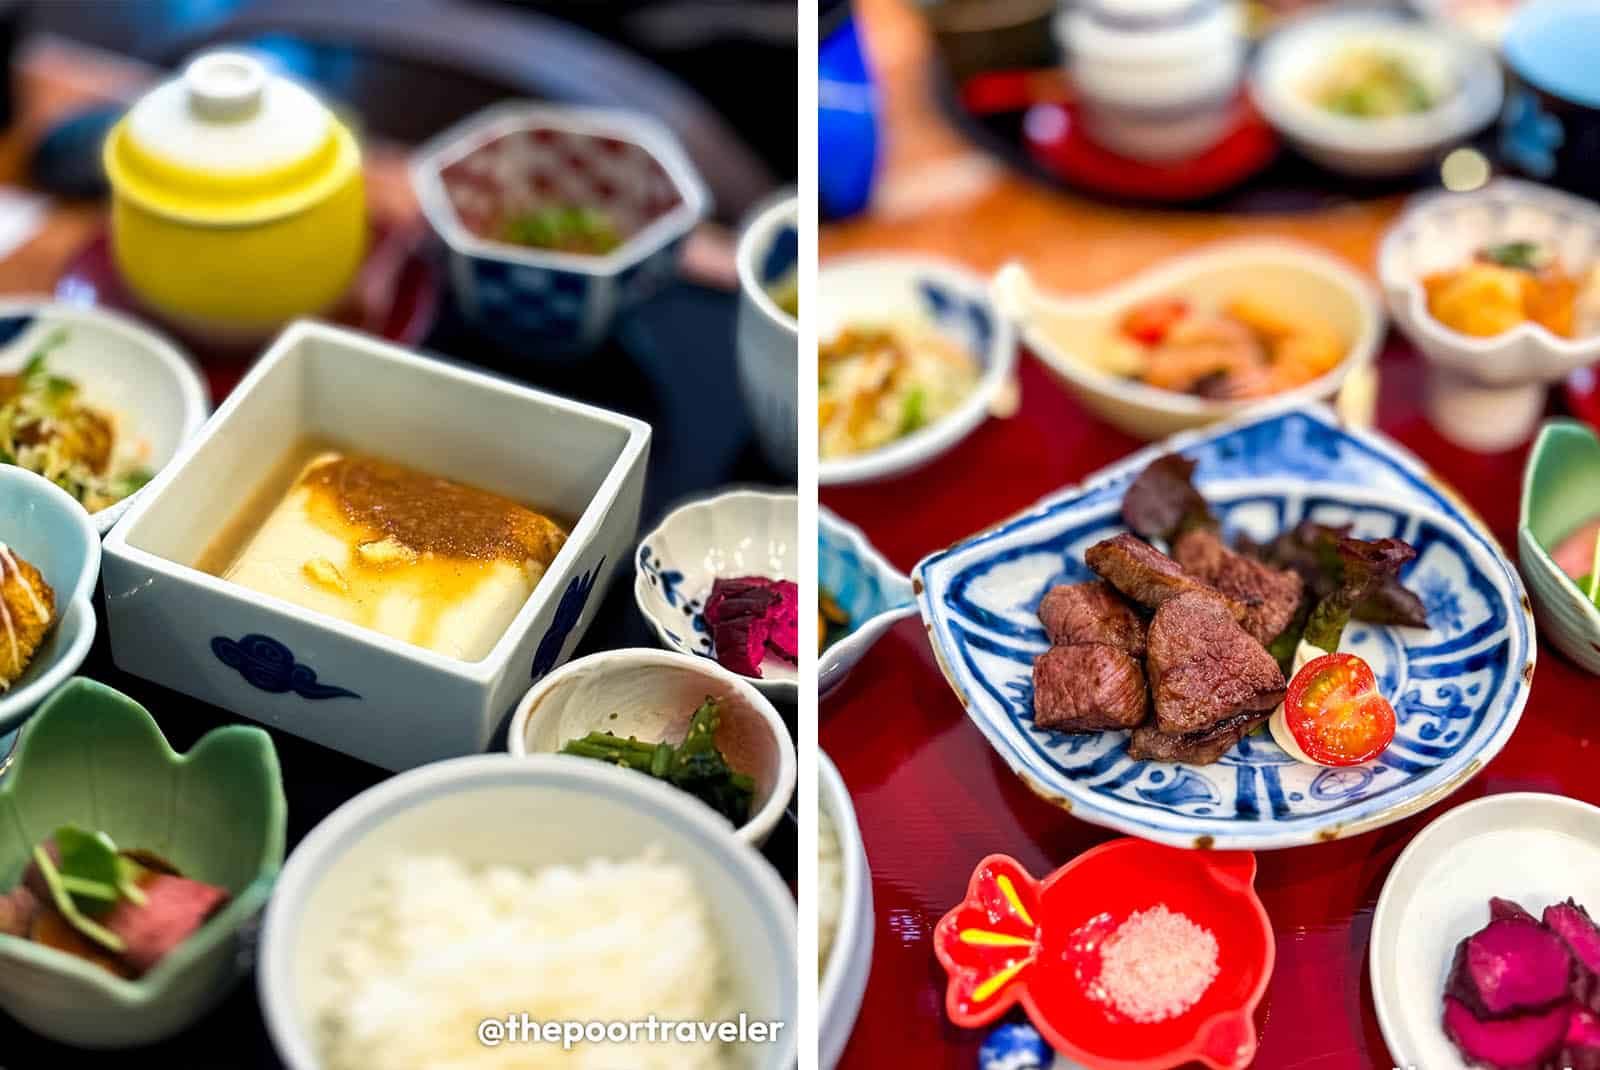
Both ends of the train feature large windows, providing passengers with expansive views of the surrounding landscapes. This was our second time taking this train, but this time we were lucky we got to have the front row seats. And oh, good food, too, especially the akaushi beef bento.
After terminating at Kumamoto Station, switch to a shinkansen (bullet train) bound for Kagoshima Chuo Station. Yes, bullet trains are also operated by JR Kyushu. And yes, we’re now heading to Kagoshima Prefecture.
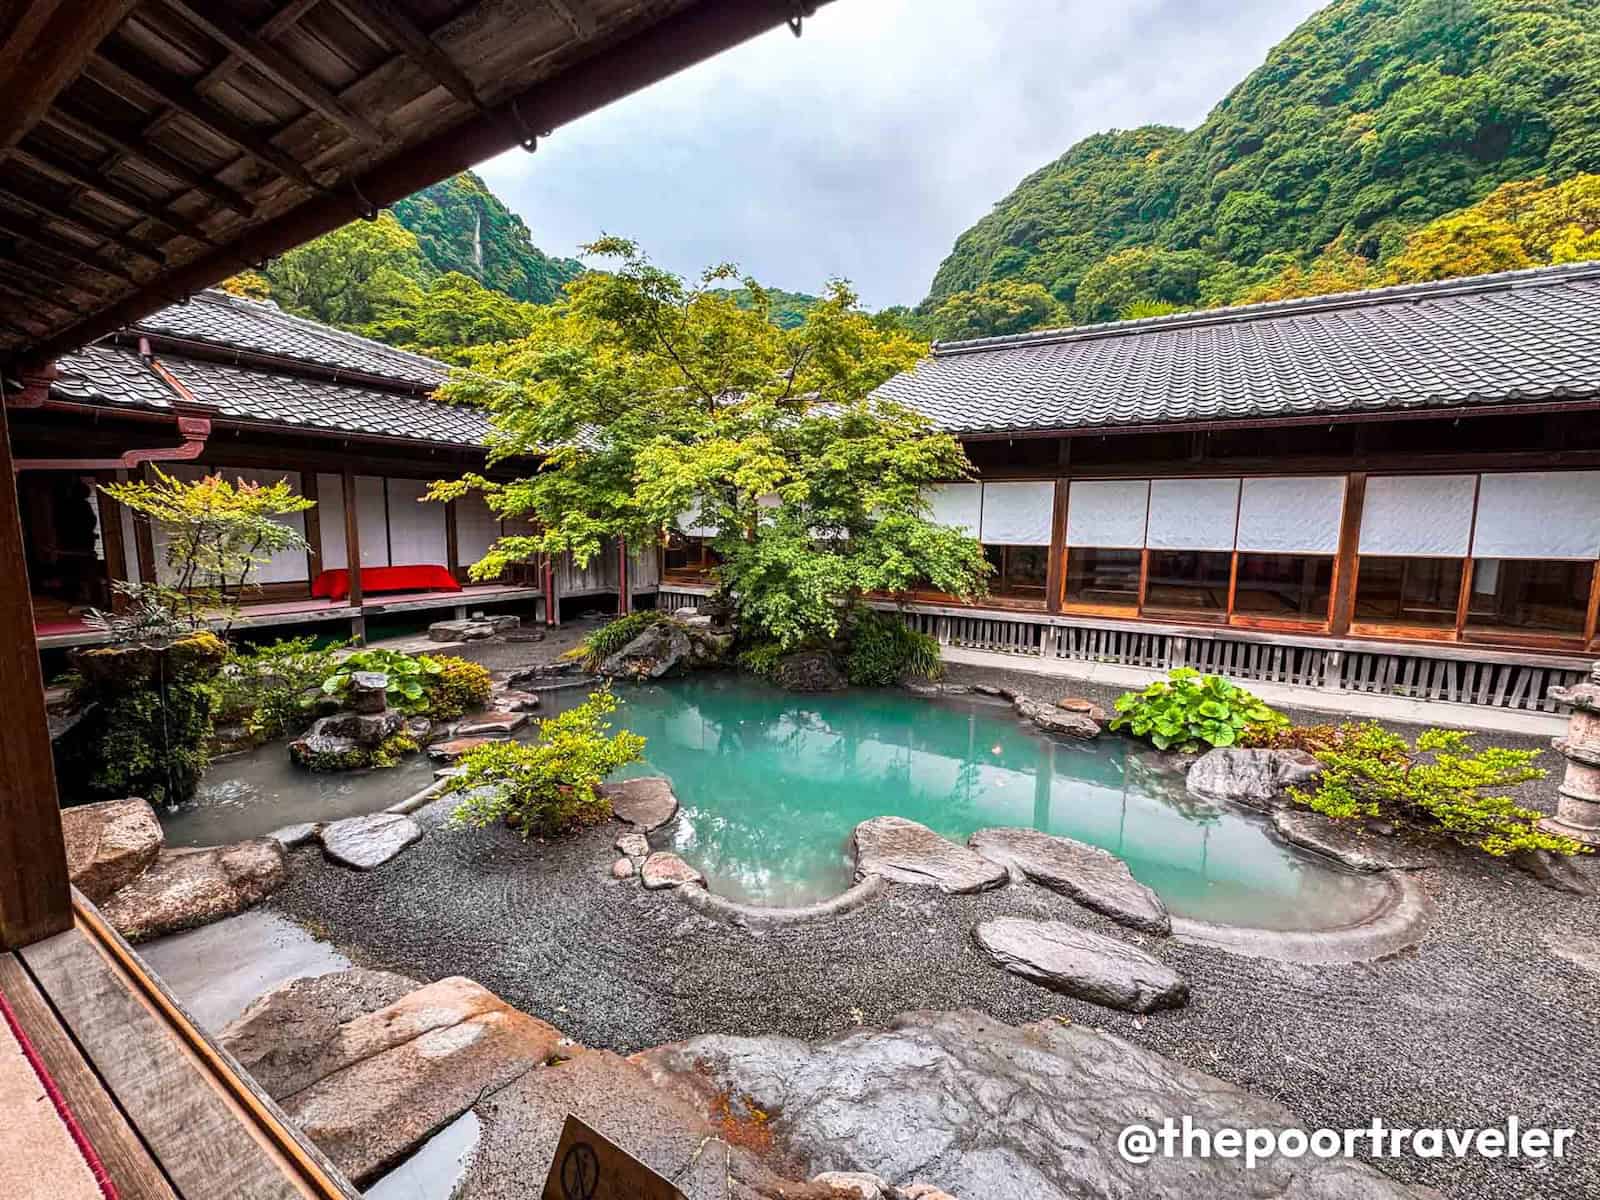
Sengan-en
At Kagoshima Chuo Station, transfer to a local train on the JR Nippo Main Line going to the newly inaugurated Sengan-en Station, opened only in March 2025. As soon as we hopped off, our attention was stolen by its magnificent, towering neighbor – Mt. Sakurajima. Yes, right on the platform, we could already gawk in awe at the view of one of Japan’s most active volcanoes, as well as Kinko Bay. In fact, it had just erupted on the day before we arrived and on the day of our visit, the volcano was still spewing ashes, demonstrating the grandeur and power of nature.
Image courtesy of Sengan-en
Across the street, just a short walk away, lies Sengan-en, a celebrated and historic seaside garden and villa complex built in 1658 by Shimadzu Mitsuhisa, a powerful daimyo and the 19th head of the Shimadzu family, who reigned over part of Kyushu for around 700 years. Covering some 50,000 square meters, it features ponds, bamboo groves, shrines, and pathways that artfully incorporate the majestic Sakurajima as natural backdrop.
At the heart of the garden lies the House(Iso Residence), originally constructed in 1658 blending Japanese and Chinese culture. Inside, visitors can explore preserved rooms that once hosted dignitaries, including royalty and diplomats, reflecting the clan’s wealth and cultural connections. We particularly liked sitting by the mansion’s tsubo-niwa, the traditional courtyard, just admiring its little pond. And from many of its porches, we also got a good look at the Sakurajima dominating the view.
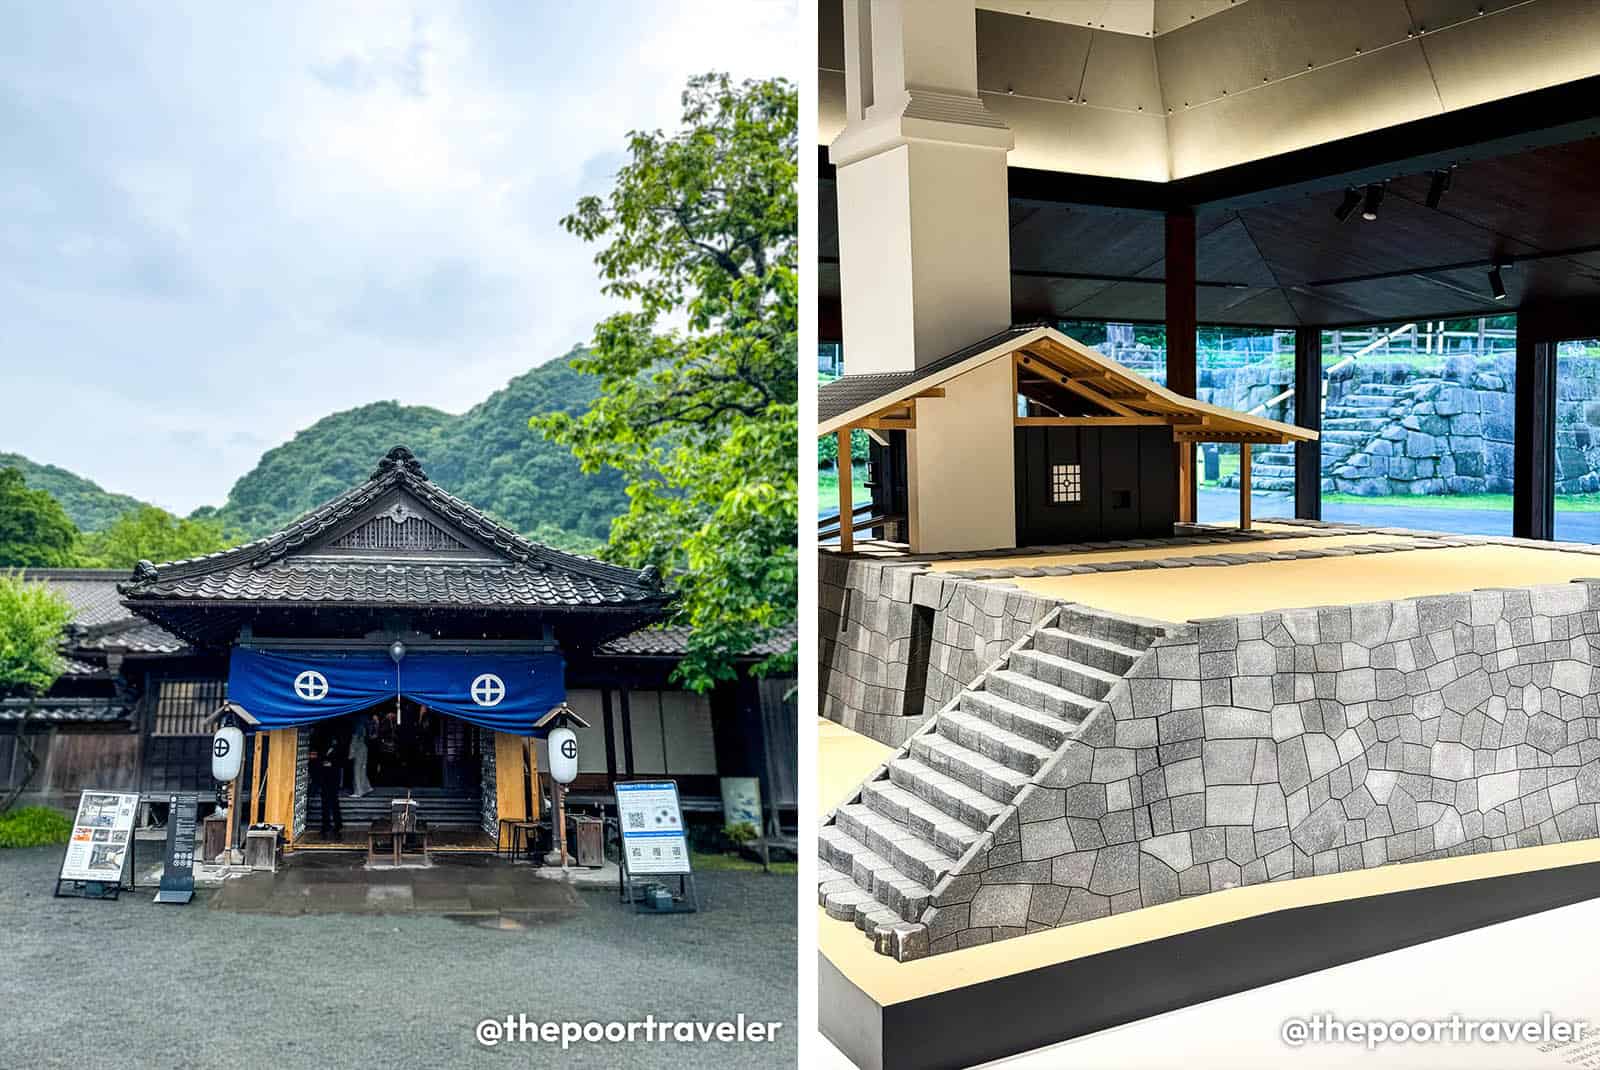
The residence isn’t the only building worthy of a visit here. Within the complex is the Kagoshima World Cultural Heritage Orientation Centre narrating the history of the site including that of the nearby ruins of cannon factory. It played such a big role in Japan’s shipbuilding, iron casting and the Meiji industrial revolution as a whole, that it was inscribed as a UNESCO World Heritage Site. A faithful model of one of the factories at its peak is showcased inside, and from here, you can also see the actual site outside.
If you want to learn more about the history here, we recommend you visit the History Museum Shoko Shuseikan, which is located next to Sengan-en.
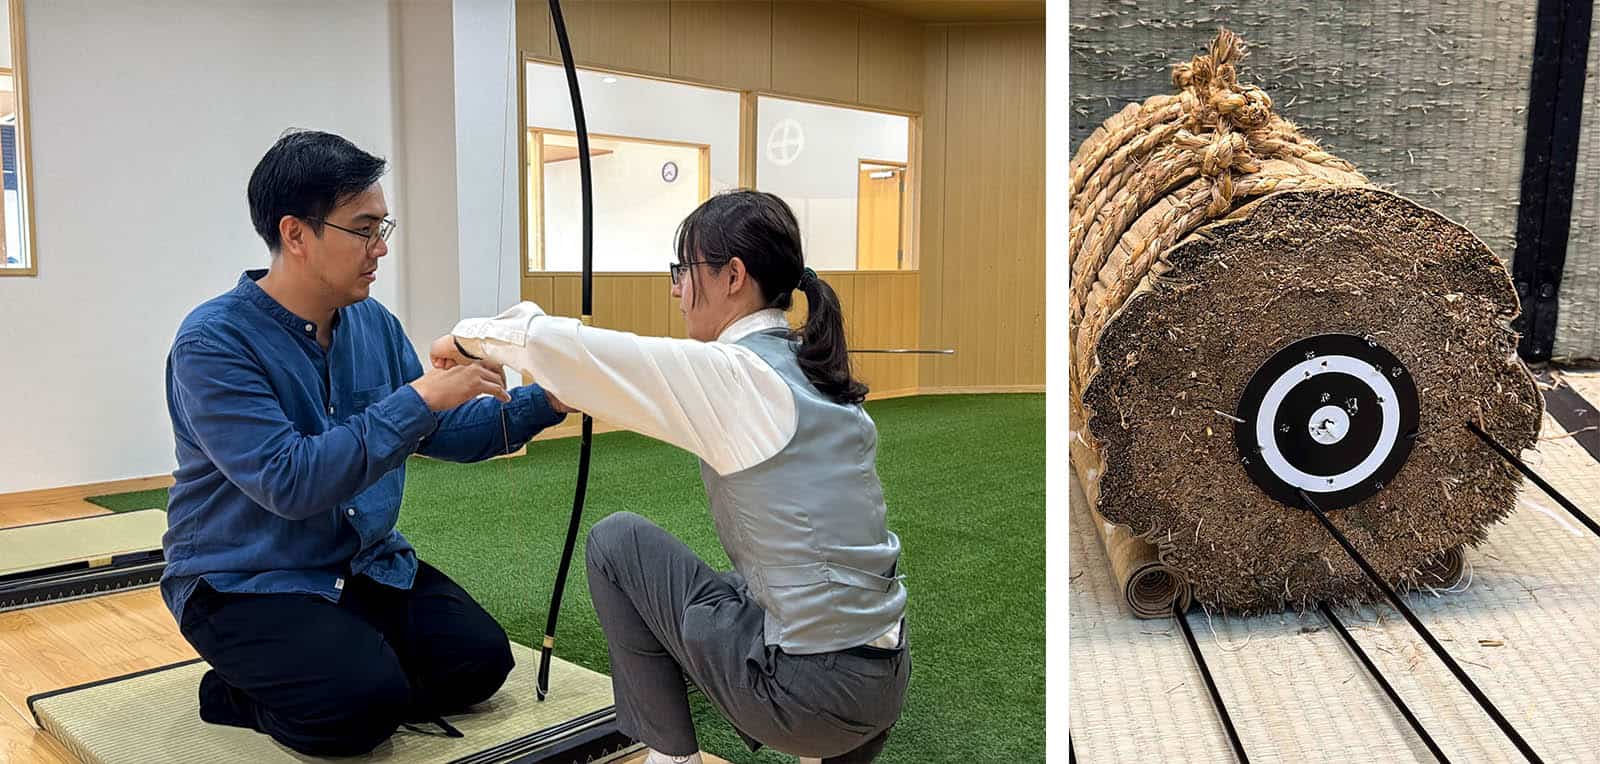
But the highlight of our visit was our first attempt at kyūdō (traditional archery)! Yes, here at Sengan-en, you can learn the basics at a guided session. For every session, you will be handed five arrows, and your goal is to hit the target at the other end of the room. It’s similar to the archery we are more familiar with, but a bit more challenging. The key difference is the stance. Instead of standing, you’re on your knees with your body slightly twisted to face the target. It took some getting used to, but we were able to hit the target with our first few arrows, so yay!!!
After stretching our arm and shoulder muscles Legolas-style, head back to Kagoshima Chuo Station. Here, make a decision on where to spend the rest of the day and night. Here are some of our recommendations:
Kagoshima City is worth exploring. Since you’re already here, might as well get to know the city better. The bustling Tenmonkan district comes alive after dark, featuring a variety of izakayas, themed bars, and karaoke lounges. For a more relaxed evening, you can enjoy panoramic views of the city and the active Sakurajima volcano from the Shiroyama Observatory, or take a ride on the illuminated Amuran Ferris Wheel atop Amu Plaza Kagoshima, offering a romantic perspective of the city lights.
Kumamoto City is also along the way to your next destination, which makes it an ideal stop. Explore the vibrant Shimotori and Kamitori arcades, where lively izakayas, karaoke bars, and jazz lounges create a bustling atmosphere. For a more relaxed evening, enjoy riverside strolls along Shirakawa River, attend seasonal events like the Shirakawa Night Market, or savor local delicacies like the garlic-loaded Kumamoto ramen.
You can even turn around and head back all the way to Fukuoka City, if you so please.
DAY 4: NAGASAKI
Our Day 4 is all about Nagasaki, one of my favorite cities in Kyushu (and Japan as a whole). It’s unique, certainly different from any other Japanese city mainly because of its complicated history. It’s the only city that remained open to foreigners when the country was in isolation. Western and Chinese influences seeped deep into its heritage in the most unexpected and poignant ways. We’ve also learned about it in Grade School as a city devastated by an unimaginable wartime tragedy.
But today, Nagasaki is a place of quiet beauty and cultural depth, with charming European-style architecture, peaceful churches, and a reflective spirit that lingers in its museums and memorials. For Filipinos, especially Catholics, you’ll find a stronger connection here than any other city in Japan. Here, the life of St. Lorenzo Ruiz, the first Filipino saint, is showcased in many of its corners.
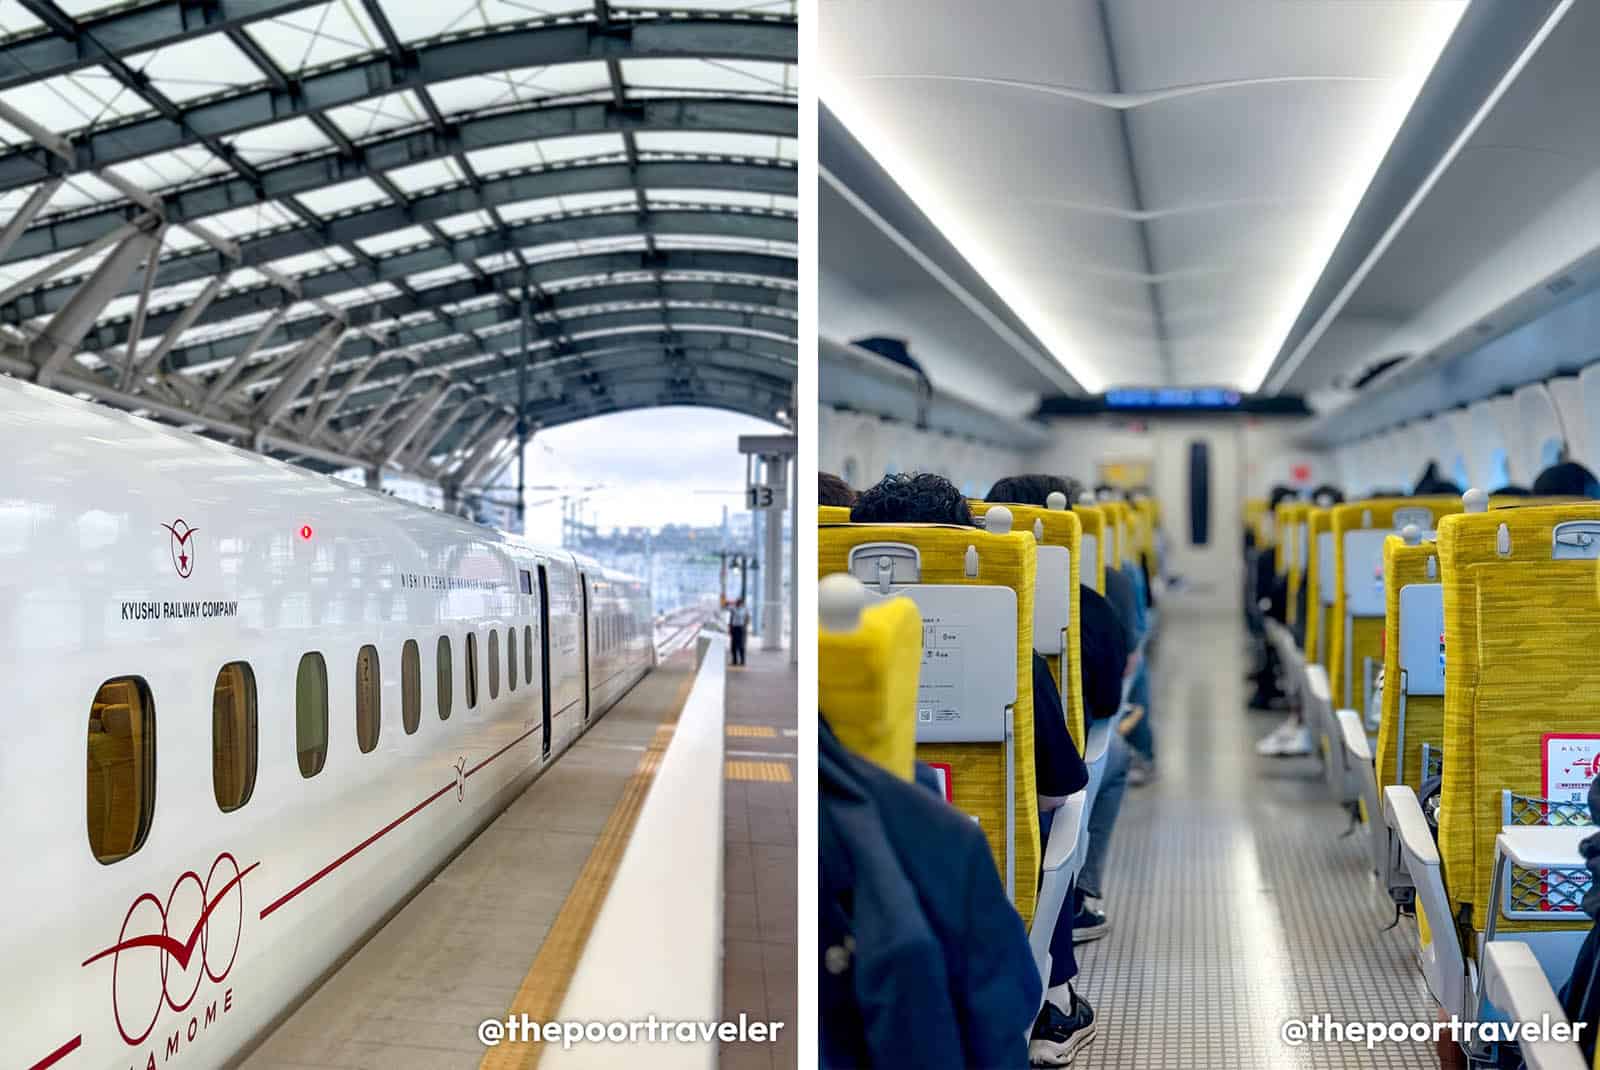
If you’re coming from Fukuoka City (Hakata Station) or Takeo Onsen (Takeo Onsen Station), you can hop onto a Limited Express KAMOME train to Nagasaki Station and start walking around.
Nagasaki City Attractions
This morning itinerary offers a profound exploration of Nagasaki’s historical and cultural tapestry, reflecting its unique blend of Eastern and Western influences. Here are some of the sites you can easily visit on foot in the city center of Nagasaki:
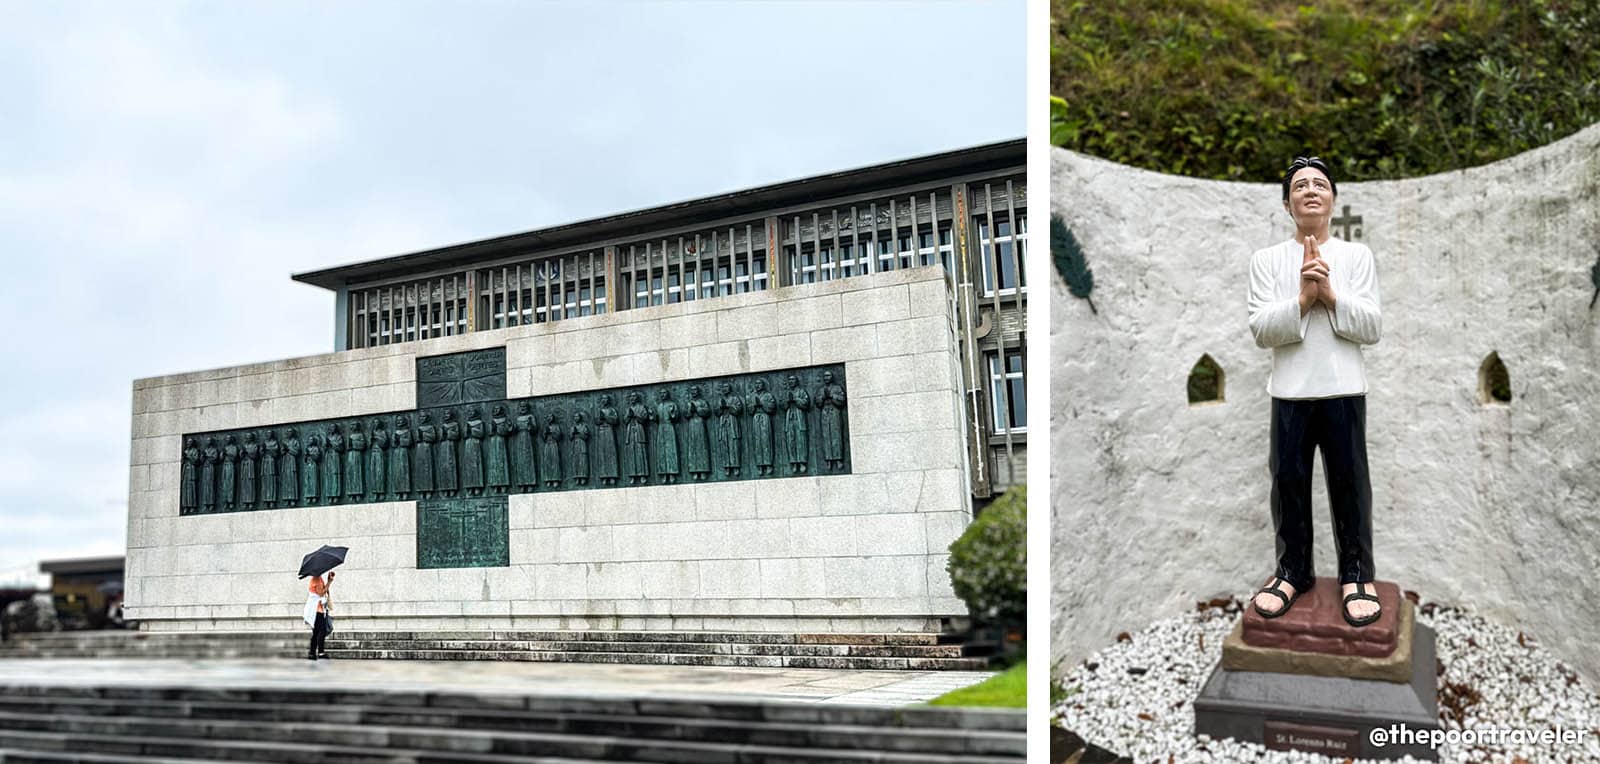
Nakamachi Catholic Church, just a six-minute walk from Nagasaki Station. Built in 1897 on the site of a former prison where Christians were once held, the church stands as a testament to resilience. Inside, admire the beautiful stained glass windows crafted by Milano Grassi. Outside, in its garden, stand the statues of the 16 martyrs including San Lorenzo Ruiz.
Twenty-Six Martyrs Museum and Monument on Nishizaka Hill, also a short walk away. This poignant site commemorates the 1597 execution of 26 Christians. (The 26 martyrs is a different group from the 16 martyrs. Over 400 martyrs in Japan have been beatified but only these two groups, 42 in total, have been canonized as saints by the Vatican.) This museum houses many historical documents and artifacts like the “Maria Kannon” statue and original letters from St. Francis Xavier, offering deep insights into the history of Christianity in Japan.
St. Philip’s Church (Nishizaka Church), adjacent to the monument, often referred to as Japan’s mini-Sagrada Familia. Designed by architect Kenji Imai, the church features twin towers and colorful mosaics inspired by Gaudí. Inside, in a niche to the right, you’ll find bone relics of St. Paul Miki, St. James Kisai and St. John de Goto.
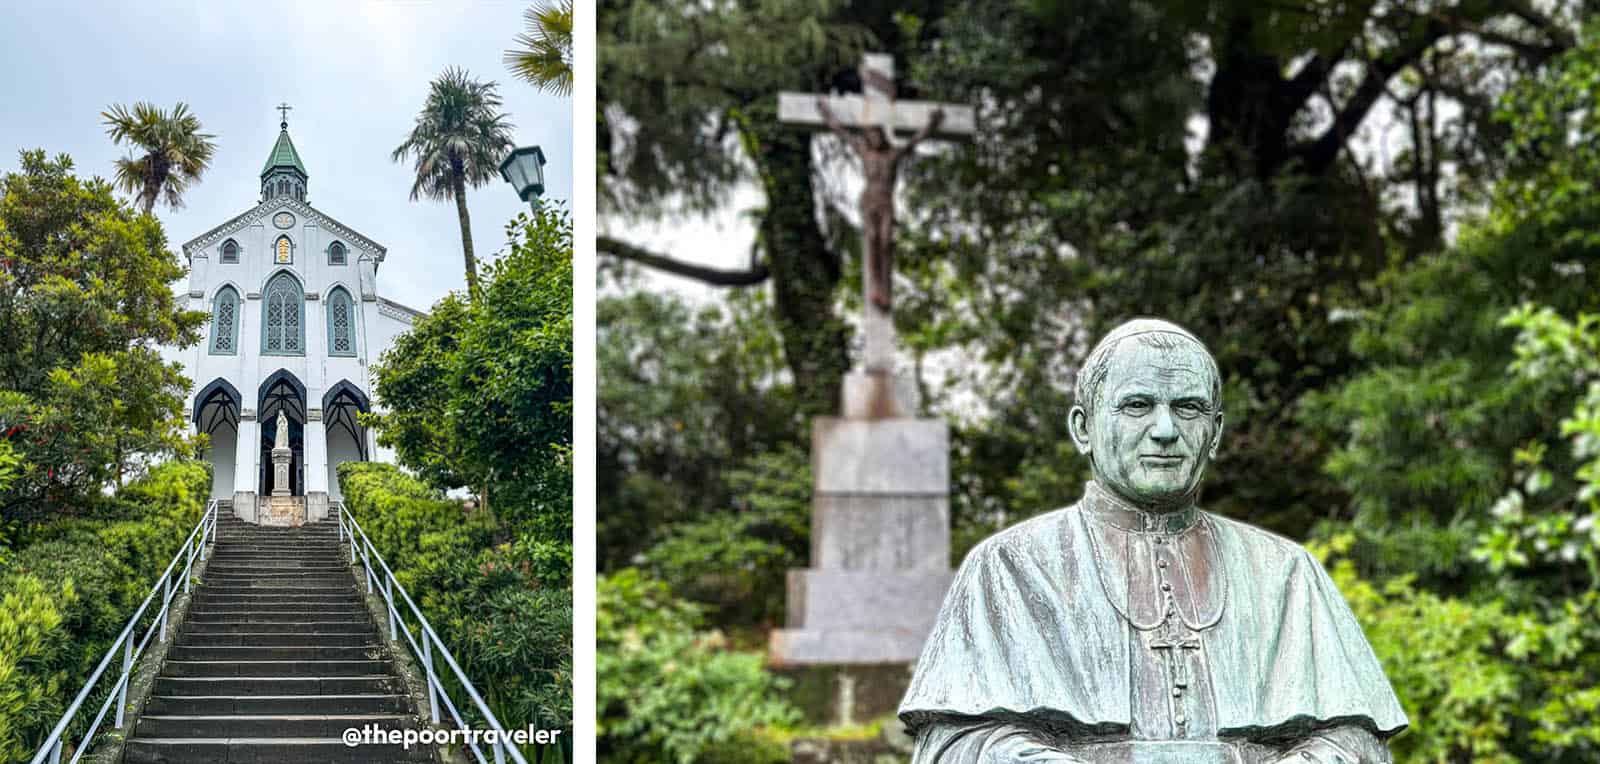
Oura Cathedral, Japan’s oldest existing wooden Gothic-style church, built in 1864 by French missionaries. Designated as a National Treasure, the church is renowned for the “Discovery of the Flock,” where hidden Christians revealed their faith to Father Petitjean after centuries of persecution. The Christian Museum next to it is also worth a stop if you have more time.
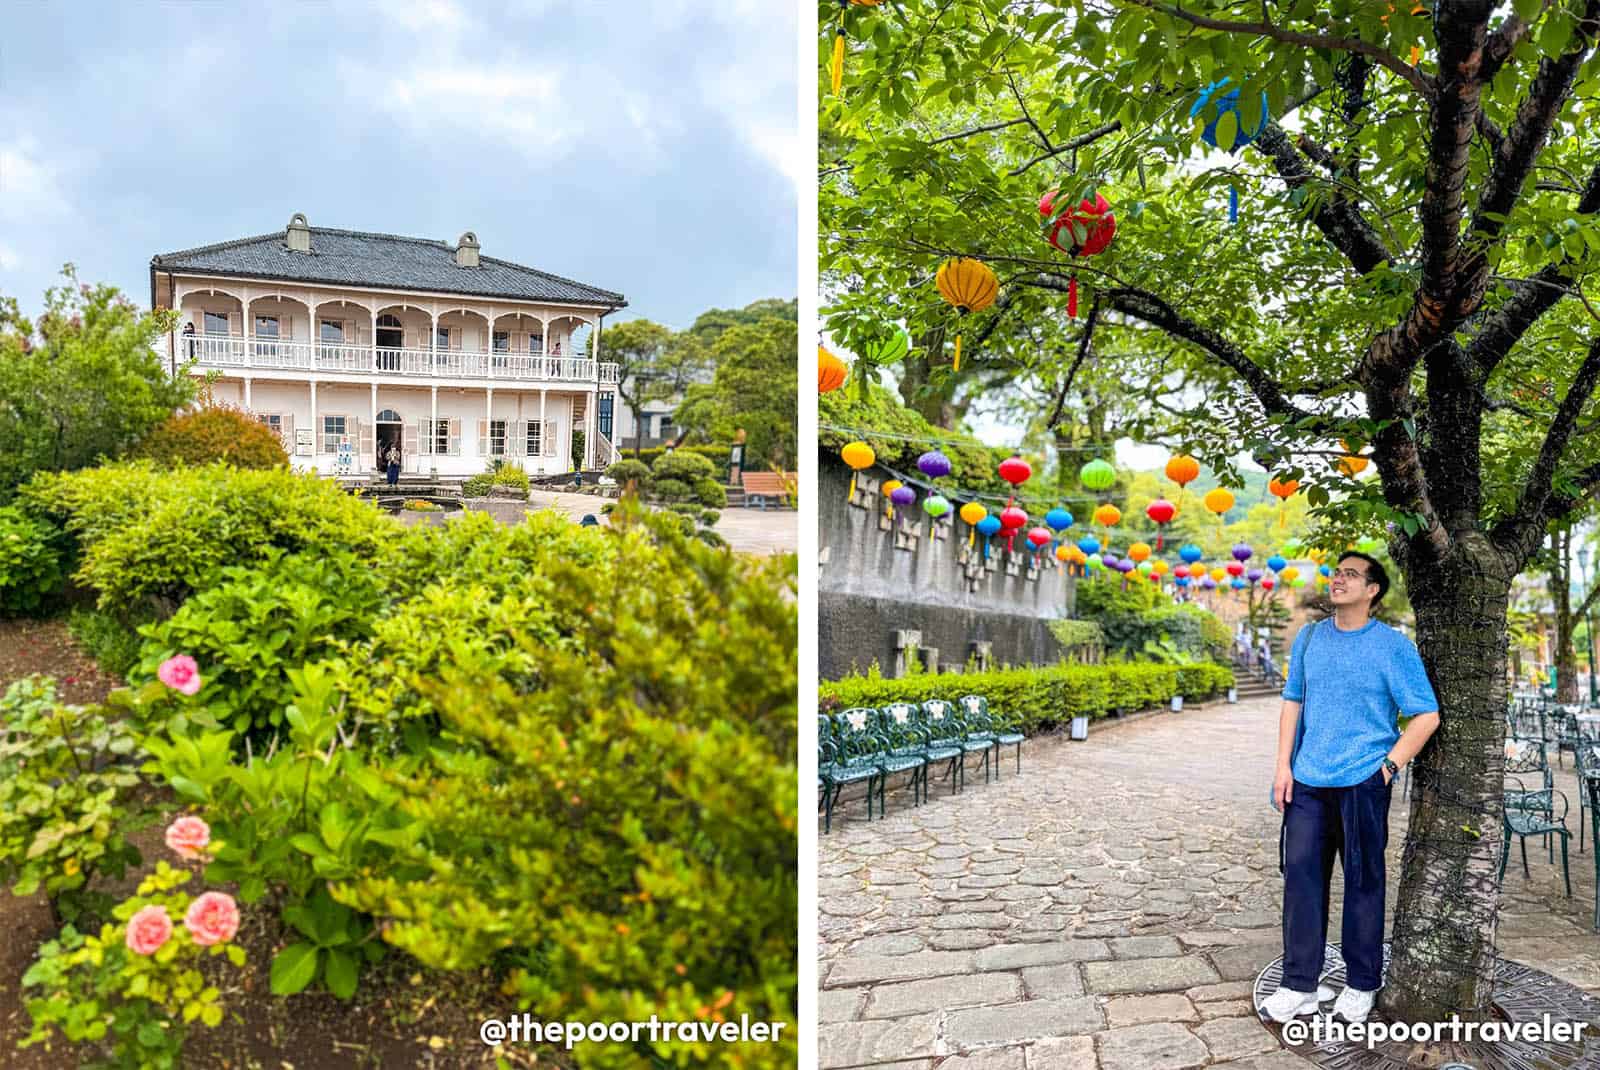
Glover Garden, just next to the Cathedral. This hillside park offering panoramic views of Nagasaki Harbor. Explore the former residence of Thomas B. Glover, the oldest existing Western-style wooden house in Japan, and stroll through gardens adorned with seasonal flowers. The site also features other Meiji-era Western residences, providing a glimpse into the lives of foreign settlers who contributed to Japan’s modernization.
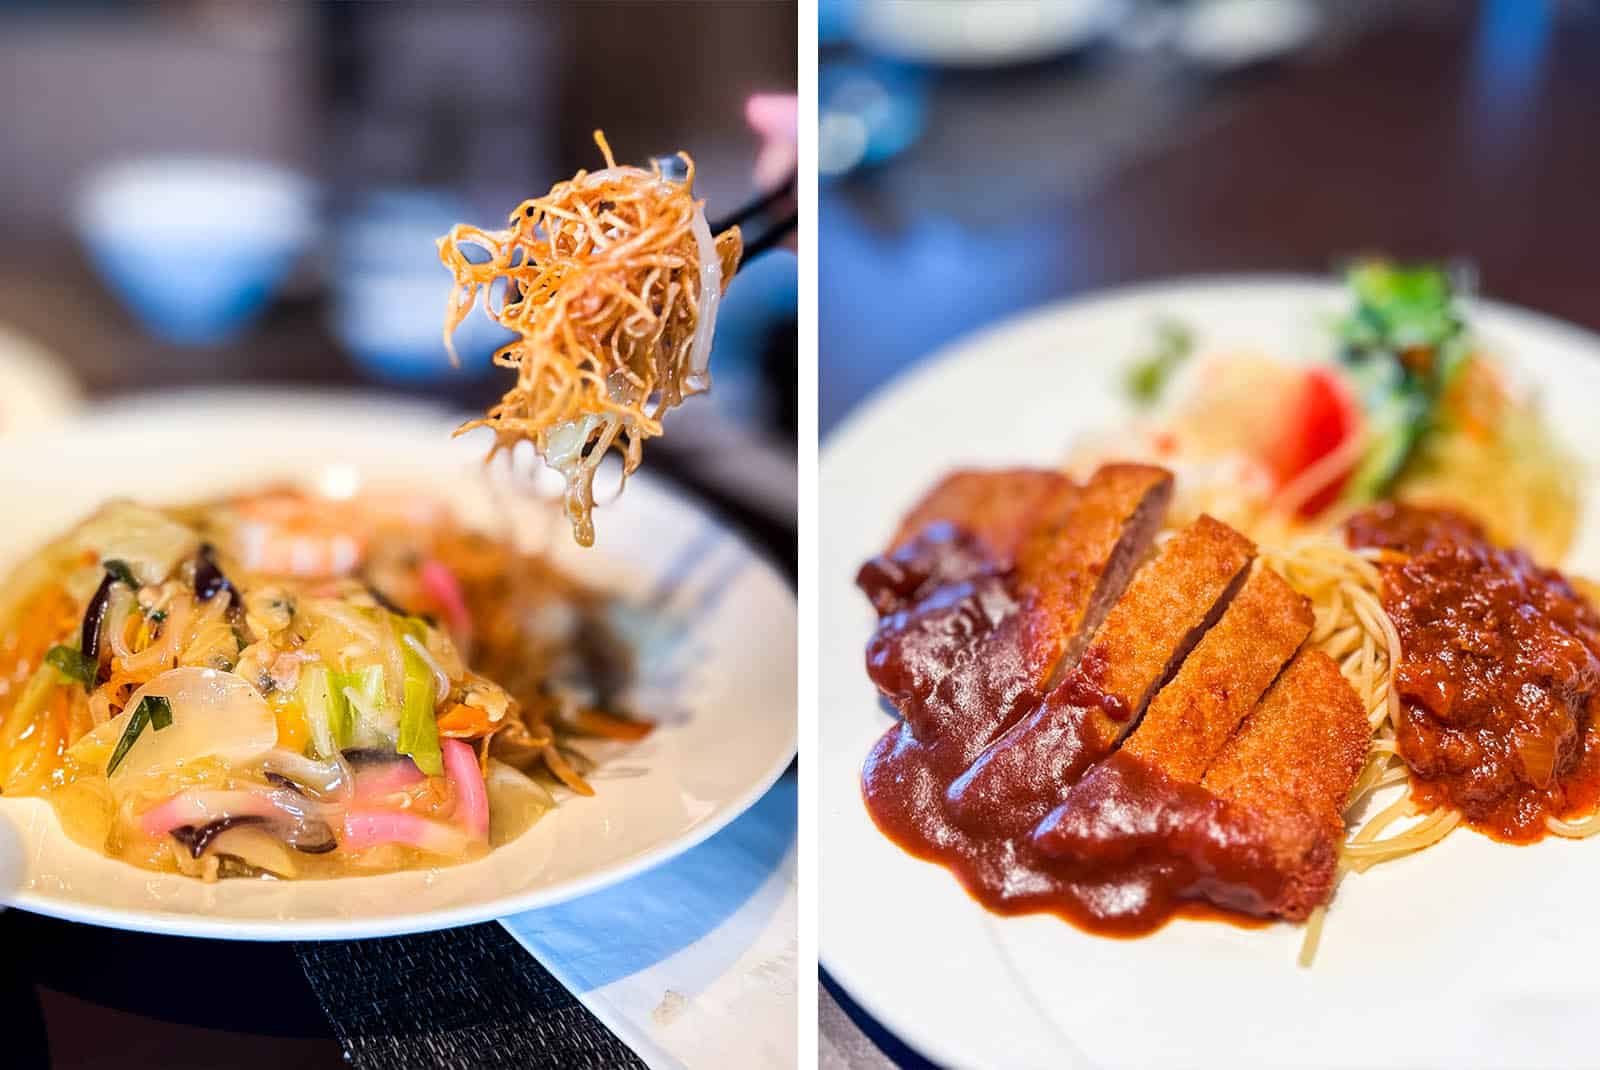
If you get hungry before or after your stop in Oura Cathedral, you can sample Nagasaki’s local dishes at any of the dining establishments at its base. For budget travelers, you’ll find street food and small eateries lining Glover Street. But if you want a proper lunch at a full-service restaurant, one of the favorites among tourists is ANA Crowne Plaza Nagasaki Gloverhill’s in-house Restaurant Pave, which specializes in a blend of Western-style cuisine and local Nagasaki dishes, including champon, Turkish rice (Toruko rice), and sara udon, crafted with locally sourced ingredients.
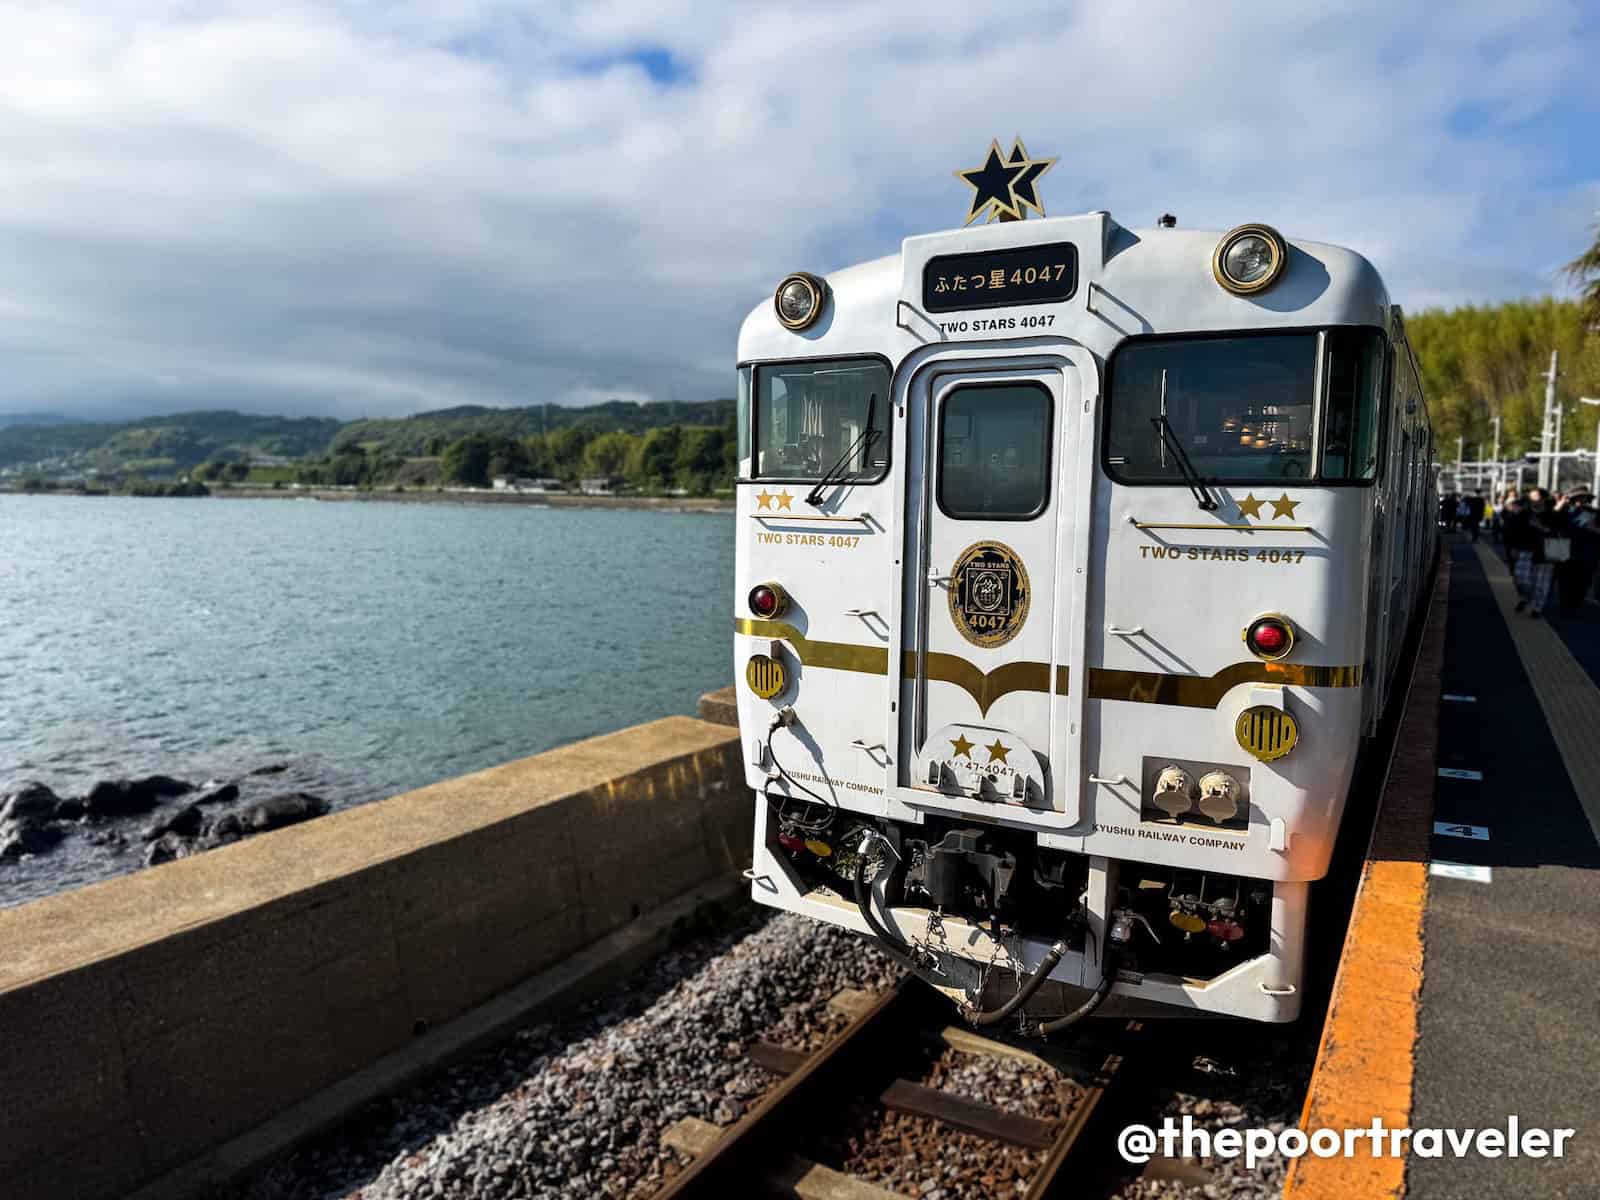
Two Stars 4047
To get to our next stop, since we’re carrying a JR Kyushu Rail Pass, how about we level up our train game? Meet the Two Stars 4047, a luxurious sightseeing train operated by JR Kyushu. This handsome train can take you on a scenic journey between Nagasaki Station and Takeo-Onsen Station in Saga Prefecture.
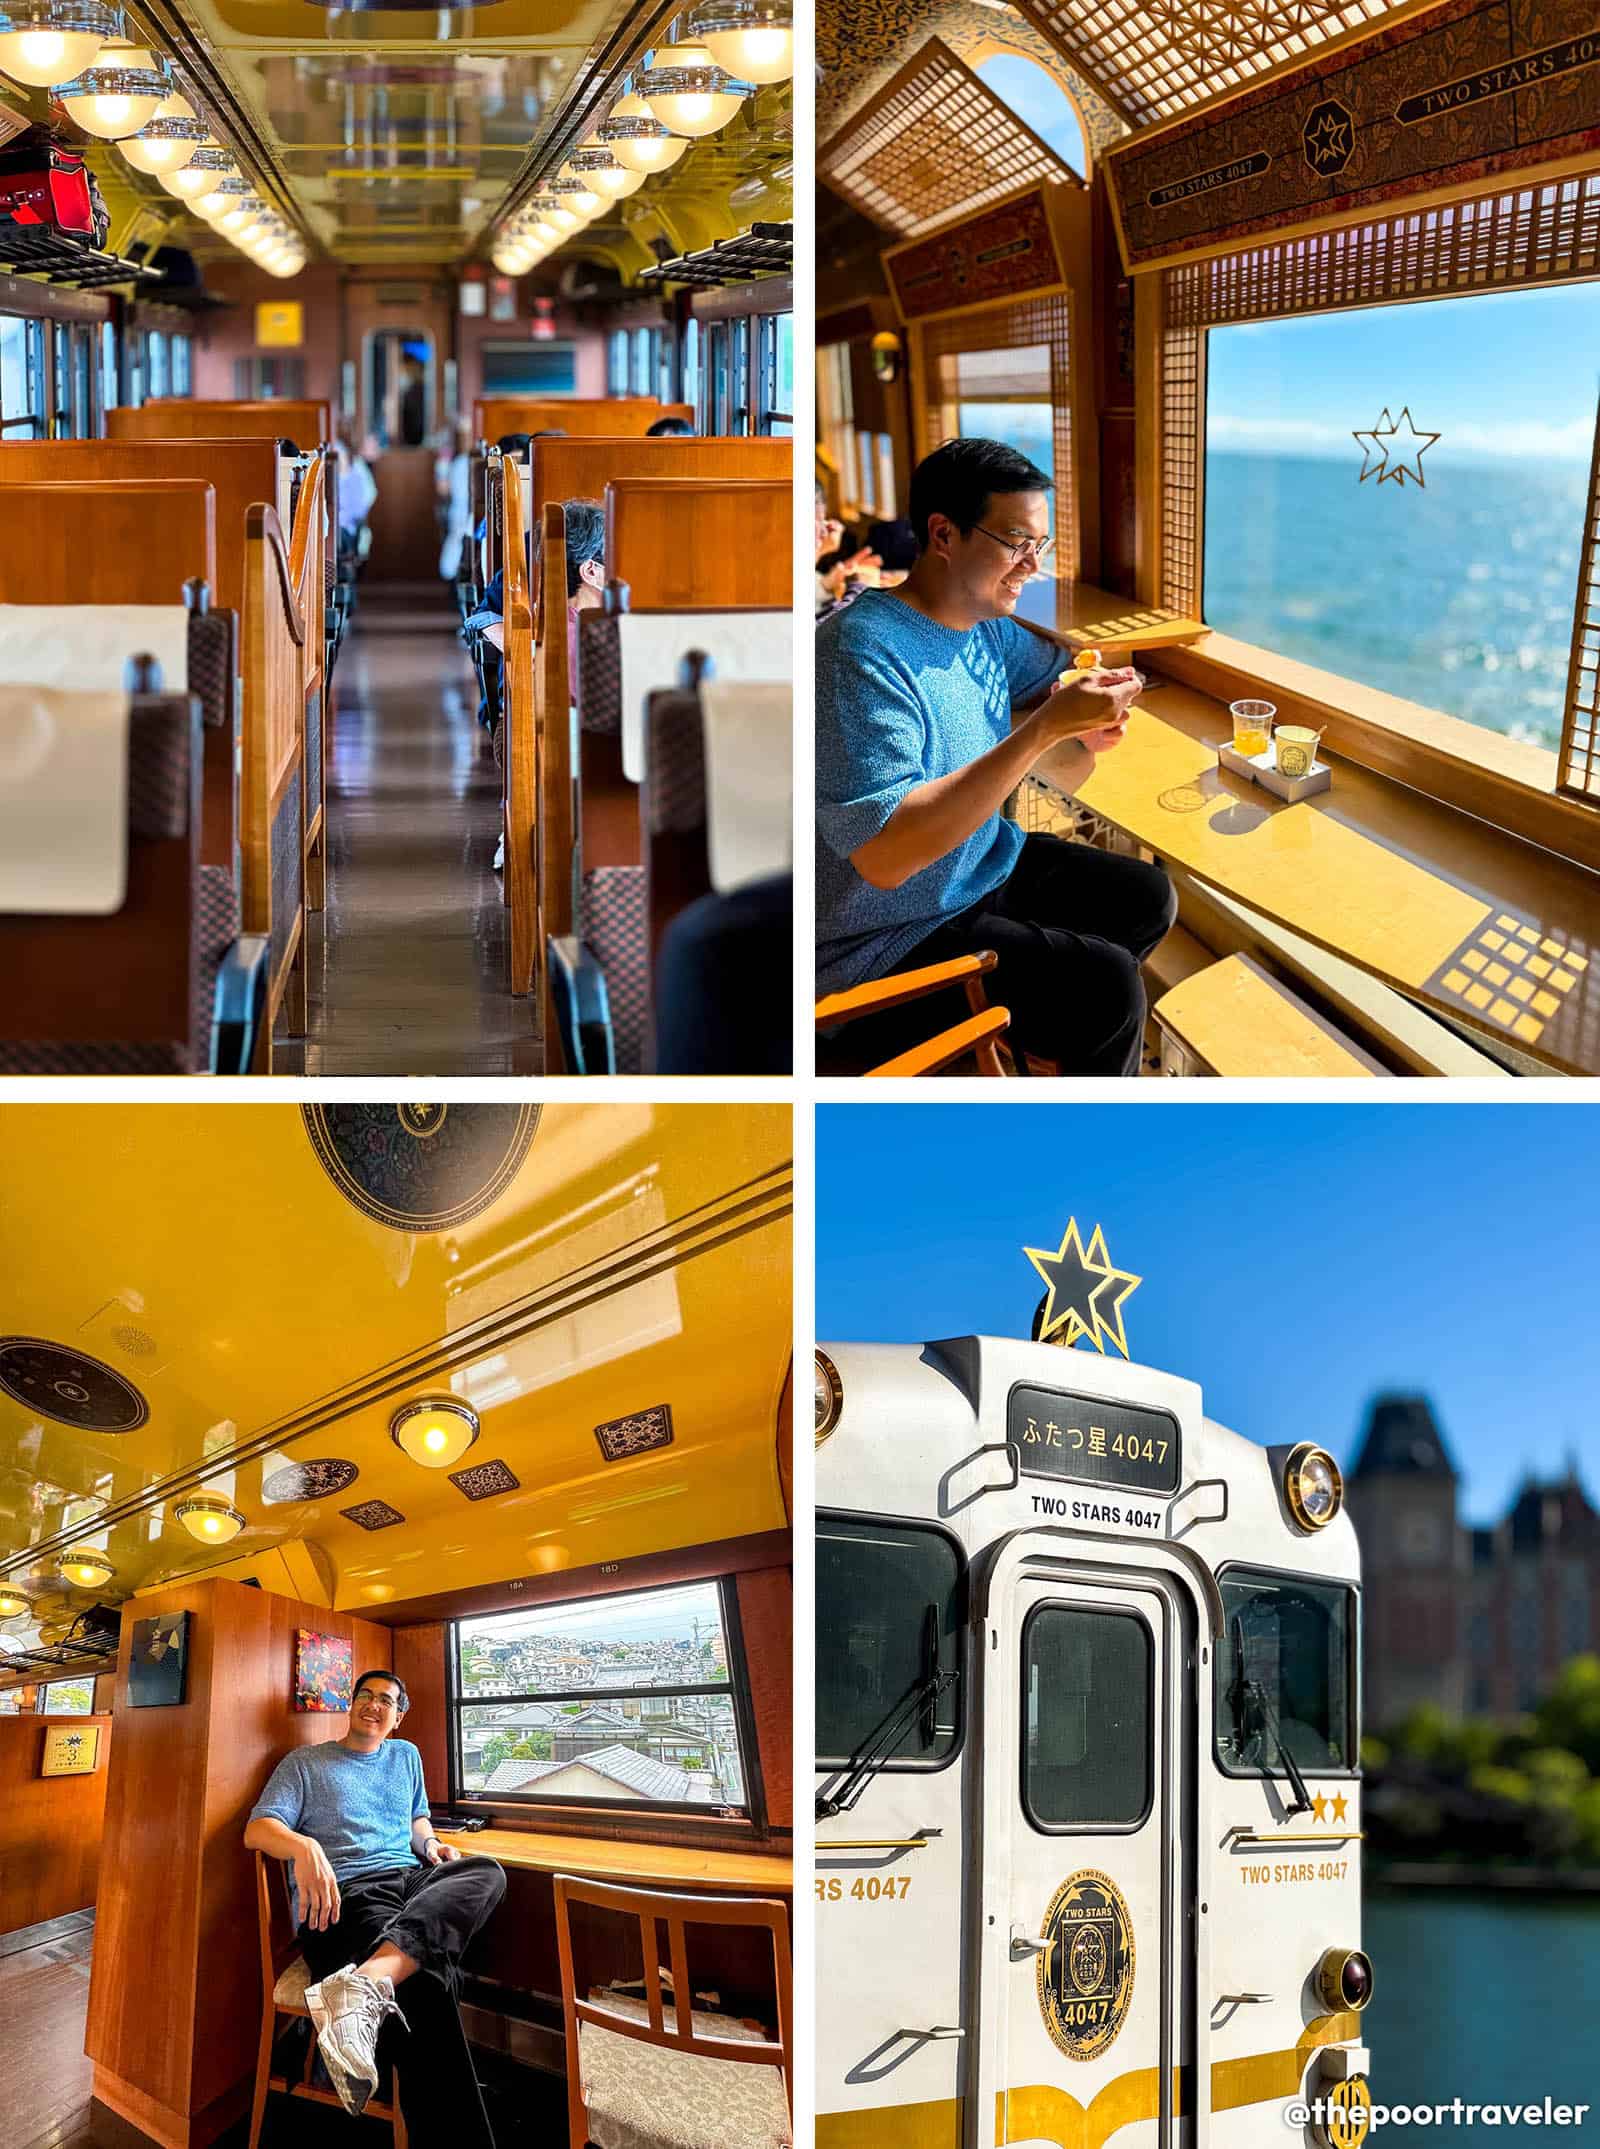
Launched in September 2022, it provides travelers with a leisurely alternative to the high-speed Nishi Kyushu Shinkansen, showcasing the coastal beauty of western Kyushu . The train’s name, “Two Stars 4047,” symbolizes the connection between the two prefectures (Saga and Nagasaki) and references the train models used: KiHa 40 and KiHa 47 series cars. Renowned industrial designer Eiji Mitooka, known for his work on other JR Kyushu trains, crafted the train’s elegant white and gold exterior and its warm, wood-accented interior.
The train operates two distinct routes daily:
Morning Route: From Takeo-Onsen to Nagasaki via the Ariake Sea coastline, offering expansive sea views.
Afternoon Route: From Nagasaki to Takeo-Onsen along Omura Bay, renowned for its tranquil waters.
Comprising three cars, the train features:
Cars 1 and 3: Reserved seating with various configurations, including booth and sofa seats, some facing large panoramic windows.
Car 2 (Lounge 40): A communal space with comfortable seating, a bar offering local snacks, drinks, and sweets, and opportunities to purchase souvenirs. You can also indulge in regional delicacies, such as bento boxes featuring Saga beef (available on the morning route) and freshly baked Nagasaki soufflés (available on the afternoon route). Additionally, the train offers cultural experiences. On our ride, we got to sample the various types of green tea produced in nearby Ureshino in Saga.
But we won’t go all the way to Takeo Onsen. We’ll be alighting at Huis Ten Bosch Station for a much-needed and much-deserved theme park stop!
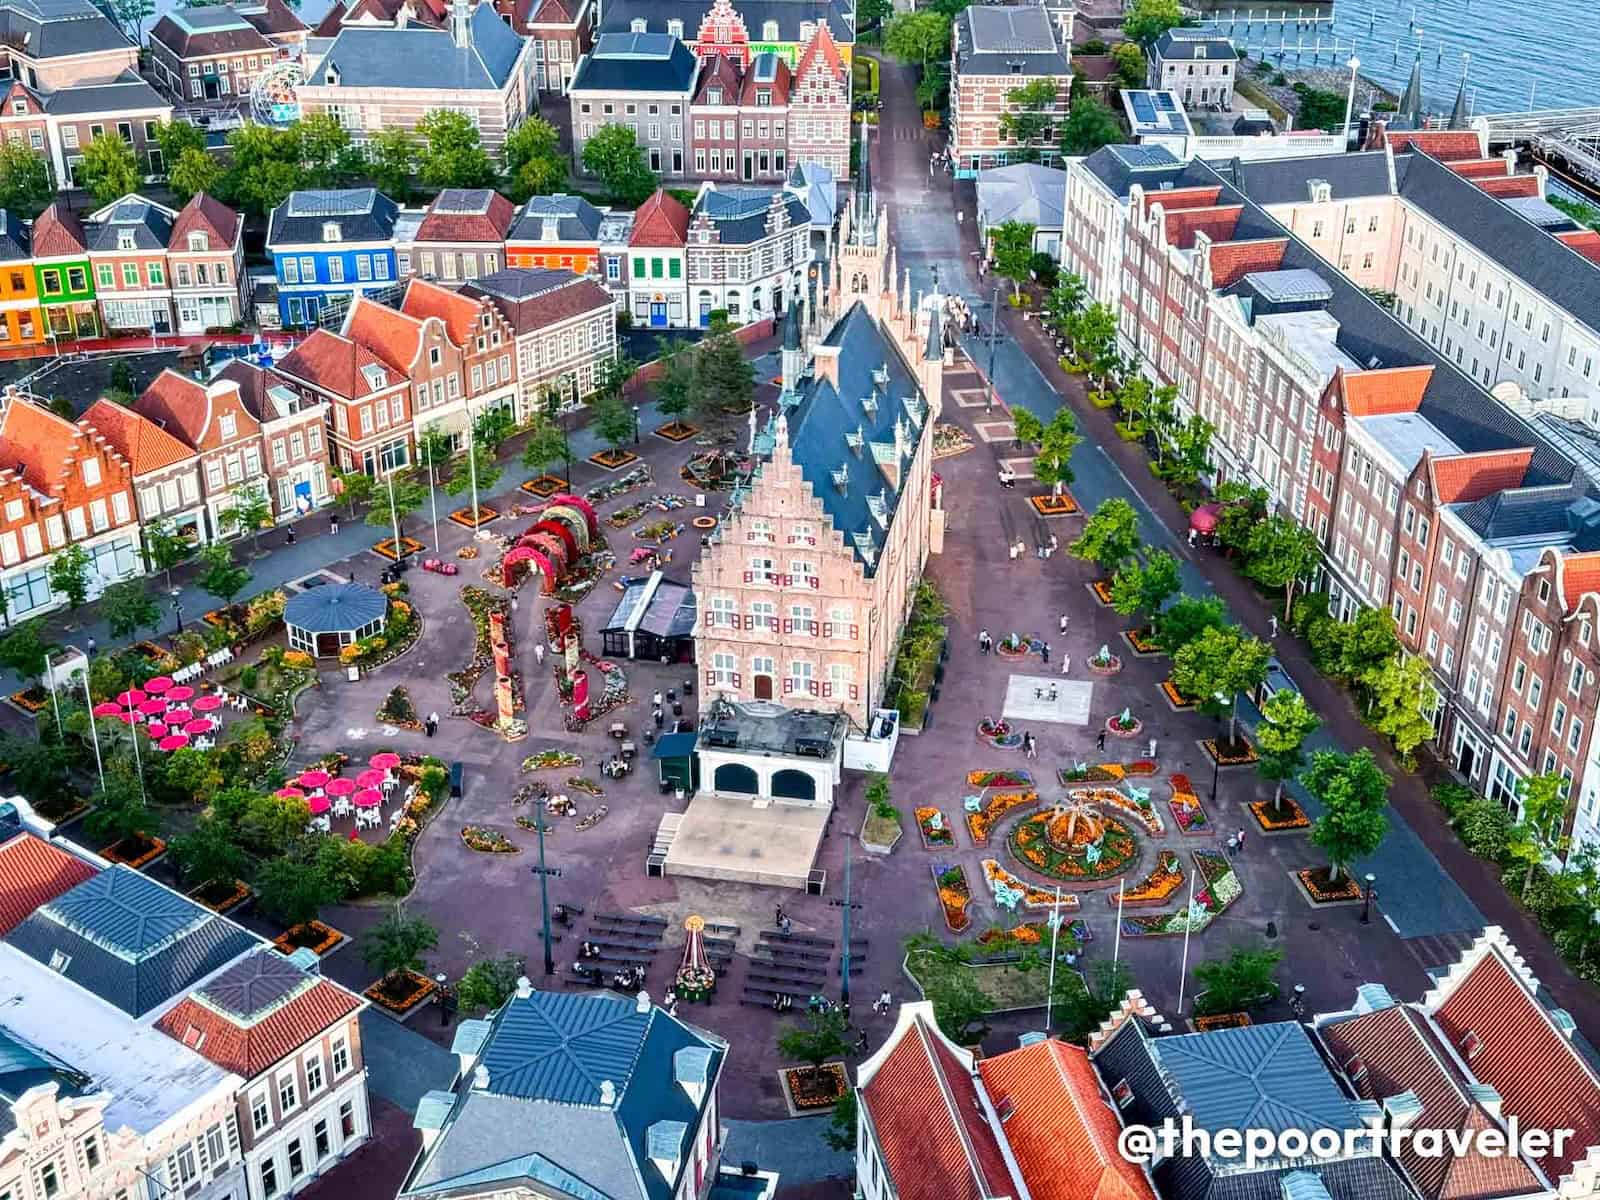
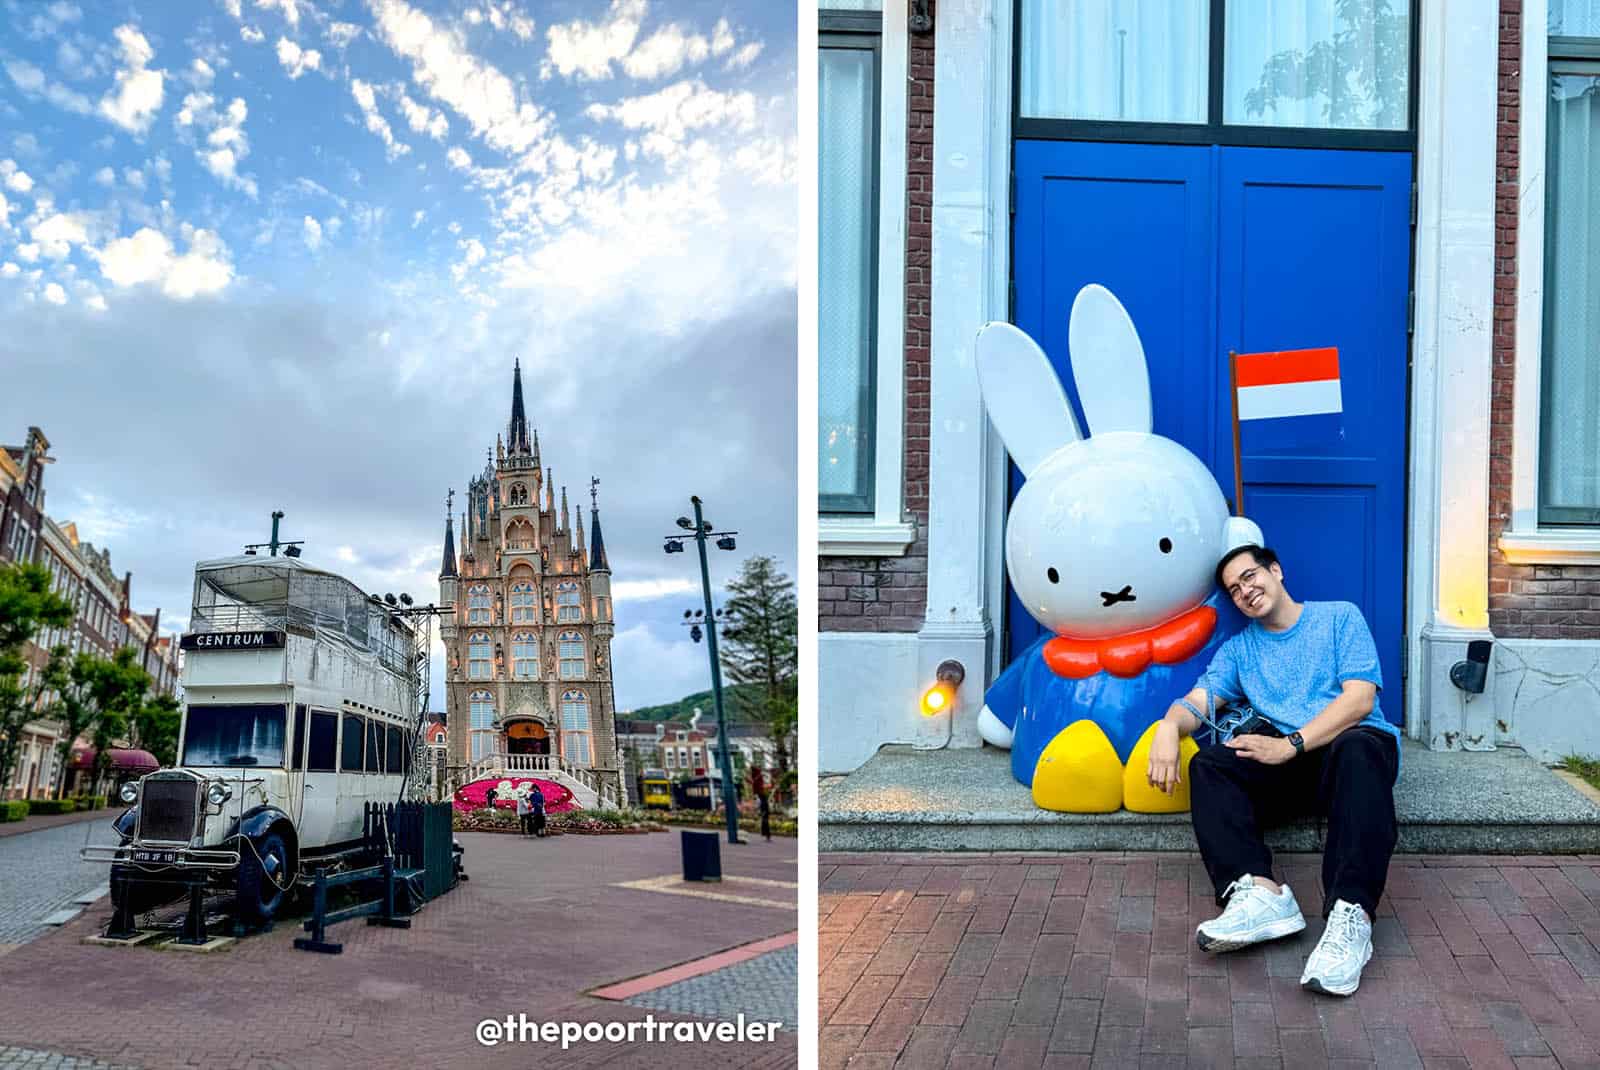
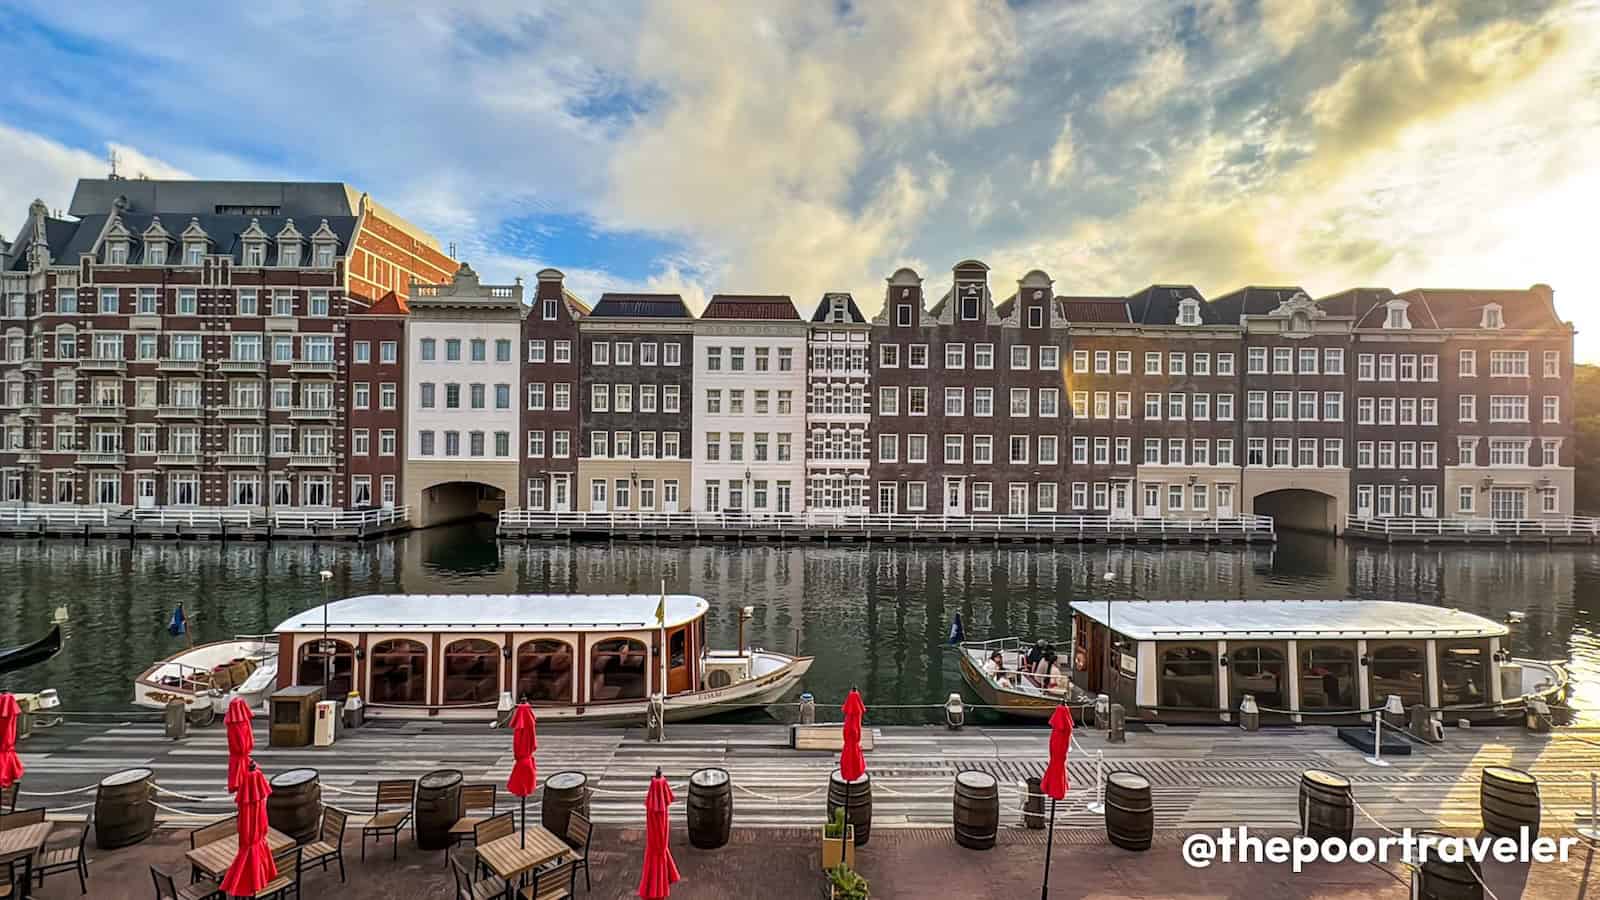
Huis Ten Bosch
Meet one of Japan’s three largest theme parks by land area!
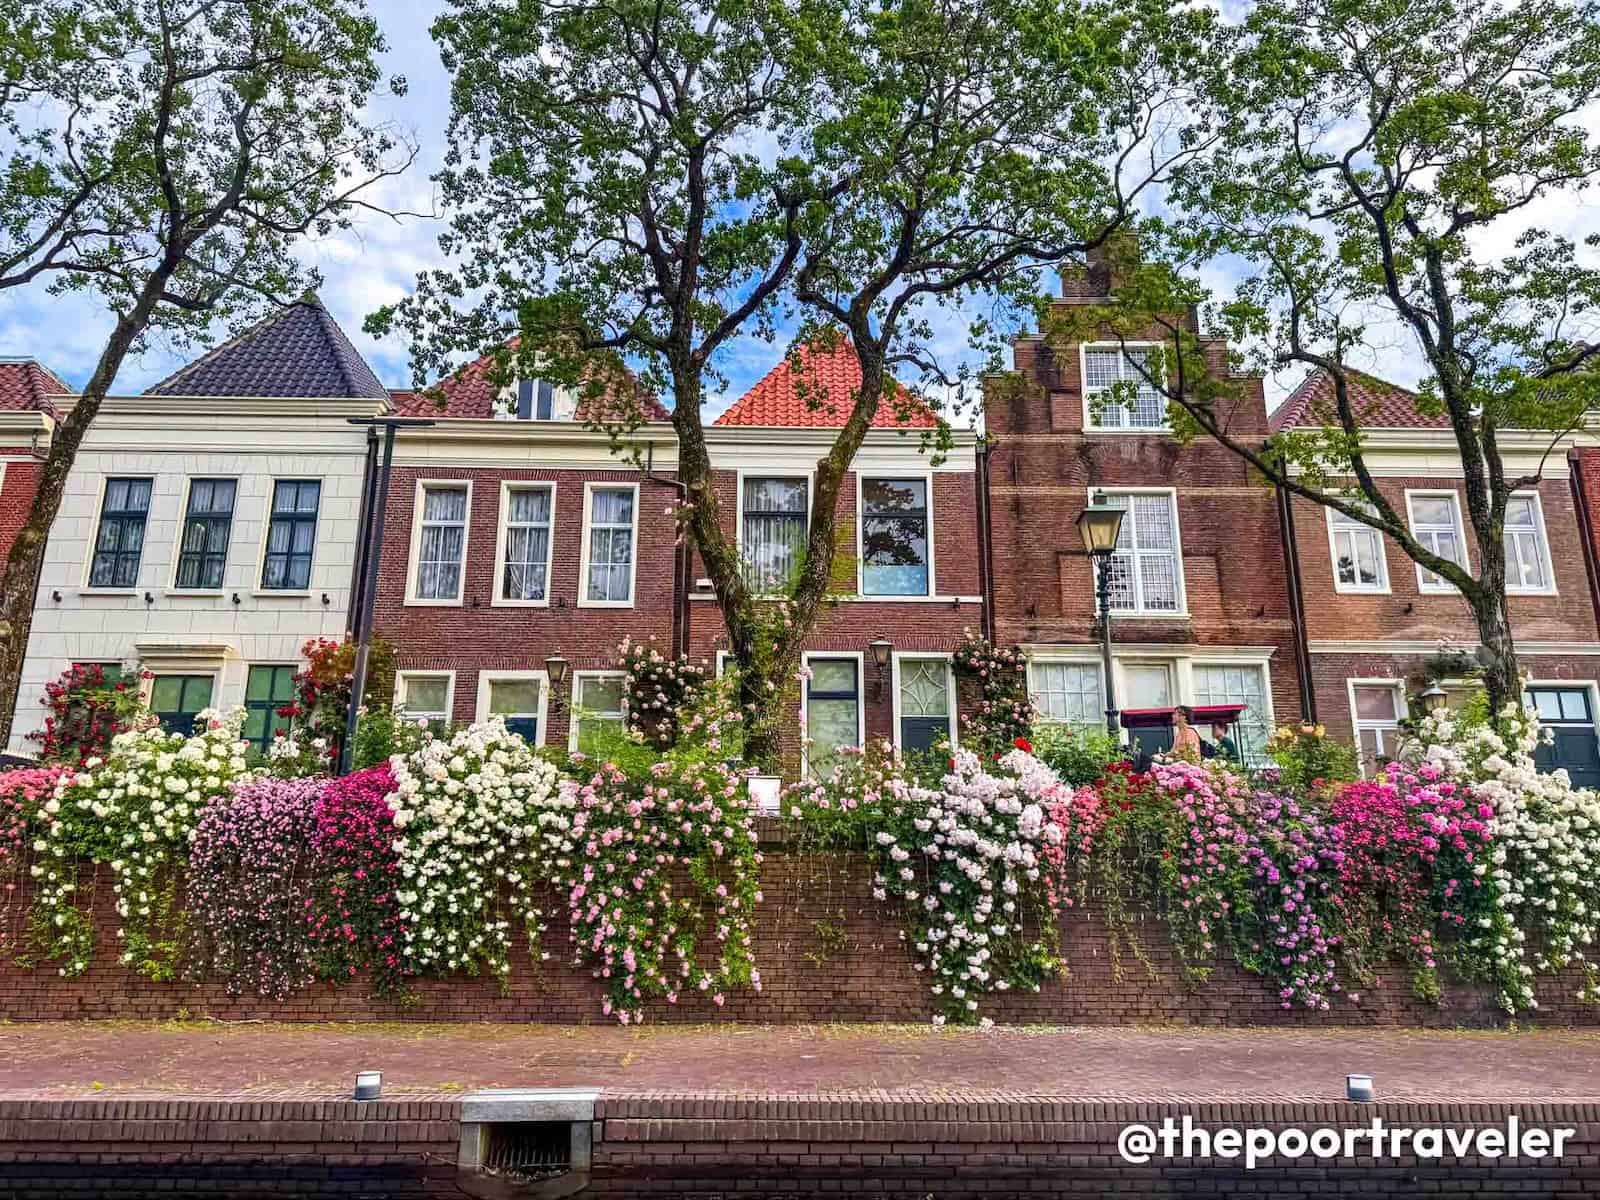
Located in Sasebo, Nagasaki Prefecture, this sprawling European-style wonderland is designed to look like a little piece of the Netherlands, complete with windmills, tulip fields, canals, and full-scale replicas of Dutch buildings. The name itself means “House in the Forest,” and it’s modeled after a royal palace in The Hague.
But this isn’t just some small replica village. It’s a vast 152-hectare park that feels like stepping into a European fairytale, all without leaving Japan. You can see the extent of its boundaries by climbing to the top of the Domtoren, its tallest building.
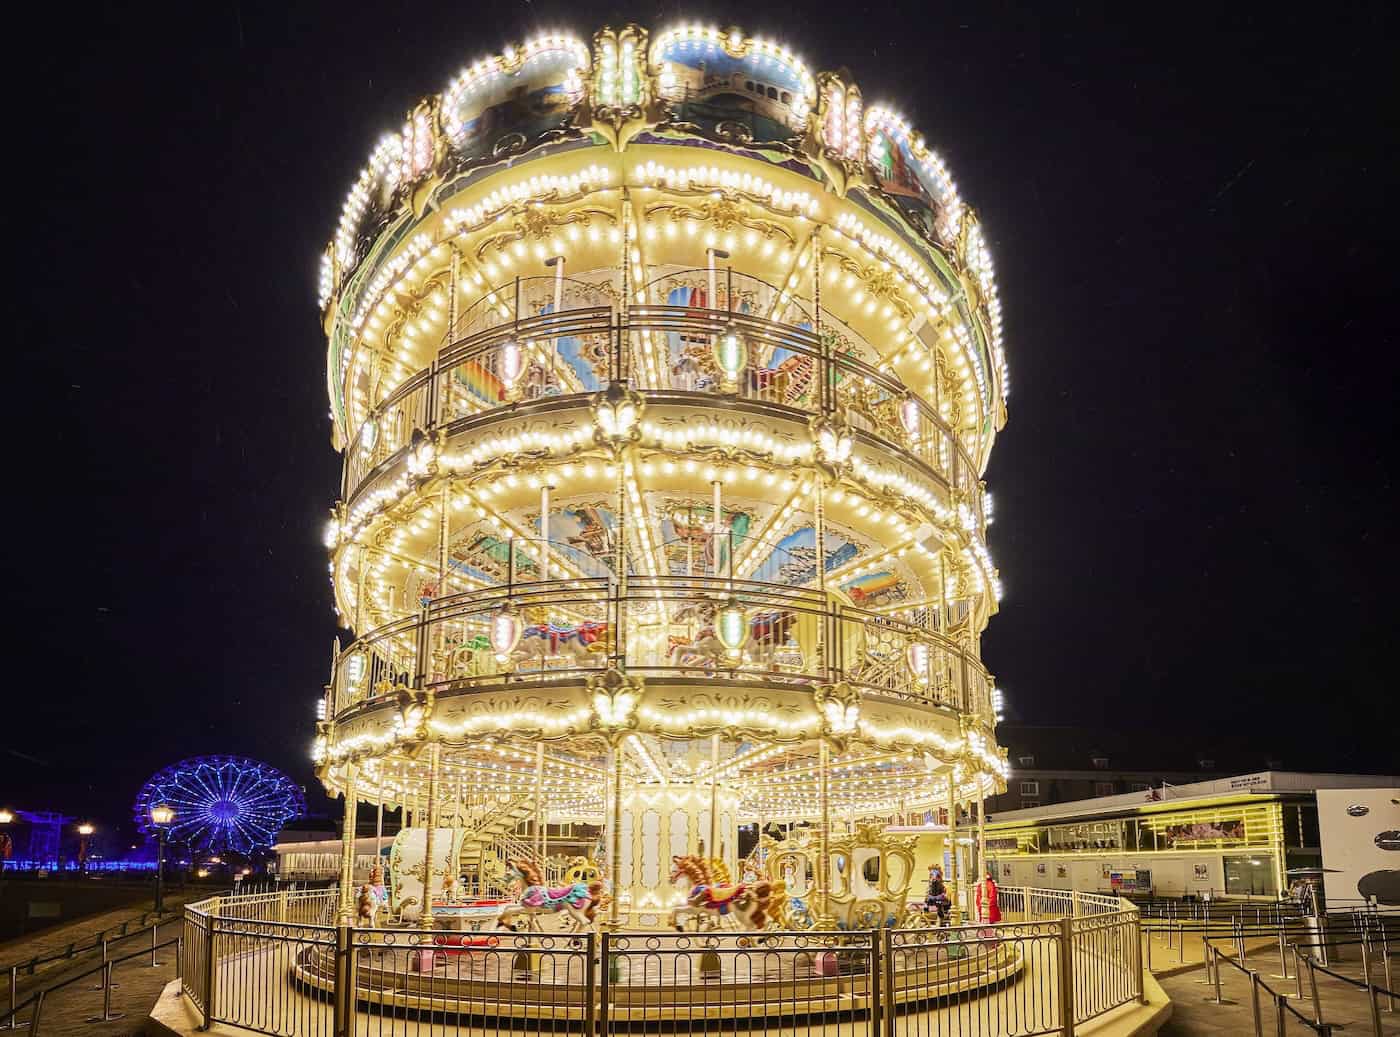
Beyond the picturesque scenery, you’ll find digital art museums, projection mapping shows, theme park staples like a giant Ferris wheel and multi-tier carousel, and seasonal events like massive illumination displays in winter and flower festivals in spring. When we visited, a 1-Million Roses exhibit takes the centerstage.
Image courtesy of Huis Ten Bosch
You can explore by bike, canal cruiser, or just wander on foot — and many visitors dress up in period costumes to match the ambiance. It’s especially popular for families, couples, and even solo travelers looking for something unexpected and photogenic.
Your time here will reach a crescendo at the Shower of Lights, a nightly show featuring fireworks display exploding in sync with a musical fountain and illuminations. On our visit, there was even a live musical performance of Katy Perry’s Firework.
It is entirely possible to visit Huis Ten Bosch on a day trip, but to save yourself from the hassle of last trip schedules and travel times, we recommend spending a night on-site.
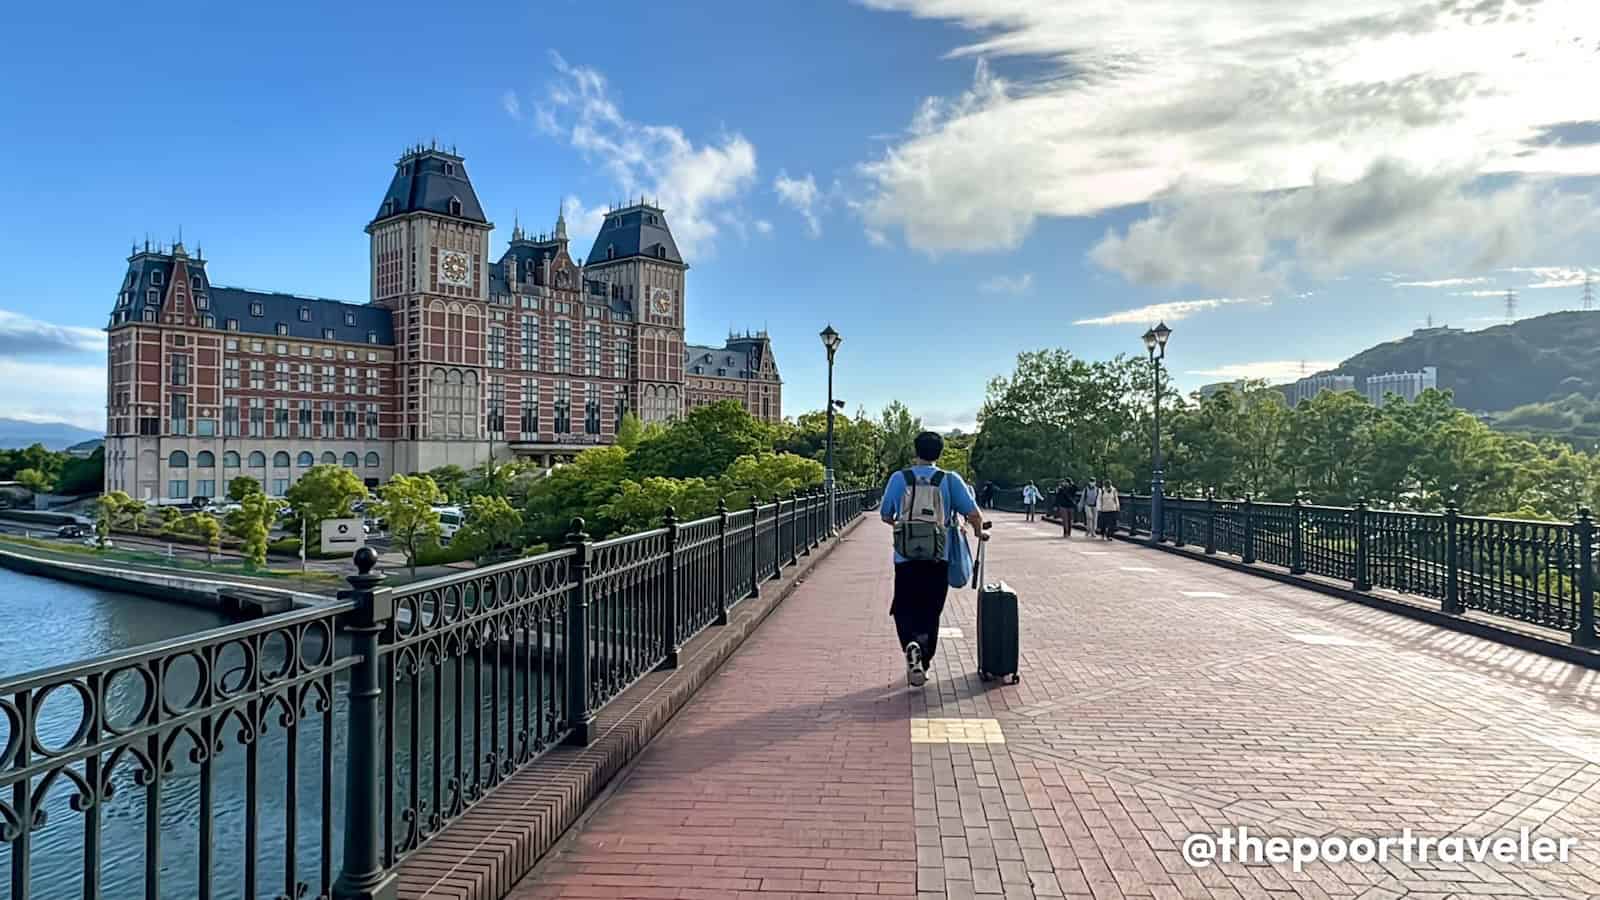
Where to Stay: Hotel Okura JR Huis Ten Bosch is a luxurious resort hotel just next to the theme park. It’s impossible to miss because its architecture, inspired by Amsterdam Central Station, is eye-catching and is probably the first structure you’ll see on your way to the park. Yes, it’s just a 5-minute walk from JR Huis Ten Bosch Station and a 2-minute walk to the park entrance, making it highly convenient for visitors.
Image courtesy of JR Kyushu Hotels and Resorts
The hotel features 320 rooms, including both Japanese and Western-style options. It also has a “Kotonoyu” bathhouse with natural hot spring baths, a convenience store, bakery, and free Wi-Fi throughout the property.
Image courtesy of JR Kyushu Hotels and Resorts
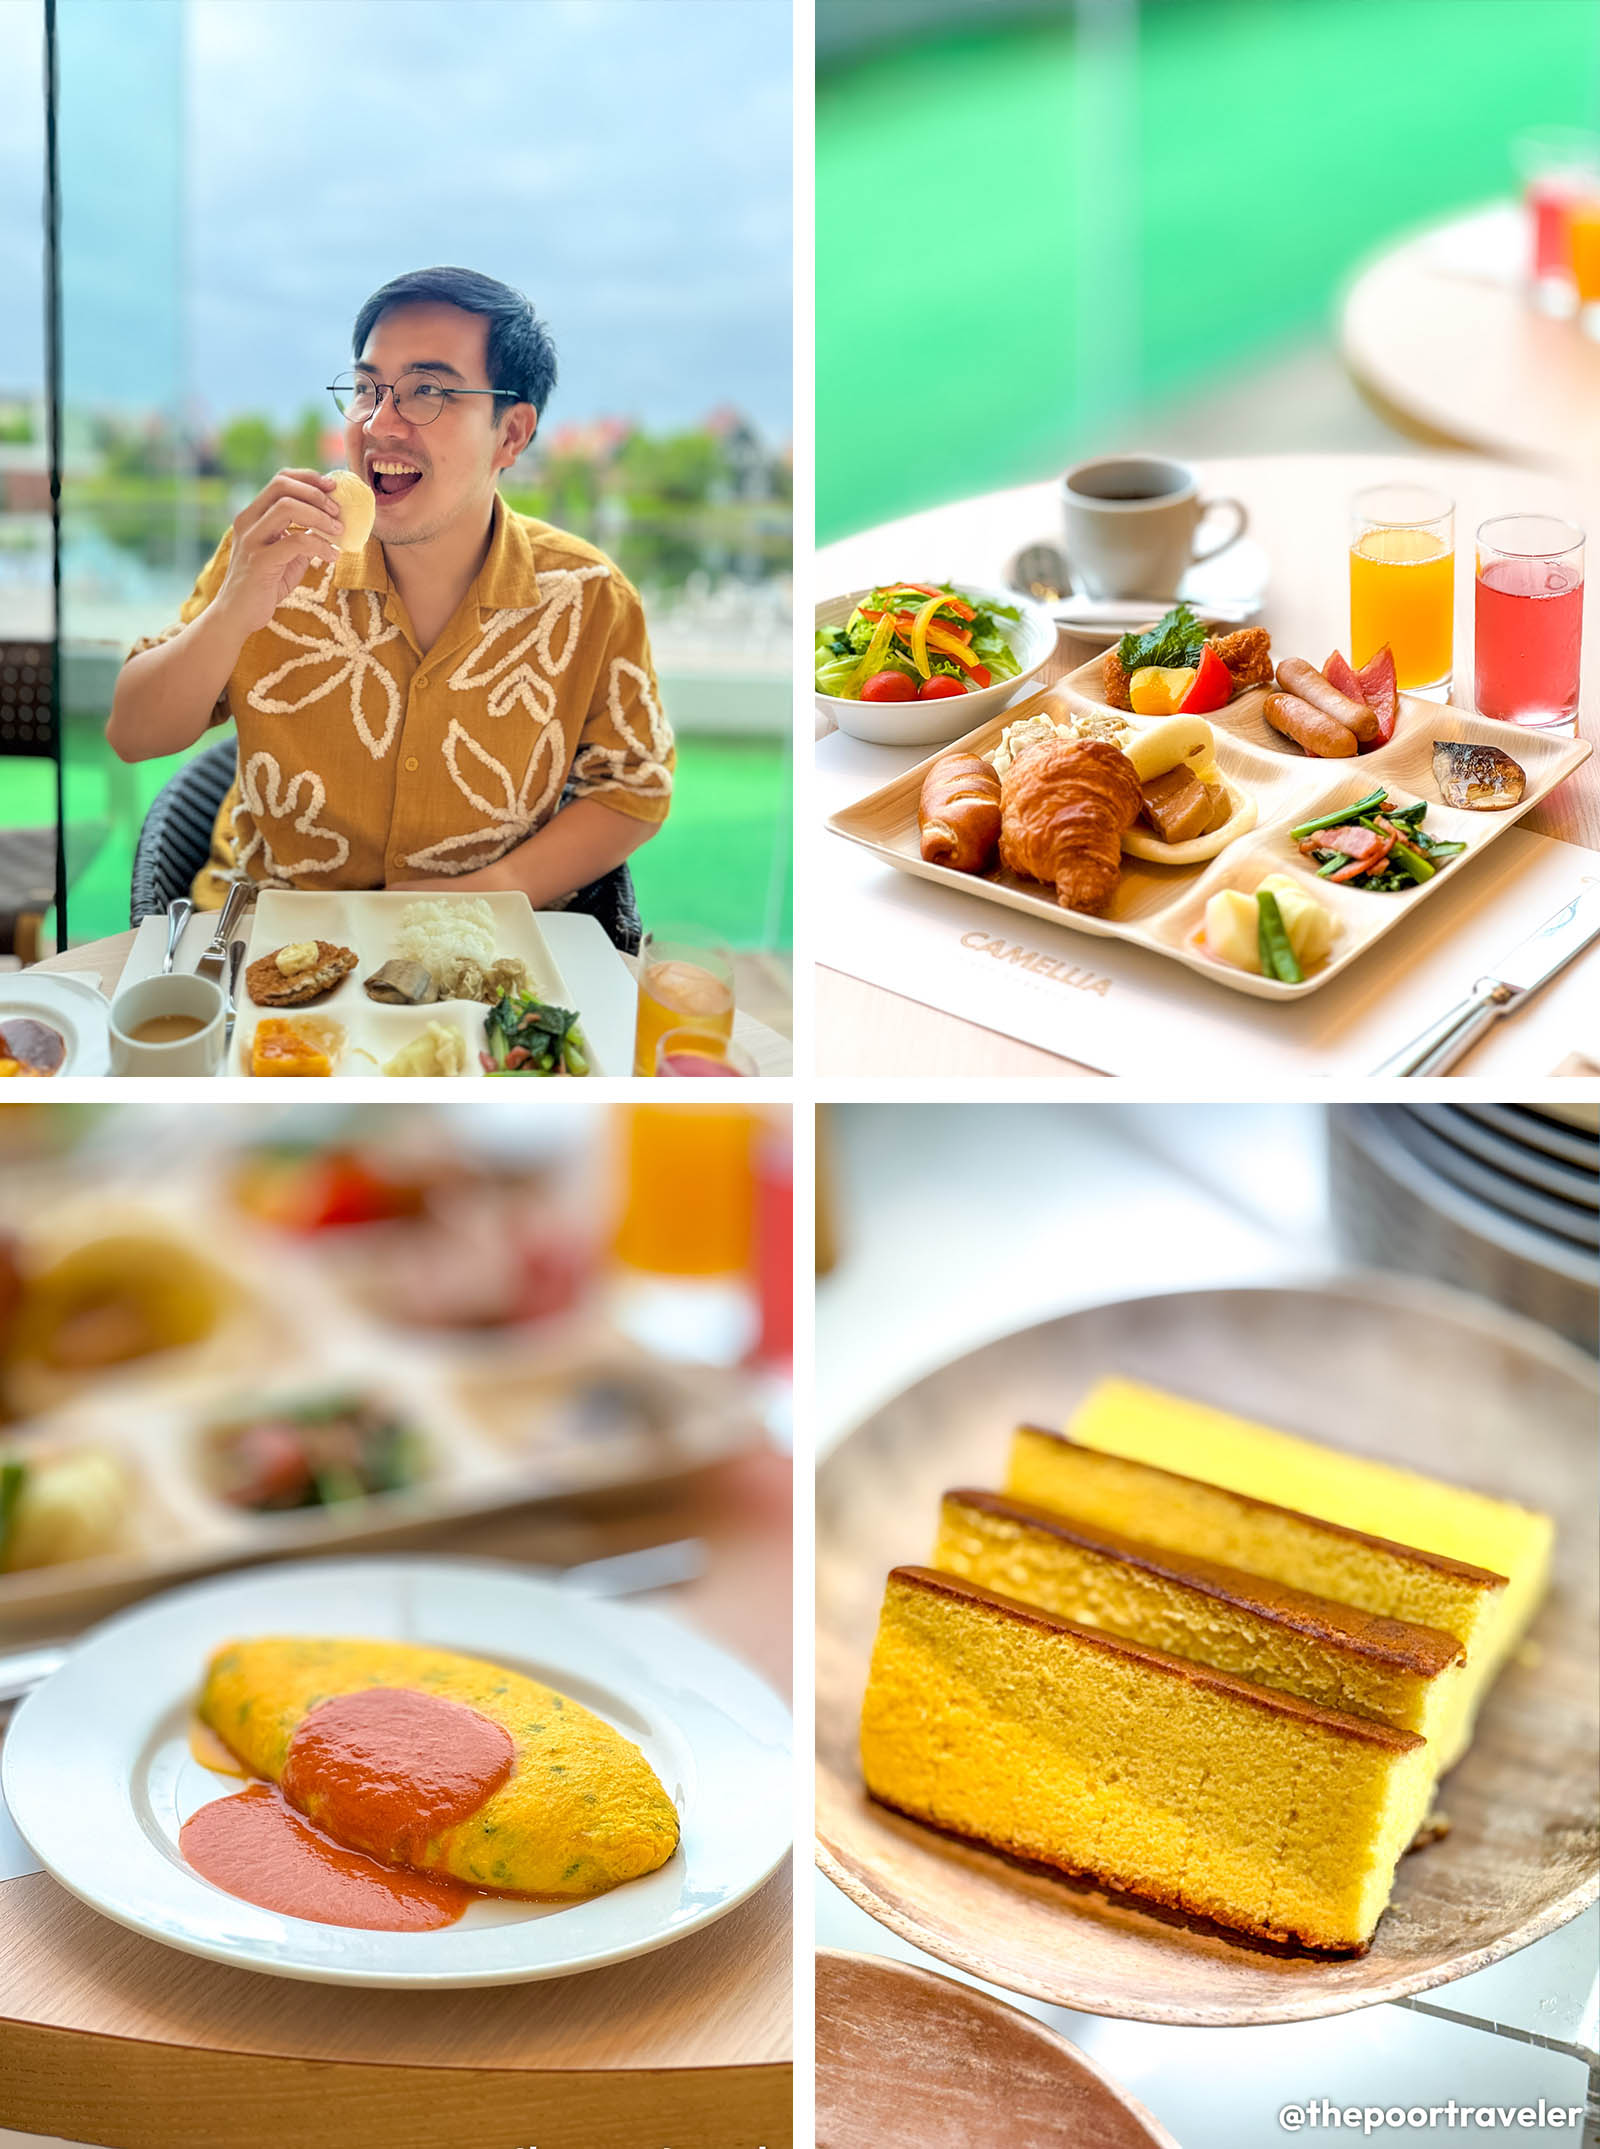
Don’t miss their breakfast buffet, which is a feast! Their signature French toast and omelette are immaculate! For their omelette, you can choose the ingredients and it was superb especially with the mentaiko.
DAY 5: SAGA
Saga is perhaps the most underrated prefecture in Northern Kyushu, which is a shame because it has lots to offer curious tourists. Here are some of the sites you might want to consider adding to your itinerary.
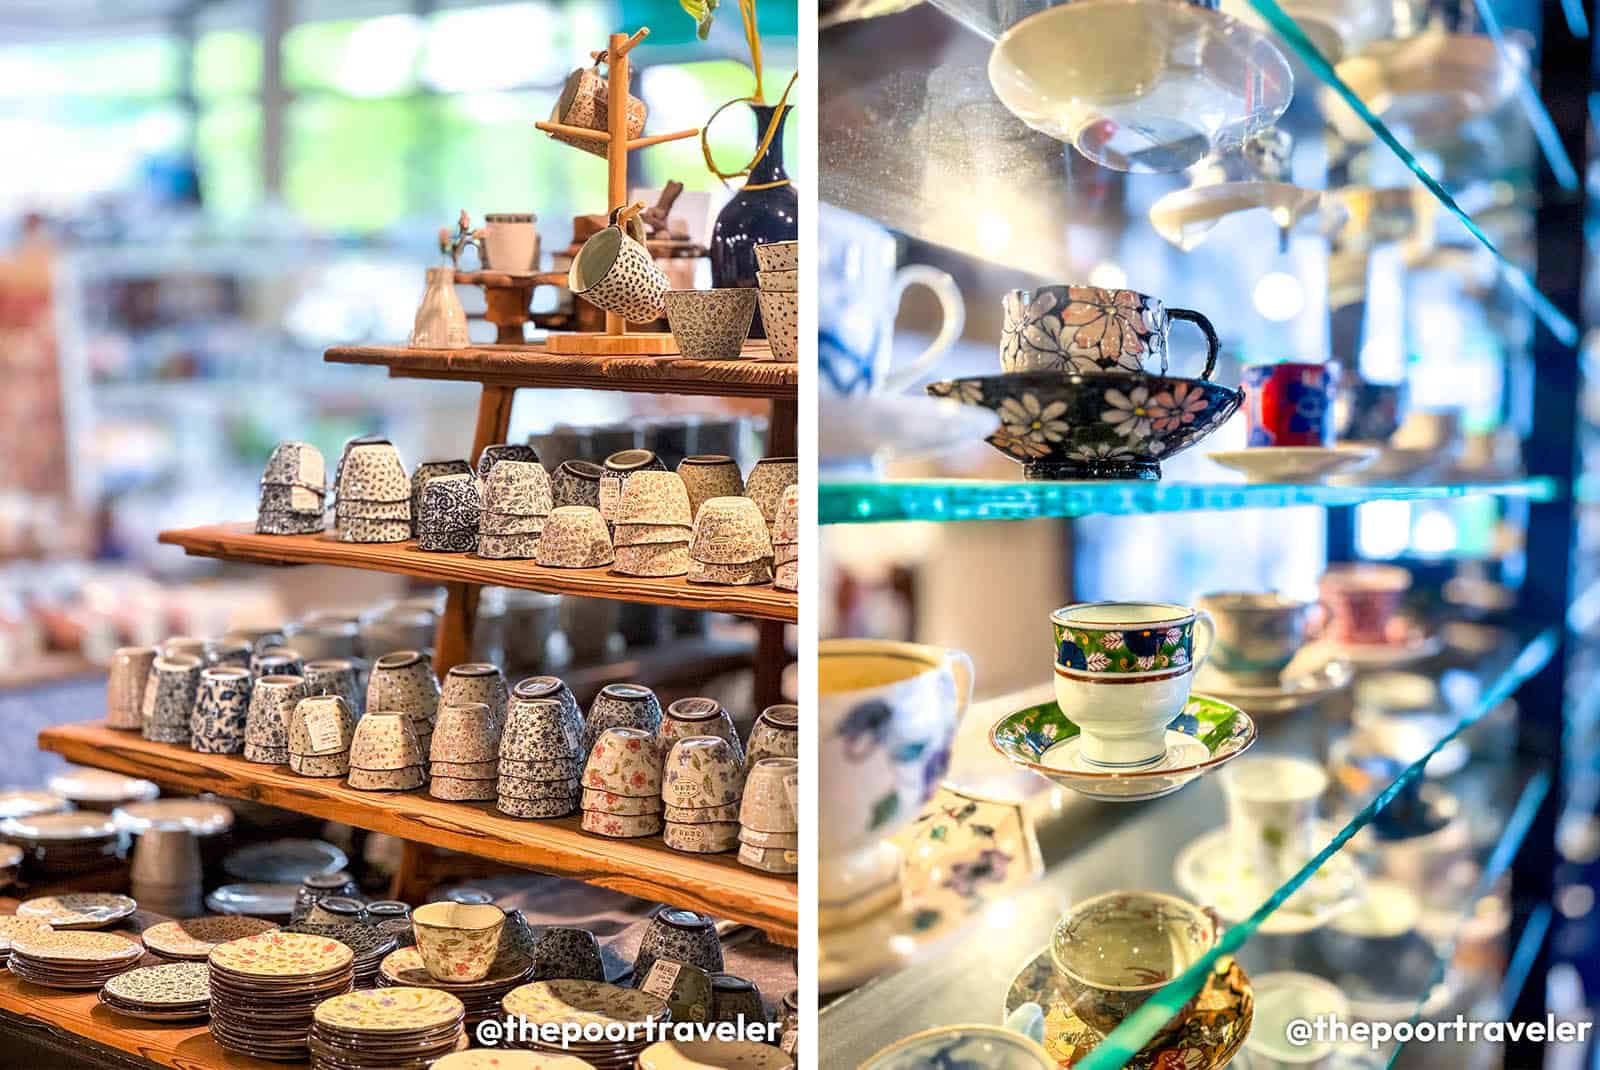
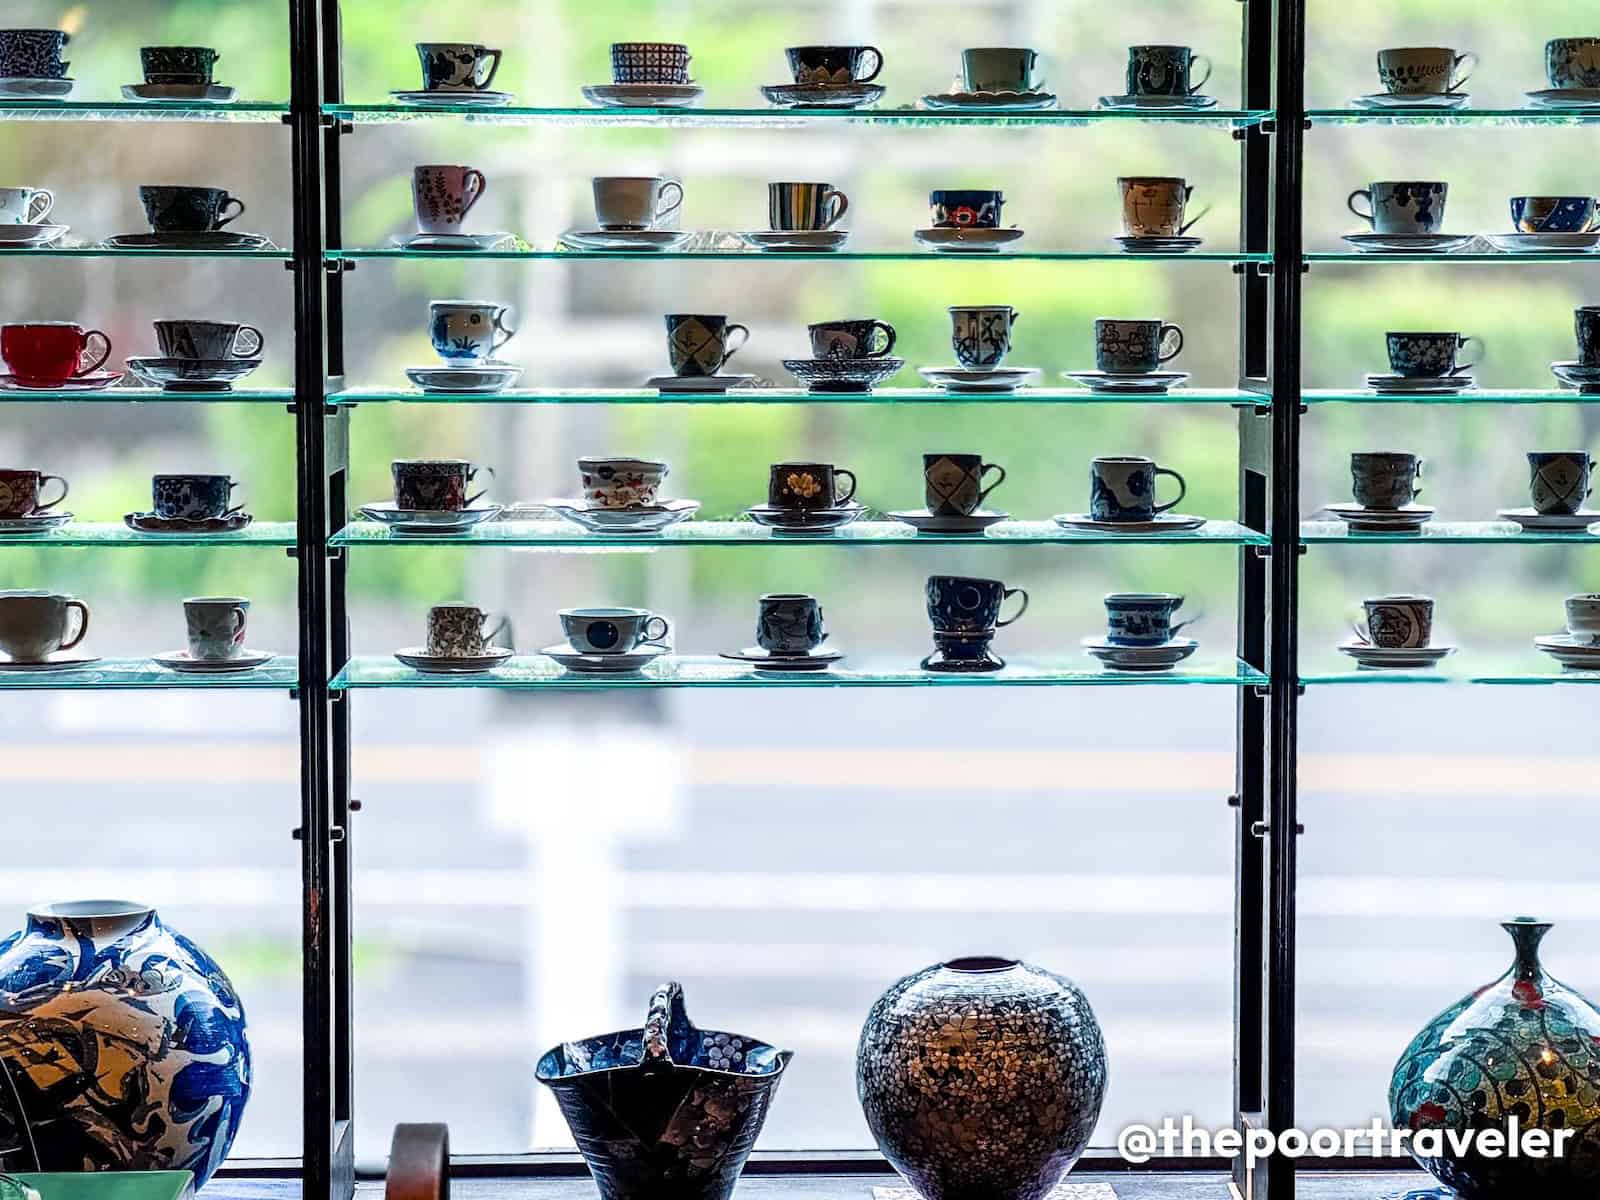
Arita Será, a prominent open-air shopping complex in Arita, best-known for its exclusive focus on Arita-yaki—Japan’s first porcelain, which has been produced in the region for over 400 years. Spanning approximately 66,000 square meters, it houses 22 specialty shops offering a diverse range of porcelain items, from everyday tableware to high-end art pieces. Don’t miss a chance to dine at Gallery Arita, a unique café and restaurant offering a distinctive experience where patrons can select from over 2,500 Arita-yaki porcelain cups and saucers to enjoy their coffee or tea. The menu features a variety of local specialties which include Saga beef, Arita chicken, and godofu, a traditional bean curd.
Takeo Onsen also offers memorable experiences. You can soak in traditional bathhouses like Motoyu or admire the beautiful Romon Gate and historic Shinkan bathhouse. You can also unwind with a book and coffee at the stylish Takeo City Library, open until late. You can also explore nearby Mifuneyama Rakuen, a historic Japanese garden established in 1845 by Lord Nabeshima Shigeyoshi as part of his villa. It showcases a harmonious blend of natural landscapes and traditional design, featuring elements like the Haginoo Tea House and the Five Hundred Arhats statues. We didn’t stop here on our most recent Kyushu trip, but we got to see it in full autumn a few years ago, and it was absolutely picturesque!
Ureshino is also worth a visit. Several cities in Japan proudly claim to be the birthplace of Japanese green tea, but Ureshino has a strong case. The story traces back to Eisai, a Buddhist monk who brought tea seeds from China, believed to have first planted them on Mt. Sefuri in Kanzaki, Saga. From there, tea cultivation spread to nearby Ureshino, which embraced the tradition and elevated it to new heights. Today, this region boasts a vibrant tea culture, with its rolling terraced fields perfectly suited for growing high-quality tea. Green tea is a staple in local cafes and restaurants, offering samplers so you can savor three distinct types of local brews. Ureshino is also famous for its hot springs. Ureshino Onsen’s alkaline waters are reputed for their skin-beautifying properties, making it a favorite destination for relaxation and rejuvenation. Scattered throughout the town are around 60 ryokan and other accommodations, each inviting visitors to soak, unwind, and enjoy the soothing atmosphere.
Back to Fukuoka
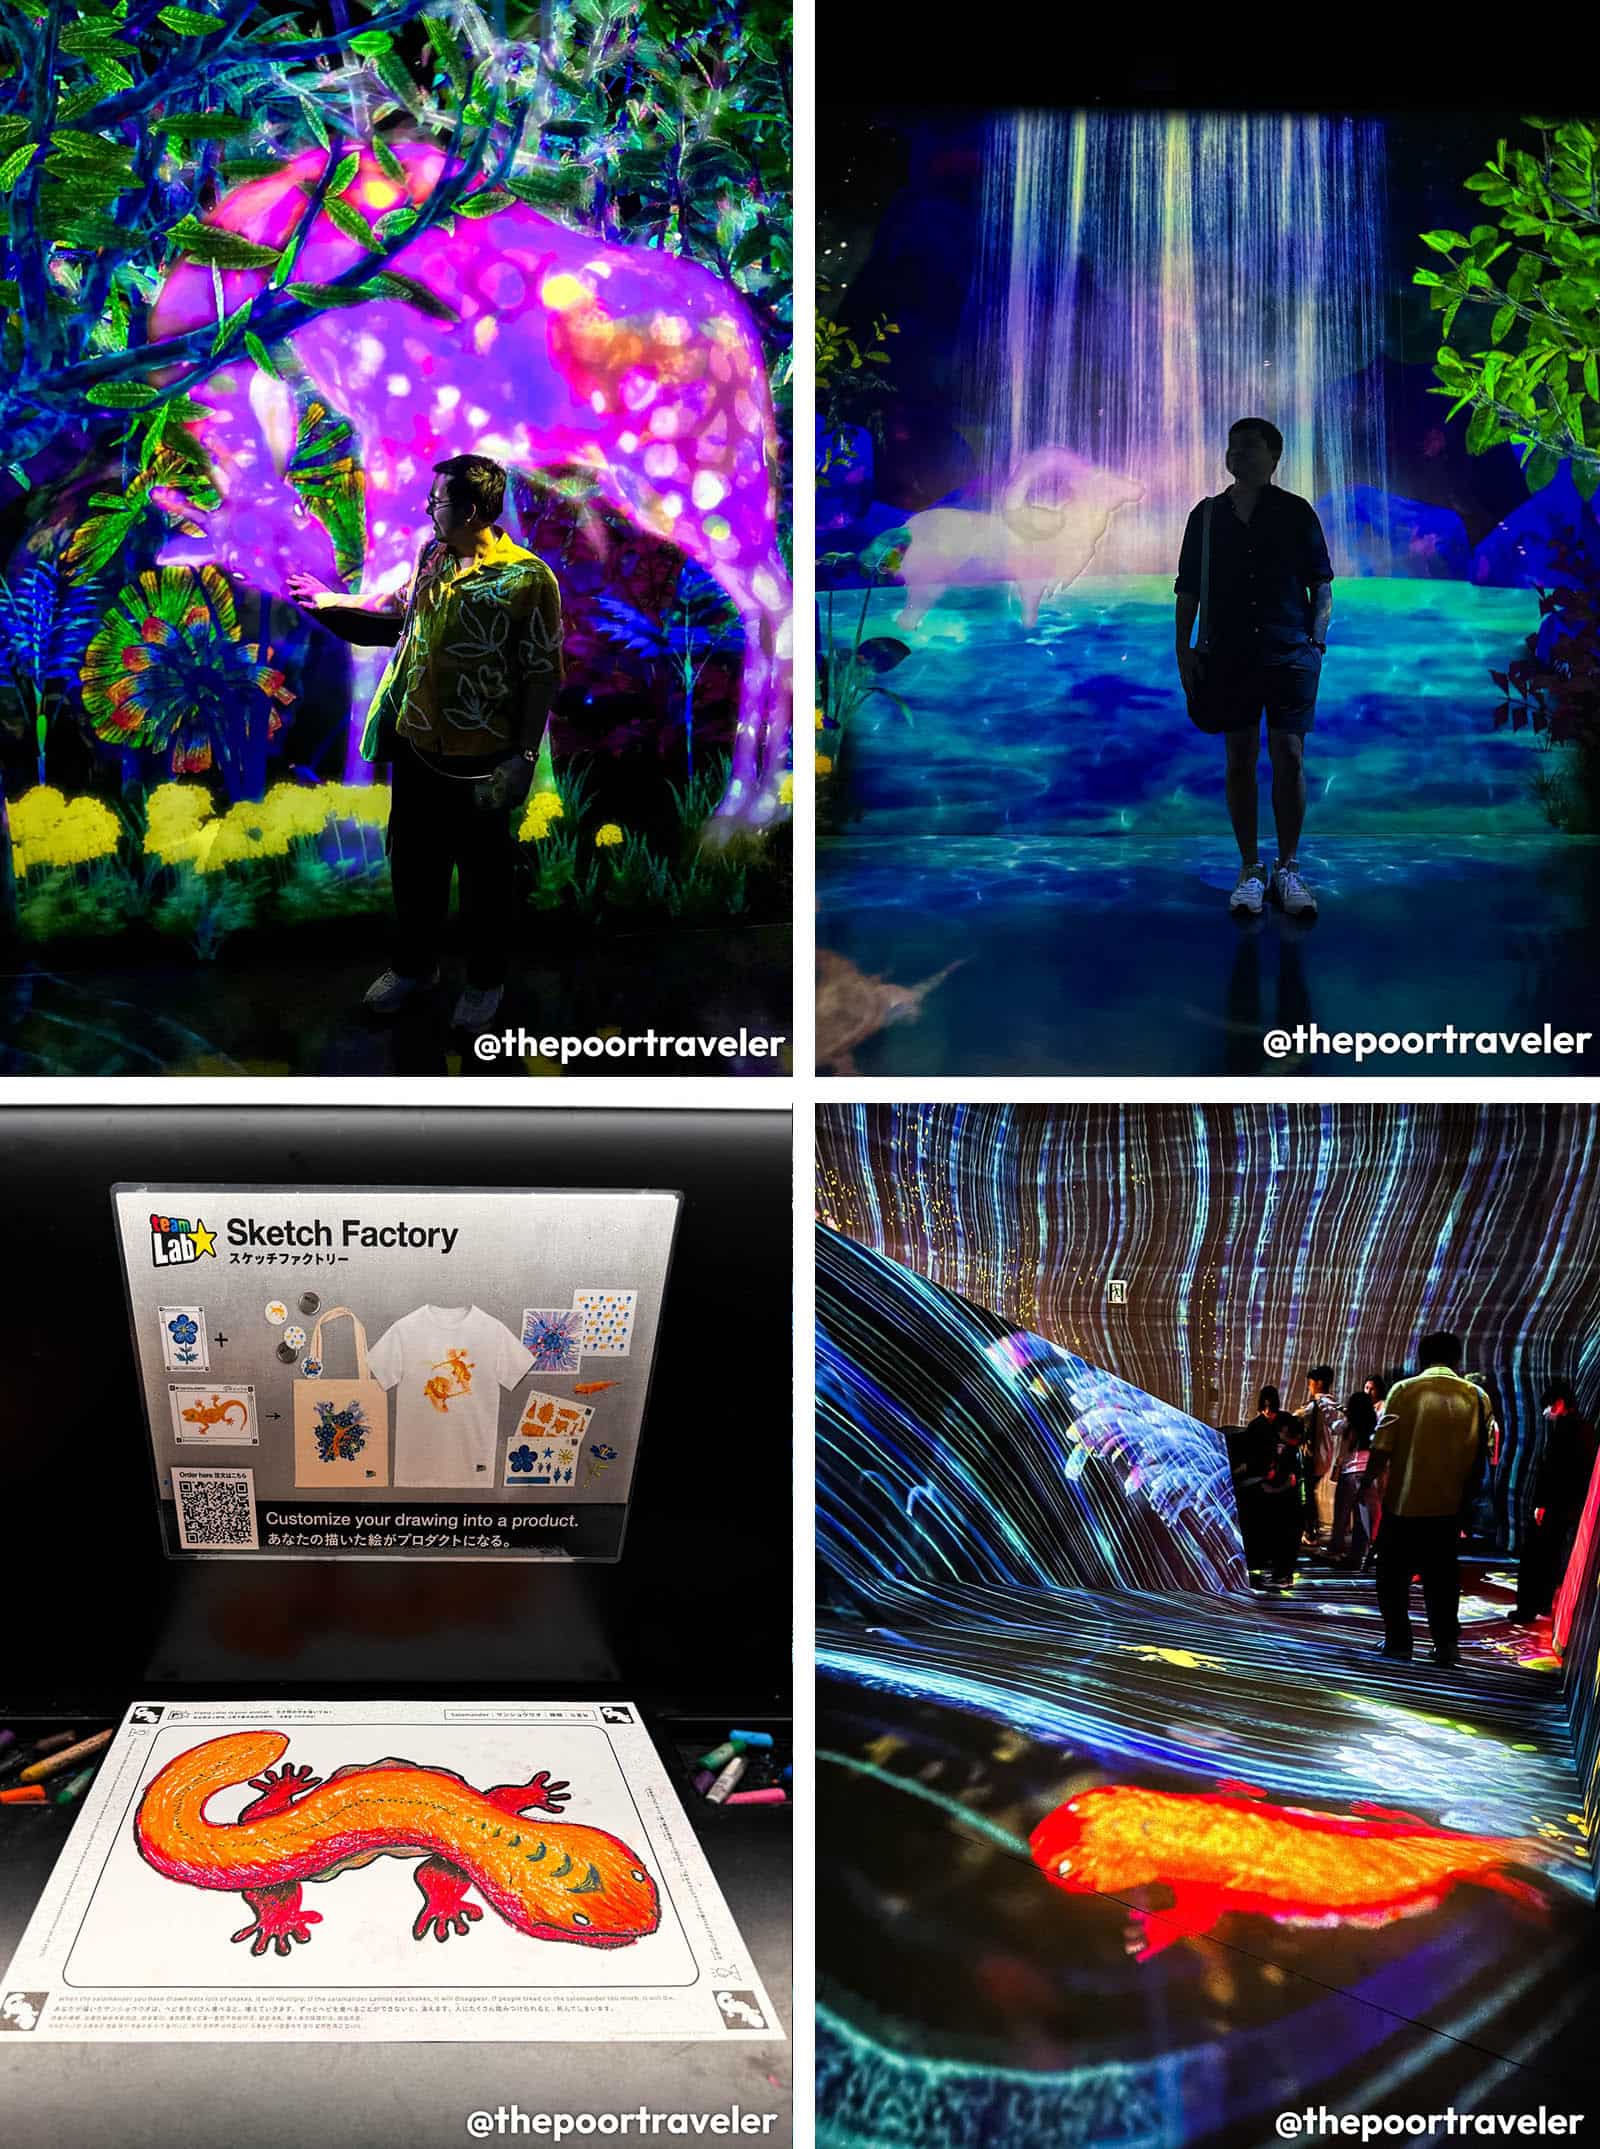
After exploring Saga, make your way back to Hakata Station in Fukuoka to catch your flight. Or if you still have more time, try to squeeze in a stop at teamLab Forest, an immersive digital art museum located on the 5th floor of BOSS E・ZO Fukuoka, adjacent to the MIZUHO PayPay Dome FUKUOKA.
Created by the renowned art collective teamLab, this permanent exhibition offers a dynamic blend of interactive art, technology, and nature. But what sets it apart from other teamLab sites is its “catching and collecting forest” zone, where you can “capture” virtual animals for “research”. They are added to your digital collection, and you can “release” them back into the environment. The exhibit evolves with the seasons, showcasing different flora and fauna throughout the year.
Some teamLab staples are here too, like the room where you can see your animal or plant drawings come to life.
Better yet, we highly encourage you to stay longer and explore Fukuoka City as well, if you haven’t yet. We’ll be creating a separate article about the places you can visit in Fukuoka so watch out for that.
Is JR Kyushu Rail Pass Worth It?
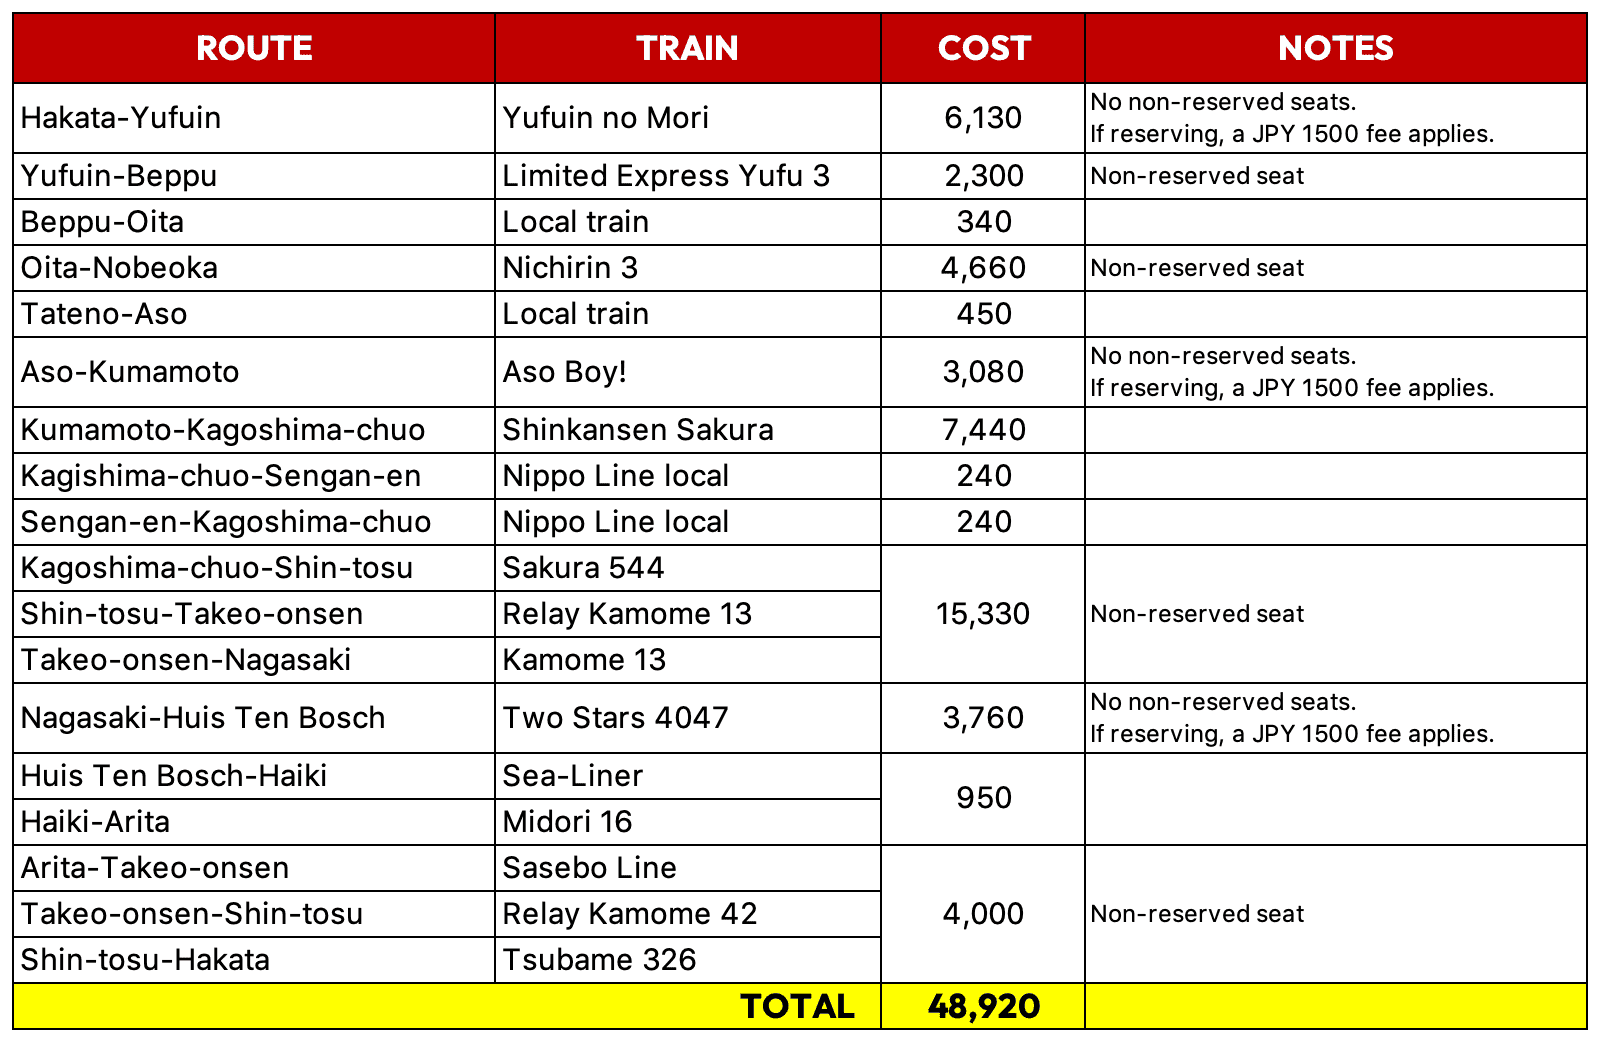
YES! The more destinations you visit, the more the JR Kyushu Rail Pass becomes valuable. Take a look at our breakdown of costs below for this sample 5-day itinerary:
The JR Kyushu Rail Pass – All Kyushu 5-Day variant costs only JPY 24,000!
Most of these journeys are on a non-reserved seat, with the exception of Yufuin No Mori, Two Stars 4047, and Aso Boy! These sightseeing limited-express trains only have reserved seats on board. They are also very in demand, so we encourage you to secure a seat beforehand. You may reserve online or at the JR Kyushu counter. For only JPY 1500 reservation fee per ride, you can make sure you get the seat you prefer. (On Yufuin no Mori, when traveling from Fukuoka to Yufuin, choose a window seat on the right side to catch the Jion-no-Taki Falls after Amagase Station. On Two Stars 4047, from Nagasaki to Huis Ten Bosch, sit on the left side of the aisle for a great view of the Omura Bay!)
For this sample budget, we’ve included the reservation fees in the computation. Even so, the total cost will be JPY 28,500, which is still just above half of what you would spend on train fares and express fees without a pass. That’s a JPY 20,420 (around PHP 8000) difference! Clearly, the JR Kyushu Rail Pass can give you a lot of savings!
Not only that, with this pass, adventure across all seven prefectures of Kyushu becomes effortless and convenient. Over the course of five days, you can hop on and off trains that connect vibrant cities, tranquil countryside, hot spring towns, and coastal gems—giving you a rich and varied experience of this incredible region. Whether you want to soak in natural beauty, dive into local culture, or savor authentic cuisine, this pass unlocks seamless travel and maximum flexibility. It’s truly the best way to discover everything Kyushu has to offer without worrying about transportation logistics, letting you focus fully on the journey ahead.
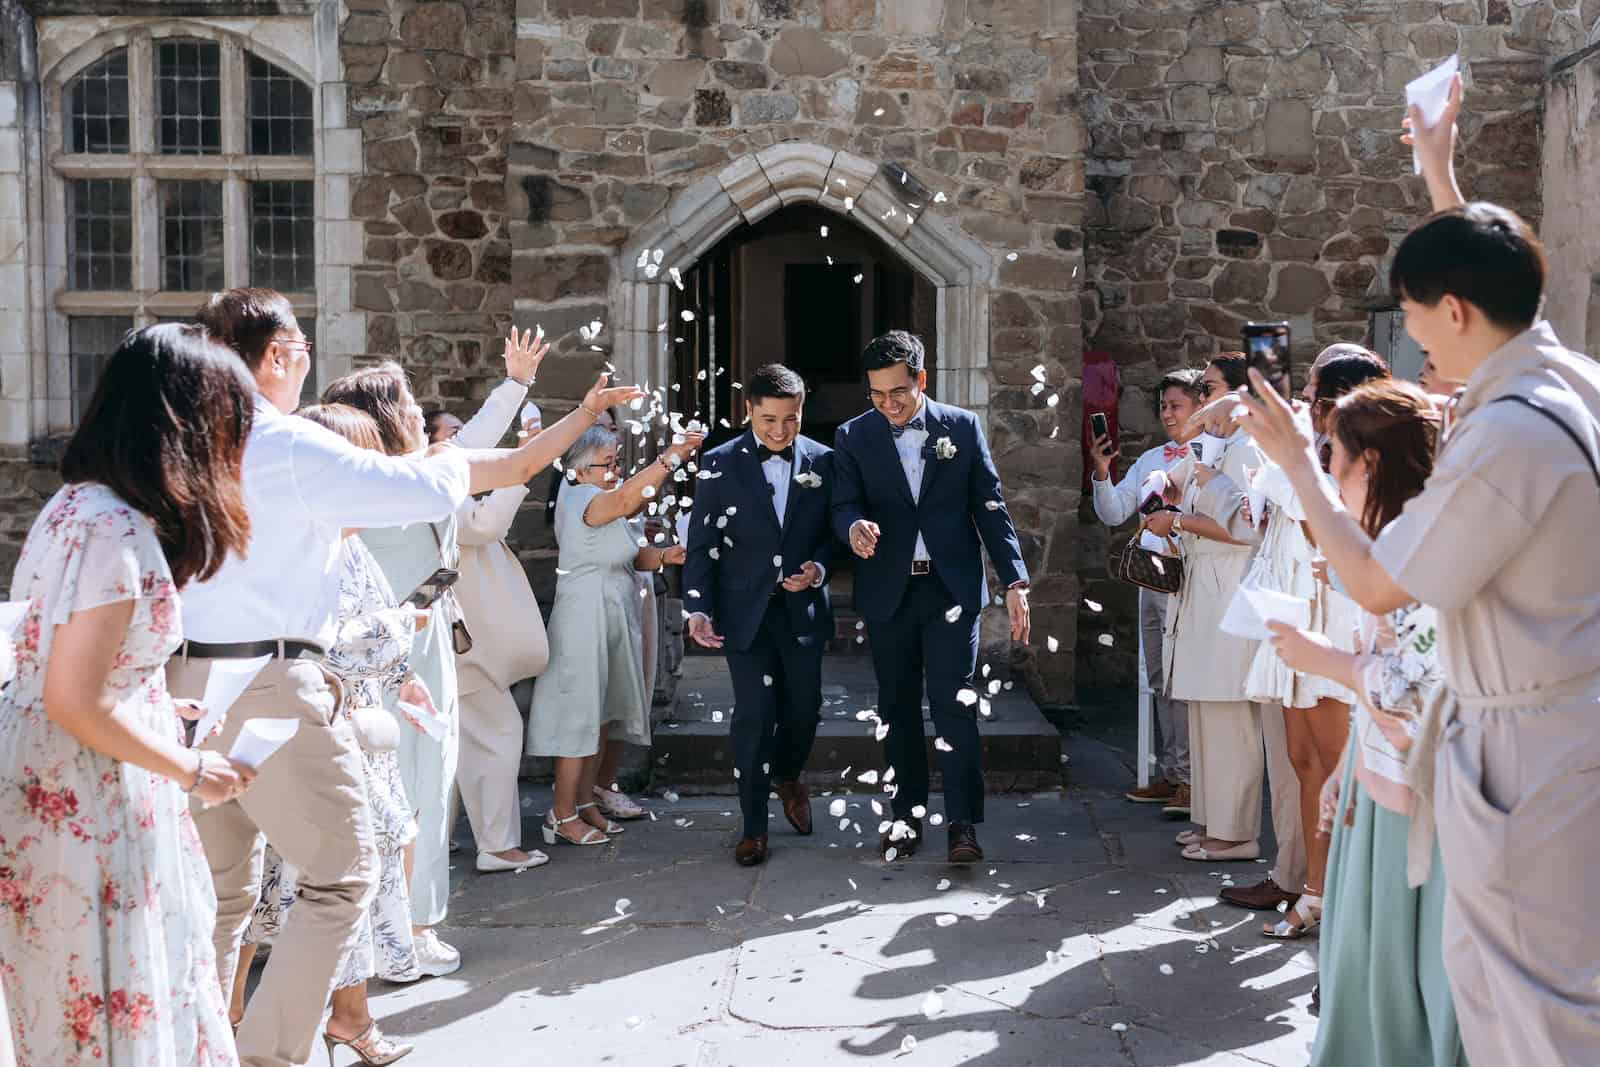
Planning to get married in Australia? Well, we’ve recently just had our wedding there, and in this article, we’ll share with you the full process and requirements, and all the steps that we’ve taken for a stress-free wedding down under!
Planning a wedding can be a difficult experience. There’s so much to think about, from the guest list and the attire to the venue and the food. But throw in the added challenge of a destination wedding, and the pressure ramps up even more. It’s like planning a wedding and a group trip at the same time. It’s especially true if you don’t have a hired wedding planner, like us. We took on the entire challenge on our own.
But it doesn’t have to too stressful. Not gonna lie, there will be some amount or some form of stress in the process, but it doesn’t need to be overwhelming. With the right preparation and the right guidance, you’ll be able to tackle these hurdles and create the wedding of your dreams, even if it’s going to be on the other side of the world.
By the way, I am NOT a wedding planner or an immigration adviser. But my blogging partner (now husband) Vins and I recently got married in Australia, and I’m simply sharing our experience.
First, let’s talk about why NOT Australia. I could think of a number of reasons why you SHOULDN’T choose Australia for your destination wedding. It’s far (8-10 hours away by plane in our case), it’s expensive (the flight alone can be too much), and the visa requirement can severely affect your guest list. While an Australian visa is not as hard-to-get as a Schengen Visa, it is not an easy one to obtain either. There’s always a chance that you or your loved ones will be denied a visa. So take that into consideration.
But for me, the pros totally outweigh the cons. And I have three major reasons.
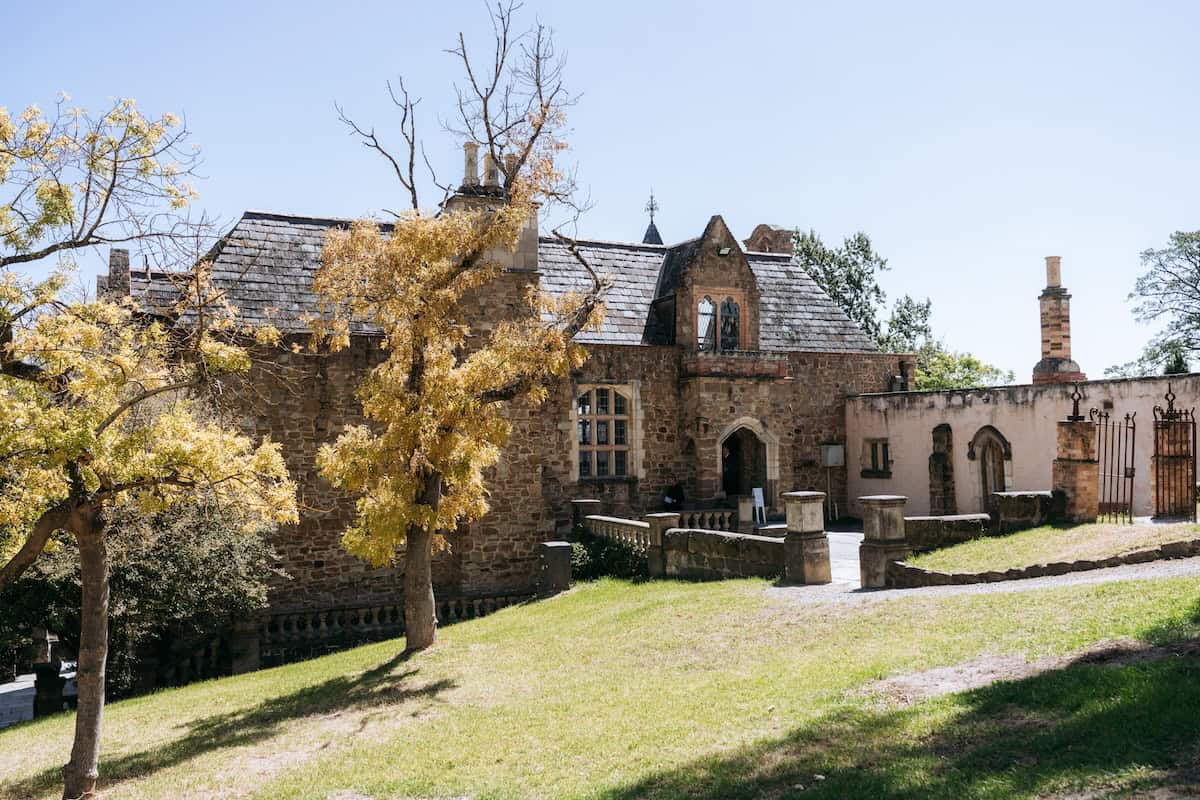
It’s easy to get married in Australia. There’s no residency requirement. You can just fly into the country as a tourist and get married immediately. There’s not much paperwork involved.
It is a beautiful, diverse country. And out of the 65 countries we have visited so far, it’s definitely one of our favorites. We first set foot here in 2015 when we backpacked across the continent from Darwin to Brisbane. And even to this day, 10 years later, it remains our most memorable trip ever. So it does hold a special place in our hearts.
Lastly and most importantly, same-sex marriage is legal in Australia since 2017, when the Marriage Act was officially amended to define marriage as the union of two people. And that’s a biggest, most important thing for us, since we are an LGBT couple.
There’s no difference in the legal process for straight and LGBTQ+ marriages in Australia. The process is exactly the same for all couples, regardless of gender or sexual orientation, including for foreign citizens getting married in Australia. So if you’re straight and you’re planning to get married in Australia, this article applies to you, too. So yes, Same-sex couples can legally marry anywhere in Australia.
Photo by King Abbott Films
And this is one of the closest countries where we could get married. Taiwan is much closer and it has marriage equality too. But we found out that LGBT couples can only get married in Taiwan if both parties are from countries that legally recognize marriage equality. So even, say, a Filipino-Taiwanese couple can’t get married in Taiwan because one of them is a citizen of the Philippines, which does not recognize it.
But don’t get me wrong, we didn’t settle for Australia. It was really one of our first choices. The other one was Denmark because I dreamt of a winter wedding, but getting a Schengen visa for our relatives could prove much more challenging than an Australian visa.
OK, so how did we plan it?
Step 1: Decide on the wedding type and size.
What kind of wedding do you want? Is it gonna be a traditional wedding with at at least 50 guests? Or a micro wedding with fewer than 40 guests? Or do you prefer an elopement wedding with just a couple of witnesses?
This is the first thing that you need to figure out and decide on because it will dictate many aspects of your wedding including the venue, logistics, and the budget.
Most destination weddings tend to be smaller primarily because there are a lot of factors that your guests need to overcome or take into consideration including the cost, time, and visa.
Initially, we wanted an elopement type of wedding with just one or two family members. In Australia, you’ll find a lot of elopement packages. Basically, you’ll hire an officiant to wed you and they will be taking care of all the legal paperwork. And that’s it. No big reception needed.
Some also choose to get married at the City Hall or Courthouse. For example, in Melbourne, the Victorian Marriage Registry offer two main marriage packages:
Classic Ceremony Package: AUD 480 on weekdays, AUD 580 on weekends. This includes the service of a celebrant or officiant, traditional wedding script, and a reservation at one of their ceremony rooms at the Old Treasury Building. You can invite guests. One room can accommodate 8 guests, the other up to 55 guests.
Legal-only Package: Weekdays only, AUD 380. They’ll take care of the paperwork and provide a celebrant, but nothing else.
I’ve also heard of super private weddings. You can even do it in a hotel room or in a private room at a restaurant, if you’re OK with that. Just make sure you have an authorized celebrant and two witnesses, and that you complete all the paperwork.
Like I said, it was something we seriously considered: a very simple wedding without any bells and whistles at all. But since we got engaged a few years ago, some of our friends and relatives expressed that they would love to be there even if it meant flying to Australia and spending on tickets and hotels. So as the days passed, we started entertaining the thought of more guests. We ended up with a guest list of 20, which was quite intimate and manageable. I think it was the perfect size for us.
Step 2: Pick a wedding date.
The next two steps in this guide are actually interchangeable. Step 2 is about the date. Step 3 is about the venue. So prioritize what matters to you more.
For us, the date was non-negotiable because it was the same date that we became a couple officially. We have been together for 16 years and we always celebrated in February, and we don’t wish to change that. The venue can change, but our wedding had to happen on a specific day in February.
Earlier, I mentioned that we wanted a winter wedding, with snow and all, which would’ve been perfect. But since we moved it to the southern hemisphere, where seasons are flipped, everything else had to adjust. February is summer in Australia, so the overall look and feel of the wedding would be very different.
The date is also very important to nail first when it comes to Australia because some of its places can have pretty extreme weather. In some cities, summer can be a sweltering hell of a season. Likewise, in some cities like Melbourne, the weather is notorious for being incredibly fickle. It can be sunny in the morning but then drench you in the afternoon.
Knowing your date early helps you plan around local conditions, take advantage of off-peak deals, and avoid holiday crowds or monsoon rains.
The season and weather can also affect not just what you and your guests could wear on your wedding but also the type of venue that is more appropriate. So let’s talk about venue.
Step 3: Find an appropriate venue.
Choosing the right venue for a destination wedding is massive—it sets the tone, vibe, and even the logistics of your big day. Do you want a beach wedding? Do you prefer a farm or a vineyard? Or are you OK with getting married in a public park or city hall?
There are countless of wedding venues in Australia. I simply googled “best small wedding venues in Melbourne” and it bombarded me with a gazillion options.
Montsalvat Artist Community. Photo by King Abbott Films
Some venues are for ceremonies only. This applies to town hall rooms like the Margaret Craig and Thomas Hyde Room at the Old Treasury Building in Melbourne.
We also encountered bars and restaurants that allow reception only, not the ceremony. One of the venues we seriously considered was this rooftop bar in the city center, but unfortunately they don’t allow ceremonies anymore.
But there are those that can accommodate both. Here are three venues that we shortlisted because they are great for both the ceremony and reception and they were available on our chosen date.
Sandbar Beach Café, which is great for beach weddings. Although we did not prefer it, we weren’t particularly opposed to the idea. Ceremony at the beach. Reception inside.
Prince Deck St. Kilda, which is a function hall that would be great for reception and has an outdoor timber deck, overlooking the beach, which would be ideal for the ceremony. But we decided against them because they’re too big. Given that we were expecting only 20 guests and we didn’t really plan on decorating it too much, either would feel virtually empty.
Montsalvat Artist Community, which is located not in Melbourne proper but in Eltham. And although it’s 30-40 minutes from the city center, when I first saw it, I had a really good feeling about it. In the end, we chose this! We have a winner!
Montsalvat’s ceremony and reception areas were inside a heritage building, which meant the weather won’t be an issue. And it was just the right size.
Montsalvat Wedding Ceremony Venue. Photo by King Abbott.Montsalvat’s Great Hall Reception. Photo by King Abbott Films.
And there are plenty of scenic spots for wedding photography. There’s even a chapel, but we did not use it as this is a secular ceremony. And bonus point: It had the European aesthetic that we initially wanted. Remember, we originally wanted to do the wedding in Europe. Best of both worlds!
Photo by King Abbott Films
Each booking comes with the services of a venue coordinator, too!
The prices were not bad, either. For the food, there were high tea, cocktails and proper plated meal options. This includes free-flowing drinks including white wine, rose, red wine, beer, apple cider, and non-alcoholic drinks. If we availed of the proper plated dining package, the ceremony fee would be waived. But there was a catch: they had a 40-guest minimum policy. We were only 20 pax, but we still went ahead, even if it meant paying for food good for twice our expected crowd size. We just had it carvery or buffet-style.
However, the management decided to not enforce the minimum 40-guest policy. In the end, we only paid for 23 pax. So thank you to the Montsalvat management. (Note that none of these are sponsored. We intentionally avoided having any aspect of our trip sponsored by any brand. We paid for every single thing at our wedding.)
Montsalvat Artist Community Carvery Dining: AUD 218/pax
Because the venue is in Australia and we’re Manila-based, we never had a chance to do an ocular inspection of the venue. And we didn’t have anyone in Melbourne to check it. We only relied on online reviews and their photos, and we took a virtual tour on Google Maps. Thankfully, the place was well-documented on Streetview.
But we still finalized our booking, thinking we’d just fly to Melbourne a few days ahead of the wedding and adjust accordingly.
Step 4: Book a Celebrant.
Any wedding in Australia must be officiated by someone legally recognized by the Australian government. They may be civil celebrants, ministers of religion, or registered officiants. Fortunately, it’s not hard to find an authorized celebrant or officiant in Australia, even for LGBTQIA+ couples.
Most venues have preferred celebrants, someone that they usually work with in the past. You could do that, too. But our first choice was Bronte Price because:
He’s the first celebrant in Australia to have completed the Certificate in Gay and Lesbian Weddings.
Most of his clients are LGBT couples from the Philippines.
And thankfully, he was available on our wedding date and could marry us.
Bronte offers a few packages, depending on the scope of work that you expect him to take on and the size of the wedding. But even for the most basic option, he’ll take care of all the necessary paperwork from start to finish. And he did that for us. He also checked in on us every now and then to make sure that everything was alright, especially regarding the legal papers.
The most important document that you need to file is the Notice of Intended Marriage (NOIM).
Step 5: Lodge a Notice of Intended Marriage (NOIM).
Regardless of the state, you must accomplish and submit a Notice of Intended Marriage at least 1 month before the wedding. You can do it as early as 18 months before. It looks like this:
You and your partner must be at least 18 years old to sign this, and you must sign it in front of an authorized witness.
If you’re signing this outside Australia, an authorized witness can be: an Australian Consular Officer, an Australian Diplomatic Officer, or a notary public, among others. For us, we signed it in front of a Notary Public here in Manila. Then, we emailed it together with a scanned copy of our passports to our Celebrant, who then lodged the application in Australia on our behalf.
The passport is needed as proof of date of birth. If you’re divorced or a widow/widower, you should also submit the corresponding certificates of divorce or death of spouse.
Make sure that all details are correct, and write in block letters. And let me repeat because it’s of utmost important: Submit the NOIM at least 1 month before your wedding date. Otherwise, if you do later, you cannot be married on your target date.
Step 6: Secure your wedding suppliers.
Once you have finalized the venue, chosen a celebrant, and lodged a marriage notice, it is time to scout vendors for your big day. Depending on how grand you want your wedding to be, you might want to look for a florist for your flowers and decors, a photographer and/or videographer for documentation, wedding cake baker, and, if your venue doesn’t have it in-house, a caterer for the reception.
Usually, your venue also has a list of their recommended suppliers, so you might want to check ask them first. But most will allow you to source outside if you prefer.
Flowers/Florist
One of the reasons we like Montsalvat is: It’s the type of venue that doesn’t need to be glammed up to look special. It has a rustic, almost medieval character to it that you can totally get away with having no to little adornments. So we only ordered for a few flower arrangements, and that was it. The name of the flower shop is Indigo Flower House, recommended by the venue coordinator. These are the costs of the arrangements we ordered:
Flowers by Indigo Flower House Melbourne. Photos by King Abbott Films
Button holes (2x): AUD 36
Floor piece (2-meter): AUD 600
Table vase arrangements: AUD 200
Big ceremony vase arrangements (2x): AUD 200
Fresh rose petals for tossing (18x): AUD 81
Delivery/set up: AUD 200
Total (inc. tax): AUD 1558.70
Wedding Cake
Our cake was baked and designed by Froggy by What Froggy Bakes. He just asked us what we wanted, and we described that we just wanted a travel-themed cake, preferably with a world map done pallete-knife style and with white flowers. And he was able to make it a reality. It was 3-tier, which was pretty excessive for 20 guests.
Cake by What Froggy Bakes. Photo by King Abbott Films
Wedding Cake 3-tier: AUD 846.20
But this was a gift from one of our best friends, and she insisted on making it 3-tier regardless. It looked stunning! Every layer was a different flavor: carrot cake on top, chocolate in the middle, and caramel at the bottom.
Photographer & Videographer
And for our photos and videos, we hired a talented Pinoy who is based in Melbourne. His name is King Abbott. We found him on Instagram and immediately fell in love with his work.
At the time, he was still offering a Basic Package (AUD 3300 for 6 hours), which was what we picked. But I’m not sure if this is still available.
Transportation for Guests
And oh, one more thing, since our venue was situated round 30 minutes from Melbourne City Center, we also had to think about transportation. While it is accessible by Uber and public transportation, Vins and I wanted to make it a lot more convenient for everyone, so we just hired a mini-bus good for 23 pax with driver.
We paid AUD 750 for the roundtrip transfer (with driver) with BusCharter.com.au. Note that the bus won’t be waiting on site. It picked us up in Melbourne, dropped us off at the venue in the afternoon, and then left. It came back 7 hours later to take us back to the city center after the reception.
Most suppliers would require that you pay a deposit first and then settle the balance later, usually a week or two before the wedding date, in our experience.
Hotel Accommodations
If you’re getting married in Melbourne like we did, best to book your hotel way in advance because accommodation rates can go crazy expensive especially in peak season. We and most of our guests ended up staying at an AirBnB, but if you prefer a proper full-service hotel, here are some that our party tried that you can suggest to your guests:
Search for more Australia Hotels:
Once you’ve locked in the venue, date, and NOIM, it’s time for Step 7.
Step 7: Send out invitations promptly.
Yes, as early as you can provided that everything’s been finalized. You need to do it sooner than later because remember, this is a destination wedding. There is travel involved. Most of them will need or want to:
File a leave of absence from work way in advance. They would probably want to stay longer in Australia to maximize the cost of flights. Most of our guests stayed for a week or two. Some even toured other parts of Australia and New Zealand.
Book flights and hotels. And usually, you’ll get them cheaper if you book way ahead of time. Informing your guests early will also allow them more time to save money. Australia is not cheap.
To be honest, this is something that we failed to follow. Our wedding was in February, and up until November of last year, we were still traveling a lot. We only started preparing for the wedding in December. Thankfully, (almost) everyone was able to secure a visa in time.
Step 8: Do an ocular visit/rehearsal before the big day.
If you didn’t get a chance to check the venue before, make sure to fly at least a couple of days early to check it and identify possible problems. We inspected the place, mapped out how the guests would move from one area to another, tested the sound system, learned the ropes at the venue.
By the way, Vins and I did not have the traditional wedding party. We didn’t have sponsors, bridesmaids, groomsmen. We only had a ring bearer and a flower girl. Vins and I planned and took care of everything up until the big day. And at this meeting, we turned it over to some of our friends, who volunteered to do certain tasks. They took charge of certain aspects. And it was perfect. Everything went without a hitch.
OK, let’s talk about the big day itself.
Step 9: Follow the wedding mandatories/legalities.
Before the ceremony, there are still a lot of things to take care of. The Celebrant will be meeting you to do 2 things:
To double-check your identity documents again (usually your passports) and verify your two witnesses are over 18.
To confirm consent. And this will be done separately. Your celebrant must speak with each of you individually to confirm you’re entering the marriage freely and willingly. This is to ensure there’s no coercion or pressure involved. I was asked to step out of the wedding suite so Vins could confirm, and Vins had to do the same when it was my turn. It’s a legal requirement, not just a formality.
At one point during the ceremony, you must read the Monitum, a formal paragraph that explains the nature of marriage under Australian law. It goes something like:
“Before you are joined in marriage… I am required to remind you that under Australian law, marriage is the union of two people to the exclusion of all others, voluntarily entered into for life.”
If this isn’t said, the marriage might not be legally valid.
Aside from any personal vows you write, you each have to say a very specific line in front of the celebrant and your witnesses:
“I call upon the persons here present to witness that I, [Name], take you, [Name], to be my lawful wedded [husband/wife/spouse].”
You can personalize your vows around this, but the legal sentence must be said in full.
Don’t worry, your Celebrant should be able to provide the correct wording.
And before the ceremony ends, you should also sign the marriage certificates, as overseen by the Celebrant and your chosen witnesses. You’ll sign three copies of the certificate:
One goes to the Registry of Births, Deaths & Marriages
One the celebrant keeps
One you get as a keepsake
The Celebrant will make sure it’s done correctly and witnessed properly.
After signing, the Celebrant will officially pronounce you MARRIED.
Outside these mandatories, you can get creative, especially at the reception. Just make sure to follow the local laws especially regarding alcohol consumption.
But it’s not over yet.
Step 10: Submit the Paperwork.
This step is more for your Celebrant, who should lodge your marriage registration with the appropriate state registry — usually within 14 days.
After the marriage is registered, you can request an official marriage certificate from the state registry. This certificate is the legal document you’ll need to change your name, update your marital status, apply for joint visas, and handle any legal or financial matters.
It can take a few weeks to a few months to receive, depending on the state. But don’t worry, if you don’t need to stay in Australia for this. You can ask your Celebrant to do this for you, usually as an add-on or for extra fee. The Celebrant can then send it to you by mail. We got ours roughly a month after our wedding.
Vins and I recently traveled to New Zealand. And yes, New Zealand was a dream. Like, ridiculously beautiful. One of those places where you start questioning if it’s even real. But as stunning as it is, traveling around came with a few surprises, missteps, and “Wait, WHAT?” moments we didn’t exactly see coming. Now that we’re back (a little sunburned, slightly broke, but very much in love with the country), we thought we’d round up the travel mistakes we personally made or almost made, so you don’t have to.
From underestimating drive times to forgetting just how intense that Kiwi sun really is, consider this our humble little PSA from one set of travelers to another. Because as magical as New Zealand is and how friendly Kiwis are, New Zealand can also humble a traveler real quick, especially if it’s your first time.
So before you pack your bags and say “Kia ora!” to the adventure of a lifetime, continue watching this video featuring our list of travel mistakes to avoid.
We almost didn’t make it to Hobbiton. And it would’ve been such a shame because it’s one of the biggest attractions that we were looking forward to before the trip, and we almost failed to grab tickets.
One thing you should know about Hobbiton is that these days, you can only explore it with a guide, so you must book a Hobbiton Movie Set Tour. There are many ways to do it:
If you prefer to drive or take a public bus on your own, you can just purchase a ticket.
You can join a day tour from Auckland or Rotorua, which already includes transfers. Most tours depart from the Shire’s Rest, a café that serves as the gateway to Hobbiton.
When we tried to book, tickets were sold out! This was one month before our target date. We knew it was popular, but we were waiting for everyone in the group to be granted a visa before we book.
Thankfully, there are a few tours departing from Matamata iSite. We were a group of five, and by sheer luck, we were able to get the LAST 5 TICKETS! Talk about meant to be. Everything went well in the end.
But yes, whether you’re joining a tour or buying a ticket only, best to secure it in advance.
If you’re required to secure a visa prior to arrival in New Zealand, like us, I have good news and bad news. The good news is, it’s actually pretty easy to apply for a visitor visa. The list of requirements isn’t too long and the whole process (100% of it) is done online.
The bad news is, just because it’s easy to apply doesn’t mean it’s easy to be granted a visa. This is not just a formality or simple e-Visas given by other less strict countries; they really do evaluate applications meticulously, so you can’t just wing it.
For example, when you look at the list of supporting documents, only three are tagged as REQUIRED: passport, photo, and itinerary. You can technically submit an application with just those three attachments. But that doesn’t mean you’ll get approved. Of course, it is recommended that you upload other documents that visa officers can use to assess your application especially evidence of genuine intent or rootedness, and evidence of funds if you declare you’re shouldering the cost of the trip yourself.
It is important that you paint a full picture of your background and your plans in New Zealand, and prove that you intend to leave the country and not overstay.
I know people who have been denied a visa, so take your application seriously.
Speaking of denied…
3. Not reapplying when rejected.
Let’s say your application is declined and you are refused a visa. What now? Can you appeal or ask for reconsideration?
NO, if you applied outside New Zealand and I’m assuming most of you reading this are not based in NZ. Here’s an excerpt from a refusal letter that my friend received.
Here’s an excerpt from the Refusal Letter that a friend received when she was denied a New Zealand visa.
But that doesn’t mean there’s nothing else you can do. What you can do is reapply. This means you’ll need to start a new application and pay another visa fee.
But before you reapply, make sure you have new supporting documents to add that could address the reasons for refusal. If you’ll be submitting the exact same pile of documents, you might just be wasting another NZD 100.
If you’re currently in New Zealand, YES, you can appeal as long as you make the request within 14 days.
This screenshot is from the official New Zealand Immigration website
But please note that what I share should NOT be taken as official Immigration advice. Think of me as just a friend sharing my experience. Check out the official New Zealand website or consult an immigration advisor for official advice or assistance.
4. Failing to Declare Risk Items Upon Entry
Agriculture and tourism are two of New Zealand’s biggest industries, and the government does everything they can to protect the environment and ensure biosecurity. That’s why they are very strict when it comes to what enters their border.
It is important that you’re familiar with items that are allowed, restricted, and downright prohibited, and follow their policies so you won’t run into any problem at the airport. You must also be aware of the items that you must declare.
Before your trip to New Zealand, you will be required to accomplish the New Zealand Traveller Declaration Form, which has two sections specifically about what you’re bringing into the country. The first is BIOSECURITY, and you have to declare if you carry in your hand luggage or check-in luggage items like:
Risk Items
Screenshot of a page on the official website
Any food: cooked, uncooked, fresh, preserved, packaged or dried, including chocolate, candies, potato chips, crackers, biscuits, cookies, instant noodles, coffee, tea bags, soft drinks and even snacks served inside the plane.
Animals or animal products: including meat, dairy products, fish, honey, bee products, eggs, feathers, shells, raw wool, skins, bones or insects
Plants or plant products: fruit, flowers, seeds, bulbs, wood, bark, leaves, nuts, vegetables, parts of plants, fungi, cane, bamboo or straw, including for religious offerings or medicinal use
Biological products: Animal medicines, biological cultures, organisms, soil or water
Equipment: Equipment/clothing used with animals, plants or water, including for gardening, beekeeping, fishing, water sport or diving activities?
Outdoor gear: Items that have been used for outdoor activities, including any footwear, tents, camping, hunting, hiking, golf or sports equipment
I was carrying chocolates and other food products, so I just declared them.
Restricted Items
You’ll also be asked if you’re carrying more than the allowed amount of restricted items like medicine and alcohol.
At the airport, the border officers just asked what items I declared and directed me to the right lane. It was pretty smooth. I’m guessing because it’s just chocolates and snacks.
So if it’s meant to be declared, declare them. You can get fined if you fail to do so.
5. Underestimating New Zealand’s size and distances.
When you’re looking at a map, it’s easy to see New Zealand as a group of small islands in the far corner of the Pacific, especially when the ginormous Australia is in the same frame. It just looks snack-size compared to its neighbor, which is a full continent, but don’t assume New Zealand is small. New Zealand’s land area is bigger than the UK and just a bit smaller than the Philippines. If you superimpose it on Europe, you’ll find that it stretches from Denmark all the way to the South of France.
So no, it will be impractical to assume it only takes a few days to explore or that you can see it all in a week. Same goes for distances. Just because Milford Sound appears to be sitting pretty next to Queenstown doesn’t mean it only takes a quick drive. To get there from Queenstown, the route goes around the mountains and takes almost four hours, excluding stops and trust me, you will make some stops because the route is just so scenic.
Waitomo Caves, which is often a favorite destination from Rotorua or Auckland, is actually 2 to 2 and a half hours away. Even Hobbiton is not “just outside Auckland”. It’s 2 hours from the city center, too.
This is why it’s important to build a strategic and solid itinerary, especially if you’re driving.
6. Driving on the Wrong Side of the Road
Driving in a foreign country is often unnerving. But while in theory, driving in New Zealand should be easy because most roads are paved and there are plenty of signs everywhere, there are a few things you need to remember before you decide to take the wheel.
First, New Zealand drives on the left side of the road. And if you’re used to driving on the right like where I’m from, it’s pretty disorienting. It takes some getting used to. It’s not just the position of the wheel inside the vehicle or your position on the road. You’ll have to unlearn certain things especially when taking a turn at intersections.
I also noticed that New Zealand’s roads deeper into the countryside are usually two-lane and narrow, but vehicles move fast here. And instead of stoplights, there are a lot of roundabouts, which is great in minimizing traffic jams.
But know that when you’re using Waze or Google Maps, you’ll be counting exits a lot. It’s not difficult, but it just takes some getting used to.
It’s best to have a navigator or a co-pilot riding shotgun so you can focus on the driving and there is someone to remind you in case you get confused.
Also, gas stations or petrol stations are few and far between especially when driving between cities, so when you see one, grab the chance and fill up because the next one might be many, many miles away.
7. Thinking It’s Difficult to Explore for Non-Drivers
When we started posting about our New Zealand trip on Instagram, we received a lot of questions about whether it is possible to explore the country even if you don’t know how to drive. And the answer is YES.
They say that the best way to explore New Zealand is to rent a vehicle and drive. And I agree. It’s also cost-efficient if you’re a group. But not everyone is able or willing to drive. For that, you can take public transportation like Intercity Buses. But make sure you sync your itinerary with the available bus journeys because for some routes, the options are limited.
Some non-drivers would take the bus to another city and then take a day tour of another attraction. Example, a common practice is to stay in Auckland then go on a day trip of Hobbiton and then return to Auckland. Then the next day, take the bus to Rotorua.
But there are one-way tours available. For instance, there is an Auckland-Hobbiton-Rotorua one-way tour. This way, once you’re done with Auckland, this tour can pick you up in the city, make a stop in Hobbiton so you could explore and then after, drop you off at your next hotel in Rotorua. It’s like a tour and transfer in one. And yes, you can bring your luggage with you.
We got to try the Christchurch-Queenstown one-way tour. The shuttle picked us up at our hotel in Christchurch along with our bags. And along the way, we stopped at various tourist spots like Lake Tekapo and Hooker Valley in the shadows of Mt. Cook before terminating in Queenstown.
It’s a good option for non-drivers and will end up less costly than taking a roundtrip tour one day and then boarding an intercity bus separately.
Whether you’re booking tours or hotels, redeem our exclusive discount voucher by visiting www.thepoortraveler.net/klook or use our promo codes TPTKLOOK5 for up to P500 OFF or THEPOORTRAVELERKLOOK for up to P300 OFF. These codes may change in the future, so check the description or pinned comment for the updated codes and links.
8. Skipping sunscreen.
New Zealand’s climate is pretty mild, and it can still get cool even in summer months, so you might think “Sunscreen? Nah, I’m good.” And by lunchtime? Boom—your face is redder than a blushing teenager. This happened to me. Well, sort of. I apply sunscreen before leaving the hotel but I usually forget to reapply.
The chilly atmosphere can lull you into a false sense of safety. But the thing is: New Zealand has one of the highest UV levels on the planet especially under the crisp, clear summer skies.
So don’t forget to bring sunscreen with plenty of SPF and actually use it. And pack a hat, while you’re at it.
9. Missing the operating hours.
If you’re used to staying out until late night, know that in many destinations in New Zealand, some establishments close much earlier, especially in smaller towns. For example, in Rotorua and even in Queenstown, most cafes tend to close at around 3 or 4pm. Some as early as 2pm. Starbucks in Rotorua closes at 5pm most days, and Starbucks Queenstown at 6pm. That’s not to say that ALL cafes are like that. You can still find some that remain open at night, but it will be harder. But don’t worry, bars and malls tend to be open much later than cafes.
This isn’t unique to New Zealand, though. We also noticed this in some cities in Australia. Could be something to do with wages and work-life balance.
Some attractions also close early. Te Puia in Rotorua is only open until 4pm and Wai-o-Tapu until 4:30pm, understandably. Christchurch Gondola only operates until 5pm and the last ride down is at 5:30PM.
We also noticed that car rental companies close early, with the exception of airport branches. Europcar in Auckland city center closes at 4pm on weekdays, and 12 noon on weekends. Some branches are closed on Sundays too. So make sure to check operating hours when building your itinerary.
10. Paying for water.
Tap water in most places in New Zealand is safe to drink. At least in all the destinations we visited. So you don’t really need to spend money on bottled water at the convenience store or supermarket. It’s not cheap. If you have a refillable water bottle, you can just fill it up at your hotel or when you can. It’s just a matter of taste, sometimes.
If you’re joining full day tours like Milford Sound or Lake Tekapo and Hookers Valley, there’s a big chance they will be providing a bottle of water too.
11. Underestimating Prices.
New Zealand is expensive. My local friends always tell me that the cost of living here is pretty high. And so is the cost of travel.
The accommodation rates alone could eat up a big chunk of your budget. There’s a reason Auckland is the only stop where we stayed at a proper full-service hotel. In Rotorua, Christchurch and Queenstown, we spent our nights at a hostel primarily because of the cost.
This is how much we paid for a private room for 2 per night.
Just look at how much we paid per night for our Queenstown room. This was already the cheapest centrally-located properties we found at the time — the cheapest – and this room does not have its own toilet and bath. We still had a great stay, though. We actually loved all these hostels.
We’re probably gonna create a separate review of all these lodging options, so if you don’t want to miss that, make sure to subscribe to this channel, ring the bell beside it and select ALL so you’re always updated.
For a meal, prepare to shell out:
Fast food: NZD 15-20 (USD9-12, PHP506-675)
Full-service restaurant: NZD 25-40 (USD 15-24, PHP 845-1350) for a main course, but higher for more premium dishes like steak or ribs
But one thing I noticed is that a serving is usually huge, even when they say it’s good for just one person. Even their burgers here are ginormous. Since we were a group, we usually just share the food and split the bill, although some restaurants have a one meal per person policy.
One of the reasons we like staying at hostels is they usually have kitchens where you can prepare your own food. It’s especially useful for long-term travelers. Eating out every day may not be sustainable. If budgeting gets a little tight, just buy something at a supermarket or convenience store and eat at the hostel.
12. Not staying long enough.
This is one thing we’re guilty of. One of the first things we said when we got home from our New Zealand trip was, “That was quick.” We spent 10 days thinking it was long enough, but we really felt like we should have extended our trip. And we would have if we had more moolah to spend.
New Zealand isn’t really a stopover kind of destination. It’s the main event. The headliner. The Beyonce of your itinerary. And much like Beyonce, she deserves your time and money. Hahaha.
The best destinations in New Zealand are spread out, so the drives are long. They’re worth it, but they’re long. And there’s a lot to do in every destination. Queenstown alone can oh-so-easily fill a week-long itinerary.
We also regretted not spending more days in Christchurch. We just didn’t expect it to be so full of charm. And because we wanted to see a lot, we tumbled into the pitfall of treating our trip as a list of sights to tick. But when we were there, we found New Zealand to be a place to slow down, linger, and absorb the surroundings.
So give yourself at least two weeks if you want to explore both islands without spiraling into an Amazing Race episode. More if you can swing it.
If you have questions, sound off in the comments section below or tag us on your Instagram stories and X (Twitter) posts. You can also follow us there and on Tiktok.
That’s all for now, remember, plan smart, travel safe, and make every trip WORTH IT!
New Zealand. Aotearoa. Middle-Earth. Whatever you wanna call it, one thing is the same: it is a spectacular destination. And for many of us, it is a place we have been dreaming of visiting. But how do you start planning a trip to this real-life fantasyland? In this video, we’ll walk you through the essentials —from timing and transportation to must-visit spots. Because yes, it may be an epic destination, but it also takes a bit of strategy.
Size-wise, New Zealand is a bit tricky when seen on the map. It does look like just a couple of droplets in the ocean, especially when the gigantic Australia is in the same frame. But it is not that small. And even if it were, there’s just a lot to see and do. It’s got glaciers, glowworm caves, snow-capped peaks, iconic filming locations, and charming cities. And chances are, you’d want to see them all.
Our first advice is to stay longer. We stayed for 10 days, and it felt really short. Getting to New Zealand is not easy or cheap, so make the most out of it by staying longer and seeing more, especially if you plan on making a stop at multiple cities.
But if you can really allocate a few days, that’s fine, but it’s going to be more challenging unless you’ll be focusing on just one or two destinations.
Step 2: Build your itinerary.
Once you figure out how many days you will be spending in New Zealand, it’s time to start building your itinerary. The first step is to identify what destinations are non-negotiable for you. For example, if you’re a Lord of the Rings fan, I’m sure you will not forgive yourself if you don’t set foot in Hobbiton. Right?
So list them out. In our case, we only had a few: Hobbiton, Christchurch, and Queenstown.
And just by looking at the map, I realized early on that they’re pretty far apart. So from here, we tried to come up with a route that would connect all of these and can realistically be enjoyed in 10 days.
From the get-go, we knew our entry point would be Auckland. As New Zealand’s largest city, it has the country’s biggest airport and is the most usual jumpoff point to Hobbiton. But instead of going back to Auckland, we decided to stay for a couple of days to Rotorua, since it is also a popular tourist destination.
Rotorua has an airport, which serves direct flights to Christchurch, so we opted to fly for this leg. But from Christchurch to Queenstown, we wanted to travel by land so we could admire the landscapes along the way. So we’ll only be booking four hotels, one each in Auckland, Rotorua, Christchurch, and Queenstown.
But as we continued researching, we realized that we could also visit other attractions. For example, from Christchurch to Queenstown, instead of booking a direct bus, we discovered that there are one-way tours on Klook. One-way because it will pick you up in Christchurch, make several extended stops at tourist spots along the way including Lake Tekapo and the areas close to Mt. Cook, and then drop you off in Queenstown. It’s like a bus transfer and group tour in one!
On Klook, they have Christchurch to Queenstown and Queenstown to Christchurch via Lake Tekapo and Mt. Cook, and Auckland to Rotorua via Hobbiton.
One thing that became apparent early on while researching for this trip was that public transportation options between cities in New Zealand were quite limited. This is why, many online publications will tell you that the best way to get around is by renting a car or a campervan.
I agree. By driving, not only do you have total control of your time, you also don’t get restricted by rigid bus or tour schedules. But before you lock it in, make sure you have a valid driver’s license and that you’re confident driving on the left side of the road.
But if you’re traveling alone or a couple, you might end up spending more. It’s more ideal if you’re part of a group so you have companions to split the cost with.
If driving is out of the picture for whatever reason, you can take InterCity Buses. But again, know that departures are few and far between. For example, from Auckland to Rotorua, there are only a handful of journeys available. But you can totally make it work if you plan your trip well.
Another option is by joining the one-way tours that I mentioned in the previous section of this video. You can also fly. Domestic flights in New Zealand are delightfully inexpensive, so don’t count them out just yet. For example, when we flew from Auckland to Christchurch, we only paid around 108 NZD (P3640) per person.
Originally we wanted to fly straight from Rotorua Airport to Christchurch, but this route was twice or thrice more expensive so we decided to travel back to Auckland Airport instead.
Speaking of flights…
Step 4: Compare flight prices.
New Zealand is pretty remote, so it’s no surprise that flights going there are expensive. Its national flag carrier is Air New Zealand, which has direct flights to and from Taipei, Singapore, Hong Kong, Tokyo, Shanghai, Vancouver and various cities across Australia, the United States, and the Pacific. Other airlines like Qantas, Jetstar, China Airlines, Cathay Pacific, Singapore Air, Qatar Airways and Emirates fly to New Zealand too. So do a number of American and Chinese carriers.
Via Wikipedia
We’re based in the Philippines and there are no direct flights available. Philippine Airlines used to offer direct Manila to Auckland flights, but that route has been discontinued. So we had to connect elsewhere. But this trip is part of our greater Australia-New Zealand trip so we flew from Melbourne.
If you book in advance, a roundtrip flight from Manila usually costs PHP 40,000 to 50,000 in off-peak season and around PHP 60,000 in peak season.
Manila-Auckland Flights in OFF-PEAK seasonManila-Auckland Flights in PEAK season
As much as possible, try to book both legs of the journey with the same airline or at least airlines with code-share agreements, so you won’t need to clear immigration at your layover airport and pick up and check in your bags again. Especially if you’re connecting in Australia, which will require you to obtain a Transit Visa first.
In this sample booking, you will need an Australian Transit Visa.
Anyway, if you see fares and arrangements that you like, don’t book just yet. Just compare and canvas. Don’t finalize anything.
Step 5: Check accommodation options.
Another thing you need to consider is accommodations. The good news is, most New Zealand city or town centers are not that big. Even Auckland, which is the country’s largest city, isn’t as bustling and is actually quite chill compared to other big cities in other countries. So in theory, as long as you’re within the city center or town center, you should be fine.
But one thing you need to be prepared for is the cost. While planning our trip, we quickly realized that accommodation rates in New Zealand are quite steep especially in the summer months.
SkyCity Hotel Auckland
In Auckland, we booked a room at SkyCity, which is just next to the Sky Tower, Auckland’s most iconic landmark. We paid around NZD 170 (P5740) per night. Great location, and the Sky Drive, which is the airport bus terminates just around the corner. Check Rates & Availability! ✅
In Rotorua, we stayed at Rock Solid Backpackers, a hostel right in the city center within walking distance of major attractions. It was just a fan room, but New Zealand summers are pretty mild so we didn’t mind. It’s equipped with all the basic amenities, a TV, a table, toiletries, and all. And yes, it has an ensuite toilet and bath. We paid USD 87 (NZD 147, PHP 4950) per night. Yes, for a fan room. That’s how expensive rooms are here. Check Rates & Availability! ✅
In Christchurch, we booked a private room at Haka House, which I think is also classified as a hostel, but it didn’t feel like it at all. It was newly renovated and our room had ensuite toilet and bath and everything was squeaky clean, so it felt like we were staying at a boutique hotel. Awesome location, too, close to most points of interest including the Botanical Garden and Riverside Market. They had no elevator though, so it can be challenging if you have heavy luggage. This room set us back NZD 183 (USD 109, PHP 6145) per night. Check Rates & Availability! ✅
But Queenstown was the priciest of them all. We stayed at another hostel called BLACK SHEEP Backpackers Hostel, in a fan room without its own toilet and shower. The place was neat and nice, and it’s not too far from the center of the action, but we shelled out NZD 215 (USD 128, PHP 7240) per night for this. And this was the cheapest that we found even if we booked this way in advance. Check Rates & Availability! ✅
By the way, you don’t need to memorize all these details. We compiled all the NEW ZEALAND TRAVEL ESSENTIALS including a list of all the hotels and hostels we tried in the TPT Masterlist. Just visit and scroll until you see the section about New Zealand. We also have a compilation for other destinations around the world. Check Rates & Availability! ✅
So yeah, New Zealand lodging is super expensive. Just keep it in mind when budgeting for your trip. That’s probably why some travelers choose to just rent a campervan.
Anyway, just like with flights and transpo, don’t commit to your hotel booking yet. Instead, choose properties that offer FREE CANCELLATION. Both Klook and Agoda have these options.
If you book with Klook, please use our promo code THEPOORTRAVELERKLOOK for up to P300 OFF or TPTKLOOK5 for up to P500 OFF. These codes might change in the future so best to just visit thepoortraveler.net/klook to redeem updated discount codes!
If you prefer AGODA, use our promo code AGODATPT for 10% discount.
Whatever you choose, make sure it’s FREE CANCELLATION because there’s one crucial thing that you need to take care of first before you make any booking final…
Step 6: Apply for a New Zealand visa.
You might be wondering why I’m bringing up the visa just now. Well, 2 reasons:
First, a New Zealand visa isn’t cheap. It costs NZD 100 (PHP 3300), as of this writing. And it’s usually valid for just 1 year. It’s not like the US or Canada visas which can give you up to 10 years. No, just 1 year. So if you’re not yet 100% certain that you’re New Zealand-bound, don’t apply. You’ll just be wasting money if you end up not using it.
Also, before you start the visa application process, it’s best that you have a strong grasp of your travel plans. When applying for a New Zealand visa, you’ll be asked for your travel dates and hotel addresses, and you can even submit a detailed day-to-day itinerary to bolster your case. Having a solid travel plan will greatly increase your chances of approval. You can also upload your hotel bookings as supporting documents, although it’s optional.
I’m not going to delve deeper into the process because we have discussed it in detail in our comprehensive NEW ZEALAND VISA GUIDE! ✅
If you prefer it in Tagalog or Filipino, just watch this video.
According to the official New Zealand Immigration website, visa processing usually takes 4 weeks or 1 month. I got mine after only 2 days but don’t count on it. It’s always best to apply at least 2 months before your target departure date.
Step 7: Finalize all your bookings.
Once you’re granted a visa, finalize all your bookings! Book those flights, tours, transfers, and other stuff that you were eyeing. Or if things change, adjust accordingly.
Again these are all the promo codes that you can use. We have discounts for hotels, tours, and eSIM for internet connection. We even have special rates for travel insurance, exclusive for TPT subscribers.
Make sure to also accomplish and submit the New Zealand Traveller Declaration Form within 24 hours before your departure flight. It has to be in their system by the time you arrive in New Zealand.
That’s all for now. Remember, plan smart, travel safe, and make every trip WORTH IT!
Taiwan is one of the most iconic travel destinations in Asia. When you see a photo of Taipei 101, you’ll immediately know it’s Taiwan. But aside from this building that was once the tallest in the world, Taiwan has a lot to offer to tourists. From rich cultural heritage, to modern cityscape, to stunning natural landscapes, it attracts travelers who are interested in different kinds of adventure. Whether you’re looking to hike through scenic trails, visit temples, or eat your heart out at night markets, this island will surely give you a trip to remember.
Taiwan was our last destination before the pandemic spread around the world and before countries closed their borders. In fact, we even got stranded here because of it! So when we felt that travel is going back to normal, it just felt right to make Taiwan our first out of the country destination.
And now, we’re sharing with you a sample itinerary that you can follow especially if it’s your first time in Taiwan.
Note: This isn’t the actual itinerary we had for our trip. But if it’s your first time and you want to experience a lot in Taipei, this itinerary is what we highly recommend.
Touchdown Airport. When you land at the airport, you can exchange money or withdraw Taiwan dollars from the ATM so you have local currency right away. You can also buy a SIM card or pick one up if you pre-ordered online, so you’re connected as soon as you arrive. Here are two options from Klook!
Make your way to the city center. If you’re on a DIY trip, you can take the train or ride a bus to reach your hotel. But if you’re with a bigger group, traveling with seniors, or just want a smoother trip, you can book a tour package with a reputable agency in Taiwan like Edison Tours, or even from the Philippines.
Check in at hotel. If you arrive too early to check in, drop off your bags at the hotel and start exploring.
Since it’s your first time, it’s best to see Taipei city center’s must-visit attractions.
Chiang Kai Shek Memorial Hall
Built in 1976 to honor one of Taiwan’s most important figures, the Chiang Kai Shek Memorial Hall houses a giant statue of him in the main chamber, with a museum and library on the lower level.
Address: No.21, Zhongshan S. Road, Zhongzheng District, Taipei City, Taiwan (R.O.C) Nearest MRT Station: Chiang Kai-shek (CKS) Memorial Hall Station (Red Line 2 or Green Line 3) Open: Daily, 9:00 AM – 6:00 PM Entrance Fee: FREE
Sun Yat-sen Memorial Hall
Another landmark built to honor one of Taiwan’s founding figures is the Sun Yat-sen Memorial Hall. Sun Yat-sen is widely regarded as the Father of the Nation, and this site celebrates his legacy with a grand statue, exhibits, and spacious grounds perfect for a leisurely stroll.
Address: No. 505, Section 4, Ren’ai Road, Xinyi District, Taipei City, Taiwan (R.O.C) Nearest MRT Station: Sun Yat-sen (SYS) Memorial Hall Station (Blue Line 5) Open: Daily, 9:00 AM – 6:00 PM Entrance Fee: FREE
Note: Since February 2024, the hall is temporarily closed for maintenance. It is expected to reopen in 2026.
Taipei 101
Taipei 101 is the most iconic attraction in Taipei. From 2004 to 2012, it held the title of the world’s tallest building until it was surpassed by the Burj Khalifa in Dubai. At the top, there’s an observatory where you can enjoy breathtaking panoramic views of the capital.
You can secure your ticket in advance online through accredited booking sites like Klook!
Address: No. 7, Section 5, Xinyi Road, Xinyi District, Taipei City, Taiwan (R.O.C.) Nearest MRT Station: Taipei 101 Station (Red Line 2) Hours open: Daily, 9:00 AM – 10:00 PM Entrance Fee: NT$600
Elephant Mountain
While the Taipei 101 Observatory offers an incredible view of the city, the best vantage point is actually from Elephant Mountain. Many of the city’s iconic postcard shots were likely taken here. The ideal time to visit is late afternoon so you can enjoy the skyline by day, catch the sunset, and see the city light up at night. Just keep in mind, it does require a bit of a climb, so it might not be suitable for those with mobility concerns.
Trail Head: Lane 150, Xinyi Road, Section 5, Xinyi District, Taipei City, Taiwan (R.O.C.) Nearest MRT Station: Xiàngshān Station (Red Line 2) Entrance Fee: FREE
Ximending
Ximending is Taipei’s youth district, known for its vibrant entertainment, dining, and shopping scene. It really comes alive at night — bright, bustling, and full of energy. Think of it as Taipei’s version of Tokyo’s Harajuku. You’ll find global brand stores, bars, cafes, and clubs here.
The most popular area is Ximen Walker Street, always packed with both tourists and locals. There are also tons of food options around, making it a great place to grab dinner and wrap up your day.
Location: Ximending, Wanhua District, Taipei City, Taiwan (R.O.C.) Nearest Station: Ximen Station (Blue Line 5 or Green Line 3) Entrance Fee: FREE
DAY 2: NEW TAIPEI CITY
After exploring Taipei City, it’s time to head to New Taipei City. Though it’s a separate municipality, it’s often grouped with Taipei City as part of the Greater Taipei Metropolitan Area. Thanks to an efficient transportation system and both cities being progressive, you might not even notice that they’re different cities.
For your second day, let’s switch things up and escape the skyscrapers and shopping malls. Travel to the countryside, visiting the charming districts of Ruifang, Pingxi, and Wanli.
Yehliu Geopark
Located at the northernmost tip of Taiwan, the Yehliu Geopark is famous for its striking rock formations, set against the backdrop of powerful waves. It’s no surprise that this spot is a favorite for photographers and tourists alike.
Queen’s Head Rock
However, it’s a bit out of the way compared to other attractions. If you’re doing it DIY-style, be mindful that the journey to the next stop could take around two hours. To save time, we recommend joining a tour, which minimizes transfer and waiting times. Without stops, it’s only about a 45-minute to one-hour drive to the next destination.
Klook offers a day tour that includes Yehliu Geopark, Jiufen, and Shifen, among others. This covers transportation, insurance, and an English-speaking guide.
Address: No. 167-1, Gangdong Road, Wanli District, New Taipei City, Taiwan (R.O.C.) Entrance Fee: Adult, NT$120; Child (6-12 y/o), NT$60
Jiufen Old Street
This is like stepping into a scene from Spirited Away. While it wasn’t the actual inspiration for Hayao Miyazaki’s film, many say the town’s ambiance strongly evokes the enchanting atmosphere of the animated world.
Jiufen Teahouses
Once a gold mining town, Jiufen Old Street is now famous for its teahouse culture and charming streets. It’s a delightful place to explore. You can browse for souvenirs, enjoy tea or coffee in cozy cafés, or savor a meal in one of its quaint restaurants. Popular spots include Jiufen Old Street, Shengping Theater, the Gold Mine Museum, Mount Keelung Trail, and various scenic viewpoints.
Location: Ruifang District, New Taipei City, Taiwan (R.O.C.)
How to Get to Jiufen: From Taipei Main Station, take a train going to Ruifang Station. Along Mingdeng Road is a bus station (Local Residents Plaza) with routes heading toward Jiufen. Take bus Route 827 or 788. Going back to Taipei city, take bus Route 1062.
Houtong Cat Village
If you’re a cat lover, the Houtong Cat Village is a must-visit! Located just a 15- to 20-minute drive from Jiufen, this former coal-mining town has transformed into a cat haven. In 2008, a local photographer captured the heartwarming sight of residents caring for abandoned cats. Since then, the village has attracted cat enthusiasts from all over the globe.
Aside from the adorable cats, you’ll find statues and cat-themed souvenir shops. The village itself is beautifully scenic, nestled between a stream and a railway. And if you’re feeling hungry, there are plenty of snack stalls to enjoy some local treats.
Location: Ruifang District, New Taipei City, Taiwan (R.O.C.)
How to Get to Houtong Cat Village: If coming from Jiufen, take the train to from Ruifang Station to Houtong Station. From Taipei Main Station, take a train going to Ruifang Station. Then, transfer to Pingxi Line to Houtong Station. Another way is to take a direct local train from Taipei Main Station to Houtong Station.
Shifen Waterfall
This area can also be a great lunch stop since there are plenty of restaurants and food stalls around. But if you’re doing a DIY trip, be ready for some walking. The nearest train stop is Shifen Station, which is about a 25-minute walk from the start of the trail. From there, it’s another 15 to 20 minutes to reach the main viewing deck.
That’s why joining a tour is a smart option, especially if you’re traveling with seniors or kids. Tour buses can park closer to the walking trail, making the journey much shorter and more comfortable. Along the way, you’ll pass by stalls selling snacks, drinks, and souvenirs. Some of the refreshments and bites you’ll find are milk tea, lemon tea, fresh fruits, and eye-catching atis (sugar apples) that are surprisingly huge!
Once you resist all the food temptations, you’ll reach the first viewpoint near the cascade, which is perfect for photos. But for the best angle, continue along the trail until you reach the main viewing platform for Shifen Falls. Just keep in mind there are stairs, so it may not be suitable for those with mobility concerns.
Location: Pingxi District, New Taipei City, Taiwan (R.O.C.)
How to Get to Shifen Waterfalls: From Taipei Main Station, take a train going to Ruifang Station. Then, transfer to Pingxi Line to Shifen Station. From there, you’ll reach the waterfalls in about 25 minutes on foot.
Shifen Old Street
Shifen Old Street is where you’ll find the iconic railway track that serves as the site for releasing sky lanterns. If you decide to try the activity, you’ll start by writing your wishes or messages on the lantern. Once you’re done, a staff member will help light it up, and you can watch it slowly rise and drift away with the wind.
The Pingxi District is famous for its Sky Lantern Festival, held during the first lunar month — usually in February. But you don’t have to wait for the festival to experience this! Visitors can release sky lanterns year-round for a fee. Of course, it’s not for everyone. If you tend to wonder where these lanterns end up after they fall, you might want to skip it. But there are still plenty of other things to enjoy, like shopping for souvenirs or sampling snacks from the stalls that line the tracks.
Location: Pingxi District, New Taipei City, Taiwan (R.O.C.)
How to Get to Shifen Old Street: From Taipei Main Station, take a train going to Ruifang Station. Then, transfer to Pingxi Line to Shifen Station. The railway tracks run along the Shifen Old Street.
Raohe Night Market
After the tour, it’s time to head back to the city. For dinner, head to Raohe Night Market, one of the oldest and most iconic night markets in Taipei. As of writing, four food stalls here have Michelin Bib Gourmand recognition — an award given to eateries that serve great food at a good value.
Fuzhou Black Pepper Buns
We were able to try two of them. The most famous is the Fuzhou Black Pepper Buns, known for their crispy, charcoal-baked pork buns cooked in a traditional brick oven. Another must-try is the Chen Dong Pork Ribs Medical Herbs Soup. It may look like mostly bones, but the meat is incredibly tender and falls right off. It’s warm, comforting, and flavorful. And while you’re here, be brave and try the notorious stinky tofu, or snack on skewers from the many vendors. Then cap off your night with a classic Taiwanese milk tea!
Chen Dong Pork Ribs Medical Herbs Soup
Address: Raohe Street, Songshan District, Taipei City, Taiwan (R.O.C.) Nearest Station: Songshan Station (Green Line 3) Open: Daily, 5:00 PM – 11:00 PM Entrance Fee: FREE
DAY 3: NORTH TAIPEI TOUR
On the third day, let’s head north! This area is still within Taipei City, but it’s more on the countryside, away from the busy city center. Here are the possible stops.
Yangmingshan National Park
Straddling Taipei and New Taipei City, Yangmingshan is one of Taiwan’s nine national parks. It’s a great destination for nature lovers and outdoor enthusiasts. The park’s most iconic feature is Qixing Mountain, the tallest dormant volcano in Taiwan, surrounded by scenic hiking trails.
Most visitors explore the western side of the park, which is the most accessible and tourist-friendly. One of its famous landmarks is the flower clock, a favorite photo spot. If you’re hoping to see cherry blossoms, this is one of the best places in Taiwan. Just make sure to visit during the right season. The rest of the year, the park still bursts with color — thanks to peach blossoms, plum blossoms, azalea, and thorn apples.
Jump-off Point: Yangmingshan National Park Visitor Center, No. 1-20, Zhuzihu Road, Beitou District, Taipei City, Taiwan (R.O.C.)
How to Get to Yangmingshan National Park: From Taipei Main Station, take Bus 260 to Yangmingshan National Park Bus Station. It’s just a short walk to the visitor center, which also serves as the main entrance to the park.
Beitou Hot Spring Park
Beitou District is a known hot springs hotspot. Tucked between its peaks are valleys where nutrient-rich, steamy waters bubble up from underground. It’s a scenic area, especially around Beitou Hot Spring Park, which often looks mystical when blanketed in steam.
If you choose to visit one of the many public hot springs or spas, you can take a relaxing stroll through the park and soak in the surroundings — literally. If you’re short on time, at least try the local tea eggs, a popular snack often sold around the area. It’s a unique mix of nature, wellness, and local flavor all in one spot.
Location: Beitou District, Taipei City, Taiwan (R.O.C.)
How to Get to Beitou Hot Spring Park: Depending on your itinerary, you can alight at any of these train stations in Beitou from Taipei Main Station: Beitou Station, Xinbeitou Station, Zhongyi Station, Qiyan Station, Fuxinggang Station, Guandu Station, Qilian Station, Mingde Station, and Shipai Station
National Palace Museum
The National Palace Museum holds a collection of around 700,000 artifacts, some dating back thousands of years! But here’s the kicker — only about 1% of that is actually on display. The rest? Safely tucked away in vaults under tight security.
The collection is so massive that it’s hard to wrap your head around. We’re talking about 6,000 bronze pieces, 3,000 calligraphy works, and countless gems, carvings, and textiles, among others. All of them showcase the depth and richness of Chinese culture and history. If you’re planning to dive deep, get ready to spend hours inside exploring.
Address: No. 221, Sec 2, Zhi Shan Rd, Shilin District, Taipei City, Taiwan Nearest MRT Station: Shilin Station (Red Line – 2), then take Bus R30 (NT$15) Hours Open: Daily 8:30 AM – 6:30 PM Entrance Fee: NT$350
Shilin Night Market
Spread across two levels, Shilin Night Market is the largest night market in Taipei. On the ground floor and nearby alleys, you’ll mostly find souvenir shops and apparel stores.
But head down to the basement, and get ready to feel hungry, even if you just ate. The mouthwatering aroma hits instantly. It’s a maze of about 540 food stalls and eateries offering local favorites like fried squid, grilled chicken tails, breaded chicken, Taiwanese sausages, fried buns, and oyster omelette. Best of all, it’s conveniently located right next to the MRT station.
Address: No. 101, Jihe Road, Shilin District, Taipei City, Taiwan (R.O.C.) Nearest MRT Station: Jiantan Station (Red Line – 2) Best Time to Visit: 5:00 PM – 1:00 AM Entrance Fee: FREE
DAY 4: CHILLIN’ AND SHOPPIN’
Don’t skip Taipei’s café culture on your last day! While Taiwan is traditionally known for its tea, coffee has now taken the lead as the locals’ drink of choice. In fact, Taiwan boasts one of the highest concentrations of cafés in the world. You’ll definitely notice this in lively areas like Ximending, where cafés — both global chains and quirky specialty shops — seem to pop up on every corner.
Fong Da Coffee
One café you shouldn’t miss is Fong Da Coffee, said to be the first to serve iced coffee in Taiwan way back in 1956. While most cafés today aim for a trendy, Instagrammable vibe, it stands out by embracing its vintage charm and sticking to its old-school roots with pride.
Address: No. 42, Chengdu Road, Wanhua District, Taipei City, Taiwan (R.O.C.) Opening Hours: Daily, 8:00 AM – 10:00 PM
Modern Toilet
Of course, milk tea isn’t taking a backseat! Taiwan is the undisputed bubble tea capital of the world. Many of the most recognizable milk tea brands, like CoCo and ShareTea, were either born here or have their headquarters in the country. But if you’re looking for a milk tea experience that’s truly unforgettable (and a little weird), head to Modern Toilet.
This quirky café-restaurant has been dishing out hilariously “crappy” meals and drinks for years, and tourists can’t get enough! Everything is toilet-themed — from the chairs and tables to the decor and even the dishes. You can sip tea from a mini urinal and enjoy ice cream served in a toilet bowl. Yep, it’s weird…but it’s also a lot of fun!
⚠️ Don’t keep your hopes up taste-wise. This is good only for the novelty of its theme. There are much better-tasting milk tea places in Taipei like 50 Lan! We’ll be creating a separate article for our food recommendations.
Branches: Ximending and Shilin Opening Hours: Ximending – Daily, 11:30 AM – 10:00 PM; Shilin – Daily, 11:30 AM – 9:30 PM
Vigor Kobo Pineapple Cake Factory
One of the most popular pasalubong items from Taiwan is the iconic pineapple cake. At the Vigor Kobo Pineapple Cake Factory, you can do more than just buy a box. You can actually make your own! They offer a fun workshop where you can try your hand at crafting these sweet treats from scratch. No baking experience? No problem! It’s simple, easy, and a great way to take home a more personal souvenir.
While waiting for your cakes to bake, you can explore the interactive museum to learn more about the history of pineapple cakes and how they’re made. One of the fun features here is the disappearing dandelion wall — give it a touch, and the flowers magically vanish! After shopping for pasalubong, don’t forget to enjoy the highlight of the visit: tasting the pineapple cake you made, fresh and warm from the oven.
Address: No. 87, Section 1, Chengtai Road, Wugu District, New Taipei City, Taiwan (R.O.C.) Opening Hours: Daily, 8:30 AM – 5:30 PM
Ever Rich Duty Free
If you’re ready for some serious shopping, Ever Rich Duty Free is the place to be. They have numerous stores all over Taipei, even in the airports, but we headed to their massive flagship store in Neihu District. Spread across five floors, it’s packed with all kinds of treasures. Plus, you’ll find some pop-up stalls outside adding to the shopping fun!
And of course, don’t forget to keep an eye on your flight time! Make sure you catch your plane!
Address: No. 129, Jinzhuang Road, Neihu District, Taipei City, Taiwan (R.O.C.) Opening Hours: Daily, 10:00 AM – 9:00 PM
D-I-Y vs Booking a Tour
You can definitely do this itinerary DIY-style. However, Days 2 and 3 can be challenging if you rely solely on public transportation, as the schedule of buses and trains needs careful timing. If you’re traveling with a group, seniors, people with mobility concerns, or if you just want a more relaxed, hassle-free trip, booking a tour is a much more convenient option.
You can check out Edison Tours, which is one of the most popular tour operators in Taiwan. They have been operating for decades. To see their offers, you can visit their website.
If you prefer to talk to Pinoys, here are some of the travel agencies in the Philippines that you can ask about Taipei tour packages.
Constellation Travels Inc. Website: www.constellationtravels.com.ph Mobile: +63 956 660 0693
Travel Warehouse Inc. Website: www.twi.com.ph
VIA Website: https://ph.via.com Landline: (+63 2) 8555-9444 E-mail: sales.ph@via.com
Getting a travel insurance is optional, but we highly recommend this, especially when traveling abroad. Travel can be unpredictable, and though we hope we’ll never use it, having it gives us peace of mind in case of unexpected delays, cancellations, or emergencies.
For international destinations, consider PGA Sompo’s TravelJOY Plus insurance. You can GET IT HERE. Don’t forget to use WORTHIT for a special affordable rate.
Aside from attractions like Disneyland, Ngong Ping Cable Car, and Victoria Peak, one of the highlights of a trip to Hong Kong is the food. Its culinary scene offers a lot to food lovers. From traditional Cantonese food to Michelin-starred restaurants to international flavors, you’ll surely have a happy tummy during your trip. Whether you’re craving some siomai, a bowl of wonton noodles, or roasted duck, Hong Kong has something to satisfy your appetite.
We understand that a lot of us travel on a budget, especially those who are going to Hong Kong as their first international destination. Don’t worry — despite being an expensive city in general, there are still food places that are relatively affordable here. There are also some that are on the pricier side, but would be really worth to try. If you’re heading to Hong Kong soon, you might want to check out some of these restaurants and food spots that have earned a spot on our must-try list.
One of the most popular budget-friendly food spots in Hong Kong is Tsim Chai Kee, which has multiple branches across the city. The one on Wellington Street even holds a Michelin Bib Gourmand recognition, so expect the lines to get really long, especially during lunchtime. Fortunately, there are other branches to check out.
Tsim Chai Kee Wellington Street Branch
On our recent trip, we visited the Queens Road Central branch, which is located in a basement. Tsim Chai Kee is famous for its noodle soup, and it absolutely lives up to the hype. Their freshly made egg noodles have the perfect springy texture. You can choose from a variety of toppings, including fish balls, sliced beef, and their signature pork and king prawn wontons. You can also opt for a combination of toppings, but the broth remains the same — simmered for at least five hours daily to develop deep shrimp and fish flavors with just the right level of saltiness.
Tsim Chai Kee Queens Road Central BranchWonton Noodle Soup
We tried the wonton noodle soup, and the prawns inside were outstanding. Despite the filling also containing pork, the prawn flavor still stood out. It’s easily one of the best noodle soups we’ve had, and at just HKD 40 (around P300) per bowl, it’s a great deal. In Hong Kong’s pricey restaurant scene, P300 is considered cheap, so don’t be too shocked by meal prices when dining out here!
TSIM CHAI KEE
Branches: Wellington Street and Queens Road Central in Central (Hong Kong Island); Temple Street in Jordan and Ivy Street in Tai Kok Tsui (Kowloon)
Opening Hours: Wellington Street, 11:00 AM – 9:30 PM (Daily); Queens Road Central, 11:00 AM – 9:00 PM (Daily); Temple Street, 10:30 AM – 7:15 PM (Mon-Sat) & 10:30 AM – 4:00 PM (Sun); Ivy Street, 11:30 AM – 8:30 PM (Tue-Sat) & CLOSED (Sun-Mon)
What to Eat
Another Michelin-recognized spot in Central is What to Eat, a restaurant known for its Taiwanese-style beef noodle soup. As soon as we entered, we were greeted by walls adorned with newspaper and magazine clippings showcasing the restaurant’s features, along with the warm smiles of the staff.
The beef noodle soup is priced between HKD 85 to HKD 95, depending on the toppings you choose. We opted for the beef noodle soup with ribs (HKD 85) and the one with tendon and meat (HKD 89), and both dishes were fantastic! The beef chunks were large and braised to perfection, tender and full of flavor. The broth was rich and savory, not too oily, and reminded us of a memorable beef noodle soup we had in Kaohsiung, Taiwan.
Beef Noodle Soup with Ribs (left) and with Tendon and Meat (right)Egg Roll with Cheese
The noodles were thick and al dente, just the way we like them — chewy and satisfying. We also tried their egg roll with cheese (HKD 39), which was a delicious side. The eggs were thinly spread, folded, and cut. Inside, the eggs were soft and moist, with cheese that oozed out and even stretched with each bite, making it a perfect complement to the hearty soup.
WHAT TO EAT
Note: As of this writing, What to Eat is PERMANENTLY CLOSED. But we’re keeping it in this list in case they re-open in the future.
Dim Sum Square Kitchen
Packed with excellent food spots, Central is a go-to district for food tours, and we were lucky enough to join one. And Dim Sum Square Kitchen — another gem in the area — is one of our stops.
We had a wonderful experience here since we’re big fans of dim sum. It offers delicious dishes like har gao (shrimp dumplings) for HKD 37, siu mai (pork and shrimp dumplings) for HKD 34, spring rolls with pork and shrimp for HKD 26, and crispy BBQ pork buns (fried siopao asado) for HKD 26. Each dish typically has three to four pieces, depending on the item.
Har Gao (Top Left), Siu Mai (Bottom Left), and Spring Rolls with Pork and Shrimp (Right)Crispy BBQ Pork Bun
While you can definitely visit Dim Sum Square Kitchen on your own, joining a food tour is a great idea if you’re looking to experience a full afternoon of eating. There are plenty of options in Hong Kong, and we went with Hong Kong Foodie Tours, which turned out to be an amazing experience. The tour includes six food stops, but in between, you also get a chance to explore local markets, temples, and more, giving you a nice break between each bite.
Hong Kong Foodie Tours Map
One of the best things about joining a food tour is the controlled portions, so you won’t get too full too quickly. Plus, there’s no pressure to order a lot, especially when the servings are quite generous!
DIM SUM SQUARE KITCHEN
Address: 78 Jervois Street, Sheung Wan, Hong Kong Island, Hong Kong Opening Hours: Daily, 10:00 AM – 10:00 PM
Tim Ho Wan
You’re probably already familiar with Tim Ho Wan, especially since it’s also available in the Philippines. However, it originally started in Hong Kong back in 2009, so it’s definitely worth adding to this list. While the first store was in Mong Kok, the branch in Sham Shui Po holds a Michelin Bib Gourmand recognition.
Baked Bun with BBQ Pork (Left), Ha Kao (Top Right), and Siu Mai (Bottom Right)
During our visit, we dined at their branch in Central, which is conveniently near Hong Kong Station. We were on our way to the airport when hunger struck, so we decided to stop by. We tried their famous baked bun with BBQ pork (HKD 33), which reminded us of siopao asado. We also ordered siu mai and ha kao (HKD 40-42). While it was a bit more expensive than other dim sum we tried, the quality and taste definitely made it worth the price.
Rice Bowl Topped with Minced Beef and Fried Egg (Left) and Rice Noodle Rolls with Pig’s Liver (Right)
We also explored a few more dishes from the menu, including a rice bowl topped with minced beef and fried egg (HKD 42) and rice noodle rolls with pig’s liver (HKD 32). The rice noodle rolls were soft and not rubbery, with the pig’s liver having no unpleasant aftertaste. It paired wonderfully with the soy-based sauce. The texture was a bit unusual since the liver and noodle rolls were both soft, but it still made for a tasty dish.
TIM HO WAN
Branches: Sham Shui Po, Olympian City, Central, K11 Art Mall, Tseung Kwan O, West Kowloon, and Sha Tin
Opening Hours: For the operating hours of each branch, you can check out the official website here.
Mak Man Kee
Mak Man Kee is a well-known noodle restaurant consistently featured in the Michelin Guide’s Bib Gourmand list. Located in the Jordan area on Kowloon side, this unassuming spot has been serving locals for over 60 years, and it has become an institution in the area. Despite its humble exterior, it has earned a strong following for its delicious and affordable offerings.
Dry Noodles with Pork and Hoisin Sauce
Though the restaurant is popular for its wonton noodle soup, which has garnered praise from Michelin, we were craving something different. After so much noodle soup on our trip, we decided to try its dry noodles with pork and hoisin sauce (HKD 50). The noodles were thin and firm — a good texture, but the dish itself was unlike anything we’d had before. It reminded us of a combination of menudo and pansit, an interesting fusion of flavors and textures.
If you decide to visit Mak Man Kee, we highly recommend trying their signature noodle soup. It’s the dish that made the restaurant famous and truly embodies what they do best.
MAK MAN KEE
Address: G/F, 51 Parkes Street, Jordan, Kowloon, Hong Kong Opening Hours: Daily, 12:00 PM – 12:30 AM
Samsen
Samsen is a Thai restaurant in Hong Kong that we found by chance in Central during a typhoon, and it turned out to be a welcome break from the usual Chinese cuisine we had been enjoying. While it’s on the pricier side, the food was incredibly good, and it has earned a Michelin Bib Gourmand award. Even if it didn’t have that recognition, the flavors would still make it worth recommending.
Khao Soi (Left), Som Tam (Top Right), and Pad Thai (Bottom Right)
We started with som tam (HKD 112), a pounded papaya salad with toasted peanuts, dried shrimp, and tamarind sauce. It was delicious, but incredibly spicy! For the main courses, we had khao soi (HKD 158) and pad thai (HKD 158). The khao soi was a standout, with bouncy egg noodles swimming in a rich, curry-based broth, big tender pieces of curried chicken, and crispy fried noodles on top. It was also garnished with coriander, spring onions, and a slice of lime for a citrusy punch. The pad Thai was equally impressive, with perfectly cooked rice noodles and tiger prawns coated in a sweet tamarind sauce, topped with peanuts, bean sprouts, and served with fresh green mango on the side.
While the meal was amazing, it’s definitely on the expensive side, so we might not go back, to be honest. However, it’s absolutely worth trying, especially if you’re craving authentic Thai flavors while in Hong Kong.
SAMSEN
Branches: Central, Sheung Wan, and Wan Chai Opening Hours: For the operating hours per branch, you can check out the official website here.
Lin Heung Kui
Known for its delicious Cantonese dishes and traditional teahouse atmosphere, Lin Heung Kui is another well-loved restaurant in Hong Kong. We actually stumbled upon this place by accident during one of our recent trips. It was close to our hotel in Sheung Wan, and we discovered it while browsing the Michelin app. Aside from being a popular local spot, it also holds a Michelin Bib Gourmand citation.
The restaurant is located on the third floor of the building, and stepping inside feels like entering a classic Cantonese teahouse, complete with push carts. Most of the customers were elderly locals, and while the staff didn’t speak much English, they were incredibly warm and patient. Even the front desk staff was very friendly, making the entire experience enjoyable.
Out of all the restaurants we tried in Hong Kong, this was my favorite, even though we didn’t get to taste their most famous offering, which is dim sum. We arrived for dinner and were told that their dim sum sells out by lunchtime, which just goes to show how in-demand it is.
Since dinner service mainly features dishes meant for sharing, we ordered a barbecue platter that included soy chicken and roasted goose. It cost HKD 168 (around P1250) and is enough for a group. The meats were absolutely delicious! The chicken was juicy and tender, while the goose, which is often dry and bony in my experience, was surprisingly moist and fatty. It was a little greasy, but in the best, most indulgent way. We also tried its seafood and assorted vegetable claypot, another dish made for sharing. The squid, fish, and shrimp were incredibly fresh, but the Chinese cabbage in the broth slightly overpowered the seafood flavors.
Barbecue PlatterSeafood and Assorted Vegetable Claypot
If you visit earlier in the day, they offer rice toppings from 10:30 AM to 4:00 PM for as low as HKD 55. From 2:30 PM to 4:00 PM, they also serve noodle toppings starting at just HKD 39, making it a great option for an affordable yet satisfying meal.
LIN HEUNG KUI
Note: We last visited in October 2023, but as of June 2025, the business is marked “PERMANENTLY CLOSED”. If you have a more updated info, please let us know in the comment section. Thank you!
Where to Stay in Hong Kong
Hong Kong may be small, but it boasts plenty of accommodation options for tourists. It is divided into three main regions — Kowloon, Hong Kong Island, and the New Territories. Mong Kok and Tsim Sha Tsui are located in Kowloon, the city center’s traditional side, while the Central Business District is found on the more modern Hong Kong Island. The New Territories region is home to Hong Kong Disneyland and Hong Kong International Airport.
The best area to stay depends on your itinerary, but you can check out our WHERE TO STAY IN HONG KONG article for a more in-depth explanation. For quick reference and recommendations, here are some of the top accommodations in Hong Kong based on online user reviews.
Getting a travel insurance is optional, but we highly recommend this, especially when traveling abroad. Travel can be unpredictable, and though we hope we’ll never use it, having it gives us peace of mind in case of unexpected delays, cancellations, or emergencies.
For international destinations, consider PGA Sompo’s TravelJOY Plus insurance. You can GET IT HERE. Don’t forget to use WORTHIT for a special affordable rate.