Hey everyone. In light of the Coronavirus pandemic, it almost feels silly to update you with what’s going on in my life. I’ll try to keep this light. I hope you are staying safe, healthy, and sane in these difficult times.
Sorry I haven’t written a recap since, oh, December. Grad school has been intense — I’m taking 15 credits right now, so it’s been tough to focus on anything but school. The good news? I’m done in June!
This winter, I’ve mostly stayed put in Ann Arbor. That being said, I did take two trips out west — Park City, Utah, to ski, and Calfornia to see friends.
The amazing City Lights Bookstore in San Francisco, where I finally picked up Little Women
Where I’ve been:
Park City, Utah (7 days)
Traverse City, Michigan (3 days)
San Francisco, CA (6 days)
LA (3 days)
Ann Arbor, Michigan (the rest of the time)
Highs:
Skiing in Park City. Over the holidays, my family and I spent a week skiing in Park City, Utah. It was delightful. I felt very fortunate to be able to ski and to take a much-needed break from grad school.
Writing a historical fiction novel. After many false starts writing books (by which I mean I started and quit writing at least ten), I think I have found my genre — historical fiction! I’m 80 pages into my novel and it’s been so much fun to research and write. One thing that helped immensely was The Artist’s Way, a book that leads you through a 12-step creative recovery course. I recommend it to everyone, unconditionally.
Spending spring break in California. As I’ve mentioned on this blog many, many times, San Francisco is my favorite city. So it was wonderful to spend five days there catching up with friends and scoping out potential neighborhoods (P.S. I’m very into Richmond and the Sunset). Though the city has changed a lot in the past 10 years, it’s still where I see myself after graduation. (And if you know anyone hiring for UX design, I would be so grateful for an intro.)
Lows:
Coronavirus. This pandemic feels so surreal and is difficult for so many reasons. I’m trying to do the socially responsible thing by staying home and washing my hands frequently. I’m trying to stay positive and not panic. I’m using this opportunity to finish my novel, read a ton, and re-learn piano. That being said, I’m very worried about people in my life who are at risk, as well as the general state of the world right now.
Michigan winter. Honestly, it sucks to live in a place where it hurts to walk outside six months out of the year. It’s just too damn cold here. Thankfully, spring seems to be right around the corner.
Saying goodbye to Cape Town. I never announced this, but last month I got a two-month internship in Cape Town, South Africa in May and June. I was SO excited about it. But yesterday, I got the news that the internship was canceled. It’s a huge bummer but pales in comparison to what other people are going through — so I’m trying to not feel sorry for myself.
My blog traffic took a huge hit in November due to a Google update. Traffic is now taking an even bigger hit due to the coronavirus. Dips in my income like this make me grateful blogging is only a side-gig — I’m really feeling for all bloggers and people who work in the travel industry right now.
February traffic: 47,375 page views
September blogging income – $812.25
Advertising – $693.36
Affiliate income (Amazon) – $61.78
Affiliate income (not Amazon): $57.11
Ebook sales: $0.00
Note that this is my blogging income before deductions or expenses.
Favorite read
The Forgotten Soldier by Guy Sajer – This book won’t be for everyone, but I really enjoyed it. This memoir follows the journey of Guy, a 16-year old French boy who is drafted into the German army in WWII. Though the book has a lot of violence, I really enjoyed Sajer’s introspection on becoming a soldier and what it’s like living in wartime. He is an excellent writer, and writes very poetically about many subjects: “Peace has brought me many pleasures, but nothing as powerful as that passion for survival in wartime, that faith in love, and that sense of absolutes. It often strikes me with horror that peace is really extremely monotonous. During the terrible moments of war one longs for peace with a passion that is painful to bear. But in peacetime one should never, even for an instant, long for war!”
Up next:
Nothing, I guess? I was supposed to go to my friend’s 30th birthday party in Baja, Mexico, in April, but it looks like that won’t be happening. Graduation is also canceled.
How is your winter going? How are you handling/embracing this crazy time?Book recommendations EXTREMELY welcome.
Enjoyed this post? Subscribe here!
Subscribe here to receive new Ashley Abroad posts straight to your inbox.
Thanks for subscribing! Now check your email to confirm your subscription.
This post may have affiliate links, which means I may receive commissions if you choose to purchase through links I provide (at no extra cost to you). Please read my disclosure for more info.
From Henley to Kingston the Thames Path National Trail offers a blend of rural to urban landscapes, as the river flows steadily towards the outskirts of London. You’ll pass the prosperous riverside towns of Henley and Marlow, known for their rowing traditions and ornate Edwardian boathouses.
This is the Thames as depicted in 19th century literary classics such as “Three Men in a Boat” and “The Wind in the Willows”. As the railways developed westwards from the 1850s, this stretch of the Thames came within the reach of Londoners for day trips, when regattas and rowing boats were all the rage.
This article may contain affiliate links that provide commission on purchases you make at no extra cost to you. As an Amazon Associate I earn from qualifying purchases.
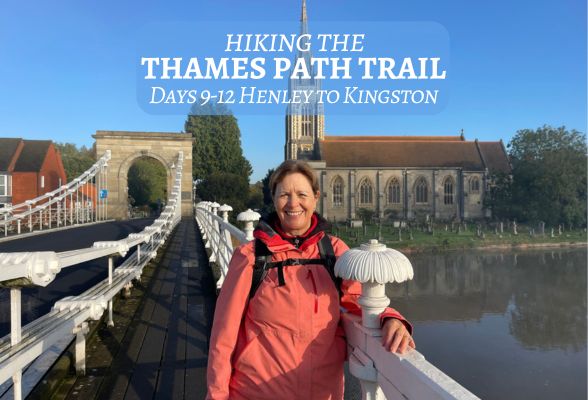
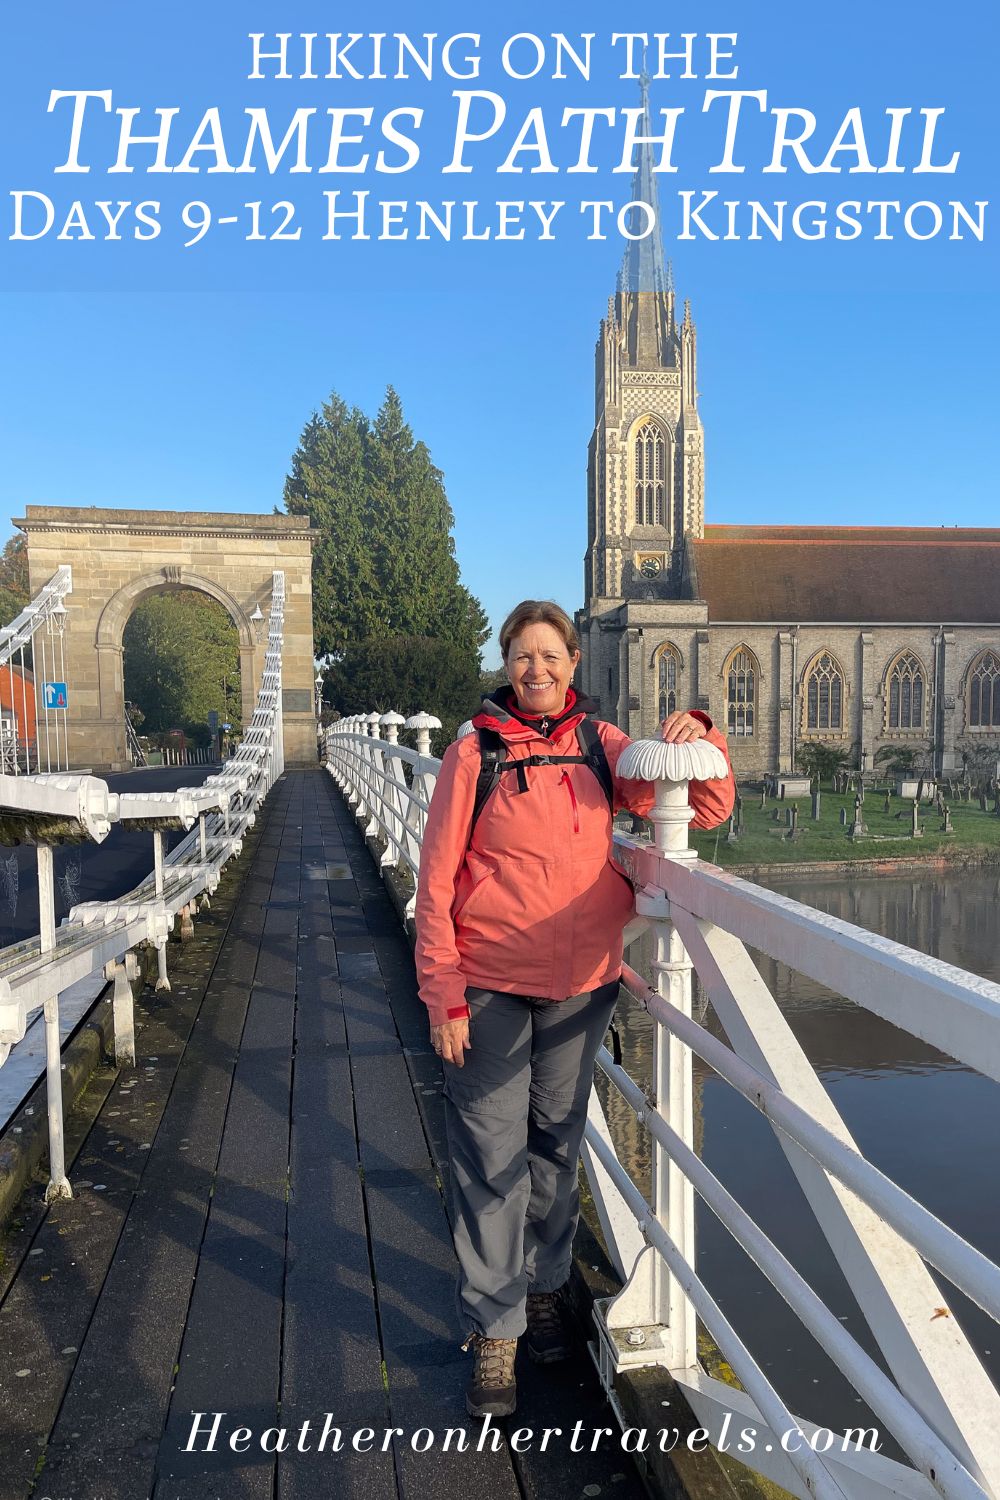
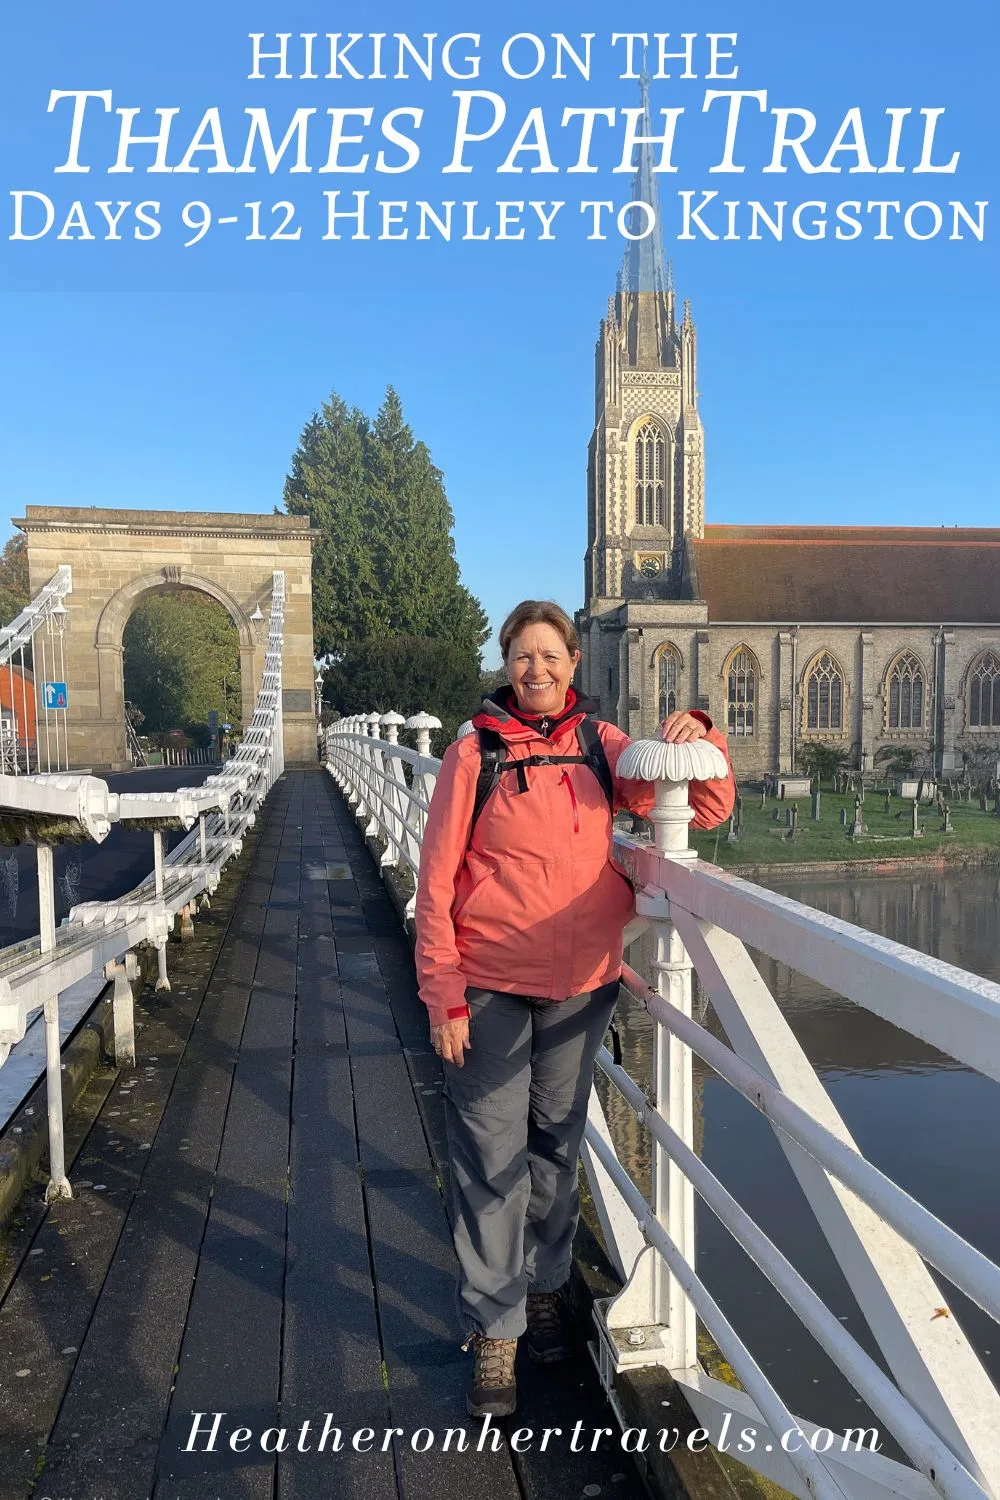
Days 9-12 – Henley to Kingston
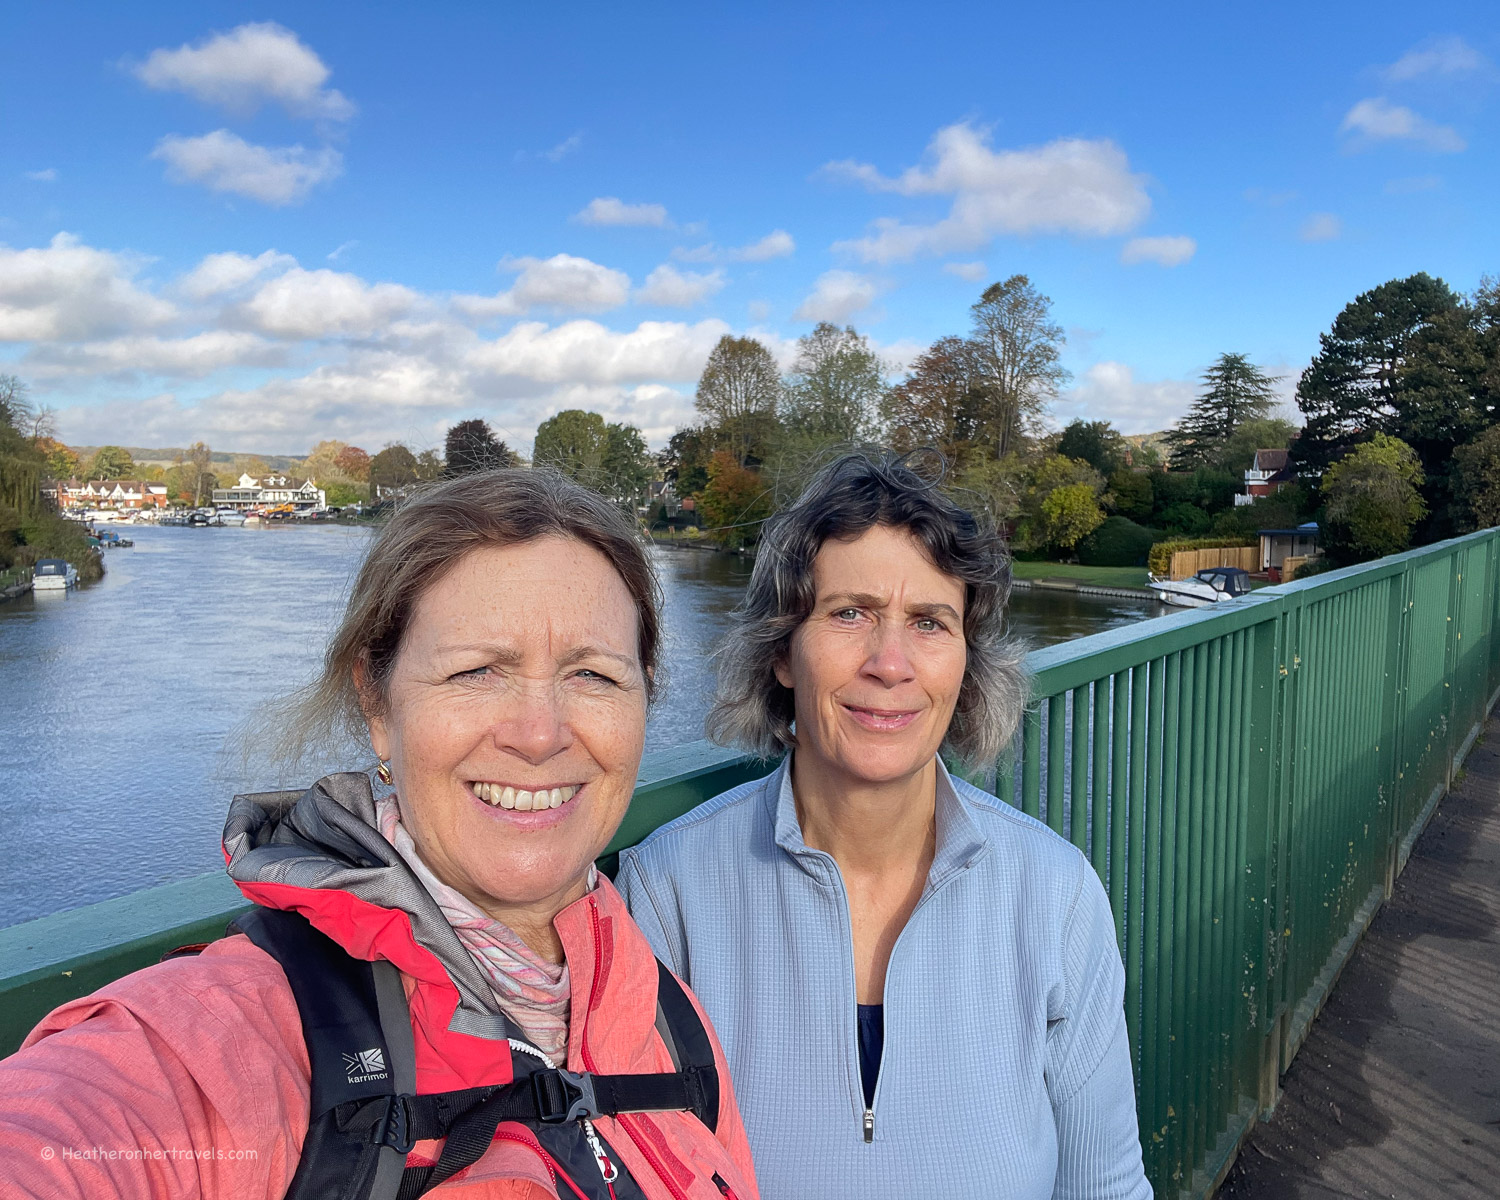
Rather than walking the whole of the Thames Path in one go, we chose to break this long distance trail into sections of one or two days. Walking with my sister, it took us a year to complete, snatching a couple of days walking whenever we could.
The whole trail takes 15 days, but to make it more manageable I’ve decided to break it into four separate articles, each covering 3-4 days of the Thames Path walk.
This section of four day’s walking could easily be managed over a long weekend. Alternatively you could just pick one of the legs for a day’s walk – our favourites were Day 10 Marlow to Windsor or Day 12 Chertsey to Kingston.
While we walked from the Source towards London, you can walk any of these stages in either direction.
Henley on the Thames Path National Trail
Essential planning for Days 9-12 – Henley to Kingston
If you are walking sections 9-12 of the Thames Trail over a 4 day period, here are the planning essentials.
Book the train to Henley for the start of the walk – it can be reached on the GWR line or the Elizabeth line from London, changing at Twyford. We recommend Trainline for easy rail bookings.
Book the train from Kingston at the end of Day 12 – there are direct trains to London Waterloo. We recommend Trainline for easy rail bookings.
Guidebook – buy the Trailblazer Thames Path Guide – this is the one we used and found it excellent for walking in either direction. While a guidebook is not essential, we enjoyed using this one as it added additional information and context to our walk.
I’ll be publishing further articles in this Thames Path series very soon. In the meantime, if you have questions about our walk on the Thames Path National Trail, feel free to email me at heather(at)heatheronhertravels(dot)com
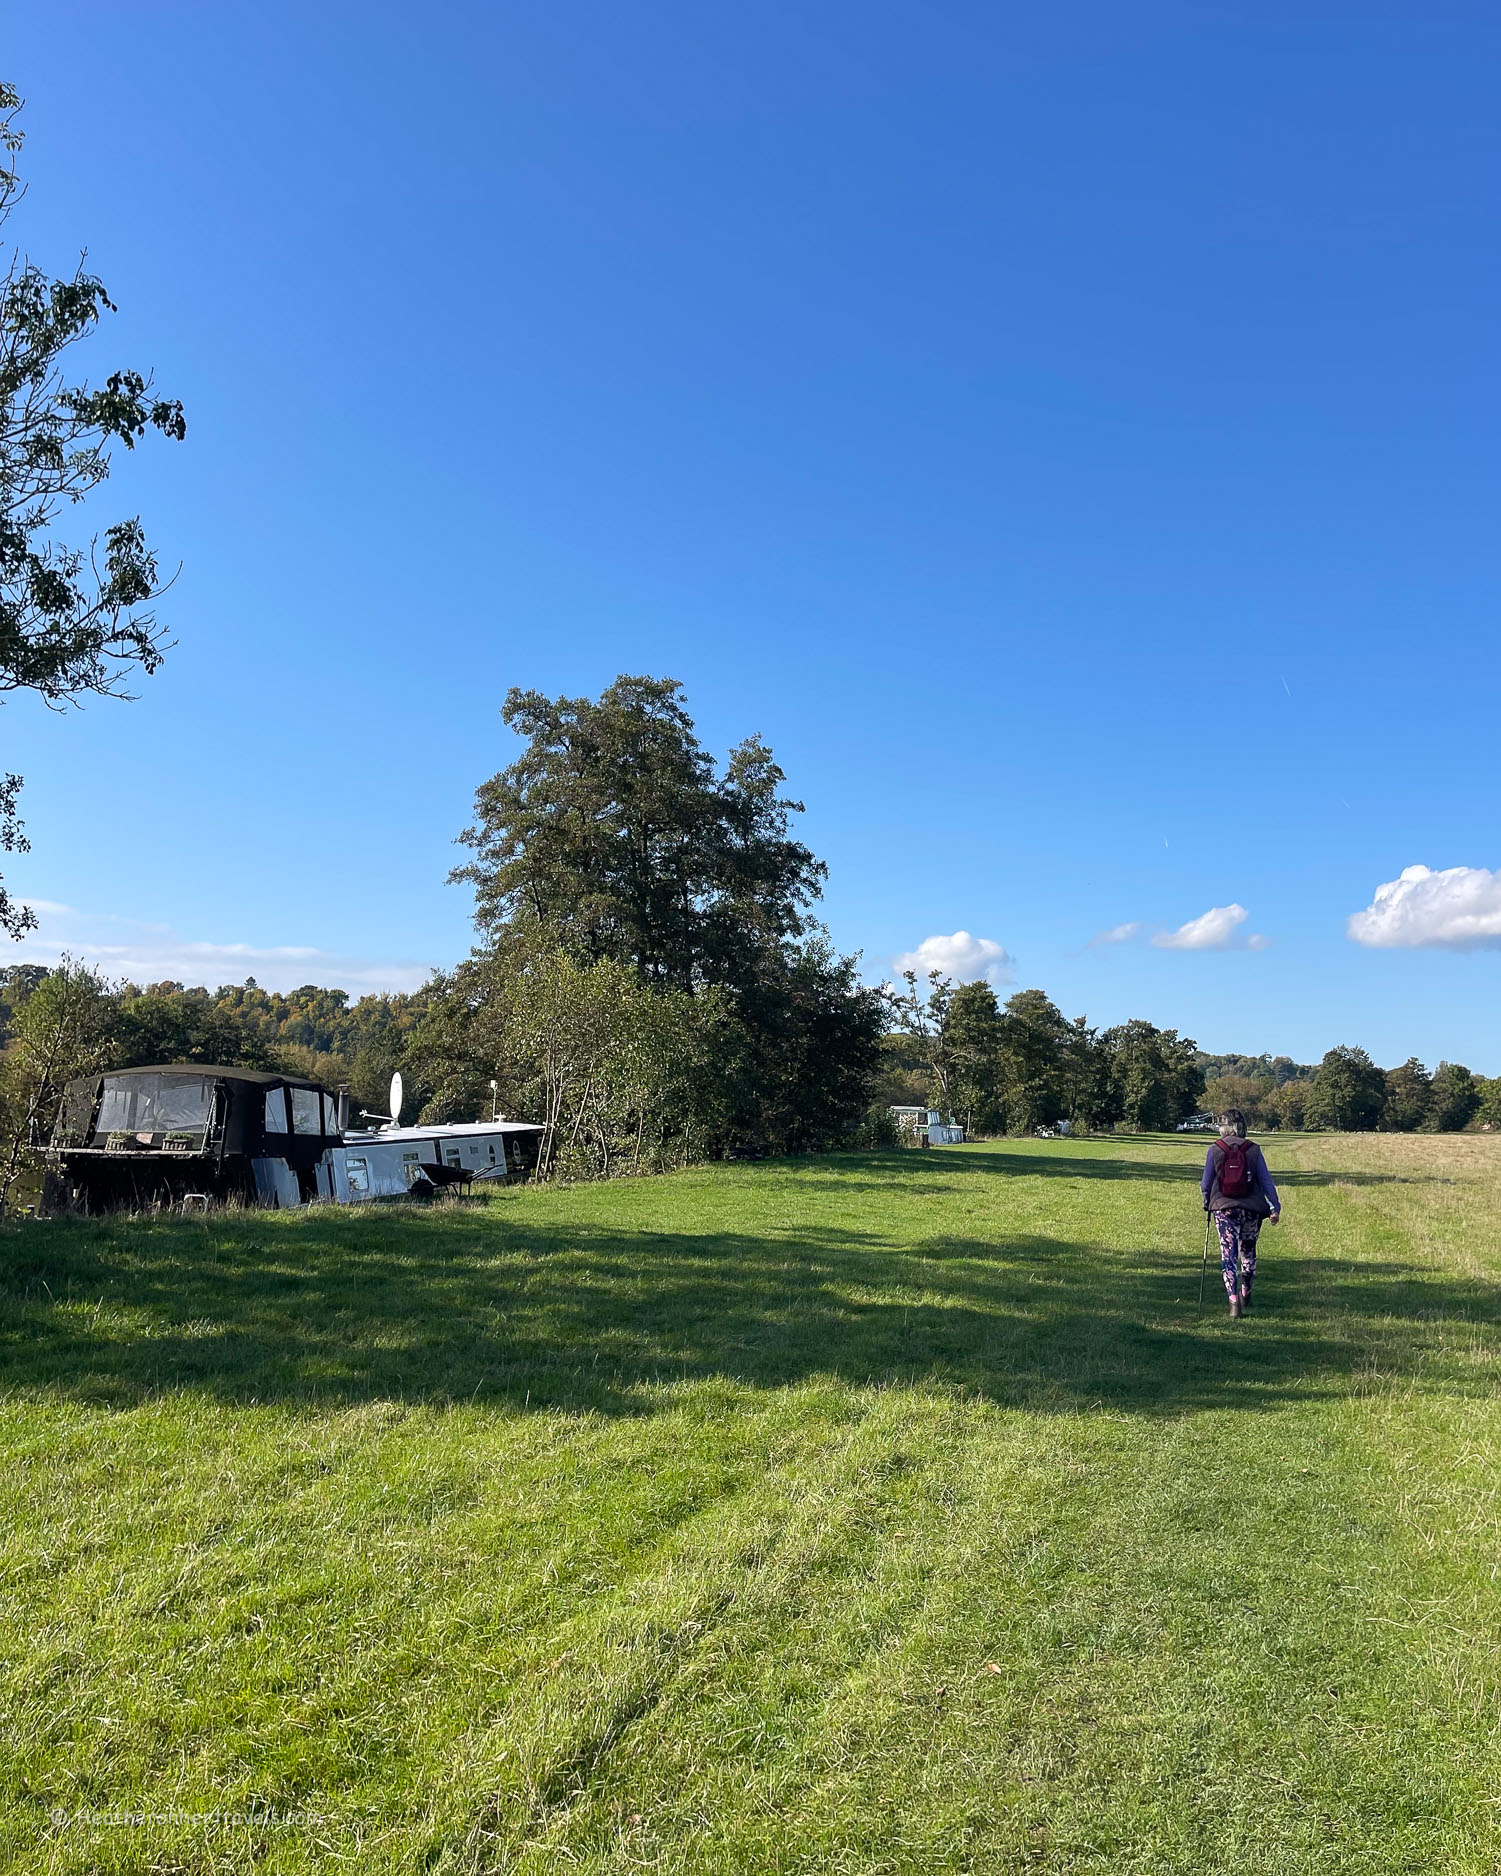
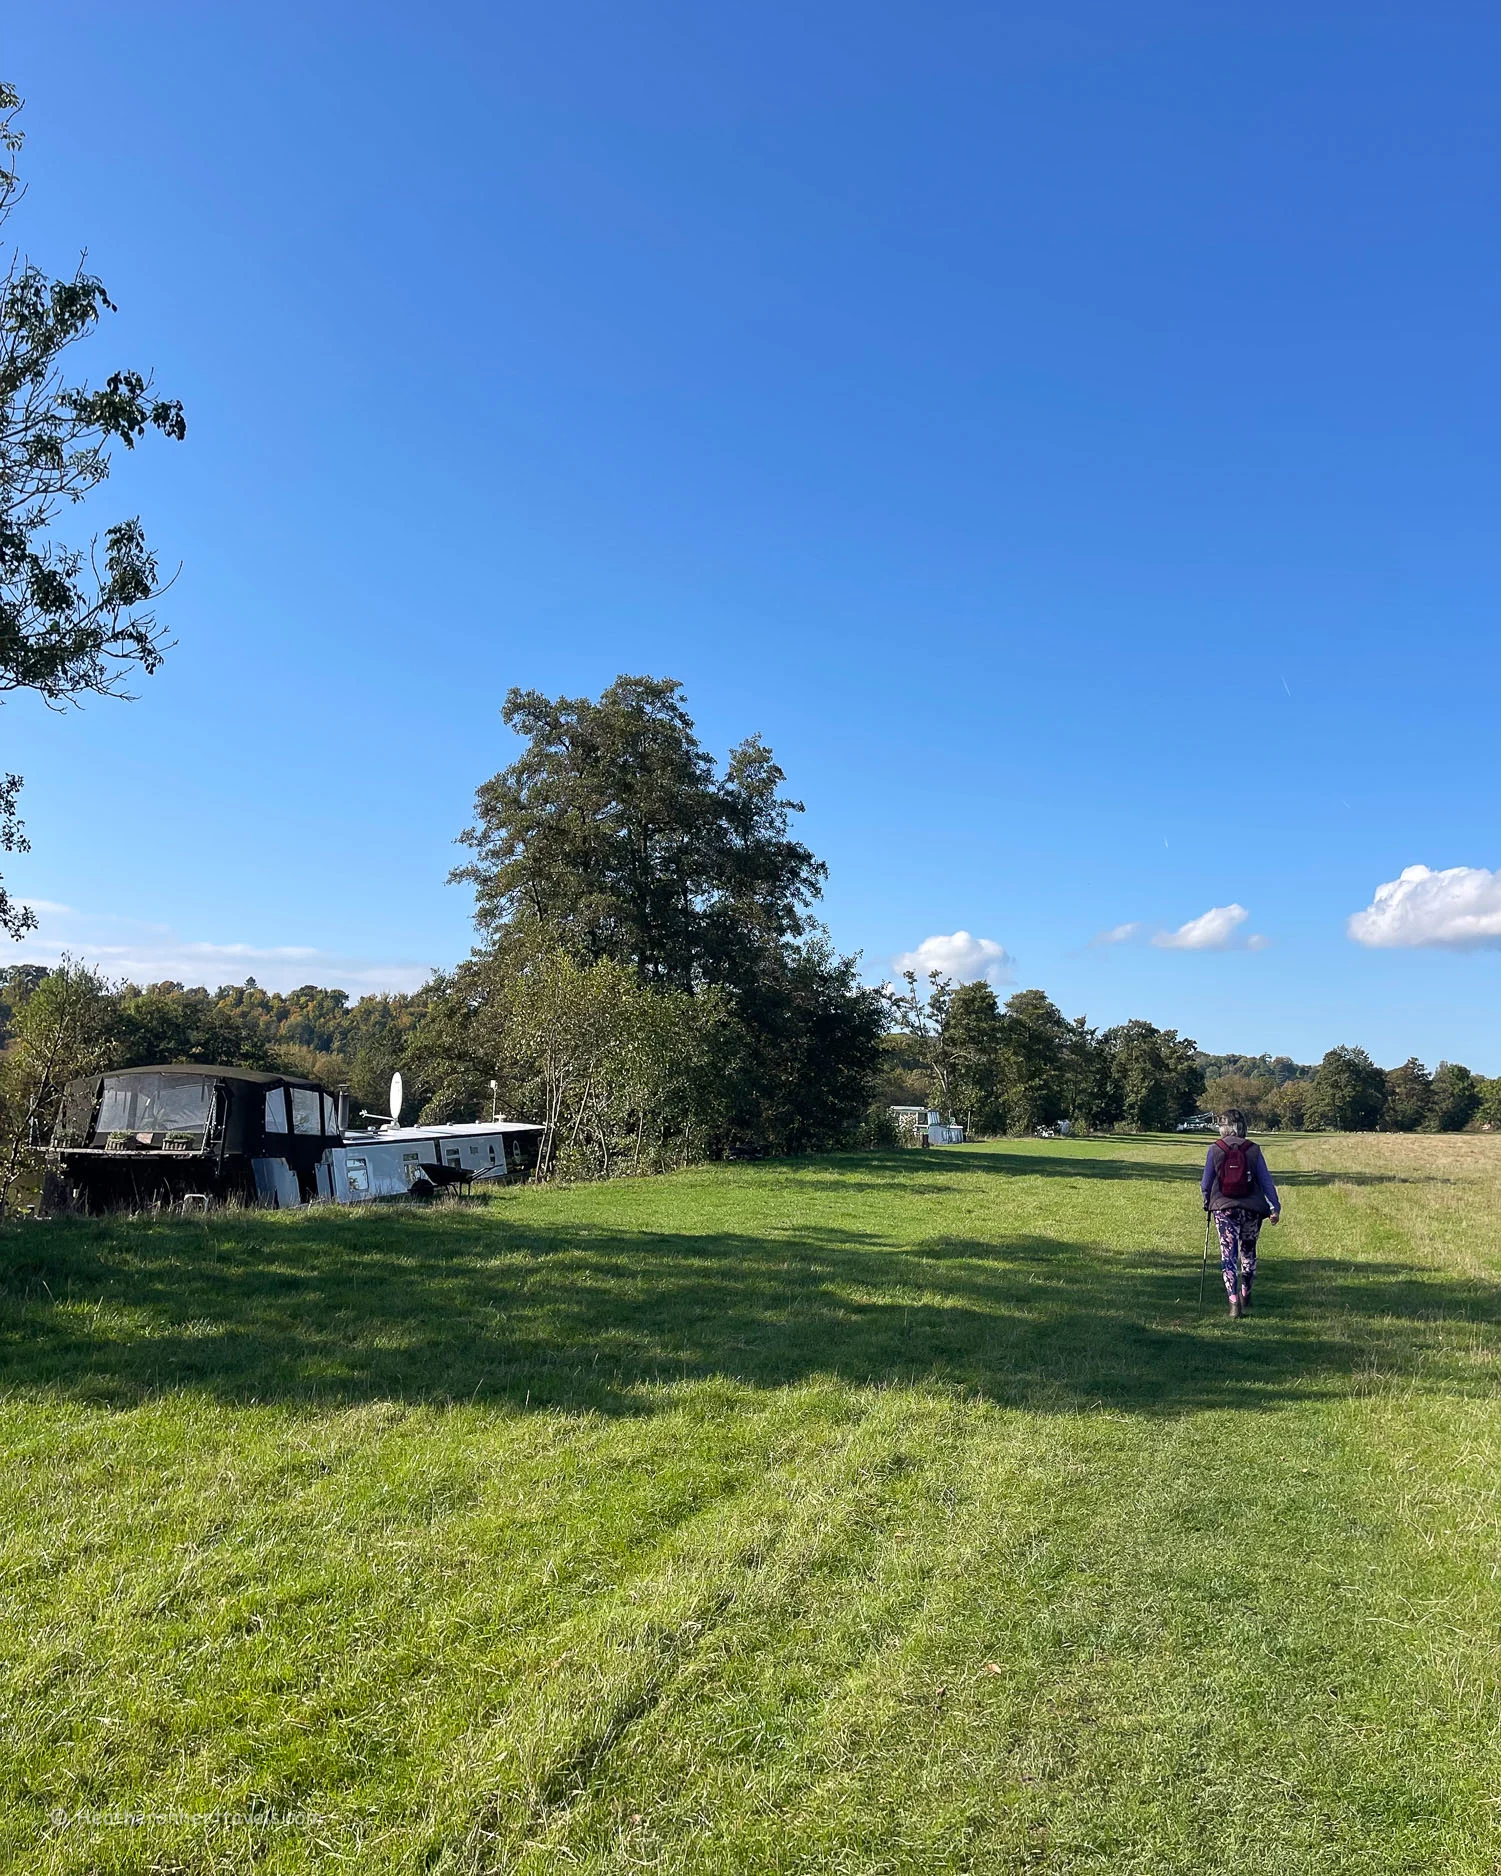
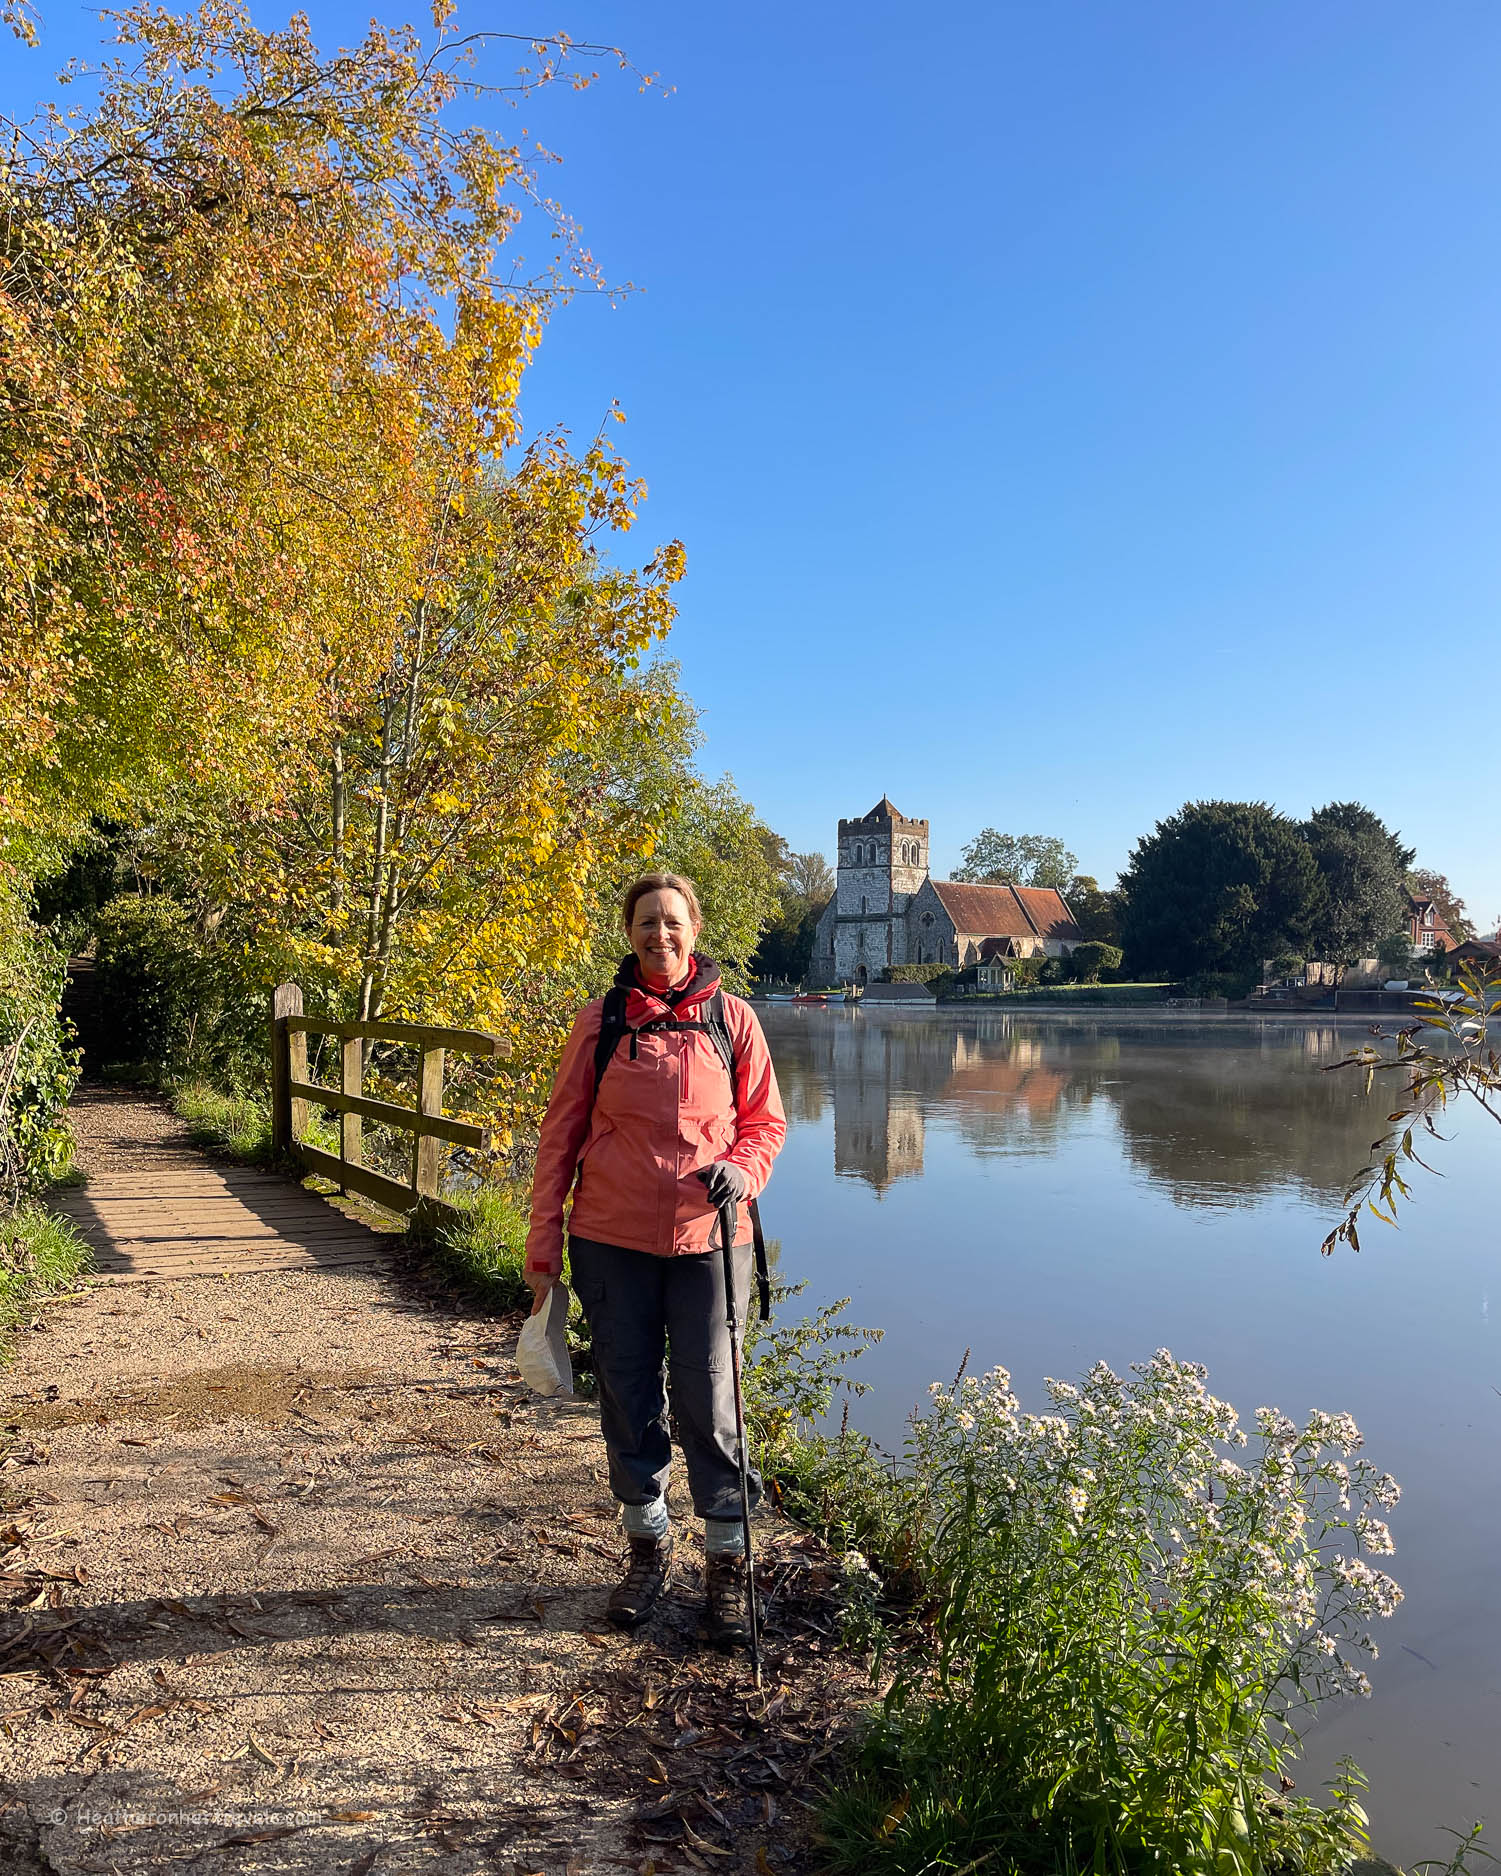
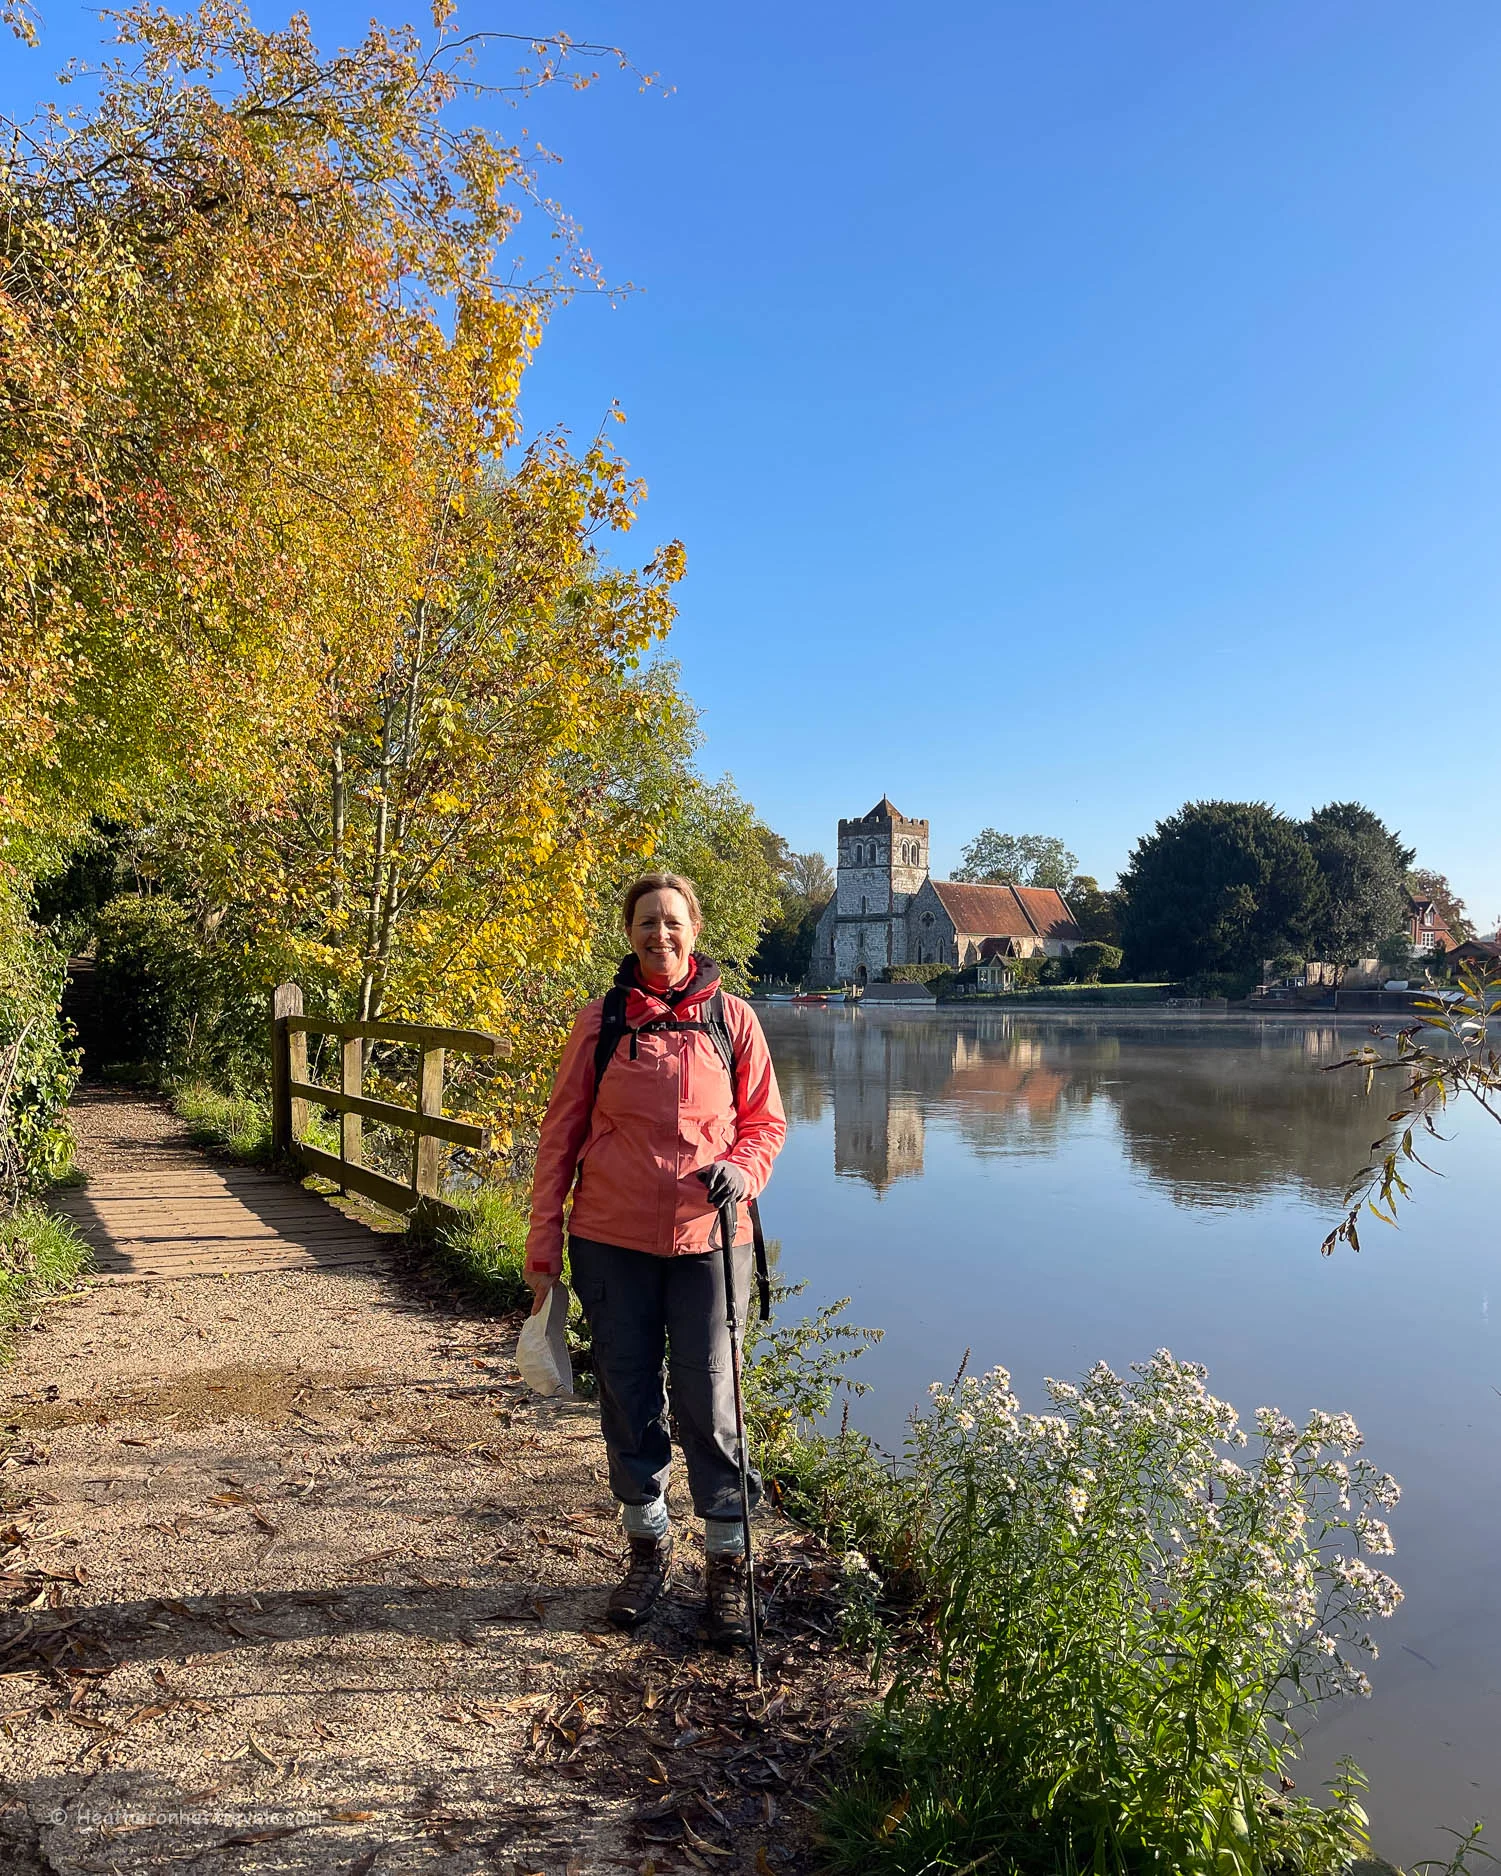
Day 9 – Henley to Marlow
This is an attractive stretch of the Thames Path, passing pretty villages and scenic riverside spots. However, with Temple foot bridge closed, it required some frustrating detours away from the river, walking along a busy road.
Before setting off, we recommend checking whether the Temple foot bridge has re-opened and be alert for detour signs.
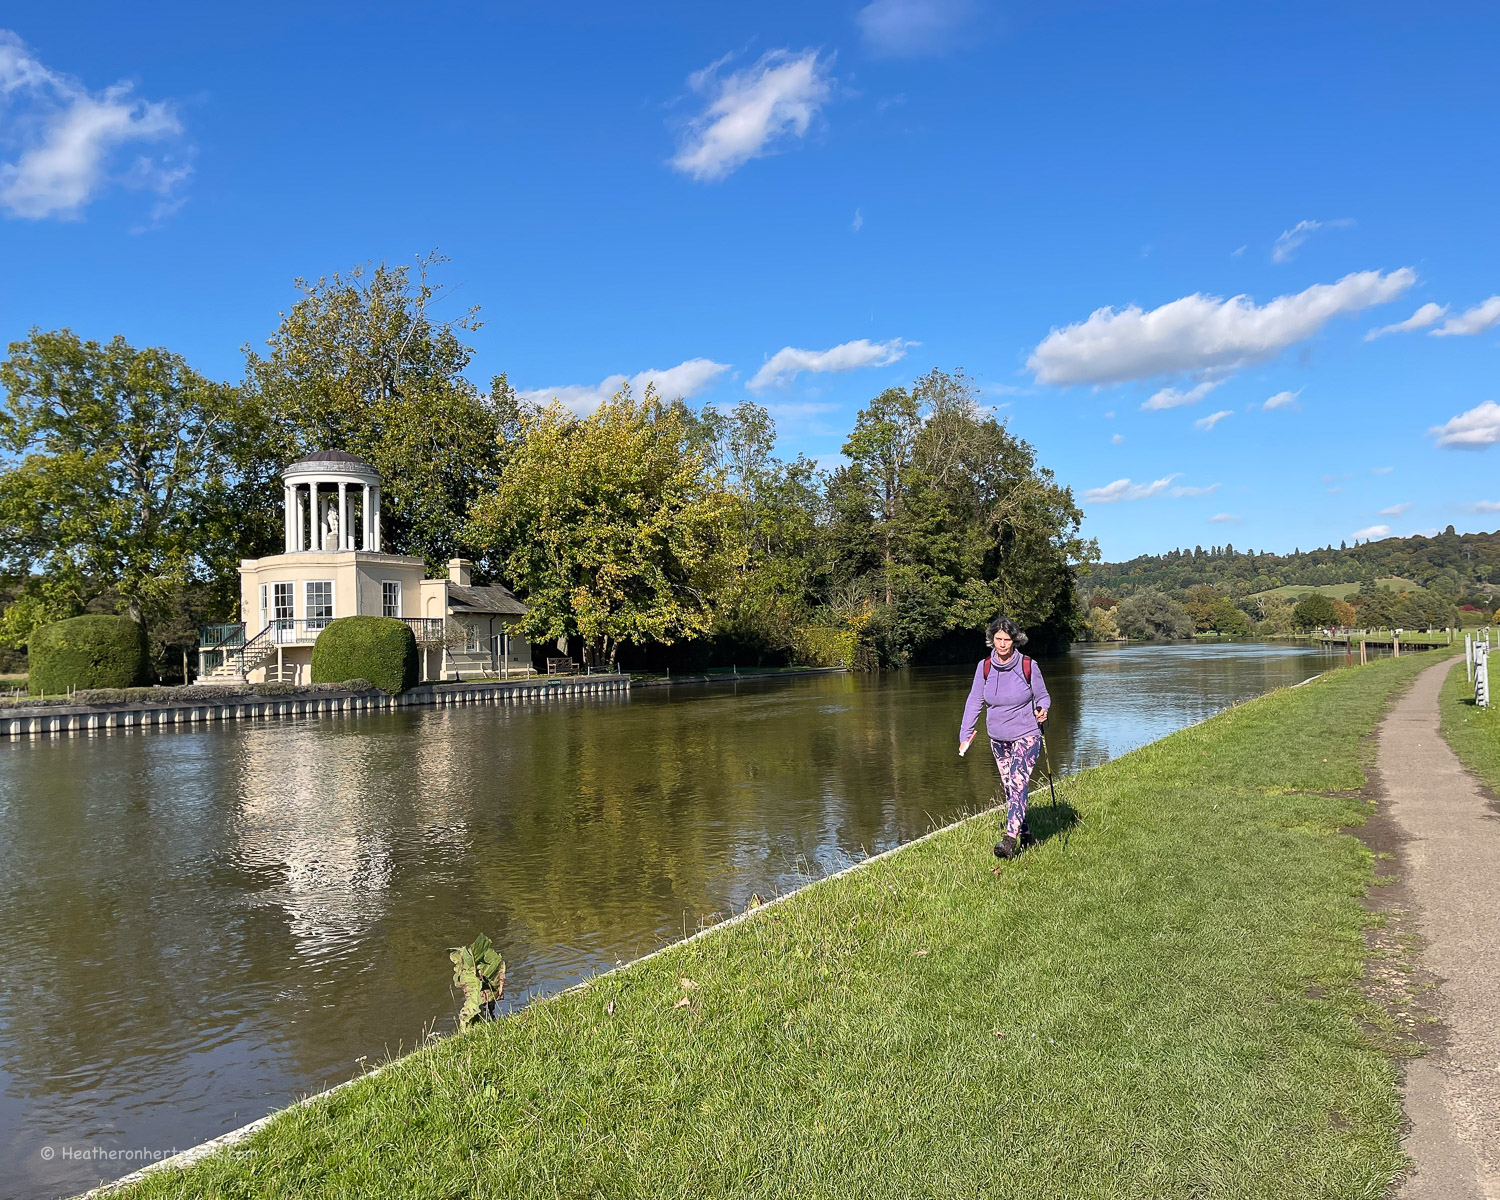
Temple Island Henley Thames Path National Trail
Leaving Henley behind
Leaving the attractive town of Henley behind, the Thames Path crosses the bridge to the south bank. Just beyond the bridge you’ll pass Britain’s oldest rowing club, The Leander Club, which is now a hotel.
A paved path runs through well maintained water meadows beside the river. It’s on these grassy lawns that the marquees will be pitched during the Henley Royal Regatta, which is held each July. The pretty classical pavilion on Temple Island is used as a marker during the famous regatta.
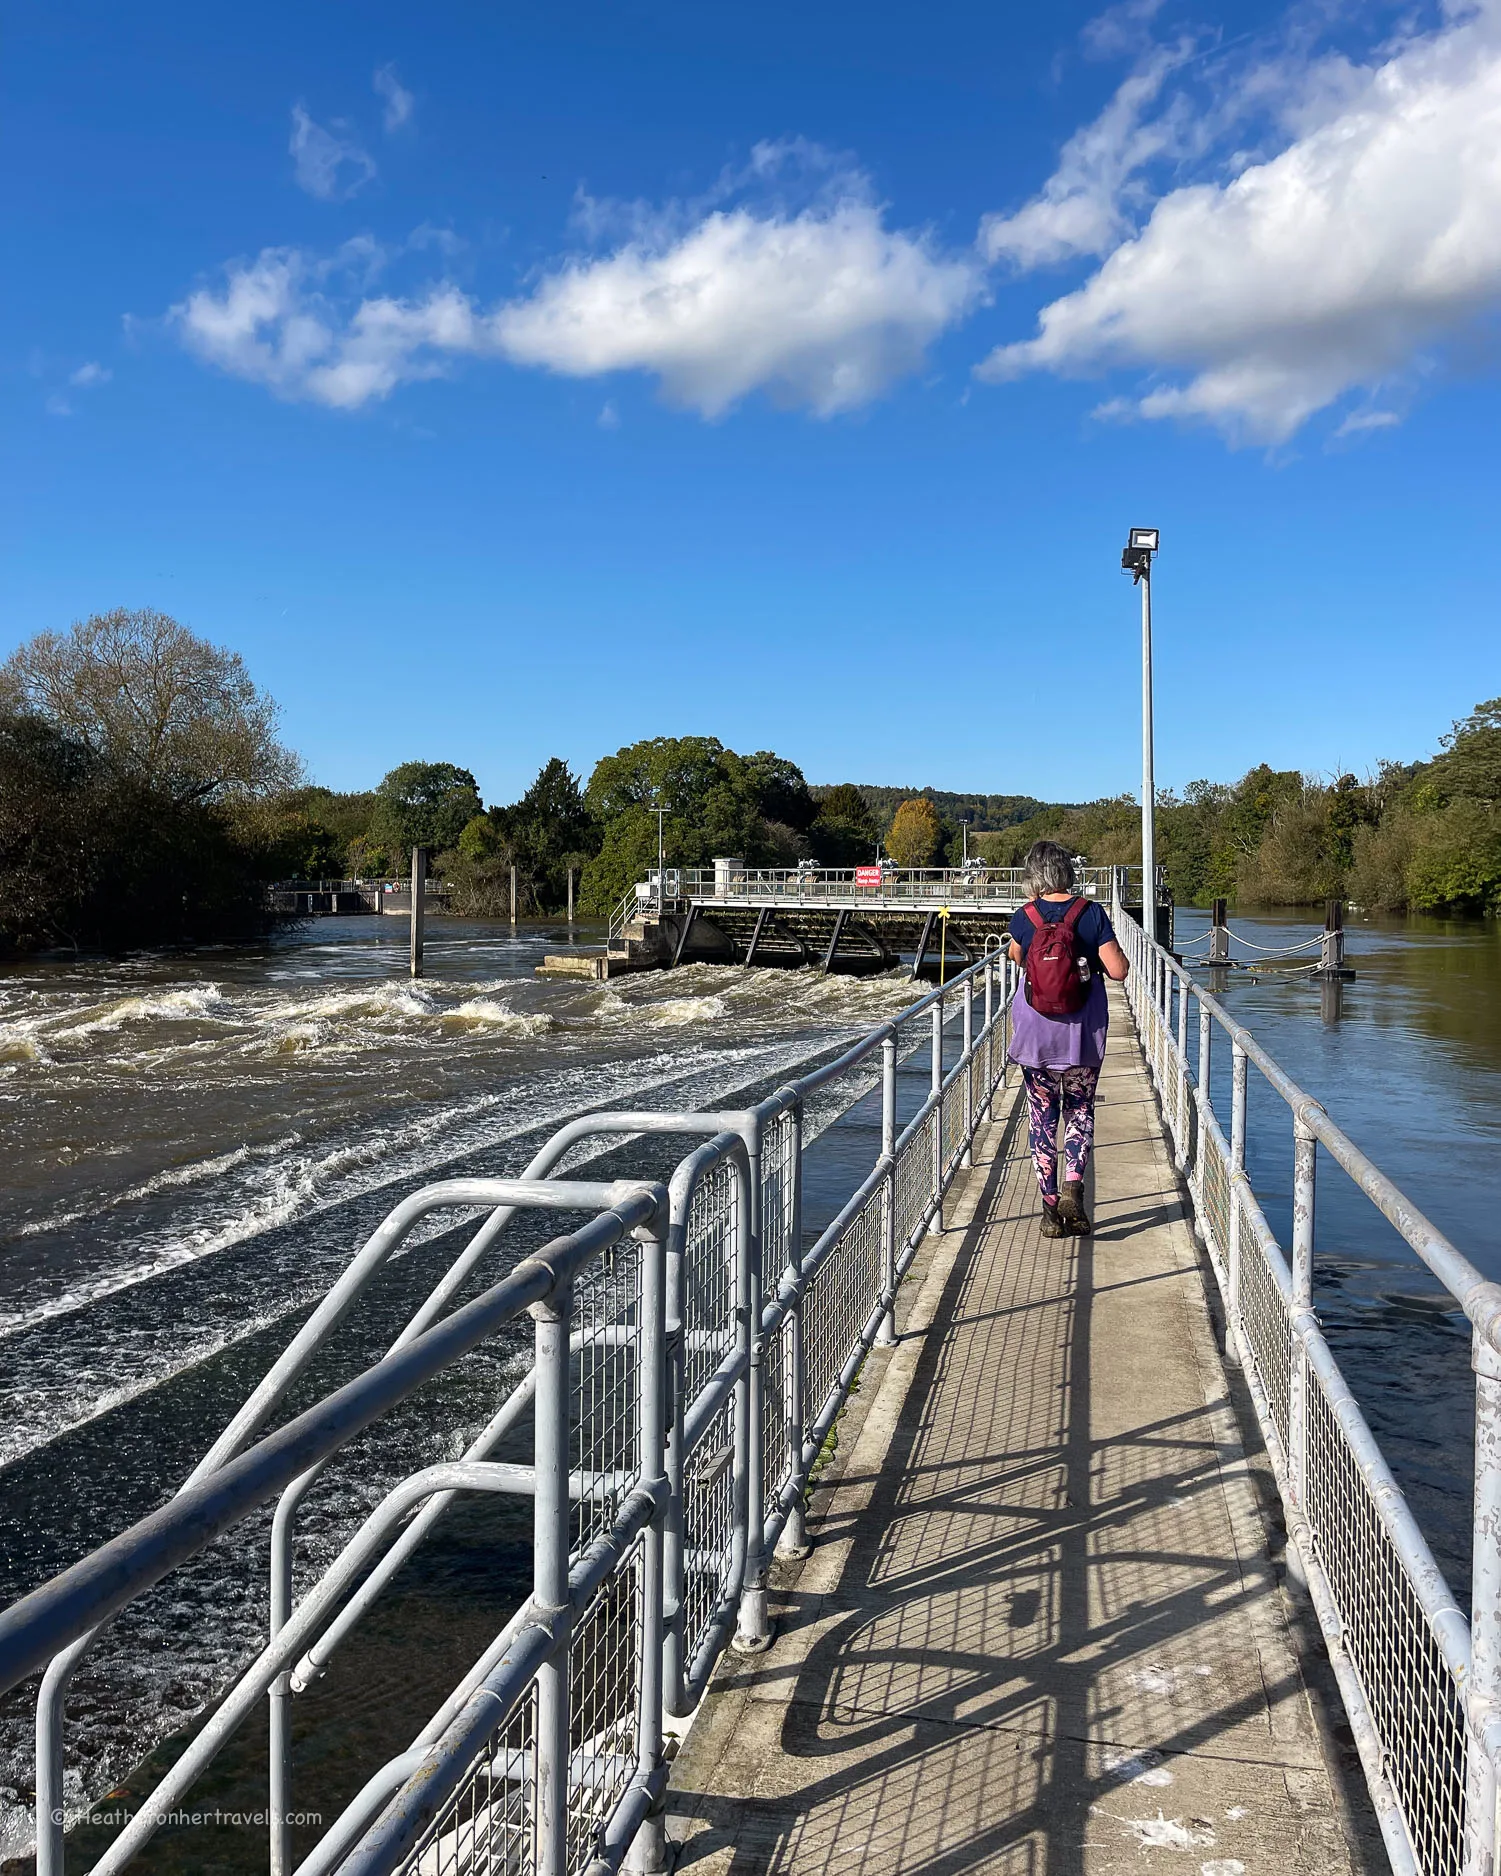
As the river curves at Remenham, the path continues to hug the bank until you reach Hambledon lock, where races start during the Henley Regatta.
Remenham on the Thames Path National Trail
Here it’s possible to cross the river on top of the weir to reach Hambledon Marina. The benches at Hambledon Lock made a pleasant place to stop for our picnic lunch.
Hambleden Marina Thames Path National Trail
Warning – diversions!
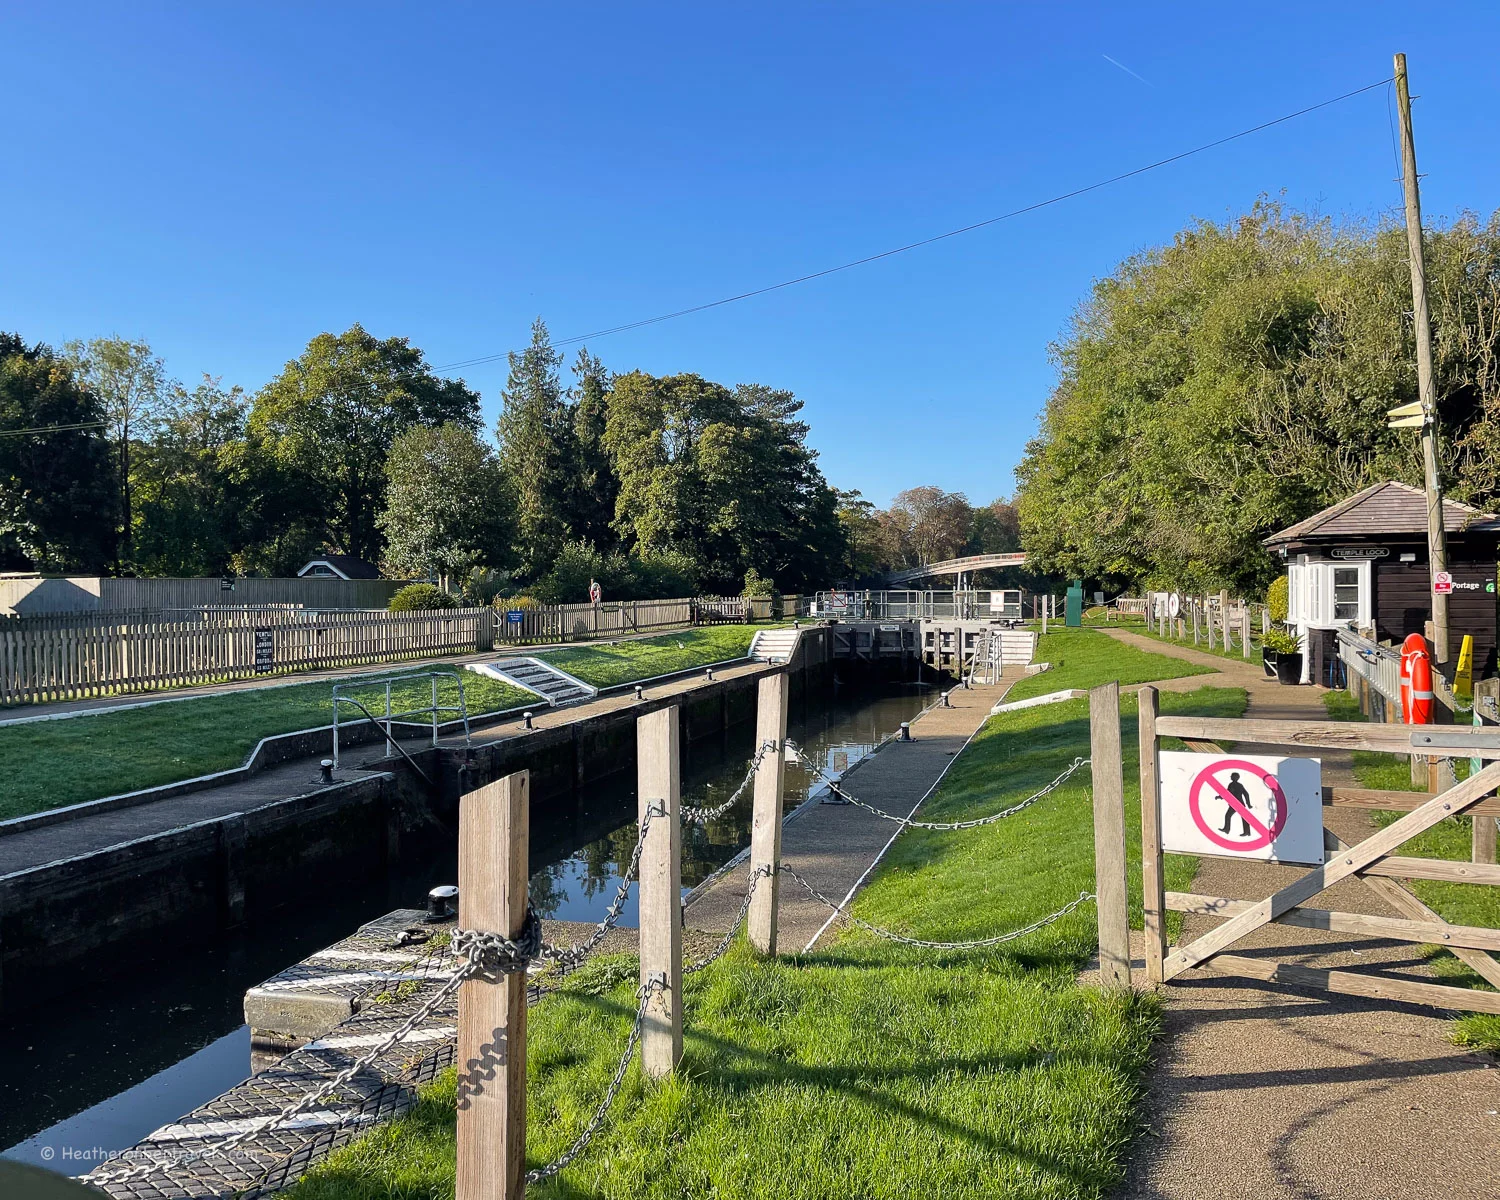
At this point you should be aware that the Temple foot bridge at Temple Lock is closed for survey and repairs. In October 2024 when we visited, the sign said it had been closed since May 2024, so there did not seem to be any urgency to reopen. This leaves you with a couple of detour possibilities:
Temple Mill Lock Thames Path National Trail
Option 1 (recommended) – south bank via Hurley and Bisham
Do not cross the Hambledon Weir, but stay on the south bank of the Thames until the village of Aston.
Here the path turns away from the river along ferry lane, towards the Flower Pot Hotel. It was once used by boatmen manning the ferry that provided a river crossing at this point.
The path now crosses the fields close to Culham Court, then returns to the river with a view of the 13th century Medmenham Abbey on the opposite bank.
Continue through a wooded area of riverbank until you reach an area of mobile homes overlooking the river, part of Hurley Riverside Park.
Thames Path at Hurley
At Hurley Lock the river divides among a group of small islands. A campsite and summer tearoom are located on one of them, reached by a wooden bridge.
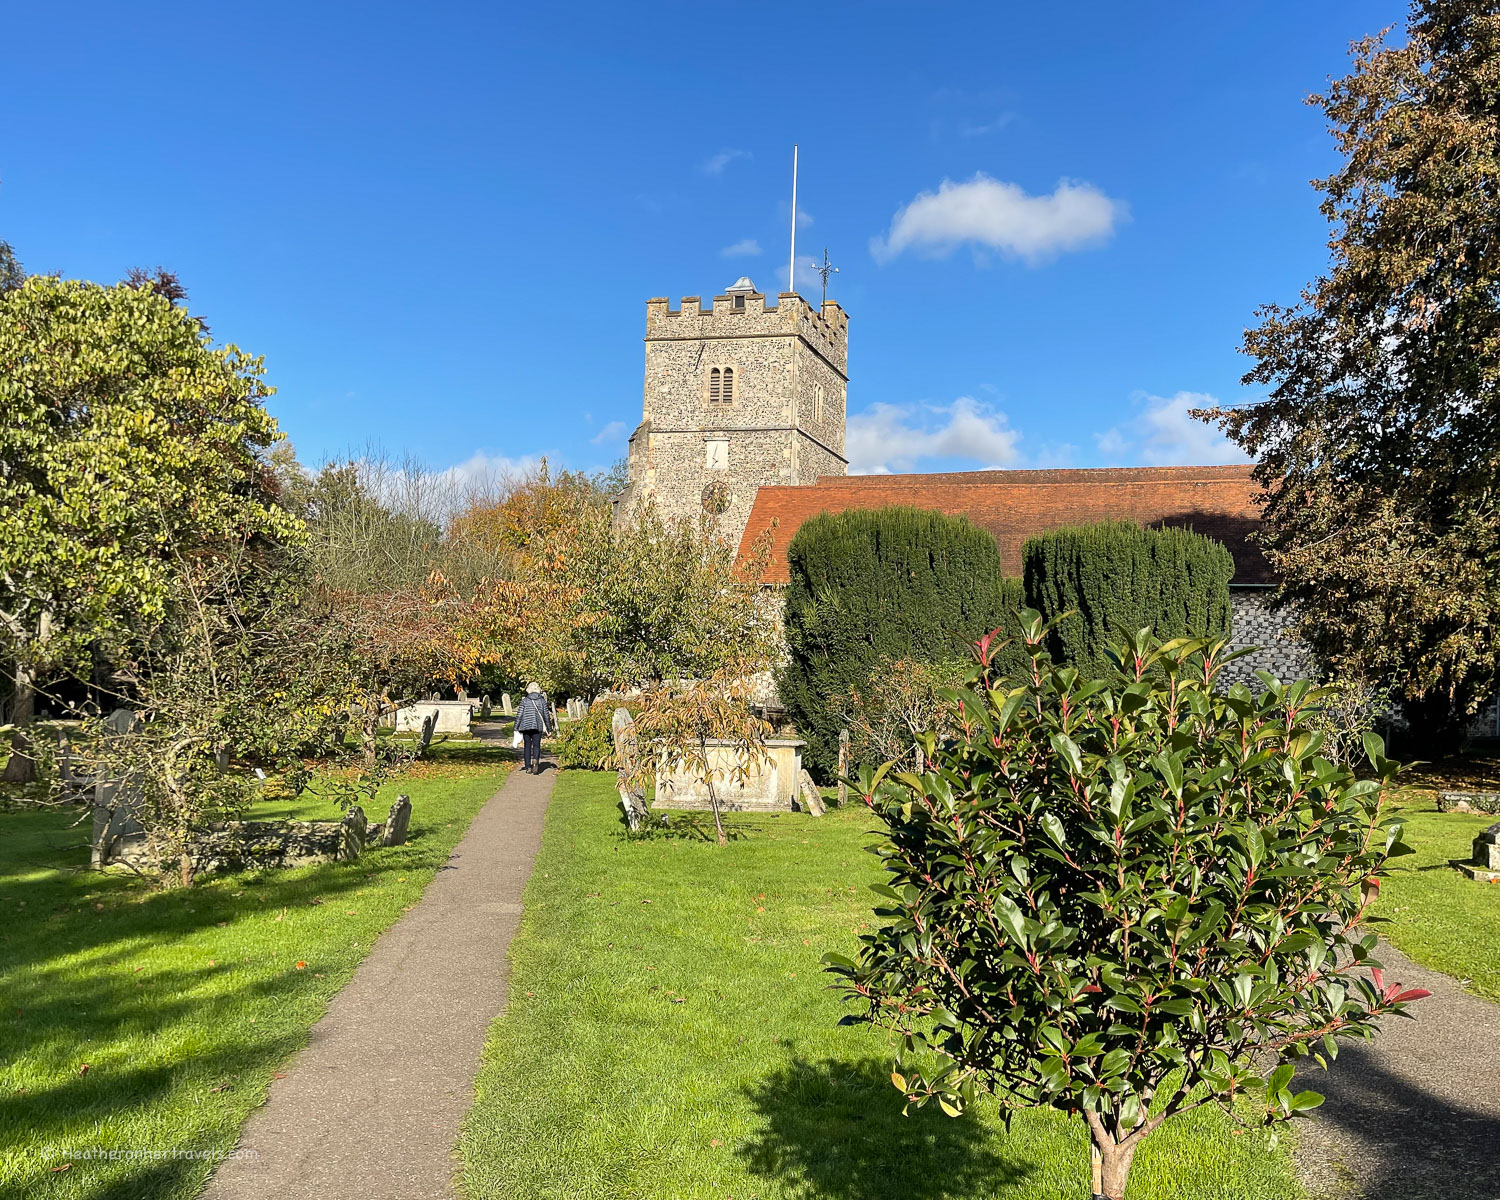
It’s worth taking the lane into Hurley Village, to look at the Saxon church of St Mary the Virgin. This was originally the chapel of a Benedictine Priory, the remains of which are now private houses.
Hurley is a good place to stop for lunch as there are a couple of pubs, including The Old Bell, which was the priory’s guest house. A little beyond Hurley, the Thames Path would normally switch to the north bank, over the arched Temple foot bridge.
Bisham Thames Path National Trail
However, with this bridge currently closed, you will need to follow the lane to Bisham with its pretty riverside church, then walk along the busy road until you reach the bridge at Marlow.
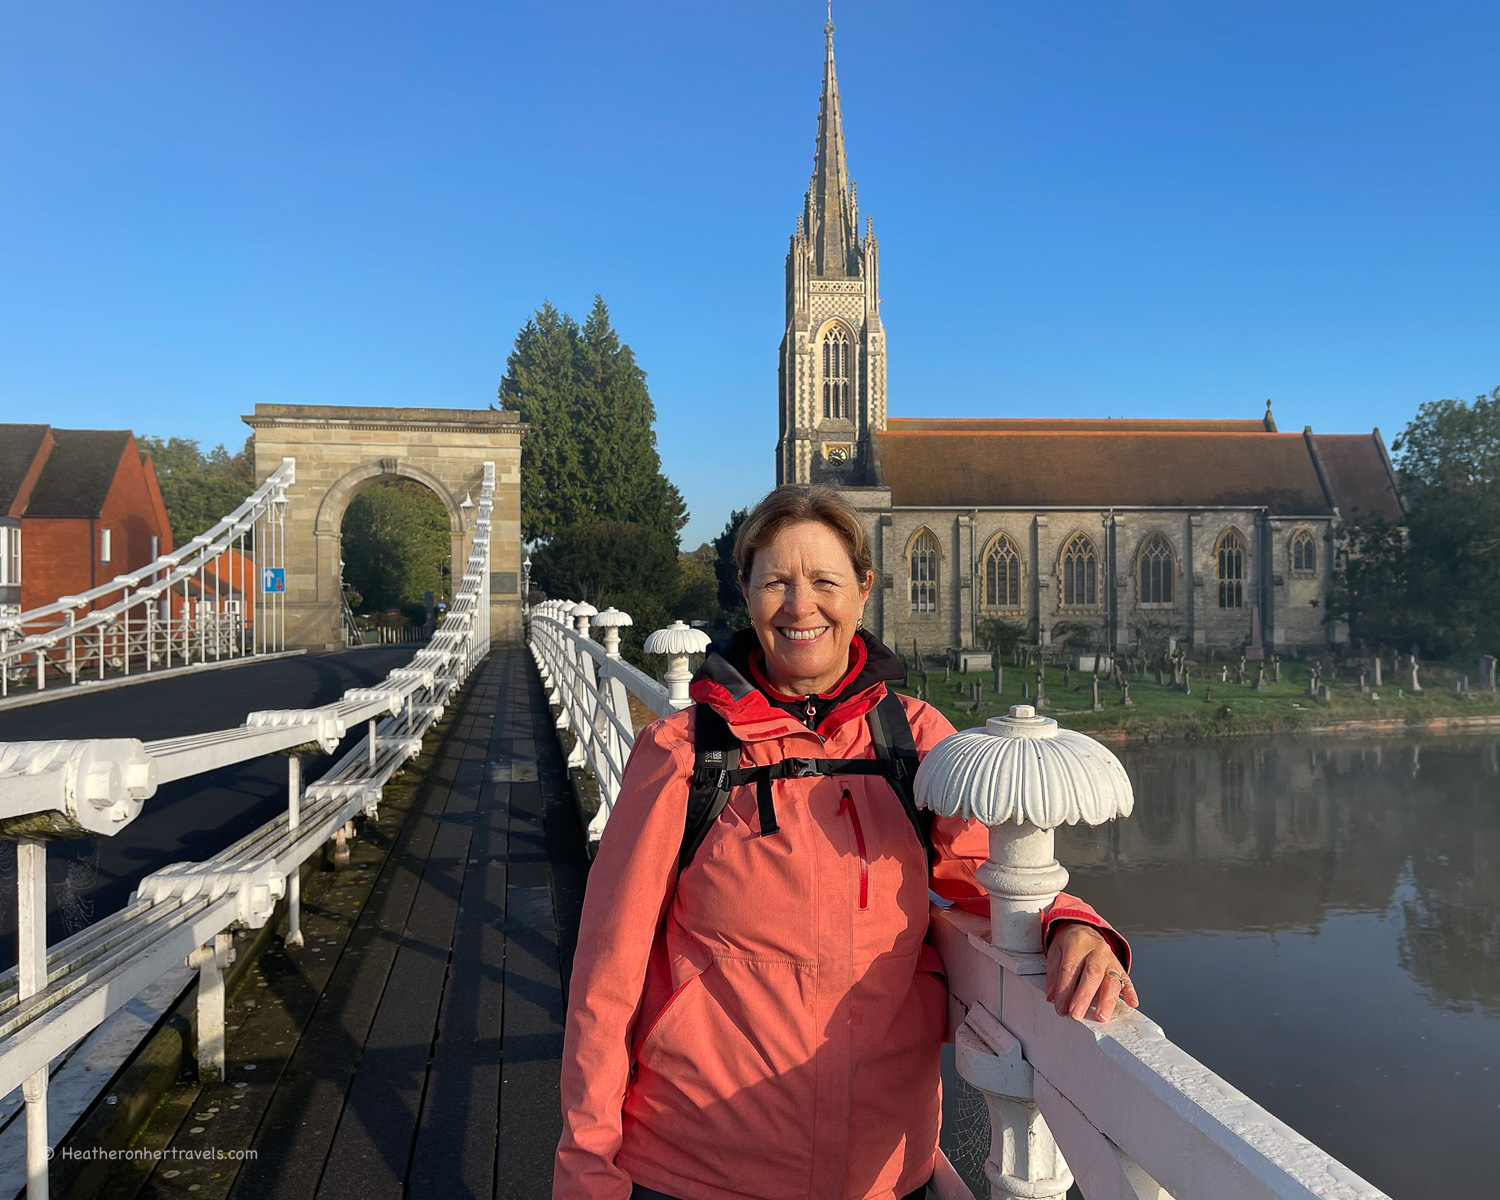
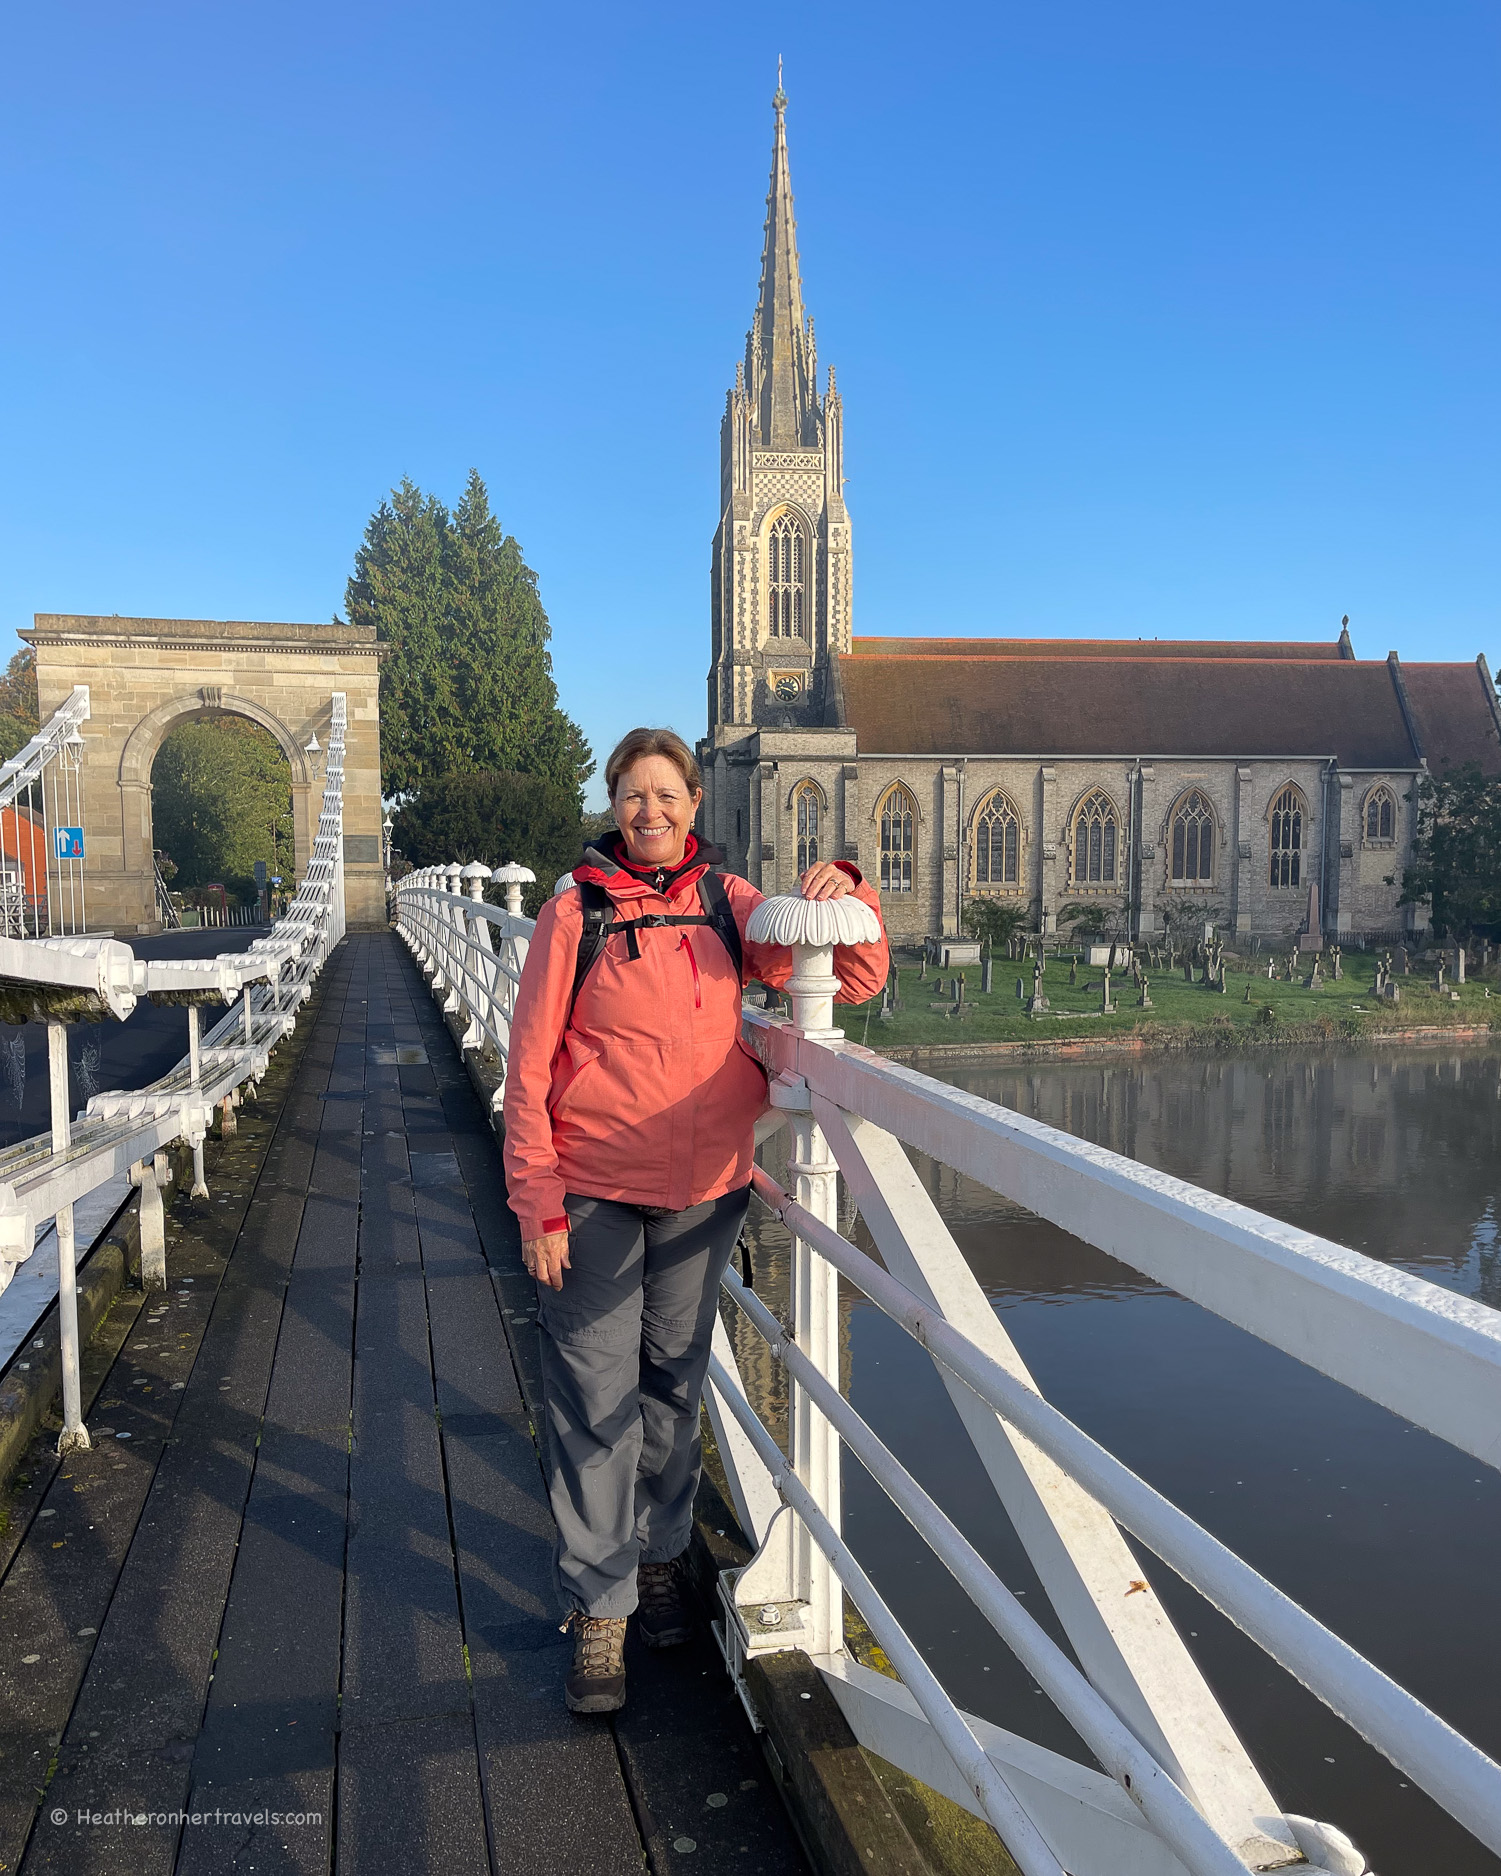
Marlow Bridge Thames Path National Trail
Option 2 – north bank via Medmenham and Harley Golf course
As we were walking in the opposite direction from Marlow to Henley, we reached the Temple foot bridge, only to find it was closed. Rather than returning to Marlow and retracing our steps on the south bank, we decided to take a detour to the path.
Footpath near Marlow on Thames Path National Trail
This took us around the Harleyford Golf course, where we stopped for coffee. We then followed the road, before rejoining the river at Medmenham.
Here we found a riverside path along the northern bank for much of the way to Mill End. Then a short walk along the road took us to Hambledon Marina.
Hambleden Weir Thames Path National Trail
At Hambledon we were able to cross the river on the impressive footbridge across the Hambledon Weir and Hambledon Lock. This enabled us to rejoin the Thames Path on the south bank.
Of course, if you are walking from Henley to Marlow, you’ll need to follow these directions in reverse.
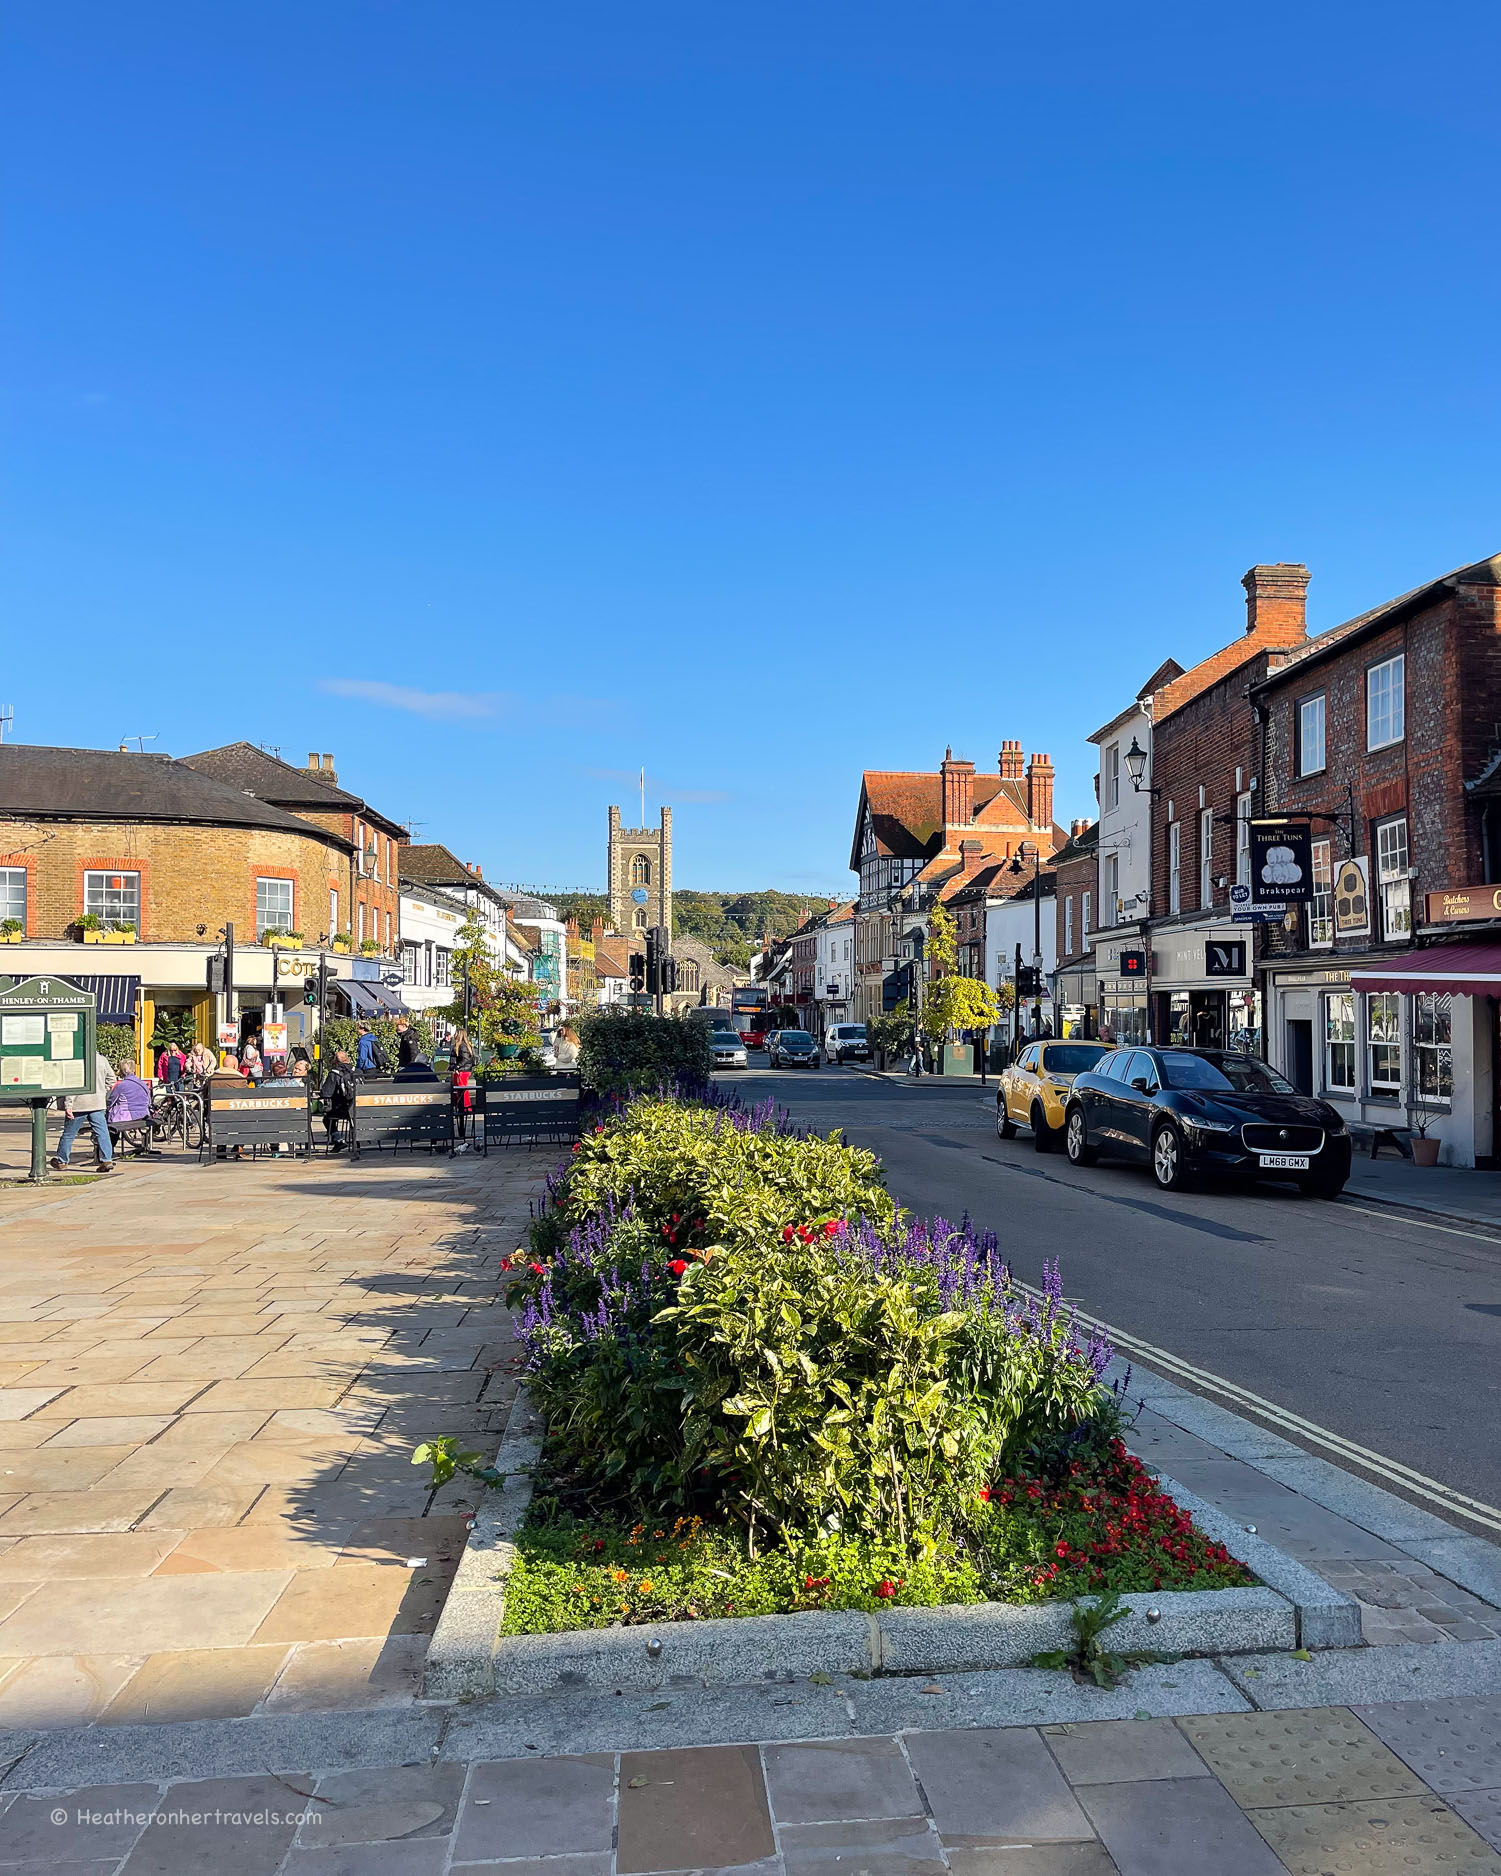
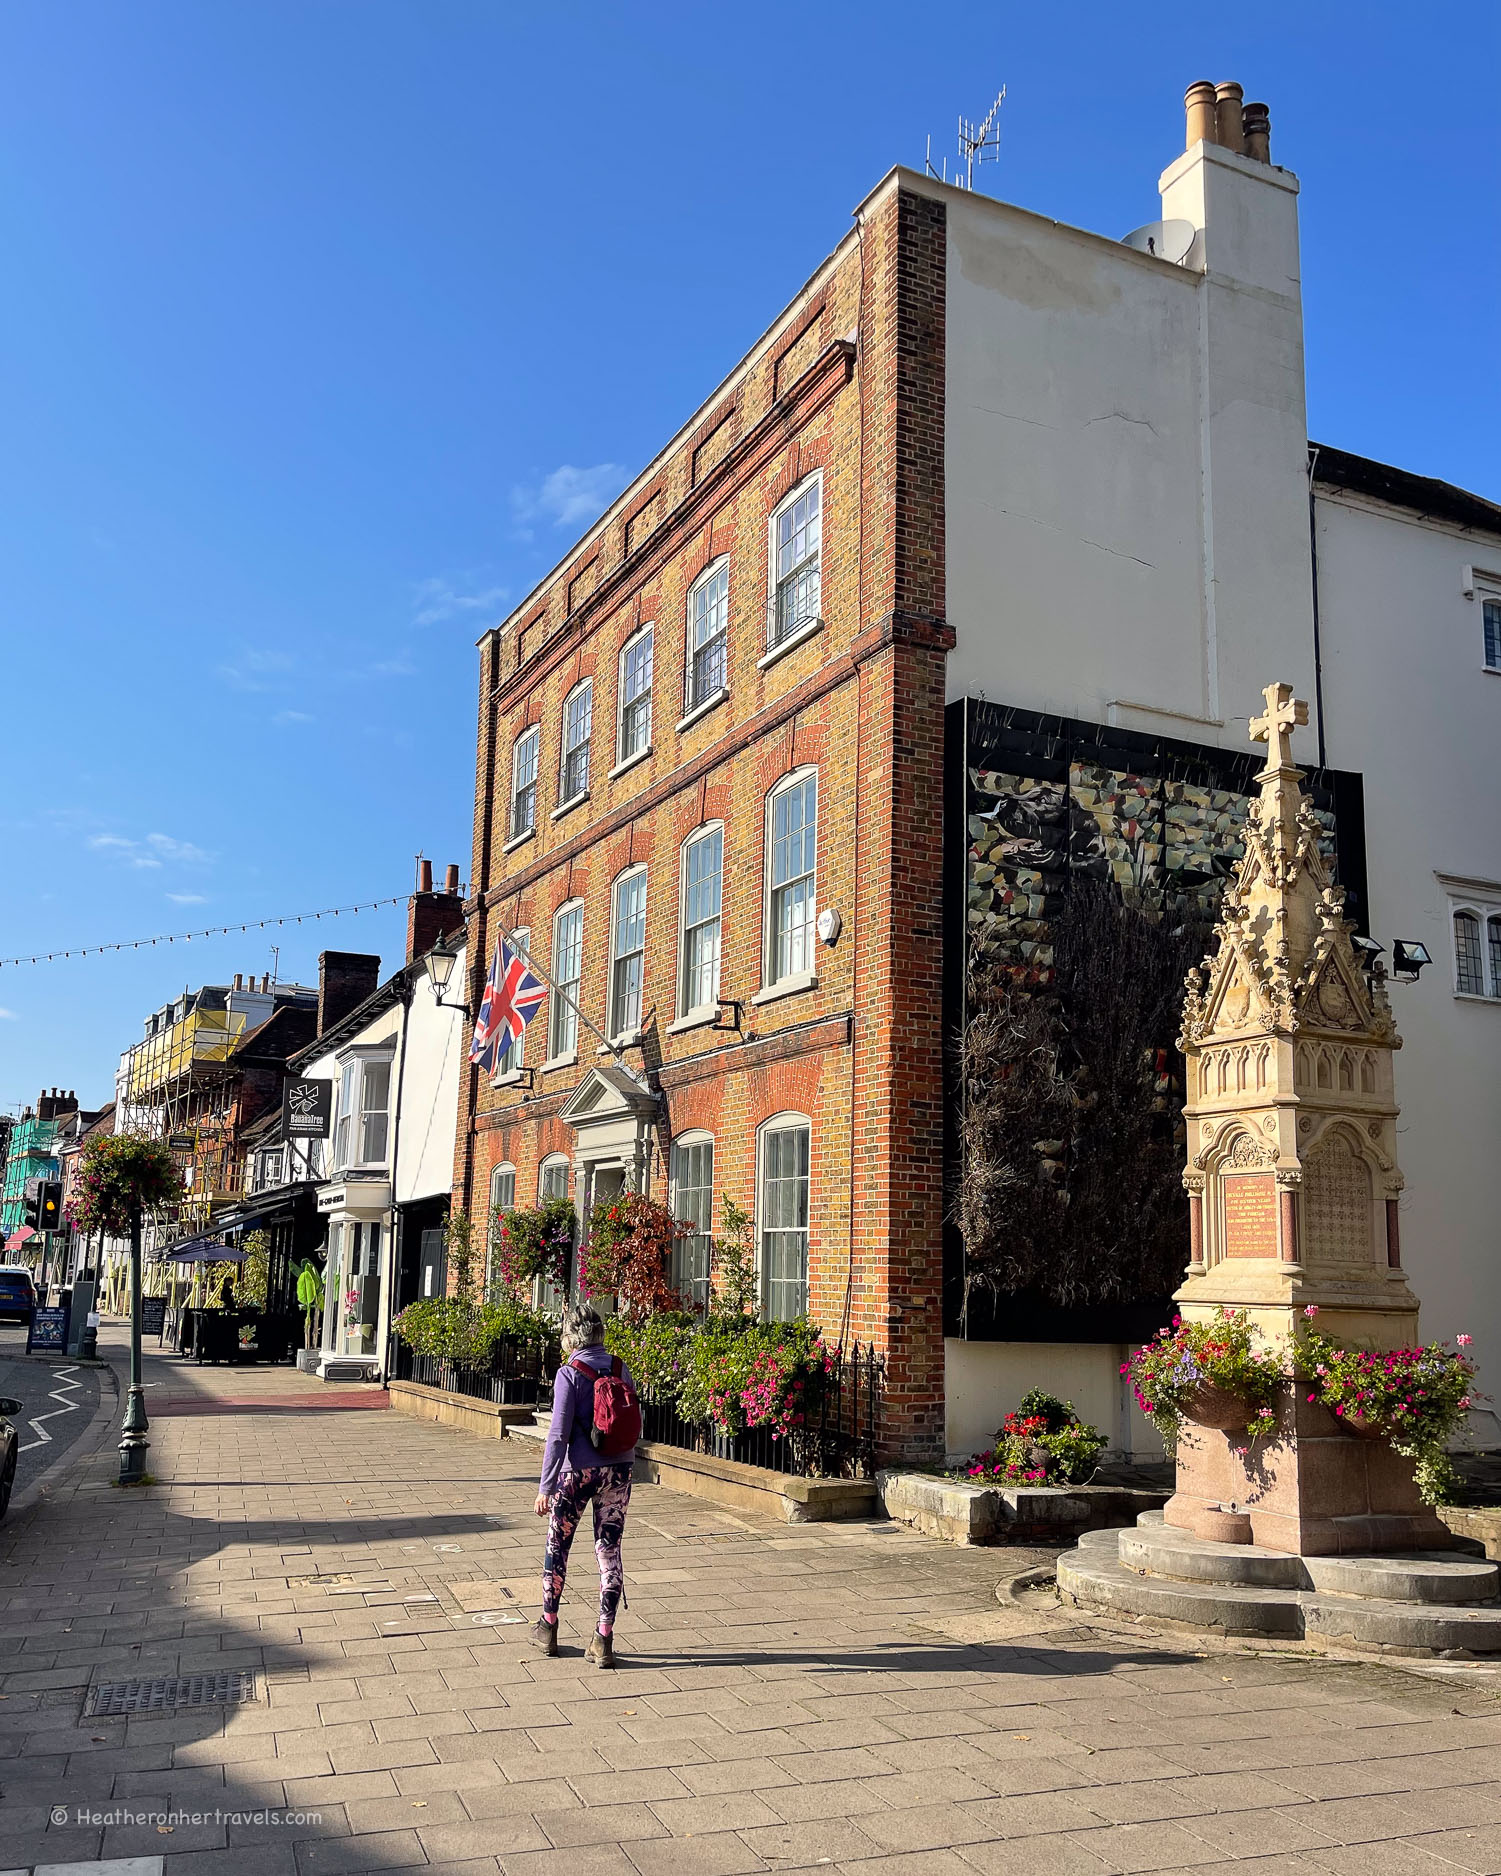
Henley Thames Path National Trail
Day 9 – Distance and timings
Henley to Marlow is aprox 8.5 miles / 14 km and took us 5 hours to walk, although this included some detours. As this is one of the shorter stages, you should have time to explore Henley and Marlow, both of which are attractive riverside towns.
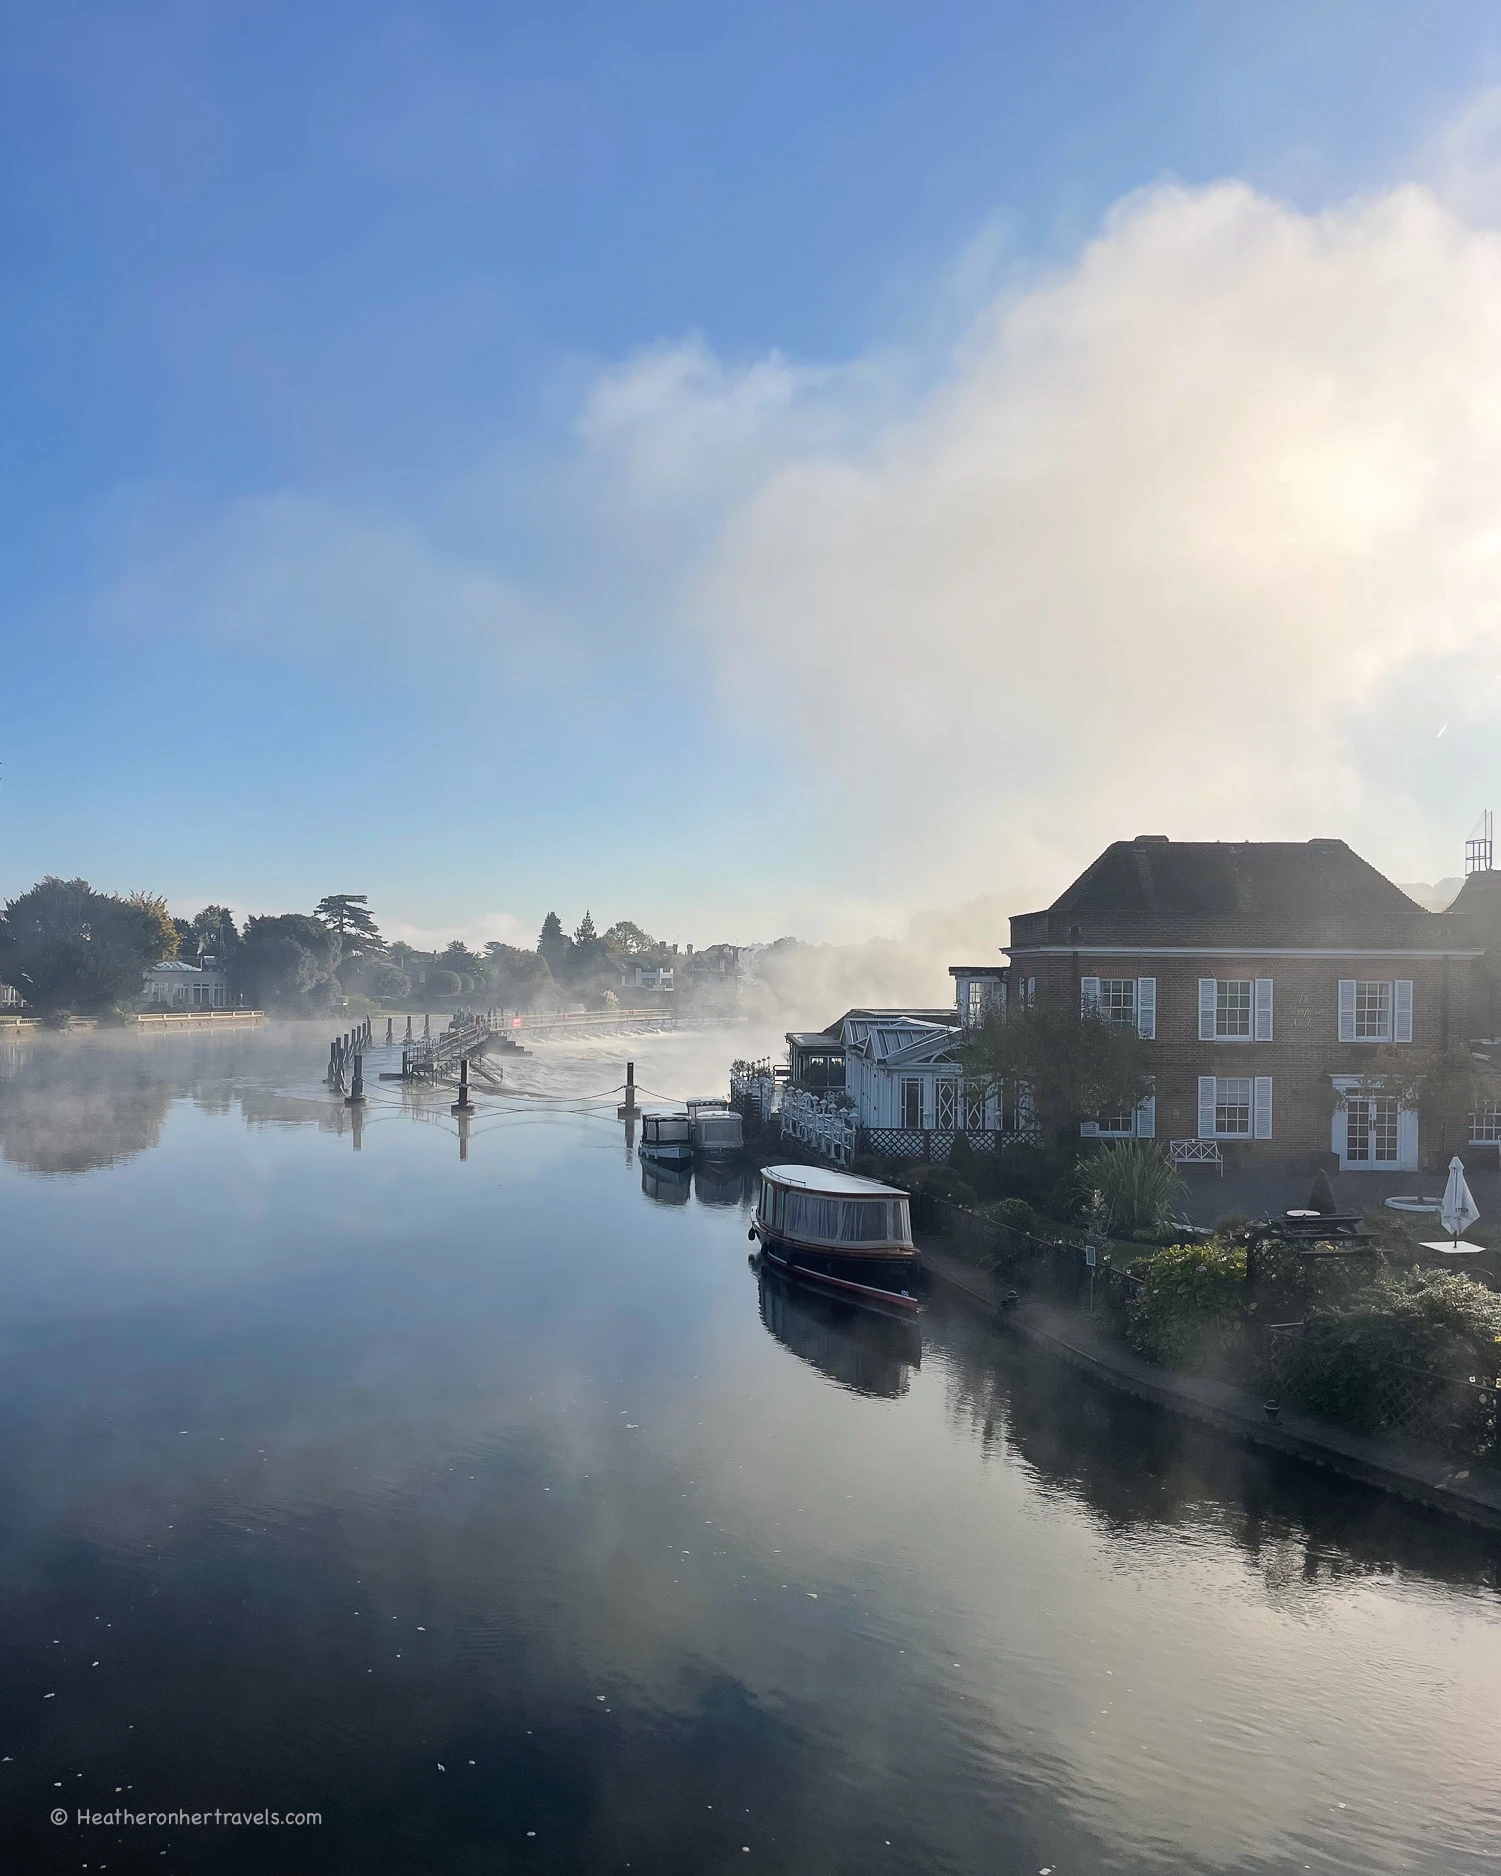
Morning mist on the river at Marlow Bridge – Thames Path National Trail
Day 9 – Where to stay
Henley: For budget options try The Catherine Wheel (traditional pub) or RIOSHOUSE (contemporary no-reception rooms). For more luxurious options, look at The Relais ( the former historic Red Lion Inn) or Hotel du Vin. All of these are well located in the centre of Henley, close to the many shops and restaurants.
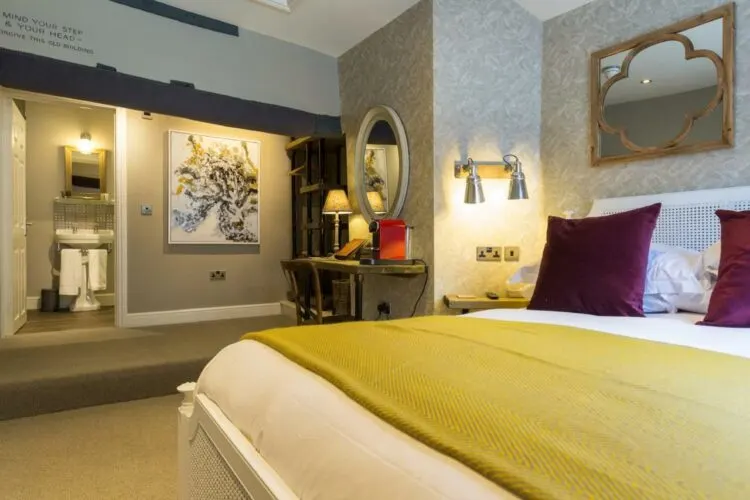
Marlow: There are a few places to stay in Marlow, although not as much choice as Henley. We recommend The Chequers Marlow, for boutique style in the centre of town or the Premier Inn for a budget choice.
The Chequers is a boutique style inn with rooms, located in the centre of Marlow
Day 9 – Where to eat
Both Henley and Marlow have a wide range of places to eat in the centre of town, as well as shops to stock up on picnic supplies.
On the walk between Henley and Marlow, The Flower Pot pub at Aston serves traditional pub food. Perhaps a better place to break for lunch is Hurley, where the Thames path crosses the river on a footbridge.
At the campsite on Hurley Lock is a tea room that’s open in the summer months. Within the village of Hurley are two pubs that both serve lunch as well as a village shop. The Old Bell at Hurley offers a more upscale menu. Alternatively, The Rising Sun is a traditional pub serving Indian food as well as pies and pub dishes.
If you are forced, as we were due to the closure of Hurley Bridge, to walk on the north bank of the Thames, you could try Harleyford Golf Club, which serves drinks and snacks to non-members.
Henley on the Thames Path National Trail
Day 9 – Transport for this stage
Henley has a railway station, which is on a branch line connecting to Twyford. At Twyford you can change to the GWR Bristol to London line or the Elizabeth Line into London. Marlow also has a railway station, which can be reached from London by changing at Maidenhead.
The number 800 and 850 buses run between Henley and Marlow, so you could park in either town, take the bus and then walk back on the Thames path. For this stage, we parked in the Southfields Car Park (24 hrs) at Henley and took the 850 bus from Henley to Marlow, then walked on the Thames Path back to Henley.
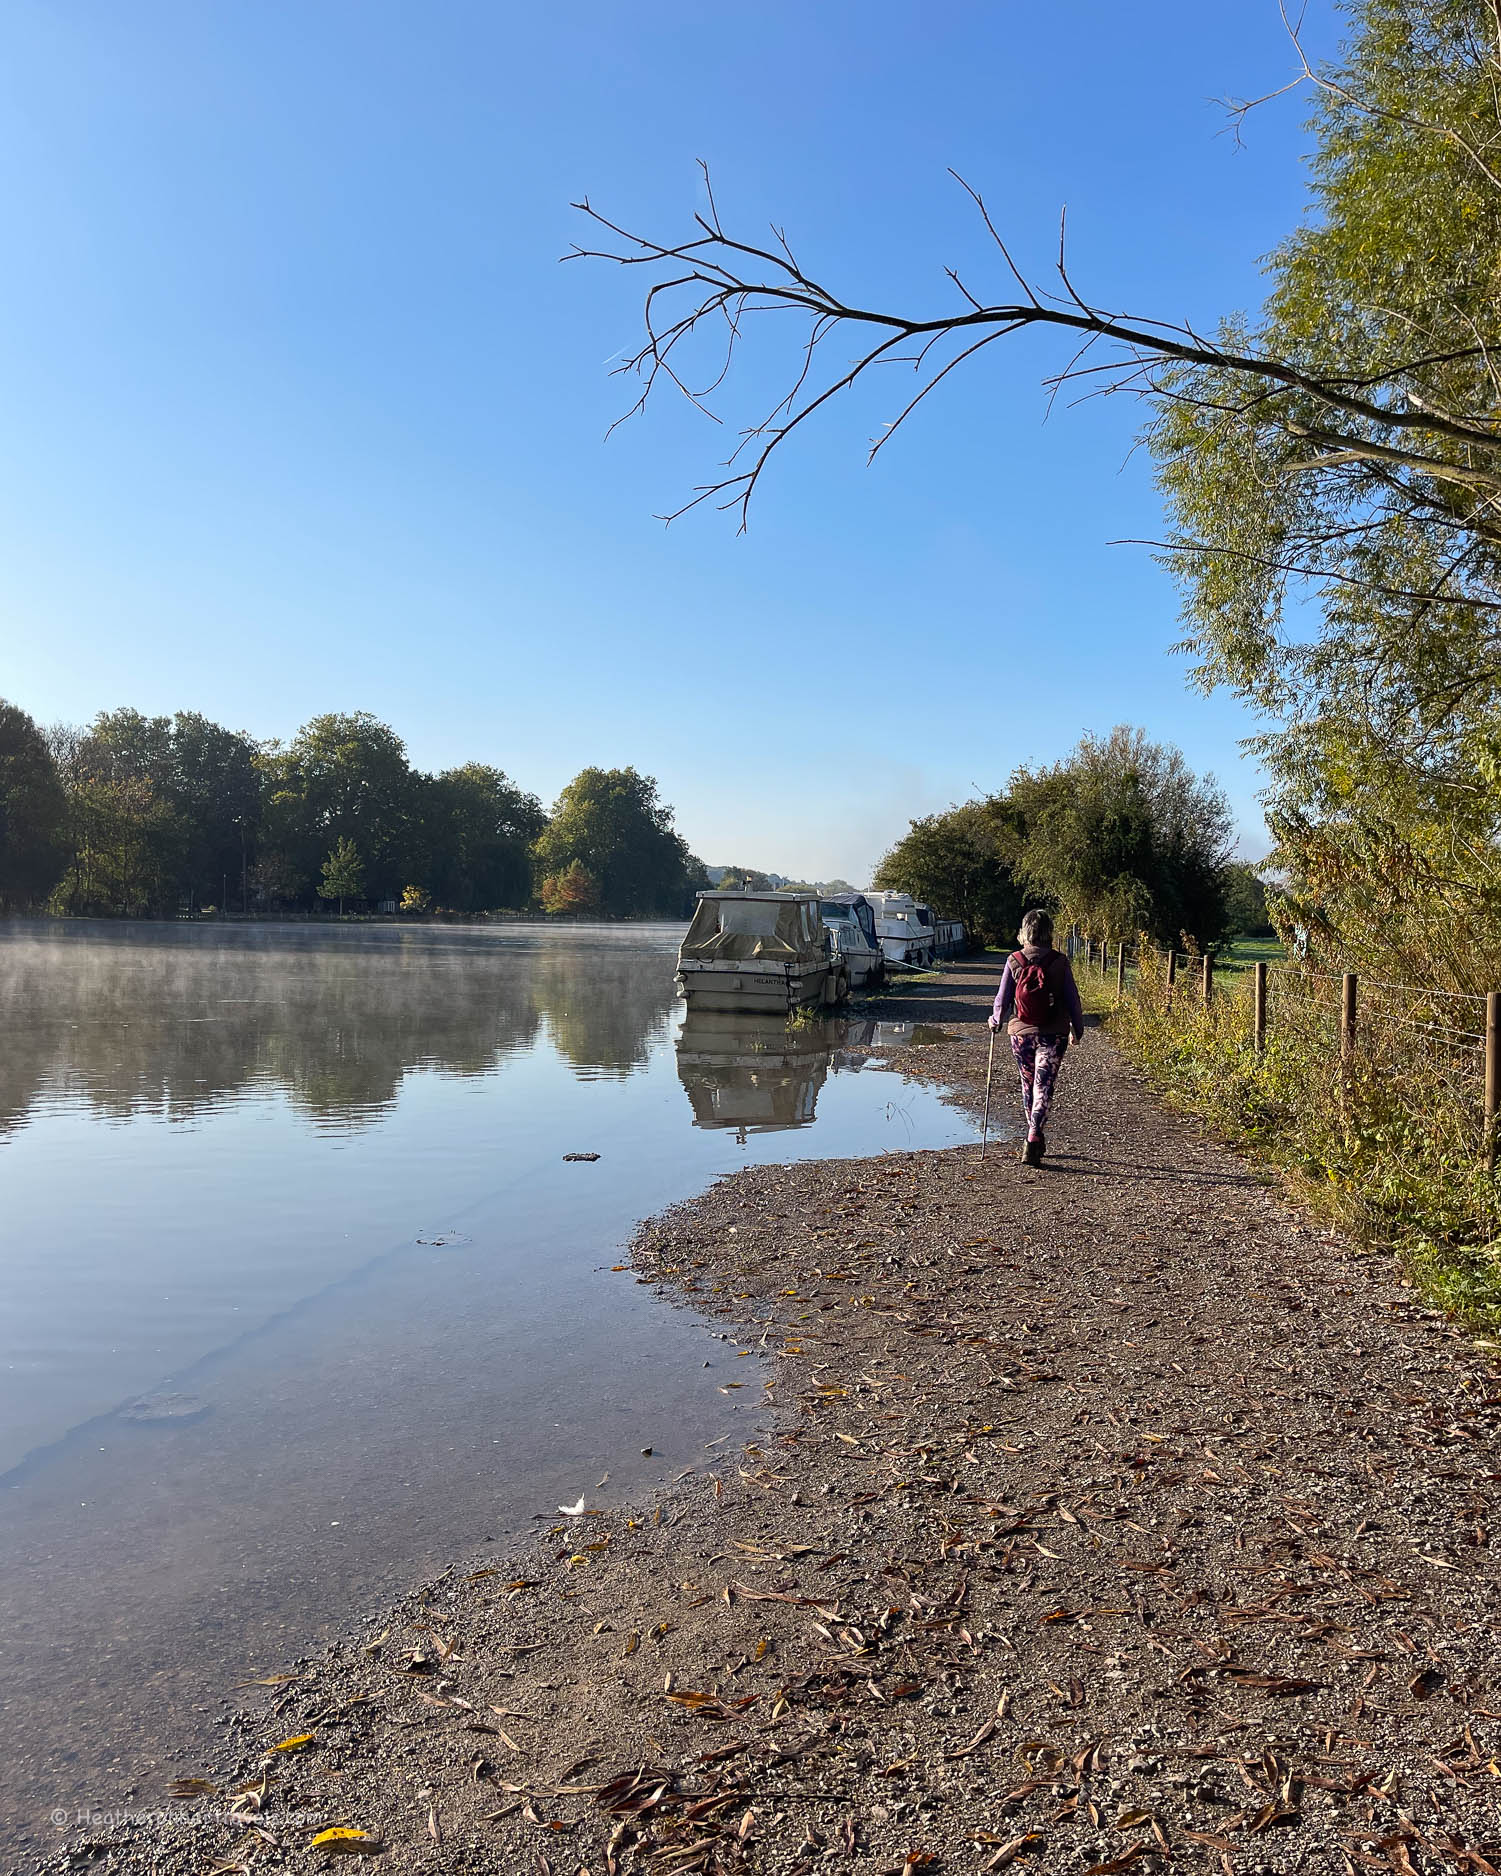
Day 10 – Marlow – Maidenhead – Windsor
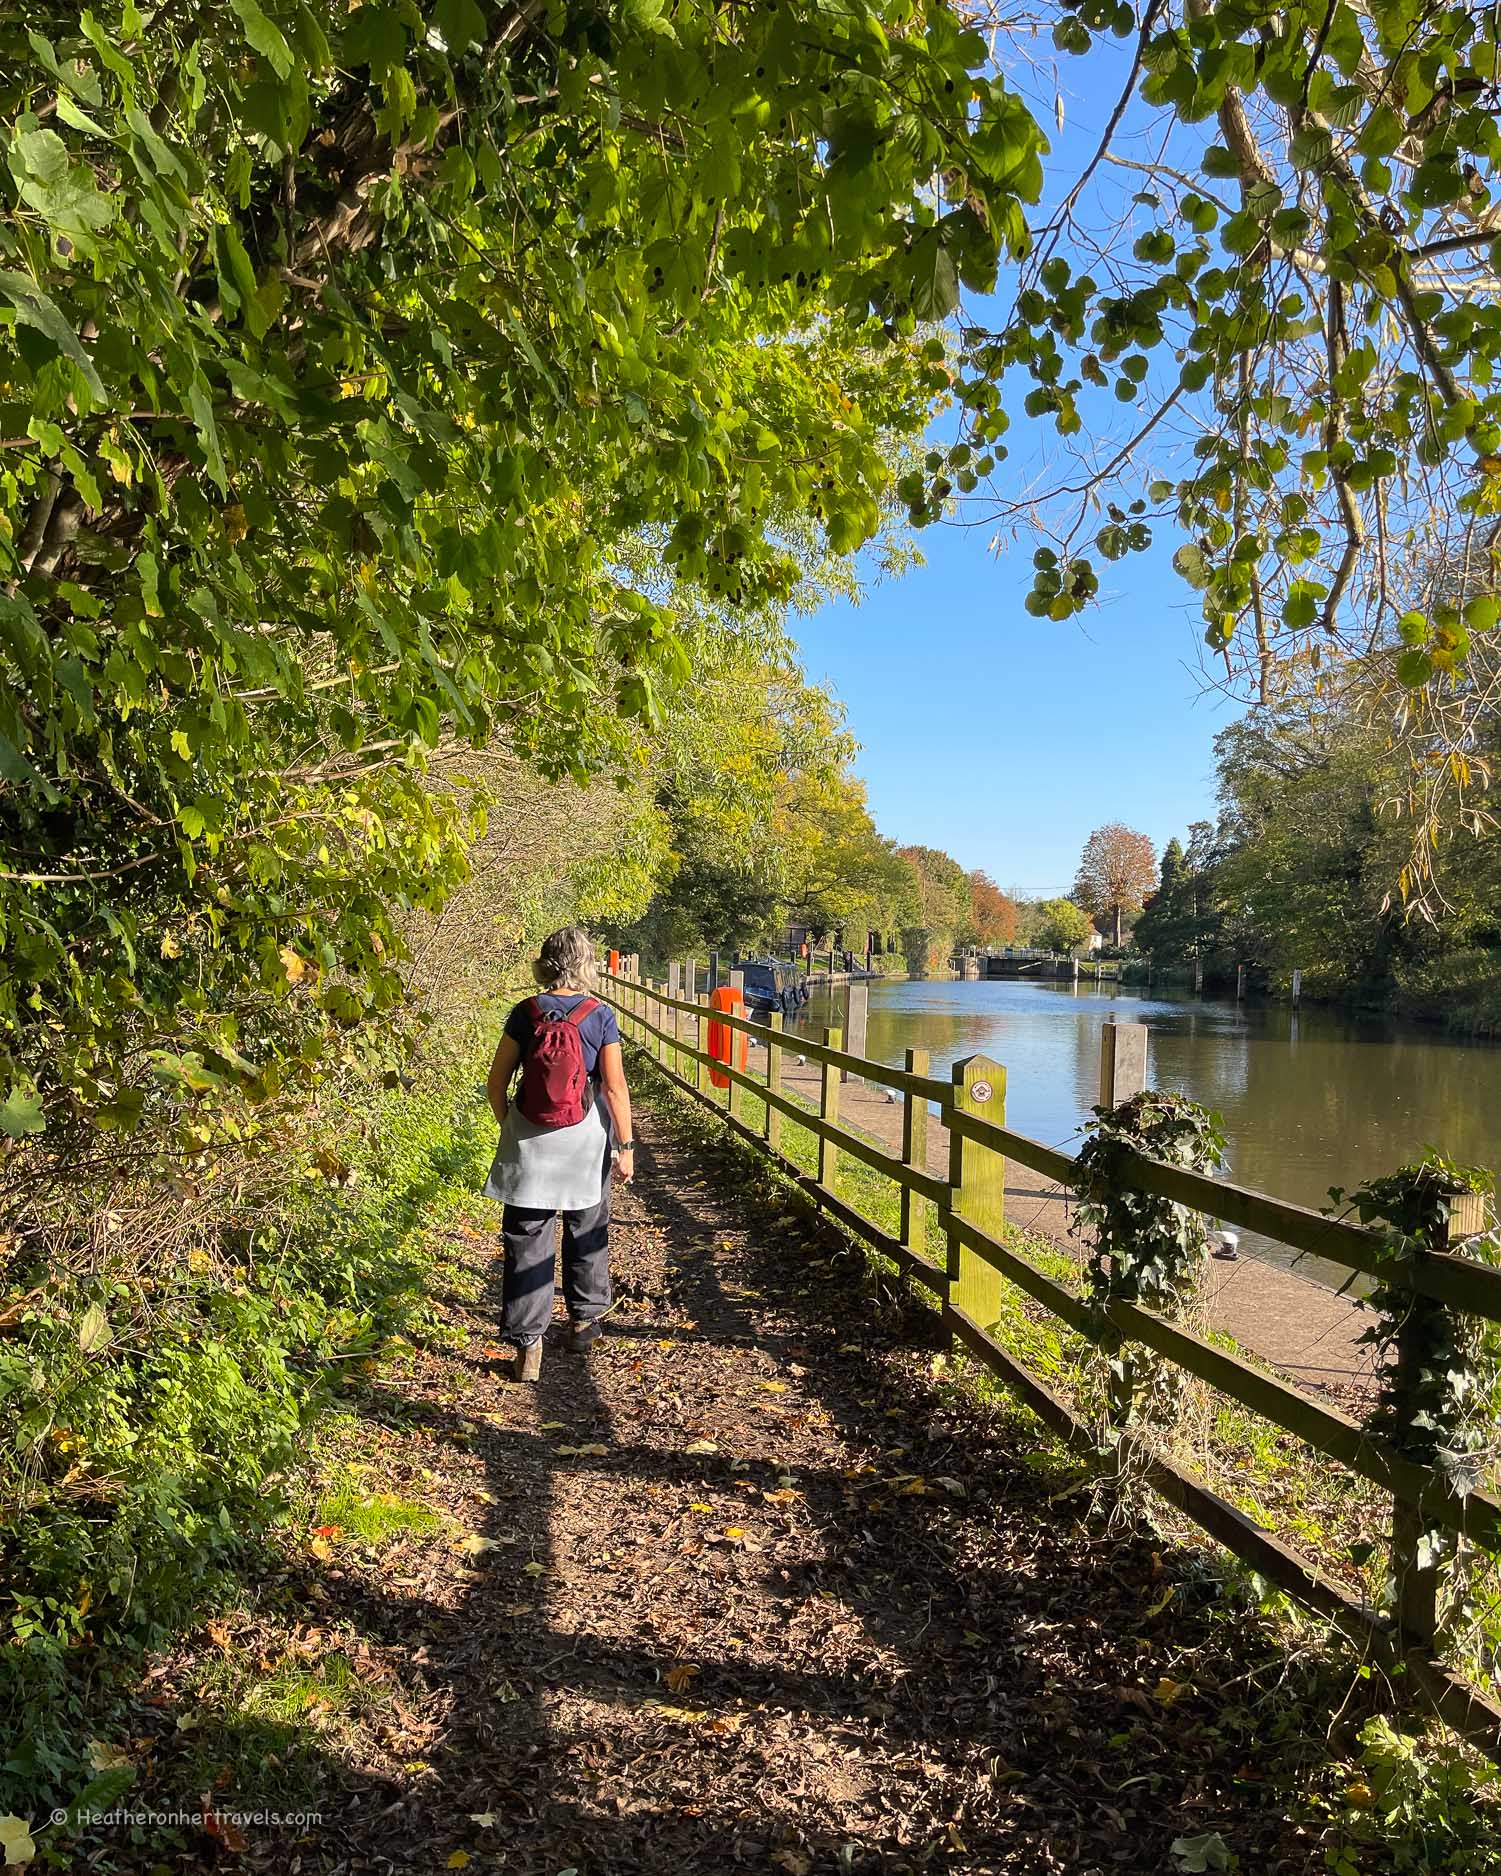
This was one of the most enjoyable stretches of the Thames, with a series of picturesque riverside towns and villages. A towpath follows the river closely, with a chance to admire the elegant Edwardian mansions and boathouses.
It was this stretch of the Thames that inspired classics of English Literature like ‘The Wind in the Willows’ and ‘Three men in a boat’.
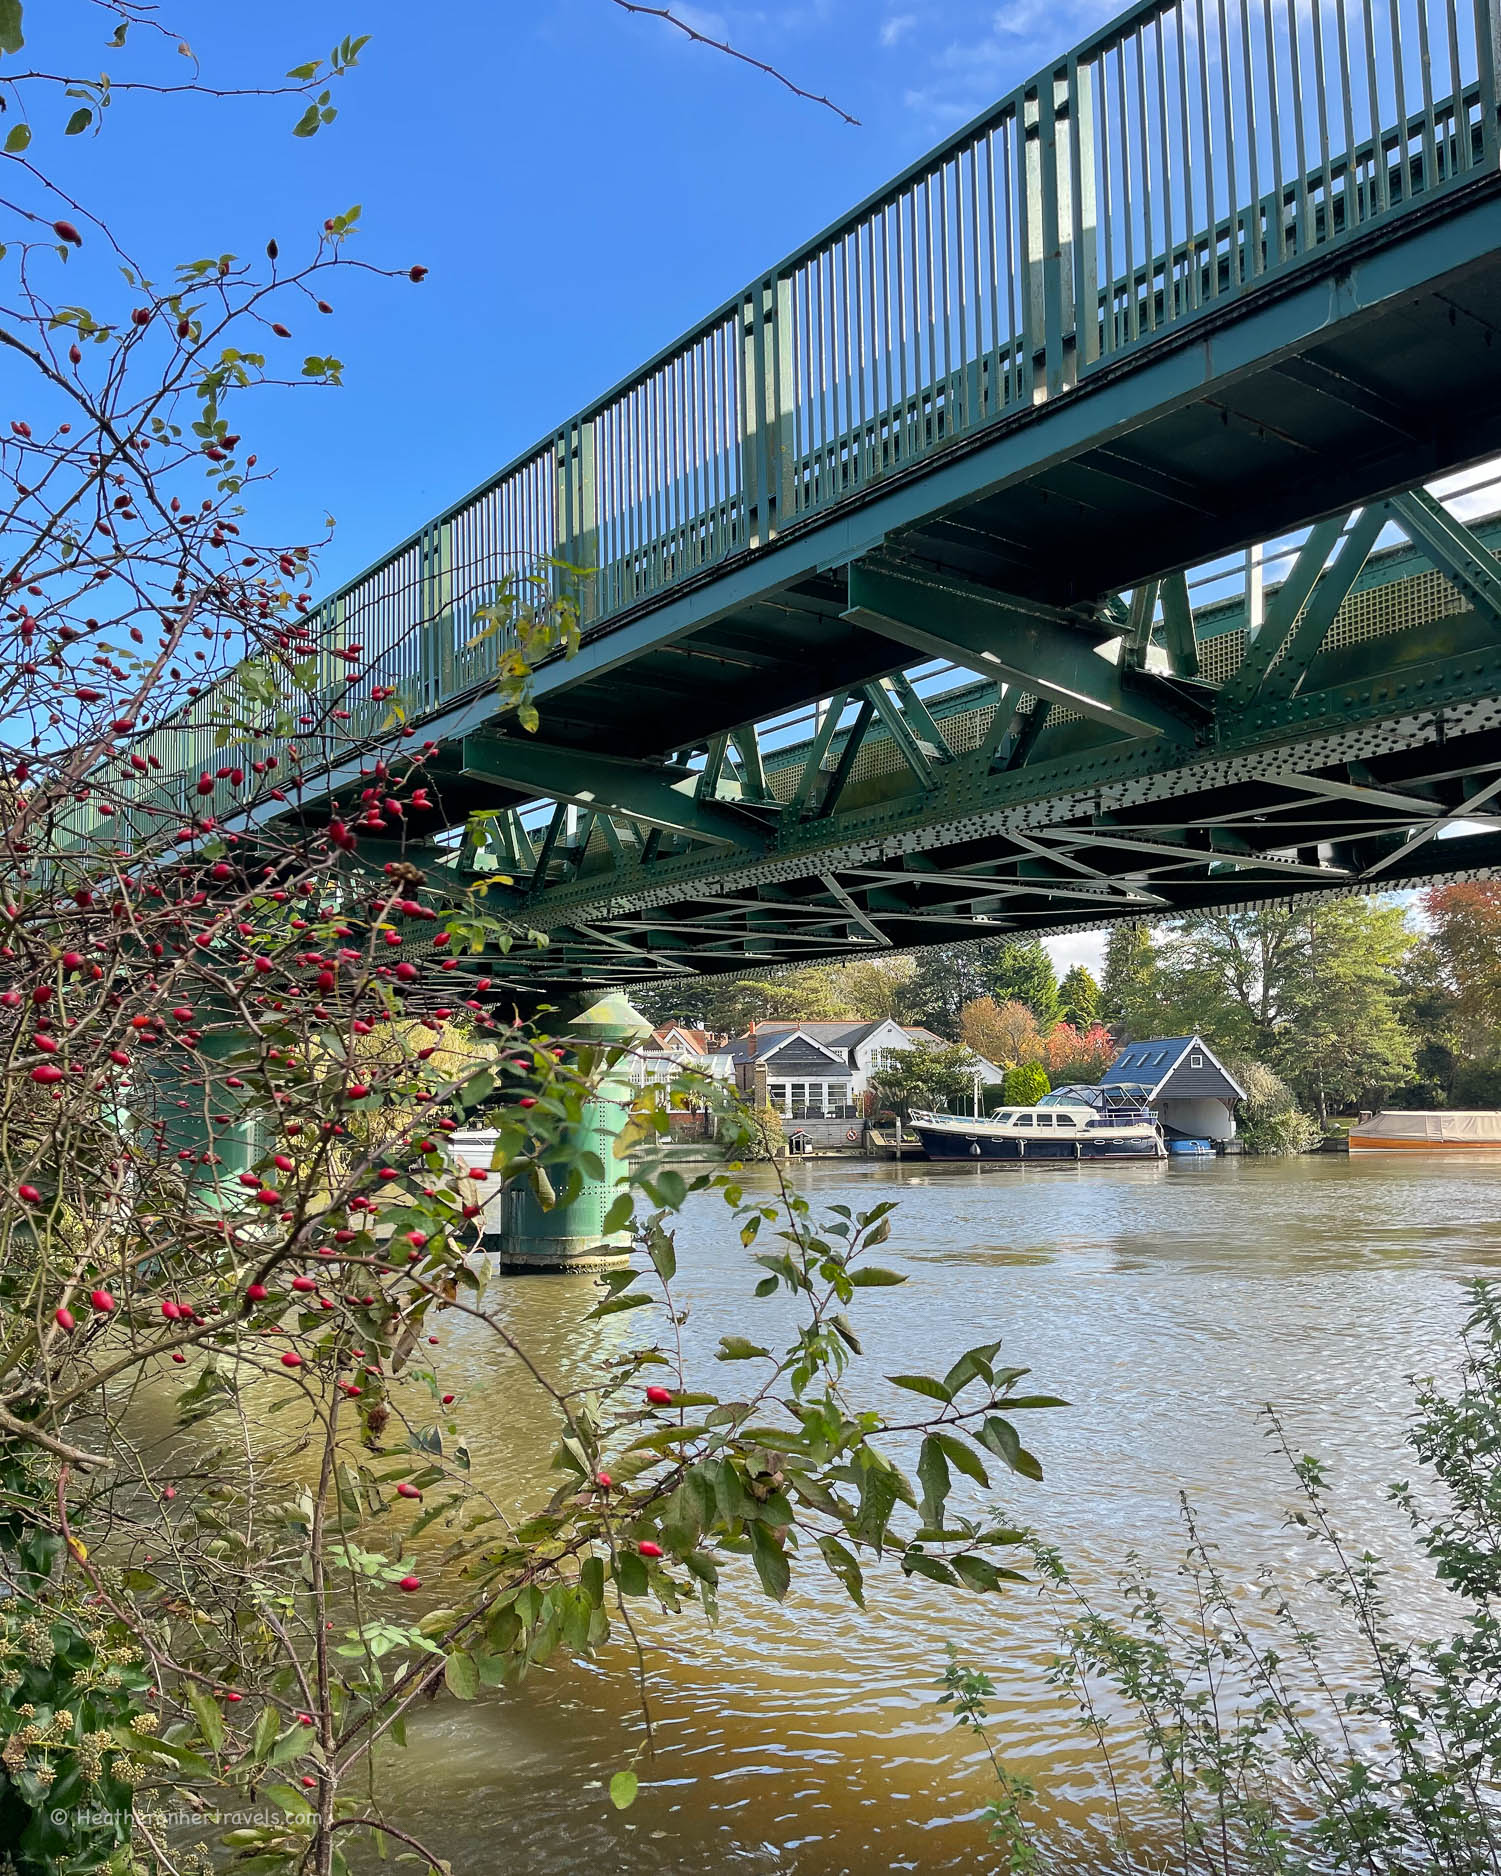
Bourne End – Hiking on the Thames Path National Trail
Leaving Marlow behind
We were sad to leave the pretty town of Marlow behind, as we skirted behind the church with glimpses down the lane of Marlow weir. The path took us through open water meadows beside the river, to Bourne End, with its small marina and sailing club.
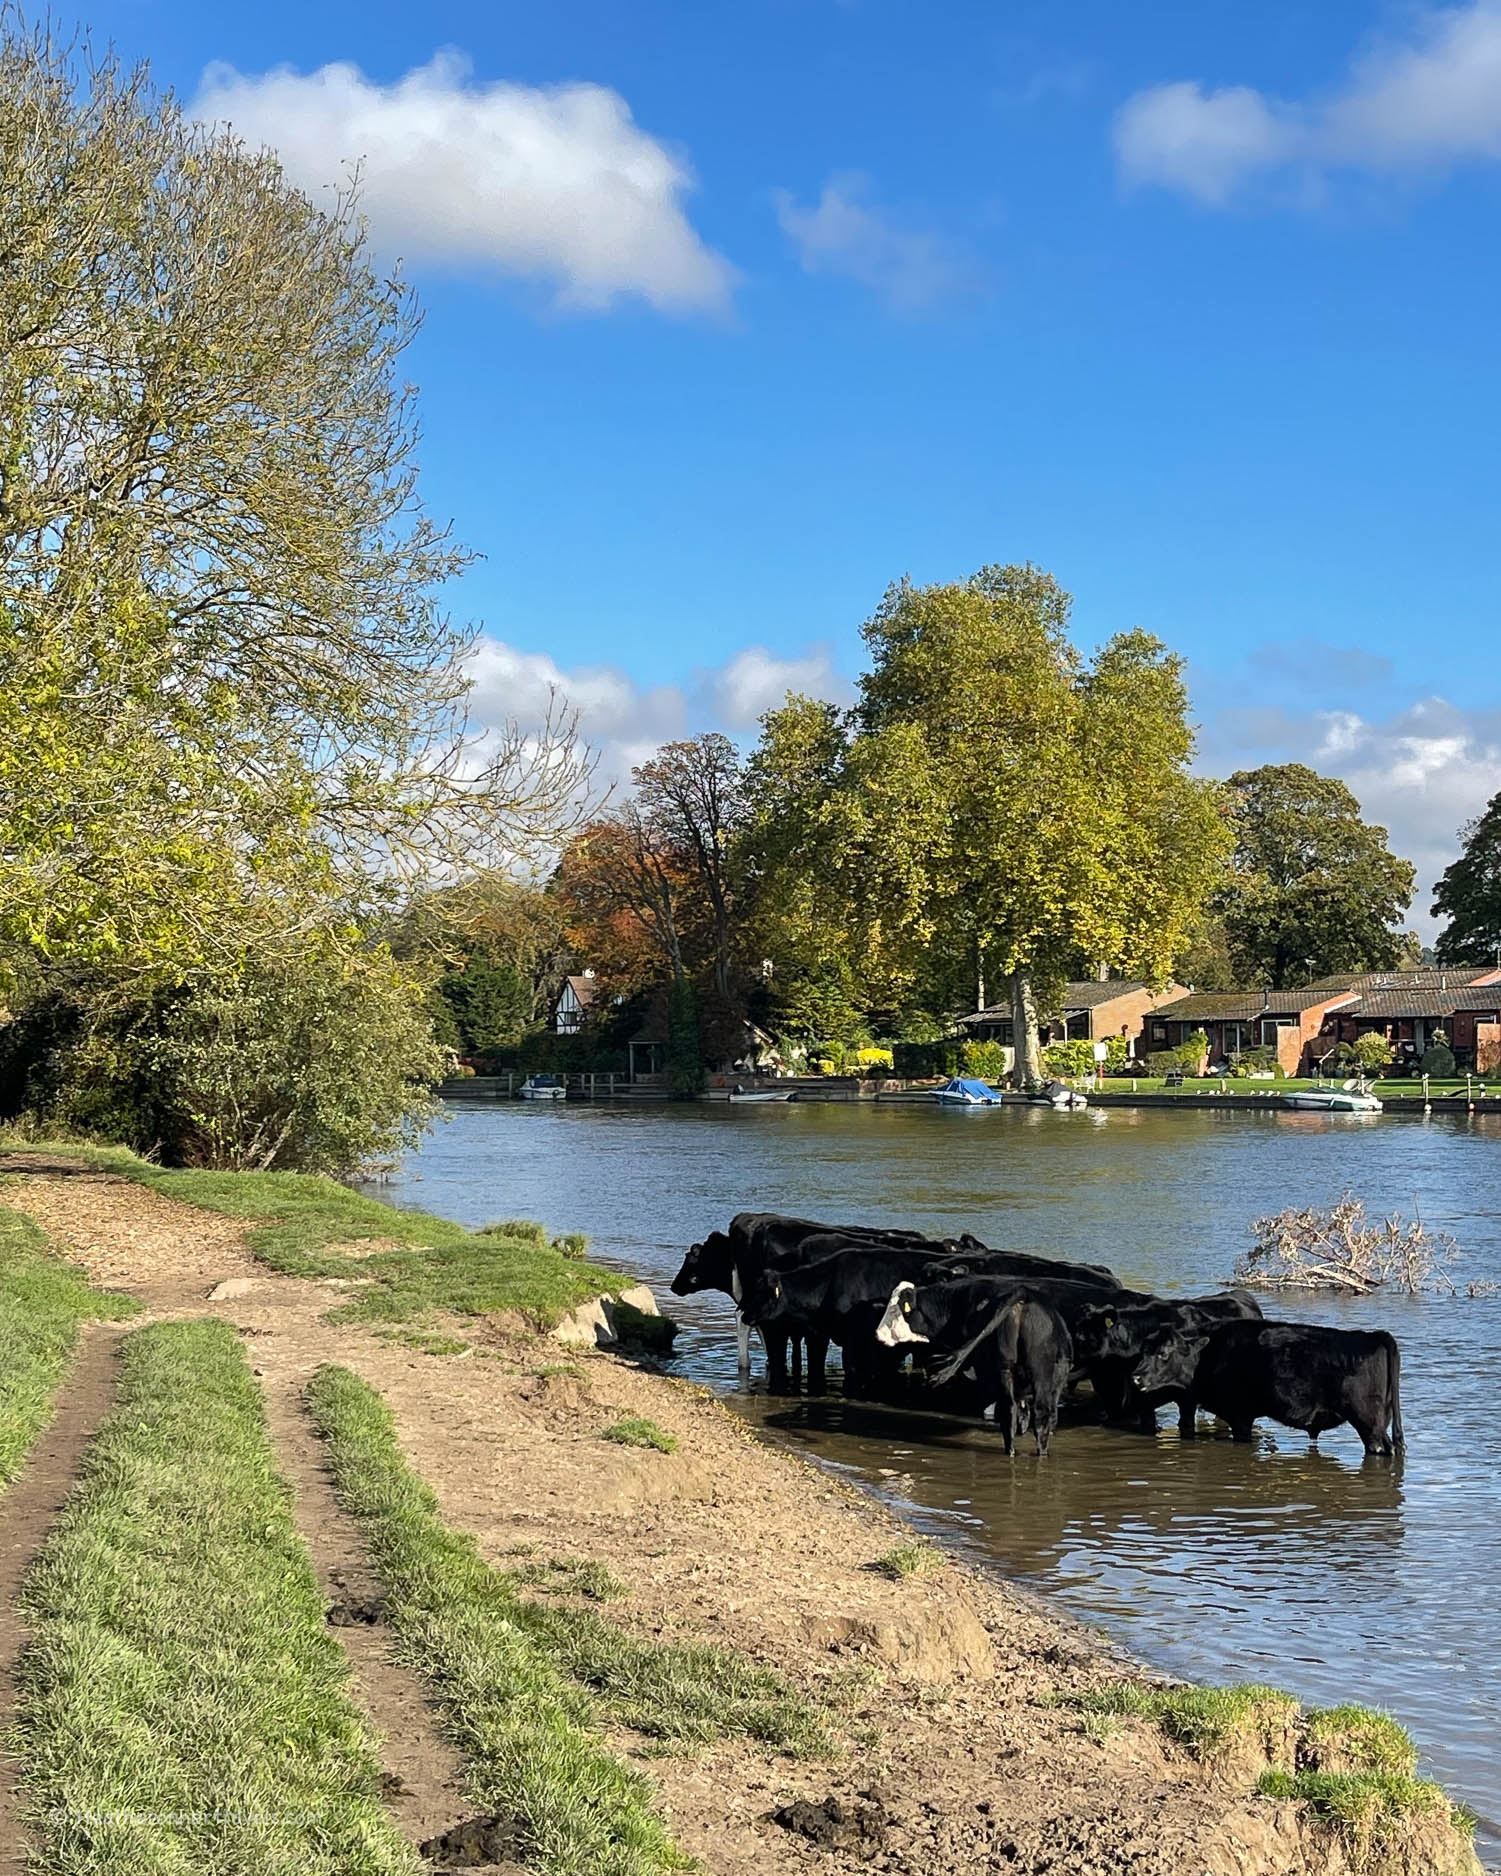
Cows near Cookham – Hiking on the Thames Path National Trail
Here we crossed over the steel footbridge to continue on the opposite bank. The herd of cows we passed wallowing in the river, could have been straight out of a Turner painting.
A stretch of grazing meadow, managed by the National Trust, lead us into the village of Cookham.
Bourne End – Hiking on the Thames Path National Trail
Stanley Spencer and Cookham
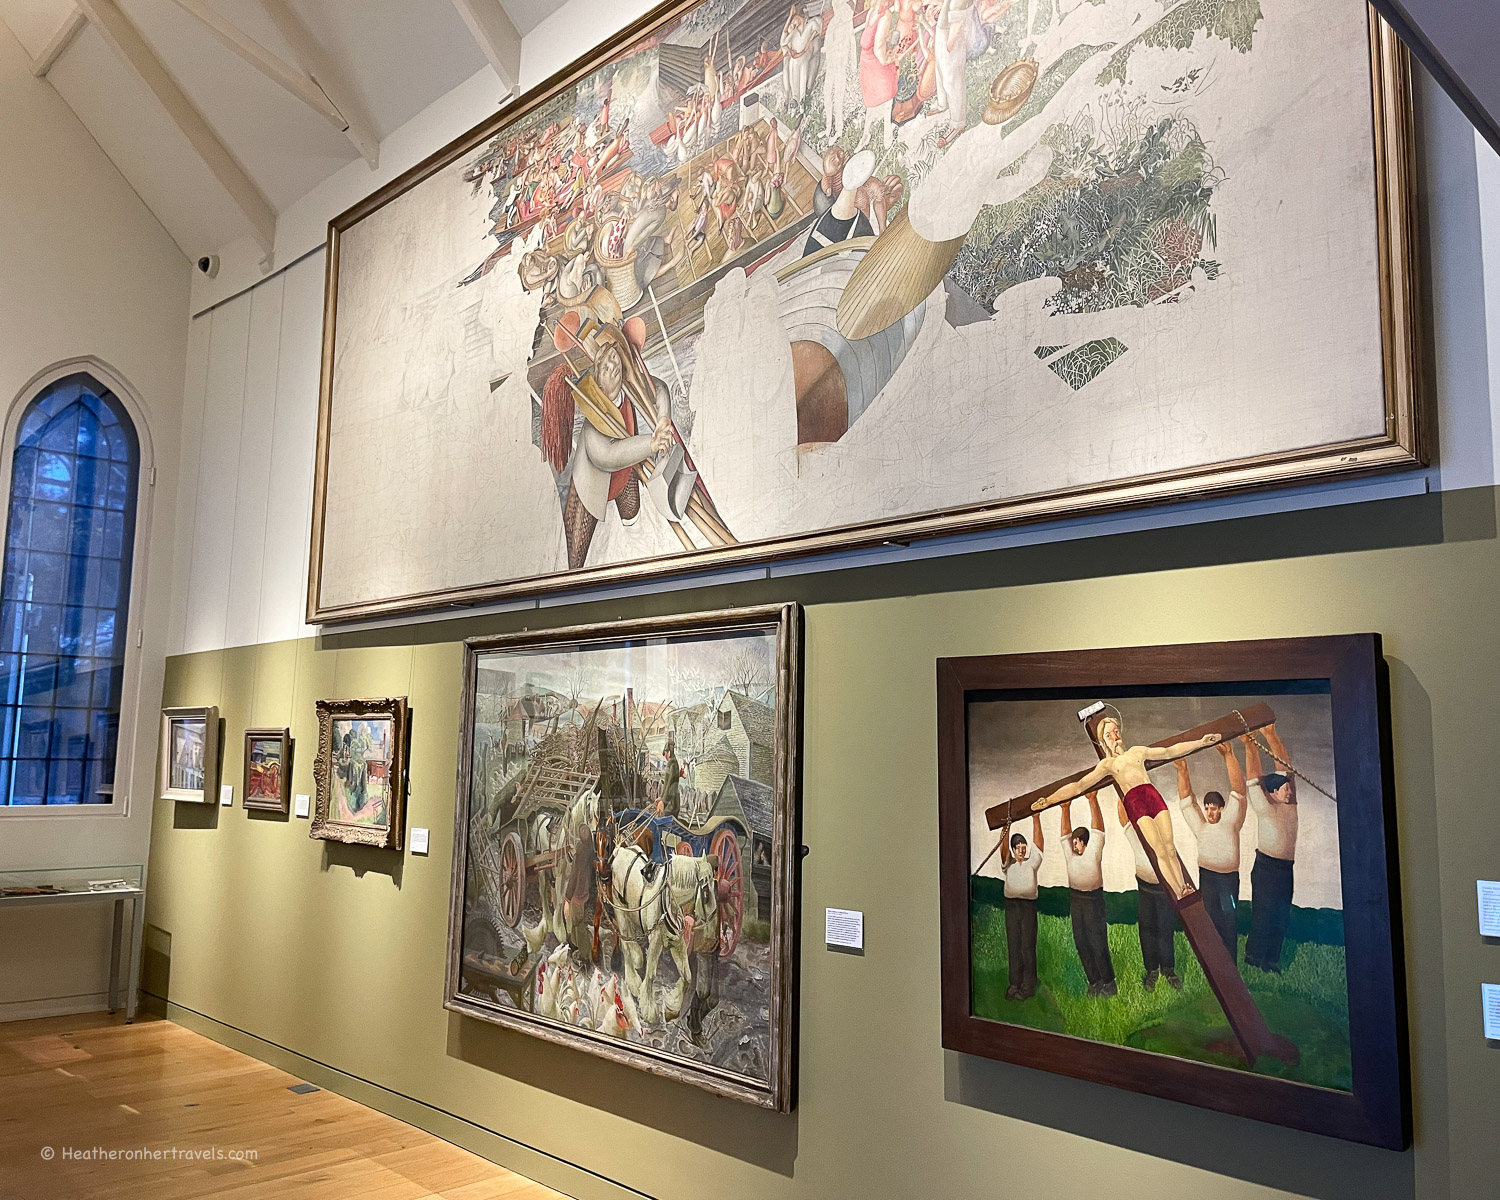
This prettiest of villages, with its 12th century church, was the home of the 20th century artist Stanley Spencer, who lived here until his death in 1959.
Cookham church – Hiking on the Thames Path National Trail
He is known for setting his religious and rural paintings in locations around Cookham, using the faces of real people he knew. The small Stanley Spencer Gallery in the heart of the village, is well worth a visit, with changing themed exhibitions of his work.
Stanley Spencer Gallery Cookham – Hiking on the Thames Path National Trail
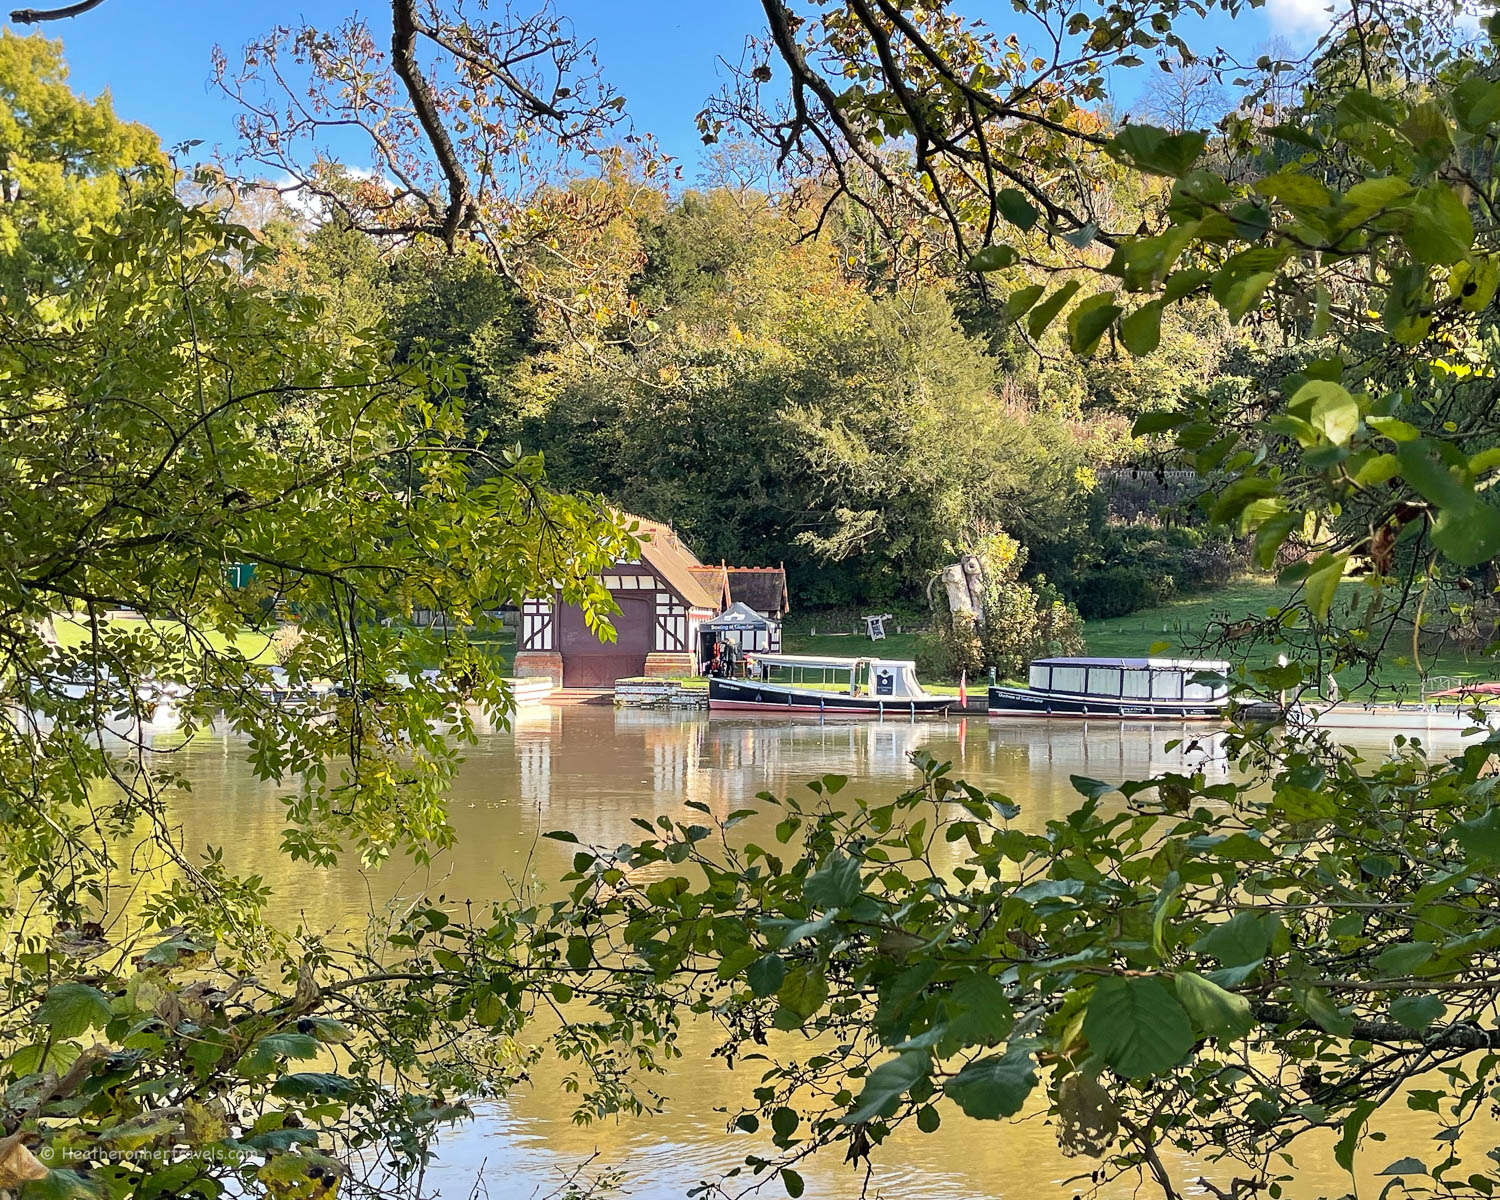
Heading out of Cookham, the path runs opposite the stately home of Cliveden, now a luxury hotel. It was the home to the Astor family, who were known for their lavish parties. The house also featured in the Profumo scandal, which rocked the government in the 1960s.
Cliveden Boathouse – Hiking on the Thames Path National Trail
The house is out of sight from the riverbank, but the gardens run by the National Trust and their attractive Edwardian boathouses, can be admired from the opposite bank.
Maidenhead – Hiking on the Thames Path National Trail
Arriving in Maidenhead
Arriving in Maidenhead, we took a break for our picnic lunch at Boulter’s Lock. At this attractive location, a footbridge crosses to Ray Mill Island and over the river to the Taplow side.
Ray Mill Island Maidenhead – Hiking on the Thames Path National Trail
The path follows the road for a short distance to Maidenhead Bridge. We crossed to continue the path on the other side, passing under the Victorian brick railway bridge, expertly engineered by Isambard Kingdom Brunel.
Ray Mill Island Maidenhead – Hiking on the Thames Path National Trail
The riverside path leading down to Bray offered views of the river on one side and a succession of elegant riverfront houses on the other.
Beyond Bray we passed under the M4 motorway, the roar of traffic slightly spoiling the peaceful atmosphere. Visible on the map but out of sight for walkers was the manmade Dorney Lake, used for rowing practice by nearby Eton College.
Eaton meadows – Hiking on the Thames Path National Trail
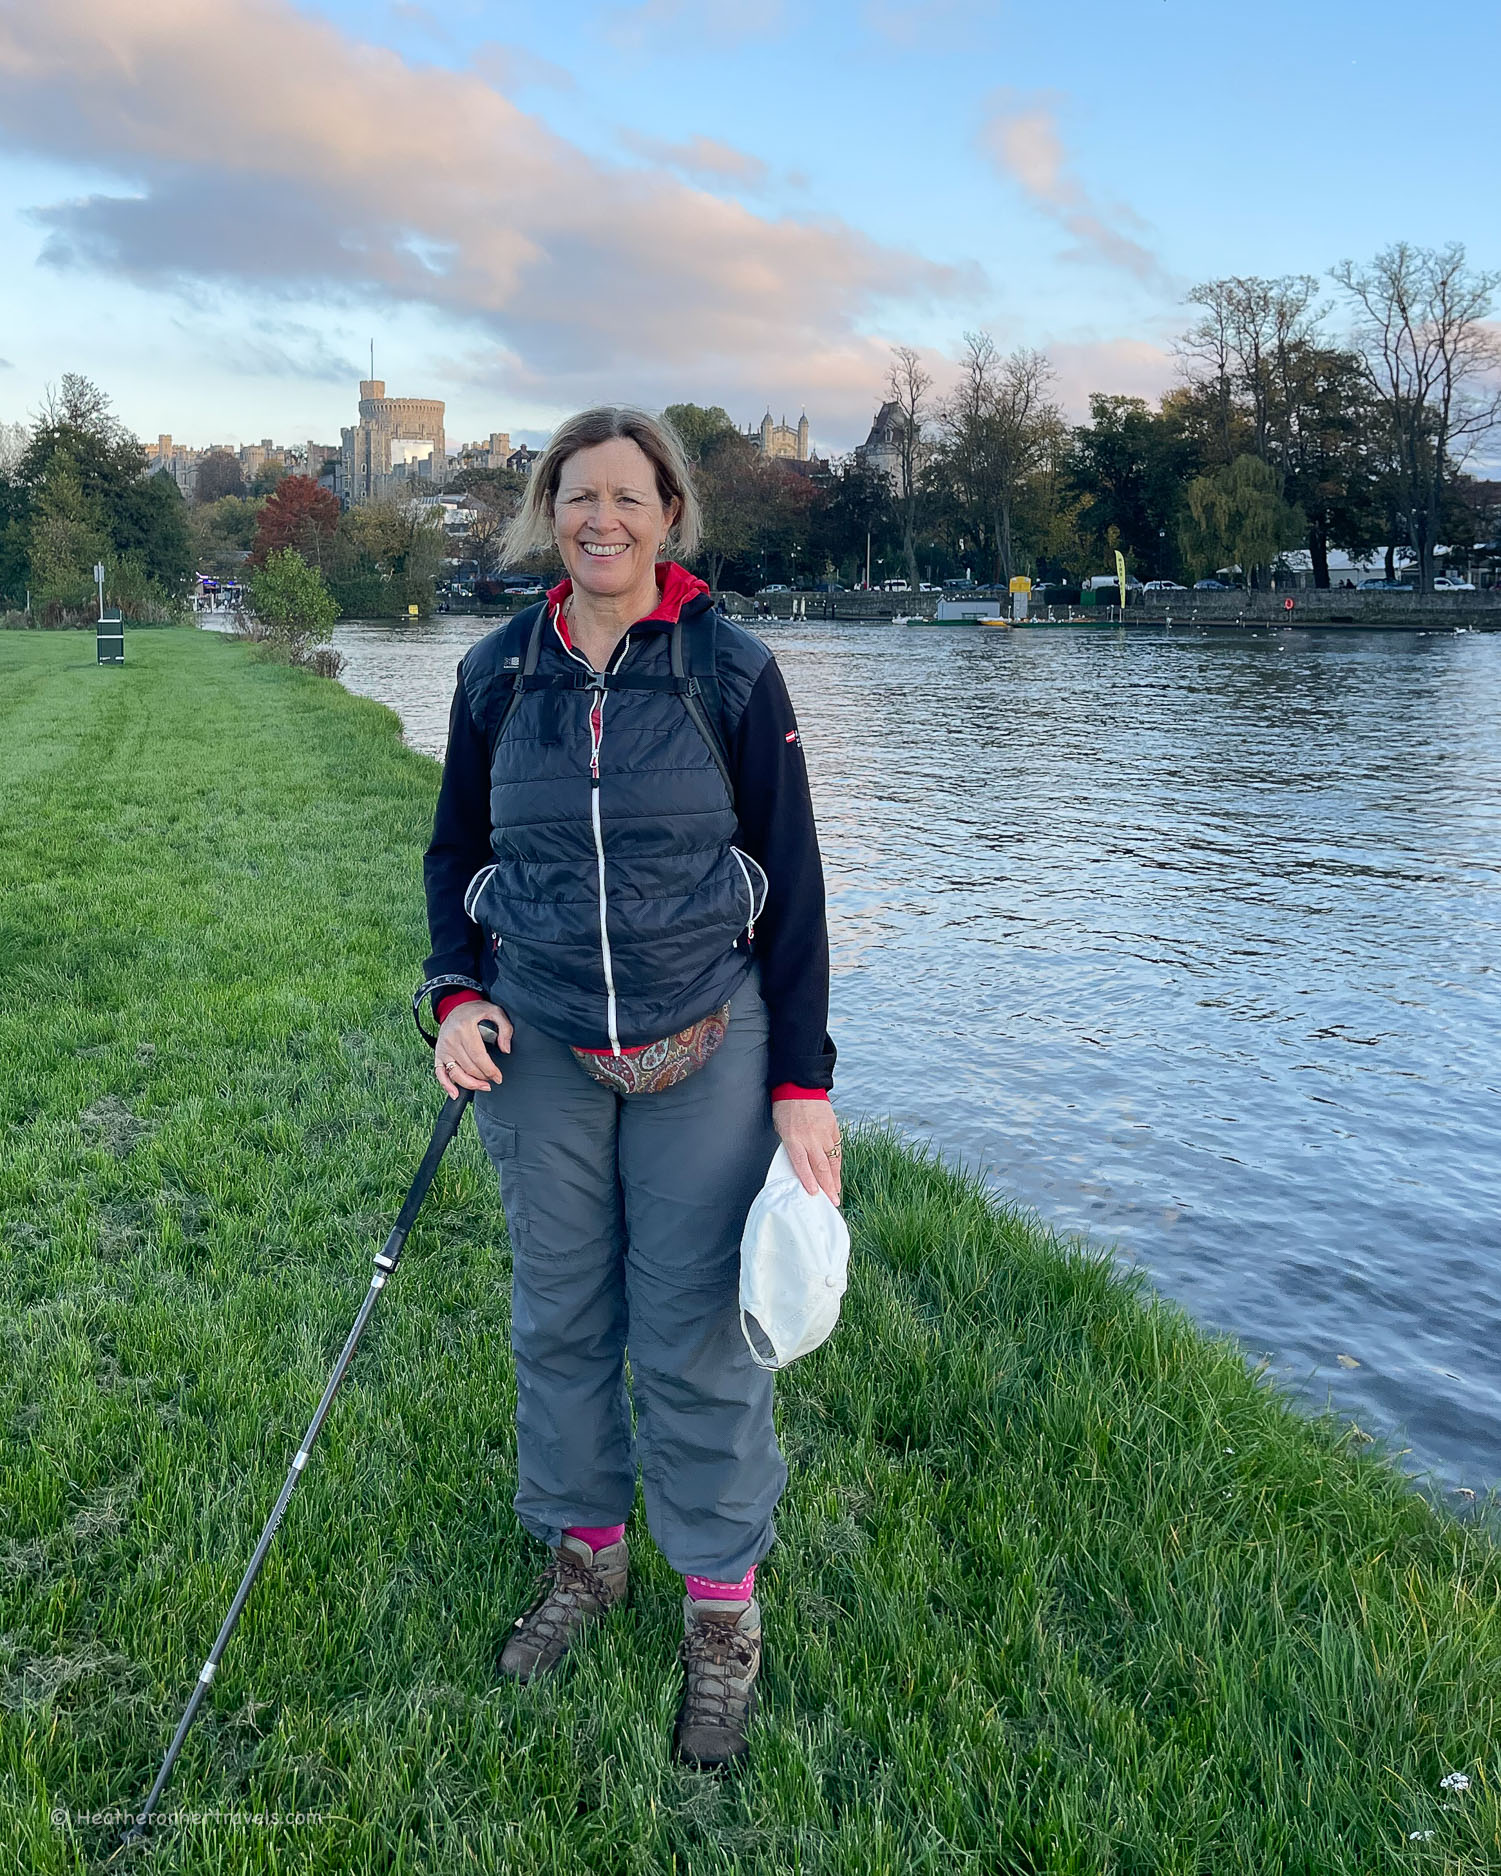
Approaching Windsor
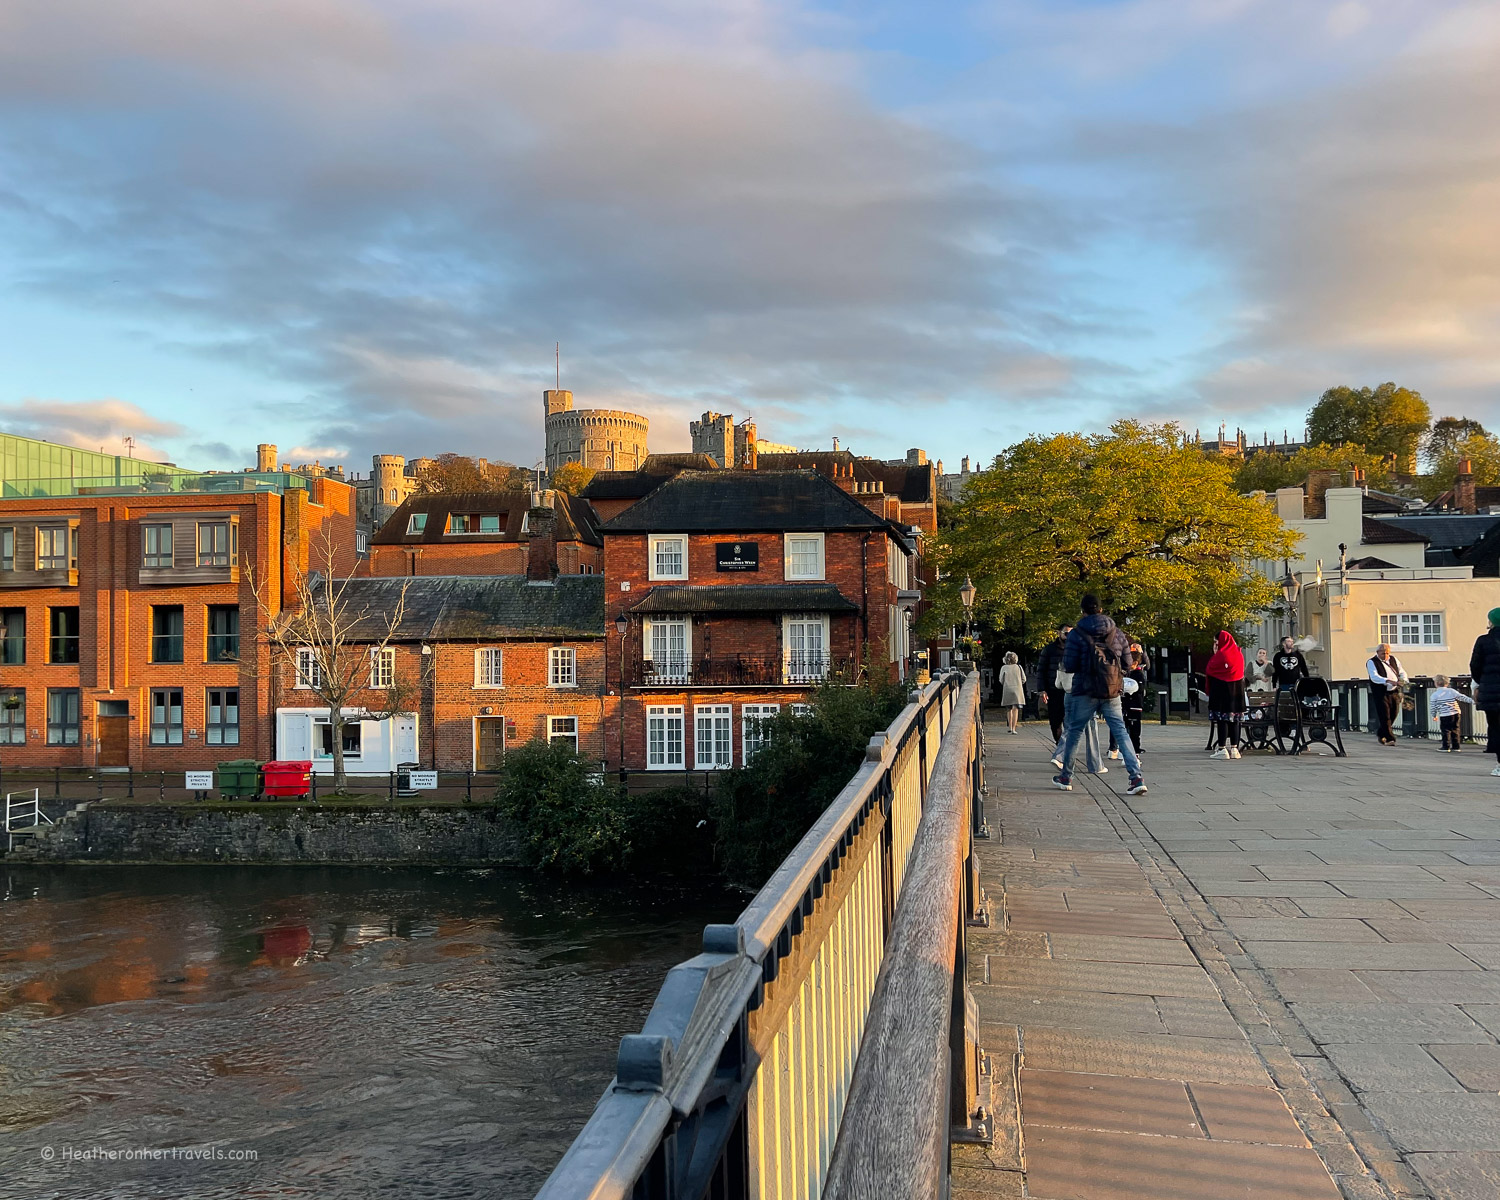
Beyond Boveney Lock, the path took us under the mainline railway bridge and through the meadows past the exclusive private school of Eton College. By now we could glimpse the views of Windsor Castle rising above the town.
Boveney Lock – Hiking on the Thames Path National Trail
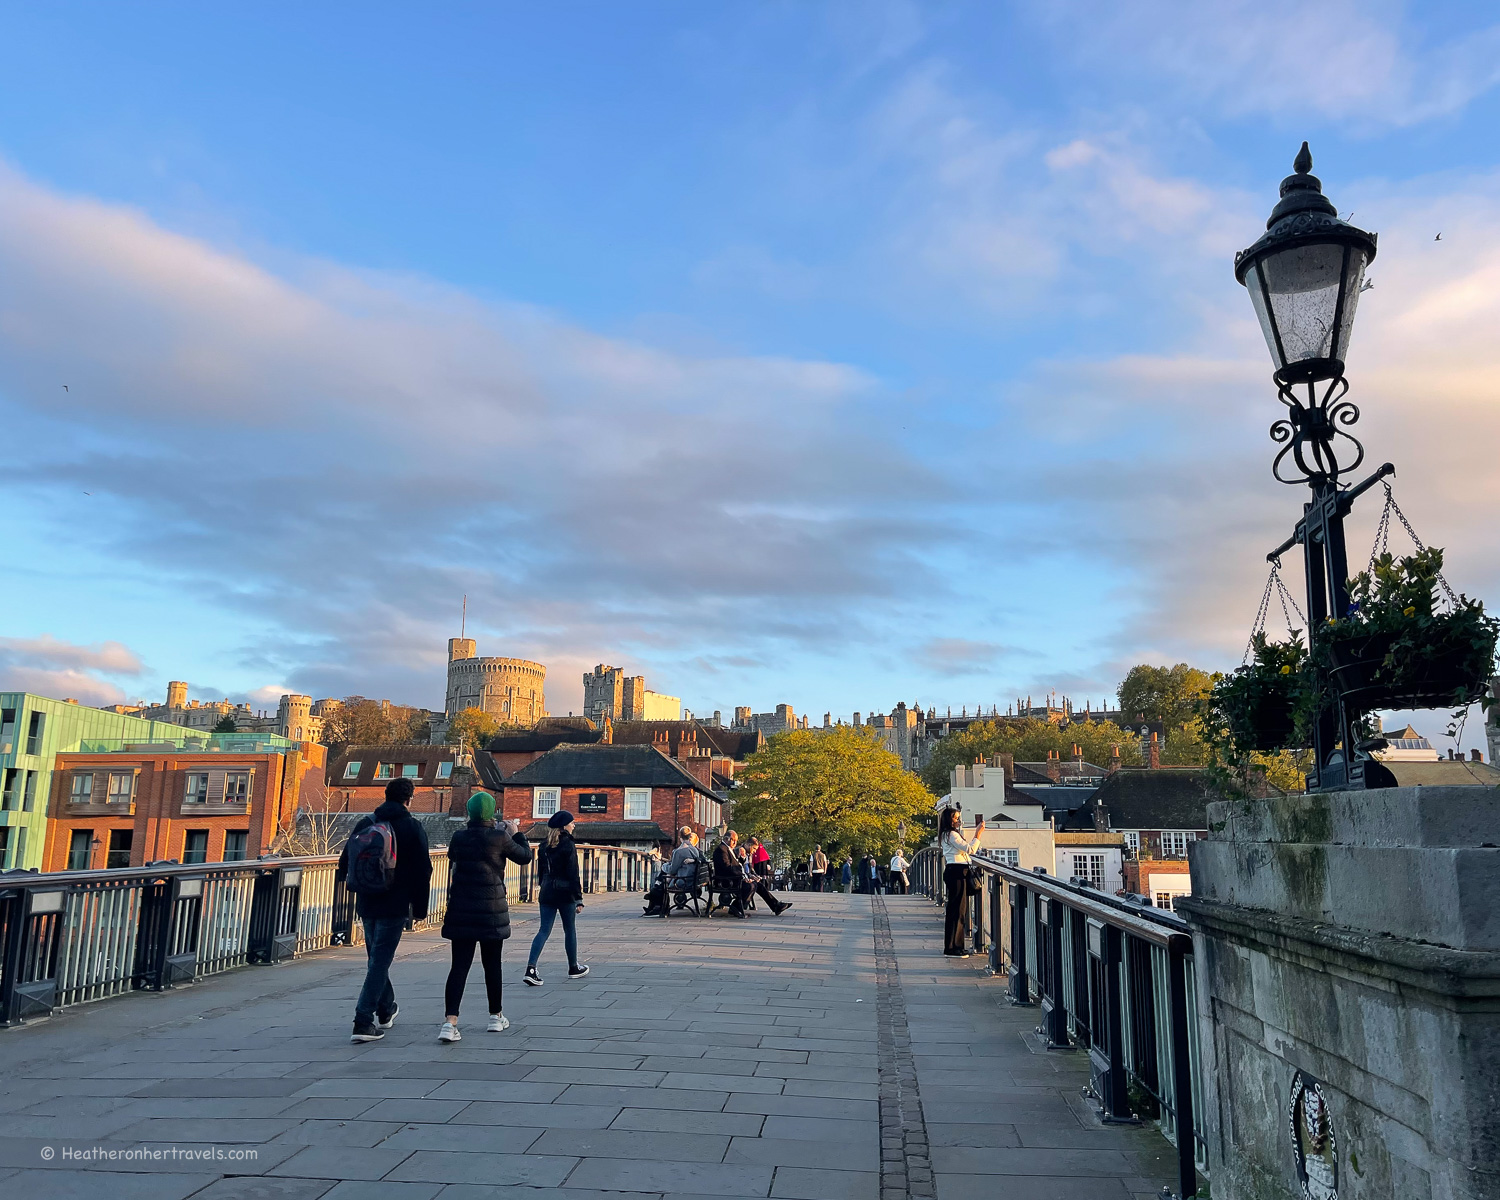
It was originally built as a fortress by William the Conquerer and is one of the main residences of the English Royal Family. The famous chapel has been a location for many royal marriages. Crossing the bridge took us into the historic town of Windsor, the end of this day’s walk.
Windsor Bridge – Hiking on the Thames Path National Trail
Day 10 – Distance and timings
Marlow to Windsor is aprox 13.5 miles / 21.7 km and took us 7 hours to walk, including lunch and rest stops as well as a visit to the Stanley Spencer Gallery.
If you want to plan in a rest day, Windsor Castle is a major heritage attraction and well worth a visit, but you’d need at least half a day to do it justice.
Cliveden – Hiking on the Thames Path National Trail
Day 10 – Where to stay
Marlow: There are a few places to stay in Marlow. We recommend The Chequers Marlow, for boutique style in the centre of town or the Premier Inn for a budget choice.
Windsor: There are a number of hotels and guest houses in Windsor to suit every budget. As prices vary widely with demand, we suggest comparing all Windsor hotels for your dates. One good mid range option is the Holiday Inn Express.
Windsor Bridge – Hiking on the Thames Path National Trail
Day 10 – Where to eat
Both Marlow and Windsor have a wide range of places to eat, as well as shops to stock up on picnic supplies. On the walk you can find places to eat at:
Maidenhead – At Boulter’s Lock cross the footbridge onto Ray Mill Island, which is a pleasant place for a picnic, with a seasonal cafe. You could also get lunch or coffee at the attractive Boathouse pub. A little further, Jenner’s Riverside Cafe is in the Riverside park, or the Thames Riviera Hotel is by Maidenhead bridge.
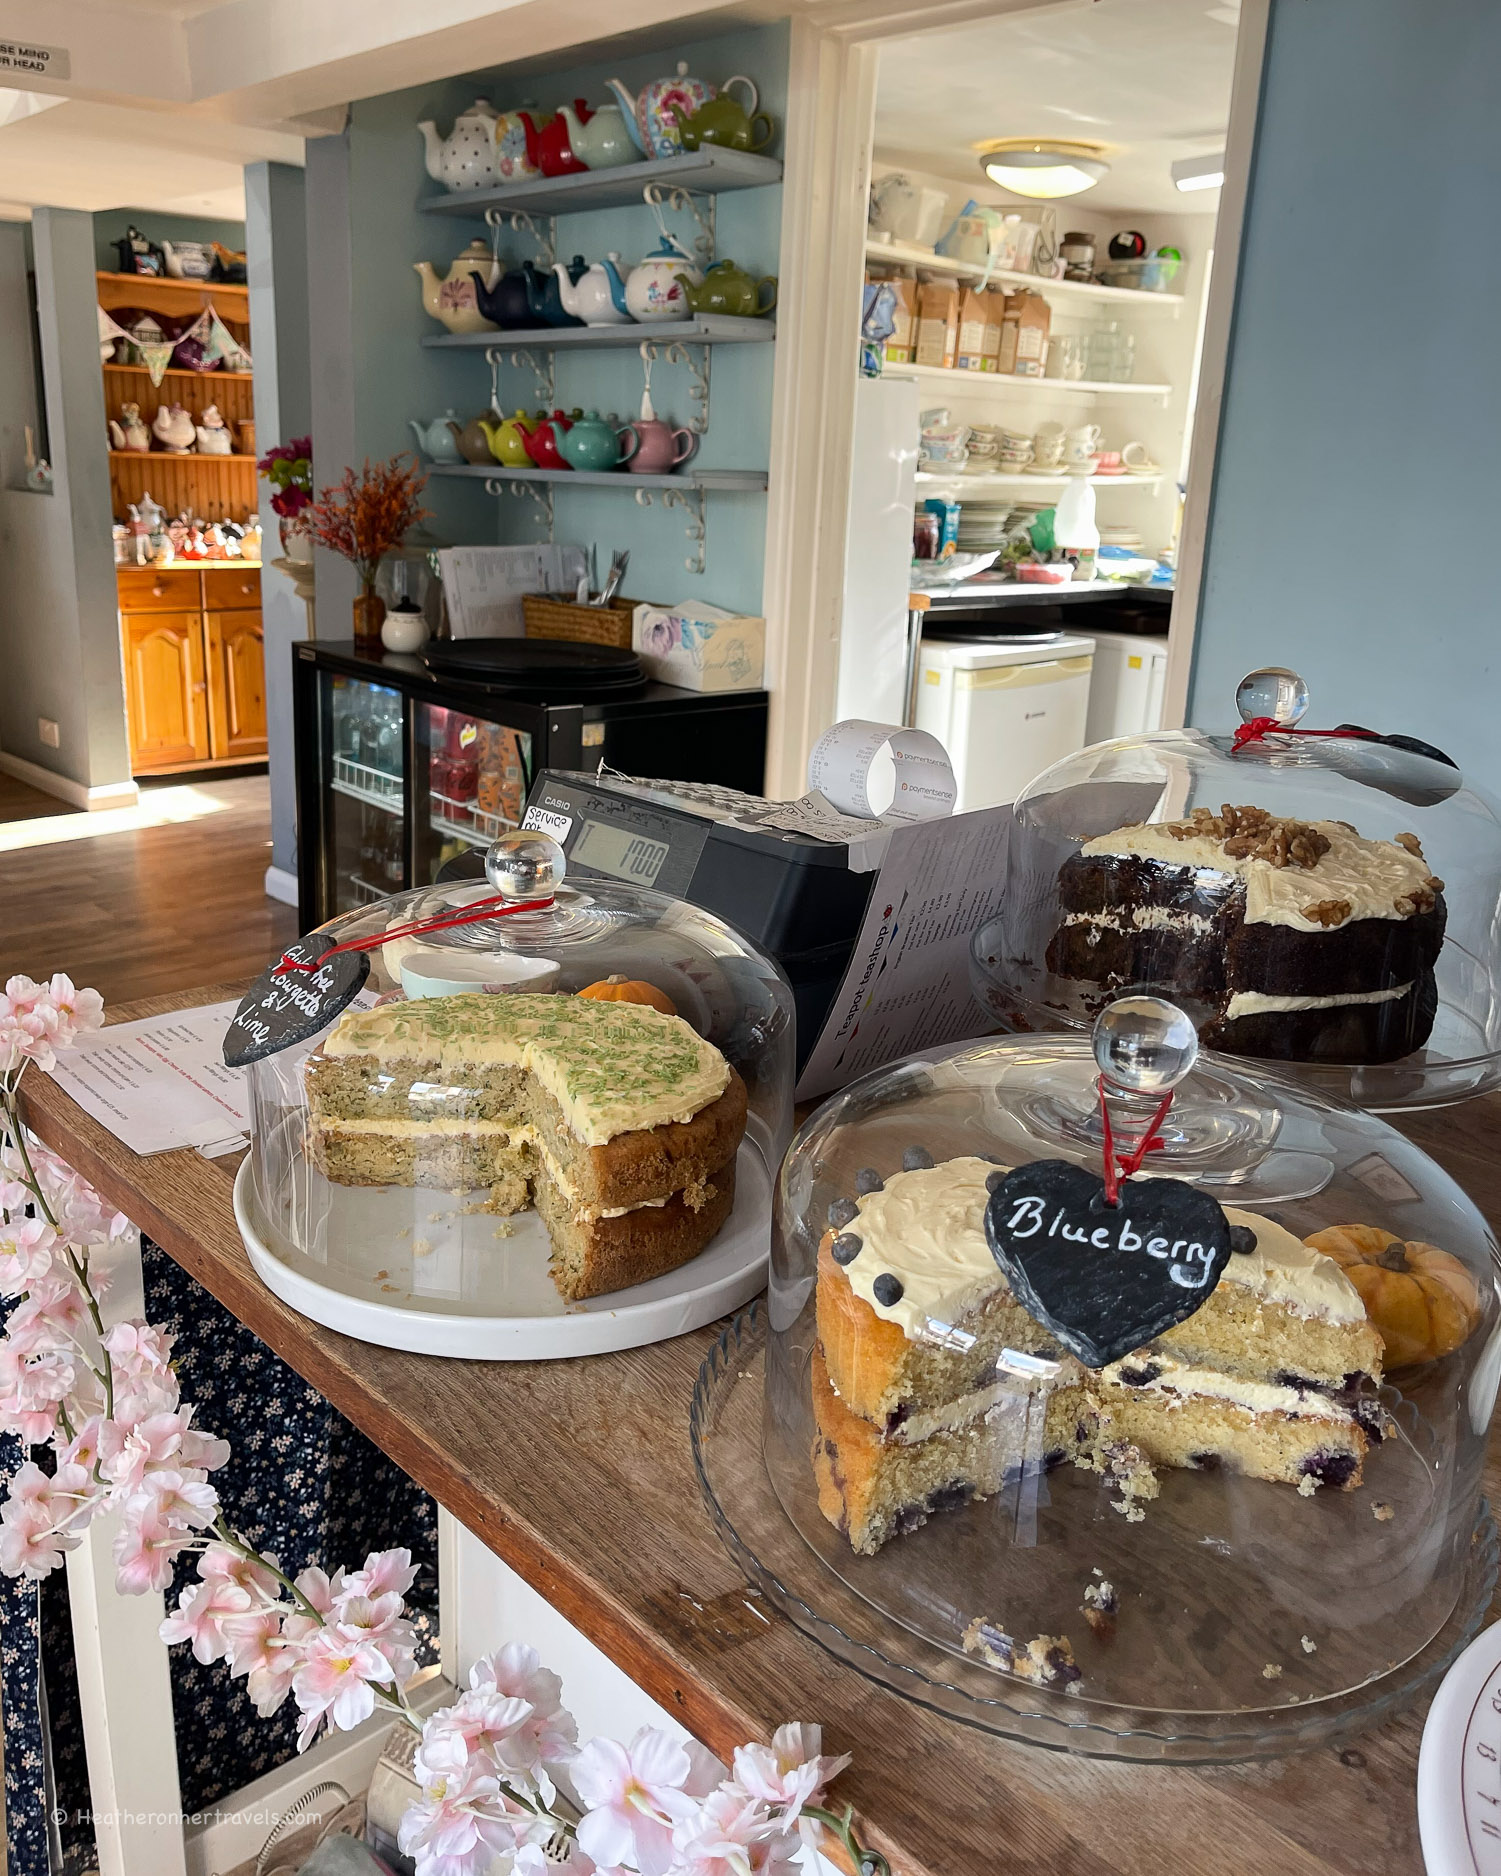
Cookham – Try the tea and cake at the Teapot tea shop, or a pub lunch at The Ferry or The Crown pubs.
Tearoom at Cookham – Hiking on the Thames Path National Trail
Day 10 – Transport for this stage
Marlow has a railway station, which can be reached from London by changing at Maidenhead. Windsor also has a railway station, which can be reached on a direct train from London Waterloo, or via the Elizabeth line with a change at Slough.
If you need to travel between Marlow and Windsor, the time by road is 20-25 minutes. However there are no direct bus connections and the route by train takes around 1 hour, requiring 2 changes, due to each station being on different branch lines.
Because we had 2 cars, we left one car at each end of the trail and drove back to recover the second car at the end of the day.
Maidenhead – Hiking on the Thames Path National Trail
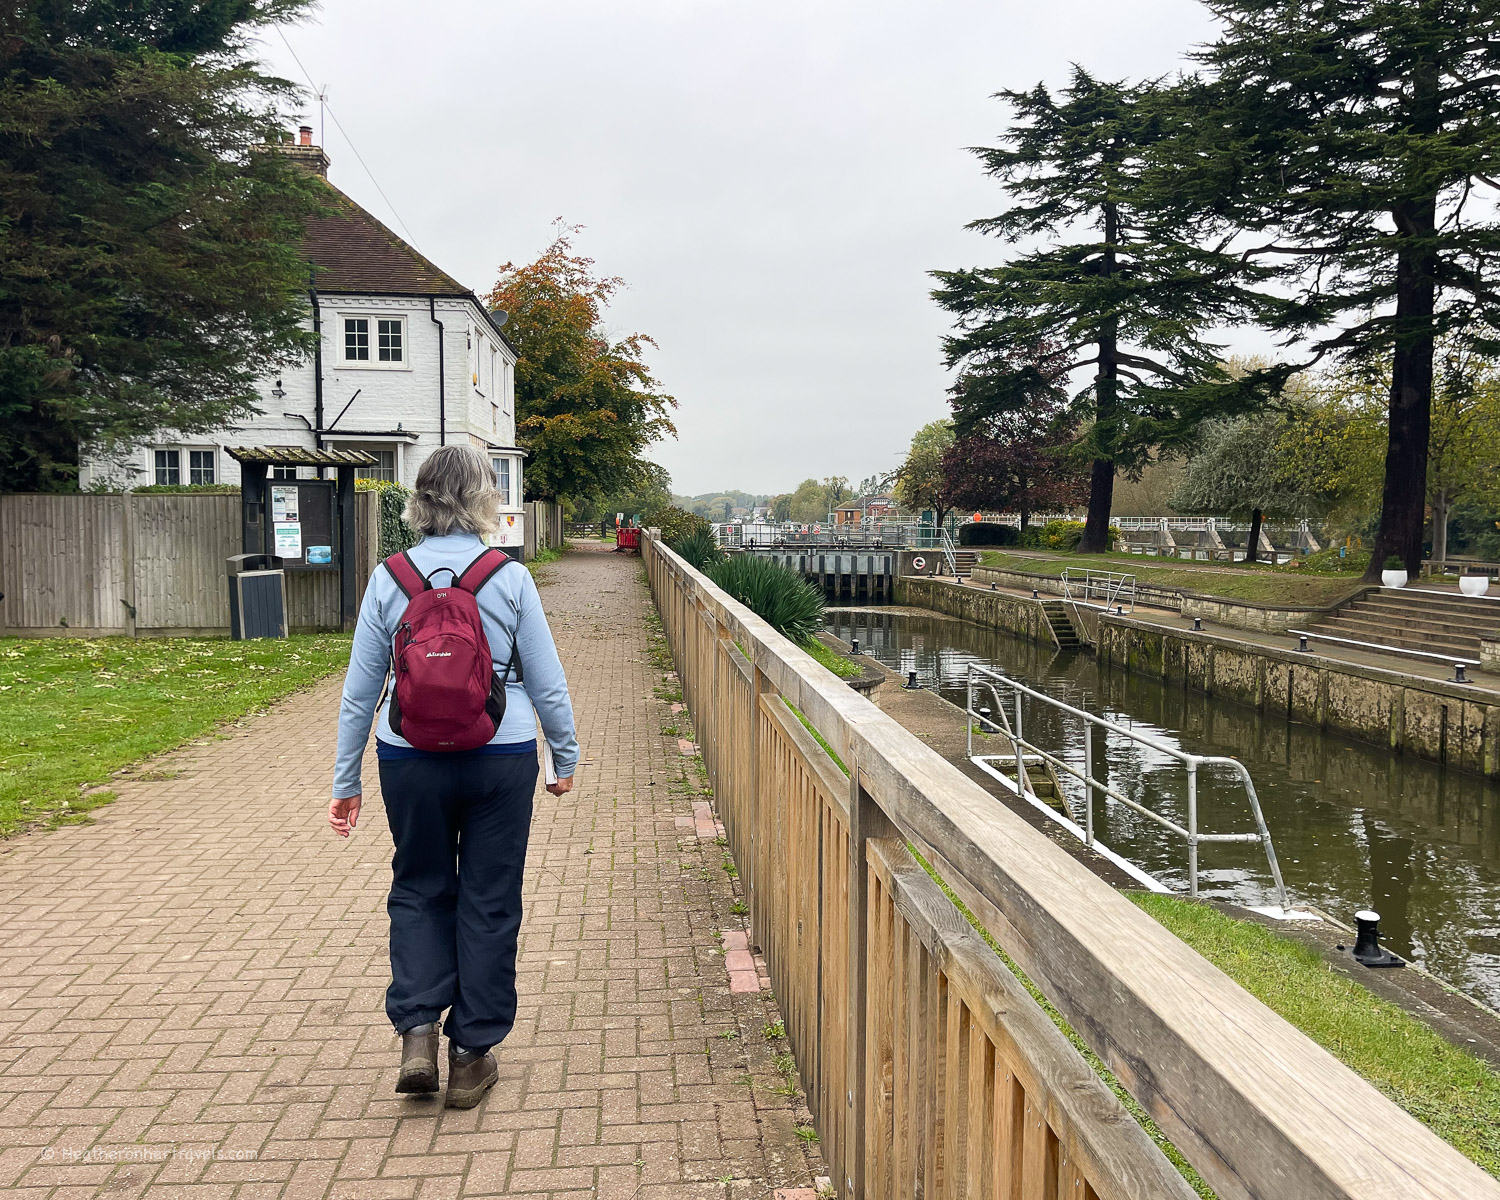
Day 11 – Windsor – Staines – Chertsey Bridge
Although it has some attractive stretches around Runnymede, this part of the Thames starts to feel quite developed, as you enter the orbit of the M25 motorway that encircles London. This was not one of our favourite stretches, although it could have just been that the grey skies and drizzle dampened our enthusiasm!
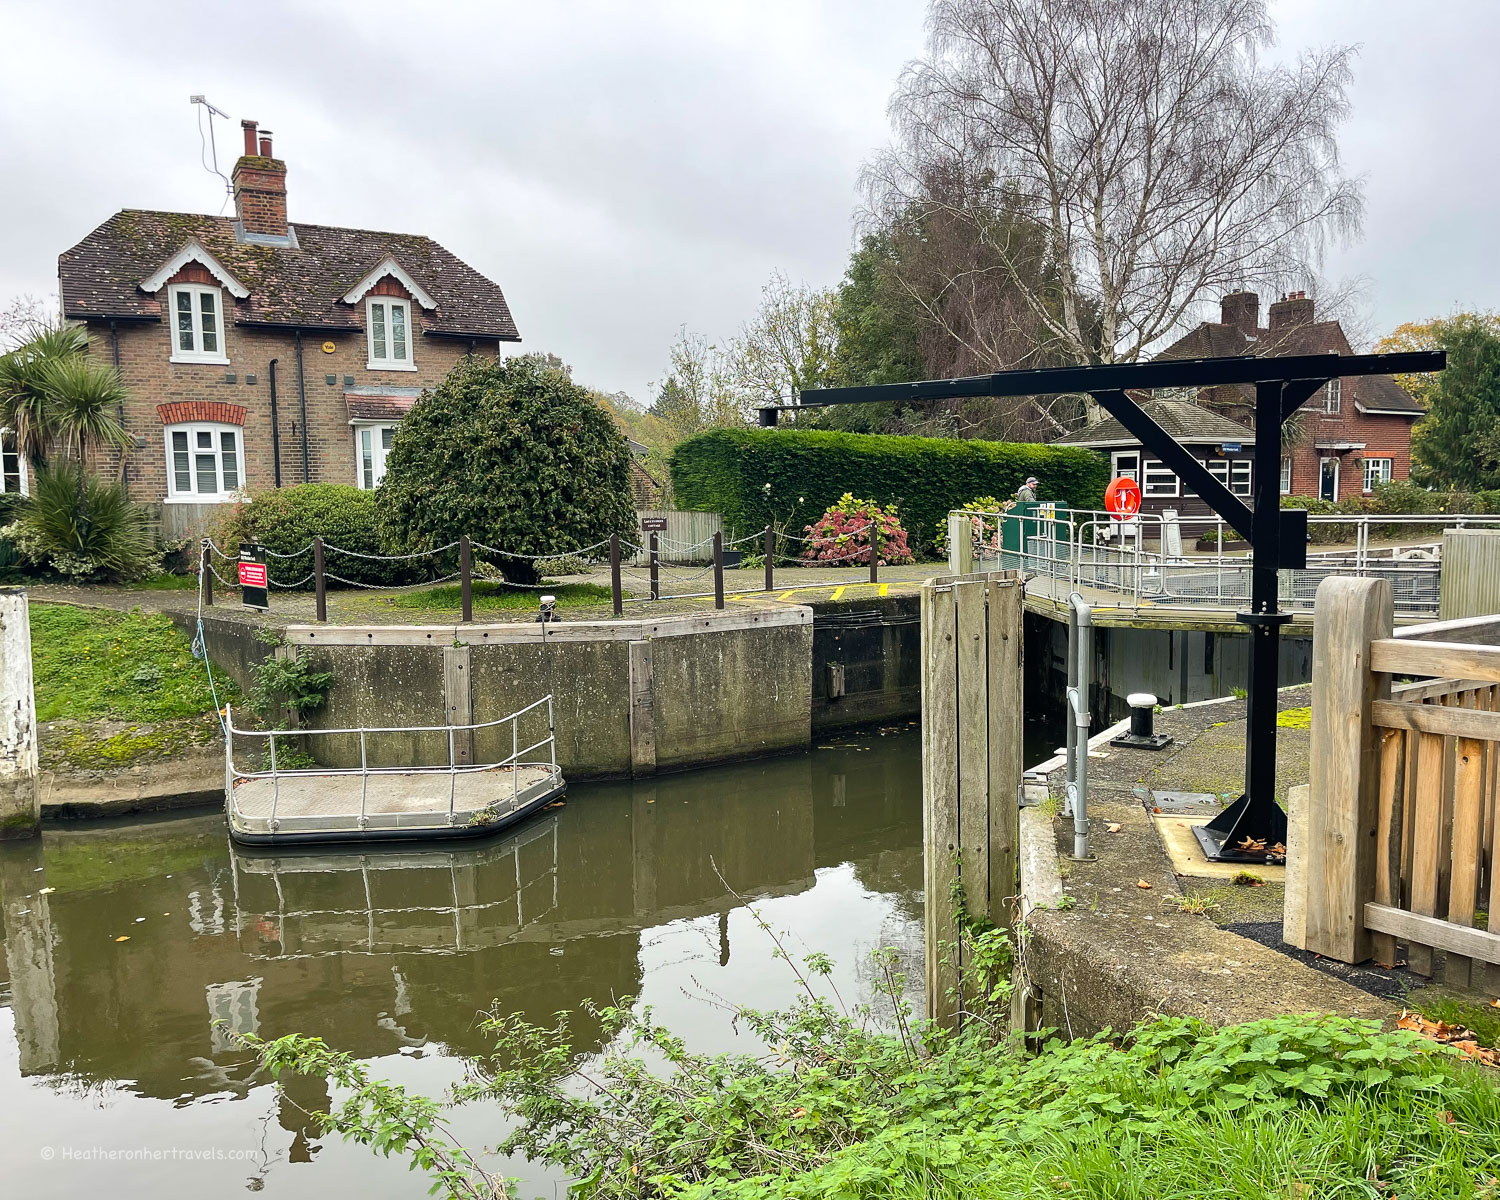
The path out of Windsor follows a loop in the river, and beyond Victoria Bridge offers fine views of Windsor Great Park and castle on the opposite bank. At Old Windsor there’s a lock and the path follows a canal that cuts off the loop in the river.
Old Windsor lock- Hiking on the Thames Path National Trail
Runnymede Meadow
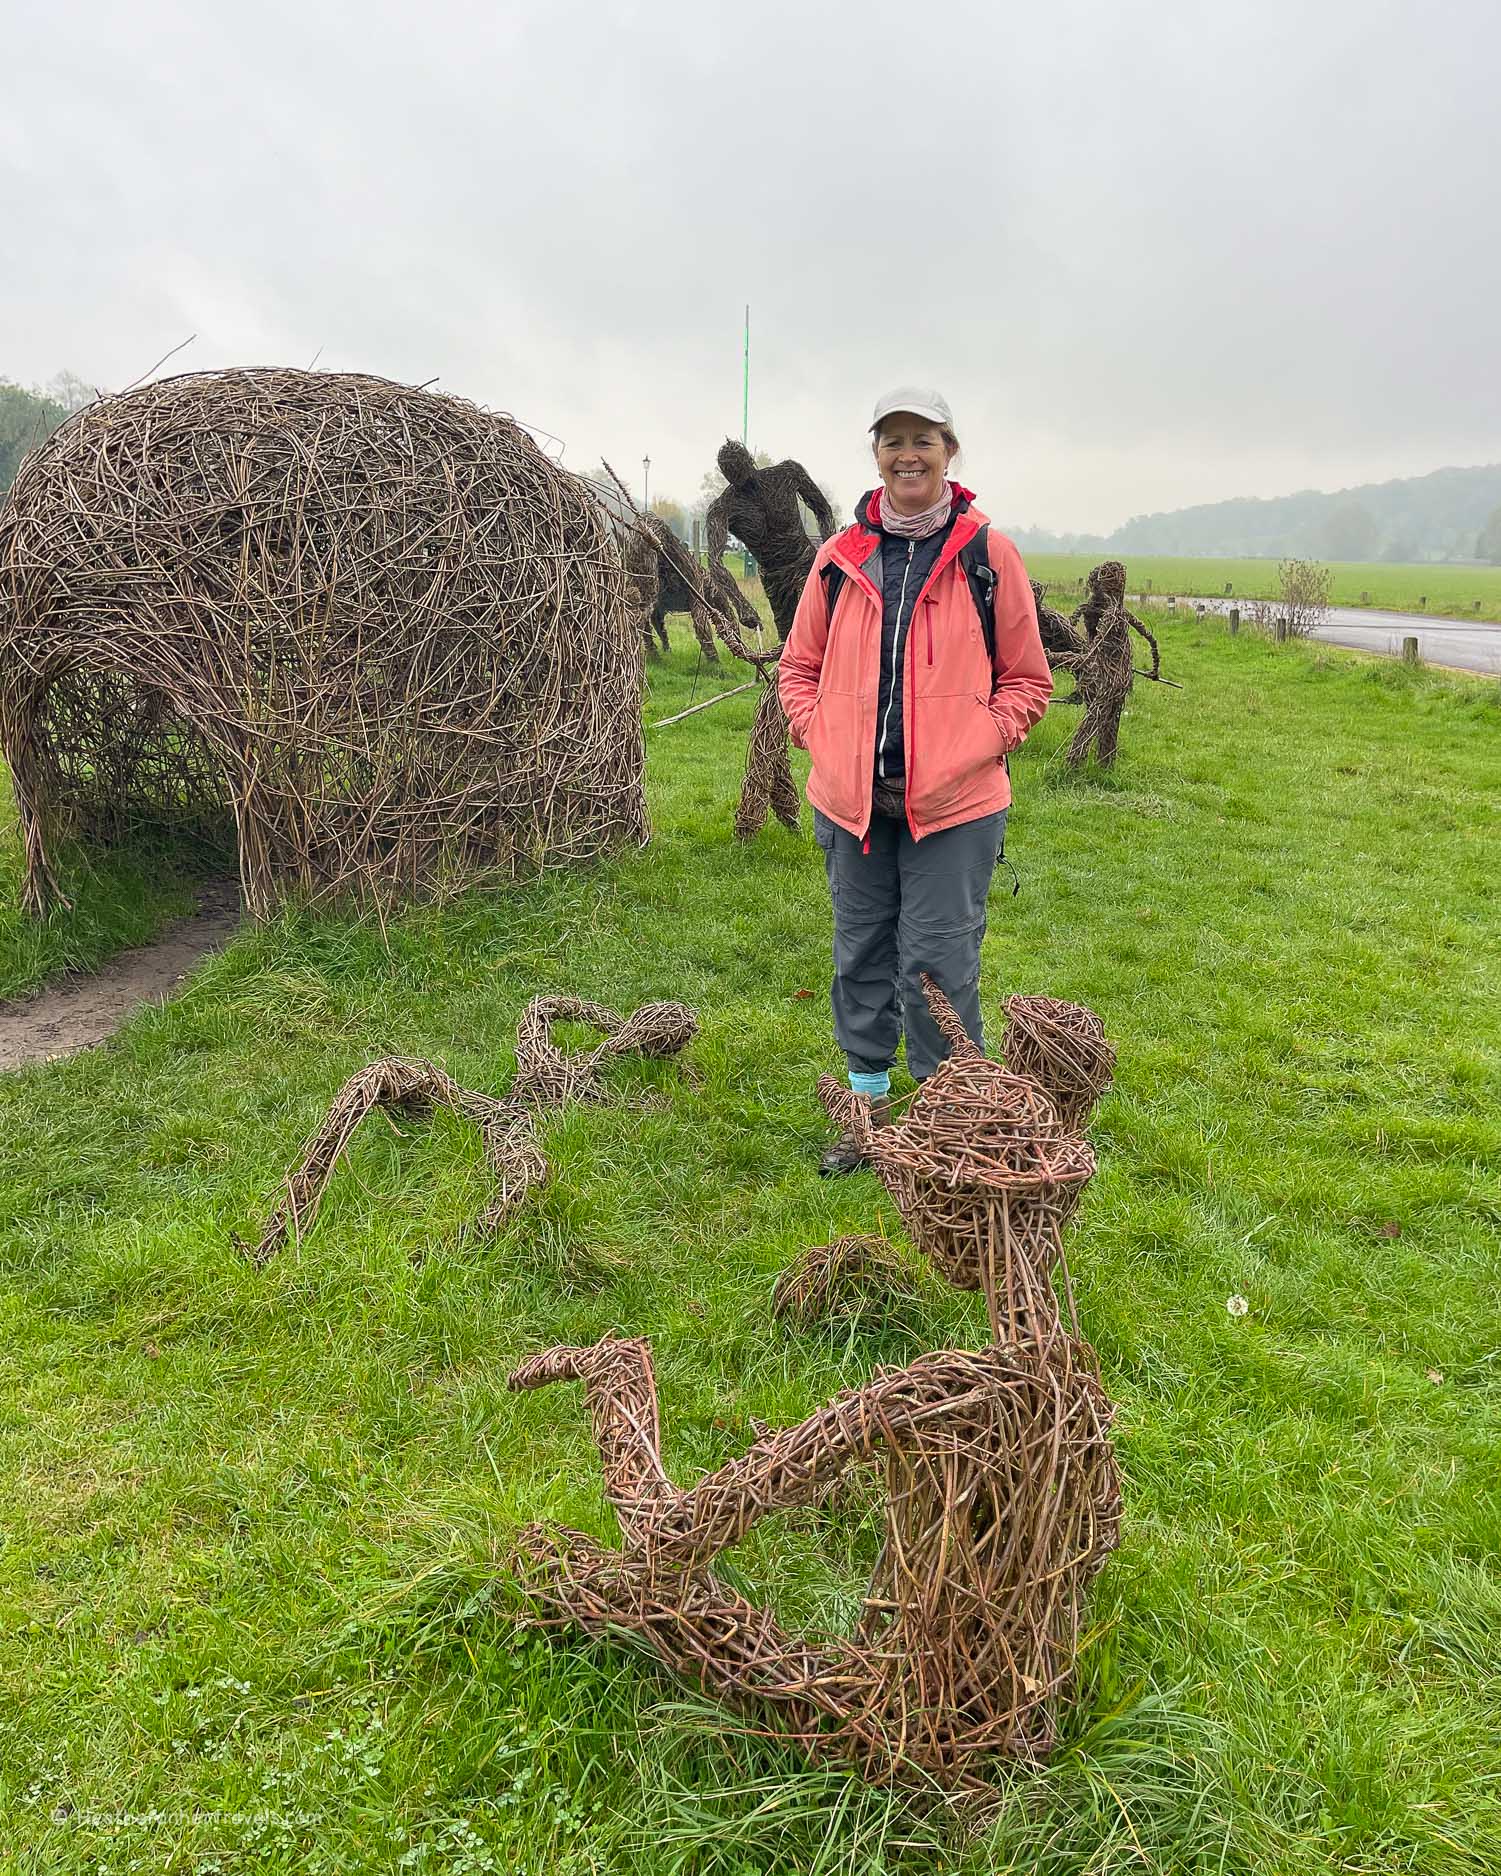
Between Windsor and Staines lies the Runnymede meadow, bounded on one side by the wooded slopes of Cooper’s Hill. This is the location of an historic meeting in 1215, between King John and his barons.
It’s considered a turning point in English history, since the king was forced to accept limits on his powers, enshrined in a document known as the ‘Magna Carta’.
Sculptures at Runnymede – Hiking on the Thames Path National Trail
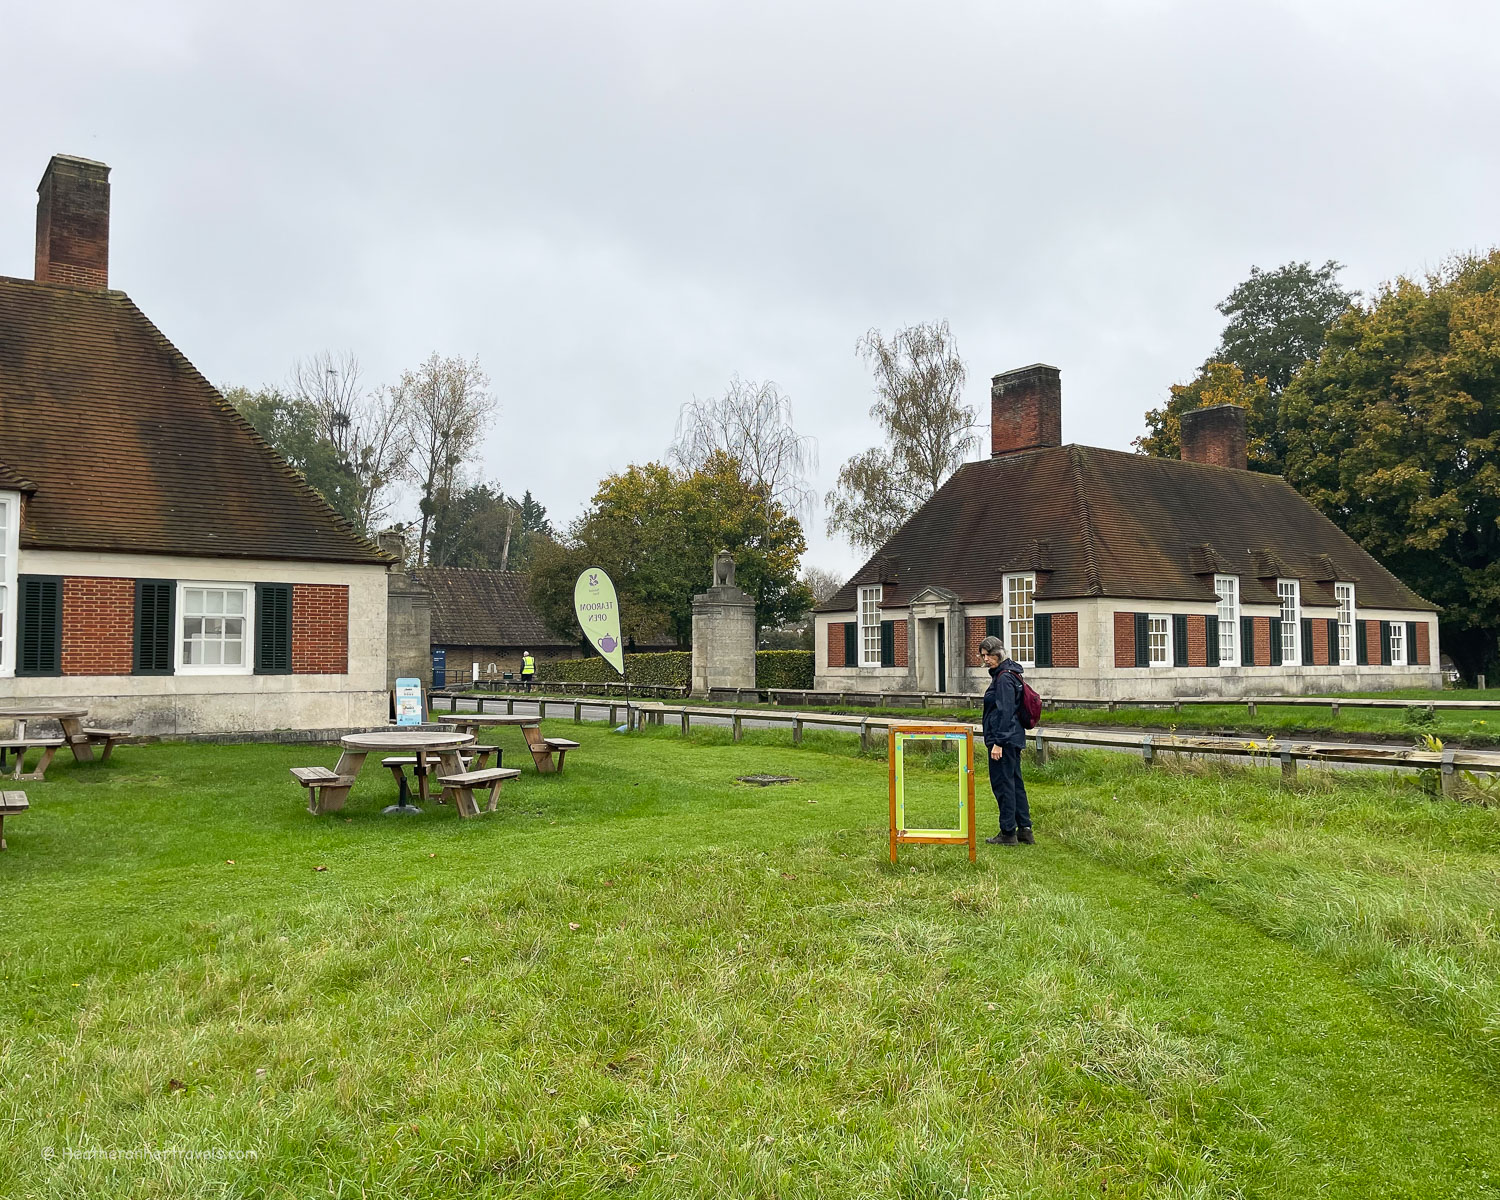
Runnymede Meadow is managed by the National Trust, with some outdoor sculptures and a tea room near the road.
Tearoom at Runnymede – Hiking on the Thames Path National Trail
Staines
The town of Staines has a less affluent feel compared to the elegant riverside towns of Marlow, Henley and Windsor upstream. It’s close to Heathrow Airport and surrounded by reservoirs that supply London with drinking water, although you won’t necessarily see them from the Thames Path.
Staines Bridge – Hiking on the Thames Path National Trail
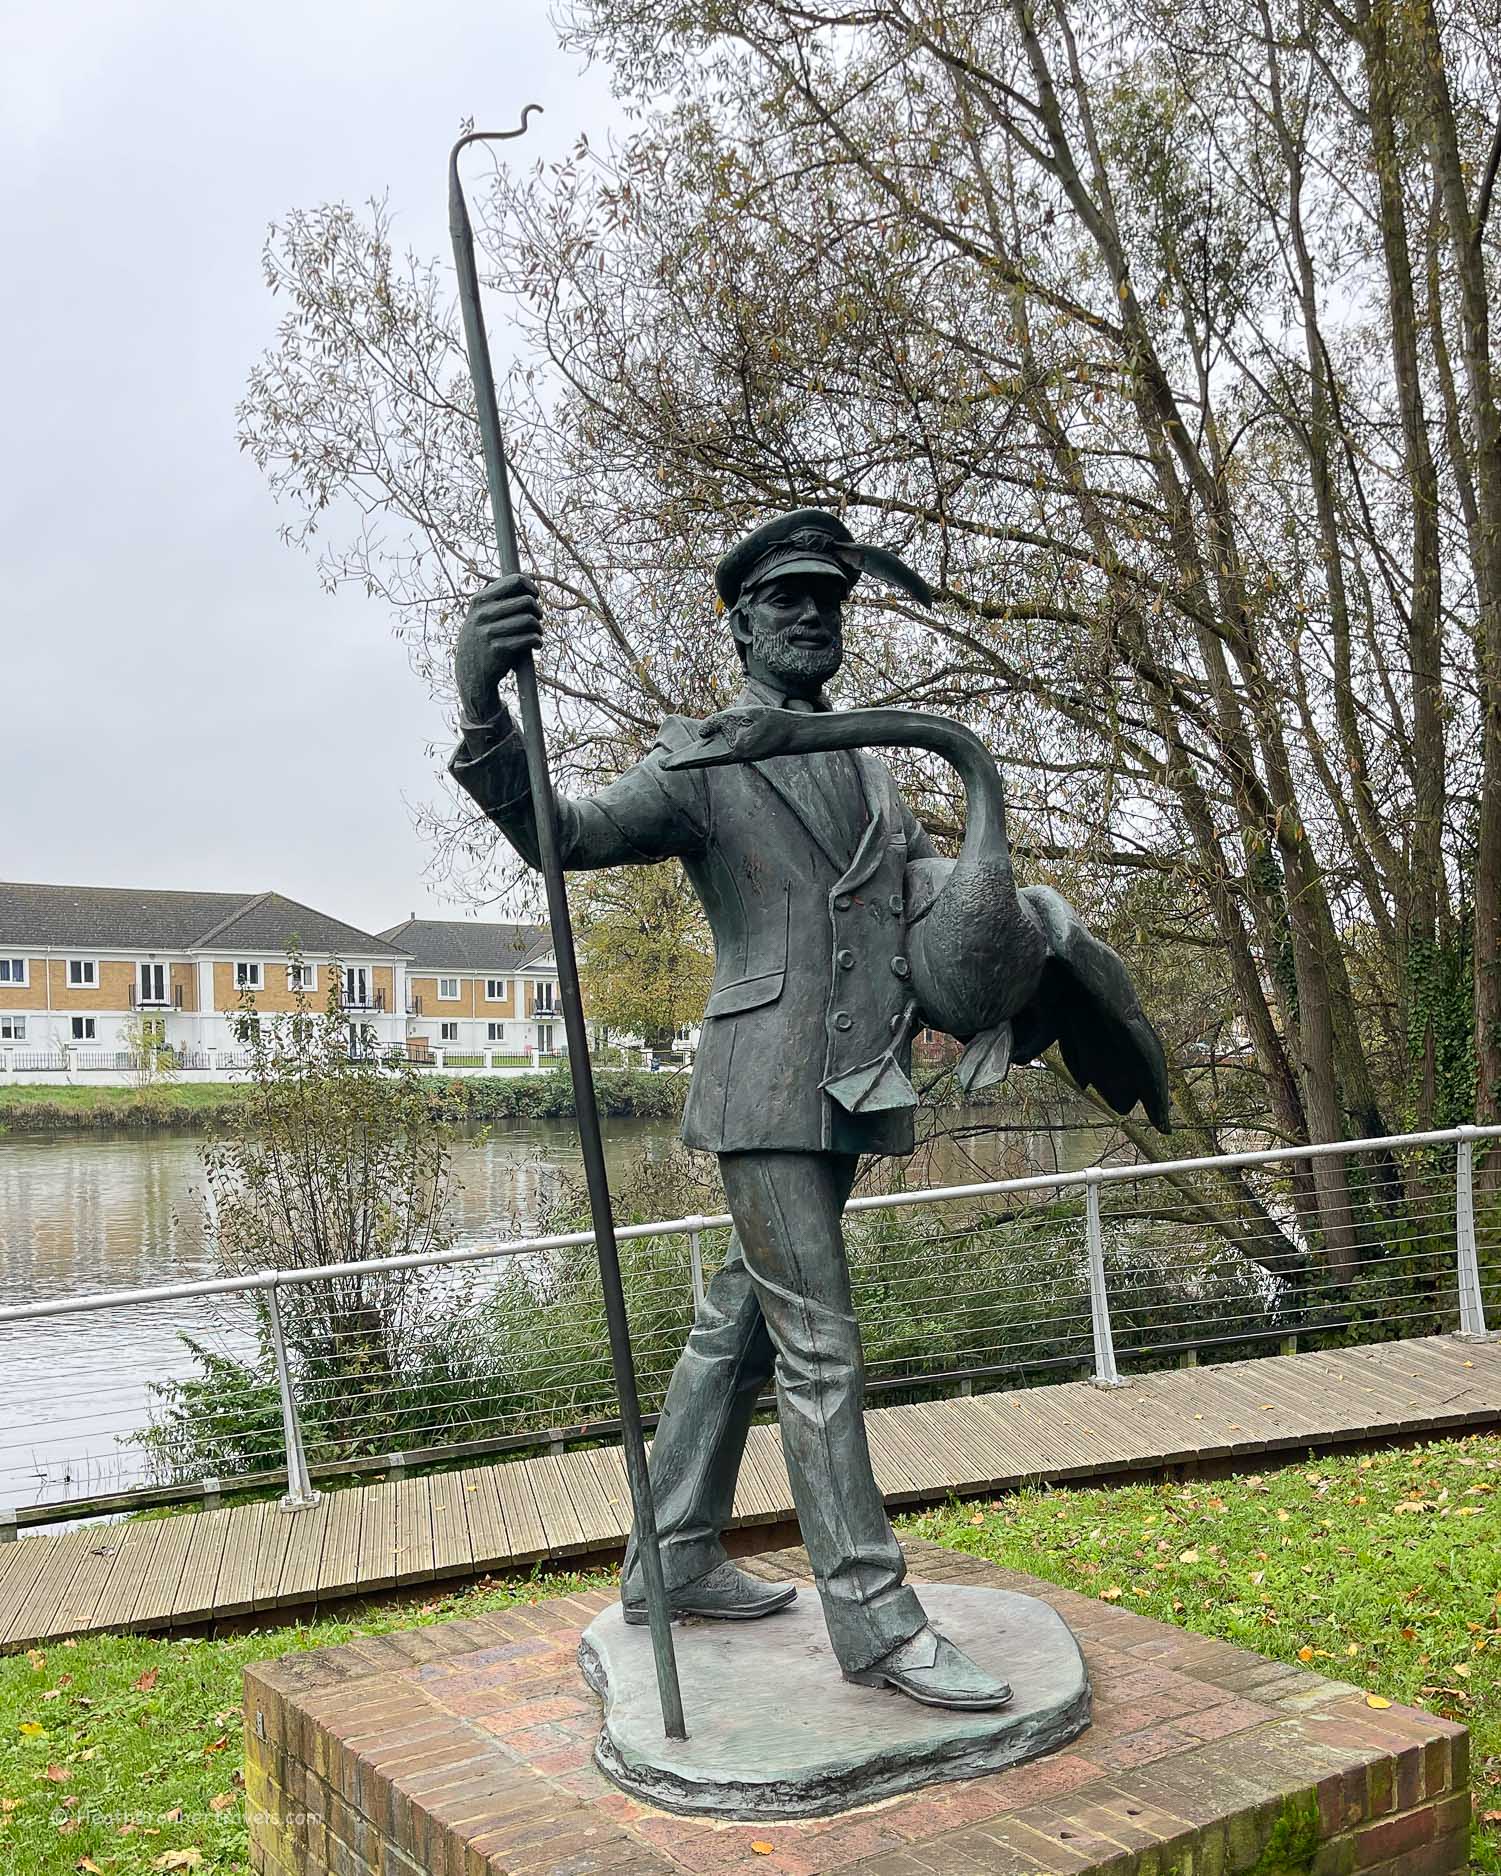
The riverside at Staines seems to have a strong affinity with swans, and we saw several swan related sculptures in the riverside park. There’s also a stone marker to show that this was the furthest point of the river over which the city of London had any jurisdiction.
The Swanmaster by Diana Thomson at Staines – Hiking on the Thames Path National Trail
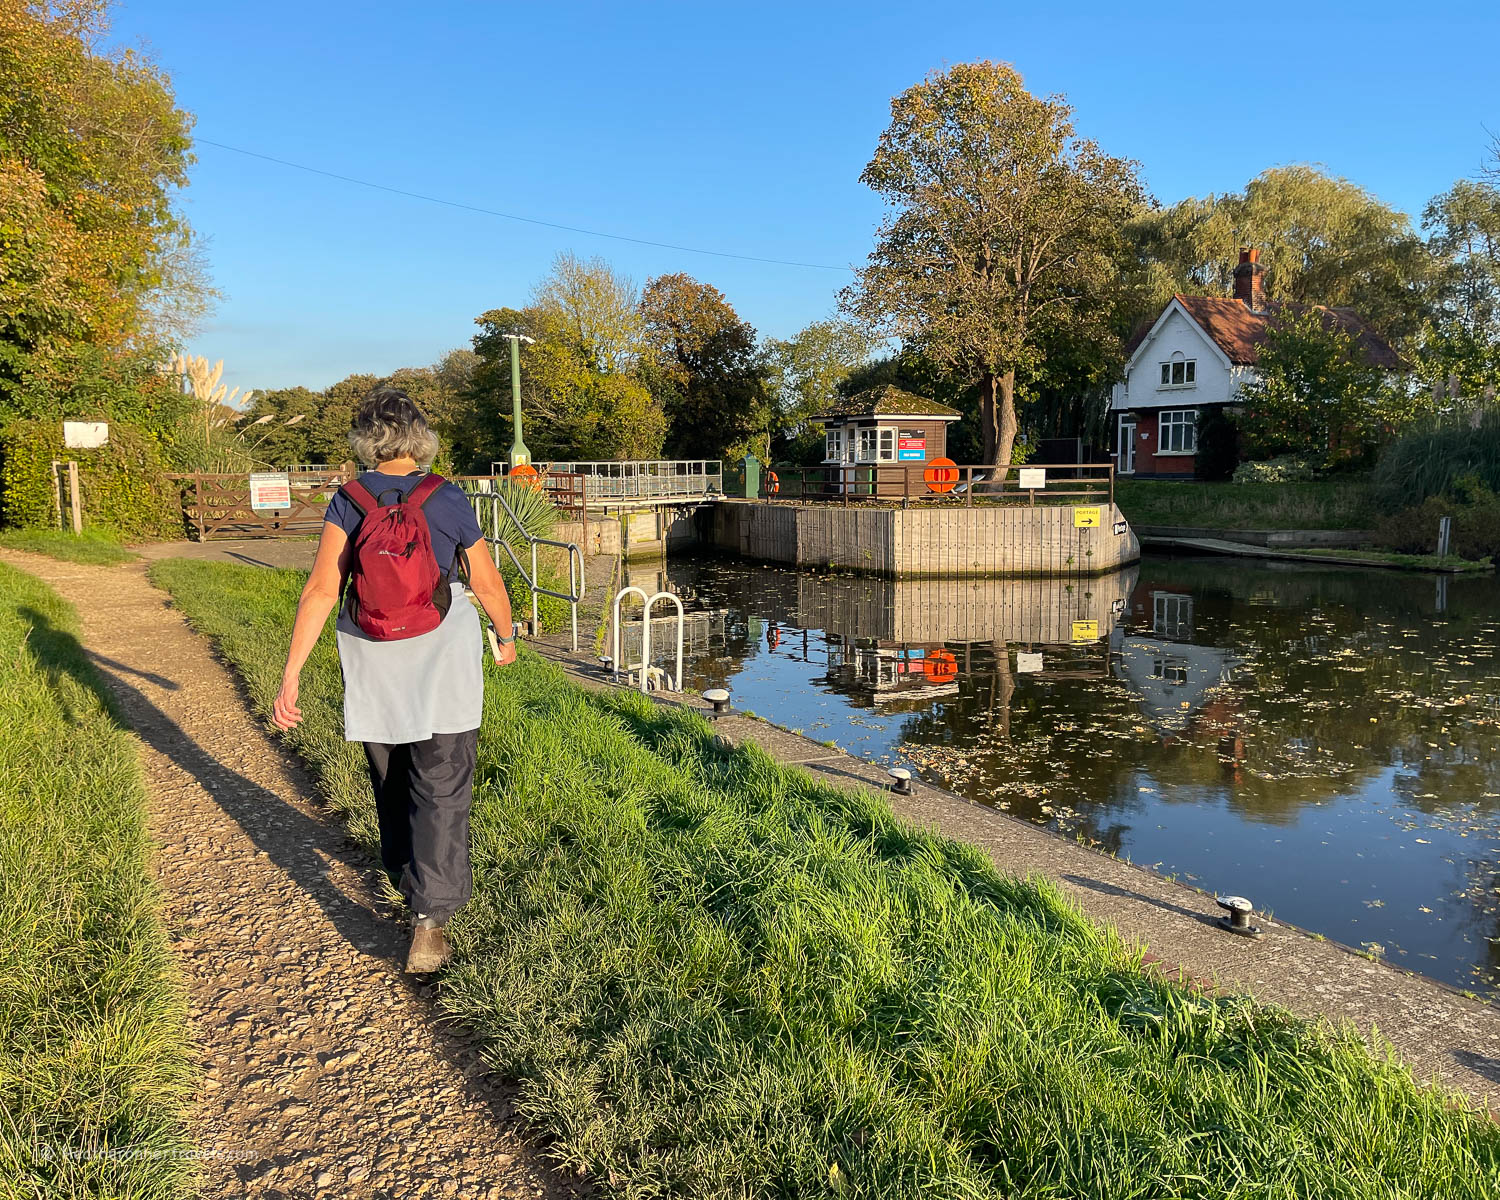
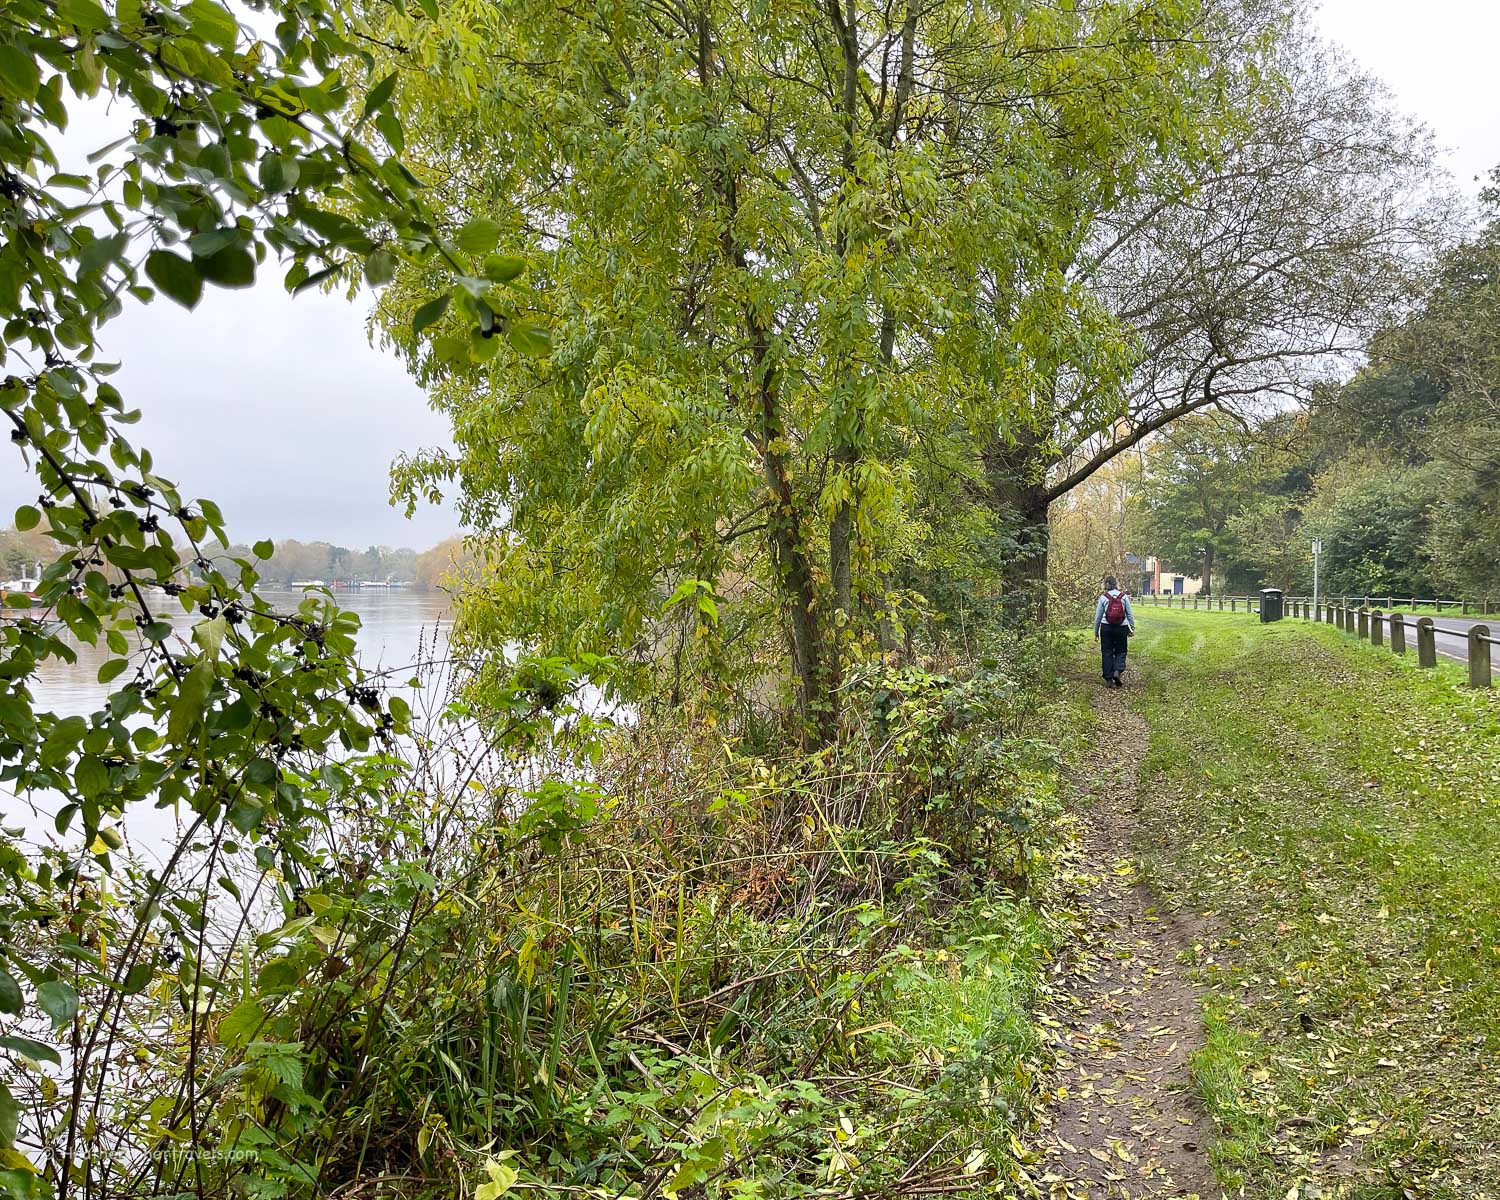
Beyond Staines, the landscape becomes decidedly suburban, with modern houses lining the banks. The path passes the village of Laleham and under the M3 Motorway bridge, with its accompanying roar of traffic.
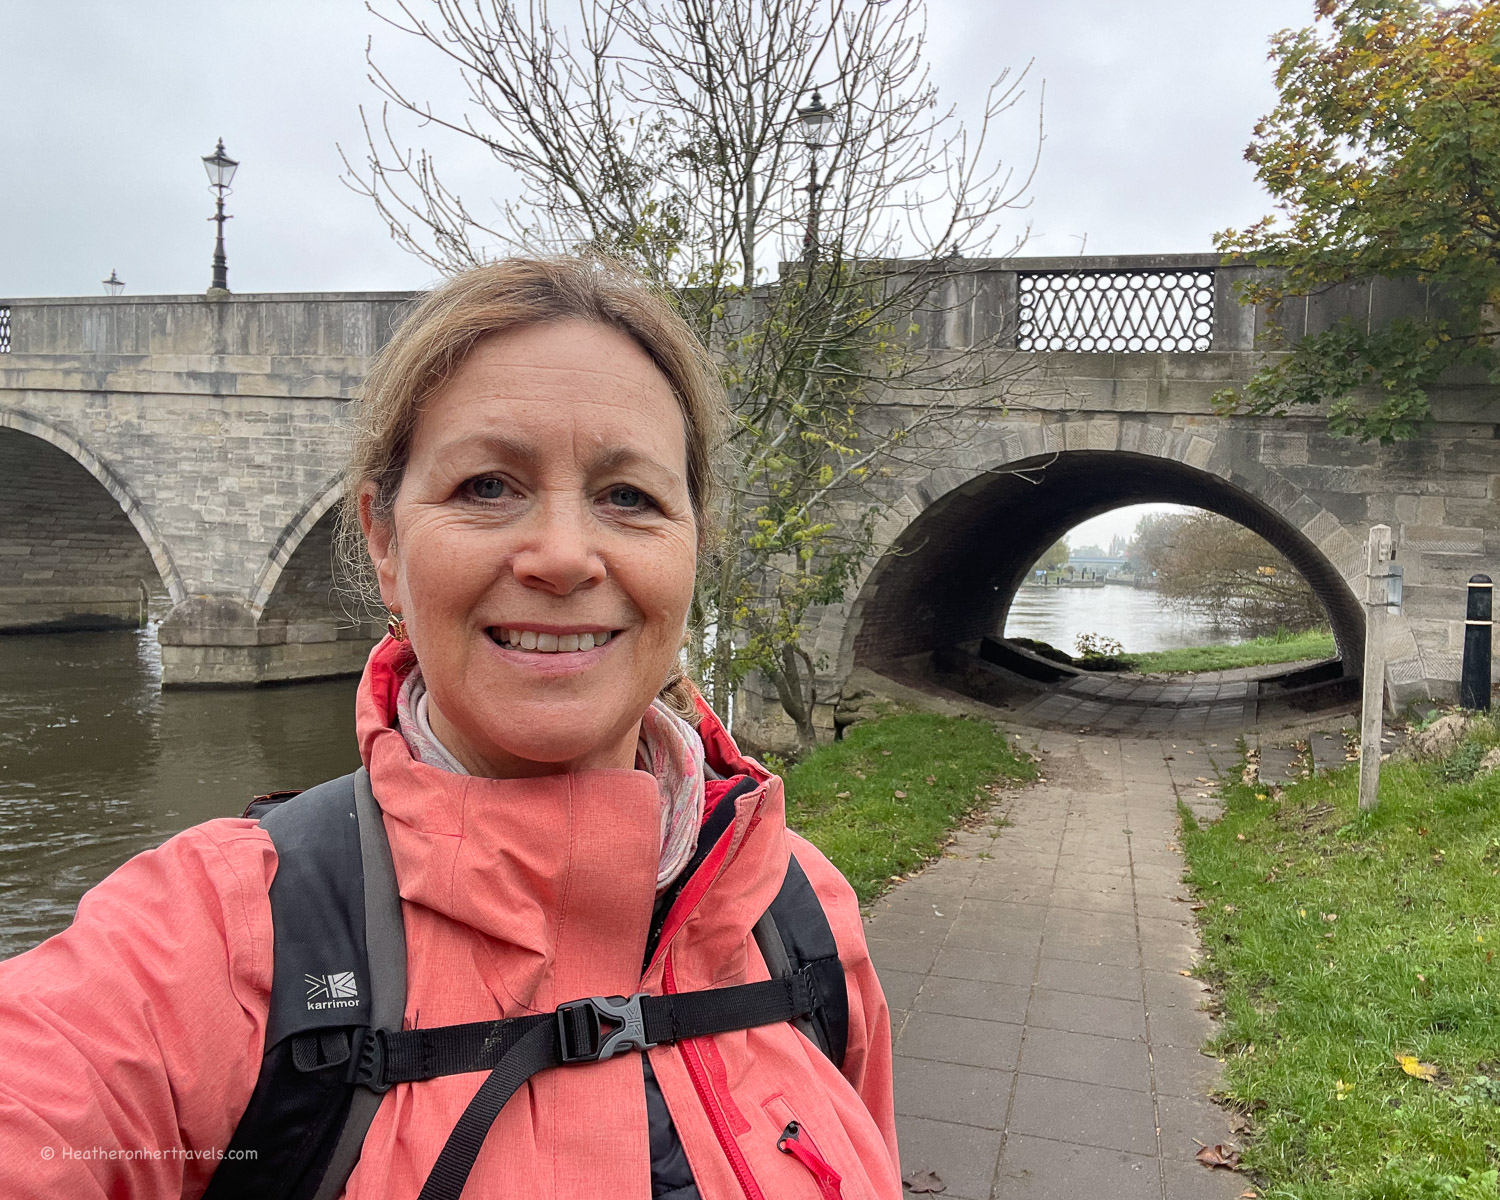
Soon after Chertsey weir you’ll arrive at Chertsey Bridge, although the town and station is around 20 minutes walk from the river.
Chertsey Bridge – Hiking on the Thames Path National Trail
Day 11 – Distance and timings
Windsor to Chertsey Bridge is aprox 11.5 miles / 18.4 km and took us 6.5 hours to walk, including lunch and rest stops.
Chertsey – Hiking on the Thames Path National Trail
Day 11 – Where to stay
Windsor: There are a number of hotels and guest houses in Windsor to suit every budget. As prices vary widely with demand, we suggest comparing all Windsor hotels for your dates. One good mid range option is the Holiday Inn Express.
Chertsey Bridge: The best option by Chertsey Bridge is The Bridge Hotel, a stylish and comfortable riverside pub. Alternatively, try the Crown Hotel or Old Swan Hotel, which are 20 minutes walk from the river in Chertsey town.
Penton Hook Lock – Hiking on the Thames Path National Trail
Day 11 – Where to eat
Windsor has a wide range of places to eat, as well as shops to stock up on picnic supplies. At Chertsey there are a couple of pubs near the bridge, but the nearest convenience store is a 10 minute walk from the river.
On this stretch, look out for:
Runnymede – The Magna Carta Tea Room is run by the National Trust. A little further on, the Runnymede Pleasure Ground is a good place for a picnic, with benches overlooking the river and there’s a cafe there too.
Bell Weir Lock – The impressive Thames Hotel and Spa has a restaurant with terrace overlooking the river.
Staines – there are several coffee shops, pubs and restaurants close to the river. We enjoyed a coffee at Nostrano Lounge, within the pedestrianised shopping area.
Bell Weir Lock – Hiking on the Thames Path National Trail
Day 11 – Transport for this stage
Windsor has a railway station, which can be reached on a direct train from London Waterloo, or via the Elizabeth line with a change at Slough.
Chertsey also has a railway station, although it is 30 minutes walk from Chertsey Bridge where the stage ends.
If you need to travel between Windsor and Chertsey, the time by road is 20-25 minutes. However there are no direct bus connections and the route by train takes around 1 hour, requiring a change at Staines.
Because we had 2 cars, we left one car at each end of the trail and drove back to recover the second car at the end of the day. At Chertsey Bridge, there is a small free car park right by the bridge.
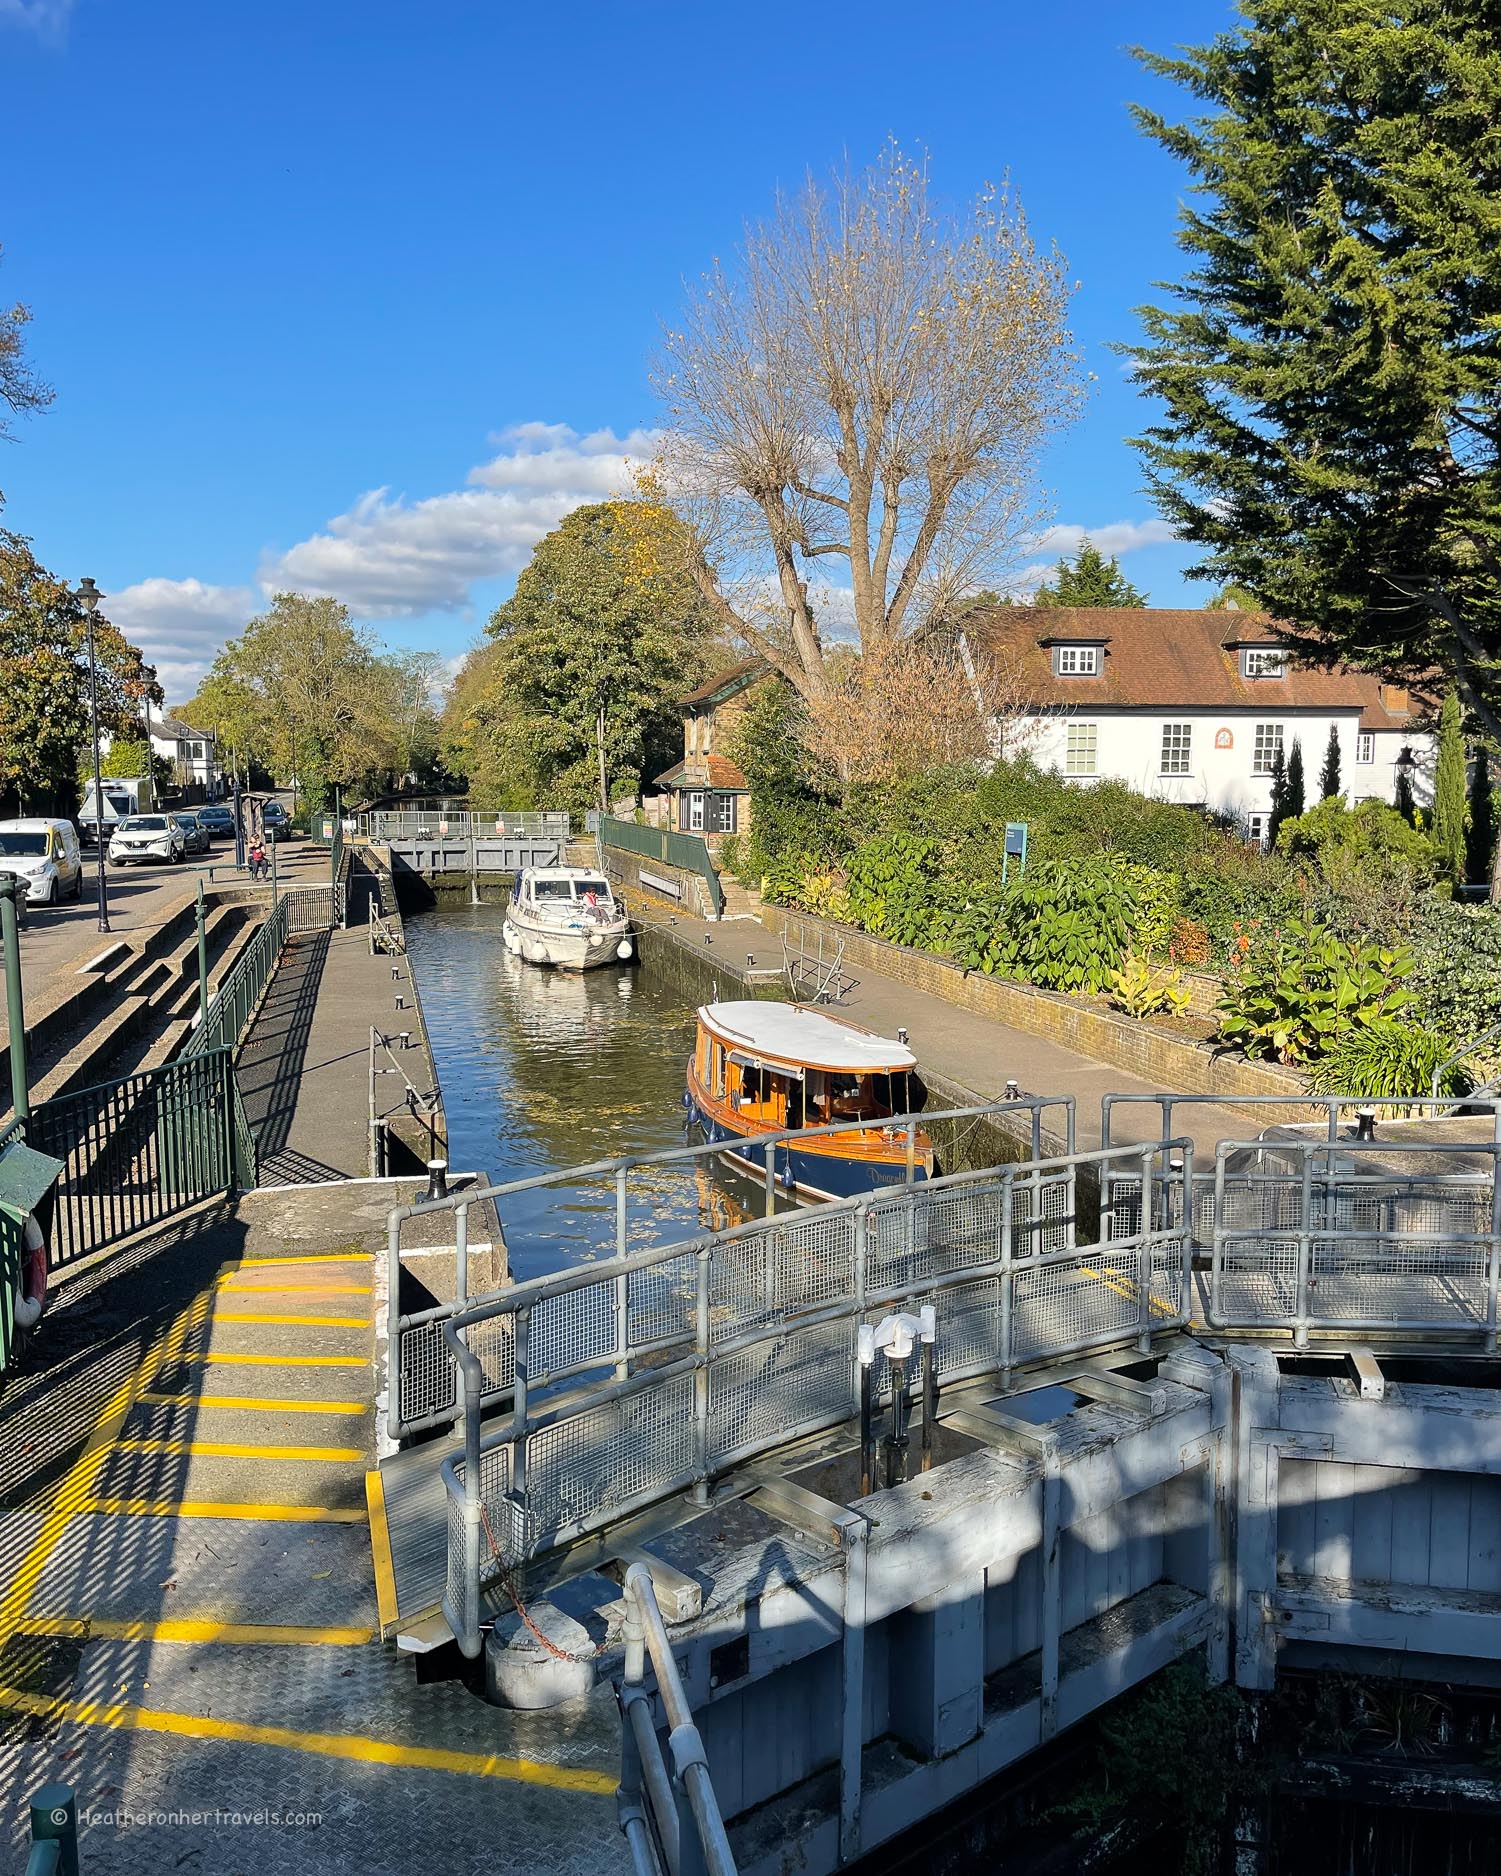
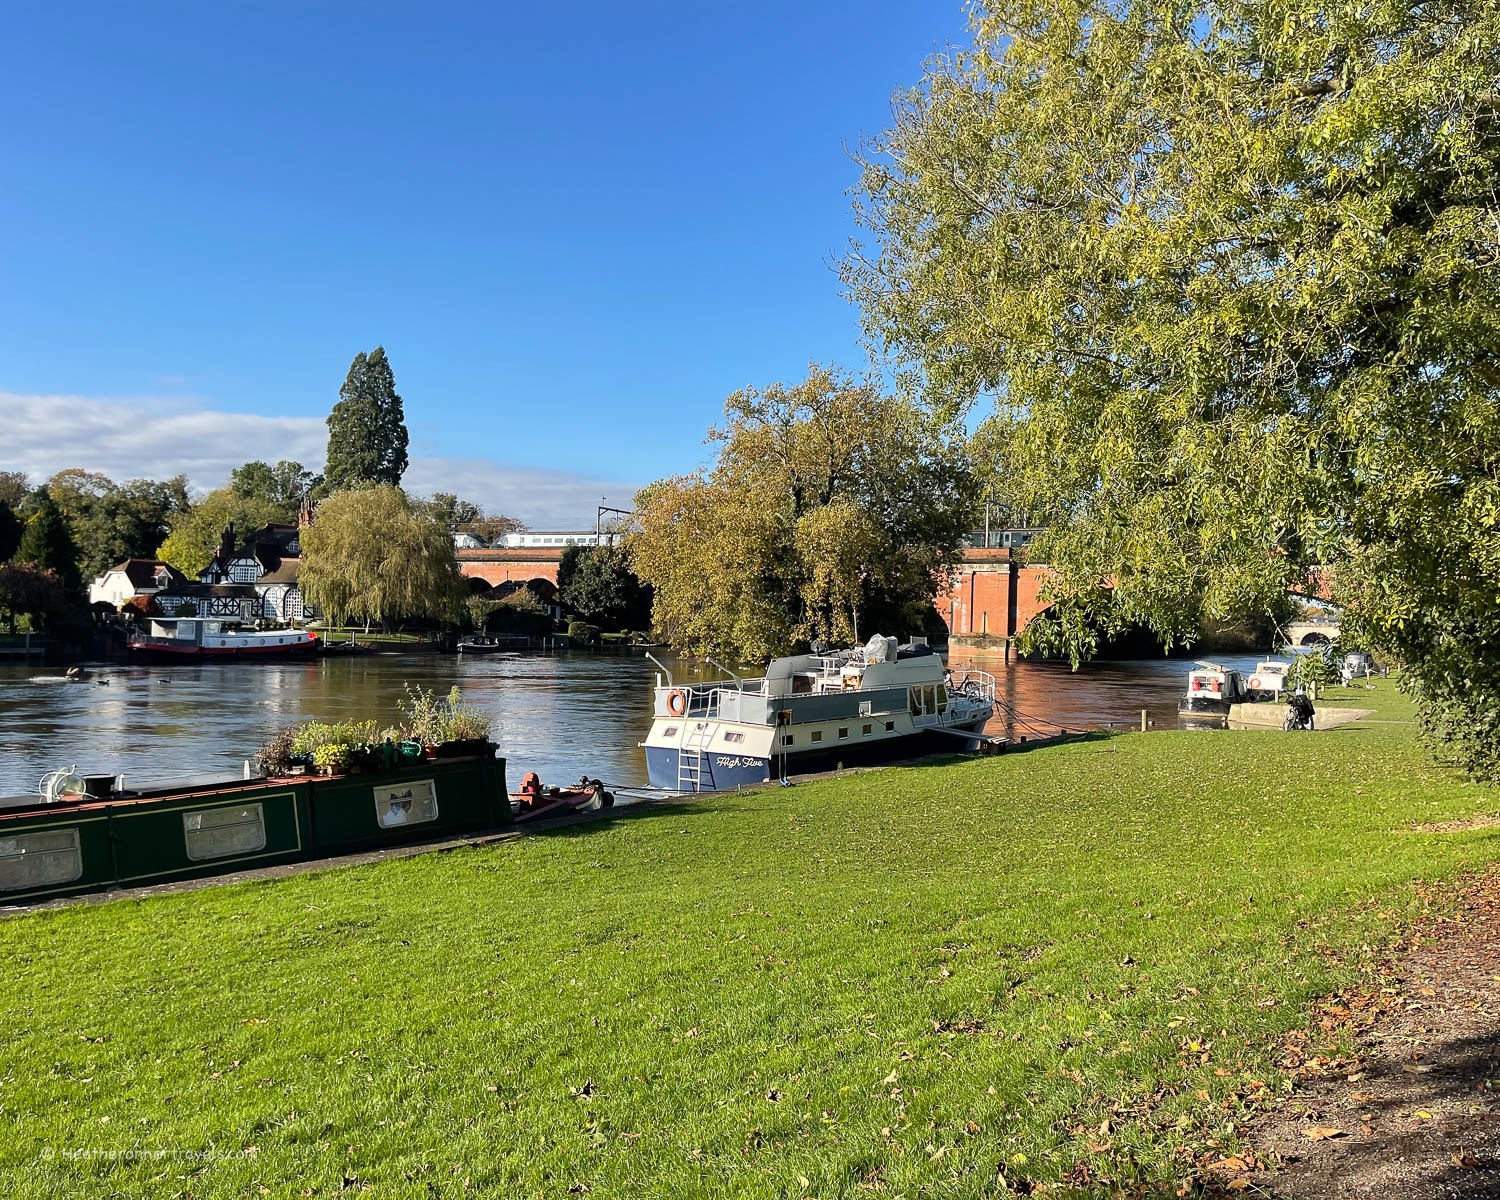
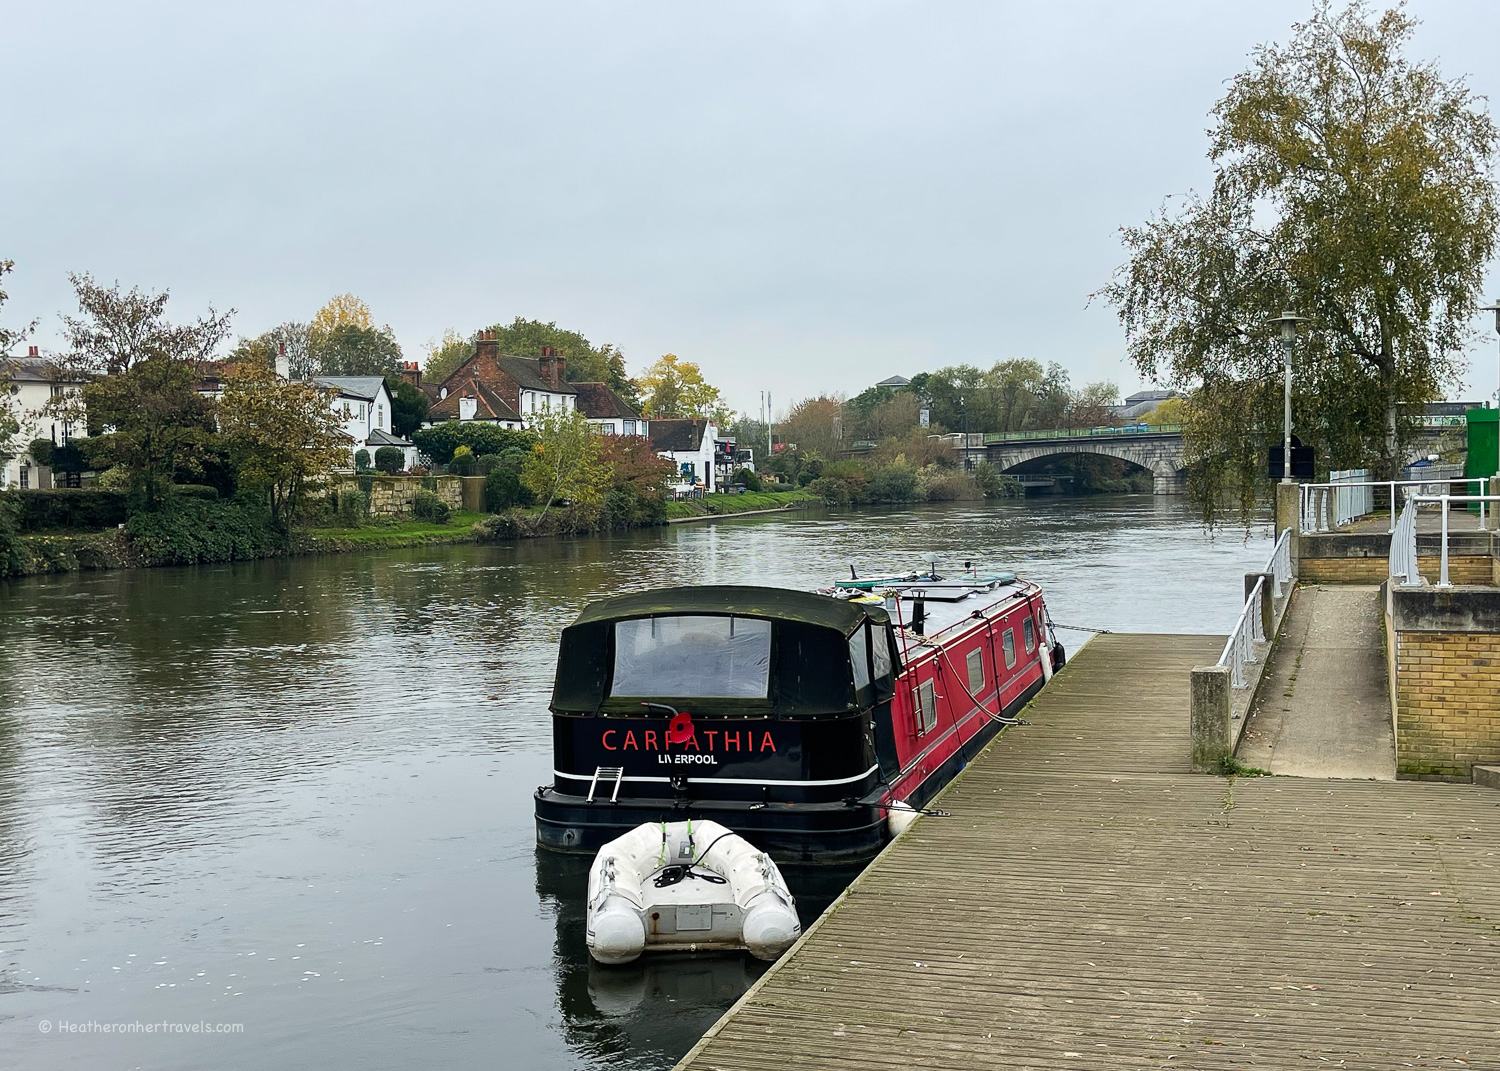
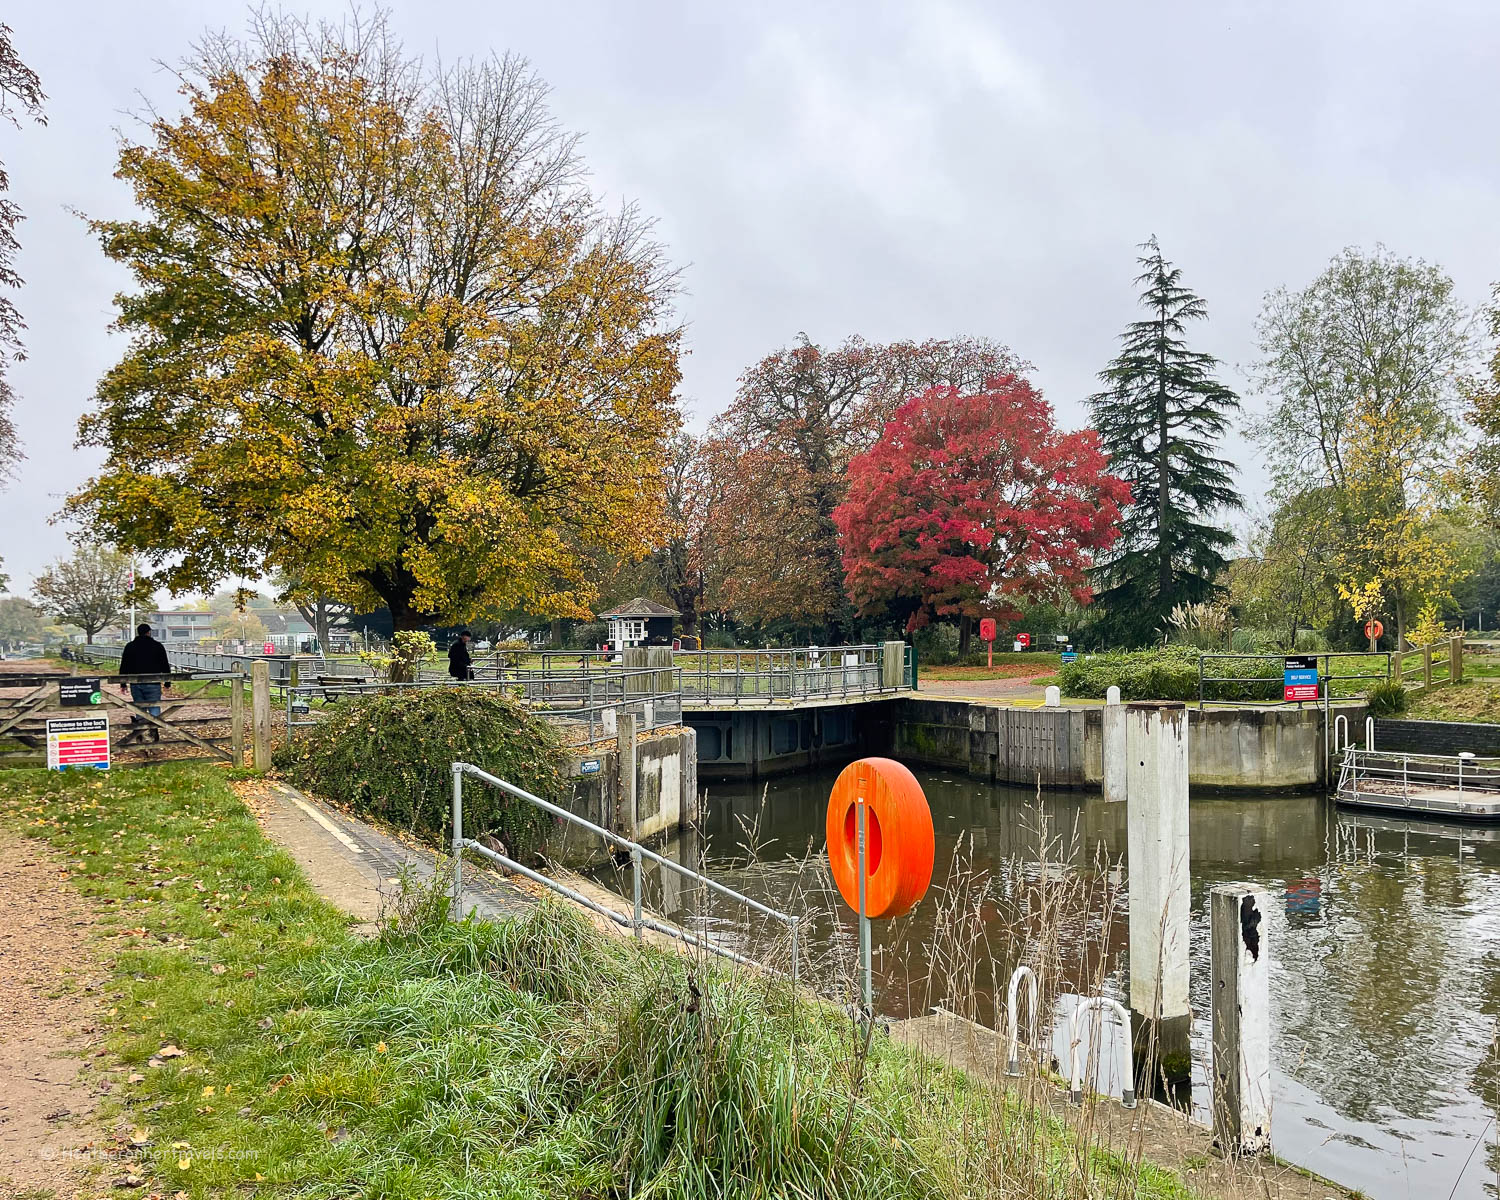
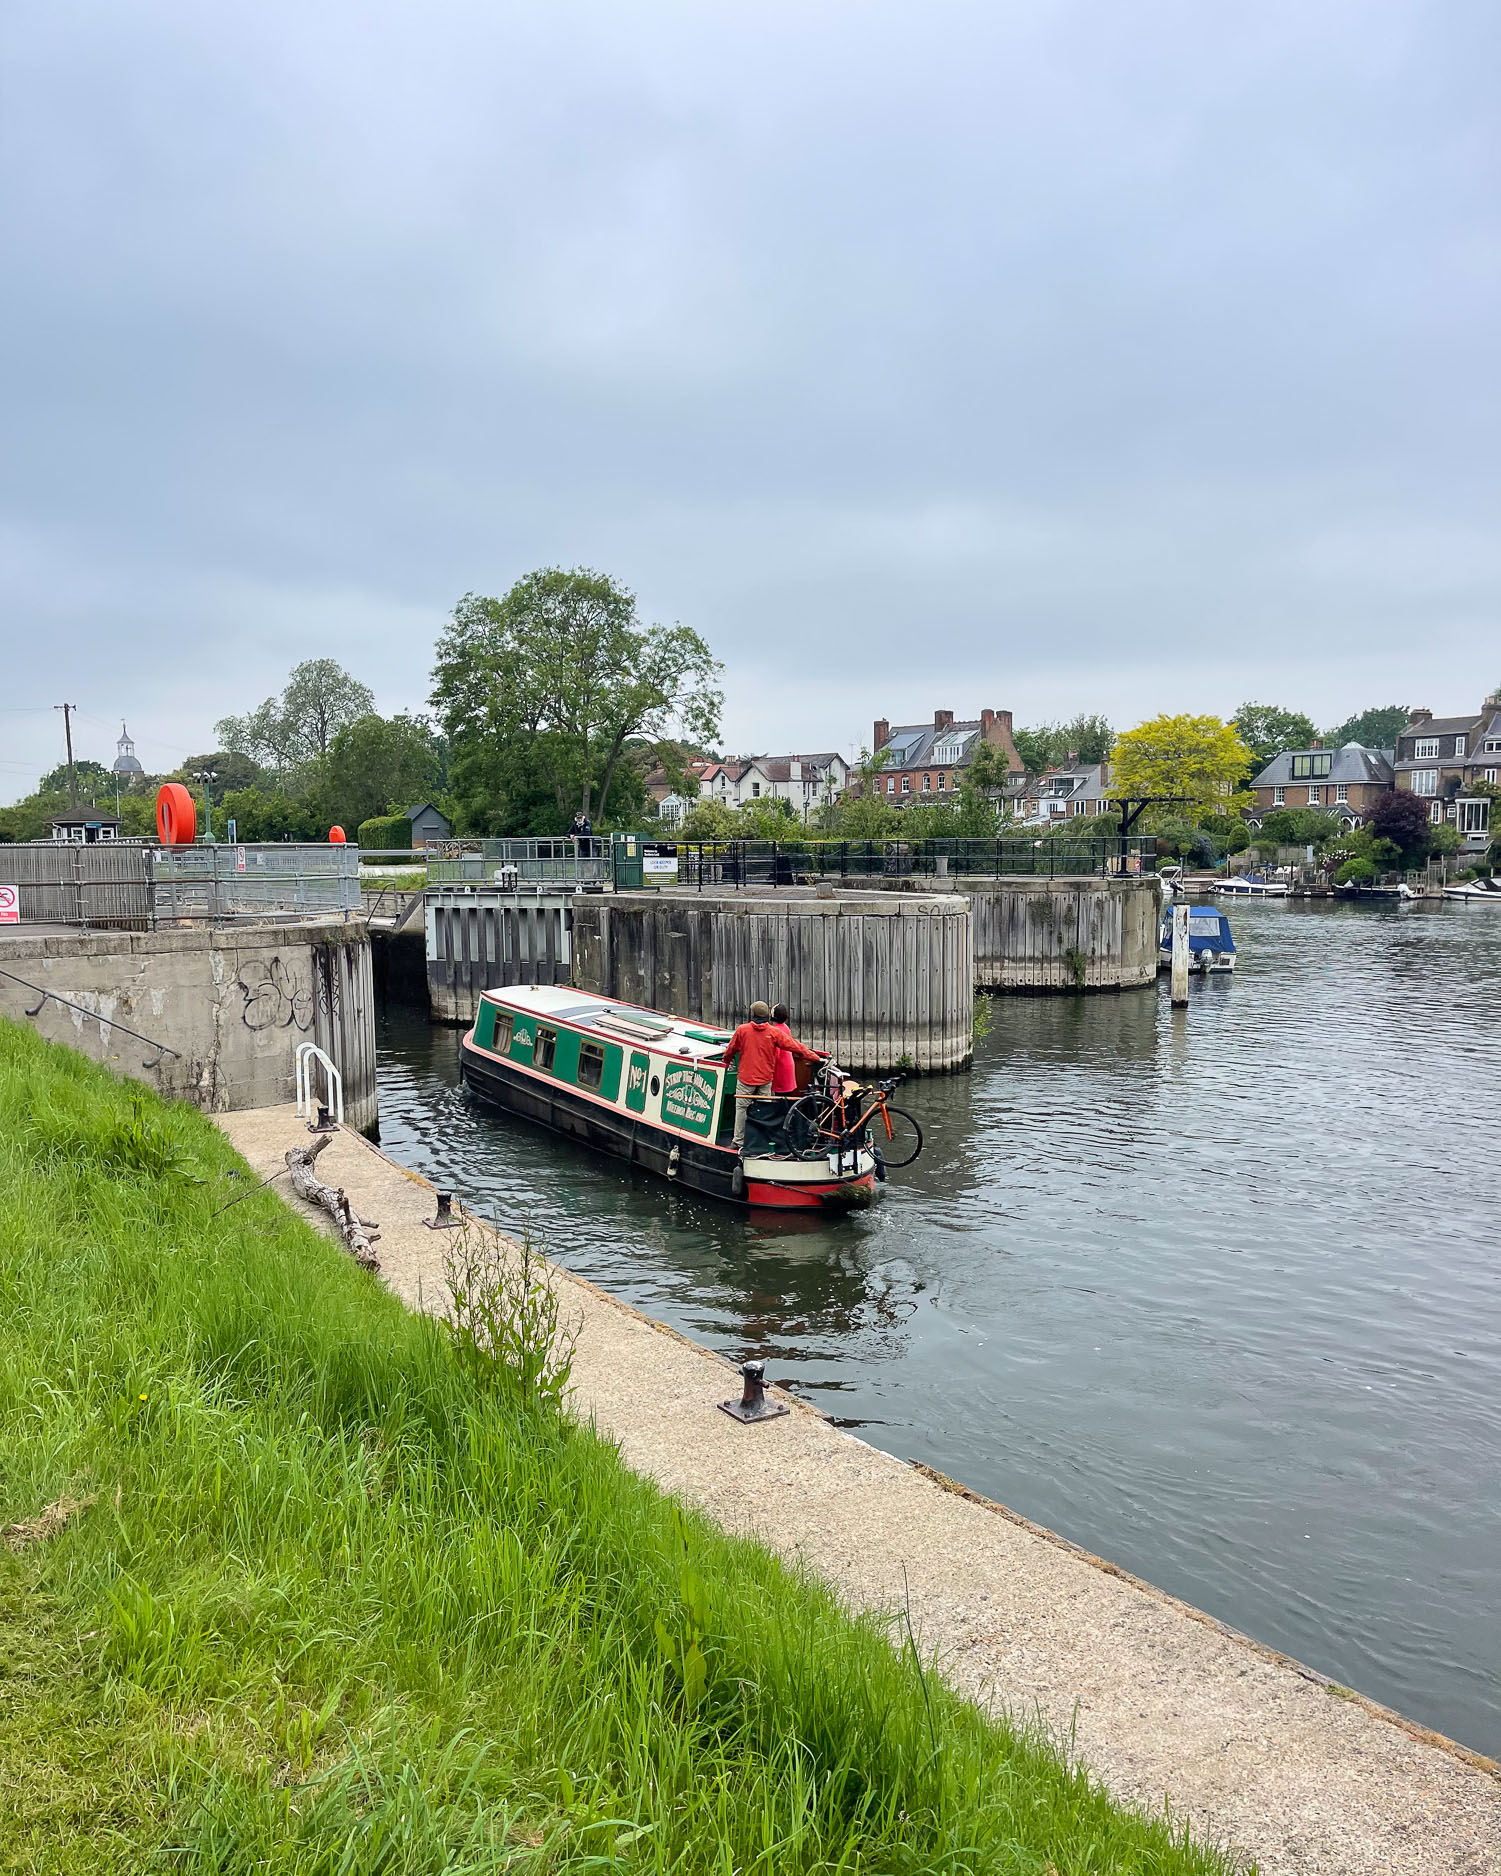
Day 12 – Chertsey to Kingston
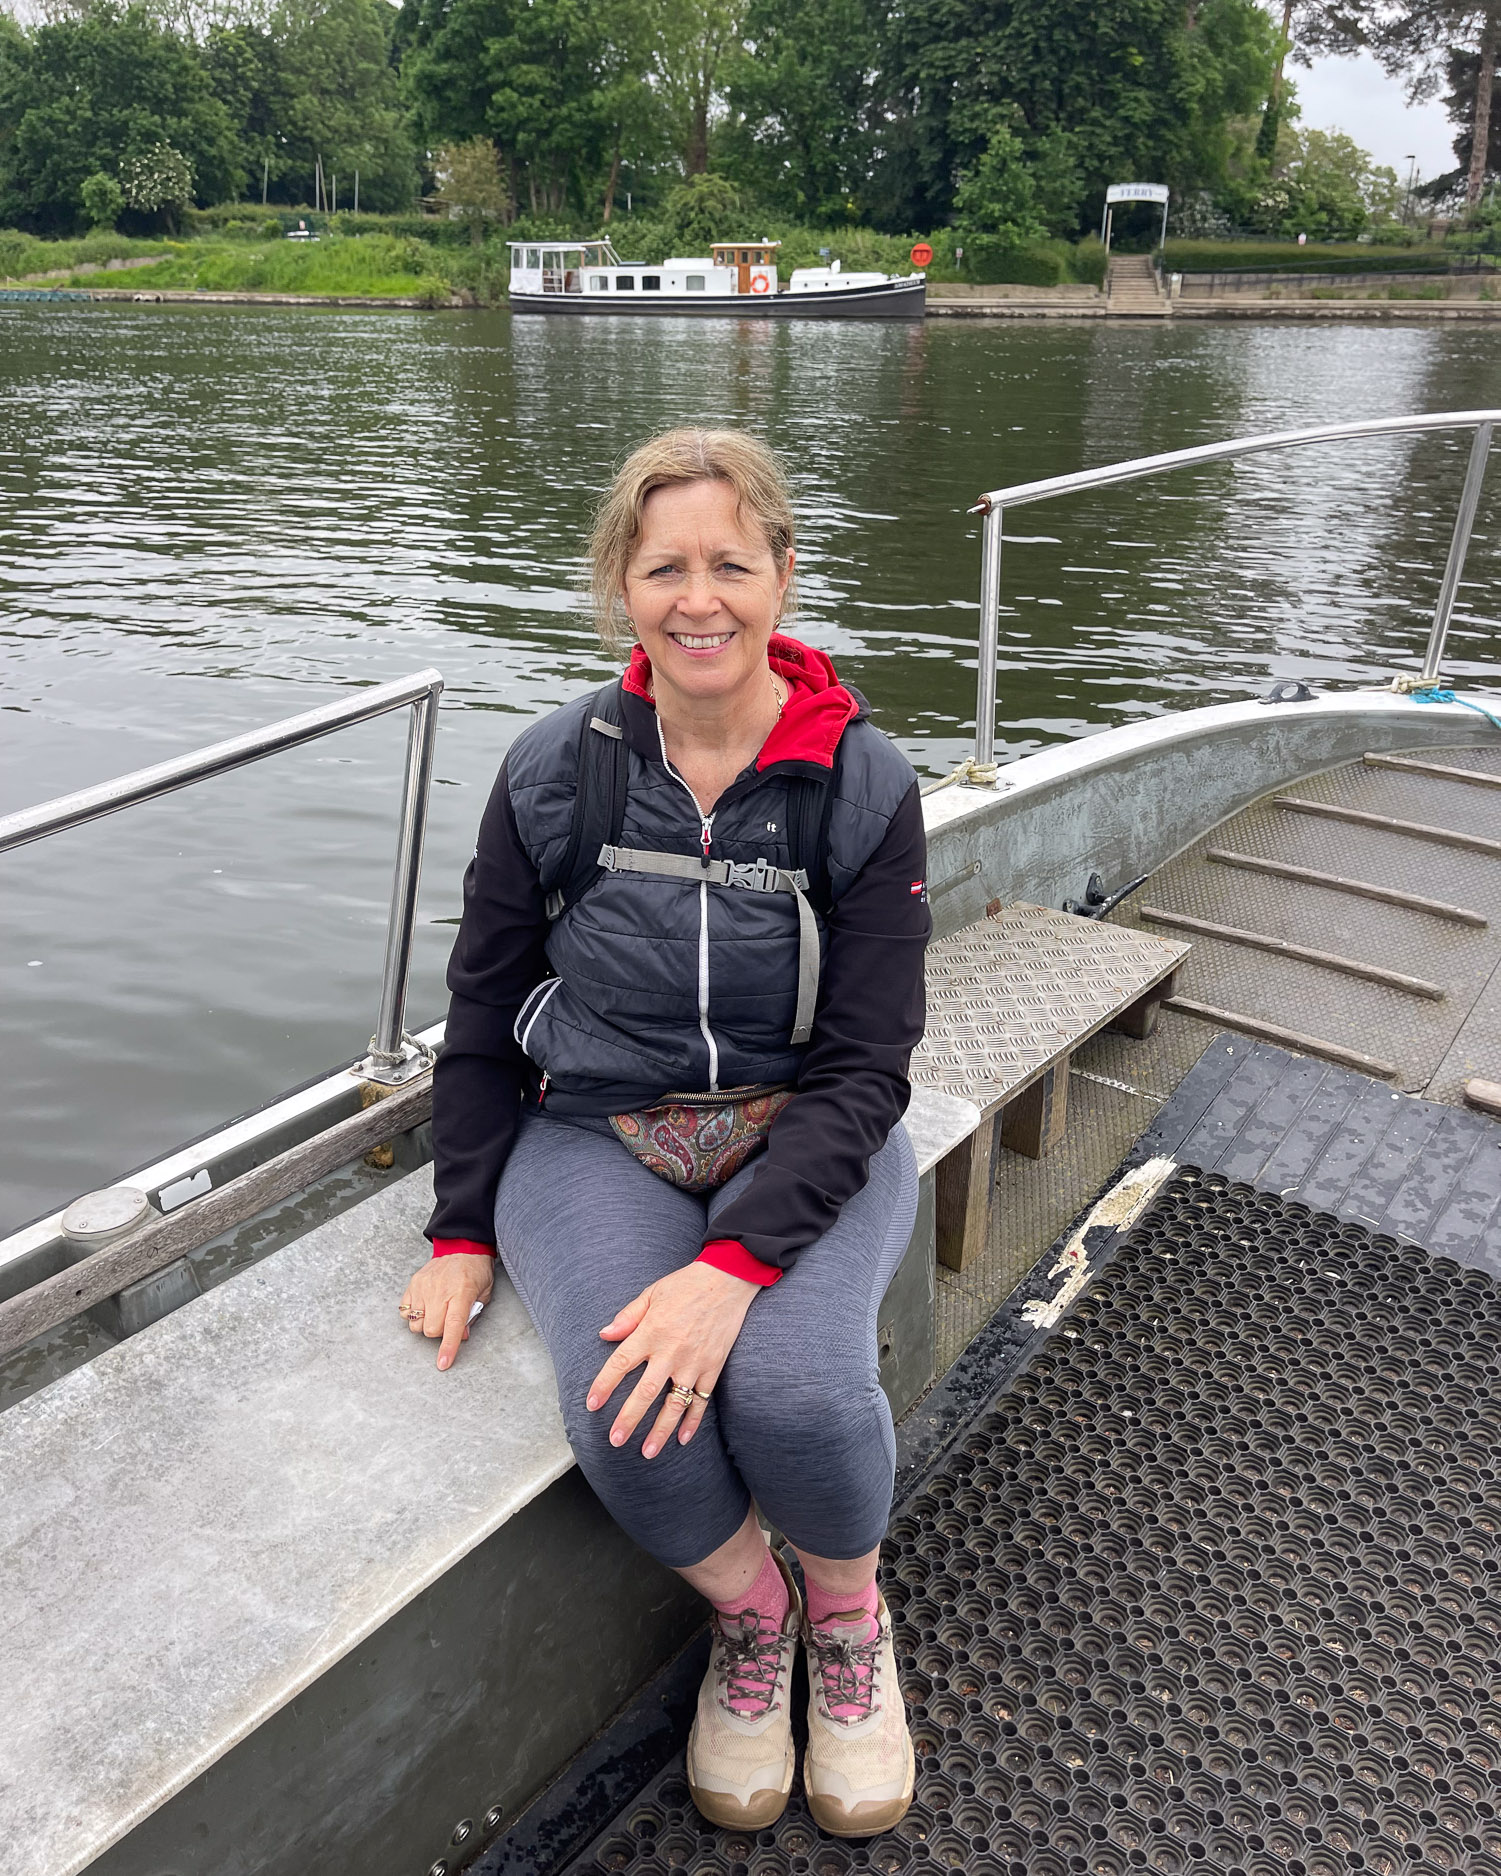
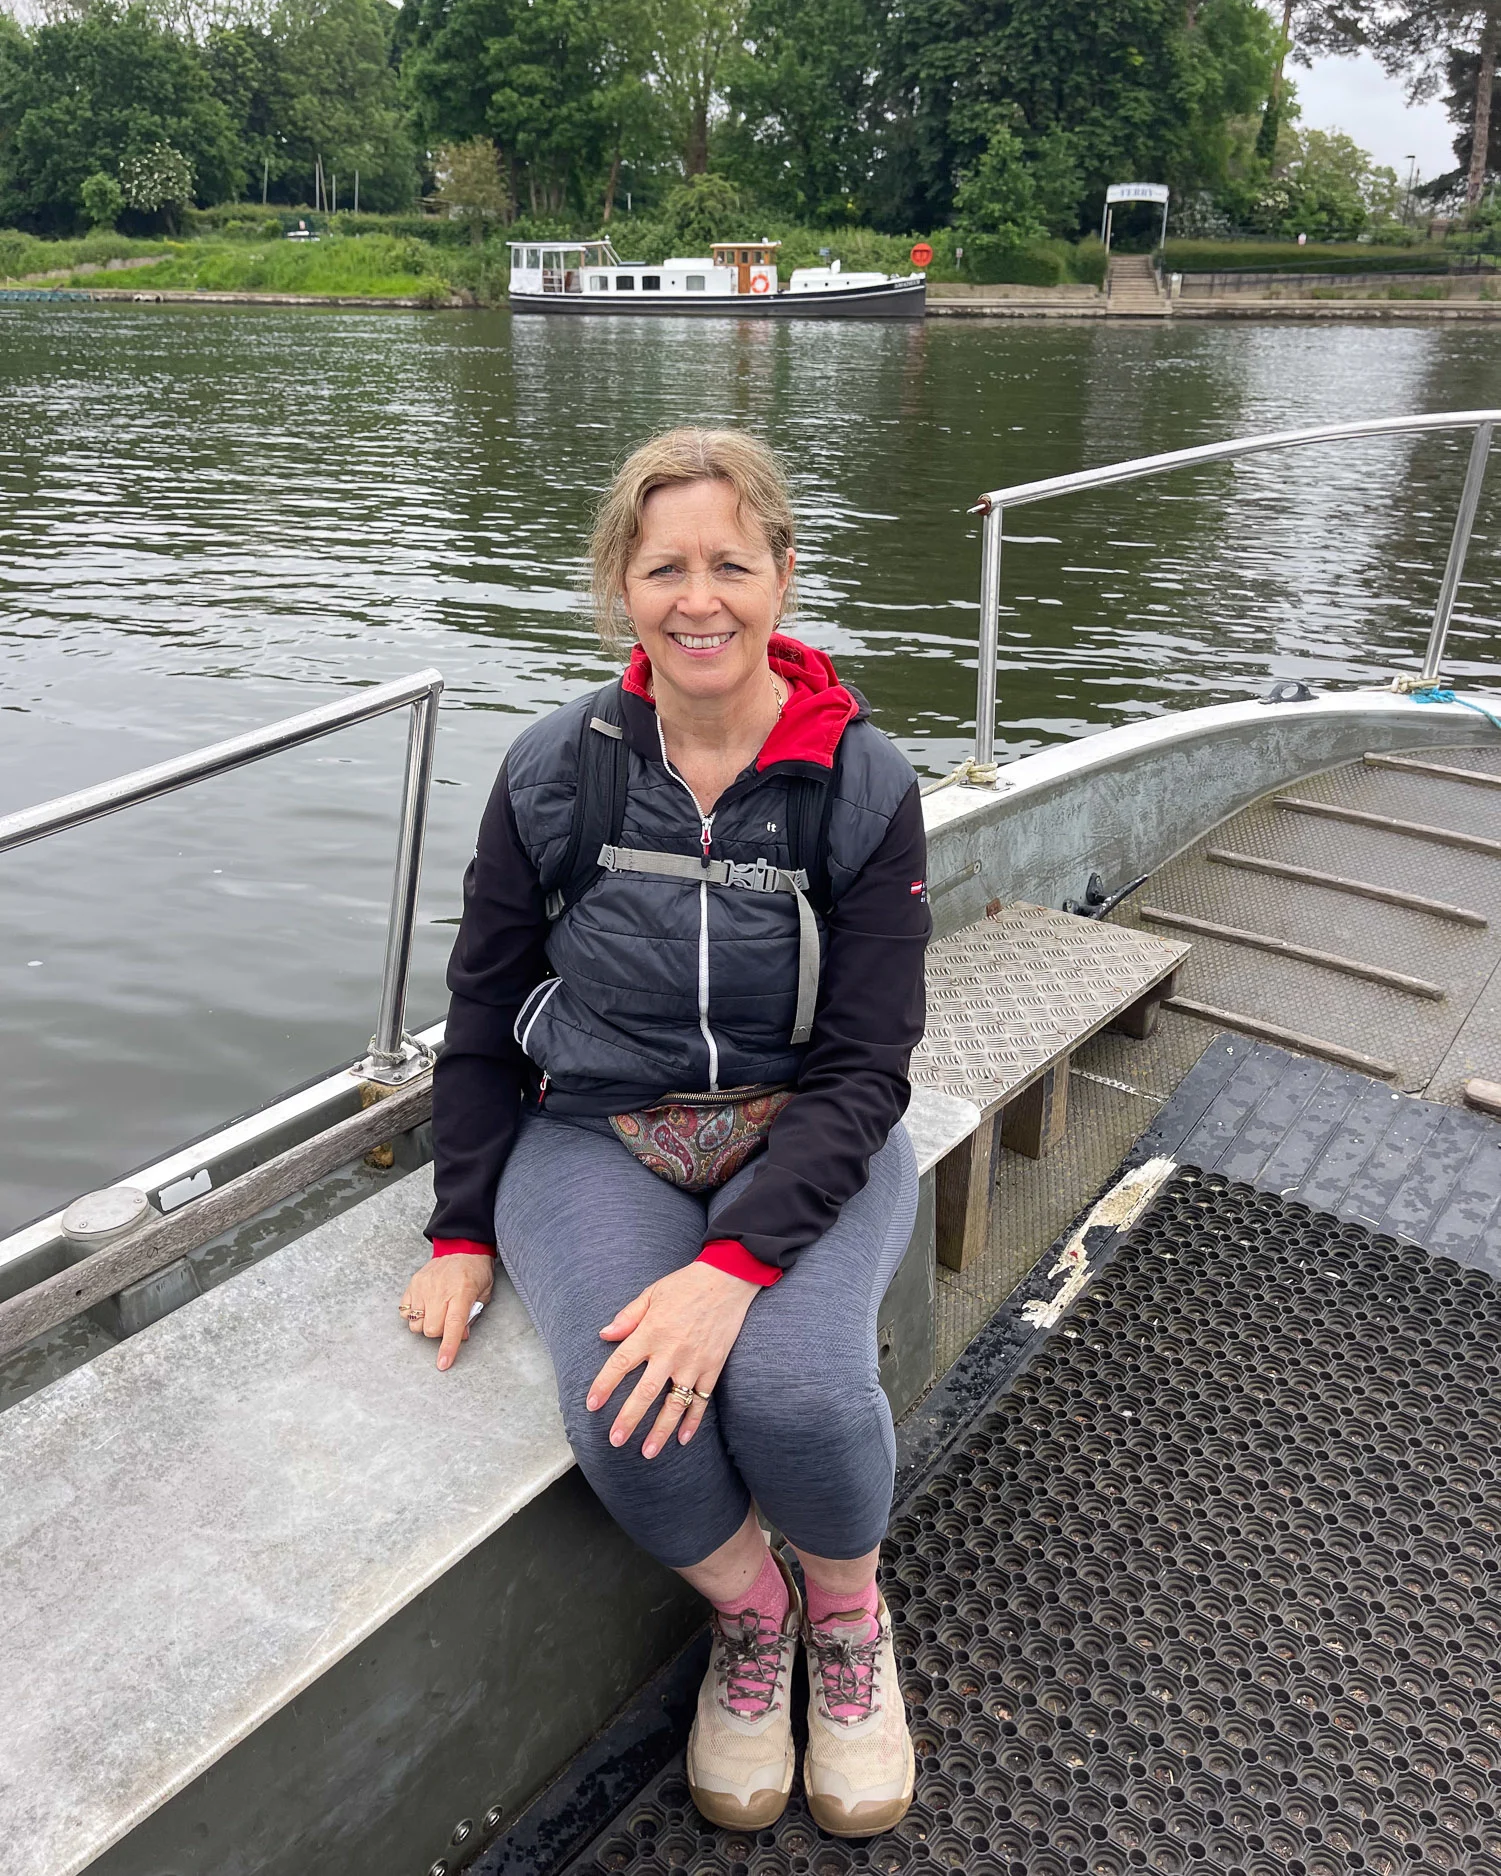
This is one of the prettiest stretches of the Thames, a blend of suburban and countryside, before the scenery starts to become more built up at Kingston. At Shepperton several branches of the river converge, with a seasonal ferry to take you from one bank to the next.
Nauticalia Ferry at Shepperton Lock – Thames Path National Trail
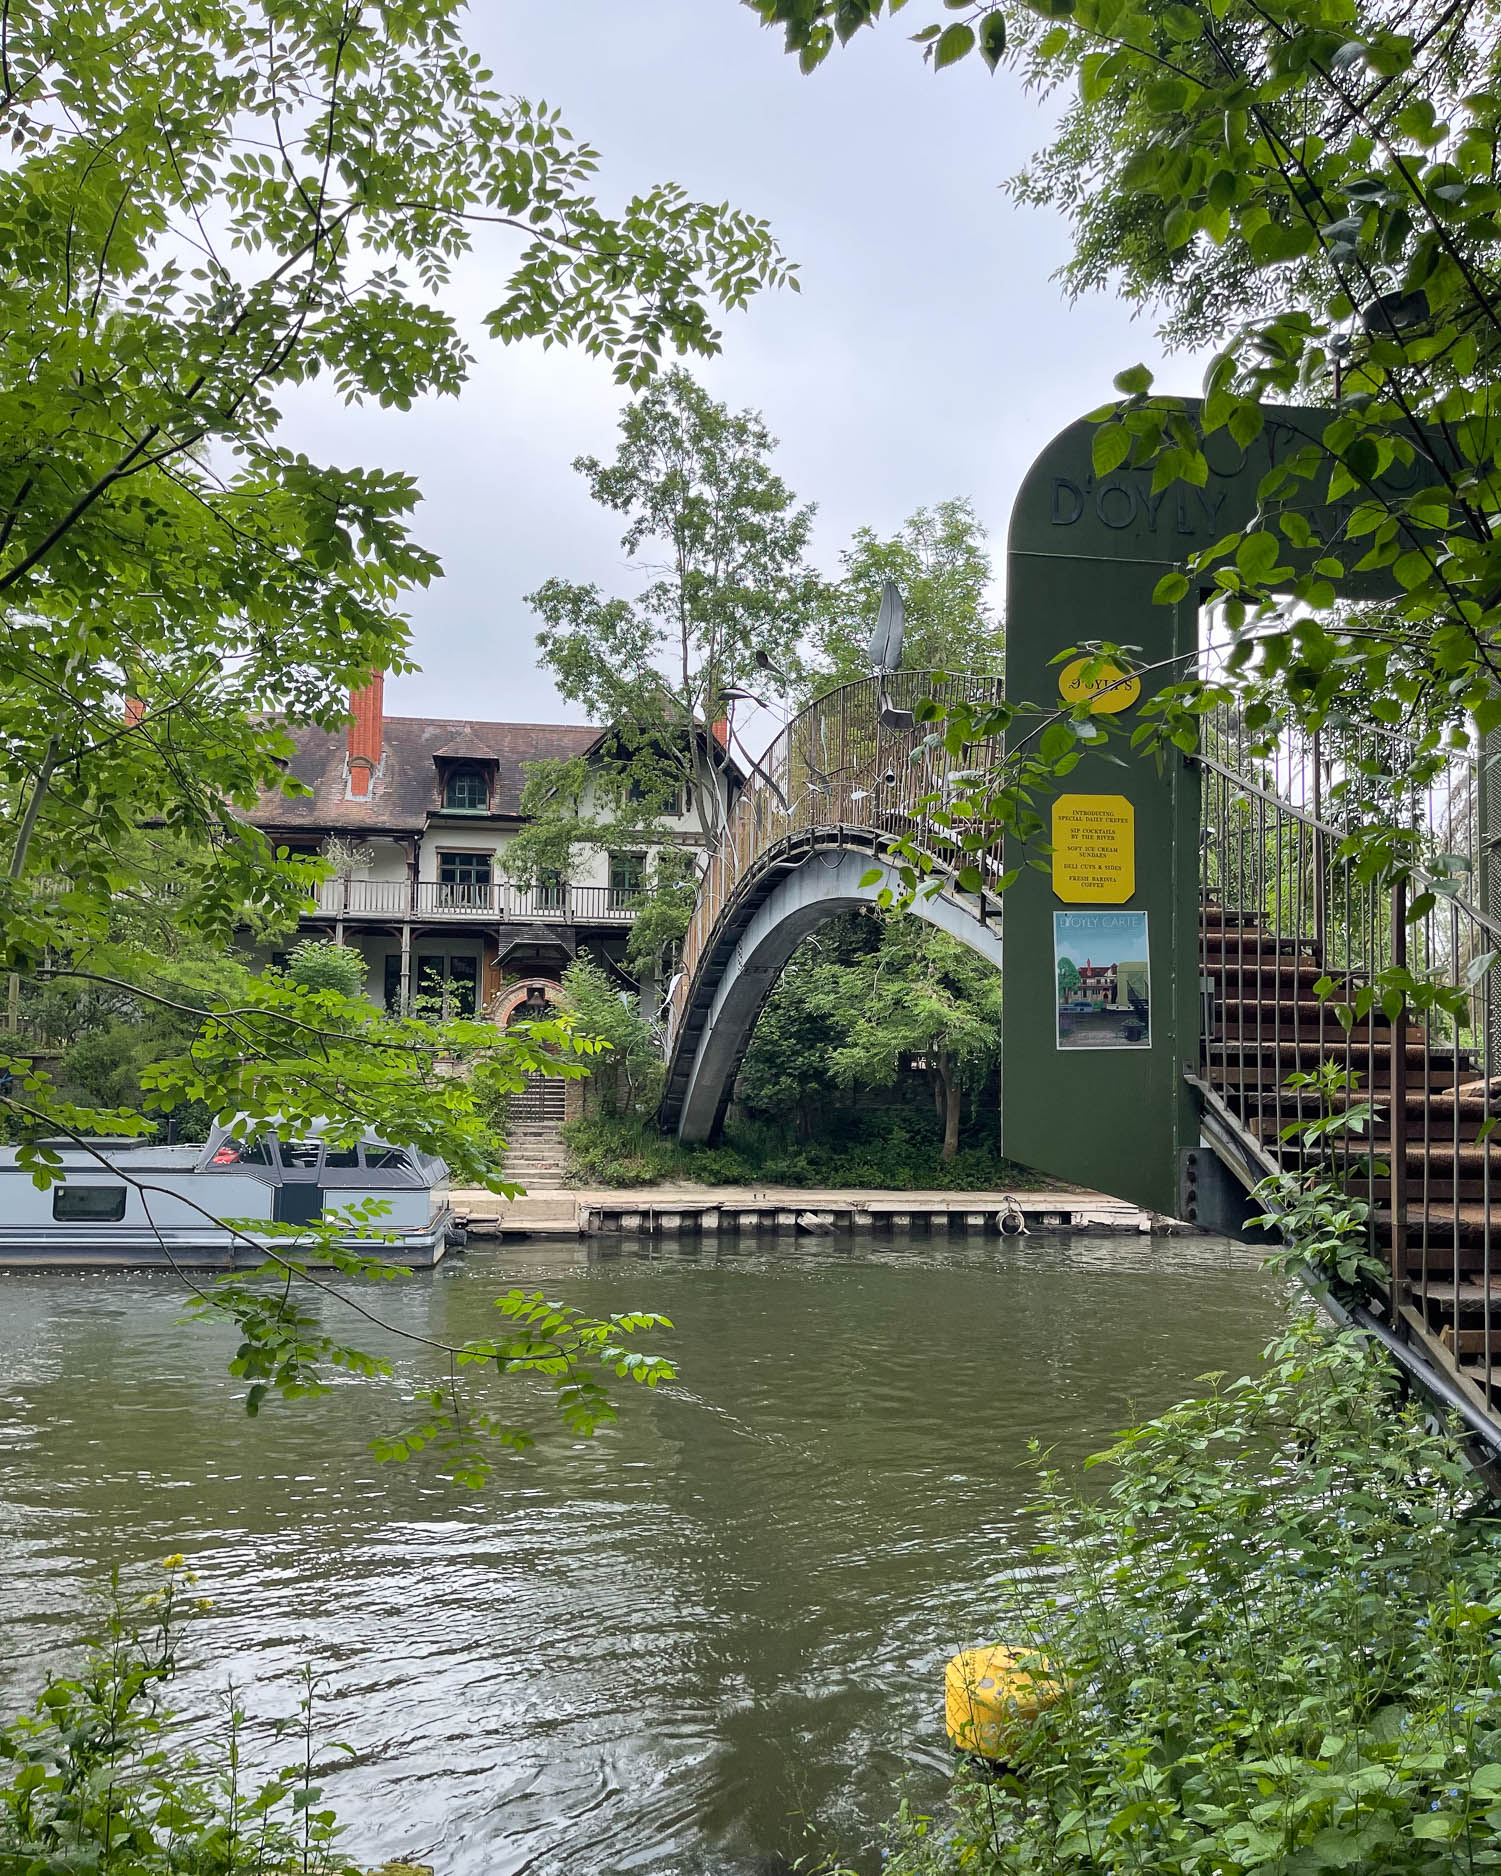
Between the tree lined banks, is the D’Oyly Carte Island, once the home to the manager of the D’Oyly Carte Opera Company, where you can take tea by the river surrounded by willows.
I can remember performing in a school performance of the Gilbert and Sullivan operetta, The Mikado which was first staged by the D’Oyly Carte Company. “On a tree by the river a little tom tit sang willow, tit willow, tit willow” – perhaps inspired by this very location.
D’Oyly Carte Island at Shepperton – Thames Path National Trail
Passing the modern Walton Bridge brings you to the old ferry point of Walton Wharf with its two riverside pubs. The straight ‘Walton mile’ of river was used for Regattas in the late 19th century.
At Sunbury Lock a large island conceals the opposite bank and there is a seasonal ferry. Large reservoirs are so well concealed by high banks beside the towpath that you’ve really no idea that they are there.
Sunbury Lock – Thames Path National Trail
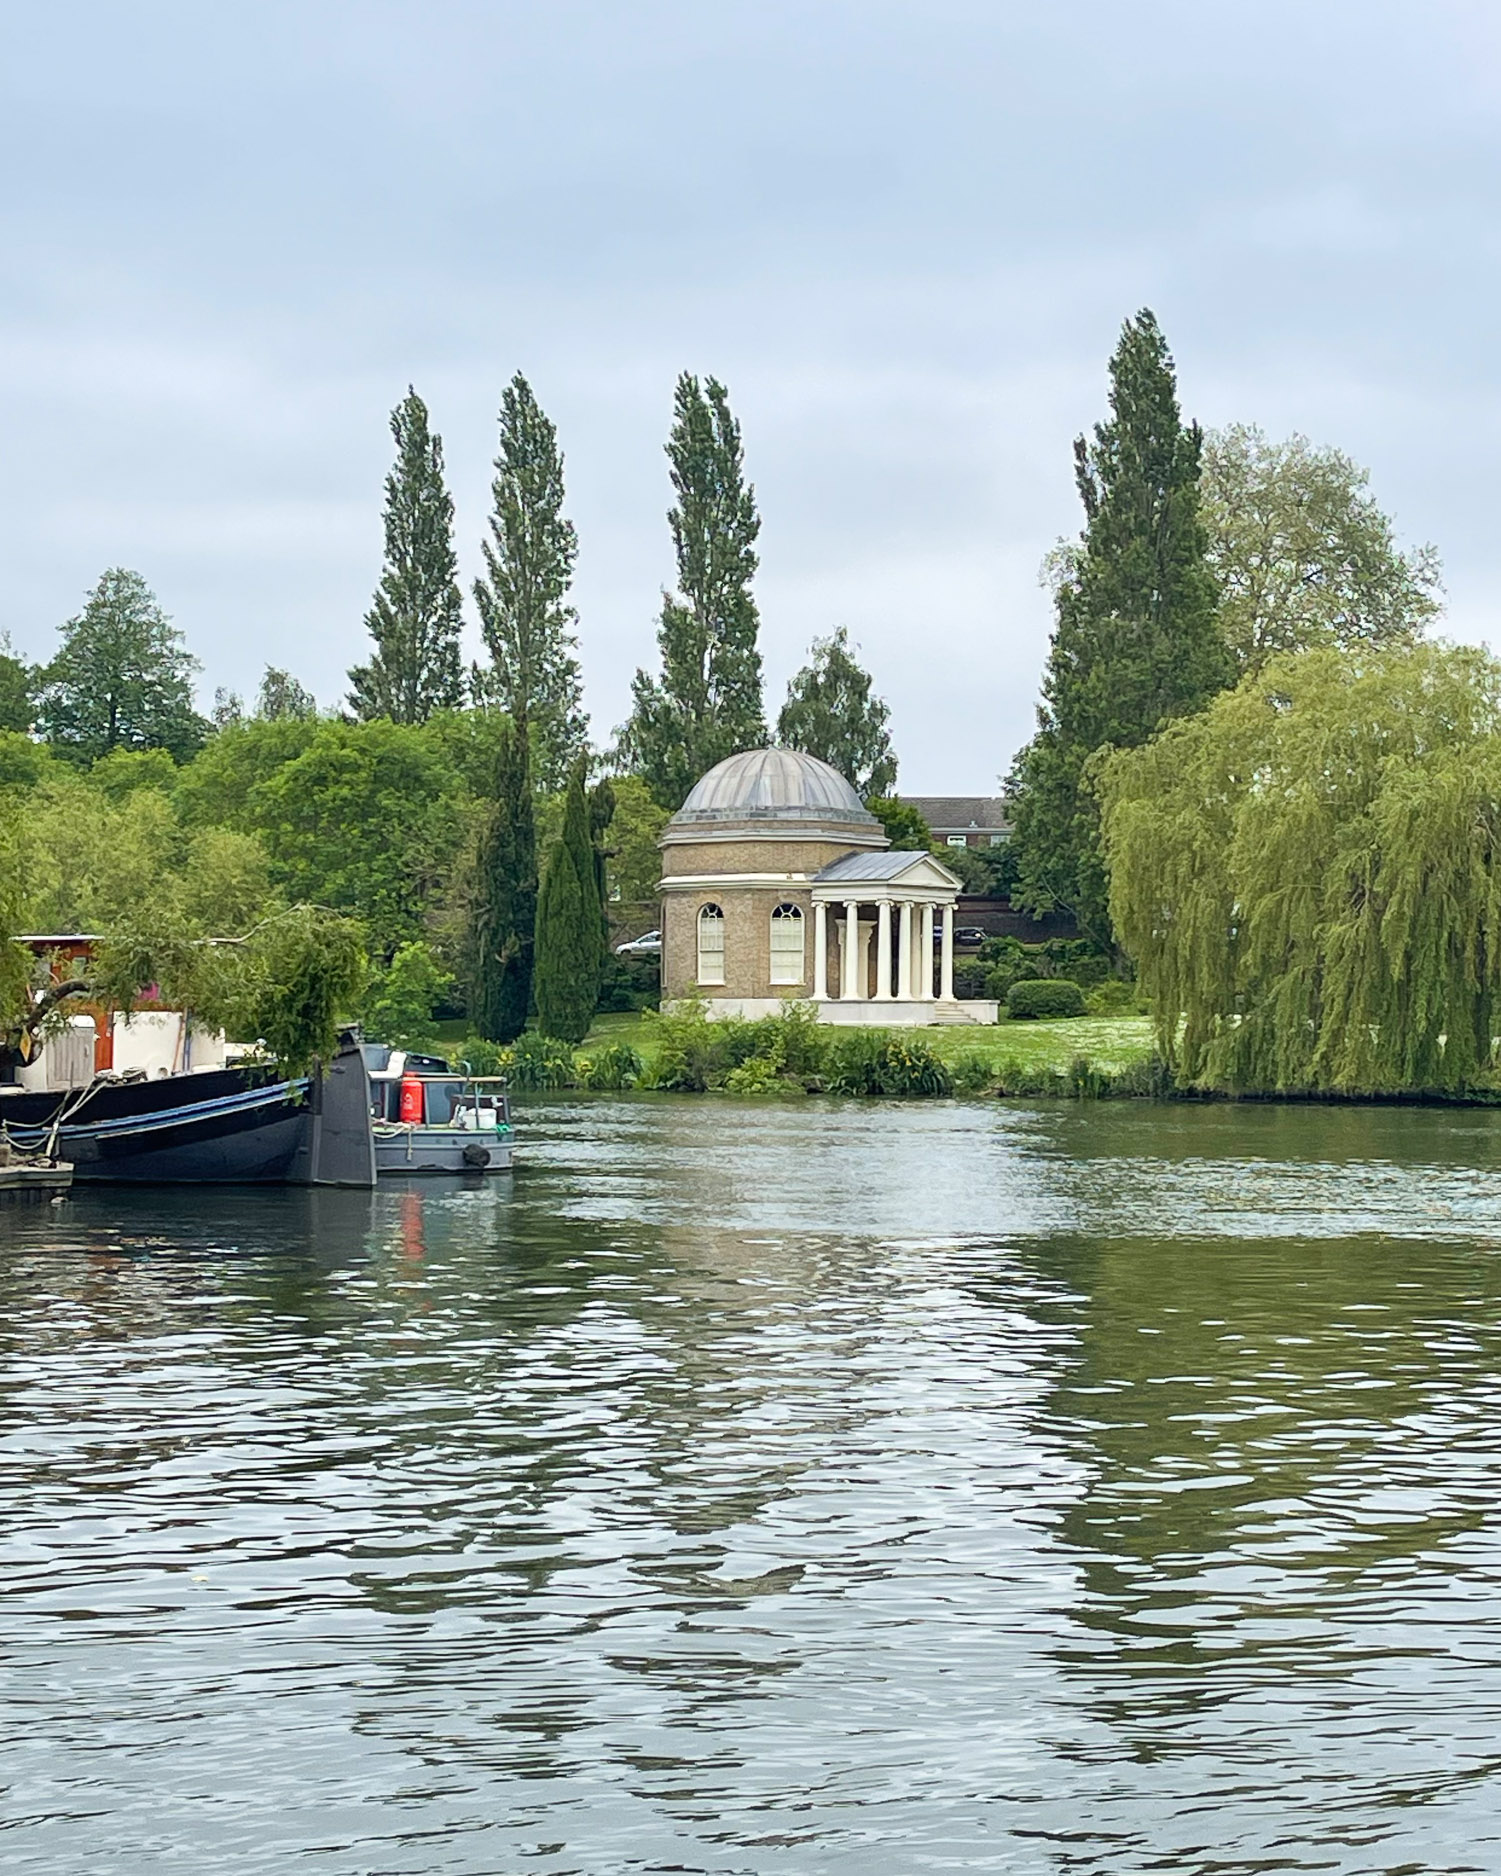
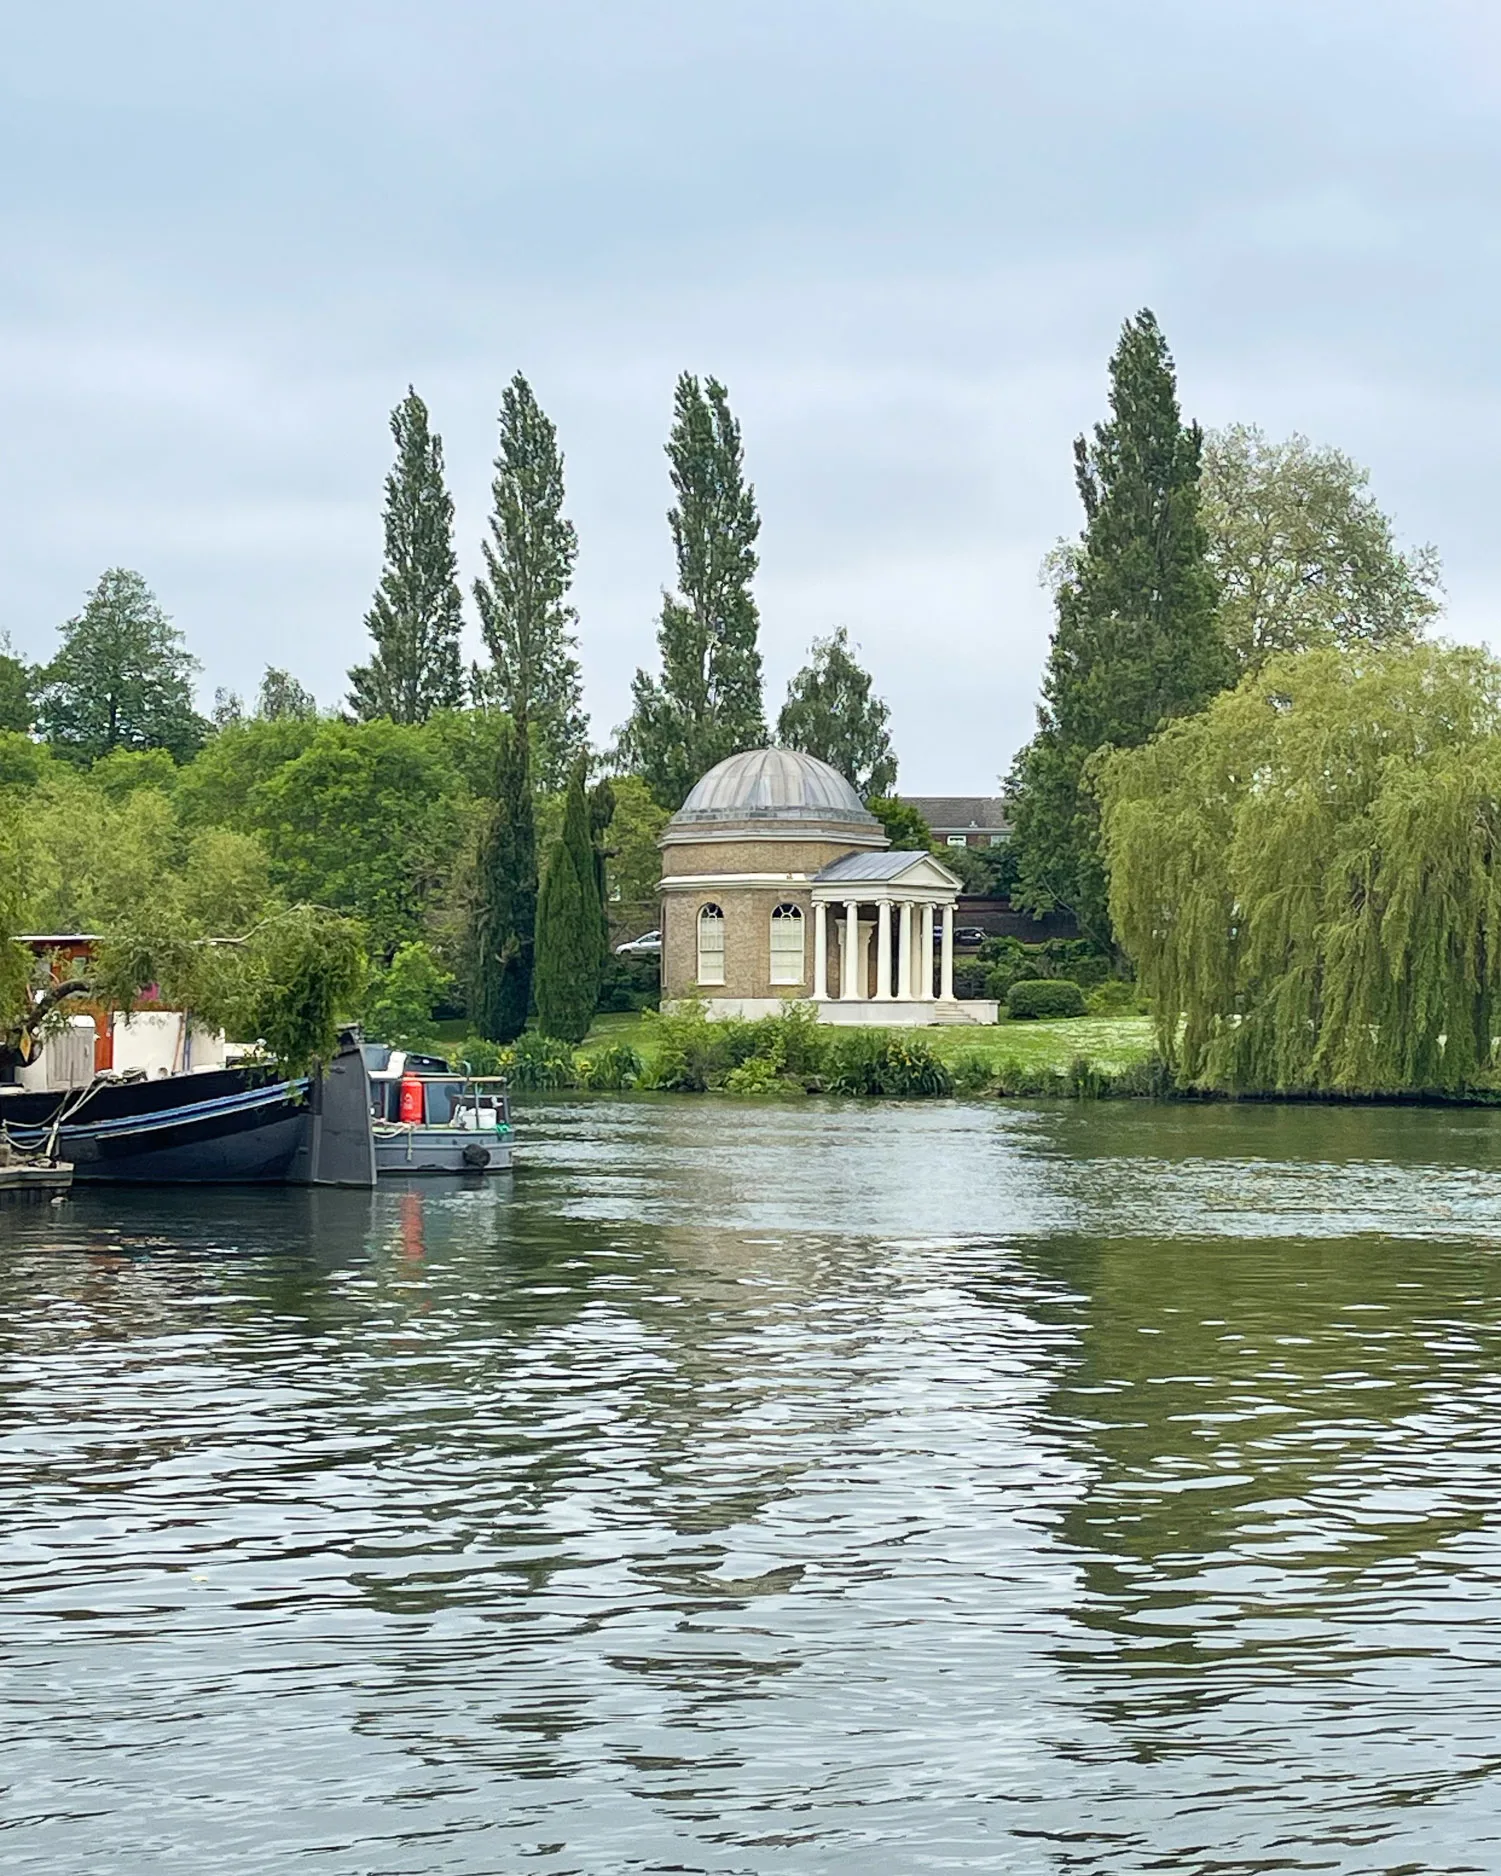
Hampton
At Hampton, a pretty view across the river opens up, towards the church tower and the domed “Garrick’s Temple”. It was built for the Shakespearean 18th century actor Richard Garrick, who lived in the house behind it.
Garrick’s Temple Hampton – Thames Path National Trail
By Molesey Lock you’ll pass rowing club boat houses and it’s time to cross the river at Hampton Court Bridge, leading to the Tudor palace set in its park.
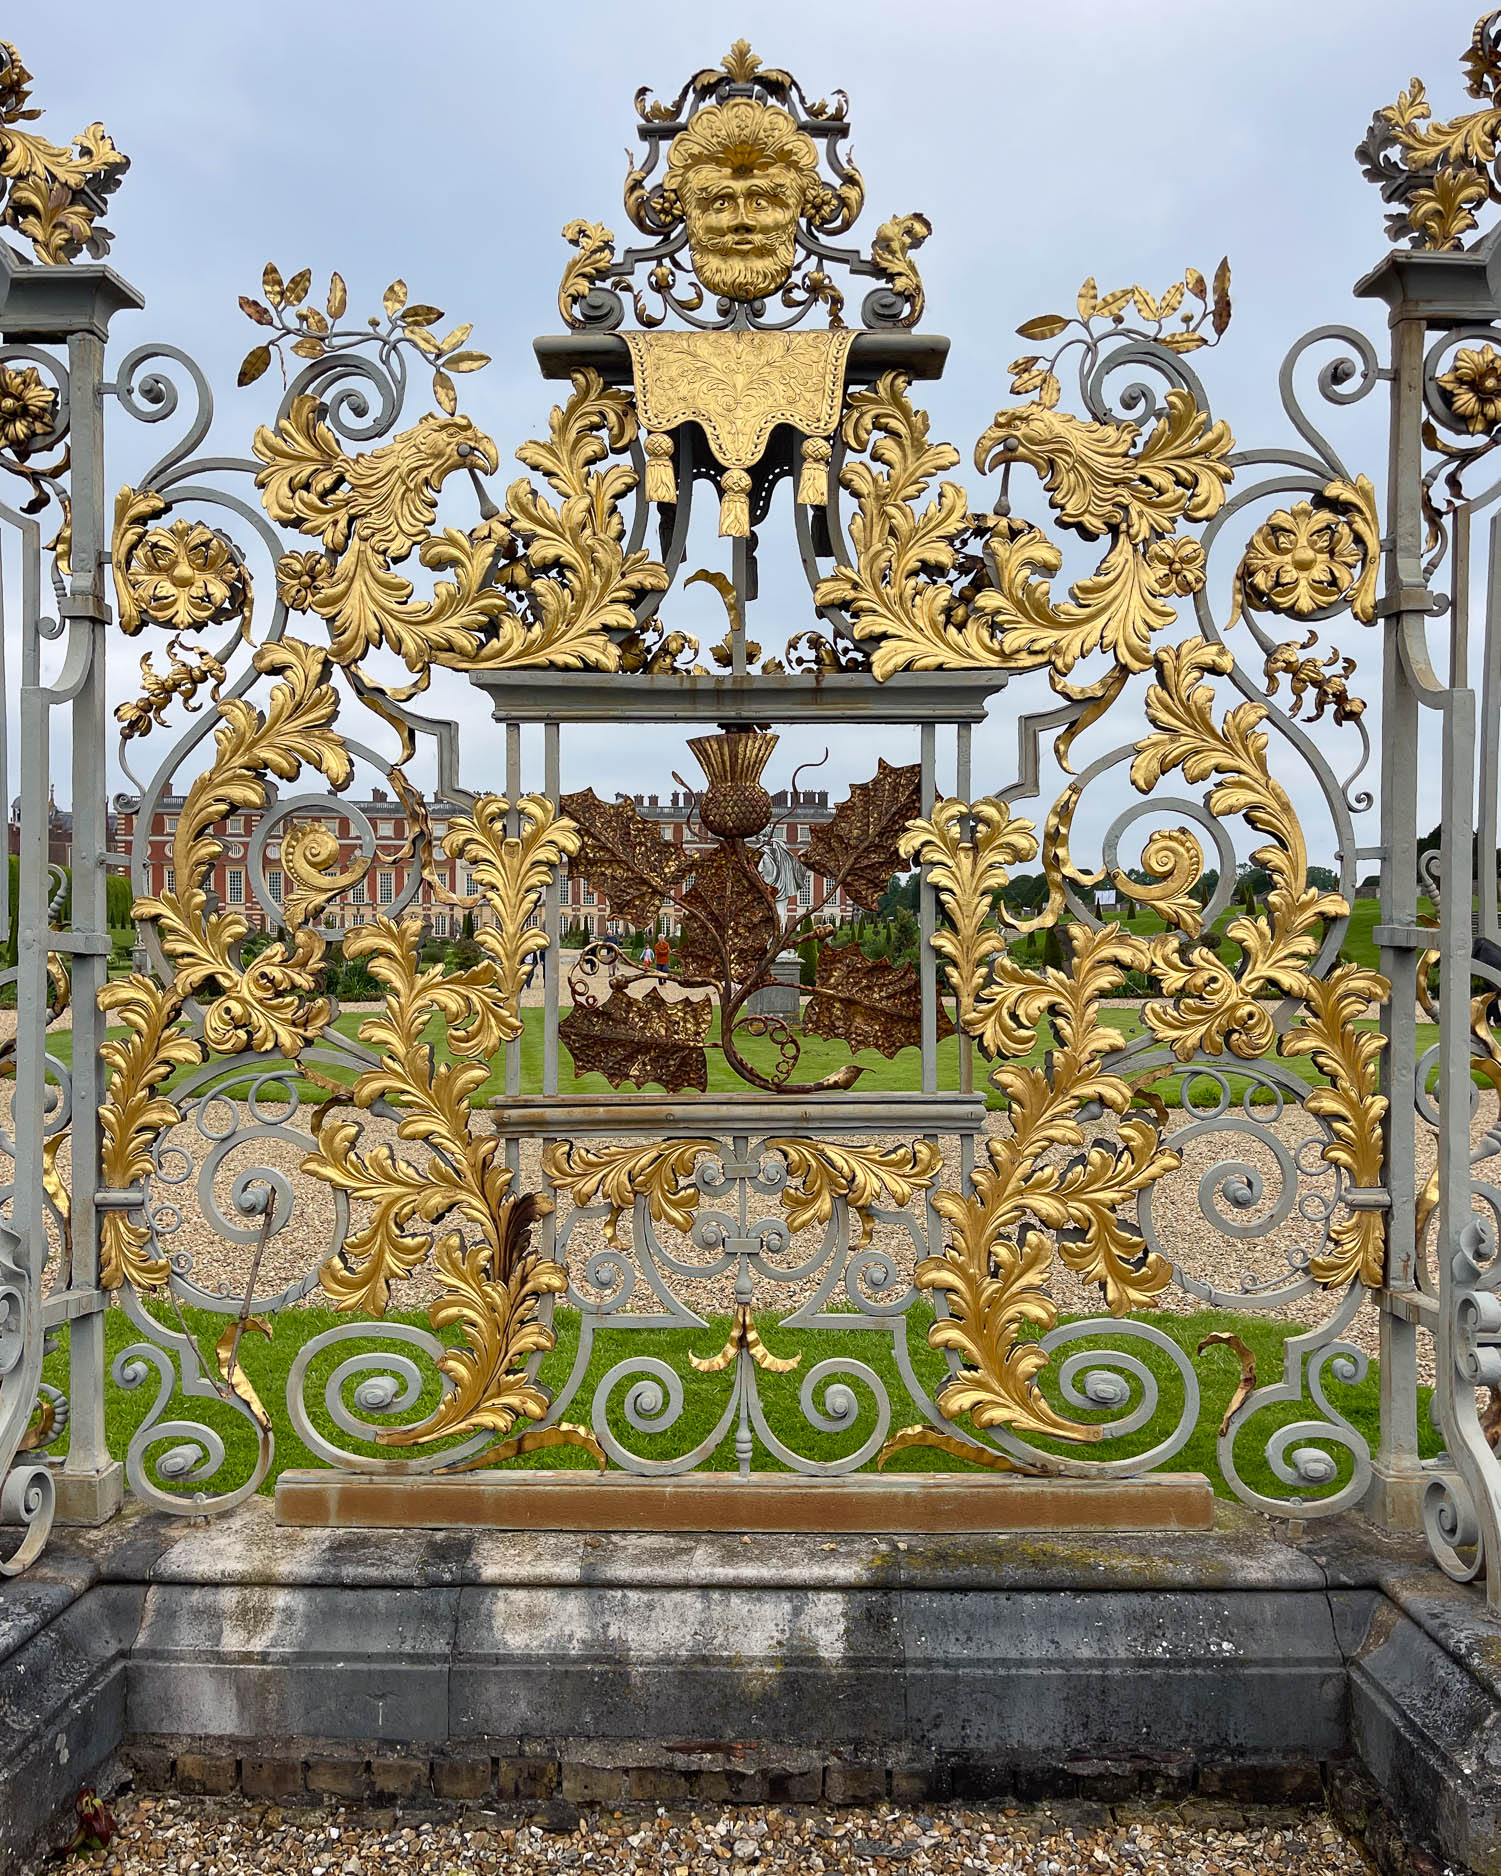
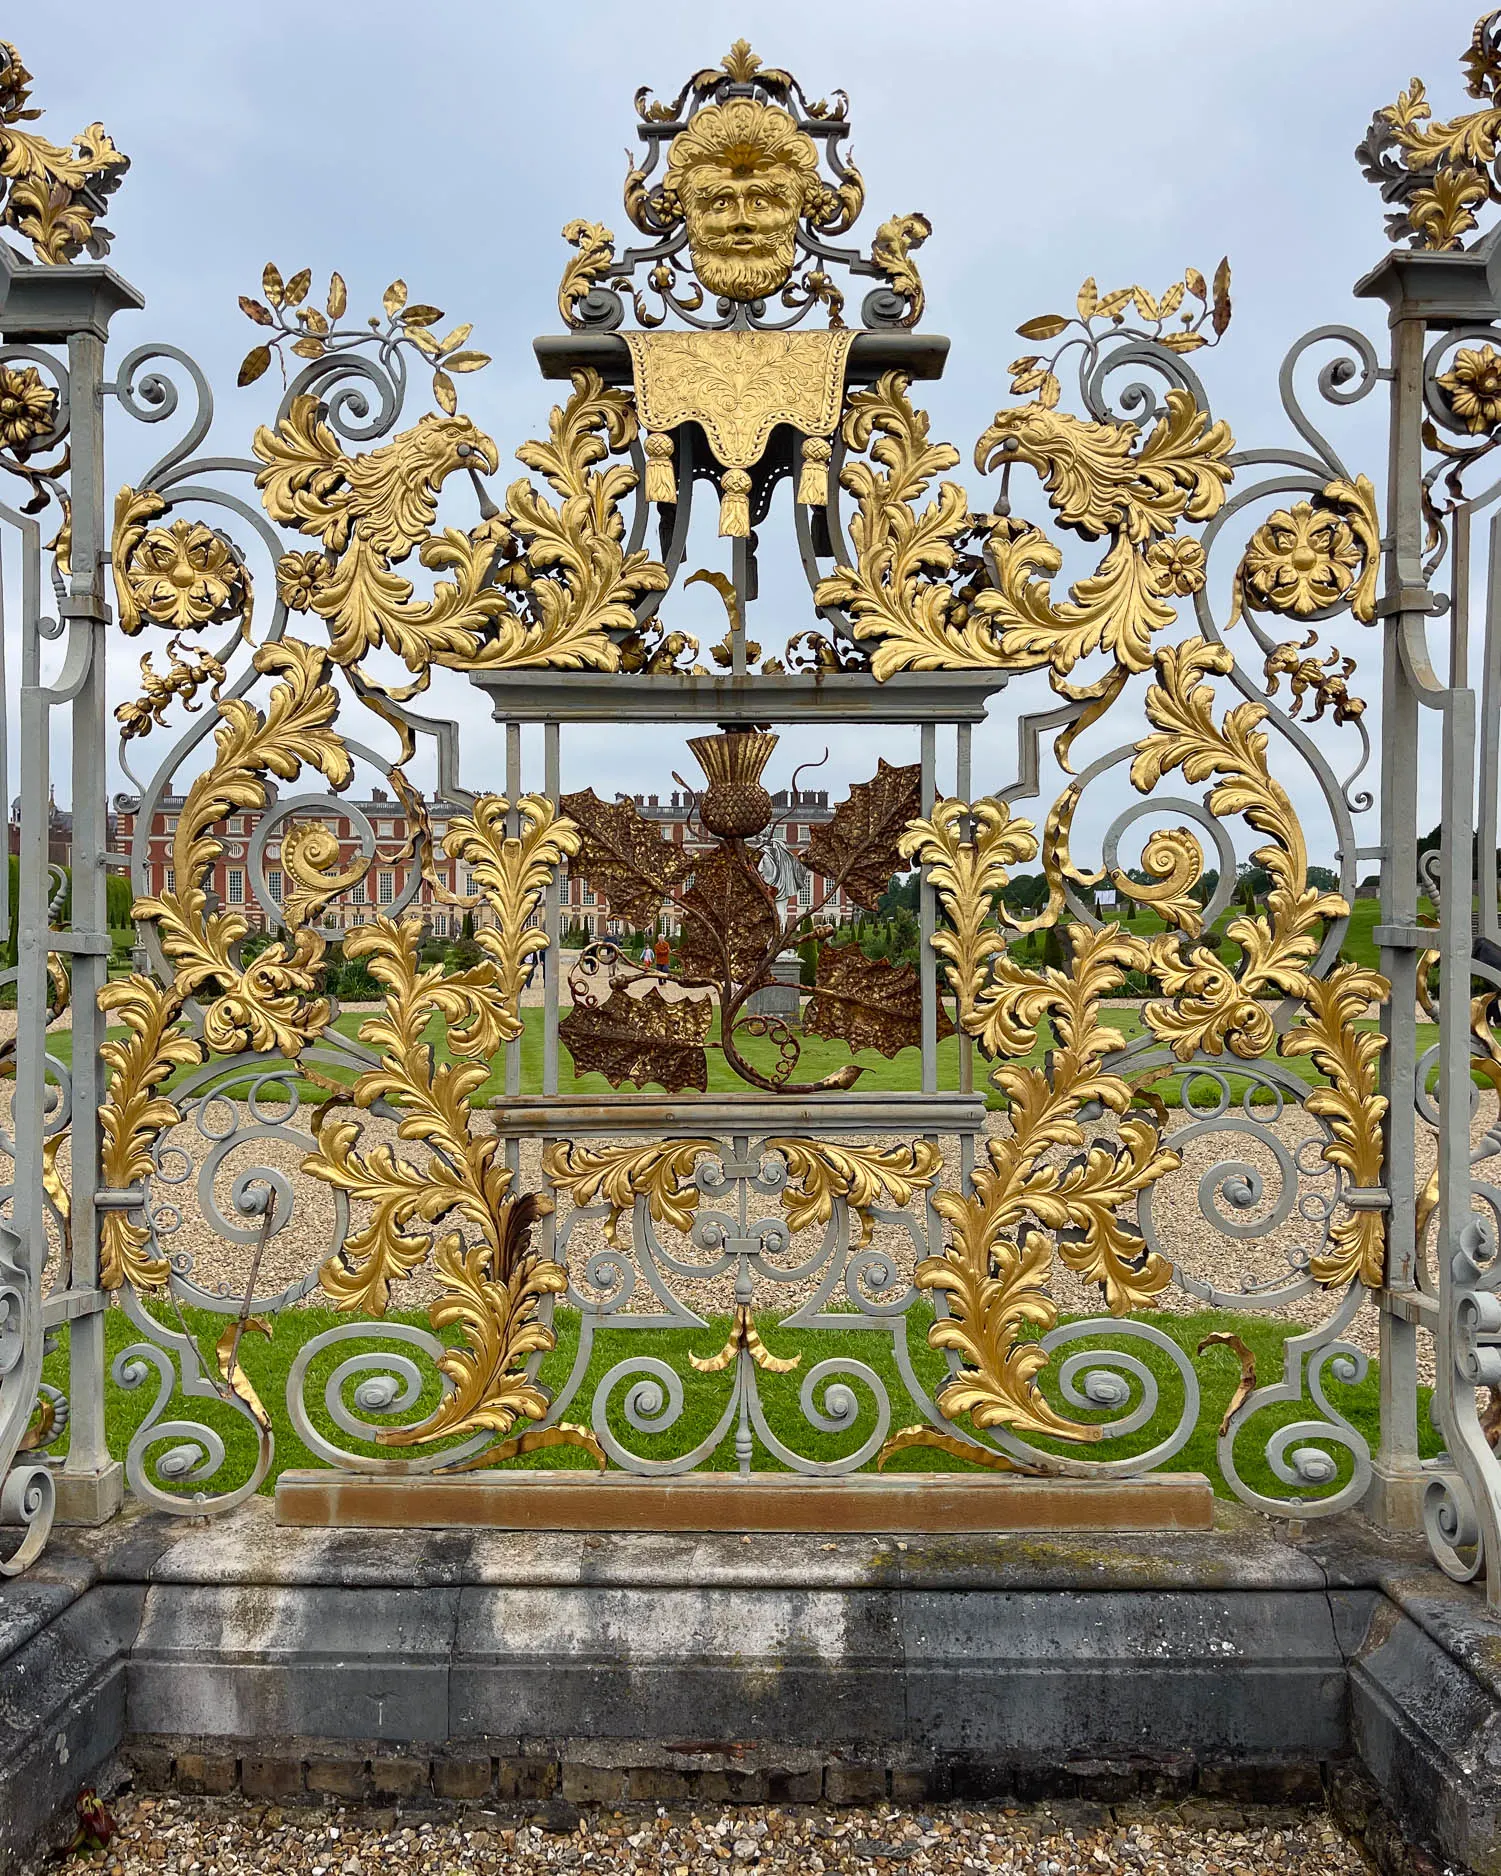
There’s just a glimpse of Hampton Court Palace through ornate gilded gates, before the towpath follows the bend in the river alongside the palace’s park, to Kingston Bridge, where this stage ends.
Gates of Hampton Court – Thames Path National Trail
Day 12 – Distance and timings
Chertsey to Kingston is aprox 11 miles / 17.7 km. Allow around 5 hours plus stopping time. If you want to stop at Hampton Court Palace, you could afterwards take the bus to save time, rather than walk to Kingston. Hampton Court Palace is a major attraction that will easily take several hours to see properly.
Day 12 – Where to stay
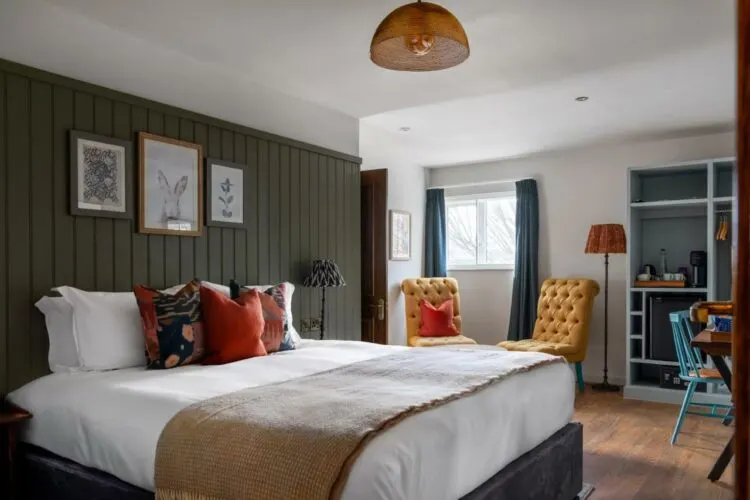
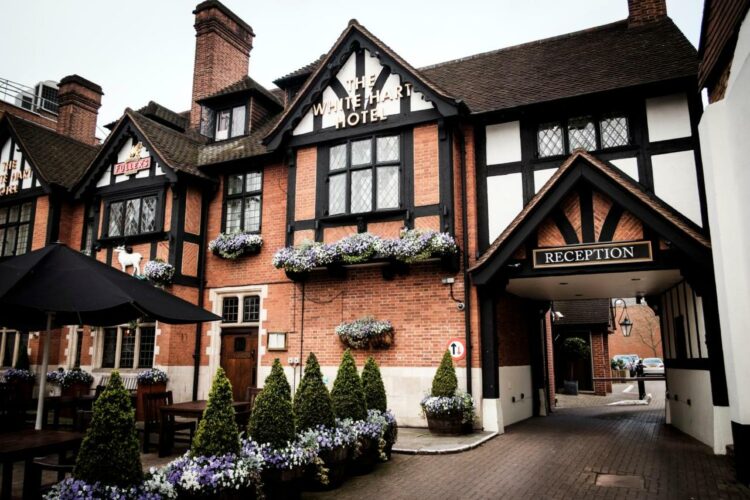
The White Hart Hotel is on the Hampton Wick side of Kingston Bridge, or walk into Kingston Town for other budget hotel options
Day 12 – Where to eat
There are numerous attractive stops for food and drink along this stretch of the river including:
Shepperton Lock – The Ferry Coffee Shop at the ferry crossing on the north bank. On the south bank is D’Oyly’s, a cafe with outdoor seating overlooking the river, on the D’Oyly Carte Island which is accessed by a foot bridge.
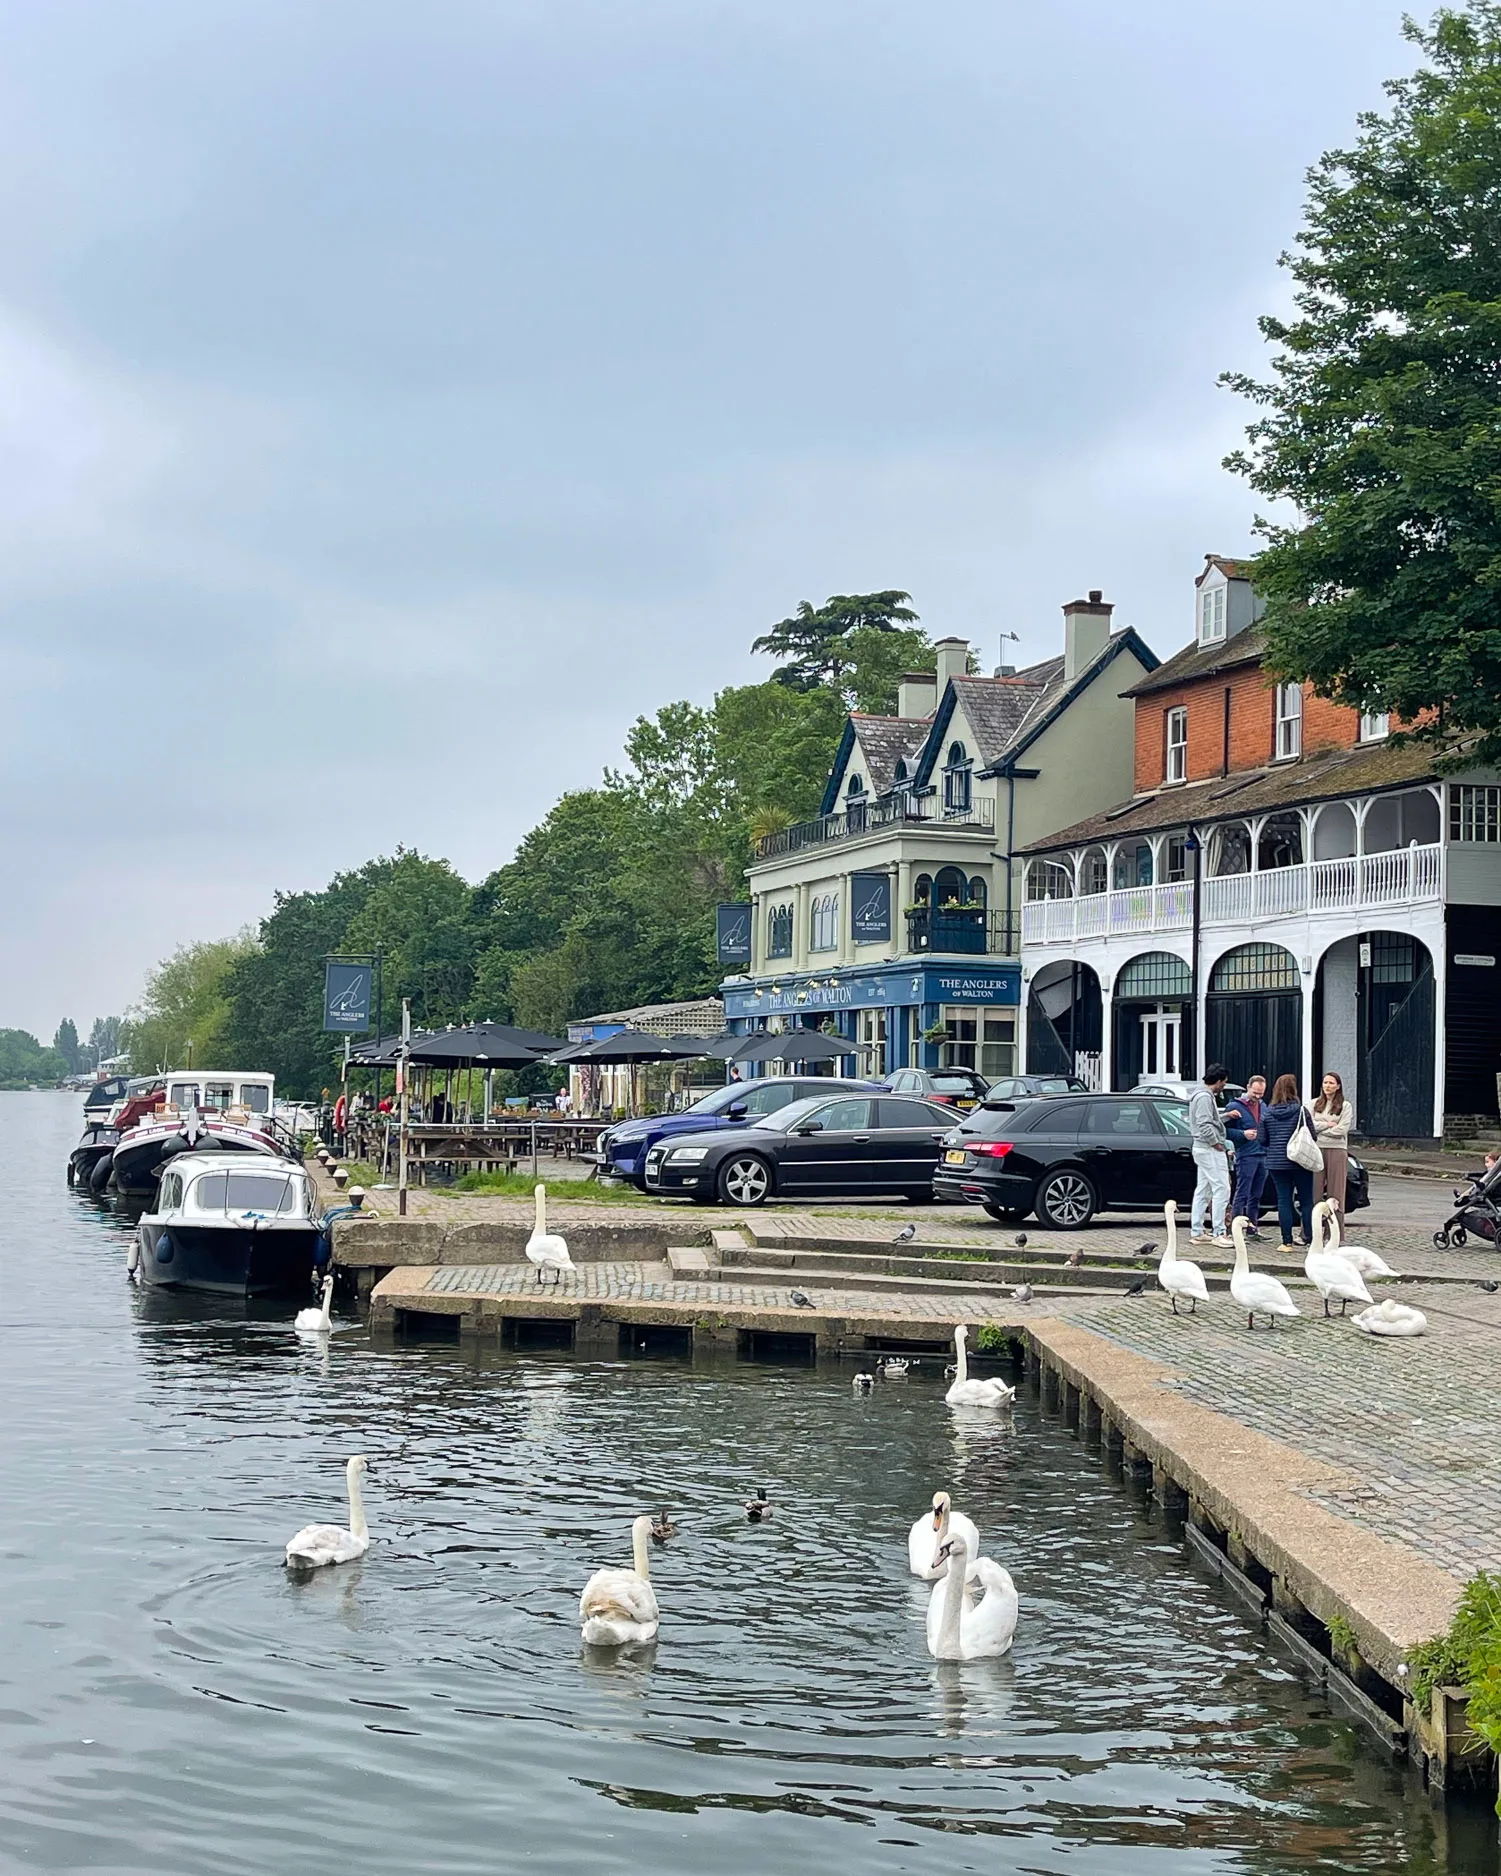
Walton on Thames – at Walton Wharf, The Anglers and The Swan are busy pubs serving food, with decks overlooking the river. You can also find shops for picnic provisions, including a Sainsbury’s supermarket, in Walton on Thames village.
Riverside Pubs at Walton Wharf Thames Path National Trail
Hampton Court – there are numerous pubs and restaurants on the south bank near the bridge and the Mezzet Box is a small outdoor cafe right by the river, tucked next to the bridge.
Kingston – There are numerous restaurants and cafes on the south bank of the river, when you cross Kingston Bridge and plenty of shops, including a Waitrose supermarket, in Kingston Town Centre.
Day 12 – Transport for this stage
There is a train station at Chertsey, but it’s quite awkward to get to, so we started our walk at Shepperton Lock instead. On this part of the walk it’s handy to look at the network map for South West Railway, to easily work out the train connections.
We took the train to Shepperton station and walked 30 mins to Shepperton Lock, where the Nauticalia pedestrian ferry takes you across the river from the north to the south bank. The ferry runs daily in summer and weekends in winter, check the timetable here.
An alternative station on this leg of the walk is at Hampton Court Palace. On arrival at Kingston Bridge the nearest stations are Hampton Wick or Kingston. If you are stuck at any point, local buses are often the most direct way to get around. We recommend the TFL Go app to plan bus and train routes in and around London.
More articles about the Thames Path National Trail
I’ll be publishing more articles in this Thames Path series very soon. In the meantime, if you have questions about our walk on the Thames Path National Trail, feel free to email me at heather(at)heatheronhertravels(dot)com
Resources for hiking the Thames Path National Trail
Train bookings – to get you to the start and end of this section of the walk, we recommend Trainline for easy rail bookings.
Book accommodation: to book hotels online and conveniently have all your bookings in once place, we used Booking.com but if you prefer you could also use Expedia.
Guidebook – we used and recommend the Trailblazer Thames Path Guide – this is the one we used and we liked the easy to follow maps and the fact that it’s just as easy to follow for walking in either direction.
Embarking on a road trip is an exhilarating way to immerse yourself in the wonders of a country, and when it comes to road trips in Germany, it offers a captivating tapestry of stunning landscapes, rich history, and vibrant cities. From the winding scenic routes through picturesque villages to the iconic autobahns, Germany is a beautiful country that has it all for avid road trippers.
Road Trips in Germany | Neuschwanstein Castle
Whether you’re a nature enthusiast seeking breathtaking mountain vistas, a history buff eager to explore medieval castles, or a food lover in search of culinary delights, Germany has something to offer everyone. Join us as we delve into the realm of road trips in Germany, uncovering hidden gems, cultural treasures, and unforgettable adventures along the way. Get ready to rev up your engines and embark on an unforgettable journey through the heart of Deutschland.
This site contains affiliate links to products. We may receive a commission for purchases made through these links. Support my blog here
The Ultimate Guide to the Best 5 Road Trips in Germany
Planning a road trip can be an exciting and adventurous way to explore a new country. Germany, with its stunning landscapes, rich history, and diverse cities, is the perfect destination for a road trip. Whether you’re interested in exploring the scenic routes, immersing yourself in the culture, or indulging in delicious food and drink, Germany has something to offer every traveler. In this ultimate guide, we will provide you with all the information to decide which of the many road trips in Germany are perfect for you.
Indulge your senses on the German Wine Route filled with many small towns, a road trip that takes you through the sun-kissed vineyards and charming wine villages of southwestern Germany. Starting in the small town of Koblenz, this route meanders through the stunning landscapes of the Palatinate region, renowned for its vineyards and wine production.
Visit historic wineries, sample exquisite Rieslings, and enjoy the warm hospitality of the locals. After stopping by Burg Eltz, explore the fairytale-like town of Cochem, stroll through vineyard-covered hills, and savor the flavors of regional cuisine paired with outstanding wines. The Wine Route is a tantalizing journey for wine enthusiasts and a feast for the senses.
2. The Romantic Road: A Journey Through Fairy Tales and Castles
Road Trips in Germany | Rothenburg ob der Tauber
Wurzburg – Weikersheim – Rothenberg ob der Tauber – Dinkelsbühl – Augsburg – Fussen
Prepare to be enchanted as you embark on the legendary Romantic Road or Romantic Route, a picturesque route that winds its way through the heart of Germany. This is one of the best road trips within Germany to experience classical German towns. Stretching from Würzburg to Füssen, this scenic drive takes you through storybook landscapes, charming medieval towns, and awe-inspiring castles.
Explore the narrow streets of the well-preserved medieval town of Rothenburg ob der Tauber and Indulge in local delicacies like the Schneeball, wander through vineyards, and witness the architectural marvels that dot the route. Immerse yourself in the fairy-tale castles like Neuschwanstein Castle, the inspiration behind Disney’s Sleeping Beauty Castle. There are a lot of panoramic views within Füssen due to the beautiful Bavarian Alps close to the Austrian border.
Where to stay
Wursburg
Rothenburg ob der Tauber
Fussen
3. The Black Forest Panorama Route: Nature’s Splendor Unveiled
Road Trips in Germany | Baden Baden, Germany
Baden Baden – Triberg – House of 1000 Clocks – Triberg Waterfall – Largest Cuckoo Clock – Hollentalbahn – Europa Park – Freiburg im Breisgau
If you yearn for breathtaking natural beauty, the Black Forest Panorama Route is the perfect road trip for you. The first stop taking place in the charming old town of Baden-Baden, this scenic route winds through the enchanting Black Forest region, known for its dense forests, cascading waterfalls, the storytales of the Brothers Grimm and idyllic lakes.
Drive along curvy roads offering stunning vistas of rolling hills, charming villages, and the famous cuckoo clocks. Immerse yourself in the region’s folklore and indulge in delectable Black Forest cake while exploring the picturesque towns of Triberg and Freiburg im Breisgau. Nature lovers and outdoor enthusiasts will find solace in the pristine hiking trails and tranquil serenity of this remarkable destination.
Where to stay
Baden-Baden
Triberg
Freiburg
4. The Castle Road: Discovering Germany’s Regal Past
Road Trips in Germany | Neuschwanstein Castle in Bavaria
Embark on a regal journey along the Castle Road, a captivating route that weaves through Germany’s historical treasures. From Fussen to Koln, this road trip takes you on a majestic adventure, passing over 70 magnificent castles, palaces, and fortresses.
Explore the grandeur of Heidelberg Castle perched high above the Neckar River, marvel at the medieval splendor of Eltz Castle, and be transported back in time as you wander through the stunning UNESCO World Heritage site of Neuschwanstein Castle in Southern Germany. Immerse yourself in the stories of kings and queens, soak in the architectural wonders, and embrace the rich history that resonates in each stone of these remarkable fortifications.
Embark on a captivating road trip through the heart of Germany, as you journey from the bustling streets of Frankfurt to the serene landscapes of Stuttgart. Each city on this route, from the awe-inspiring Cologne Cathedral in Koln to the historic charm of Nuremberg’s Imperial Castle, tells a unique story of Germany’s rich history and culture.
Explore the maritime allure of Hamburg, immerse yourself in the dynamic energy of Berlin, and bask in the artistic vibes of Leipzig. Discover the blend of modernity and tradition in Munich, and conclude your adventure and final stop in Stuttgart, surrounded by picturesque hills and architectural wonders. This road trip is a remarkable passage through the diverse tapestry of Germany’s major cities, offering an unforgettable fusion of experiences and memories.
Tips for Driving for road trips in Germany
There are a lot of rules when it comes to driving in Germany. These are some of the rules you should keep in mind for taking one of the many road trips in Germany.
Keep your car filled: It’s illegal to run out of fuel on the AutoBahn and you can really get some major fines if this happens. You need to make sure your vehicle is always filled up
Most rental cars in Europe are Stick Shift: Either be prepared to know how to drive stick shift in Germany or be sure to reserve an automatic car well in advance as these cars can often be selected first.
Be aware of traffic cameras: There are many cameras all over Germany that result in heavy fines if you are even 1km over the speed limit. The autobahn does have unlimited speed zones, but they can quickly drop down to 80km an hour in some areas. You have to pay attention to the speed limit, especially in construction zones where fines can be double or triple the price.
Get your international driver’s license in advance: Be sure to get your international drivers license in advance, if you are from the US, you can go to a AAA office to get one and they will provide you with a book of the rules of the road for Germany. Typically, driving in Germany with an International driver’s license is only good up to 6 months while in the country
Follow the Rules of the Road: Familiarize yourself with the traffic rules and regulations in Germany. Observe speed limits, traffic signs, and signals. Remember that the autobahn, while famous for its stretches without speed limits, still has recommended speed guidelines and rules for passing.
Stay in the Right Lane: On the autobahn, keep in mind that the left lane is primarily for passing. Slower vehicles should use the right lanes, and it’s important to be mindful of faster vehicles approaching from behind. It’s illegal to be in the left lane preventing people from passing. This can also cause major accidents while people are driving fast.
Maintain Safety Distances: Maintain a safe distance from the vehicle in front of you, especially when driving at high speeds. The general rule is to keep a distance of at least a two-second interval or more in good weather conditions.
Be Aware of Road Signs: Pay attention to road signs, as they provide crucial information about speed limits, construction zones, parking regulations, and other important details. Familiarize yourself with common signs to ensure a smooth and safe journey.
Plan for Toll Roads: While most highways in Germany (autobahns) are toll-free, there are some exceptions. Research your planned route in advance to check for any toll roads and consider purchasing a vignette or paying tolls electronically, if necessary. If you plan to drive outside of Germany check to see if a vignette is needed. Many surrounding countries like France, Switzerland, and Austria require vignettes.
Use GPS or Navigation Systems: Utilize GPS or navigation systems to aid your journey. They can provide real-time traffic updates, and alternative routes, and help you navigate unfamiliar roads and cities with ease.
Be Mindful of Pedestrians and Cyclists: Keep an eye out for pedestrians and cyclists, especially in urban areas and designated zones. Always yield to them and be cautious while turning or maneuvering through intersections.
Adhere to Parking Regulations: When parking, make sure to comply with parking regulations and signs. Pay attention to designated parking zones, time restrictions, and any necessary permits or payment requirements.
Carry Required Documents: Ensure you have all necessary documents while driving in Germany, including a valid driver’s license, vehicle registration, and proof of insurance. It’s also a good idea to carry your passport or identification in case of any unexpected situations.
Practice Defensive Driving: Stay alert, anticipate the actions of other drivers, and be prepared for changing road conditions. Maintain focus, avoid distractions, and adapt your driving to the prevailing circumstances to ensure a safe and enjoyable road trip in Germany.
Make sure your rental car has the following: A first aid kit, reflective jacket, warning triangle, spare tire, and tools to change the wheel or tire repair kit. Ask the rental office who to call if there are any issues or an accident.
Why Germany is the Perfect Destination for a Road Trip
From the rolling hills of Bavaria to the stunning coastline of the Baltic Sea, there are countless scenic routes to explore. The country is also home to several national parks, such as the Black Forest and the Harz Mountains, where you can immerse yourself in nature and enjoy outdoor activities like hiking and biking. To be honest, to see the best of Germany must be seen by car. It’s more than just the busy cities but more of the small German towns and villages that make Germany so beautiful.
In addition to its natural beauty, Germany is steeped in history and culture which is why road trips in Germany are essential to see the best highlights. From the iconic Brandenburg Gate in Berlin to the fairy-tale Neuschwanstein Castle in Bavaria, there are countless historical sites and landmarks to visit. The country is also known for its vibrant arts scene, with world-class museums and galleries in cities like Munich and Dresden.
Germany is also home to a diverse range of cities and towns, each with its own unique charm. From the medieval architecture of Rothenburg ob der Tauber to Heidelberg, there is something for everyone. You can explore charming villages, visit local markets, and sample regional cuisine as you make your way through the country.
No road trip in Germany would be complete without indulging in the delicious food and drink that the country has to offer. From hearty sausages and pretzels to world-renowned beers and wines, Germany has a lot to offer. You can visit traditional beer gardens, dine in Michelin-starred restaurants, and sample local specialties as you travel through the country.
Choosing the Best Route for Your German Road Trip
When planning a road trip in Germany, it’s important to choose the best route that suits your interests and preferences. There are several popular routes and itineraries to choose from, depending on the duration of your trip and the areas you want to explore.
One popular route is the Romantic Road, which stretches from Würzburg to Füssen. This scenic route takes you through charming towns and villages, such as Rothenburg ob der Tauber and Dinkelsbühl, and allows you to experience the beauty of the Bavarian countryside.
Another popular route is the Black Forest High Road, which winds its way through the stunning Black Forest region. This route offers breathtaking views of the forest, as well as opportunities to visit charming towns like Freiburg and Baden-Baden.
When choosing a route for your road trip, it’s important to consider factors such as the time of year, the duration of your trip, and your interests. If you’re interested in history and culture, you may want to include cities like Berlin, Munich, and Dresden in your itinerary. If you’re more interested in nature and outdoor activities, you may want to focus on routes that take you through national parks and scenic landscapes.
If none of the popular routes suit your interests, you can also create a customized route based on your preferences. Consider the areas you want to visit, the attractions you want to see, and the activities you want to do, and plan your route accordingly. This will allow you to have a unique and personalized road trip experience.
Essential Tips for Renting a Car in Germany
Renting a car is a convenient and flexible way to explore Germany on a road trip. However, there are certain requirements and considerations to keep in mind when renting a car in Germany.
To rent a car in Germany, you must be at least 21 years old and have a valid driver’s license. Some rental companies may require you to be at least 25 years old, so it’s important to check the age requirements before making a reservation. You will also need a credit card in order to make the reservation and provide a security deposit and international driver’s license that you can easily get in your home country.
There are several types of rental cars available in Germany, ranging from compact cars to luxury vehicles. It’s important to choose a car that suits your needs and preferences, as well as your budget. Consider factors such as the number of passengers, the amount of luggage, and the type of terrain you will be driving on.
When renting a car in Germany, it’s important to shop around and compare prices from different rental companies. You can use online travel agencies or rental comparison websites to find the best deals. It’s also a good idea to read reviews and check the terms and conditions before making a reservation.
Most vehicles in Germany are manual cars, so if you do not have a manual car, I suggest you reserve and pay for in advance an automatic vehicle. If you do not pay for it in advance, you may not be as lucky when you arrive and it may not be the option available to you. When you return the car, be sure to take photos before and after you took the vehicle so that you have evidence that the car was fine when you dropped the vehicle off to prevent any additional charges.
Some companies I suggest renting from in Germany are Hertz, Sixt, EuropaCar, and Enterprise.
Packing for Your German Road Trip: What to Bring and What to Leave Behind
Packing for a road trip can be a daunting task, but with some careful planning, you can ensure that you have everything you need for your German adventure.
When packing for a road trip in Germany, it’s important to bring essential items such as a valid driver’s license, passport, and credit card. You should also bring a map or GPS device, as well as a charger for your electronic devices. It’s also a good idea to bring a first aid kit, a flashlight, and a roadside emergency kit in case of any unforeseen circumstances. I’d suggest bringing a car charger as well, as some of the vehicles do not have provided car charges.
In terms of clothing, it’s important to pack layers, as the weather in Germany can be unpredictable. Bring comfortable walking shoes, as well as a waterproof jacket and umbrella. It’s also a good idea to pack a swimsuit if you plan on visiting any lakes or beaches.
When it comes to toiletries, it’s important to pack travel-sized items to save space. Many vehicles in Germany are smaller, so storage space can be difficult. You should also bring any necessary medications, as well as sunscreen and insect repellent. It’s also a good idea to bring a reusable water bottle and a travel mug for hot drinks.
When packing for a road trip, it’s important to consider what you can leave behind. Avoid overpacking by only bringing essential items and leaving behind anything that you can easily purchase or rent during your trip. It’s also a good idea to pack items that can serve multiple purposes, such as a sarong that can be used as a towel or a picnic blanket.
The Best Time of Year to Take Road Trips in Germany
The best time of year to take road trips in Germany depends on your preferences and the activities you want to do. Germany has a temperate climate, with warm summers and cold winters, so it’s important to consider the weather and climate when planning your trip. If you are not comfortable driving in snow, I highly suggest you don’t rent a vehicle in Germany as it can be icy and difficult to maneuver.
The summer months of June, July, and August are the most popular time to visit Germany, as the weather is warm and sunny. This is the perfect time to explore the country’s outdoor attractions, such as the national parks and lakes. However, it’s also the peak tourist season, so you can expect larger crowds and higher prices.
If you prefer milder weather and smaller crowds, consider visiting Germany in the spring or fall. The months of April, May, September, and October offer pleasant temperatures and beautiful scenery. This is also the time when you can experience events such as Oktoberfest in Munich or the Christmas markets in December.
If you don’t mind the cold weather, winter can be a magical time to visit Germany. However, the snow can make it quite difficult to go on some road trips in Germany – so make sure you are comfortable driving in the snow or willing to take a day or two to relax until it’s safe to drive. The country is known for its Christmas markets, where you can shop for unique gifts and sample traditional food and drink. You can also enjoy winter sports such as skiing and snowboarding in the Bavarian Alps.
Must-See Destinations on Your German Road Trip Itinerary
When planning road trips in Germany, there are several must-see destinations that you should include in your itinerary. These destinations offer a mix of history, culture, and natural beauty, and will provide you with a well-rounded experience of the country.
Berlin, the capital city of Germany, is a must-visit destination on any road trip itinerary. The city is known for its vibrant arts scene, historical landmarks, and diverse neighborhoods. You can visit iconic sites such as the Brandenburg Gate and the Berlin Wall, explore world-class museums like the Pergamon Museum, and enjoy the city’s vibrant nightlife.
Munich, the capital of Bavaria, is another must-see destination in Germany. The city is known for its beer gardens, traditional architecture, and rich history. You can visit famous attractions such as the Marienplatz and the Nymphenburg Palace, explore the beautiful English Garden, and indulge in traditional Bavarian cuisine.
The Romantic Road is a scenic route that stretches from Würzburg to Füssen and is a must-visit destination for those who want to experience the charm of medieval Germany. Along this route, you can visit picturesque towns such as Rothenburg ob der Tauber and Dinkelsbühl, explore stunning castles like Neuschwanstein and Hohenschwangau, and enjoy the beauty of the Bavarian countryside.
The Black Forest is another must-see destination on your German road trip. This region is known for its dense forests, charming villages, and delicious food. You can hike through the forest, visit the famous cuckoo clock makers in Triberg, and indulge in Black Forest cake and other regional specialties.
The Rhine Valley is another must-see destination for its stunning landscapes and charming towns. You can take a scenic boat ride along the Rhine River, visit the famous Lorelei rock, and explore the medieval town of Cochem. The region is also known for its vineyards, so you can enjoy wine tasting and sample the local Riesling.
No road trip in Germany would be complete without a visit to Neuschwanstein Castle. This fairy-tale castle is located in the Bavarian Alps and is one of the most famous landmarks in Germany. You can take a guided tour of the castle, explore the surrounding hiking trails, and enjoy breathtaking views of the surrounding mountains.
How to Budget for Your German Road Trip: Costs to Consider
When planning road trips in Germany, it’s important to budget for the various costs associated with the trip. This will help you determine how much money you need to save and how to allocate your funds.
One of the main costs to consider when planning a road trip in Germany is the rental car. The cost of renting a car can vary depending on the type of vehicle, the duration of the rental, and the rental company. It’s important to shop around and compare prices from different rental companies to find the best deal.
Another cost to consider is gas and tolls. There aren’t really any tolls within Germany, however, if you happen to travel into other of the surrounding countries there are many. Gas prices in Germany are generally higher than in other countries, so it’s important to budget accordingly.
Accommodations are another cost to consider when planning a road trip in Germany. The cost of accommodations can vary depending on the type of accommodation, the location, and the time of year. It’s important to research different options and compare prices to find the best deal. Consider staying in budget-friendly accommodations such as hostels or guesthouses, or consider camping if you’re traveling with a tent.
To save money on food and drinks while traveling in Germany, I suggest buying water at a local grocery store like Aldi, Lidl, or Globus. You can also save on breakfast by going to the local bakery instead of restaurants. While there are plenty of budget-friendly options available, such as street food and local markets, it’s important to budget for meals and snacks. You should also budget for drinks, especially if you plan on indulging in the local beer or wine in restaurants. It’s much more affordable to buy alcohol at a local store than when out.
Finally, it’s important to budget for activities and attractions. Germany is home to a wide range of attractions, from museums and castles to outdoor activities and festivals. It’s important to research the cost of these activities and factor them into your budget.
Staying Safe on the Road: German Driving Laws and Regulations
When driving in Germany, it’s important to familiarize yourself with the local driving laws and regulations to ensure a safe and enjoyable road trip. If you are from the US, you need to ensure that you have an international driver’s license prior to renting a car abroad. Understand that most rental car places have manual or stick shift vehicles and you need to ensure at booking in order to rent an automatic car if you are unable to drive a manual.
The speed limit on German highways, known as the autobahn, is only unrestricted in certain areas with unlimited speed zone signs. However, there are certain sections where speed limits are enforced, so it’s important to pay attention to the signs. In urban areas, the speed limit is usually 50 km/h (31 mph), while on rural roads it is usually 100 km/h (62 mph). Ensure you are driving the speed limit or you may be caught by the German speed cameras which often result in a hefty fine.
It’s important to pay attention to road signs and signals when driving in Germany. Signs are usually in German, but some major roads and tourist areas may have signs in English as well. It’s also important to familiarize yourself with the meaning of different road signs and signals before your trip.
Drinking and driving laws in Germany are strict, with a blood alcohol limit of 0.05%. It’s important to avoid drinking and driving and to designate a sober driver if you plan on consuming alcohol. It’s also important to note that Germany has a zero-tolerance policy for drug use while driving.
In case of an emergency, it’s important to know the emergency procedures in Germany. The emergency number for police, fire, and medical emergencies is 112. It’s also a good idea to have a basic understanding of German phrases related to emergencies, such as “help” and “emergency.”
Finding the Best Accommodations for Your German Road Trip
When planning a road trip in Germany, finding the best accommodations is an important part of the planning process. There are several types of accommodations available, ranging from budget-friendly options to luxury hotels. Keep in mind that many hotels and airbnbs or houses within Germany do not have air conditioning as Germans find it wasteful. So if you are prone to the heat, be sure to double-check to see if your accommodation has AC available.
One of the most popular types of accommodations in Germany is a hotel. There are hotels available in every price range, from budget-friendly options to luxury hotels. It’s important to research different hotels and compare prices to find the best deal. Consider factors such as location, amenities, and customer reviews when making your decision.
Another popular type of accommodation in Germany is the guesthouse or bed and breakfast. These accommodations offer a more personal and intimate experience, with hosts who can provide local recommendations and insights. Guesthouses and bed and breakfasts are often located in charming towns and villages, allowing you to immerse yourself in the local culture.
If you’re traveling on a budget, consider staying in a hostel. Hostels offer dormitory-style accommodations, as well as private rooms, at a fraction of the cost of a hotel. Hostels are a great option for solo travelers or those who want to meet other travelers.
Camping is another popular option for accommodations in Germany. The country is home to numerous campsites, ranging from basic facilities to fully-equipped sites with amenities such as showers and restaurants. Camping allows you to immerse yourself in nature and enjoy outdoor activities such as hiking and biking.
I’m not quite sure how to start this. it’s been a while — and by a while, I mean a year.
Honestly, I’ve been putting off writing this post. I wanted to write something eloquent and touching, to summarize COVID and BLM and what it’s like to live through these times. But every time I started, I fell short. So I quit.
But I’ve realized I don’t have to write something meaningful and profound. I just have to write.
Life updates
I feel fortunate that this pandemic hasn’t been too hard on me. When lockdown happened, my parents were kind enough to let me move out of my tiny apartment and move into their house. I haven’t lost any friends or family. I spent most of the summer quarantining in Northern Michigan, which is the perfect place to quarantine because there’s basically no one there.
I feel bad admitting that a lot of positive things have happened to me in the past year. I finished graduate school. I got a job as a UX designer at Deloitte. I got a puppy (!) named Alfie. I fell in love with road-tripping, visiting seven national parks. And I found a place to live that I love! I now live in Austin, Texas.
My sweet puppy, Alfie
But, of course, it hasn’t been all roses. There have been weeks when I’ve doomscrolled endlessly, refreshing the New York Times’ home page an embarrassing amount of times. I’ve strengthened some friendships, but others have fallen by the wayside. Job-hunting during a pandemic was grueling — it took me six months to land a job after I graduated. And don’t even get me started on being single during a pandemic.
But all in all, I know how lucky I am. In the grand scheme of things, I can’t complain.
A year away from blogging has taught me that I really do miss it. I miss writing. I miss sharing book recommendations (you guys always have the best ones). I miss having a space that is all mine.
I’m not sure I’ll ever blog as regularly as I used to, but I still want to check in from time to time.
Which leads me to the question: How are you, really? What has this year been like for you? Are you feeling hopeful or worn out, or both?
Sending you love, wherever and however you are.
Enjoyed this post? Subscribe here!
Subscribe here to receive new Ashley Abroad posts straight to your inbox.
Thanks for subscribing! Now check your email to confirm your subscription.
This post may have affiliate links, which means I may receive commissions if you choose to purchase through links I provide (at no extra cost to you). Please read my disclosure for more info.
Hey everyone! My Living Abroad series, after a long hiatus, is back. Today, I’m chatting with Jennifer, an American teacher and blogger living in Romania.
Jennifer, a serial expat, has spent the past 11 years living and working on four continents, but she now calls Bucharest home. With its gorgeous countryside, low cost of living, and hearty food, she makes Romania seem like a pretty dreamy place to live. I hope you enjoy reading about her life there!
Jennifer’s background:
My name is Jennifer Stevens and I’m originally from a small town near Tampa, Florida. I’ve been an expat for the last 11 years, living in South Korea, Colombia, China, and now Romania. My husband Luke and I both work at the American International School of Bucharest and live in the center of town with our Shanghai street dog, Charlie.
On moving to Romania: Admittedly, I didn’t know much about Romania when my husband and I were offered teaching positions here. But we were keen to explore Europe and knew Eastern Europe would be a more affordable way to do this. Plus, when we Googled Romania, pictures of snow-capped mountains and fairytale castles filled the computer screen!
On making friends with other expats in Romania: To be honest, most of my friends are fellow teachers from school. Romania doesn’t have the same expat scene as other places I’ve lived like in Shanghai, but there is a chapter of InterNations here in Bucharest, and you can find some gatherings on Meetup.com. To make local friends, I’ve found success by talking to fellow dog owners at the parks, and taking fitness classes at gyms (that is, when they were still open).
On living in Romania during Covid-19: It’s had its ups and downs. We’ve been lucky to work at a school that has prioritized the health of its teachers and students, but teaching online has been extremely difficult. It’s now been a full year of Zoom instruction and we’re all completely burned out. Currently, Europe is in its third wave, and the new variants have hit Romania pretty hard. This means strict curfews and lockdowns in some areas (where you have to have a declaration form to leave the house). It also means that schools have to remain closed until cases get down to 6/1,000. Right now, I believe numbers are closer to 9/1,000 where my school is located.
It’s been hard not being able to go home, but Luke and I have a lot of gratitude for our situation. Romania is a beautiful country with plenty of cabin escapes in nearby mountain ranges, and the WIFI is strong. So, while we feel trapped and homesick at times, nature and the ability to quickly connect is a huge comfort.
On Romanian food: Typical Romanian food is heavy and pork-forward. I love the soups here, especially the “sour” variety, which uses fermented barley or wheat bran (borș) to get its flavor. I also love the roasted eggplant dip (salata de vinete), and the summer produce is second-to-none!
A typical Romanian meal is especially perfect on a cold winter day: pork-stuffed cabbage rolls (sarmale), polenta (mămăligă) topped with a dollop of sour cream, some type of sour soup (ciorbă), possibly a side of grilled sausage (mici), and fried cheese doughnuts (papanasi) served with blueberry jam and sweet sour cream.
On learning Romanian: The Romanian language is beautiful, and apparently the closest living language to Vulgar Latin. Since I can speak Spanish, I thought learning Romanian would be easy, but it’s been pretty challenging. I found that when I took lessons, I was mixing up words I knew from Spanish and French.
Most people in Bucharest can speak English, so I typically greet strangers in Romanian (“Buna ziua”), then ask them if they speak English (“Vorbiți Engleza?”). More often than not, the conversation switches to English—which is great for communicating, but bad for learning the language.
On the cost of living: For the most part, Romania is a very inexpensive place to live—especially if you’re coming from the States. Depending on which city you live in and what neighborhood, expats can expect to pay less than $1,000 USD for a 2-bedroom apartment. At least in Bucharest, landlords typically advertise apartments for much more than they’re worth (for example, our 3-bdrm place in downtown Bucharest was advertised for $1,300 and we got it for $1,000). Keep in mind, you can find places much cheaper (especially in an older Communist building or outside the city), or more expensive (in a new expat complex).
For everyday items like produce, it really depends on what you’re buying. Locally grown products are very affordable, and depending on the season, you can get great deals on some of the best tasting fruits and vegetables out there. In July, for example, you can go to Obor market (one of the biggest farmers’ markets in the city) and take home a kilo of blackberries for less than $5. Imported products can be expensive, and I wouldn’t recommend ordering from websites outside the EU, as import taxes can be incredibly steep.
On local fashion: In Bucharest [Romania’s capital], the color black reigns supreme. I’ve actually had trouble finding clothes to my taste, and shoes in particular are tough if your feet run on the larger side (US 9 and above for women). The handmade traditional blouses are absolutely gorgeous though—typically white cotton with billowy sleeves, embroidered in a variety of colors and patterns.
On the medical system: The worst part of living in Romania is the medical system. Romania consistently ranks worst in the EU, according to the Euro Health Consumer Index, which looks at variables like accessibility, treatment outcomes, range of services, care, and pharmaceuticals. I’ve heard of many instances of bribery, and have personally experienced a misdiagnosis and the inability to find my thyroid replacement medicine (the country ran out for many months and I had to find a way to get it from the States).
On missing home: I always miss my family most—especially this last year when flying home wasn’t an option. Otherwise, I miss the ease of everyday things, like being able to fully communicate at the doctor’s office, or being able to find the correct products you need to clean your house. I also miss nicely paved streets and familiar road rules.
On the best part about living in Romania: It’s hard to choose just one thing, so I’ll say my top three: the gorgeous countryside, the proximity to other countries in Europe, and the low cost of living.
On living in Romania long-term: Next school year will be our last. Five years will have been the perfect amount of time to properly explore the country and to develop a true appreciation for the people and the culture. But because of my recent cancer journey, our next post will have to be somewhere with a more dependable medical system.
Subscribe here to receive new Ashley Abroad posts straight to your inbox.
Thanks for subscribing! Now check your email to confirm your subscription.
This post may have affiliate links, which means I may receive commissions if you choose to purchase through links I provide (at no extra cost to you). Please read my disclosure for more info.
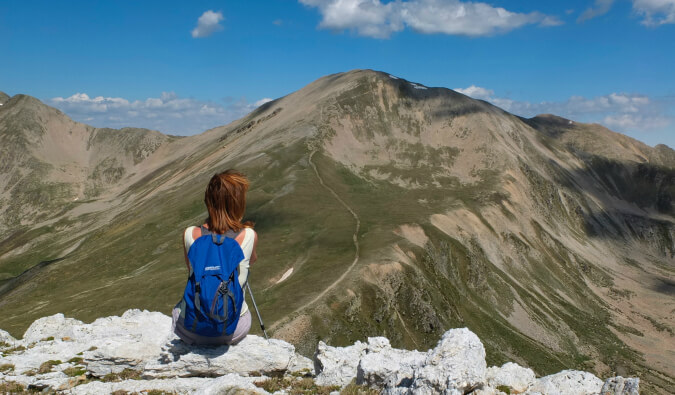
Time. There just never seems to be enough of it. It always seems to move too fast (and, every year, it seems to just move faster).
Time is something people always tell me they don’t have enough of and is one of the main reasons why they don’t travel as much as they would like. (Money is also an issue, which I’ve talked about here.)
While there are more digital nomads and remote workers now that COVID has changed the concept of the office, not everyone is able to work remotely these days.
But, even if they don’t want to be nomadic, most people I know with office jobs (specifically Americans) want to travel more than they do. They just feel like they don’t have the time.
They are wrong.
Here’s why.
Let’s say you work 50 weeks a year and get two weeks of vacation. (Not American? Then you probably get a lot more and that’s wonderful.) Counting your vacation time and every weekend brings the total number of days per year you can travel to 110 (104 weekend days plus the 10 days in your two-week vacation). That’s a lot of time to travel. Throw in three-day weekends and holidays, and we can add even more days to our total. It may not be all continuous, but you can do a lot with that much time.
Let’s think about that for a second: 110+ days of free time per year. That’s close to four months of potential travel time per year! Four months! The world is your oyster with that much time.
When looking at it this way, our busy schedule becomes a lot more open. What are you doing with that time?
Everything is about priorities. Yes, there are certain obligations we have in our day-to-day lives that take up time but if you really want something, you find a way to make it happen. It’s like when I say I don’t have the time to go to the gym. I have plenty of time to go to the gym; I’m just spending that time elsewhere.
Because the gym just isn’t a priority for me (though it probably should be).
That’s not really their fault. It’s just how the travel industry tells us we need to travel because long and big trips mean people will spend more money. We internalize that concept and never consider other options.
However, if COVID has taught us anything it’s that there are TONS of things to see and do close to home. Even when you don’t have months to travel, as we’ve seen, you still have 110 days of potential travel per year. If you make it a priority, you can certainly travel more.
But what do you do? What kind of trips can you take on a smaller time scale that still have a big impact? Here are some trip ideas to help you plan to travel when you have limited time:
1. Take a weekend getaway
Spend a weekend away somewhere. Two days isn’t a lot of time, but it’s still enough to explore a city, town, or camp in a national park close to you. I used to spend a lot of time in New York City. From there, weekends away would include trips to Atlantic City, Fire Island, the Hamptons, the Berkshires, Boston, Philadelphia, and Washington DC — and those are just the ones a few hours away!
Try to incorporate more weekend trips away. It can help break up your routine and keep your wanderlust in check until your next big trip. Even a couple of days somewhere are better than no days anywhere!
2. Go somewhere close
Only have a week? Don’t travel halfway around the world, wasting tons of time getting to your destination. Go somewhere a short distance away.
Living in Miami and Fiji is too far? Head to Central America!
In Sydney and Los Angeles is too far? Go halfway and stop in Hawaii, visit New Zealand, or pop over to a Pacific island nation!
In Europe? Well, 90% of the continent is a three-hour flight away so you’re set!
Stay close and you’ll need less time to do what you want. Additionally, the best flight deals you can find are often for destinations close to you. So be flexible.
Anywhere you haven’t been is a good place to visit.
And, when you travel, less is always more.
3. Be a local tourist
I don’t think people are tourists in their own city often enough. How often do you visit the museums, explore new areas in your town, or visit the major attractions of your city? I know New Yorkers who have never been to the Met, Bostonians who have never walked the Freedom Trail, and Amsterdammers who have never wandered through the red-light district.
Take the weekend, move out of the house and into a cheap place to stay, and be a tourist. I love playing tourist in my own city because it helps you learn and understand where you come from.
There’s so much around you that you probably don’t take advantage of when you’re busy leading your regular life that, when you stop and look for a second, you can find plenty of exciting activities to fill your time.
After all, travel is about seeing and learning about new things – and that can take place right in your own backyard!
Important: If you are going to do this, stay somewhere that’s not your house so it feels more like a vacation. Otherwise, it will be too tempting to wake up, run some errands, and then “run out of time.” For this to really work, you need to break your routine — and not staying in your house is important to do that.
4. Maximize your time
Don’t try to see everything under the sun. You’ll run around too much. I field a lot of emails from people who want to see half of Europe in two weeks or want to conquer all of South America in a month.
When you think that is how you have to travel and try to cram everything in, it’s easy to get burdened by your itinerary. You look at all those destinations, get overwhelmed, realize there is not enough time, give up, and hold off until you do “have” the time.
I get that you don’t have a lot of vacation and want to see a lot, but don’t! Sticking to just one or two places suddenly opens up a lot of time and opportunity! You’ll never be able to see it all. Even with my open schedule, I still can’t see everything I want. I stopped trying long ago. In travel, less is more. Quality over quantity.
****
You may not have months to travel, but that doesn’t mean you can’t travel at all. There are a plethora of ways to get out and travel the world on a budget without having to be a nomad like me. Telling yourself you don’t have time is just an excuse.
You do have the time and you can learn the skills to travel better. The problem is you probably aren’t thinking of how to spend that time beyond the typical “two-week vacation.”
So the next time you think “I don’t have the time,” think of all the places nearby you could explore. Yes, you’ll have errands to run and things that require your attention. But by using your time productively, prioritizing travel, and thinking outside the box, you’ll find you do have time to explore the world.
Travel is about exploration, and that exploration can happen anywhere for any length of time.
How to Travel the World on $75 a Day
My New York Times best-selling book to travel will teach you how to master the art of travel so that you’ll get off save money, always find deals, and have a deeper travel experience. It’s your A to Z planning guide that the BBC called the “bible for budget travelers.”
Book Your Flight Find a cheap flight by using Skyscanner. It’s my favorite search engine because it searches websites and airlines around the globe so you always know no stone is being left unturned.
Book Your Accommodation You can book your hostel with Hostelworld. If you want to stay somewhere other than a hostel, use Booking.com as it consistently returns the cheapest rates for guesthouses and hotels.
Don’t Forget Travel Insurance Travel insurance will protect you against illness, injury, theft, and cancellations. It’s comprehensive protection in case anything goes wrong. I never go on a trip without it as I’ve had to use it many times in the past. My favorite companies that offer the best service and value are:
Want to Travel for Free? Travel credit cards allow you to earn points that can be redeemed for free flights and accommodation — all without any extra spending. Check out my guide to picking the right card and my current favorites to get started and see the latest best deals.
Need a Rental Car? Discover Cars is a budget-friendly international car rental website. No matter where you’re headed, they’ll be able to find the best — and cheapest — rental for your trip!
Need Help Finding Activities for Your Trip? Get Your Guide is a huge online marketplace where you can find cool walking tours, fun excursions, skip-the-line tickets, private guides, and more.
Ready to Book Your Trip? Check out my resource page for the best companies to use when you travel. I list all the ones I use when I travel. They are the best in class and you can’t go wrong using them on your trip.
Was 2020 a slow reading year for anyone else? The pandemic basically turned my brain into mush.
That being said, my love for reading came back with a vengeance this year. I’ve been reading so much this summer and it feels delicious. I’ve run the gamut from memoirs to fiction to historical non-fiction. I’ve liked some more than others but here are some of my absolute favorite reads of the past year.
Here are seven books I highly recommend picking up this summer:
The Midnight Library follows the story of Nora Seed, a deeply unhappy thirty-something who endlessly ruminates on what might have been. After a near-death experience, she ends up in a library where each book contains a story of an alternate reality. When she picks up a book, she is able to live out one of her parallel lives: from Olympic swimmer to pub owner to glaciologist.
Full of philosophical musings, this book will stick with you long after you’ve read it. I loved this book and read it in less than 24 hours.
If you’ve ever struggled with regret, ghost lives, or wondering “what-if”, I think you’d enjoy this one.
The Paris Wife follows the story of Hadley Richardson, Ernest Hemingway’s first wife. Richardson and Hemingway meet in Chicago in 1920, have a whirlwind romance, and quickly move to Paris. They soon find themselves amongst the “Lost Generation.” But as Hemingway’s career picks up steam, their marriage begins to unravel.
What I loved about this book was how real the characters seemed. Although this is a work of fiction, it reads almost like a memoir. The dialogue in particular is excellent.
If you’ve ever dreamt of living in Paris in the 1920s with the likes of Hemingway, Gertrude Stein, and F. Scott Fitzgerald, you’ll enjoy this book.
Michelle Zauner, also known as her alias Japanese Breakfast, is a Korean-American indie rock musician. Crying in H Mart, her memoir, is many things: a memoir about losing one’s mother, a bildungsroman, and a story about making it as a famous musician. At its heart though, it’s a book about food and family.
Growing up as the only Korean-American in Eugene, Oregon, Michelle Zauner often feels out of place. But once she grows up and learns to appreciate her Korean roots, her mother dies, and she loses her connection to her heritage.
The way she finds her way back to her roots is through food.
Heartbreaking, sentimental, and gorgeously written, I highly recommend this if you like food memoirs such as Blood, Bones, & Butter.
Lillian and Madison are an unlikely pair of friends. After rooming together at boarding school and then drifting apart, Madison asks the down-and-Lillian to nanny her twins.
The only problem? The children spontaneously burst into flames.
This premise shouldn’t work, but does. I laughed out loud so many times reading this book.
At its core, this book is not just about flammable children; it’s about friendship, abandonment, class divisions, and growing up.
Writers & Lovers is the story of Casey Peabody, a 31-year-old woman who has staked her entire life on becoming a writer. Despite this, she still hasn’t finished her first novel. She is also broke, single, and grappling with the recent loss of her mother.
Though her life is in shambles, she is still clutching onto something most of her friends have given up on — the drive to live a creative life.
As I’m now 31, I related to so much of this book. As the book jacket says, it follows a woman who is in “the last days of a long youth”: a time of your life that can feel akin to Indian Summer.
If you’re around this age or have ever had a dream to live a more creative life, I highly recommend this book.
Daisy Jones & the Six follows a fictional band’s rise to fame in the 1970s.
I found this book a little jarring at first, as it reads like a transcript. Once you become accustomed to the dialogue-only writing style, it’s hard to put this book down.
If you’re a fan of 70’s music or this era, I think you’ll enjoy this book. Though the characters are a little cliche (gorgeous but mysterious female lead singer, controlling but insanely talented band leader), they still felt real to me.
If you haven’t read it yet, I also recommend Taylor Jenkin Reid’s previous book, The Seven Lives of Evelyn Hugo.
The Splendid and the Vile is set during the Blitz, a German bombing campaign on London that occurred from June 1940 – June 1941. It centers on Winston Churchill’s first year in office, and his fight against the Luftwaffe and their relentless raids on London.
Though some parts of the book dragged on (especially the romances), overall this book transported me to London in the first years of the war: blackouts, bombings, and people carrying on with their lives regardless of the turmoil and strife.
The Shell Seekers by Rosamunde Pilcher (I’m halfway through and it’s soo good!)
Where the Crawdads Sing by Delia Owens
The Devil in the White City by Erik Larson
Norse Mythology by Nail Gaiman
Malibu Rising by Taylor Jenkins Reed
What’s on your reading list for this year?
Enjoyed this post? Subscribe here!
Subscribe here to receive new Ashley Abroad posts straight to your inbox.
Thanks for subscribing! Now check your email to confirm your subscription.
This post may have affiliate links, which means I may receive commissions if you choose to purchase through links I provide (at no extra cost to you). Please read my disclosure for more info.
Gwangjang Market (광장시장) is a famous Korean street food market located fairly close to the Dongdaemun Design Plaza. This traditional food market offers a variety of traditional Korean street food from Mungbean pancakes, mandu (Korean dumplings), and more. If you want to get traditional Korean food in South Korea, this is the place to do it. If you are new to Korea or just traveling you have to add Gwangjang market to your places to visit at least once in your lifetime.
This site contains affiliate links to products. We may receive a commission for purchases made through these links. Support my blog here.
Posts Related to Gwangjang Market:
Gwangjang Market
Gwangjang Market | What to eat in Seoul’s Traditional Market
This market is Seoul’s oldest traditional market to get traditional clothing, traditional street food, and more. Gwangjang Night Market is when most of the action happens, but there are some workers that come in to eat food during the lunch rush. Gwangjang Market is also known as Gwangjang sijang and Kwang jang Market. Kwangjang is the old spelling and sijang just means market in Korean.
Why is Gwangjang Market Popular?
Gwangjang market is a popular Seoul food market because it’s the oldest market in Seoul. It is not only known for its Gwangjang market street food, but you can also get a lot of great clothing items in this area. It is considered to be one of Korea’s largest markets and is located in the heart of Seoul. Here you can find a variety of things from silk, custom-madehanboks, vintage clothing, and traditional Korean street food. If you are looking more for clothes, then I highly suggest visiting Dongdaemun market.
What to eat at Gwangjang Market | Popular Korean Street Food in Gwangjang market
There are so many great food stalls at Gwangjang Market and it has always been popular among tourists visiting South Korea. However, it has recently become even more popular due to the famous Gwangjang Netflix series on Korean Street Food. If you are planning to visit Gwangjang Market, then these are the Korean street foods you need to try there. I’ve listed Gwangjang market famous food options below.
Unlike the food market Myeongdong, the food at Gwangjang market is more traditional in comparison. Here are some of the most popular things to eat at Gwangjang market.
Not sure what to eat or feel intimidated? Book this Gwangjang Market food tour!
Bindaetteok at Gwangjang Market
Bindaetteok – Mungbean Pancakes – best food at gwangjang market
Gwangjang market Food is known for these famous and popular mung bean pancakes and all for good reason as well. You will go here and have one and I’m sure you’ll crave another and want to go back. This Gwangjang market pancakereminds me of potato pancakes and are warm and a little crispy on the outside. It’s absolutely delicious and a must eat at Gwangjang market.
Kimbap or Gimbap
This popular Korean dish is best described as a Korean version of sushi. However, instead of raw fish, this dish is usually stuffed with vegetables and meat including carrots, cucumbers, pickled radishes, and meats like bulgogi (marinated beef), tuna, and more. You can get a variety of different types of kimbap, although the smaller or mini ones called Mayak kimbap also spelled Mayak gimbap are considered to be more favorable in this market.
Kalguksu
This Gwangjang market kalguksu traditional Korean soup is filled with knife-cut Korean-style noodles. This soup is great for keeping you warm during the cold winter months and packed with comfort and flavor. There are different types of Kalguksu you can get from seafood to beef.
This soup is mild in flavor meaning it isn’t spicy however like most Korean dishes is often served with a side of kimchi. If you plan to go visit the Gwangjang Market Netflix lady, this is one of her most popular dishes and one of the most popular knife-cut noodles att Gwangjang market – she is known as the Netflix kalguksu lady.
Kalguksu and Kimchi Mandu at Gwangjang Market
Mandu
There are two typical types of mandu or dumplings that are typical in Korea. There is the traditional flavor filled with minced meat and veggies and the kimchi mandu which is filled with mean and kimchi. Kimchi mandu is only common in Korea and it’s one of my favorites to eat in Korea. They are so delicious and you can’t leave this market without eating them.
Most Koreans eat it steamed or in a soup, however, there are places that pan-fry them. I usually like them panfried, however, it honestly depends on how they are made and what they are stuffed with. The woman from the Netflix stand has both the traditional and kimchi mandu and let me tell you, that kimchi mandu is something I want to go back for.
떡볶이 – Tteokbokki
This is a popular Korean street food at Gwangjang market that is made of cylinder-shaped rice cakes and covered in a sweet and spicy sauce. You can see this type of street food all over South Korea and it’s one of the most popular street foods to enjoy. If you haven’t had it or found other vendors in other locations, be sure to have some here.
육회 – Yuk-hoe or Steak Tartare
This market is very popular for the steak tartare. They usually top it off with a raw yellow yolk that you mix in with the steak tartare. Although I didn’t get a chance to try it here because I was so full off of everything else, it looked absolutely delicious and I plan to go back and have some. I really enjoy beef tartare in South Korea because it is so flavorful and lightly seasoned.
Soondae
Best known as blood sausages. This dish is for the adventurous because it is a bit chewy in texture and blood sausages are usually stuffed pig intestines. They are quite delicious but can be somewhat bland as well. I think the texture is what most people dislike about it.
Sannakji
Although you can get live octopus here, I would suggest you wait and get it at one of the fish markets in Seoul or Jagalchi market in Busan. If you don’t have a chance to visit those places, then you could try it here. It’s one of my favorite dishes to eat in South Korea. It’s a freshly cut octopus covered in sesame oil, sesame seeds and a little bit of salt. The octopus is still moving on the plate and you may need to use your chopsticks to pry the moving tentacles, but honestly, don’t let that scare you away.
Soy Marinated Crab
Soy Marinated Crab at Gwangjang Market in Seoul is a must-try delicacy. This dish features crab marinated in a blend of soy sauce, garlic, and a hint of sweetness. The meat is tender, and the roe offers a rich, oceanic flavor. It’s a hands-on eating experience that captures the essence of Korean street food.
Other options you can eat at Gwangjang Market
비빔밥 – Bimbimbap – A spicy rice dish with veggies and meat
물냉면 – Mul-naengmyeon – Cold noodle soup
족발 – Jokbal – Pigs feet
닭발 – Dalkbal – Chicken feet
Desserts at Gwangjang Market
Hotteok at Gwangjang Market
Hotteok
This popular street food in Korea and usually served during the winter months. I only found a few stalls at the Gwangjang market that had them, but if you find them it’s totally worth checking out. It’s my favorite dessert street food option in South Korea. A hotteok is a sweet rice flour pancake that is usually stuffed with brown sugar and sometimes sunflower seeds and nuts depending on the vendor.
꽈배기 – Twisted Korean doughnut
Right next to the hotteok stand I saw inside the Gwangjang market was a stall selling Gwabaegi which is a popular Korean doughnut. This is a very popular donut that is made of rice flour so it’s a little stickier than regular donuts. They are usually hot and fresh in order to be good and covered in sugar and sometimes cinnamon sugar. If you are a donut lover like myself, you must try one of these donuts.
붕어빵 – Bungeo-ppang
Now, this is a popular snack among many Asian kids. It was my favorite growing up and if you aren’t a big fan of sweet red beans then I don’t suggest you order this. This is a fish-shaped pastry stuffed with sweetened red bean paste. This popular dish originated in Japan and was brought over and become a popular staple in Korean street food cuisine.
호두과자 – Hodo Kwaja
These delightful treats are made from a soft, cake-like batter that’s poured into a walnut-shaped mold. Inside, you’ll typically find a filling of sweet red bean paste, and sometimes even a chunk of walnut for that extra crunch. The mold is then closed and baked until the outside turns a golden brown. The result? A warm, fluffy pastry with a gooey, sweet center.
Hodo Kwaja is a popular snack not just for tourists but also for locals. It’s like a hug for your taste buds—comforting, sweet, and oh-so-delicious. Plus, they’re usually sold in little paper bags, making them the perfect on-the-go snack as you continue to explore the wonders of Gwangjang Market.
Where to shop at Gwangjang Market
So all of the street food vendors are typically on the first floor. If you want to look for fabrics, clothing, and more, they are mostly on the second floor. There are a few vendors on the first floor down some alleyways as well. I would say that the more prestigious ones are upstairs with higher quality, however, I find them all to be pretty great in design. I highly suggest taking one of Gwangjang Market’s day tours in Seoul to get more out of it.
How to get to Gwangjang Market and Opening Hours
Gwangjang Market Opening hours: Typically 8:30 am – 6 pm daily but the restaurants are usually 8:30 am to 11:00 pm, but I suggest you go in the afternoon or evening even though places are opening in the morning, most of them are prepping the food for the day. Some places are closed on Sunday.
Address: 88 Changgyeonggung-ro, Jongno-gu, Seoul, 서울특별시 종로구 창경궁로 88 (예지동)
How to get there: Take the subway to Jongno-5 station and exit number 7. Head straight and you will see the entrance to the market on your right-hand side.
Prices: Korean street food prices vary, at the Netflix stall we paid 10,000 won (~$9USD) for a bowl of Kalguksu and Mandu. We shared the dish and it was pretty filling for 2 people. The Bindaetteok was about 2 for 3,000 won (~$2.50). So honestly, it depends on where you go and what you get. Most places are 1,500 won and up.
There are a lot of things to do near Gwangjang Market. Besides eating foot at Gwangjang market, here are a few things I suggest you do while here.
Purchase a Hanbok
The Hanbok is a traditional Korean dress characterized by its vibrant colors and simple lines. The women’s version usually consists of a jeogori (blouse) and a chima (skirt), while the men’s version has a jeogori and baji (pants). It’s a symbol of Korean culture and heritage, often worn on special occasions and holidays.
Now, why should you buy it at Gwangjang Market? Well, my friend, this market is like a treasure trove for authentic, high-quality Hanboks. Unlike the mass-produced versions you might find elsewhere, the Hanboks here are often handmade, stitched together by artisans who’ve honed their craft over decades. You can feel the love and tradition in every thread. Plus, the variety is astounding—whether you want something traditional or a modern twist, you’ll find it here. And let’s not forget, the prices are often much more reasonable compared to specialty boutiques.
Buy Traditional Souviners
Gwangjang Market is like a treasure chest when it comes to traditional Korean souvenirs. Let’s go on a little virtual shopping spree, shall we?
Korean Pottery: Whether it’s a celadon vase or a cute kimchi pot, Korean pottery is renowned for its craftsmanship. These make for elegant gifts or home decor.
Korean Fans: Hand-painted with intricate designs, these fans are not just functional but also incredibly beautiful. They’re easy to pack and make for a charming gift.
Traditional Masks: Known as “Hahoe,” these masks are often used in traditional Korean plays and dances. They make for unique wall decorations and are a great conversation starter.
Korean Tea Sets: If you’re a tea lover, you’ll adore the traditional Korean tea sets. They often come with a teapot, cups, and a serving tray, all exquisitely designed.
Korean Snacks: From dried seaweed to honey-filled “Yakgwa” cookies, Korean snacks are a tasty souvenir that won’t last long but will be remembered!
Calligraphy Sets: If you’re into art or writing, a traditional Korean calligraphy set could be a meaningful keepsake. It usually includes brushes, ink, and paper—all you need to try your hand at this ancient art form.
Jewelry: You can find beautiful pieces made of jade, a stone that holds special significance in Korean culture. It’s said to bring good luck and prosperity.
Silk Scarves: These are often hand-painted and feature traditional Korean patterns. They’re lightweight, making them easy to pack, and they add a touch of elegance to any outfit.
Korean Ginseng: Known for its health benefits, Korean ginseng is a popular gift. You can find it in various forms, from roots to extracts and teas.
Gwangjang Market FAQs
Is Gwangjang market indoors?
It is not located indoors, however, it is under a covered structure. It’s a large open space with roofing which prevents rain and other weather from ruining your chances of eating at this vintage market in Seoul.
Where is Gwangjang market located?
It’s located in Seoul, South Korea. The address is 88 Changgyeonggung-ro, Jongno-gu, Seoul, 서울특별시 종로구 창경궁로 88 (예지동).
Does Gwangjang market take card?
Not typically. This Korean food market in Seoul is pretty much a cash-heavy area to grab cheap and delicious food. Myeongdong food market is pretty much the same as well.
What is the kimbap Korean spelling?
김밥 is the Korean spelling for Gimbap or Kimbap.
What are the best food in Gwangjang Market?
I’ve listed them above, but to be short and concise, the top choices are binddatteok, kimbap specifically mayak kimbap, Kalguksu, mandu, 떡볶이 – Tteokbokki, 육회 – Yuk-hoe or Steak Tartare, Soondae, Sannakji, 비빔밥 – Bimbimbap – A spicy rice dish with veggies and meat, 물냉면 – Mul-naengmyeon – Cold noodle soup, 족발 – Jokbal – Pigs feet, 닭발 – Dalkbal – Chicken feet, Hotteok, 꽈배기 – Twisted Korean doughnut, and 붕어빵 – Bungeo-ppang.
What are some halal food at Gwangjang market?
While I can’t guarantee any of the meat is halal, here are some halal options you can consider: Gohyang Kalguksu, hotteok, 꽈배기 – Twisted Korean doughnut, 붕어빵 – Bungeo-ppang, 떡볶이 – Tteokbokki, some mayak kimbap, and 물냉면 – Mul-naengmyeon – Cold noodle soup.
How to go to Gwangjang market by subway
Take the subway to Jongno-5 station and exit number 7. Head straight and you will see the entrance to the market on your right-hand side.
Did you like this article? Support this blog by donating to the button below.
Cappadocia is one of Turkey’s most magical destinations, and it’s not just for adults. With its fairy-tale landscapes, underground cities, and hot air balloons, Cappadocia is a dream destination for families traveling with children. If you’re looking for the perfect base to explore the region, Uçhisar is an excellent choice.
This charming village offers stunning panoramic views, easy access to major attractions, and a quieter atmosphere compared to busier towns like Göreme. Here’s how you can make the most of your Cappadocia adventure with kids while using Uçhisar as your home base.
Why Stay in Uçhisar?
Uçhisar is the highest point in Cappadocia, offering breathtaking views of the valleys and fairy chimneys. It’s less crowded than Göreme but still close to all the major attractions. The town itself is home to Uçhisar Castle, an ancient rock fortress that kids will love exploring. Many of the hotels in Uçhisar are built into the rock formations, providing a unique experience that will delight children and adults alike.
We stayed at the Peristyles cave Hotel in Cappadocia, which has a great terrace from which to take the pictures of the balloons you see below. The breakfast is also fantastic!
Start the Day with Hot Air Balloons
One of the most iconic experiences in Cappadocia is watching the hot air balloons rise over the valleys at sunrise. While young children may not be able to go on a balloon ride (most companies have a minimum age requirement), watching them from the terraces of Uçhisar is just as magical. Many hotels in town offer early morning breakfast with spectacular balloon views, making for a memorable start to the day. This is what we did!
Explore Göreme Open-Air Museum
Just a short drive from Uçhisar, the Göreme Open-Air Museum is a must-visit for families. This UNESCO World Heritage Site is a collection of ancient rock-cut churches adorned with well-preserved frescoes. Kids will love exploring the caves and learning about the history of early Christian settlements in the region. The site is relatively easy to navigate with children, though a stroller may not be ideal due to uneven terrain.
Horseback Riding in Cappadocia
We had always dreamed of exploring Cappadocia, but experiencing it on horseback with our kids made it even more magical. There are many horseback riding companies in the area, but very few of them allow kids under 12 to join them. One of the few that do is Moonlight Horse Ranch, a super friendly operator which made for great memories.
From the moment we saddled up, the landscape opened up in a way we could have never imagined—fairy chimneys, hidden valleys, and wide-open trails stretched as far as the eye could see. Our guide was incredibly friendly and made sure the horses were gentle and suited to each of our experience levels, especially for the kids. It felt like we had stepped into a storybook world, trotting past ancient rock formations and cave dwellings while the kids giggled and pointed out every new discovery.
What made the tour truly special was how family-friendly it was. The pace was relaxed, allowing us to enjoy the scenery and chat with each other along the way. We paused midway through to take in the view over a quiet valley, where the kids got off their horses and ran around for a bit while we took photos. It was one of those rare travel experiences where everyone, regardless of age, felt connected—to the place, to the moment, and to each other.
Adventure in Love Valley and Pigeon Valley
For families who enjoy the outdoors, a hike through Love Valley or Pigeon Valley is a great way to experience Cappadocia’s natural beauty. Pigeon Valley, in particular, is accessible from Uçhisar and offers easy trails that kids can manage, though watch out for heat during the summer days.
Along the way, you’ll see ancient pigeon houses carved into the rocks and stunning rock formations. If hiking isn’t an option, horseback riding tours are available and offer a fun alternative for exploring the valleys.
Admission is free, by the way.
Discover the Underground Cities
Older kids with a sense of adventure will love exploring Cappadocia’s underground cities. Derinkuyu and Kaymaklı are two of the largest and most famous. These subterranean cities, once used by early Christians as hiding places, feature narrow tunnels, living quarters, and ventilation shafts.
While some parts may be a bit claustrophobic, they offer an exciting and educational experience for families interested in history.
Pottery Making in Avanos
A short drive from Uçhisar, the town of Avanos is famous for its pottery tradition, dating back thousands of years. Many local workshops offer hands-on experiences where kids can try their hand at making their own clay creations. This interactive activity is both fun and educational, allowing children to connect with Cappadocia’s artistic heritage.
Evening Relaxation in Uçhisar
After a day of exploring, Uçhisar provides a peaceful retreat where families can relax and enjoy traditional Turkish cuisine. Many restaurants in the town offer family-friendly menus with delicious local dishes such as pottery kebabs and lentil soup. The cool evening breeze and stunning sunset views over Cappadocia’s valleys make for the perfect ending to an adventurous day.
Final Thoughts
Exploring Cappadocia with kids is an unforgettable experience, and Uçhisar is the perfect base for a family-friendly adventure. Whether watching hot air balloons, hiking through valleys, or creating pottery, there are plenty of activities to keep children entertained and engaged. With its breathtaking scenery, rich history, and welcoming atmosphere, Cappadocia promises an enchanting trip for the entire family.
Kayseri, a charming city in central Turkey, is known for its rich history, stunning landscapes, and delicious cuisine. While many travelers visit for its historical sites and winter sports, Kayseri also offers plenty of family-friendly activities in the summer. From exploring nature to hands-on learning experiences, there’s no shortage of ways to keep kids entertained while creating lasting memories.
If you’re planning a summer visit, here are some of the best things to do with children in Kayseri.
Cool Off and Have Fun at Sirin Aquapark
Summer in Kayseri can get quite warm, making water activities the perfect way to cool down. Sirin Aquapark, located in the Melikgazi district, is one of the best places for kids to splash around. The park features various pools, thrilling water slides, and designated shallow areas for younger children. Families can relax under shaded areas while kids enjoy the water attractions, making it an ideal spot to spend a hot afternoon.
Discover Science in an Interactive Way
For a fun and educational experience, the Kayseri Science Center is a must-visit. This interactive museum encourages children to engage with science through hands-on exhibits and experiments. Kids can explore different sections focused on physics, space, and natural sciences while learning in an exciting and entertaining environment. The air-conditioned indoor setting also provides a great escape from the midday heat.
Explore the Natural Beauty of Aladağlar National Park
Kayseri is home to some breathtaking natural landscapes, and Aladağlar National Park is one of the best places to explore with kids. Located just outside the city, the park is known for its hiking trails, waterfalls, and picnic areas. While summer temperatures can be warm, the high-altitude location and the presence of lakes and rivers provide a refreshing outdoor experience. Families can take easy hikes, observe wildlife, or simply enjoy a picnic surrounded by nature’s beauty.
Step Back in Time at Kayseri Castle
Children who love stories of knights and castles will be fascinated by a visit to Kayseri Castle. This well-preserved fortress dates back to Roman times and has been an important landmark throughout history. Walking along the ancient walls and exploring the site’s history can be an exciting adventure for kids, sparking their imagination about the past. The surrounding area also has charming cafés and shops where families can take a break and enjoy local treats.
Have an Active Day at Soysalli Park
Kayseri has several well-maintained parks, but Soysalli Park is particularly family-friendly. With large green spaces, playgrounds, and walking paths, it’s an excellent place for children to run, play, and burn off some energy. The park also has plenty of shaded areas, making it a comfortable location for a summer outing. Bring along a picnic and enjoy a leisurely afternoon while the kids explore the playgrounds and outdoor facilities.
Visit the Imaginary Museum of Childhood (Hayal Müzesi)
A unique and creative space for children, the Imaginary Museum of Childhood is dedicated to sparking kids’ creativity. The museum features interactive exhibits and engaging activities that allow children to learn and play simultaneously. Whether it’s through storytelling, hands-on workshops, or artistic displays, this museum offers a refreshing break from traditional sightseeing.
Explore the Covered Bazaar and Enjoy Local Treats
No visit to Kayseri is complete without exploring its famous Kapalı Çarşı, or Covered Bazaar. This historic market is full of colorful textiles, handcrafted goods, and delicious local foods. Kids will love discovering the variety of items on display, from intricate carpets to traditional sweets like pastirma and sucuk. It’s also a great place to teach children about Turkish culture and trade while picking up unique souvenirs.
Take a Day Trip to Soğanlı Valley
For families who enjoy a mix of history and nature, a day trip to Soğanlı Valley is a fantastic option. The valley is known for its rock-cut churches and stunning scenery. Children will love exploring the caves and ancient dwellings while parents appreciate the breathtaking landscape. The valley also has picnic spots and walking trails that make for a pleasant day outdoors.
Enjoy a Summer Evening in Kayseri’s City Center
As the sun sets, the city comes alive with open-air cafés, cultural performances, and family-friendly entertainment. Cumhuriyet Square is a great place to experience the local atmosphere, with beautiful fountains and historical landmarks nearby. Families can take an evening stroll, grab some delicious dondurma (Turkish ice cream), and soak in the vibrant summer energy of Kayseri.
Final Thoughts
Kayseri is a fantastic summer destination for families, offering a mix of adventure, culture, and relaxation. Whether you’re cooling off at a water park, exploring nature, or diving into the city’s rich history, there’s something for kids of all ages. With its welcoming atmosphere and diverse attractions, Kayseri ensures a memorable vacation for the whole family. So, pack your bags and get ready to create wonderful memories with your children in this beautiful Turkish city!