When I was growing up, I wanted to be an archeologist. I loved history (and still do), and the thought of uncovering temples and tombs in jungles excited me. I used to read books on Greek and Roman history and have discussions with my history teacher, even as young as 13. In short, I was a huge geek from the get-go.
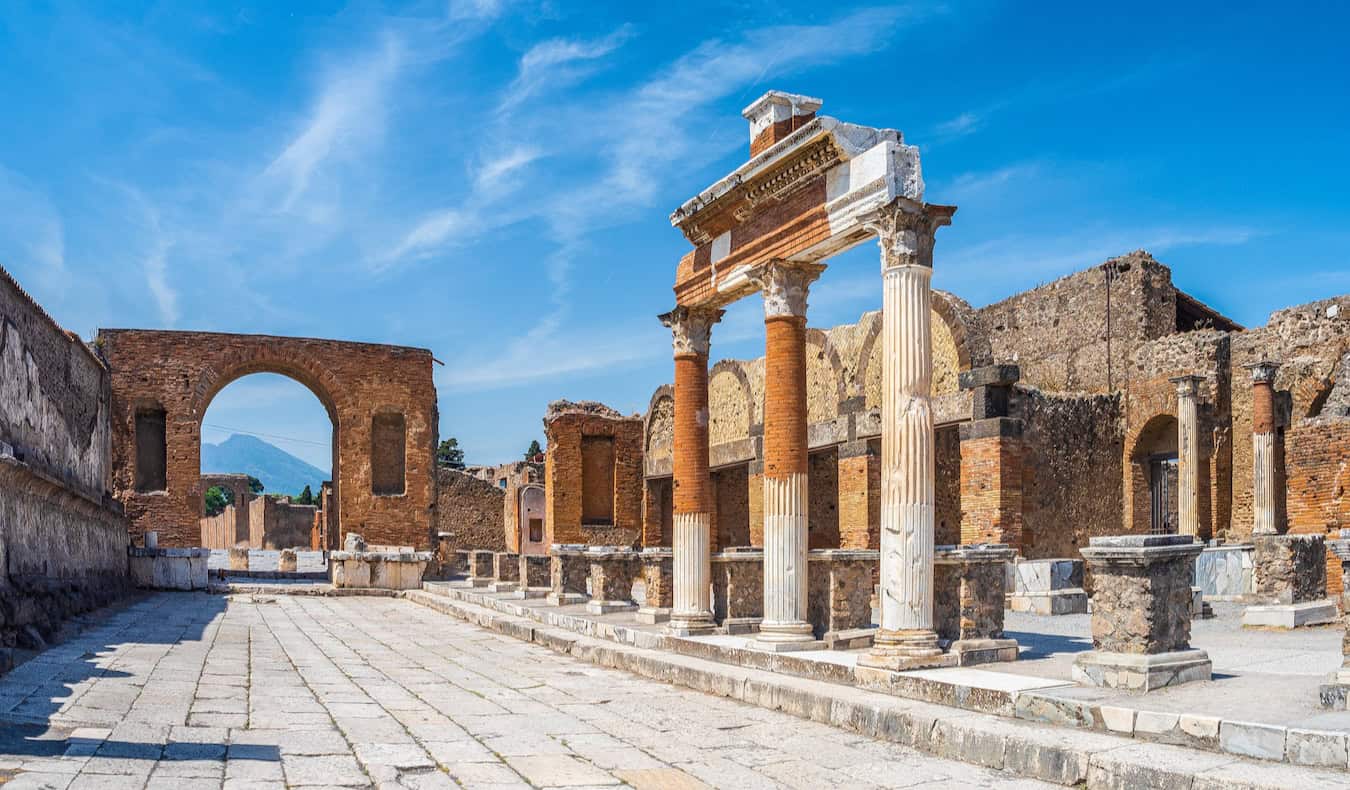
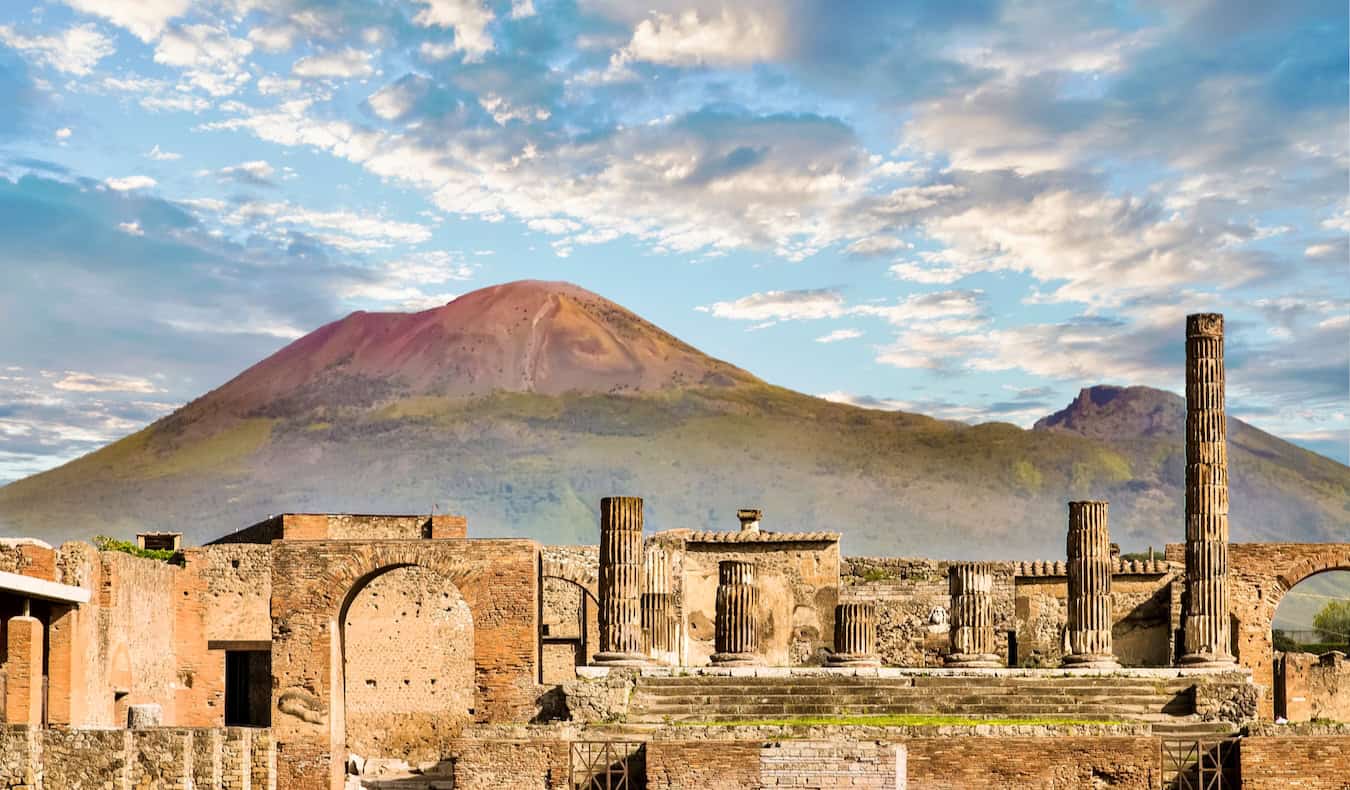
Being such a huge history geek, visiting Pompeii, the city destroyed by Mount Vesuvius in 79 CE, has always been high on my list of things to do.
When the volcano erupted, the falling ash came so quickly that it preserved the city just as it was, burying Pompeii in 4–6 meters (13–20 feet) of ash. It’s a city frozen in time.
The earliest settlements in the area date to the 8th century BCE, though most people know Pompeii as the Roman city that it was at the time of its demise. The rich agricultural land combined with its location on important trading routes meant that, over time, Pompeii became a wealthy provincial city. it had a population of over 20,000 people.
The city was also a regional cultural center, with a large amphitheater, forum, public baths, various temples, and an extensive aqueduct system providing clean water. Many of these buildings, including expansive private villas in the surrounding countryside, were buried during Vesuvius’s eruption.
The eruption itself lasted over two days, with the first phase of falling ash and pumice lasting over 18 hours. While the 1,150 bodies discovered is significant, it was only a fraction of the overall population. Most inhabitants likely had a chance to escape during this initial eruptive phase, though the final casualty count remains unknown.
While the eruption was the biggest tragedy of its time, the falling ash also kept the buildings, frescoes streets, pots, and bodies incredibly well preserved. And while there was some looting after the eruption, eventually Pompeii’s location was lost with the passage of time.
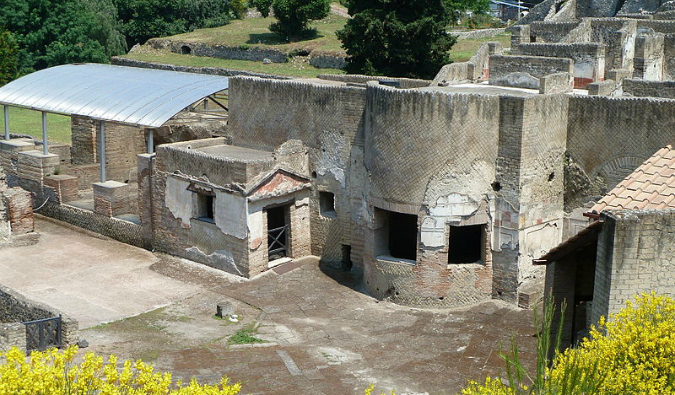
It wasn’t until the rediscovery of the nearby town of Herculaneum (buried in the same Vesuvius eruption) that interest was renewed in the area. The first excavations at Pompeii occurred in 1748, with archaeological work continuing to this day. There is still a significant portion of the site that remains unexcavated so who knows what they will discover here in the future!
I’ve traveled the world for a while and have seen plenty of marvelous ruins over the years. But this is one of the best. Even though a lack of upkeep has taken its toll on the site, I still found it a fascinating place to spend the day. My only hope is that the Italian government will get its act together to keep this site from falling into further disrepair.
Located near Naples in Italy, Pompeii takes a full day to see. If you truly want to indulge your inner Indiana Jones and visit every building here, schedule an extra half day. At over 160 acres, it’s a huge site and you could easily spend even more time than that.
I saw a lot on my full day, but there was a lot that I missed. To help you make the most of your visit, here is everything you need to know to visit Pompeii:
The Top 12 Attractions in Pompeii
1. The Brothel
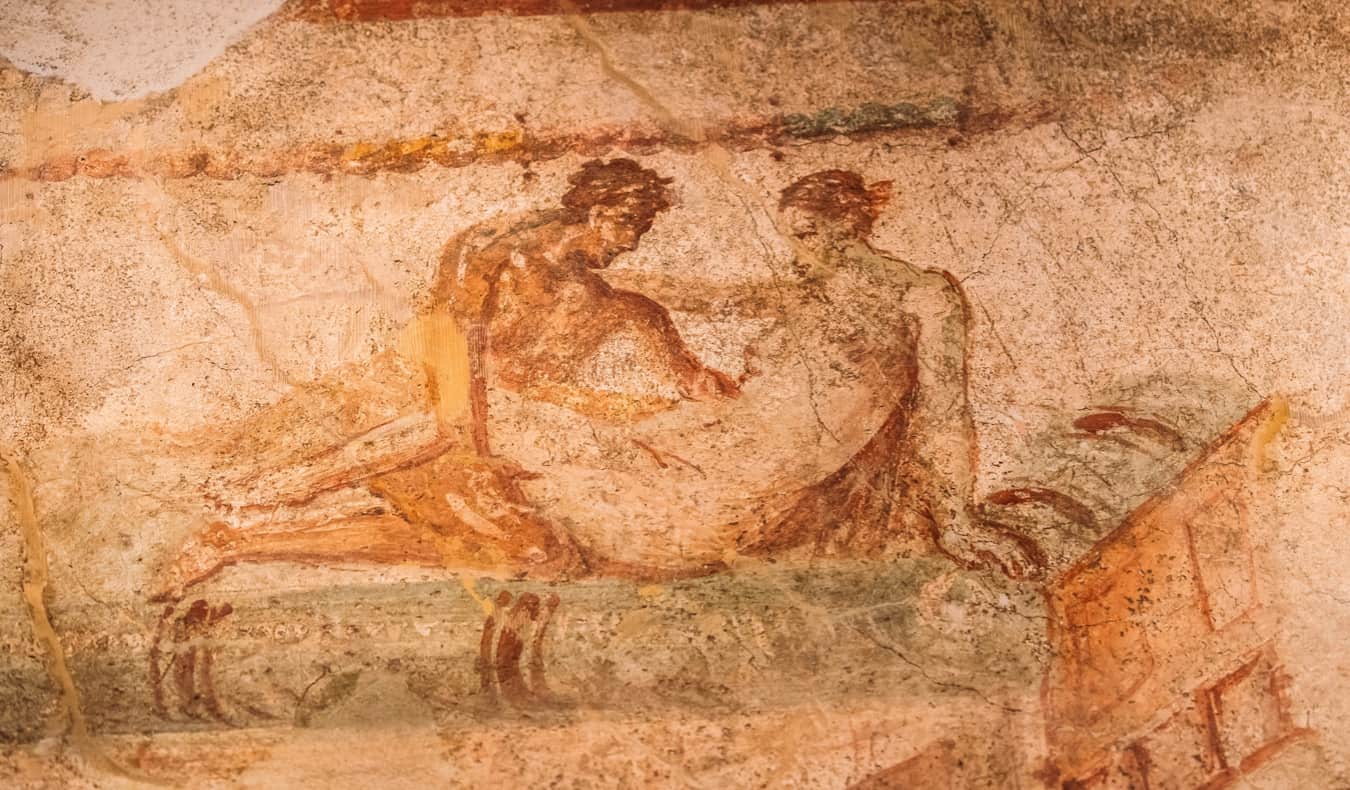
The ancient lupanar (brothel) is a tiny house with stone beds and scenes of the acts customers might pay for. It’s essentially ancient porn, though whether the frescoes served a practical purpose or were merely decoration is unclear.
Unsurprisingly, this is one of the most visited houses in all of Pompeii (it was probably just as popular before the eruption — no pun intended — too). It’s the largest of the pleasure houses uncovered in Pompeii (so far) and so historians think it was the city’s main brothel. After all, the Romans did enjoy their…rest and relaxation.
2. The Forum Baths
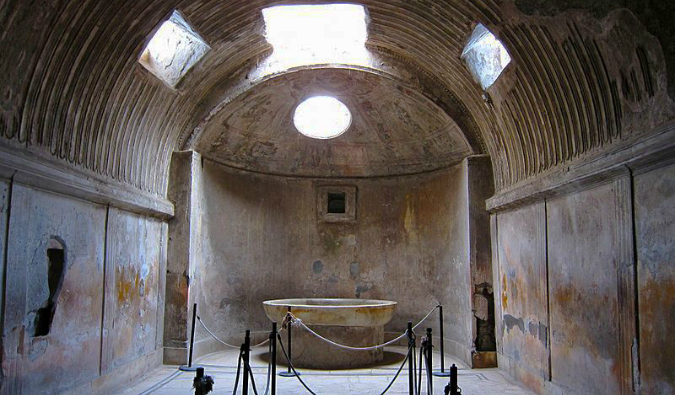
Located near the forum (the main public space), these baths are incredibly well preserved. You can peek inside the wall to see how they heated the baths back when they were still in use. Their innovation is incredibly impressive, and it’s not hard to picture the baths as they were.
While the forum baths are the smallest of the various bath ruins in Pompeii, they are arguably the most elegant. There were separate areas for men and women, including separate entrances. The bath not only had hot baths but cold and tepid baths as well.
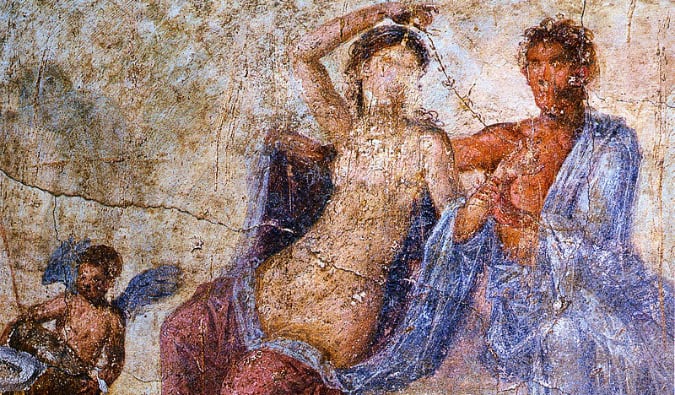
3. The Villa of the Mysteries
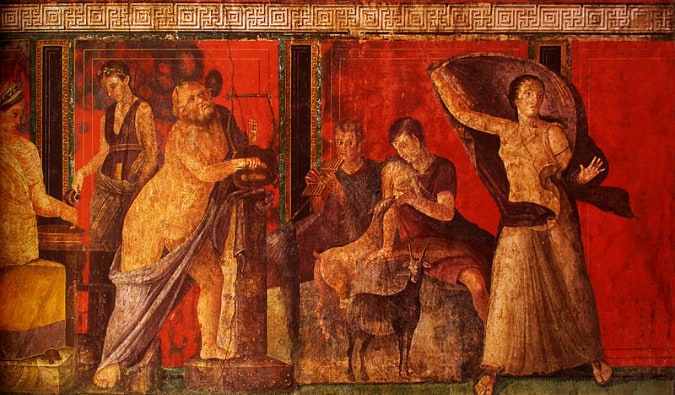
Located outside the main area, the frescoes here are amazingly well preserved in their full vibrant color. In fact, they’re some of the best examples of 1st-century Roman painting. The frescoes seem to depict a woman entering into the initiations for a Greco-Roman mystery cult, hence the name the villa is known by today.
The villa, which is on the outskirts of Pompeii proper, was excavated long after the rest of the city (excavation of the villa began in 1909). Since it’s a bit of a walk, not many people come here either, giving you the place virtually to yourself.
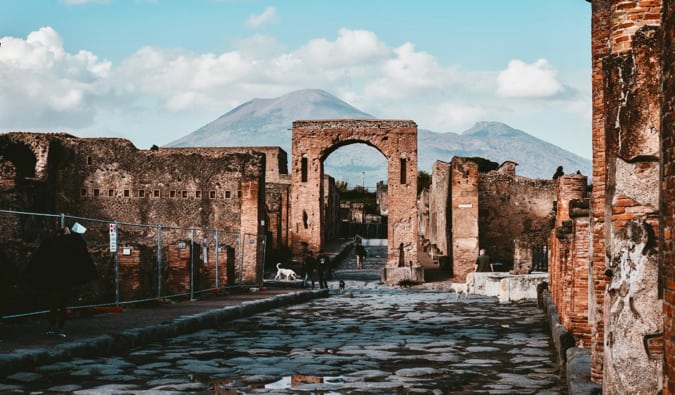
4. The Forum
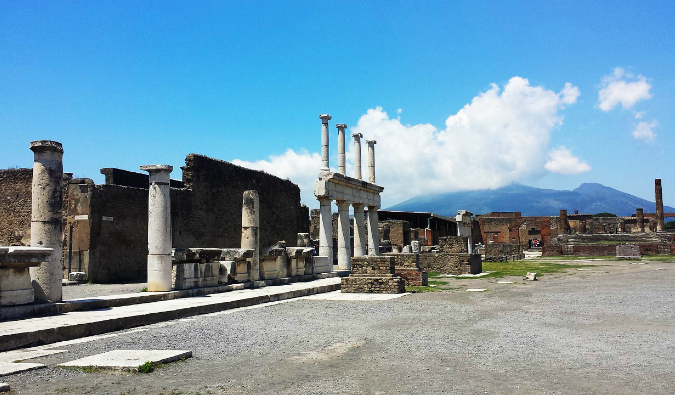
The most crowded place in Pompeii, the forum is located right near the main gate. It was the main center of life in Pompeii, the cultural and civic nerve of the city. Any significant religious or commercial events would occur here; it was essentially the main square and heart of the city. When you wander around here, you can really get a sense for what life in Pompeii was like.
5. The Stabian Baths
Another well-preserved bath, this one is the oldest in Pompeii. It also has a slightly bigger chamber and sees a whole lot fewer crowds. You can also see some preserved bodies here, which is unsettling (though you’ll get used to it the more you wander the ruins).
The bath area also had a gym and workout area (for wrestling, as well) and a large, almost Olympic-sized, swimming pool.
6. House of the Small Fountain
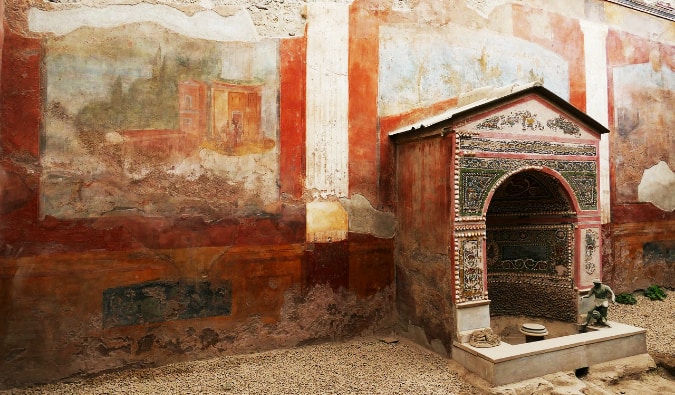
A beautiful house with a large back room, wonderful frescoes, and a beautiful mosaic fountain. Almost all of the rooms lead to the central atrium and you can see that the house was owned by someone who was wealthy.
The sloped roof was used to collect rainwater and doubled as a fountain, a great example of innovation at the time.
7. House of the Faun
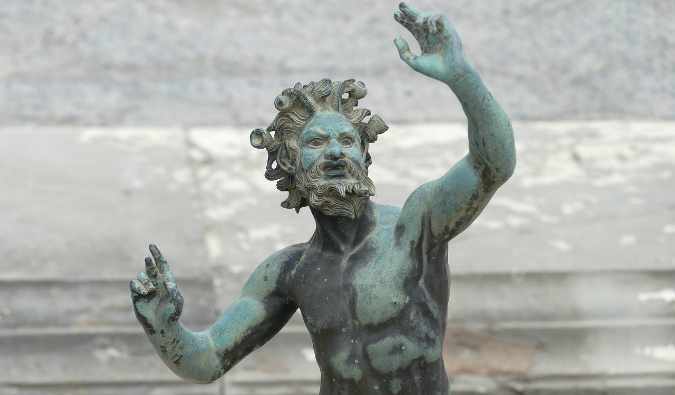
This is the biggest house in Pompeii and gets its name from the statue in the front courtyard. Built in the 2nd century BCE, there’s a large courtyard in the back where you can also find a very detailed mosaic of a battle scene.
It’s one of the most complete surviving examples of a wealthy and luxurious private residence from the time — even better preserved than many sites in Rome itself!
8. Garden of the Fugitives
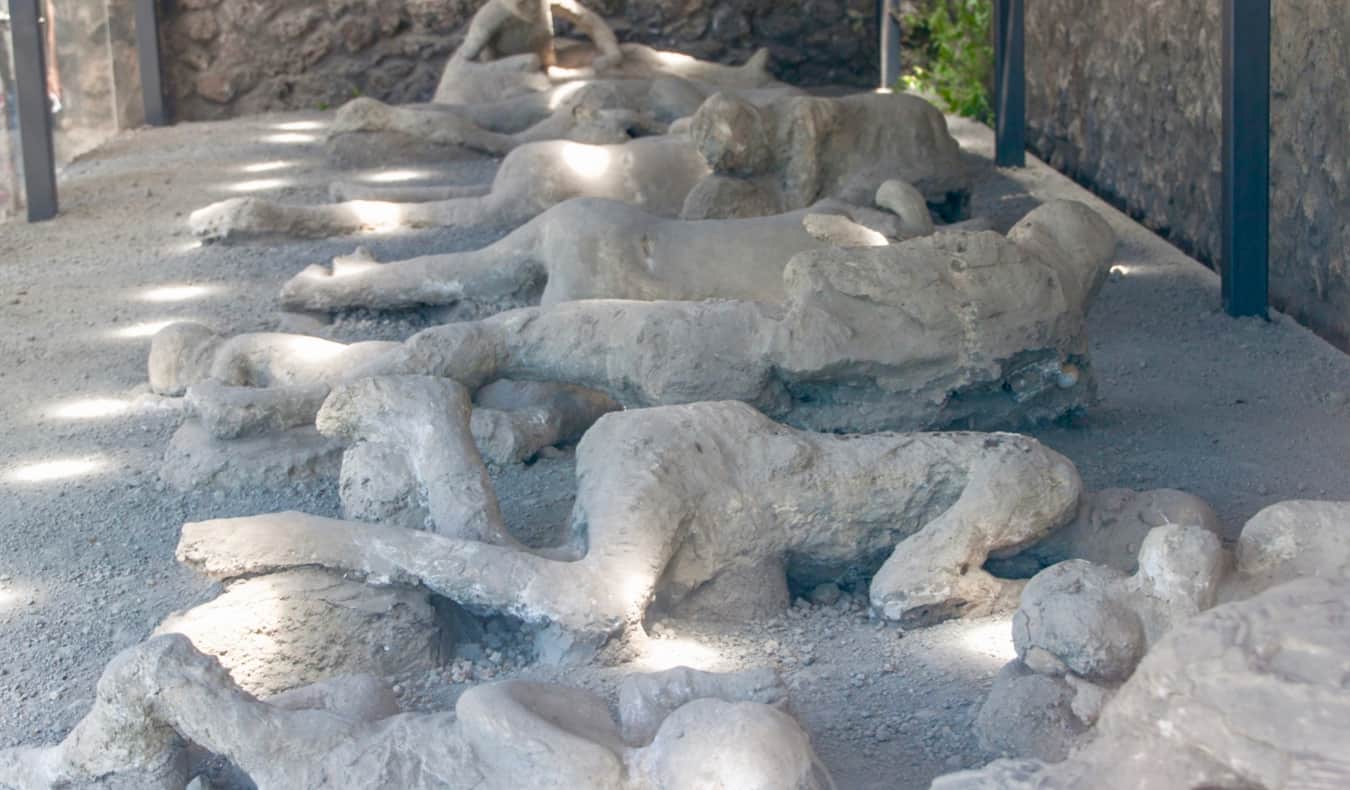
Located in the back of Pompeii, this old vineyard has preserved casts of people who didn’t make it out of the city alive. There are 13 bodies in the garden, frozen in a grotesque and agonizing tableau that reflects the horrible final moments of the city. It’s both incredibly interesting and unsettling at the same time.
9. House of Venus in the Shell
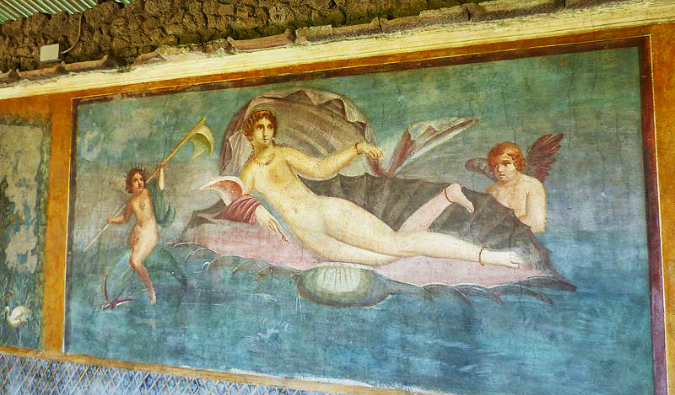
Another place located far away from the crowds, this house has a colorful fresco to the goddess Venus. There are also a few gardens here and a detailed statue of Mars.
The house was actually under renovation when Vesuvius erupted and was also damaged during the bombing in World War II (though it was restored in the 1950s).
10. The Amphitheater
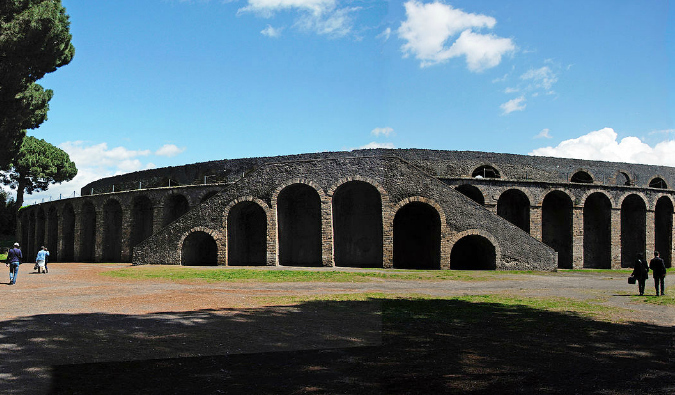
This huge amphitheater is where the citizens of Pompeii held the ancient games that entertained them. It’s a quiet place to walk around and given its position at the far end of Pompeii, you’ll see very few people there, especially during the early morning or late afternoon hours.
Built in 70 BCE, it was one of the first amphitheaters to be built of stone. Today, it is the oldest surviving Roman amphitheater in existence.
11. Great Palestra
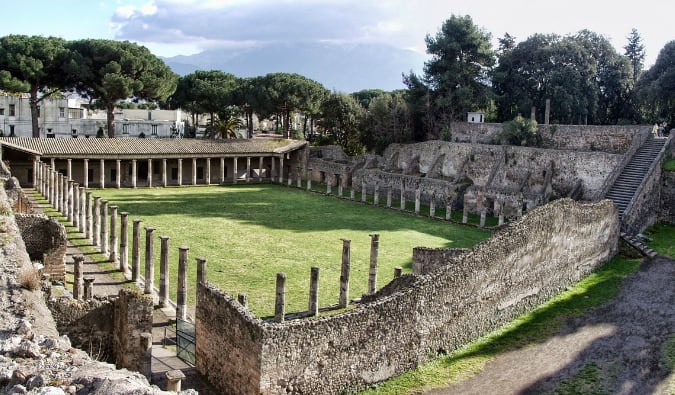
Right next to the amphitheater, the “great palace” was an exercise park and place for youth groups. It was used for sports and games, and there was also a swimming pool here as well.
It’s another a great place to escape the crowds as not so many tourists make it here.
12. House of Sallustio
This is one of the oldest houses in Pompeii, with sections dating to the 4th century BCE. It was most likely an elite residence, owing to its location and size. The upper floors may have even been used as an inn at some point in its history.
There’s a small garden and covered porch in the back, a fresco of the goddess Diana, a bakery, and even a little food shop in the front. During World War II, a bomb partially destroyed the back walls, though these were restored in the 1970s.
12 Tips for Visiting Pompeii
Here are 10 super important things to remember when visiting Pompeii:
1. Watch out for closings – Not all the attractions are open, even if they say they are. I found a number of places you were supposed to be able to get into closed. They even started closing one while I was looking around. Check the hours when you arrive, since information online might not be accurate.
2. Start in the back – To avoid the crowds, move from the farthest temples toward the front. The majority of people stick to the center of Pompeii, and you can visit the main area when the crowds have gone by late afternoon.
3. Don’t do the audio guide – I bought the audio tour and found it to be a waste of time. The free book they give you includes enough information. The audio guide doesn’t explain much more.
4. Limited time? Do a guided tour – I listened to a number of guided tours while I was walking around and I was impressed with their knowledge. Plus, I like being able to ask questions that can further explain things. The guided tours simply take you to the highlights, unless you do a personal tour.
5. Bring lots of water – During the summer, it gets scorchingly hot. Bring lots of water and some sunscreen to avoid getting burnt. A hat is a good idea too.
6. Pack snacks – There are a few cafes and snack bars here, but if you wander far into the ruins, you might not be near them for a while. It’s best to bring some food with you for the day’s explorations.
7. Take the train – This is the easiest way to visit. Just make sure you go to Pompei Scavi – Villa Dei Misteri station as the main Pompeii station only takes you to the modern city.
8. Watch out for scams and pickpockets – As Pompeii is such a popular attraction (over 2.5 million people visit each year), there are many people who try to take advantage of visitors. Common scams include trying to sell fake (or overpriced) train and bus tickets or saying that the entrance is closed (but they can get you in). Also watch out for pickpockets around the entrances and train station.
9. Don’t bring a large backpack – Security likely won’t let you bring in a large rucksack, so only come with a smaller purse or day bag.
10. Choose your tour carefully – If you’re going to do a tour, do an official tour from inside the gate. There are plenty of tours offered outside of the gate, but they are much larger and not as good (though they are cheaper). I suggest going with Take Walks. I always learn a ton on their tours.
11. Wear sturdy footwear – The ruins are actually quite spread out and you’ll be on your feet all day. Wear comfortable, sturdy shoes (no flip flops).
12. Buy tickets in advance – To beat the line, buy your tickets online in advance. Pompeii can get super busy, meaning long lines when they open. Avoid the hassle and get your tickets ahead of time.
How to Get to Pompeii
The train is the best way to get to Pompeii if you’re coming from Naples. To get here, catch the Sorrento Circumvesuviana train from Naples and get off at Pompeii. The journey takes about 40 minutes and costs around 3.50 EUR. The site is just 5 minutes from the train station.
If you’re coming by car, it’s about a 30-minute drive. Note that there is no free parking lot for the site, though there are many paid municipal and private parking lots nearby.
Starting in 2025, the site has put restrictions on daily visitors to help preserve the site:
From 9:00 am to 1:00 pm, a maximum of 15,000 admissions (subdivided into 12,000 for Pompeii express and 3,000 for Pompei +)
From 1:00 pm to 5:30 pm, a maximum of 5,000 admissions?(subdivided into 3,000 for Pompeii express and 2,000 for Pompei +)
From April 1st to October 31st, the entire site is open from 9am-7pm (last entrance at 5:30pm). From November 1-March 31, the site is open from 9am-5pm (last entry at 3:30pm). However, each individual attraction has its own opening and closing times, with last entrances starting 1-1.5 hours before closing time of the entire site. For updated hours, check pompeiisites.org.
FAQ on Visiting Pompeii
How long do you need in Pompeii?
You’ll want to spend a full day here if you want to see everything. If you just want to see the main sites, 3–4 hours will suffice.
Do you have to pay to visit Pompeii?
Yes! Tickets are 18 EUR per person for the basic ticket (this gets you the main sites) and 22 EUR for the comprehensive, all access ticket.
Should I book a guided tour?
If you don’t have a guidebook or if you want a deeper, more insightful visit then getting a guide is a good idea. There is minimal signage here so you’ll get much more from your visit if you have a guide.
You can either book a guide on arrival (you’ll see a bunch hanging around the entrance) or go with a reputable company like Take Walks. They have a comprehensive and informative 3-hour tour of the site as well as a full-day tour that includes Pompeii and a drive along the Amalfi Coast. Tickets are 59 EUR for the three-hour tour and 189 EUR for the full-day tour (including tickets that let you skip the line).
Do you need to book tickets in advance for Pompeii?
Tickets can be bought online in advance, which includes access to Pompeii, Oplontis, and Boscoreale. If you’re visiting on a Saturday or public holiday, you must book online in advance.
How many tourists visit Pompeii each year?
Pompeii is one of the most popular attractions in Italy, bringing in over 2.5 million tourists each year. It gets busy!
When should I visit Pompeii?
The summer offers the best weather, but it is also incredibly hot and busy. Consider visiting in the shoulder season (May or October) in order to beat the crowds and also have cooler weather. But if you are going to visit in the summer, bring sunscreen as the site is very exposed to the sun.
In the time I was there, I barely scratched the surface of Pompeii — and I filled a whole day! One day, I’d love to go back and visit all the buildings I missed. But then again, I’m a history geek and could spend days upon days among ruins. If you don’t live and breathe history as I do, one day would be enough to see the highlights.
Make sure you move away from the city center to see some of the lesser-known and less crowded sites. Walking among the ruins is an eerie but beautiful feeling.
Plan your trip to Europe like a pro
Get all my best Europe travel tips as well as free planning guides sent straight to you and see more of the country for less!

Book Your Trip to Italy: Logistical Tips and Tricks
Book Your Flight
Use Skyscanner to find a cheap flight. They are my favorite search engine because they search websites and airlines around the globe so you always know no stone is left unturned!
Book Your Accommodation
You can book your hostel with Hostelworld as they have the biggest inventory and best deals. If you want to stay somewhere other than a hostel, use Booking.com as they consistently return the cheapest rates for guesthouses and cheap hotels.
If you’re looking for a place to stay, check out Agorà Hostel Deluxe.
Don’t Forget Travel Insurance
Travel insurance will protect you against illness, injury, theft, and cancellations. It’s comprehensive protection in case anything goes wrong. I never go on a trip without it as I’ve had to use it many times in the past. My favorite companies that offer the best service and value are:
Looking for the Best Companies to Save Money With?
Check out my resource page for the best companies to use when you travel. I list all the ones I use to save money when I’m on the road. They will save you money when you travel too.
Need a guide?
Take Walks runs my favorite paid tour. Their Complete Pompeii Experience: Skip the Line Tour & Archaeologist Guide will give you an incredible behind-the-scenes and historical Pompeii experience. If you want a tour, take that one!
Want More Information on Italy?
Be sure to visit my robust destination guide on Italy for even more planning tips!