We all want to travel more. Whether a vacation, career break, gap year trip, there’s some trip we are always thinking about. One of the things that keeps a lot of people from achieving that dream is money.
Saving money to travel can be an uphill battle but travel is not as expensive as you think. There are plenty of ways to save money on the road and lower your costs.
And you don’t have to be a backpacker to travel cheap. There are tons of ways to travel on a budget without sacrificing comfort.
One of the easiest ways to travel on a budget is to just go somewhere inexpensive. There are plenty of amazing places to visit that are still quite affordable. In fact, many of them are actually cheaper than day-to-day life back home!
And, while there are dozens upon dozens of inexpensive countries you can visit, in this post, I am going to share my favorite that I think are the best!
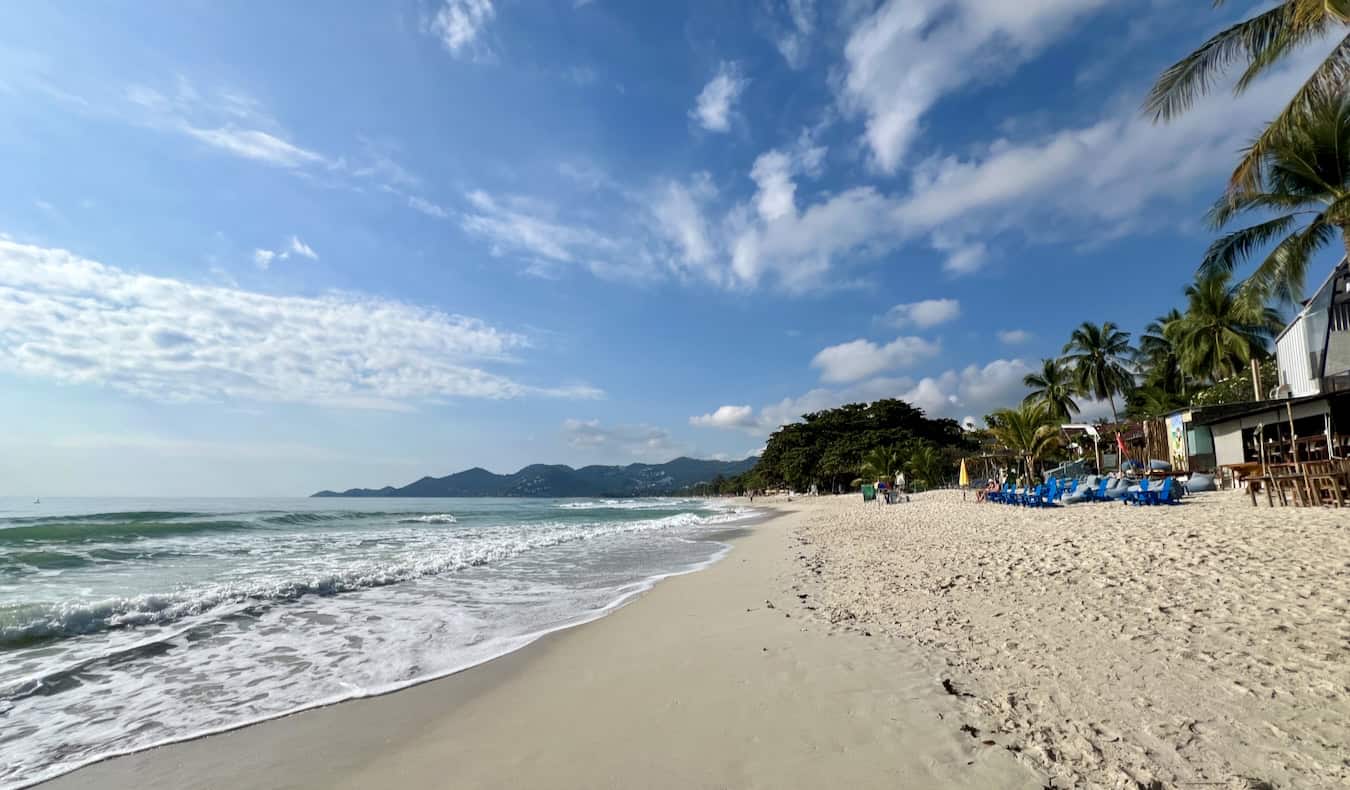
1. Thailand
Despite being a hugely popular tourist destination, Thailand has remained relatively cheap.
Outside of the popular island destinations, it’s easy to visit the country for around $50 USD per day if you’re backpacking. Hostel dorms cost $10 USD per night, you can eat on less than $10 USD per day if you stick to delicious street food markets, drinks are just a couple bucks each, and tours and activities don’t cost much more than $20-30 USD.
If you’re not looking to backpack around Thailand, you can still visit the country on a budget if you use points for hotels, stick to budget accommodation, continue to stick to street food vendors and public transportation. If you do that, you’d spend around $100 USD per day.
I’ll be honest: I was late to the game on Mexico. It wasn’t until a few years ago that I finally took the time out to explore the country. The country is just incredible. Mayan ruins, stunning beaches, lush jungles, world-class food, picturesque cenotes, mezcal….I love the country.
The trick to having an affordable trip to Mexico is to get out of the tourist regions. Leave Tulum (it’s the worst place in the world anyway), Playa del Carmen, Cabo San Lucas, Cancun, and all the other resort towns filled with American hotel brands and tourists.
Hostels cost between $10-15 USD per night, street tacos are $1 USD or less, other meals will set you back $5-10 USD, beer is around $1-2 USD, and even big-ticket sites like Chichen Itza are just $5-15 USD.
If you aren’t looking to backpack, you can still visit affordably. On a midrange budget of about $80, you can stay in a private hostel room or cheap hotel, eat out at restaurants serving cheap traditional cuisine, visit more attractions, enjoy a few drinks, and take the occasional taxi to get around.
For more information on how to plan a trip there, check out my guide to visiting Mexico.
3. Portugal
Portugal is not only one of my favorite countries in Europe but it’s one of the cheapest eurozone countries as well. Offering charming cities, stunning coastlines, and beautiful weather, this country has become much more popular in recent years. There’s a growing expat scene as well as a lively digital nomad community.
You can get by here for around $50 USD per day without missing out on the amazing food, fun activities, and delicious wine. On this budget, you’ll be staying in a hostel dorm room, cooking all of your meals, limiting your drinking, using public transportation to get around, and sticking to free activities like free walking tours and enjoying the beaches.
While prices are a bit higher in popular Lisbon, you can easily offset that by visiting in the shoulder season or in the winter.
Central America is one of the cheapest regions of the world, with pretty much every country here an affordable place to visit. Because of that, I’m including the whole region!
In countries like El Salvador, Honduras, Nicaragua, and Guatemala you’ll find the best deals, with budget hotels costing around $15 USD, meals for $3-4 USD, bus journeys for the same price, and beer for less than a dollar.
In the “expensive” countries in the region (Belize, Panama, Costa Rica), you’ll be spending closer to $50 USD per day, though you won’t be wanting for anything as street food costs under $5 USD and hostel dorms are $8-12 USD.
Hungary is an amazing, affordable country, the highlight of which is Budapest. I love Budapest. It’s a beautiful, historic city.
Hostels in Budapest start at $10 USD per night. Meals at the markets or at the plethora of kebab and sandwich shops are around $5-10 USD. Trains and buses were just a few dollars while a beer is less than $2 USD.
Unless you are going out for a big night of drinking or paying for lots of attractions and activities, $50 USD will give you plenty of room to enjoy the sites and sounds of the country. And the Budapest is a great alternative to more popular destinations like Prague or Vienna, offering just as much fun for a fraction of the cost.
Home to the epic Wonder of the World, Machu Picchu, Peru is one of the most popular countries in South America. I absolutely loved my trip there. It’s a country I would go back to over and over again.
While hiking the Inca Trail will definitely burst your budget, everyday life in Peru is quite affordable. If you want to backpack Peru, I’d plan for $50–80 USD per day. On this budget, you’d be staying in hostel dorms, eating at typical hole-in-the-wall restaurants and cafés, limiting your drinking, taking public transportation and overnight buses, and doing a few paid activities and tours. If you’re going to party a lot, you’ll be on the higher end of this range.
And, if you do want to do some guided hikes but don’t have the money, try to book last minute. You can usually find amazing deals — including deals for hikes like the Inca Trail. While you might end up spending more than $50 USD per day, those once-in-a-lifetime experiences are worth it.
For more information, check out my guide to visiting Peru.
7. Vietnam
Vietnam is one of the cheapest countries in Southeast Asia. From the stunning views of Sam Mountain and Ha Long Bay to the man-made artistry of the sacred temples and pagodas to the rice terraces and beaches, Vietnam is stunning.
Hostels can be found for as little as $4-5 USD, with many including free breakfast and free beer (during limited hours). Food from street vendors can be found for under $1-2 USD, and buses around the country are incredibly cheap. Even activities here are cheap. The Cu Chi Tunnels (tunnels used by the Viet Cong during the Vietnam war) are just $5 USD to visit while a full day of canyoning is just $20 USD.
No budget travel list would be complete without India. India has always been an inexpensive place to visit, but the steep decline in the Indian rupee in recent years has made the country an even bigger bargain. You can travel well here for very little money, and increasing your budget by just a few dollars can often lead to substantial increases in luxury.
For example, on a budget of $30-45 per day, you can do the typical backpacker thing: guesthouses, cheap food, sleeper trains, and overland buses. In the larger cities of Mumbai, New Delhi, and Bangalore as well as beach destinations like Goa, you can expect to spend around $45-55 per day.
But, if you doubled that, there’s virtually nothing you couldn’t do from private tour guides to three- or four-star hotels to opulent meals to internal flights. The country is generally just really, really cheap.
9. Taiwan
Taiwan is one of the most underrated countries in Asia. It’s super affordable, safe, clean, and has plenty of things to see and do.
You can easily visit Taiwan for $40-50 USD per day as food and accommodation are both super affordable. Hostels start around $10 USD while street food costs just a couple dollars (and is super tasty). There are plenty of markets, lots of hiking, convenient public transportation, and a fun nightlife. No matter what you are interested in, you can find it in Taiwan. You’ll get a lot of value here.
For more information, check out my guide to visiting Taiwan.
***
There are many great destinations in the world that don’t have to cost a fortune. And, if you use points to fly there, you can save even more money. And, even if you aren’t an uber budget traveler and want some more luxury, all the destinations listed here can still provide a lot of luxury on a bargain.
By visiting some of these budget destinations, you’ll be able to stretch your budget and make your trip financially attainable.
How to Travel the World on $75 a Day
My New York Times best-selling book to travel will teach you how to master the art of travel so that you’ll get off save money, always find deals, and have a deeper travel experience. It’s your A to Z planning guide that the BBC called the “bible for budget travelers.”
Book Your Flight Find a cheap flight by using Skyscanner. It’s my favorite search engine because it searches websites and airlines around the globe so you always know no stone is being left unturned.
Book Your Accommodation You can book your hostel with Hostelworld. If you want to stay somewhere other than a hostel, use Booking.com as it consistently returns the cheapest rates for guesthouses and hotels.
Don’t Forget Travel Insurance Travel insurance will protect you against illness, injury, theft, and cancellations. It’s comprehensive protection in case anything goes wrong. I never go on a trip without it as I’ve had to use it many times in the past. My favorite companies that offer the best service and value are:
Want to Travel for Free? Travel credit cards allow you to earn points that can be redeemed for free flights and accommodation — all without any extra spending. Check out my guide to picking the right card and my current favorites to get started and see the latest best deals.
Need a Rental Car? Discover Cars is a budget-friendly international car rental website. No matter where you’re headed, they’ll be able to find the best — and cheapest — rental for your trip!
Need Help Finding Activities for Your Trip? Get Your Guide is a huge online marketplace where you can find cool walking tours, fun excursions, skip-the-line tickets, private guides, and more.
Ready to Book Your Trip? Check out my resource page for the best companies to use when you travel. I list all the ones I use when I travel. They are the best in class and you can’t go wrong using them on your trip.
After a few days camped out in the North Bay of San Francisco, we relocated to the city and four nights gave us ample time to to revisit our old haunts. But there’s one thing we made a priority, and that was taking a Half Moon Bay day trip to Martin’s Beach.
This post was last updated in March 2025.
Getting Around the Bay Area
Having a car in San Francisco can be one big headache: It’s either an arm and a leg to park overnight or you have to comply with very strict street parking rules (including paying attention to street cleaning times, which are always very random), something we learned the hard way living there and racking up too many parking tickets to count.
On our second day in San Francisco, we picked up our rental, which we got for a steal—under $300 for a full week from Enterprise—so we had a car for the duration of our trip.
But we knew we’d be turning it in early to avoid the hassle of driving around in circles waiting for a spot to open up only then having to move it every two hours we were stationary, so we planned our day trip to Half Moon Bay for the first weekday then turned in the car early.
Sadly, there’s no real public transportation method to get you up and down the coast, so if you want to see a bit of Highway 1 (aka the Pacific Coast Highway), you’re going to need a car. If you’re traveling on your own dime and not your company’s, I always recommend renting from a location within a city and not at the airport to save money on those airport taxes.
And let me just say if you are only going to rent a car for one day, make it a weekday. Despite the sunny, relatively warm weather, our beach day in North California was blissfully empty. There was literally nobody there.
Cruising Down Highway 1
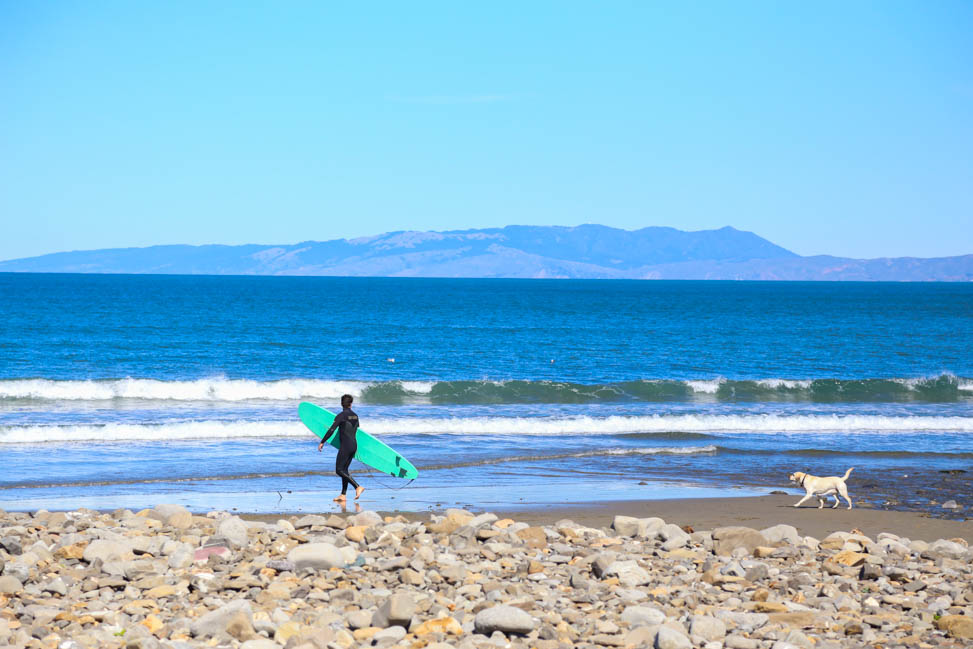
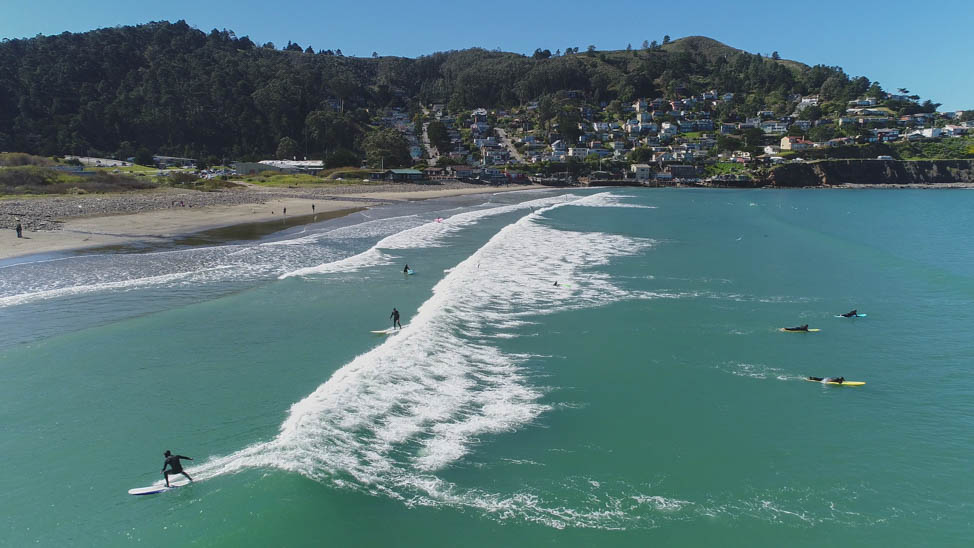
Our first house together in the Bay Area was in South San Francisco, meaning Pacifica was just over the hill. SVV surfed there often, and my Bikram studio was located there, as well, so we popped down to the crescent-shaped Pacifica State Beach en route to Half Moon Bay to snap some photos.
Despite the sunny day, it was cold out. I was bundled up in a long-sleeved shirt, a vest and a sweater on top, and yet these surfers were out there in the 60-degree water in just a seven-millimeter wetsuit. Further proof I could never be a surfer.
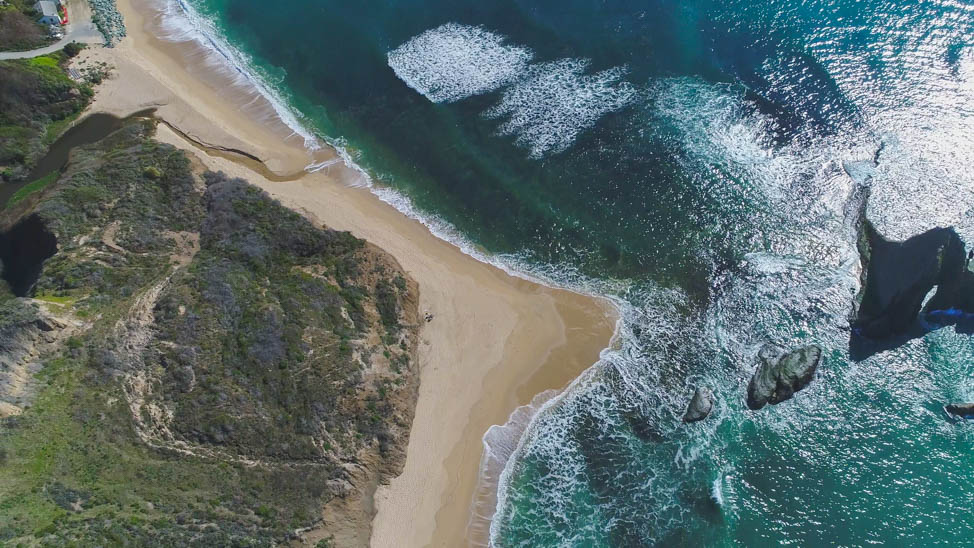
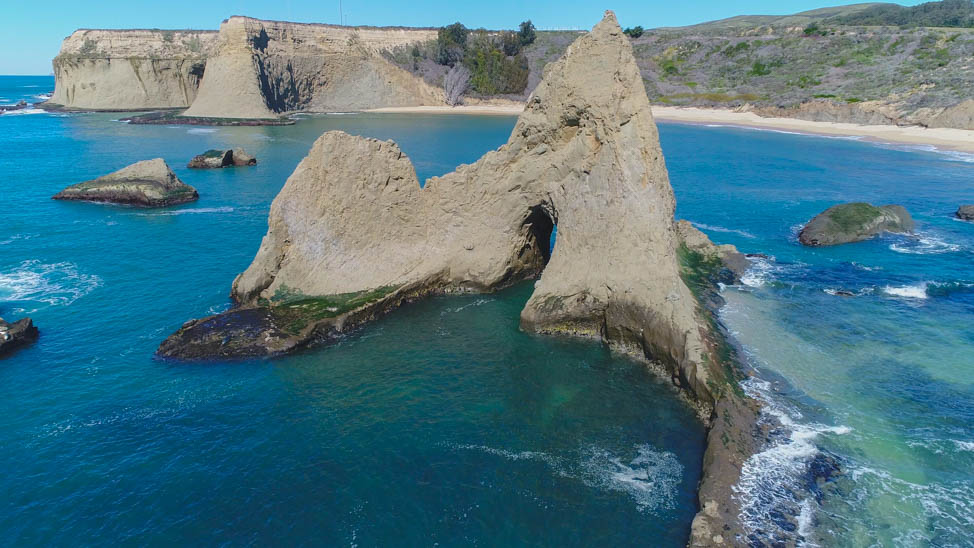
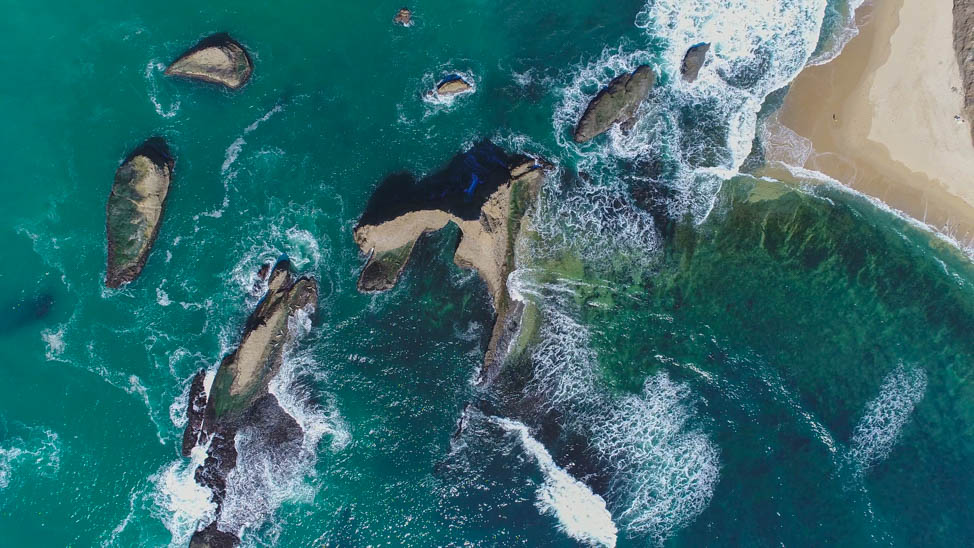
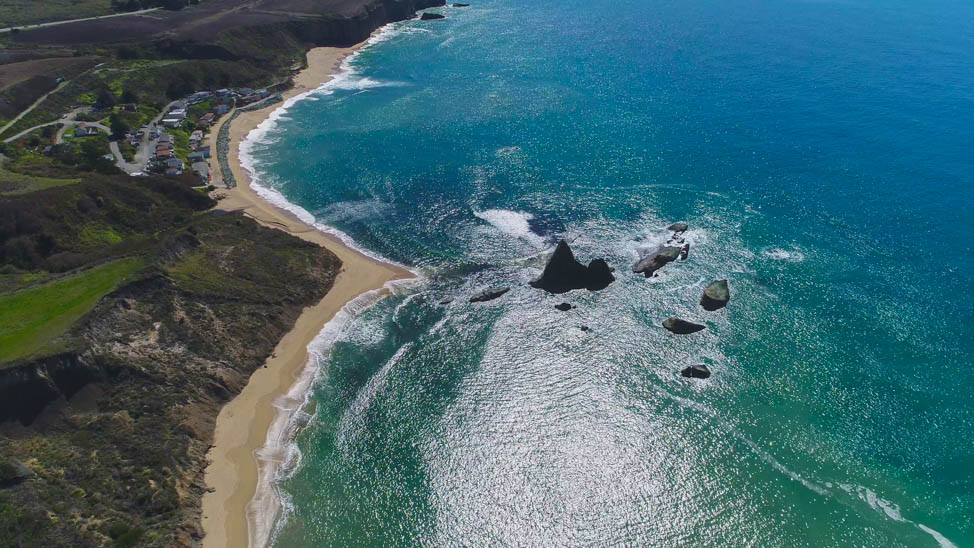
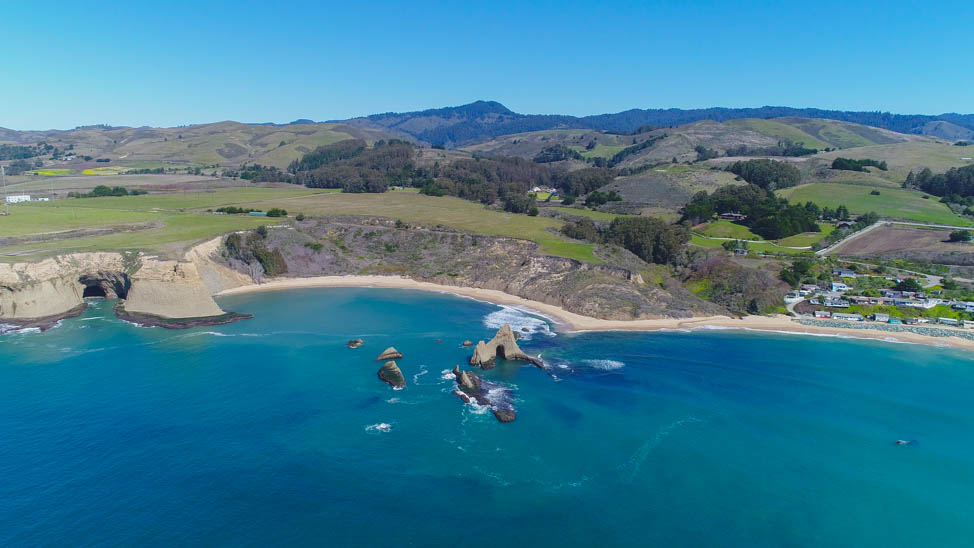
We didn’t stay long (see: freezing outside!) and, from there, headed further south to the famed Mavericks and the town of Half Moon Bay. This was always—and still is—our favorite part of the Bay Area, and you can see why from this little video of our drone footage I put together.
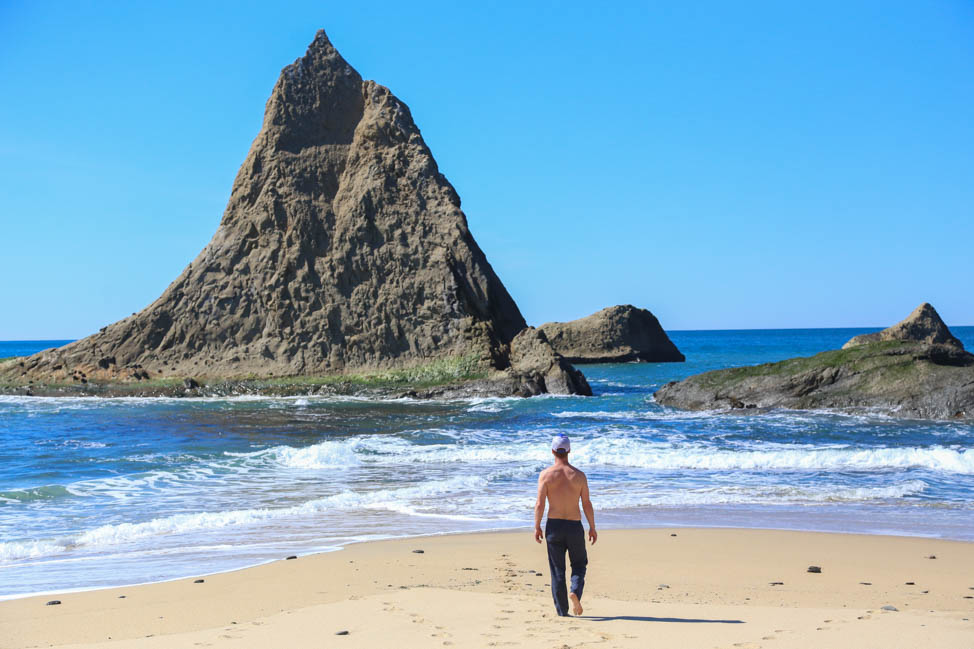
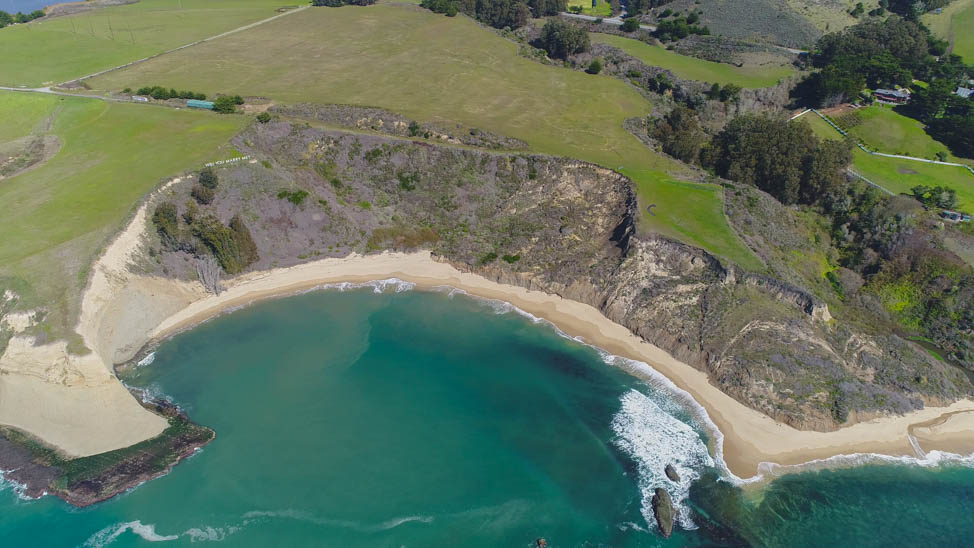
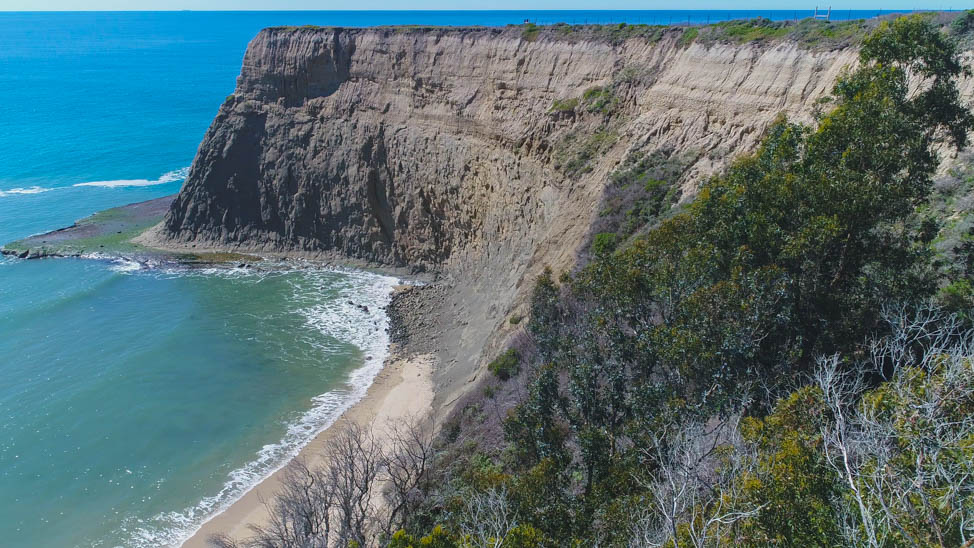
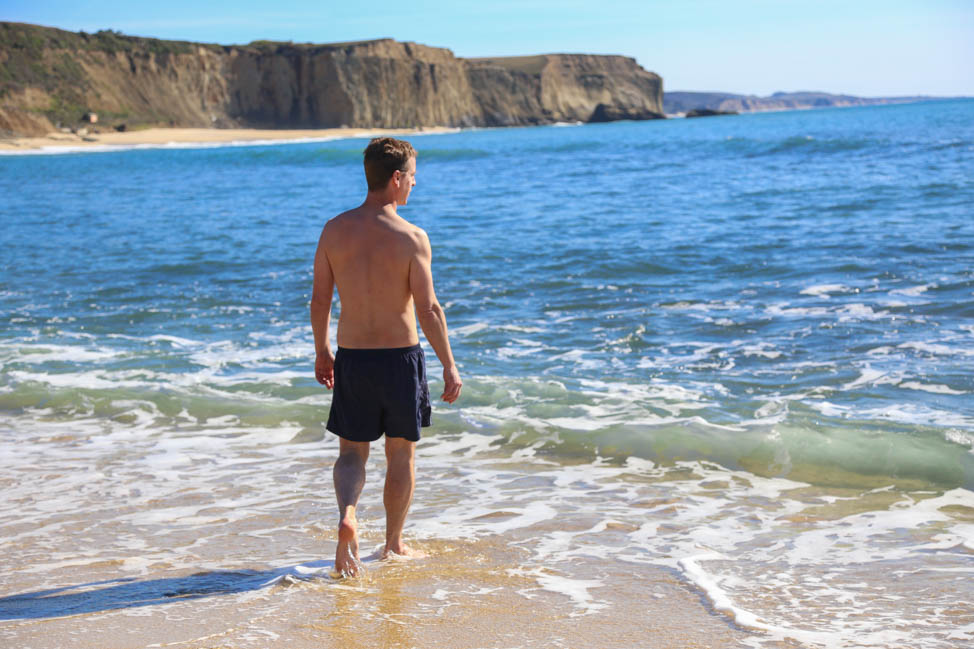
We spent a glorious four hours on the lesser-known Martin’s Beach, which was quite literally vacant until we arrived. How that can still happen in a state with nearly 40 million residents and even more tourists is beyond me.
This is the exact spot we were the moment my brother-in-law texted that my niece Charlotte was born at 3:07pm, and I’ll forever cherish that despite the fact that no act of God could get us to convince the airlines to put us on an earlier flight home to meet her as she made her entry into the world.
It’s an interesting thing, the Pacific Ocean. If you gave me the choice, nine times out of 10, I would pick the balmy waters of the Gulf, warm enough to swim in 75 percent of the time and devoid of great white sharks that just feel as if they’re lurking behind every seal-laden rock.
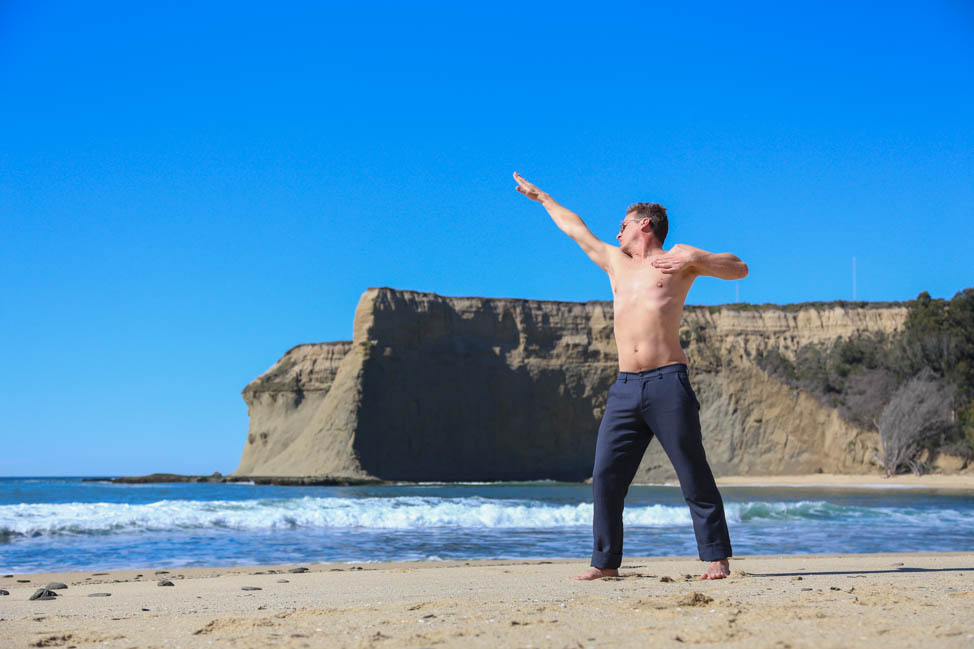
But I see the appeal of the Pacific, I do. SVV always says: “The Gulf is tame and predictable—unless you count hurricanes. The Pacific Ocean is alive, breathing and will smack you in the face if you turn your back on it. There’s something exciting about that.”
“There’s a reason I would go surfing six days a week after working on my feet all day. It’s cleansing and invigorating. It’s constantly being churned. It’s full of life on a level that’s just not seen anywhere with warm water. That cold water breathes energy into the environment, and you can’t ignore it when you’re in the ocean.”
He swam laps in his beloved Pacific despite it never getting above 65 out that day while I stayed bundled up on the shore of Martin’s Beach.
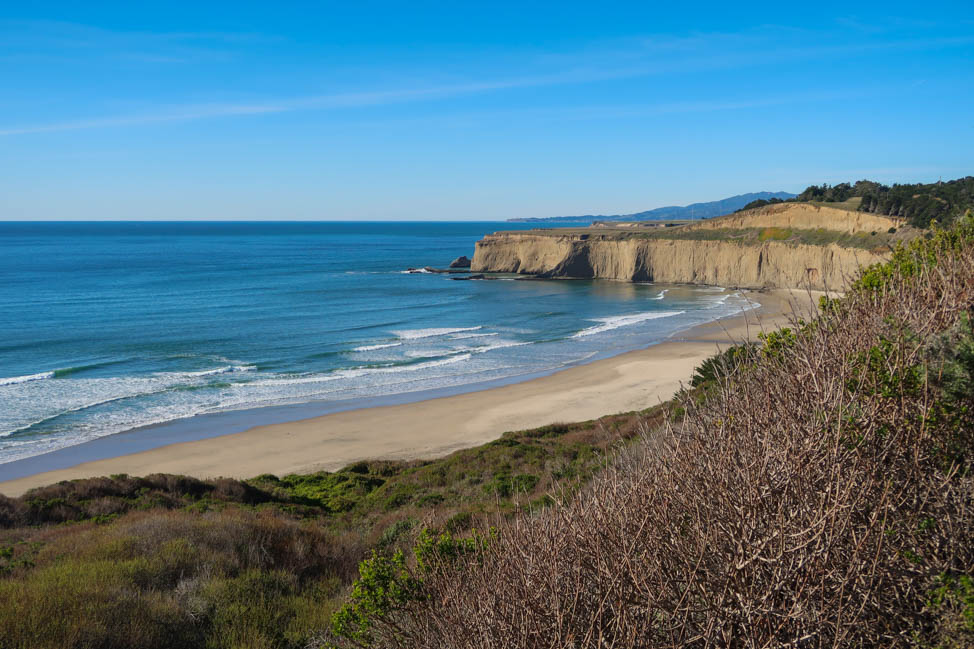
After we’d soaked up all the sun our pallid winter skin could take, we headed back to the town of Half Moon Bay, but not before making an impromptu stop in the mustard fields that flanked the sea cliffs. You think it’s the ocean that gives all of Northern California its color? You haven’t seen the half of it.
We concluded our day trip with a stop at the local brewery and both agreed that while we miss the easy access to places like Half Moon Bay, we don’t miss the harsh realities of day-to-day life in San Francisco.
For those of you also making the journey, if you’re looking for the most perfect day trip from San Francisco, you can never go wrong with Half Moon Bay and the secret Martin’s Beach. Though it appears to be private, it is open to the public—at least for the time being.
Planning a California vacation? I have plenty of added ideas here:
Imagine this. You’re out on a camping trip with the family, the stars are out, and everything’s perfect, until your gear starts dying all at once.
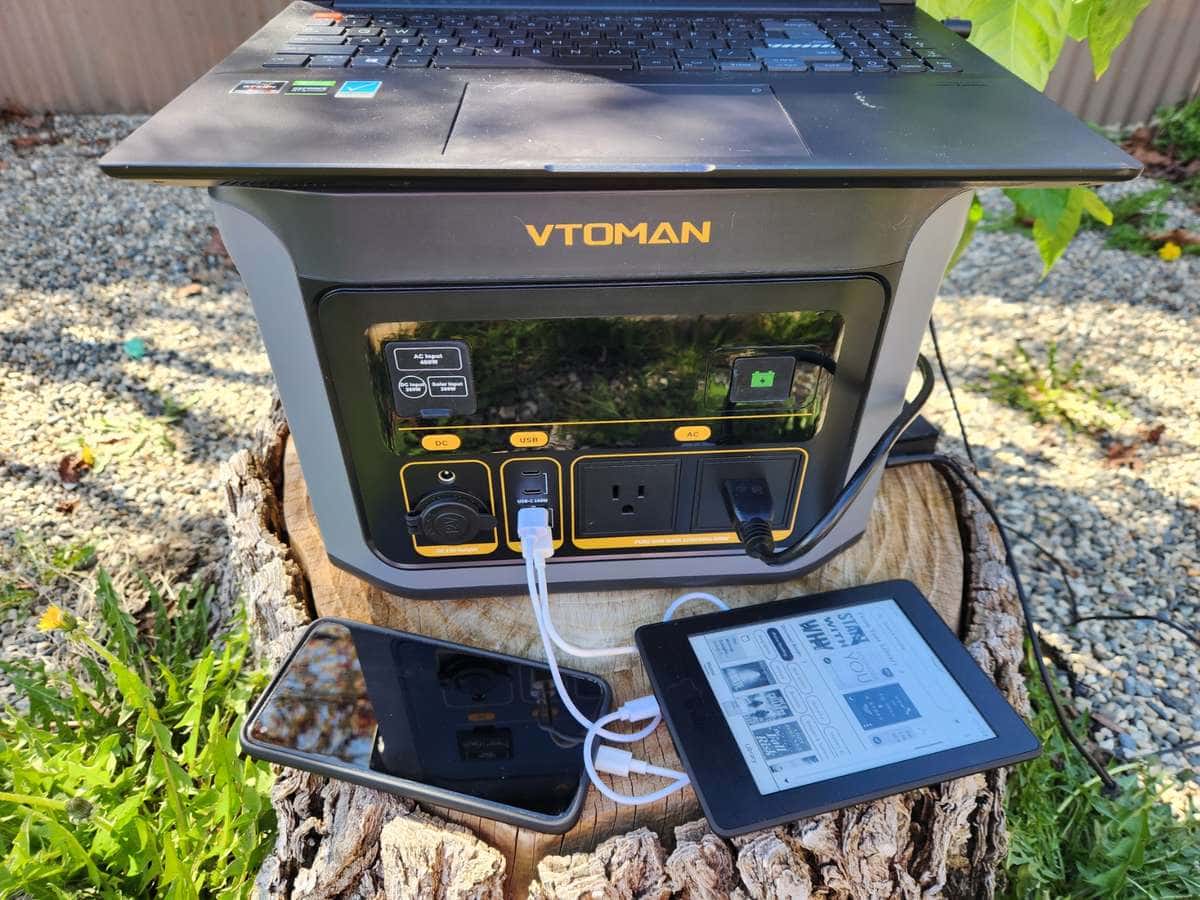
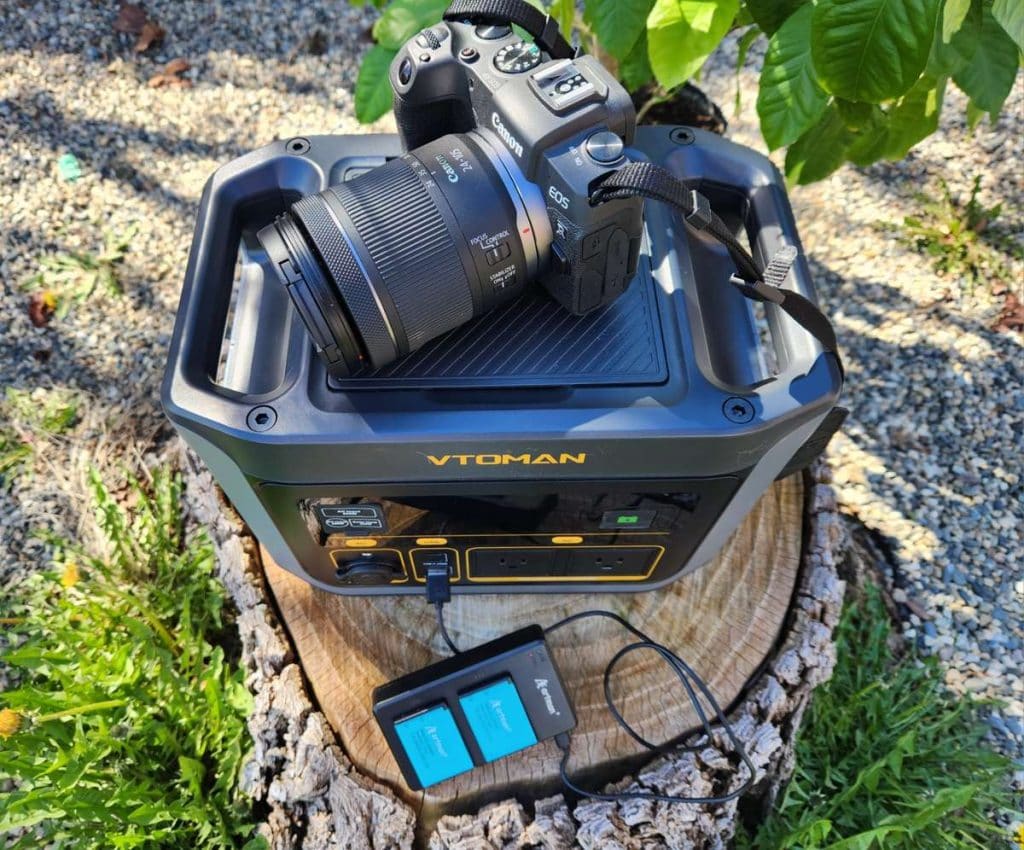
The phones are down to a sliver of battery, the led lights you hung around your campsite are flickering, your battery powered lantern is almost dead and that trusty little tent fan is barely spinning. That means no new pictures in the morning, no rocking music playlist in the afternoon and here comes the overnight condensation and early morning boil in your tent. If you didn’t pack a decent power station, you’d be out of luck. However, if you had the VTOMAN FlashSpeed 600 in the car, you’d be just fine.
Here’s what surprised us most. For something that only weighs about 16 pounds, this thing can power way more than we expected. Thanks to VTOMAN’s V-Beyond technology, the FlashSpeed 600 can handle gear that normally needs more than 600 watts, and even brief surges up to 1200W.
Surprisingly Mighty for Its Small Size
It’s built with travelers and off-grid explorers in mind. Compact, lightweight, and packed with useful features like fast USB-C charging and support for solar panels. Whether you’re car camping, RVing, working remotely, or prepping for emergencies, it’s the kind of tool you end up using more than you thought you would.
We first tried the larger VTOMAN FlashSpeed 1500 a few years ago and honestly, it impressed us. Solid build, plenty of juice, and for the features you get, it’s a really great value. So when we got our hands on the smaller FlashSpeed 600, we were curious to see how it stacked up.
1. A full-size blender Yup, we sometimes bring a blender camping. It’s a bit extra, but nothing beats smoothies or frozen drinks after a long hike. The FlashSpeed 600 handled it like a champ, no sputtering, no drama.
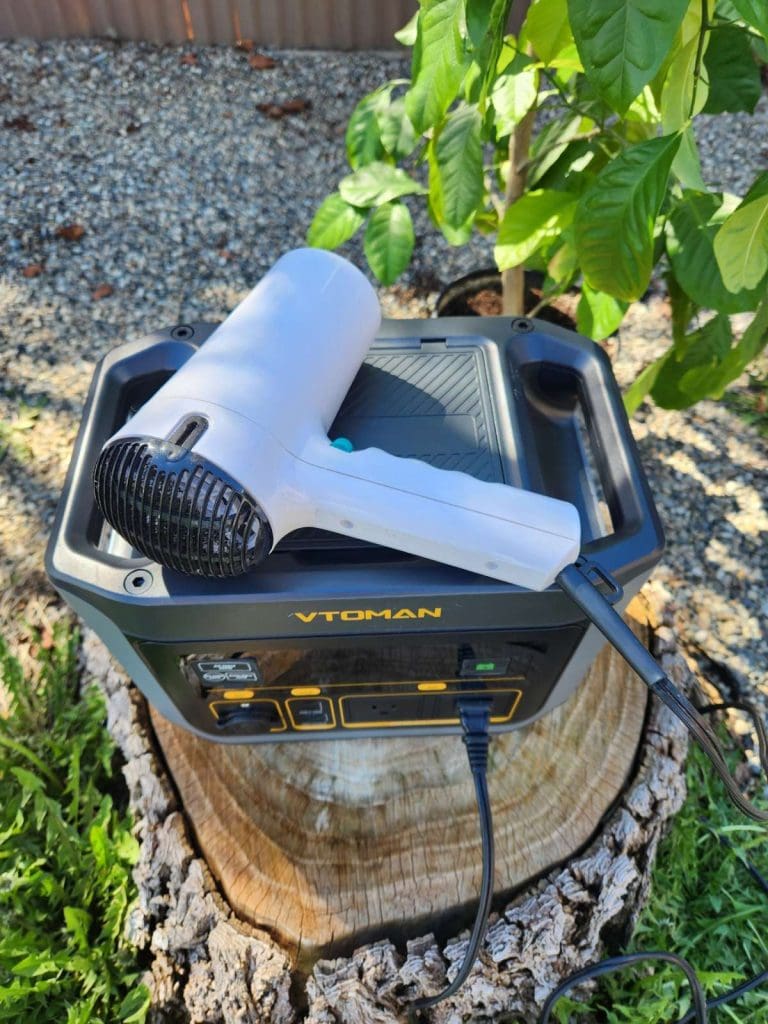
2. A Travel Sized Hairdryer This one shocked us. A compact hairdryer actually worked, as long as we used it on the lower setting without heat and didn’t go for full salon mode. It’s also great for drying wet socks or gloves in a pinch.
3. An electric blanket Cold night? No problem. Just plug in a low-wattage electric blanket, and stay warm for hours. Perfect for when your sleeping bag isn’t quite enough and the temperature drops fast.
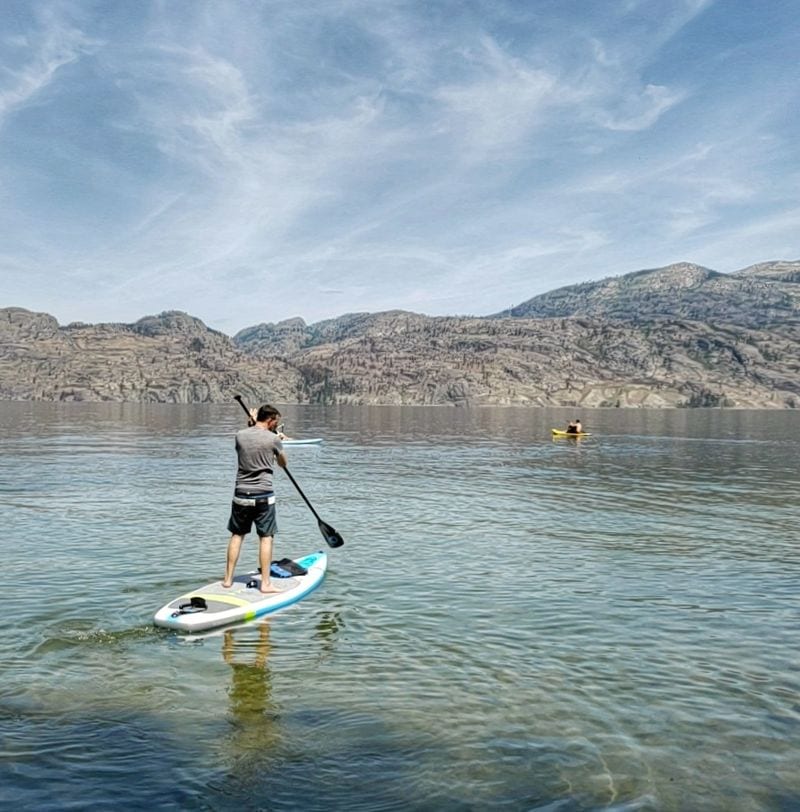
4. An Electric Air Pump for Paddleboards or Inflatables If you’ve ever manually pumped up a paddleboard, you know it’s a workout. Plug in an electric air pump (regular electrical plug or a 12v car style plug) and let the VTOMAN do the heavy lifting. It will handle ours with ease and with plenty of power left for other gear.
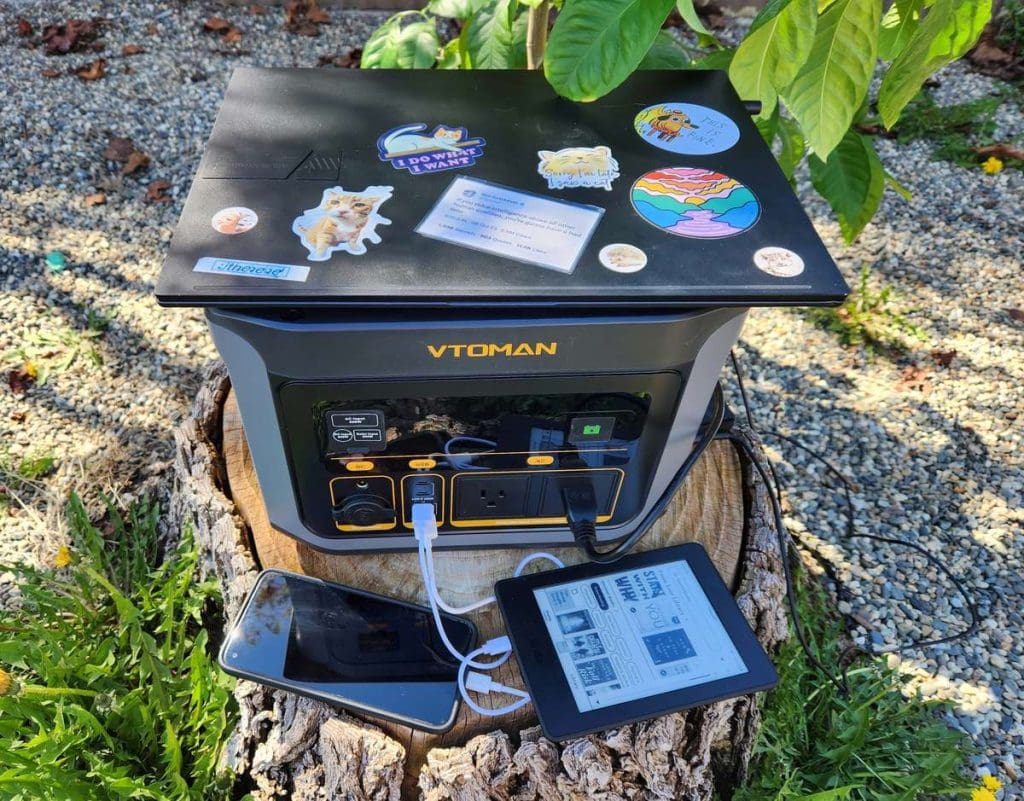
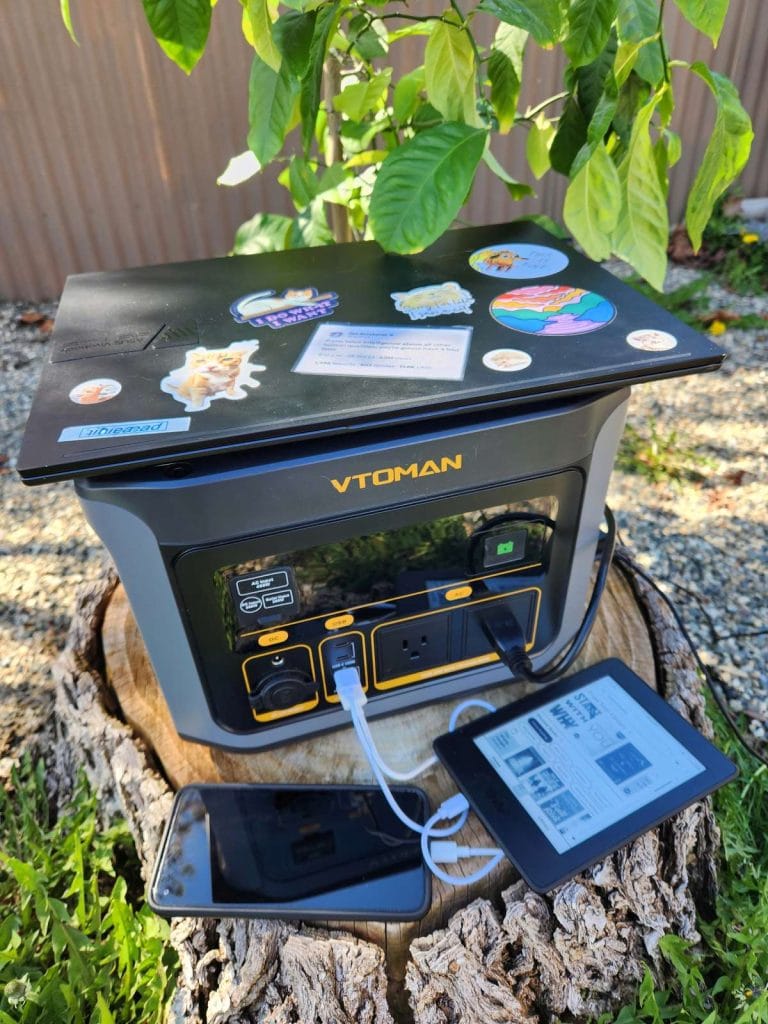
5. A laptop, Kindle, and phone all at once With 8 outlets, including fast-charging USB-C and QC3.0 USB-A ports, this thing is built for multitasking. We had the whole family’s tech charging at the same time, and no one had to fight for a plug.
6. LED lights and a projector for movie night One of our favorite camping traditions, hanging a white sheet and watching a movie under the stars. The FlashSpeed 600 will power LED string lights and a compact projector with zero issues. Definitely one of those moments that makes you forget you’re in the woods.
7. A drone battery charger If you film or photograph while traveling, this is gold. We can recharge our drone batteries right at the campsite and not miss a single shot of the mountain views.
8. A portable fan or heater This can be a lifesaver in a tent. A charged fan keeps air moving, helps with condensation, and makes sleeping way more comfortable during a warm night. We’ve also used our power station to power a diesel tent heater and it lasted us for multiple nights that were well below freezing (wasn’t cold in the tent though, those heaters are crazy warm.)
9. A small air purifier In severely dusty campsites or during wildfire season, having cleaner air in an RV can make a noticeable difference. While they don’t take much energy, it’s amazing how much they can filter in a few hours.
10. A camera battery charger When you’re off-grid for days and still want to document your trip, this is key. We ran our camera battery charger multiple times without draining the FlashSpeed much at all.
11. Bonus! Power tool batteries If you own an RV or work on projects outdoors often, you know that sometimes having a bit of remote electrical power is helpful. Whether running a cordless drill, inflating tires and inflatables or running a cordless saw or sander, those power tool batteries don’t charge themselves and never last as long as you wish they did.
To give you an idea of the size of the VTOMAN Flashspeed 600 in relation, it can charge over a dozen typical 18 volt power tool batteries. Considering our lantern, fan and inflator all use an 18v power tool battery, you know we bring our charger with us everywhere we go and the VTOMAN 600 keeps them all charged up for the weekend.
Why This Works
Here’s the secret sauce, VTOMAN’s V-Beyond technology. It’s what lets this power station push beyond the 600W mark for short bursts, powering gear that would usually trip up other portable stations in this size range. Combine that with LiFePO4 battery cells, a rugged build, and VTOMAN’s LIFEBMS safety system, and you’ve got serious reliability in a small, travel-ready package.
A Few Quick Tips
Try to run only one high-power device at a time, especially if you’re stretching its wattage.
Keep an eye on your battery level. The LCD screen is easy to read and gives you time estimates.
Add a solar panel or an extra VTOMAN battery if you’re out for longer trips. An extra batter can extend the 499Wh capacity all the way to 2047Wh and a solar panel (max 200W) can top the VTOMAN up every day in a few hours.
Unlike a normal gas/propane/diesel generator, you can use a portable power station like the VTOMAN at all hours regardless of where you’re camping and they’re so quiet you can even leave them plugged in directly inside your RV or right next to your tent.
Final Thoughts
The VTOMAN FlashSpeed 600 has officially earned a spot in our car camping kit. It’s compact, powerful, and just plain useful. Whether you’re going off-grid or just want a backup at home, it handles more than you’d expect without the price tag of bigger stations.
You can check it out here if you’re curious. And if you’ve found a creative or surprising way to use your power station, we’d love to hear about it. Drop a comment or tag us, we’re always up for new ideas.
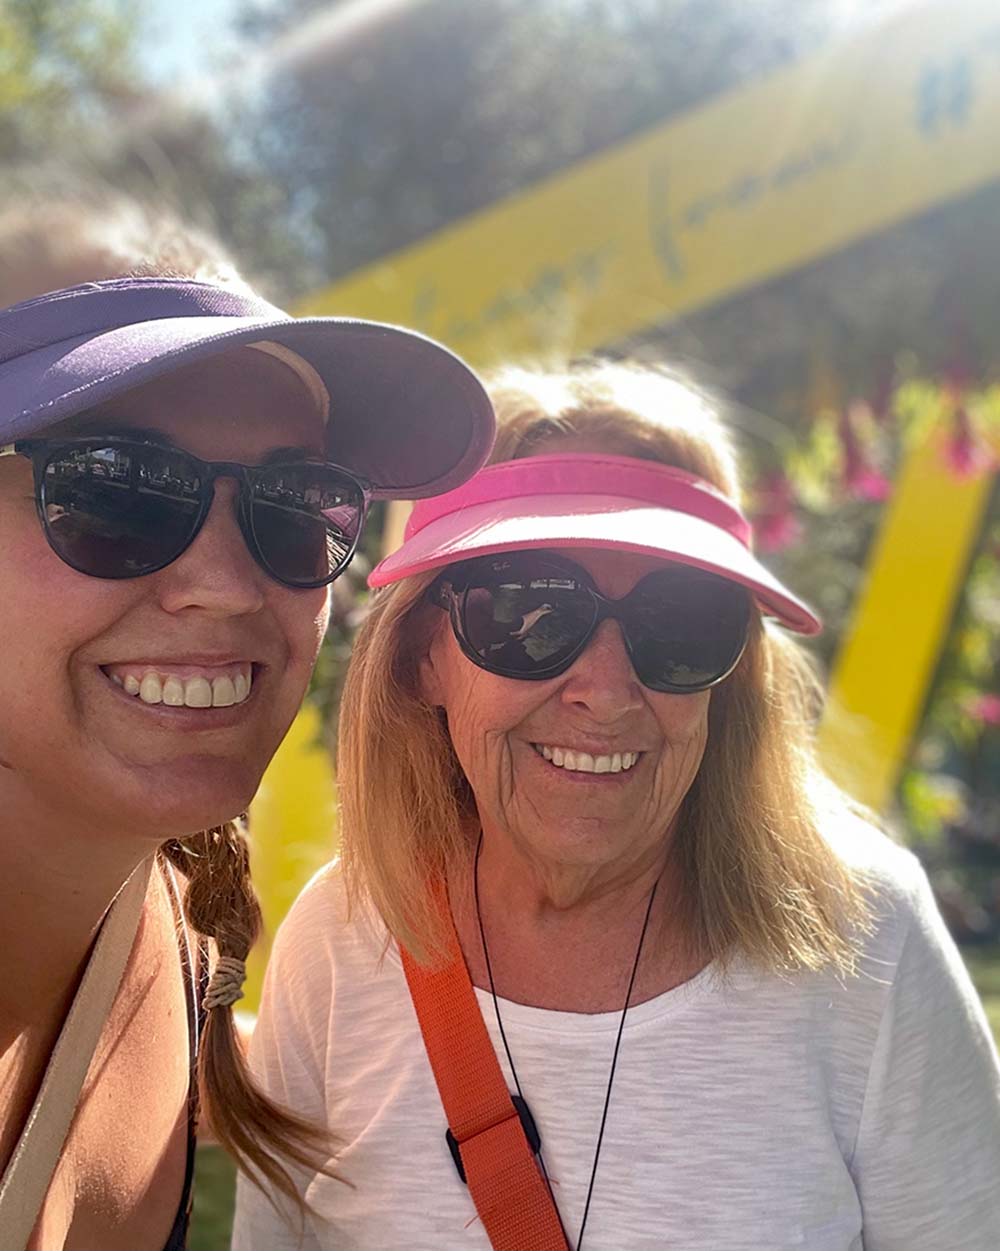
When my mom and I were planning a trip to Indian Wells, one of the major tennis tournaments, a couple years back, I had so many questions. What sessions should we buy? Where should we stay? And how many days on site is enough? This is California, after all; we’ll likely want to see more of the Palm Springs area beyond tennis, right?
This post was last updated in March 2025.
And with the latest BNP Paribas Open underway from now through March 16, let’s talk all thinks Indian Wells.
About the “fifth Slam”
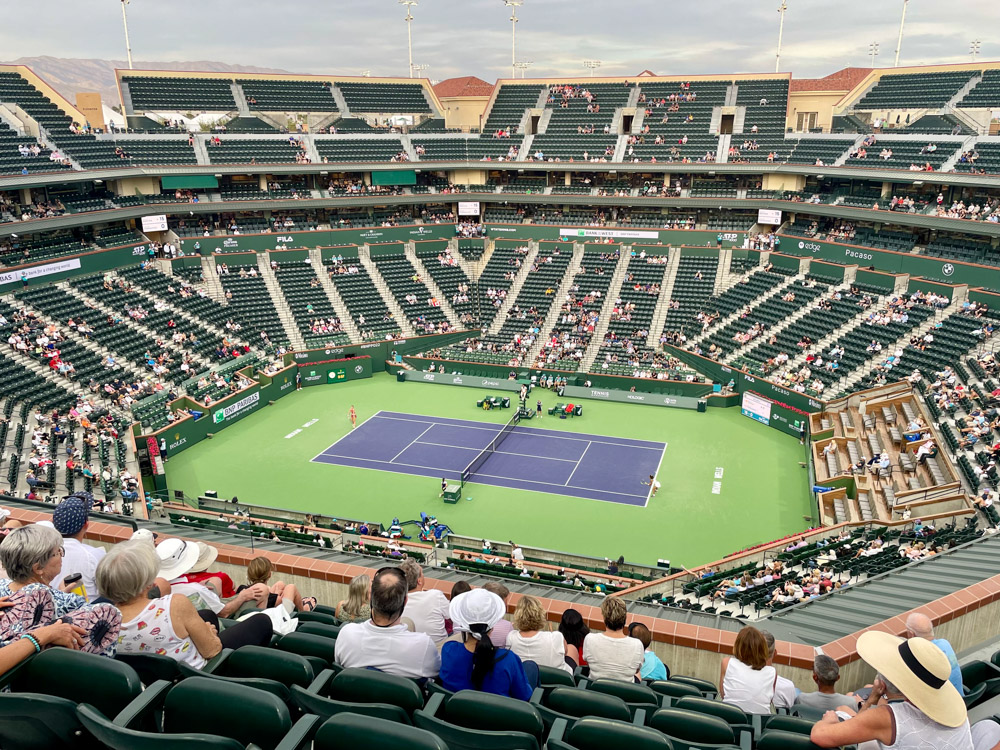
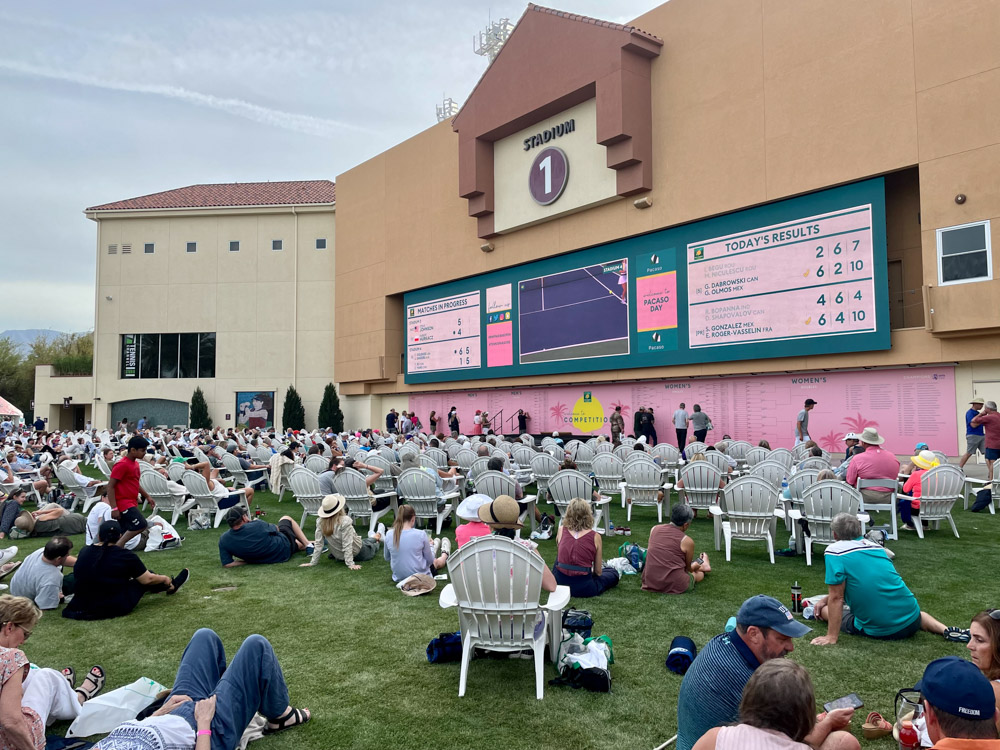
Though Indian Wells is not one of the four grand slams—which, in order, are the Australian Open, Roland-Garros, Wimbledon and the U.S. Open—it’s one of the biggest master events. The fifth-most attended tournament after the slams boasts the second-largest permanent tennis stadium in the world after Arthur Ashe in New York, and all your favorite pro tennis players will be there assuming they aren’t sidelined with an injury.
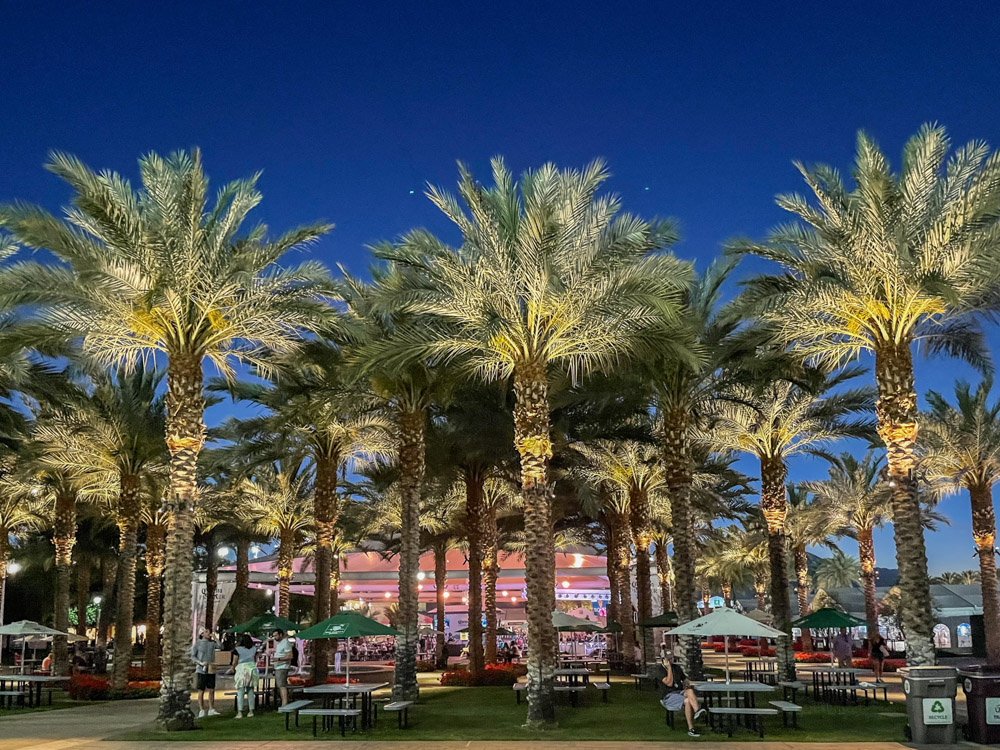
In fact, it’s a mandatory WTA 1000 and ATP Masters 1000 event, and the player field includes the top 75 male and female players in the world, as well as wild cards and qualifiers. It’s also in a stunning setting referred to as “the Garden,” sheltered between desert and mountains.
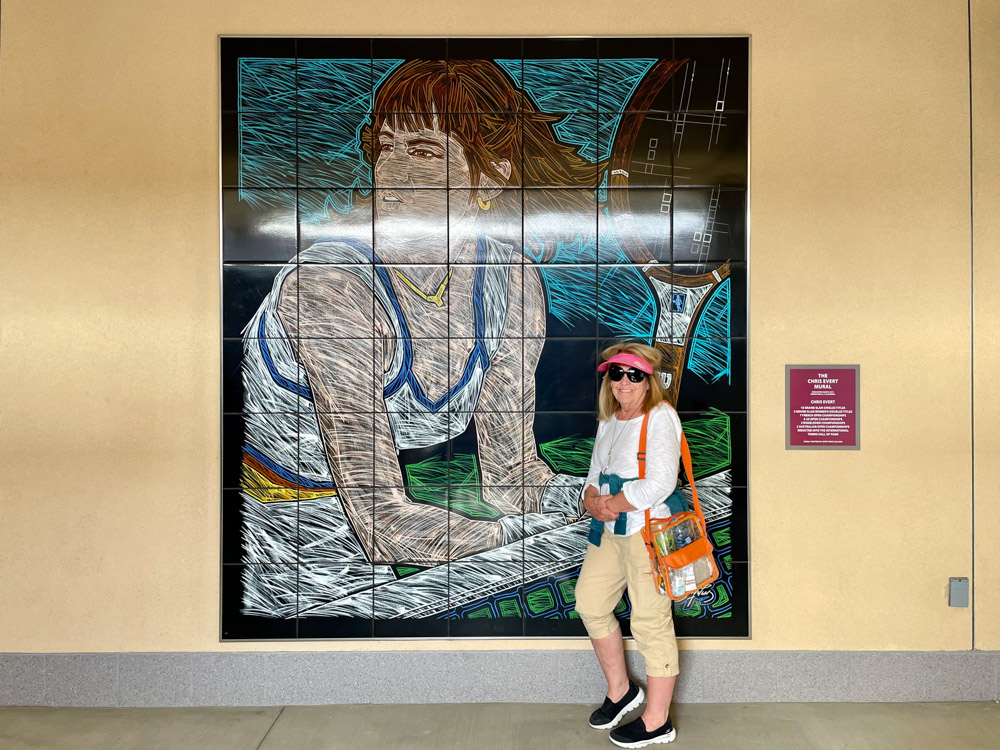
As a former tennis player on the USTA circuit and a big fan in my adult years, I took copious notes during our five days at BNP Paribas Open in Indian Wells in hopes it’s easier for you to plan your own trip to one of the most prestigious tournaments in pro tennis. Even if you’re a fair-weather fan, you’ll love this event, I promise you.
How to get to Indian Wells
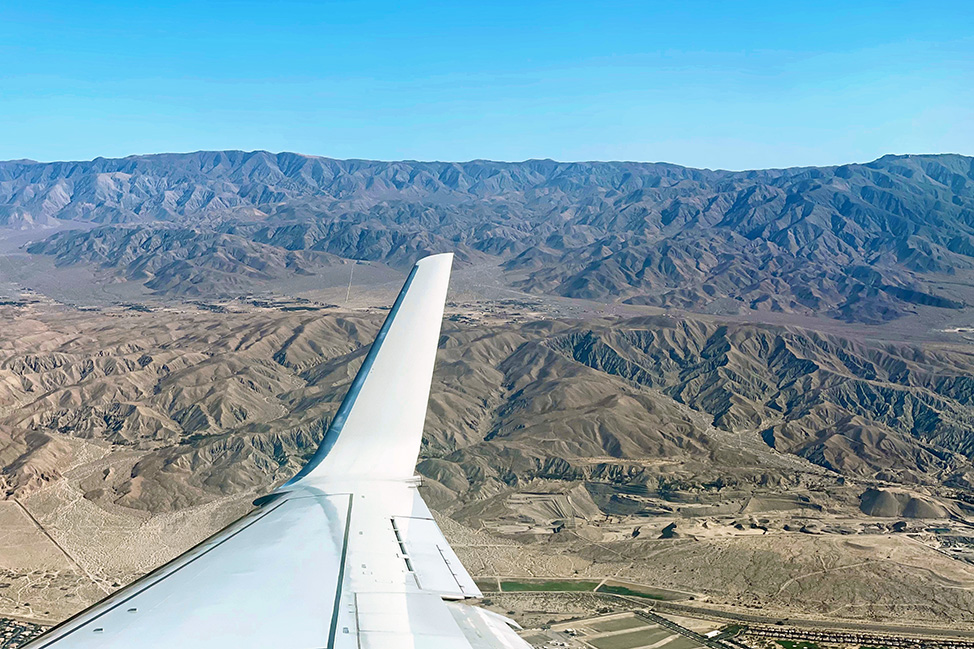
First things first: How do you even get to Indian Wells? Palm Springs International Airport (PSP) is just 15 miles west of the tennis garden and services many direct flights a day. I’ve flown into Palm Springs via Dallas on American Airlines, and I’ve also flown direct from Nashville to Palm Springs on Allegiant Airlines. If you’re flying internationally or don’t have an easy connection to PSP, you can arrive via any of the LA-area airports like LAX, rent a car and drive the two hours to the desert. In our case, it was cheaper to fly into Palm Springs.
You absolutely will need a rental car when you arrive, especially for getting out to and around Indian Wells. The desert area of Southern California is very spread out, and while ride-sharing does exist out there, it’s not the most reliable mode of transportation in the area. On my last two visits to Palm Springs—March of the two past years—I’ve rented a car and only taken an Uber if parking was going to be an issue.
Also worth noting is the Indian Wells tennis tournament falls during prime Spring Break season every year, so you’ll also be competing with families looking for a little late-winter sun. In other words, book your rental car as far out as you can when planning a future Palm Springs vacation, a lesson we learned the hard way when I spaced on booking a car and could not find a single vehicle for rent three weeks out. You can check rental car prices and availability for Expedia here or Discover Cars here.
Where to stay for Indian Wells
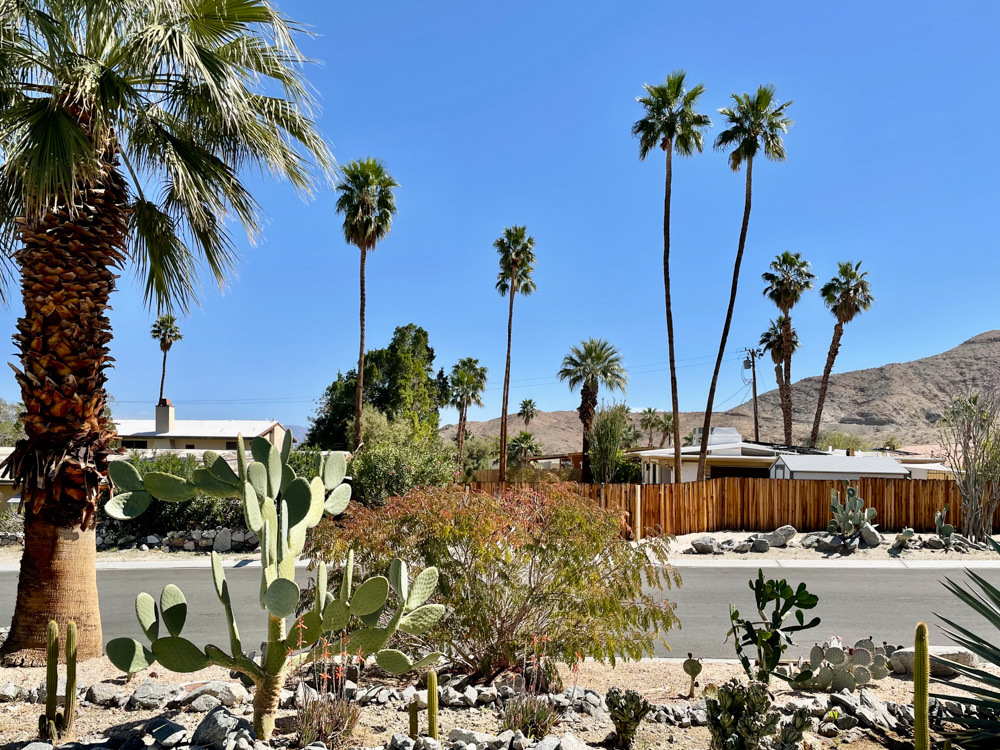
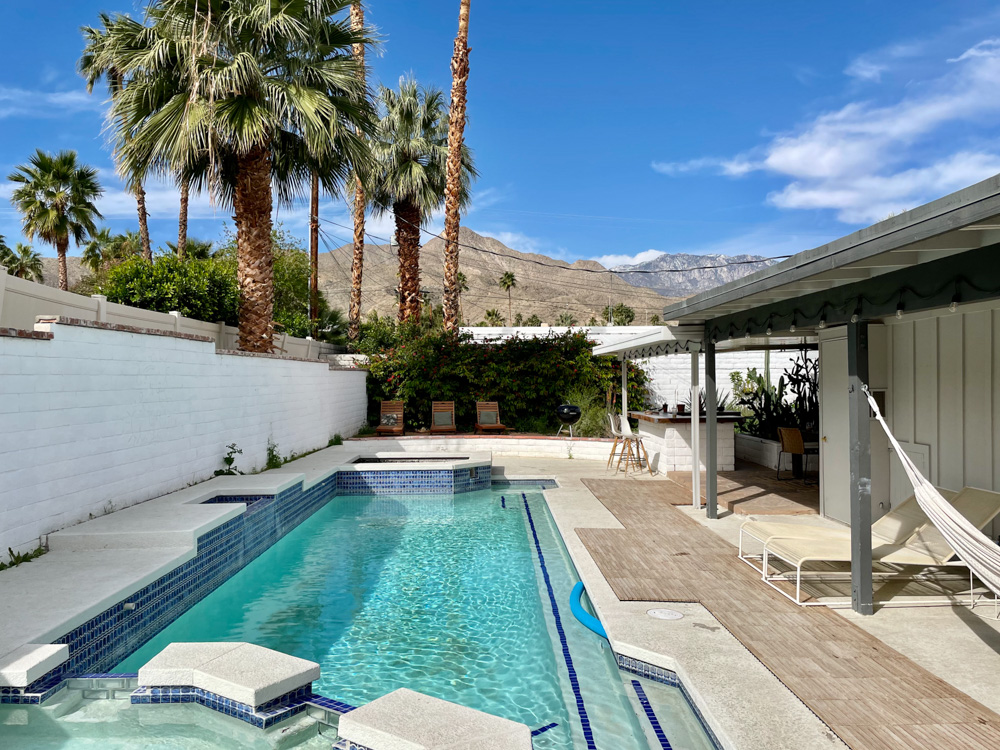
The Greater Palm Springs area spans nine cities—Palm Springs, Desert Hot Springs, Cathedral City, Rancho Mirage, Palm Desert, Indian Wells, La Quinta, Indio and Coachella—and it’s all positively stunning desert terrain, so it can be hard to figure out where to stay for Indian Wells. If I were going to the area simply to enjoy the food, dining and art, I would stay in Palm Springs, as we’ve done several times before.
However, traveling to Palm Springs for tennis is a different ball game. If you’re a mega-fan and plan to be on site from start time till well after dark each day, you’ll want to stay as close to the grounds as possible: in Indian Wells, Rancho Mirage or Indio. For our own Indian Wells experience last year, Mom and I booked a vacation rental in Cathedral City with a pool. It was great to kick it by the pool each morning before heading to the tennis center grounds each afternoon.
That 25-minute drive to and from Indian Wells, plus parking then walking to the courts, at the start and finish of each day got old quickly, though. If we were to do it again, I’d book much further out and snag a rental house in Indian Wells instead. It’s a good strategy for groups, too; if some individuals don’t want to stay as long as you do, they can easily Uber or Lyft back to your hotel or rental.
Hotels and rental houses can be pricey during the BNP Paribas Open, and we booked our rental about six months before when inventory was still high. Here are a few hotels in Indian Wells and rentals near the tennis garden where you might start with your lodging search:
How to pick seats at Indian Wells
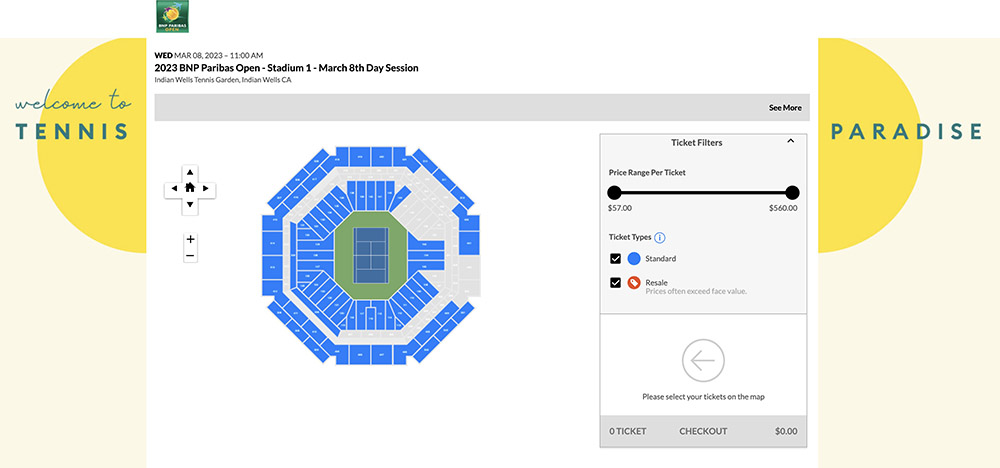
By far the most annoying thing about Indian Wells was hacking the ticketing system. There are so many options, and while I’ve been to tennis Grand Slams, seating for every tennis tournament is different. When I first booked our seats at Indian Wells, I had no idea what sessions to book and whether I needed seats or not—and wound up wasting a lot of money. Hopefully, my errors helps others in the same situation. The short of it is: If you plan to watch the center court matches, you’ll need to book seats.
Grounds passes at Indian Wells
Grounds passes (from $30 to $60 a day) are available for day sessions only through the fourth round play, which goes March 2-12, 2025, and will allow you to stay at the Indian Wells Tennis Garden for the evening sessions, as well. Grounds passes do give you access to non-reserved seating for Stadiums 2 through 9 the entire day; that said, a good majority of night sessions take place on Court 1, so only having a grounds pass is not the best option if you want to see night matches.
Pro tip: If you’re on a tight budget, grounds passes for qualifying matches on the first three days—in 2025, that’s March 2, 3 and 4—are just $10.
Stadium 2 is included in the day session as well as the night session and many of the big players who aren’t assigned the main stadium will play their matches there. The only issue we found is that a lot of Stadium 2 is reserved, so seats can be tough to come by during big matches and on the opposite side of the stadium from the entrance. Also, Stadium 2 is half-shaded and half-direct sun in the height of afternoon, which can not only be brutally hot but also tough conditions for watching a match.
Access to the main court at Indian Wells
If you want access to the matches at the main court, Stadium 1, day or night, you must purchase a separate ticket, which is attached to a seat. We didn’t realize this in advance and found ourselves buying night tickets each day to ensure we saw the big matches.
Stadium 1 prices range dramatically from $60 in the earlier rounds into the thousands for the quarterfinals, semis and finals. On average, I’d say we spent around $175 per person for seats every time we booked a Stadium 1 ticket. This was often on top of what we had already spent for day session passes. A few times we sat in nosebleeds, and two nights we sprung for the lower bowl. The 400 levels are so high, it’s incredibly hard to follow the match, so I’d say if you’re going to spend the money, do so when you can get tickets in a 100 or 200 section.
Since they scan your tickets via the BNP Paribas app to get into Stadium 1, you will only be able to access the section for which you bought your ticket. In other words, no seat-creeping to move up to a vacant section.
For Stadium 1, there’s a Daily Double option where you can reserve the same seat for the entire day; this is the more economical option now that I realize how much extra we spent to see matches at Stadium 1 after already purchasing day grounds passes. Next time we go, I’ll go this route on the days when all of our favorite players are scheduled for the main court.
My biggest tip for booking tickets is to wait until the week you’re attending—even day of in some cases—so you know what matches you’ll want to see. We made a classic rookie move and booked all our tickets months out being afraid sessions would sell out, then wasted so much money on tickets we didn’t use once we arrived to the garden and realized we needed a separate ticket for some matches. We wound up springing for several nighttime sessions because my mom is tennis’ number one fan and wanted to see many of her favorites take the court.
Luckily, we were able to buy tickets day of on the app. We also stopped in the box office to buy some tickets in person, but that was a much lengthier experience. When possible, I recommend buying tickets through the app.
Buying the series packages
If you’re planning for next year, you could set your calendar for when tickets open in the fall and splash out on the series package instead, which gives you access to every match, every day on every court with an assigned seat. Series packages start at $800 for Loge or $1200 for Prime Loge, then start at $2,850 per person for a stadium box.
Honestly, with as much as we spent going four days and buying day sessions and night sessions a la carte, we will be going this route next time. Per the Indian Wells website, Series Packages patrons are able to sell or transfer their tickets for any individual session they are unable to attend, so this is ideal if you want to see a whole lot of tennis.
Note: Tennis is not a spectator sport for the budget traveler; that said, if you don’t care about seeing the biggest names in tennis, you can get away with just purchasing single day sessions and it will be much more affordable.
The food and drink at Indian Wells
We ate many meals on-site at the tennis garden, and they were fine, nothing impressive but they did the trick when we didn’t want to leave between matches. The lines were often long, and if you want to get into any of the handful of seated restaurants like Nobu, you need to get there early as they don’t do reservations, only walk-ins.
We also had quite a few drinks, which were limited to frozen margaritas and a limited selection of domestic beers. That said, if you go to the center of the garden, you’ll be able to buy more cocktails from whatever tournament sponsors have activations that year.
When is the best time to attend Indian Wells?
This is all personal opinion. Like any tennis tournament, I prefer attending right in the middle. We got into Palm Springs on a Saturday at the end of the first week and went to Indian Wells every day but one from Saturday through Wednesday and, as a result, saw second, third and fourth round matches for men’s and women’s, both singles and doubles.
While seeing the semifinals or finals would be awesome, my mom and I both agree that we love attending a tennis tournament right smack in the middle due to the sheer number of matches we get to see and the fact that we have a better chance of seeing all our favorites play.
Other things to know about attending Indian Wells
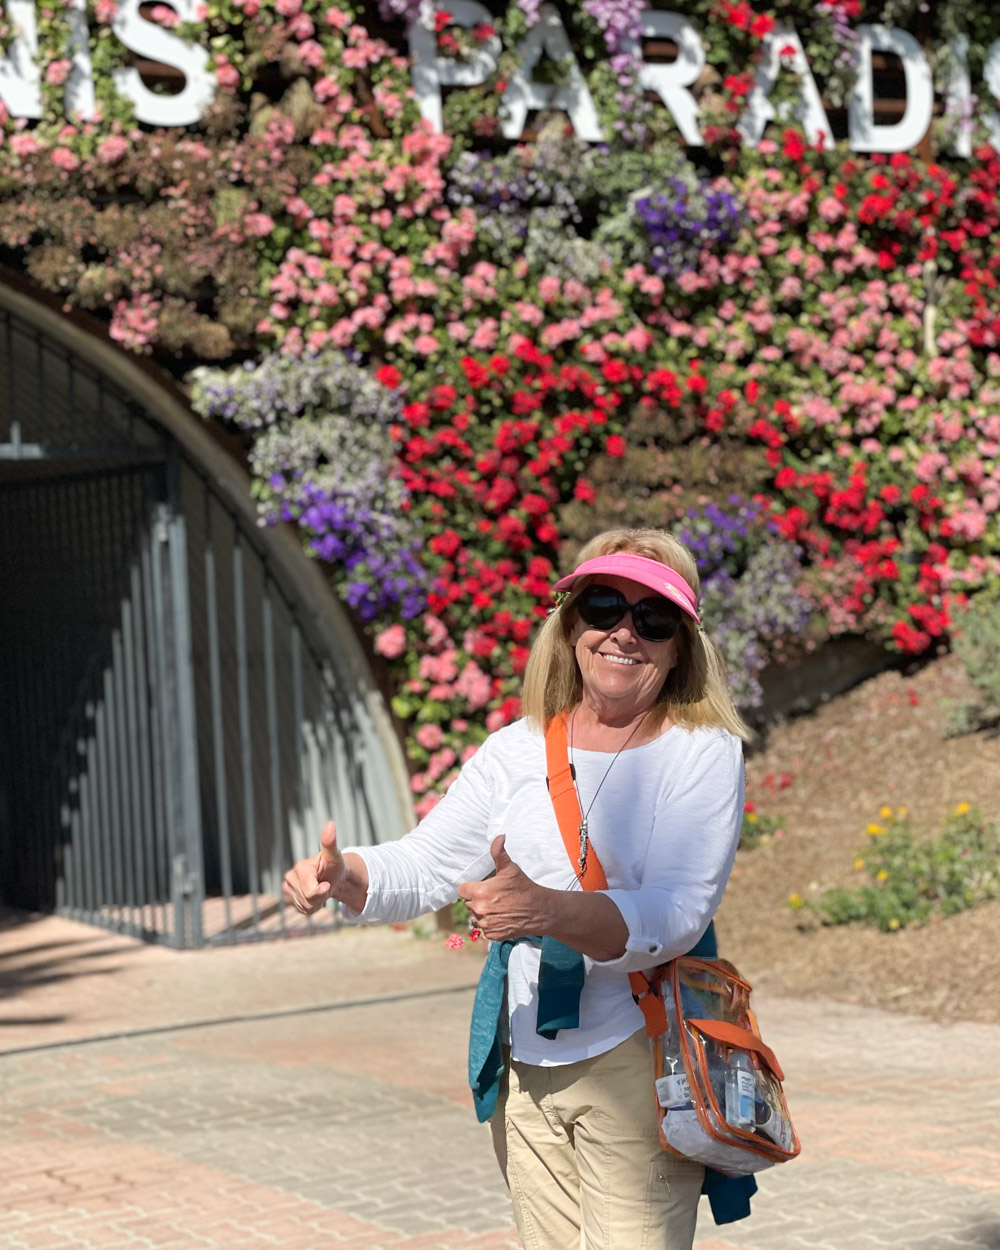
There’s a clear bag policy for larger bags. Like most sporting events, Indian Wells requires the use of clear bags. Since the weather changes dramatically in the desert and you likely will need a light jacket after the sun sets, I recommend buying a clear plastic backpack that’s the maximum size (12” x 6” x 12”) to use as a day bag for your time at the tennis tournament. You can also bring in a purse (does not have to be clear) so long as it isn’t larger than 4.5″ by 6.5″, and I use this clear belt bag (or fanny pack) often when I don’t feel like the added weight on my back.
Bring a hat or visor and sunscreen. No big surprise, but the sun in the desert is brutal. Even when the temperatures hover in 70, the direct sunlight beating down on you is court side. Be sure you put some sort of hat in your bag, lather up on sunscreen and plan on a touch-up every few hours. I’m a big fan of these visors and also have this visor in several colors.
Bring in your own water. The refreshment lines at Indian Wells were long, and it was rare we didn’t have to wait 10 minutes or more just to get water. Had I known you could bring in your own canister, I would have packed my S’well (and also cut back on single-use plastic in the process).
The grounds open at 10am every day. While the matches don’t start until 11am—and often, there weren’t any we wanted to see until 2 or 3—it was nicer being there early in the day when crowds were fewer and parking lots not as packed.
Make sure your phone is charged before you arrive. Everything at Indian Wells—tickets, food and drink sales, merch—is cashless. Because the service is so bad in the desert, this will very quickly drain your phone battery, and you’ll need your phone to check the app for updated match times, as well as to scan in and out. A few times, my phone died entirely and there’s virtually nowhere to charge it inside the grounds, so I’d recommend also packing a portable external charger in your purse or day bag, as well as a phone lanyard so you can keep your phone close but not have to worry about losing it.
Note where you parked. Be sure and drop a pin on your phone reminding you where you parked. The parking lot is massive, and it all looks the same (because, well, desert!). Make a note before you go in the grounds and take a photo of it to help as a visual reminder. And then also write it down in case your phone does die!
Would I go back to Indian Wells?
Absolutely. This was such a fun tennis tournament in the most magical setting. We got to see so many of our favorite players take the court—Coco Gauff, Emma Raducanu, Taylor Fritz, Rafael Nadal, Shelby Rogers, Jenson Brooksby, Maria Sakkari, Paula Badosa, Jack Sock, Caty McAnally, the list goes on—and I’ve rarely seen my mom happier. We just returned from the Australian Open and are slowly working our way through other WTA 1000 events, but I’m really hoping we can make a repeat trip to the Indian Wells tennis tournament in the years to come.
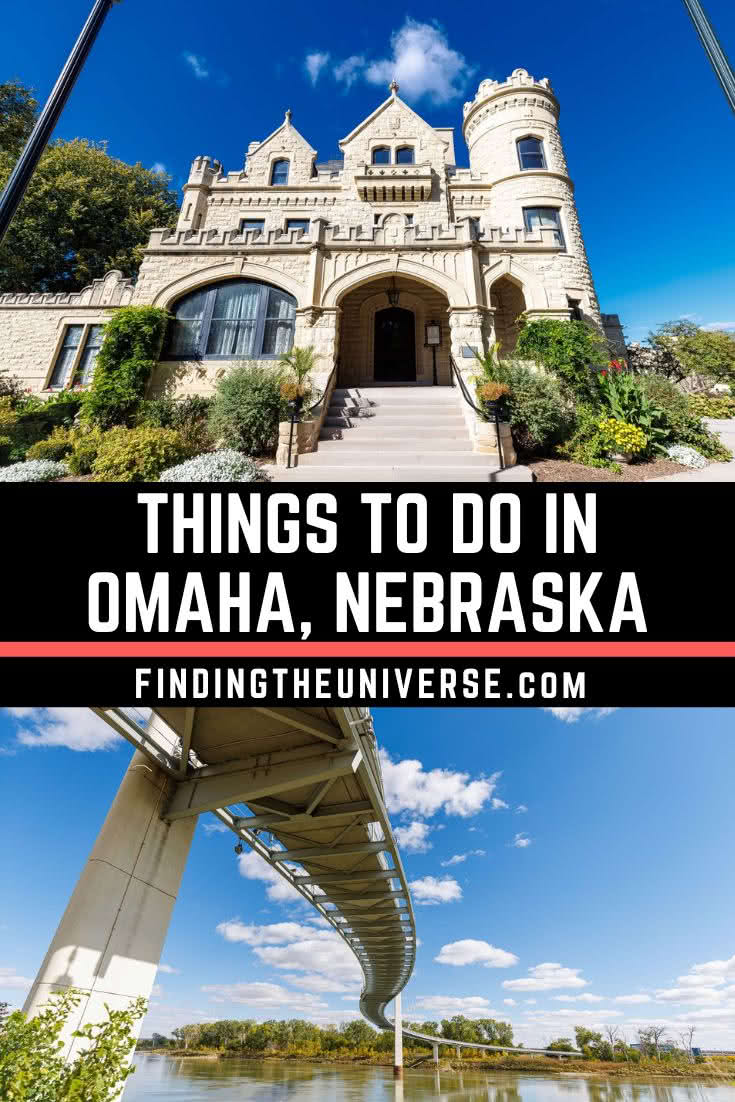
Jess and I have family in Omaha, which means we’ve visited the city a number of times over the years. In that time, we’ve visited a great many of Omaha’s sights and attractions. So we wanted to put together a quick guide to our favorite things to do in Omaha, Nebraska.
Omaha is the largest city (by population) in Nebraska. It became an important transportation hub in the 19th century and would eventually attract people to stay for its railroad, meatpacking, and industry jobs. Today this mid-sized Midwestern city is home to a number of cultural attractions and plays host to popular events such as the College World Series and the annual Berkshire Hathaway meeting.
So, whether you’re in town for a big event like the College World Series, a conference, visiting family like us, or just wondering what there is to do in Omaha, this guide is for you.
We’ll cover the main sights and attractions, provide tips on where to stay, give suggestions on foods to try in Omaha, ideas for what to do in Omaha with kids, and lots more.
Let’s get started!
Things to Do in Omaha
There’s a lot to do in Omaha, from museums to historical sights to eating and shopping. Here are our favorite things to do in Omaha.
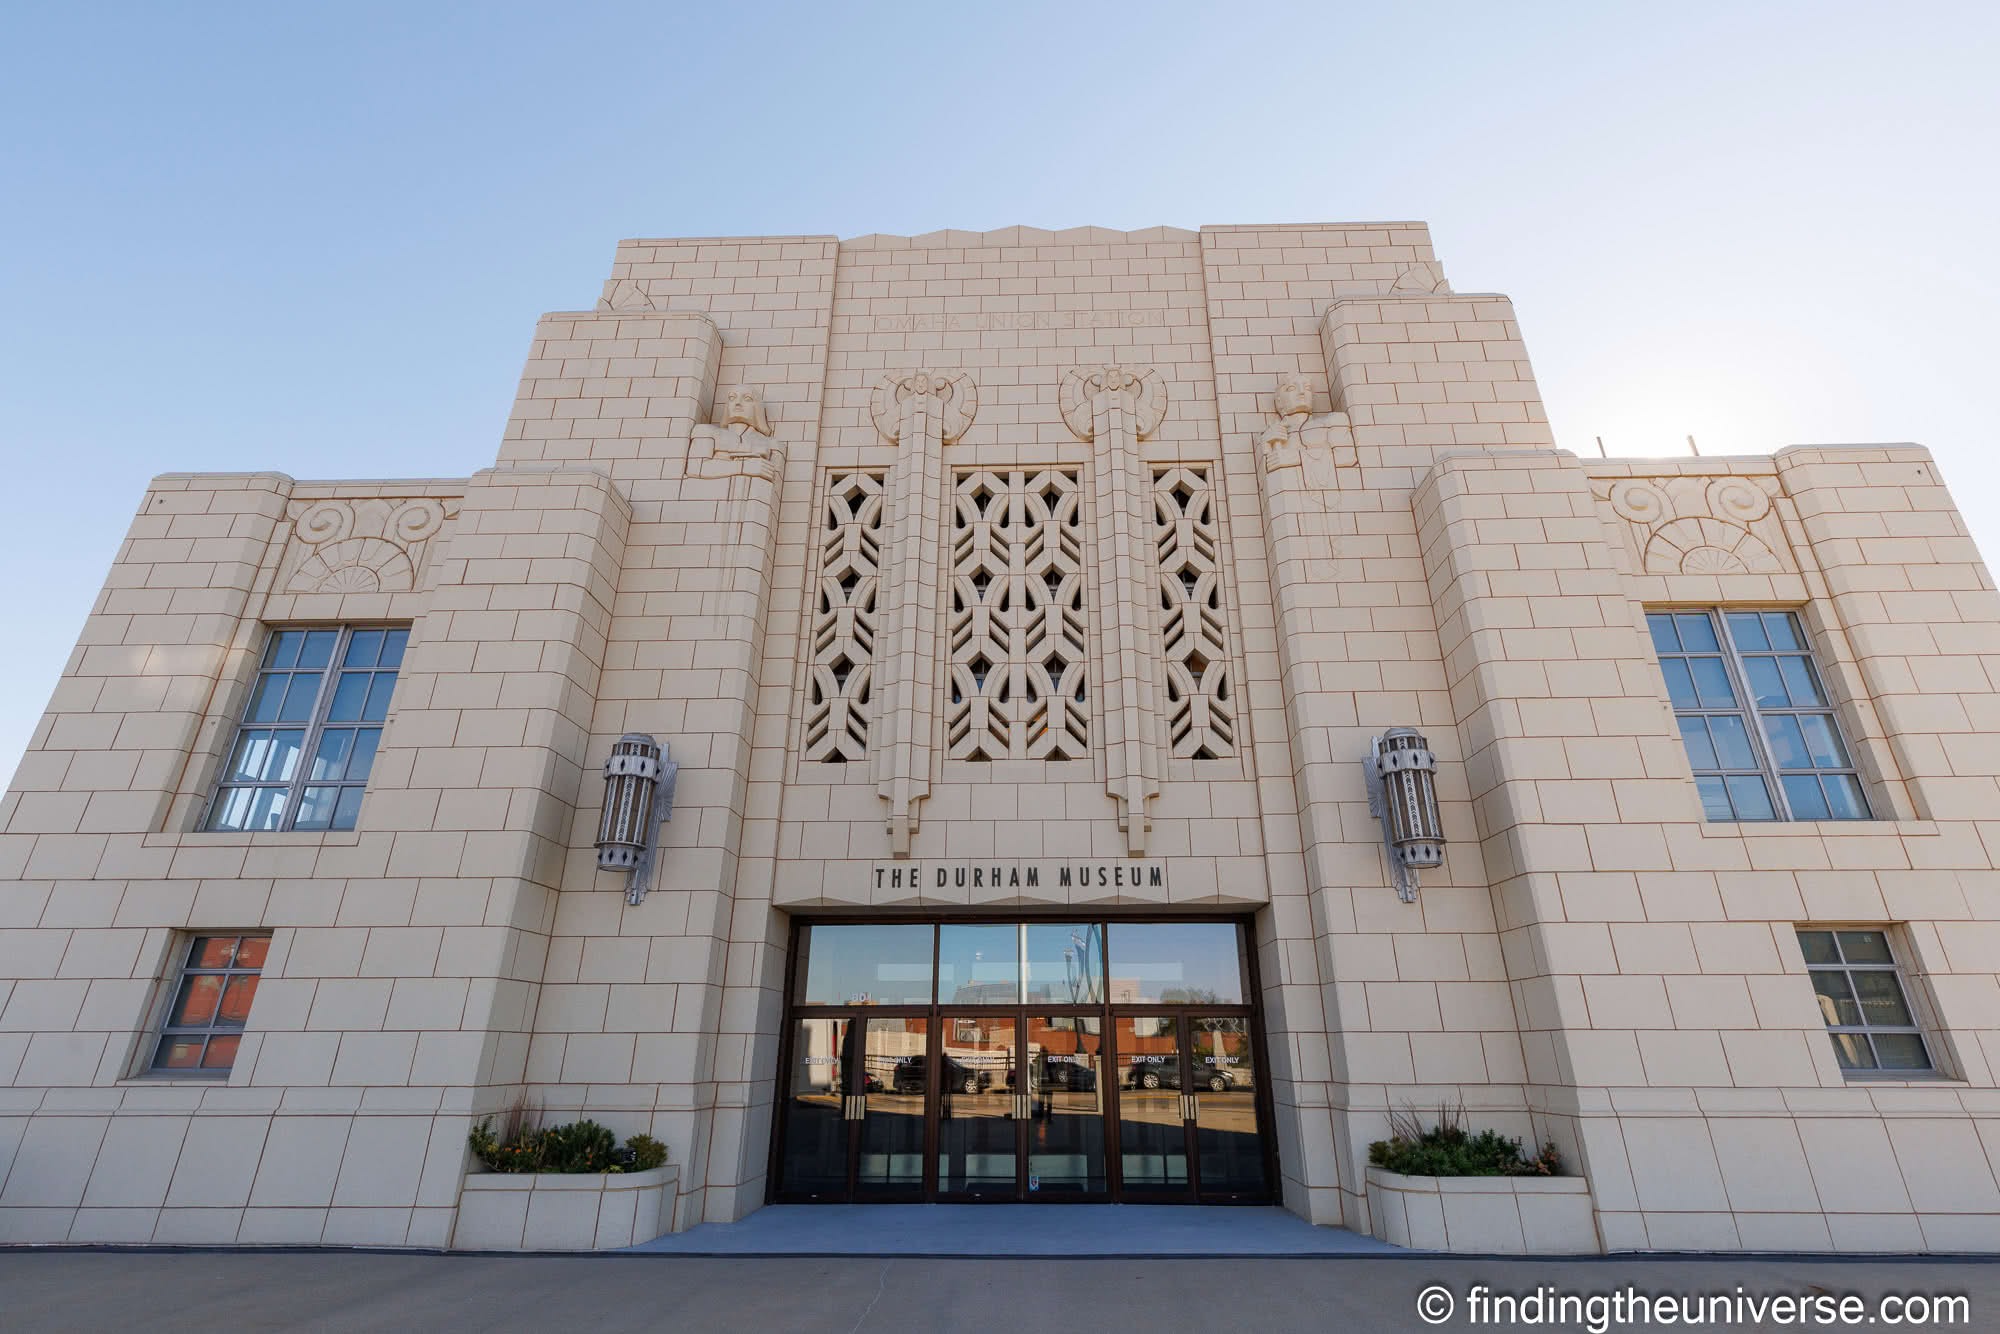
Durham Museum
The Durham Museum is found in Omaha’s original Union Station building, which dates from 1899. It was the Union Pacific’s first Art Deco railroad station and was used as a passenger train station until 1971.
The Union Station building is a gorgeous example of Art Deco architecture. It’s almost worth visiting this museum for the building alone! That said, the museum contained within the building is one of our favorite attractions in Omaha.
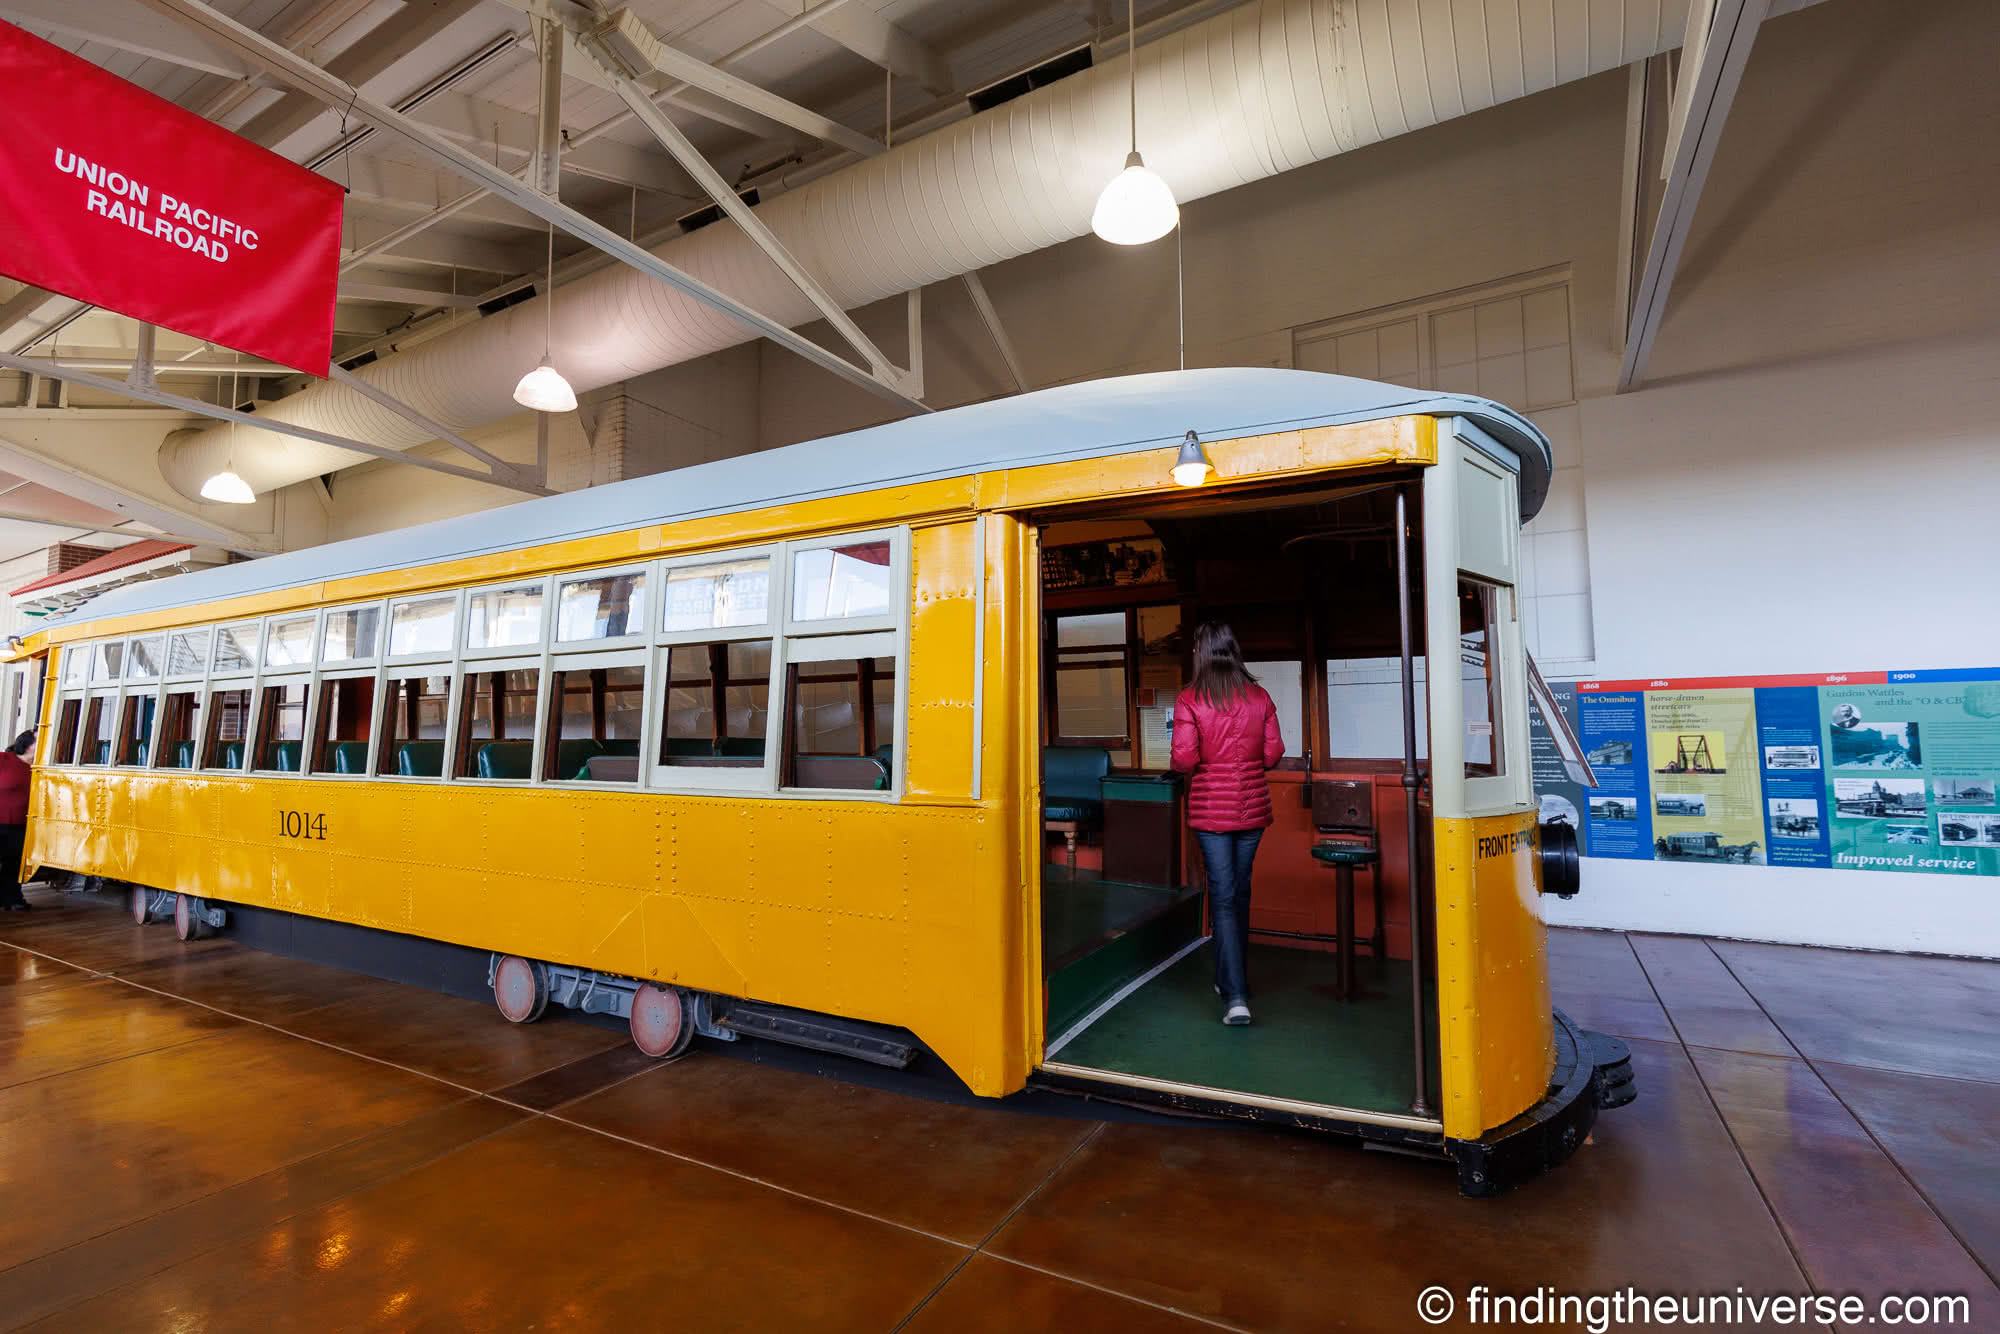
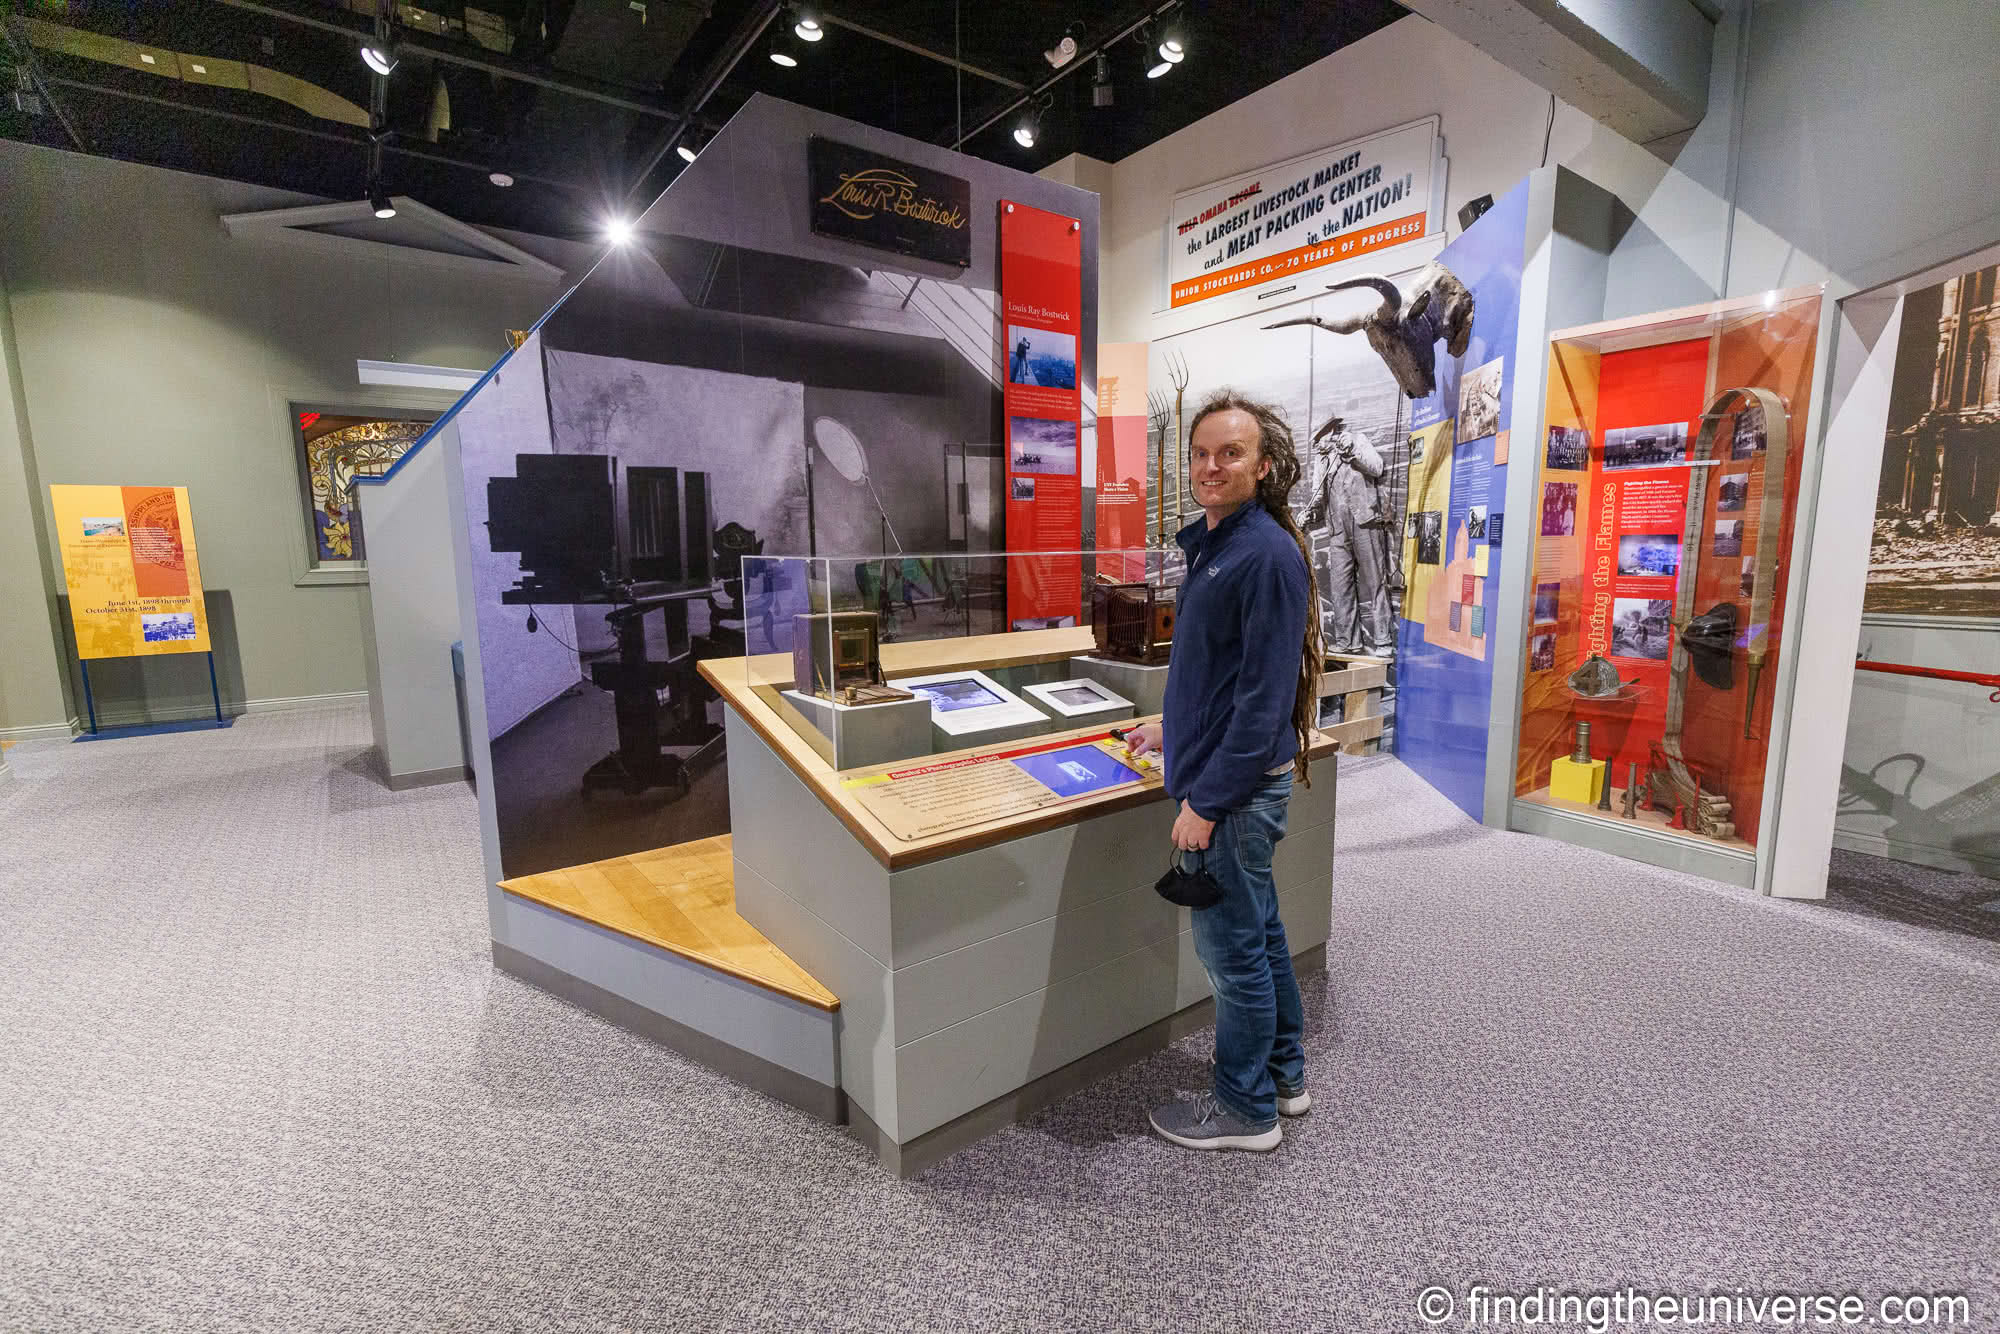
The Durham Museum focuses primarily on the history of the region and Western America in general, covering history, culture, science, and industry. So whether you are interested in transport and trains, Native American culture, or wildlife, you are going to find something interesting. We particularly enjoyed the full size train exhibits on the lower levels, but the whole museum was excellent to be honest.
If you want to learn about Omaha and this part of the country in general this is the best place to go. If you are going to just one museum in Omaha, this would be our recommendation for most people.
There is also an on-site museum shop which is a great place for souvenirs and the Soda Fountain and Candy Shop which is the original Union Pacific soda fountain that serves phosphates, egg creams, sundaes, soda, coffee, ice cream floats, snacks, candy, and more. Sandwiches, salads, and soups are also served here during lunch hours.
If you stay for lunch, you can easily spend half your day enjoying this museum. They also often have special exhibitions and family events happening.
There’s an admission fee for the museum and free parking on site. You can save on admission with the free Omaha Savings Pack.
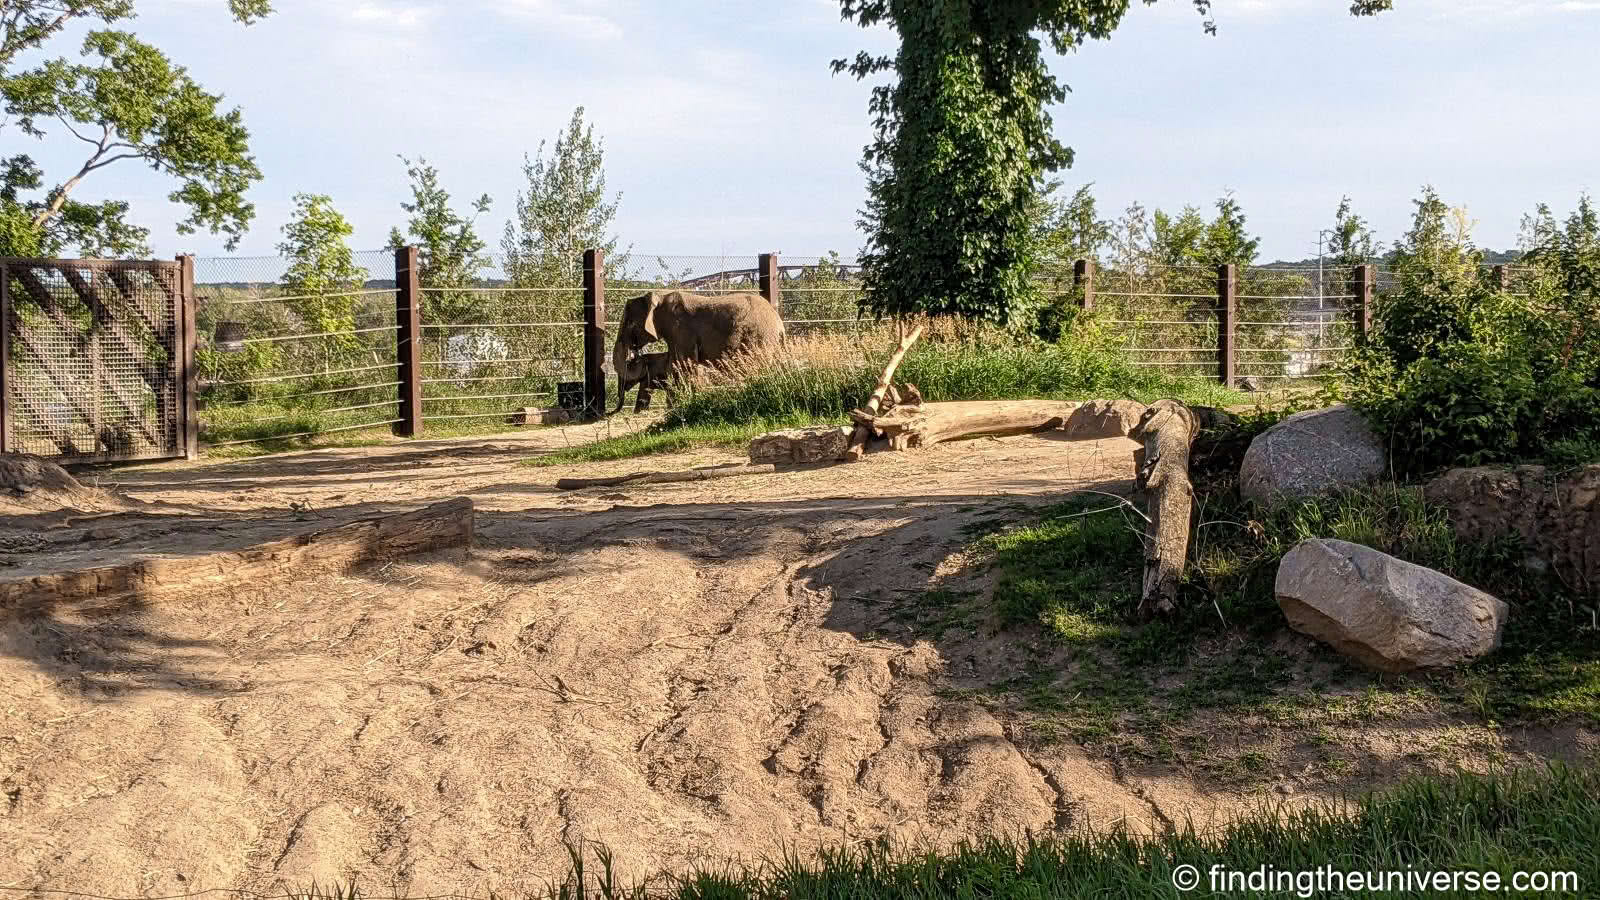
The Henry Doorly Zoo & Aquarium
Rated as one of the world’s top zoos, the Henry Doorly Zoo & Aquarium, also known as the Omaha Zoo, spreads across over 130 acres of land and is home to over 962 animal species! It has been around for over one hundred years as well, making it one of the oldest attractions in Omaha on our list.
The zoo is large and there’s a lot to see, with different habitats showcasing different species. These include:
the 28-acre African Grasslands area, home to species including African elephants, giraffes, rhino, lion, cheetah, meerkat, ostrich, and more
the 8-acre Asian Highlands area including species such as the red panda, Indian rhinos, snow leopard, and Siberian tiger
the Desert Dome, which is one of the world’s largest indoor deserts. This 1 acre covered area has desert species from around the world including the African wild cat, klipspringer, bobcat and greater roadrunner
Gorilla Valley – an exhibit primarily focused on primates including gorillas and various monkey species
Orangutan Forest – another primate focused exhibit which includes the orangutan and langur
the Suzanne and Walter Scott Aquarium, one of the world’s largest in-zoo aquariums. Species include sea turtles, sharks, jellyfish, puffins, and penguins
Kingdoms of the Night, the world’s largest nocturnal animal exhibit, which also happens to contain the world’s largest indoor swamp! Inside you’ll find everything from bats to porcupine, sloth, crocodiles, & alligators
There are lots more exhibits, but this should give you an idea of how impressive this zoo is. There are also rides, including a 2.5 mile steam powered narrow-gauge railroad which loops around the park. There’s also a tram and a “Skyfari”, which is basically an open-air chairlift which offers excellent views over exhibits including the lions and cheetahs.
The old Rosenblatt stadium, which used to host the College World Series (now played in town at the Charles Schwab Stadium), can also be found at the Zoo. Whilst not a lot remains, the footprint of it can still be found in the Zoo parking lot.
As you can see, there’s a lot to see and do at the Omaha Zoo. We recommend planning on spending at least a half day here, but ideally a full day.
There’s an entry fee, with free parking available on site. You can save on admission with the free Omaha Savings Pack.
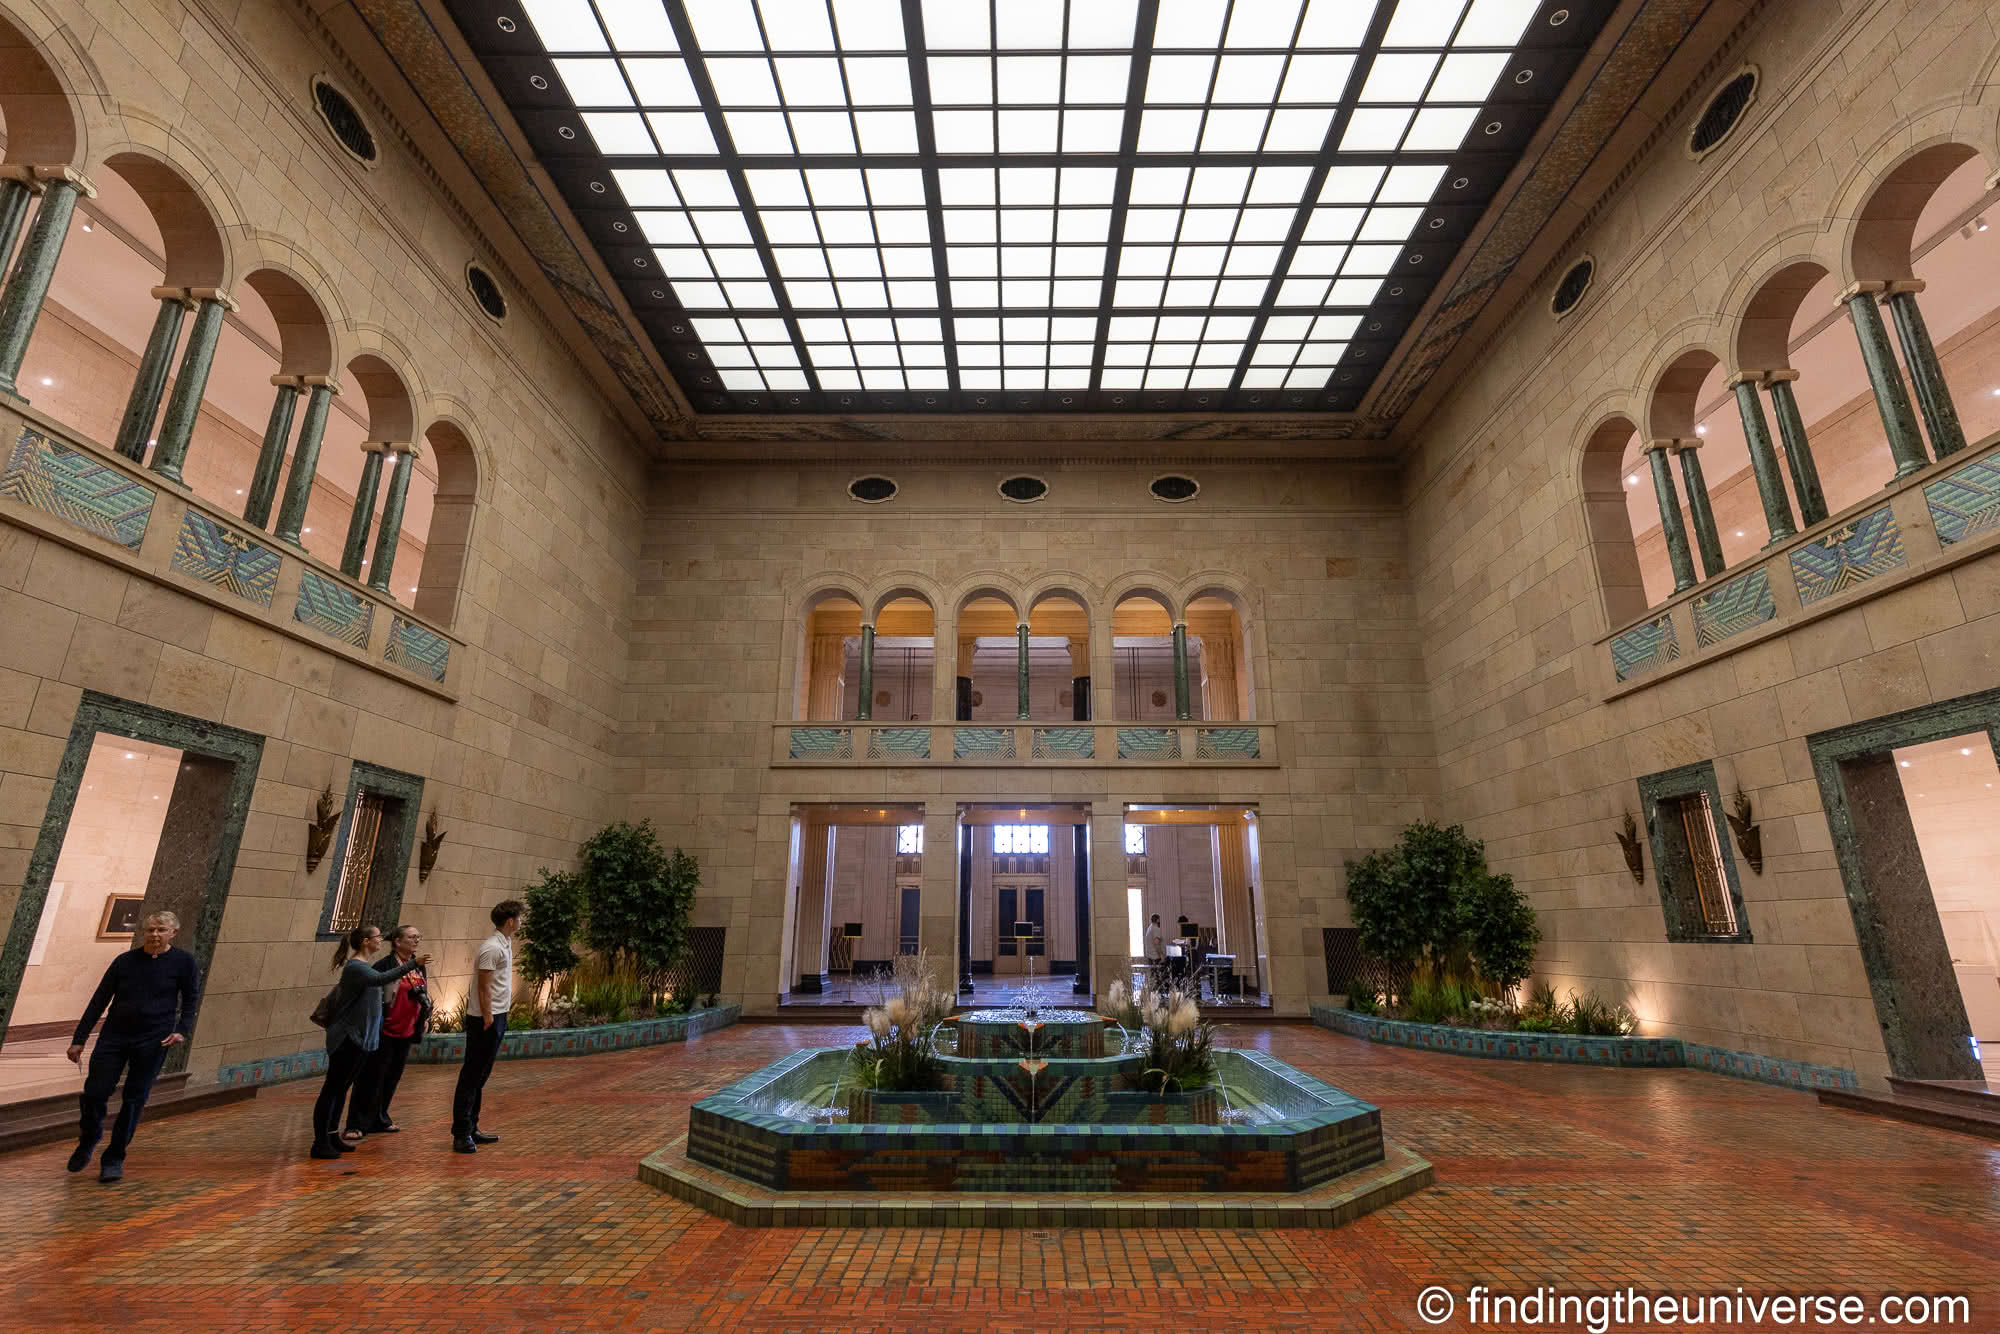
Joslyn Art Museum
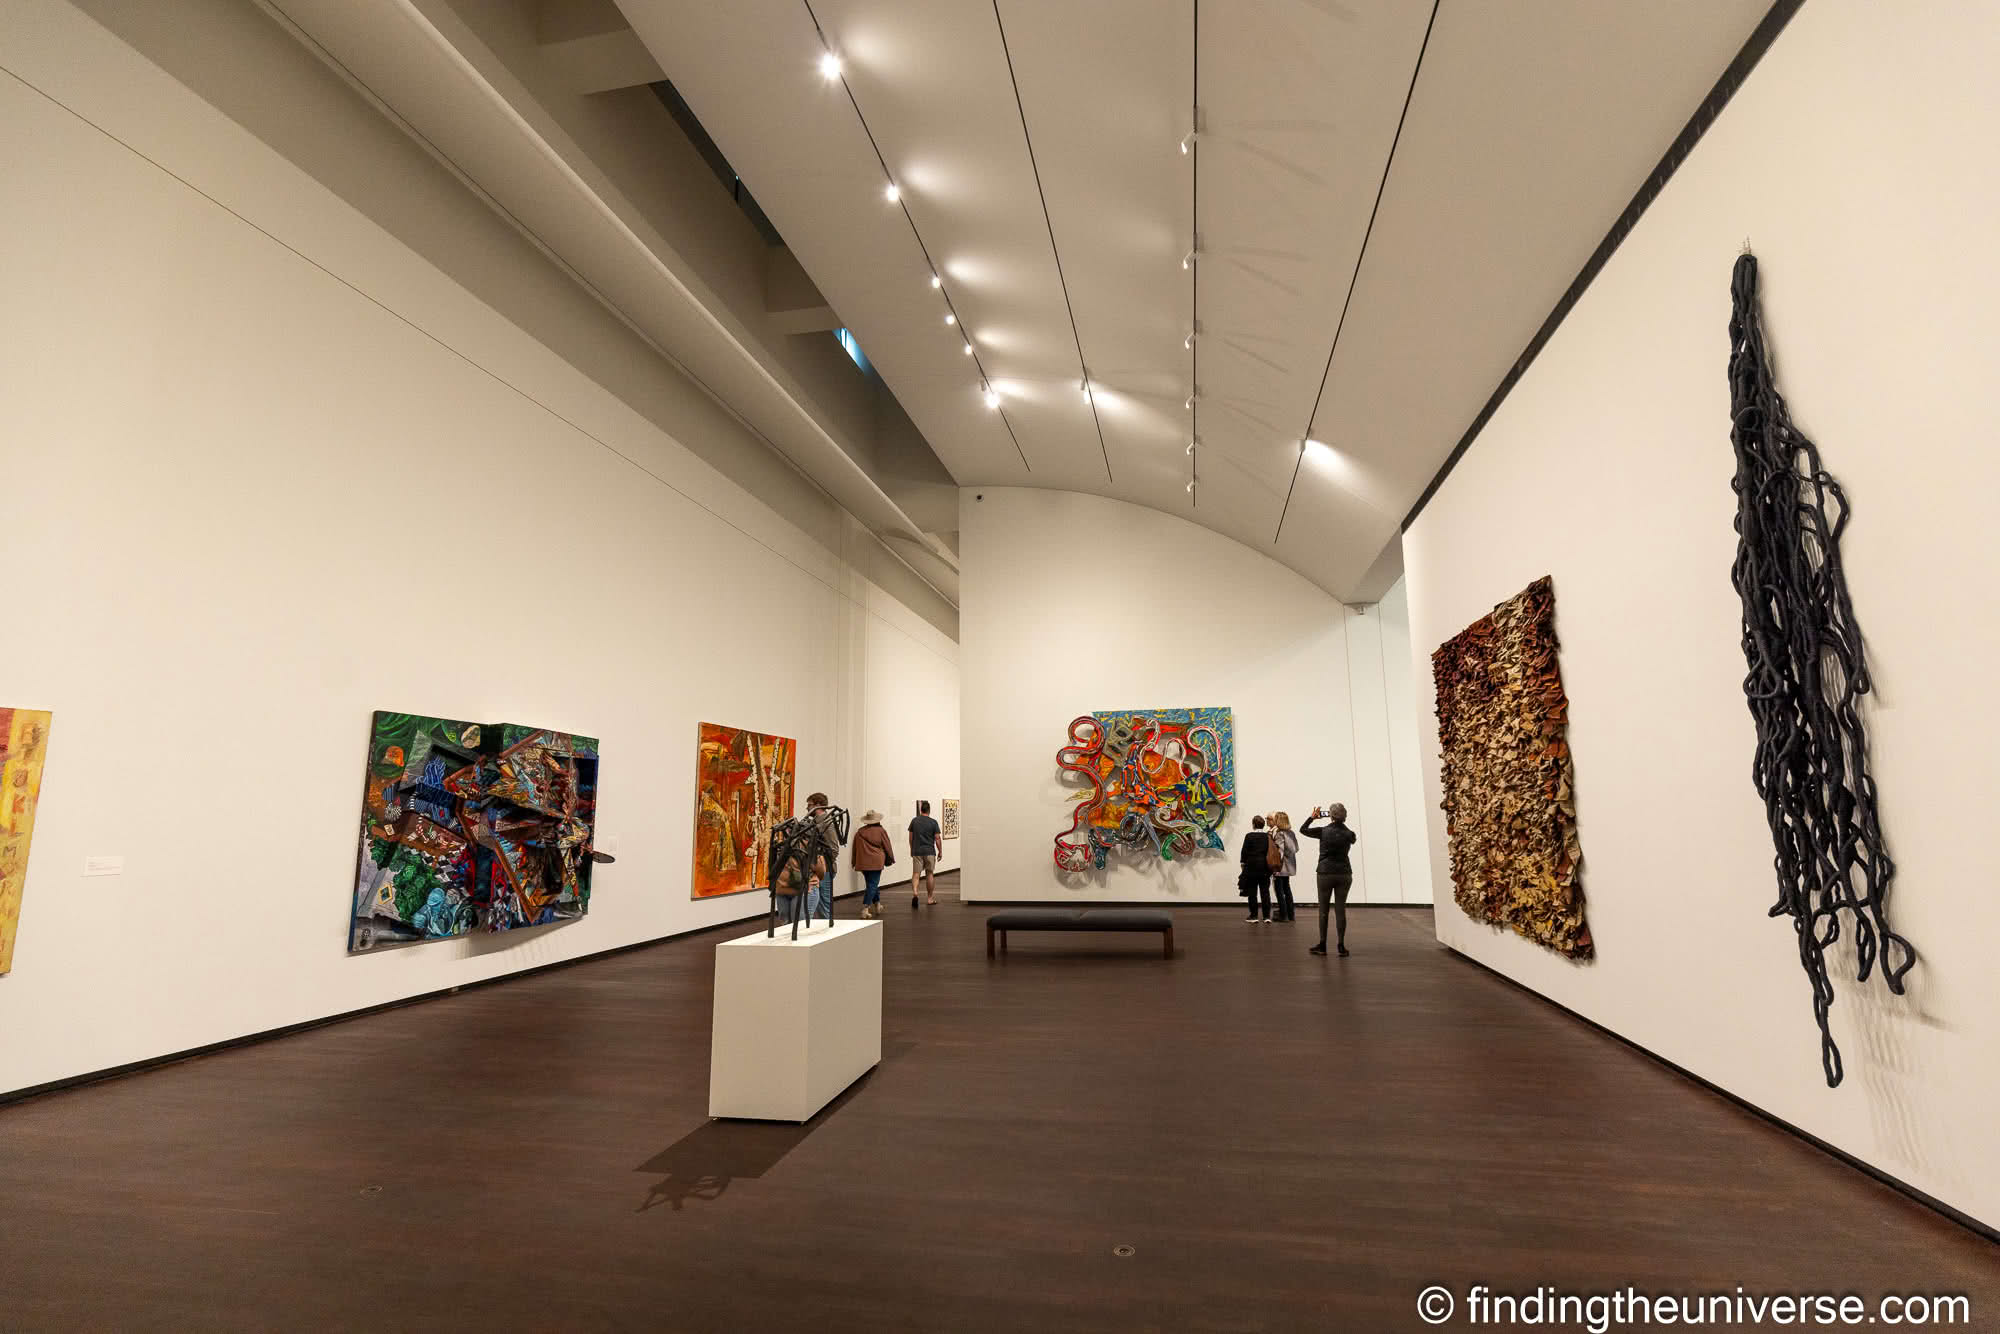
If you enjoy art museums then you will definitely want to include a visit to Omaha’s impressive Joslyn Art Museum on your visit to Omaha. This originally opened in 1931, and has undergone significant updates over the decades, including the most recent renovations which were completed in late 2024.
Today, the museum has a number of permanent collections which cover a wide range of time periods and areas. These include Ancient art from Greece and Italy, European artists including Rembrandt and Monet, and a wide range of early and modern American art. There is also a large area of modern and contemporary art, and a lovely outdoor garden featuring various sculptures.
The Joslyn Art Museum is free to visit and there is also free parking on site. However, you should be aware that the car park can fill up so be prepared to wait, or find parking nearby (paid street parking is also available).
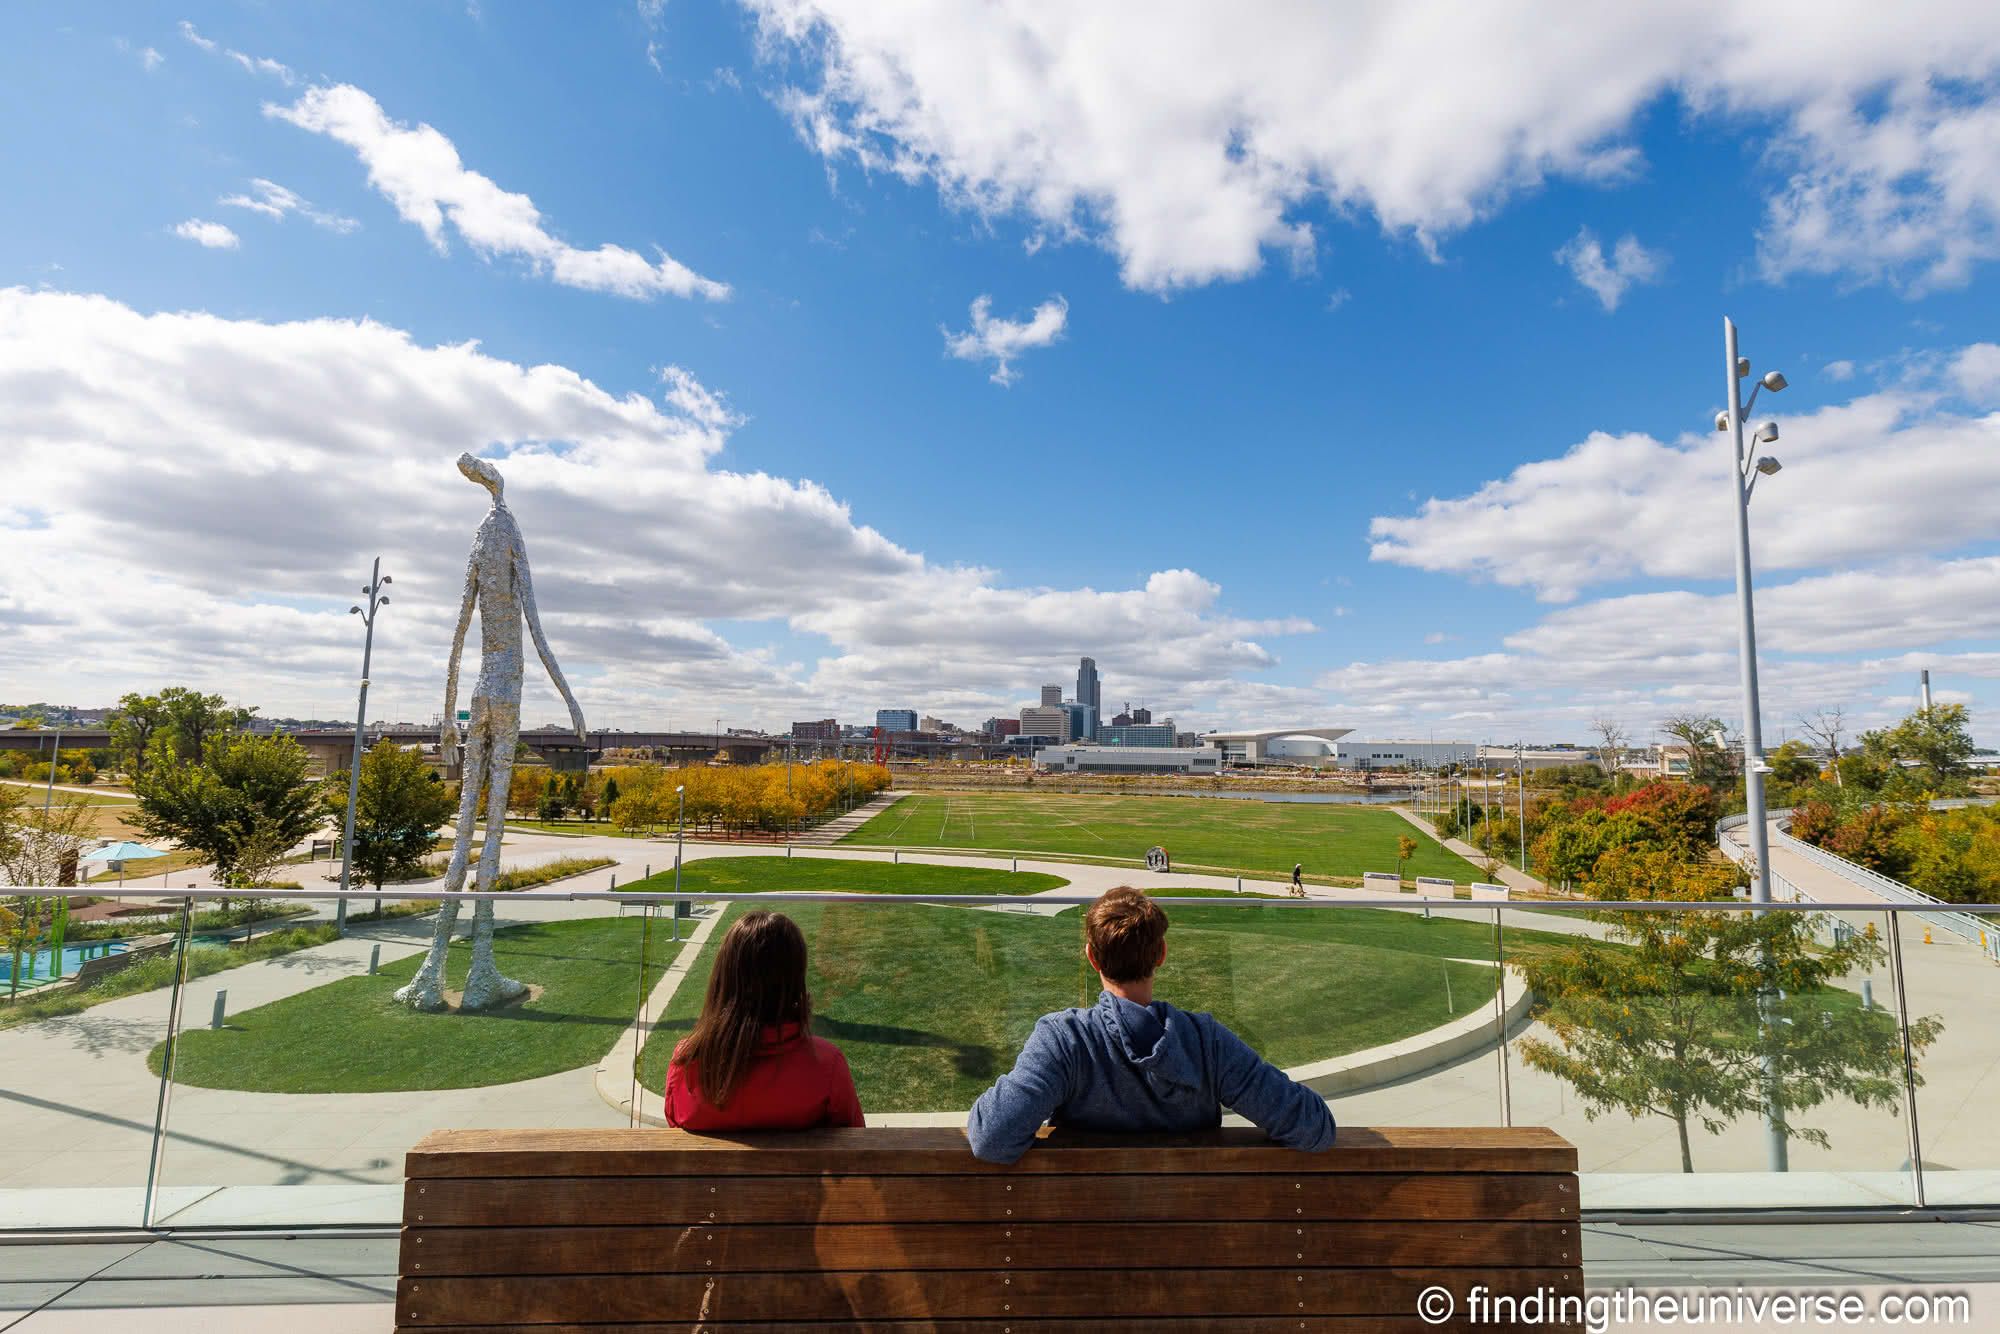
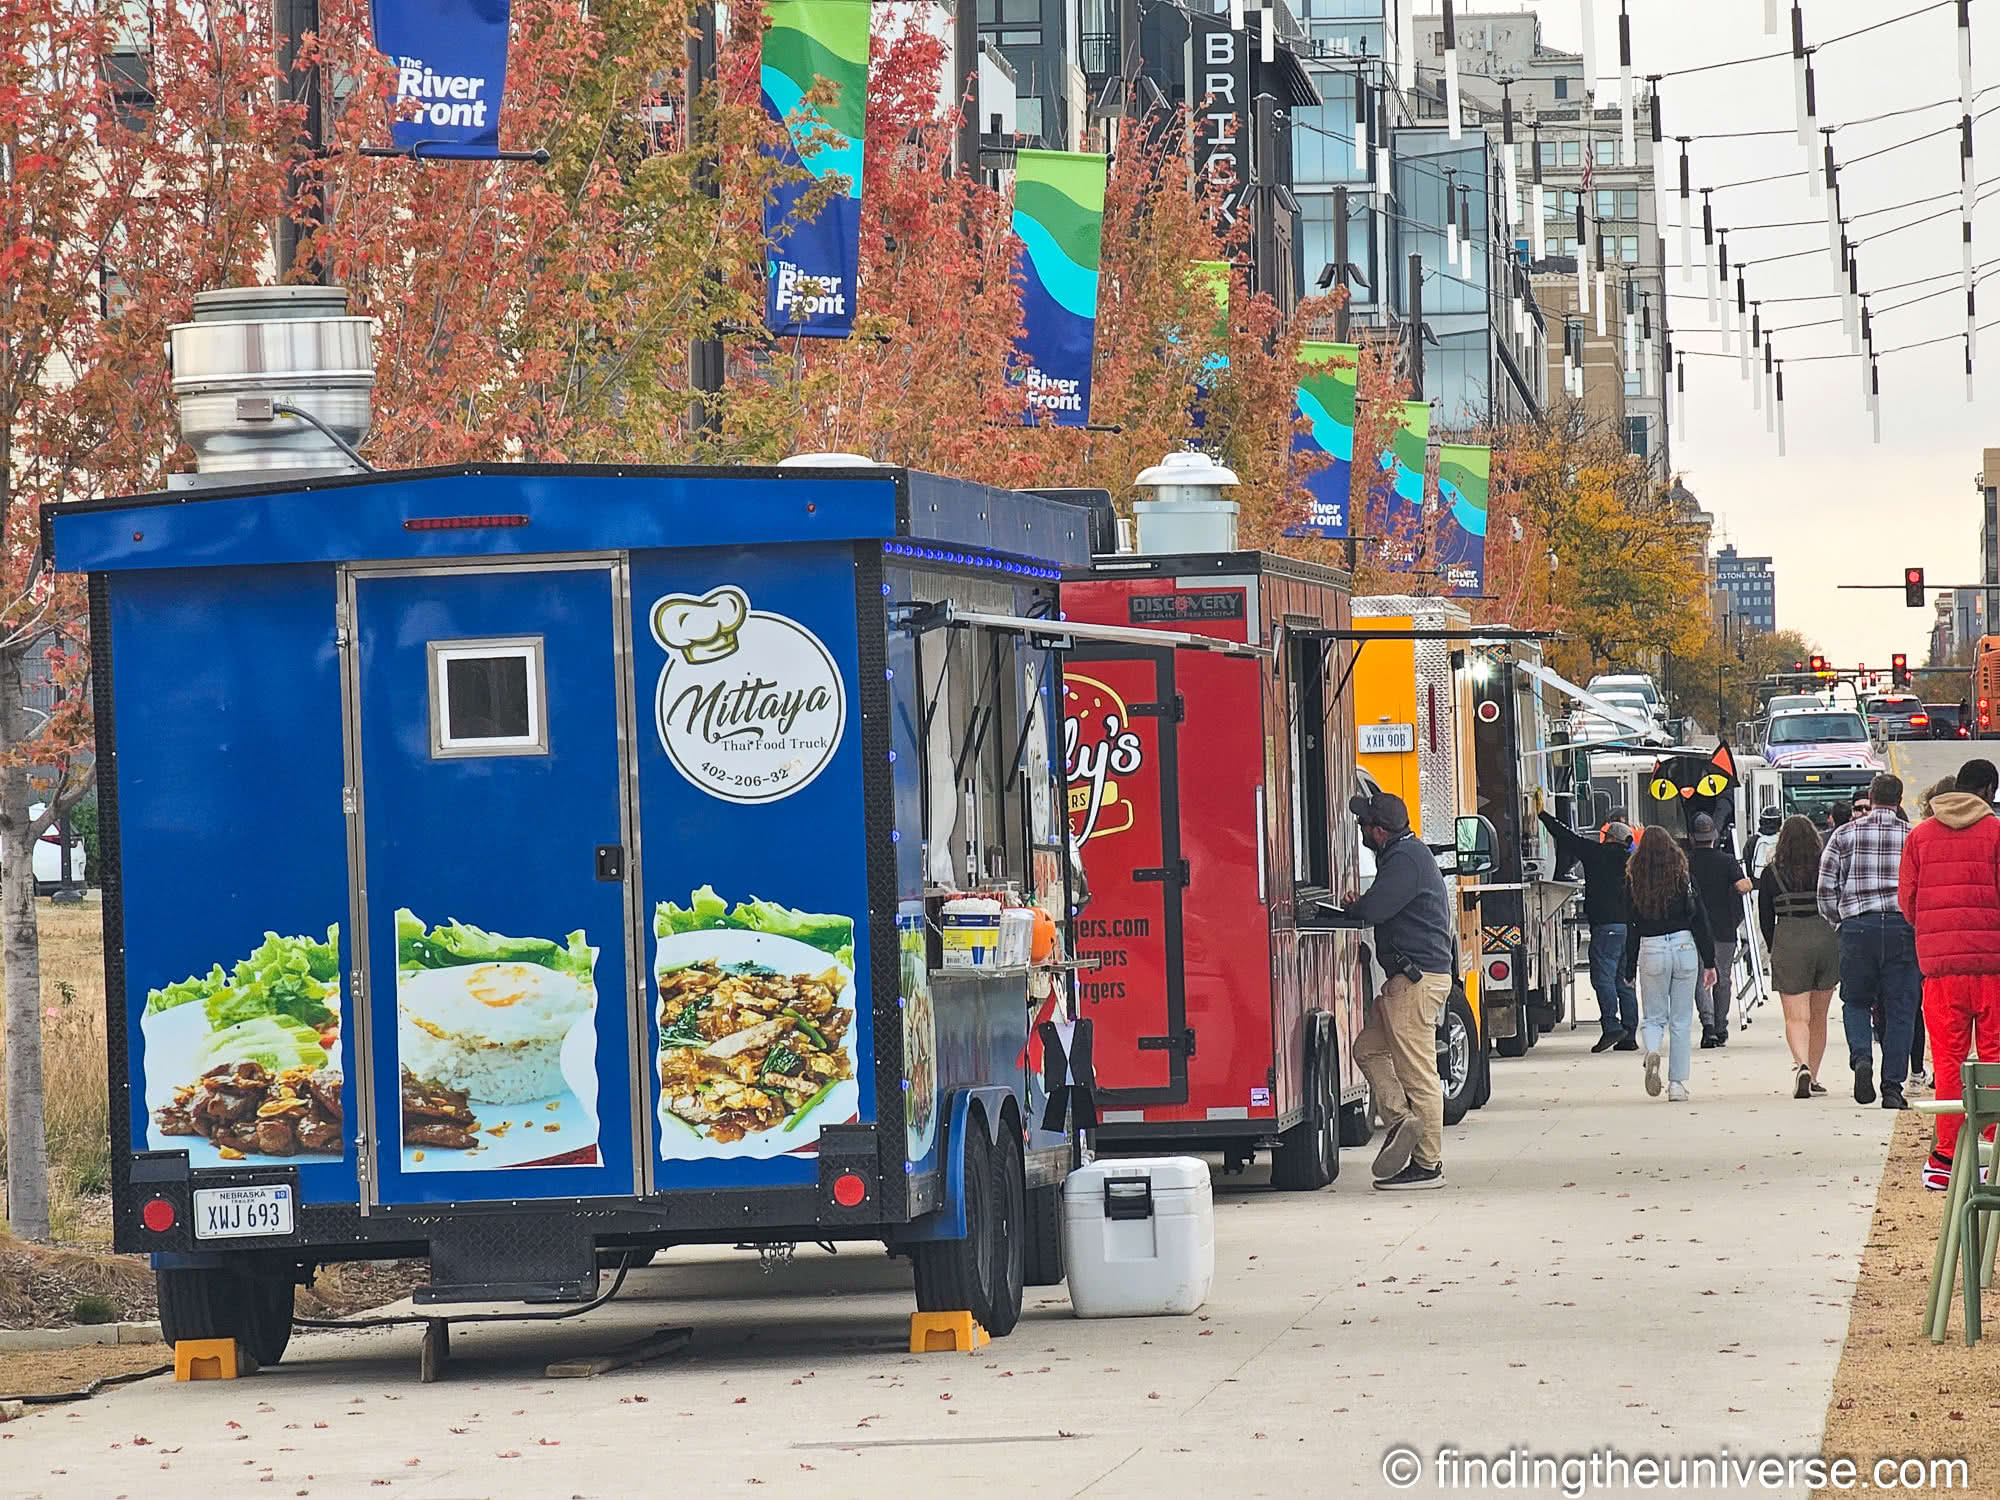
Omaha’s Riverfront Area
Omaha’s riverfront area has undergone significant revitalization in recent years, turning it into a destination in its own right. Today, it’s a 72-acre area which links downtown Omaha to the riverfront. There are three distinct areas to explore: the Lewis & Clark Landing. the Gene Leahy Mall, and the Heartland of America Park.
You can visit all three in one go, or pick and choose depending on your interests. The whole riverfront development is definitely worth a stroll though, especially on a nice day. If you are looking for a nice place to go for a walk, have a picnic, relax on a bench, or take the kids out for some fresh air, any of these would be a great option. Here’s what you’ll find in each area.
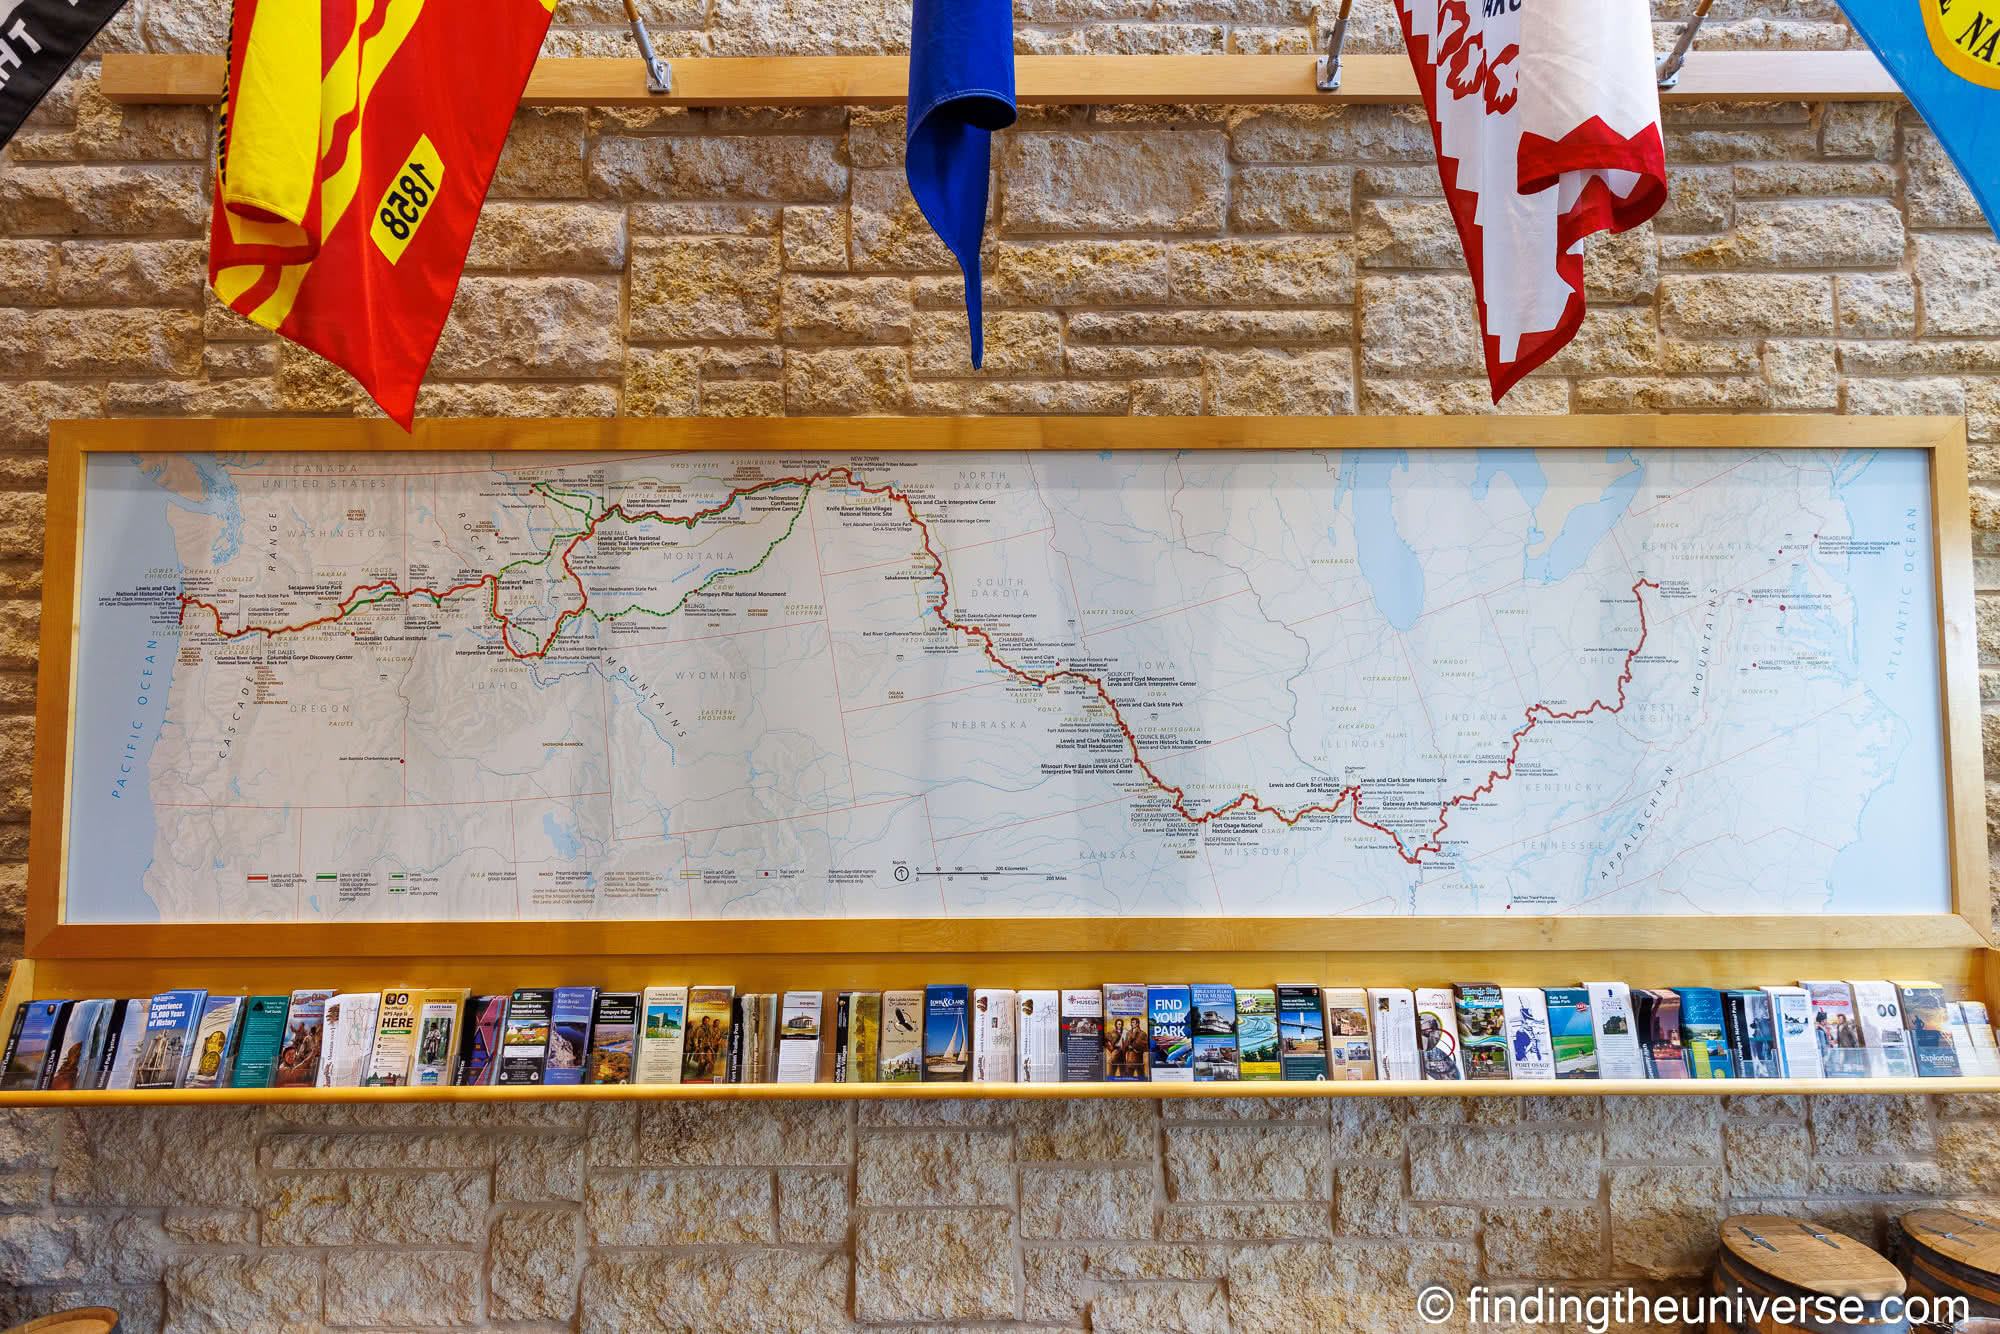
Lewis & Clark Landing & Visitor Center
In the early 19th century, famed explorers Meriwether Lewis and William Clark journeyed across the vast expanse of land which the United States had purchased from France as part of the Louisiana Purchase. They primarily followed the Missouri River, which today flows through and marks the eastern edge of Omaha.
Today, there are a number of things you can do in the landing area. First, we’d recommend visiting the Lewis and Clark National Historic Trail Headquarters and Visitor Center. This building is the headquarters of the historic trail which covers 4,900 miles across 16 states, and is a good place to learn about the expedition and the trail as it can be explored today. It is free to visit.
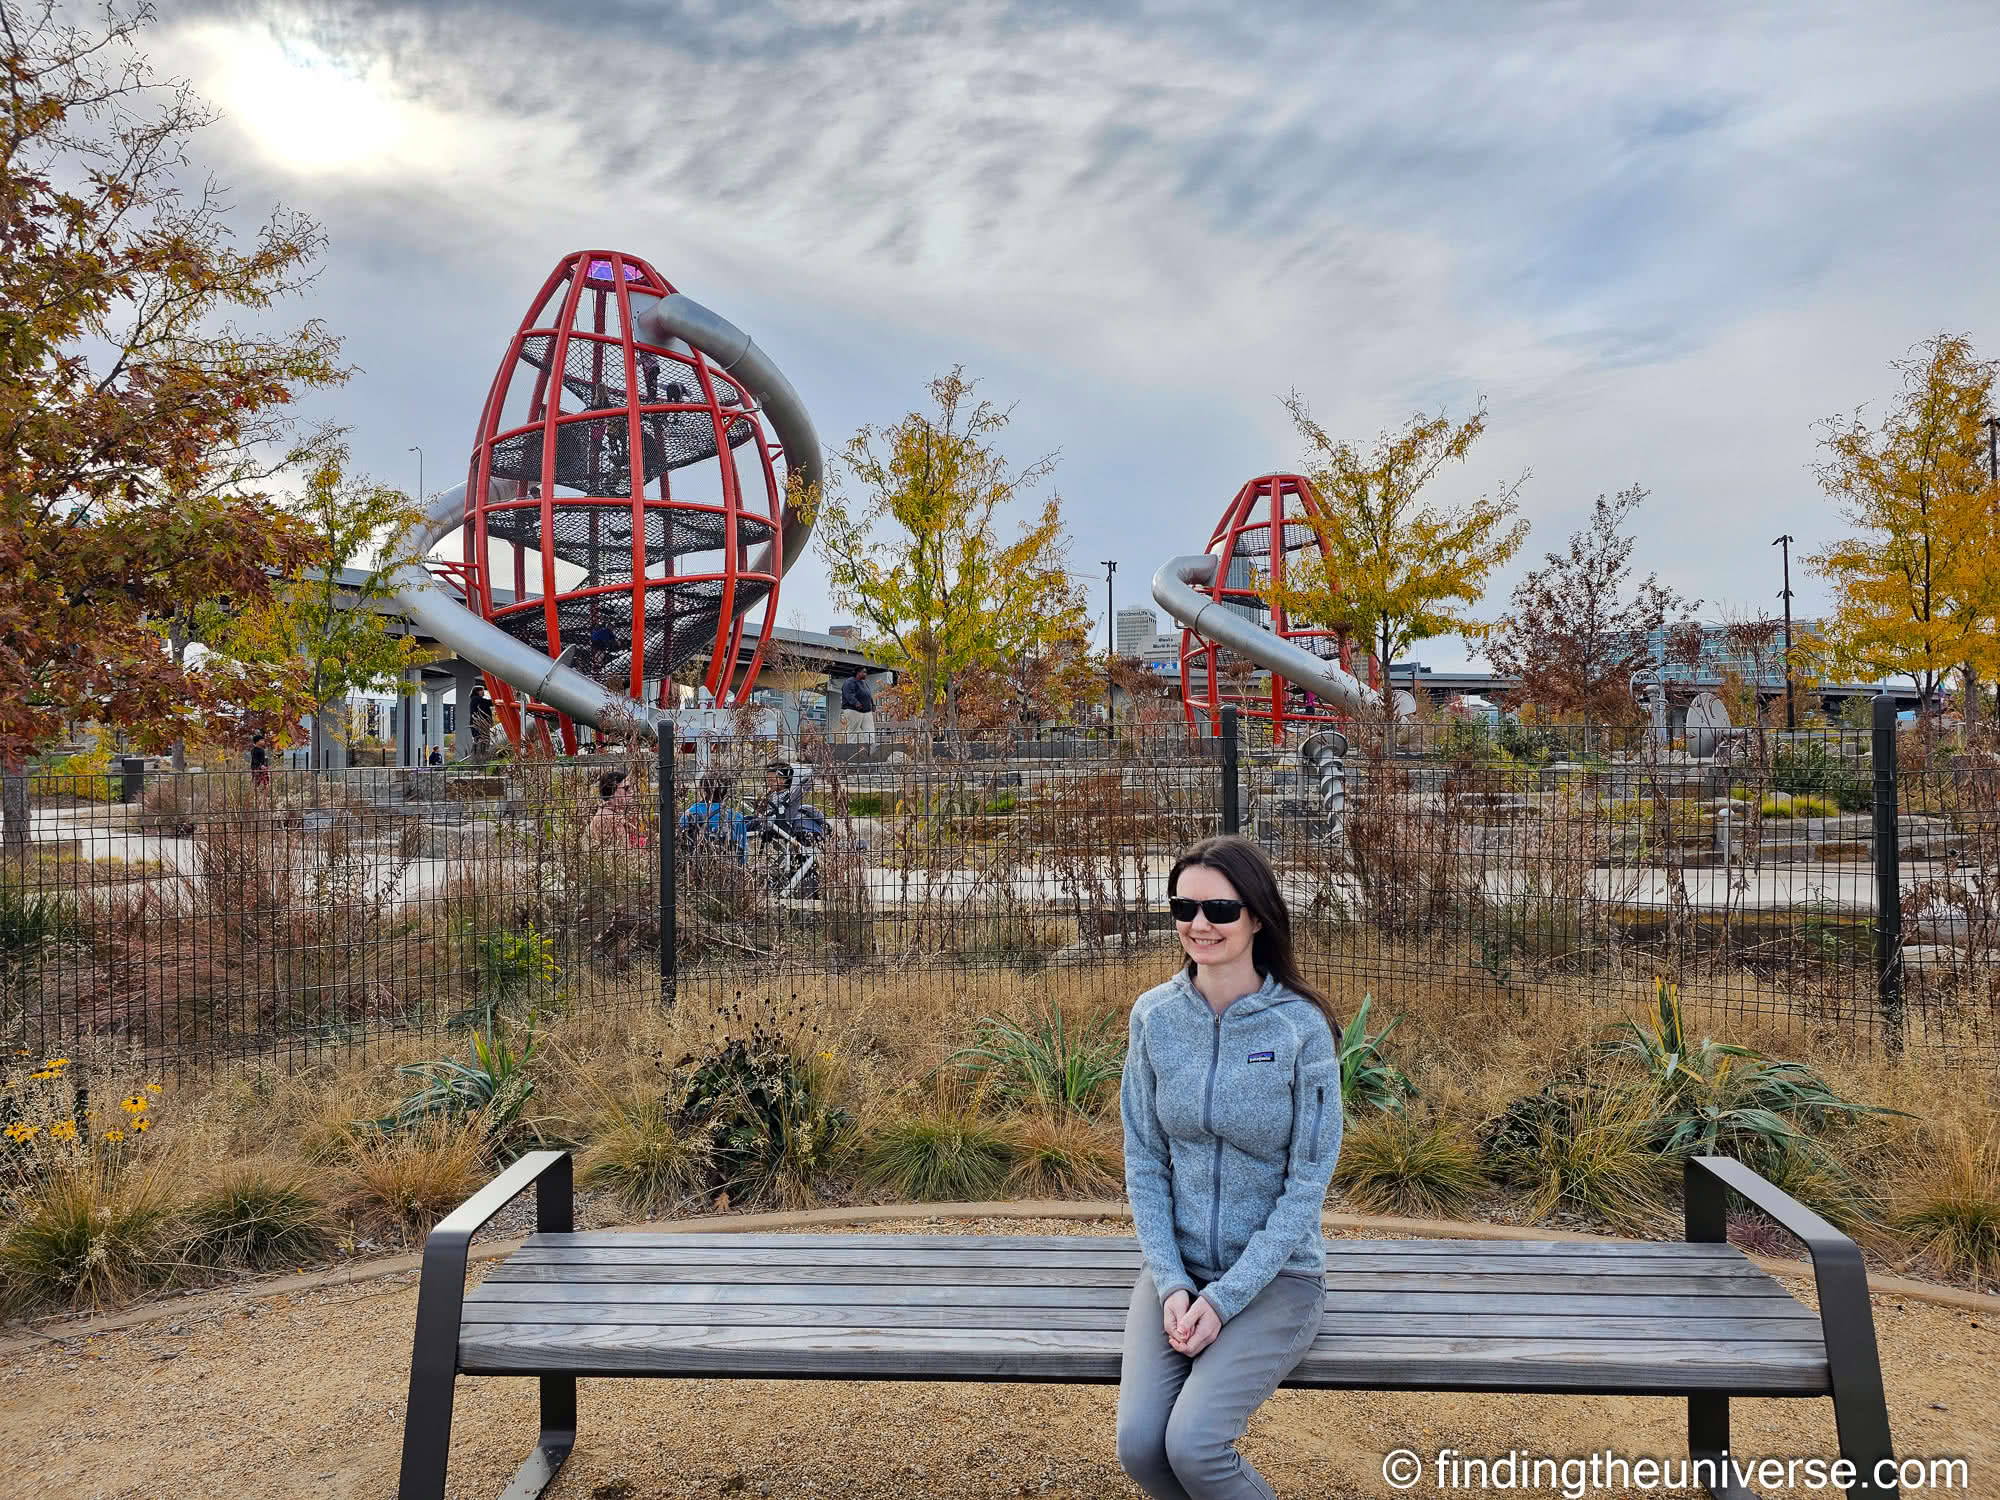
The Lewis and Clark landing area has a lot more to offer beyond the visitor center though. It’s part of the Omaha Riverfront area, and is home to an urban beach, volleyball courts, walking trails, and an impressive playground which features zip-lines, rocket ship shaped climbing towers, sand pits, and more. If you have kids, they are going to love visiting this playground.
This part of the Riverfront is also where you’ll find the Kiewit Luminarium, which we cover elsewhere in this post as a top thing to do in Omaha.
Gene Leahy Mall
The Gene Leahy Mall extends Omaha’s riverfront parks into the downtown area. This large urban park has a sculpture park, outdoor concert venue, water features, outdoor tables and benches, and play area. If you visit in winter time, it’s going to be festooned with lights.
The Gene Leahy Mall connects with the Old Market area of Omaha as well as the Heartland of America park. It’s a nice place to walk for a nice green break from the urban landscape.
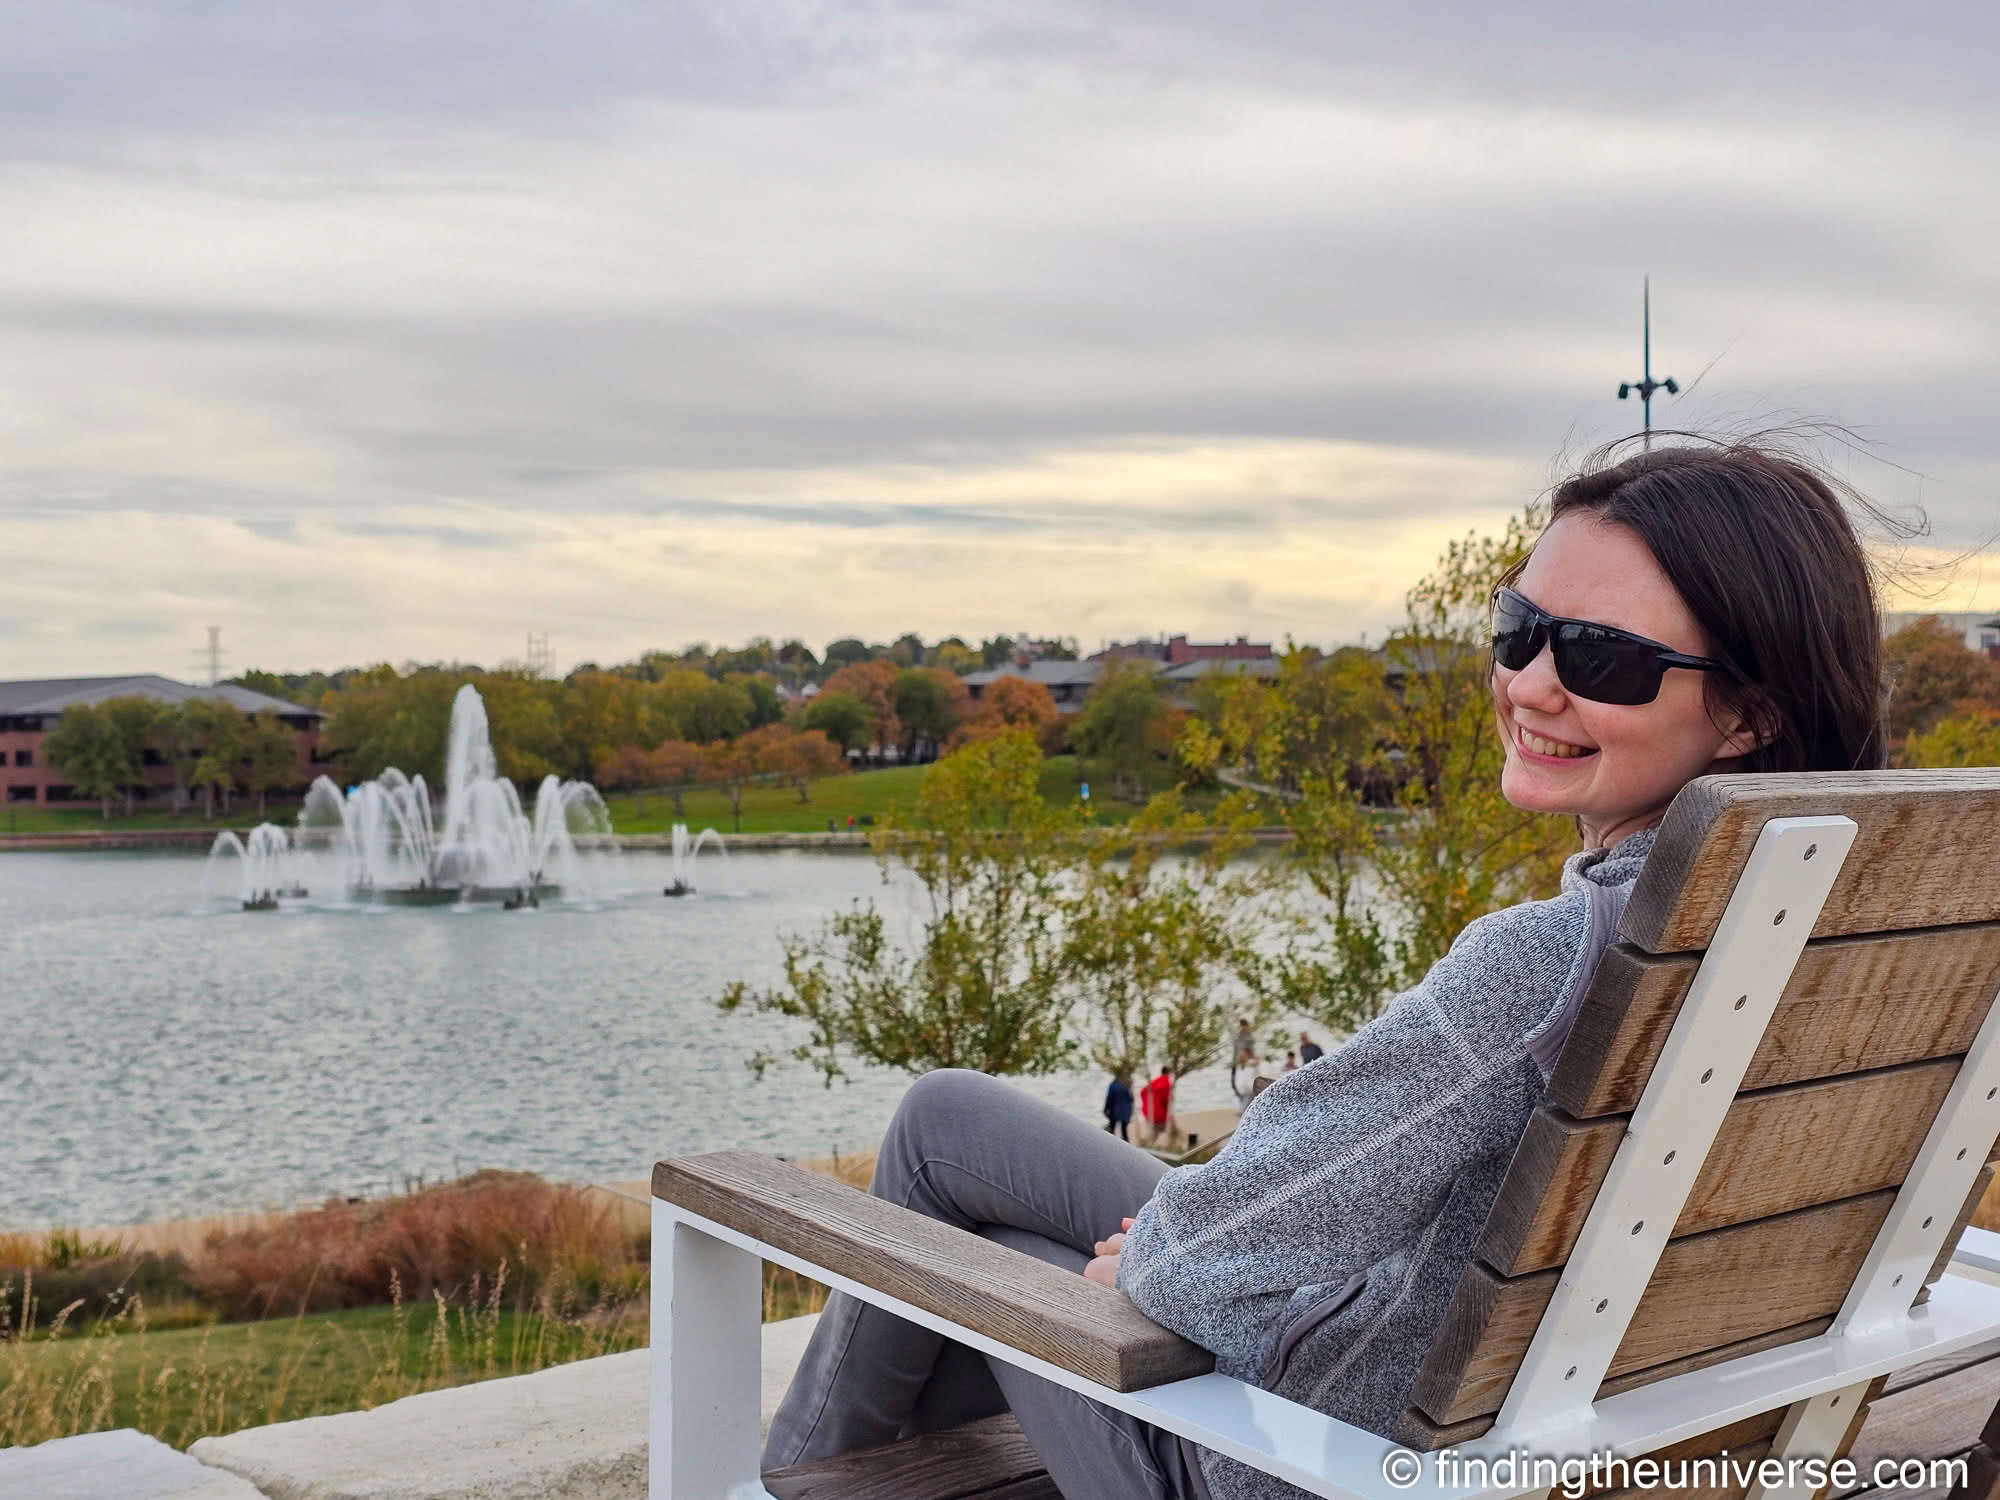
Heartland of America Park
The largest of the three RiverFront parks, this is also the most southern of the parks. It extends along the Missouri River, with the key element being a large lake which features three fountains. The largest of these three fountains shoots water 300 feet into the air and has a nighttime light show.
There’s a walking trail which circumnavigates the lake (around a mile in length), and in the summer you can take boat rides on the General Marion boat. If you’re in Omaha in late Spring, this is also where you’ll find the annual Taste of Omaha event.
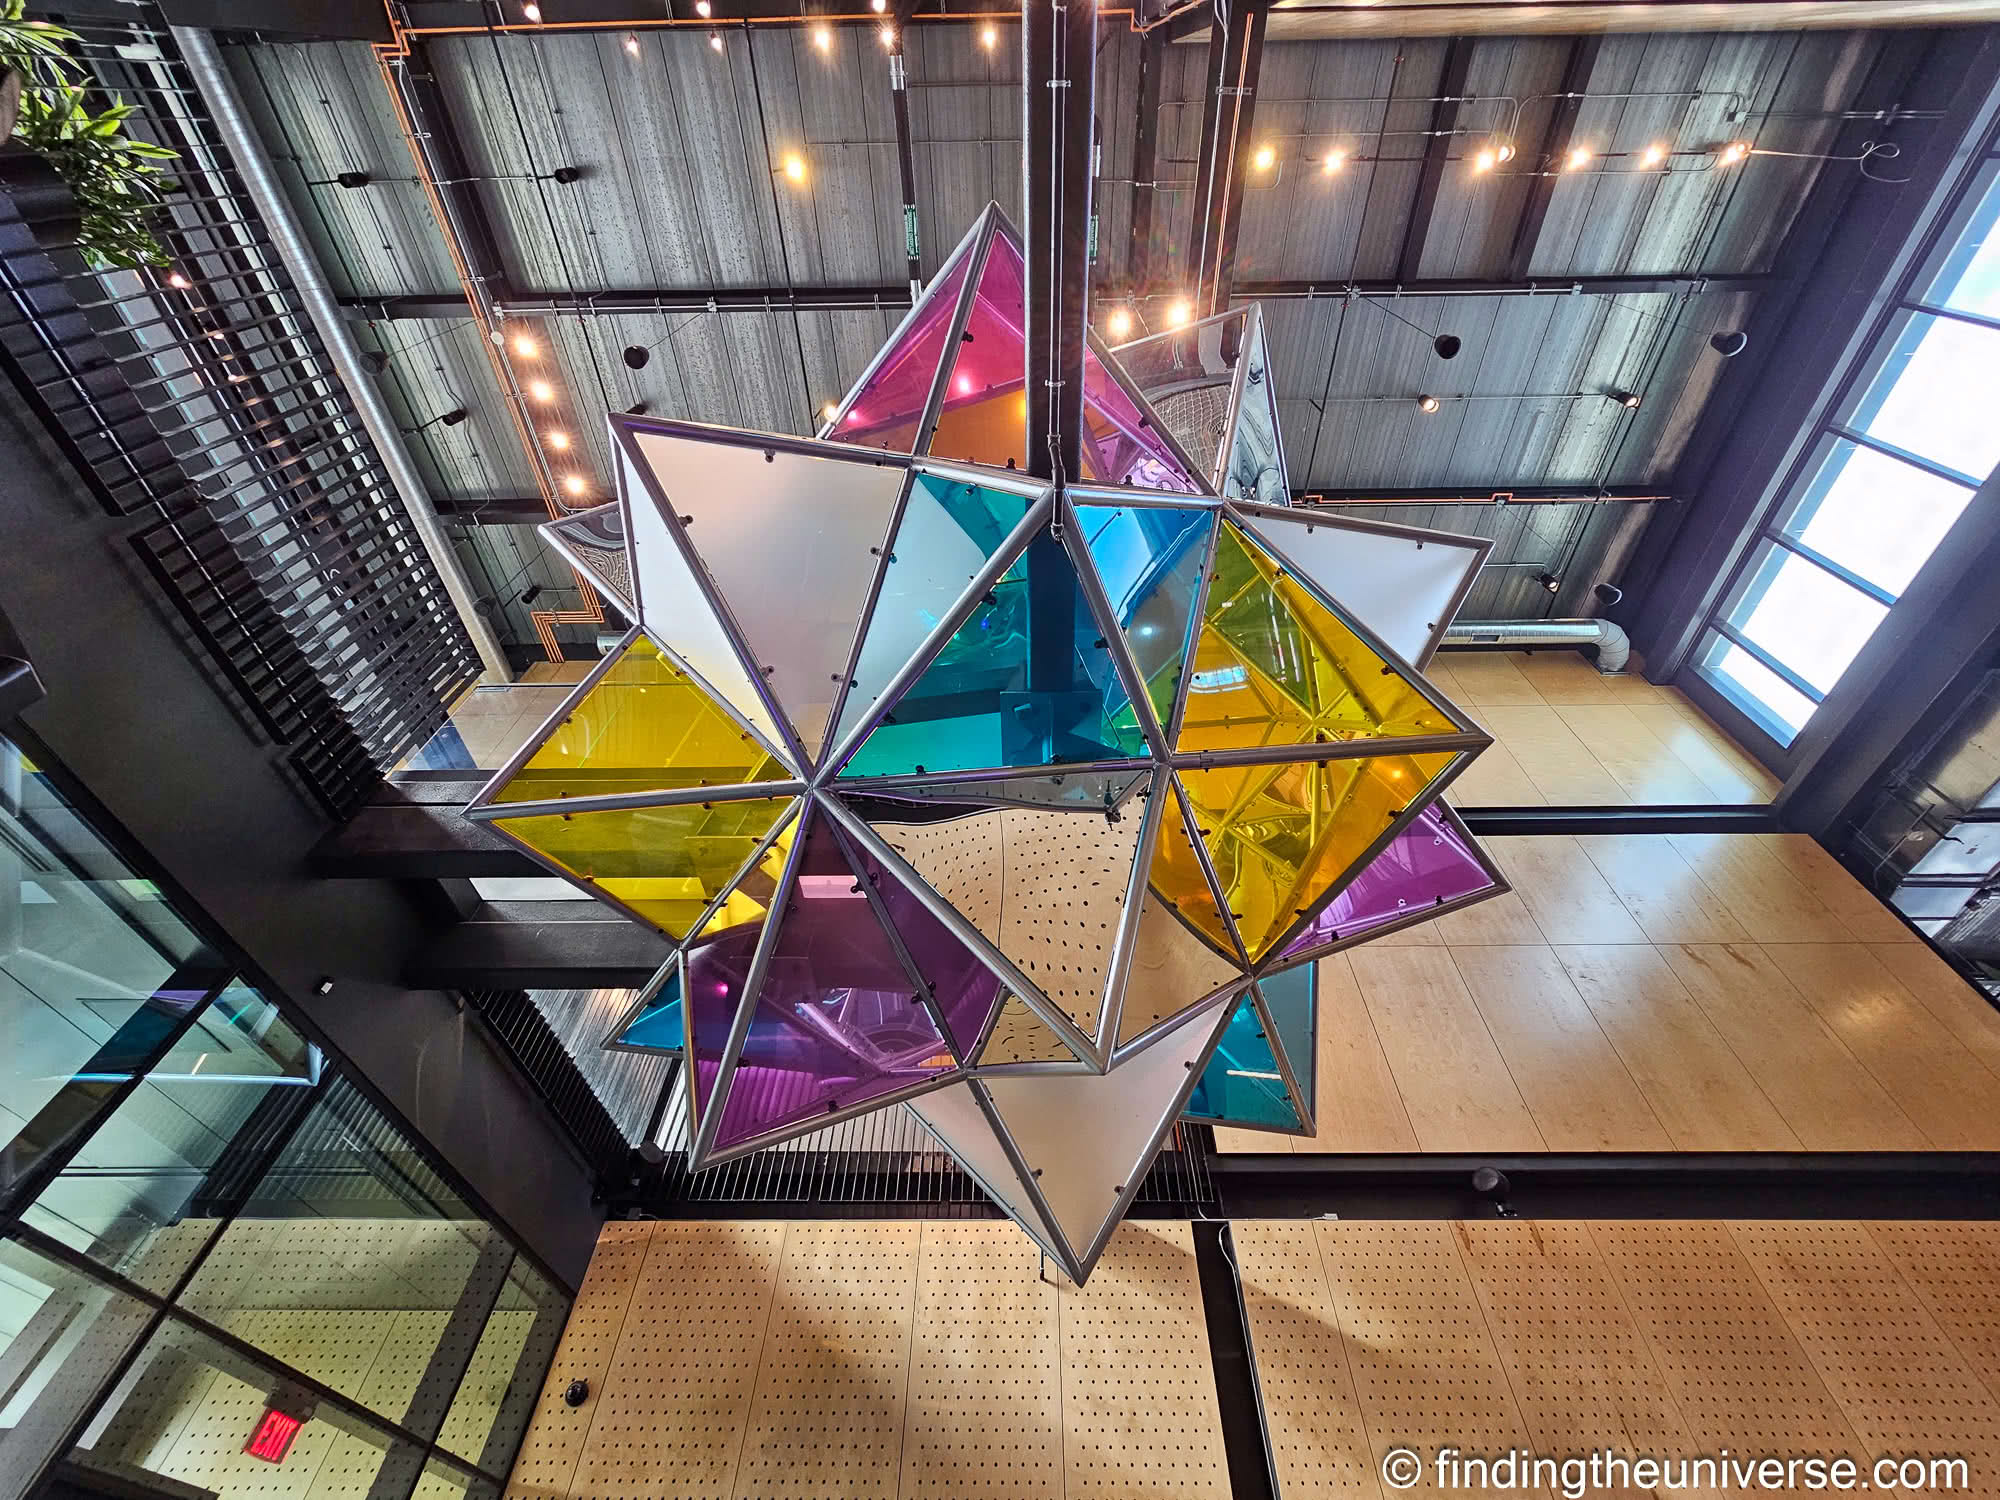
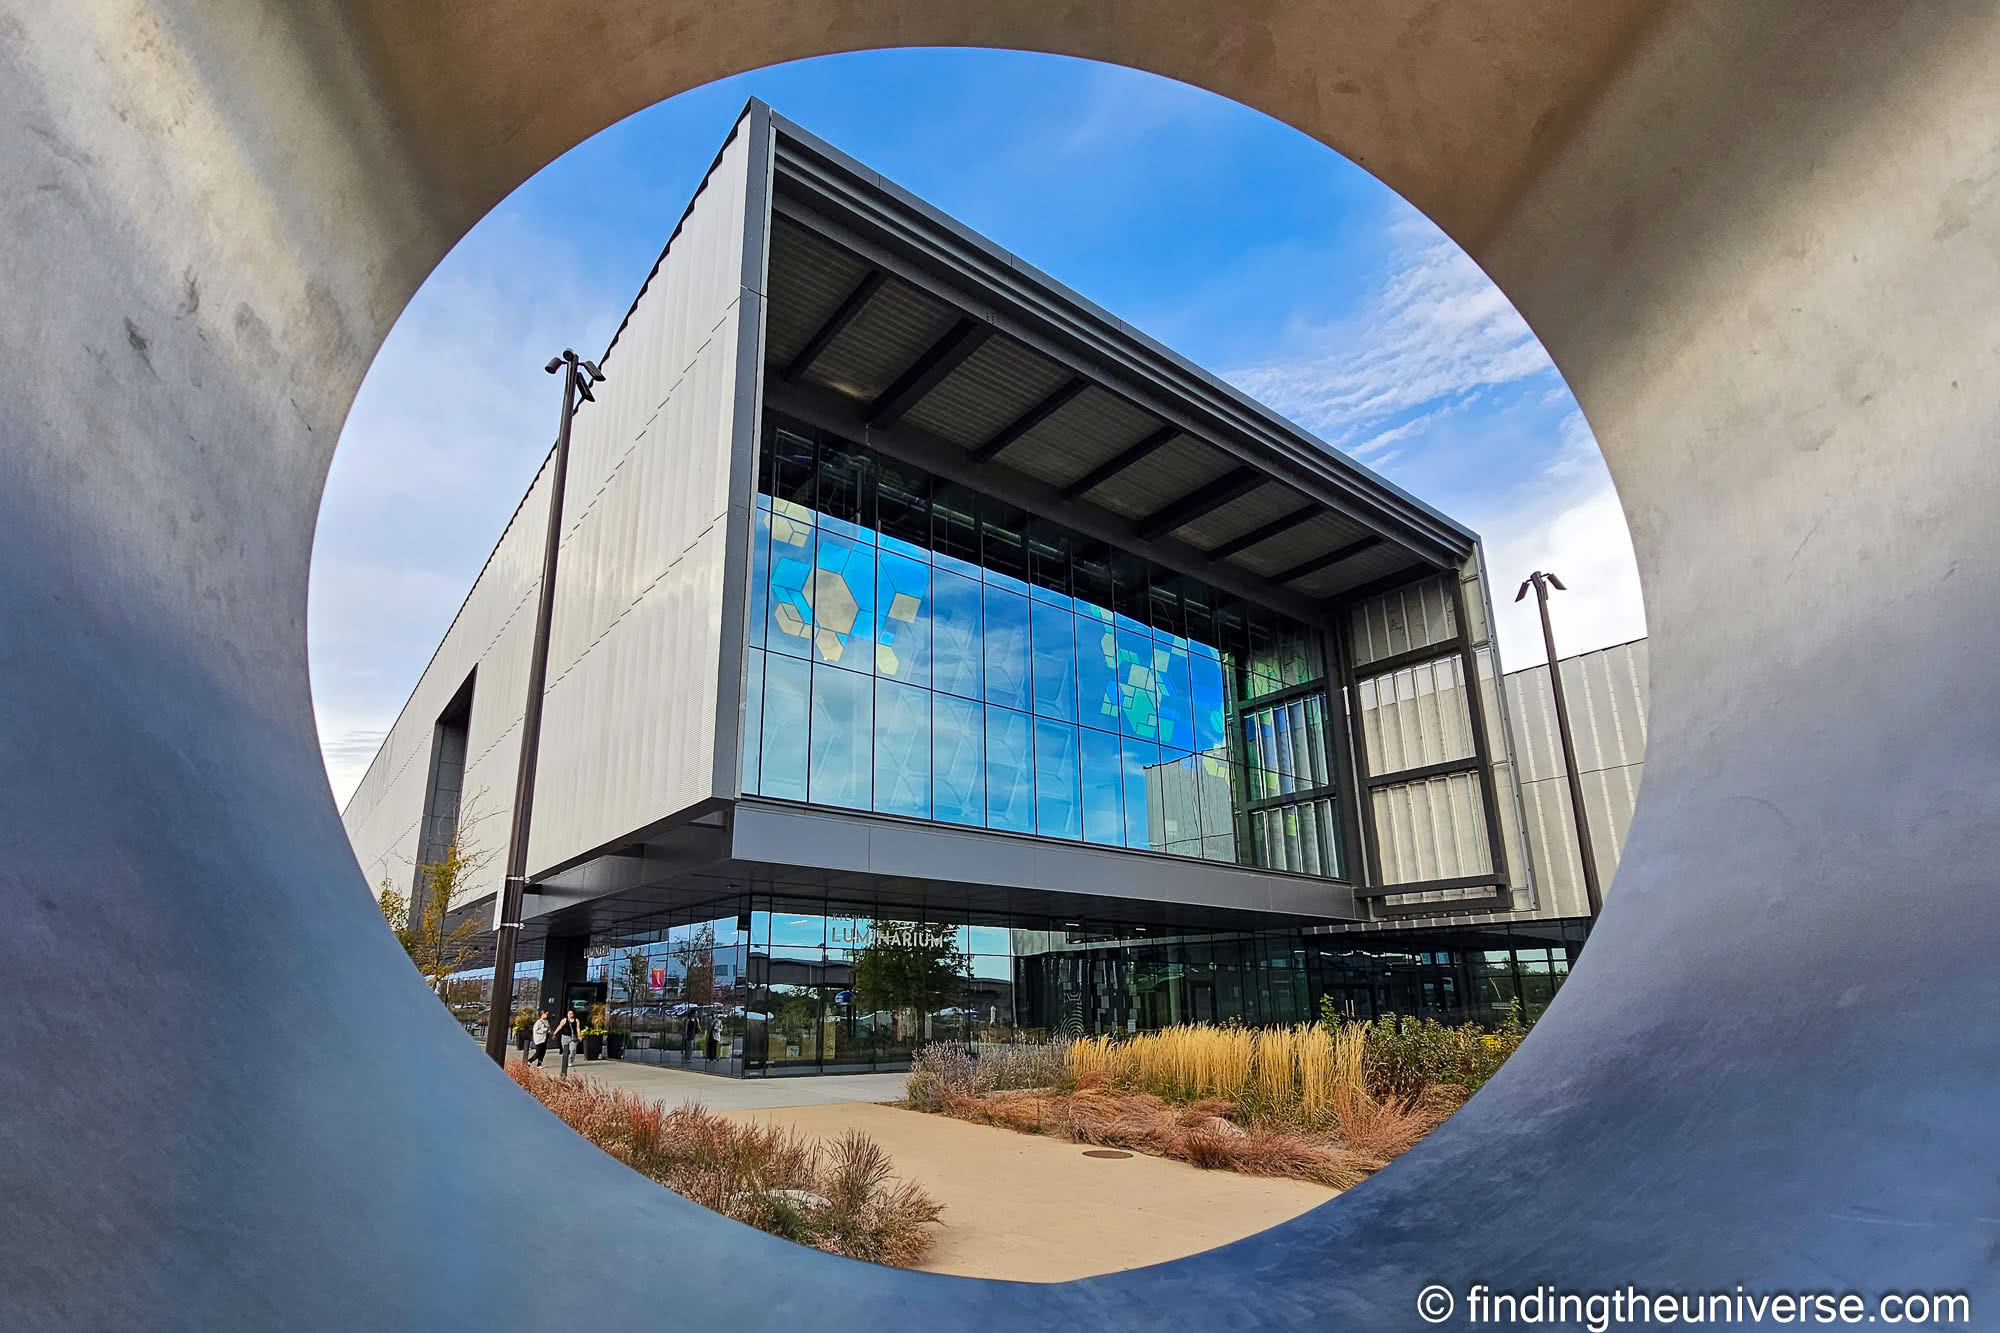
Kiewit Luminarium
Found in the Lewis & Clark Landing area of Omaha’s RiverFront, the Kiewit Luminarium is a large Science Museum which has an emphasis on hands-on, interactive exhibits. It is a particularly good option if you’re visiting Omaha with kids, but adults are catered too as well. In fact, there’s normally an adults only event called Night Light on Thursday evenings.
Inside, you’re going to find more than a hundred hands-on exhibits. From learning how physics works, to material science, structures, the human body, technology, math and geometry, you are sure to find something to enjoy.
There’s free parking on site. There’s an entry fee, which is relatively high, but we think worth it if you plan to spend at least half a day here.
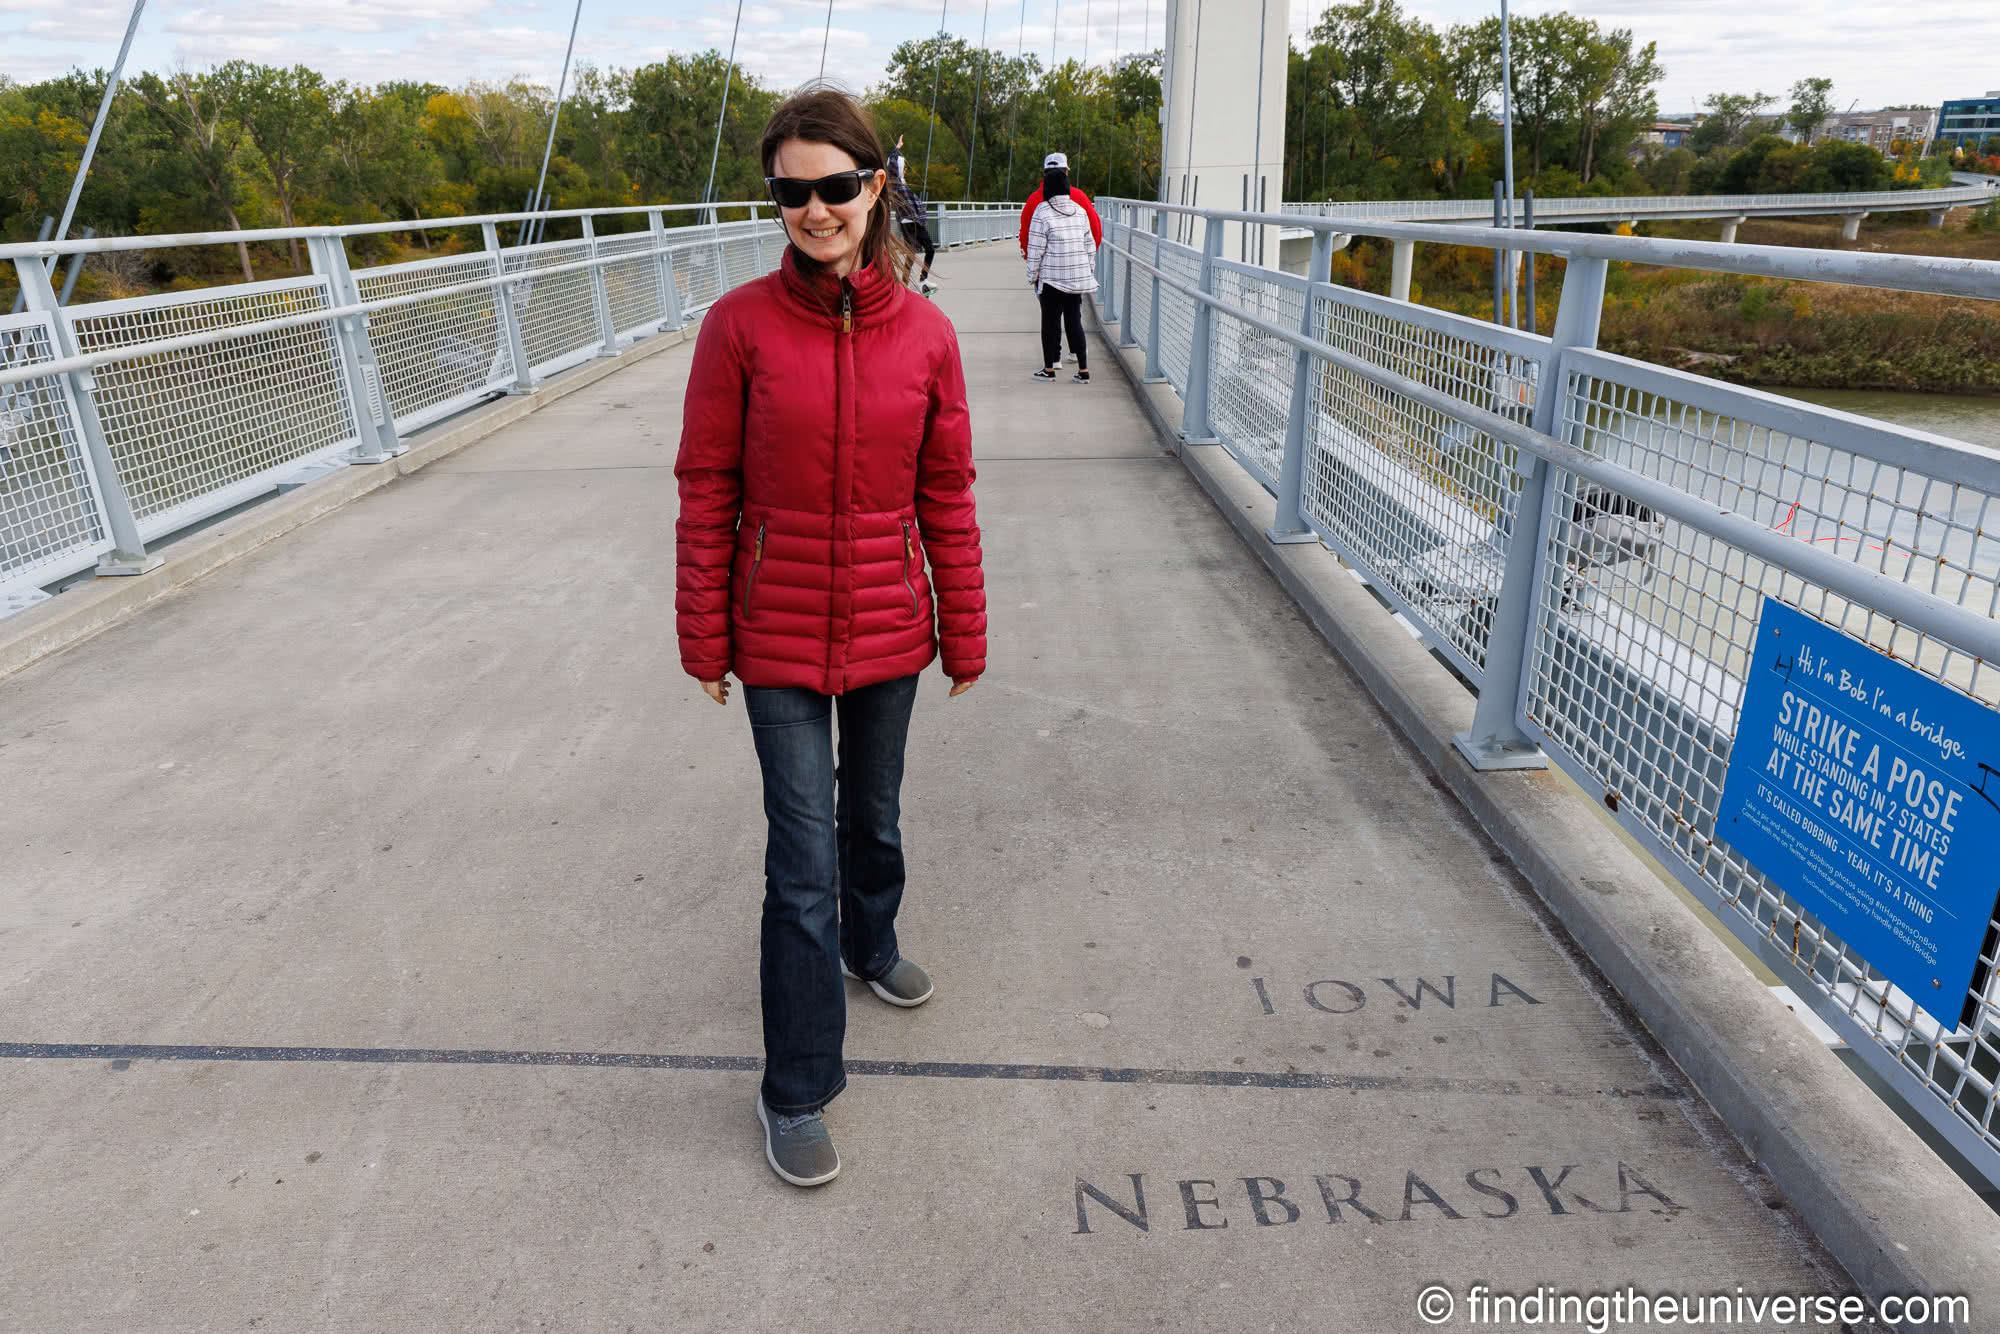
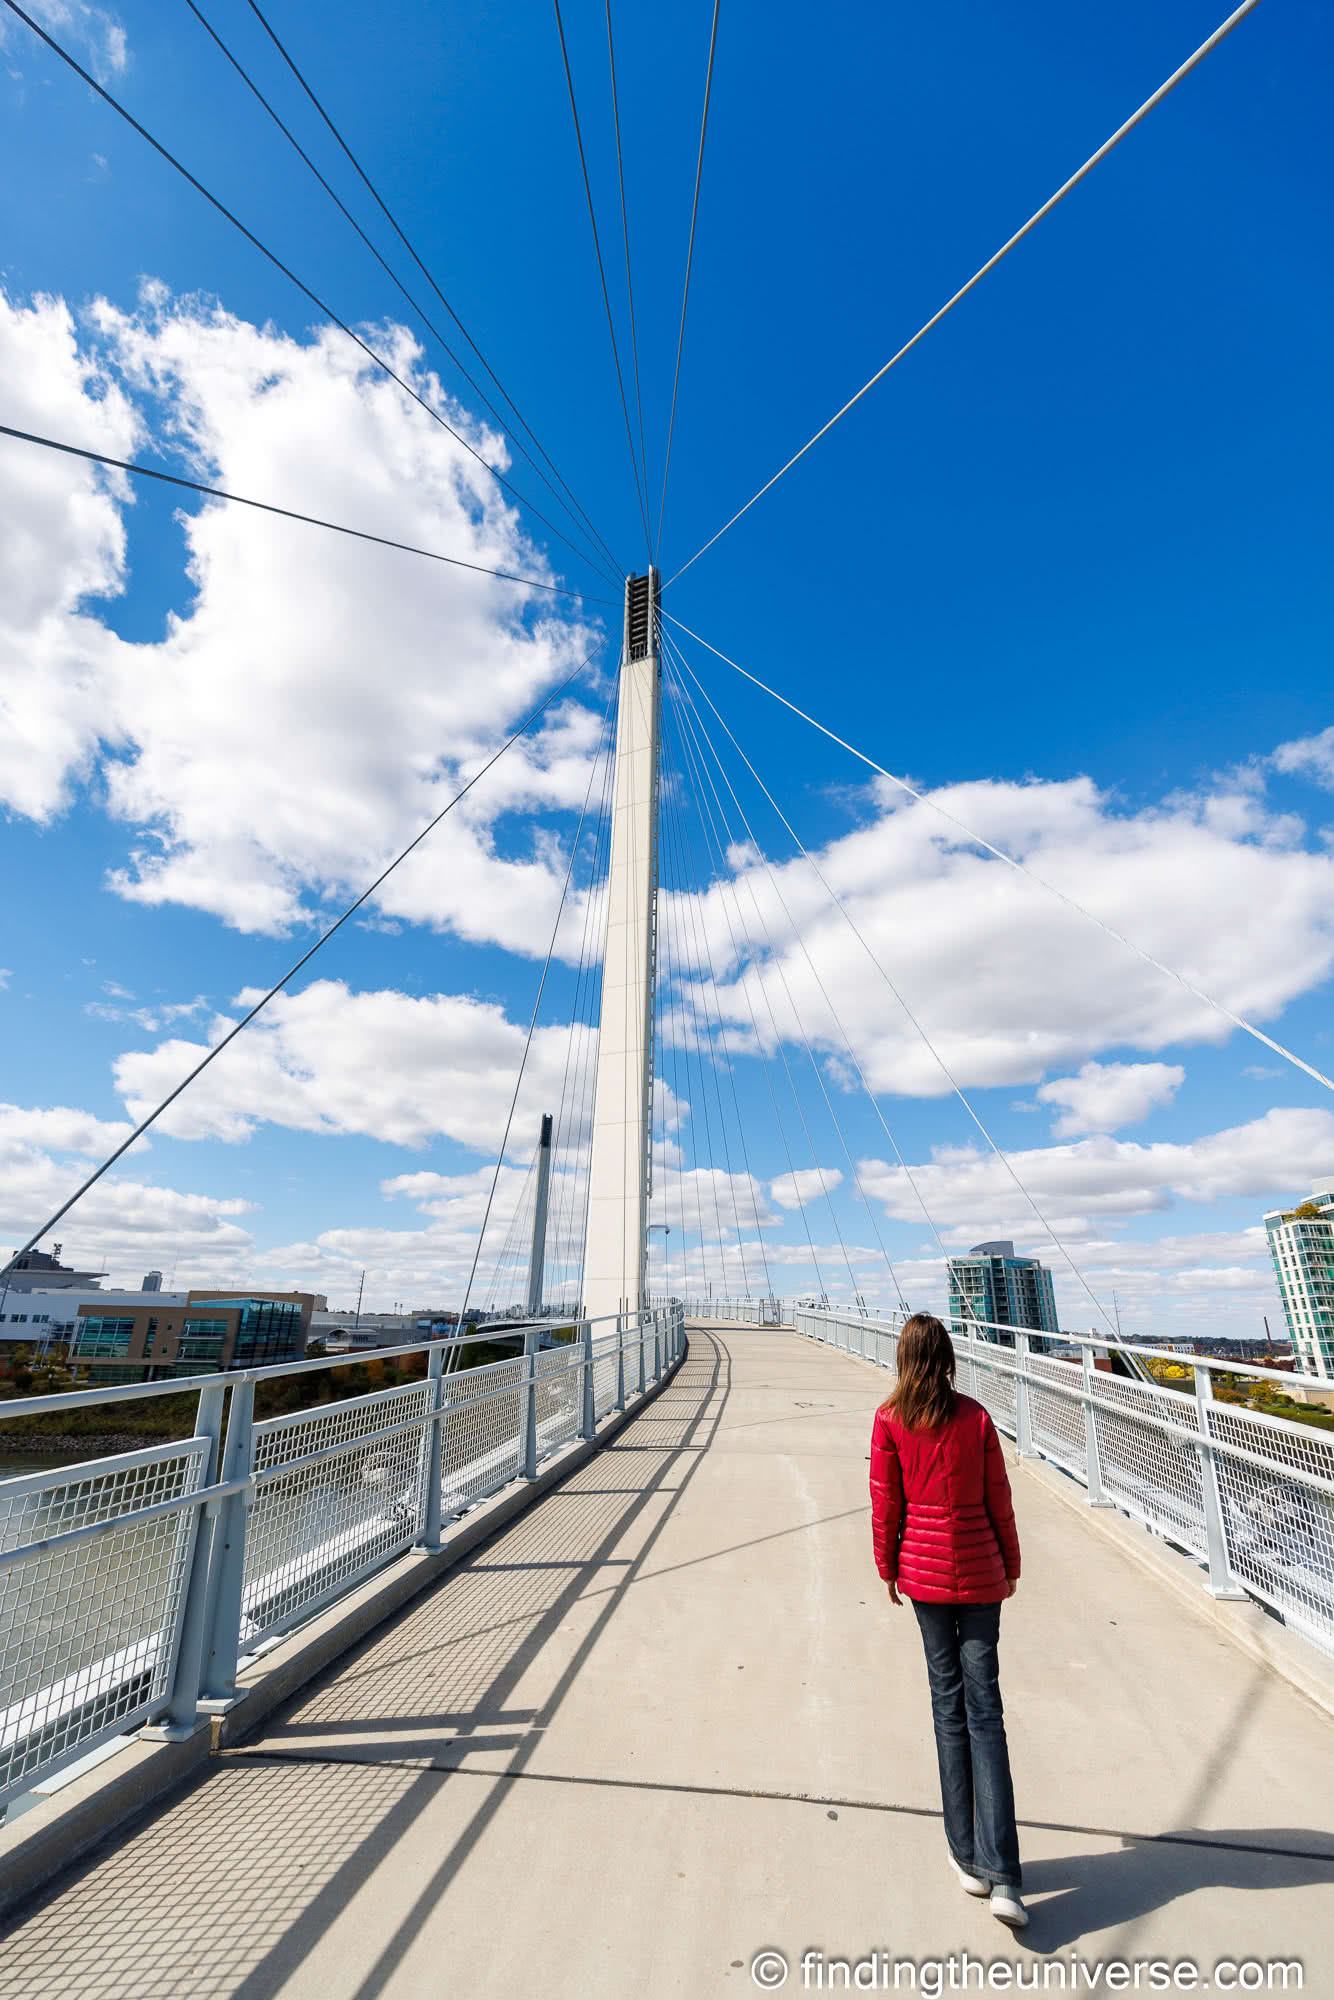
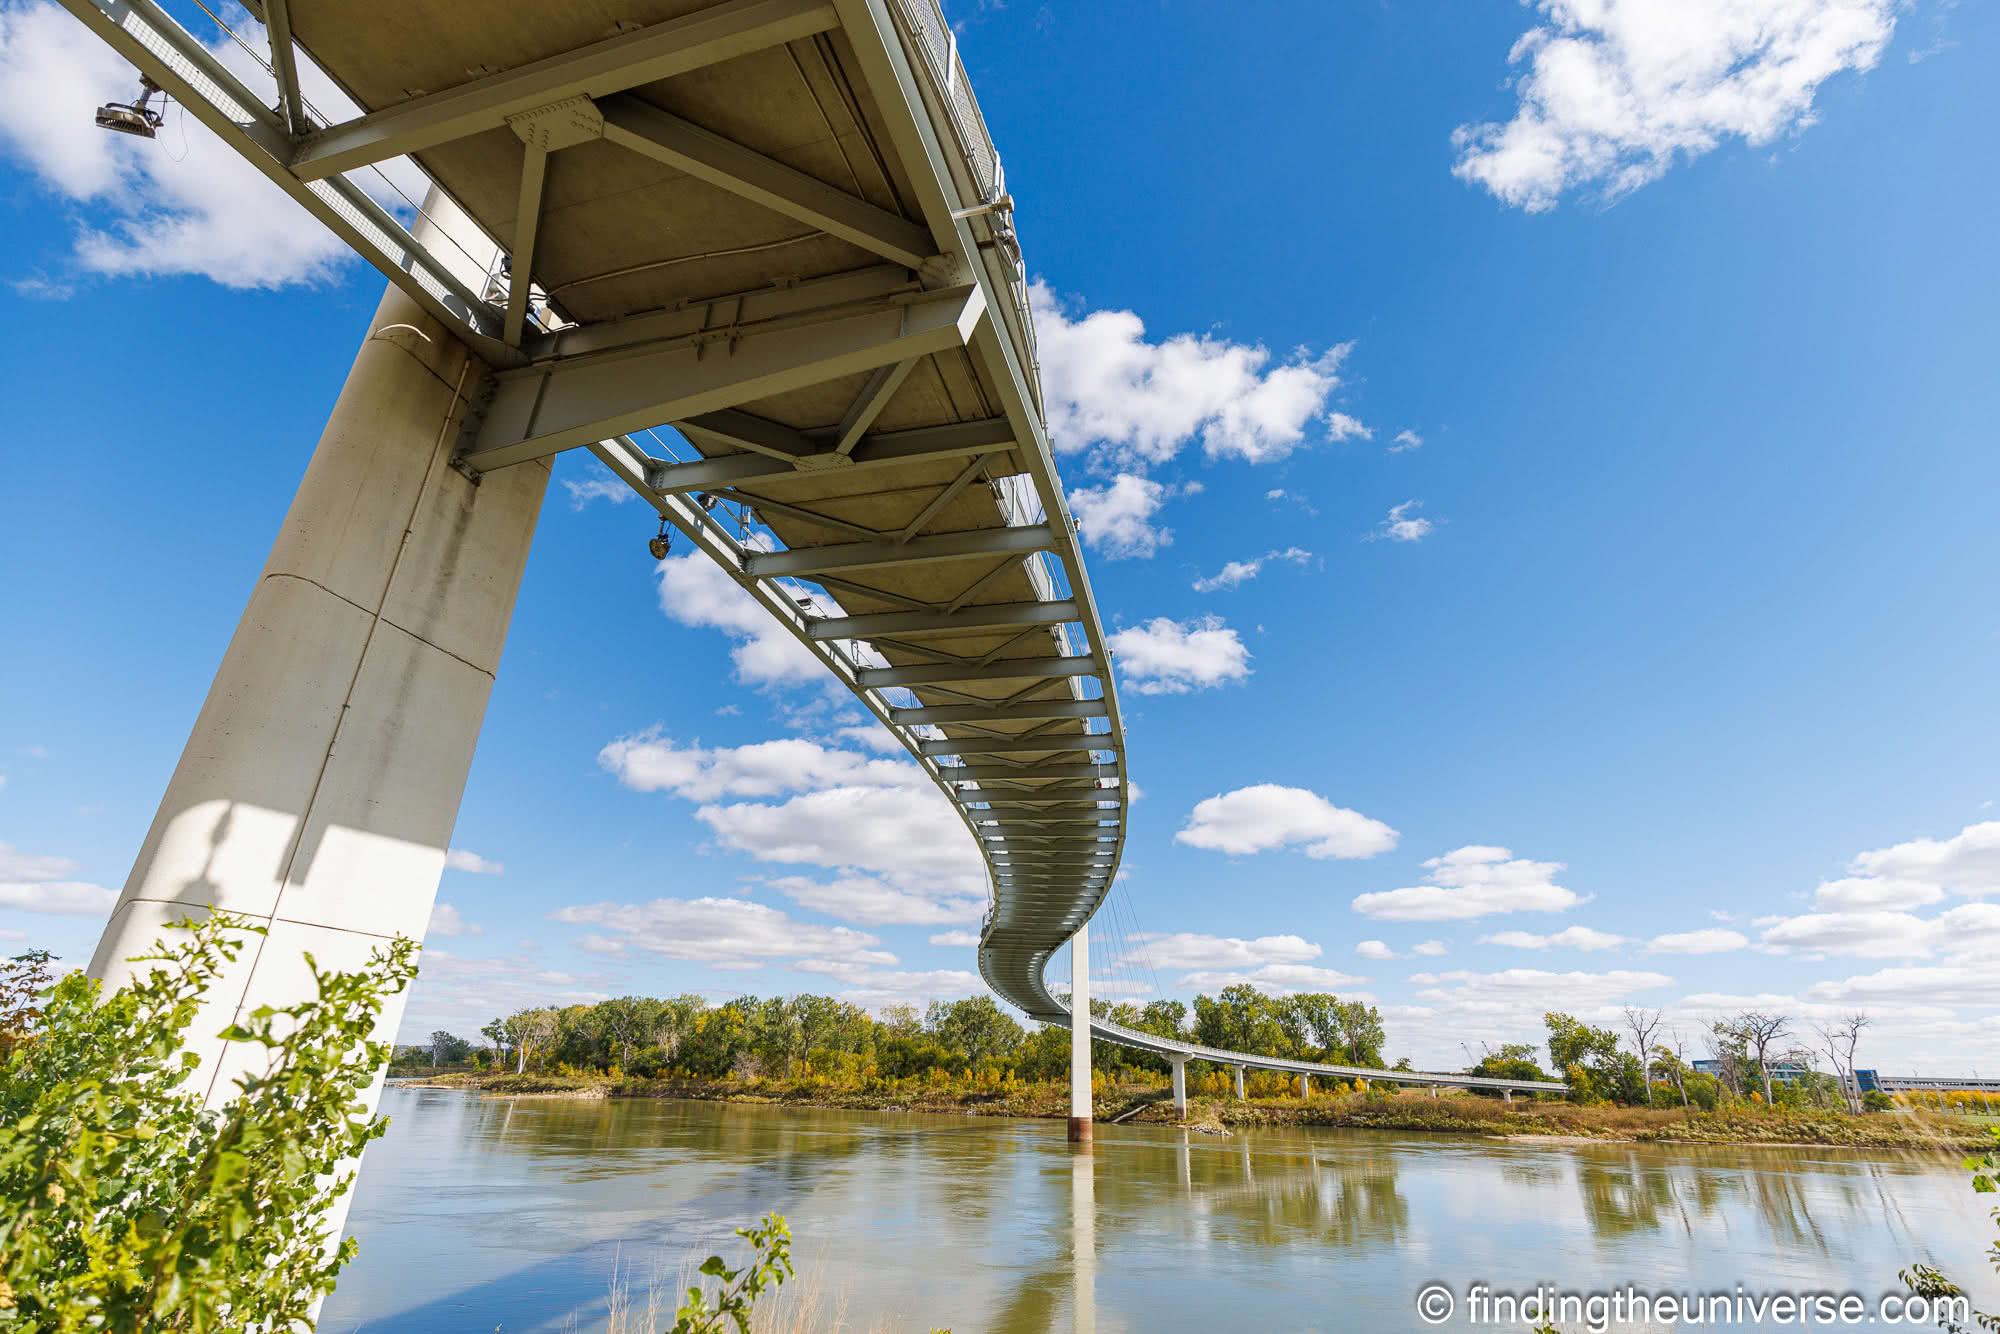
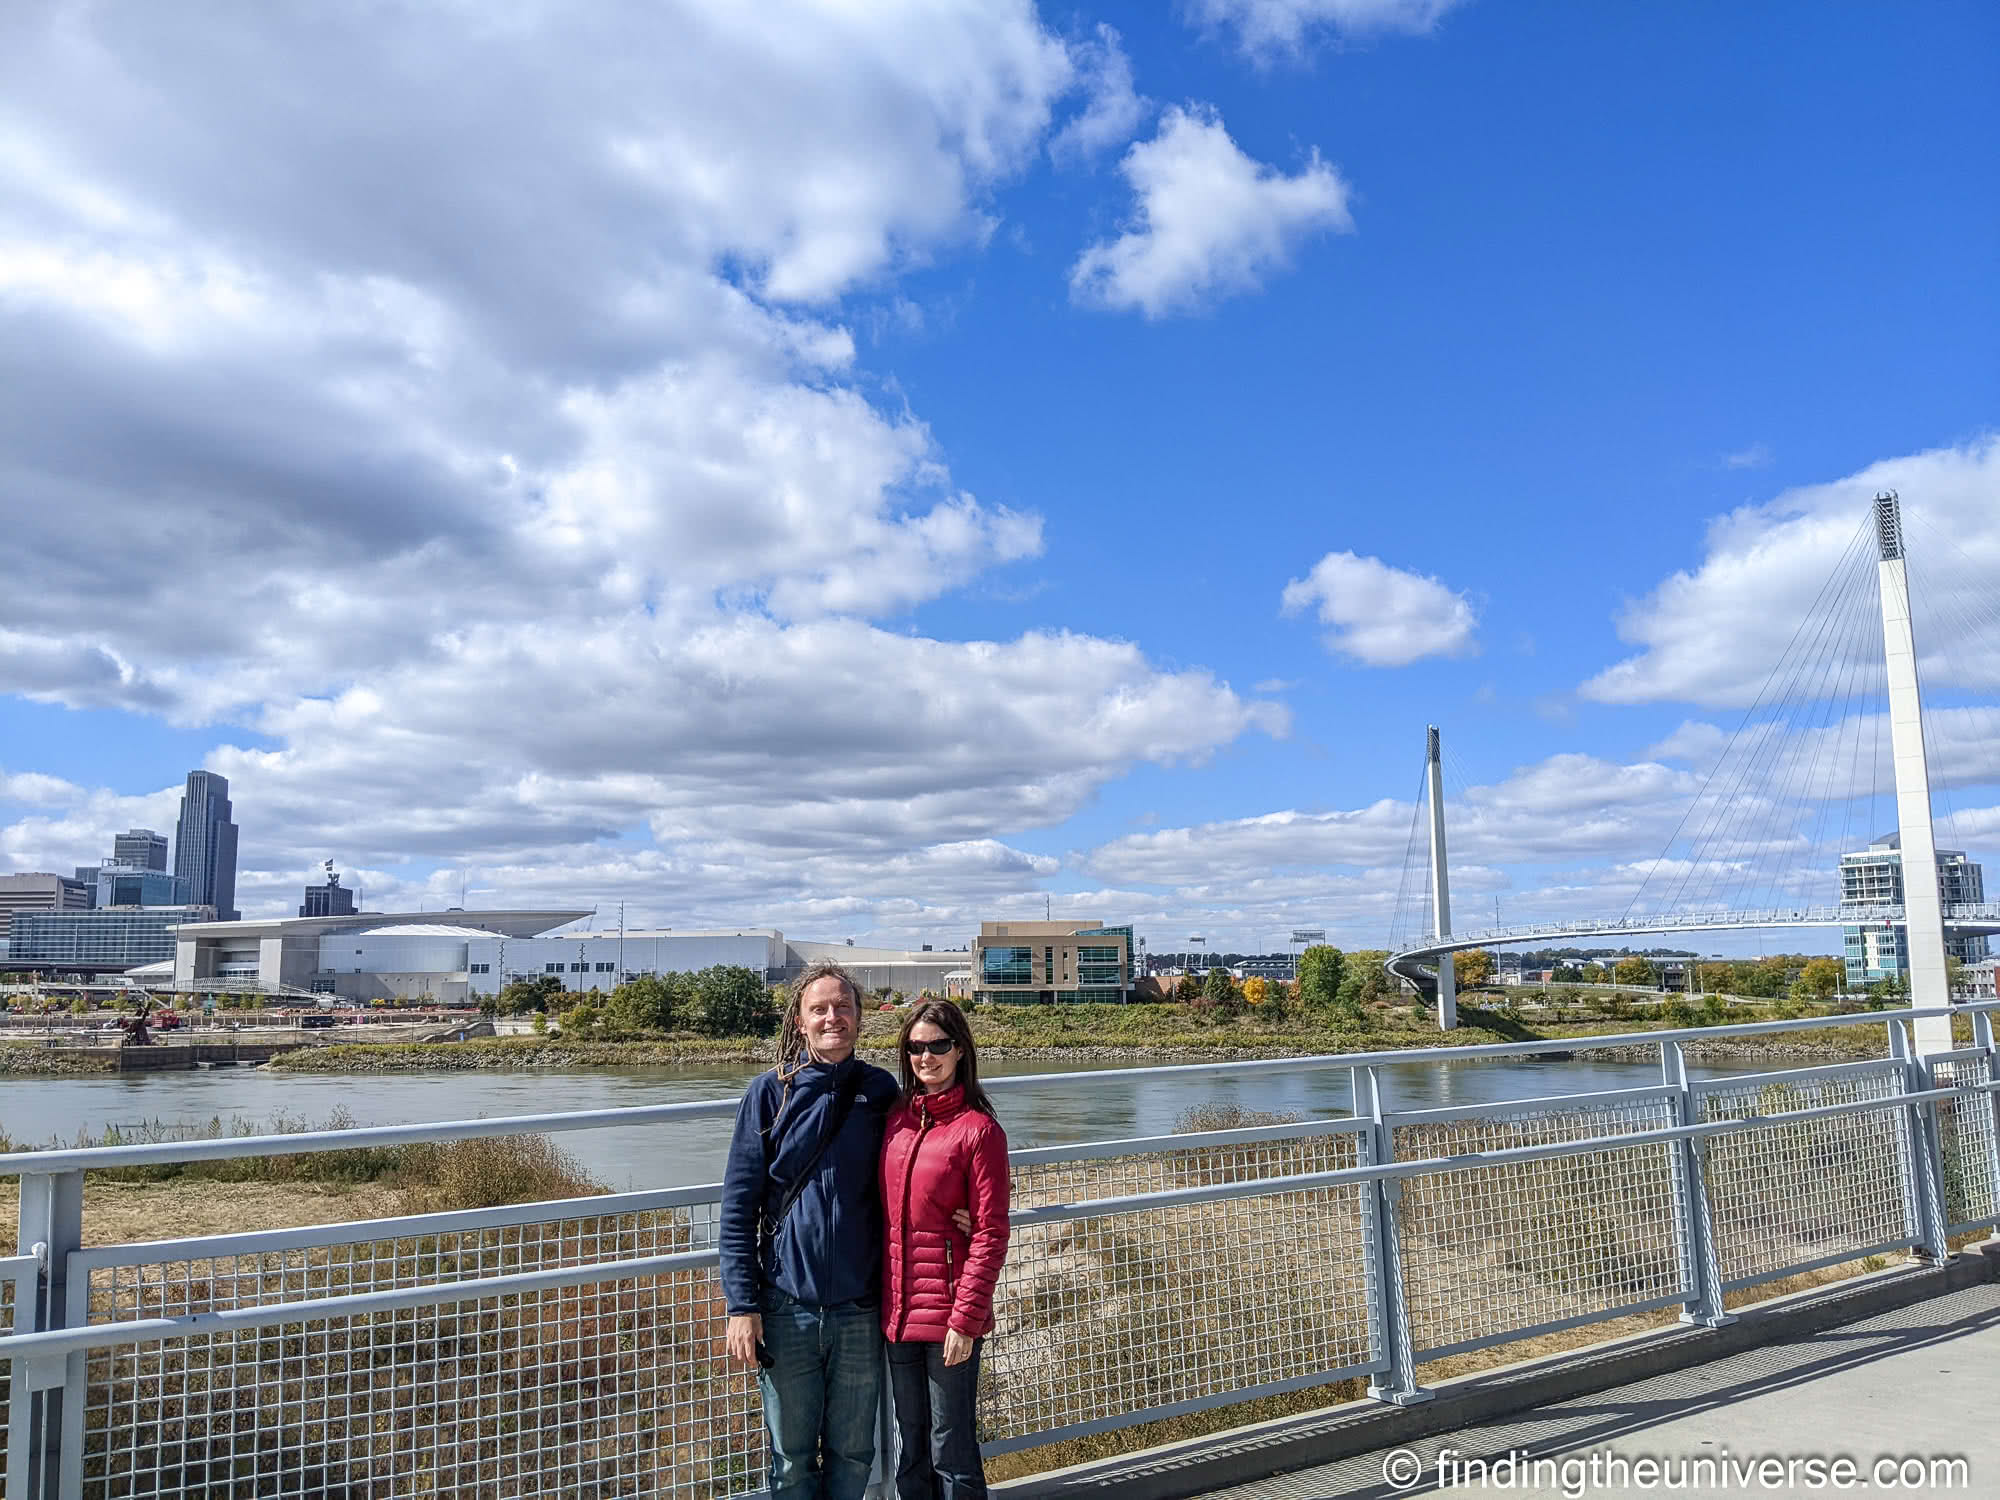
Bob Kerrey Pedestrian Bridge
Omaha sits right on the eastern edge of Nebraska, with just the Missouri river separating the city from Council Bluffs, Iowa. Linking the two cities, and giving you the opportunity to stand in both states at once, is the impressive Bob Kerrey Pedestrian Bridge.
This 3,000 foot long bridge curves majestically across the river, and from it you get good views of the cities of Omaha, Nebraska and Council Bluffs, Iowa. Naturally you also get good views of the Missouri river, which the bridge crosses.
The bridge is pedestrian only so no car traffic making it a popular option for families with kids to enjoy.
On the Omaha side, the bridge starts near the National Park Service Visitors Center. It takes you to the Tom Hanafan River’s Edge Park on the Iowa side. If you enjoy walking or cycling the bridge links up with 150 miles of trails. So you can keep going for quite some time if you wish!
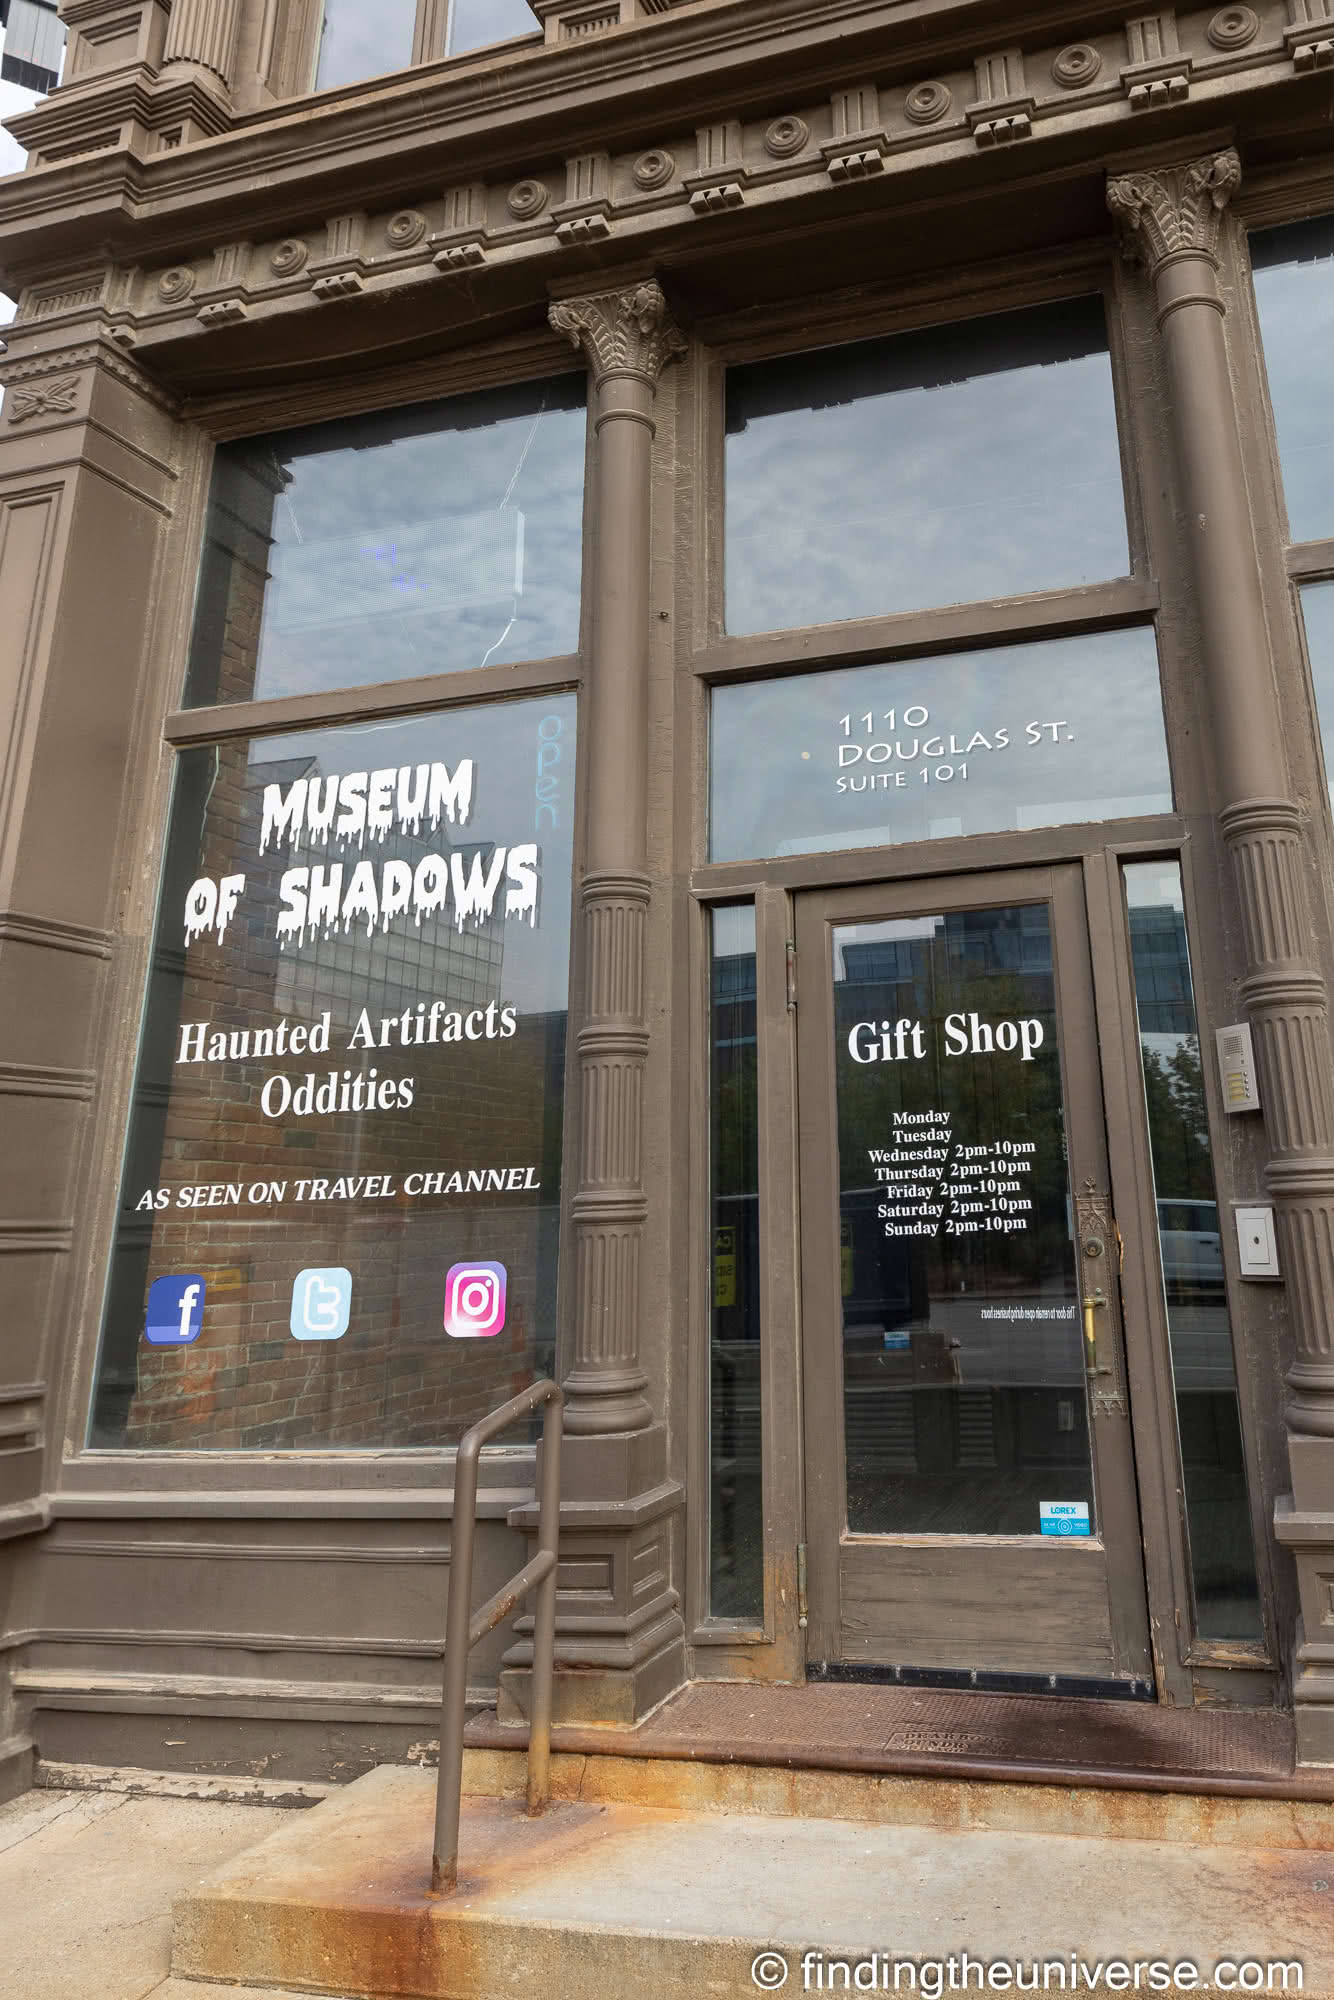
Museum of Shadows
If you like your experiences to be of the paranormal kind, then you will likely enjoy a visit to Omaha’s Museum of Shadows. This is home to a variety of haunted artifacts, with the museum itself also said to be haunted.
Now, this experience isn’t going to be for everyone, and reviews are definitely mixed. However, if you want to experience something a bit different and believe in the paranormal, it’s definitely an option.
There’s an entry fee, find out more here. You can purchase tickets online in advance or on site in person. Just note this is not open every day so be sure to check opening days and hours before you head here.
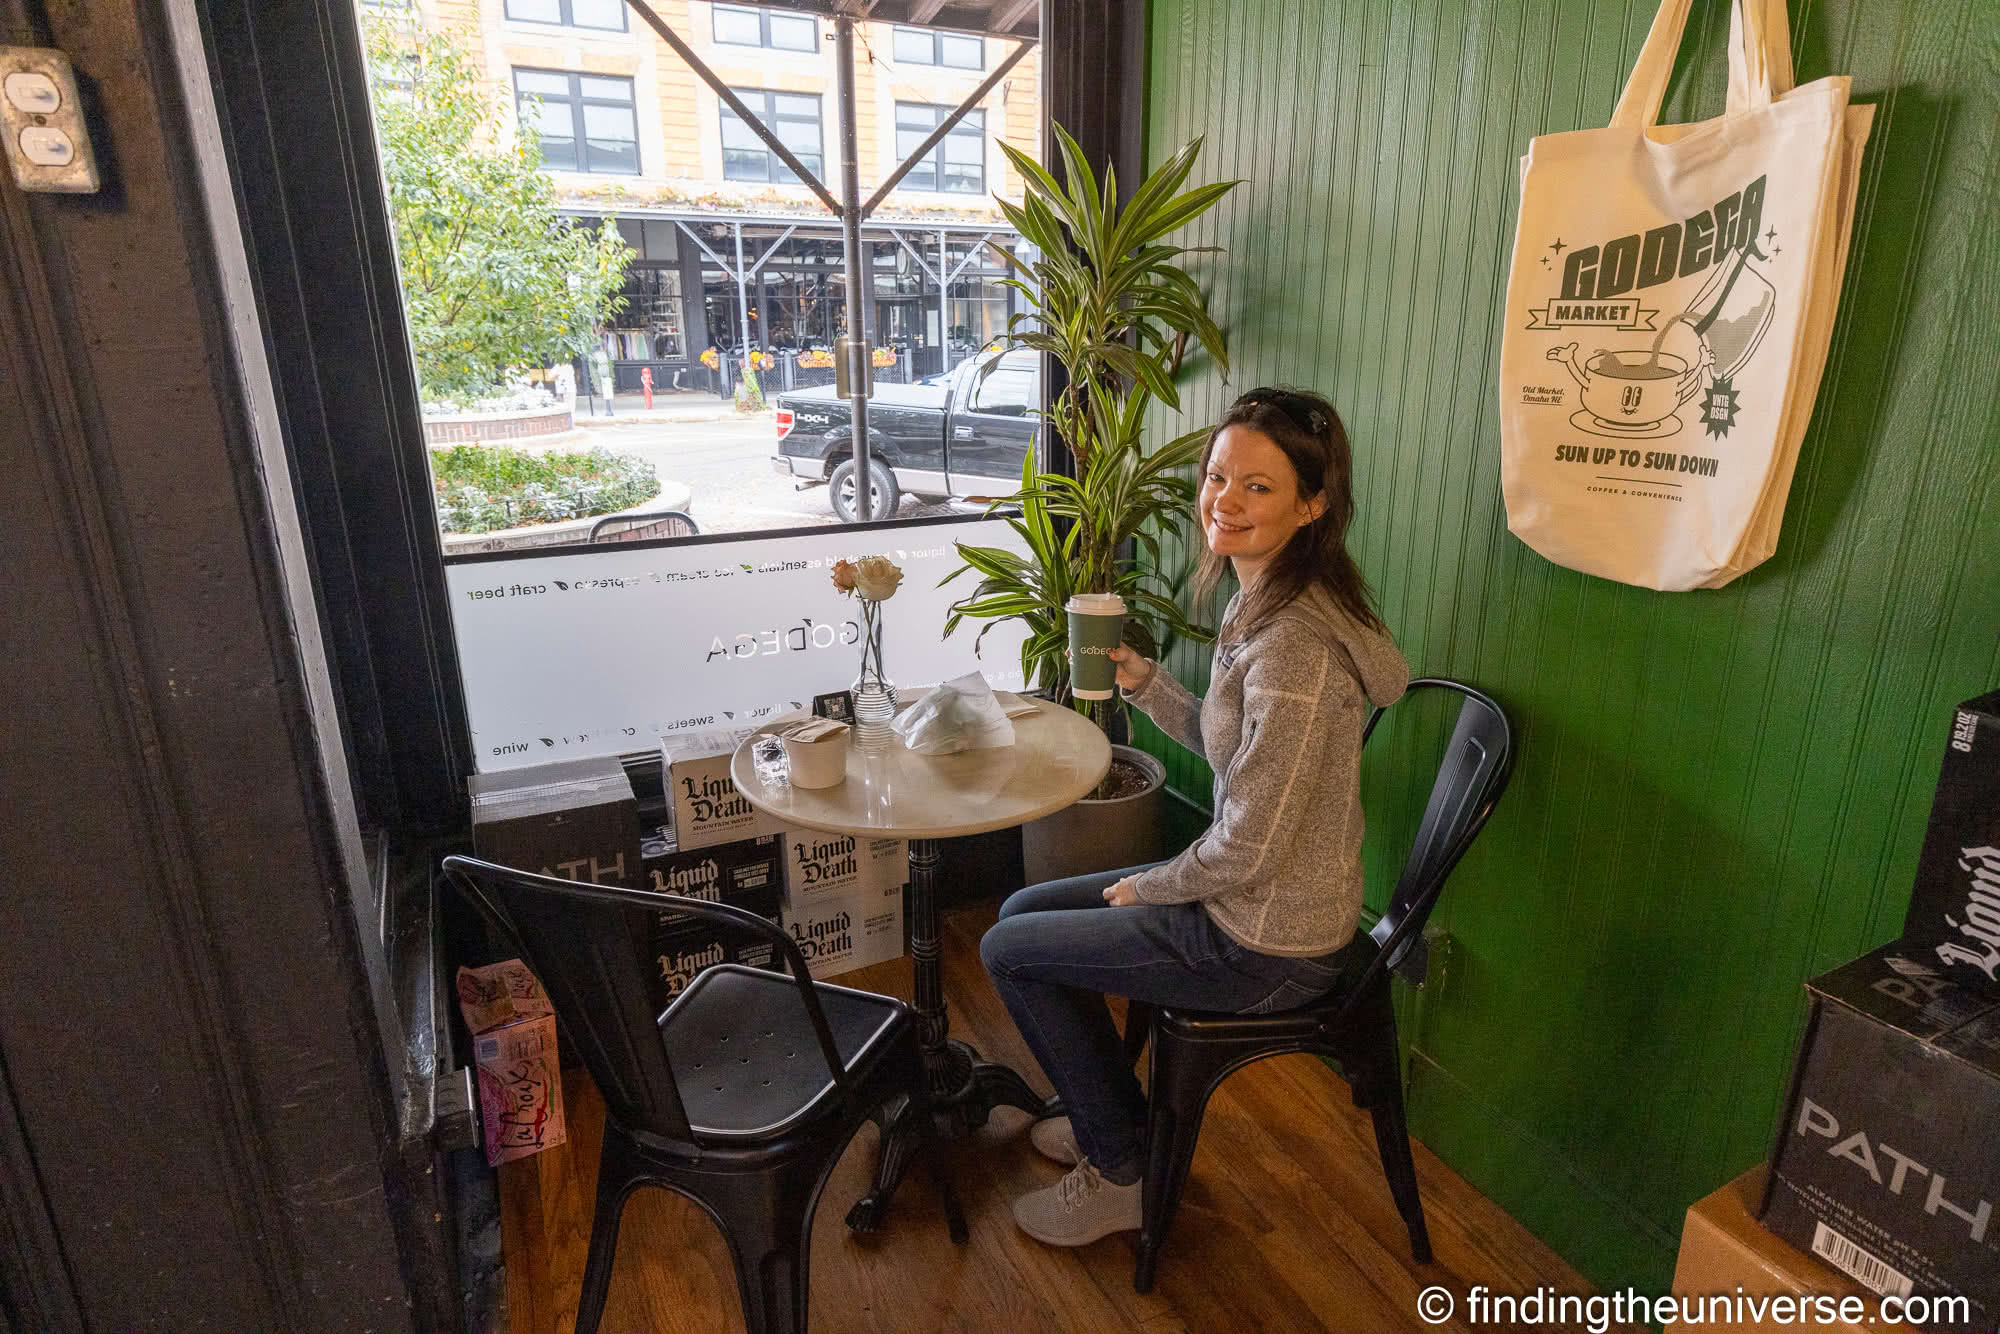
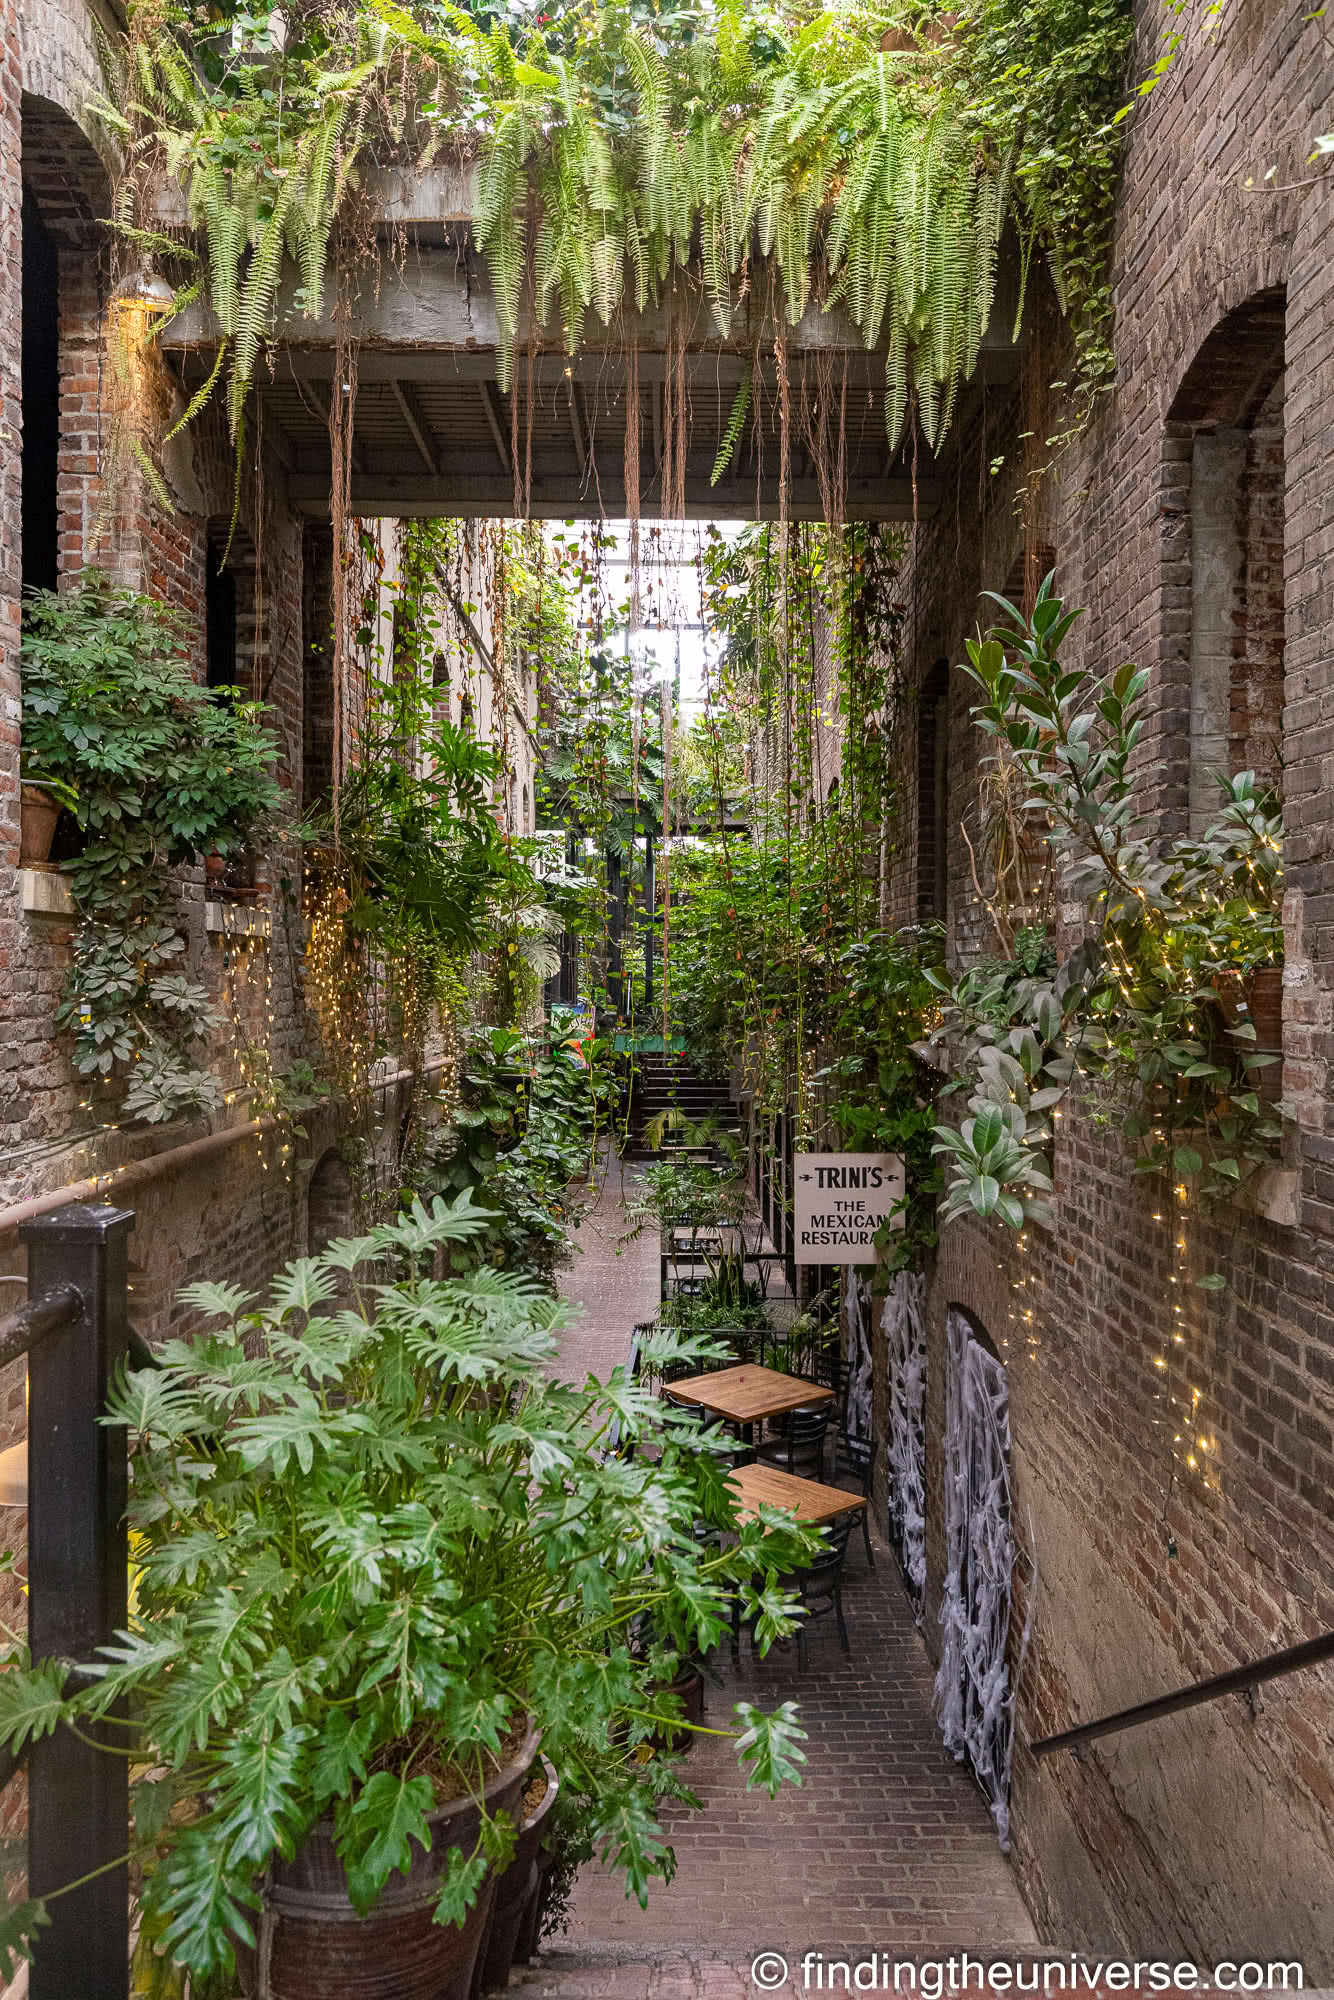
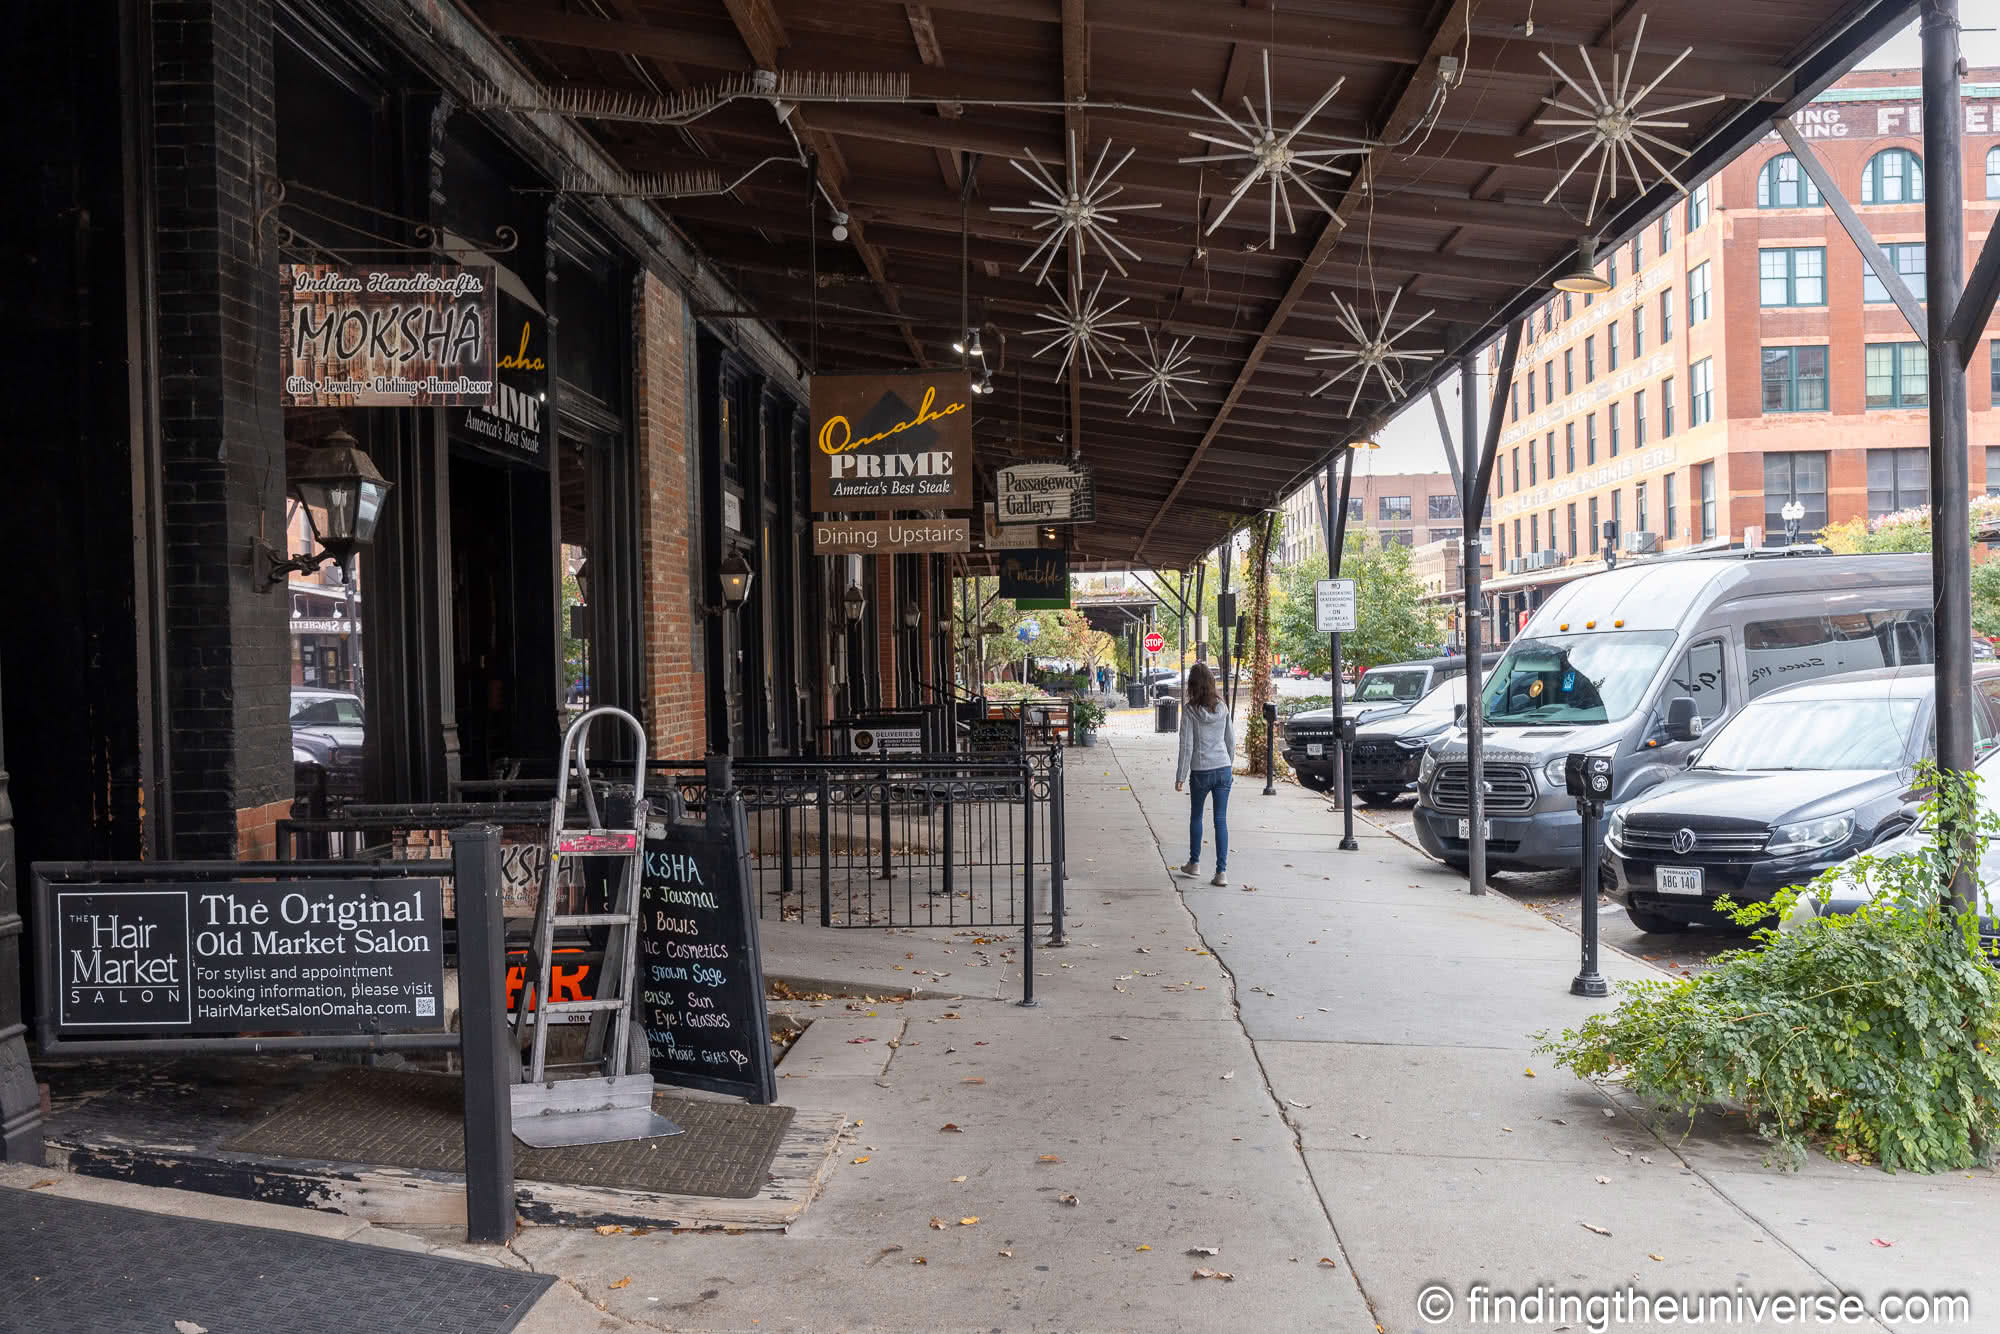
The Old Market
One of our favorite neighborhoods to wander around and grab a coffee in Omaha is the Old Market. This was the originally the heart of Omaha’s wholesale grocery trade back in the late 19th century when Omaha sat at the heart of the railroads connecting East and West. The brick buildings here served as warehouses, wholesale stores, offices, and more.
Changes in how groceries were bought and sold meant that by the 1950s the Old Market was no longer fulfilling its original function, and many of its buildings were at risk of being condemned.
Thankfully, locally born landowner Samuel Mercer saw the potential of the area, and led the renovation efforts. Today, the Old Market district is the heart of the dining and shopping experience in Omaha. The old buildings and cobbled streets remain, now home to stores, restaurants, bars, coffee shops, thrift stores, pubs, and apartments. You can even still take a carriage ride!
You’ll also find that the Omaha Visitors Center is located next to the Old Market area on 306 S 10th Street. It is normally open Tuesday-Saturday from 10am-4pm. They have staff who can help you plan your time, free tourist brochures, and also local souvenirs and gift for purchase. If you are interested in the Omaha Savings Pack, you can find out more about it here.
Lauritzen Gardens
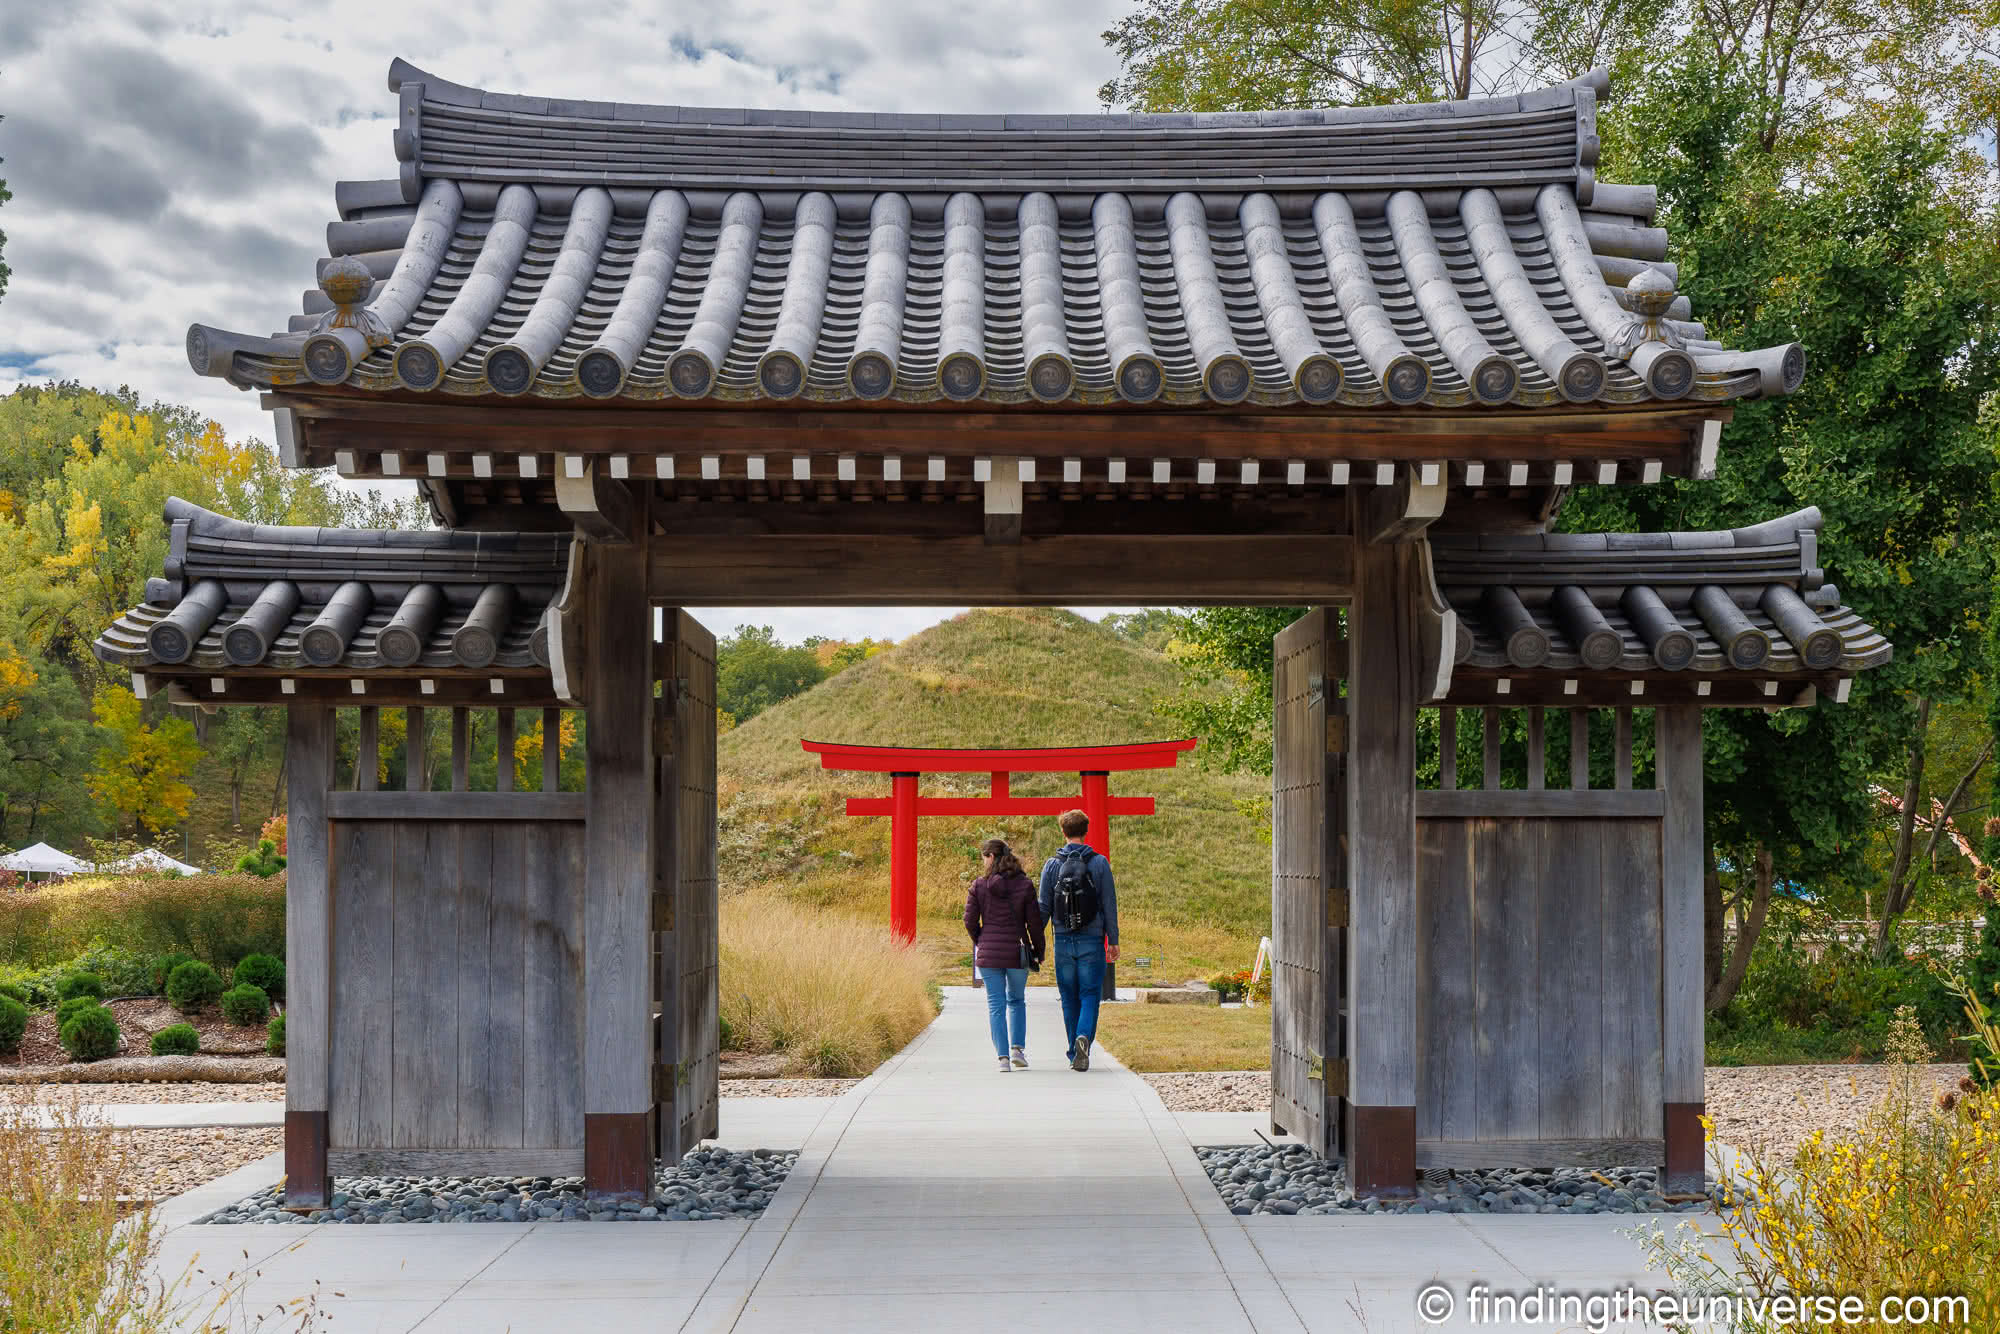
If you enjoy green spaces, Omaha has a lot of options, both free and paid. Falling into the latter category are the Lauritzen Gardens. These are a botanical garden and arboretum in southern Omaha which cover 100 acres, including a 4-acre arboretum, and bird sanctuary. They also have events running throughout the year. We visited once during a Japanese festival which was a lot of fun. You can find out more on the official website here.
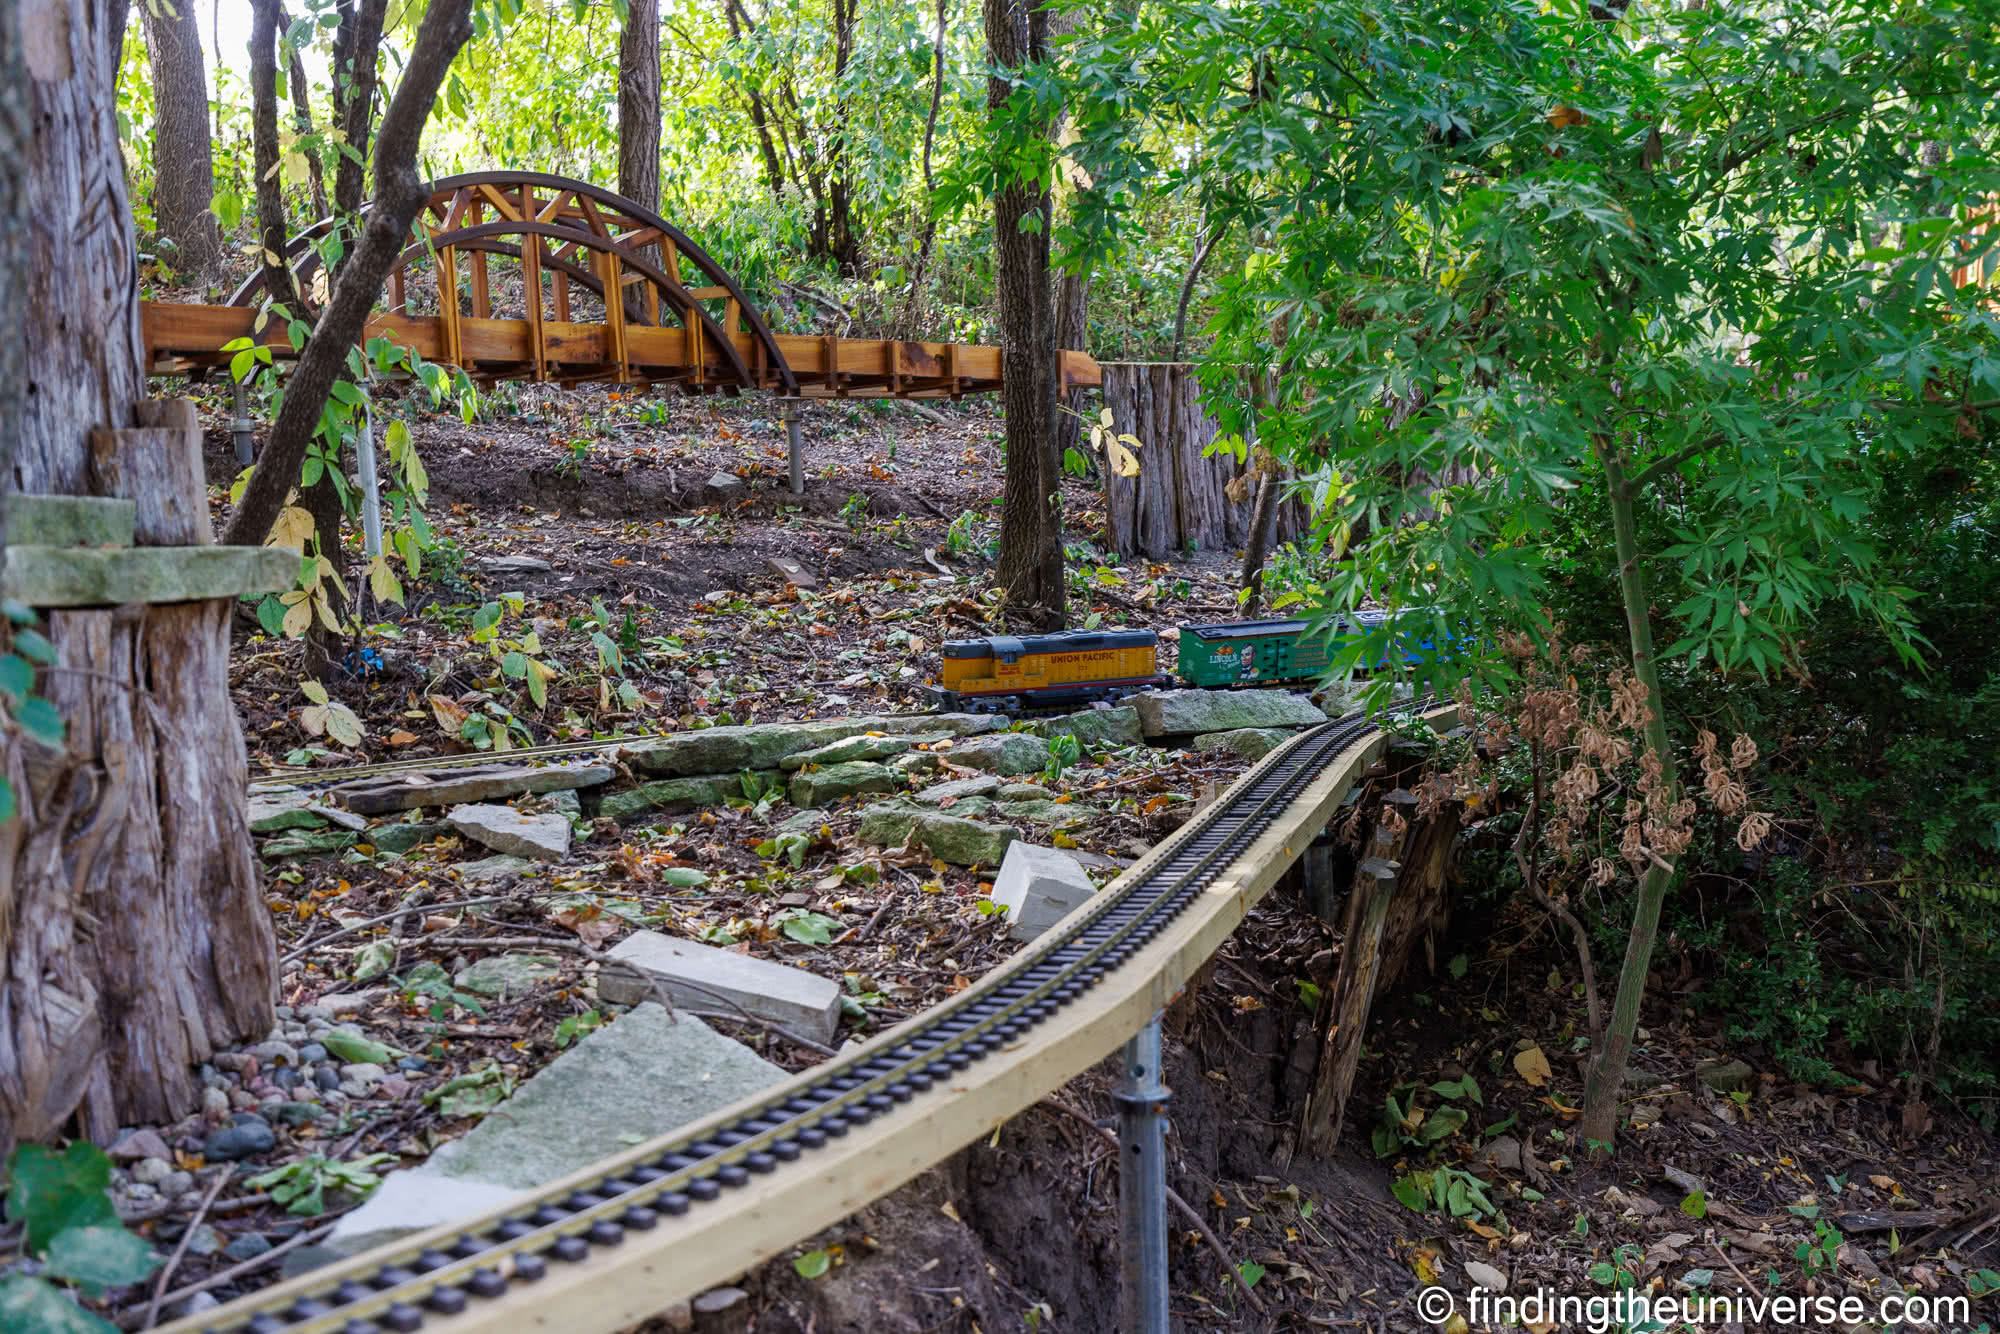
The arboretum area focuses primarily on the flora of the Nebraska region, and it also has helpful information on how to attract local birds to your garden. The gardens also include a rose garden, Victorian garden, herb garden, Japanese park, and even a model railroad garden complete with running model trains.
Speaking of trains, right next to the Lauritzen Gardens is Kenefick Park. This overlooks Interstate 80 and welcomes people arriving from Iowa with the sight of two massive locomotives. Which you can stand right next to if you visit Kenefick Park. This park is free and we really enjoyed visiting it.
Lauritzen Gardens charge an entry fee, and there’s free parking on site. You can save on admission with the free Omaha Savings Pack.
Joslyn Castle & Gardens
When you visit Omaha, you will notice the name “Joslyn” popping up here and there, including the Joslyn Art Museum and the Joslyn Castle & Gardens. And you might wonder why that is.
Well, George Joslyn and his wife Sara moved to Omaha in 1880 and became wealthy thanks to George Joslyn’s involvement in the printing industry. They contributed a great deal to the city, including the aforementioned Art Museum.
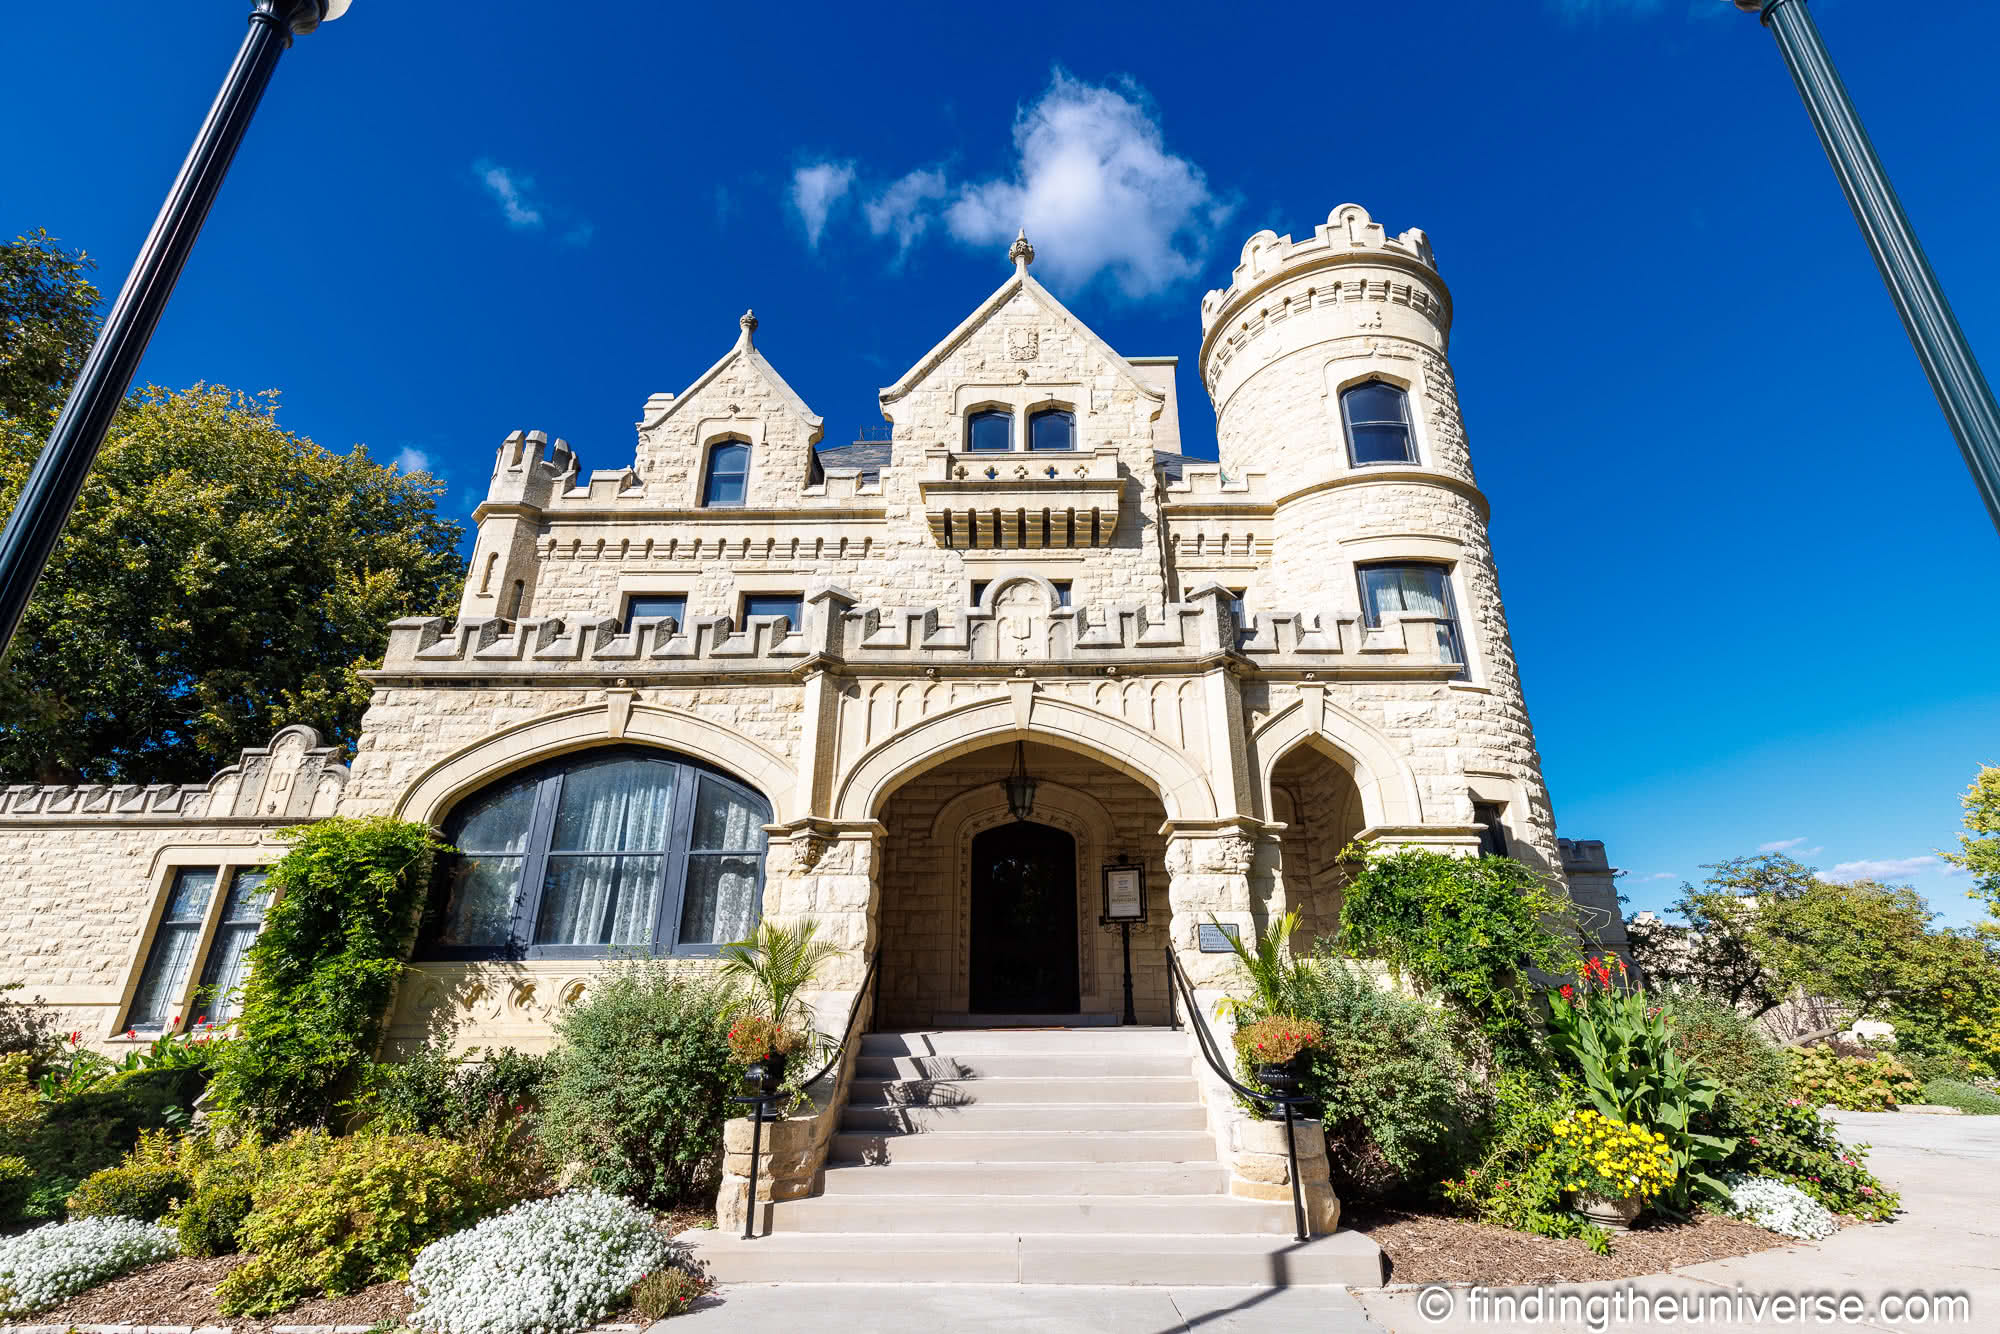
By 1893 the Joslyn’s had sufficient wealth to build the garden and home of their dreams. This resulted in the creation of their home they called Lynhurst and what is today known as Joslyn Castle & Gardens. The house itself, completed in 1903, is a four story building built in the Scottish Baronial Revival architectural style. It basically looks like a Scottish castle in the heart of Omaha. This cost $250,000 to build back in 1903, or around $9 million in today’s money.
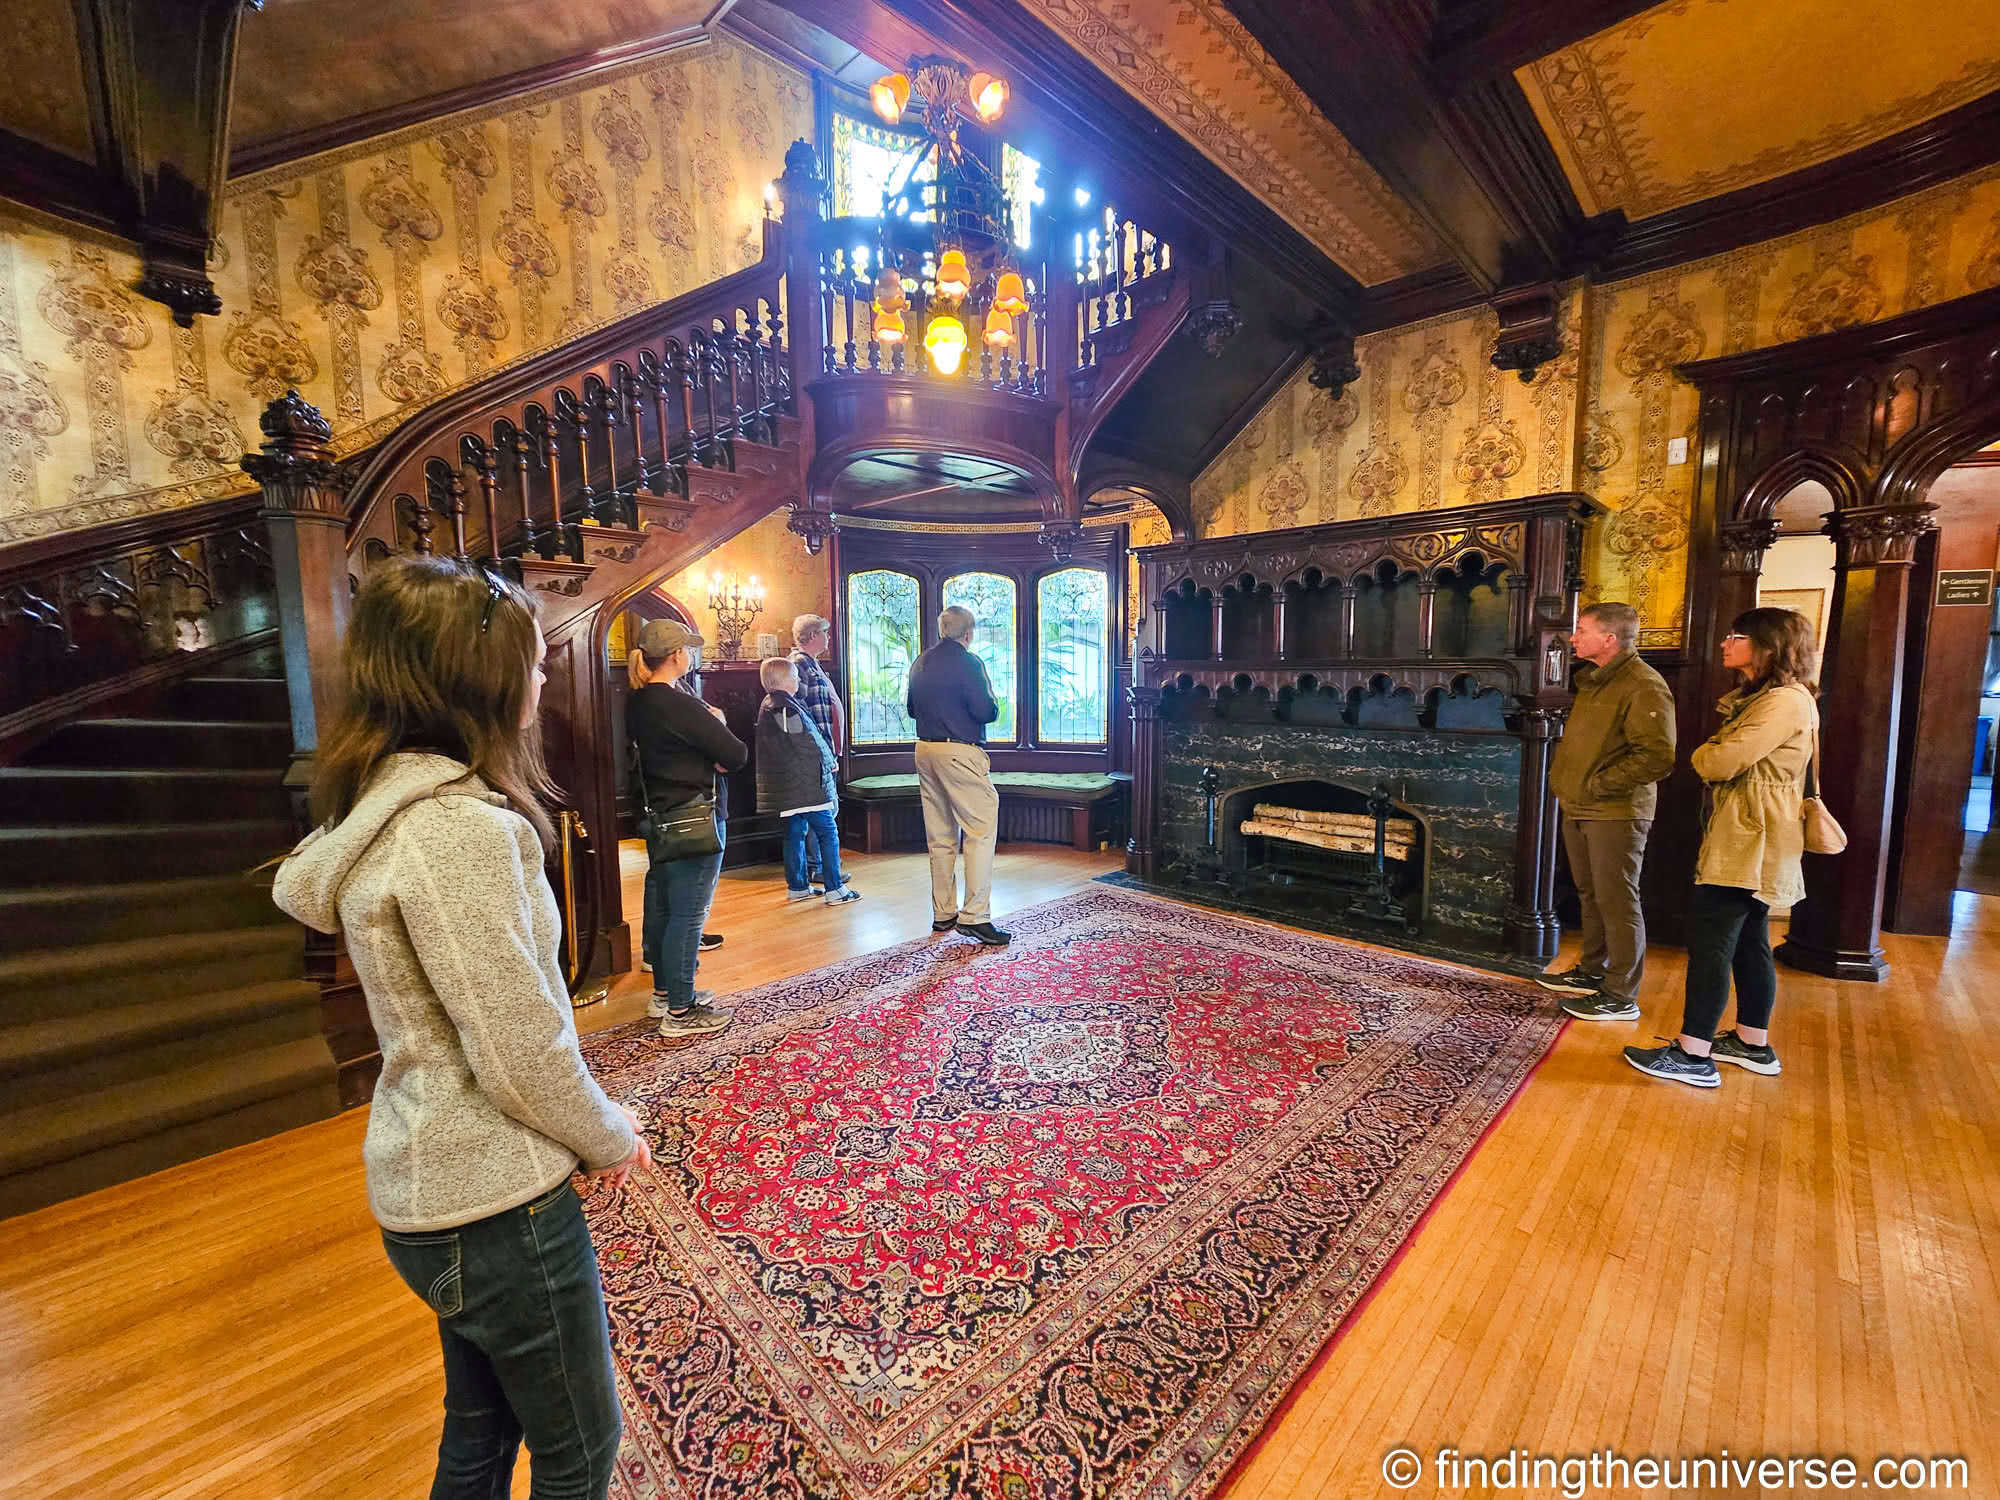
The almost 20,000 square foot house is open to the public by guided tour only, and we can definitely recommend taking a tour if you’d like to learn more about this unusual property and the people who built it. We really enjoyed our tour here, the guides were incredibly knowledgeable and the interior is just stunning. This was definitely our favorite guided tour we’ve taken in Omaha.
There is a fee to take a tour and you can see the tour schedule and price here. The tours last about 90 minutes and I’d allow at least 2 hours for your total visit.
If you aren’t visiting on a tour day, or are happy to just explore the garden and look at the building exterior, this is free to do. There’s free parking on site and you can explore the grounds yourself.
Public art in Omaha
If you like public art, then there are lots of locations across Omaha where you can enjoy public art for free. Some of our favorite pieces include:
Untitled by Jan Kaneko in the Gene Leahy Mall. You can’t help but notice the large peaceful head when you walk through this park!
The Illumina sculptures outside the CHI Health Center Arena. Featuring six statues of people representing the arts and humanities events that take place at the convention center, as well as a 35 foot clock. Step inside the center at night for another colorful art installation
The Pioneer Courage Park sculptures by Utah sculptors Blair Buswell and Edward Fraughton can be found on Capital Avenue. They feature a wagon train proceeding along a creek bed, and have to be seen to be believed. There’s also another installation in this series, the Spirit of Nebraska Wilderness sculptures found outside the First National Bank of Omaha, which depict over 50 larger than life Canada Geese. See details on both these parks here. Two sculpture parks, Pioneer Courage and Spirit of Nebraska’s Wilderness and The Transcontinental Railroad, celebrate the city’s pioneering history.
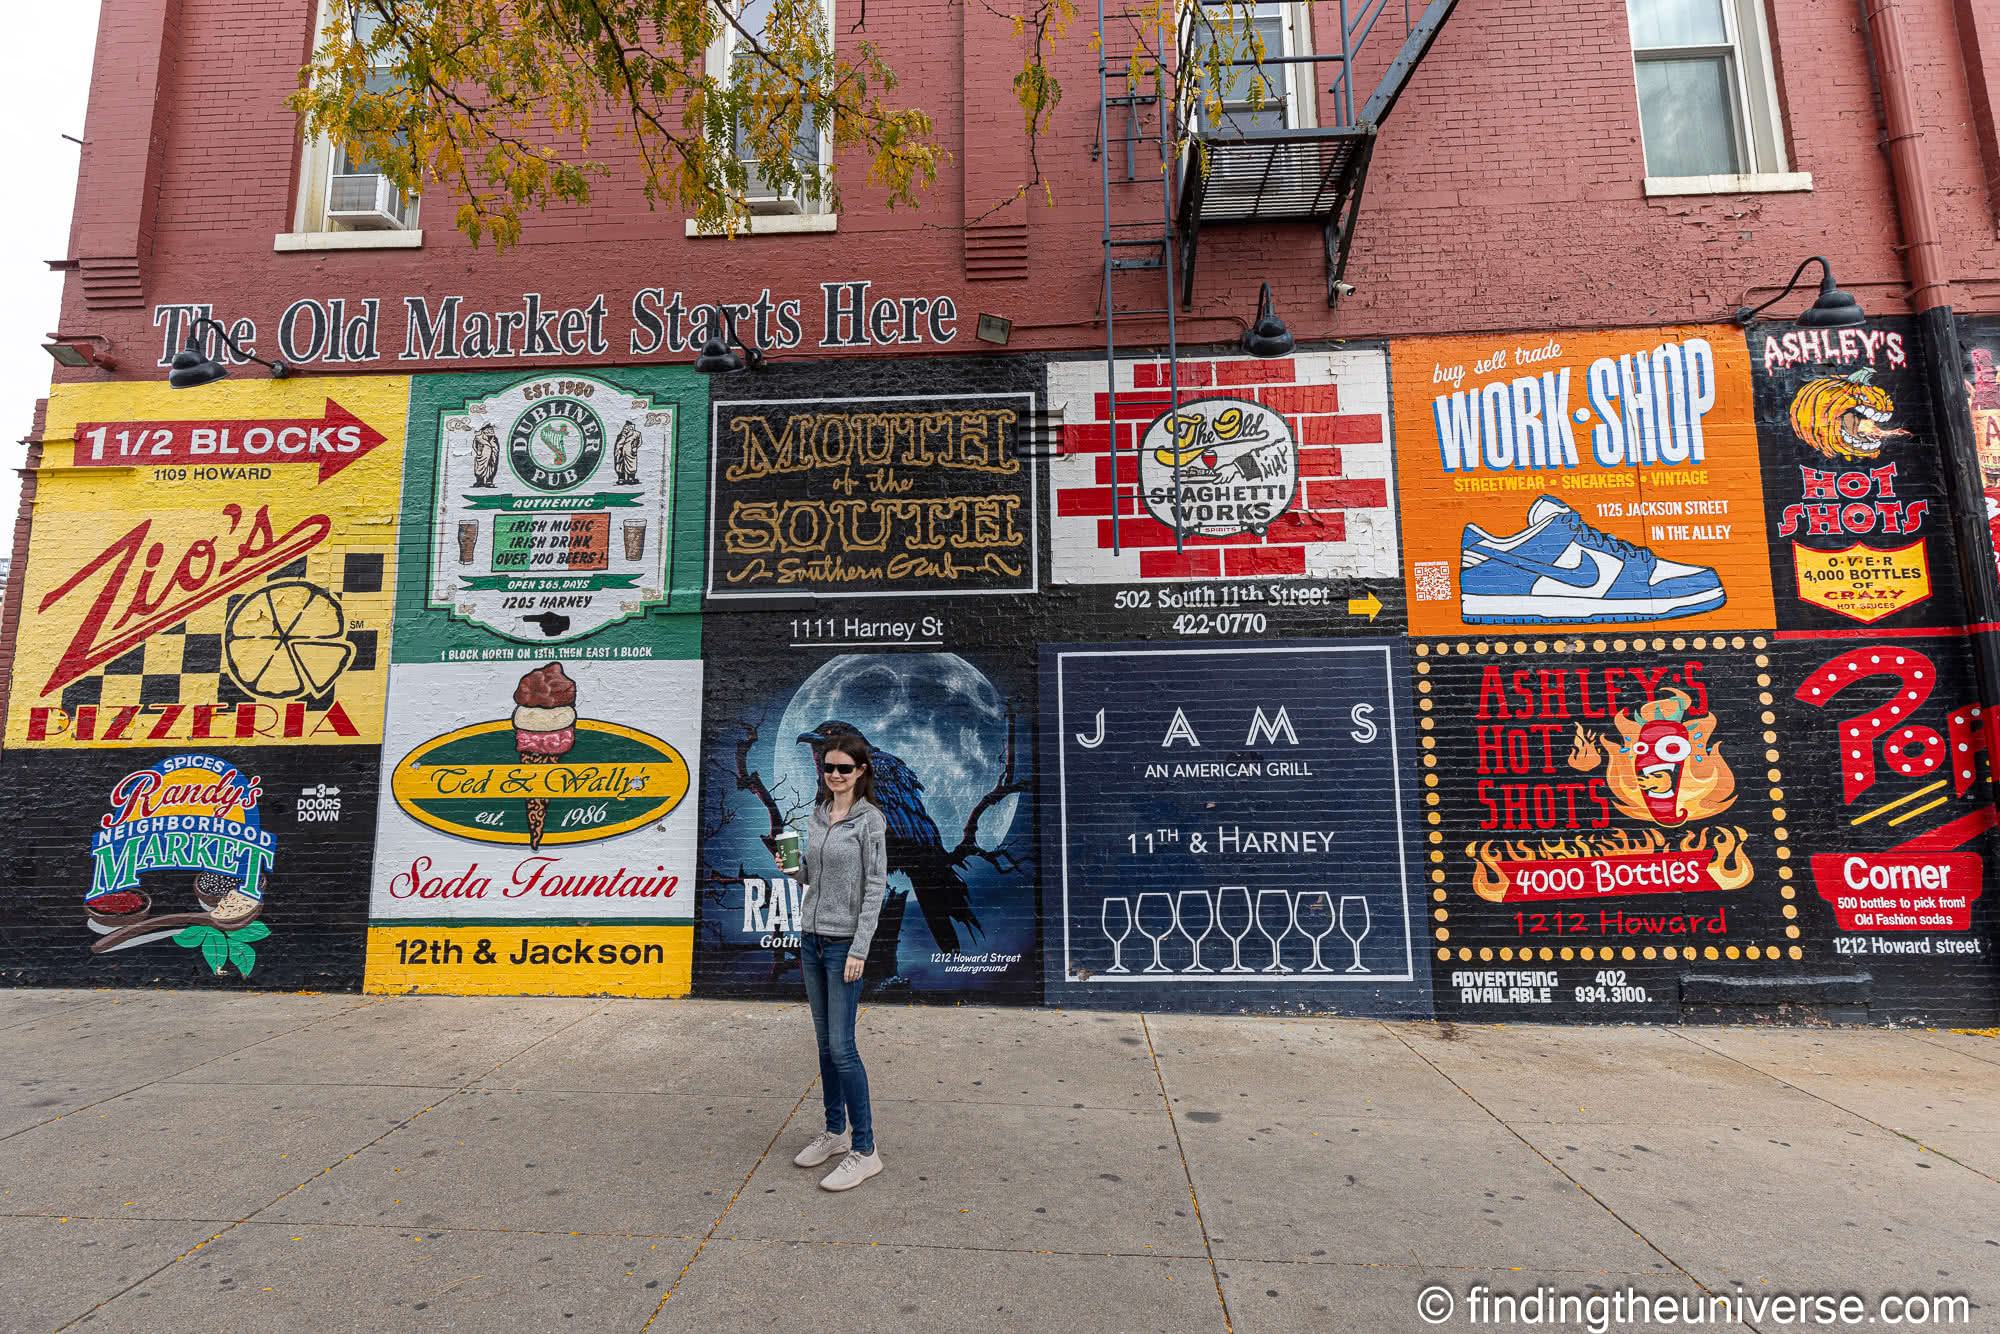
Fertile Ground Mural by Meg Saligman. You can’t talk about public art in Omaha without including the Fertile Ground Mural. At 70 feet tall and 465 feet long this is the largest public art project in Omaha and one of the largest murals in the USA. Find it on 602 N 13th St in the Old Market area of town.
The Chef Boyardee Statue outside the Conagra building in the Heartland of America park. OK, so this might be an oddball choice, but if you’ve ever eaten canned spaghetti in the USA as a child, you are probably familiar with the Chef Boyardee brand. The statue is of the real-life chef behind the brand, Italian immigrant Ettore Boiardi. He changed his name to Chef Hector Boyardee to help sales of his packaged spaghetti sauce and dinners and his name became nationally known.
You can see lots more examples of public art in Omaha, with location information and details of the piece and artist at the official Public Art Omaha website here.
Local food and produce
When you’re in Omaha you are going to want to eat, and there are a few food options you should definitely try when you’re in town. We recommend the following dishes and locations:
A Reuben Sandwich. It is believed that the original Reuben Sandwich was invented at the Blackstone Hotel in Omaha, Nebraska, back in 1925 (although some New Yorkers would contend this!). The good news is that you can still have a Reuben Sandwich at the Blackstone Hotel, which has since become the Cottonwood Hotel. We had one here and it was delicious (as was the other food we’ve tried here). We also had one at the Crescent Moon across the road on another visit, which many claim to be the best Reuben in Omaha. Honestly, they were both good. If you prefer a more formal dining experience, then the Blackstone is the best option. If you prefer a pub style setting with a beer, then go with the Crescent Moon option.
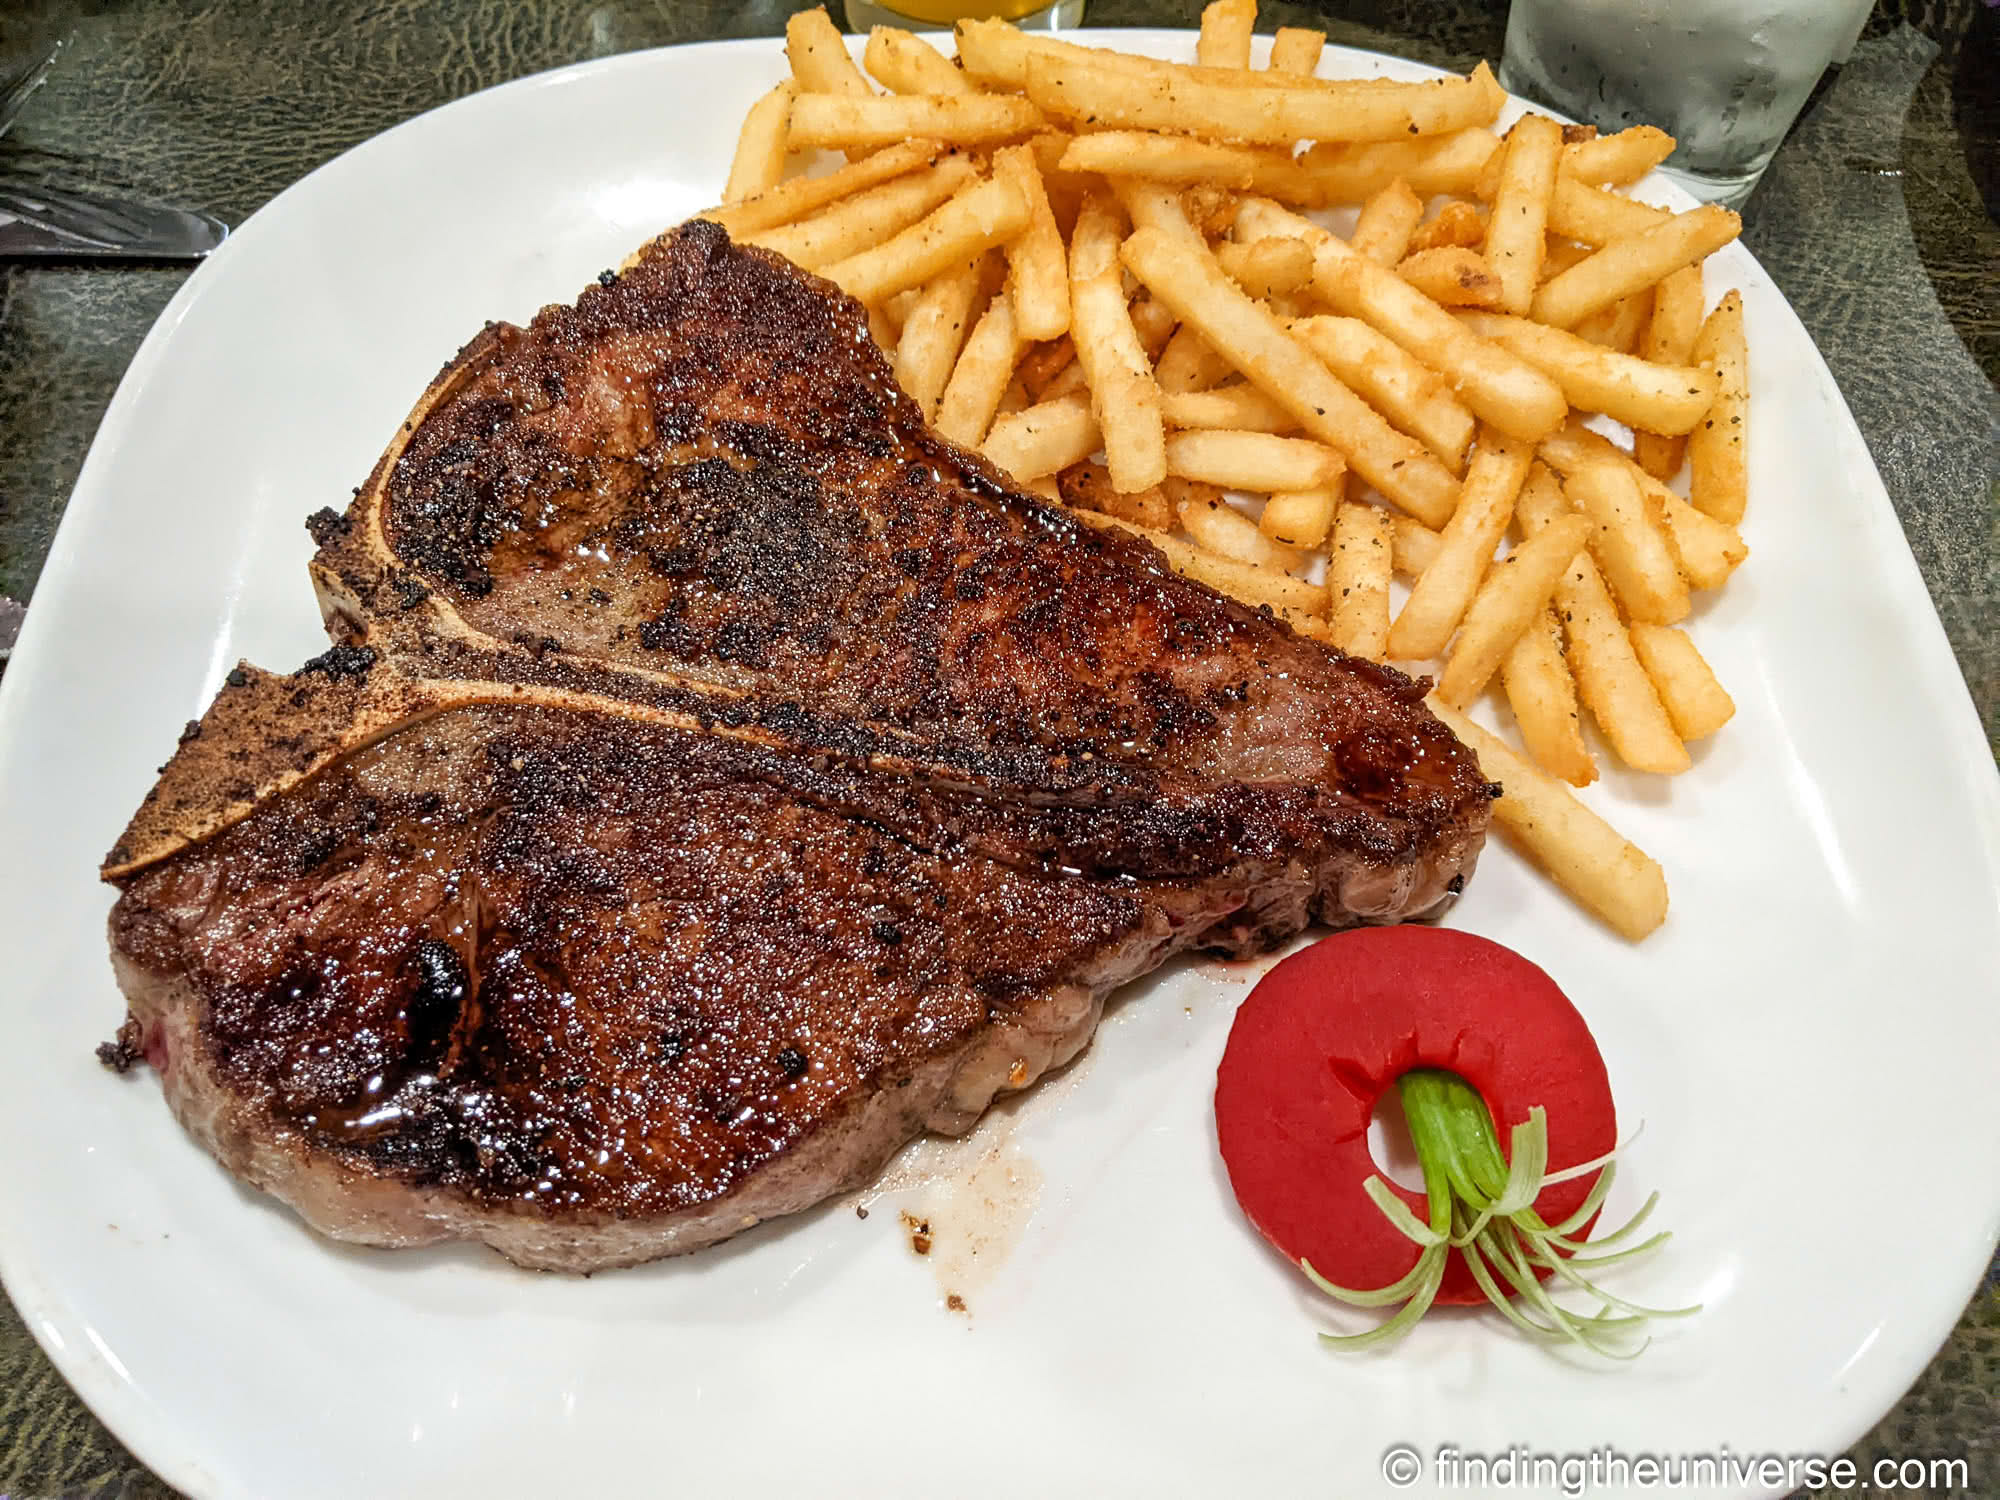
It’s hard to mention food in Omaha without talking about steaks. There’s literally a whole company dedicated to the concept! This actually makes a lot of sense as beef is Omaha’s largest industry, and the city has been a meatpacking center since the middle of the 20th century. So you might want to actually have a steak while you are in town. Options to consider for a steak include Drover, Mahogany, Jerico’s, Sullivans, Gorat’s, Flemings, and Brother Sebastian’s.
Speaking of steakhouses, as we mentioned above, one popular steak dining option in Omaha is Gorat’s Steakhouse. But this restaurant is famous for another reason – it’s the favorite steakhouse of legendary investor Warren Buffet who is head of Berkshire Hathaway. He’s eaten here many times, and has even eaten here with Microsoft founder Bill Gates. His favorite dish is the 22-oz Omaha T-bone steak and the hashbrowns. When we went we didn’t see Warren in person, but there’s a cardboard cutout of him that you can pose by if you so wish!
If you want to try more local produce beyond steak, then you’ll definitely want to include corn in your list of foods to try in Omaha. Corn is the number one crop grown in the state so we definitely can recommend having an ear of corn here when its in season. Other popular crops and produce include milk and dairy products, beans (Great Northern, pinto, etc.), pork, poultry, eggs, sugar beets, apples, and honey. Nebraska is also home to over 30 wineries so you may also have a chance to try some local wine.
A locally popular fast food is the Runza, which is a yeast dough bread pocket with a filling consisting of beef, cabbage or sauerkraut, onions, and seasonings. The best place to get a Runza is at a Runza’s, a fast-food chain which has been operating in Nebraska since 1949. For a true local experience, buy a cinnamon roll at Runza’s and dip it in Runza’s chili. We’ve done this, and it is definitely better than it sounds.
If you like ice cream (who doesn’t like ice cream?), then we highly recommend a visit to Coneflower Creamery, which is within walking distance of the Kimpton Cottonwood hotel and Joslyn Castle & Gardens. This actually placed first in a nationwide ranking of ice cream locations, so we’re not the only ones who think it’s worth a visit! They handmake their ice cream with local, fresh ingredients, and have a range of classic and seasonal flavors to choose from
That should give you some ideas of where and what to eat when you visit Omaha, although there are of course plenty more options across the city.
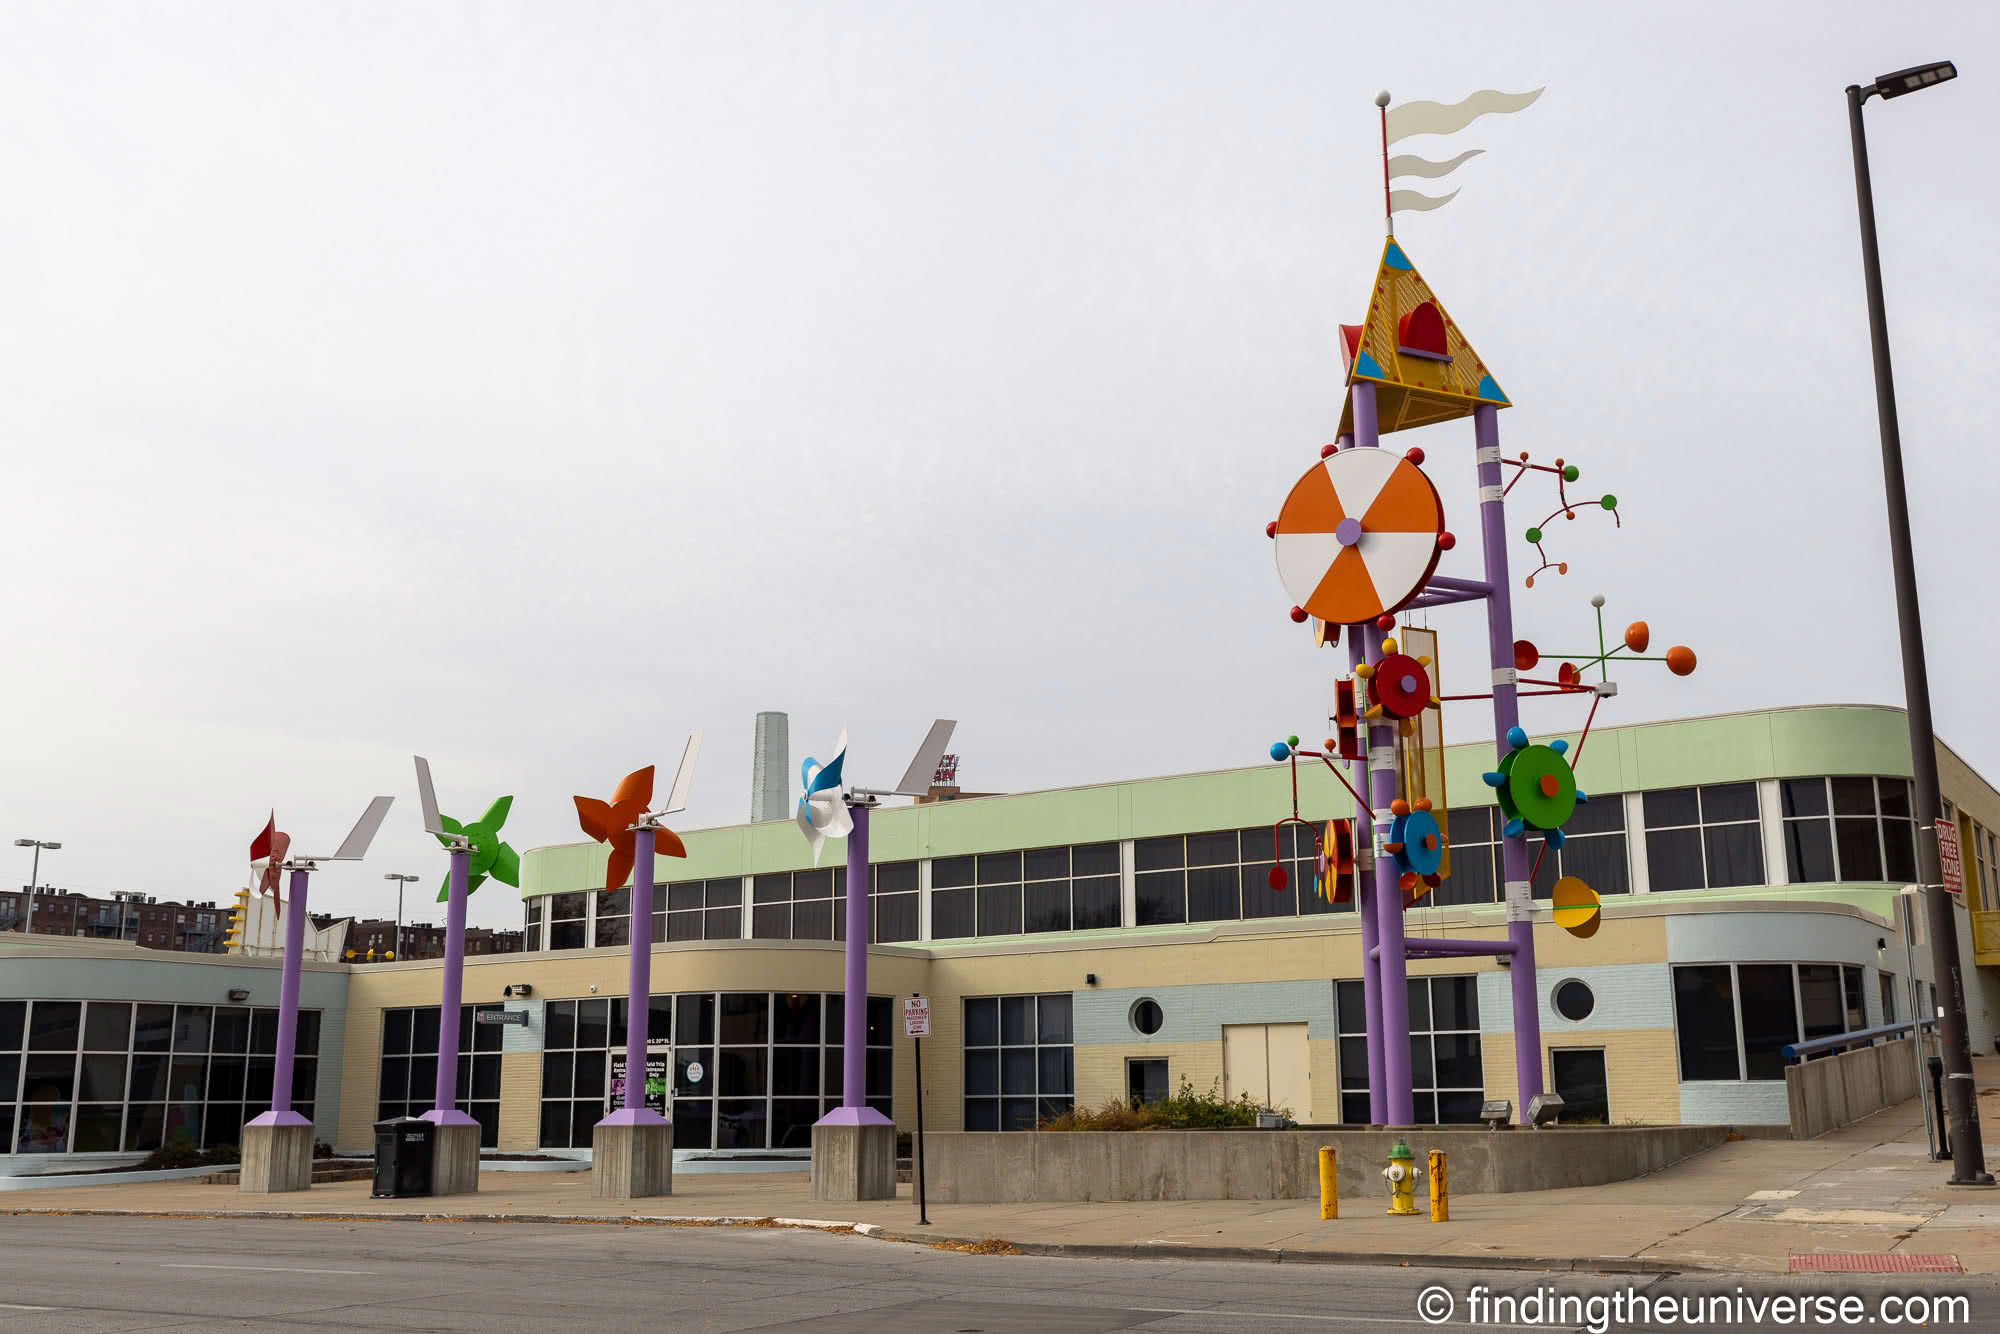
Omaha Children’s Museum
If you’re visiting Omaha with children, then you should definitely consider including the Omaha Children’s Museum on your to-do list. This award winning museum aims to stimulate kids imagination and excite them about learning new things.
It does this through a wide variety of permanent and temporary exhibits, the majority of which are interactive. These include a science center where experimentation is encouraged, a kid-sized hospital with interactive “x-ray” machines, an interactive kid-friendly bank branch, and loads more.
The museum has an entry fee and there’s free parking on site. You can save on admission with the free Omaha Savings Pack.
Shopping
As with most cities, Omaha has an excellent choice of shopping options. These range from the standard big box and department stores that you’ll find most everywhere, through to locally owned locations, which we’ll focus on in this guide.
The Old Market area of Omaha is where we’d recommend heading if you’re looking for smaller, locally owned shops. You’ll find everything from antique shops to candy shops, home decor, books, vintage clothing, jewelry and music. We can also recommend visiting the Artists Cooperative Gallery if you’d like to peruse and buy art from local artists. Naturally, the area also has plenty of coffee shops (as well as restaurants and bars) to keep you fueled. You’ll also find the local tourism office here.
The Dundee neighborhood, to the west of downtown, is also a good shopping destination. Neighborhood shops include Roger + Chris (home decor), Albany and Avers (vintage clothing) and Dundee Candle Co where you can create and pour your own candle.
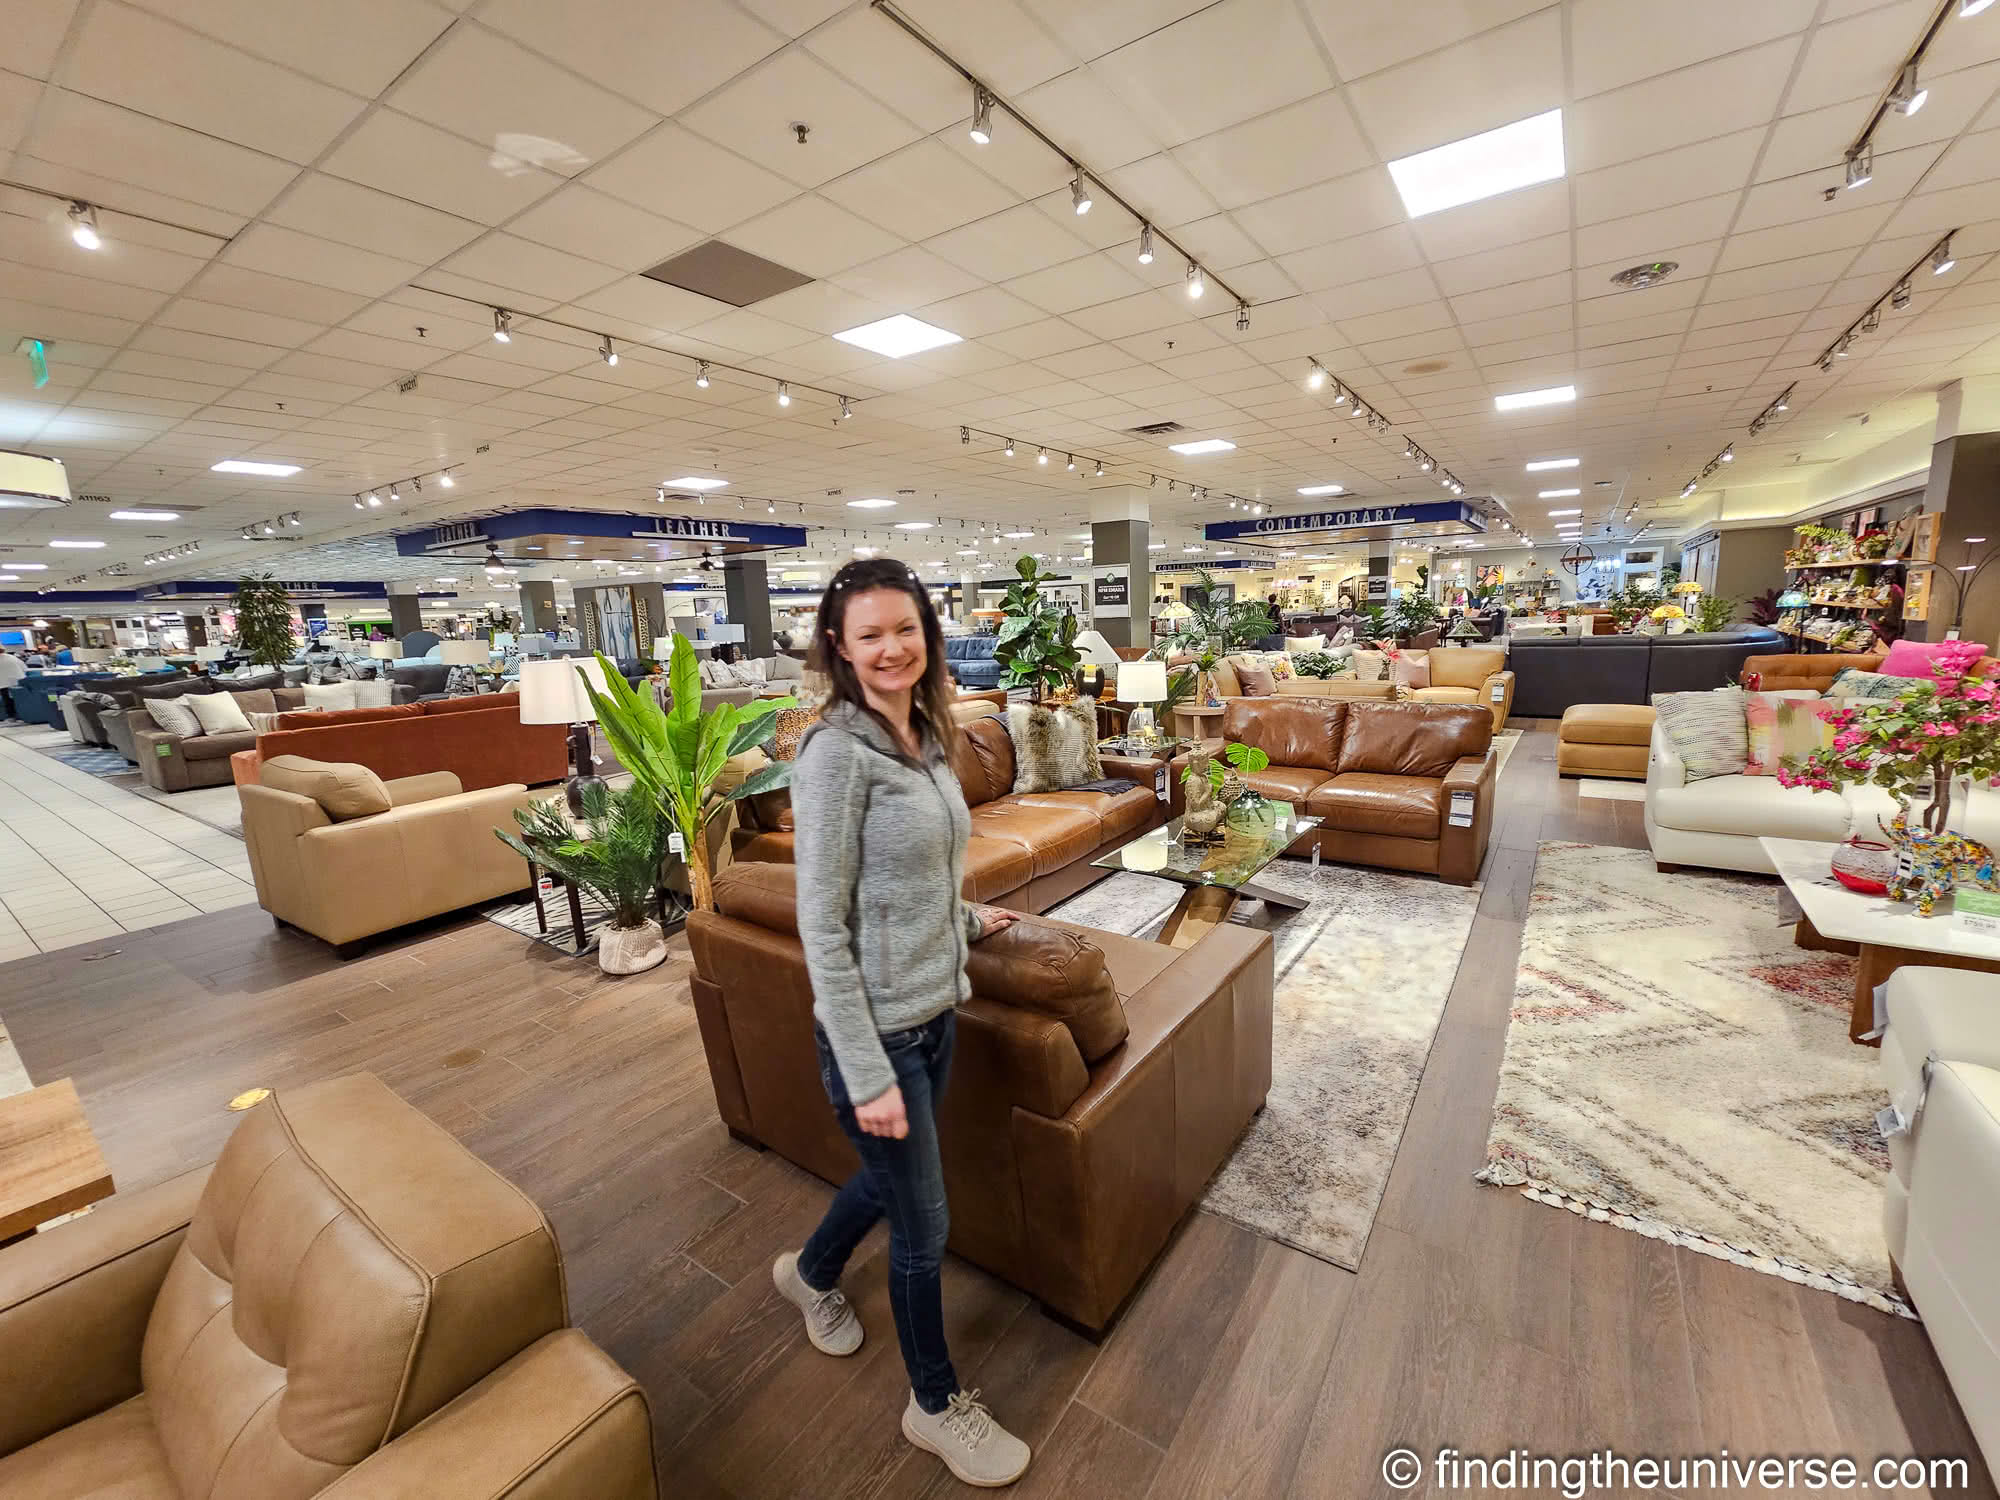
Nebraska Furniture Mart. Founded in Omaha in 1937, and today owned by Berkshire Hathaway, this is an iconic Omaha home furnishing store. With over 450,000 square feet of retail space, it’s safe to say that if you are looking for furniture, this is a good option. It’s also quite an experience wandering around such as vast store. Jess and I visited, and were impressed at the range of furniture on offer, across a wide range of budgets. And yes, they offer shipping.
For more name brand retail therapy, you might want to head to one of the nearby shopping outlets. These are largely located outside of Omaha, and include Nebraska Crossing (largest outlet mall in Nebraska), Village Pointe and Regency Shopping Center (more upscale brands). We once did some coat shopping at Nebraska Crossing and found it to be a really nice outdoor outlet mall.
As you can see, there are lots of shopping options in Omaha, whatever you are interested in buying!
Fun Plex Waterpark and Rides
If you are visiting Omaha in the hot summer months with family, then you might consider a trip out to the Fun Plex Waterpark and Rides. This is about seven miles from downtown, and is the largest amusement park in Nebraska.
The park has a number of regular rides for both adults and kids, as well as a large waterpark area which features slides, a wave pool, lazy river, and more. There’s even a 21+ swim-up bar for those looking for a bit more adult fun.
The Fun Plex is normally open from late May to the start of September, and you can see ticket prices and park opening hours on the official website here.
Local Entertainment, Festivals, Shows, & Events
Omaha hosts many events throughout the year, from major sporting events through to large conferences, festivals, and more. Depending on when you visit Omaha, you might find that there’s something go on! Here’s a quick run down of just a few of the events that take place in Omaha to give you an idea of what to expect.
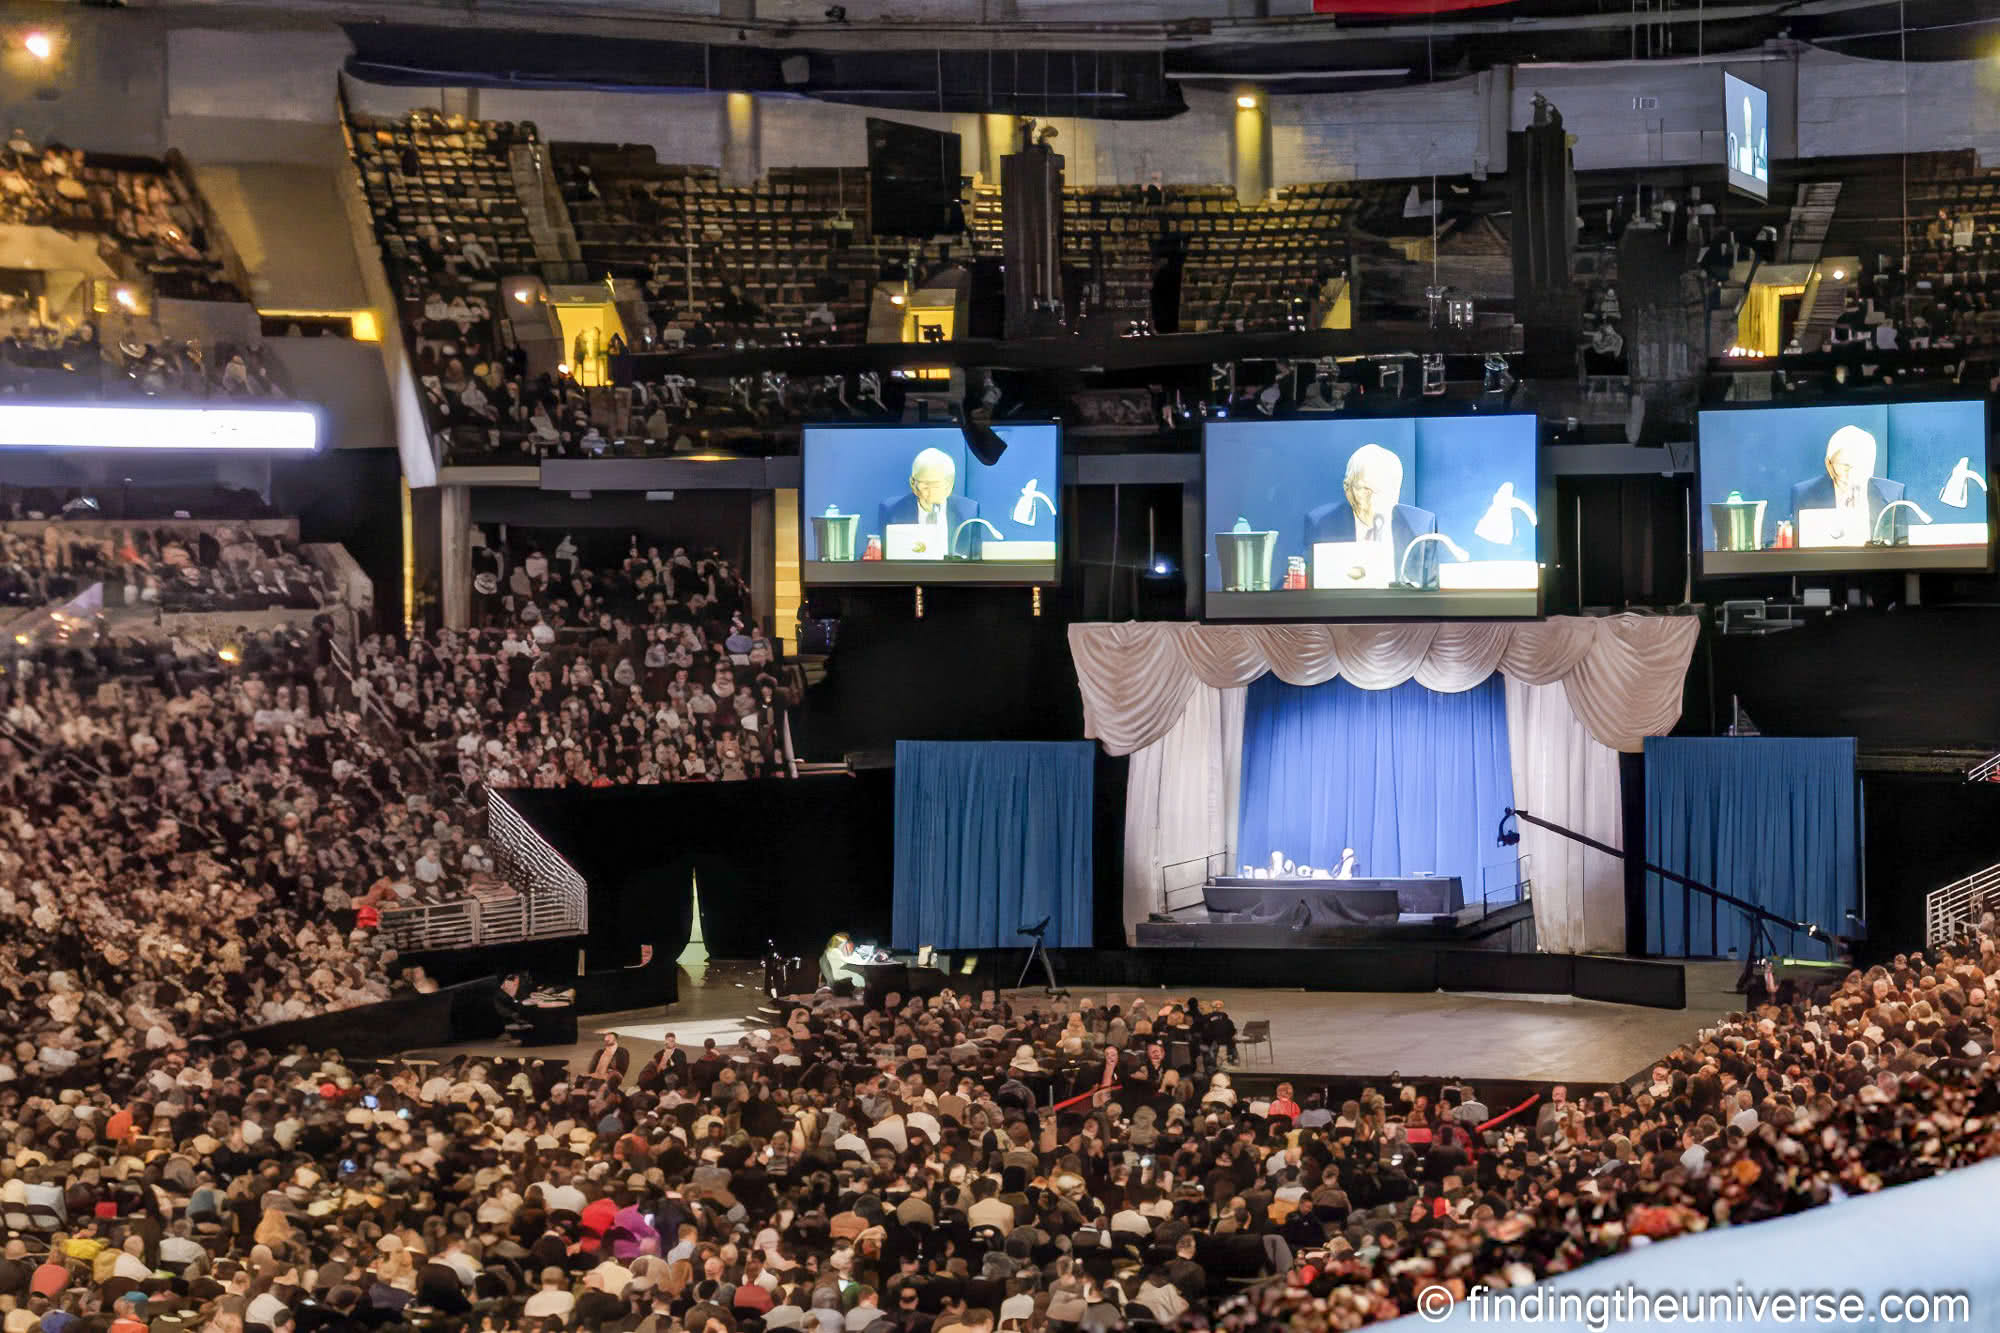
Even if you aren’t interested in a specific event it’s worth noting when it takes place as some events, such as the Berkshire Hathaway Meeting or the College World Series can be very popular times to visit Omaha, with accommodation prices shooting up and popular restaurants booking out. So if you don’t intend on taking part in the event, you might want to avoid town at that time!
College World Series, a baseball tournament held in Omaha every June since 1950,. currently taking place at the Charles Schwab Field
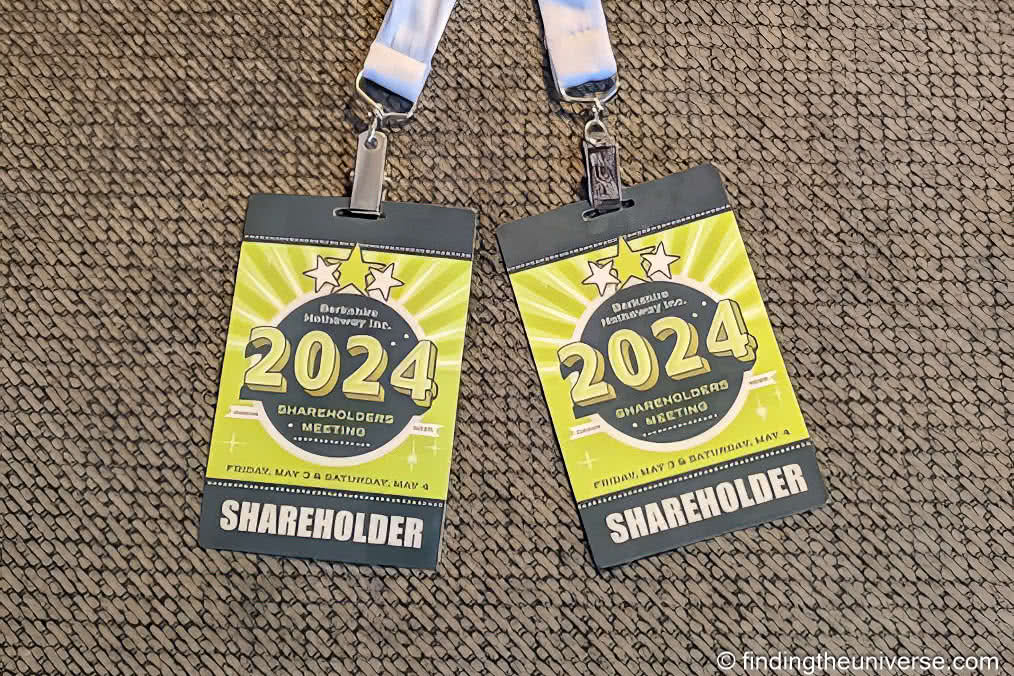
Berkshire Hathaway Annual Meeting, the annual meeting for Berkshire Hathaway shareholders. Normally held in early May at the CHI Health Center Omaha Convention Center and Arena.
Taste of Omaha – a three-day food festival held every summer in the Heartland of America park
Maha Festival – a large music festival which normally takes place at the end of July
Plus of course there are movies, axe throwing, arcades, bowling, mini golf… the list of activities in Omaha goes on!
For more on what’s on in Omaha, and more ideas on what to see and do in general, we highly recommend popping into the Omaha Visitors Center in the Old Market area on 306 S 10th Street. The Visit Omaha website also has information on events happening in the city.
And Even More!
Of course, there’s lots more to do in Omaha and the surrounding area than we have covered above! Some other notable highlights to consider visiting, depending on your interests, are the following:
Squirrel Cage Jail. Found in Council Bluffs, Iowa, this museum was a jail from 1885 through to 1969. It’s notable as being home to a revolving “squirrel cage” cell, one of only 18 built
Strategic Air Command & Aerospace Museum. Just southwest of Omaha, this museum focuses on the aircraft and nuclear missiles of the US Airforce during the Cold War. Exhibits include an SR-71 Blackbird aircraft and a B52 Stratofortress aircraft, as well as lots more aircraft, missiles, and even spacecraft.
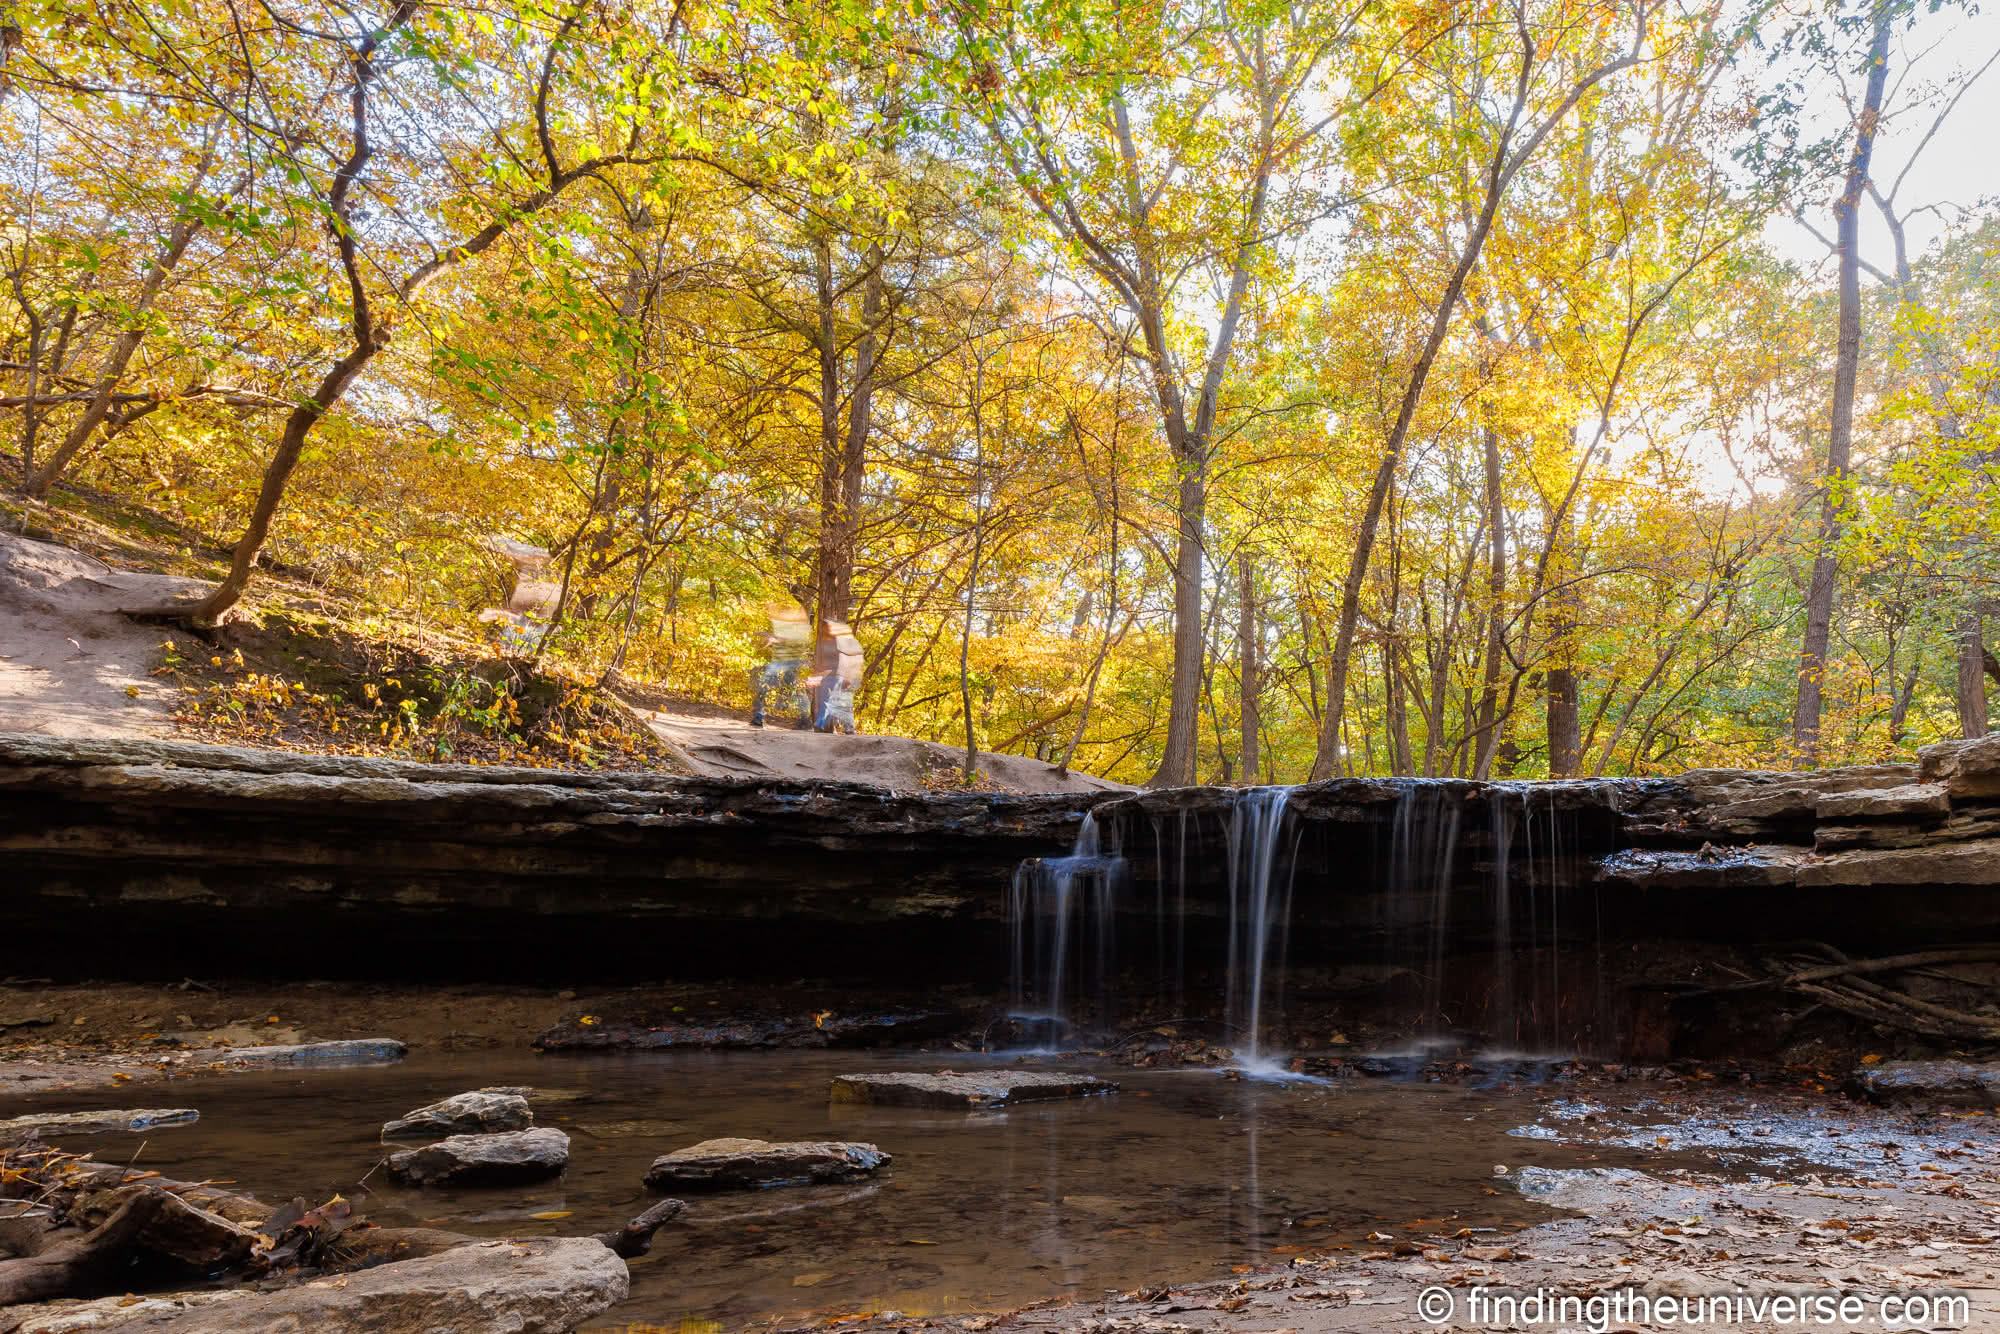
Platte River State Park – found halfway between Omaha and Lincoln, this state park offers a variety of nature trails and activities including fishing and kayaking. We can recommend climbing up one of the observation towers for wonderful views of the surrounding landscape
Vala’s Pumpkin Patch – if you’re visiting Omaha from late August through to early November, then consider a visit to Vala’s Pumpkin Patch. This huge outdoor attraction focuses on all things Fall, and you’ll find loads to do from watching pig races to a corn maze, cider drinking, live shows and more. A very fun family attraction.
How to Get to Omaha
Omaha is right in the middle of the USA, and has reasonable transport connections. We’ve visited Omaha by car, plane, and train! Here are the main ways to get to the city.
By car. Omaha is connected by road to the rest of the U.S. by two main Interstates, I-80 which runs east all the way to New York via Chicago and west all the way to San Francisco via Salt Lake City. There’s also I-29 which runs north to Fargo, and then ultimately to the Canadian border, and south to Kansas City.
By plane. Omaha’s airport offers direct flights to over 30 destinations in the United States, meaning the city is relatively easy to get to by air
By train. Omaha is on the Amtrak passenger train network. We’ve traveled to Omaha on the overnight sleeper train from Denver into Omaha which was a fun experience. Omaha is on the main Amtrak route which runs between Chicago and San Francisco, the service known as the California Zephyr, which includes stops in Denver, Salt Lake City, and more.
How Many Days Should I Spend in Omaha?
Yon can spend as little or as much time as you want in Omaha as there are plenty of things to do and see. You can easily spend a week here visiting all the cultural attractions, exploring the parks, gardens, and walking paths, shopping, eating at steakhouses, and taking in some evening entertainment.
But at a minimum we’d probably recommend at least two full days and nights to get a good taste of the city.
Suggested Two Day Omaha Itinerary
Here’s a quick overview of a possible itinerary for two days in Omaha.
On your first day you might go to the Durham Museum in the morning, have a Reuben for lunch, spend the afternoon in the Old Market area, and see a play that evening.
Then on the second day you might head over to the Omaha Zoo & Aquarium (Henry Doorly Zoo & Aquarium) for a full day out and then have dinner that evening at a local steakhouse.
If you have more time, then I would go through our list and write down all the places you want to see and how much time you think you’d spend at each. That should give you a good idea of how much time you’ll need. Also be sure to take into account opening times and days as many attractions are closed at least one day a week.
If you are visiting for the College World Series, Berkshire Hathaway Annual Meeting, or some other big event, it is a good idea to add an extra day to your trip so you have more time to explore if possible.
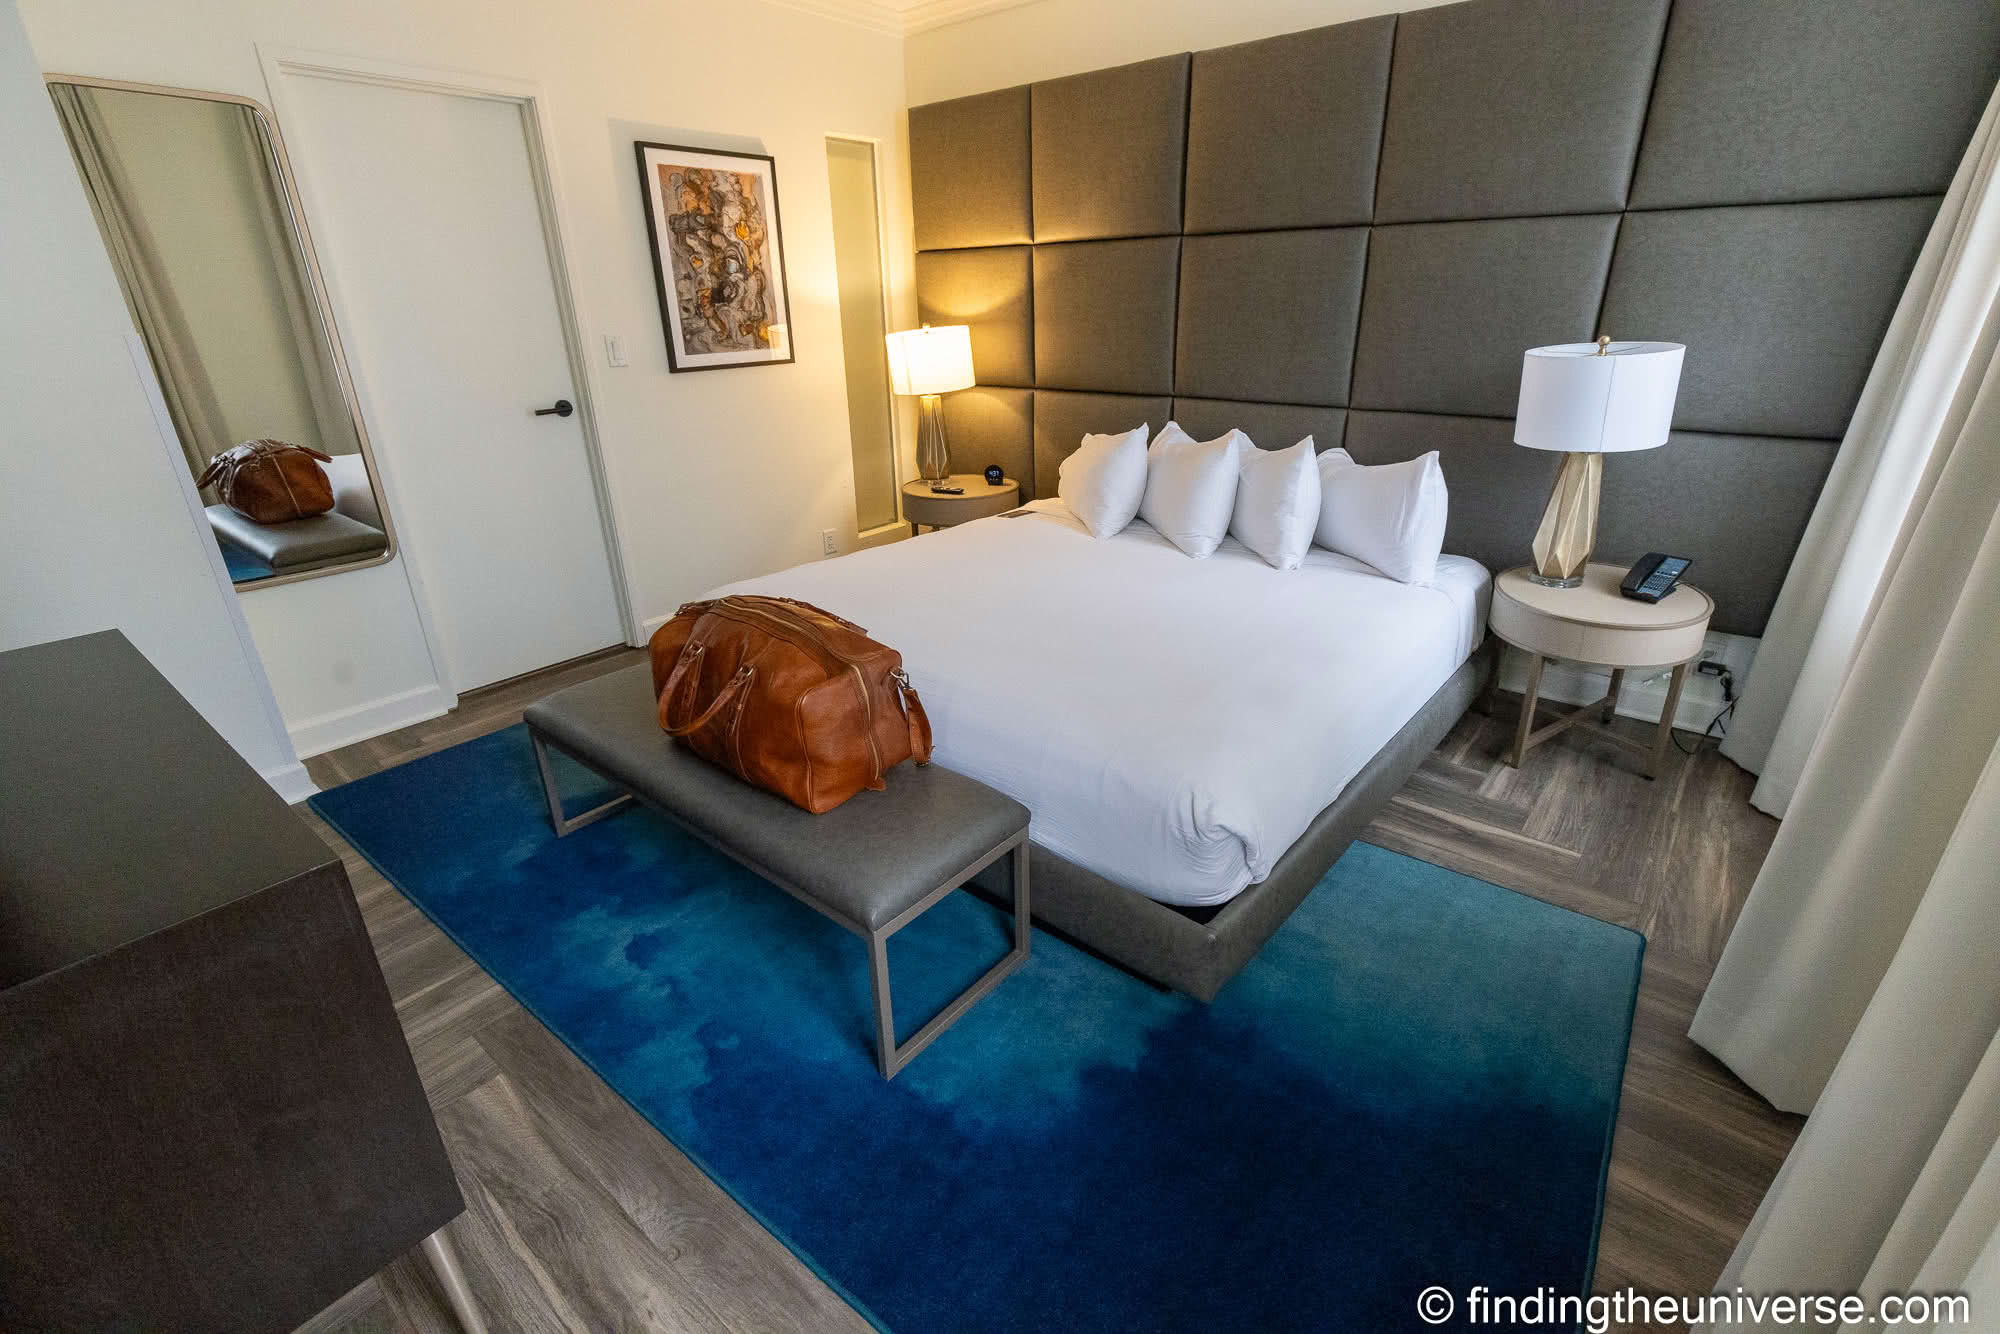
Where to Stay in Omaha
Omaha has a wide range of accommodation options, including hotels, apartment rentals, motels, and more. Prices range from budget to high-end, and generally the closer you are to downtown the higher the prices will be. If you are driving, most downtown hotels will offer valet parking, although street parking is also often an option (just remember to pay the meter!).
It’s also worth noting that pricing can vary a lot depending on the time of year you visit, and if there are any major events going on in the city. The Berkshire Hathaway meeting for example is a time when prices for accommodation in Omaha can really go up, so if you aren’t planning on attending that you might want to avoid those few days.
Here are some options for where to stay in and around Omaha.
Hotel Deco – in a building dating from 1930, this Art Deco styled 4* boutique hotel offers lovely en-suite rooms and is within easy walking distance of the downtown sights. There’s an on-site restaurant and valet parking. We stayed here for three nights on a recent visit to Omaha and enjoyed it.
Hilton Omaha – This is the closest hotel to the CHI Health Center (convention center for a number of events and conferences in the city), to which it is connected via a Skybridge, making it a good option if you’re attending an event here. 4* hotel with on-site restaurant, airport shuttle, pool and both self-parking and valet parking options. Pets accepted. This also a good hotel option for the College World Series at the Charles Schwab stadium as it is very close to the venue also.
The Peregrine – this hotel is found in a historic local landmark building which dates from 1914. Today it’s a boutique hotel offering 4* accommodation just minutes walk from downtown.
The Farnam, Autograph Collection – one of the most highly rated hotels in downtown Omaha, this centrally located 4* hotel offers comfortable rooms, on-site parking, and three restaurants to choose from.
Kimpton Cottonwood Hotel – found in Omaha’s Blackstone district a few minutes drive from downtown, this gorgeous 4* hotel is a revival of the iconic Blackstone hotel which was found on this location from 1916. This is a beautiful old hotel with all the amenities you’ll need for a leisure or business stay. If you stay here, be sure to try a Reuben! The hotel also has afternoon tea service on some Sundays.
Hampton Inn Council Bluffs – if you would prefer a hotel with free parking, then the Hampton Inn in Council Bluffs Iowa is a good option to consider. It’s just a few minutes drive to downtown and breakfast is included
BridgePointe Inn & Suites – a more budget oriented option found in Council Bluffs, Iowa. There’s free parking on site and breakfast is included. It’s also only a short drive from downtown Omaha
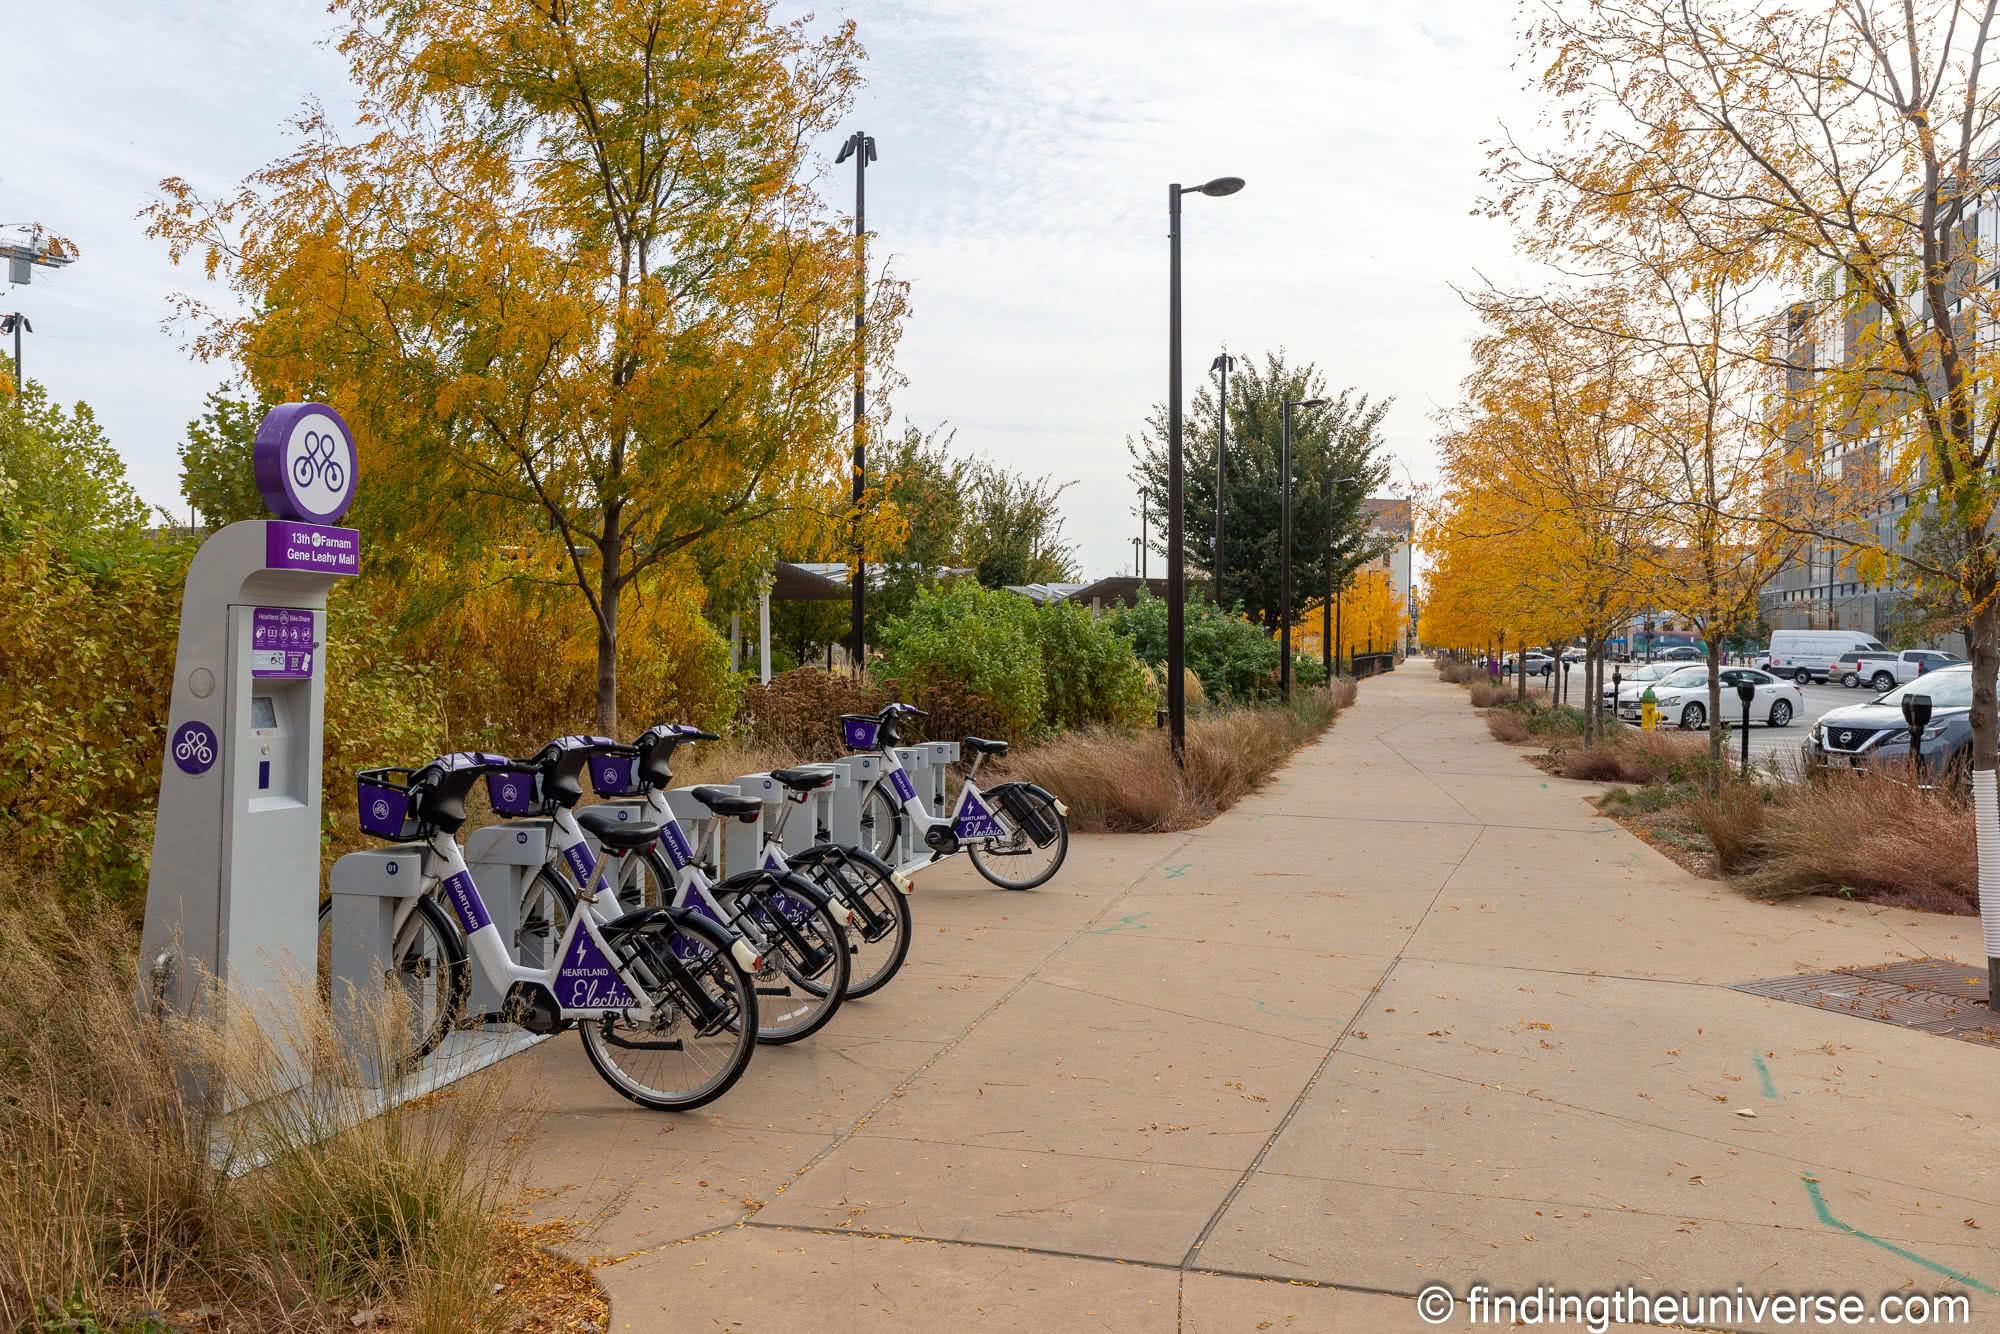
Omaha is a fairly easy city to get around whether on foot, by car, by bike, or by public transit.
Downtown Omaha is very walkable, with many sights just a few minutes walk apart. For destinations a little further from downtown, such as the Blackstone District, Joslyn Castle, Lauritzen Gardens etc., then you will want to use some means of mechanized transport.
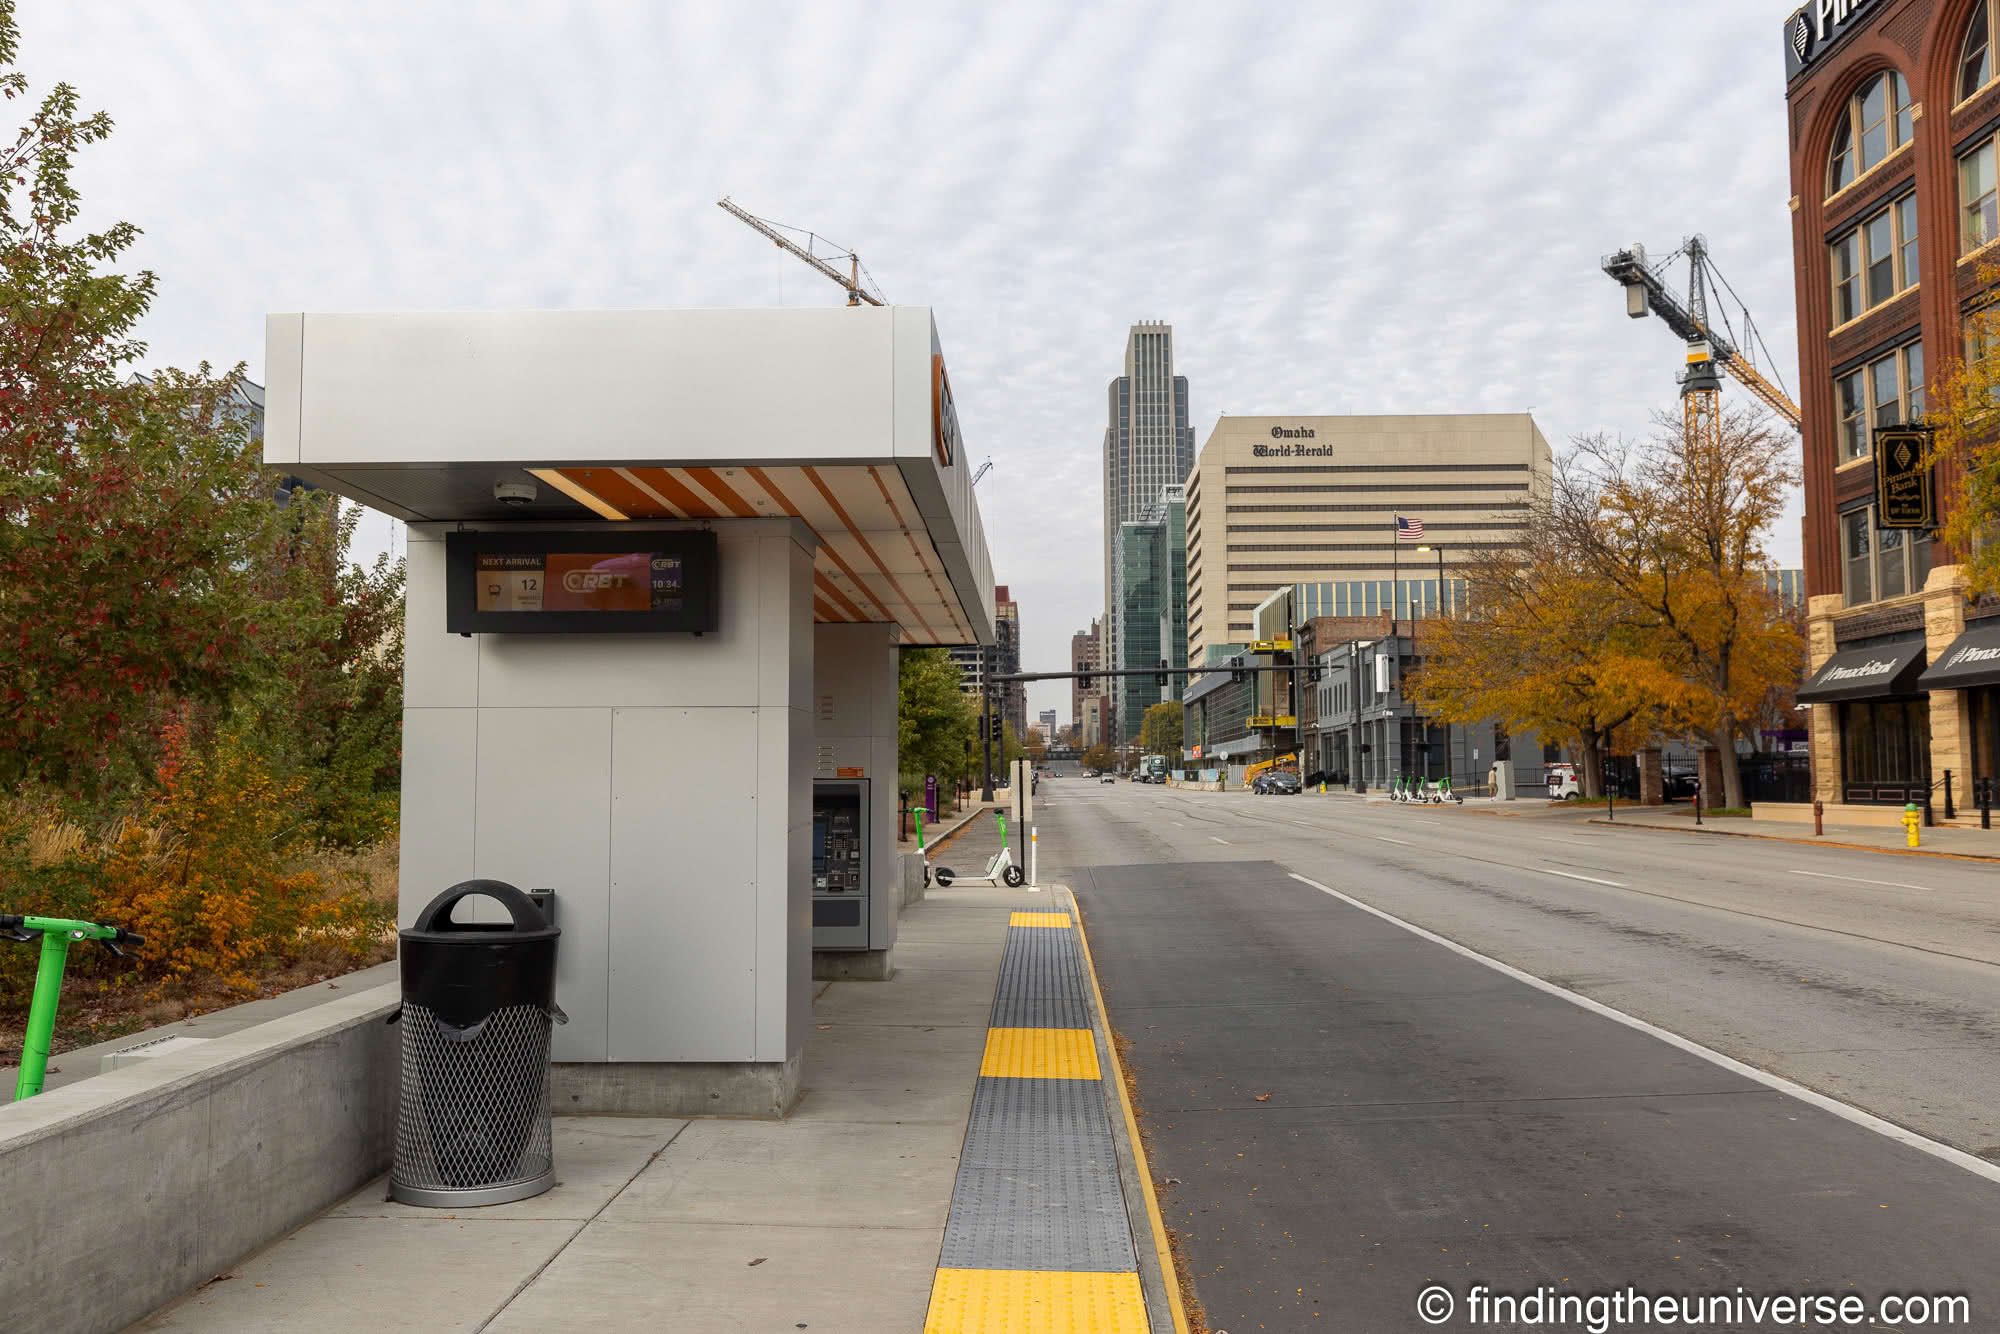
Public transport services, primarily in the form of a bus system, operate across the Omaha area. The system is known as the Omaha Metro, and you can find live bus times and routes on the My Ride website and app. Fares for the Metro service need to be paid through the UMO system, which means either downloading the UMO app, getting an Umo card, or purchasing an Umo token. See more on how to do that here.
Omaha is also in the process of constructing a streetcar service which is intended to link downtown with the Blackstone district. That is hoped to be running by 2027.
You can also drive easily around Omaha, which is what we normally end up doing. Street parking is available all around the city for reasonable rates, and you can pay using the Park Omaha or ParkMobile app for smartphones. Rates vary, and you can check the latest parking information here.
Ride share services including Uber, Lyft and zTrip are also available, as are bike share and scooter rental services.
How to Save Money in Omaha
While Omaha doesn’t have a city attraction pass that we are aware of, you can save on attractions with the free Omaha Savings Pack. This is a free service offered by the local tourism office, and offers discounts on some of the most popular attractions in the city.
This includes places like the Durham Museum, Lauritzen Gardens, the Zoo, Omaha Children’s Museum, and more.
It’s free to get the pass and it’s all handled online. All you have to do is provide your information and the pass will be sent to your phone. You can see more and sign up on the official Omaha Savings Pack website here.
Further Reading
That’s it for our guide to things to do in Omaha, Nebraska. Before you head off though, I just wanted to share some more resources we’ve put together to help you plan your trip to the city, and travel in the USA in general.
And if you’re looking for inspiration for the rest of the USA, check out our USA section, which has lots more inspiration
Do you have any questions about visiting Omaha? As always, we’re happy to answer any questions you might have, just pop them in the comments below and we’ll get back to you as soon as we can.
Every traveler should have a good carry-on. Even if you only fly occasionally, having a reliable one on hand allows you to bypass the check-in and worry less about your baggage getting lost. But what makes a high-quality carry-on?
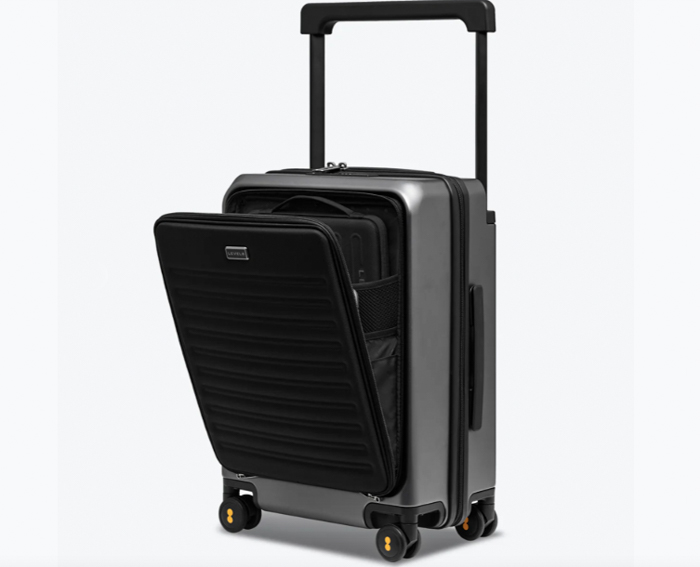
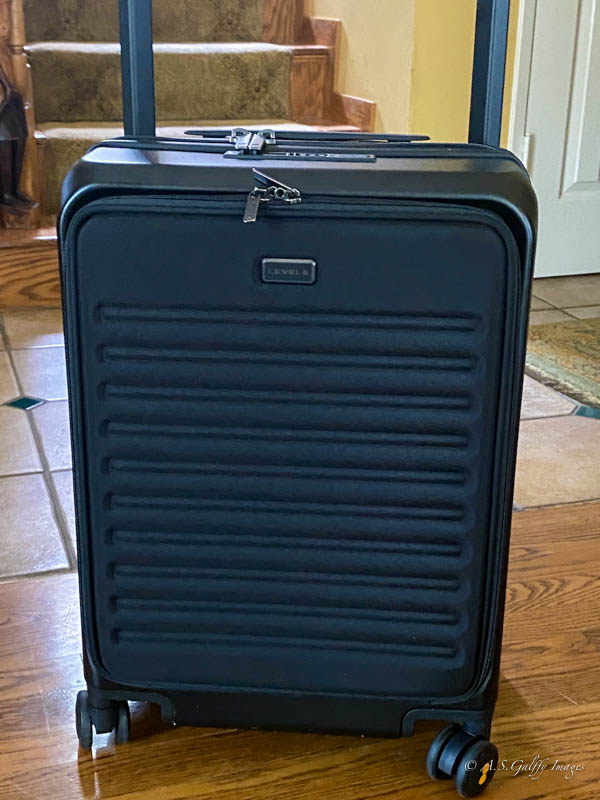
As someone who hasn’t checked a bag in the past ten years of travel across the U.S. and abroad, I’ve thought a lot about what makes a good piece of carry-on luggage. And if you ask me, it’s about capacity, maneuverability, durability, and design. After testing quite a few carry-ons over the years, I came across one that beats all the ones I had before: the Level8 Creator Carry-on.
Level8 Creator Carry-on
Why the Level8 Creator Carry-on Stands Out
The best carry-ons should be both spacious and easy to keep organized, with handy pockets and compartments. I prefer a carry-on that also looks good and the Level8 Creator Carry-on meets all these requirements.
In terms of features, the Creator has some that sets it apart from the rest of the suitcases:
Built-in USB-A&C ports
Wide-handle: this suitcase offers an adjustable telescopic wide trolley handle. This revolutionary design is ultra-sturdy and provides enhanced stability. It also has the advantage of creating more interior space for packing.
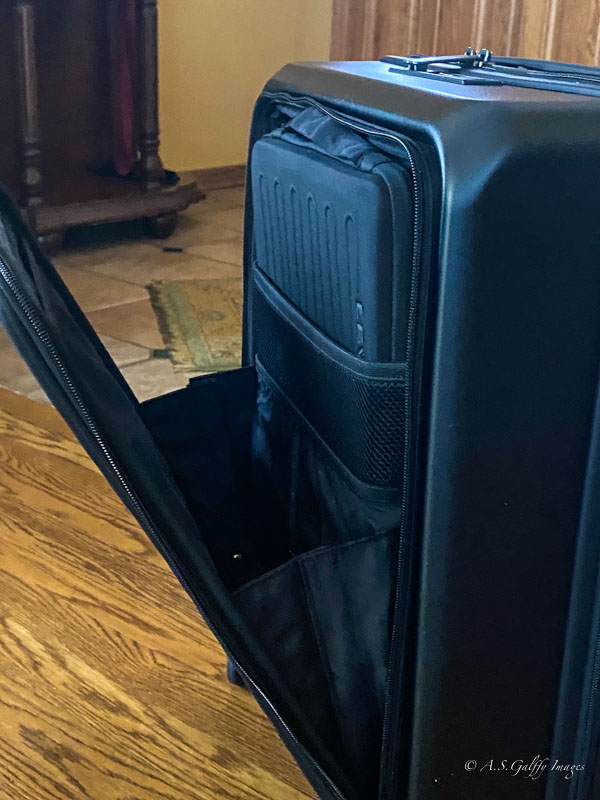
Quick-Access Laptop Pocket: Front sleeve with an independent laptop compartment for easy access.
Built-in USB-A&C ports: this feature keeps you powered up on the go. (Power bank not included)
Durable Design: premium German Makrolon® polycarbonate, which is lightweight and built to last.
YKK dual-layer zipper: provide better protection against water and dust.
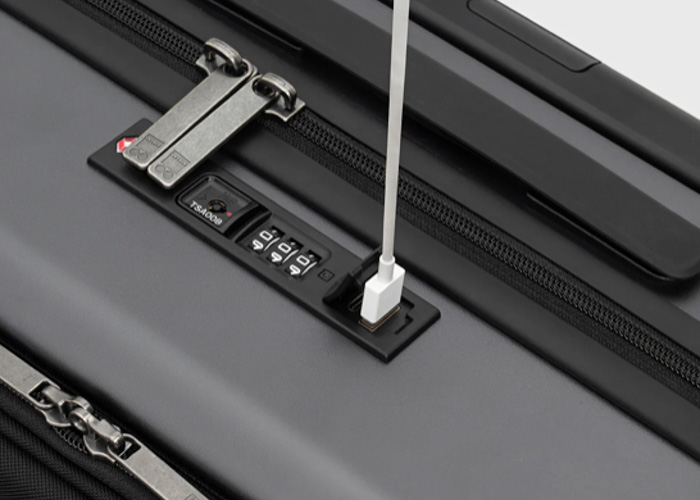
TSA-approved lock: this not only ensures the security of your belongings, but also saves you from the inconvenience of having your lock permanently damaged during a routine security inspection.
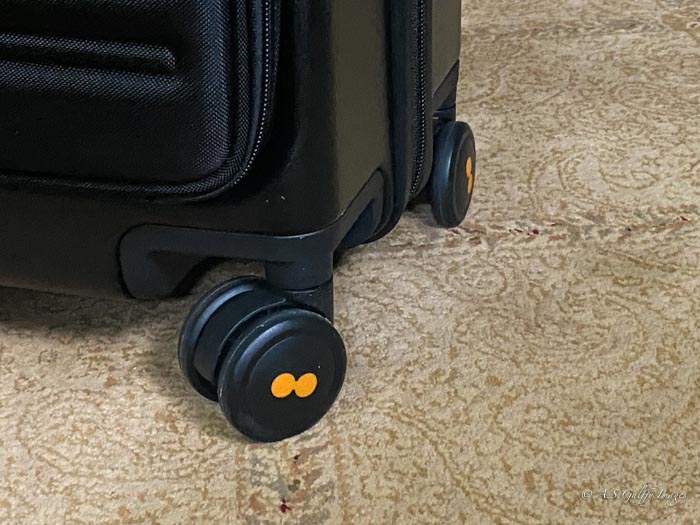
360° smooth spinner wheels: this system with precision ball bearings ensures smooth handling and lasting durability, no matter the terrain. The wheels are not only smooth, but also very quiet.
Eco-Friendly Interior: Fully lined with 100% RPET recycled polyester features a divider and dual zippered compartments for smart packing.
Dual zippered compartments and a divider for better packing. The front sleeve includes a mesh pocket and an independent laptop compartment, making organization effortless and your essentials easily accessible.
Lifetime Guarantee: Lifetime warranty that covers functional aspects including shell, wheels, handles, and zippers.
Quick access laptop pocket
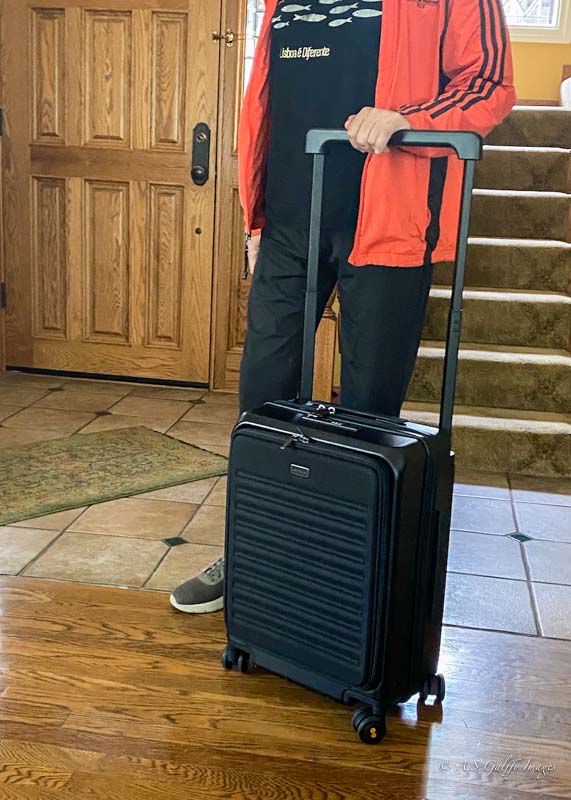
My Personal Opinion About the Level 8 Creator Carry-on
I also like the robust construction and organization features, particularly the zipless openings and compression straps.
The spacious interior and smooth wheels are also a big plus.
Smooth wheels
I love the sleek design and modern look of the Creator Carry-on.
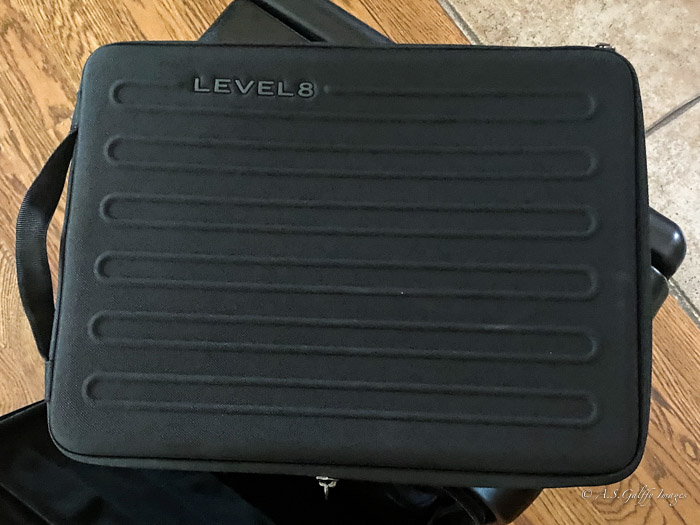
The suitcase comes with a sturdy computer sleeve which allows you to carry your computer in your hand if you choose to.
Computer sleeve
Cons
Price wise, the Level8 Creator carry-on is on the expensive side. Nonetheless, it’s a good value for the money and a good investment. Besides, these days Level8 offers a big 15% discount for many of its suitcases, including the Creator.
Due to its sturdy construction it is also a little heavier (10.1 lb) than other Level8 carry on, like the Pro Carry-on spinner or the Adventurer, which are only 9.1. This may be an issue with some airlines carry-on allowance.
While it might not be ideal for all airlines’ carry-on size restrictions, its robust construction, spacious interior, and organized features make it a worthwhile investment for many travelers.
Level8 Creator Carry-on
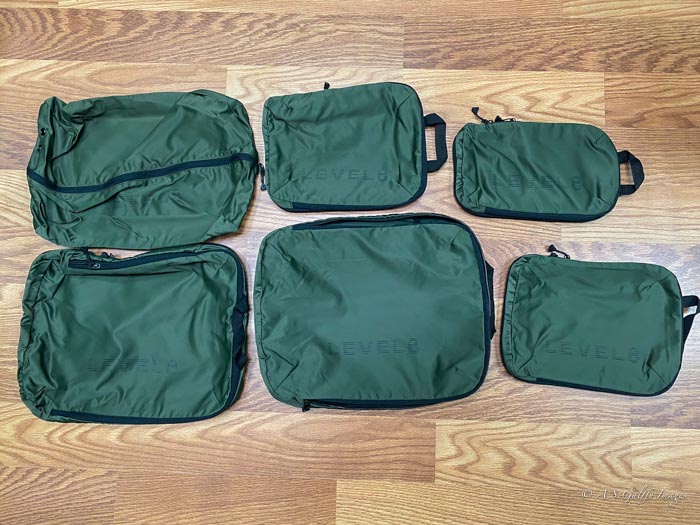
Don’t Miss the Packing Cube Travel Set!
If you want to pack even smarter, you can complete your Level8 Creator carry on with the 4-piece Packing Cube Travel Set. These are good for garments, gadgets, or grooming essentials and will make your packing way more efficient. A great way to keep your belongings dry and organized.
The packing cubes are made of a two-tone polyester that fightsmildew and repels water and have detachable rubber patches for quick identification. The cubes dimensions are as follows:
Level8 packing cubes set
Dimensions: Garment Cube: 18″L x 12″W x 4″D (46 x 31 x 10 cm) Journey Cube for Worn Attire or Footwear: 12″L x 9″W x 4″D (31 x 23 x 10 cm) Electronics Cube: 9″L x 5.9″W x 3.9″D (23 x 15 x 10 cm) Grooming & Beauty Essentials Pouch: 9″L x 5.9″W x 3.9″D (23 x 15 x 10 cm)
Note: Level8 Group provided me with this suitcase for a review. However, the opinions expressed in this article are based on my own experiences with this piece of luggage.
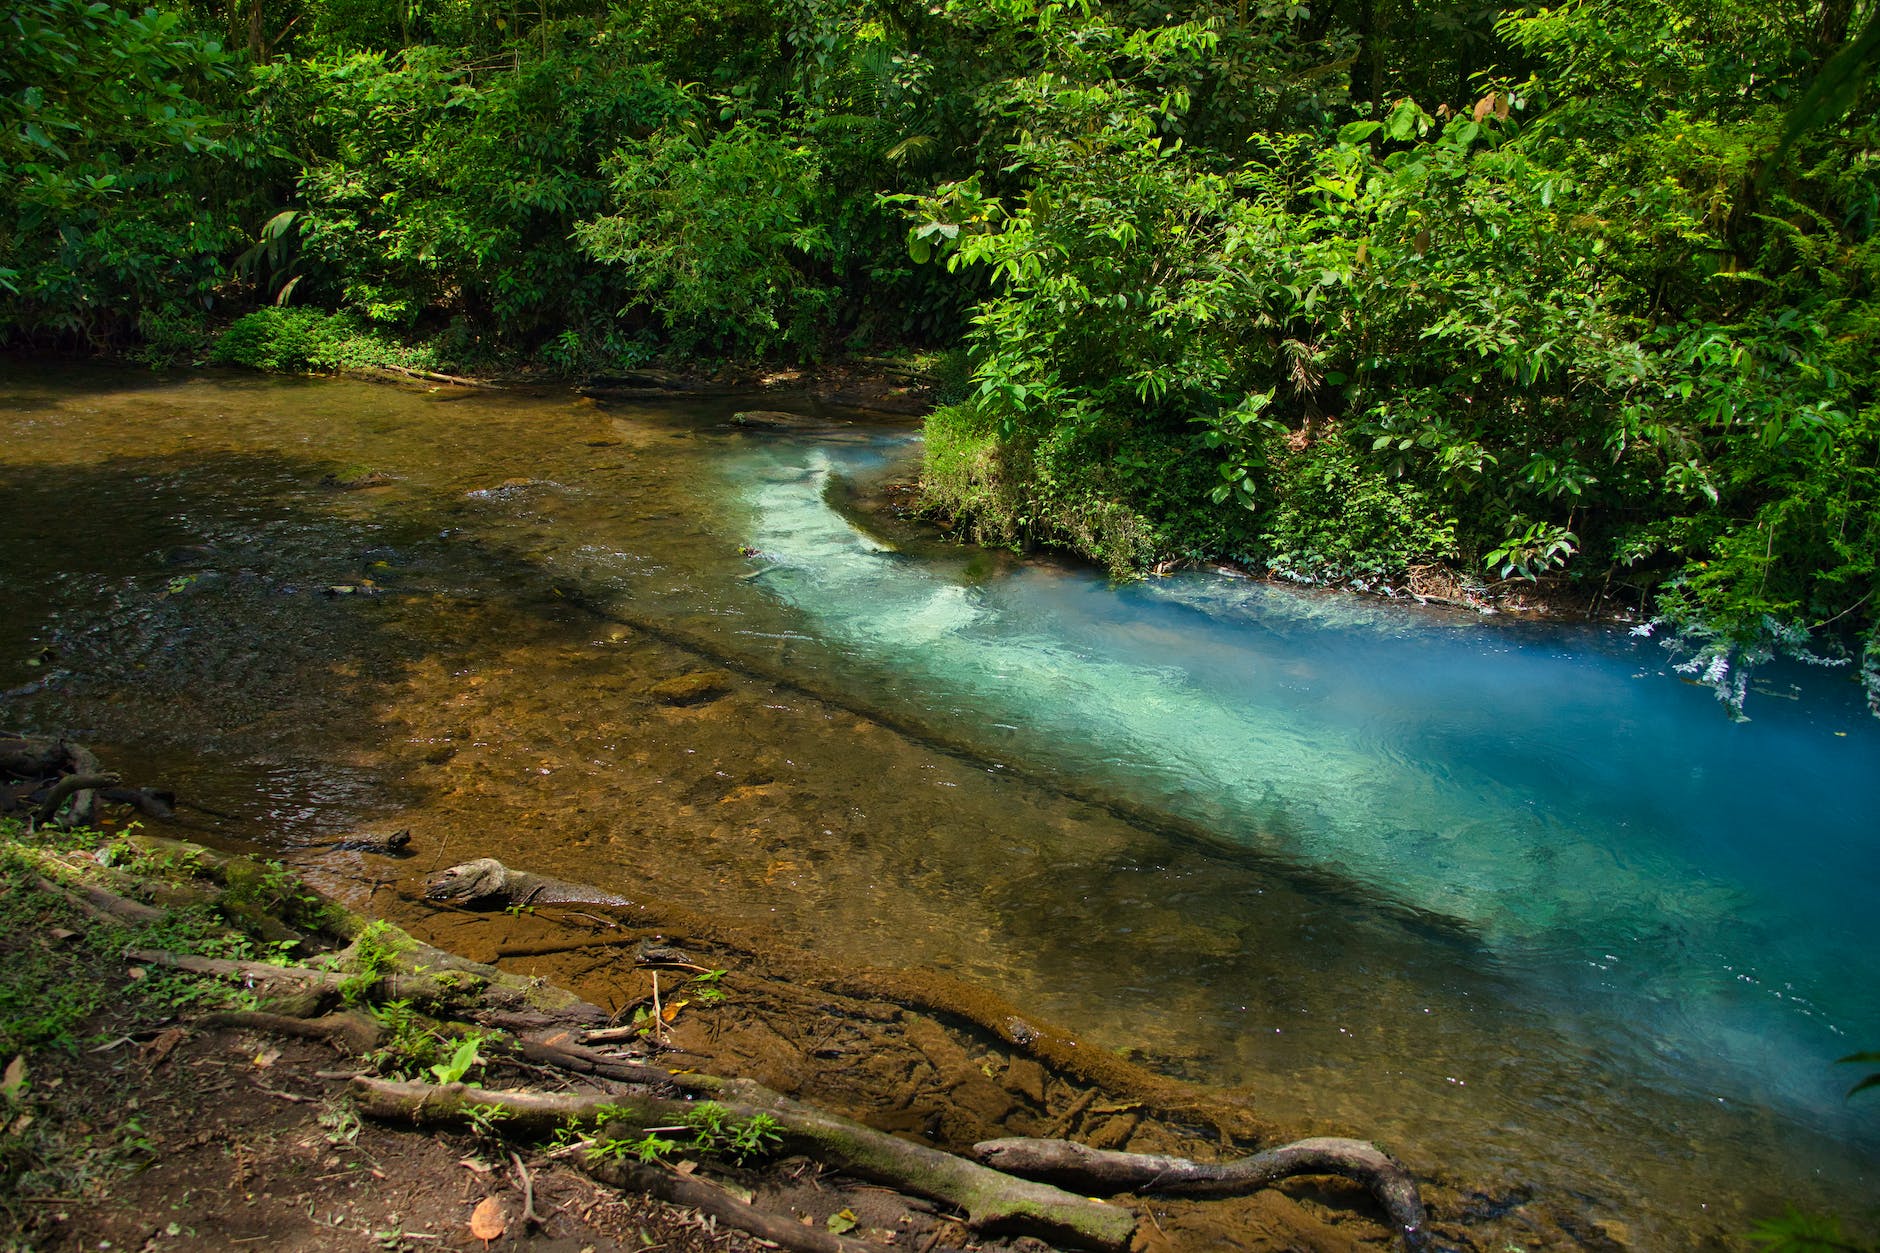
The Costa Rican countryside offers the ideal backdrop for a wide range of exhilarating activities both adults and children will find fun and exciting. The chance to glide above a rainforest’s canopy while taking in breathtaking panoramic views is one of the primary reasons why ziplining is a must-try tourist attraction in the country. The Arenal volcano area is a breathtaking location to partake in this thrilling activity, with several tour companies offering family-friendly zipline excursions to this destination. Even nicer, you could incorporate a zipline cable ride with a gondola trip above the forest and a walk across a hanging bridge. Four-year-olds and older are welcome to participate, and knowledgeable tour guides will always be present.
See Exoticca’s selection of “trips to Costa Rica” if this sounds like something you and your family might like. The flights, transfers, and accommodation are all included in each of these vacation packag-es, along with a guided hike to the Arenal Volcano.
Rappelling
Rappelling, which utilizes a rope to descend steep terrain, is yet another thrilling activity not to be missed when in Costa Rica. This is because rappelling here typically entails descending waterfalls amidst lush vegetation or cliffs near the shore, making it an exhilarating experience for families to en-joy. The Arenal Volcano Area, Monteverde Cloud Forest, and Manuel Antonio National Park are among the best destinations to go rappelling in the entire country. To make your outing to any of these places even more worthwhile and action-packed, add other adventure sports, like ziplining, horseback riding, and hiking, to your itinerary.
White-Water Rafting
White-water rafting is another activity that could make your heart race. The Pacuare River, which cuts through the center of the rainforest, has class II, III, and IV rapids that provide an unforgettable rafting excursion. For families with children at least 12 years old and older, there are several adventure compa-nies with highly experienced instructors that offer different rafting experiences.
Surfing
Anyone hoping to catch some waves will find ideal surfing conditions on Costa Rica’s Pacific coast. Tamarindo Beach, in the northwest of the country, is a popular surfing destination for both amateur and expert surfers. Its waves are consistent, and if you need help from an instructor, the beach is dotted with surf schools that welcome both adult and young learners. With the use of foam boards in shallow parts of the bay and personalized coaching, local instructors help beginners become more technical.
The Tranquility
Connecting to Nature
While Costa Rica has a reputation for being a top destination for thrilling endeavors, there are many places to visit to experience tranquility and relaxation. National parks, including Manuel Antonio and Corcovado, provide visitors an opportunity to admire abundant wildlife in a pristine natural environ-ment and take things more leisurely. When children catch a glimpse of monkeys, sloths, and exotic birds in their native habitats, they become instantly intrigued.
In addition, national parks typically consist of mountains, forests, beaches, and mangroves, among oth-ers, allowing visitors to experience various ecosystems in one trip. Manuel Antonio is a beautiful exam-ple, with its magnificent crescent-shaped beach and lush surroundings. However, be advised that there is an entrance cost for the nation’s national parks. Nevertheless, it’s worthwhile to spend the day taking in nature’s untainted beauty.
Hot-Spring Bathing
Costa Rica is home to a variety of hot springs spread around the land due to the amount of volcanoes and volcanic activity in the country. The Tabacon Hot Springs near La Fortuna, next to Arenal, is one of the most well-known and easily reachable. Natural hot springs inside the complex offer a range of temperatures ideal for a soothing bath. The quiet atmosphere is further enhanced by waterfalls and lovely gardens, which add to the relaxing effects of bathing in the mineral-rich water.
Relaxing Beach Activities
The beachfront resorts in this country are excellent for families seeking to unwind and unplug com-pletely. On the Peninsula Papagayo, the exclusive Andaz Papagayo Resort is located. It offers access to a private beach as well as kayaking, paddle boarding, and snorkeling. The hotel also has a kids’ club with regularly scheduled activities to keep the youngsters interested and happy, making it even nicer for families with small children. Another favorite is the 120-acre natural sanctuary that is the Four Seasons Resort Costa Rica, also situated on Peninsula Papagayo. In addition to activities like Ziplining and surf-ing, the resort’s outstanding setting offers family-friendly tours, marine excursions, and diving.
Tips for Finding Balance
Parents commonly make the mistake of jam-packing every vacation day with exciting activities and sightseeing in an attempt to keep kids from growing bored. To balance stimulation and rest, however, is essential for the family to recover and fully appreciate their trip to Costa Rica. Planning an itinerary that has a good balance of both may be a bit difficult, but with the following advice, you can do it:
Plan ahead: List the sites and activities that you and your family wish to participate in, along with the dates that you will be visiting. This will give you a basic idea of how your travel will go and assist in helping you design an itinerary with ample breaks.
Mix adventure and relaxation: Alternate days of intense activities, like ziplining or white-water raft-ing, with days of leisurely pursuits, like trips to the beach, a park, or hot springs.
Plan around your kids: Consider your children’s interests, hobbies, and attention span while making timetable decisions. Consider giving kids enough time to relax because they can easily get overstimu-lated.
Don’t overdo it: Limit your activities to give every family member time to enjoy the sights and the ex-periences and to prevent over-exhaustion at the end of the day.
Live in the moment: Enjoy Costa Rica’s unique culture and stunning landscape by living in the mo-ment. Being in the present is the only way to create priceless experiences with your family that will last a lifetime.
Take care of yourselves: Take care of yourself by setting aside time for a healthy diet, exercise, down-time, and sleep. Your happiness and energy levels will remain high the entire journey if you get enough sleep and are in excellent condition.
Combine Excitement and Tranquility in Costa Rica
With its natural wonders, mix of action-packed and relaxing activities, environmentally conscious tour-ist policies, and family-friendly attractions, Costa Rica is a destination that has something to offer eve-ryone. Create individual and family memories that will last a lifetime, whether by flying over the rain-forest canopy or unwinding in the hot springs, by letting your family unplug and recharge all at once on a trip to this Central American nation.
I love hostels. Even after over nineteen years traveling the world, I still stay in hostels because they’re the best way to meet people and the cheapest accommodation option in much of the world.
But what makes a good hostel?
And how do you avoid a bad hostel?
After staying in over a thousand hostels since I first started traveling the world, I’ve become adept at figuring out very quickly if the hostel owners know what they are doing or if they just randomly woke up one day and said, “Let’s open a hostel. It sounds like fun.”
While hostels are all about the people, management can do a few things to make their hostel the perfect framework for making your experience better. Certain features make a hostel memorable (common rooms, group activities, kitchens) while others can make them forgettable — or worse (push-button showers, general filth, unknowledgeable staff).
Here’s a breakdown of what I would look for in a hostel to help you pick the best one for your next trip:
1. Is There a Common Room?
I love meeting new people when I travel. Since I usually travel solo, I need to go out of my way to meet people if I want to be social. Common rooms in hostels make that easy. They help me find people to chat with, get tips from, do activities with, or even travel with.
Plus, they’re good for just having fun. They usually have pool tables or video game consoles, TVs/movies (perfect for rainy days), foosball, ping pong, and comfy couches (comfy couches are a must!). If you want to be social, make sure you stay somewhere that has a decent common room (or several). It’s the best place to easily connect with other travelers.
In warmer destinations, a common area outside is also a big plus. Rooftop bars, patios, BBQ areas, a pool — any social outdoor space is a must.
2. Is It Centrally Located?
Location, location, location. Whenever I’m looking for a new hostel I make sure that it’s near the things I want to see. I don’t want to spend all my time commuting when I get somewhere new. For that reason, I always make sure my hostels are in a central location and that they’re close to public transportation. That way, I can get around easily and don’t need to worry about having to waste money on taxis.
This is especially important in large cities where things are spread out and when you’re on a shorter trip and time is of the essence. Yes, they might cost more money, but you’ll save money on transportation. Plus, the more centrally-located hostels are usually the more popular ones, making them better places to meet people.
Don’t waste your vacation in transit; book somewhere central!
3. Is It Clean?
Sure, budget travelers like things cheap — but that doesn’t mean we like things dirty. While hostels have come a long way in recent years, there are still many that are poorly maintained and in need of a thorough scrubbing. Since it’s easy to get sick on the road, avoid dirty hostels. Gross bathrooms and showers (as well as the increased risk of bed bugs) aren’t worth the risk — even if the hostel is cheap. Invest in yourself. You deserve a clean room!
Since the photos hostels post on their website and social media can be misleading, make sure to specifically read reviews on sites like Hostelworld for hints on cleanliness. If just one person complains, maybe it’s not a big deal. But if numerous reviews mention the lack of cleanliness, take that as a cue.
4. Did You Read Reviews?
Always read reviews before you book. Is the hostel quiet or noisy? Is it a party hostel or more laid back? Are the mattresses comfy? Are the bunk beds squeaky? You can usually answer all of these questions (and many more) by reading reviews.
Websites like Hostelworld and Booking.com have tons of reviews to help you find the hostel that best suits your needs and budget.
While you’ll want to take them with a grain of salt (people love to complain), they are definitely helpful when it comes to picking the best hostel. Make sure you leave reviews too — good reviews help hostels grow and bad reviews can warn your fellow travelers so they don’t make the same mistake.
Additionally, make sure you only stay at hotels with lots of reviews. A hostel might have a high rating on Hostelworld but if it only has 10 or 20 reviews then I’ll likely stay away from it (it’s easy to fake ratings like that). However, if a hostel has hundreds (or thousands) of reviews and still has a rating of 8 or 9 out of 10 then that’s a good sign it’s a solid place to stay.
Generally, I try to only book hostels with a rating of 8 or higher on Hostelworld.
5. Do they Organize Group Activities?
If you plan on staying at a social hostel and want to meet people, choose a hostel that offers group activities. These could be walking tours (my personal favorite activity), pub crawls, trivia nights, cooking classes, or BBQs. These events are a great way to meet other travelers and learn about your destination.
My favorite hostels are always social hostels that organize events. It just makes your stay much more fun and lively!
6. Is There Late Checkout?
Never stay at a hostel with a checkout time before 10am. The best hostels have 11am checkout times, and the really good ones let you check out at noon. Sleep is valuable on the road because you’ll rarely get enough of it. Hostels with late checkout times understand this and are often more relaxed environments. There’s just something wrong about a hostel asking you to be packed and out so early in the morning.
7. Is There a Bar?
Bars are not deal breakers and there are a lot of wonderful hostels without them, but they make for a great place to socialize with other hostel guests. Usually if a hostel has a bar, they put a strong emphasis on making sure the people staying there are having fun, interacting, and being festive.
If you’re looking to be social and meet people, you’ll want to stay somewhere with a bar.
8. Do They Have Lockers?
It’s surprising, but I’ve actually been in hostels that don’t provide lockers or will charge you for them. In this day and age, lockers should be standard. You should never pay for security. This is a deal-breaker for me (especially since I travel with electronics). Always bring a lock with you as well, so you can use the lockers when they are provided.
9. Is There a Kitchen?
Try to look for hostels with kitchens since you can then prepare your own food, lower your food budget, and share a meal with your new friends. Nothing binds people closer together than a shared meal (and a few glasses of wine).
10. Do They Offer Breakfast?
Look for a place with a decent breakfast (i.e., more than bread and cheese) or at least one that begins and ends when people are actually awake (breakfasts that start around 8:30am usually go late). Breakfast is also a great way to load up on snacks for the day, cutting down your food budget.
11. Do They Have Pod-style Beds?
Gone are the days of sleeping on creaky, metal bunks. Whenever possible, look for a hostel with pod-style beds. These beds provide much better privacy and dampen the noise around you so you can sleep better. They usually have curtains too, which are always a big plus in my book.
12. Are There Individual Lights & Outlets?
Before you book, find out if the dorm bunks have their own outlet and light. Not only will this ensure you can charge your devices without having to fight for space, but it means your fellow travelers can turn on their own small lamp instead of the room’s main light. (I hate it when people turn the lights on in the middle of the night. Use your bed’s lamp or a flashlight!)
***
I don’t need a hostel to have all these things, but a truly wonderful hostel that understands what travelers are looking for has the majority of the things listed above.
Additionally, as more and more people shift to remote work, hostels have started to accommodate long-term travelers who work on their laptops. If you’re a remote worker, these hostels are great places to stay as they have fast Wi-Fi and make it easy to connect and network with other digital nomads. However, if you’re not working online while traveling, avoid these hostels since most people will just be on their laptops working and that’s kind of boring if you’re not doing it too. Instead, stay at a hostel that caters to backpackers. It will be much more enjoyable and you’ll have an easier time meeting people.
In the end, what really makes a good hostel are the people and even the worst hostels will be great if you meet good people. But removing the people from the equation, I look for hostels that have some of the above qualities in them. Hostels that know what you want as a traveler are there to enhance your travel experience, not simply take money from you in exchange for a bed. I would rather stay at a place that is looking to make sure I have a good time.
How to Travel the World on $75 a Day
My New York Times best-selling book to travel will teach you how to master the art of travel so that you’ll get off save money, always find deals, and have a deeper travel experience. It’s your A to Z planning guide that the BBC called the “bible for budget travelers.”
Book Your Flight Find a cheap flight by using Skyscanner. It’s my favorite search engine because it searches websites and airlines around the globe so you always know no stone is being left unturned.
Book Your Accommodation You can book your hostel with Hostelworld. If you want to stay somewhere other than a hostel, use Booking.com as it consistently returns the cheapest rates for guesthouses and hotels.
Don’t Forget Travel Insurance Travel insurance will protect you against illness, injury, theft, and cancellations. It’s comprehensive protection in case anything goes wrong. I never go on a trip without it as I’ve had to use it many times in the past. My favorite companies that offer the best service and value are:
Want to Travel for Free? Travel credit cards allow you to earn points that can be redeemed for free flights and accommodation — all without any extra spending. Check out my guide to picking the right card and my current favorites to get started and see the latest best deals.
Need a Rental Car? Discover Cars is a budget-friendly international car rental website. No matter where you’re headed, they’ll be able to find the best — and cheapest — rental for your trip!
Need Help Finding Activities for Your Trip? Get Your Guide is a huge online marketplace where you can find cool walking tours, fun excursions, skip-the-line tickets, private guides, and more.
Ready to Book Your Trip? Check out my resource page for the best companies to use when you travel. I list all the ones I use when I travel. They are the best in class and you can’t go wrong using them on your trip.
Houston, Texas, is a vibrant urban playground that offers a diverse range of activities for visitors and locals alike. Whether you’re looking to explore the city’s rich cultural heritage, enjoy its natural beauty, or indulge in its world-class cuisine, Houston has something to offer everyone. From its sprawling parks and green spaces to its bustling downtown core, there’s always something new and exciting to discover in this dynamic city.
One of the best ways to explore Houston is by visiting its many parks and playgrounds. With over 350 parks and 200 miles of interconnected trails, Houston is a haven for outdoor enthusiasts. Whether you’re looking to hike, bike, or simply relax in the sunshine, Houston’s parks offer a welcome respite from the hustle and bustle of city life.
From the lush greenery of Hermann Park to the space-themed Exploration Park, there’s a park in Houston to suit every taste and interest. So, pack a picnic, grab your sunscreen, and get ready to explore all that Houston has to offer!
The Heart of Houston: Downtown
If you’re looking for the beating heart of Houston, look no further than Downtown. This vibrant urban center is the perfect place to explore the city’s rich history, sample its diverse culinary scene, and experience its vibrant nightlife.
Historic Sites
Downtown Houston is home to a number of historic sites that offer a glimpse into the city’s past. Some of the must-visit landmarks include:
Sam Houston Park: This 20-acre park is home to some of Houston’s oldest buildings, including the Kellum-Noble House, the oldest surviving brick house in the city.
Houston City Hall: This iconic building has been a fixture of the city’s skyline since 1939 and is a great place to snap some photos.
Houston Public Library: The Central Library building is a stunning example of modernist architecture and is worth a visit, even if you’re not a bookworm.
Culinary Scene
Houston’s culinary scene is one of the most diverse in the country, and Downtown is no exception. Here are some of the must-visit restaurants:
The Grove: This farm-to-table restaurant is located in Discovery Green and offers stunning views of the park. The menu features seasonal ingredients and creative cocktails.
Xochi: This award-winning restaurant serves up authentic Oaxacan cuisine, including mole and mezcal. The vibrant decor and lively atmosphere make it a popular spot for dinner.
Phoenicia Specialty Foods: This gourmet market and deli is a great spot for a quick lunch or to stock up on snacks for a picnic in one of Downtown’s parks.
Nightlife
Downtown Houston comes alive after dark, with a variety of bars, clubs, and live music venues to choose from. Here are some of the top spots:
The Secret Group: This comedy club and music venue host a variety of shows, from stand-up comedy to indie rock concerts.
The Rustic: This popular spot offers live music, craft beer, and a menu featuring Texas-inspired cuisine.
The Pastry War: This mezcal bar is a great place to sample some of Mexico’s finest spirits and enjoy a lively atmosphere.
Outdoor Adventures
When it comes to outdoor adventures, Houston has plenty to offer. From kayaking to exploring the zoo, there’s something for everyone.
Buffalo Bayou Park
If you’re looking for a scenic outdoor adventure in Houston, look no further than Buffalo Bayou Park. This 160-acre park is located in the heart of the city and offers a variety of activities for visitors of all ages. Rent a kayak and paddle down Buffalo Bayou for stunning views of the Houston skyline.
You can also bike or walk along the park’s trails, which wind through the lush greenery and offer plenty of opportunities for birdwatching.
Houston Zoo
The Houston Zoo is a must-visit for animal lovers. This 55-acre zoo is home to over 6,000 animals from 900 different species. You can get up close and personal with the animals at the petting zoo or take a ride on the carousel. The zoo also offers a variety of educational programs and events, so be sure to check the calendar before you go.
Space Center Houston
For a truly out-of-this-world outdoor adventure, head to Space Center Houston. This educational center is located just outside of Houston and is home to NASA’s Johnson Space Center. You can take a tram tour of the facility, see real spacecraft up close, and even meet an astronaut.
Space Center Houston also offers a variety of exhibits and interactive displays, so there’s plenty to see and do for visitors of all ages.
No matter what kind of outdoor adventure you’re looking for, Houston has something to offer. Whether you’re exploring the city’s parks or learning about space travel, you’re sure to have a memorable experience.
Sports and Entertainment
Houston is a city that loves sports and entertainment. From baseball to basketball, football to soccer, Houston has it all. Here are some of the top sports and entertainment venues that you should visit while exploring Houston.
Minute Maid Park
Minute Maid Park is the home of the Houston Astros, Houston’s Major League Baseball team. The park opened in 2000 and has a seating capacity of 41,168. Minute Maid Park is known for its retractable roof, which allows games to be played rain or shine. The park is also home to several unique features, including a train that runs along the outfield wall, a hill in the center field, and a giant orange juice can that serves as a scoreboard.
NRG Stadium
NRG Stadium is the home of the Houston Texans, Houston’s National Football League team. The stadium opened in 2002 and has a seating capacity of 71,995. NRG Stadium is also home to the Houston Livestock Show and Rodeo, which takes place every year in March. The stadium is known for its retractable roof, which can be opened or closed in just seven minutes.
Toyota Center
Toyota Center is the home of the Houston Rockets, Houston’s National Basketball Association team. The arena opened in 2003 and has a seating capacity of 18,055. Toyota Center is also home to several other sports teams, including the Houston Comets of the Women’s National Basketball Association and the Houston Aeros of the American Hockey League.
The arena is known for its unique design, which includes a large glass wall that allows fans to see outside while still enjoying the game.
Shopping in Houston
Houston is a shopper’s paradise and offers a wide range of shopping experiences, from high-end designer boutiques to vintage shops and outlet malls. Here are three shopping destinations you shouldn’t miss when exploring Houston.
The Galleria
The Galleria is Houston’s premier shopping destination and is one of the largest malls in the United States. It features over 400 stores, including high-end designer boutiques such as Louis Vuitton, Gucci, and Prada, as well as popular department stores like Neiman Marcus, Macy’s, and Nordstrom.
The Galleria also has a large food court and several restaurants, making it a great place to spend a day shopping and dining.
Rice Village District
Rice Village District is a charming shopping district located near Rice University. It features a mix of national and local retailers, including clothing boutiques, gift shops, and home decor stores. Rice Village District is also home to several restaurants and cafes, making it a great place to grab a bite to eat while shopping.
Houston Premium Outlets
Houston Premium Outlets is an outdoor shopping center located in Cypress, Texas, just outside of Houston. It features over 145 stores, including popular brands like Nike, Coach, and Kate Spade. Houston Premium Outlets also has several dining options and a children’s play area, making it a great place to spend a day with the family.
Conclusion
Houston is a city that truly has something for everyone. From lush green spaces like Discovery Green to the bustling downtown area, there is never a dull moment in this vibrant urban playground. If you are a local or a tourist, you can always find something new and exciting to explore on houstoning.com.
I wanted to share a guide of how I designed and furnished my home office as a photographer. As a travel photographer, I spend a lot of time out in the world taking photos of beautiful places. On the flip side of that, I also spend a good chunk of time at home sitting in front of a computer screen editing photos and creating content like this.
Jessica and I bought our first house together last year and have been busy fixing it up and trying to make it a home. One of the first rooms I focused on was setting up my home office where I do the vast majority of my blog writing and photography editing.
Sure, it’s possible to work on the road. Personally though, I find that I get better results if I focus on capturing content on the road and creating content at home. Editing photos for example is certainly possible with a good photo editing laptop, but nothing beats a nice big monitor for editing photos, an ergonomic chair, and a powerful desktop computer.
I’ve also found that creating a dedicated home photography office helps separate work time from other time. My office is a place where I can get work done and really focus.
Obviously, function is important, and I wanted to design my office so if would fulfill all my main needs. For me, these included having a comfortable place to edit and organize my photos, an area for camera and photography equipment storage, a mini photography studio area, and a place to file paperwork and business documents.
Still, despite it being an office, where function is important, that doesn’t mean I can’t give it some personality. I spend a fair amount of time here, so it’s nice to make it personal to me, and be a place where I actively want to spend some time.
When we moved internationally, we came with no furniture and little equipment, so I had to start almost from scratch in terms of equipping, furnishing, and decorating my office. So I’ll go through all those decisions, what I chose to do, and some options for different budgets and styles.
In this guide, I’m going to go through what I think are the important things to think about when setting up your own home photography office. This is all based on my personal experience creating a dedicated office space for us in our home.
Whilst some of this content will be specific to working as a photographer, the majority of it will apply to any home office space. With so many of us switching to remote working in the last few years, I hope that you find the content in this useful for helping you set up your own home office space!
Things to Consider
Let’s first go over what you need to think about when planning your dream home photography office.
Size and Layout of the Room
The first thing you’re going to need to know is the size and layout of the room you have to work with. If you are lucky, you might have a choice of rooms in your room where you can setup your home office. However, if you’re like me, you likely aren’t going to have a vast choice of empty rooms to choose from.
In my case, there was a spare bedroom that I was able to utilize as a home office. For many people, turning a spare bedroom into an office can make a lot of sense. Maybe you have kids who have left the house, or you just have a spare guest bedroom that doesn’t get a lot of visitors.
It’s also possible that you don’t have an entire room to dedicate to a home office. Maybe the spare bedroom does get some use, so you have to leave the bed in there, or a sofa bed at the least. Maybe you have more of a hallway office situation going on or need to carve out a space in your family room or dining area.
My one piece of advice is to try to find at least a small dedicated area for yourself to work. Even if this is a small corner area with your own desk and storage, this is often nicer than trying to share a space with others for other purposes such as a kitchen table.
Whatever your situation, my suggestion would be to try to find the best option that works for you and the rest of your household. Once you have found a space, I’d suggest measuring it out. Graph paper can be useful to create a sketch of the space.
Once you know the size and layout you have to work with, you can start to plan things like furniture. After all, there’s no point planning on having a huge desk and dedicated studio area if you won’t have room for it. You’ll also be able to start planning exactly where you want to place different items of furniture in the room. Which leads me on to my next point.
Light Sources
When designing your home photography office, one thing you are going to want to consider is the various light sources, and how you are going to be able to control them.
Most spaces are going to have a number of light sources, which may include windows, overhead lights, lamps, and so on. I recommend having a variety of sources of light other than just an overhead ceiling light such a a floor lamp, desk lamp, and natural light.
Having lots of light is going to be great for lots of type of activities you might want to do in your office and having some natural light can help boost our mood.
However, whilst it may seem like a good idea to always have a nice bright working environment, this can be problematic. First, for photo editing, you are obviously going to be working on a monitor. And the brighter the room you are in, the harder it will be to see the monitor. If you’ve ever tried to work on a laptop outside, you’ve probably quickly realized how hard it can be to see the screen.
If you work in a bright environment, you have to turn the brightness on your monitor up to compensate for it. This can have the unfortunate side effect of you editing your photos on a screen that is too bright, meaning that when other people see your images on their devices, or when you print your images out, they don’t look as you imagined them.
The other issues with lots of light sources is that they can cause annoying reflections on your screen. Even on a monitor with an anti-reflective coating this can create a distracting effect.
Now, I’m not suggesting you move your office to a basement and embark on a troglodytic existence (unless you are also using it as a dark room). Although that will give you lots of control over your lighting!
Instead, think carefully about the light sources in your office and how you can control them. Ideally, you don’t want any bright light sources like a window behind you, as this will likely reflect in your monitor. Having your desk facing the windows if you have any will help cut down reflections, if this is possible.
If it’s not possible, and even if it is, you’ll also want to look at how you can control the light situation. So this will be things like using blinds or windows shades that you can adjust when necessary, allowing you to darken the room as needed. Also, plan the lights in your room so they don’t create reflections.
Noise
When planning your home office, you’ll want to think about what levels of noise you are happy to deal with, and what you can do to mitigate noise. From time to time for example I give video talks and presentations, and like many people who work from home I also have conference calls from my office.
Outside of those, I also prefer to work in a fairly distraction free environment if possible.
If you are choosing between various options for where your home office space is going to be, you will want to factor in the sources of noise in each area and if you think you can work with them. These may be external things like road noise or a neighbor’s dog, or internal noise like a lounge TV, kitchen noises, or your kid’s music.
It’s also worth mentioning that as well as external noise coming into your office, you should consider any noise you will be making and how that might affect the other occupants of your home. If you like to listen to music through speakers, or regularly take part in calls, locating your office in a location which won’t disturb other members of your home will be appreciated.
Storage Requirements
Any home office is going to need storage for things like documents, paper, pens and other office accessories. In my experience, a photographer’s home office also benefits from storage for camera equipment and accessories, from lenses and camera bodies to tripods, lights, batteries, filters, memory cards, chargers, cables, and more.
When planning out your home office and your furniture requirements, take into account everything you would ideally like to keep in your office. Don’t forget you’ll need storage for non-photography items as well, from paperwork to general office supplies. Think about the best options you have for storing everything, which might be drawers, shelves, filing cabinets, or something else.
Getting all your photography equipment stored in your office will make it easy to find and manage. It also moves it out the way of the occupants of the rest of the house, which can be a good thing for peace of mind.
How to Set up the Perfect Photography Home Office
Now I’ve covered the things you want to think about when planning your photography home office, I’m going to share some ideas for the key components you need. I’ll share what you need to think about for these components, as well as some recommended options based on my personal experiences.
Desk
One of the most important parts of any home office set up is the desk. You have a few choices to make when it comes to a desk.
First, and most importantly, the size of the desk. Obviously, this will be largely determined by the size of your room. If you have a larger room, then you’ll be able to fit a larger desk. If you have as smaller room, well, you’ll have to work with what you have.
To get an idea of the size that is best for you, I would write a list of all the things you would ideally want to sit on your desk and their size. This might include your monitor, keyboard, speakers, office organizers, mouse, computer tower, external hard drive, headphones, microphone, framed photos, coffee mug, desk calendar, plants, stapler, etc.
What else would you ideally like to be able to fit on your desk when needed such as your laptop, gaming gear, ring light, filming equipment, planner, or an extra monitor?
To save space, getting a desk where you can store things like your computer tower, speakers, and/or external storage underneath is a good idea. Just be sure when planning that your chair and legs will still have plenty of room.
For a home office I’d generally recommend a desk size that is no smaller than 48 inches wide and 24 inches deep. However, I personally believe that larger is better.
A wider desk will give you more room, so if you need to keep a notepad handy, or use a graphics tablet for example, you won’t be worrying about having enough space.
A deeper desk will allow for larger monitors, and a larger monitor can really benefit photo editing. If you have more than one monitor, then you definitely want to choose a larger desk.
So, if you have the space, I’d recommend looking at a desk that is more like 60 inches by 30 inches. Personally, I have a desk which is 71 inches wide and 35 inches deep and I love how much room I have.
There are also a number of other factors to consider. One of these is whether or not you want a standing desk. These have become very popular, with the idea that you can vary your position through the day from standing to sitting.
There are some downsides to a standing desk though, not least of which is cost, as a standing desk requires additional engineering to build and so obviously costs more. Some standing desks may also be less stable than regular desks and may not accommodate large monitors. You also need to think carefully about cable management with a standing desk and how you will manage the desk changing height with your setup.
You also have to think about if you want storage in your desk and how much you want or need. Drawers can be great for limiting the amount of stuff on your desk as you have places to store your pens, notebooks, paper, office supplies, extra cables, headphones, USB sticks, etc. The downside of a lot of drawers is limited space for storage under your desk. So think about if there are things you would ideally like to sit on the floor under your desk.
I personally chose a desk with no drawers as I wanted to be able to use the space underneath my desk for a large computer tower, Internet box, UPS battery storage tower, my office waste basket, and a bunch of cables. However, ideally I do wish I had at least a pencil drawer.
Finally, there are aesthetic decisions to be made, including what material the desk is made from, desk color, design style, and so on. Desks are available in all sorts of materials, including solid wood, engineered wood, and metal. Different materials will result in different prices, but this is primarily an aesthetic decision rather than a functional one. The main functional concern is to ensure it is a solid desk that will hold all the things you need and that it will hold up over time.
My main priority was getting a really solid desk at a good price. I initially thought I was going to get an IKEA gaming desk but when I went to get it in person I didn’t like the quality as it didn’t seem that solid. I also considered getting a simple vintage solid oak wood desk but there were practical issues given the size and weight of such a large heavy desk and getting it up our stairs.
I spent a lot of time researching desks, and I finally ended up going with this 70.8 x 35.4 Tribesigns desk. It is an engineered wood top set on a powder coated steel frame. It offered a great balance of size, weight, and price. It is a very sturdy desk and I have been pleased with it.
The other desk I seriously considered, and would recommend adding to your shortlist, is the Secretlab MAGNUS Pro. That’s an all metal desk which does include the sit to stand feature. It also has a really neat accessories system which works with magnets and which helps with organizing your desk.
Another popular brand that I looked at and which gets good reviews is the Uplift Standing Desk. They offer a range of standing desks with various options of color and material to choose from.
Finally, you can also get good value desks from somewhere like Ikea. A popular hack is to get a pair of Alex drawers, and then purchase a tabletop separately.
For me, it came down to wanting a slightly larger desk. I also really couldn’t justify the price difference for a more premium desk whose features I might not use that often, deciding instead to invest that money in a more premium monitor rather than the desk the monitor sits on!
Chair
Another important decision you’re going to have to make when putting your home office together is a chair. This is where you are going to be spending a lot of your time, so it’s critical that you choose the right chair.
Having been down the chair rabbit hole myself, I should warn you that there is a lot of choice out there. There are also seemingly endless office chair reviews out there which are going to have you second guessing yourself.
The main things you will want to decide are what material the chair is made of (foam vs mesh are the main decisions), and then things like whether or not the chair has armrests, a headrest, what type of upholstery, and how adjustable it is.
Chairs, like seemingly everything in life, are available at a wide price range, from under $100 through to well in excess of a thousand.
I did a huge amount of research when purchasing an office chair. I concluded I wanted a headrest and armrests, a mesh back for air circulation, adjustable height and back, and a foam base for comfort and longevity. A price sweet spot seemed to be between $200 and $500 for a good chair that would last me a while and offer all the features I need.
In the end I settled on this office chair, which I have been very happy with. The seat is very comfortable, it’s adjustable in all the ways I could want, and it is very well built and solid.
From my research, other chairs that you might consider include the Herman Miller range and Steelcase chairs. Both these manufacturers make excellent chairs but they are definitely more expensive options. The good news is that you can sometimes find them used or refurbished for a better price.
Other well reviewed mid-range options include chairs from Branch, Humanscale and Haworth. At the more budget end of the spectrum, look at brands like Sihoo and Staples. The Staples Hyken chair in particular offers great value.
The main thing to remember when choosing a chair is that everyone is different, and so the perfect chair for me is unlikely to be the perfect chair for you. So keep this in mind when reading reviews and getting advice. In an ideal world, you’ll want to visit a store that actually sells a variety of office chairs so you can try them and see what works.
The next best option is to buy a chair from a store with a no questions asked free returns policy, so you can return a chair if it doesn’t work out for you.
If you are a particularly small, large, or tall person, I would encourage you to pay closer attention to reviews for people of similar size and build. For example, Jess is a tiny person so most office chairs are not particularly comfortable for her as they are built for someone larger and taller than her. Some office chair brands offer some of their chairs in different sizes such as Herman Miller, Haworth, and Steelcase.
From a photography perspective I would say there is nothing specific you need for a photography home office chair compared to a regular home office chair. You just want it to be really comfortable and supportive for long periods of sitting down.
Computer & Monitor
A computer is pretty much an essential item for any home office, but especially so for a home photography office. This is where you are going to be doing all your photo editing, a task which requires a pretty powerful computer and a high quality monitor.
I’ve already put together a guide to the best photo editing monitors, so I won’t replicate that information here. That has everything you need to know to choose a good monitor for your photo editing needs, including the specifications to look for and what is important. It also has a number of recommended models at various price points.
I would also add when choosing a monitor to also consider what else you plan to use it for. If you are going to be using for anything else beyond photo editing, such as watching movies or TV shows, or even gaming, then you might want something that is good across a range of tasks.
As an example, many photo editing monitors have lower refresh rates, say around 60Hz. Whilst this is fine for photo editing, it can result in issues when playing computer games. So, you might consider a monitor with a higher refresh rate that works for both photo editing and gaming.
Size wise, I’d suggest something in the 27″ – 34″ range, although this will depend on the size of your desk.
I ended up going with an MSI 34″ ultrawide OLED monitor, which works well for everything from photo editing to gaming to consuming content.
For the computer itself, I do have a guide to choosing the best laptop for photo editing. I would recommend reading that guide as it covers which specifications are important for a photo editing computer and why. However, rather than buying a laptop, I would personally recommend a desktop computer for home office use.
Desktop computer components are nearly always more powerful than their laptop counterparts, as they don’t have the same size and thermal restrictions as a laptop. However the naming convention is the same, so my laptop guide will still prove useful.
I actually built my own desktop computer from parts as it’s something I enjoy doing (and have a computer science background). However, you can purchase excellent pre-built desktop systems. Just be sure to check that the specifications include a recent processor from Intel or AMD, a discrete graphics card (GPU), at least 32GB of RAM, and a 1 TB SSD. Again, check my guide to the best laptop for photo editing for the specifications that matter.
Lighting is important for any office, but particularly so for a home office where you plan to do photo editing, as outlined previously in this guide. I recommend having your lighting coming from a number of different sources (e.g., floor light, desk lamp, window, overhead light, etc.) and being able to control that light as needed (e.g., dimmable bulbs, blinds, diffusers, etc).
In terms of actual lighting suggestions, I have a couple of ideas. First, I would advise a monitor bias light. This goes behind your monitor and bounces light off the walls around you to create a diffuse light source that will reduce eye strain.
I’d also suggest one or more floor standing lamps. You can place these in strategic places around your office to provide light as required. I’d also highly recommend getting a lightbulb that lets you change it’s color temperature, from warm to cool, and which is also dimmable.
This way you can change the lighting in your room depending on your mood and needs, and to ensure a neutral background light when you are editing your photos. I like these Philips Hue bulbs for this purpose. You can also get bulbs like these which change color across the RGB spectrum but those aren’t really necessary.
For photo editing, you want to ensure that your room lighting is not affecting your color perception, so having lighting in the range of 5000K – 6500K (to match your monitor calibration) is going to be ideal. But you might not want a cooler tone all the time, so having adjustable lightbulbs is a good idea, so you can have a more normal warmer light when not editing.
Useful Accessories
There are a few useful accessories that I have which you might consider for your home photography office. In no particular order, these are:
Desk Pad
A desk pad, as the name suggests, is a large pad that sits on your desk. It’s a bit like a mouse pad, but larger. It can make the working area a bit more comfortable and is a better writing and typing surface. If you have a more budget table like I do or a worn one, a desk pad can also be a clever way to disguise that fact and protect the surface from damage.
Desk pads can also be customized so you can do anything from monogramming it to choosing an artwork you like. They’re also available in all sorts of material, including felt, leather, cork, vegan leather, and wool, and in myriad colors and designs.
Personally, I went with a Grovemade desk pad in natural linoleum with a cork backing. I really love all the material choices they offer including leather, natural linoleum, cork, and wool. I chose a simple black because I already have a pretty dramatic canvas print and rug choice in my office, and didn’t want to go entirely crazy. But as with everything, it’s your office, so go with what makes you happy!
Mouse
I actually think a good mouse is a really important accessory for photo editing at home. I particularly recommend you buy a gaming mouse. The reason for that is because most gaming mice come with lots of extra buttons, which you can assign to keyboard shortcuts. I use these to speed up my photo editing workflow, with common Lightroom shortcuts that I use all the time assigned to specific buttons.
I specifically recommend the Logitech line of gaming mice , which I have been using for many years, with my personal favorite being the G502. This is available in a number of varieties. I prefer the wireless version as I find it easier to move without a cord. But it’s also available corded, and I had the corded version for years.
I’d also add that if you decide against a desk pad, then I can recommend getting a nice mouse pad for your mouse instead, which will improve accuracy and protect your desk surface.
Monitor Calibration Tool
If you are serious about your photo editing, it’s important that your display is correctly calibrated. This is particularly important if you plan on having prints of your work made, as it will ensure that what is printed matches what you see on your monitor.
I have a whole guide to monitor calibration here, but the key takeaway is that for the best results you should use a hardware monitor calibration tool like one of these, which is what I use.
External Hard Drive / Network Attached Storage
A backup system for your photos is an essential part of your home photography office setup. If your computer stops working or a hard drive fails, you don’t want to lose all your images.
I have a complete guide to backing up your photos, but the key takeaway is that you need two backup systems in place. First, you need a cloud backup that stores your digital image files offsite. This will protect you in case of a disaster at home. I use and recommend Backblaze, but there are other options.
You should also have a local backup system in place. This will let you get a quick restore of your image files should a local drive fail. A large external hard drive or network attached storage device is the best solution in this case. Personally I have a large external drive I use for on-site backup.
How to Store Camera Equipment
If you’re anything like me, then you probably have a fair amount of photography equipment to store away. Prior to setting up my home office, my camera gear primarily lived between various photography bags I had. This did keep it protected, but wasn’t an ideal solution as I had to go rooting through bags to find what I needed for any given shoot.
It also meant that if I needed that specific bag, I’d have to move everything out of it. In my research for storing my camera gear at home, I came up with a few options.
Ideally, you will have a more permanent storage area in your home that will keep your cameras and photography gear organized, safe, free of dust, and protect it from damage. You want to keep it out of direct sunlight, away from water and humidity, and in a place with stable normal temperatures.
Using Camera Cases
One thing many photographers have is a camera bag, or, if you’re like me, a variety of camera bags for different scenarios. These might include backpack style bags like these, hard cases like this or this, and roll on bags like these. I happen to own all of these types of photography bags and cases.
For storage I particularly like this hard case which is also highly recommended for storing photography items when moving or doing shoots in rough terrain locations. Personally, I concluded that the case would look a little out of place in my home office. Instead, I use it for storing extraneous gear in a closet, where I also keep other items I don’t need on a regular basis like my photography bean bags, extra tripods, extra cables, photography bags, and so on.
However, if you already have a spare camera bag or two, and you don’t have too much gear to store, then using these can be a good option to store your gear in between shoots.
Cabinets / Drawers
The next option to consider is to use cabinets or drawers to store your photography gear. These look more natural in a home office setting, and they are available in a huge range of sizes and materials.
The downside of using cabinets or drawers is that generally the drawers are not designed to store camera equipment specifically. So the drawers might not be deep, tall, or wide enough for your equipment. Additionally, most drawers are not padded or set up in a way that provides any protection for camera equipment.
Some kind of padding or protection is essential for your gear as you don’t want it moving around or bumping around in a drawer when you open and close it as that could lead to damage. So you will likely have to add some kind of padding and divider system, which will take up additional space in the drawers.
If you do decide to go down the cabinet / drawer route, you will want to consider the size of your equipment and how it will all fit into the solution you purchase.
Other factors to consider are how sturdy and secure drawers are (can they be locked for example?), the material they are made from, and of course the price.
One popular option is to adapt a tool chest for your camera gear. Most tool chests are well made, constructed of durable metal, and can be locked as they are designed to store and protect high value tools. There are many brands available, such as Husky and Kobalt, with a wide range of products available.
Of course, you can also purchase a cabinet or chest of drawers from a furniture store and work with that. Just be sure it is large and sturdy enough to accommodate your storage needs.
My Home Office Camera Storage Solution
For my office, I wanted a solution that would let me store my camera gear in an existing set of drawers. I decided that a set of drawers wouldn’t look out of place in an office, and I was able to find this set of drawers that matched my desk, and were within budget. They are designed for clothing storage and have deep drawers, which meant they had the dimensions I needed to store all my equipment.
However, for this to work I would need a solution that provided protection and prevented equipment from rolling around when the drawer opened, as most drawers are not generally designed to keep camera equipment in.
I really liked the look of the Pelican TrekPak Divider System. However, I calculated that I’d need at least four of them to hold my gear, making the cost somewhat excessive in my opinion. I also looked into using ICU systems like these, but again the cost would end up being a bit higher than I wanted.
My solution was to create my own system. I purchased this neoprene adhesive sponge foam, this corrugated plastic, some 1″ acoustic foam for the base, and some stiff craft wire to create the pins which hold it all together. A few careful hours with a sharp knife and measuring tape later, and I had built my own camera drawer storage system where I can keep all my camera gear and accessories.
As previously mentioned, I also use my existing hard case for storing extra gear out of the way that doesn’t fit in the drawers or is more rarely used.
Filing Cabinet
Whatever you use your home office for, the reality is that you are going to need some kind of storage for paperwork. If you regular print photos, then you’ll probably need a space to store and file them. if you do film photography, you’ll need a safe and clean space to store film and negatives.
Even if you don’t print out your photos often, you’re likely going to have business paperwork and receipts that need filing, as well as bit and pieces of electronic gear and adaptors that need somewhere to live.
If you don’t have much of this, then you might consider getting a desk with a file drawer if that is all you need. But if you think you might need more than one drawer of storage, I’d probably opt for a separate filing unit.
Personally, I like having a filing cabinet to keep all my paperwork filed away neatly. You can pick up filing cabinets online, but they are also an item that can easily be purchased (if you have the right vehicle) at a thrift store or second hand somewhere like Facebook Marketplace. Often, the secondhand models are going to be clearance models from old offices, and will be a pretty high quality.
All that said I ended up getting mine online because my car isn’t big enough to fit in the size of filing cabinet I wanted. I got a locking lateral three drawer filing cabinet which went together pretty easily and does the job.
Light Box / Studio Setup
Depending on the type of photography you do, you may want to incorporate some sort of studio setup in your home office as well so you can take the photos you need.
For example, if you do portrait photography, then putting together a dedicated area to do that would be a good idea if you don’t have a dedicated studio space. You’ll need studio lights and a backdrop against which to shoot. A pull down backdrop can be a good idea if you don’t have a lot of space but have a blank wall.
Personally, as I’m primarily a travel photographer I don’t do a lot of photos that require a home studio setup. However, I do review products from time to time, and being able to take photos of them in a controlled lighting environment is handy. For this purpose, I use a large photography lightbox.
If you plan on printing your photos at home, then you’ll want to invest in a good photo printer. There are a number of options to consider, with key decision points being your budget, and the size of prints you want to print
One thing to bear in mind when purchasing a printer is that you will also have to pay for suitable paper as well as printer ink. Both of those supplies can quickly increase the cost of your print.
Personally, I use a photo lab for printing my photos. It’s more convenient, and it also gives me access to a huge array of print mediums. I generally use SmugMug for my photo needs. I also host my image portfolio with them, and if someone orders a product they handle all the printing and shipping for me. You can see my detailed SmugMug review here.
All that said, I do still have the need to print things out at home from time to time, but these are paperwork rather than images. So I ended up purchasing a wireless black and white Brother Laser Printer. I’ve had one of these for years, first in the UK and then in the USA.
Whilst the upfront cost of a laser printer is a little higher than that of an inkjet, the ink toner cartridges last forever, meaning in the long run it is way more cost effective. I also highly recommend a wireless printer so you can have more flexibility in where you place it in your office.
Other Accessories
There are lots of additional accessories you might consider for your photography home office.
Office supplies and organization tools
If you are running a business like I am or just pursing a passion, you’re still going to want some basic office supplies such as pens, stapler, writing pads, paper clips, printer paper, scissors, surge protectors, and the like.
While not exciting, you are also going to want to keep your office organized so you can easily find things. I found that when I just threw stuff in drawers in the past, I was often losing things or buying duplicates of things I already owned.
So these are things like pen holders, file folders, file organizers, drawer trays, wire organizers and cables, and the like. I would evaluate what all you need in your office and then figure out what type of organization tools would be best for you and your space.
Artwork and personal touches
You are likely going to be spending quite a lot of time in your home office, so you will want to personalize it to your tastes and give it some personality. It is the one room of the house where my wife has given me pretty much free range to decorate how I want.
Some of the things I love are space, travel, science fiction, gaming, and photography, and my favorite color is purple. If you came to my office, you would probably be able to pick up on most of these things pretty quickly.
Personally I’m a big fan of space, so I added a canvas print of a James Webb image (freely available from NASA), as well as this galaxy themed rug under my desk.
If you’re interested in a MOVA globe specifically for your desk, we have been given a 10% off discount code that can be used for any 6 inch or 8.5 inch MOVA globe purchased from their website. Just put in coupon code TRAVELCATS at checkout.
In relation to photography, I have displayed some of my old cameras on the filing cabinet. I also have a framed wedding photo on my desk. I am also likely going to frame some of my photos in the future for one of my blank walls.
Gaming wise I haven’t chosen a particularly strong gamer aesthetic, although my PC case does have a bit of RGB lighting, and I have a game controller within easy reach! The nice thing about building a photo editing PC is that it happens to double up well for gaming as well.
The color purple is scattered throughout the room. I even have a purple dragon door topper peeking from atop of my door.
Of course, you’ll want to personalize your office in a way that suits you, which could mean anything from hanging prints of your own work, to other artwork or decor. If you do want to display your own images, don’t feel restricted to print, it’s amazing what you can put images on these days from coffee mugs to rugs to metal.
The main thing though is to make your office a place where you enjoy spending time.
Plants
I love having some greenery in my office and it can really add some visual interest and naturalness to what can be a pretty utilitarian space. You want to go with hearty plants that don’t require too much maintenance. And ones that can thrive indoors in the amount of light available to you in your office space.
I personally favor spider plants as they have proven difficult to kill, and it is a plant that just keeps giving as I start with one and soon have half a dozen of them. I keep mine in a plant pot that sits on a black metal drink tray stand next to one of my windows.
Now, if you don’t have much light or know that you won’t be able to care for a live plant, then I recommend looking for preserved dried flowers and greenery. These are going to look better than fake ones and don’t require really any maintenance, just occasionally blowing them with some air for dusting. Dried and preserved flowers can last for years in a climate-controlled space.
MOVA Globe
One of the things on my desk which I noted above is a MOVA Globe. We first saw these magical contraptions whilst traveling in Venice, Italy.
They are powered by solar energy and will spin when they have enough natural or artificial light. They are a very fun addition to a desk, especially if you like travel as much as we do.
If you’re interested in purchasing one, we have been given a 5% off discount code that can be used for any 6 inch or 8.5 inch MOVA globe purchased from their website. Just put in coupon code TRAVELCATS at checkout.
Scents
You may also want to work in a place that has your favorite scent. Fresh flowers can be one way to infuse some nice scents to your office. You can also go with candles, potpourri, diffusers, incense, wax melts, etc.
One of my favorite scents in sandalwood so I have one of those scent diffusers on my desk with the little wooden sticks and sandalwood essential oils.
Further Reading
That’s it for my guide to setting up a home photography office! If you found this useful, you might enjoy some of my other photography related content. Here are some articles to get you started.
Knowing how to compose a great photo is a key photography skill. See our guide to composition in photography for lots of tips on this subject
We have a guide to what depth of field is and when you would want to use it.
We are big fans of getting the most out of your digital photo files, and do to that you will need to shoot in RAW. See our guide to RAW in photography to understand what RAW is, and why you should switch to RAW as soon as you can if your camera supports it.
You’re going to need something to run your photo editing software on. See our guide to the best laptops for photo editing for some tips on what to look for.
If you found this post helpful, and you want to improve your photography overall, you might want to check out my online travel photography course.
Since launching the course in 2016, I’ve already helped over 2,000 students learn how to take better photos. The course covers pretty much everything you need to know, from the basics of how a camera works, through to composition, light, and photo editing.
It also covers more advanced topics, including astrophotography, long exposure photography, flash photography, and HDR photography.
You get feedback from me as you progress, access to webinars, interviews and videos, as well as exclusive membership of a Facebook group where you can get feedback on your work and take part in regular challenges.
It’s available for an amazing one-off price for lifetime access, and I think you should check it out. Which you can do by clicking here.
And that’s it! I’d love to hear about your thoughts and tips on what has worked for your home photography office and as always am happy to answer any questions you have. Just pop them in the comments below and I’ll get back to you as soon as I can.