From exploring the Alice Springs Desert Park to Simpsons Gap, these are some of the most incredible things to do in Alice Springs.
Alice Springs, located in the heart of Australia’s Red Centre, is more than just a stop on the way to Uluru. It’s a destination in its own right!
Surrounded by rugged desert terrain, this lively outback town in the Northern Territory is a melting pot of culture, history, and natural beauty.
As the spiritual heart of Australia, Alice Springs is a place where ancient rivers and rugged mountains, shaped over millions of years, meet Aboriginal culture that is rich in art and storytelling.
Numerous historic sites throughout Alice Springs tell the story of the region’s settler past. One such place is the Old Telegraph Station Reserve, an iconic landmark that marks the town’s pivotal role as the midpoint of the 19th-century telegraph line connecting Adelaide to Darwin.
For adventure seekers, tackling the breathtaking Larapinta Trail is an absolute must. Recognised by National Geographic as one of the world’s top 20 trekking experiences, this epic trail stretches through the rugged West MacDonnell Ranges, rewarding you with some of Australia’s most mesmerising Outback scenery.
After a day of exploring, unwind and take in the vibrant atmosphere of Alice Springs. Head to the town centre, where you’ll find quirky bars, cosy cafés, and scenic restaurants. These are the best things to do in Alice Springs!
18 Incredible Things To Do in Alice Springs
Alice Springs is packed with incredible experiences. Whether you’re here to explore its breathtaking landscapes or learn about its vibrant heritage, there’s no shortage of unforgettable experiences waiting for you to discover.
Check out some of the best things to do in Alice Springs.
A visit to Alice Springs Desert Park is an absolute must for anyone wanting to experience the natural beauty and wildlife of Central Australia up close. This immersive park showcases three distinct desert habitats, where you can explore the unique flora and fauna that thrive in the Outback.
A paradise for wildlife enthusiasts, Alice Springs Desert Park has some of Australia’s most iconic animals like emus, dingoes, and red kangaroos.
Witness the breathtaking free-flying bird show, where eagles and falcons soar overhead, and even get up close with a majestic wedge-tailed eagle.
Stop by the Nocturnal House, where you’ll discover the elusive creatures of the desert night, including rare marsupials and fascinating reptiles.
Aside from being a wildlife sanctuary, the Alice Springs Desert Park is a gateway to understanding the rich culture and traditions of the Aboriginal people.
Dive deep into Aboriginal culture as expert guides bring Dreamtime stories to life, sharing ancient wisdom and traditions passed down for generations.
Learn essential survival skills, from tracking wildlife to finding water in the arid landscape, and discover the rich traditions of bush tucker, where native plants and ingredients have sustained Indigenous communities for thousands of years.
A bird of prey on the move in Alice Springs Desert Park.
2. Tee off at one of the world’s best desert golf courses
Golfing in Alice Springs is a truly unique experience, as lush fairways and manicured greens stand in contrast to the rugged red landscapes of the Northern Territory.
Golf lovers shouldn’t miss the chance to tee off at Alice Springs Golf Club, one of Australia’s premier desert courses. It offers a unique and challenging game, with lush fairways contrasting beautifully against the rugged MacDonnell Ranges.
Challenge yourself with 9 or 18 holes on this championship course, where narrow fairways wind between rocky outcrops, and the ‘rough’ is as wild as the Outback itself.
The club also features a floodlit driving range, a putting green, and a fully equipped pro shop for all your golfing needs.
But if you’re looking for a more relaxed activity, you can play lawn bowls on the grass bowling green.
After your game, unwind at the modern clubhouse and restaurant, where you can indulge in a well-earned meal and drink surrounded by spectacular views.
3. Explore the MacDonnell Ranges
Enjoy an unforgettable adventure in the Outback with a visit to the breathtaking East and West MacDonnell Ranges.
Home to some of Central Australia’s most stunning landscapes, these rugged mountain ranges have scenic hiking trails that lead through ancient gorges and dramatic rock formations.
Along the way, take in the rich red rock landscapes, ghost gum trees, and abundant wildlife that make this region spectacular.
For a hassle-free experience, consider booking the West MacDonnell Ranges Day Trip from Alice Springs. This tour allows you to visit multiple highlights, including the East Macdonnell Ranges and West Macdonnell Ranges with expert guides providing insights into the area’s history, geology, and cultural significance.
4. Swim in the Ellery Creek Big Hole
After an adventure-filled hike through the MacDonnell Ranges, there’s no better way to cool off than with a refreshing swim at Ellery Creek Big Hole.
Known for its crystal-clear waters and breathtaking scenery, the stunning waterhole is one of the most beautiful and popular swimming spots in the West MacDonnell Ranges.
Surrounded by towering red cliffs and ancient rock formations, the cool water provides a welcome respite from the Outback heat. Enjoy a leisurely swim or a quick dip while soaking in the serenity of the place.
Take advantage of the shaded picnic areas with tables and BBQ facilities. Don’t forget to pack some food, fire up the grill, and enjoy a laid-back meal surrounded by breathtaking views!
5. Admire Aboriginal Art at Araluen Cultural Precinct
No visit to Alice Springs is complete without immersing yourself in its vibrant Aboriginal art scene. As the heart of Indigenous Australian culture, the town is home to numerous art galleries and cultural centers showcasing the works of local and regional First Nations artists.
A must-visit is the Araluen Cultural Precinct, where you can admire an impressive collection of paintings, intricate weavings, sculptures, traditional artifacts, and sacred sites that tell the stories of the land, the aboriginal people, and their deep spiritual connections.
The museum also houses works by renowned Indigenous artists, including those from the famous Papunya Tula movement, known for their striking dot paintings.
For a truly immersive art experience in Alice Springs, attend the Desert Mob Exhibition, an annual event held at the Araluen Arts Centre.
The Desert Mob Exhibition showcases stunning works from over 30 Indigenous art centres across Central Australia. Attending this event allows a rare opportunity to see and purchase authentic Aboriginal art directly from the artists.
The prestigious exhibition brings together hundreds of contemporary Indigenous artworks from art centers across Central Australia.
6. Take a Hot Air Balloon Ride
An Early Morning Hot Air Balloon Flight is an experience you should not miss in Alice Springs. There’s nothing quite like floating high above the vast Outback as the first light of dawn appears!
Waking up before the sun is a small price for the unforgettable experience of drifting above the Red Centre in a hot air balloon.
These flights are run by trusted operators like Outback Ballooning, promising a seamless and unforgettable experience in Alice Springs.
Along with complimentary hotel pick-up and drop-off, they will treat you to light refreshments and a celebratory glass of sparkling wine upon landing.
A hot air balloon ride is one of the best things to do in Alice Springs.
7. Immerse Yourself in the Outback at Ooraminna Station Homestead
Just 30 minutes south of Alice Springs in the heart of the Northern Territory, Ooraminna Station Homestead offers an authentic Outback experience within a spectacular national park-like setting.
Spanning 600 acres of rugged red desert terrain, the secluded retreat allows visitors to immerse themselves in the beauty of the Australian bush while still enjoying modern comforts.
Ooraminna Station features luxury cabins, glamping tents, and a historic film set originally built for the 2002 movie The Drover’s Boy. It’s a sought-after destination for private events, weddings, and unforgettable Outback dining experiences.
While you’ll spend most of your time here relaxing, adventure awaits those who love to explore the great outdoors.
Hike through the scenic bushwalking trails where you could spot native wildlife such as kangaroos, emus, and wedge-tailed eagles. Stop by spectacular overlooks and marvel at the awe-inspiring views!
8. Get Up Close with Wildlife at the Alice Springs Reptile Centre
Want a close encounter with some of Australia’s most fascinating and often misunderstood creatures? Visit the Alice Springs Reptile Centre.
As one of the most unique attractions in Alice Springs, it is home to a diverse range of reptiles, from frilled-necked lizards and massive goannas to saltwater crocodiles and venomous snakes!
One of the highlights is its interactive reptile show, where you can learn about these incredible creatures from expert handlers.
If you’re brave enough, you can even touch or hold some friendlier residents, like pythons and blue-tongued lizards.
The centre’s exhibits also provide valuable insight into the adaptations that allow these reptiles to survive in the harsh Northern Territory environment.
Explore more of the Northern Territory with a visit to Darwin!
9. Discover the Telegraph Station Historical Reserve
The Alice Springs Telegraph Station is one of the town’s most iconic and historically significant landmarks.
As the site of the first European settlement in Central Australia, it connects Australia’s north and south via the Overland Telegraph Line in the 19th century.
A beautifully preserved heritage site, it takes you to a fascinating glimpse into the region’s past through interactive displays, guided tours, and restored buildings.
History enthusiasts will find plenty to explore, including the National Road Transport Hall of Fame. Here, learn about Australia’s transport history, from vintage trucks to locomotives, and get to know the pioneers who helped shape the Outback.
Don’t miss the Alice Springs School of the Air, where you can gain insight into the world’s largest classroom, providing education to children in remote areas of the Australian Outback.
Another highlight is the Royal Flying Doctor Service Museum, which celebrates one of Australia’s most remarkable medical services.
Offering an immersive look into the incredible work of the flying doctors who provide lifesaving healthcare to remote communities in the Northern Territory for nearly a century, the Royal Flying Doctor Service Museum is a fascinating place to explore.
The best way to explore these historic sites is by joining a guided Historical Tour of Alice Springs. This immersive experience takes you through some of the town’s most significant landmarks, including the School of the Air, the Telegraph Station, and the Royal Flying Doctor Service Museum.
10. Meet the Hermannsburg Potters
When visiting Alice Springs, get to know the Hermannsburg Pottery, which features bold colors and intricate depictions of community life.
The distinctive ceramic art is crafted by the Hermannsburg Potters, a First Nations art cooperative that continues the proud artistic traditions of the Western Arrernte people.
Located in the historic township of Hermannsburg, just an hour and 20 minutes from Alice Springs, a visit to the pottery workshop allows you to watch artists bring their terracotta pieces to life.
Each hand-built creation tells a unique story, consisting of desert landscapes, native wildlife, and moments from everyday life.
While in Hermannsburg, stop by the Historic Precinct, where 19th-century German-style buildings offer insight into the Lutheran missionaries who first settled here in 1877.
Before returning to Alice Springs, indulge in a slice of German apple strudel at the Kata Anga Tea Rooms. It’s a delicious treat right in the heart of the Outback!
11. Experience the Kangaroo Sanctuary
For an unforgettable wildlife experience, head to The Kangaroo Sanctuary – a must-visit for animal lovers and anyone looking to get up close and personal with one of Australia’s most beloved creatures.
The iconic rescue center cares for orphaned and injured kangaroos, giving them a safe and natural environment to thrive.
You’ll also have the chance to meet Kangaroo Dundee. The renowned Australian kangaroo carer gained international recognition through the 2013 BBC documentary “Kangaroo Dundee.” It showcased his incredible work rescuing and rehabilitating orphaned joeys, which you get to learn more about on your visit to the kangaroo sanctuary.
As you wander around, you’ll be introduced to the mob of rescued kangaroos, learning about their behaviours, personalities, and the incredible rescue efforts that help them survive.
One of the most heartwarming moments? Cradling a baby joey in your arms. This special moment is a must for wildlife lovers!
Get up close and personal with kangaroos at the sanctuary!
12. Hike the Larapinta Trail
When describing the Larapinta Trail, “breathtaking” is an understatement.
Stretching 223 kilometres through the rugged heart of Central Australia, this epic trail begins in Alice Springs and winds its way along the West MacDonnell Ranges.
This bucket-list trek isn’t for the faint of heart, though. Made up of 12 challenging sections, the trail is known for its demanding terrain with two sections officially rated “very hard” and six labeled “hard.”
Even the easiest segments of the trail require determination and endurance, so be prepared for blisters, battered boots, and aching legs.
But the reward? Incredible scenery! Just imagine walking through fields of blooming desert roses, watching a sky ablaze with stars at night, and stumbling upon secluded waterholes.
Also try to check out the Olive Pink Botanic Garden, Australia’s only arid zone botanic garden nestled in the heart of Alice Springs.
The tranquil oasis is home to hundreds of Central Australian plant species, making it a must-visit for nature lovers and those curious about the region’s unique flora.
Explore the five self-guided walking trails, which wind through the gardens. Along the way, you get a closer look at native desert plants, including vibrant wildflowers, towering ghost gums, and resilient spinifex grasses.
Check out the sculptures and interpretive signs to learn about the area’s ecology and Olive Pink’s pioneering conservation efforts.
You can also take a short climb up Tharrarltneme (Annie Myers Hill) for the best views. From here, admire the panoramic views of Alice Springs and the surrounding MacDonnell Ranges.
14. Join the Henley on Todd Regatta
If you’re visiting Alice Springs in August, don’t miss the Henley on Todd Regatta, one of Australia’s quirkiest and most entertaining events.
Unlike traditional boat races, the regatta happens on the dry Todd River. Participants race on foot while carrying makeshift “boats” made of wood, fabric, or even strange objects like bathtubs!
The hilarious event, first held in 1962, is inspired by the famous Henley Royal Regatta in England – but with a unique Outback twist!
Witness competitors hilariously lift their bottomless boats and run through the sandy riverbed in a test of speed, coordination, and sheer fun.
You’ll also be treated to live entertainment, food stalls, and themed competitions, making it one of the most family-friendly events around Alice Springs.
As the world’s only land-based boat race, the Henley on Todd Regatta is a one-of-a-kind spectacle that perfectly embodies the lighthearted spirit of Alice Springs and the adventurous charm of the Northern Territory.
15. Cycle to Simpson’s Gap
A ride to Simpsons Gap is a must-do for cycling enthusiasts in Alice Springs.
It’s one of the most iconic natural wonders in Central Australia, renowned for its striking red cliffs and a permanent water hole. Simpsons Gap also holds deep cultural significance for the Arrernte people, as several Dreaming trails and stories converge here.
Rent a bicycle and embark on a scenic 17-kilometre ride along the Simpsons Gap Bike Path, a well-maintained trail that winds through the stunning landscapes of the West MacDonnell Ranges.
For the most magical experience, wake up early and time your ride to arrive at dawn.
As the first rays of sunlight paint the rugged cliffs of Simpson’s Range in a golden glow, watch the landscape come alive in a jaw-dropping display of colours!
Also, when you visit during the cooler hours, you could spot rock wallabies, which often emerge from their rocky hiding spots to feed during this time.
For a truly iconic Outback adventure in Alice Springs, embark on a camel ride with Pyndan Camel Tracks. Traverse the breathtaking red desert park on the back of a gentle, well-trained camel, just as explorers and settlers once did.
Pyndan Camel Tracks offers noon, afternoon, and sunset tours, each providing a different perspective of the stunning Central Australian scenery.
Riding at sunset is particularly magical, where you can witness the golden hues of the setting sun cast long shadows over the rugged terrain.
The ride through the Outback is surprisingly peaceful. Only the gentle footsteps of the camels and the whisper of the desert breeze break the silence.
You can also spot kangaroos, perentie lizards, wedge-tailed eagles, and other fascinating creatures along the way.
17. Meander through the Arltunga Historical Reserve
Another place to visit around Alice Springs to learn about the region’s history is the Arltunga Historical Reserve.
As Central Australia’s first official town and now a captivating ghost town, exploring Arltunga takes you into the region’s gold rush era of the late 19th century.
Once bustling with fortune seekers, it is now an abandoned settlement filled with well-preserved ruins, old mine shafts, and remnants of stone buildings that tell the story of Australia’s tough Outback pioneers.
Walking through Arltunga feels like stepping back in time. You can explore the old police station, see the government battery, and even crawl into hand-dug mining tunnels to experience the harsh conditions miners endured.
Interpretive signs provide insight into the struggles and hopes of those who once lived here.
Located about 110 kilometers east of Alice Springs, it is only accessible by a 4WD vehicle. Visiting this ghost town is an incredible way to connect with the Northern Territory’s fascinating history.
The best way to get around is to rent a car and explore on your own! We recommend Rental Cars, which has the largest range of vehicles for the best value on the market.
The best way to get around is to rent a car and explore on your own! We recommend Rental Cars, which has the largest range of vehicles for the best value on the market.
18. Savour local delicacies
One of the best ways to truly immerse yourself in the culture of Alice Springs is through its food.
The town’s dining scene features a mix of modern Australian cuisine and unique Outback flavours, so there is always something to delight food lovers.
Feast on a hearty meal or challenge yourself to savour exotic dishes like camel burgers – a true Outback specialty. The Rock Bar is especially famous for this. It’s a lively bar and restaurant known for its great atmosphere and Aussie-style pub meals.
Feeling adventurous? Sample crocodile spring rolls or emu fillets at restaurants like Tali at Lasseters, one of the top fine dining restaurants in Alice Springs.
For a casual bite, head to Todd Mall, and check out cosy cafés like Page 27 Café, known for its fresh, locally inspired meals and excellent coffee.
While exploring Todd Mall, don’t miss trying wattleseed-infused desserts for a truly unique taste of Northern Territory.
DISCLAIMER: Some of the links in this article are affiliate links, which means if you book accommodation, tours or buy a product, we will receive a small commission at no extra cost to you. These commissions help us keep creating more free travel content to help people plan their holidays and adventures. We only recommend the best accommodations, tours and products that ourselves or our fantastic editorial team have personally experienced, and regularly review these. Thanks for your support, kind friend!
DISCLAIMER: Some of the links in this article are affiliate links, which means if you book accommodation, tours or buy a product, we will receive a small commission at no extra cost to you. These commissions help us keep creating more free travel content to help people plan their holidays and adventures. We only recommend the best accommodations, tours and products that ourselves or our fantastic editorial team have personally experienced, and regularly review these. Thanks for your support, kind friend!
It is like a time-out from life — like the ones you got in grade school, but this time more fun. It slows us down, makes us stop and smell the roses, and creates a little change in the normal patterns of our lives.
Travel is a tried and true way to reset when you are feeling low or just need a new perspective. It’s an amazing tool for personal development and a wonderful vehicle for self-reflection and growth.
Whether you take a weekend, a week, a month, or a year, just getting out and doing something different can recharge your batteries. The excitement, the fun, and the new places you’ll see can give you more energy and bring you back into focus. You’ll get a chance to meet some great people and even get offline and disconnect if you need to.
Think about it: when you travel, you’re away from all the stress in your life. You are in a new environment. There are a lot of things to see and do, people to meet, places to go, and fun challenges to overcome. You can let go, relax, and embrace new habits or perspectives. In short, you can be a new you.
And you have ultimate freedom when you travel — and freedom is the most liberating, stress-free experience there is.
By focusing on your mental health when you travel you can return to work and your responsibilities with new focus and commitment, because you have cleared your head.
Plus, you may find a new passion or opportunity that would never have presented itself otherwise. There are tons of job opportunities overseas, too, so you can even work while traveling if you want.
Most of us work toward retirement — that time when we can sit back, relax, and do what we want instead of what we have to do. But by the time many of us get there, we might not have the money — or health — to do that. After all, there are no guarantees in life.
We may never even make it to retirement.
That’s why I say: don’t put off your dreams for a future that may never come.
That’s why I say: now is the best time to travel — because you don’t know what the future holds.
I’ve seen friends die, get sick and become bedridden, and businesses collapse. The past is not prologue and if COVID has taught us anything it’s that life and society can change at the drop of a hat.
Don’t be reckless and rack up debt to travel. But if you need a change, look to the open road. The blank slate travel gives you allows you to work on yourself and enjoy life. No one looks back and says, “If only I had worked more.”
We all want to make the most of our time here. Stop delaying all those things you really want to do and just do them. Don’t let your travel dreams remain just dreams — make them your goals.
So, the next time you have visions of white-sand beaches or climbing Mt. Everest, start making them happen.
Don’t let yourself wonder what might have been. Life is too short.
How to Travel the World on $75 a Day
My New York Times best-selling book to travel will teach you how to master the art of travel so that you’ll get off save money, always find deals, and have a deeper travel experience. It’s your A to Z planning guide that the BBC called the “bible for budget travelers.”
Book Your Flight Find a cheap flight by using Skyscanner. It’s my favorite search engine because it searches websites and airlines around the globe so you always know no stone is being left unturned.
Book Your Accommodation You can book your hostel with Hostelworld. If you want to stay somewhere other than a hostel, use Booking.com as it consistently returns the cheapest rates for guesthouses and hotels.
Don’t Forget Travel Insurance Travel insurance will protect you against illness, injury, theft, and cancellations. It’s comprehensive protection in case anything goes wrong. I never go on a trip without it as I’ve had to use it many times in the past. My favorite companies that offer the best service and value are:
Want to Travel for Free? Travel credit cards allow you to earn points that can be redeemed for free flights and accommodation — all without any extra spending. Check out my guide to picking the right card and my current favorites to get started and see the latest best deals.
Need a Rental Car? Discover Cars is a budget-friendly international car rental website. No matter where you’re headed, they’ll be able to find the best — and cheapest — rental for your trip!
Need Help Finding Activities for Your Trip? Get Your Guide is a huge online marketplace where you can find cool walking tours, fun excursions, skip-the-line tickets, private guides, and more.
Ready to Book Your Trip? Check out my resource page for the best companies to use when you travel. I list all the ones I use when I travel. They are the best in class and you can’t go wrong using them on your trip.
Travel plans can disrupt your fitness routine. If you let that happen, it might take a while for you to return to your normal fitness routine, even after your trip is over. Although you can’t follow your daily fitness routine exactly on the days you travel, you can make some modifications and keep making progress toward your fitness goals.
Exercising during your travels can actually be beneficial for combatting travel-related aches and strains, fatigue, and jet lag. You will, most likely, be in unfamiliar surroundings, so you will need to use a little bit of creativity to increase your activity levels.
You know what they say “Failing to plan is planning to fail”. Even before you start from home, you should have at least a rough plan for maintaining your fitness. Incorporate these tips and draw a customized fitness plan for yourself:
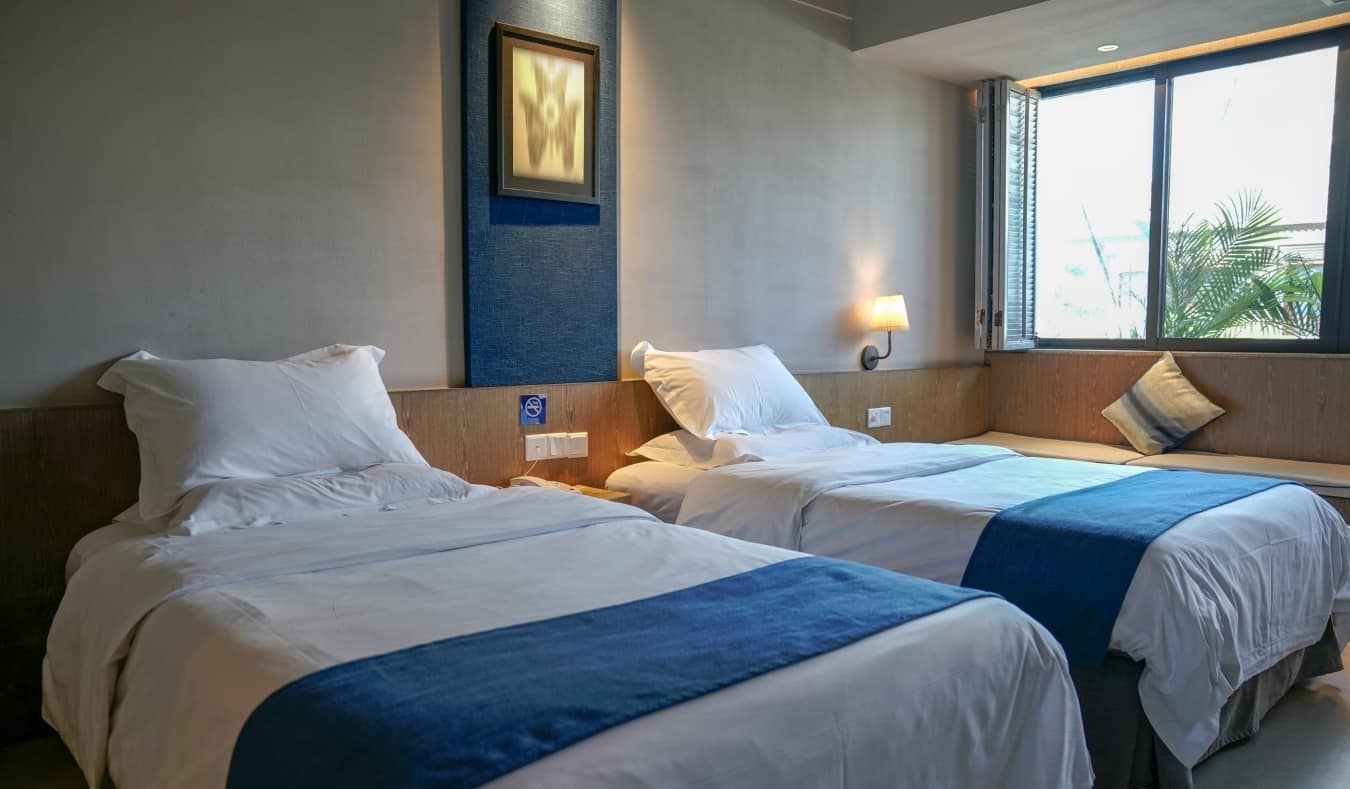
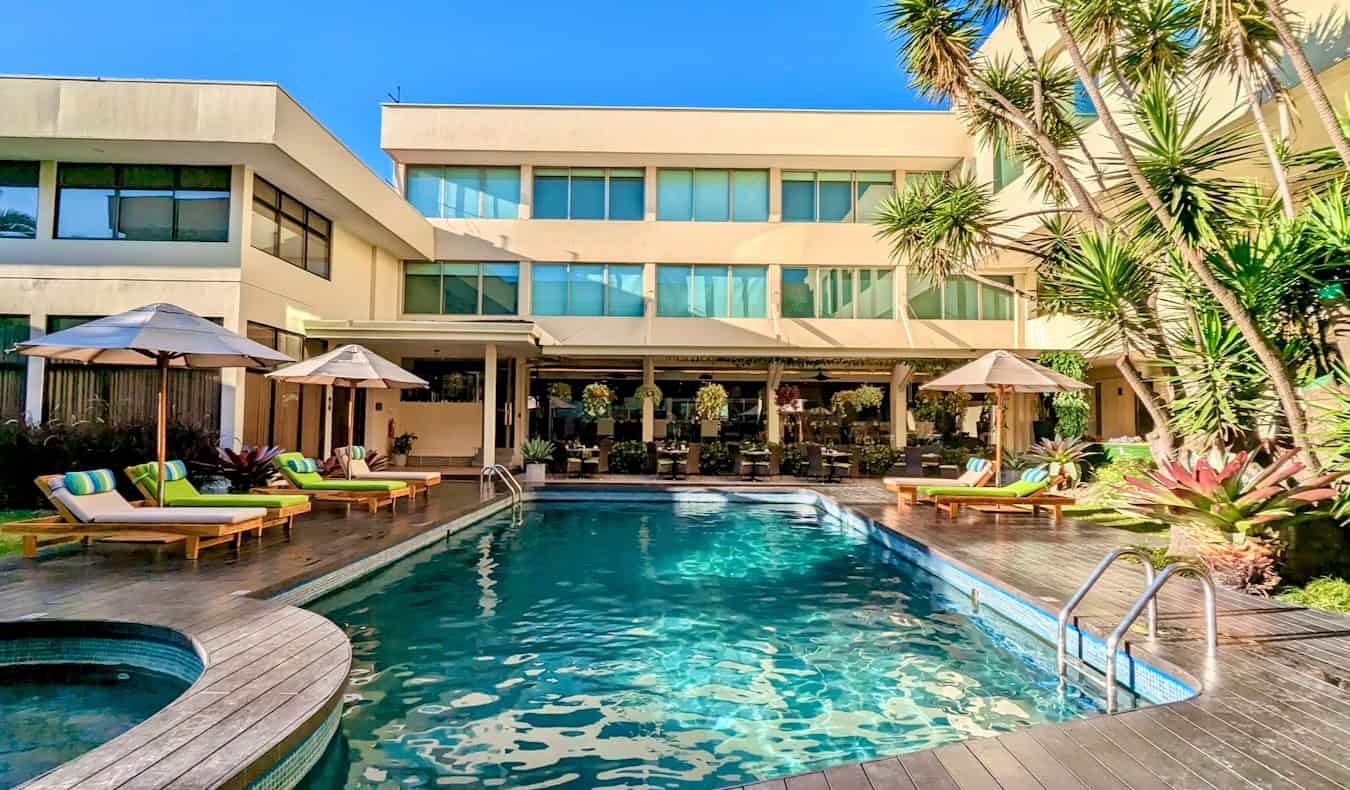
Select a Fitness-Friendly Hotel
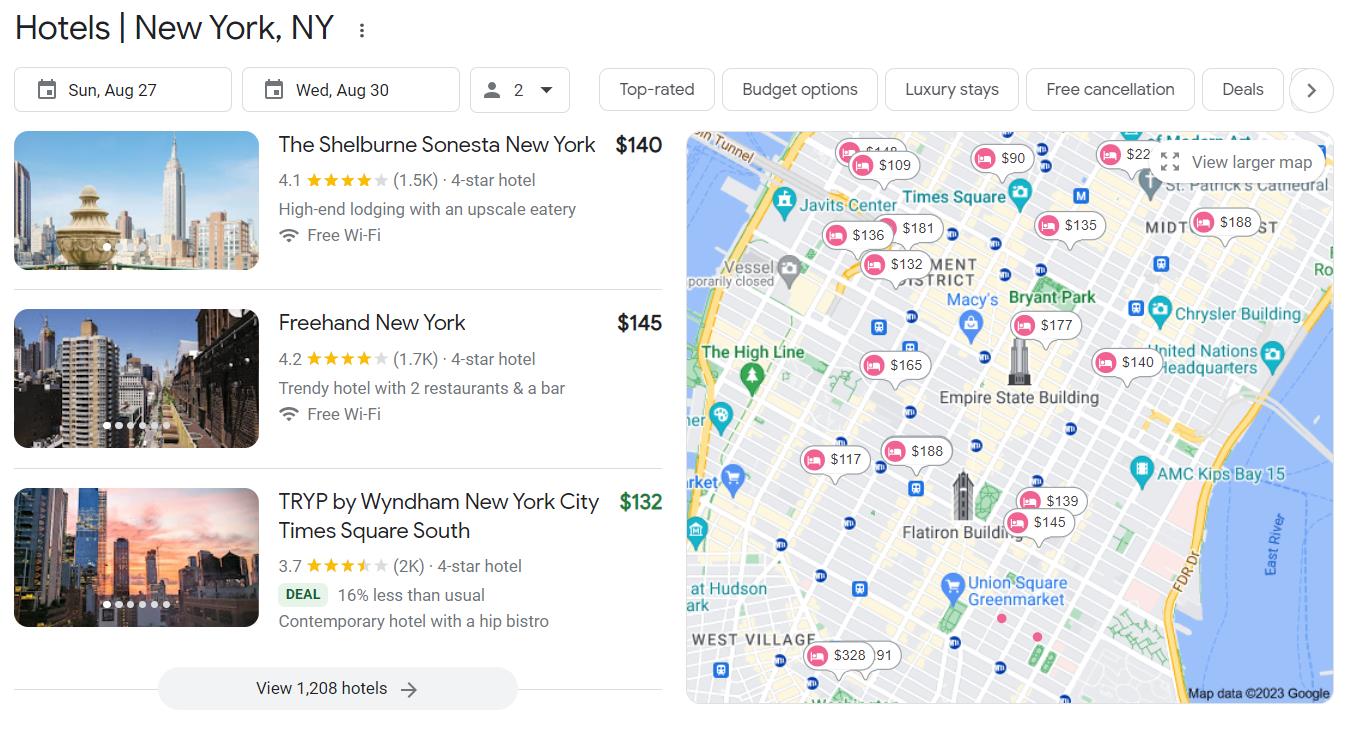
These days, it’s very easy to check out the place where you are planning to stay. Just a quick search online, and you can find out all about the hotels. Select a hotel with exceptional fitness offerings.
If you can’t find a hotel with a gym, or if their timings do not suit your needs, choose a hotel with a gym nearby. You can check out the area around the hotel using online maps. If there is no gym near the hotel, check what other fitness activities are possible in that area.
Check if there’s a cycling track around, a fitness class, or even a park. Some hotels even offer guided fitness tours. Even if you have to spend a little extra on a hotel that can help you maintain your fitness, consider it an investment in your health.
Pack Some Exercise Gear
If you are traveling for work, or if you have a packed itinerary, you may not be able to hit the gym. For such situations, it’s better to carry your portable gym with you. Carry lightweight, small exercise tools in your luggage. The mere presence of these in your luggage will motivate you to work out.
If you have work during the day, you can work out with these in the comfort of your hotel room at night.
These are some of the more popular travel-friendly exercise gear options: Resistance bands, a travel suspension trainer, a jump rope, water-fillable dumbbells, a foam roller, a hand gripper, a yoga mat, and tennis balls.
Perform Bodyweight Exercises
If plan A was the gym, and plan B was the portable exercise gear, this is your no-fail plan C. You may not be able to go to the gym, and you may not be able to carry any exercise equipment, but you always have yourself. Bodyweight exercises depend only on the weight of your body for resistance. Additionally, bodyweight exercises have variations suitable for different fitness levels.
Your workout can be as intense or as light as you like. You can take your workout outdoors, and gain the added benefit of fresh air. Moreover, the scenic landscape will take your workouts (and during and post-workout pics and selfies) to the next level.
Enhance the effects of your workouts with nutritious post-workout supplements. The supplements will provide insurance against the imperfections of your travel diet.
Opt for Active Transportation
When you are on a trip, whether for work or vacation, you will have to move from place to place. Whenever possible, ditch the car or public transport, and try an active mode of transportation to get wherever you want to reach. Try to walk as much as you can when you go sightseeing.
Walking allows you to explore places that you can’t possibly reach through the usual means of transportation. Rent a bike, and join guided cycling tours. If you’re good at skateboarding, you could try that.
During trips, transportation contributes significantly to total sedentary time. If it is necessary to remain seated in a car, or other means of transport for a long time, try safe exercises such as neck stretches, shoulder rolls, seated leg lifts, ankle rotations, and isometric contractions.
Use Your Smart Devices
Your phone, tab, and smartwatch can help you remain on track with your fitness goals even in new places. Use these devices to track your activity levels, monitor your progress, and access fitness resources online. Install special fitness and nutrition apps on your devices to increase your motivation for your fitness goals.
Smart devices make it possible for you to join live fitness classes from anywhere in the world. Or you could follow recorded videos for workouts or guided meditations.
Wrapping Up
Trips do not and should not mean a break from fitness activities. In fact, exercising can improve travel experiences. By exercising, you’ll be more energetic and ready for your adventures. If it’s a work trip, exercising can help relieve stress naturally and boost your mood. You’ll also sleep better, and wake up fresh.
You can also balance your food indulgences with a corresponding increase in activity levels. Exercising can also strengthen your immune system, so you won’t fall sick during your travels. The list of benefits can go on and on. To derive these benefits and more, incorporate exercise into your travel itinerary.
Wanna travel to Kazakhstan with Against the Compass?
Join a group of like-minded travelers in our next scheduled tour in Kazakhstan on:
June 4th to 13th, 2025
Kazakhstan is the 9th largest country in the world and the most modern of all the ‘stans’.
Yet very little is known about this fascinating country.
Following more than a few visits there, I compiled this guide with all the relevant travel tips for Kazakhstan, from visas to how to get in, money, and everything needed to plan your trip.
With its Backpacker plan, IATI Insurance is the best insurance for any kind of adventurous destination, like Kazakhstan.
🇰🇿 Introduction: what it’s like to travel in Kazakhstan
Kazakhstan is, by far, one of the strangest countries I have ever been to, along with Haiti and Eritrea.
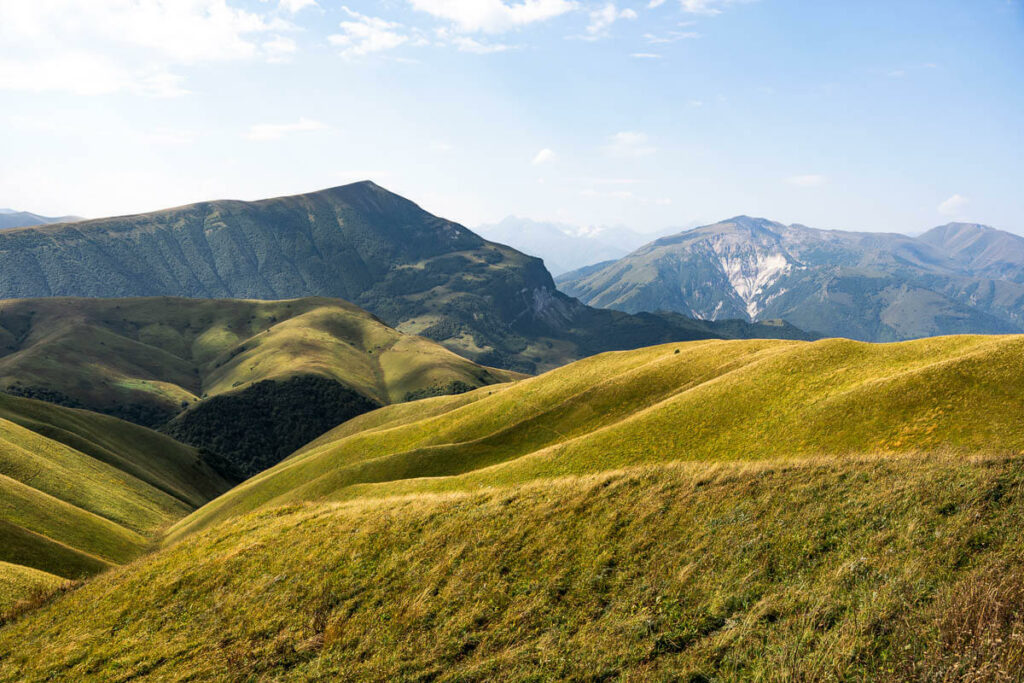
On the one hand, it is a surprisingly developed country, home to the most Westernized city in Central Asia – Almaty, whose inhabitants are very European-minded – as well as some striking mountains.
This is the Aral Sea in Kazakhstan
On the other hand, this gas-rich, barely populated country is also the 9th largest in the world and is home to some of the bizarrest places on Earth, such as an old nuclear testing town, a dried-up sea, the Russian Cosmodrome, and an extremely vast steppe with the occasional hairy 2-humped camel.
Kazakhstan has two faces, and for this reason, it can find a place in everybody’s heart, both the traveler who likes to explore a cosmopolitan city and beautiful mountains, and the avid backpacker who likes to delve deep into obscure places off the beaten track.
Citizens from the following countries can get a free visa on arrival (VOA) in Kazakhstan.
All EU and Schengen countries, Argentina, Australia, Azerbaijan, Bahrain, Brazil, Canada, Chile, Colombia, Ecuador, Iceland, Indonesia, Israel, Japan, Malaysia, Mexico, New Zealand, Oman, Philippines, Qatar, Saudi Arabia, Serbia, Singapore, South Korea, Thailand, Turkey, United Arab Emirates, United Kingdom, United States, Vietnam
This is valid for any entry point, both international airports and land borders, and all you get is a friendly stamp.
Registering in Kazakhstan
In the past, registering your stay with the local authorities was mandatory, but since 2020, it’s no longer a requirement.
🚑 Travel Insurance for Kazakhstan
Kazakhstan is an adventurous destination, so we recommend going there with proper travel insurance.
Their backpacker plan covers all types of adventure activities, including trekking
Very competitive prices
Readers of this blog can get a 5% exclusive discount
💻 Internet and connectivity when you travel in Kazakhstan
How is the Wi-Fi in Kazakhstan?
Wi-Fi mostly works fine throughout the country.
It’s not the best Wi-Fi in the world but I managed to work online without major issues.
Can I get a SIM Card for Kazakhstan?
Yes, you can get a SIM Card on arrival at the airport or at any official mobile shop. Data plans are really cheap.
I strongly recommend doing so because having a local number is a must to use local taxi apps such as Yandex.
eSIM for browsing, calling and traveling in Kazakhstan
An eSIM is a regular SIM card with a digital format that works like a normal physical SIM card, with the added benefit being that you can buy it at home before the beginning of your trip, hence avoiding the hassle of buying it at your destination.
In Kazakhstan, they use the Kazakh Tenge, and approximately
1 USD = 500 KZT
Can I pay by card in Kazakhstan?
Yes, absolutely. Today, you can pay by card virtually everywhere throughout the country.
The only place where card payments might not be accepted is the café on trains, so do bring cash for your long train journeys across Kazakhstan.
Also, carry some spare cash when you’re visiting smaller villages or traveling by marshrutka instead of train.
Can I use an ATM?
Yes, you will find many ATMs in all towns and cities, most of them accepting foreign cards.
Where can I exchange foreign currency?
You can easily exchange Euros or American Dollars in many banks and offices across the country.
Keep in mind that, except for Russian Rubles, Kazakhstanis aren’t huge fans of their neighbors’ currency. Kyrgyz Som should be fine, but I was never able to exchange the Uzbek Som I had left.
How much does it cost to travel in Kazakhstan
Kazakhstan is the most expensive of all Stans, including Pakistan and Afghanistan.
Below are the prices of the most typical expenses:
Dorms – 3,000 to 6,000 KZT
Single room in a mid range hotel in Almaty – from 19,000 KZT
Meals in local restaurant – 3,000 KZT
Meals in nicer restaurant – Mains from 4,000KZT
Trains – Aktau to Aralsk, 20 hours, 1,400km, 2nd class (19,000KZT)
Kazakhstan has several international airports, the best known being Almaty International Airport (ALA).
Check out flights with Pegasus, Turkish Airlines or Qatar Airways.
You can also fly into Astana (NQZ), Shymkent (CIT) and Aktau (SCO).
How to travel to Kazakhstan by land border
Kazakhstan shares a border with 5 countries. Pretty much all borders are open.
Russia: Most borders with Russia are open. I crossed the border near Astrakhan in 2024 by train. Easy to cross. Check our Russia travel guide for more info.
Turkmenistan: Open, as long as you have a valid visa for travel in Turkmenistan.
Uzbekistan: Pretty much all borders are open, some can be crossed by train. I crossed by train at Beyneu.
Kyrgyzstan: Busy crossing but no train, only car or marshrutka.
China: Open as long as you have a valid visa for China.
Remember that contrary to what some travelers believe, Kazakhstan doesn’t share a border with Mongolia. It looks like they do, but zoom in and you’ll see there’s a tiny bit of Russia in between.
This is the border between Uzbekistan and Kazakhstan
How to travel to Kazakhstan by boat
Long-term overlanders like to catch the ferry from Baku to Aktau, which takes 24 hours. I’ve never taken it but my friends over at Journal of Nomads did.
Kazakhstan is an ex-Soviet republic that got its independence from Russia in 1991.
It is, however, the country with the largest Russian influence in Central Asia – to the extent that Russian is generally more widely spoken than Kazakh itself.
‘We like Russia because she takes cares of us’, a Kazakh friend of mine said.
Kazakhstan is the only Stan that borders Russia, so it’s not surprise that its presence and influence is highly visible.
Friendly Kazakhs
Kazakhstan today
Kazakhstan is the most modern and developed country in Central Asia, something that can be explained by its abundance of natural resources, such as oil and gas.
The Government has also been investing a lot in terms of education, one of their most successful policies being the opportunity of awarding loads of scholarships to students to study abroad at major universities worldwide, the only condition being that they must come back and work in Kazakhstan after X number of years.
This has led to a highly educated work-force for Kazakhstan.
Furthermore, Almaty is a seriously modern city by European standards.
In fact, I think Almaty is the most European city in all of Asia.
Astana is very modern too but it’s one of those brand-new cities with absolutely no soul, more similar to Dubai and Almaty itself.
Modern Astana
Kazakhstani people
Kazakhstanis are descended from Turkic and Mongolian tribes.
Although very ethnically mixed, most of them have strong Mongolian features.
The Kazakhs used to be a nomadic nation that moved across the steppe and their biggest contribution to the Silk Road trade were animal-related products like fur.
However, unlike in Mongolia and neighboring Kazakhstan, nomadic life has pretty much disappeared not only due to the country’s development but also because under the Soviet Union, many Kazakhs were forced to become sedentary and focus on the plantation of wheat.
a friendly Kazakh woman in the mountains near Shymkent
Language in Kazakhstan
Kazakh, a Turkic language, is the official language in Kazakhstan, along with Russian.
Russian however, is the main language used in Almaty.
Well-educated young people from Almaty and Astana can speak English, but other than that, do try to learn some Russian words if you decide to visit Kazakhstan.
Google translate and Google Lens have made our life much easier but still, I recommend learning some Russian words, as well as the alphabet.
Religion in Kazakhstan
Officially, Kazakhstanis are Muslim, although religion doesn’t play any significant role in Kazakhstan.
This is not only because they used to be part of the USSR but also because religion has never seeped into nomadic societies.
Still, you are likely to see a few mosques with a handful of worshipers; generally though, Kazakhs are atheist, even though Saudi Arabia is ploughing millions into trying to reverse that.
Turkestan mosque
🛺 Transportation: how to get around in Kazakhstan
Traveling in Kazakhstan by train
A multi-day train journeys over the Kazakh steppe is an experience by itself and so much fun!
To avoid any hassles, I recommend you download Yandex, which is like the Russian Uber.
Remember that you will need a local number to use Yandex.
🏨 Accommodation: where to stay in Kazakhstan
From backpacking hostels to 5-star hotels, accommodation in Kazakhstan is a no-brainer.
You can find all sorts of accommodation to suit all budgets.
In my Kazakhstan itinerary, you can find a variety of accommodation options in each city I visited.
Epic train journeys, always the most unexpected stuff
🍲 Food and alcohol when you visit Kazakhstan
In large towns and cities, there are all sorts of food available, but when it comes to the local cuisine, this is very similar to other countries in Central Asia.
The first time I visited Kazakhstan, it was my last stop after a trip across the region spanning several months, so I’m a bit biased when it comes to judging Kazakh food, since I was already bored of it before even stepping foot into the country.
When it comes to local dishes, pelmeni (dumpling soup) would be the most common option, as is lagman (noodle soup with horribly chewy and fatty beef).
Horse meat in Kazakhstan
Although you can find horse meat in many countries around the world, nowhere else does it like Kazakhstan, where horse meat is the base of many of their dishes, which is why you’ll see farms all around the country.
I actually visited a horse-farm in Zhabagly, a mountain village around Shymkent.
They kept hundreds of horses and told me that, when the horse gets to a certain age, they decide whether to keep it as a work horse or send it to the butchery.
Horse farm in Kazakhstan
The most unique horse-based dish they have is beshbarmak, a national dish which consists of pasta layers, vegetables, and the star-ingredient being horse meat, all served in a huge flat dish with a bit of broth.
Usually, it is a sharing dish, so the few restaurants that serve it require a minimum order of a couple of people.
Kazakhs reserve beshbarmak for special occasions.
Beshbarmak, the national dish
❗ More resources for traveling to Kazakhstan
📢 In my Travel Resources Page you can find the list of all the sites and services I use to book hotels, tours, travel insurance and more.
All guides and articles for traveling in Kazakhstan destination
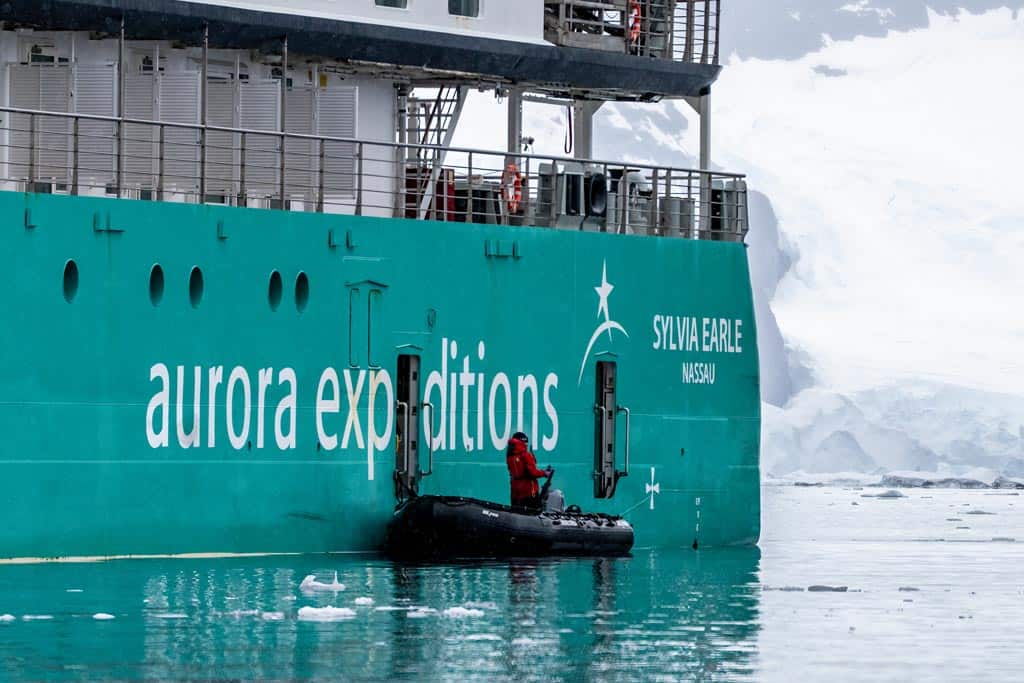
When it comes to expedition cruising, few ships are as well-equipped for polar exploration as Aurora Expeditions’ Sylvia Earle.
Named after Sylvia Earle, the first female chief scientist of the U.S. National Oceanic and Atmospheric Administration, this vessel pays tribute to her extensive contributions to marine conservation.
Purpose-built for adventure, this state-of-the-art vessel combines cutting-edge technology with comfort, making it an ideal choice for travellers looking to explore the remote and breathtaking landscapes of the polar regions.
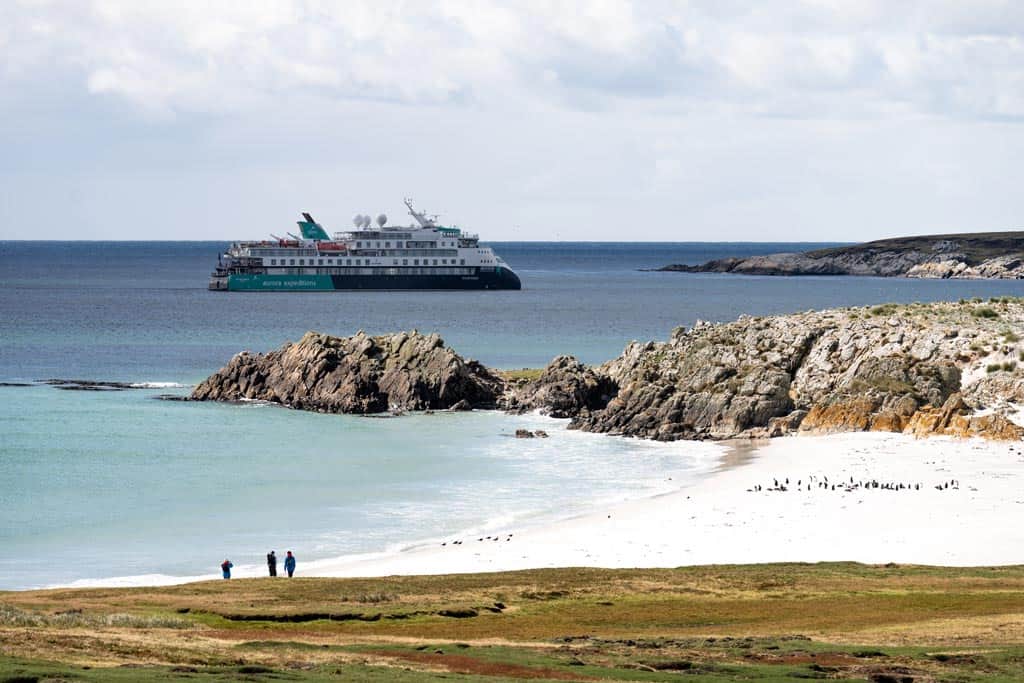
We recently spent three weeks onboard the Sylvia Earle in Antarctica, South Georgia, and the Falkland Islands, navigating some of the most awe-inspiring regions on Earth.
From the penguin-speckled beaches of the Falklands to the wildlife-rich shores of South Georgia and the ice-covered landscapes of the Antarctic Peninsula, this journey was an unforgettable deep dive into some of the planet’s last true wilderness areas.
But what really sets this ship apart? Is the Ulstein X-BOW® design as smooth as advertised? How does the onboard experience compare to other expedition vessels?
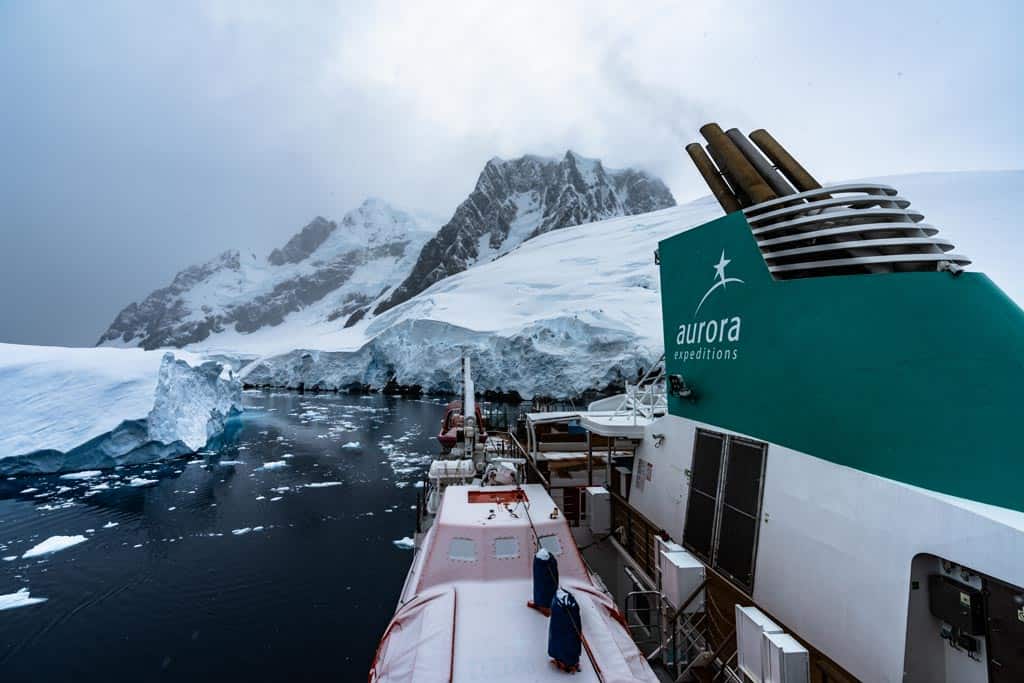
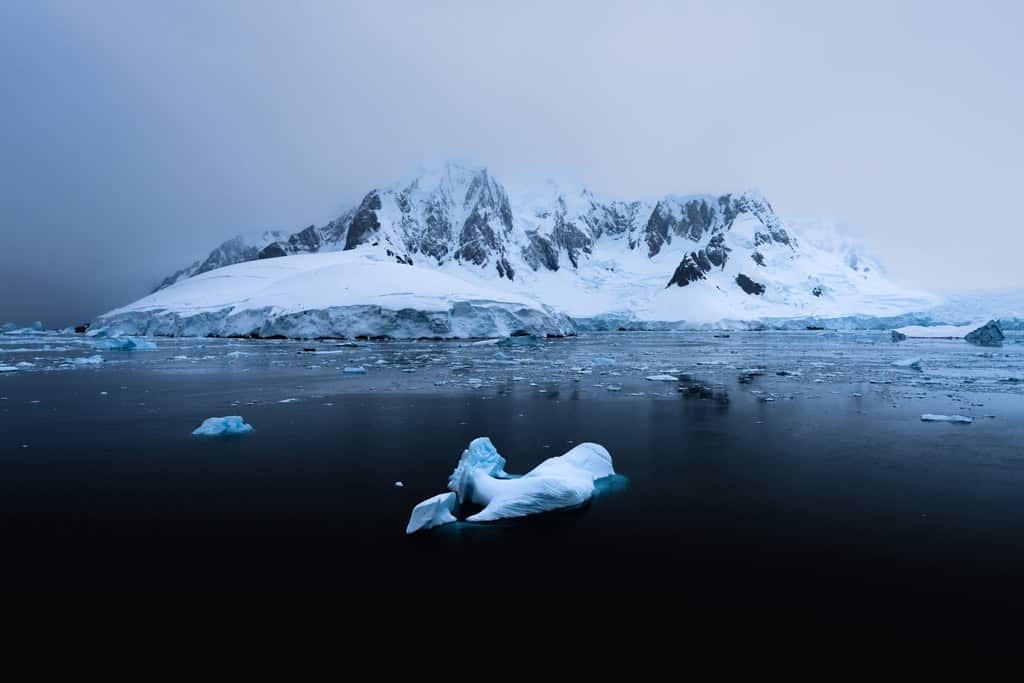
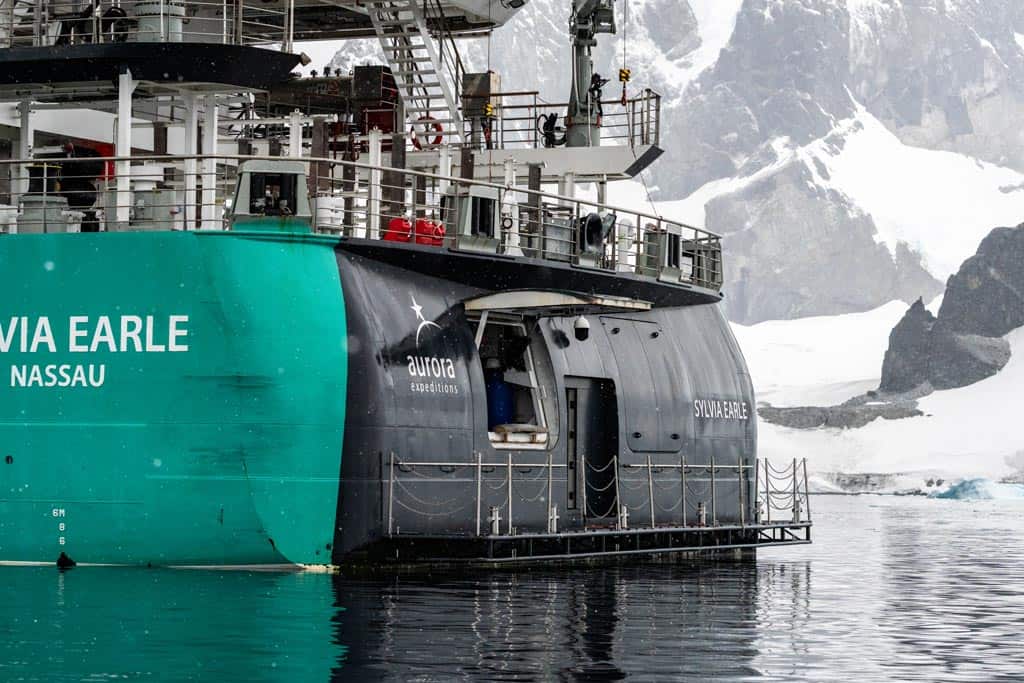
The Sylvia Earle amongst the ice of Winter Island in the Antarctic Peninsula.
And most importantly – is the Sylvia Earle worth booking for your next polar cruise adventure?
Having worked in Antarctica since 2017, Alesha has clocked up 7 trips to the Peninsula on 5 different vessels, and I have visited Antarctica 15 times on 6 vessels.
So it’s safe to say we have a fair bit of experience down here.
In this detailed Sylvia Earle review we break down everything you need to know about the ship, including cabin options, dining, onboard amenities, expedition logistics, and the overall experience.
Whether you’re planning a future trip or simply curious about what it’s like to sail on one of the world’s most advanced expedition vessels, this guide has you covered.
Let’s dive in.
SPECIAL DEAL: Thinking about booking a trip with Aurora Expeditions? We have negotiated a very special deal for readers of NOMADasaurus for any of their polar trips! Email us at hello@nomadasaurus.com to find out more.
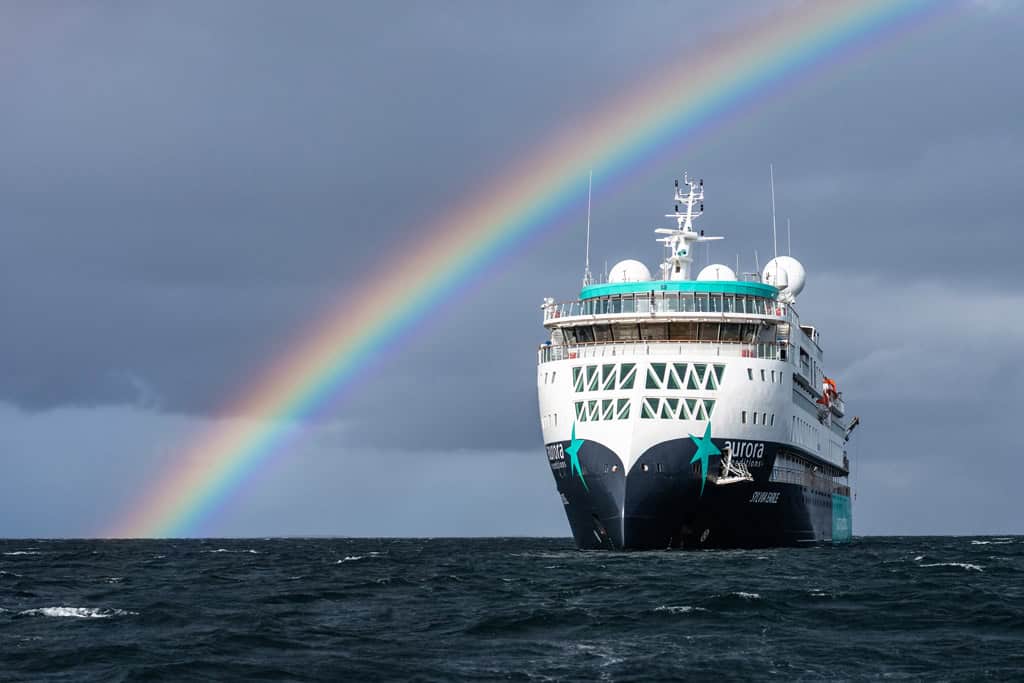
A rainbow over the Sylvia Earle in the Falkland Islands.
Key Takeaways
The Ulstein X-BOW significantly reduces movement in rough seas, making crossings like the Drake Passage more comfortable. Passengers experience less motion sickness compared to traditional expedition ships.
130 passengers maximum on their Antarctic expeditions means more time onshore. As IAATO regulations stipulate no more than 100 passengers may be ashore at any one time, when activities like kayaking, day paddling and snorkelling are under way every other passenger can land at the same time.
The efficient mudroom with personal gear storage to the quick and organised Zodiac operations proves that the ship is built for seamless off-ship experiences. Getting on and off for landings is fast, safe, and hassle-free.
The ship’s Observation Lounge, Tektite Bar, and outdoor decks provide plenty of space to relax and enjoy the breathtaking scenery. Floor-to-ceiling windows ensure constant connection to the landscapes, even when indoors.
The Gentoo and Rockhopper Restaurants serve diverse and well-prepared meals, including à la carte dining and buffet options. Service is warm, efficient, and personalised, adding to the overall comfort of the voyage.
Naturalists, historians, and marine biologists bring the journey to life, leading engaging lectures and expert-guided excursions. Their passion, expertise, and accessibility make the expedition experience truly immersive.
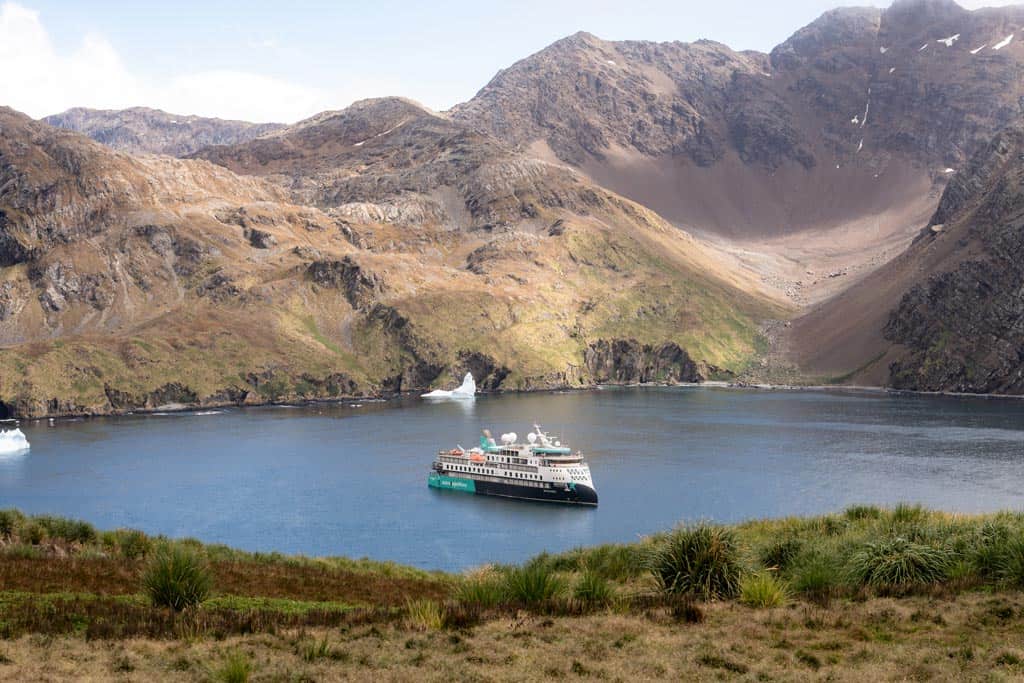
This small ship is able to manoeuvre into some very narrow places, such as Godthul Harbour in South Georgia.
About Aurora Expeditions
Founded in 1991 by Australian mountaineers Greg and Margaret Mortimer, Aurora Expeditions has been a leader in small-group expedition travel for over three decades.
Their inaugural voyage to Antarctica in 1992 set the stage for a legacy of immersive and responsible exploration.
Aurora were also founding members of IAATO, cementing their position as the pioneers of modern Antarctic tourism.
Throughout its history, Aurora has introduced innovative activities to the expedition cruising world, including the first commercial climbing expedition in Antarctica in 1995.
In January 2024, Aurora Expeditions achieved Certified B Corporation™ status, reflecting its commitment to high standards of social and environmental performance, transparency, and accountability.
This certification underscores the company’s dedication to balancing purpose and profit, ensuring that its operations positively impact all stakeholders—from employees and communities to the environment.
Aurora’s fleet features modern, purpose-built ships designed for intimate and sustainable travel. The Greg Mortimer, launched in 2019, and the Sylvia Earle, which set sail in 2022, both incorporate the innovative Ulstein X-BOW design, enhancing stability and comfort in challenging seas.
Looking ahead, the company plans to introduce the new Douglas Mawson ship in 2025, further expanding their capacity for exploration and opening up exciting voyages to the Ross Sea and East Antarctica.
With a diverse range of expeditions Aurora Expeditions offers travellers the chance to explore some of the planet’s most remote and awe-inspiring destinations, including Antarctica, the Arctic, the British Isles, Costa Rica, and Patagonia, with the South Pacific and Mediterranean now on their horizon.
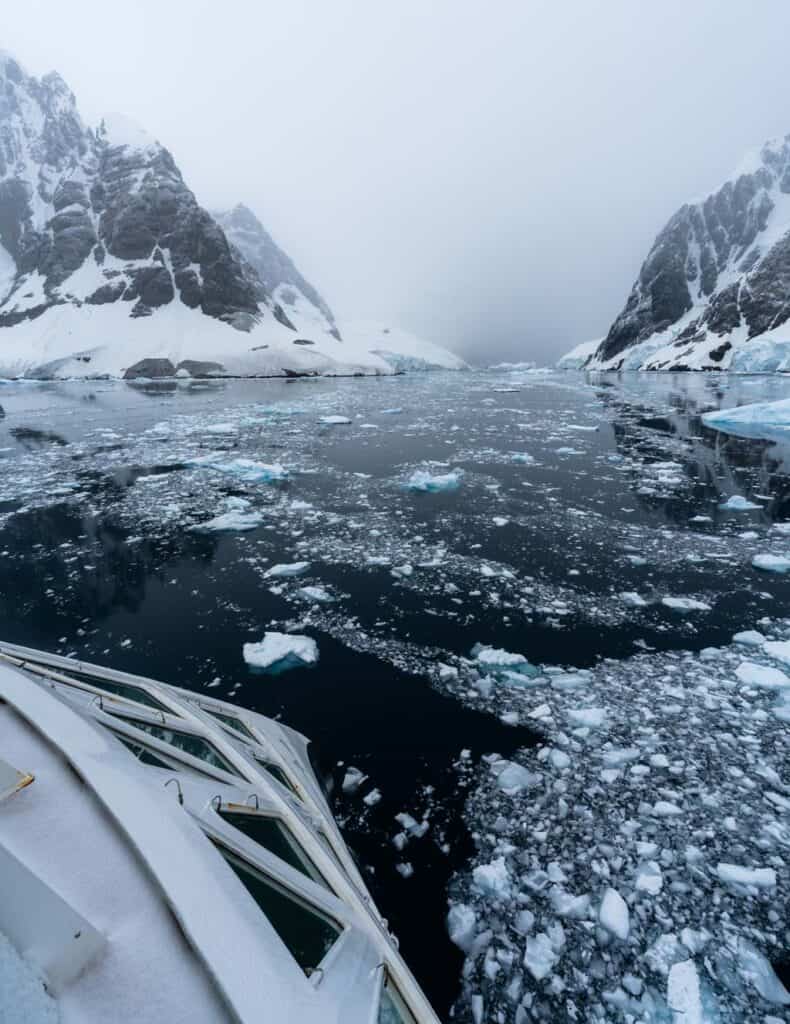
Looking back on a narrow passage in the Lemaire Channel.
Introduction to the Sylvia Earle Expedition Ship
Operated by Aurora Expeditions, the Sylvia Earle is a purpose-built expedition ship designed for adventure in some of the most remote and challenging environments on Earth.
Named after the renowned marine biologist and oceanographer Dr. Sylvia Earle, this state-of-the-art vessel blends cutting-edge technology with sustainability, ensuring a smooth, comfortable, and environmentally conscious cruising experience.
The Sylvia Earle isn’t just named after one of the world’s most renowned marine biologists though. It’s a ship designed to celebrate and honour women in conservation.
Throughout the vessel different decks and public spaces are themed after pioneering female scientists, activists and environmental leaders who have made significant contributions to protecting the planet.
Each deck pays tribute to a different influential woman, with educational displays highlighting their achievements in marine science, polar exploration, and environmental advocacy.
Looking out the massive windows on the bow of the Sylvia Earle.
This thematic design is a reminder of the critical role women have played in conservation and a source of inspiration for travellers exploring the fragile ecosystems of the polar regions.
Launched in 2022, the Sylvia Earle features a signature Ulstein X-BOW design, which enhances stability in rough seas and reduces fuel consumption.
At 104 meters in length the ship accommodates a maximum of 130 passengers, creating an intimate and immersive expedition atmosphere without sacrificing comfort.
Each voyage is led by a world-class expedition team, offering expert insights into the landscapes, wildlife and history of the destinations visited.
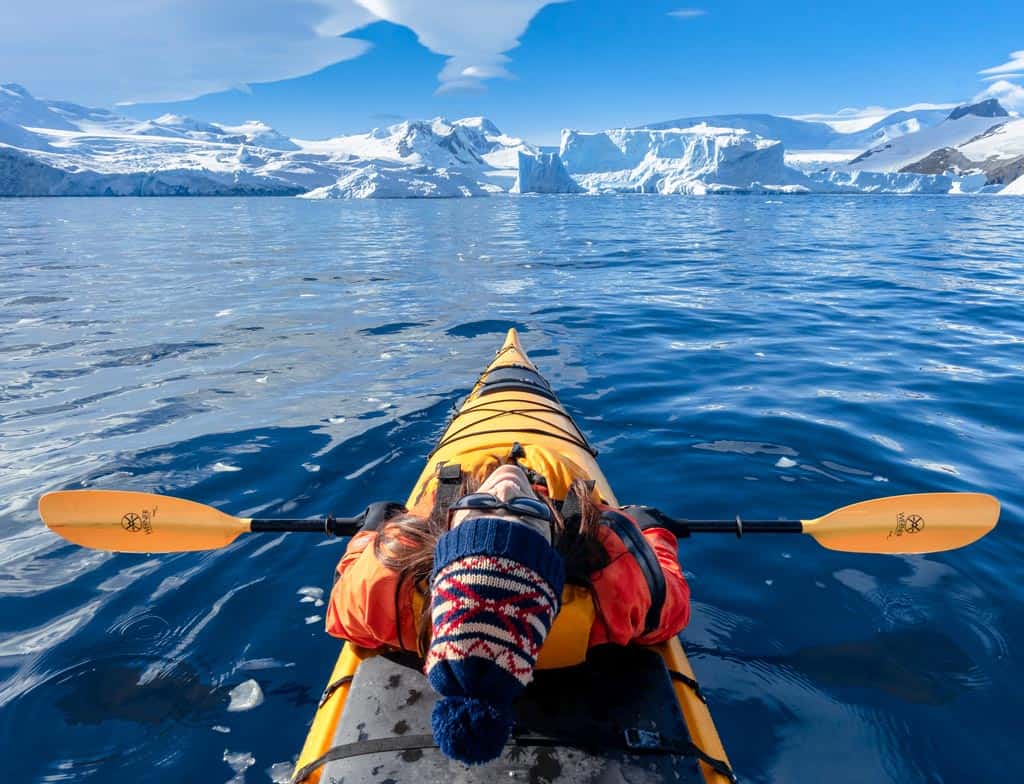
Designed for off-ship exploration the Sylvia Earle is fully equipped with Zodiacs, a science center, observation decks, and multiple adventure options like kayaking, snorkelling, and mountaineering.
Onboard, guests can enjoy spacious cabins, high-quality dining, a wellness center, and immersive educational programs that elevate the expedition experience.
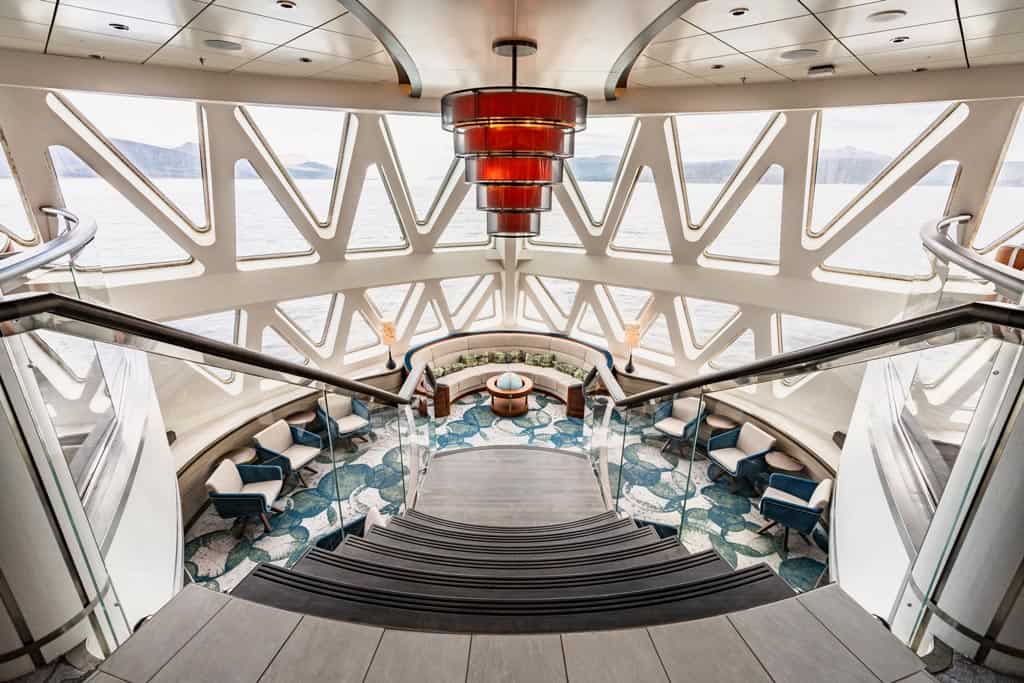
The glass atrium lounge inside the bow of the Sylvia Earle, with its huge windows providing superb views to the front of the ship, is a standout feature that enhances the overall travel experience.
Built to navigate the polar regions with ease, this ship is an excellent choice for travellers seeking an active, enriching, and eco-friendly voyage through some of the world’s most spectacular and untouched landscapes.
The Sylvia Earle offers a range of comfortable and well-designed cabins, catering to different budgets and travel styles while ensuring every guest enjoys a cozy and functional space throughout their expedition.
With a total of 71 staterooms, including twin share rooms, balcony suites, and premium suites, the ship provides a personalised and intimate cruising experience that enhances time spent in some of the world’s most remote destinations.
Each cabin is modern, well-appointed, and designed with expedition travel in mind. Features include ensuite bathrooms, ample storage, adjustable climate control, and large windows or glass doors that allow guests to take in the breathtaking scenery from the comfort of their rooms.
For those seeking a more luxurious experience the suites offer a more spacious layout, a choice between a king bed or two twin beds, a separate lounge area, in-suite binoculars, a one-hour spa treatment for each guest, a stocked mini bar, a bottle of champagne, and included crew gratuities.
The Balcony Stateroom Category A is the most cabin onboard.
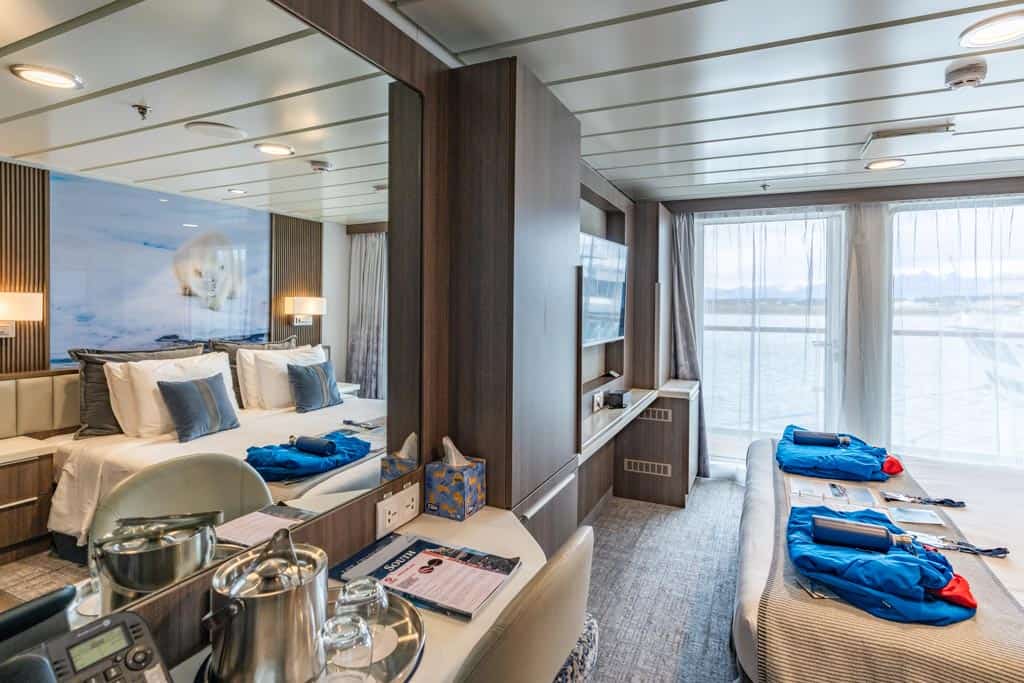
Balcony Suites – Our Experience
For our three-week voyage through the Falklands, South Georgia, and Antarctica, we stayed in a Balcony Stateroom Category C, and it was an absolute game-changer for the experience.
The spacious layout made it feel more like a home base than just a cabin, with a private balcony offering uninterrupted views of towering icebergs, vast Southern Ocean swells, and wildlife-packed beaches.
The seating area was perfect for unwinding after a long day of excursions, and the floor-to-ceiling sliding doors meant we could wake up to sunrise over the Antarctic Peninsula or sip coffee while watching albatross glide effortlessly alongside the ship.
The ensuite bathroom was also surprisingly roomy for an expedition ship, with a walk-in shower and quality amenities.
If you’re considering an upgrade we highly recommend the Balcony Suites. Having a private outdoor space in these breathtaking locations is worth every cent.
POPULAR QUESTION: What type of electrical outlets do they use on the Sylvia Earle? The cabin is equipped with built-in adaptor wall sockets, meaning most electrical plugs from around the world will work without an additional adaptor.
Our cabin was a Balcony Suite Category C, and was the perfect size and comfort level for our journey.
Other Cabin Categories
Aurora Staterooms (Triple/Twin/Single) – The most budget-friendly options, featuring large windows, comfortable twin or triple bedding configurations, and all essential amenities.
Balcony Staterooms – A step up from the Aurora Staterooms, these offer private balconies, additional living space, and upgraded furnishings.
Junior Suites – Larger cabins with premium furnishings, an expanded seating area, and extra storage, ideal for those wanting more comfort.
Captain’s Suite – The largest and most luxurious accommodation on board, featuring a separate bedroom, lounge area, and the most expansive balcony on the ship.
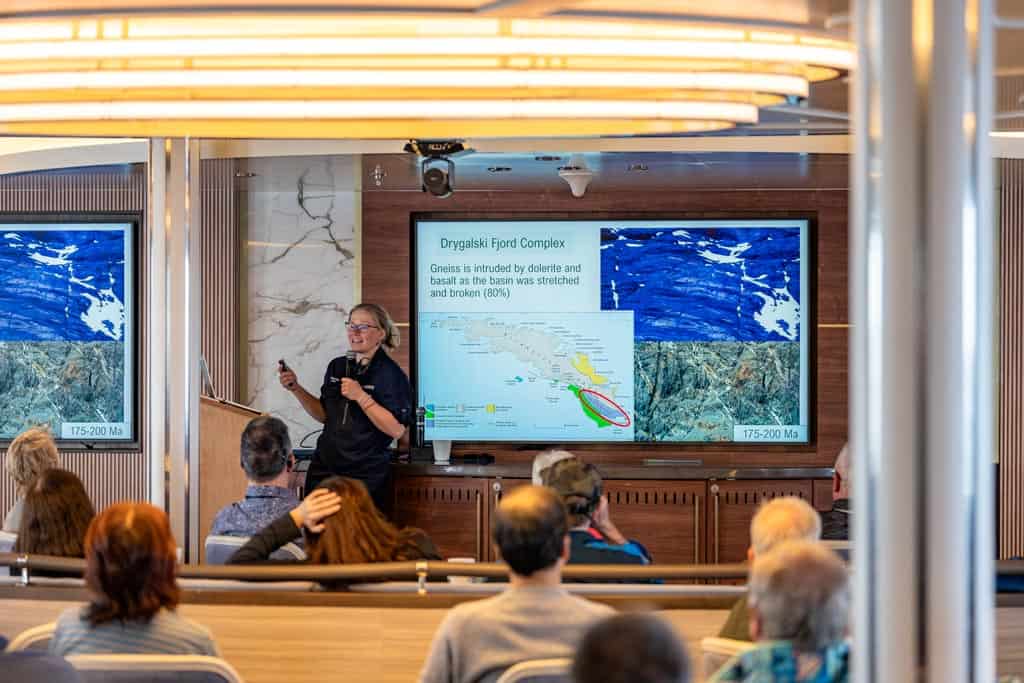
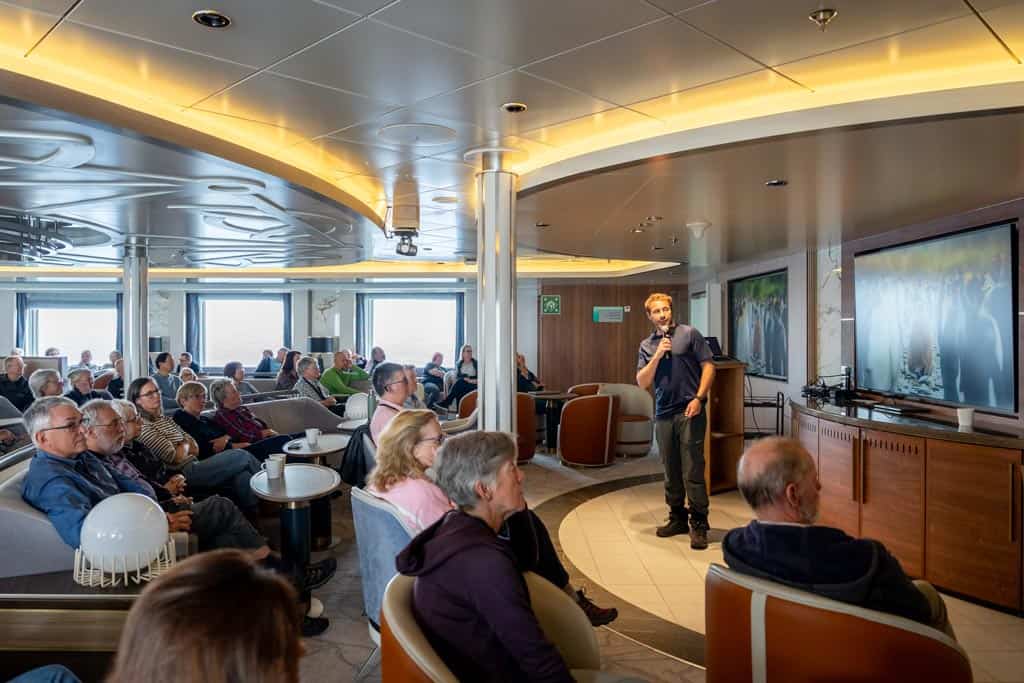
The Lecture Theatre
The Sylvia Earle’s Lecture Theatre serves as the central hub for education, expert insights, and daily expedition briefings, designed to enhance the onboard experience with in-depth knowledge about the destinations visited.
Located on deck 5 between the Gentoo Restaurant and the Citizen Science Lab, this spacious venue is equipped with comfortable seating, a large presentation screen and high-quality audio-visual systems, ensuring every talk is both engaging and accessible.
Expedition cruising is about more than just witnessing breathtaking landscapes – it’s about understanding the ecosystems, wildlife, and history that make these regions so remarkable.
The Lecture Theatre is the main hub on the ship.
Throughout the voyage Aurora Expeditions’ team of naturalists, marine biologists, geologists, and historians deliver a series of fascinating lectures covering topics such as penguin behaviour, climate change in the polar regions, marine conservation, and the stories of legendary Antarctic explorers.
For added convenience, all lectures and briefings are streamed directly to the cabins, allowing guests to watch from the comfort of their room if they prefer to relax in private.
READ MORE: Don’t miss our complete guide covering everything you need to know about travelling to Antarctica!
Beyond traditional lectures the space is also used for daily recaps, photography workshops, guest presentations, and documentary screenings, making it a versatile and frequently used area of the ship.
Daily briefings provide essential updates on weather conditions, upcoming landings, and wildlife sightings, ensuring passengers are well-prepared for each day’s activities.
Sydney, the onboard geologist and glaciologist, giving a fantastic lecture about the geology of South Georgia.
Jarryd and I were onboard as guest photographers, where we gave a series of lectures and workshops on polar photography.
The Library and Citizen Science Lab
Two of the most valuable spaces onboard for curious travellers are the Library and the Citizen Science Lab, both designed to deepen the experience beyond what can be seen from deck or on shore.
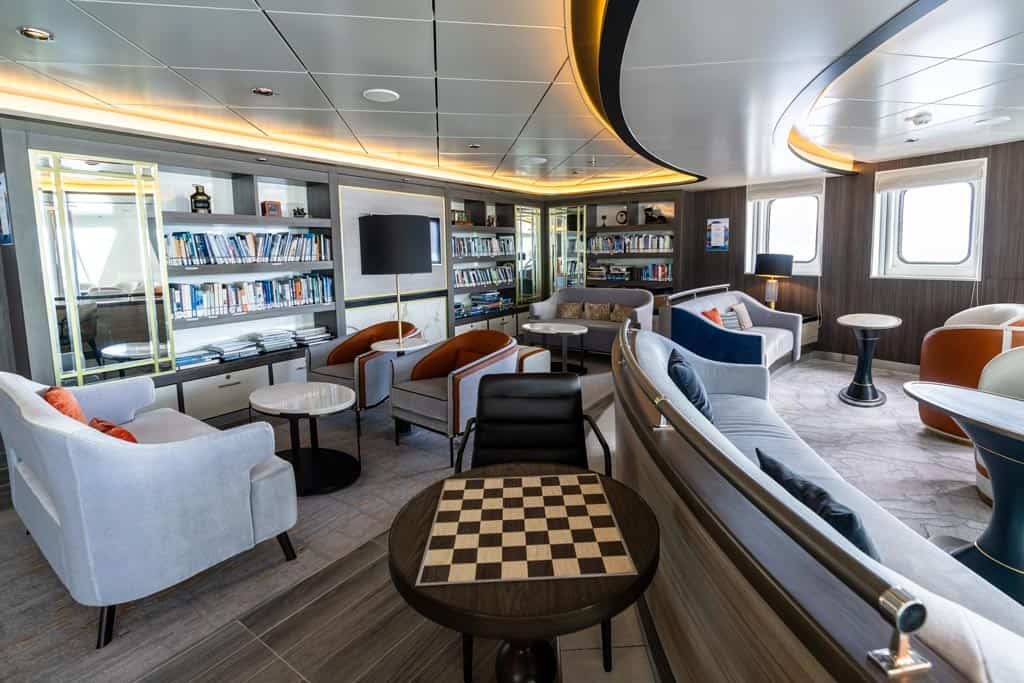
Library – A Quiet Retreat with a View
Tucked away in a bright and peaceful corner of the ship, the Library is the perfect place to unwind between landings while soaking in the views from panoramic windows.
Stocked with an impressive selection of books, it covers everything from Antarctic wildlife and glaciology to exploration history and photography guides.
Whether diving into the heroic age of polar exploration or simply paging through stunning photography collections, there’s something for every interest.
The space itself is inviting and comfortable, with cozy seating and a relaxed atmosphere that makes it easy to spend hours reading while the ship sails past towering icebergs and snow-covered mountains.
It’s also a great place to review field guides before an excursion or reflect on the day’s sightings with fellow passengers.
The library is one of the best parts of the Sylvia Earle.
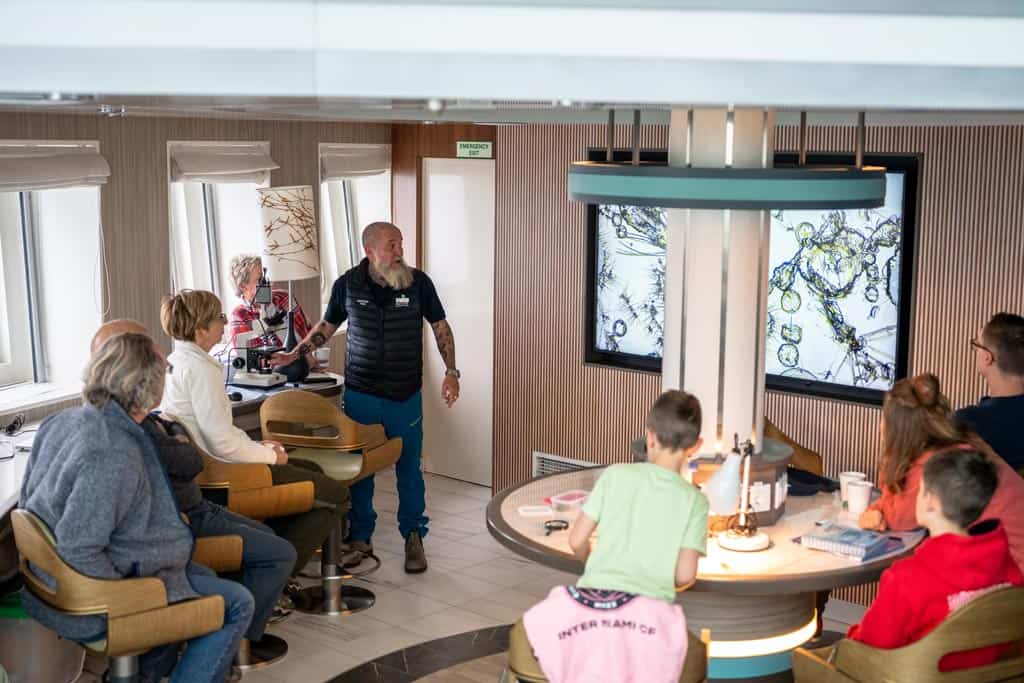
Citizen Science Lab – Hands-On Learning and Research
For those wanting to take a more active role in scientific research, the Citizen Science Lab provides a unique opportunity to contribute to real-world conservation efforts while sailing through some of the most remote ecosystems on the planet.
Partnering with various global research organisations, Aurora Expeditions encourages passengers to participate in projects such as cloud and phytoplankton monitoring, seabird surveys, and whale identification programs.
These efforts contribute valuable data to ongoing scientific studies, helping researchers better understand climate change, marine biodiversity, and ecosystem shifts in the polar regions.
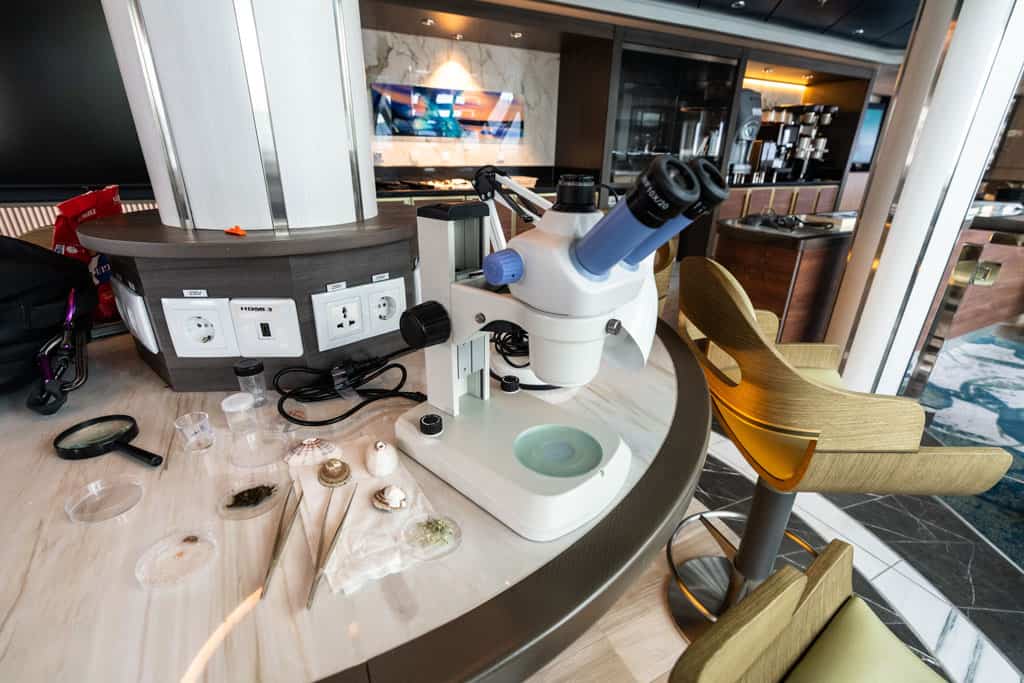
There are all kinds of scientific tools to assist with the research work.
Equipped with microscopes, lab stations, and interactive displays, the Citizen Science Lab allows guests to examine plankton samples, compare weather patterns, and analyse findings alongside expert naturalists and scientists.
It’s an engaging way to go beyond sightseeing and actively contribute to polar research, making the expedition feel even more meaningful.
The citizen science lab stands out as a unique feature, allowing passengers to engage in real scientific research during their voyage.
Dr Leo giving a citizen science talk in the lab.
The Restaurants
Embarking on an expedition to the remote corners of the globe doesn’t mean compromising on culinary experiences.
Aboard the Sylvia Earle guests are treated to exceptional dining across two different venues: the Gentoo Restaurant and the Rockhopper Restaurant.
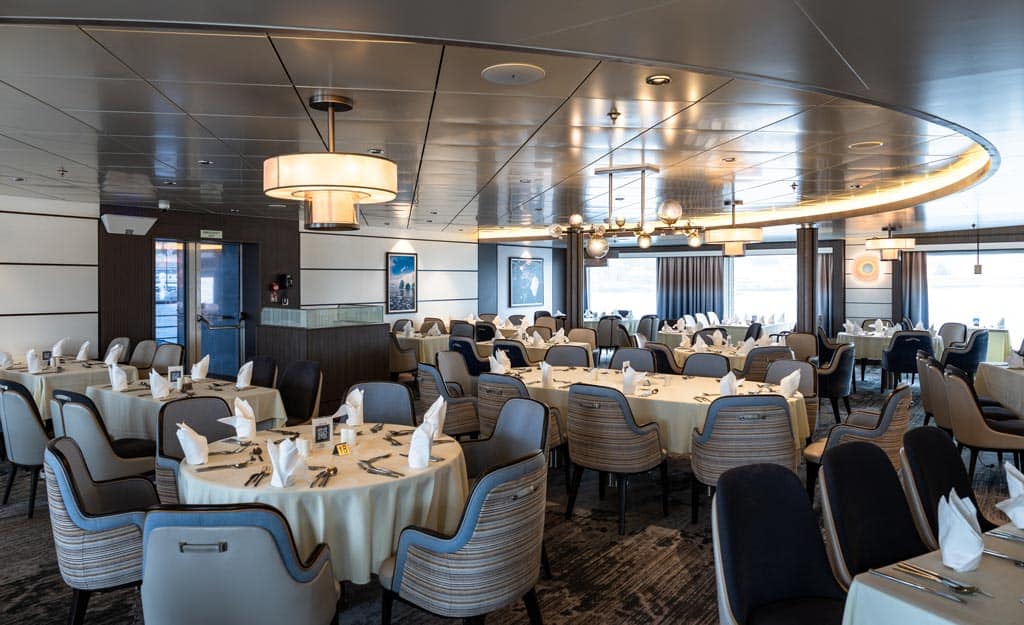
Gentoo Restaurant – Main Dining Venue
Located on Deck 5, the Gentoo Restaurant serves as the ship’s primary dining area, offering a welcoming atmosphere with open seating that encourages camaraderie among travellers.
Floor-to-ceiling windows provide panoramic views, allowing guests to enjoy the stunning landscapes during their meals.
Both breakfast and lunch are presented buffet-style, featuring a diverse selection to cater to various tastes.
Mornings include options like fresh fruits, pastries, made-to-order eggs, and a range of hot dishes.
The Gentoo Restaurant.
Lunchtime offers an array of salads, soups, and international entrees, ensuring a satisfying meal after morning excursions.
In the evenings the Gentoo transitions to an à la carte service, presenting a daily menu with meat, seafood, and vegetarian options, alongside an “every day” menu featuring classics such as Caesar salad, burgers and sirloin steak.
This setup allows guests to choose between familiar favourites and regional specialties inspired by the voyage’s destinations.
Tea, coffee, and snacks are available around the clock, ensuring guests have access to refreshments at any time.
House wines, beers, and soft drinks are included with dinner, complementing the evening dining experience.
Perched on Deck 8 behind the Observation Bar, the Rockhopper Restaurant offers an intimate and upscale dining alternative.
With seating for up to 40 guests this venue requires reservations, providing an exclusive atmosphere for those seeking a unique culinary experience.
Breakfast and lunch are served à la carte, with lunch featuring classics such as shrimp tacos (our favourite), vegetarian pizza and wraps.
In the evenings the Rockhopper transforms into a steakhouse-style restaurant, offering a set menu that includes appetisers like salmon tartare and seafood chowder, main courses from the grill, and delectable desserts such as chocolate fudge and Tahitian vanilla crème brûlée.
The Rockhopper Restaurant is on Deck 8, has an amazing view and needs to be reserved ahead of time for dinner.
Reservations are required for dinner, ensuring a personalised and attentive dining experience.
The expedition team normally eat downstairs in the Gentoo, but if you personally invite some of them to join you for dinner in the Rockhopper they will love the chance to get to know you more in a smaller setting.
The addition of the Rockhopper Restaurant enhances the overall dining options aboard the Sylvia Earle, providing variety and a touch of indulgence during the expedition.
Both restaurants emphasise sustainability, sourcing high-quality ingredients and offering menus that reflect a commitment to environmental responsibility.
This dedication ensures that even in the most remote locations, guests can enjoy meals that are both delicious and conscientiously prepared.
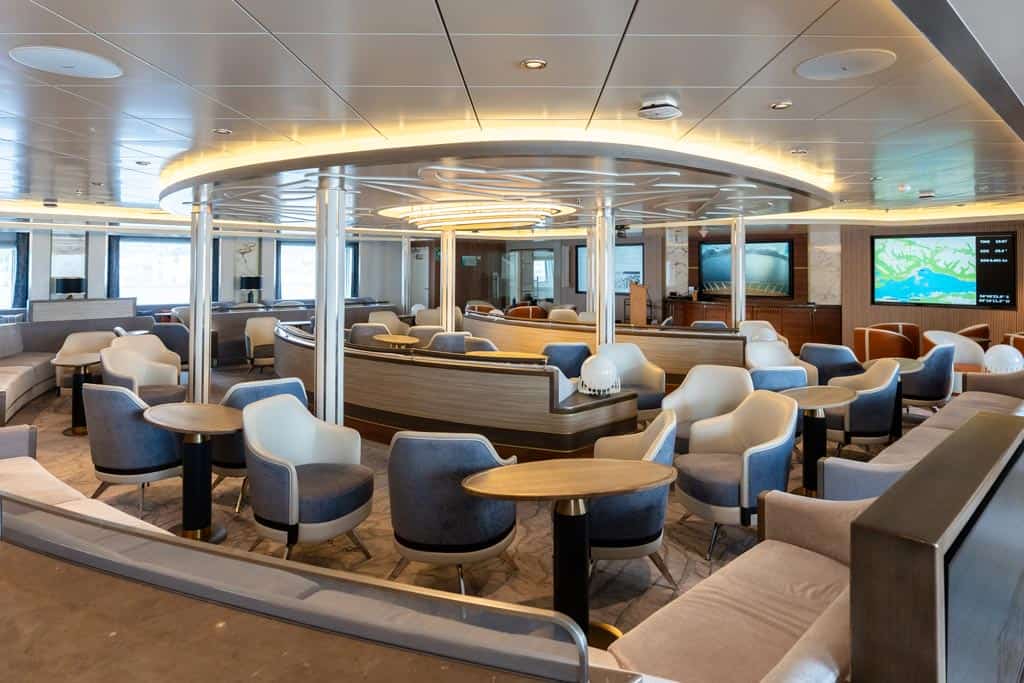
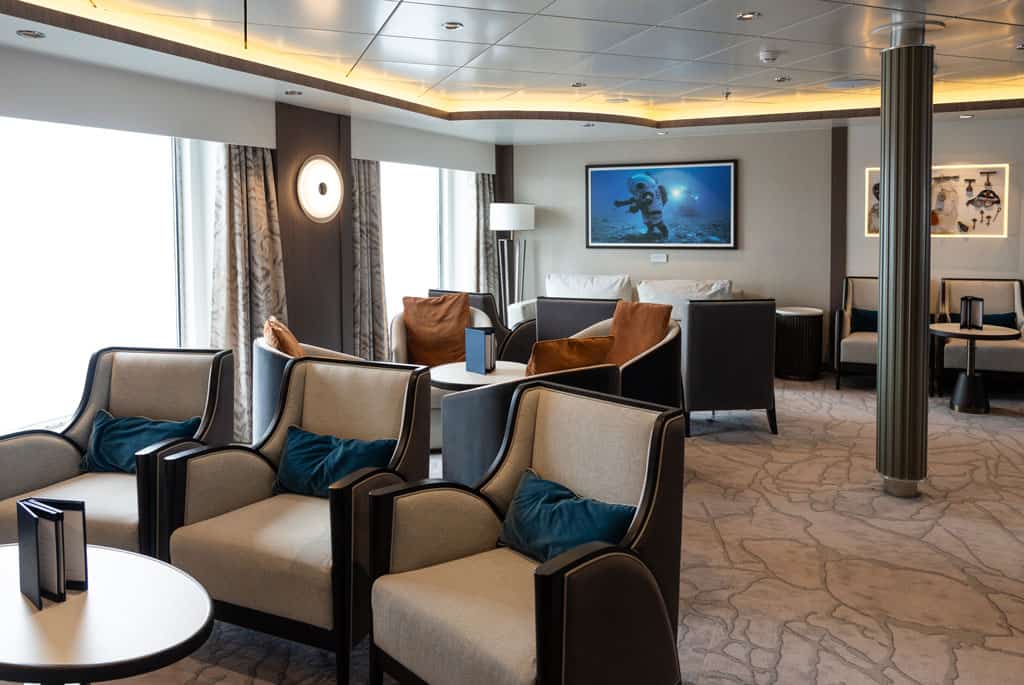
The Observation Bar
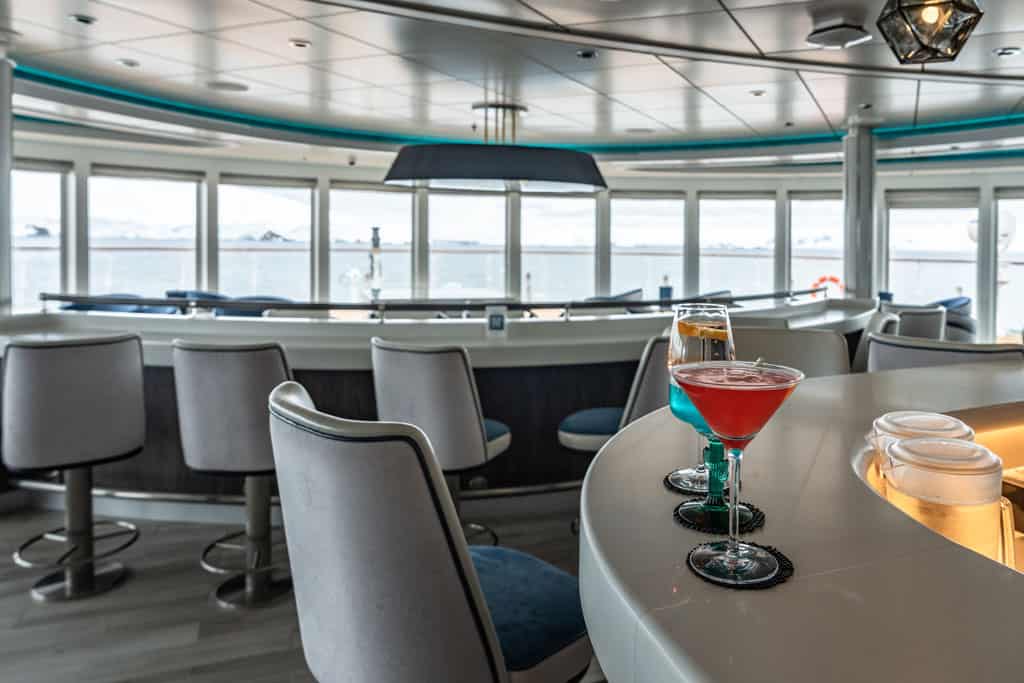
Perched at the forefront of Deck 8, the Observation Lounge aboard the Sylvia Earle offers guests an unparalleled vantage point to immerse themselves in the breathtaking vistas of the polar regions.
This thoughtfully designed space serves as a serene retreat, combining comfort with expansive views, making it an ideal spot for both relaxation and wildlife observation.
The lounge features massive windows, ensuring that the stunning landscapes remain a constant backdrop.
The Observation Lounge is a great place to relax at any time of day or night.
Comfortable seating arrangements are thoughtfully positioned to maximise viewing opportunities, allowing guests to witness the majesty of icebergs, channels, and diverse wildlife from the warmth of the indoors.
In addition to its visual appeal the Observation Lounge is equipped with informative resources, including wildlife guides and binoculars, enabling guests to deepen their understanding of the surrounding environment.
In the evenings it also transforms into the place to be for a nightcap, with cocktails, wines and delicious beers flowing for as long as the guests remain thirsty.
Cocktails of the day on offer in the Observation Lounge.
The Tektite Bar
Situated on Deck 5 near the reception area, the Tektite Bar serves as a central gathering spot aboard the Sylvia Earle.
This inviting space offers a comfortable environment for guests to unwind, share stories of the day’s adventures, and enjoy a wide selection of beverages.
The beverage menu at the Tektite Bar is extensive, offering a range of options from classic cocktails and fine wines to local craft beers and non-alcoholic selections.
The bar hosts happy hours, and with plenty of board games scattered around the room it was one of our favourite places to chill after a big day of adventures, throwing the dice for a round of backgammon.
The Tektite Bar.
The Gym, Sauna and Spa
Expedition cruising might be physically demanding, with daily Zodiac landings, long hikes, and adrenaline-filled wildlife encounters, but the Sylvia Earle ensures guests have every opportunity to stay active and recover between adventures.
With a fully equipped gym and a sauna designed for post-expedition relaxation, the ship’s wellness facilities provide a nice balance of fitness and recovery while sailing through some of the most remote regions on Earth.
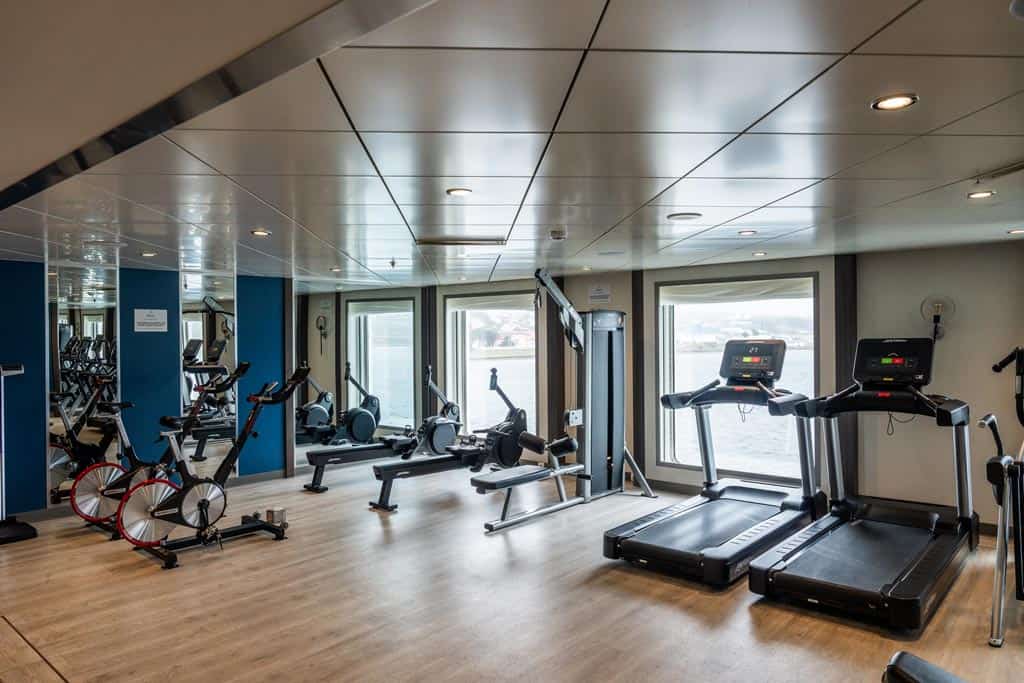
Located on Deck 7, the Sylvia Earle’s gym is a well-designed space with large windows allowing for natural light and scenic ocean views while working out.
The layout is spacious enough for movement-based exercises yet compact enough to feel intimate and functional.
The gym is equipped with treadmills, stationary bikes, rowing machines, and elliptical trainers, offering plenty of options for cardio workouts while watching the waves roll past.
Strength training is well-supported with a selection of free weights, resistance machines, and mats for bodyweight exercises or stretching.
Lots of weight and cardio machines are available in the gym.
Guests looking for a low-impact option can take advantage of yoga and stretching areas, ideal for warming up before landings or recovering after a long hike in South Georgia.
Unlike many expedition ships where gym facilities can feel like an afterthought, the Sylvia Earle’s fitness space is thoughtfully designed, providing everything needed for a proper workout without feeling cramped or secondary to other onboard amenities.
There is a fantastic gym onboard the Sylvia Earle.
Sauna – Rejuvenation After a Day of Adventure
After a cold and physically demanding day exploring Antarctica, South Georgia, or the Falklands, few things are as rewarding as stepping into the onboard sauna to warm up and relax.
Located next to the wellness center, the sauna provides a quiet, restorative space to soothe sore muscles, improve circulation, and simply unwind while taking in views of the passing landscapes.
Personally we found the layout of the sauna area to be a little strange, and almost as if it was an afterthought.
The sauna itself was great, with its large window bringing in natural light and opening up to views.
But there was no real ‘wet area’ for the sauna at all.
There were two very small change rooms, male and females separated, with a single shower, no toilets, and no lockers to store your personal items.
These were located next to the spa, meaning you need to go out of the sauna and into a public area, dripping sweat and water all over the floor.
It also meant there was nowhere to really cool off after the sauna. To us one of the big benefits for wellness is relaxing in the sauna, cooling off with a cold shower or standing outside in the elements, then getting back into the sauna.
While the sauna itself is great, it definitely does not feel as well thought-out as saunas we’ve seen on other ships.
The sauna onboard the Sylvia Earle is lovely. The space around it is not quite so well thought-out.
There is one spa room on the Sylvia Earle.
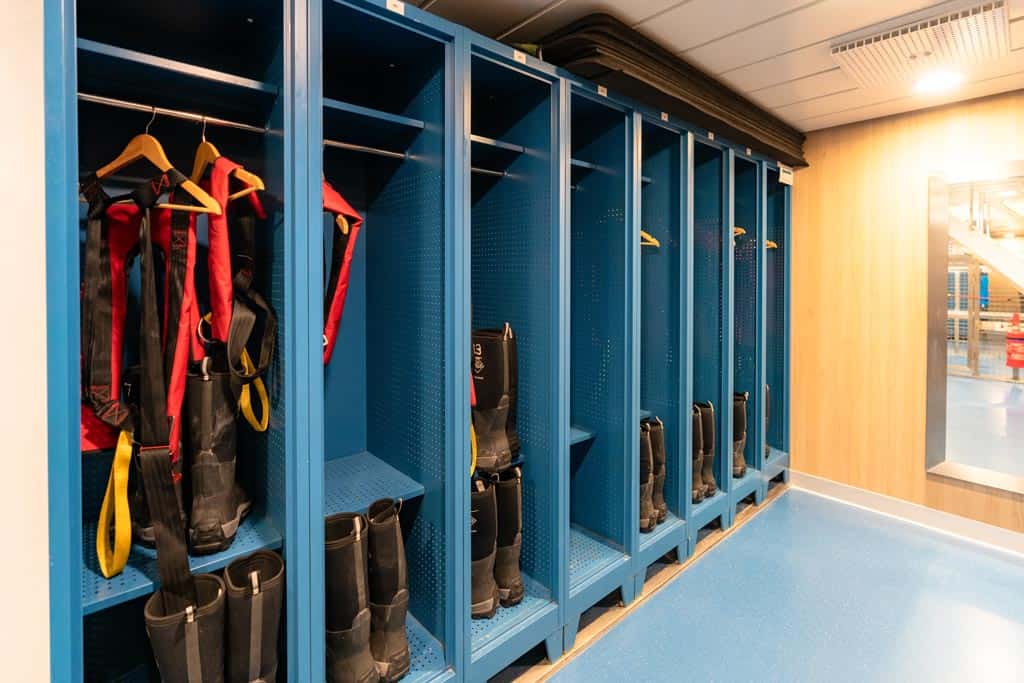
The Mud Room
The Sylvia Earle’s mud room, located on Deck 3, is where all expedition landings and adventure activities begin and end.
Designed for efficiency and practicality, this space allows guests to store and prepare their gear without cluttering their cabins.
It’s a purpose-built area that makes getting ready for Zodiac excursions, hiking, and polar exploration as seamless as possible.
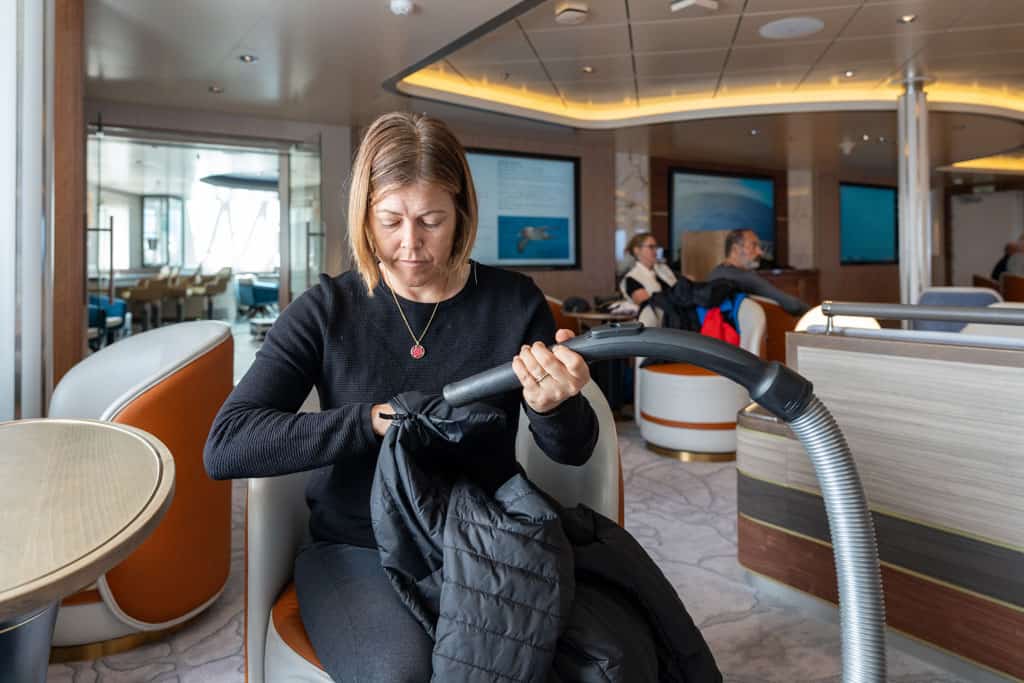
Each guest is assigned a locker based on their cabin number, providing a designated space to keep wet-weather gear, boots, and expedition jackets dry and organised.
Instead of bringing bulky layers back to the cabin, everything stays in the mudroom, ensuring that the rooms remain clean, dry, and free from clutter.
The mud room is where you get ready before an excursion, and where you can leave your wet gear.
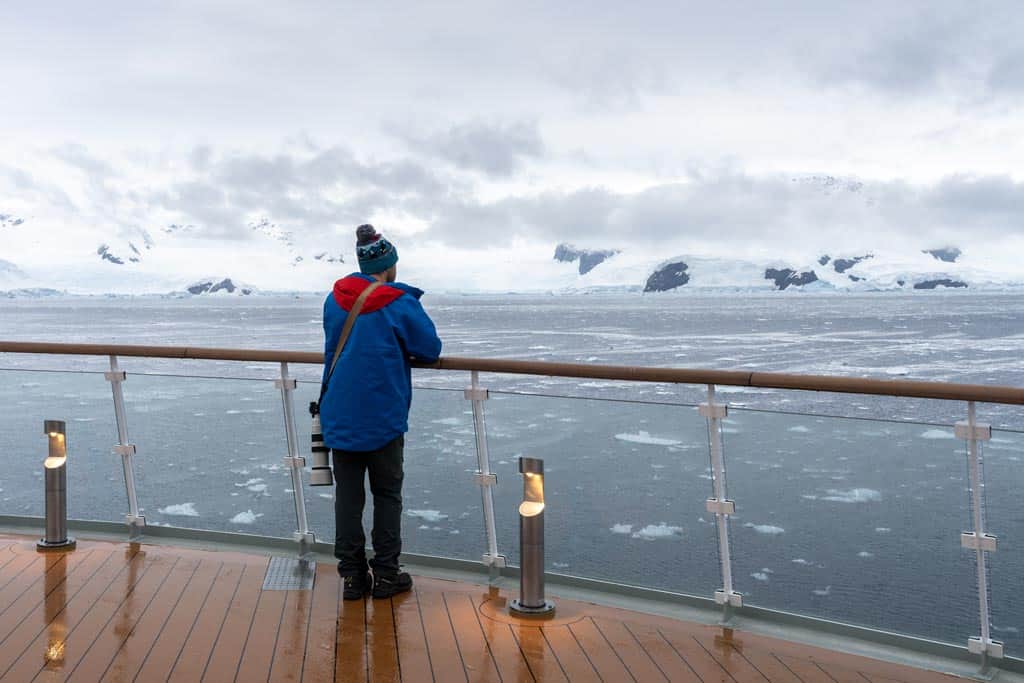
The Outdoor Decks
Spending time on the Sylvia Earle’s outdoor decks is one of the best ways to experience the raw beauty of the Falklands, South Georgia, and Antarctica.
Whether watching icebergs drift by, scanning the horizon for wildlife, or feeling the crisp polar air after a day’s excursion, the ship offers plenty of well-designed open-air spaces that ensure guests are never far from the action.
The largest and most impressive outdoor deck is located on Deck 8, positioned high above the waterline for uninterrupted, wide-angle views.
This is one of the best spots on the ship for wildlife spotting, whether it’s seabirds soaring overhead, whales surfacing in the distance, or towering icebergs floating past.
The deck wraps around the Observation Lounge, allowing guests to step outside quickly during a lecture or coffee break when an unexpected wildlife sighting is announced.
The open layout ensures there’s plenty of space to move around, with railings positioned at the right height for photographers to set up their cameras without obstructions.
Jarryd admiring the view from the Observation Deck.
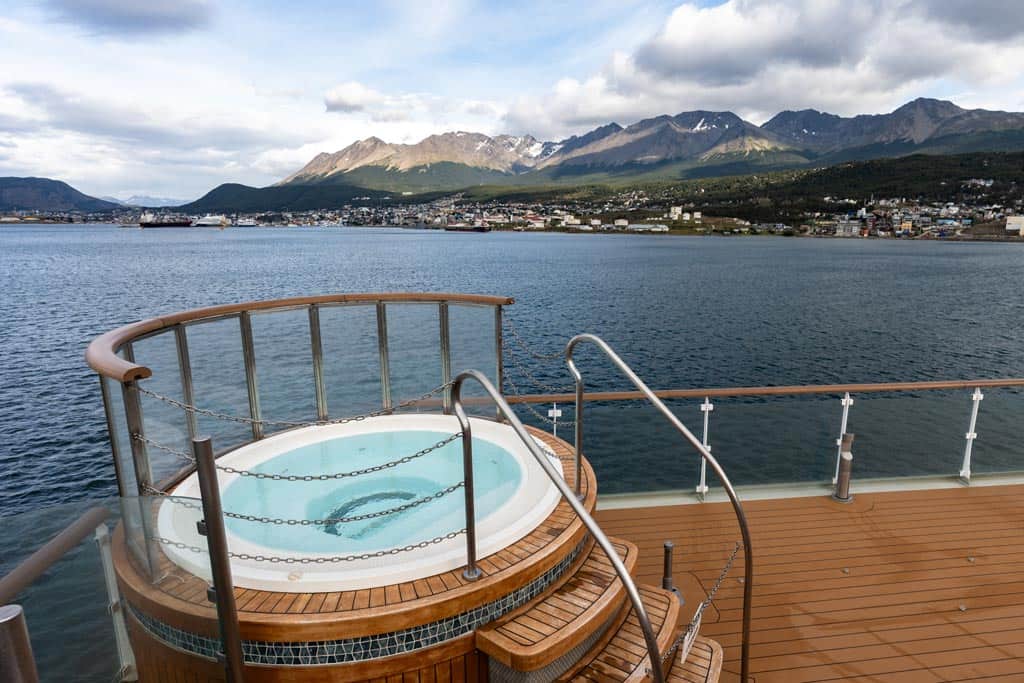
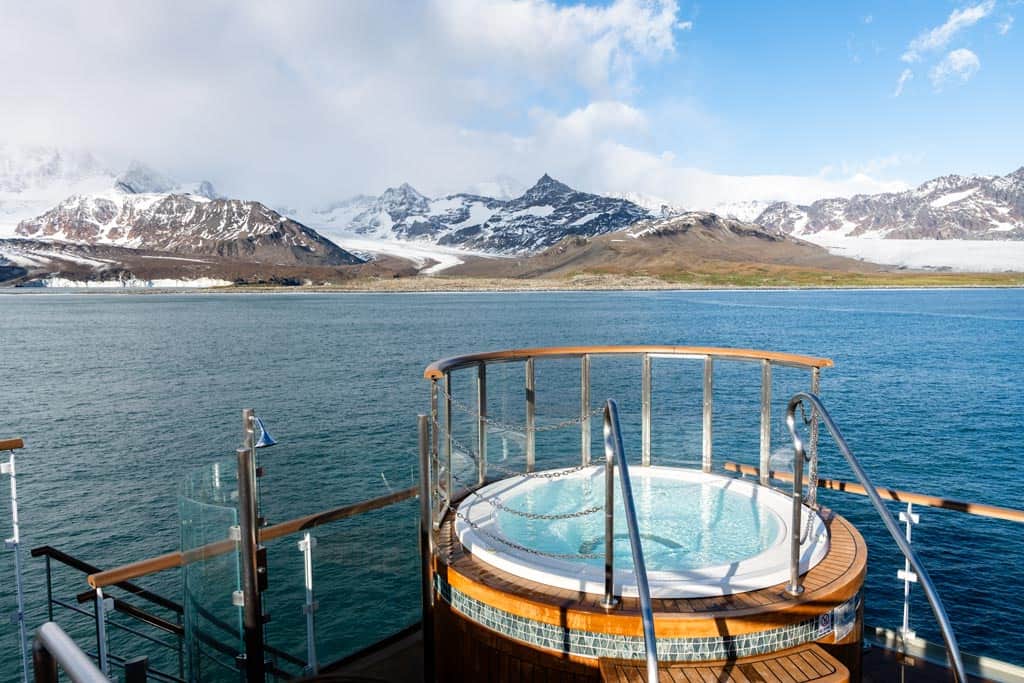
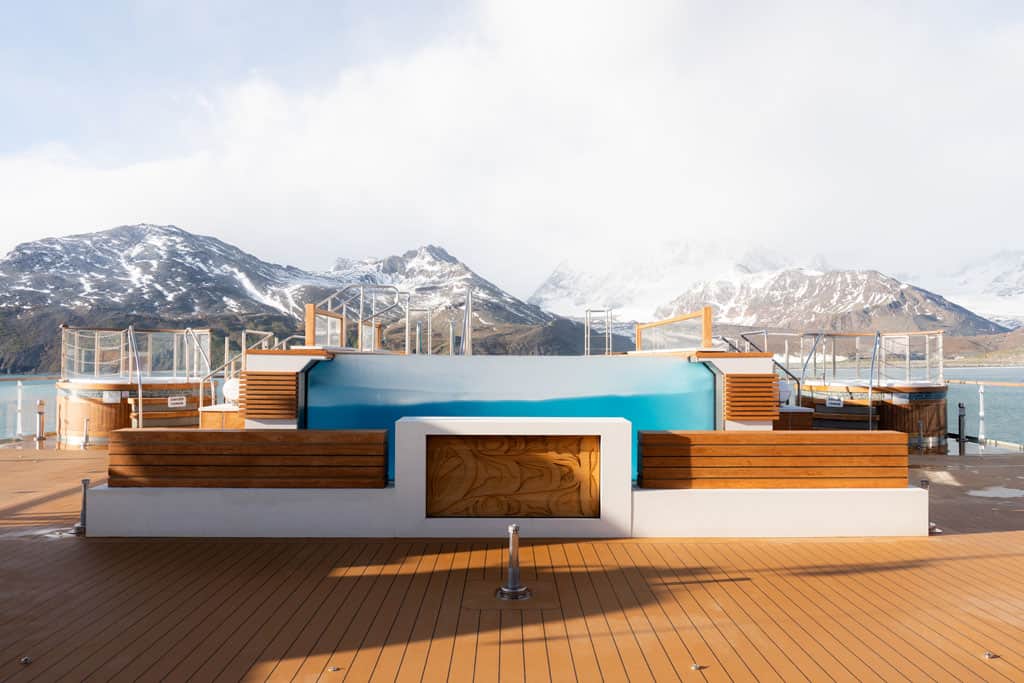
Deck 7 – The Jacuzzis with a View
On Deck 7 guests will find two outdoor Jacuzzis and a swimming pool, offering a unique way to enjoy the landscapes.
This is one of the most popular relaxation spots on the ship, especially after a cold Zodiac excursion or an early morning landing.
Watching glaciers, mountains, and seabirds from a bubbling hot tub is a true expedition luxury.
A jacuzzi with a view – not a bad place to look at the king penguins of South Georgia.
Decks 4 and 6 – The Most Accessible Viewing Areas from Your Cabins
For those wanting quick access to an outdoor deck, the stern at Deck 6 and sides of deck 4 provide an easily reachable space for casual wildlife spotting or taking in the fresh air.
Deck 4 is particularly good for wildlife photography, offering a lower perspective closer to the water.
Watching out for seabirds on the stern of Deck 6.
The Sylvia Earle Experience
A great expedition ship isn’t just about where it goes – it’s about how it feels to be onboard.
The Sylvia Earle is designed for luxury adventure, but what sets it apart is how seamlessly it balances exploration with comfort.
From the moment we stepped aboard in Ushuaia the ship felt spacious, modern, and thoughtfully built for expedition cruising.
Moving between outdoor decks, lounges, the lecture theatre, and dining areas was effortless, creating an environment that felt intimate yet open.
With a maximum of 130 passengers there was always space to spread out, even on sea days when everyone was moving around onboard.
Daily life on the Sylvia Earle revolves around wildlife encounters, Zodiac excursions, and expert-led lectures, but the time in between is just as memorable.
Mornings often started with a coffee in the Observation Lounge, watching the first light hit the ice-covered peaks of the Antarctic Peninsula.
After excursions the sauna and Jacuzzis provided the perfect place to warm up, and evenings brought lively conversations in the Tektite Bar, where passengers and expedition guides swapped stories from the day and real life back home.
What truly defines the Sylvia Earle experience is the expedition team. Every lecture, briefing, and shore landing is led by world-class naturalists, historians, and wildlife experts, adding depth and meaning to every moment.
Their passion and knowledge transformed the voyage into something much more than just a scenic cruise.
In this section we’ll take a closer look at daily routines, onboard atmosphere, expedition logistics, and what makes life aboard the Sylvia Earle a truly immersive experience.
The Sylvia Earle at Cuverville Island.
Embarkation Process
Boarding the Sylvia Earle is a seamless and well-organised process, ensuring guests start their expedition stress-free.
For most Antarctic voyages, embarkation takes place in Ushuaia, Argentina, where guests meet at a designated hotel or transfer point.
Expedition staff handle check-in and luggage, and your bags are delivered directly to your cabin.
At the port you are driven straight to the ship by bus and crew members welcome guests at the gangway before escorting them to reception on Deck 5 for key cards and cabin assignments.
A mandatory safety briefing and lifeboat drill follows in the Lecture Theatre, where the expedition team introduces the crew and outlines the journey ahead.
Once formalities are complete guests gather on Deck 8 or in the Observation Lounge for a welcome toast, watching as Ushuaia disappears and the voyage officially begins.
With everything handled smoothly, embarkation sets the perfect tone for the adventure ahead.
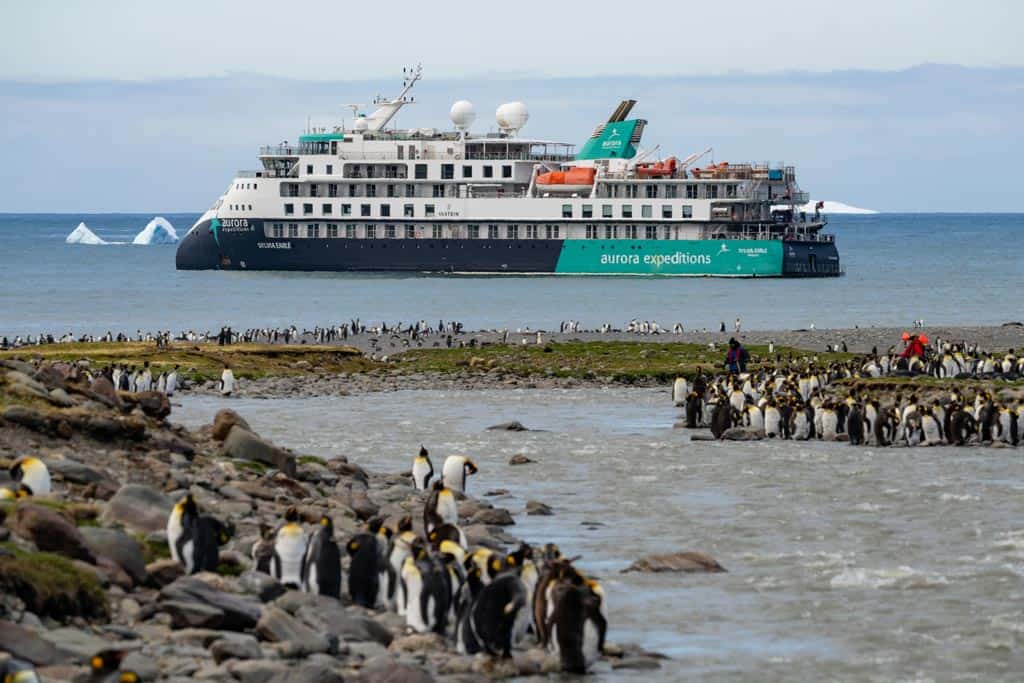
Our might vessel in the Falkland Islands.
The Dining Experience
Expedition cruising might take you to some of the most remote places on Earth, but the Sylvia Earle’s dining experience ensures that every meal remains a highlight of the journey.
With two onboard restaurants, Gentoo and Rockhopper, the ship offers a diverse and well-balanced menu, carefully crafted to keep guests nourished, satisfied, and ready for adventure.
Food quality aboard the Sylvia Earle is exceptional, especially considering the logistical challenges of storing and sourcing fresh ingredients when travelling to the polar regions.
Meals are prepared with an emphasis on healthy produce, high-quality proteins, and international flavours, creating a dining experience that feels more like a boutique hotel than an expedition vessel.
The variety is impressive, catering to different tastes and dietary requirements without feeling repetitive, even on extended voyages.
At the Gentoo Restaurant guests can enjoy buffet-style breakfasts and lunches, featuring fresh fruits, hot dishes, pastries, salads, and daily chef specials.
Dinners are served à la carte, offering a mix of meat, seafood, and vegetarian options, along with a selection of house wines, beers, and soft drinks included with the meal.
For those looking for something more intimate, the Rockhopper Restaurant provides a specialty dining experience in a steakhouse-style setting.
Available by reservation, this venue serves premium cuts of meat, gourmet seafood dishes, and indulgent desserts, all in a smaller, more exclusive environment.
Beyond the meals themselves, the overall dining atmosphere is warm and welcoming. Floor-to-ceiling windows in both restaurants ensure that every meal comes with a spectacular view, whether sailing past ice-cloaked mountains in Antarctica or the rugged shorelines of South Georgia.
Service is friendly and efficient, with staff ensuring that meals are delivered smoothly, even during rough seas.
The food is divine onboard!
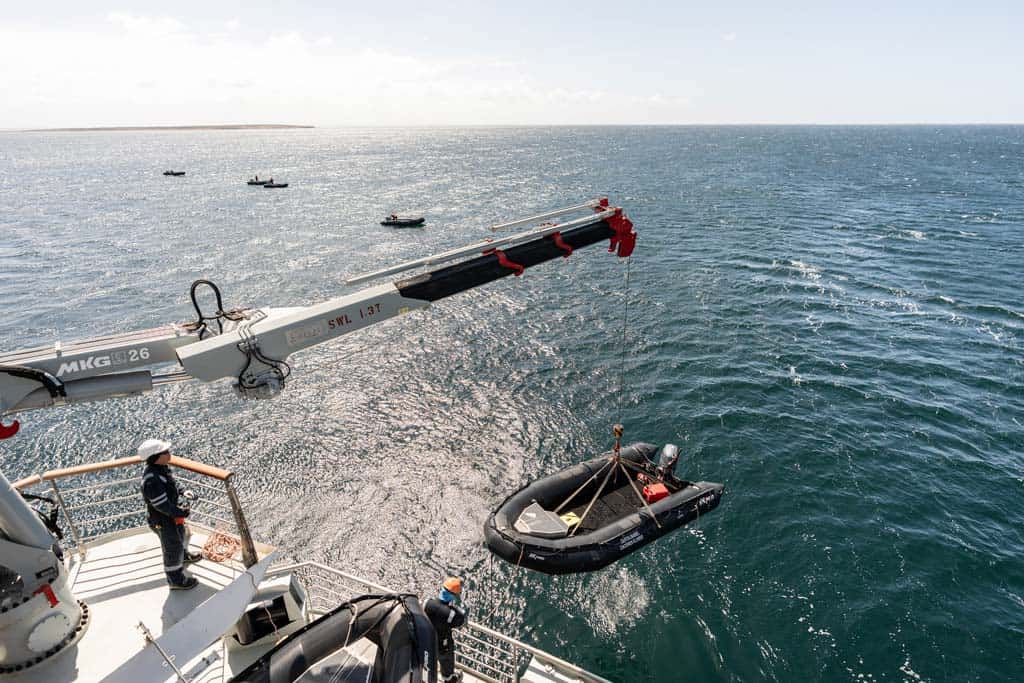
Zodiac Operations
Zodiac excursions are the core of any expedition aboard the Sylvia Earle, allowing guests to get up close to wildlife, step onto remote shorelines, and explore towering ice formations.
Designed for efficiency and safety, the ship’s boarding and disembarkation process ensures that every landing runs smoothly, maximising time ashore.
Unloading the Zodiacs is quick and safe thanks to the well-designed crane and deck system.
Boarding the Zodiacs
Everything starts in the mudroom on Deck 3, where guests gear up and prepare for the excursion.
Each person has an assigned locker for waterproof boots, jackets, and wet-weather gear, making it easy to transition from the warmth of the ship to the harsh polar elements.
When ready, guests step onto a sanitised boot-wash station before proceeding to the loading area.
The Sylvia Earle is built for quick and safe Zodiac operations, with 3 points of disembarkation that can be used depending on sea or weather conditions, and what activities are scheduled.
At the stern there is a dedicated boarding platform that sits just above the waterline, normally used by kayakers, but occasionally in operation for Zodiacs.
This long, wide platform allows for loading two Zodiacs at one time with minimal steps involved.
The Marina Deck at the stern is utilised to load and unload kayakers or Zodiacs,
The main Zodiac loading stations are found on either port or starboard, where you walk down some interior stairs (comfortably out of the elements) until you reach the same level as the top of the Zodiac pontoons.
In this way you step easily from the ship to the tender, without having to navigate a slippery gangway.
Expedition crew assist every step of the way, ensuring a steady handoff as guests move from the gangway onto the inflatable boats.
The process is well-practiced, with guides using the “sailor’s grip” to help guests step in and take their seats safely.
Even in rough conditions the design of the ship and the expertise of the crew make getting on and off the Zodiacs as smooth as possible.
The side gates are usually used to get passengers in and out of Zodiacs.
Exploring by Zodiac
Once away from the ship Zodiac excursions offer a front-row seat to Antarctica’s wildlife and landscapes.
Some outings involve scenic cruising, gliding past icebergs or watching whales up close, while others are wet landings, where guests step directly onto shore to explore.
The expedition team always ensures that time ashore is maximised, balancing adventure with strict environmental guidelines to minimise impact.
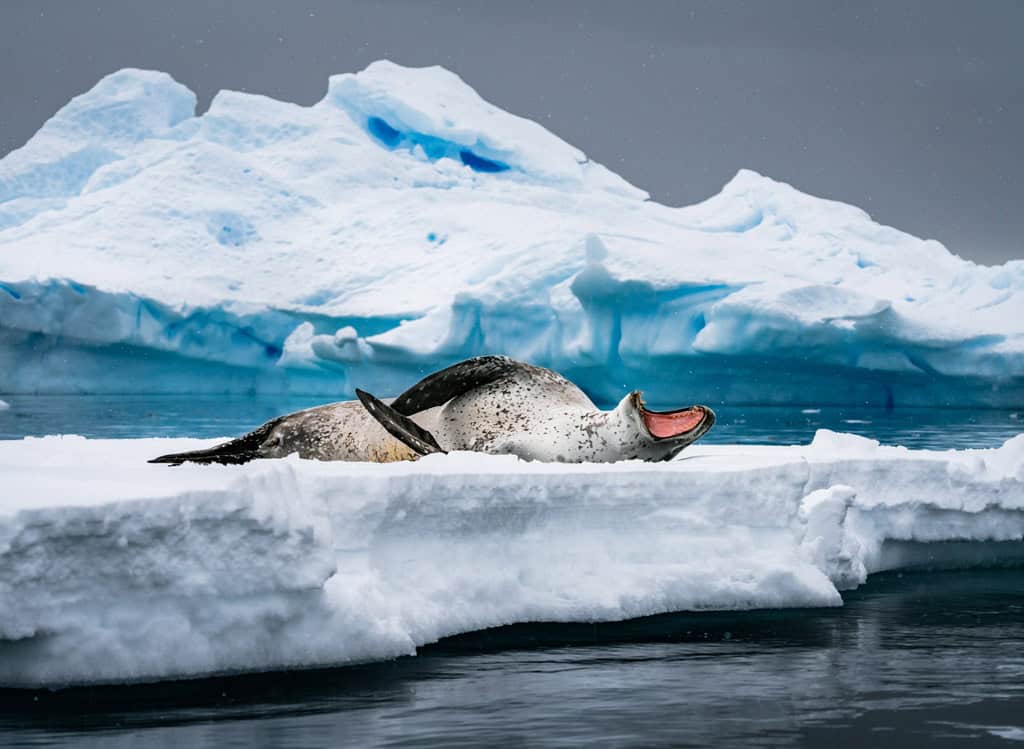
A beautiful leopard seal we spotted on the ice during a Zodiac cruise.
Returning to the Ship
Back at the Sylvia Earle, guests follow the same process in reverse. Zodiacs pull up to the loading platform, where guides assist with stepping back onboard.
Before heading inside boots and outer layers are cleaned at designated wash stations, preventing mud, snow, and bio-contaminants from being tracked into the ship.
Heading back to the ship.
Innovative Design Elements
The Sylvia Earle is equipped with several innovative design elements that enhance both performance and passenger comfort.
One of the most notable features is the Ulstein X-BOW design, which improves fuel efficiency and provides a smoother ride through waves.
This inverted bow design reduces noise and enhances the overall travel experience, particularly during rough seas.
Further enhancing the comfort on ocean passages, the Sylvia Earle is equipped with two stabilisers which steady the rolling motion in rough seas.
Another significant innovation is the virtual anchoring technology, which minimises environmental impact by protecting the sea floor.
The ship also features a Glass Atrium Lounge with expansive windows, offering panoramic views and a serene environment for relaxation.
These design elements showcase the Sylvia Earle’s commitment to combining cutting-edge technology with sustainable travel practices.
Looking down the X-Bow in the Lemaire Channel.
Ulstein X-BOW® – A Smoother, More Efficient Ride
One of the Sylvia Earle’s most defining features is its Ulstein X-BOW, a cutting-edge hull design that enhances stability, efficiency, and passenger comfort while navigating rough seas.
Unlike traditional ship bows, which rise and crash over waves, the X-BOW is inverted, allowing the ship to cut through swells rather than slam into them.
This design significantly reduces vertical movement and hull slamming, making a noticeable difference during ocean crossings, especially in challenging waters like the Drake Passage where we encountered 6m waves.
Passengers experience less motion and fewer abrupt impacts, leading to a more comfortable ride with reduced seasickness compared to conventional expedition ships.
Beyond comfort, the X-BOW also improves fuel efficiency and minimises environmental impact.
By reducing resistance through the water the ship consumes less energy, helping Aurora Expeditions maintain its commitment to sustainable travel.
The bow’s streamlined shape also enhances ice navigation, allowing the Sylvia Earle to glide more smoothly through polar waters.
For anyone concerned about rough seas, the X-BOW makes a real difference. The smoother ride, combined with the ship’s stabilisers and expert crew, ensures that passengers can enjoy the journey without being at the mercy of unpredictable ocean conditions.
One thing to note however is that the X-BOW is a fairly new design, and as such lacks the centuries’ of open-ocean testing that traditional bows have had.
Whether this unique design becomes popular across the polar fleet will become obvious in the following years.
The Sylvia Earle is designed with sustainability at its core, incorporating a range of eco-friendly practices and initiatives to minimise its environmental footprint.
This state-of-the-art vessel features a low-polluting marine engine and a streamlined design that significantly reduces fuel consumption and emissions, making it one of the most environmentally conscious ships in its class.
Onboard, the Sylvia Earle implements a comprehensive recycling program and has banned single-use plastics, ensuring that waste is minimised and managed responsibly.
The ship’s commitment to sustainability extends to its partnerships with various conservation organisations, promoting the protection of marine protected areas and the conservation of ocean wildlife.
The expedition team aboard the Sylvia Earle is dedicated to responsible and sustainable tourism practices.
They ensure that all activities and excursions are conducted in a way that minimises environmental impact and adheres to local regulations.
This commitment to sustainability not only enhances the travel experience but also contributes to the preservation of the pristine polar regions for future generations.
Alesha doing her part to biosecure all gear before we head to South Georgia and Antarctica.
Accessibility Features for All Travellers
The Sylvia Earle is thoughtfully designed to be accessible to all travellers, regardless of age or ability.
The ship features an elevator that serves all six guest decks, making it easy for everyone to move around the vessel.
Wheelchair-accessible cabins and public areas ensure that all guests can enjoy the ship’s amenities comfortably.
The observation lounge and glass atrium lounge are designed with accessibility in mind, offering stunning views of the surrounding landscapes from a comfortable and inclusive setting.
The staterooms feature French balconies, providing guests with a private outdoor space to take in the breathtaking scenery in peace and quiet.
The wellness centre on the Sylvia Earle offers a range of treatments and activities, including yoga and meditation classes, to promote relaxation and well-being.
These features ensure that all guests, regardless of their physical abilities, can fully enjoy their expedition experience.
The Sylvia Earle at Kidney Cove in the Falklands.
Itineraries and Destinations
The Sylvia Earle offers a variety of itineraries that take travellers to some of the most remote and awe-inspiring destinations on the planet.
Popular routes include voyages to the Antarctic Peninsula and South Georgia, where guests can witness vast penguin colonies, majestic whales, and towering icebergs.
Unique destinations in the Arctic Circle offer opportunities to explore the pristine landscapes of Greenland, Svalbard, and the Canadian Arctic, with activities such as kayaking, camping, and mountaineering providing immersive experiences.
The Lemaire Channel – a true highlight of any journey to the Antarctic Peninsula.
Adventure Activities – Camping, Kayaking, Paddling, and Snorkelling in the Polar Regions
Expedition cruising with Aurora isn’t just about stepping onto your 7th continent; there’s a whole other world to explore by getting out onto the water for a more immersive experience.
Aboard the Sylvia Earle guests have the opportunity to explore Antarctica, South Georgia, and the Falklands from a whole new perspective, with a selection of off-ship activities that take the adventure to the next level.
Some of the additional activities on offer are their sea kayaking program, day paddle excursions and the unique snorkelling experience.
Important Note – Due to the popularity of these programs, they do need to be pre-booked when you first reserve your cabin.
Camping – A Night on the Ice
For those looking to fully immerse themselves in the polar experience, the Sylvia Earle offers Antarctic camping excursions early in the season that allows guests to spend a night sleeping on the snow.
This activity provides a rare opportunity to experience Antarctica in complete silence, surrounded by towering glaciers, star-filled skies, and the distant sounds of calving ice or penguins shuffling in the distance.
Guests are provided with specialised gear, including thermal sleeping bags and bivy sacks, designed to keep warm in the extreme conditions.
There are no tents, allowing for an authentic, open-air experience, much like the early explorers who camped on the continent over a century ago.
With strict environmental guidelines in place, the camping experience is low-impact and carefully managed by the expedition team, ensuring that nothing is left behind.
Waking up on the Antarctic ice, with the first light of day illuminating the untouched landscape, is a memory that stays with you forever.
We didn’t camp with Aurora Expeditions on our recent voyage, so here’s a photo of the golden light experienced from another camping trip earlier in the same season.
Sea Kayaking – The Ultimate Polar Adventure
For those wanting to experience the silence and serenity of the polar regions from water level, the sea kayaking program is one of the most rewarding activities available.
Limited to a small group of experienced paddlers, this program runs throughout the voyage with kayakers launching whenever conditions allow.
Paddling through calm waters, weaving between icebergs, and watching wildlife from just meters away is an experience unlike any other.
The kayaking guides are highly experienced in polar conditions, ensuring safety at all times while still allowing for flexibility and adventure.
Guests who opt into this activity will receive specialist gear, including a drysuit, paddling mitts, and a spray skirt, making it possible to stay warm and comfortable even in freezing waters.
Kayakers out and about in Godthul, South Georgia.
Day Paddle – A One-Time Kayaking Experience
For those who want to try kayaking but aren’t ready to commit to the full program, the Day Paddle option provides a perfect introduction.
Unlike the dedicated sea kayaking program, which runs throughout the voyage, the Day Paddle is a one-time excursion available to a larger number of guests.
It’s an excellent way to experience the magic of paddling in polar waters without needing prior experience.
The activity will take place in a calm, sheltered location, ensuring that even first-time kayakers feel confident on the water.
Using stable, inflatable sit-on-top kayaks, participants are able to get out among the ice floes and wildlife in a way that simply isn’t possible from a Zodiac or the ship.
The experience is gentle, accessible, and unforgettable, offering a quiet, personal moment in the vast polar wilderness.
Sea Kayaking vs Day Paddle – Which One is Right for You?
This is a very common question we get, and it really comes down to what you want to get out of your time down in the polar regions.
If you love kayaking and want to get away from the crowds a bit, we recommend signing up for the sea kayaking program.
With this you’ll be out paddling at every possible moment, which leads to truly memorable wildlife and landscape encounters.
The downside is though that you get less time ashore (you still go to land on a lot of excursions though), don’t really take part in zodiac cruises unless the kayaking gets cancelled, and the photo opportunities are more difficult due to most people decided not to bring out their big cameras for risk of dropping them in the ocean.
The day paddle program is perfect for those who want to try to kayaking once for the experience, but would rather be part of the rest of the expedition.
In short:
If you are diehard kayaker and love unique adventures, go for the sea kayaking program.
If you just want to try kayaking in Antarctica once, but in general would prefer to focus on photography and have more time ashore and in zodiacs, go for the day paddle program.
Personally we prefer day paddle.
If you love being on the water, the sea kayaking or day paddle programs are a worthy addition to your Antarctic adventures.
Polar Snorkelling – A Unique View Beneath the Ice
Snorkelling in Antarctica, South Georgia, or the Falklands might sound extreme, but with specialised gear and expert guides, it’s an incredible way to see a side of the polar regions that few ever witness.
Equipped with a specialist dry suit, gloves, hood, and fins, guests have the chance to float among sculpted ice formations, observe marine life up close, and even spot seals swimming below the surface.
Polar snorkelling is best suited for adventurous travellers who are comfortable in cold water, but the gear provided ensures warmth and buoyancy, making it more accessible than most would expect.
The experience of floating in crystal-clear, icy waters, looking up at towering glaciers from below the surface, or coming face-to-face with curious seals is truly one-of-a-kind.
Most snorkel excursions only last between 20 and 30 minutes, meaning you’ll then get a chance to enjoy a zodiac cruise or go to shore afterwards.
We didn’t go snorkelling on this trip as it was already fully booked, but if you want to play in the water there’s always the pool?
Crew and Guide Expertise
A great expedition isn’t just defined by the ship design, amenities, or destinations. It’s the people onboard who truly make the experience unforgettable.
From the expedition leaders and Zodiac drivers to the hotel staff, restaurant servers, and crew running the ship behind the scenes, every member of the Sylvia Earle team plays a role in making each voyage smooth, exciting, and deeply rewarding.
Expedition Team – Passionate Experts Who Bring the Journey to Life
The Sylvia Earle’s expedition team is made up of highly skilled naturalists, marine biologists, historians, geologists, and polar experts who are not only incredibly knowledgeable but also genuinely passionate about what they do.
Every day they lead Zodiac excursions, landings, and onboard lectures, sharing insights that make each stop more meaningful.
Their ability to spot wildlife, explain complex ecosystems, and bring historical events to life is what transforms the trip from simply seeing the polar regions to understanding them on a deeper level.
What stands out most is their approachability and enthusiasm. There’s never a sense of formal distance between guests and guides.
Instead, the expedition team is always available for questions, stories, and casual conversations in the lounge, on deck, or at dinner.
They genuinely love what they do, and that energy is infectious. If it wasn’t for a fantastic guides that Aurora Expeditions manages to have on their team, the entire polar experience would not be nearly as excellent.
Dr Leo was wealth of knowledge as one of the expedition guides and marine biologists onboard.
Hotel and Restaurant Staff – Warm, Friendly, and Always Ready to Help
From the moment guests step onboard the hotel and restaurant staff make sure every need is met with a smile.
Service aboard the Sylvia Earle is seamless, friendly, and personalised, striking a perfect balance between professionalism and warmth.
Cabins are kept spotless, with staff working quietly in the background to ensure everything is clean, comfortable, and refreshed each day.
Restaurant servers go out of their way to remember names and dietary preferences, recommend dishes, and create a welcoming dining atmosphere, even during rough seas.
The bartenders at the Tektite and Observation Bars quickly learn guests’ favourite drinks, adding an extra touch of hospitality that makes returning from an excursion feel even more like coming home.
The small size of the ship allows for a more personal level of service, where guests aren’t just another face in the crowd.
There’s a genuine effort to create a warm, welcoming environment, and it’s evident that the staff take pride in making every voyage special.
The restaurant staff are some of the best in the industry.
Ship Crew – The Unseen Heroes Who Keep Everything Running
While much of the guest experience happens in the lounges, dining areas, and out on excursions, the Sylvia Earle’s ship crew is working tirelessly behind the scenes to ensure a safe, smooth, and efficient journey.
From the captain and bridge officers navigating through ever-changing ice conditions to the engineers and deckhands keeping the vessel running flawlessly, their expertise is what allows the expedition to unfold without a hitch.
Throughout the voyage the captain and senior officers are around, often found in the dining room for meals or giving updates from the bridge.
The sense of professionalism, combined with an obvious passion for exploration, creates an environment where guests feel both safe and part of something truly special.
The officers of the Sylvia Earle.
Room for Improvement?
The Sylvia Earle is clearly a well-designed, high-quality expedition ship, but based on our first expedition aboard, there are a few areas that have room for improvement or refinement.
In our experience having worked and travelled on multiple expedition ships across the polar regions and tropics, we found that the small number of things we found were more to do with basic operations rather than anything to do with the ship itself.
These aren’t deal-breakers, but they are aspects that could be optimised to enhance the overall experience.
The Spa and Sauna
We’ve already touched on this previously, but the spa and sauna feel like more of an afterthought on the Sylvia Earle compared to other ships we’ve been on.
The gym is absolutely fantastic, but the sauna and spa could have been better designed. Although perhaps this aspect of the cruise isn’t as big a priority as they are on other ships?
Mud Room Groups
The mud room setup is efficient, but the way the guests are called down can cause congestion.
On every other expedition vessel we’ve been on previously, guests are split up into groups, being called down in a rotating order.
On the Sylvia Earle the guests are called down by decks and which side of the ship their cabin is on.
This sounds great in theory, except the lockers in the mud room are grouped together in this same way.
The result is that you get everyone from deck 6 starboard for example in the same part of the mud room at the exact same time trying to get dressed, while the rest of the mud room is empty.
This is a simple fix and we’re sure there is a reason that it is done this way. But we’ve found the other loading methods on most ships to be more efficient.
The Marina Deck.
Expanded Rockhopper Restaurant Availability
The Rockhopper Restaurant offers an intimate, high-end dining experience, but access is limited and requires reservations.
This is definitely part of the appeal, but we discovered that there were quite a few guests who would book this restaurant every single night rather than choose to eat in the Gentoo Restaurant, which meant that on most evenings it is fully booked with the same people.
Perhaps a rotating roster for guests to be automatically booked in, with the choice to opt-out if they choose, would result in more possibilities for other guests to experience this restaurant.
Not Much Evening Entertainment
On all of the other ships we’ve worked on there is usually some form of evening entertainment on offer after dinner, whether that’s a music night, trivia, bar talks from the guides or fun games.
We found on our expedition that throughout our entire 23-day voyage there was only 3 nights of entertainment, and this was from the same guide reading chapters from his book.
Not to take anything away from that one guide – his book is amazing and he is a very funny presenter. We loved this evening talks.
But besides his three sessions, most other nights when dinner was over there was nothing for the guests to do except go to the bar.
And because there was no entertainment, most guests just went to bed instead.
Personally we would have liked to see some kind of post-dinner entertainment on most evenings, even if it was just for 20 minutes.
Another shot of the library.
Final Thoughts on the Sylvia Earle – 9/10 Expedition Ship
The Sylvia Earle delivers an exceptional expedition experience, combining cutting-edge technology, thoughtful design, and expert-led adventures to create a ship that feels purpose-built for exploration.
From the stability of the X-BOW to the efficiency of the Zodiac operations, everything is designed to maximise time in the field while ensuring comfort onboard.
The spacious cabins, high-quality dining, inviting communal areas, and well-organised expedition logistics make life onboard feel seamless, even in the most remote regions.
What truly sets this ship apart though is the crew and expedition team, whose passion and expertise bring the journey to life.
Every detail, from the knowledge shared in the Lecture Theatre to the warm service in the dining rooms, enhances the experience.
For those looking for a premium yet adventurous expedition to the polar regions, the Sylvia Earle is a standout choice, delivering unforgettable moments at the edge of the world.
What kind of cabins are available on the Sylvia Earle?
The Sylvia Earle features a variety of cabin types, including Balcony Staterooms for solo travelers, Junior Suites with private balconies, and the luxurious Captain’s Suite. Each option is designed to enhance your cruising experience.
What dining options are available on the Sylvia Earle?
The Sylvia Earle offers two main dining venues: the Gentoo Restaurant for buffet-style meals and the Rockhopper Restaurant for steakhouse dinners, both providing diverse dishes to accommodate various dietary preferences.
How does the Sylvia Earle handle zodiac operations?
The Sylvia Earle efficiently handles zodiac operations with two cranes for quick deployment and gangways on both sides for easy loading and unloading. Additionally, the marina deck accommodates Zodiacs and kayaks, enhancing operational efficiency.
What kind of activities can passengers participate in on the Sylvia Earle?
Passengers on the Sylvia Earle can participate in camping, kayaking, snorkelling, hiking, guided Zodiac tours, and educational presentations by naturalists. These activities provide a rich opportunity for exploration and learning.
What makes the Sylvia Earle a unique expedition ship?
The Sylvia Earle is unique due to its eco-friendly operations and innovative design, featuring the Ulstein X-BOW®, which allows for safer and more comfortable navigation in challenging waters. Its spacious cabins, modern amenities, and focus on immersive educational experiences make it an exceptional choice for expedition cruising.
Sylvia Earle Ship Review
This Sylvia Earle ship review gives you a full rundown on the key features and onboard experiences on this luxury vessel by Aurora Expeditions.
Planning a family vacation can be exciting, but it’s essential to find activities that will keep both kids and adults entertained. Luckily, Panama City in Panama offers a wide range of family-friendly attractions and experiences that are sure to create lasting memories.
From exploring the historic Old Town to marveling at the engineering wonders of the Panama Canal, this vibrant city has something for everyone, including the little ones.
Let’s dive into the top things to do in Panama City (Panama) with kids!
Get lost in the Old Town (Casco Viejo)
Step back in time and wander through the picturesque streets of the Old Town, also known as Casco Viejo. This UNESCO World Heritage site is filled with historic buildings, charming plazas, and beautiful cathedrals.
Take a leisurely stroll as you admire the architecture and soak in the vibrant atmosphere, stop by the Plaza de la Independencia where kids can run around and enjoy the open space and make your way to the water front.
I must mention that while the area is perfectly safe during the day, some sections might seem otherwise once the sun goes down. If you’re visiting with kids you’ll be fine if you’re near the cathedral but might want to avoid wandering further.
Don’t forget to try some delicious local street food, ice cream, or enjoy some of the fine bakeries in the area!
Take a Bike Tour Along Amador Causeway
For an active and enjoyable family adventure, rent bikes and explore the scenic Amador Causeway, one of the top Panama activities to do with kids. This four-mile stretch of road connects Panama City to three small islands in the Pacific Ocean.
Enjoy stunning views of the city skyline and the ocean as you cycle along the causeway. Kids will love the feeling of the wind in their hair and the freedom to explore this picturesque area!
We did our bike ride tour with Dameslfly Tours, which we found when strolling along Casco Viejo. Our guide Nicolas was lots of fun, and the bike tour was great as well! Lasting over two hours, it took us around Old Town, along the Amador Causeway and all the way to Avenida Balboa.
On the way back we stopped for some ceviche (included in the tour) at the fishing marina. It was delicious!
Stroll Along Avenida Balboa
Avenida Balboa is a prominent street in Panama City, Panama, known for its stunning waterfront views and vibrant atmosphere. Located along the shores of the Pacific Ocean, this bustling avenue offers a plethora of recreational activities and entertainment options.
Whether it’s taking a leisurely stroll or biking along the picturesque promenade, visitors can revel in the breathtaking ocean vistas and the lively energy of the city.
Visit the Biomuseo
Make learning fun at the Biomuseo, a unique museum dedicated to the biodiversity of Panama. Designed by renowned architect Frank Gehry, this eye-catching building is a work of art in itself. Inside, interactive exhibits captivate visitors of all ages, making it an excellent place for children to learn about the natural history and conservation efforts of Panama.
From colorful displays to educational games, the Biomuseo offers an engaging experience that combines education and entertainment.
Teo liked most the interactive representations of animals, including some that are extinct, as well as being able to touch rocks that are millions of years old and come from volcanoes.
Watch Ships at the Panama Canal
No trip to Panama City is complete without witnessing the marvel of the Panama Canal. Head to the Miraflores Locks Visitor Center, where your family can observe massive ships passing through the locks and learn about the history and significance of this engineering masterpiece.
Miraflores lock , located in Panama City, is a vital component of the famous Panama Canal. This lock is one of the three sets of locks that facilitate the transit of vessels through the canal, enabling them to traverse the elevation changes along its route. Miraflores lock features two chambers that raise or lower the ships by utilizing the force of water.
The lock operates by filling and emptying these chambers, allowing the vessels to smoothly transition between the different water levels. Its strategic position and efficient mechanisms make Miraflores lock a crucial element in facilitating international trade and maritime transportation.
With informative exhibits and a chance to see the canal in action, it’s an educational and awe-inspiring experience for kids and adults alike. Makre sure you don’t miss the 3D movie, though the information given in it is quite dated as it mentions the constructions of a new set of locks in the future…which have actually already been made and have been operative for a few years.
This said it is very well made, informative, and kids will love it! Our son Teo loved it so much that he wanted to watch it again, I was able to persuade a security guard and let us do so.
As a tip, you don’t really have to pay to see the canal and or docks. Further down the same road you take to get there you actually drive past the canal, and cross it with a bridge!
Have Fun with Monkeys on Monkey Island
Just a short boat ride away from Panama City lies Monkey Island, a sanctuary for these curious creatures. Set sail through the Gatun Lake and get ready for an adventure your family will never forget. On the island, you can witness different species of monkeys in their natural habitat, swinging from trees and playing with each other. Kids will love observing these adorable creatures up close and may even get the chance to feed them- as Teo did!
We did our tour with Barefoot Panama, a local company that has several tours to other attractions as well. The guide actually went the extra mile once the full tour was done and asked us if we’d like to have lunch at a local restauarant that he know of, and when all the group agreed we made our way there.
Remember, it’s essential to respect the wildlife and follow the instructions of the local guides to ensure the monkeys’ well-being.
Learn about Sloths at the Sloth Sanctuary
Panama is famous for its incredible biodiversity, and what better animal to learn about than the beloved sloth? Take your kids to the Sloth Sanctuary, where they can discover fascinating facts about these slow-moving creatures.
Observe sloths being rehabilitated before being released back into the wild and gain a deeper understanding of their conservation needs. This educational and heartwarming experience will surely be a highlight of your trip.
We visited the sloth sanctuary with Monkey Adventures, a local company that turned out to offer a fantastic service. The guide was very nice and the van was spotless! We also took the aerial tram right before visiting the sanctuary.
On this tram you float above the tree canopy and we got to hear a howling monkey! There’s also an observation deck with breathtaking views of the area, totall y worth making your way to the top.
Visit an Embera Tribe Village
Expand your family’s cultural horizons by visiting an Embera Tribe Village. Immerse yourselves in the rich traditions and customs of Panama’s indigenous people. Kids can participate in hands-on activities like traditional dance, crafting, and face painting, hear fascinating stories from the tribe members and gain a deeper appreciation for their way of life.
This unique cultural experience will leave a lasting impression on your entire family, and especially the younger ones!
There are several Embera villages, but there’s one just beyond the sloth sanctuary, only reachable by boat. The experience is totally worth it.
Teo felt like an explorer!
We did our tour with Barefoot Panama as well, part of the same tour in whihc we had fun with the monkeys.
Eat Local Panama Food
No family vacation is complete without indulging in the local cuisine. Panama City offers a myriad of culinary delights that will tantalize your taste buds. From traditional dishes like ropa vieja to fresh seafood and tropical fruits, there’s something to please every palate.
Ropa vieja is a flavorful and popular dish in Cuban cuisine. This traditional recipe features tender and juicy shredded beef cooked with a variety of aromatic ingredients, including bell peppers, onions, garlic, and tomatoes. The name ” ropa vieja ” literally translates to “old clothes” in Spanish, which refers to the shredded appearance of the beef resembling old and tattered fabric.
This savory dish is typically served over a bed of fluffy white rice, accompanied by sweet plantains or crispy tostones for a perfect balance of flavors. Ropa vieja is a must-try culinary delight for anyone craving a taste of authentic Cuban cuisine.
Explore local markets and food stalls, where you can discover the diverse flavors of Panama. Don’t be afraid to try something new – let your kids be adventurous and embrace the culinary journey!
Enjoy Your Hotel Pool
After a day of exploring, let your kids unwind and have some fun at your hotel’s pool. Many hotels in Panama City offer family-friendly amenities, including pools with water slides and play areas.
Take advantage of this relaxing time to bond as a family and reflect on the day’s adventures. Kick back in a lounge chair while the kids splash around, enjoying the warm weather and beautiful surroundings.
Where did we stay? We loved the Waldorf Astoria (check rates here), set in a superb location and offering pretty much anything you can think of while delivering top quality products and services.
This said, I do have to mention that what we loved most was the food. The room was certainly nice, as was the pool area and gym (I was training for an ultra trail marathon due a month after the trip), but if the food was unreal.
All the dishes were superb, but I do have to say that their version of the brownie is the best I’ve ever had anywhere (not kidding) and the buffet breakfast is one to enjoy slowly (which we couldn’t because of the tours!).
Tips for your Panama City Visit.
Use Uber better than taxis to get around. The trip will cost about a third and the cars are in better shape.
Panama is a safe city, but once the sun sets streets do get dark. Make sure you know where you are, or stay close to your hotel if traveling with kids.
There’s much more to Panama (city) than shopping. We met several couples and families that only had shopping in their plans because they thought there’s nothing else to do. Wrong!
You don’t have to pay to se the Panama Canal. Read above to get the details.
Panama Map
What Are 5 Things Panama is Known For?
Panama Canal: One of the most famous engineering marvels in the world, connecting the Atlantic and Pacific Oceans.
Biodiversity: Panama is home to a rich variety of flora and fauna, including tropical rainforests and diverse wildlife.
San Blas Islands: A stunning archipelago with pristine beaches and a unique indigenous culture of the Guna people.
Casco Viejo: The historic district of Panama City with its colonial architecture, vibrant street life, and cultural attractions.
Panama Hat: Contrary to its name, the Panama hat originated in Ecuador but gained international fame when worn by workers during the construction of the Panama Canal.
“”=””>
What Panama is Known for to Tourists?
Panama Canal: A must-see for its engineering brilliance and the Miraflores Locks Visitor Center.
Bocas del Toro: A popular destination for its beautiful beaches, water activities, and vibrant nightlife.
Boquete: Known for its cool climate, coffee plantations, and opportunities for hiking and birdwatching.
Gamboa Rainforest: A gateway to the rainforest with wildlife viewing, boat tours, and the famous Pipeline Road for birdwatching.
Pearl Islands: Known for their pristine beaches and as a retreat for celebrities.
“=””>”=””>”=””>”=””>”=””>
What Not to Miss When Visiting Panama
Panama Canal: Take a tour to understand the history and operation of this iconic waterway.Casco Viejo: Explore the historic district’s cobblestone streets, colonial architecture, and vibrant atmosphere.
Boquete: Enjoy outdoor activities like hiking, birdwatching, and exploring coffee farms.
San Blas Islands: Experience the unique Guna culture and relax on the picturesque beaches.
Bocas del Toro: Dive into water sports, explore the islands, and soak in the lively atmosphere.
“=””>”=””>”=””>”=””>
Is There a Lot to Do in Panama?
Yes, Panama offers a diverse range of activities. From exploring the natural beauty of its rainforests and beaches to cultural experiences in historic cities, there’s something for everyone.
Outdoor enthusiasts can hike, birdwatch, or indulge in water sports, while those interested in history and culture can visit museums, colonial sites, and indigenous communities.
The Panama Canal is a highlight, and the country’s strategic location provides opportunities for eco-tourism and adventure tourism. Overall, Panama has a lot to offer to visitors with varied interests.
Conclusion
Contrary to what many people think, Panama City is a treasure trove of family-friendly activities and attractions. From the enchanting Old Town to the awe-inspiring Panama Canal, this vibrant city offers a blend of history, culture, and outdoor adventures that will captivate both kids and adults.
Whether you’re exploring the charming streets of Casco Viejo or getting up close with monkeys on Monkey Island, there’s never a shortage of excitement.
So pack your bags, create lifelong memories, and embark on an unforgettable journey to Panama City with your loved ones.
“=””>”=””>”=””>”=””>
Accommodation in Panama City
Booking.com has over 100 hotels in Panama including apartments and resorts. You get free cancellation on most rooms and a best price guarantee.
Book Ground Transfers
Find the best ground transfer rates in Panama with Bookaway.com
Rental Cars in Panama
RentalCars.com is the world’s biggest car rental booking service that compares all the major brands like Hertz, Avis, and Alamo.
Tours in Panama
Get Your Guide offers small group tours and activities in Panama including tickets to the popular Panama city attractions.
If you’re anything like me, learning a new language can feel both exciting and a bit overwhelming.
That’s where FluenDay comes in. I’ve been testing it out for a few weeks, and while it’s not perfect right now, it does offer a fresh approach with its focus on real-world context.
You can dip into short video Clips, follow structured Courses, or even chat with an AI Tutor. Luckily there’s also a mix of eBooks and games to keep things interesting.
Whether you’re planning a trip, needing a new skill for work, or just want to expand your horizons, FluenDay has some useful tools to help you get there.
My FluenDay Review
Learning a new language can be a wild ride – sometimes it’s thrilling, sometimes downright confusing. So, when I came across FluenDay, I was curious to see if it could actually make the process a bit more fun and less of a chore. Spoiler alert! It’s got some cool features, but like any app, it’s not without its quirks.
FluenDay is a language learning app that covers Spanish, French, German, and English speakers. You can use it on your phone (available on Google Play and the App Store) or on the website if you prefer a bigger screen.
With a solid 4.8 rating and 42,000 reviews on Google Play, it’s clear people are liking what FluenDay has to offer. The app focuses on teaching language in context, which is a fancy way of saying you’ll learn how to speak like real people do in real-life situations – not just memorize vocabulary lists.
What’s Included in FluenDay?
When you sign up for FluenDay, you get access to a pretty impressive range of features designed to make language learning as engaging and flexible as possible. Here’s what’s included:
All Languages: No need to pick just one – your membership gives you access to all the languages FluenDay offers. Feel free to dabble in Spanish, French, German and English as much as you want.
All Courses: Progress at your own pace with bite-sized lessons that help you build up your vocabulary and grammar skills step by step.
All Movie Clips: Dive into over 3,000 clips from movies and TV shows, giving you a real-world feel for how languages are used by native speakers.
AI Tutor: Practice speaking in real-life scenarios with the AI Tutor, which gives you personalized feedback to help you improve.
All Games: Learn while having fun with mini-games that reinforce key language concepts like vocabulary and grammar.
All eBooks: Access a selection of popular classics in both text and audio formats, perfect for reading or listening at your own level.
The Features
FluenDay has four main sections: Clips, Courses, an AI Tutor, as well as eBooks and Games. I’ll break them down for you:
FluenDay – Clips
This is hands down my favorite part of FluenDay. The Clips section is packed with over 3,000 short clips from movies and TV shows, which makes learning feel more like binging Netflix than studying. The clips come with context notes, so you’re not just learning what the words mean, but also how they’re used in different situations. Plus, at the end of each lesson, there’s a quick dialogue session where you can try out what you’ve learned. It’s a pretty cool way to practice without feeling like you’re practicing.
FluenDay – Courses
The Courses are where you’ll find more traditional lessons, but they’re still pretty bite-sized and manageable. They walk you through vocabulary and grammar, and if you’re learning English, there’s an AI presenter that reads your answers back to you, which helps with pronunciation. They’ve got flashcards, quizzes, and extra exercises to reinforce what you’ve learned, but if you’re after French or Spanish, you’ll have to wait a bit longer for the AI presenter feature.
FluenDay – AI Tutor
If you’re learning English, the AI Tutor is like having your own personal language partner – minus the awkwardness of talking to a real person. It lets you practice specific dialogues and then gives you feedback on how you did, with tips on how to improve. It’s a cool idea, but right now, it’s only available for English learners. They say more languages are coming, so fingers crossed!
FluenDay – eBooks and Games
This section is where you can indulge your inner bookworm or gamer. There’s a selection of popular classics in their original language, with both text and audio formats. The built-in dictionary is handy for tricky words, and you can save words to review later. The mini-games are fun and are a nice way to reinforce what you’ve learned without feeling like you’re hitting the books.
How Much Does FluenDay Cost?
FluenDay offers a few different subscription options, so you can pick what works best for your budget and commitment level. Here’s the breakdown:
Monthly Plan: $9.99, billed every month. This is great if you’re just testing the waters, but keep in mind you’ll be paying more in the long run.
Annual Plan: Currently 50% off at $49.99, billed once a year after a 7-day free trial. This is a solid choice if you’re planning to stick with it for a while, and it’s easier on the wallet than the monthly plan.
6-Year Plan: $71.99, one-time payment for six years. This is hands down the best value if you’re in it for the long haul. You pay once, and you’re set for six years—basically locking in a super low rate.
Whether you’re committing for the short term or the long run, there’s an option that’ll fit your needs.
Can I Get a Refund?
If you change your mind after purchasing FluenDay, you’re in luck—there’s a 7-day no-questions-asked money-back guarantee for purchases made through the website. This gives you a full week to decide if FluenDay is right for you.
For in-app purchases, the process is a bit different. You’ll need to check out the help section “How do I request a refund?” for specific instructions.
And if you run into any issues or have questions, you can always reach out to their customer support team at support@fluenday.com.
Final Thoughts
Overall, FluenDay is a fun app to use, and I enjoy it as an alternative to the more traditional methods of language learning.
The Clips feature alone makes it worth checking out, in my opinion. It’s not perfect, though no app is, however I’m excited to see how it grows and what new features they roll out. If you’re looking for a fresh way to learn a language, FluenDay might just be what you need to get started.
Wanna travel to Chechnya with Against the Compass?
Join a group of like-minded travelers in our next scheduled tour in Chechnya on:
April 14th to 21st, 2026
Chechnya is a republic in the North Caucasus that forms part of the Russian Federation.
Infamous for its agitated past, few know about its stunning mountains, its warm hospitality, and that it has become one of the most modern regions in the Caucasus.
This guide will cover everything you need to know about traveling to Chechnya, including cultural etiquette, permits, how to get in, where to stay, things to do, and more.
Chechens were always a proud and fierce group of people living in the remote mountain areas of today’s South Chechnya, feared by the Tsars who conquered them in the 19th century, as well as by Stalin, and modern Russians.
During WWII, Stalin began an ethnic cleansing campaign that consisted of the mass, forced deportations of Chechens into Kazakhstan, and they weren’t allowed to return until 1957, following Stalin’s death. However, their social exclusion continued until the dissolution of the Soviet Union in 1991.
Unlike other Caucasian countries such as Georgia, Armenia or Azerbaijan, Chechnya was unable to become an independent country because it already formed part of the Russian Federation before the Soviet Union was created.
This is Grozny, one of the most surprising things to see in Chechnya
Decades of being excluded from the rest of Russia – fueled by their strong identity – led to the self-declarion of independence from Russia, resulting in the first Chechen war, from 1994 to 1996.
The war ended with Russia’s victory, although they were never able to fully control the ongoing rebellion, hence a second war began from 1999 to 2009.
These two wars saw a toll of 250,000 deaths, but after 2009 a peace agreement allowed Chechnya to enter a new era under the rule of a controversial but pragmatic leader named Kadyrov, initially a pro-independence revolutionary but later a close ally to Putin.
Kadyrov is the man chosen by Putin to control Chechnya by keeping it free from any separatist movements. In exchange, Chechnya receives big chunks of federal investment and Kadyrov can rule the republic as he sees fit, acting like almost a dictator.
This is a very brief summary of today’s Chechnya.
Chechnya was practically destroyed during the two wars but it was entirely reconstructed. When you travel there, you’ll realize that from an infrastructure perspective, Chechnya is an advanced region as per regional standards, but Chechens have never lost the strong identity that defines them.
Beautiful road in southern Chechnya
Cultural Etiquette: what to expect when you travel in Chechnya
Chechnya is a surprising destination indeed.
Despite being part of the Russian Federation since 1858, this small country is a completely different world from anywhere you might have been in Russia, or any other Caucasus country.
First of all, Chechnya is a Muslim country but, unlike in other former Soviet Muslim nations, religion plays a big role in Chechens’ daily lives.
Men can’t wear shorts
This also translates into strict rules that may affect you as a traveler. For example, wearing shorts in public is strictly forbidden, a rule you will see announced in pretty much any public space, most likely as a warning to all the Russians from Moscow who come for a visit.
No alcohol in Chechnya
Moreover, Chechnya is a near-dry country with only one or two places in Grozny (top-notch hotels) serving alcohol. This is something I wasn’t expecting to experience in a country like Russia.
A homogenous society
After visiting Chechnya, I found it easy for me to recognize Chechens in Moscow, not only because of their facial features but also because they all share a particular style.
Men trim their beards just like Kadyrov does long beards with no mustache. It was pretty intriguing to walk along the main boulevard in Grozny and notice that pretty much all Chechen men looked like Kadyrov.
Most women dress similarly as well. They all wear a long, colourful dress with long trousers underneath, without exception. The vast majority wear a hijab too.
Chechnya has managed to keep a very strong identity, which I for one find truly fascinating.
Yes, you can. Chechnya is part of the Russian Federation, therefore any traveler visiting Chechnya will need a Russian visa.
For more information, check the visa section of our travel guide to Russia.
Permits for visiting Chechnya
Do you need any special permit to travel around Chechnya?
No, you don’t, not even in the areas near the border with Georgia.
However, remember that you do need a permit to visit South Ingushetia – travelers tend to cover both republics in one trip.
By the way, Ingushetia is a different republic from Chechnya, but Ingushetians are ethnically and culturally the same as Chechens. They were simply split into 2 different republics in an attempt to divide their society.
You need a permit to visit the border areas, and you’ll also require the help of a local guide and tour operator. It takes one full month for the permit to be issued so if you’re interested in visiting that part of North Caucasus, plan accordingly.
Tours of Chechnya
Traveling around Chechnya and North Caucasus requires complicated logistics, not only in terms of transportation but also because a knowledgeable local guide will always come in handy.
At Against the Compass, we offer one expedition that combines not only Chechnya but also Ingushetia, Dagestan and North Ossetia.
Grozny – the capital of Chechnya – has an international airport (GRV). To be honest, it’s a very small airport with few international flights, but there are some flights from Istanbul, Jeddah and Dubai.
However, Grozny has several daily connections with Moscow.
Alternatively, you can also fly to the nearby airports of Makhachkala (Dagestan) and Vladikavkaz (North Ossetia).
For more information on how to book flights, read the Getting in section of our travel tips for Russia.
How to travel to Chechnya by train
Grozny has a train station with direct trains from Moscow and many other cities in Russia. Keep in mind however, that the journey from Moscow to Grozny takes more than 1 day.
I personally entered Russia from West Kazakhstan into Astrakhan, from where I took a night train to Makhachkala. From Makhachkala, I entered Chechnya by car through the mountains, but there’s a train connecting both cities as well.
For more information on how to book trains, read the Getting in section of our travel tips for Russia.
How to get around Chechnya
Chechnya isn’t great in terms of public transportation.
I mean, you can easily get to Grozny by train and travel between the different towns and cities by minibus, but it’s very difficult to visit the southern part of the republic, since that’s a barely populated area of the Caucasus.
Hitchhiking, however, should be easy, and it’s something the local people do all the time. It can be quite an adventure too, time allowing.
A 4WD is also necessary to visit the remotest and most stunning parts of Chechnya.
Road you will have to travel in South Chechnya
Best time to visit Chechnya
Generally speaking, the best time to visit Chechnya is from June to September.
That’s the best season to visit the mountains as well as for trekking.
However, since Grozny is located in the lowlands, it can get overwhelmingly hot in the summer months, and the same goes for pretty much any other city in North Caucasus.
Honestly, if you aren’t planning to do any particular hikes, I’d say that April-May and October-November are the two best times to visit Chechnya, since the weather in the cities will be pleasant.
Where to stay in Chechnya
Where to stay in Grozny
Grozny has plenty of hotels. I personally stayed at Central City Hotel Grozny, a newly built, small hotel located in the center.
If you want something a bit fancier, check out Grozny City Hotel, located in one of the tallest buildings in Chechnya.
Where to stay in other parts of Chechnya
In South Chechnya, near Itum-Kale, you can stay at Edelweiss Hotel, which is very close to the Tusheti region of Georgia.
I also stayed at Kezenoy, a mountain lake in east Chechnya. While it’s true that the lake is nothing spectacular, you’re likely to stop off here on your way from Dagestan. There’s a government-run hotel called Kezenoy-Am Hotel.
When it comes to cities in the North Caucasus, Grozny is my favorite, but only because it’s something you would never expect, not only because of its unique identity but also because some areas are more like Dubai than to anywhere else in Russia.
Besides strolling around the city center and along the main boulevard, where Chechens all hang out, I recommend taking a Yandex to Argun, the most newly reconstructed area in probably all of the Caucasus.
I recommend to spend 1 or 2 nights here in Grozny.
Grozny’s most visited mosque, one of the best places to visit in Chechnya
Day 2 – Galanchozh, Tsoy Pede and Veduchi
This was my favorite part in the whole of Chechnya, home to utterly jaw-dropping landscapes.
You will need a 4WD, however, since the roads here are really rough.
It’s actually possible to reach Veduchi – the final destination – with a normal car, but then you’ll be missing the highlights found on the road that runs parallel to the Republic of Ingushetia. Please, check the above map for reference.
At the end of the mountain road, you will come to Tsoy Pede, a Caucasus necropolis built in the 13th century, consisting of several crypts built on the top of a hill, and where you can still see human remains.
Next, I recommend heading to Veduchi, where you can stay at a decent hotel named Edelweiss.
Day 3 – Sharoi, Kezenoy-am and Khoi
From Veduchi, you can travel from valley to valley along a pretty insane mountain road that will take you directly to Sharoi, a newly reconstructed Chechen mountain village that has today been turned into an open-air museum.
To be honest, I am not a big fan of these modern, soulless reconstructed places but I must admit it’s actually impressive to see.
Mountains in South Chechnya
From Sharoi, you can also travel to the next valley along another amazing mountain road that will take you to Kezenoy, a mountain lake and popular tourist spot for Chechens.
I don’t think the lake is particularly pretty, but it’s a cool place where you can see locals hanging out and spending their day over a barbecue.
In Kezenoy, you can stay in the government-run hotel called Kezenoy-Am Hotel.
The following day, I recommend continuing onwards on your journey to Dagestan.
More information:
📢 In my Travel Resources Page you can find the list of all the sites and services I use to book hotels, tours, travel insurance and more.
All guides and articles for traveling in Russia destination
When planning a family vacation, Lima, the capital city of Peru, may not be the first destination that comes to mind. However, Lima offers a plethora of activities and attractions that cater to all age groups, including children. From exploring ancient ruins to indulging in culinary delights, Lima is a gem waiting to be discovered by families.
In this article, we will highlight the top things to do in Lima with kids, ensuring a fun-filled and memorable vacation for the whole family.
How many days is enough for Lima?
Lima boasts a rich cultural heritage and a wide range of attractions, so ideally, spending at least three to four days in the city would allow you to explore its wonders comfortably. However, if you have limited time, a two-day itinerary can still provide an enriching experience for your family.
What is Lima best known for?
Lima is best known for its historical significance, vibrant culture, and culinary scene. The city is famous for its ancient ruins, colonial architecture, and world-class gastronomy, making it a captivating destination for families seeking diverse experiences.
Can you get to Machu Picchu from Lima?
Although Lima is not directly connected to Machu Picchu, it is still possible to visit this iconic Inca citadel from Lima. Flights from Lima to Cusco, the gateway to Machu Picchu, are readily available, making it convenient to include both destinations in your family vacation.
Where Did We Stay?
We stayed at the Estelar Apartamentos Bellavista in Miraflores, and have to say it was a fantastic choice. We travel with a 7 year old and the room had plenty of space including separate sleeping and living quarters. Check rates.
Is there more to do in Cusco or Lima?
Both Cusco and Lima have their unique attractions, and the choice between the two depends on your family’s preferences. While Cusco is known for its Inca heritage and proximity to Machu Picchu, Lima offers a vibrant city life, rich cultural experiences, and culinary delights. Consider your family’s interests to decide which destination aligns best with your vacation goals.
1. Exploring Ancient Ruins: Lima’s Historical Wonders
While walking around central Lima is already a trip into time, there are some ruins smack in the middle of Lima worth visiting.
Discover the fascinating history of Lima by exploring its ancient ruins. Visit Huaca Pucllana, an archaeological site featuring well-preserved pyramids. These ruins are faily easy to reach and are easy to walk along. Teo loved being outdoors, making his way to the top of the hill, and seeing the llamas at the end of the path.
There’s also a superb restaurant on site, but it’s pricey and often full…
To delve deeper into history, explore the Museum of the Nation, where your kids can learn about Peru’s ancient civilizations through interactive exhibits.
2. Cultural Adventures: Museums and Art in Lima
Take your kids on a cultural adventure by visiting Lima’s museums and art galleries. The Larco Museum is a must-visit, offering a remarkable collection of pre-Columbian artifacts. The Children’s Museum is another great option, with engaging exhibits and interactive activities that make learning fun for kids of all ages.
3. Hidden Gems: Exploring Lima’s Neighborhoods
Venture beyond the conventional tourist spots and explore Lima’s vibrant neighborhoods. Barranco, with its colorful streets and bohemian vibe, is perfect for a family walk. Don’t forget to visit the Bridge of Sighs, an iconic spot in the district.
Barranco is one of those bohemian neighborhoods that you often find in large cities. We walked here from Miraflores, though it did take about 45 minutes.
Here you can see the Bridge of Sighs behind us, which was closed for maintenance when we visited.
Also, stroll through the historic district of Miraflores, where you’ll find beautifully preserved colonial buildings and the stunning Plaza de Armas.
Larcomar, an ocean facing shopping center, is surprisingly an also great place where to hang out, eat good food, and enjoy magnificent views of beachfront Lima- plus plenty of shopping as well.
4. Culinary Delights: Foodie Experiences in Peru
One cannot visit Lima without indulging in Peru’s exquisite cuisine. Take your kids on a culinary adventure by trying traditional dishes like ceviche, lomo saltado, and anticuchos. Plan a visit to a local market, such as Mercado Surquillo or Mercado de Magdalena, where your family can sample fresh fruits, local delicacies, and perhaps even participate in a cooking class.
Of all the dishes I tried while in Peru, I really enjoyed Aji de Gallina, as well as different versions of Ceviche and eating Choclo con queso (corn on the cob with cheese) at the simplest stalls I could find.
5. Surf’s Up: Catching Waves in Lima
Lima’s coastal location makes it an ideal place for surfing enthusiasts. Take your family to popular surfing spots in Lima, such as Miraflores or Waikiki Beach. Lessons are available for beginners, ensuring a safe and enjoyable experience for everyone. Surfing in Lima promises a memorable adventure, filled with sun, sand, and waves.
6. Outdoor Fun: Parks and Gardens for Kids
Lima boasts several parks and gardens where kids can burn off some energy and enjoy outdoor activities. Parque de la Reserva, also known as the Magic Water Circuit, offers interactive water fountains and light shows that will mesmerize your children.
Additionally, visit Parque Kennedy in Miraflores, a spacious park bustling with street performers, artists, and even friendly cats.
7. Wildlife Encounters: Discovering Lima’s Animal Life
For a unique wildlife experience, head to the Pantanos de Villa Wildlife Refuge. This protected area houses diverse bird species, turtles, and even sea lions. Take a guided tour with your family to learn about the importance of conservation and enjoy spotting various animals in their natural habitat.
Miraflores, one of Lima’s most beloved neighborhoods, offers several family-friendly attractions. Visit the Parque de la Reserva, explore the Larcomar shopping center, or enjoy a relaxing walk along the Malecon, a picturesque coastal path offering stunning views of the Pacific Ocean.
Most of the time Lima is covered by clouds, but it literally never rains. So if you’re tempted to bring your umbrella leave it at home- disaster would strike if it did rain…there’s no water sewage !
9. Amusement Park Excitement: Thrills in Lima
For a day filled with excitement and adventure, visit the Costa Verde amusement park. This family-friendly attraction offers thrilling rides, including roller coasters and a Ferris wheel, ensuring an unforgettable experience for kids and adults alike. Let your kids immerse themselves in this fun-filled park and create lasting memories.
10. Local Markets: Shopping and Souvenirs
Explore Lima’s vibrant local markets and let your kids experience the unique shopping culture. Mercado Inca offers a wide selection of Peruvian handicrafts and souvenirs, perfect for taking a piece of Peru back home. Allow your children to practice their bargaining skills while purchasing traditional items like alpaca wool textiles or colorful pottery.
11. Sports Galore: Soccer and Surfing in Lima
Engage in activities that resonate with the Peruvian culture by enjoying a soccer game at one of Lima’s stadiums. Feel the energy and passion of the local fans as you cheer for your favorite team.
If your family is more inclined towards water sports, opt for paddleboarding lessons or try your hand at stand-up paddleboarding along Lima’s coastline.
Had I not been recovering from a long lasting injury I would have definitely used the opportunity to surf in Peru again!
12. Creative Workshops: Crafts and Artistic Activities
Let your children explore their creative side by participating in workshops focused on crafts and artistic activities. Lima offers various centers, such as Creceart and Creattiva, where kids can unleash their imagination and engage in arts and crafts projects, such as painting, pottery, and even jewelry making.
13. Fun with Nature: Zoo and Botanical Garden Exploration
For a day surrounded by nature’s wonders, visit Lima’s zoo and botanical gardens. The Parque de las Leyendas zoo offers a vast collection of animals, including llamas, jaguars, and condors, making it an educational and entertaining experience for kids.
Additionally, explore the botanical gardens to learn about Peru’s diverse plant species and engage in nature trails.
14. Ocean Bliss: Exploring Palomino Islands with Family
Embark on a boat tour to the Palomino Islands, located off the coast of Lima. Witness sea lions in their natural habitat, and if you’re lucky, you might even spot penguins and dolphins- we certainly did!. This adventure promises a unique and thrilling experience for the whole family, with stunning views of the Pacific Ocean.
We did our tour with Ecocruceros, a local , well reputed company that certainly delivered.
The tours starts from the harbor at Callao, in a neighborhood that is best avoided during most of the day. Once you got past the gates to the marina all is good though, and you can roam around with ease. Plus it’s nice too!
Once you reach the meeting point you are escorted to a small boat that will take you to the larger boat, and from there it’s a one hour trip to Palomino islands. The views on the way there are amazing, and the crew is very friendly as well.
Once you get close you’ll realize that there’s horrid smell. Well, that’s from the bird poop on the rocks, as well as that of the sea lions. The water is also cold year round, but wetsuits are provided should you want one.
You’re then invited to jump off and have some fun!
I do have to say that Teo did not enjoy the experience too much, mostly because of the water temperature. Despite using a wetsuit it was too cold for him. But once on board it was all fun and games again! Plus he loved seeing the animals from a distance too.
15. Join a Hop On/ Hop off Bus Tour
If you’ve read any other city article in this blog you probably know by now that ever since we had Teo I’m a big fan of hop on / hop off bus tours. They are a great way to visit a city without the little one getting tired. Plus, you get to visit the most interesting parts of the city without having to waste time figuring out where to go and how to get there.
We joined the tour with Turibus , a local company. The tour started at Lancomar and took us around the main attractions, however because of local unrest that had recently happened a few weeks before, the bus tour was not a hop on/ hop off experience and instead offered a guided walking tour of the Plaza de Armas at the end.
We were fine with that, and so was everyone on the bus! It was a great experience that I certainly recommend to anyone looking for things to do in Lima with kids.
Closing Thoughts:
Lima offers countless opportunities for families to create unforgettable memories together. Whether you choose to explore ancient ruins, indulge in culinary delights, or experience the breathtaking coastal beauty, Lima is a destination that will captivate both children and adults alike.
Embark on a family-friendly adventure filled with culture, history, and ample opportunities for fun in Lima, Peru.
Accommodation in Lima
Booking.com has over 500 hotels in Oahu including apartments and resorts. You get free cancellation on most rooms and a best price guarantee.
Tours in Lima
Get Your Guide offers small group tours and activities in Lima including tickets to the popular Lima attractions.
As much as I love hostels, there is something nice about the luxuriousness of a hotel: the clean room, comfy bed, desk, iron, strong shower, and bottled soap for the taking (errr…I mean borrowing). They are a quiet, relaxing respite from the world.
But luxury comes at a price.
Hotels aren’t cheap and I hate spending money on a room I am only going to be in for a few hours. Often, even at my age, I would much rather stay in a hostel (private room though!), which costs less, has more social interaction, and doesn’t make you feel as removed from the destination you’re staying at. I always feel hotels are isolating, like a concrete bubble keeping you out of the place you’re visiting.
That said, the older I get, the more I use hotel points, and the more I travel for work, the more I find myself staying in hotels, especially if it’s a short trip.
I’ve spent years looking at websites trying to find the best ways to get the best rates on hotel rooms because the budget traveler in me hates spending a lot of money. Post-COVID, hotel prices have increased a lot and it seems there are fewer and fewer bargains these days.
But there are a lot of ways to actually get a good deal and stack deals on deals to lower the cost of your room.
Let me show you how.
Want to travel the world for free?
Download my free guide to points and miles and learn how to master the one thing all travel experts do to save money and get free flights and accommodation!
Enter your info below to get the guide sent to you right away:
How to Book Cheap Hotels
Here is how to find the cheapest hotel in one simple step:
First, go to Google and type in where you want to go. For example, “New York City hotels.”
That’s it. Google will pull results from all the major booking websites and tell you what site is the cheapest. You just go there and book your hotel. That’s why it’s the best booking site because, rather than searching every website individually, you can just go to Google, find which website has the cheapest rate, and book there. It saves a lot of time!
Here’s a step-by-step guide:
Click on the “View hotels” button at the bottom of the first result section to go to Google’s hotel searching hub.
Next, put in your dates and filters to narrow your search until you find a hotel you like in your price range. You’ll be able to sort by lowest price and look at the map to book by location. You can even see typical pricing trends for your dates by clicking on “what you’ll pay.”
Click on the “view prices” button for a hotel and you’ll be presented with all your booking options. Find the lowest price and head to that website. Just keep in mind that the top results are usually ads, so scroll down to make sure you aren’t missing out on any deals.
Once you’ve found the lowest price, book at that website!
But, before you actually book the room, there are a couple of other tips you need to know about to ensure you get the best price possible:
1. Contact the hotel directly
Find the hotel, call them up, and ask them to match the offer (they usually will since it saves them on commission). If they are a big global brand, the big benefit to direct bookings is that you only earn loyalty points and status when you book direct, so if you love earning points and miles, don’t book their rooms elsewhere!
2. Use points
The best way to save money on a hotel room is to not have to pay for it. Collect hotel points through branded credit cards or transferring them from a Chase, Capital One, etc., and book a free room. I save thousands upon thousands of dollars a year doing this. Here are my favorite hotel cards to get you started.
3. Use discount rates like AAA or AARP
If you are part of the AARP or AAA you can get special rates that are cheaper. Fun fact: Anyone can join the AARP. I’m a member. They have amazing travel benefits (including deals on hotels and British Airways flights). It’s well worth the membership.
If the lowest rate is through a major booking site like Booking.com, Expedia, or Hotels.com, go through Mr. Rebates or Rakuten. By using their links, you’ll get 1–10% back. It’s a little extra savings that can add up over time. I never do any online shopping without going to these sites (they have deals for everything).
5. Book a mystery deal
Both Priceline and Hotwire offer cheaper rates on hotel bookings where you don’t get the full reservation details up front. On Hotwire’s Hot Rates and Priceline’s Express Deals, you’ll see the general neighborhood as well as star rating of the property and amenities offered, just not the exact hotel itself. With Priceline’s Pricebreakers deals, you’ll be guaranteed one of three hotels that they group together (you just won’t know which one until you book). You can save 30–60% off with these deals if you can tolerate a bit of the unknown!
6. Sign up for Booking.com’s loyalty program
Booking.com offers members 10–20% off bookings. They definitely helped a lot. Before you sign up for their loyalty programs before you book with them!
7. Get discounted gift cards
You can book major hotel chains with hotel gift cards. Check out a website like Giftcardgranny.com for discounted gift cards and use it to book your hotel. (Gift card purchases also count toward point earnings and status.)
8. Buy someone else’s reservation with Roomer
Often people can’t go on a trip and can’t cancel the reservation, so rather than lose the money, hotels put these rooms on Roomer, where they sell it at a discount to earn some money back. I’ve never used this website, but I’ve heard good things about it.
***
Hotel pricing is a lot more set than airline pricing and tends to fluctuate less. I wouldn’t spend hours searching hotel websites or days tracking prices like people do with airline prices. I’d spend, at the most, 30 minutes on booking a hotel.
Just follow the steps above to get a cheap hotel by using my favorite (and what have been shown to be the best) hotel booking websites listed here so you get a good deal and enjoy your trip quicker.
And if you find yourself staying in a lot of hotels, it might be worth looking into getting a hotel credit card so that you can start earning points towards free stays (free is always better than cheap)!
Stop paying full price for travel!
Download my free guide to points and miles and learn how to use points and miles for free travel! It’s how all the pros travel so much! In this guide, I’ll show you:
How to Pick a Credit Card
How to Earn Up to 10x Miles on Your Spending
How to Redeem Your Points
And a Ton of Other Money Saving Tips!
Book Your Trip: Logistical Tips and Tricks
Book Your Flight Find a cheap flight by using Skyscanner. It’s my favorite search engine because it searches websites and airlines around the globe so you always know no stone is being left unturned.
Book Your Accommodation You can book your hostel with Hostelworld. If you want to stay somewhere other than a hostel, use Booking.com as it consistently returns the cheapest rates for guesthouses and hotels.
Don’t Forget Travel Insurance Travel insurance will protect you against illness, injury, theft, and cancellations. It’s comprehensive protection in case anything goes wrong. I never go on a trip without it as I’ve had to use it many times in the past. My favorite companies that offer the best service and value are:
Want to Travel for Free? Travel credit cards allow you to earn points that can be redeemed for free flights and accommodation — all without any extra spending. Check out my guide to picking the right card and my current favorites to get started and see the latest best deals.
Need a Rental Car? Discover Cars is a budget-friendly international car rental website. No matter where you’re headed, they’ll be able to find the best — and cheapest — rental for your trip!
Need Help Finding Activities for Your Trip? Get Your Guide is a huge online marketplace where you can find cool walking tours, fun excursions, skip-the-line tickets, private guides, and more.
Ready to Book Your Trip? Check out my resource page for the best companies to use when you travel. I list all the ones I use when I travel. They are the best in class and you can’t go wrong using them on your trip.
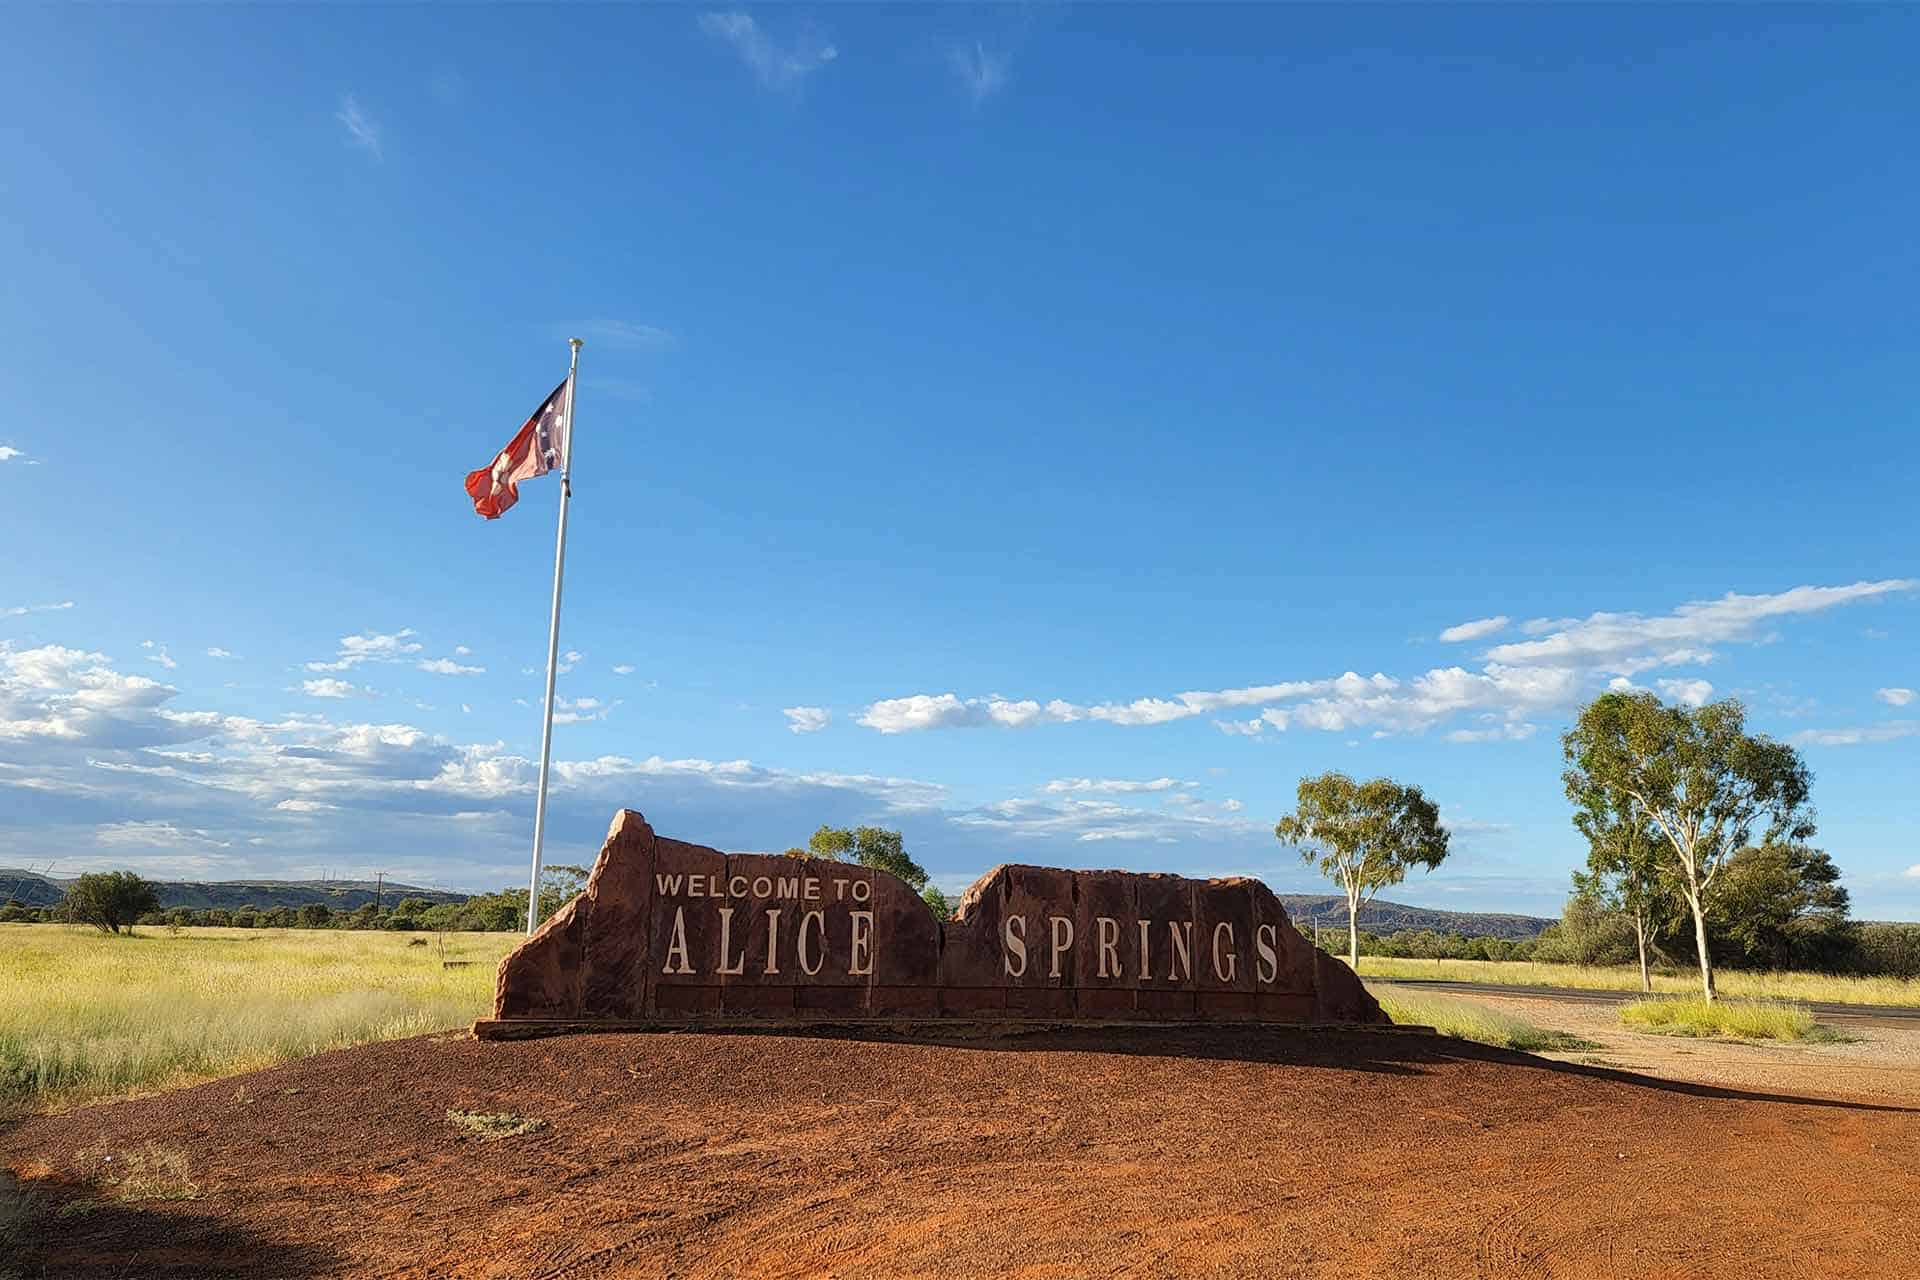


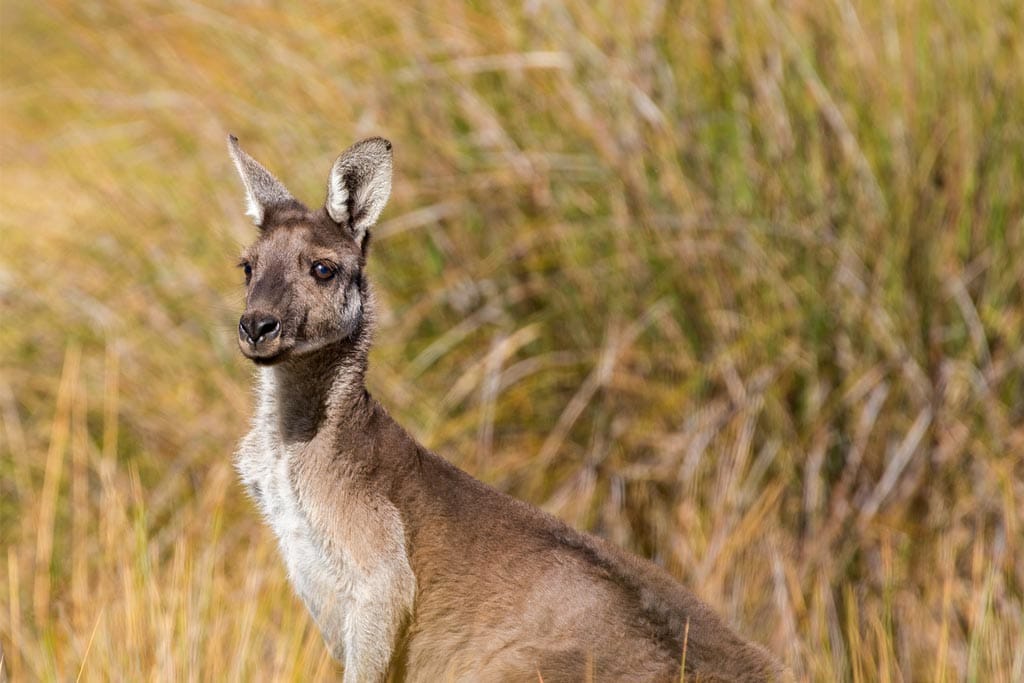

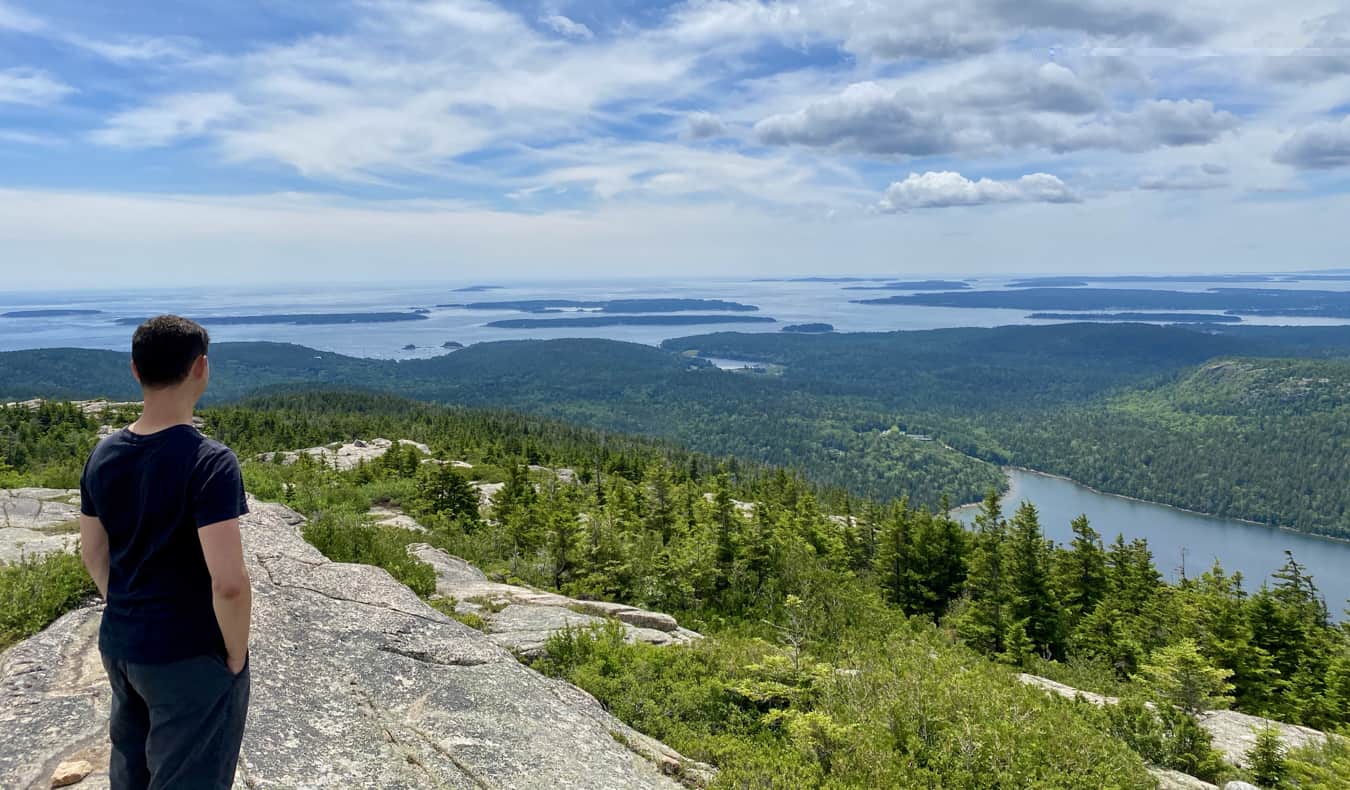

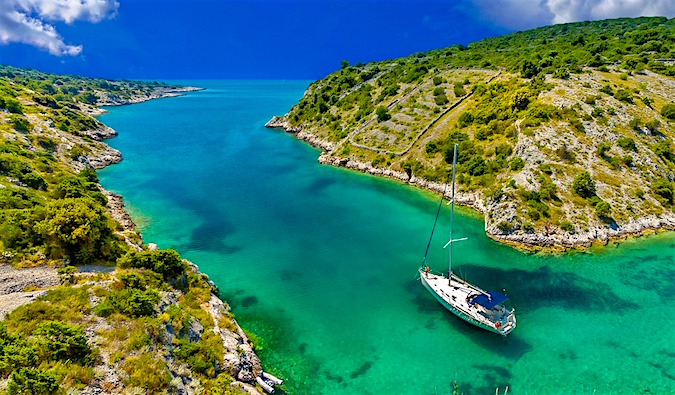


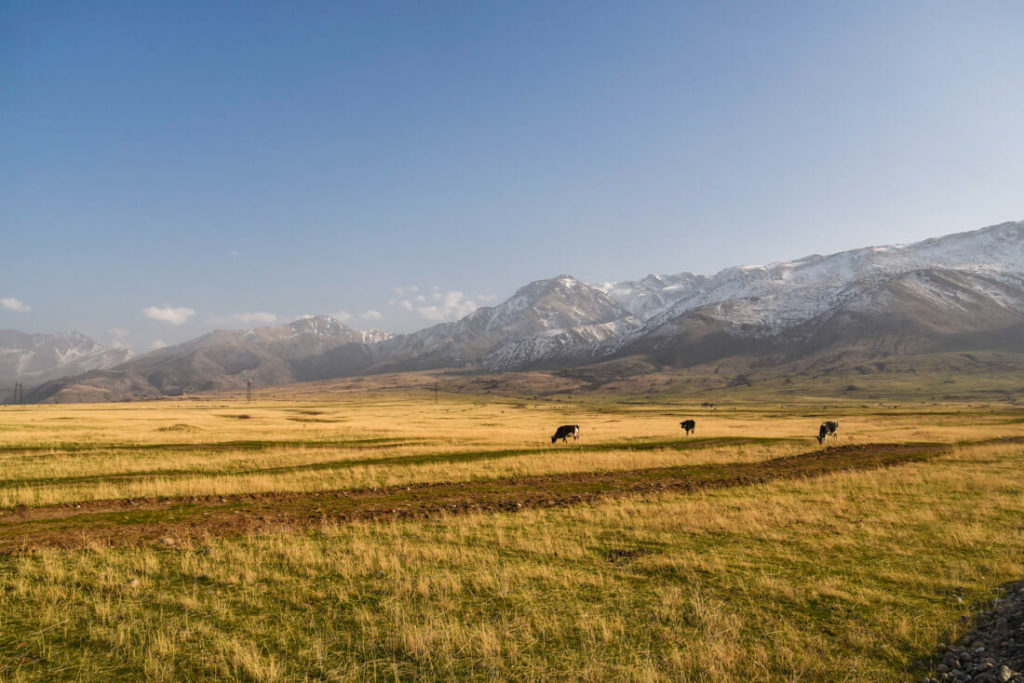

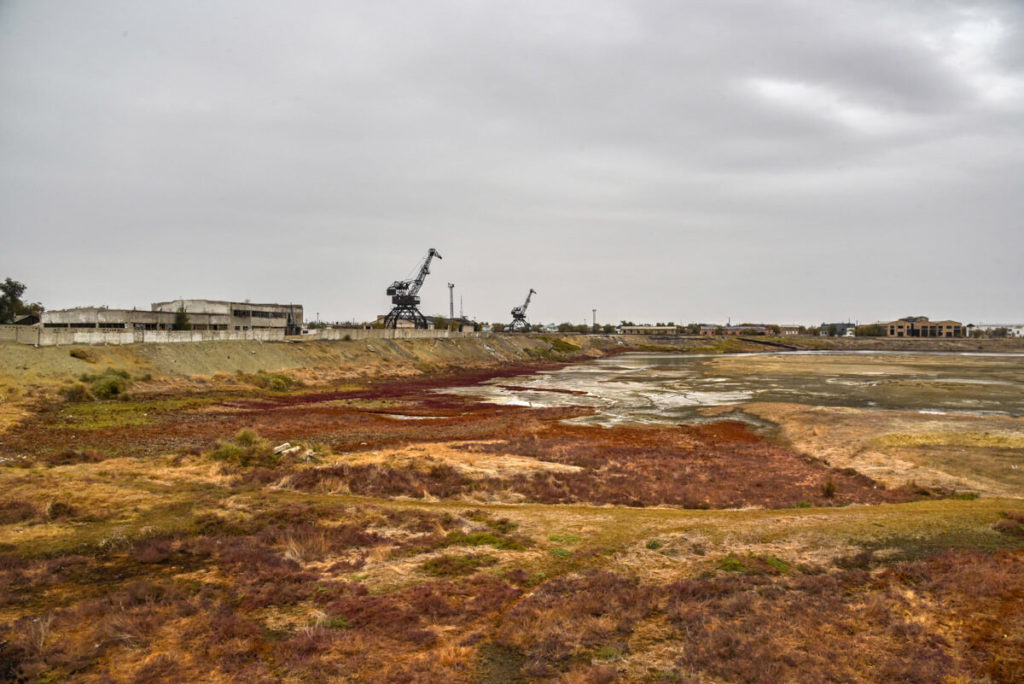
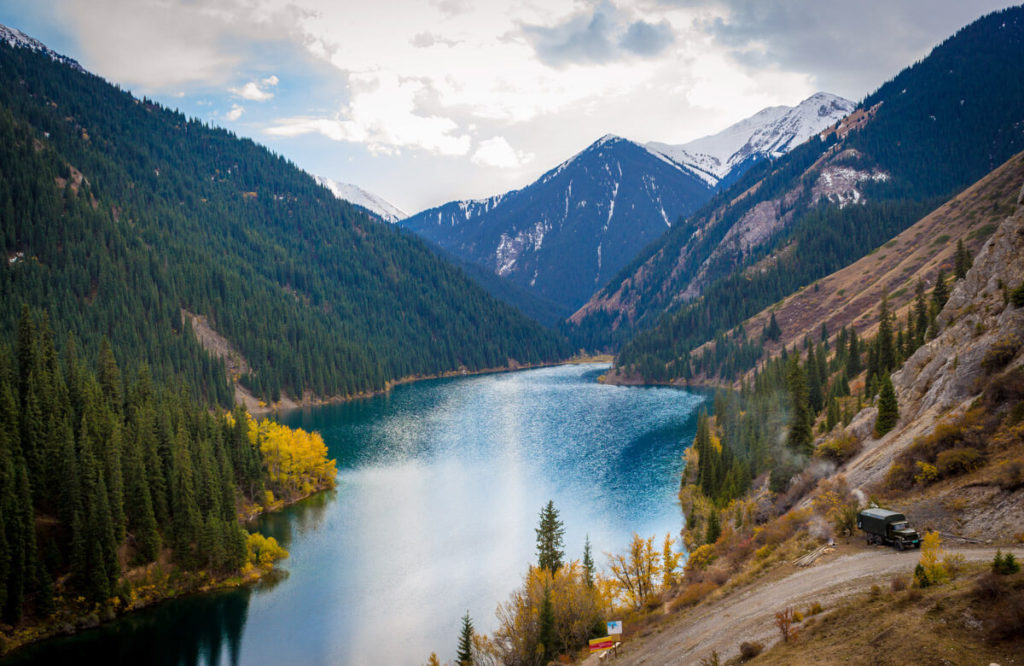
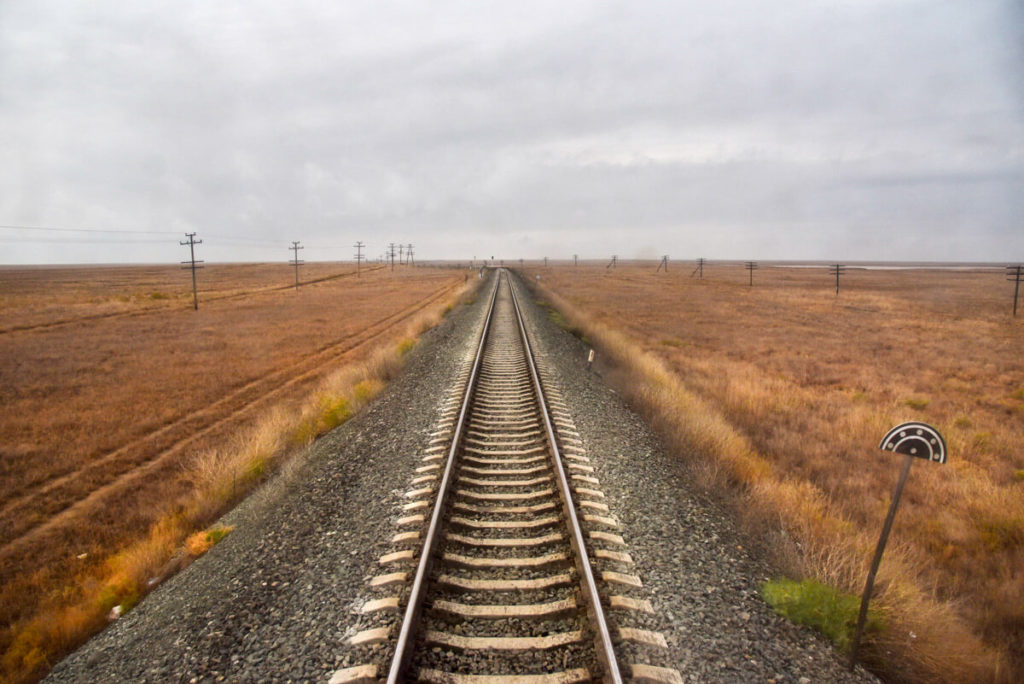
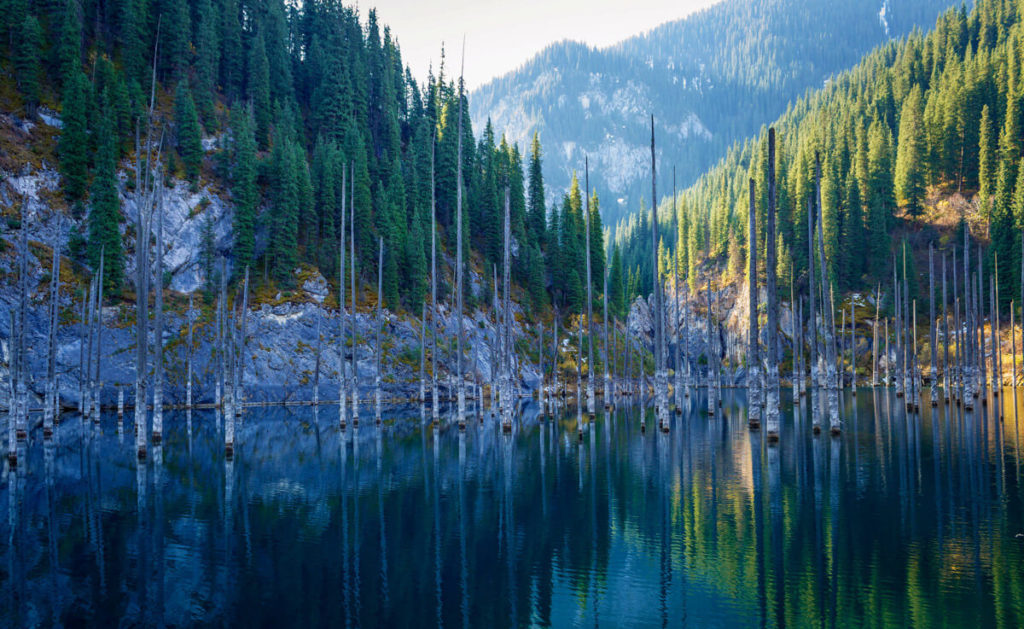
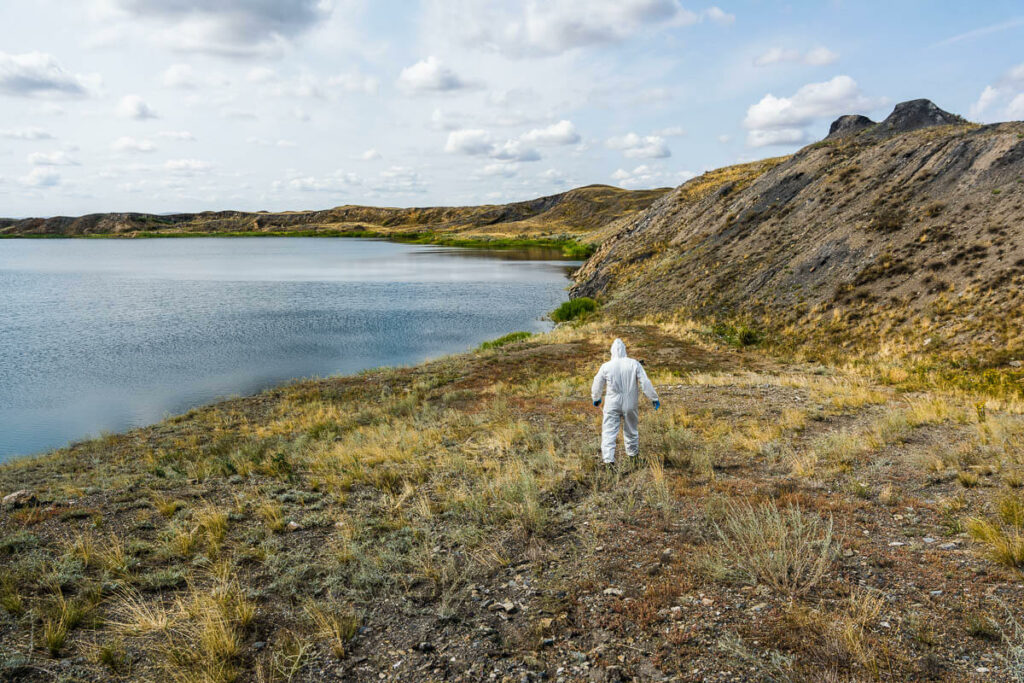

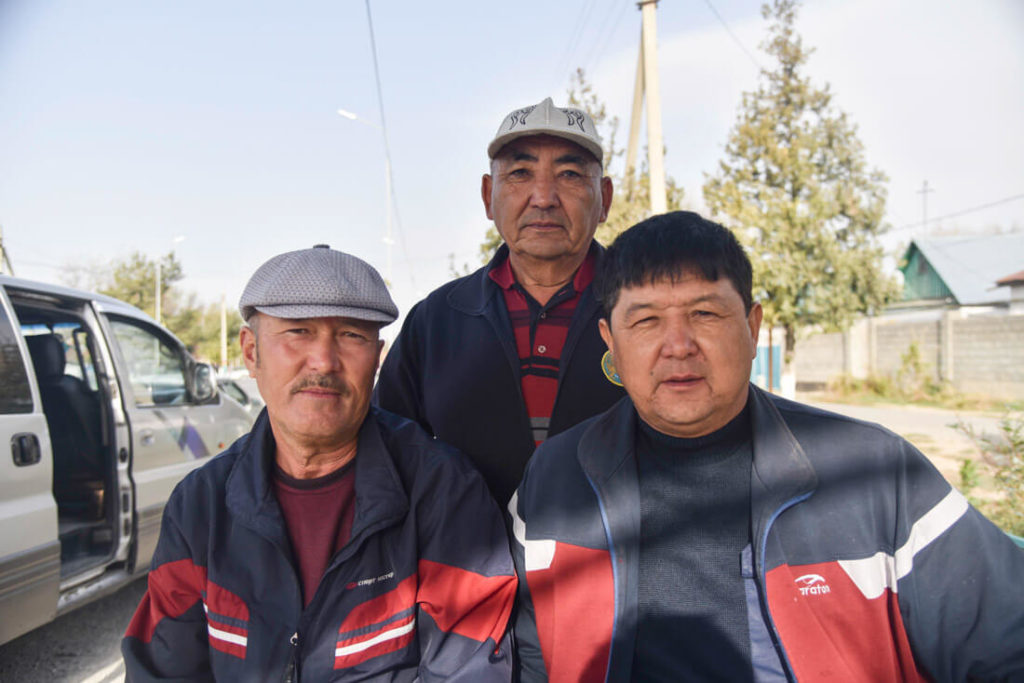
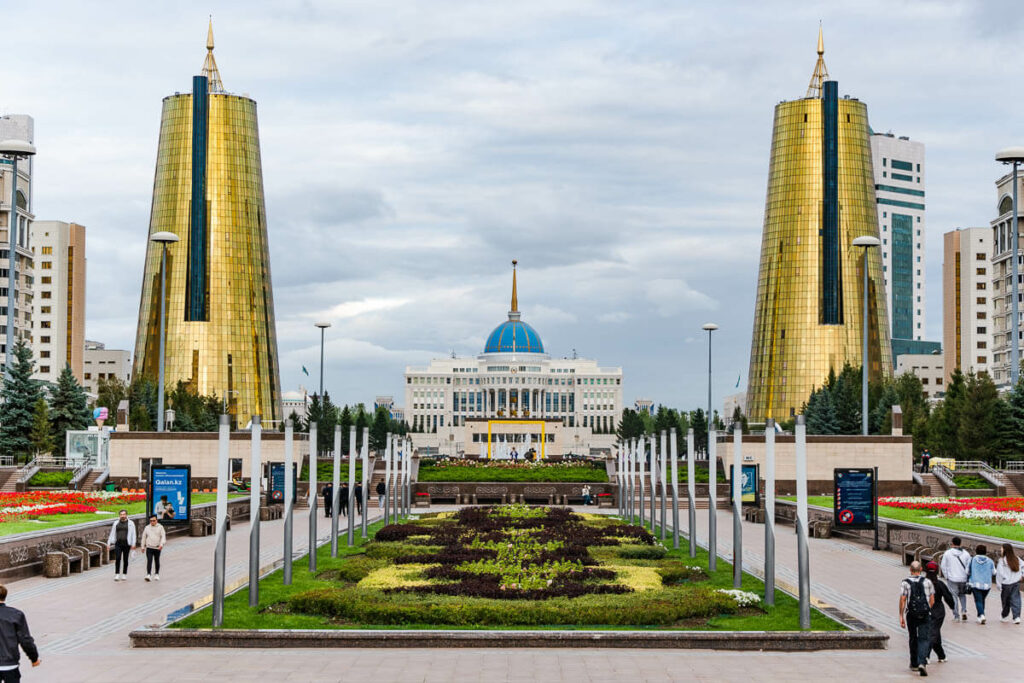
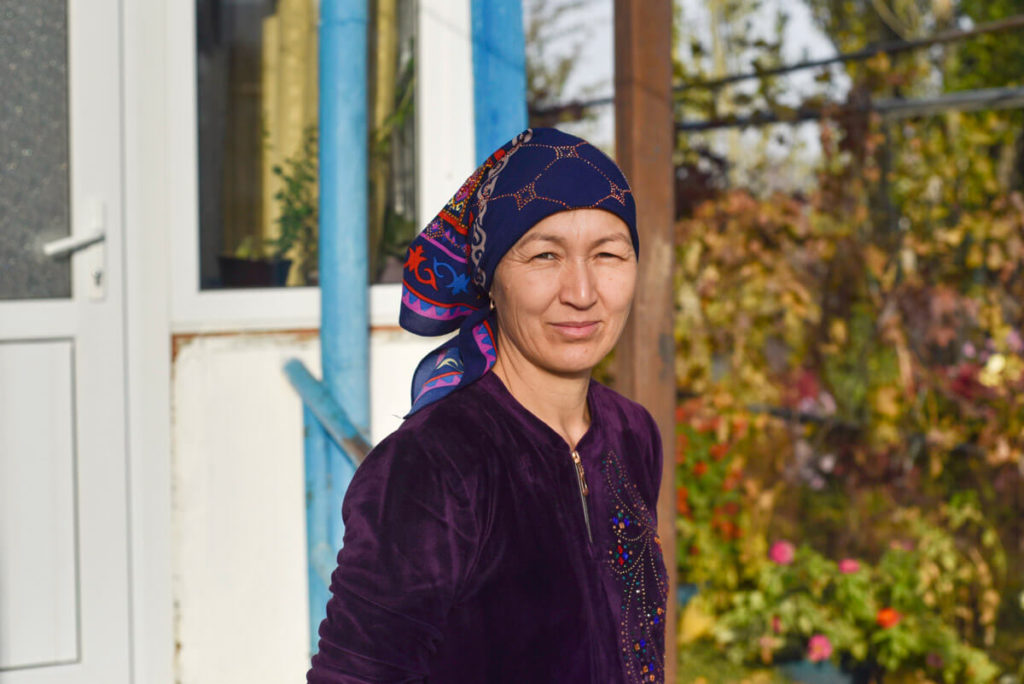
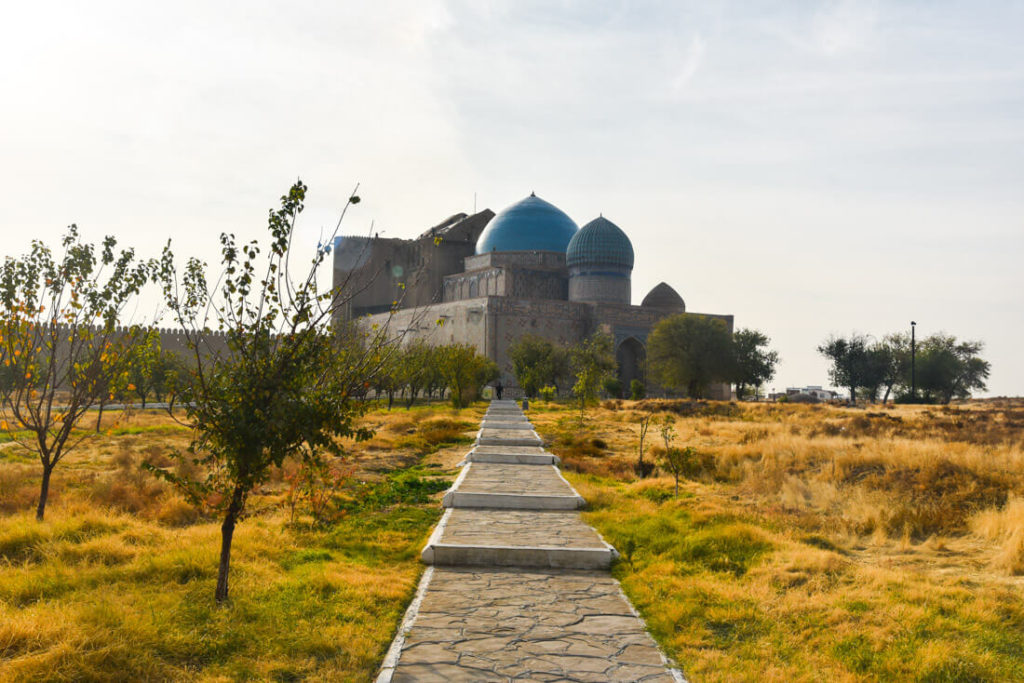
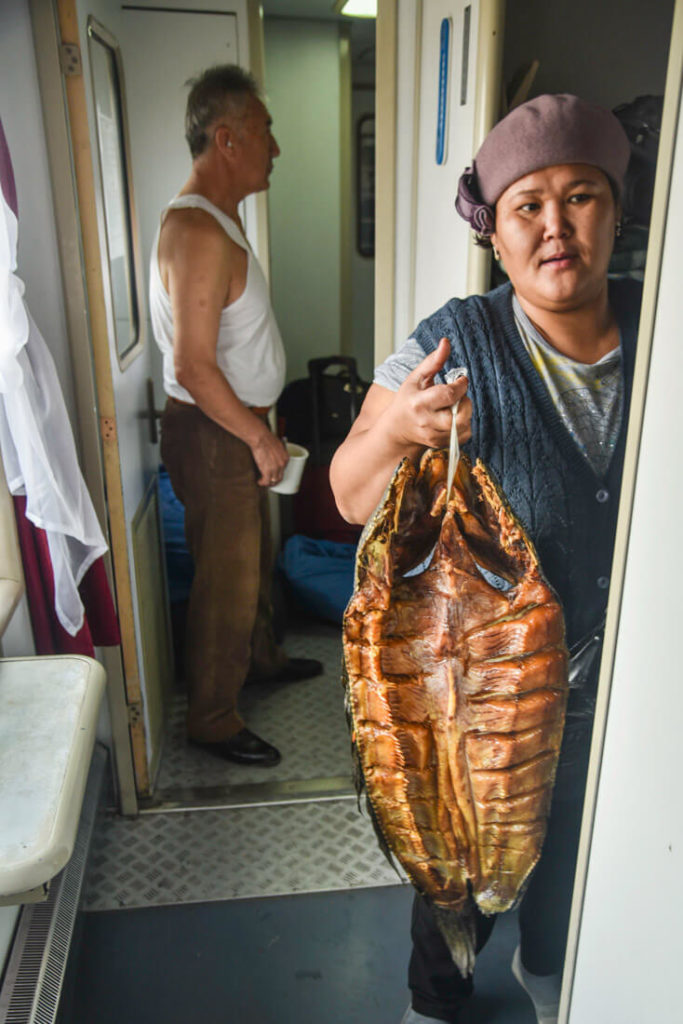


![Aurora Expeditions’ Sylvia Earle Ship Review [2025]](https://farasar.ir/wp-content/uploads/2025/04/Sylvia-Earle-Ship-Review-Aurora-Expeditions-Tour-Feature-Image.jpg)