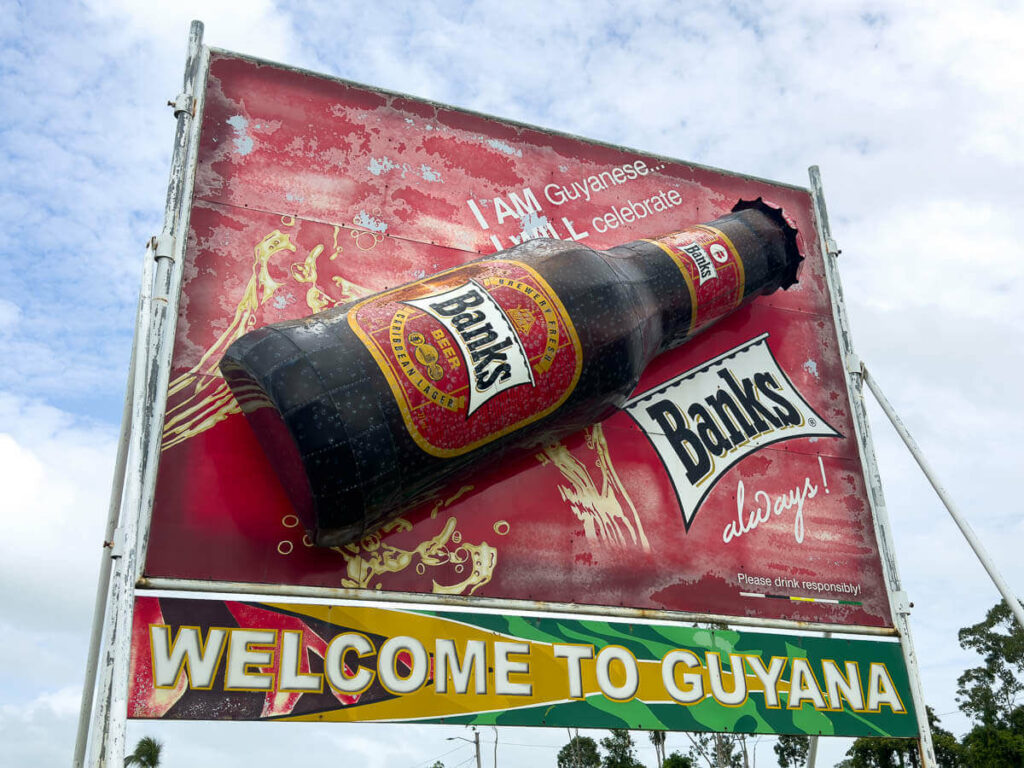
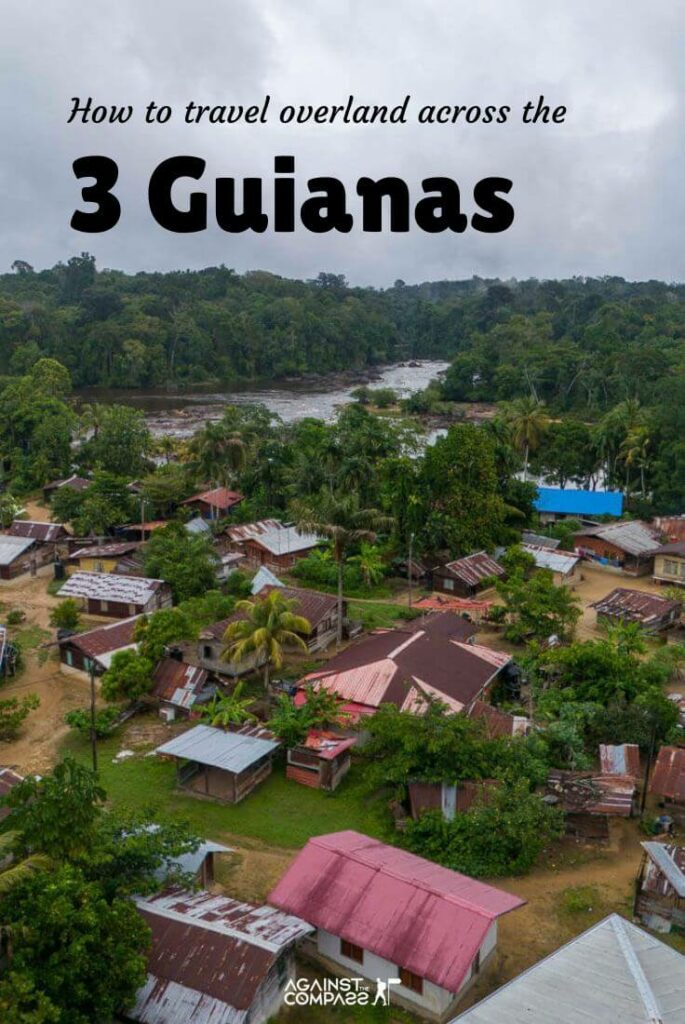
Guyana, Suriname and French Guiana, popularly known as ‘’the 3 Guianas’’, are three countries located on the eastern shoulder of South America – and probably the least visited countries in the all the Americas.
Whether you are overlanding across Latin America or just traveling here for a few weeks, it’s easy to combine the 3 countries in one single trip.
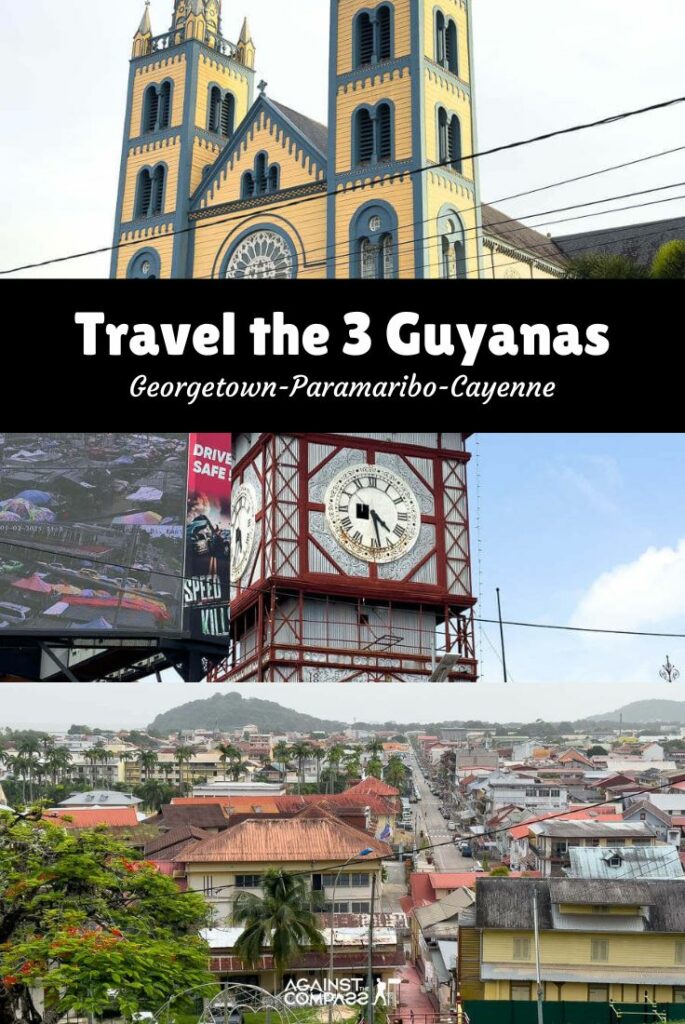
This guide will show you how to cross the 3 Guianas (Guyana-Suriname-French Guiana) overland, from Georgetown to Cayenne.
In this Guyana travel guide, you will find:
our recommended travel insurance for Guyana
With its Backpacker plan, IATI Insurance is the best insurance for any kind of adventurous destination, like Guyana.
Introduction to travel in the Guyanas: Why are they called the 3 Guianas?
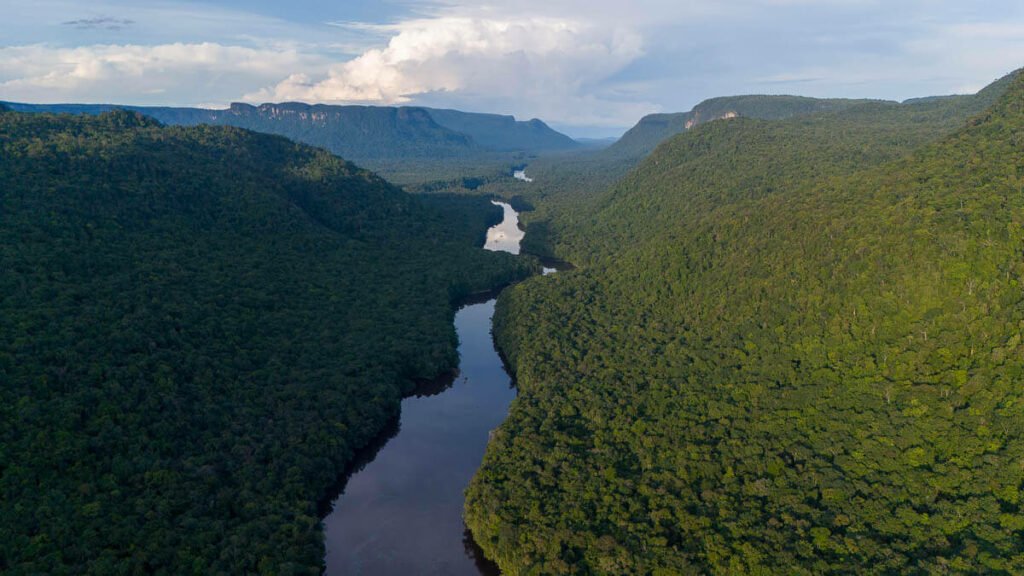
The Guyana is a geographical area comprised of the Guiana Shield.
Politically-speaking, this area today refers to Guyana, Suriname and French Guiana but, theoretically, it also includes the Guayana region in eastern Venezuela and Amapá state in Brazil.
In fact, during colonial times, Venezuelan Guayana was referred to as Spanish Guyana, while Amapá state was Portuguese Guyana.
Similarly, Guyana (the country) was known as British Guyana, and Suriname as Dutch Guyana.
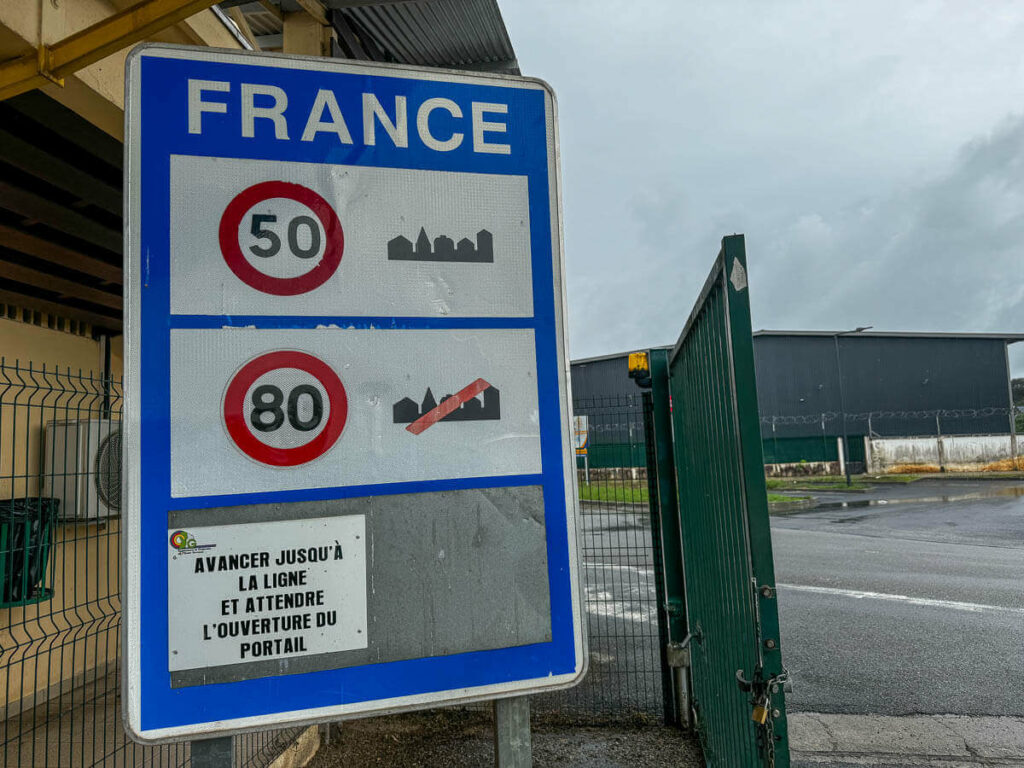
French Guiana never got its independence and today, this tiny country is an overseas department and region of France, and as such is part of the European Union.
The Guyanas is mostly dense forest, photo taken in South Guyana (British)
How to get to the 3 Guianas
Where to start from, Guyana or French Guiana?
From a logistical perspective, it really doesn’t make any difference you should start from wherever is more convenient for your kind of trip.
I personally started from Georgetown (Guyana), and the only advantage I can think of is that I liked ending my trip in Cayenne (French Guiana), where I found pretty amazing restaurants serving decent French food and wine, something which is hard to find in the other 2 Guianas.
How to travel to the 3 Guianas by land
Traveling to Guyana by land
From Venezuela: There’s no official border between the two countries, not even roads, just thick jungle.
From Brazil: The border is open at Lethem, easily reached by public transportation from Boa Vista. If you are traveling in Venezuela, you should get yourself to the southern city of Santa Elena de Uairén – there are direct buses from Caracas – and then cross into Brazil to Boa Vista.
The journey from Lethem to Georgetown is a very long one, over 500km of mainly unpaved road including a river crossing by ferry, and it’s difficult to do it in one go, so do stay somewhere in between, like the area of Rupunini or Iwokrama.
Traveling to Suriname by land
Suriname has a border with Brazil but there aren’t any roads, so you can only get in from either Guyana or French Guiana.
Traveling to French Guiana by land
Macapá, a city that lies on the Amazon delta, is the main transportation hub to Saint-Georges, the border town from this part of French Guiana.
How to travel to the 3 Guianas by flight
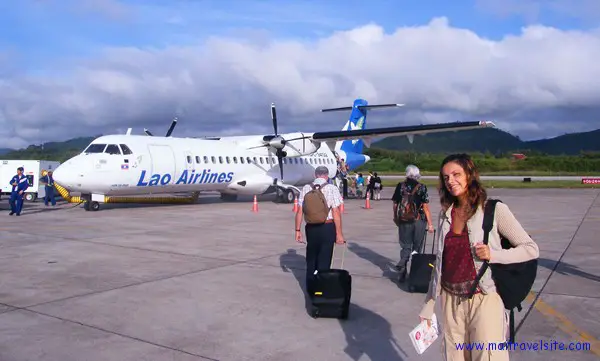
Before getting into the Guianas, I was traveling in Trinidad and Tobago for a couple of days, and from there I flew into Georgetown.
From Port of Spain (Trinidad and Tobago) there are inexpensive daily flights to Georgetown, meaning that adding Trinidad and Tobago onto your 3 Guianas adventure is quite feasible, especially because from a cultural perspective, they are similar.
Traveling to Georgetown by flight
Georgetown has two international airports – Eugene F. Correia International Airport (OGL) and Cheddi Jagan International Airport (CJIA).
Besides Port of Spain (POS), common connections are Panama (PTY), Miami (MIA), New York City (JFK) and Bridgetown, Barbados (BGI).
Traveling to Cayenne by flight
Besides a daily flight to Paris (CDG) with Air France, the International Airport of Cayenne (CAY) has barely any connections, only to the French Caribbean islands of Martinique and Guadeloupe.
How to travel the 3 Guianas overland: Georgetown-Paramaribo-Cayenne
our recommended travel insurance for Guyana
With its Backpacker plan, IATI Insurance is the best insurance for any kind of adventurous destination, like Guyana.
The route Georgetown-Paramaribo-Cayenne
The distance between Georgetown and Paramaribo is 840 km.
Remember that the countries are not connected by road, and are separated by a river with no bridge, meaning you can only cross by boat.
How to get from Georgetown to Paramaribo (Guyana to Suriname)
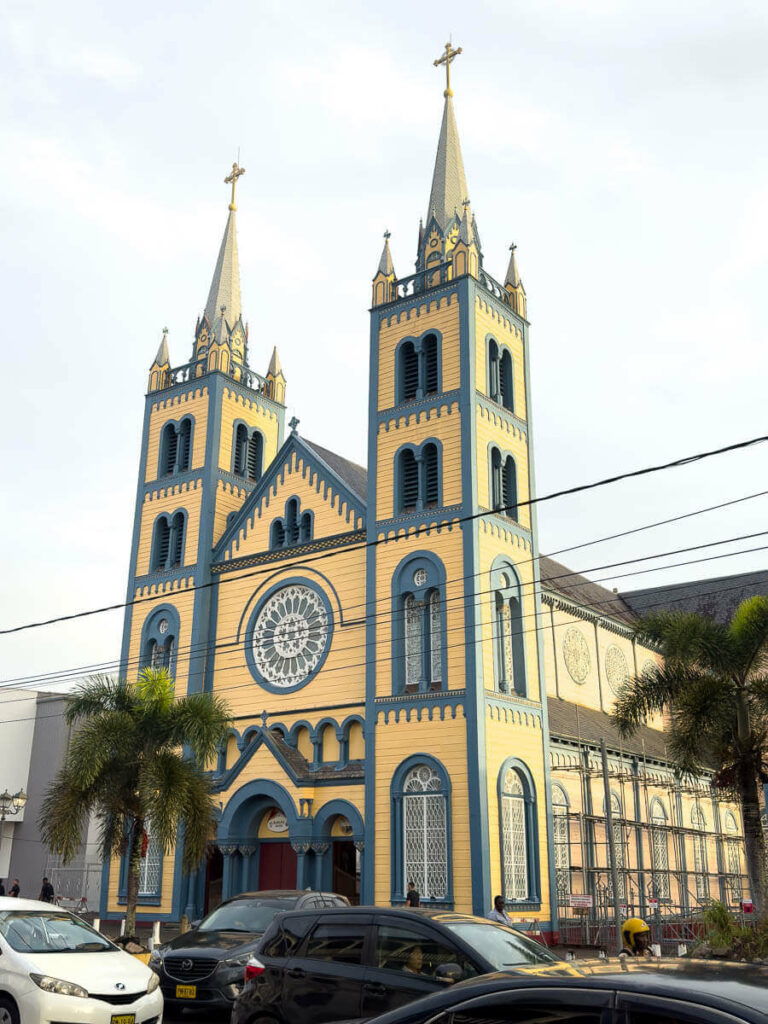
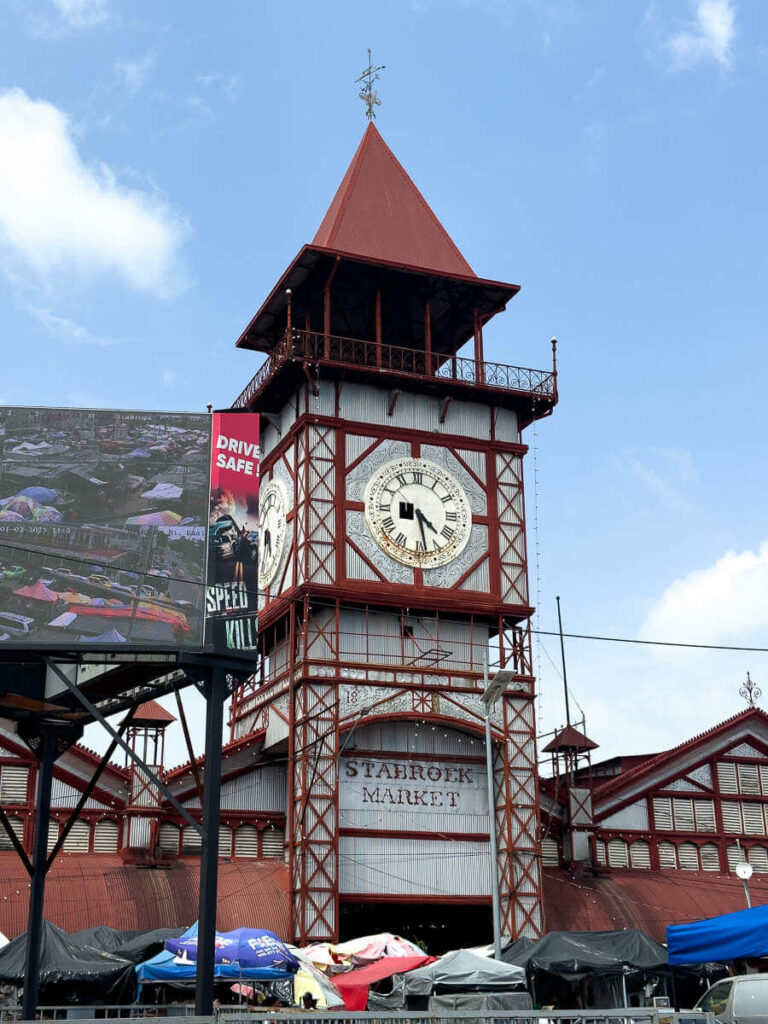
The main cathedral in ParamariboMain market in Georgetown
Here are the steps you need to follow to travel from Guyana to Suriname by land.
Step 1: Get your Suriname e-visa and complete the online immigration form
Suriname is the only country in the Guianas that requires a visa.
The portal recommends applying 72 hours in advance, but I applied the day before and got mine right there and then.
After securing your visa, you need to fill out the following online form and show the respective QR code upon arrival in Suriname.
A yellow fever certificate is also an entry requirement for Suriname
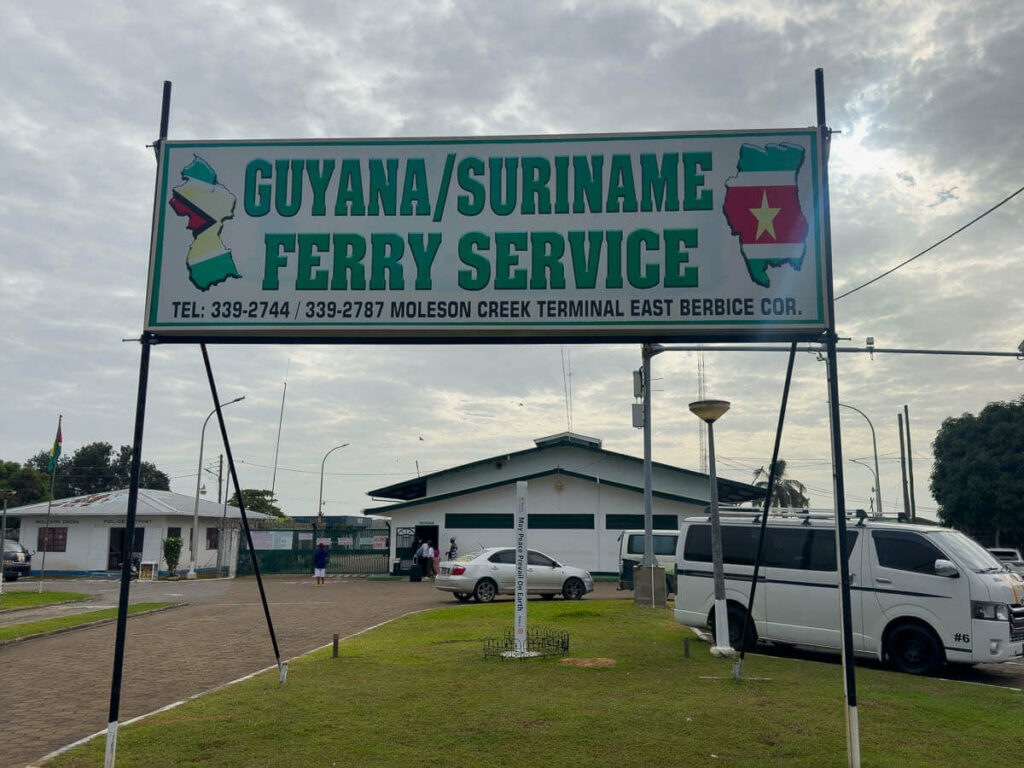
Step 2: Georgetown to Molson Creek
Molson Creek is the border town with Suriname, where you need to catch the ferry.
The journey takes 3 to 4 hours, depending on the type of vehicle used.
You have two options:
1) Booking a shared taxi in advance
This has the added benefit that they will pick you up from your hotel. A second shared taxi will be waiting for you across the border to take you to Paramaribo.
For this, you should book a couple of days in advance to secure your spot.
Pick-up is between 4 am and 5 am and the journey takes about 3 hours. It costs 50 USD, including the second leg of the journey, from the border to Paramaribo.
Note that the ferry ticket isn’t included in the price.
I can recommend a man named Rudolf, a very easy-going, kind local guy from Georgetown. You can message him on WhatsApp: +592 641 6010
2) Going by local bus
The advantage of going by bus isn’t really the price difference but personally, I prefer going by public transportation, as it’s usually a great way to meet locals. Option 1 is just too easy.
Important: there’s only one daily ferry crossing the river, so if you want to catch it, you’ll have to be at the station extra early, no later than 4 or 5 am.
The problem, however, is that the minivans depart from Stabroek market, one of the sketchiest areas in the city, and you’ll have to be there when it’s still dark.
Georgetown is well-known for its violent crime so, if possible, try to get there by taxi from your hotel don’t walk alone around this area!
Alternatively, you could just show up in the middle of the day, and spend the night at the border town.
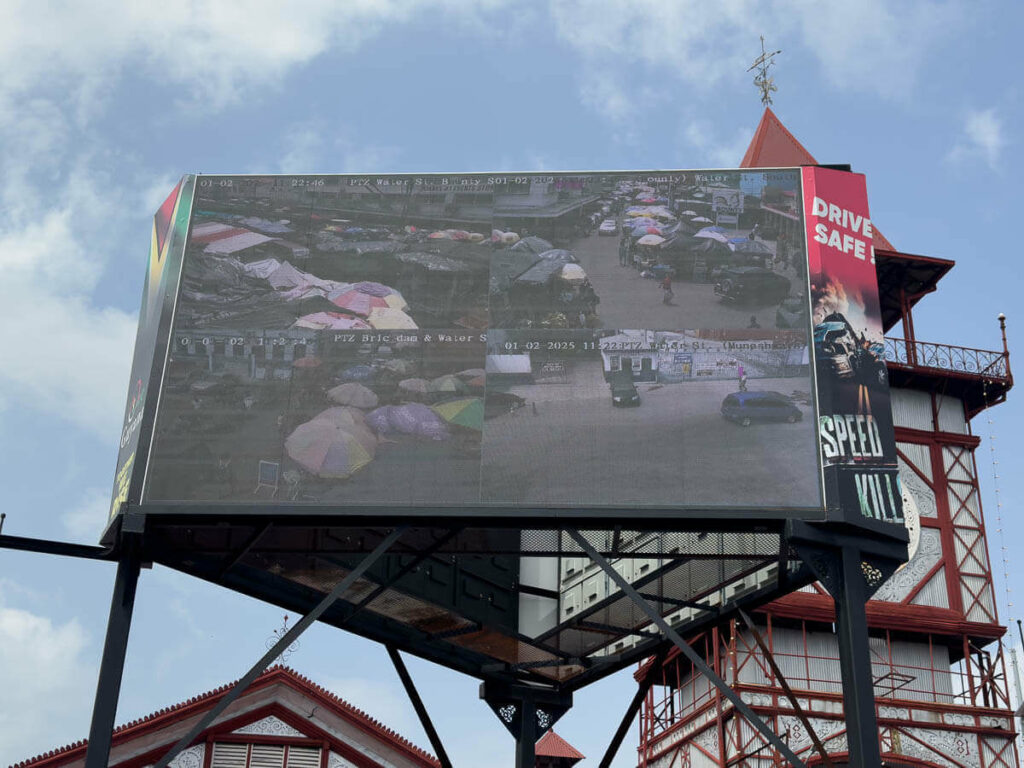
Due to all the safety issues in Georgetown, Stabroek market in Georgetown features a massive surveillance screen
Step 3: Immigration and ferry crossing
In Molson Creek, you’ll need to get to the ferry terminal, where you’ll go through immigration and purchase your ferry ticket, costing 20 USD.
In my experience, the border was quite busy, but the whole process didn’t take more than 25 minutes.
Guyana / Suriname border
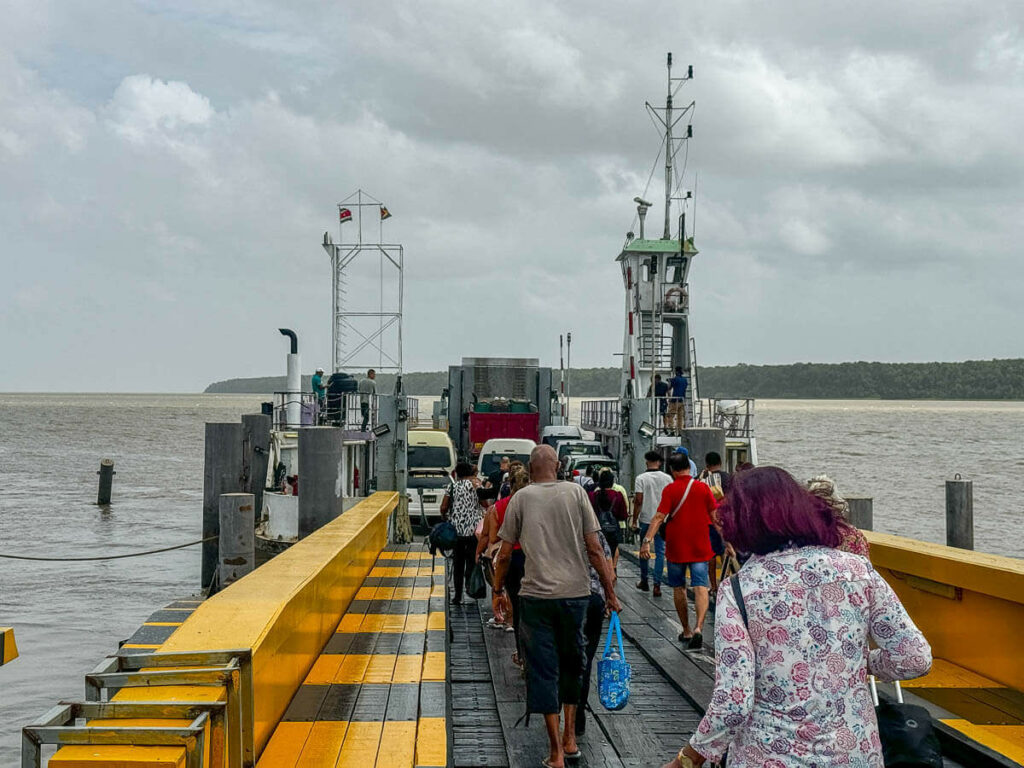
After getting your passport stamped, all you have to do is wait for the ferry. Apparently it departs at any time between 9:30 am and 1 pm. In my case, it departed at 11 am.
The journey by ferry takes 1 hour 30 minutes, and it’s incredibly slow.
The ferry that takes you from Guyana to Suriname
Step 4: Suriname immigration and South Drain to Paramaribo
As soon as you cross the river, get off the boat quickly to skip the immigration line.
On leaving customs, you’ll be approached by several shared-taxi drivers looking for passengers to Paramaribo.
The journey shouldn’t cost more than 20-25 USD.
From the border to Paramaribo takes another 3 to 4 hours.
How to get from Paramaribo to Cayenne (Suriname to French Guiana)
Here are the steps you need to follow for overland travel from Suriname to French Guiana.
Step 1: Complete your online immigration form
Similarly to what you did when entering Suriname, you will also need to fill out the same online form to exit the country. Here’s the link.
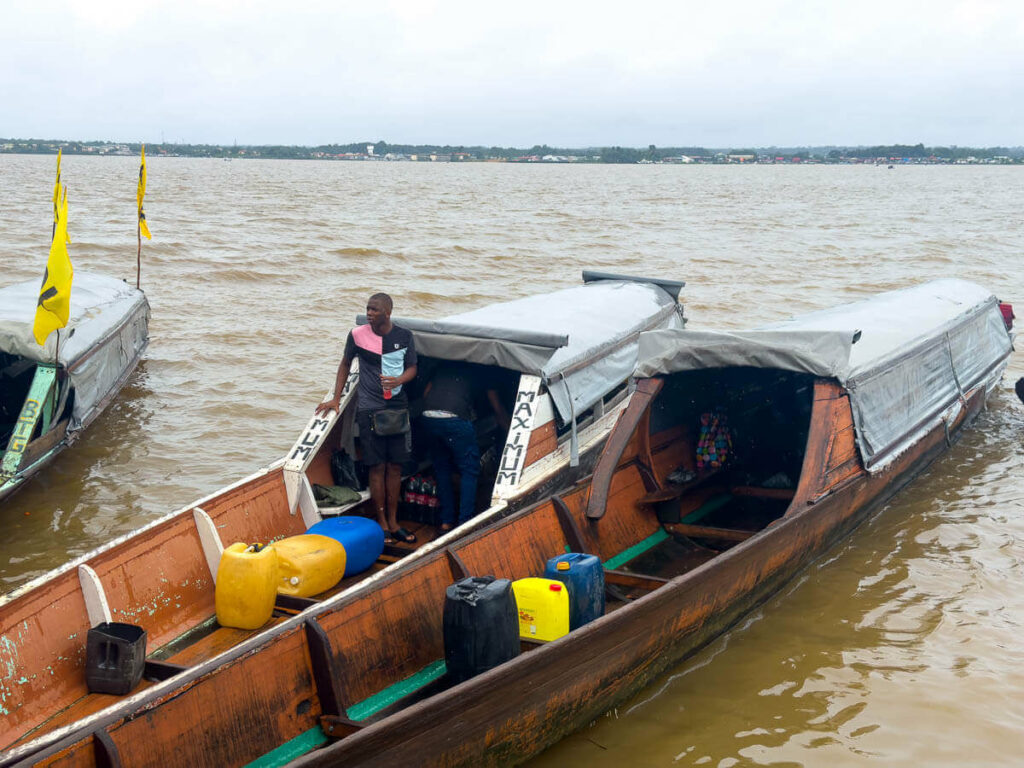
Step 2: Paramaribo to Albina
To travel to French Guiana, you can easily take a local shared taxi to the border town of Albina.
The journey takes 2 hours and costs 20 USD. Too easy…
Step 3: Look for the actual customs
The boats that take you to French Guyana, actual European Union
This could prove confusing for some.
The local shared taxi will drop you at a very busy spot by the river banks, an area packed with small boats that take you across the river.
These boats take people into French Guiana illegally, but I was never able to understand why there isn’t any control over it.
While you are sure to be approached by some of their captains, remember that first, you’ll need to get your exit stamp at the actual customs, located 500 meters away from where you probably are. Right here.
After obtaining your exit stamp, it doesn’t matter whether you take the official boat or go back to the ‘’illegal’’ port.
In fact, the guy who stamped my passport encouraged me to take one of the illegal boats, since it’s way faster, but he told me to make sure I go through French immigration.
I went back to my initial location and, when I got on one of the boats, the guy said: Do you want to be dropped off at the French customs?
I was the only person who actually got off at the customs, the rest entered French Guiana somewhere else.
This is what you find upon arriving in French Guyana
Step 4: Saint-Laurent-du-Maroni to Cayenne
The French have invested very little in their South American colony/enclave, especially when it comes to public transportation.
Moreover, this is a rarely-transited border crossing, so the chances of not seeing any drivers at all are pretty high.
You have 2 options:
Walk to the center of Saint-Laurent-du-Maroni and take the 1 pm bus to Cayenne. There are 2 daily buses, one at 6 am and another at 1 pm.
At the customs, you’ll see a few boat owners. If you can’t see any taxi, ask them to call a shared taxi for you.
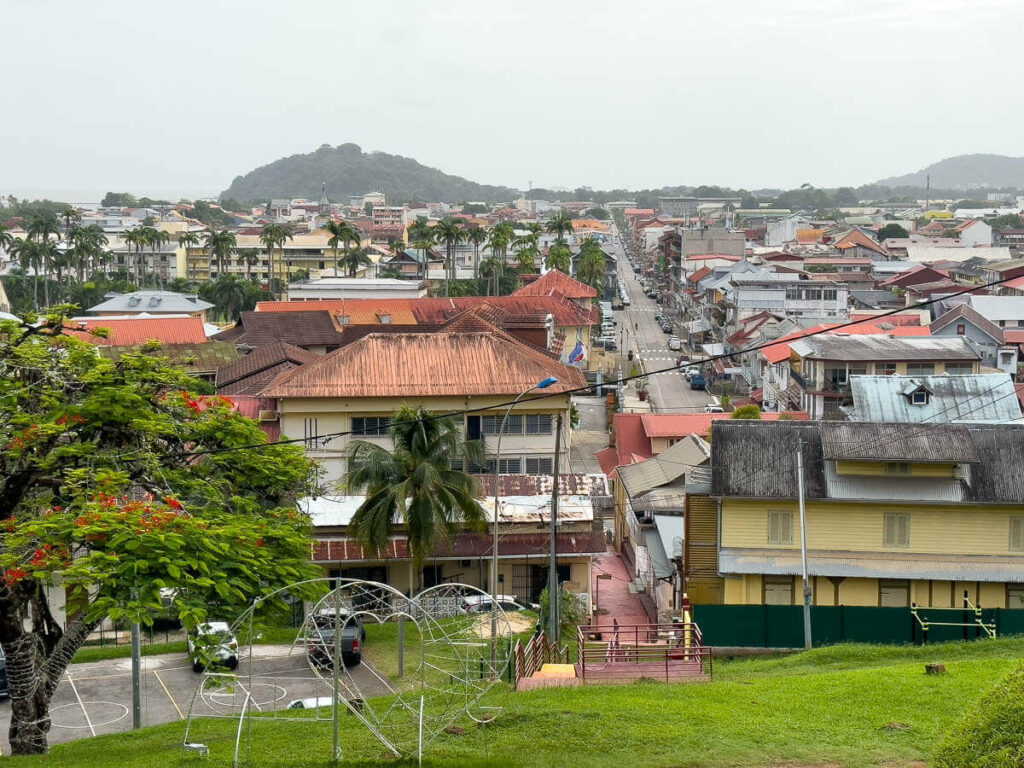
Cayenne. the capital of French Guyana
In my case, I decided to spent the night in Saint-Laurent-du-Maroni, which I can strongly recommend.
The town is packed with street vendors most likely from Suriname, there’s a nice market and the Transportation Camp for the prisoners going to the Salvation Islands (remember the book/movie Papillon?). It’s hard to believe the town belongs to the EU.
The next day, at around 10 am, I headed to the bus station only to find out that I’d already missed the first bus (it was at 10 am) so I went back to customs, where I managed to find a shared taxi thanks to one of the boat men.
You can either try your luck there or just call this number: +594 694 21 18 28 (Nell)
The journey takes 3 hours by car and costs 40 USD. French prices!
More travel information
📢 In my Travel Resources Page you can find the list of all the sites and services I use to book hotels, tours, travel insurance and more.
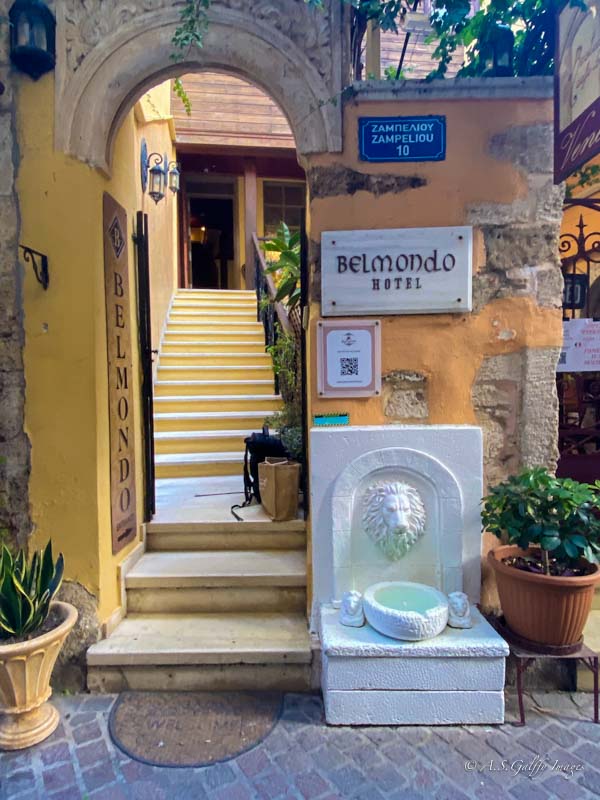
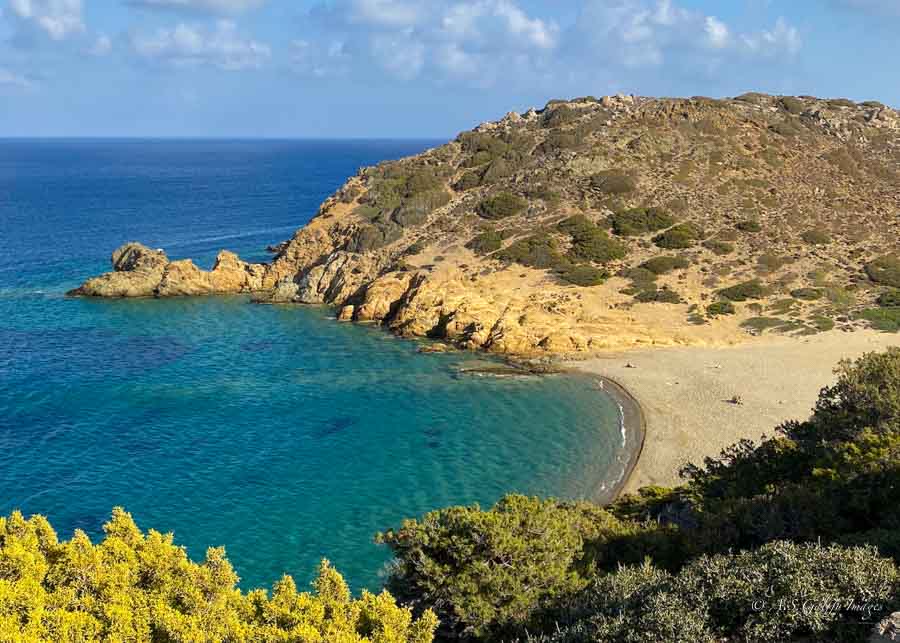
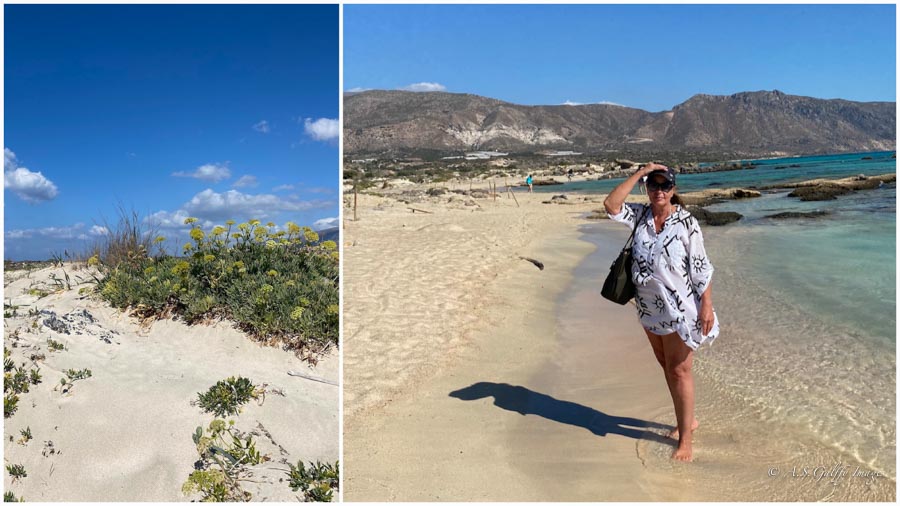
Crete is the largest and most diverse of the Greek islands. It has something of interest for everyone: history and culture galore, beaches aplenty, soaring mountains, canyons, historic towns and interesting archeological sites. With so much to see and do in Crete, you’ll need a well planned itinerary if you want to explore the island properly.
Chania, one of the places on your Crete Itinerary
After visiting the Ionian islands, I thought the battle for my favorite Greek island was between Corfu and Ithaca, but I was wrong. Crete is now my favorite one for very many good reasons. It’s simply impossible to get bored there. I expected Crete would be lovely, but not THIS lovely!
How to Explore Crete Properly
One thing I need to mention from the beginning is that we visited Crete independently, as part of a 3-week Greek Islands Itinerary. If you are interested in visiting Crete on an organized trip, there are many tour operators who offer guided trips. However, with an organized trip you won’t be able to see as much as we did.
POPULAR TOUR
We arrived in Athens by plane, then rented a car and moved from island to island by ferry. But if you don’t plan to visit other islands, you can fly to Crete directly from many cities in Europe. The island has two airports: one in Heraklion and one in Chania.
If you plan to visit the entire island you’ll need to rent a car. There are car rental agencies at both Crete airports, as well as in the cities. While visiting Crete by public transportation is technically possible, it is very time-consuming and not at all convenient. However, many people choose to limit their explorations to one portion of the island, in which case using the bus system may work.
How Much Time to Spend in Crete
Crete is really huge! It measures about 3,260 square miles (8,450 square kilometers. Just to give you an idea, it’s nearly 100 times the size of Mykonos. Because it’s so big and diverse you’ll need a minimum 7 days in order to see some of its marvels. But if you truly want to enjoy Crete I would recommend planning a 10 to 14 days itinerary. We’ve spent 10 days on this island and felt it was not enough.
Where to Stay When Visiting Crete
I recommend staying in at least two places when visiting Crete. Distances are big here, so the idea is to spend less time driving and more time having fun.
We spent the first five days of our itinerary on the eastern side of Crete, in Agios Nikolaos, and the next five on the western side, in Chania. This proved to be a good option because our driving time between the different points of interests didn’t exceed 2 hours (one way).
Hotel in Chania, Crete
Crete Itinerary – 10 Days
We arrived by ferry from Santorini and started our itinerary on the eastern part of the island.
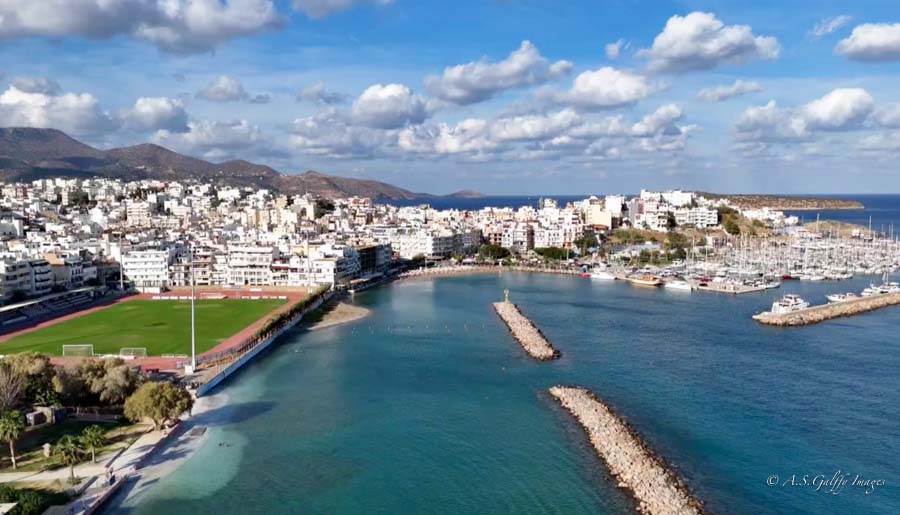
Day 1: Agios Nikolaos
Built atop the remains of an ancient city, Agios Nikolaos is an interesting mix of an artsy-sleepy and yet also bustling town.
The town’s landmark is Lake Voulismeni, known for its many legends. According to Greek Mythology, it the goddesses Athena and Artemis used to bathe in this lake. The sweet-water lake becomes one with the sea through a narrow canal that has red rock formations and lush vegetation all around.
Perhaps the most common thing to do in Agios Nikolaos is to enjoy some shopping in the downtown area. You can also walk around the marina, which is a very colorful and lively place, or sit in one of the seaside cafés.
Aerial view of Agios Nikolaos
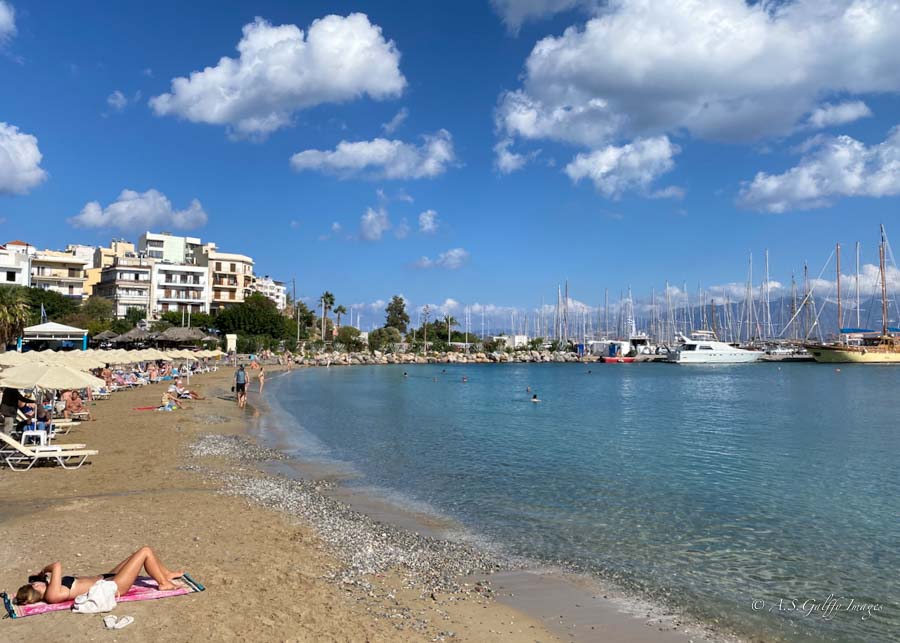
In the afternoon you can delve into the history of the Minoan civilization at the Archaeological Museum of Agios Nikolaos. The museum features a collection of exhibits showcasing their culture and life. Or you may choose to spend the rest of the day at the beach.
Main beach in Agios Nikolaos
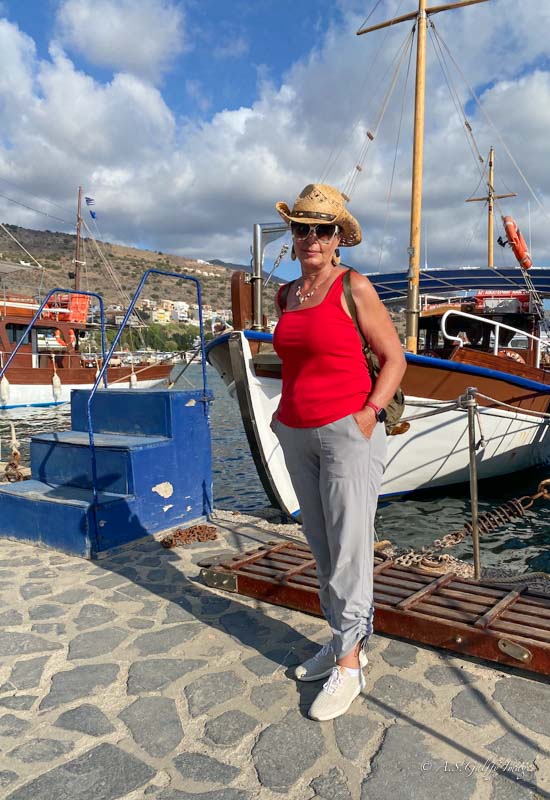
Day 2: Elounda & Spinalonga Island
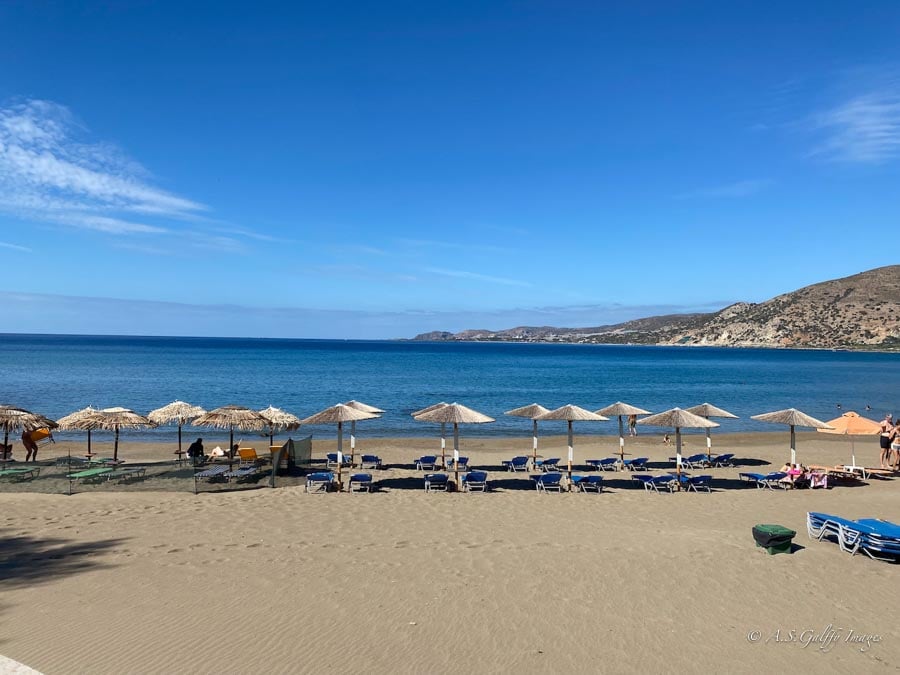
In the morning you can visit Elounda, a charming seaside town located within the municipality of Agios Nikolaos. Elounda has several nice beaches, including the main beach of Plaka, which is a pebble beach. Or you can go to Driros, a sandy beach perfect for swimming, sunbathing, and water sports.
Walking along the harbor in Elounda
Another interesting thing you can do in Elounda is explore the ancient sunken city of Olous, a significant archeological site. Or you can stop by the church of Agios Konstandinou Kai Elenis to admire some stunning frescoes.
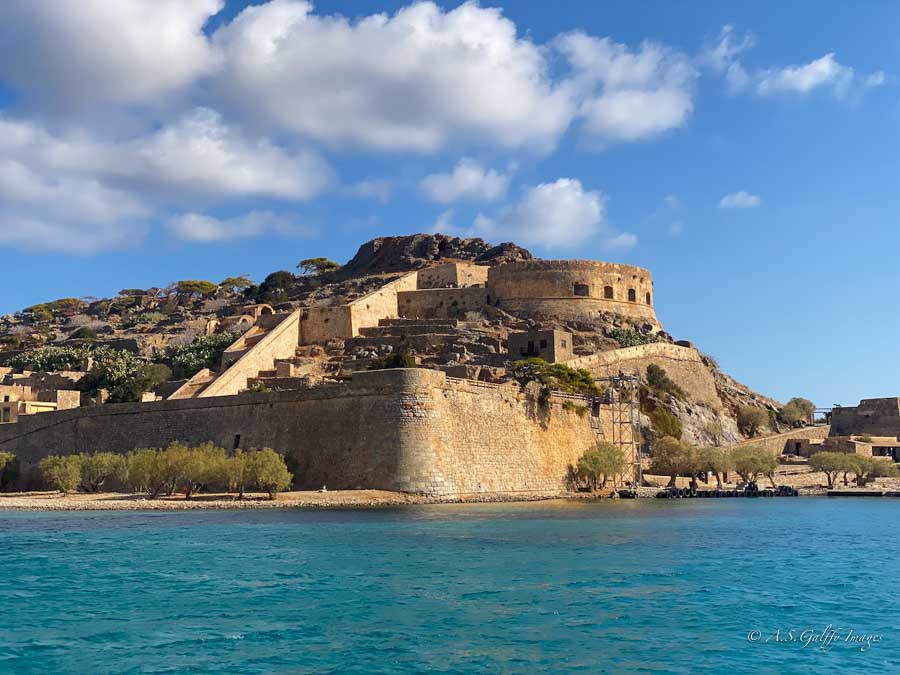
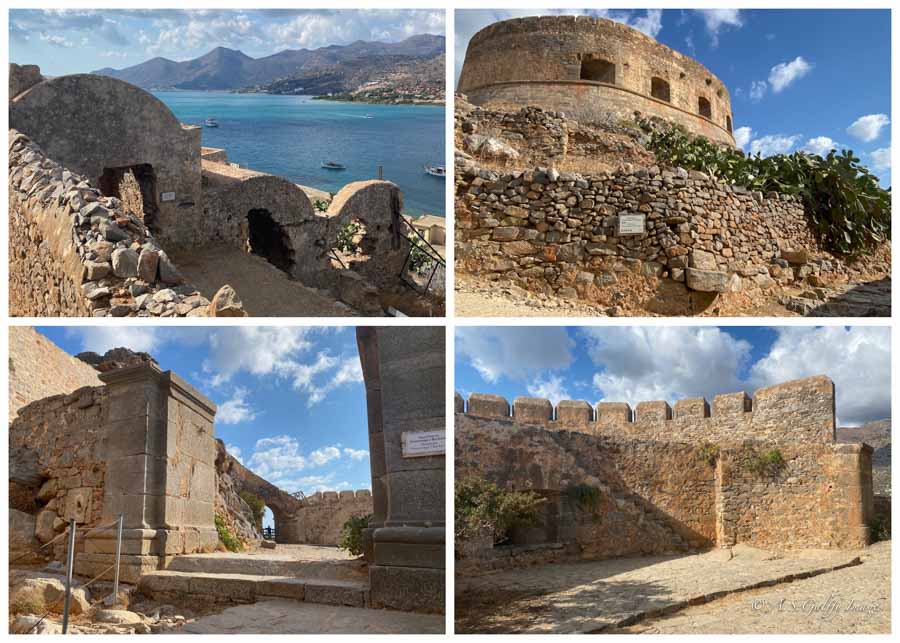
In the afternoon take a boat trip to Spinalonga Island, a former leper colony. This is a very enjoyable trip that you shouldn’t miss when visiting this side of Crete. On Spinalonga you can explore the Venetian Fortress as well the ruins of an abandoned village.
Spinalonga Island
Practical Information for Visiting Spinalonga Island
Boats for Spinalonga Island depart daily around 12:30 pm from the main port in Agios Nikolaos and drop you off on the island and will pick you up around 5 pm. Boats to Spinalonga from Elounda run every 30 minutes during the tourist season. The cost is €20/person.
The Venetian fortress on Spinalonga island
Most people explore the island on their own, because it’s really very small, but there are also group tours if that’s what you are after. Admission fee for Spinalonga Island is €8 for adults and free for students and under 18. There’s a cafe, toilets and a souvenir shop on the island, near the port.
Day 3: Vai Palm Beach & Lassithi
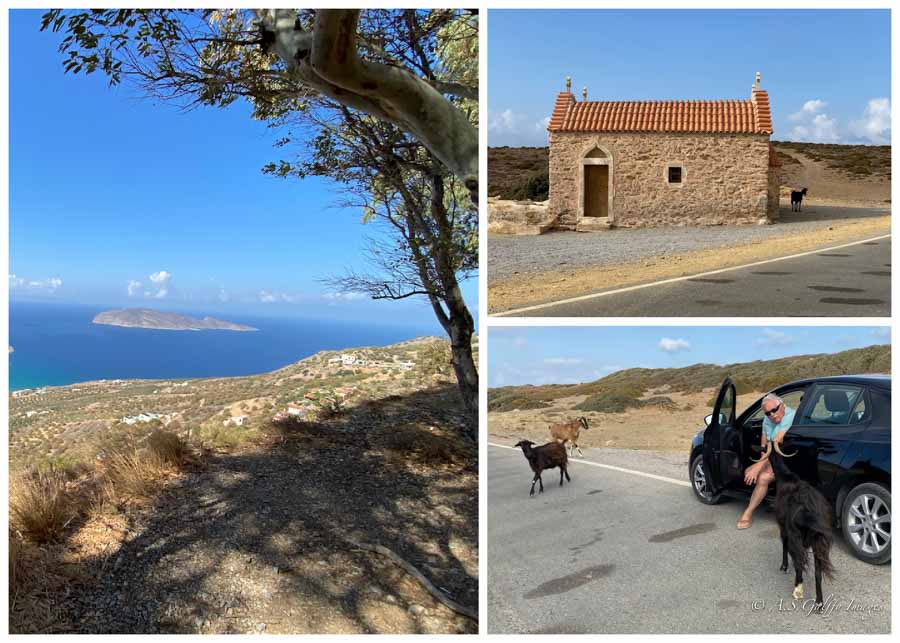
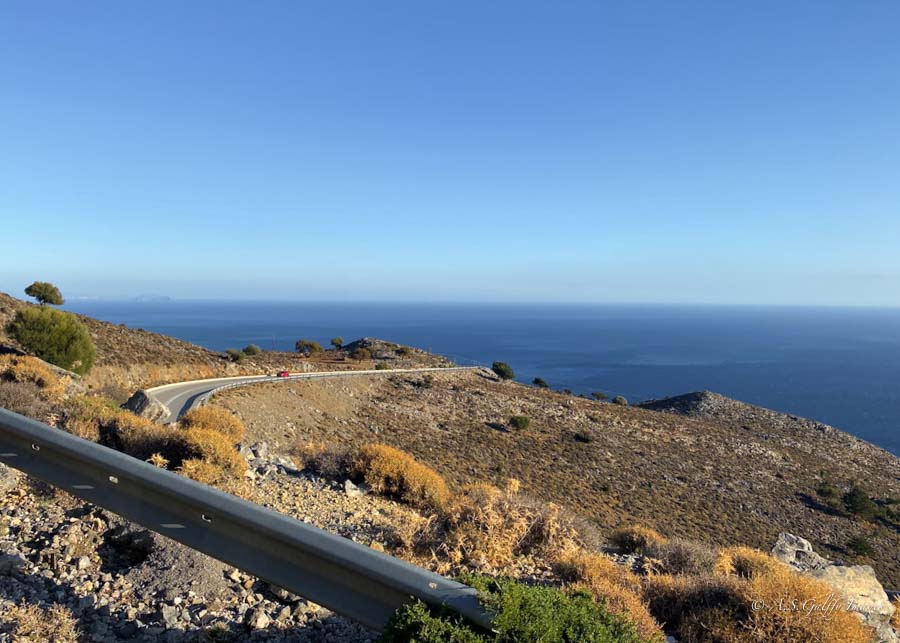
Today’s itinerary will take you to the easternmost part of Crete, at one of the most spectacular beaches on the island: Vai Palm Beach. To reach it you’ll have to cross the Dikti Mountain range, also known as the Lassithi Plateau. This is a major mountain range that runs through the Lassithi region, one of the most remote and authentic parts of Crete! The drive takes about 1.5 hours from Agios Nikolaos.
Driving through the Lassithi Plateau
The road across the mountains is absolutely spectacular, winding around the shore and unveiling unbelievably beautiful views. Along the way you’ll pass through lush forests, fertile green fields dotted with orchards, almond trees and the remains of ancient windmills, cradled by the rugged mountains of the Dikti range.
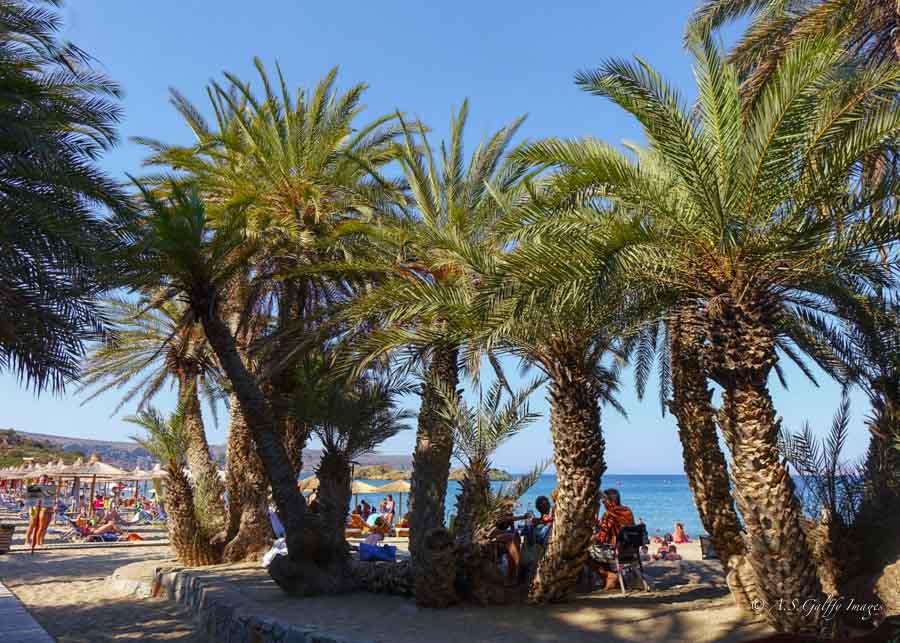
Vai Palm Beach
Vai is a very beautiful beach surrounded by a patch of palm trees, which are rather unusual for Greece. The beach has chairs and umbrellas but is a little too crowded for my taste.
However, if you don’t mind a short hike, to the right of Vai Beach there is a small golf that hides a nude beach. If you don’t mind the nakedness, this one is truly beautiful and just perfect for swimming and sunbathing.
Nude beach next to Vii Palm Beach in Crete
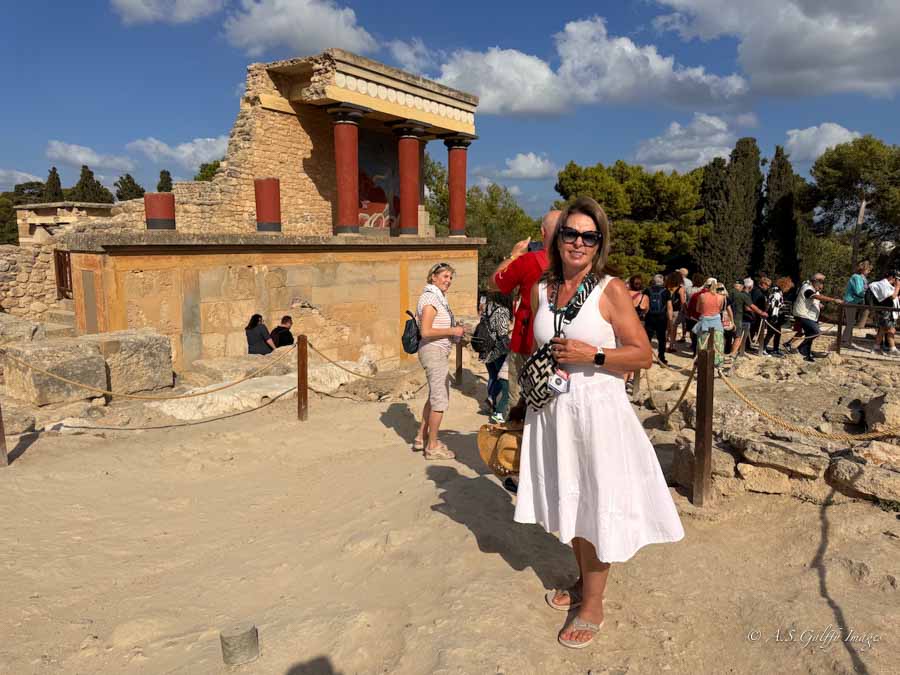
Day 4: Heraklion (Knossos Palace), Heronissos, Zeus’ Cave
On the 4th day of your itinerary you will be heading towards Heraklion, a port city and the capital of Crete. Here you’ll be visiting the ancient Knossos Palace, a major center of the Minoan civilization dating back to approximately 2000-1350 BCE.
Knossos Palace
This is one of Europe’s oldest cities and a very interesting archeological site. However, if you want to visit buy your ticket at the archeological museum because the queue is horrendously long. There were literally hundreds of people waiting in the boiling sun when we were there!
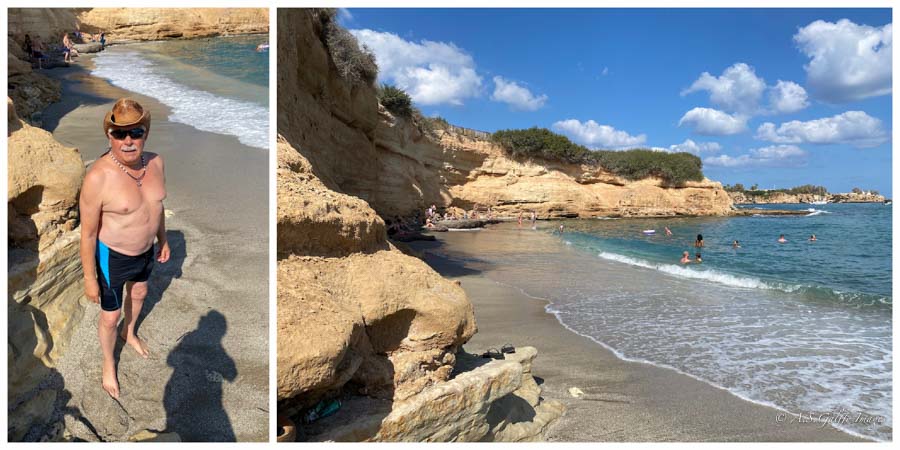
In the afternoon go to one of the beautiful beaches in Heronissos. This bustling resort town is located on the northern coast of Crete, about 26 km east of Heraklion.The beaches in this area are relatively narrow with very limited space for sunbathing. Nonetheless they are very, very scenic and truly worth a stop.
Beautiful beach in Heronissos
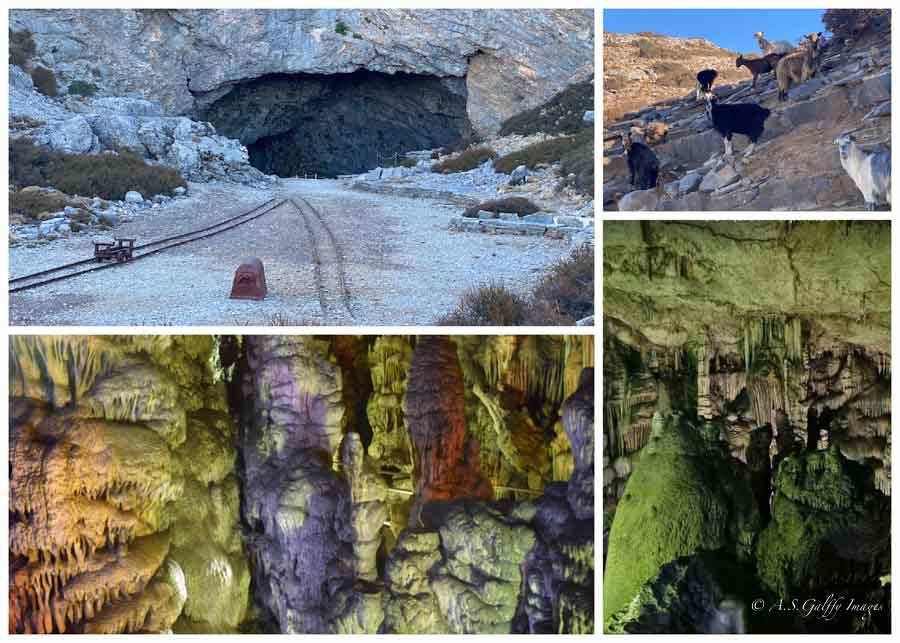
Another option for the afternoon is a visit to the Cave of Zeus, also known as the Idaean Cave of Antiquity. The cave is about 60 km away from Heraklion, on your way back to Agios Nikolaos. Zeus’ Cave is in a rather remote place, on the slopes of Mount Ida. Along the way you’ll come across many goats and sheep herds.
Zeus’ Cave
Even if you’re not a fan of Greek mythology you’ll stillenjoy exploring this stalagmite and stalactite-filled cavern. Also, the views of the surrounding valley at the top are stunning!
Day 5: Rethymno & Drive to Chania
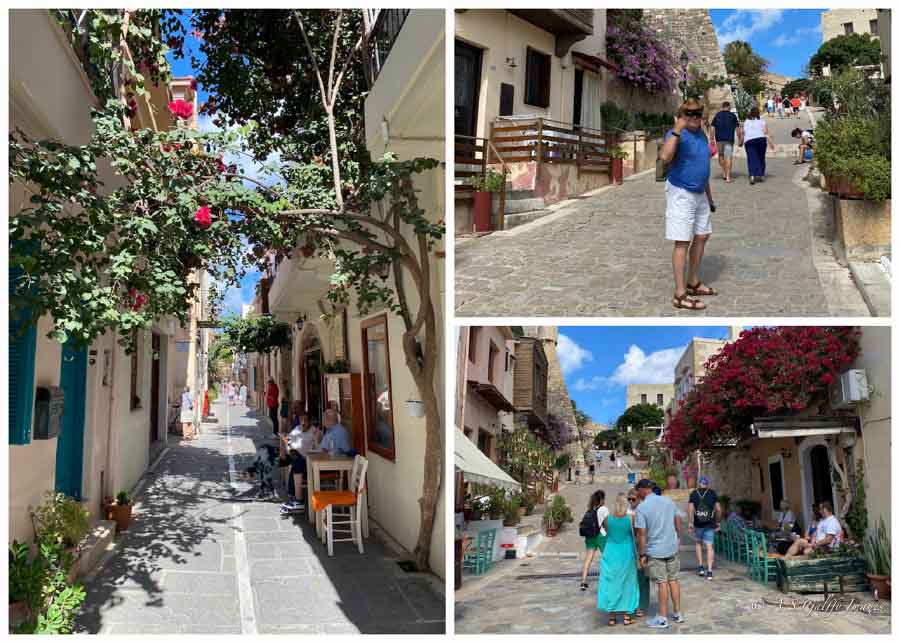
On the 5th day of our itinerary we left Agios Nikolaos and the eastern part of Crete and started towards the west side. The driving distance is 200 km, which takes roughly 3 hours. Along the way we stopped in Rethymno, one of the best-preserved Venetian old towns on the island of Crete.
Old Town Rethymno
Its 16th-century buildings are beautiful examples of ancient architecture. In the old town, the Venetian Harbor is filled with fishing boats and lined with tavernas. Here you can roam around for hours, checking out the quirky boutiques filled with hand crafted souvenirs.
Images from Rethymno Old Town
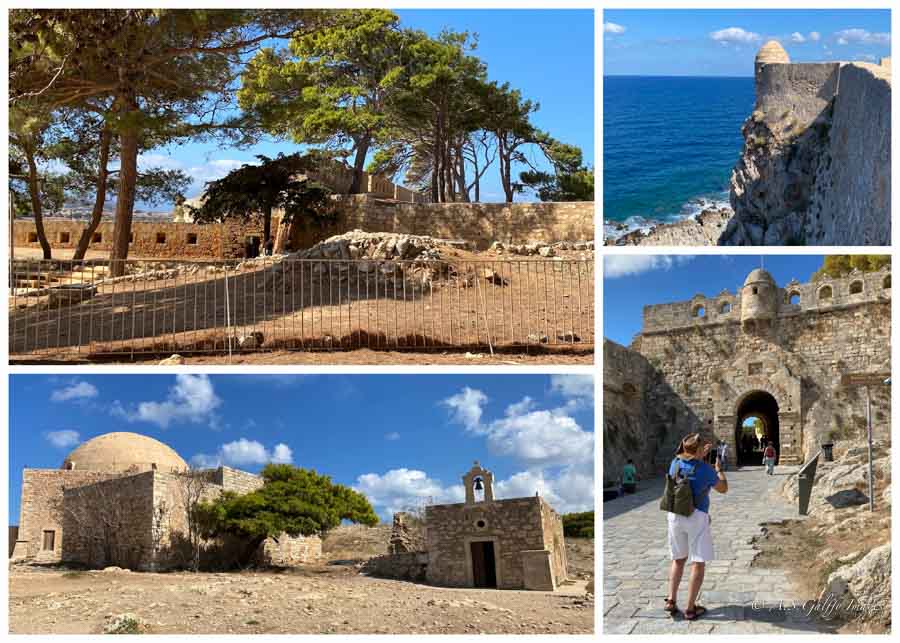
Atop the acropolis of Rethymno the Venetians erected a beautiful star-shaped fortress known as Fortezza, built in the late 16th century, which showcases both European and Moorish influences.
The Venetian Fortress in Rethymno
There are quite a few parts of the fortress still standing today, among which: the eastern gate complex where the Venetian emblem of St. Mark’s Lion was placed, the gunpowder warehouse, the artillery warehouse, a few bastions, the Holy Spirit’s Ledge, the Counselor’s residence, Catherine’s Church and Sultan Ibrahim Khan’s Mosque.
Day 6: Chania & Zorba’s Beach
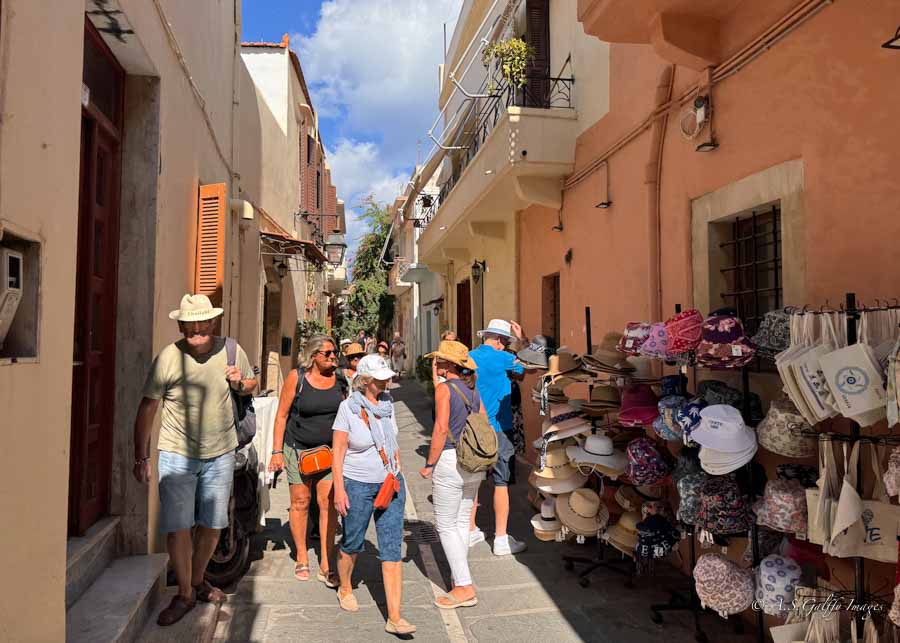
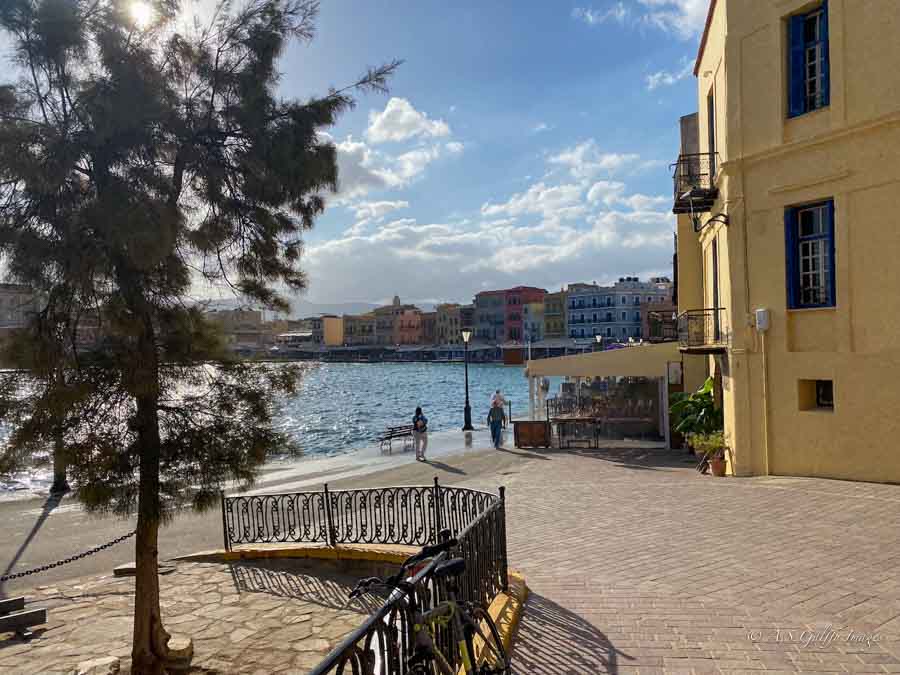
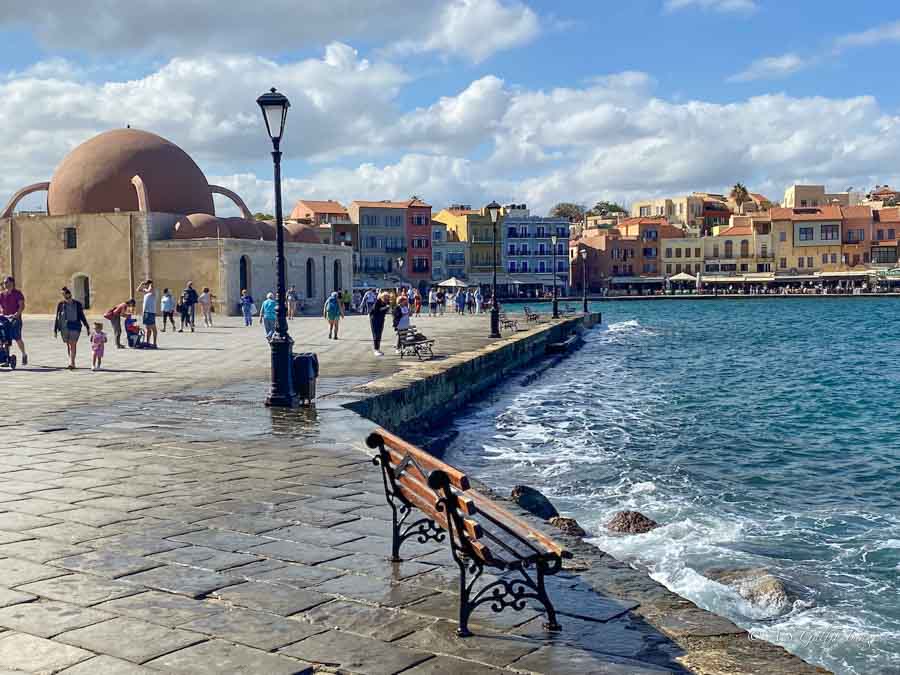
Located on the northwest coast if Crete, Chania is the island’s oldest and most beautiful city dating back over 5000 years. The city was built around a Venetian port and is considered one of the oldest continuously inhabited settlements in Europe. Its historic center is a lovely labyrinth of narrow streets full of small shops, restaurants, and buildings with historical and architectural interest.
Chania
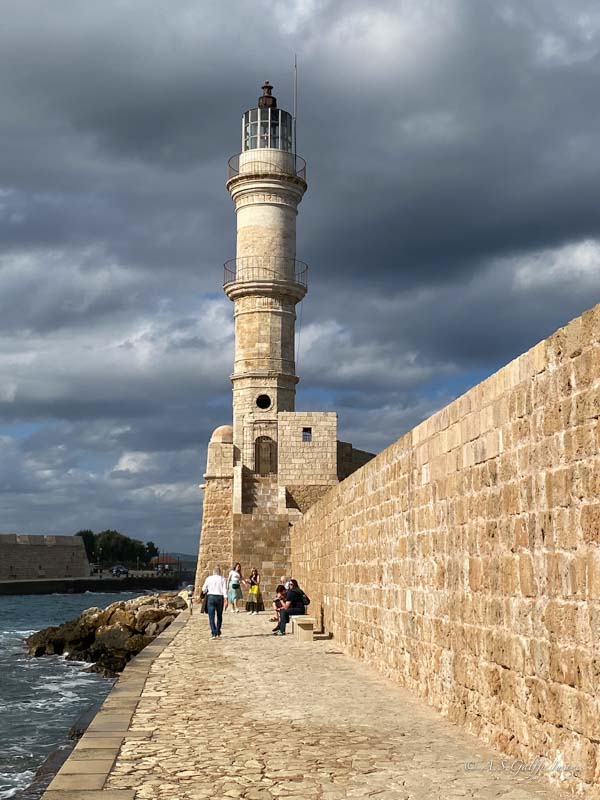
There are plenty of attractions in Chania, from ancient sites, museums, churches and castles. But perhaps the most appealing part of the town is its old Venetian harbor which was built in the 14th century for commercial purposes and for protection against pirate raids.
The Old Lighthouse in Chania
You can spend hours here, strolling the the long promenade lined with cafes and restaurants. This is a a much-photographed place with a touch of magic!
The seaside promenade in Chania
In the afternoon I recommend going to Zorba’s Beach, a calm and less touristy beach located just a short drive away from Chania, in the Akrotiri peninsula.
Zorba’s Beach
The actual name of the beach is Stavros Beach, but since 1964 when the iconic movie “Zorba the Greek” was filmed here, the beach has become famous and is now known as Zorba’s Beach.
The little beach in front of Zorba’s Beach Hotel
The beach offers a very subdued and authentic experience, which is far from the embellishments of Hollywood. To the left of the beach there is a small resort called Zorbas Beach Village Hotel where you can go for some refreshments.
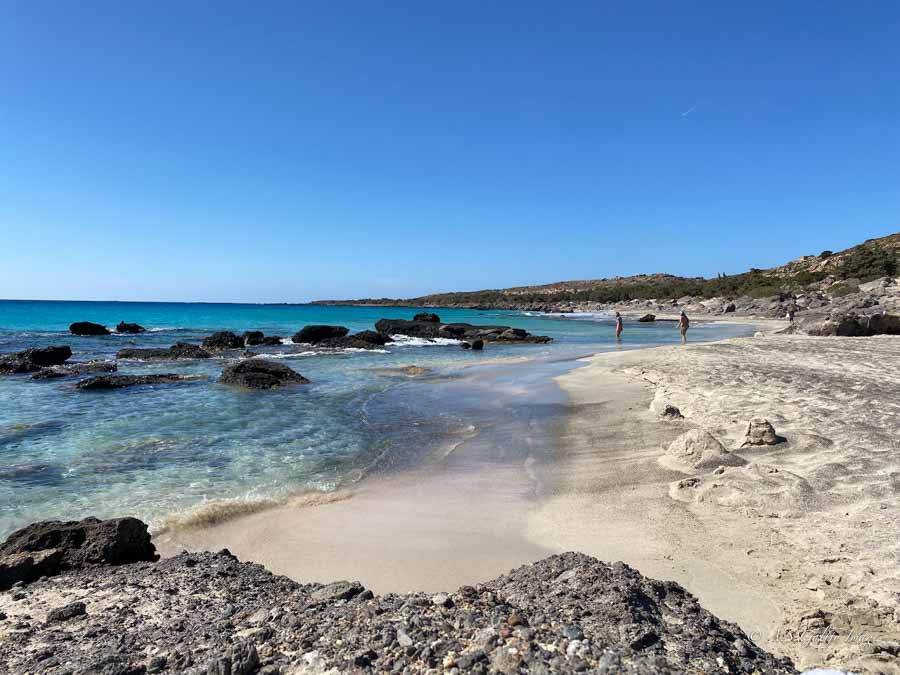
Day 7: Elafonissi Beach
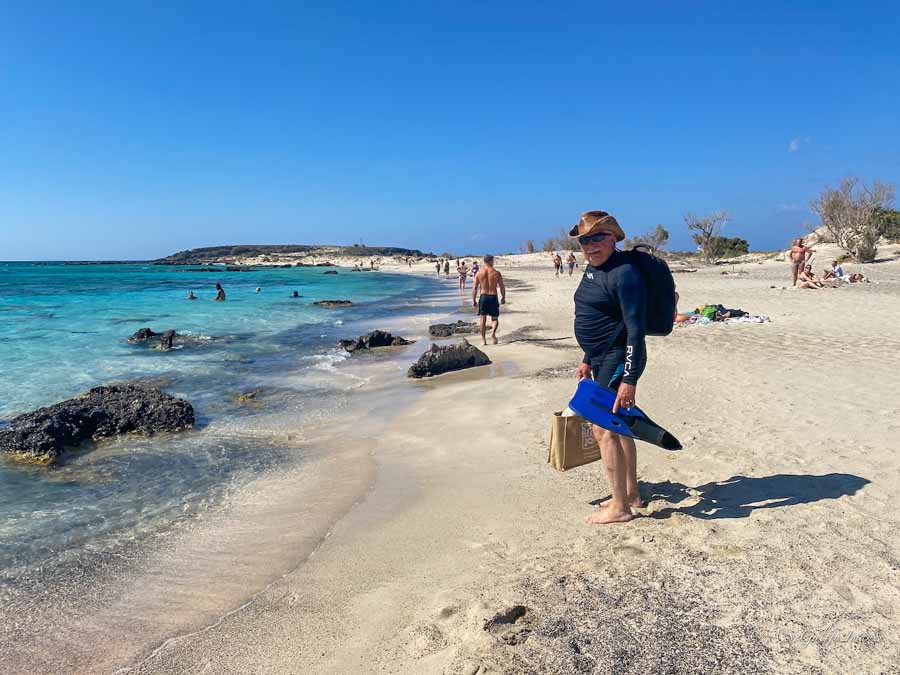
They say that no Crete itinerary would be complete without a trip to Elafonissi and I agree. Elafonissi is one of the most beautiful beaches in the world, so make sure you don’t miss it. Situated in the southwest corner of Crete, near the town of Elafonissi, the beach is famous for its pink-tinted sand created by the presence of crushed seashells and red coral fragments.
Elafonissi Beach
However, temper your expectations as the amount of pink on display may vary with conditions and the season. Regardless, the crystal clear waters and huge stretch of sand make this the most popular beach in Crete.
Although most of the time it is very crowded, if you keep walking you’ll surely find a spot where you can enjoy a little privacy. The drive from Chania is about 1 hour and 20 minutes, but the road is packed, especially during the summer.
Elafonissi Beach
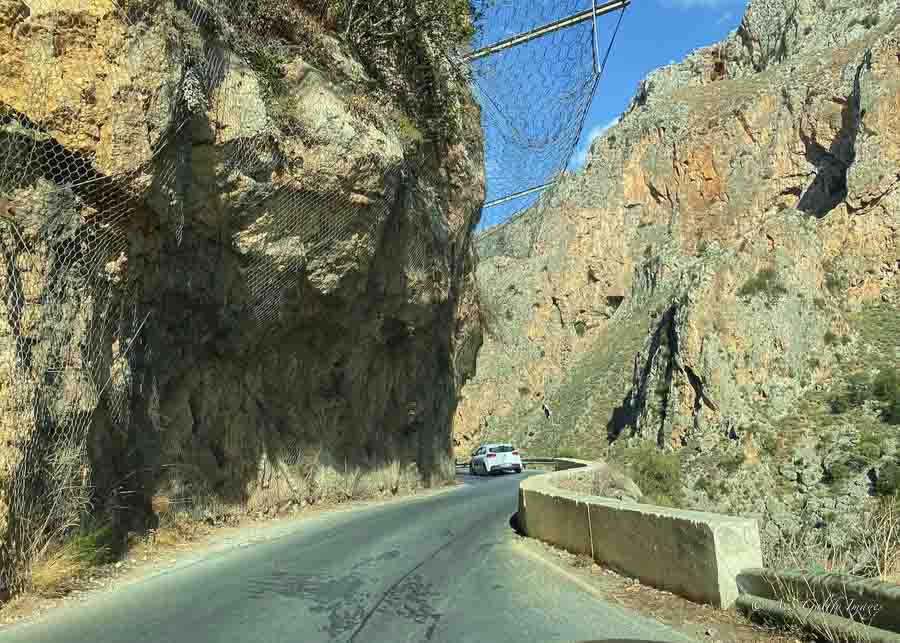
To reach Elafonissi, you’ll have to cross the White Mountains, which are absolutely spectacular, but the road may be a little scary at times. In some areas there are no guard rails and you can also come across narrow parts with blind turns.
Difficult road to Elafonissi Beach
To avoid the crowds both on the road and at the beach, visit early in the morning or in the evening, when most people have left.
Also, hike up to the neighboring cedar tree reserves for a change of scenery.
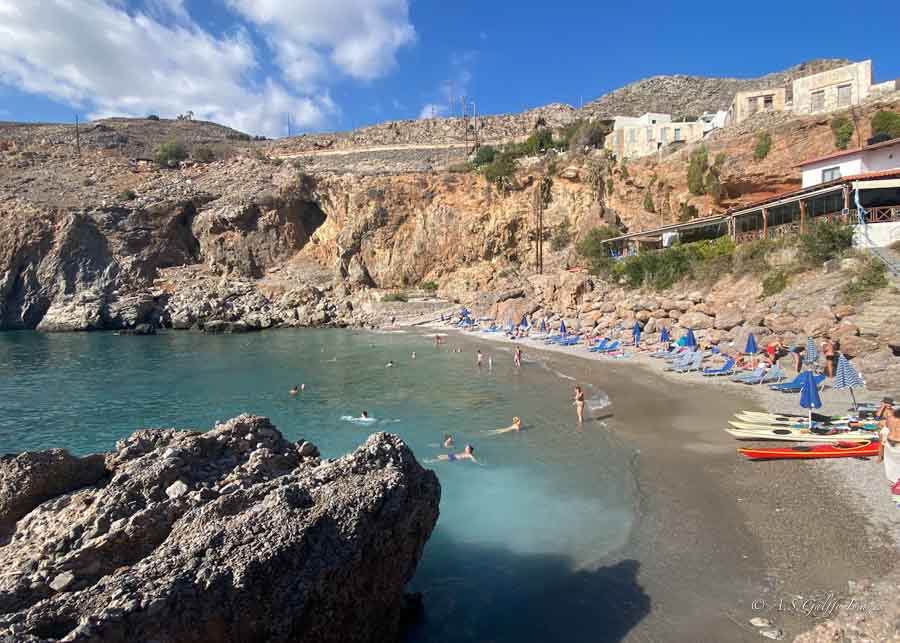
Day 8: Chora Sfakia & Vrisi Beach
On our 8th day we intended to see some of Crete’s most beautiful beaches that can only be accessed by boat, located between the fishing villages of Sfakia and Loutro. Unfortunately it was a windy day on the see and the boats didn’t want to depart, so we decided to stop in Sfakia which is a very beautiful destination.
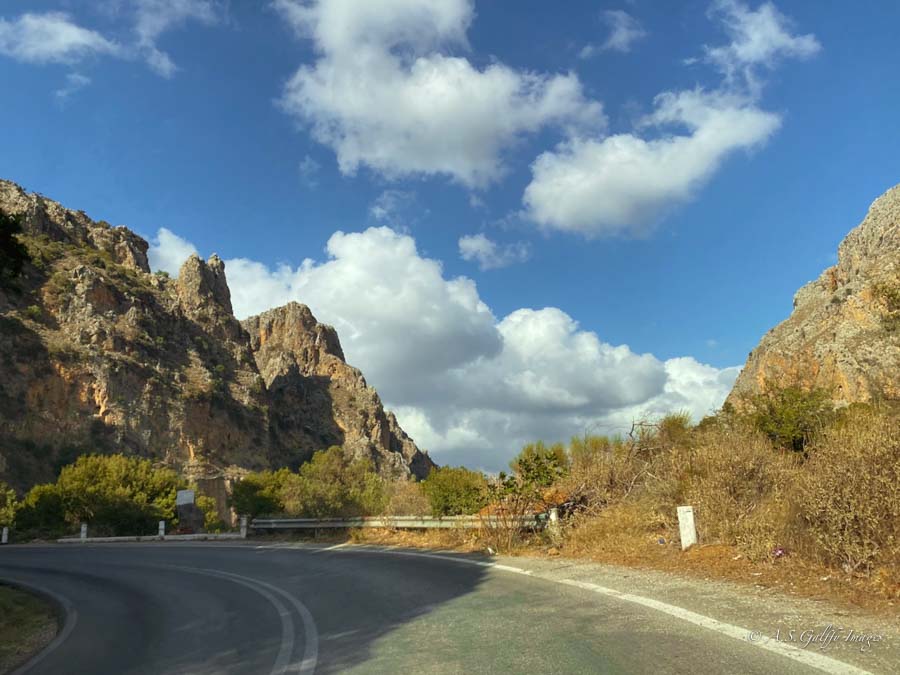
The Road to Sfakia
The road to Sfakia is an adventure in itself, crossing the beautiful White Mountains and passing through beautiful gorges and scenic landscapes.
Driving through the White Mountains in Crete
In Sfakia you can walk around the village and enjoy an authentic lunch at one of the many restaurants in the harbor where you can enjoy Cretan salads, Sfakian pies and fresh local seafood.
Vrisi Beach in Sfakia
In the afternoon I suggest visiting the quiet little pebble beach of Vrisi to enjoy some sun and blue water. The beach, which lies to the west of the town, hosts a beach club where you can rent two sun beds and an umbrella for €10.
Day 9: Paleochora & Sailboat Trip to Theodorou Island
Today you can drive to Paleochora, a charming village located on the south-west side of Crete. After strolling around the harbor, head to Pachia Amos Beach, which is the main beach in Paleochora. This is a huge stretch of golden sand with plenty of space to spread out, beach bars, sunbeds and umbrellas.
Pachia Amos Beach in Paleochora
But if you are looking for a more natural and secluded beach, carry on to the far west end of the beach. Here you’ll come across some odd nudist beaches and of course plenty of gorgeous water to dive into.
One I can recommend is Chalikia, which in contrast to Pachia Ammos is a rocky beach but less busy than its sandy neighbor. The beach has umbrellas and sunbeds for hire.
Chalikia Beach
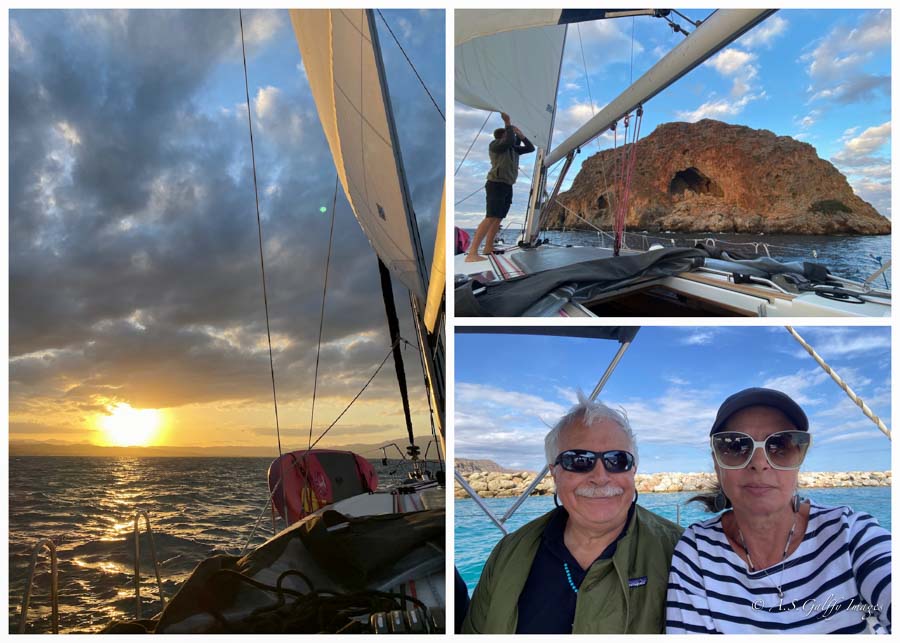
In the afternoon we took a sailboat trip to Theodorou Island, which I can highly recommend. However, don’t do the sunset tour as late in the evening it gets very windy on this part of Crete.
Theodorou Island is a barren, small, uninhabited islet situated close to the shore village of Platanias, northwest of Chania. The island was once home to a Venetian fortress that was constructed in the 16th century for defense purposes.
Sailboat trip to Theodorou Island
You can still see ruins of the fortification on the island today. Unfortunately tourists are not allowed to disembark because the island is also home to a number of endangered Cretan goats (Kri- Kri) which are protected. Those animals were close to extinction and only live in a few places in Crete, most certainly on theThodorou islandand in the Samaria Gorgeas well.
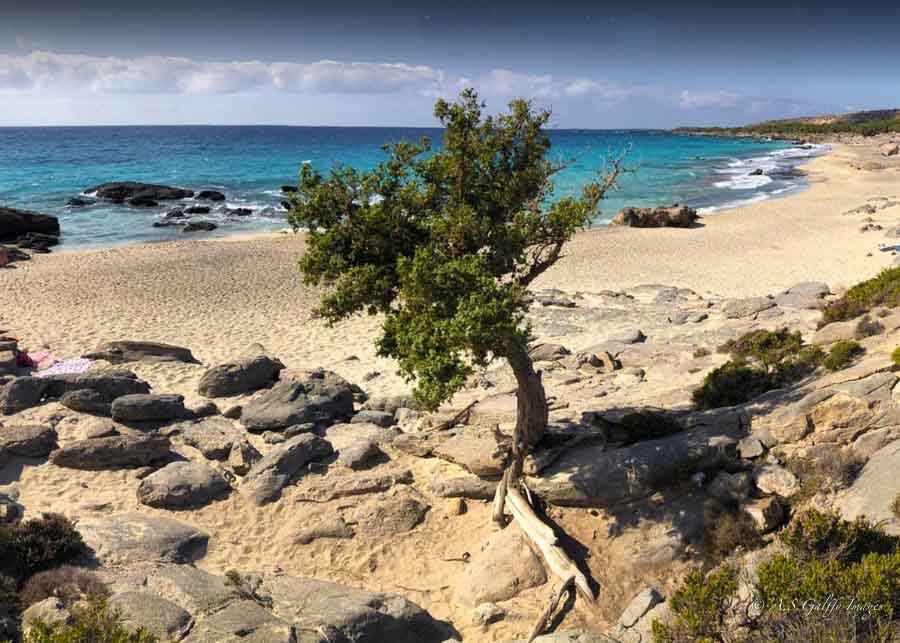
Day 10: Kedrodasos Beach
Kedrodasos is MY FAVORITE BEACH in Crete! A tranquil paradise of sand and water, a secret hidden treasure which I’m almost reluctant to write about for fear of making it too popular.
Kedrodasos Beach
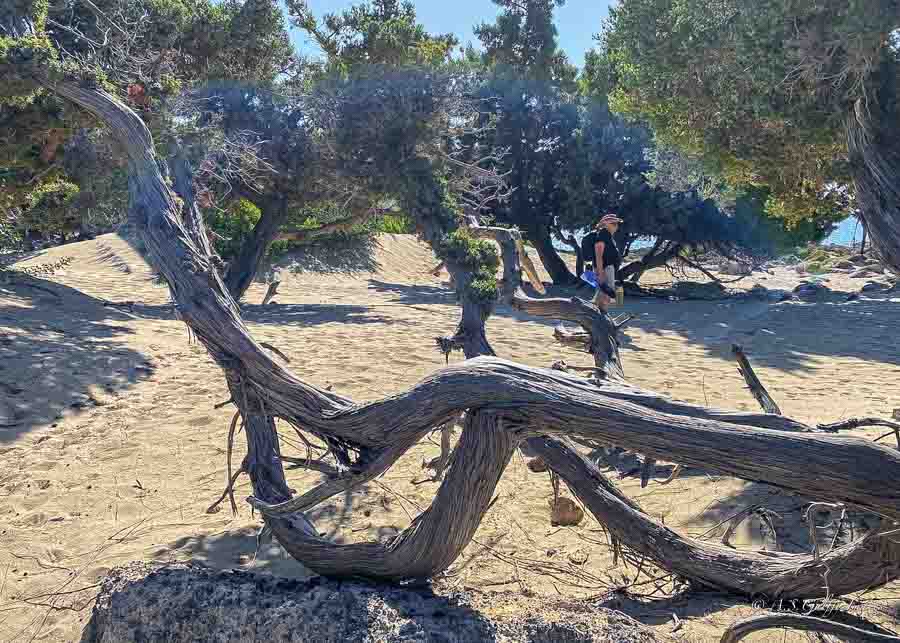
What makes Kedrodasos beach so special is the fact that it’s very secluded. It lies behind an ancient and very unique juniper forest with a mix of white sand, black rock and crystal-clear blue water.
The beach is located a short 20-minute hike from Elafonissi beach, but you can also reach it via a dirt road. The drive is only 10 minutes long, but from the top of the hill where you leave your car there is another 15 minutes walk to the beach.
The beginning of the path towards Kedrodasos Beach
Because it is relatively hard to reach, Kedrodasoss enjoys a tranquil and secluded atmosphere, which makes it a favorite beach for nudists. This pristine, unspoiled environment comes in such a stark contrast with the more developed and commercialized beaches you’ll find anywhere else on Crete.
Kedrodasos Beach
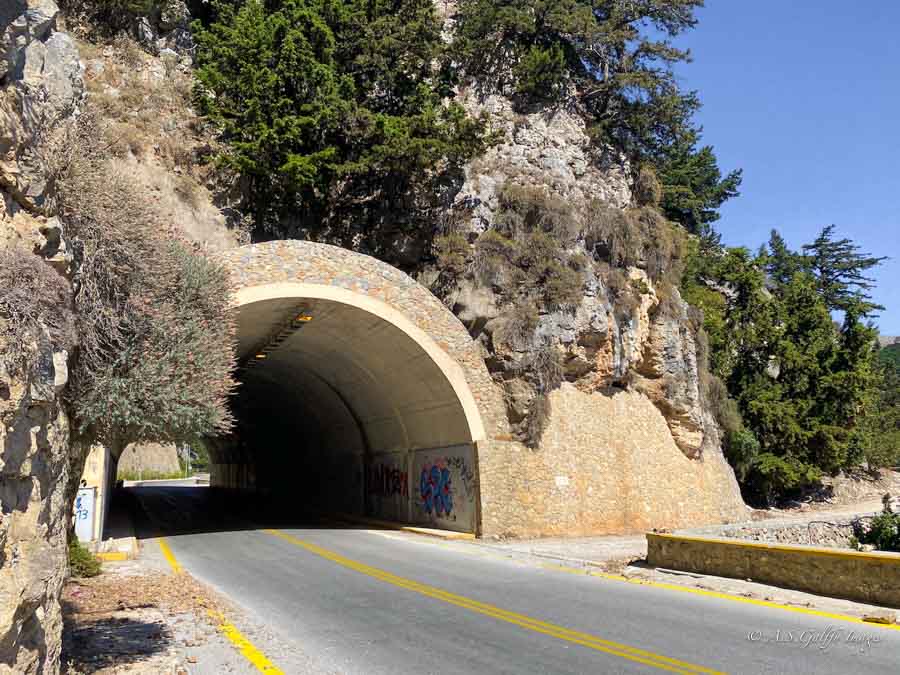
Reaching the beach from Chania means driving through the narrow steep road across the White Mountains, which is spectacular but difficult and time consuming. The drive itself is not very long, but you can’t go fast and the road is almost always crowded.
Tunnel on the road to Kedrodasos Beach
One thing to keep in mind if coming to this beach is that there are no restroom facilities, no potable water and no sunbeds or umbrellas. If you need shade during the day, you can go under one of the juniper trees behind the beach.
Travelling solo can be an empowering experience, offering freedom and flexibility unmatched by group trips. However, navigating crowded airports, enduring long queues, and managing tight schedules can sometimes make solo journeys more overwhelming than liberating. That’s where red-eye flights come in—a travel option that transforms these challenges into opportunities for a smoother, more focused journey.
Flying overnight may not be everyone’s first choice, but it holds particular appeal for solo travellers seeking convenience and efficiency. With fewer crowds, quieter terminals, and unique time-saving advantages, red-eye flights cater to the independence and adaptability that solo adventurers often value most.
Wondering which travel time is best for you? This article explores why choosing a red-eye flight could be the smartest move for your next solo trip, offering practical insights to make your journey as seamless and stress-free as possible.
Quieter Airports and Streamlined Security
One of the most immediate benefits of flying red-eye is the serenity of a nearly empty airport. With most travellers opting for daytime flights, late-night departures mean fewer people and a less chaotic atmosphere. For solo travellers, this translates to easier navigation, quicker check-ins, and shorter queues at security checkpoints. Gone are the moments of jostling through packed terminals or waiting endlessly in line—everything moves faster in the airport during the wee hours.
For those arriving or departing through busy hubs like Singapore, this quieter experience can be a game-changer. After landing, you can avoid the hassle of bustling daytime crowds by planning ahead and booking hotels near Singapore airport. Not only does this offer a convenient place to rest, but it also ensures a seamless transition from your flight to the next phase of your journey. These minor adjustments can make solo travel significantly more manageable and stress-free.
Flexibility in Seating Choices
Flying solo gives you an undeniable advantage when it comes to securing the perfect seat. Red-eye flights, with their reduced passenger numbers, take this benefit even further by offering more options for that coveted spot. Without the pressure of competing with large groups or families, you’re more likely to find a seat that fits your preferences—whether it’s for extra legroom, a quick exit, or a peaceful corner to settle in for the journey.
Moreover, the lighter passenger load often means empty seats nearby, giving you extra space to stretch out and relax. For solo travellers, this added comfort can make a significant difference, especially on longer journeys. Being able to select your ideal seat with minimal hassle enhances the overall experience, making a red-eye flight an even more appealing choice for those venturing alone.
Time to Focus and Recharge
Red-eye flights offer something rarely found during the day—uninterrupted quiet. This unique window of calm can be a golden opportunity for solo travellers to focus on small personal goals or simply recharge. Whether it’s catching up on reading, journalling your travel experiences, or revising your itinerary, the stillness of an overnight flight provides the ideal environment for reflection and productivity.
Beyond personal projects, this quiet time also allows you to unwind after a hectic day of travel preparations. Without the distractions of a bustling cabin or frequent announcements, you can settle into your own world, free from interruptions. Solo travellers often cherish this solitude, using it to prepare mentally and emotionally for the adventures that lie ahead. By the time you land, you’ll feel more centred and ready to make the most of your destination.
Cost Savings
Travelling solo often means managing every expense carefully, and red-eye flights can be a great way to stretch your travel funds. Due to lower demand, these flights cost less than their daytime counterparts, making them an attractive option for budget-conscious adventurers. The money saved on airfare can then be redirected to other travel priorities, such as unique experiences, upgraded accommodations, or even an extended itinerary.
Aside from ticket prices, red-eye flights also help reduce costs in other ways. Since you’re flying overnight, you can save on a night’s accommodation by sleeping on the plane. For solo travellers, who often juggle multiple expenses on their own, these savings can add up quickly. Ultimately, choosing a red-eye flight is not only a practical decision but also a strategic one, as it allows you to enjoy more of what your destination has to offer without compromising your budget.
Efficient Use of Travel Time
For solo travellers, time is one of the most valuable resources and going on a red-eye flight allows you to make the most of it. As overnight travel lets you combine transit with rest, you can turn what could be downtime into a productive part of your journey. By the time the plane touches down, you’re ready to jump into your itinerary without wasting precious daylight hours.
This efficiency is particularly appealing for those with tight schedules or ambitious itineraries. Imagine landing early in the morning, grabbing breakfast at a local café, and starting your adventure before the city even wakes up. For business travellers, it means heading directly to meetings without sacrificing a day to transit. Red-eye flights seamlessly integrate travel into your schedule, ensuring you maximise every moment of your solo journey.
Red-eye flights may not be for everyone. For solo travellers, however, they offer distinct advantages that are hard to ignore. From efficient use of time to significant savings, these flights align perfectly with the needs of independent adventurers. So, consider taking to the skies at night on your next solo trip, as it might just turn out to be the wiser, more rewarding option for your journey.
Hey there, fellow non-designers! Micki here, and I want to share my experience using Squarespace to create my personal website.
Confessions of a Non-Designer
Let’s be real: I’m not a natural designer. I can appreciate beautiful design, but creating something stunning myself? That’s an entirely different story. I honestly have the design skills of a potato, and this has followed me through various aspects of life, including the websites I’ve tried to build.
I’ve always admired beautifully designed websites, but as someone who doesn’t consider herself a natural designer, I’ve struggled to create visually stunning sites myself. It’s not that I can’t recognize good design when I see it; I simply don’t have the innate ability to craft something beautiful from scratch.
Curious? Use our code NOMAD10 for 10% off your annual subscription here.
Past Website Struggles
Charles and I have built dozens of websites over the years including ones for ourselves, a few for companies and a few for friends and family. Some of our most popular include this site TheBarefootNomad, our recipe bog TheParentSpot, plus a few websites dedicated to helping travelers choose the proper travel insurance (which we’ve since sold or shut down).
Despite our best efforts and countless hours invested, none of these websites turned out as beautifully as we had envisioned. Any design improvements we attempted to make were met with frustration and felt like an uphill battle. The problem has never been technical for us, more of vision.
Discovering Squarespace
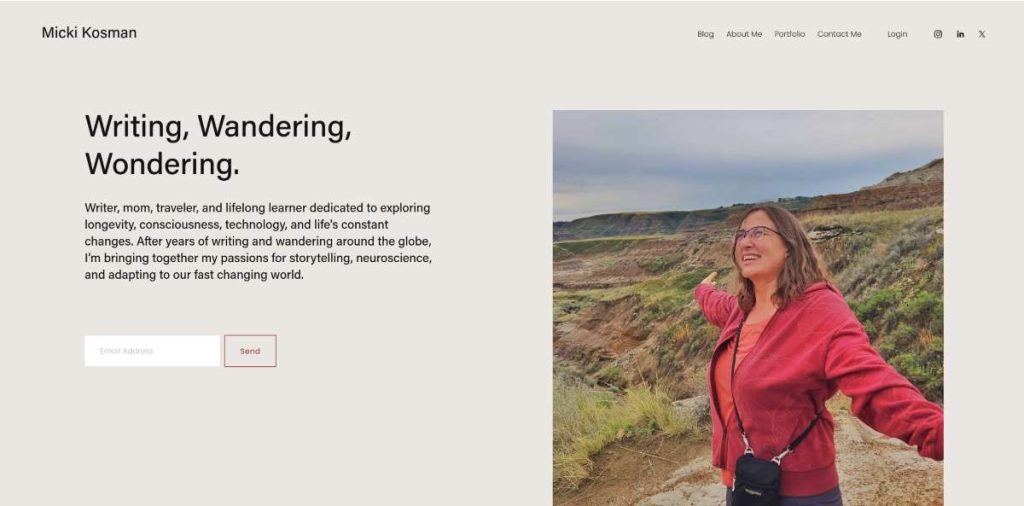
After our past website struggles, I realized that having the right tools might just make a big difference. That’s why I decided to give Squarespace a try for my personal website, MickiKosman.com. I wanted a space to share my journey as a travel writer, entrepreneur, and storyteller, plus a place to connect with my audience in a creative and professional way.
What is Squarespace, Anyway?
So, you’ve likely heard of Squarespace, but what exactly is it?
In a nutshell, it’s an all-in-one platform for building websites. It comes with a bunch of features like professional templates, a drag-and-drop editor, a content management system, blogging tools, SEO stuff, e-commerce options, and site hosting. Basically, it’s has a lot of the things you need to create a gorgeous website, all in one place.
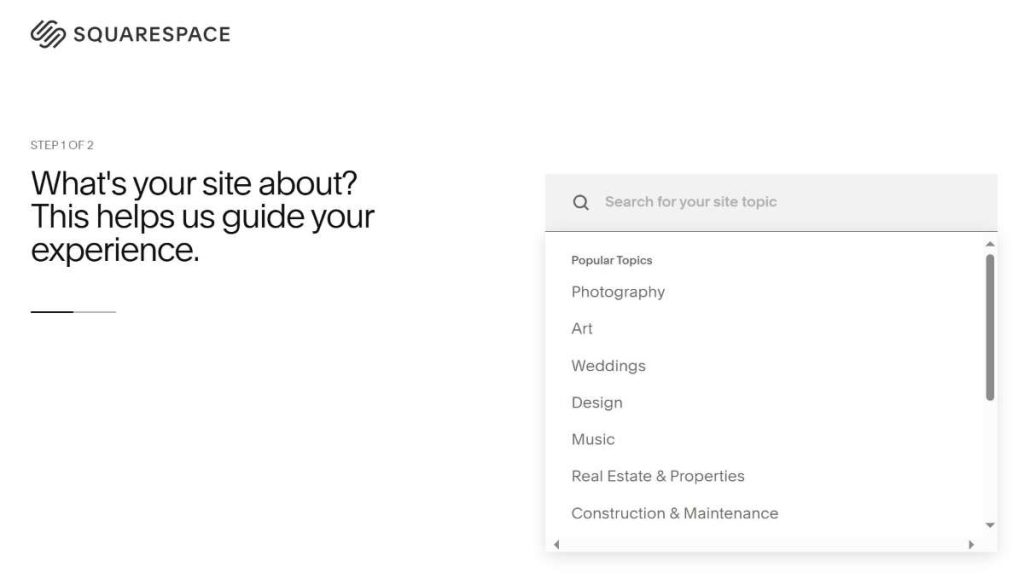
Getting Started with Blueprint AI
Signing up for Squarespace was straightforward. I started with the free 14-day trial and played around with the Blueprint AI design feature. It offered some helpful design suggestions based on my site goals.
What really impressed me was Squarespace’s library of customizable templates. There were plenty of attractive designs to choose from.
Customizing My Website
Customizing my website with Squarespace was a relatively smooth process. The drag-and-drop interface and various features made it easy to personalize the design without needing coding skills. I could add, remove, and rearrange elements on the page with just a few clicks.
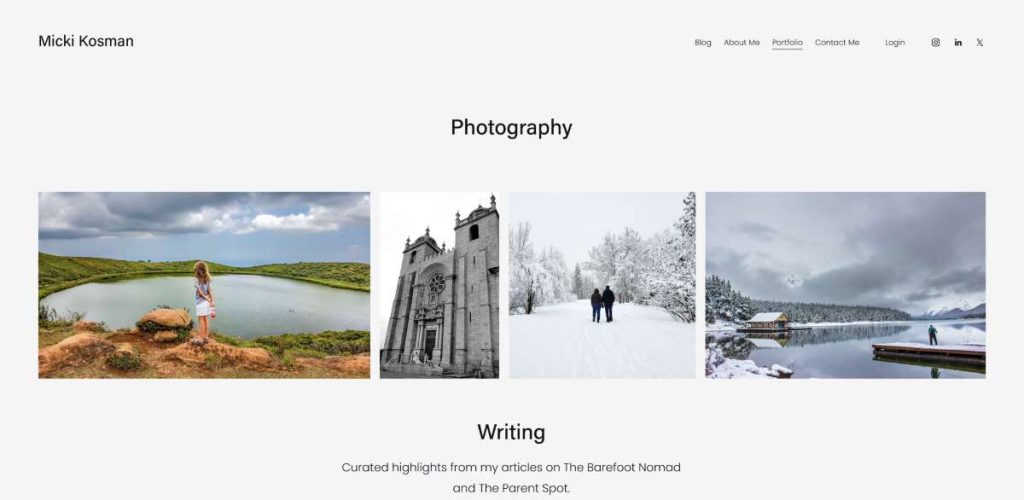
Finding the Right Images
One thing that can be time-consuming when building a website is finding the perfect images.
Squarespace helped with that by offering a selection of stock images in addition to the ability to upload my own photos. I used my own photos, but having stock photos on hand could definitely save time and hassle!
The End Result
Within a couple of hours, I had a website that I was happy with. Squarespace allowed me, a non-designer, to create a site that was both visually appealing and functional. The built-in features like mobile optimization, SEO tools, and social media integration weren’t as apparent when designing it but as a website owner, are all extremely helpful.
Templates That Look Pretty Darn Good
One thing that stood out to me about Squarespace was the templates. I’ve got to admit, they’re pretty easy on the eyes. They’ve got this clean, professional vibe going on.
And the cool part is, you can just pick one of their templates, toss in your own photos and text, and your website will look pretty polished. No design skills needed!
Another nice thing about the templates is that they’re responsive. That means they automatically adjust to look good on different devices, like tablets and phones. It’s handy because more people browse the web on their mobile devices these days than laptops and desktops combined.
Use our code NOMAD10 for 10% off your annual subscription here.
When it comes to styling your website, Squarespace has a decent number of options. You can play around with the fonts (which is great if you’re picky about typography like me), colors, sizes, button styles, and all sorts of other design elements. And you can do all of this without touching any code, which is a relief for those who aren’t exactly tech wizards.
But, if you do happen to know your way around code, Squarespace does have a Custom CSS section where you can add your own coding magic.
Want to browse some gorgeous designs? Get some inspiration from some of the best designs on the web at their design showcase here.
Built-in Features
One thing to note about Squarespace is that everything is baked right into the platform. You don’t have to go hunting for plugins or extensions. It’s convenient, however it also means you’re limited to the features they offer.
That being said, Squarespace does have a pretty good selection of features, especially for bloggers and small businesses. You can easily add things like a blog, contact form, email signup, photo galleries, event calendar, social media buttons, and even a shopping cart for selling products or digital downloads.
Let’s Talk Money
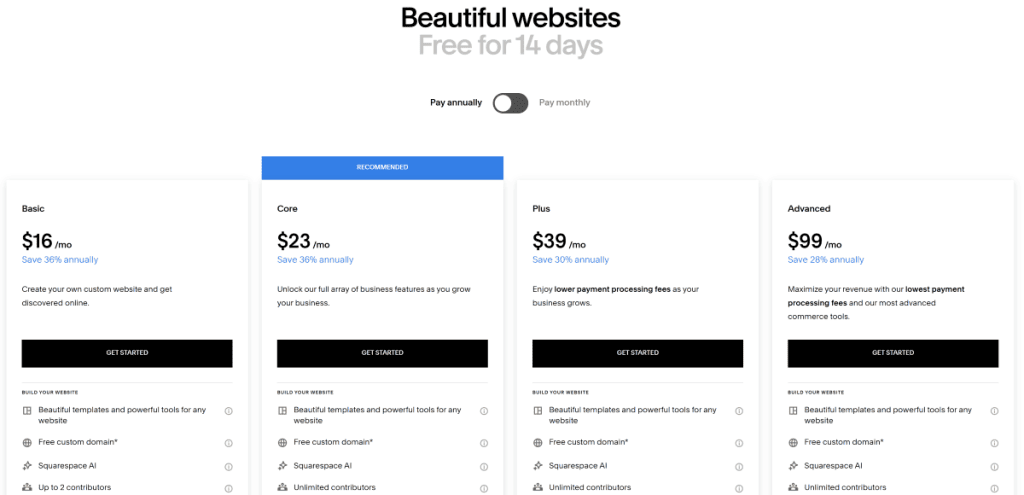
Now, let’s talk about pricing. Squarespace offers a free 14-day trial, so you can test the waters and see if it’s the right fit for you. After that, you can choose from four different plans: Basic, Core, Plus, or Advanced.
If you’re in Canada like me, you might see these plans labeled as Personal, Business, Commerce Basic, and Commerce Advanced, which I believe is simply the old branding for the same packages offered in the USA.
The Basic plan starts at just $16 USD per month if you opt for annual billing, or $23 USD per month if you prefer to pay monthly. As your business grows, you can upgrade to higher-tier plans that offer even more features and tools to help you succeed online.
Use our code NOMAD10 for 10% off your annual subscription here.
The Bottom Line
So, is Squarespace the be-all, end-all of website builders? It has its strengths, like the attractive templates and built-in features, but it might not be the perfect fit for everyone if you want extreme flexibility or demand very out-of-the-box designs.
If you’re looking for a platform that’s easy to use and gives you a professional-looking website without a ton of hassle, Squarespace is definitely worth checking out.
But hey, that’s just my two cents based on my own experience. Your mileage may vary!
Use our code NOMAD10 for 10% off your annual subscription here.
Hoping to plan out your Australia trip cost? Here is a detailed guide for what you might spend Down Under!
Australia is a magnificent country full of natural beauty and man-made wonders.
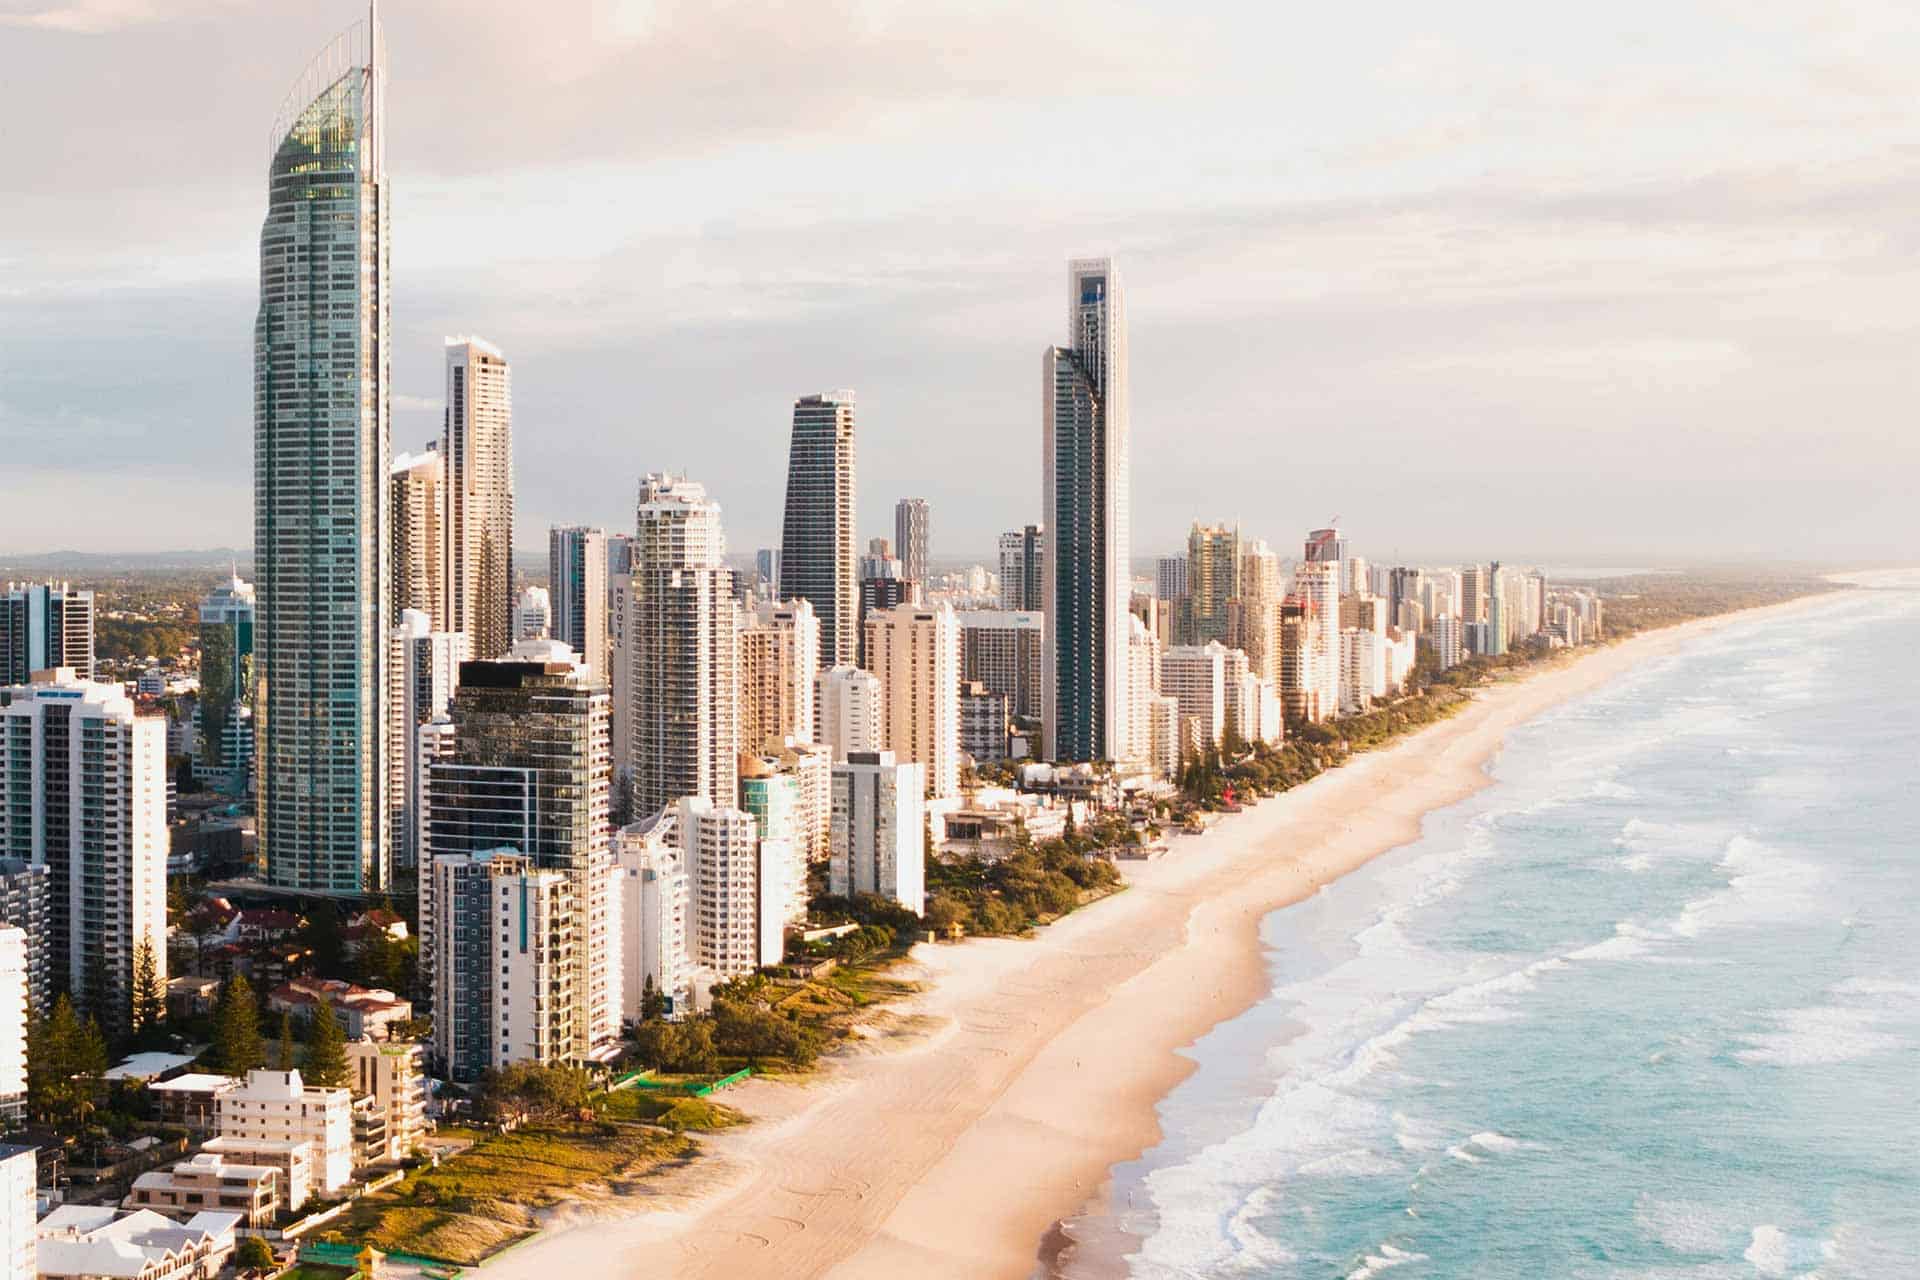
Visitors can scuba dive on the Great Barrier Reef, surf in the Gold Coast, and road trip through Outback destinations like Alice Springs or Uluru.
You can also marvel at the Sydney Opera House, explore Melbourne, and visit world class beaches outside Perth.
Australia offers vibrant cities, charming culture, unique wildlife, and natural wonders. But what does a trip to Australia cost?
This amazing country is not the cheapest in the world, but it is still worth visiting. You just have to plan your trip well and think about your budget ahead of time.
You could absolutely spend tons of money in Australia if you’re lax with your budget. Dine at fancy restaurants, take taxis everywhere, and stay in luxury hotels. OR, lower your Australia cost with some budget travel tips like staying in hostels, camping, cooking your own food, or finding cheap tours.
We’re going to break down the typical costs for a trip to Australia. Though it’s easy to make Australia an expensive trip, it’s also very doable on a tight budget.
In this guide to Australia travel cost, we’ll cover these main categories: flights, transport, accommodation, food, and activities. We’ll also mention other expenses that you might find, such as visas and travel insurance.
For the budget travelers out there, we’ll also cover any budget travel tips that can help lower your Australia cost. With a bit of discipline and mindful spending, you can have the trip of a lifetime without blowing all of your savings.
Take this advice and cater it to your own travel style and financial situation. Every traveler is different, so this is just meant to help you organize your own trip!
Get ready for the Australia trip of a lifetime!
Australia travel cost overview
Here is what some typical costs may look like for your Australia trip. We won’t include flights in this estimate, as flights will vary greatly depending on where you are departing from.
Average prices may vary based on season as well. If you visit in the off season, you can generally score cheaper prices on accommodation and activities.
Your travel expenses will also depend on your travel style. We’ll list some average prices for the following categories based on budget, mid-range, and luxury.
Keep in mind, there are just estimates, and actual expenses will hugely vary person to person.
Transportation
Budget – $20 per day
Mid-Range – $30 – $50 per day
Luxury – $60 – $100 per day
Accommodation
Budget – $20 – $70 per night
Mid-Range – $100 – $200 per night
Luxury – $300+ per night
Food
Budget – $20 – $40 per day
Mid-Range – $50 – $70 per day
Luxury – $80 – $150 per day (or more)
Activities
Budget – $50 – $200 per week
Mid-Range – $250 – $400 per week
Luxury – $500 – $1,000 per week
Flights to Australia
Depending on where in the world you live, flights to Australia may be one of your trip’s biggest expenses. Australia is quite an isolated continent, so most flights to reach the country are long-haul (unless you’re coming from somewhere close like New Zealand).
If you’re flying to Australia from somewhere far, like Europe or the Americas, you can easily spend $1,000 or more on a one-way flight.
But to visit Australia, you’ll just have to bite the bullet and book a flight.
Many people who travel to Australia tend to stay for a while, simply because it is so far away from most of the world. A three to four week trip is common, though you could easily spend years in Australia and still not see everything!
But for those who are determined to book that trip to Australia, the flight prices are always worth it. And saving money on your Australia flight is easier than you think!
Tips to save money on your flight to Australia
If you’re hoping to lower your Australia cost, you might be able to score a cheap flight with these travel tips.
Fly off season
Every country has its peak season and its off season. Australia is a large country, so the peak season varies depending on where you go.
For example, Sydney’s peak season is summer (December, January, February) and the off season is winter (June, July, August).
But somewhere hot and tropical, like Cairns, has winter as its peak season. Summer is the off season because it gets very hot and humid, but you can get some really cheap flights to the tropics at this time of year.
So depending on where you want to go, consider a visit in the off season! Average prices for flights in off season are often significantly cheaper than peak season.
You can also visit in shoulder season for that sweet spot of nice weather combined with cheaper prices.
Be flexible with your itinerary
Having flexibility with your trip to Australia means you can plan your itinerary around the cheapest flights.
Do some browsing online to see the cheapest flights to Australia from your home country.
Most travellers fly into Sydney, but you can also find cheap international flights into Brisbane, Perth, or Melbourne.
Maybe it’s costly for you to fly to Sydney in New South Wales, but maybe it’s surprisingly cheap to fly to Perth in Western Australia.
If you haven’t planned out an itinerary yet, perhaps you can organise your trip based on where the cheapest flights are! There is stunning beauty all over the country, so you can easily plan an epic adventure no matter where you arrive.
Get creative with layovers
Because Australia is so far from much of the world, it’s pretty rare to find a cheap AND direct flight.
Generally, the more layovers you have, the cheaper the flight price is. If you don’t mind taking some slightly more inconvenient layovers on the way to Australia, you may be able to get a much cheaper overall price.
You could also combine Australia with a trip to elsewhere nearby, such as New Zealand, Fiji, or Southeast Asia.
Though you may spend more money if you add on another country, you’ll get much more value out of your trip. Something to consider!
Most travelers start their Australia trip in Sydney.
Transportation costs within Australia
Once you arrive in Australia, you’ll need to get around the country. There are lots of great ways to get around Australia, so you can choose the ones that best suit your time frame and budget.
Those who want to save money can combine the cheapest forms of transport, such as walking and public buses for small distances in a city center, and coach buses or domestic flights for long distances.
A mid-range travel style might see a car or campervan rental paired with some domestic flights, taxis, or public transport.
Luxury travel will likely include just the most convenient methods of transport such as car rentals, taxis, and domestic flights to get around.
Domestic flights
Australia is absolutely massive. So if your trip to Australia includes lots of destinations, domestic flights can be very helpful.
For example, driving from Sydney to Perth will take you at least 3 days if you drive all day long with no stops. But flying there will only take 5 hours.
Domestic flights can be really cheap as well! Especially if you fly off-season and use budget airlines such as Jetstar, you can find one-way flights within Australia for around $100 or less one way.
This is a great way to save time on traveling overland, which can sometimes be a bigger journey than you’d expect in Australia.
Coach bus
Those who prefer to travel by land can get coach buses around Australia.
Greyhound is one of the most popular long-haul bus companies that visits cities and towns all over the country.
Just remember that driving distances can be very long in Australia! Utilise overnight buses where possible to optimise your time.
For example, a bus from Sydney to Melbourne is around 12 hours of driving. A bus from Sydney to Byron Bay is 13 hours of driving. Bus prices vary as well, so make sure you research the route you want to take.
If the bus and a flight are similar prices, you may prefer to take a flight to save time. But if you’re not in a rush and you find some cheap tickets, buses are a great way to get around Australia.
You can also get great deals on bus passes that include multiple journeys. For example, a Greyhound bus pass for the East Coast includes unlimited travel between Sydney and Cairns and prices start at around $330.
Car or campervan rental
One of the absolute best ways to explore on your trip to Australia is a road trip!
Flights can save you lots of travel time and help you pack in lots of destinations into a 1 or 2 week trip. But for those with a bit more time and flexibility, consider a road trip in a car or campervan.
Road trips allow you to see more of Australia, appreciating the natural beauty and small towns in between the tourist hotspots.
Car rental prices vary depending on your time frame, vehicle type, and location. But average costs can be anywhere from $50 – $100 per day.
A fun alternative to renting a regular car is hiring a campervan. Australia is absolutely packed with epic campsites, and a campervan lets you have a more flexible road trip because you can camp along the route.
Campervans are usually between $100 – $500 per day, depending on the quality and inclusions. But the price tag is often worth it. You can save money on accommodation and food by doing your road trip in a van that includes a bed and kitchen!
The best way to get around is to rent a car and explore on your own! We recommend Rental Cars, which has the largest range of vehicles for the best value on the market.
Public transportation within cities
Most Australian cities and larger towns have decent public transportation systems. Trains, trams, metros, and public buses are common in a city center, and they are a cheap and reliable way to get around a given area.
Most public transportation costs have reasonable rates that are no more than a couple of dollars per journey. Some longer rides and airport transfers may be more expensive at $15 – $10.
Though you can also try to walk as much as possible if saving money is a priority.
Most larger cities in Australia are safe, with lots of attractions within walking distance. Walk when you can, and take a local bus or train for larger distances in a city center.
Public transport is of course, slightly more hassle than taxis or Ubers. But it’s much cheaper!
Taxis and rideshare apps
If you have a bigger budget for your Australia trip, you can catch taxis and rideshare apps around most areas in Australia.
In popular cities like Sydney, Gold Coast, or Melbourne, taxis and rideshare apps will likely cost more money than in smaller towns. But the perk of being in a city center is that public transport will almost always be available when you need it.
If you’re in a very small, rural town, public transport might be more rare. In that case, local taxis may be your only option, but they likely won’t be too expensive.
It goes without saying that if saving money is your priority, try to stick to walking and public transport as opposed to taxis and rideshares.
Getting around Australia is half the fun!
Accommodation costs in Australia
Accommodation is often a pretty big expense while traveling anywhere in the world. A trip to Australia is no different!
There are lots of different places to stay on your trip, from budget backpacker hostels to wilderness campgrounds to fancy hotels and basic motels.
In popular tourist destinations, such as the East Coast, you’ll have a greater variety of accommodations to choose from. In remote, small towns, there may only be a handful of local hotels so you’ll have less choice.
But here is an overview of the most common accommodation types and what they typically cost in Australia.
Hostels
Hostels are a great option for budget travelers, though hostels in Australia are definitely on the expensive side.
Dorm rooms are generally between $20 – $70 per night, with the higher costs in popular cities like Sydney or Melbourne.
Prices may also be more expensive during peak season (summer and around holidays).
You can also get private rooms in hostels for roughly $100 per night. This may be slightly cheaper than hotel rooms! But a dorm bed is always the best way to save money in Australia.
Camping
Australia is one of the best countries in the world for camping! Picture well-maintained campgrounds surrounded by lush forest or stunning beaches.
Some have excellent amenities like kitchens, BBQ, and hot showers. These well-equipped campgrounds often cost money, but not much compared to a hotel.
Nicer campgrounds in Australia cost around $10-40 per night, depending on the time of year, day of week, and quality of the campground.
You can also find basic campgrounds with little to no facilities. Many of these are either free or very cheap at just $5-10 per night.
The only downside to camping as a traveler in Australia is that you also need gear! If you can hire a campervan that includes all the gear, that’s a convenient way to do it.
You can also buy cheap secondhand camping gear on GumTree or Facebook marketplace.
Camping in Australia is a magical experience.
Hotels and motels
If you prefer private rooms in classic hotels or motels, these are common around Australia as well.
Hostels are not very common in the less touristy regional towns as well, so sometimes hotel rooms are the only option.
But all over Australia you should have no problem finding mid-range hotels that are nice but won’t break the bank.
Private rooms in mid-range hotels and motels often cost between $100 and $200 per night, with costs creeping up to $300 per night in expensive areas like Noosa, Gold Coast, or Byron Bay.
Airbnbs
Airbnbs are super popular around Australia! If you’re visiting small towns on your trip to Australia, hostels and hotels may be less common. But you can often find Airbnbs owned by locals, so these are nice and reliable.
They are generally on the more expensive side, especially when you find the rentals that include entire homes or apartments.
But if you’re visiting Australia with a group, a large Airbnb is ideal. Airbnbs can generally cost between $250 and $500 per night, depending on the quality and size of the place.
Of course, luxury hotels are also an option when you visit Australia! Big cities and popular tourist hotspots will have more options in terms of elegance and luxury.
A room in a fancy hotel in Australia might start at around $300 per night, with prices soaring higher for the five-star accommodations.
Food costs in Australia
Food costs on your trip to Australia will mirror most destinations around the world. Eating out is expensive and cooking your own food saves you money. This is true almost everywhere!
But it’s especially important in Australia to be mindful of your spending when it comes to food. Eating and drinking in bars and restaurants is very costly in Australia!
Part of a holiday should definitely involve trying some delicious food as it’s an important part of the local culture. But for the budget travelers out there, cooking some of your own meals is one of the top methods for saving money.
Average food costs in Australia
Before we dive into the tips for eating according to your budget, let’s go over some basic food costs.
These prices are just an estimate! The same dish may be cheaper at a small, local place or more expensive at a fancy place in a city. But these basic costs should be pretty consistent around Australia.
Dining out / takeaway
Coffee – $5
Bacon and egg roll – $10
Egg breakfast with sourdough and avocado – $18
Local beer – $9
Craft beer – $11
Glass of wine – $10-15
Chicken sandwich – $15-20
Seafood lunch – $30-40
Salad – $15-20 ($5 to add protein)
Pasta dish – $20-30
Steak dinner – $30-50
Vegetarian dinner – $25-30
Desserts – $10
Groceries
1kg of oats – $3-5
Box of 6 apples – $5
2kg bag of potatoes – $4-5
Bag of frozen fruit $6-10
Can of beans – $1
12 pack of eggs – $8
1kg of rice – $4-5
Box of pasta – $3-6
Whole chicken – $10
Grass fed steak – $10
Can of tuna – $2-4
1kg of coffee beans – $15-25
Bottle of wine – $10-30
6 pack of beer – $20-40
Budget
Based on the average prices above, your Australia cost will likely be lower if you try to buy food from grocery stores and cook your own meals!
Try to find an accommodation that has kitchen facilities, or hire a campervan with cooking facilities. Even if you just make one meal a day at home, this will save you so much money throughout the course of your trip.
The hardcore budget travelers can even try to cook the majority of their meals. Then when you do decide to treat yourself to a meal out, it will feel that much more special!
If you mostly spend money on groceries, with the odd meal out here and there, you might spend around $20 – $40 per day on food in Australia.
Cafe culture is huge in Australia.
Mid-Range
A mid-range traveller in Australia might want to cook some meals and dine out for some meals. A healthy mixture of the two gives you some indulgence but also helps you save money.
An average breakfast at a cafe in Australia can be around $25 per person, with a meal and a coffee.
Lunch can also be about the same, especially if you skip the drink or look for lunchtime specials. Find the best deals by researching local lunch specials, as they are quite common around Australia!
Dinner out is usually the most expensive, especially if there is a cocktail involved (which can be $20 or more in Australia).
If you want a nice balance of dining out without spending a lot, consider cooking your own dinners and eating out for breakfast or lunch as these are the cheaper meals.
Luxury
With a heftier budget, your travel style can include much more cafe and restaurant meals in Australia.
If you’re looking for a luxury food experience, you can even head to some of the more upscale, expensive restaurants. Popular in the big cities, there are many restaurants in Australia run by world-famous chefs where you can indulge in transformative food experiences.
The price tags in these places will well exceed the averages I’ve listed above. But if you have the budget for it, you can really dive into the premium food scene Down Under.
Activities in Australia
Tours and activities are essential to having a fulfilling Australia experience.
Most day tours in Australia cost around $100 – $300, depending on the tour.
Overnight tours greatly vary in cost, depending on how long the tour is and what level of luxury you get.
For example, camping overnight tours on K’gari (Fraser Island) are more affordable because you’re staying in nature without many facilities. But similar tours with resort accommodation will cost more.
On the other hand, some Whitsunday sailing tours include a stay in a luxury private catamaran cabin, and some fancy train tours across Australia include luxury cabins as well. So these tours will cost much more.
Budget Tours
If you want to keep your costs low in Australia, stick to the budget tours and day trips. Then fill most of your days with free activities like hiking, beach-hopping, and sightseeing.
But do pay attention to the cost per day for an overnight tour! Some backpacker-friendly overnight trips are actually great value for money, even if they are 2 or 3 days.
On overnight tours, your accommodation and food is usually covered in the tour price. So an overnight tour can still be affordable, especially for nature-focused tours like K’gari (Fraser Island) or camping near Uluru.
But in general, your trip will be a lot cheaper if you emphasize the free activities that Australia offers.
Mid Range
For mid-range travellers, definitely treat yourself to some amazing Australian tours. Maybe mix in some day trips, affordable overnight trips, and more luxury tours for a bit of variety.
And do your research so you can see which attractions are better with or without a tour. For example, the Great Barrier Reef is definitely better with the marine life experts on a guided tour, whereas national parks like the Blue Mountains can be easily visited without a tour.
Also take note of entrance fees for things like museums, wildlife centres, and art galleries. Pick and choose which attractions will bring you the most joy, and be selective about what you pay for to maximise your budget.
Luxury
For those who don’t mind higher costs, you can really live life to the fullest in Australia.
Book as many guided tours and experiences as you want! You can even treat yourself to private tours and private charters for trips out to sea.
There are so many cool experiences to have in Australia.
Additional costs for a trip to Australia
Most visitors can plan their travel budget for the transport, accommodation, food, and activities. But many forget about the additional expenses!
Here are some other things to include in your Australia travel budget.
Visa
Everyone visiting Australia needs a visa! Those visiting on a holiday will need a Visitor Visa, and those planning to stay longer and work can do a Working Holiday Visa.
Regardless of your intentions in Australia, you will need a visa.
A Visitor Visa is pretty cheap at around $195. Working Holiday Visas cost more at around $650, but they allow you to stay for up to a year and work to fund your trip.
It’s always a good idea to get travel insurance for a trip abroad. You never know when you might need emergency medical treatment or have some sort of travel fiasco, so it’s worth buying travel insurance to know you’re covered.
Travel insurance costs vary depending on the length of your trip to Australia, your nationality, and which provider you choose. Do a bit of shopping around to find the best plan for you!
Important Note! Before you book any international trip, we honestly recommend getting travel insurance. You never know when things will go wrong, and medical bills can add up quickly if you get sick or injure yourself overseas.
Our personal recommendation based on our own experience is World Nomads.
Souvenirs
Souvenirs are not an essential purchase on a trip to Australia. But it’s a good idea to set aside a little cash just in case you see something that sparks your attention.
A beautiful, hand-crafted souvenir that reflects the local culture is a wonderful way to remember a trip abroad.
But try to avoid buying things just for the sake of it! You don’t want random trinkets that will just collect dust, as it’s a waste of money.
Be mindful with your spending and try to only buy meaningful souvenirs that you will actually use and cherish.
Australia Cost Wrap Up
Given all the info we just covered, it’s easy to see that Australia can easily be affordable or expensive depending on your travel style.
Most people would agree that the best way to travel is by following your intuition and being mindful. Combine a few budget travel tips with some once-in-a-lifetime experiences.
If you are going to spend your money, spend it on something that really adds value to your trip.
Whether it be a fancy hotel in a city you’ve always wanted to visit, a five-star restaurant that showcases your favorite cuisine, or a multiday tour that includes all the highlights of a given area, you can enhance your trip to Australia through buying things that mean something to you.
But to avoid any guilt or financial stress, balance that out with some frugality. Cook some meals at your accommodation, spend a few nights at a cheap hostel, or try camping in the wilderness. Skip the cocktails one night or walk around instead of taking taxis.
Be flexible with your trip and spend with intention. This will help you plan a trip to Australia that is unforgettable, but also affordable!
DISCLAIMER: Some of the links in this article are affiliate links, which means if you book accommodation, tours or buy a product, we will receive a small commission at no extra cost to you. These commissions help us keep creating more free travel content to help people plan their holidays and adventures. We only recommend the best accommodations, tours and products that ourselves or our fantastic editorial team have personally experienced, and regularly review these. Thanks for your support, kind friend!
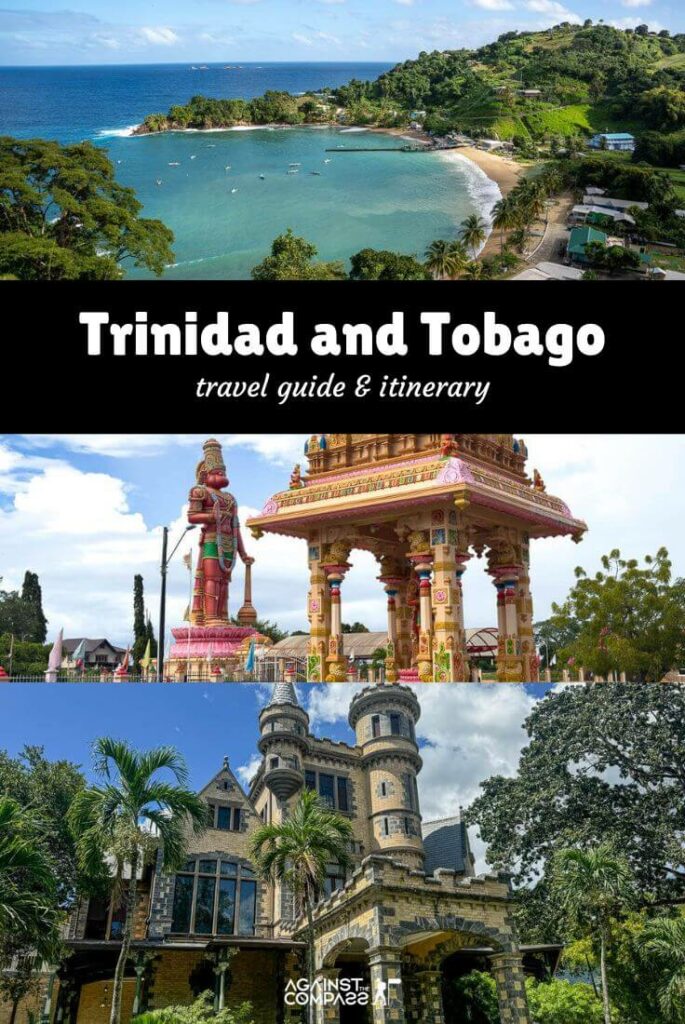
Trinidad and Tobago is the southernmost country in the Caribbean.
After the Republic of Haiti, this island-nation is also the least visited and most unsafe country in the region.
It’s a country divided into two islands: the island of Trinidad, and the island of Tobago, each one offering a completely different travel experience.
This travel guide to Trinidad and Tobago will tell you everything you need to know to tour one of the least visited countries in the Caribbean, including how to get there, budget, itinerary and more.
In this travel guide to Trinidad & Tobago you will find:
our recommended travel insurance for Trinidad and Tobago
With its Backpacker plan, IATI Insurance is the best insurance for any kind of adventurous destination, like Trinidad and Tobago.
🇹🇹 Introduction to traveling to Trinidad and Tobago
I liked Trinidad and Tobago, and I liked it because this isn’t your typical Caribbean destination.
On the one hand, the capital – Port of Spain – is a bustling metropolis as per usual Caribbean standards. It’s busy, polluted and the city center features high-rise, concrete towers.
Port of Spain’s city center
On the other hand, and as mentioned earlier, this Caribbean nation is composed of two islands that could hardly be more different.
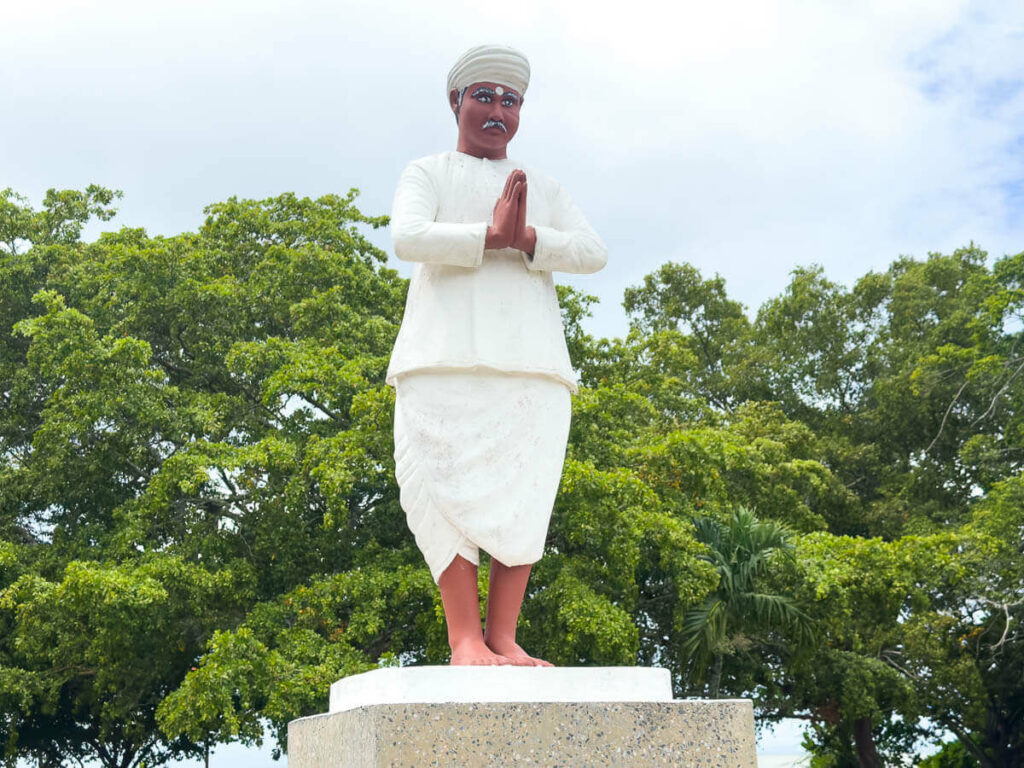
The island of Trinidad is multiethnic, most of their population being ethnically African – descendants of former slaves – and Indian – brought to replace freed African slaves who refused to continue working on the sugar plantations.
You are also likely to meet many white Trinis, as well as direct descendants of incomers from Syria and China.
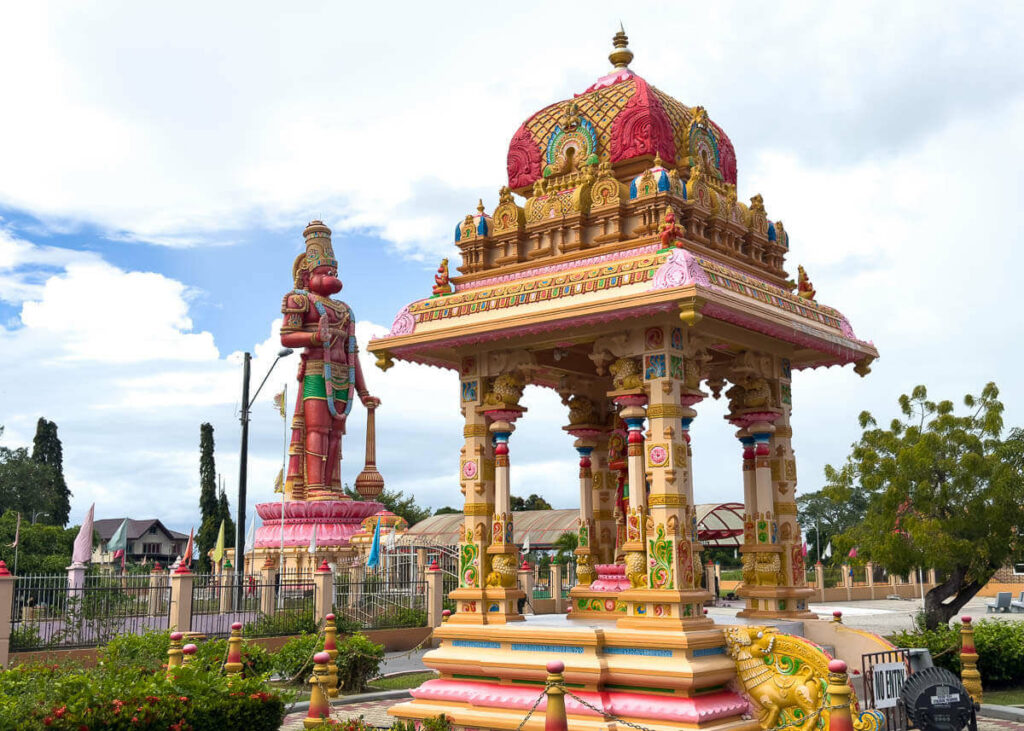
This cultural diversity and the way the different ethnicities coexist and worship in their respective temples – the island is packed with Hindu temples, churches and mosques – is the highlight of visiting Trinidad.
A Hindu temple somewhere in Trinidad
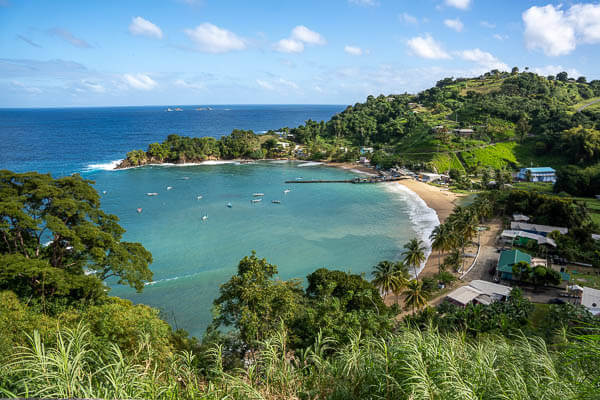
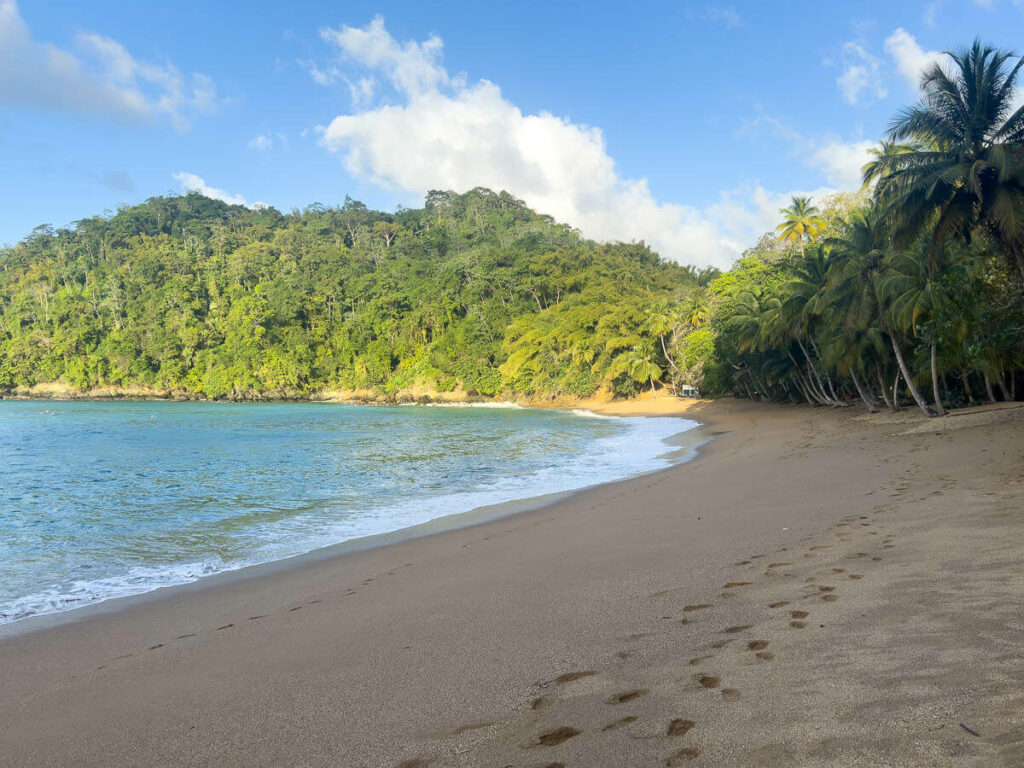
Tobago, nevertheless, is more rural and 99% African. It’s also significantly closer to your idea of a Caribbean holiday, with the added benefit that mass tourism isn’t really a thing here. In fact, this is one of the few places in the Caribbean where you can still find unspoiled beaches that can be enjoyed all to yourself.
The thing is that Trinidad and Tobago is the leading producer of natural gas and oil in the Caribbean, so they never had a need to develop a proper tourist industry, making it one of the most authentic countries to explore in this part of the world.
Trinidad was first Spanish and then British Trinidad had been a Spanish colony since their first permanent settlement in 1592 but years of negligence and leaving the island abandoned and defenceless make the British taking it over in 1797. Trinidad and Tobago got its independence from the British in 1962. Despite Trinidad being a Spanish colony for 200 years, today’s colonial heritage is purely British, not only in the language and architecture, but also in that Indians – brought to replace freed African slaves who refused to continue working on the sugar plantations – are the largest ethnic group.
An empty dreamy beach in Tobago
⚠️ Is it safe to travel to Trinidad and Tobago?
Excluding Haiti, Trinidad is infamous for being the most violent country in the Caribbean and one of the worst in Latin America.
In 2024 alone, the country registered 624 homicides for a population of 1.5 million people. That’s higher than Mexico and USA cities with a high level of criminality, such as Chicago.
The situation was so bad that in December 2024, Trinidad and Tobago imposed a nationwide state of emergency due to the spread of gang violence in Port of Spain.
This gang violence is explained by the country’s proximity to Venezuela and direct transportation routes to Europe, which makes Trinidad and Tobago an appealing market for drug smuggling.
Gangs and violent street crime are a fact of life here, but that shouldn’t prevent travelers from visiting Trinidad and Tobago, for the following reasons:
Gang violence mostly focuses on Port of Spain
Shootings and homicides are concentrated in Port of Spain, more specifically in certain areas within Port of Spain like Laventille, which you are very likely to avoid.
Violent crime here is not worse than in Bogota or Mexico City
Street crime in Port of Spain is pretty bad per Caribbean standards, but I don’t think it’s that bad if we compare it to other Latin American cities frequented by tourists such as Rio de Janeiro, Bogota or Quito.
You already know how things work in these places, just apply common sense: don’t take random taxis, don’t walk alone at night and avoid empty areas after dark, such as downtown.
Tobago is pretty safe
Unlike Trinidad, Tobago is as safe as other islands in the Caribbean.
Tobago is super safe to travel
🪪 How to get a visa for Trinidad & Tobago
You don’t need a visa to visit Trinidad & Tobago.
Upon arrival, all you’ll get is a friendly stamp valid for travel in Trinidad and Tobago for 90 days.
🚑 Travel insurance for Trinidad and Tobago
Trinidad and Tobago is an adventurous destination, so we recommend going there with proper travel insurance.
Their backpacker plan covers all types of adventure activities, including trekking
Very competitive prices
Readers of this blog can get a 5% exclusive discount
🛫 How to get to Trinidad and Tobago
How to travel to Trinidad and Tobago by air
The International Airport of Port of Spain (POS) is the main hub in the Caribbean, connecting with several islands like Barbados, Grenada, and Saint Vincent, among many others.
You can also fly there from anywhere in the 3 Guianas, including Georgetown, Paramaribo and Cayenne.
Just check flight schedules on Caribbean Airlines, the national airline.
If you’re coming from Europe, you can find relatively cheap flights from London with British Airways, and if coming from the Americas, check out flights via Miami (American Airlines) and Panama City (Copa Airlines).
I personally traveled to Port of Spain on a direct flight from London and flew out to Georgetown, Guyana.
Does Tobago have an international airport?
Tobago has a tiny international airport named ANR Robinson International Airport (TAB).
It has several daily connections with Port of Spain but very limited (and expensive) connections with the rest of the world.
However, they are currently building a larger terminal, so Tobago is set to be more connected within the next few years.
How to travel to Trinidad and Tobago by boat
As of today, there aren’t any official ferries going to Trinidad, only cruise ships.
⛅ Best time to visit Trinidad and Tobago
Choosing when to travel to Trinidad and Tobago highly depends on the amount of rain.
The dry season runs from the end of November to May so technically, this would be the best season to visit both islands, especially if you are interested in beaches and Caribbean vibes.
The rainy and hurricane season runs from June to November. However, being the southernmost island in the Caribbean means that Trinidad and Tobago receives lesser amount of rainfall than other islands in the Caribbean, from Grenada to Haiti.
Visit Trinidad during Carnaval
Port of Spain holds what is arguably one of the best Carnavals in the world, perhaps not as large as Rio de Janeiro’s but way more authentic. That’s what they claim, anyway.
Their Carnaval is so important to them that upon my arrival in Port of Spain, the bartender from the first bar I went to asked me: Are you here for the Carnaval? – even though Carnaval was still 6 weeks away.
If I ever go back to Trinidad, I’ll definitely visit the country during Carnaval.
As you may know, Carnaval dates always vary but it’s always some time between the end of January and the beginning of March.
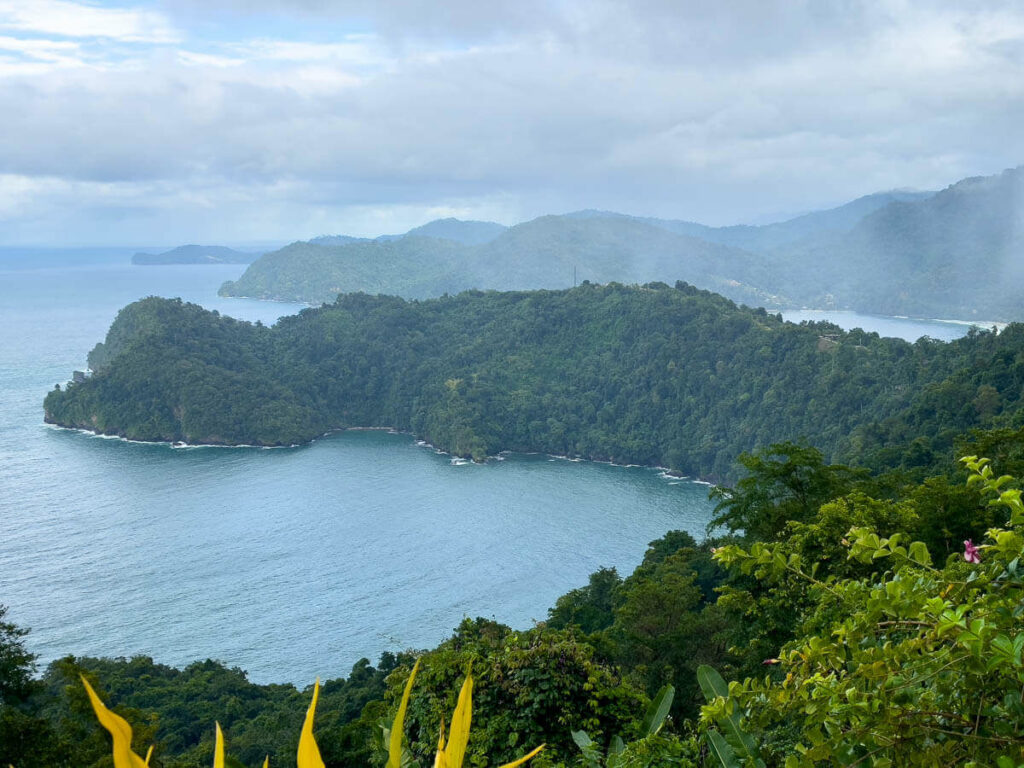
Lookout at Maracas. We visited Trinidad in January, it was great, just a little rain from time to time
🛺 How to get around Trinidad and Tobago
As in other West Indies islands, public transportation isn’t great and not particularly convenient to visit the various nature spots around the country.
That’s why I recommend renting a car directly from the airport, either in Tobago or Trinidad. Remember, however, that in Trinidad and Tobago, they drive on the left side of the road, like the United Kingdom.
If, for whatever reason, you can’t rent a car, you can still get around (sort of) on the buses and minivans connecting the main towns, although you’ll be more limited.
Is there a bus from the airport to Port of Spain?
Yes, there is a bus running from Monday to Friday, and tickets can be purchased from inside the terminal.
However, the bus drops you downtown, one of the most notorious areas in Port of Spain for violent crime, so I don’t recommend getting on that bus if it arrives after dark. In day time, it should be fine.
How to get around by shared taxi
To get around Port of Spain, locals use what they call Route Taxis, which are shared with other passengers going in a similar direction. They charge TT$5 per passenger.
Please make sure their license plate starts with the letter ‘H’’. Don’t accept a ride from cars with the license plate beginning with the letter ‘’P’’ or ’T’’, just as you wouldn’t accept a ride from a random car in Mexico City, Bogota or Caracas.
How to travel between islands, from Trinidad to Tobago
Traveling from Trinidad to Tobago by air
Caribbean Airlines has loads of daily scheduled flights from Port of Spain to Tobago for around 70 USD return. It’s a 30-minute flight, making it the fastest way to travel to Tobago.
How to travel from Trinidad to Tobago by ferry
There are 2 daily ferries running between Port of Spain and Scarborough, the capital of Tobago.
Typically, one departs in the morning, and the other in the afternoon.
Important: In my experience, rental car companies don’t allow their cars on the ferry. If you plan to rent a car for your entire trip, you’ll have to make 2 different bookings, one on each island.
💰 Money & budget in Trinidad and Tobago
In Trinidad and Tobago, they use the Trinidad & Tobago Dollar (TTD) and approximately:
1 USD = 6.75 TTD
Exchanging money in Trinidad and Tobago
I recommend exchanging your currency at the airport – the rate was pretty decent.
Cash or card?
Many places across both islands accept card payments, especially hotels and fancier restaurants, but do bring cash for the rest.
By the way, US dollars are accepted in many hotels and/or Airbnbs.
How much does it cost to go backpacking in Trinidad and Tobago?
These are the prices of the most typical things:
Private room with bathroom in Tobago: from 400 TTD
Private room in a hotel in Port of Spain: from 100 TTD
Local meal, e.g. roti: from 40 TTD
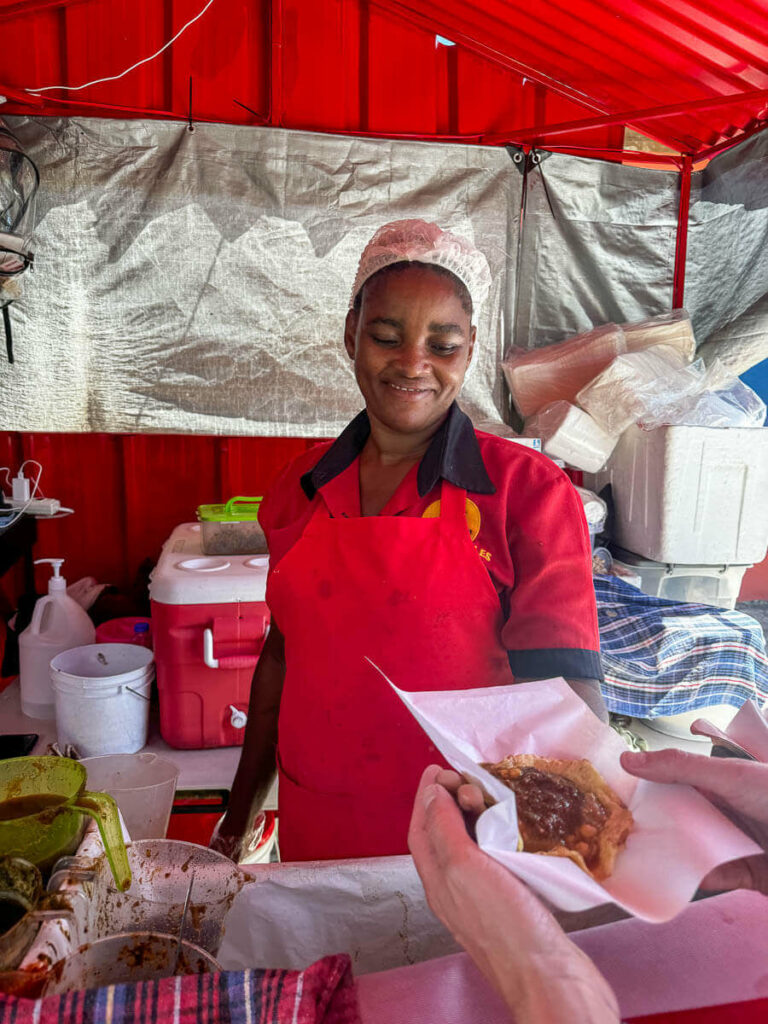
Street food e.g. doubles: from 10 TTD
Main meal in a restaurant: from 110 TTD
Rental car: from 60 USD a day
Beer: from 70 TTD
Short taxi ride with local app: from 100 TTD
🛖 What to do in Trinidad and Tobago in a 5-day itinerary
The following itinerary for Trinidad and Tobago is what we followed during our 5-day visit, which worked pretty well for us.
In only 5 days, we obviously didn’t became the ultimate experts on the country, but it gave us an idea of what’s it’s like.
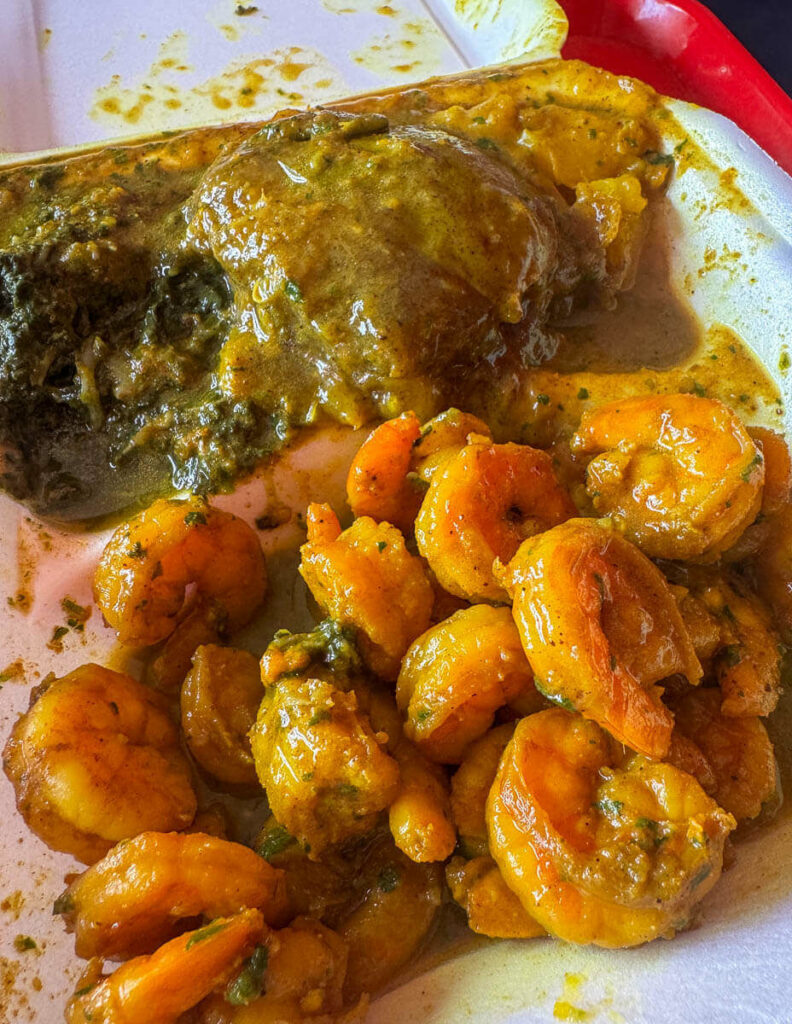
Try doubles Doubles is a popular street food consisting of curry chickpeas served in two fried flatbreads. They tend to top it with mango and different kind of spices, so this Indian-influenced snack is more amazing than it sounds. You can find doubles everywhere across both islands.
Map of our Trinidad and Tobago itinerary
What to do in Trinidad and Tobago on a 5-day itinerary
Day 1 – Arrival in Trinidad and Tobago, staying in Piarco
The first day of our Trinidad and Tobago trip, we landed in Piarco International Airport around 5 pm.
We decided to spend the night in the town right next to the airport, since our flight to Tobago was scheduled on the next day early in the morning.
There’s not much to do in Piarco, so all we did was go for drinks and a meal at a bar/restaurant called Quties.
Where to stay in Piarco
Please note that accommodation in Piarco is pretty expensive for solo travelers.
If you want something cheaper, go to Port of Spain instead.
We stayed at a place called Travelholics Getaways, a comfortable, privately-owned guesthouse. It’s quite expensive but there were 3 of us, so it turned out to be a good deal.
Proper hotel. There aren’t many hotels in this area and Holiday Inn Express is one of the few choices, but it’s $$$.
Around Piarco, there’s a cheaper option called The Layover, a small apartment with two rooms.
Day 2 – Fly to Tobago
On day 2 of our Trinidad and Tobago itinerary, we took the Caribbean Airlines flight from Port of Spain to Tobago.
We picked up our rental car (via Rental Cars) at the airport itself and chose to stay in a village named Castara.
Do I recommend staying in Castara?
Yes, I actually do. It’s a small coastal village with a pretty laid-back and quiet local vibe.
On Thursday night, local people from the area gather by the beach around a bonfire with music and drinks.
On that particular day, we didn’t do much other than recover from jetlag and a small hike to Castara waterfall.
Where to stay in Castara
We stayed in Casa de Castara, a house that features single and double rooms with a private bathroom. I think it was the cheapest option in town.
Day 3 – Full day around Tobago
On our third day in Trinidad and Tobago, we did a full circuit of the island, stopping in the following places:
Englishman’s Bay: Probably the best unspoiled beach in the Caribbean.
Parlatuvier: This tiny village isn’t only pretty but also very local
Charloteville and Pirate’s Bay: A medium-sized town, not touristy, from where you can walk to another unspoiled beach named Pirate’s Bay.
Argyle Falls: The highest falls in Tobago, which you can reach in an easy 20-minute hike. They charge an entry fee of around 10 USD per person.
Scarborough: The capital of Tobago. There isn’t much to do here, but it’s worth checking it out.
Pigeon Point: The closest thing in Tobago to a proper touristy Caribbean beach. I don’t really recommend it, but it’s good to see every facet of Tobago.
In the evening, on the way back to Castara, I recommend you stop at a local bar named Village Vibes, right in the center of the island, where you can enjoy a very authentic side of Tobago.
Look for Sue’s Doubles in Tobago. The best doubles we had in Tobago were from Sue’s Doubles, which has quite a few street stalls across the island. Look for the one in Scarborough.
This is Trini rotiThis is Trini doubles
Day 4 – Back to Trinidad and full day around Trinidad
On day 4 of our Trinidad and Tobago trip, we flew to Port of Spain in the early morning.
After checking in to our hotel, we spend the day driving around the island of Trinidad.
A man selling coconut in Port of Spain
Places we visited included:
Sewdass Sadhu Shiva Mandir Temple in the Sea: A Hindu temple built on the sea. There wasn’t anyone there when we visited but it’s still nice to see.
Dattatreya Mandir Temple: Another Hindu temple, larger and more active than the previous one.
Maracas Beach: The northern coastline is the prettiest in Trinidad, Maracas being the most popular places for locals.
Try chow at Maracas Lookout: Here, you’ll get amazing views of the area and you’ll also be able to buy chow, which consists of local fruit like mango or pineapple marinated in garlic, salt and coriander.
This is the famous Trini chow
Maracas is known for serving the best Bake & Shark, a Trini fried fish sandwich, too greasy in my opinion, but a typical thing to eat in the area.
We spent the evening and night in Port of Spain, in a very busy street called Ariapita, which is packed with all manner of bars and restaurants.
Where to stay in Port of Spain
Port of Spain is definitely not backpacker friendly, most budget accommodation being rooms and apartments run by private owners. Hence, I recommend Alicia’s Lodge.
Budget/mid-range hotel – Culture Crossroads Inn. Probably the cheapest proper hotel in the city.
Day 5 – Port of Spain and departure
Our flight to Georgetown (Guyana) was in late afternoon, so we saved the last day to visit Port of Spain properly.
For breakfast, I recommend going to an area by the sea, where you will find a dozen food stalls serving all sorts of local foods, including coconut bake with smoked fish, a traditional breakfast.
For lunch, try roti at Prataj Roti Shop. Roti is another Indian-influenced street food, consisting of roti bread filled with a choice of slow cooked curry, from shrimps to potatoes.
When it comes to things to see and do in Port of Spain, we walked around Independence Square in downtown – an area to avoid once it gets dark – and also Queen’s Park Savannah and all the colonial buildings along Maraval Road.
Colonial building in Port of Spain
❗ More information
📢 In my Travel Resources Page you can find the list of all the sites and services I use to book hotels, tours, travel insurance and more.
As travelers, we all know the importance of a good piece of luggage. Traveling is stressful enough, so minimizing the number of things that can go wrong on a trip is important. Aside from your passport, your suitcase is undoubtedly the most important thing you’ll have to rely on when you travel. But how do you know which one to choose when there are so many out there? In this post I’ll give you my honest opinion about a piece of luggage that truly convinced me: the Level8 Adventurer Carry-on.
Level8 Adventurer Carry-on
Why Choose Level8 Luggage
A few years ago I tried my first Level8 suitcase. More precisely, the Level8 Pro Carry-on Spinner Luggage with front pocket and double TSA locks. And I truly fell in love with it! I’ve taken the suitcase on about 6-7 trips across the world already. Most of the time as a carry-on luggage, but I even checked it in a couple of times and it did hold up pretty well. No complaints so far.
But then I discovered that Level8 came up with a new addition, the AdventurerCarry-on, so I decided to give it a try. So in this post I’ll give you my honest opinion about it.
How Does Level8Adventurer Differ from Other Carry-ons
What I found most attractive about the Adventurer Carry-on is the front side-lid opening design which offers easier access to your cloths and maximizes the space in the main compartment. This also allows you to open your suitcase quickly in an airport, without having to place it flat on the floor. No more unzipping the whole bag!! It’s also convenient if you want to keep it open on a luggage rack in your hotel room.
Side lid opening design
The exterior material is German-made Makrolon® polycarbonate, while the interior: 100% RPET recycled polyester.
Wide trolley handle
Other Features:
Wide Trolley Handle: this suitcase offers an adjustable telescopic wide trolley handle. This revolutionary design is ultra-sturdy and provides enhanced stability. It also has the advantage of creating more interior space for packing.
Expandable zipper: this feature conveniently allows for further expansion of the suitcase. This gives you 5 liters and 24 inches extra space for travel essentials. It holds lots of stuff!
Dual-spinner wheels: this system with precision ball bearings ensures smooth handling and lasting durability, no matter the terrain. The wheels are not only smooth, but also very quiet.
TSA-approved lock: this not only ensures the security of your belongings, but also saves you from the inconvenience of having your lock permanently damaged during a routine security inspection.
Interior compression: this packing system keeps your belongings neatly secured during travel.
Dual-spinner wheels
I really like the Level8 products! Although I have bought more expensive bags in the past, most of them lacked some of the features that this company provides. Plus I’m absolutely loving the striking yellow and black color scheme of the Adventurer Carry-on!
Dual-zipper
The Best News
The best news is that Level8 Adventurermeets all the requirements for any airline carry on. This is key for me, considering that the airlines changed the carry-on rules recently. With this suitcase and a good travel backpack I have all I needed for one or two weeks away for travel.
Why Buy Level8 Adventurer Carry-on
They offer a big variety of luggage for both check-in and carry on. But what’s more important, they put a lot of effort into building sturdy, reliable suitcases that are meant to last.
What I mostly like is the reliability of their dual-spinner wheels system which delivers unmatched durability and an ultra-quiet ride. They are engineered with a Covestro AG polycarbonate case, designed to conquer Europe’s cobblestones with ease. What’s really impressive is the fact that they are backed by a lifetime guarantee. They also show less than 2mm of wear after an incredible 276,000 rotations. This is the quality test that most other brands fail.
FOR 10% DISCOUNT ON ALL PRODUCTS, GO TOLevel8 Catalog choose whatever you like and enter the exclusive code “agalffy10” when you check out.
Don’t Miss the Packing Cube Travel Set!
If you want to pack even smarter, you can complete your Level8 Adventurer carry on with the 4-piece Packing Cube Travel Set. These are good for garments, gadgets, or grooming essentials and will make your packing way more efficient. A great way to keep your belongings dry and organized.
The packing cubes are made of a two-tone polyester that fightsmildew and repels water and have detachable rubber patches for quick identification. The cubes dimensions are as follows:
Dimensions: Garment Cube: 18″L x 12″W x 4″D (46 x 31 x 10 cm) Journey Cube for Worn Attire or Footwear: 12″L x 9″W x 4″D (31 x 23 x 10 cm) Electronics Cube: 9″L x 5.9″W x 3.9″D (23 x 15 x 10 cm) Grooming & Beauty Essentials Pouch: 9″L x 5.9″W x 3.9″D (23 x 15 x 10 cm)
Note: Level8 Group provided me with this suitcase for review. However, the opinions expressed in this article are based on my own experiences with this piece of luggage.
Solo traveling has become increasingly popular over the years, with more and more young adults deciding to go off into the world by themselves. Many of these individuals would say the experiences has improved their lives greatly and added essential character to their personalities. But what do you need to know before traveling solo?
There are many factors that potential solo travelers should know beforehand. This can include anything from costs of traveling to making friends in a foreign country. However, you should also be aware of the factors that will keep your safe while you explore unfamiliar destinations.
In this post, three of the most important safety factors have been listed to ensure you are adequately prepared when you head off on your solo trip.
Do Your Research Beforehand
To begin your research, you should look online. Although a Google search will unveil lots of useful information, many people forget what social media has to offer. There are many Instagram travel accounts that can provide helpful details for different destinations, including popular solo travel countries like Australia, Croatia, Iceland, and Japan. These accounts will provide ideas on accommodation, activities, and locations to visit.
Once you have a better idea of where you would like to go and what you would like to do, you can then determine if these locations are suitable for solo traveling. This goes further than just ensuring you will be safe in the country; you might even be concerned about being the only solo traveler in an area that is filled with couples, families, and groups.
Another aspect to research is whether you will need a visa to visit your preferred country. This will often depend on how long you plan on staying in that country. For example, a tourist visa will allow you to stay in Australia for up to three months, while solo travelers should receive a Visa on Arrival (VOA) when entering Indonesia that is valid for 30 days. You can check with the embassy of your destination to receive advice on what visa, if any, is required.
You should also research accommodation options, common scams and dangers, transportation, and such before finalizing your decision.
Ensure You Have Suitable Insurance for Your Trip
After researching your destination and finalizing your booking, you will need to select the correct type of insurance for your requirements. Solo traveling can cause a few challenges to occur, and having insurance is one of the best ways to protect yourself from unexpected scenarios, such as baggage loss, illness, injury, natural disasters, theft, and unexpected cancellations. No one wants to imagine being the victim of these situations, but it is entirely possible.
When selecting your insurance, you should consider the length you are traveling for. Some ordinary vacation travel policies will only last a week to ten days, which might not be enough if you are planning on exploring a new country for a month or more. If you travel more frequently to different destinations, then opting for an annual policy might work better for you. You should also ensure your insurance policy will cover accidents and injuries that happen during bungee jumping, kayaking, and other activities.
You might also want to consider the cost of the policy before deciding which plan to go for. The cost of your international travel medical coverage will be affected by multiple factors, like your age, your chosen deductible, add-ons, etc. Most insurance policies will range from $40 to $60 per month, which is often more cost-effective than paying for each day, although this might increase if you have a pre-existing medical condition.
Share Your Plans with Someone at Home
Creating a travel itinerary before you begin your travel can be a useful task. Not only does this allow you to ensure your days are packed with activities and you have enough in your budget, it also helps you to prioritize your safety. This is done by sharing your itinerary and travel plans with a family member or friend who is back home. The details you should share include flight details, accommodation, and destinations you’ll be visiting.
The best way to create your itinerary is through a Google document. This means it can be edited through your phone as your travel and other people back home can access it and see the changes as they come through. The instant updates are great for ensuring you are safe at a distance. As your family member or friend cannot check up on you in person, they will see you have been active and can rest easy knowing you are safe.
For women who are solo travelers or would like to experience solo traveling, this is a very important tip to remember. A study found that 88% of women said they were somewhat threatened or felt unsafe while traveling, which goes to show the scope of this issue.
Traveling solo can be a great method of self-discovery. It has proven to be a good way for individuals to experience personal growth and boost confidence, although it is advised that people complete the required preparations before heading off on a trip. This post has outlined some of the most important factors you should consider to ensure your solo travels are enjoyable and safe.