We’ve been to Bacolod several times, and most of our trips, our main motivation is none other than…FOOD! From the city’s famed chicken inasal to its decadent sweet treats, Bacolod never fails to satisfy our craving — from appetizers to desserts.


In this article, we’ll be sharing the dishes, restaurants, and food spots we tried and loved during our most recent visit. This list is arranged in no particular order. Also, our choices and opinions may differ from yours, as taste is subjective. We are in no way food experts; we simply love eating and discovering good food.
WAIT, WAIT, WAIT! If you have a trip soon, please also visit our The Poor Traveler Masterlist. Here, we compiled travel essentials, including immigration requirements and all our recommended hotels and attractions. Just visit this page: TPT Masterlist. We also have a compilation for other destinations around the world.
Lion’s Park
When we asked our three Bacolod-based friends what they thought was the best chicken inasal in the city, we got three very different answers. Somehow, we weren’t surprised. Given the sheer number of great inasal places in the City of Smiles, it seems everyone has their own favorite spot — and they’ll defend it with the same passion people usually reserve for love teams, BTS, or Taylor Swift.
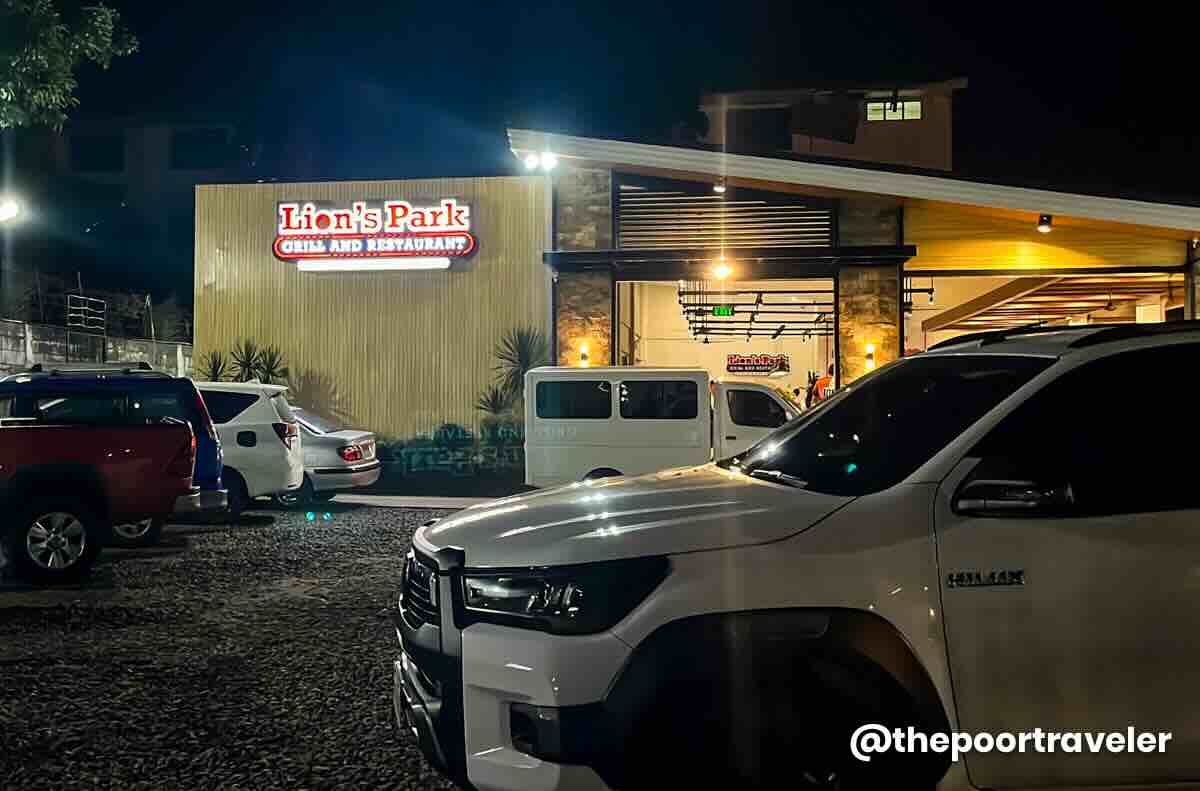
That’s the good thing about Bacolod — you surely won’t leave without tasting delicious, perfectly grilled chicken inasal. On our previous trips, we usually ate at Manokan Country. We’ve already tried Aida’s and Nena’s Rose, so this time we wanted something different. Our friend Mark highly recommended Lion’s Park Grill Haus, a local institution that has been serving inasal since 1981.
Its original location was at the famous Manokan Country, which was demolished and rebuilt as part of SM City Bacolod. But we ate at the site along Lizares Avenue. Not sure if it transferred to this spot or it’s an additional branch. Most of the tables are in the open-air area, but it does have an air-conditioned section now. Either way, the smell of grilled chicken hits you before you even sit down.
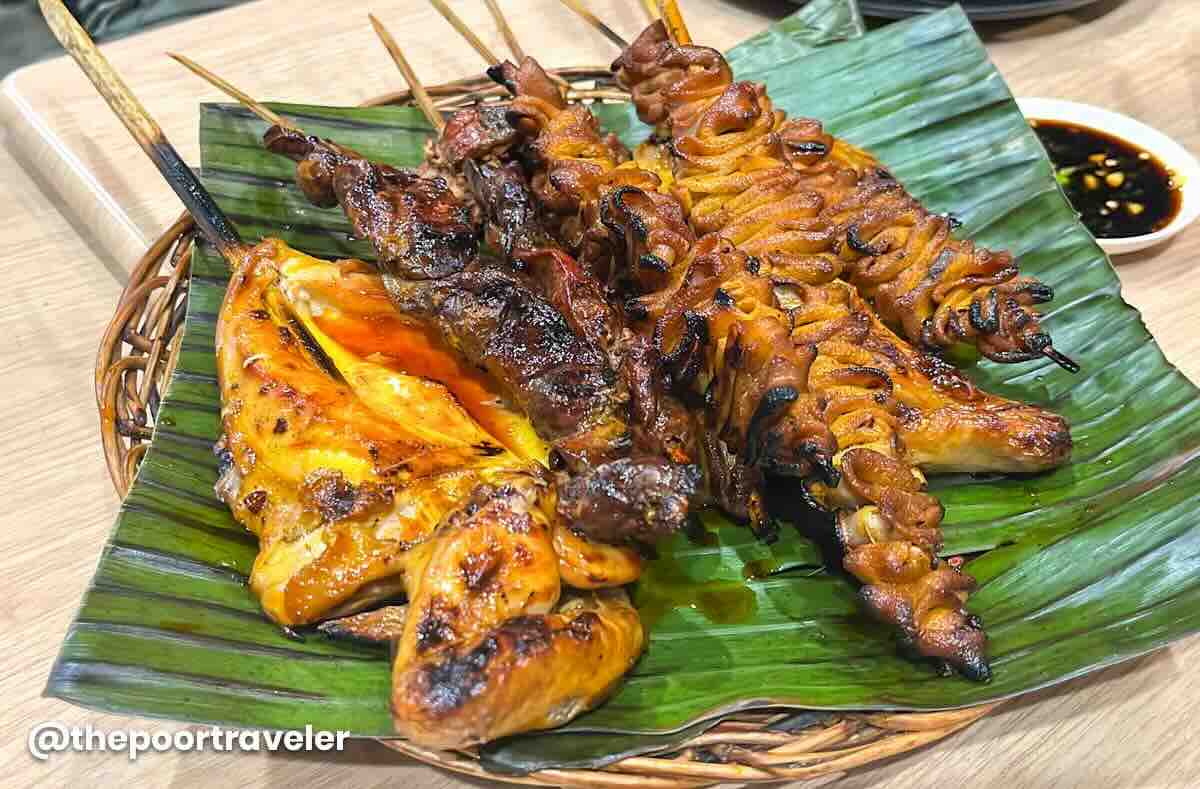
Aside from the cut (pechopak is the best, still), it also offers native chicken variant. Both options are smoky, flavorful, and best paired with rice drowned in chicken oil and sinamak (spiced vinegar).
We also enjoyed its isaw, locally called isaw/tinae, which was cut open and thoroughly cleaned, so there was no funky aftertaste. We also had chicken liver or atay and pork sisig, both of which were your usual fare — good enough but won’t exactly steal the spotlight from the inasal.
It’s funny because on our last Bacolod trip, there were also three of us in the group, and each had our own favorite and a different take on which one was the best. For Vins, Lion’s Park is his top pick, while our teammate Asta (@ganitofriend) and I placed our bets on other chicken inasal contenders.
Address: Lion’s Park Grill Haus, Lizares Street, Bacolod, 6100 Negros Occidental
Opening Hours: Daily, 10:30 AM – 2:00 PM; 4:30 PM – 10:30 PM
What We Ordered: Chicken Inasal Pecho, P135; Native Chicken Pecho, P160; Isaw/Tinae, P40; Sisig, P190; Atay P60
Chicken House
Chicken House got the highest mark on Asta’s scorecard. The chicken inasal that we tried here had a tastier marinade, with the vinegar being more intense and balancing out the saltiness.
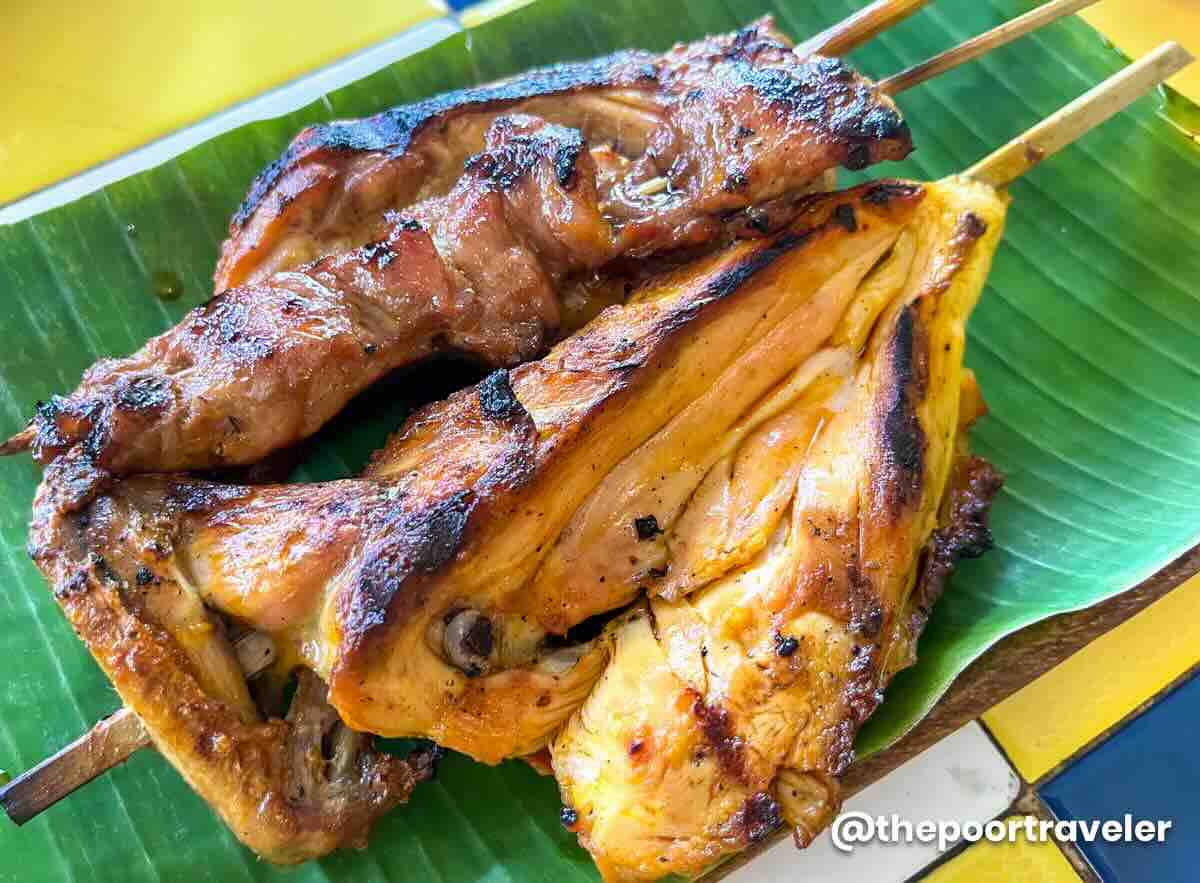
The serving was smaller, though, and the piece Vins got was a bit on the dry side. The chicken we had at Lion’s Park was juicier, making it Vins’s top preference, but only by a slim margin.
We also had grilled squid or inihaw na pusit, which was perfectly grilled and not chewy at all. The lemongrass stuffing helped tone down the strong seafood taste of the squid. As for the pork barbecue, it was just okay.
Address: Chicken House Main Branch, 24th Lacson Street, Bacolod, 6100 Negros Occidental
Opening Hours: Monday to Friday, 11:00 AM – 10:00 PM; Saturday, 11:00 AM – 12:00 AM; Sunday, 12:00 AM – 10:00 AM; 11:00 AM – 10:00 PM
What We Ordered: Chicken Inasal Pecho, P140; Grilled Squid, P160; Pork BBQ, P50/stick
Sugba Sugba Inasal & Seafood
For me, the best inasal I tried on our most recent trip was from Sugba Sugba Inasal & Seafood. Actually, it was tied for #1 with Vins’s pick. We just made him pick only one.

Of all the chicken inasals we tried on this trip, this was by far the juiciest and the most flavorful. It was also the cheapest, at P115-125 apiece. But it wasn’t just the inasal. Every single dish that was served on our table was fantastic.
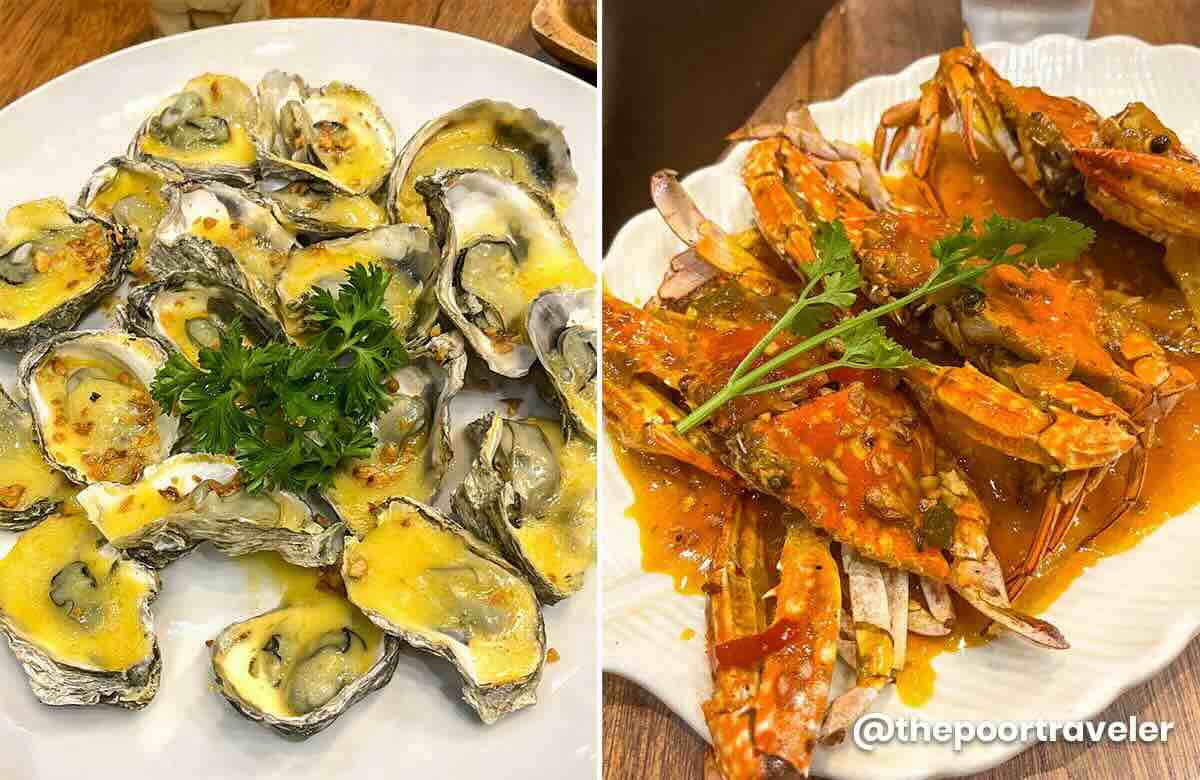
From the usual grilled innards like isaw and atay to its seafood bestsellers. The chili garlic crabs were so fresh, made even tastier by the sauce, which was like a mix of sweet chili and sarciado. And of course, the baked oysters. The oyster meat was small, but there were 20 of them, profusely complemented by the rich, cheesy sauce. This was our best meal in Bacolod on this trip.
The place was also air-conditioned, so we dined comfortably even when it was really hot outside.
Address: Sugba Sugba Inasal & Seafood, 115 4th Street, Bacolod, 6100 Negros Occidental
Opening Hours: Daily, 10:30 AM – 2:30 PM; 5:30 PM – 9:30 PM
What We Ordered: Chicken Inasal Paa, P115; Chicken Inasal Pechopak, P125; Isaw, P45; Atay, P60; Chili Garlic Crabs, P400; Baked Oysters, P300
Gina’s Seafoods Restaurant
If you want more fresh ocean bounty, look no further than Gina’s Seafoods Restaurant. It’s a spacious open-air restaurant, fronted by a parade of squid, shrimps, prawns, and various types of fish. Diwal or angel wing clams were also on the menu. It’s my favorite, but it was not available at the time.
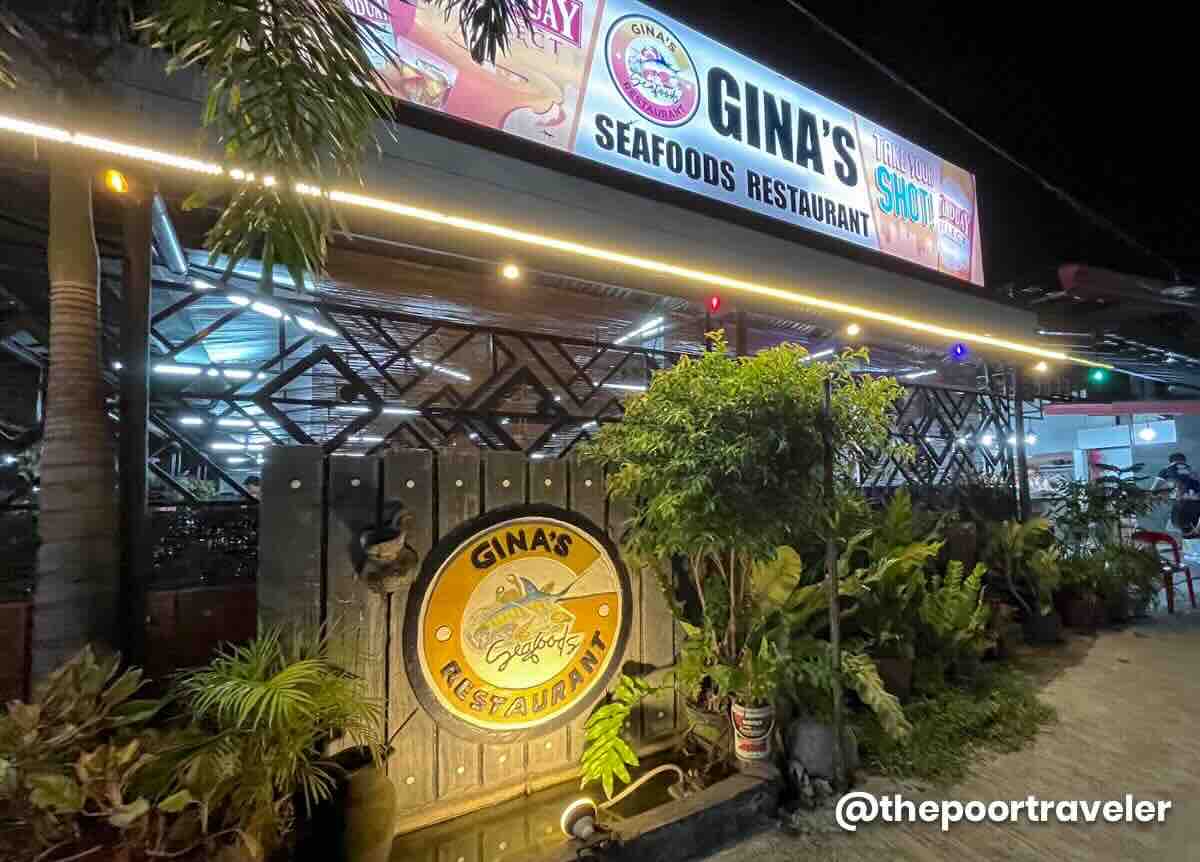
Gina’s is a paluto restaurant, where you pick your seafood then decide how you want it cooked (grilled, steamed, sizzling, sweet and sour, sinigang, etc).
We asked the staff for their bestsellers, and they mentioned grilled blue marlin, garlic butter shrimp, and sizzling squid, so that’s exactly what we ordered.
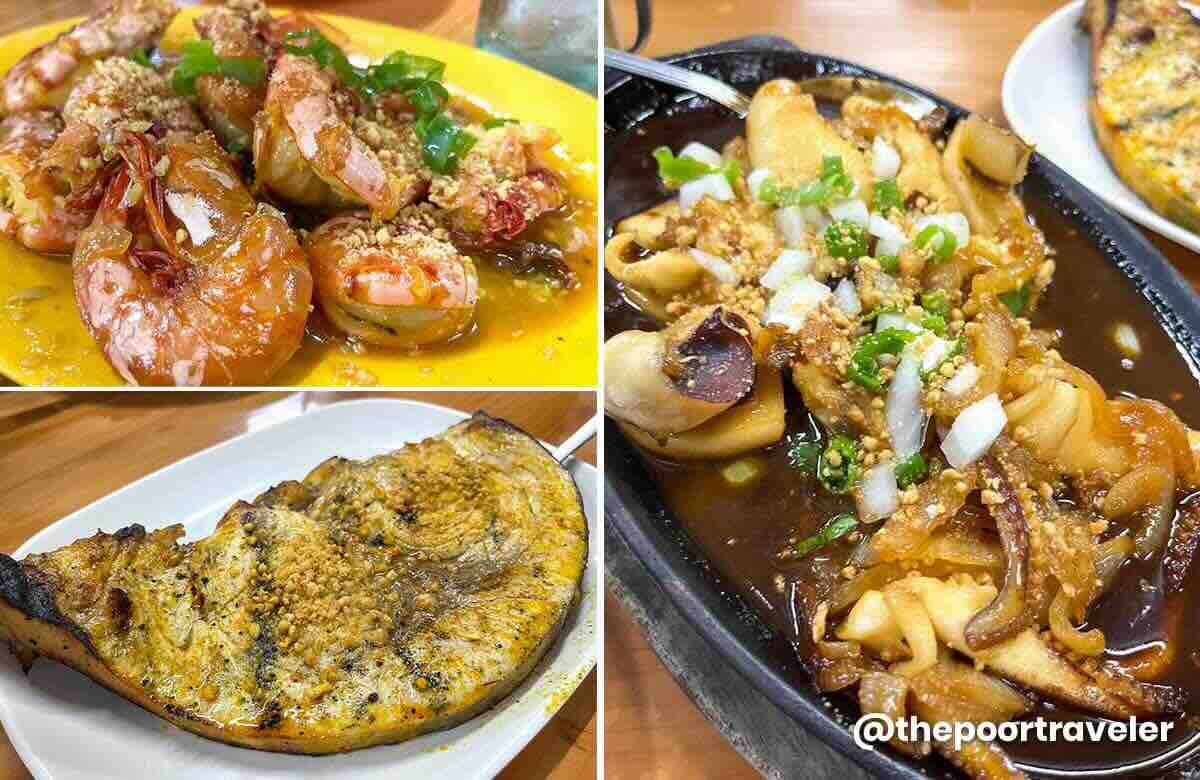
Every single thing we ordered was so fresh. There was no funny or funky smell or aftertaste at all. They were also perfectly cooked. The blue marlin was tender. It was easy to appreciate its natural flavors; we didn’t even need a dip or sauce for it. Meanwhile, the shrimp dish didn’t disappoint either. The garlic made the crustaceans sing. But our unanimous standout pick here was the sizzling squid! Technically, it was cuttlefish or pusit lumot, which made me nervous because it could easily turn rubbery, but this one didn’t. It was very soft, and its sauce had the right blend of sweet and salty.
Address: Gina’s Seafoods, San Juan Street, Bacolod, 6100 Negros Occidental
Opening Hours: Daily, 10:00 AM – 11:00 PM
What We Ordered: Blue Marlin, P275 for 1/4 kg; Shrimps Steamed with Garlic Butter, P225 for 1/4 kg; Squid, P225 for 1/4 kg
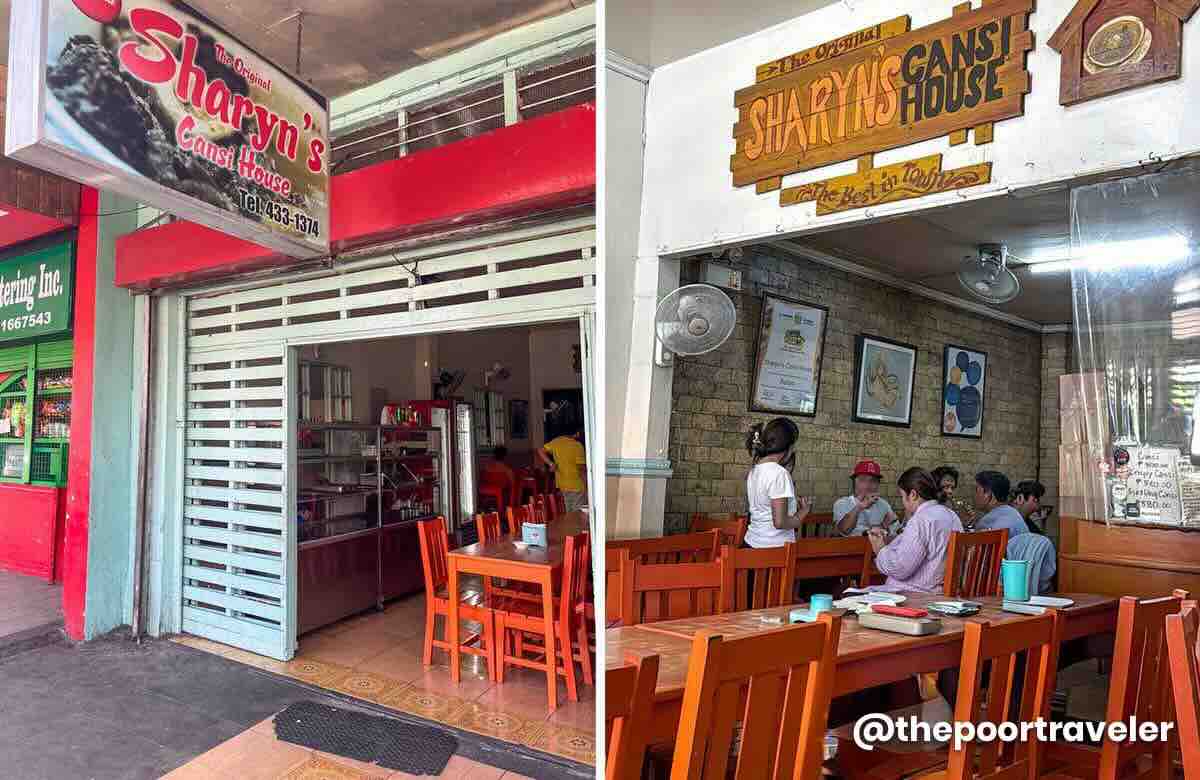
Sharyn’s Cansi House
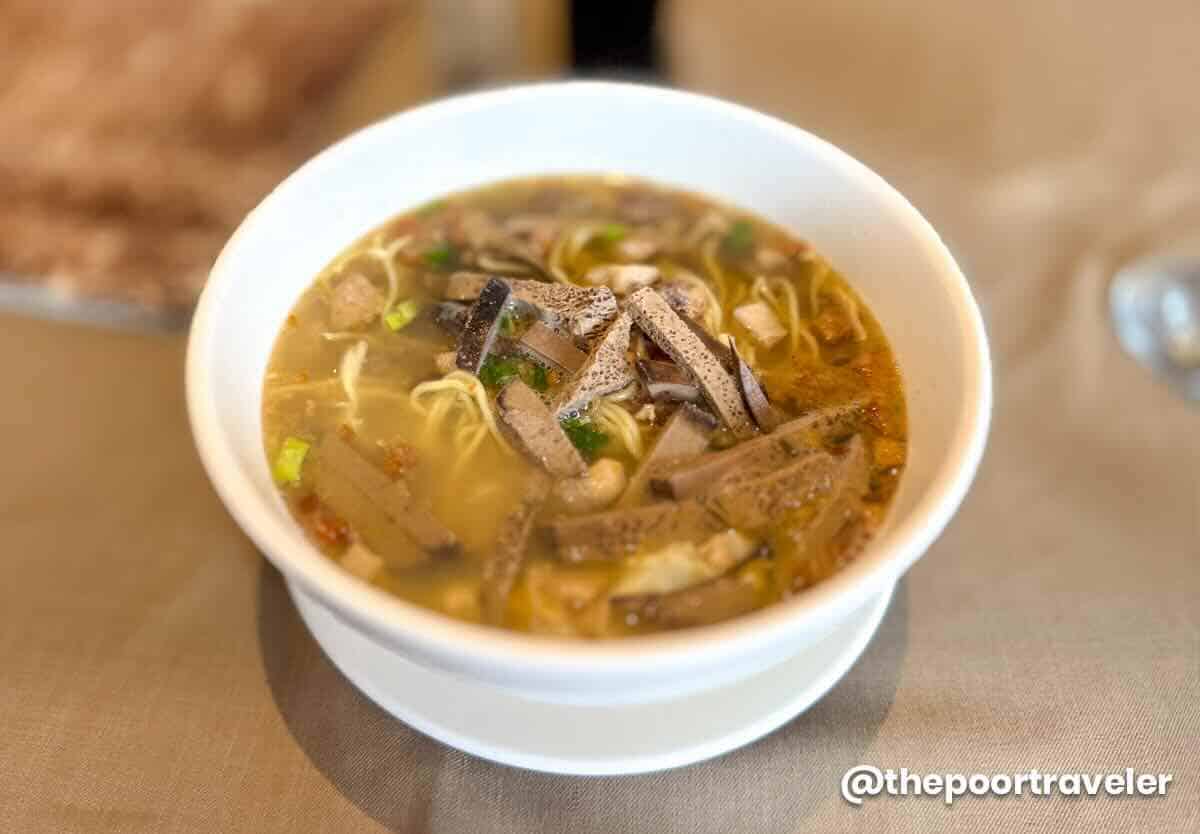
If there’s one place in Bacolod you want to go for a bowl of cansi, Sharyn’s is it. Located on Narra Avenue, Barangay Villamonte, this no-frills eatery has been serving up its signature beef soup since 1985, and in 2017 it was even recognized by the World Street Food Congress as one of the Top 50 Street Food Masters in the world.
The beef shank is stewed until it’s fall-off-the-bone tender, the broth is deeply beefy, and there’s a sour kick from batuan, a souring fruit native to Negros and Panay, which gives the soup its distinct flavor. Every order is good for a group, usually served in a big bowl with extra mugs of soup for refill. If you’re going solo, I doubt you’d be able to finish it.
On our recent visit, the first thing the staff told us as we entered was that they didn’t have bone marrow anymore. We really appreciated them informing us before we could even sit down or order. But we still went ahead. This was our third time here, and while the bone marrow takes it to another level of richness, we’re totally fine without. When we had our first sip, we were reminded why we came back! Their cansi is really comforting.

We also ordered their “crispy” version of cansi, which is basically the cansi’s shank meat deep fried until it’s crunchy. But to be honest, the crispy cansi in our memory was better than what we got this time. This one was much tougher than I remember.
If you decide to visit, manage your expectations. It’s basically a specialized carinderia. It’s simple, modest, and not air-conditioned. It’s casual and often busy, especially around lunch or dinner.
Address: Sharyn’s Cansi House, Narra Avenue, Barangay Villamonte, Bacolod, 6100 Negros Occidental
Opening Hours: Daily, 8:00 AM – 8:00 PM
What We Ordered: Cansi, P500; Crispy Cansi, P580
Calle Luna Halo-Halo
Just a short walk from Sharyn’s stands Calle Luna, a dessert spot originally from Silay City, with a branch also in Talisay and Bacolod. It’s known mostly for its wide, wide selection of halo-halo and other icy desserts.
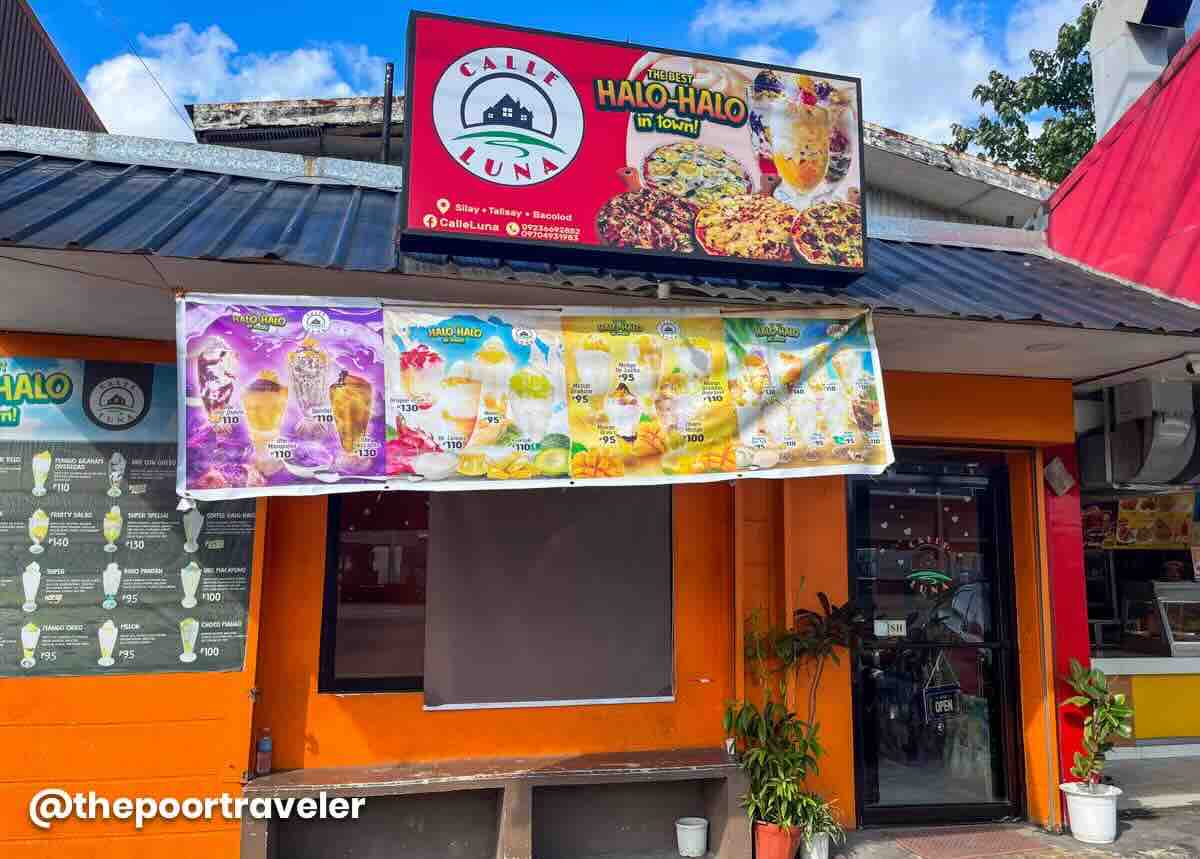
What sets it apart from the typical halo-halo is that it uses so-called milky ice, which is finer, smoother and milkier. Instead of the usual basic shaved ice drizzled with evaporated milk, the milk is more infused in the ice.
Vins ordered their bestseller called Super Special, which has sweetened banana, sweet buko strips, jelly bits, corn kernels, mango, ube halaya, and then topped with ube ice cream, leche flan, and cheese. According to him, it was good — very creamy, with well-balanced ingredients. Nothing was overpowering. It was just a bit unusual for him to have mango in halo-halo, but once he got used to it, it turned out okay.

Meanwhile, Asta got the De Langka. This flavor is seasonal, but thankfully, it was available that time. Of course, langka or jackfruit took the spotlight, as it should. It also came with sweetened banana, buko or coconut, corn, and crowned with vanilla ice cream.
I ordered Mango de Leche, which has mango caramel syrup and jelly bits, then topped with mango ice cream and leche flan. I liked it but didn’t really live for the mango ice cream as it overpowered the natural flavor of the real mango. I enjoyed Asta’s Langka and Vins’s Super Special halo-halo much better. But overall, it was very satisfying, especially after a bowl of cansi. It was also scorching hot that day!
We also wanted to try La Arte’s halo-halo, but it was out of the way, and we didn’t have much time, so we just skipped it for now. Maybe next time!
Address: Calle Luna Halo-Halo, BS Aquino Drive, Bacolod, 6100 Negros Occidental
Opening Hours: Daily, 11:30 AM – 7:00 PM
What We Ordered: Super Special Halo-Halo, P130; De Langka, P110; Mango de Leche, P110
21 Restaurant
Located at 21 Lacson Street, corner 21st Street (hence the name), 21 Restaurant used to be a humble merienda spot but has evolved into one of Bacolod’s more upscale casual dining spots. A few years ago, I first visited this place with Vins and Asta, and we ordered a lot. I remember we had a great meal overall.
But this time around, I came alone, and I came for one thing and one thing only — a bowl of its signature batchoy! The broth isn’t clear-clear but not opaque either, but surprisingly packed with flavor! It’s simmered until it soaks up all the umami goodness, then layered with noodles, tender bits of meat, and generous slices of liver, and then sprinkled crunchy chicharón on top. It’s less rich and less garlicky than the ones I tried in Iloilo and more refined than usual, but still very comforting.
Although I went for the batchoy, I also ordered its Lola Nitang’s Bibingka, which was a bit inconspicuous in the menu. But I’m obsessed with bibingka in general, so I just had to try it. And my gosh, this was really good. It was soft, moist, and tasty. It had just the right amount of sweetness.
Address: 21 Restaurant, 21 Lacson Street corner 21st Street, Bacolod, 6100 Negros Occidental
Opening Hours: Daily, 10:00 AM – 10:00 PM
What We Ordered: Batchoy Special , P180 (w/ egg, +P25); Lola Nitang’s Bibingka, P170
Café Bobs
And since we’re already talking about sweets, let’s cross to the next item, literally. Located just across the street from 21 Restaurant sits the flagship store of Café Bobs. Honestly, it was our first time hearing about it, so we’re not too familiar with its legacy. Apparently, it started back in 2003, so it’s been part of Bacolod’s food scene for over 20 years, serving specialty coffee, pastries, and casual café culture in the city. The name “Bobs” comes from owner Bobby Magalona and his wife’s passion for baking and coffee.
We asked the staff for their bestsellers on the iced drinks menu, and they recommended the Iced Spanish Latte. Normally, this drink is quite sweet because of the condensed milk, but their version — as Tito it may sound — was not too sweet at all. It was just right, with the espresso and milk really standing out.
We also got a slice of Burnt Cheesecake. The burnt-ness adds extra flavor and makes it more complex, but since it didn’t have a crust, it tasted a bit one-dimensional and it lacked the texture to cut through its richness. It did get quite overwhelming after a while.

We also had a piece of Choco Carrot Cake, and we actually enjoyed this more than the burnt cheesecake. We love carrot cake, so by default, it was a “yes” for us. This one was moist, with a layer of chocolate icing. And maybe it’s just us, but we picked a strong cinnamon notes, which we really liked.
But if cakes are what you’re really after, you should also check out the next two items on this list.
Address: Café Bobs, 21 Lacson Sreet, Bacolod, 6100 Negros Occidental
Opening Hours: Monday to Thursday, 8:00 AM – 10:00 PM; Friday to Sunday, 8:00 AM – 11:00 PM
What We Ordered: Iced Spanish Latte, P175; Burnt Cheesecake, P135; Choco Carrot Cake, P120
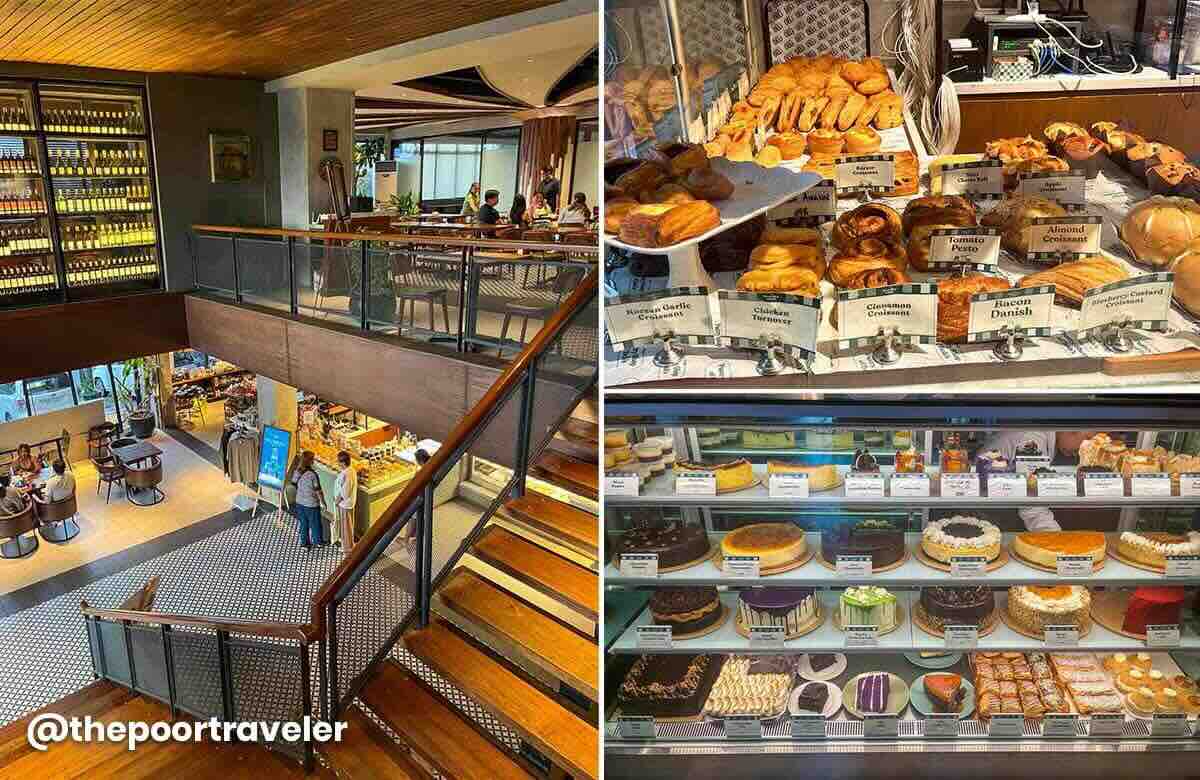
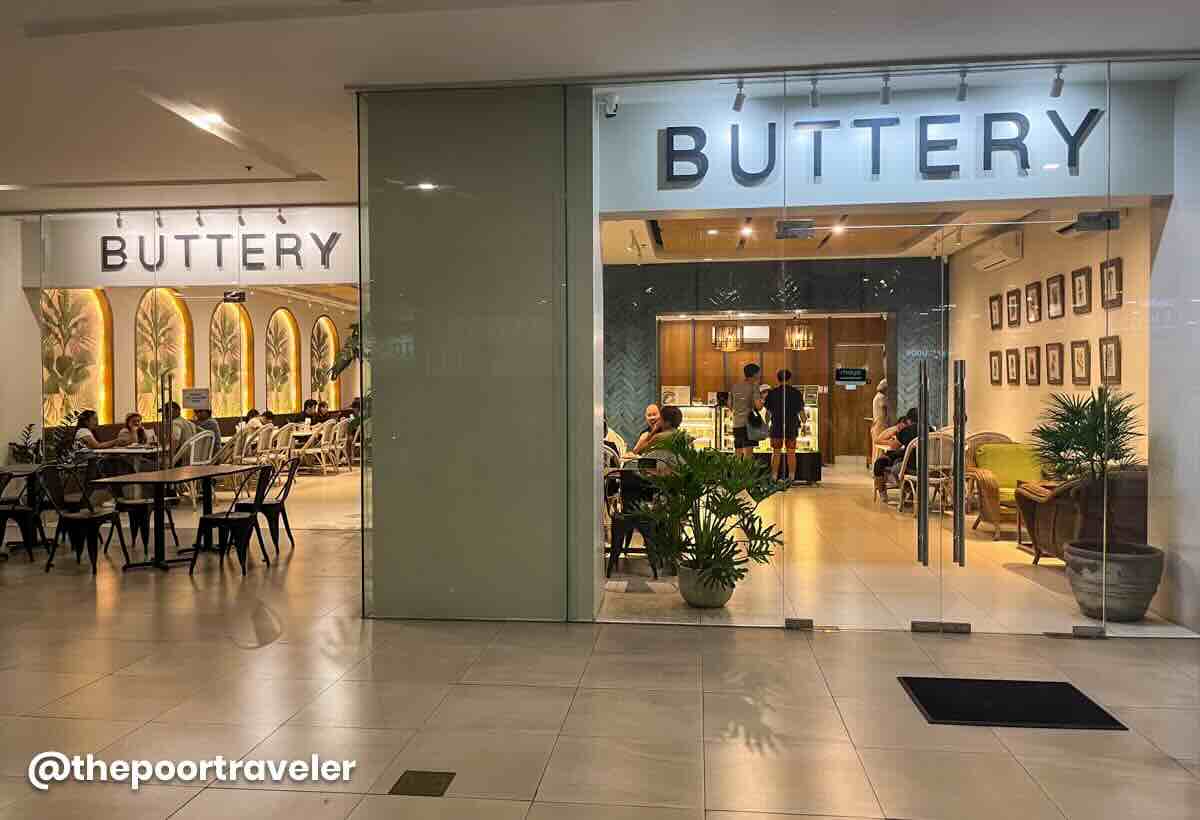
Buttery Negros
We had a hard time here at Buttery, not because we didn’t like anything, but because we couldn’t decide what to order. Their cakes were on full display near the cashier, and we wanted to taste them all. They all looked so good!
When we asked the staff, they recommended the Lemon Chill and Pistachi-oh Craze cakes. But I also ordered Galleta de Leche for good measure. As someone who likes my cakes simple, it really appealed to me, and I was also told it was a signature creation of theirs too.
The Lemon Chill was a combination of calamansi cake and lemon square with creamy lemon mousse in between and topped with pieces of almond. Meanwhile, the Pistachi-oh Craze was composed of crunchy lumpia wrapper coated in Nutella, covered in pistachio mousse and pistachio cream, sitting on an Oreo crust and drizzled with more Nutella and dark chocolate, and sprinkled with more pistachio bits. I was a bit skeptical in the beginning because these cakes sound like they’re too complicated and too decadent for their own good. But because we always follow staff recommendations, we did just that, and they didn’t disappoint. They were truly delicious!

But the Galleta de Leche was my favorite. It’s basically just creamy caramel flan on a salty cracker crust, topped with whipped cream. I appreciated the simplicity of it! The richness and sweetness were just right, not saturated.
Oh, we also ordered the Ube Cheesecake. Told you we couldn’t make up our minds, so we ended up ordering a lot. This is ube-flavored cheesecake sitting on polvoron crust and topped with queso de bola.

Here at Buttery, we were accompanied by our college friend Ry, who is a Bacolod local. He had the Matcha Tiramisu, which is green tea-flavored tiramisu with white chocolate and almonds. We also got a taste of it because we all shared cakes. Both the ube cheesecake and matcha tiramisu delivered, too. We ended up having a different favorite!
Buttery’s roots can be traced back to Dumaguete, but the Bacolod locals had embraced it, and no surprise there, really. Every single thing on our plates was unforgettable.
But if you’re looking for desserts that are truly local and homegrown, then the place to be is…
Address: Buttery, Lacson Street corner C.L. Montelibano Avenue, Bacolod, 6100 Negros Occidental
Opening Hours: Daily, 9:00 AM – 9:00 PM
What We Ordered: Lemon Chill, P130; Pistachi-oh Craze, P180; Galleta de Leche, P130; Ube Cheesecake, P150; Matcha Tiramisu (P120)
Calea
Calea is one of Bacolod’s iconic bakery-cafés, located along Lacson Street. Every time we’re in Bacolod, we visit to get at least three slices from its massive selection of cakes, ice cream cakes, and cheesecakes. But prior to our visit last month, it had been years since we last set foot here, so as always, we asked the staff for recommendations. They suggested the Choco Mud Pie, Imported Chocolate Cake, and Blueberry Cheesecake.
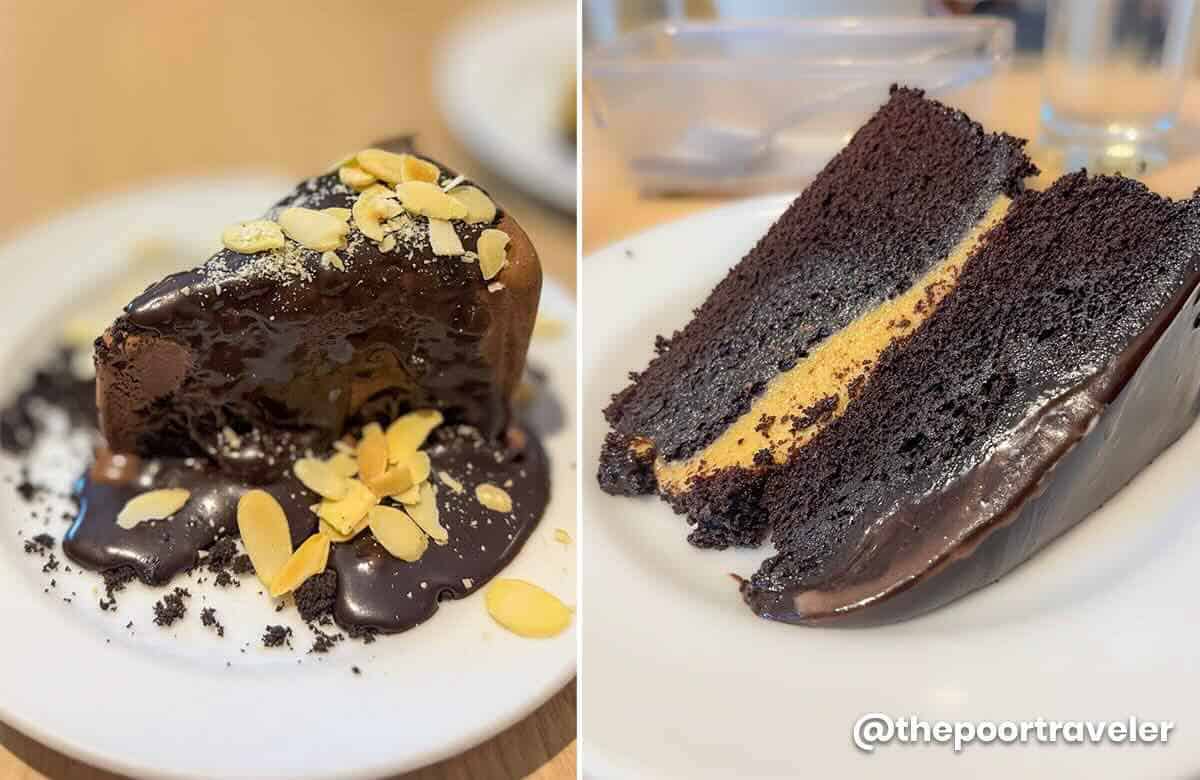
The Imported Chocolate Cake is among their bestsellers. It’s the very first item on their cake menu. It’s a dark chocolate cake with rich custard filling and covered in dark chocolate icing. It’s so moist, we couldn’t stop digging in. It’s dark chocolate, but still pretty sweet. We always order this when we’re here, and it never fails to delight us!
But it was our first time trying their Chocolate Mud Pie. It’s a big chunk of chocolate ice cream sitting on Oreo crust, clad in fudge, bits of almond, and Oreo powder.

But I was most excited about the cheesecake. In the past, I tried their White Chocolate Cheesecake (P120) with raspberry sauce and Fruity Cheesecake (P110), which was topped with blueberries, raspberries, and strawberries. Both were delectable! I was expecting this Blueberry Cheesecake to be similar, but no, it was much more delightful! First of all, the crust was different. It had a lot more texture, which was great because it complemented the smooth and rich cheesecake.
After all these years, Calea is still the same dessert powerhouse that I remember. Big servings and spectacular tastes at affordable prices. Please don’t change, Calea! Honestly, if we’re going to rank our favorite spood spots in Bacolod, Calea sits comfortably on top.
Address: Calea, Balay Quince, Lacson Street corner 15th Street, Bacolod, 6100 Negros Occidental
Opening Hours: Monday to Thursday, 9:00 AM – 9:30 PM; Friday to Sunday, 9:00 AM – 10:00 PM
What We Ordered: Choco Mud Pie, P130; Imported Chocolate Cake, P125; Blueberry Cheesecake, P125
Where to Stay in Bacolod
The capital of Negros Occidental, Bacolod City makes an excellent base for exploring Metro Bacolod and its neighboring towns. It offers a wide range of accommodations across different budgets and types, so you’ll never run short of options. Here are some of the top-rated hotels in Bacolod City according to online traveler reviews.
🔥🔥🔥 Use AGODATPT for 10% off on select hotels! 🔥🔥🔥
The Poor Traveler readers and followers can now use a special discount code to score 10% discount, up to USD 100 (roughly PHP 5700)! To apply and avail of the promo code, visit AGODATPT Promo Code.
Search for Bacolod Hotels!

Updates Log
2025 9 17 – First uploaded
Photos by: Yosh Dimen and Asta Alvarez