Whether you want diverse landscapes, rich history, or vibrant culture, here are the best places to visit in Victoria, Australia.
Victoria is a vast, diverse state in southeastern Australia, known for its scenic coastal drives, charming towns, buzzing city life, lush wine regions, and incredible natural landscapes.
Whether you’re craving a beach escape, a mountain retreat, or a taste of Australia’s thriving arts and food scene, Victoria delivers!
Many visitors flock to Victoria to drive through the iconic Great Ocean Road, spot little penguins on Phillip Island, wander through Ballarat’s living gold rush museum, sip wine in the Yarra Valley, and more.
But there are plenty of unexpected things to discover in Victoria, too.
Historic steam trains chugging through mountain ranges, quirky art-filled laneways, regional food and wine festivals, and off-the-beaten-path beaches make exploring this Australian state full of surprises.
19 Best Places To Visit In Victoria, Australia
From road-tripping along the iconic Great Ocean Road to sipping delicious wine in the Yarra Valley, spotting penguins on Phillip Island, or soaking in the hot springs of the Mornington Peninsula, here’s our list of the best places to visit in Victoria, Australia.
If you’re planning a trip soon, use this list to make the most of your adventure in Victoria!
The best way to get around is to rent a car and explore on your own! We recommend Rental Cars, which has the largest range of vehicles for the best value on the market.
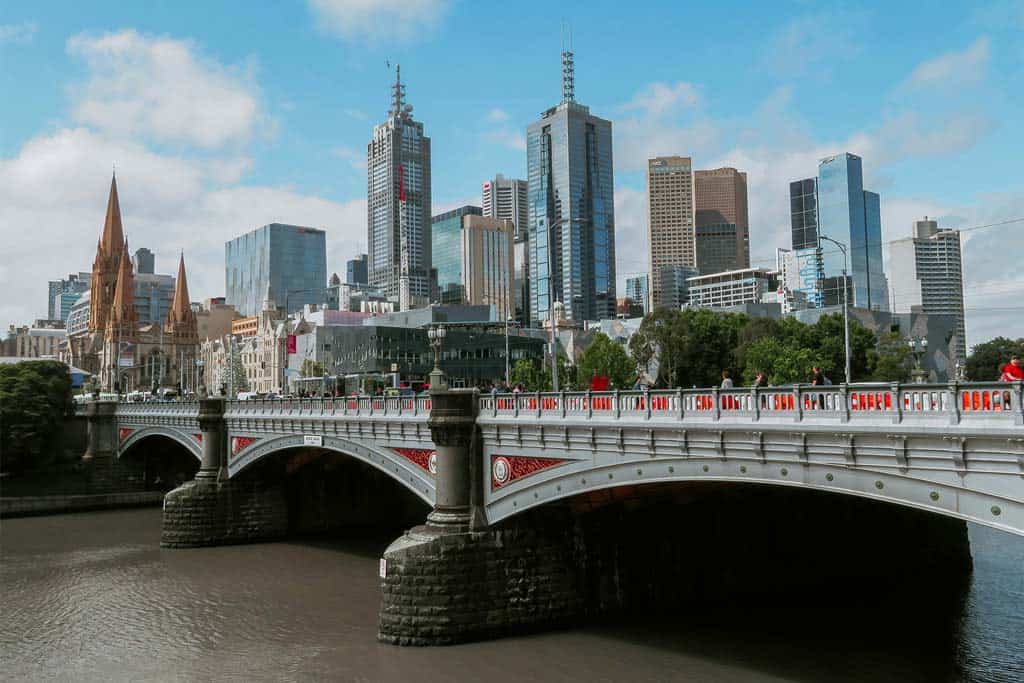
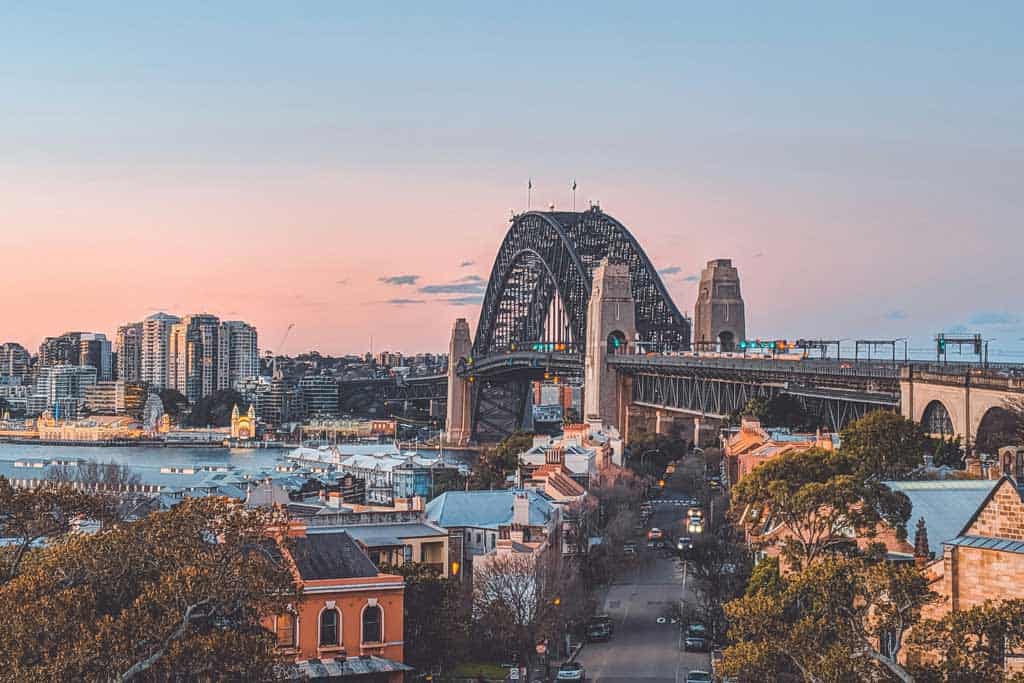
1. Melbourne
No trip to Victoria is complete without experiencing the dynamic charm of Melbourne, the state’s buzzing capital. It’s known for its quirky art-filled laneways, world-class coffee shops, and a thriving creative scene.
Wander through its charming streets to uncover hidden street art, indie boutiques, and tucked-away cafés that locals swear by. Queen Victoria Market, Federation Square, and the Shrine of Remembrance are a few iconic landmarks to check out.
The city has plenty of fun adventures for all ages, from interactive museums to zoo experiences and even the chance to catch a live AFL game.
And when you’re ready for a breather, the coast isn’t far: St Kilda, Elwood, and the iconic Brighton Beach huts offer a sunny escape just minutes from the city.
Melbourne is the ideal gateway to exploring Victoria, thanks to the well-connected Melbourne airport, which welcomes travellers from various countries around the world.
Once you pick up your rental car from Melbourne Airport, you can hit the road and kick off your adventure with a scenic drive along the iconic Great Ocean Road.
2. Great Ocean Road
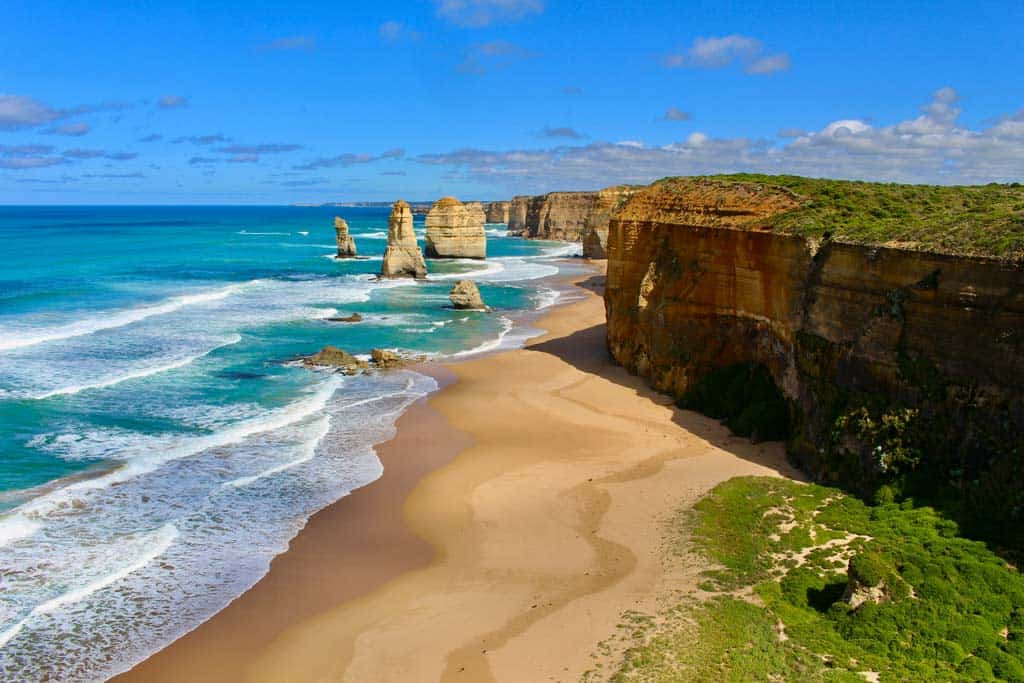
If you’re a fan of road trips, the Great Ocean Road is one journey you simply can’t miss. Stretching over 240 kilometres along Victoria’s rugged southern coast, this leisurely drive boasts some of Australia’s most spectacular coastal scenery. Book a guided tour if you don’t want to drive yourself!
Whether setting off for a weekend escape or taking your time over several days, the route promises dramatic ocean views, windswept beaches, and charming seaside towns.
The iconic 12 Apostles (towering limestone stacks rising from the sea) are a must-see highlight, but the magic of the Great Ocean Road doesn’t stop there.
Take a detour inland to explore Lake Elizabeth, where early risers might catch a glimpse of elusive platypuses paddling through the mist. Or enjoy the charming coastal town of Apollo Bay.
Don’t miss a stop at the Great Otway National Park near the Great Ocean Road, where you can hike through lush rainforest, stand beneath towering waterfalls, or even go ziplining through the treetops.
And if you feel like stopping for a treat, enjoy a sweet detour at the Great Ocean Road Chocolaterie & Ice Creamery.
3. Mallacoota
Tucked away on the far eastern edge of Victoria, Mallacoota is a hidden gem surrounded by the breathtaking Croajingolong National Park.
While it may not sit directly along the Great Ocean Road, this off-the-beaten-path destination offers just as much natural beauty without the crowds.
Blessed with some of the warmest winter temperatures in Victoria, Mallacoota is a fantastic year-round escape for beach lovers, hikers, and water enthusiasts.
Spend your days kayaking along the Mallacoota Inlet, hiking scenic coastal trails, or boating through serene waterways.
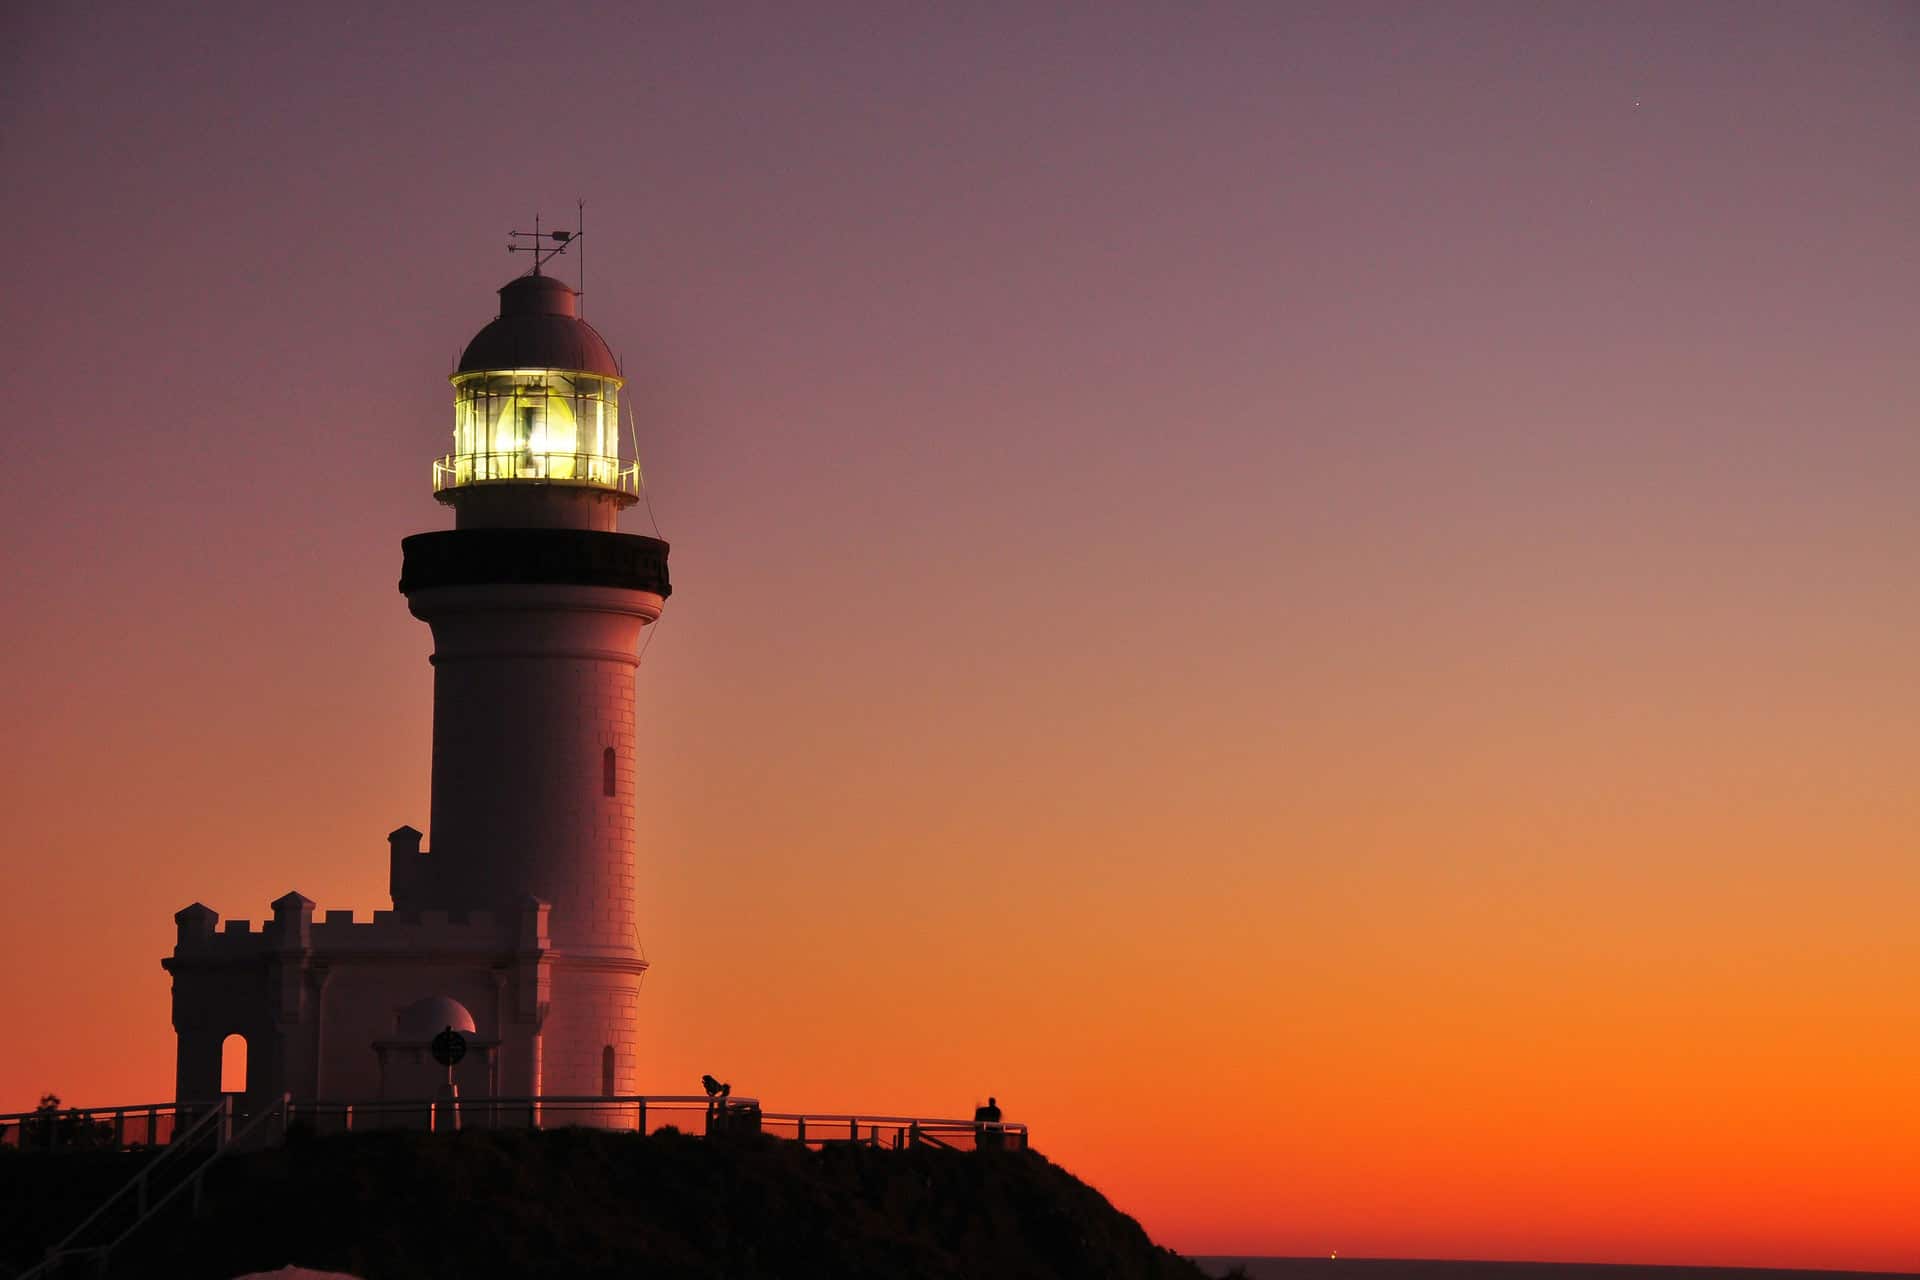
History buffs should stop by historic sites, including the WWII Bunker Museum and the nearby Gabo Island Lighthouse, which offers a glimpse into the region’s maritime past.
Read next: 19 Best Beaches In Victoria, Australia
4. Phillip Island
Just a two-hour road trip from Melbourne, Phillip Island is one of Victoria’s most beloved coastal escapes.
The island’s biggest claim to fame is the enchanting Penguin Parade, where each evening, hundreds of little penguins waddle ashore at Summerland Beach. The Penguin Parade is a magical, must-see experience for all ages.
Animal lovers will also enjoy a visit to the Koala Conservation Centre, where you can stroll along tree-top boardwalks and spot koalas lounging in their natural habitat.
Marine life thrives around Phillip Island. Join a Wildlife Coast Cruise to see fur seals, dolphins, and even whales during migration season.
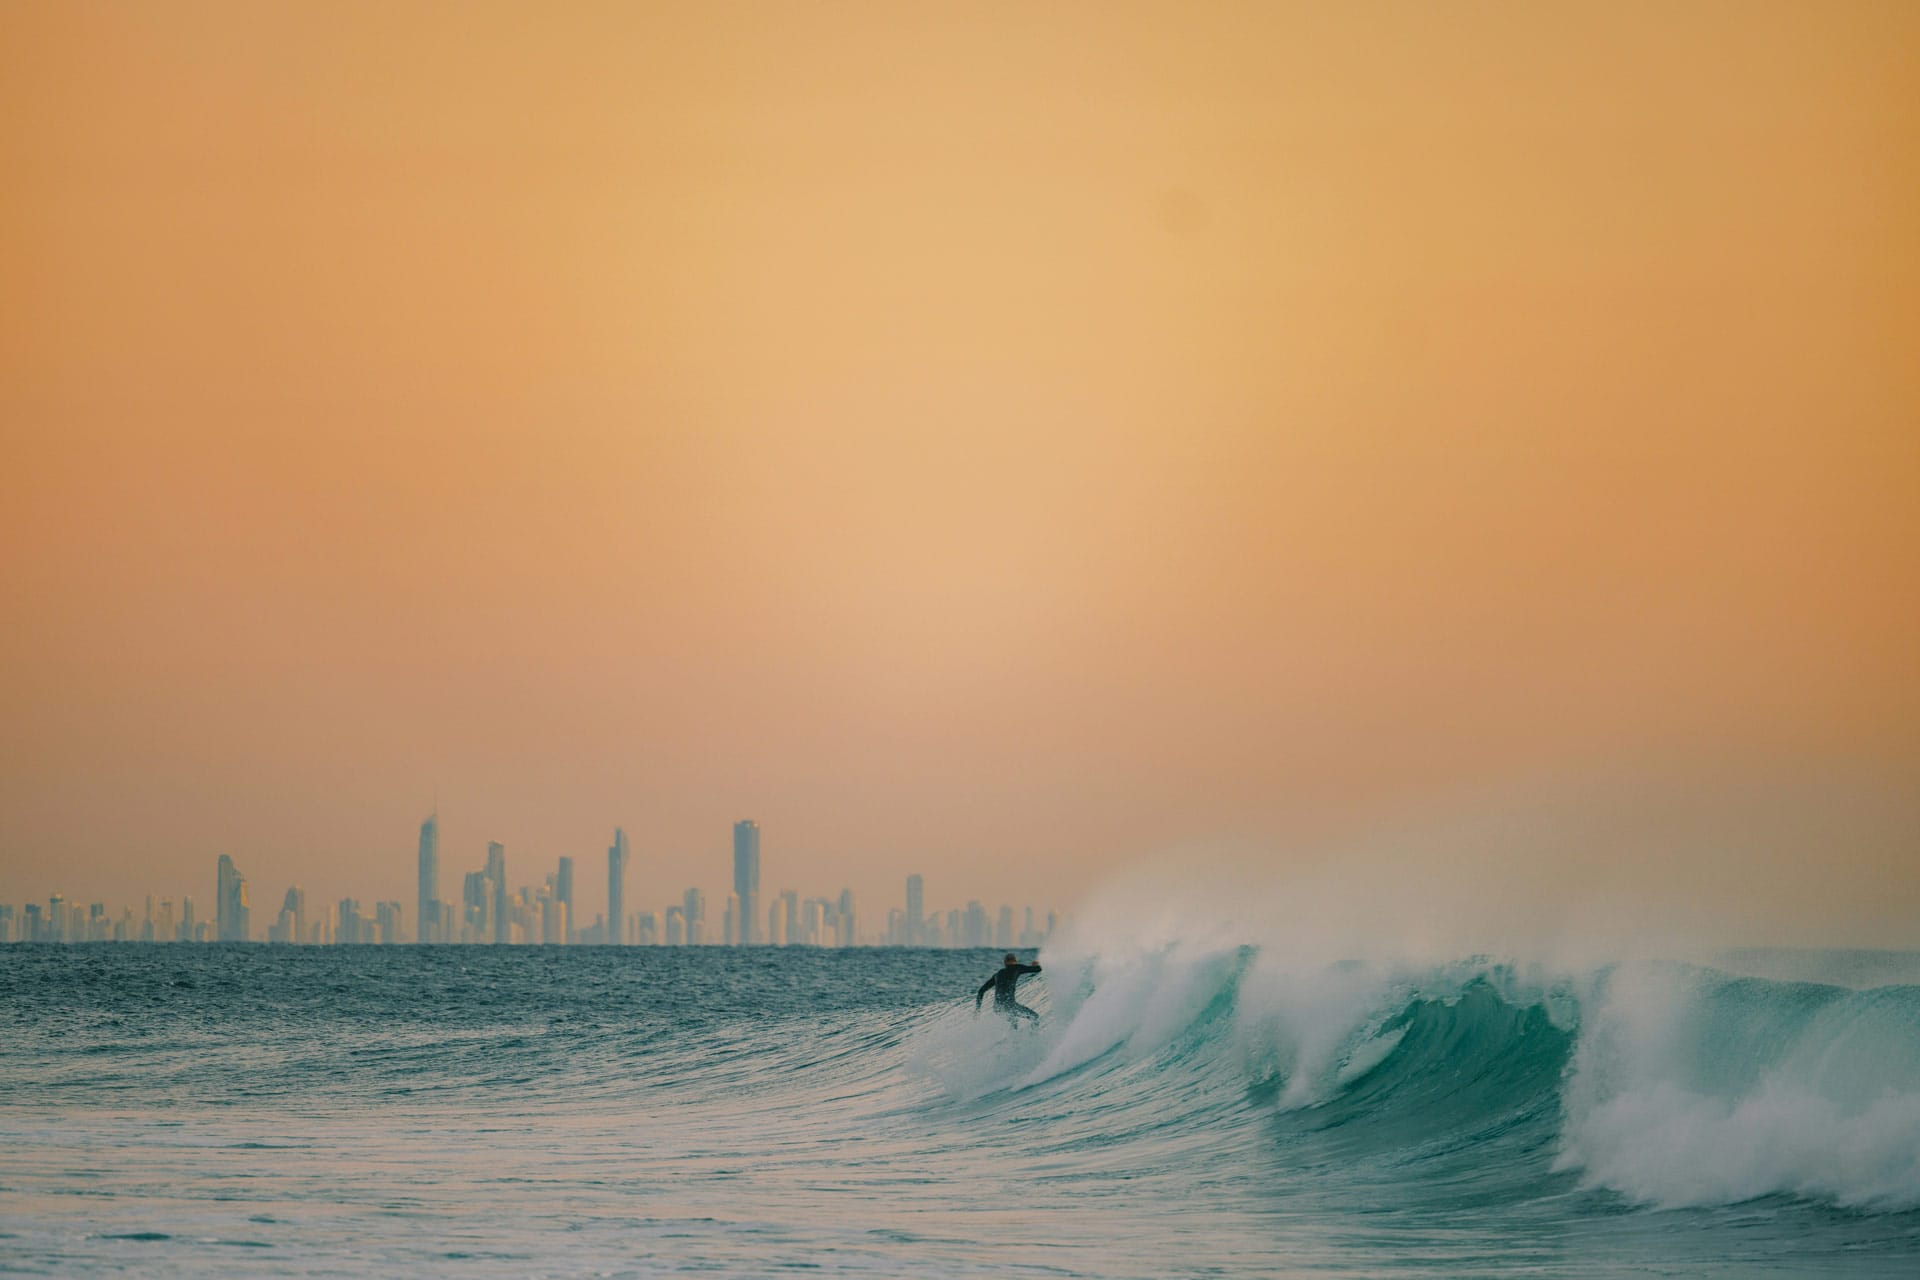
If you’re keen on surfing, head to Cape Woolamai, part of Victoria’s first National Surfing Reserve, with world-class waves and stunning ocean views.
History buffs can dive into the island’s past at the Phillip Island Historical Society Museum. And for motorsport fans, Phillip Island is also famous for its adrenaline-filled racing events, including motorcycle Grand Prix and car championships.
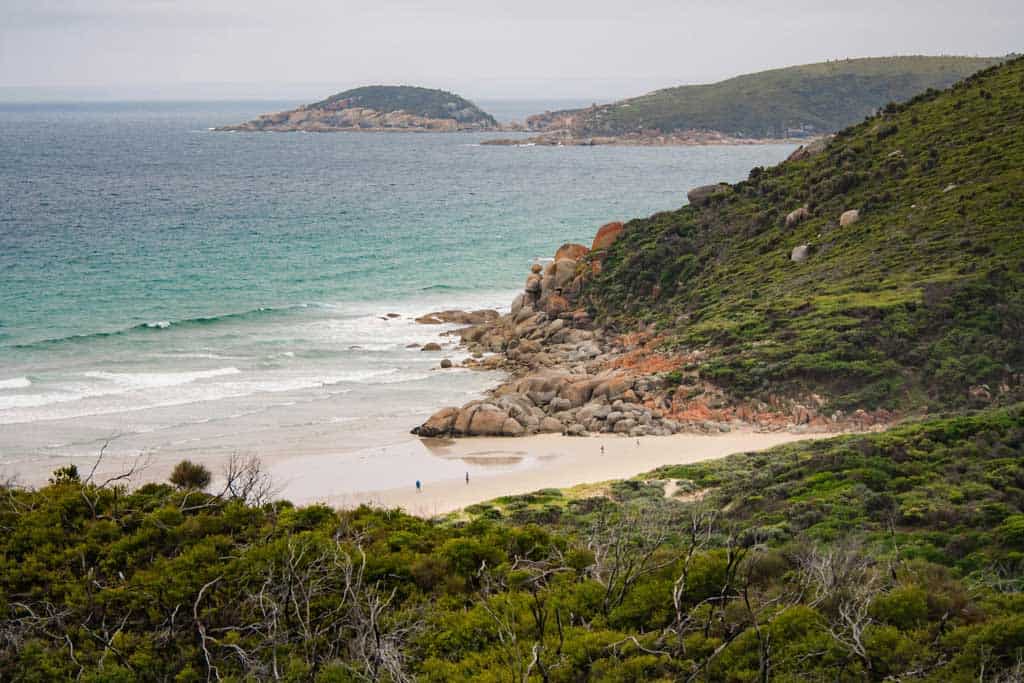
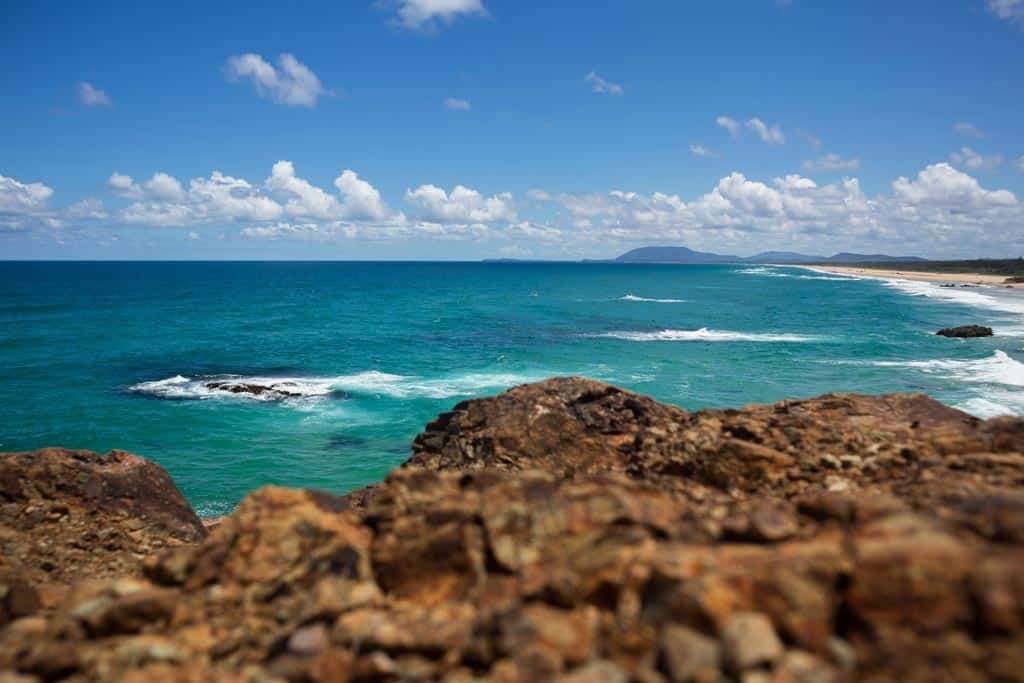
5. Wilson’s Promontory National Park
If you’re craving an escape into nature, Wilsons Promontory National Park delivers some of the most unforgettable outdoor adventures in Victoria.
Just under a three-hour drive from Melbourne, this stunning national park in the Gippsland region is the perfect day trip for those looking to explore and reconnect with the wild.
Often called “The Prom” by locals, the park is home to dramatic mountain ranges, powdery beaches, and trails that showcase the beauty of Victoria’s coastline.
Whether hiking to the top of Mt. Oberon for sweeping ocean views or swimming in the clear waters of Picnic Bay, every turn offers something breathtaking.
From granite peaks to lush rainforests and remote beaches, the landscapes here are as diverse as they are pristine.
For a more immersive experience, consider booking a sightseeing tour or wilderness cruise to explore the surrounding islands and marine life.
6. Yarra Valley
Just an hour from Melbourne, the Yarra Valley is a dream destination for lovers of food and wine.
While the Great Ocean Road is full of coastal beauty, the Yarra Valley has rolling vineyards, award-winning cellar doors, and peaceful countryside charm.
This region is famous for its cool-climate wines, especially Chardonnay, Pinot Noir, and Shiraz.
Spend your weekend sipping and savouring on a winery tour, or indulge in a Yarra Valley Wine, Gin, Whisky and Chocolate Tour that brings the best of the region’s gourmet offerings.
Nature lovers can stroll through the towering trees of the Redwood Forest. Meanwhile, animal enthusiasts should not miss Healesville Sanctuary, one of the best places in Victoria to see Australian animals up close.
7. Mornington Peninsula
The Mornington Peninsula is a great idea if you’re looking for a destination that perfectly balances adventure and relaxation.
Just a short drive from Melbourne, this coastal gem hugs the shores of Port Phillip Bay and is known for its rolling vineyards, clifftop walks, and charming seaside towns.
One of the standout experiences here is soaking in the Peninsula Hot Springs, a natural thermal oasis where you can unwind in steaming pools surrounded by native bushland.
Book this Alba Thermal Springs & Spa, the ultimate way to recharge after all the fun adventures.
For wine lovers, the region is a dream. The Peninsula is home to some of Victoria’s top wineries, especially known for producing cool-climate Pinot Noir. Pair your tastings with a long, lazy lunch at one of the area’s award-winning restaurants, many of which overlook the vines.
If you prefer the outdoors, explore the stunning Mornington Peninsula National Park, hike scenic walking trails, or join a dolphin and seal snorkelling tour in Port Phillip Bay for a thrilling wildlife encounter.
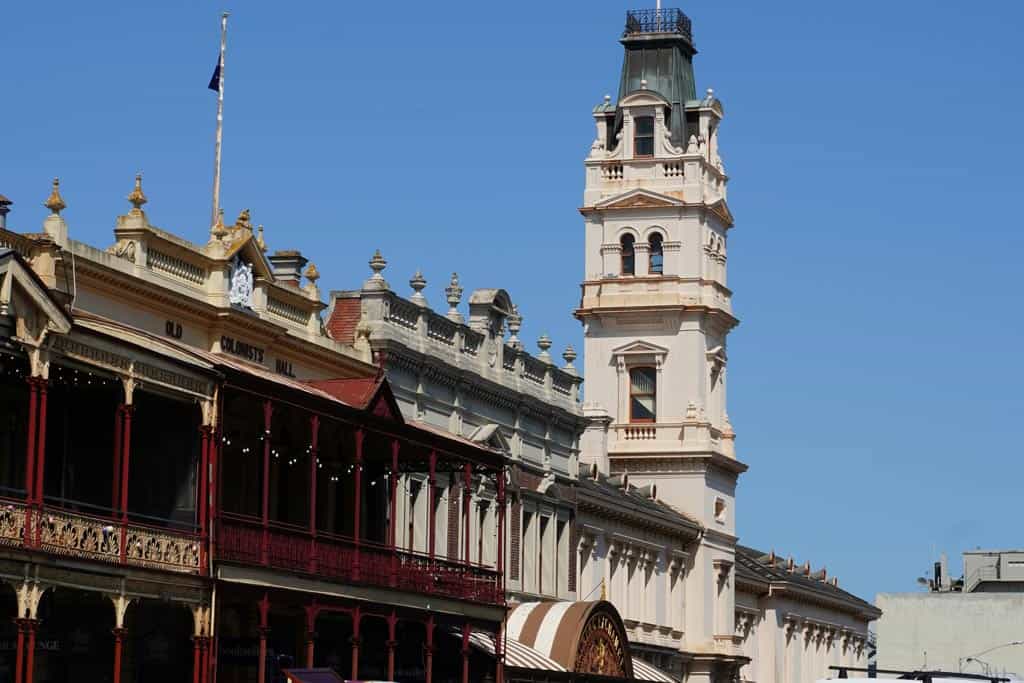
8. Ballarat
Nestled in regional Victoria, Ballarat is a charming small town with a big personality, perfect for anyone looking to explore beyond the usual Great Ocean Road stops.
As one of the most historically rich destinations in the state, Ballarat is where you can learn more about Australia’s gold rush era.
Step back in time at Sovereign Hill, an open-air museum where costumed characters, gold panning, and candle-making demonstrations bring the 1850s to life.
History should check out the Arch of Victory and wander through one of the country’s oldest regional galleries, the Art Gallery of Ballarat.
Families shouldn’t miss the Ballarat Wildlife Park, home to local wildlife like kangaroos, koalas, wombats, and even crocodiles.
For a relaxing afternoon, stroll through the beautifully maintained Ballarat Botanical Gardens, or hop aboard a vintage tram at the Ballarat Tramway Museum.
9. Bendigo
Once a booming town during the gold rush, Bendigo has now become one of Victoria’s most vibrant cultural destinations.
While many visitors are drawn to the coastal wonders of the Great Ocean Road, those who venture inland to Bendigo are rewarded with fascinating history, stunning art, and cultural richness.
Start your journey underground at the Central Deborah Gold Mine, where you can experience life as a gold miner and learn about the town’s glittering past.
Art lovers shouldn’t miss the Bendigo Art Gallery, one of Australia’s oldest and most prestigious regional galleries, which houses an impressive collection of local and international art pieces.
Bendigo also proudly celebrates its Chinese heritage. A visit to the Golden Dragon Museum offers a captivating insight into the lives and traditions of the Chinese community that helped shape the city.
You can also stop by Bendigo Pottery, Australia’s oldest working pottery, for a hands-on experience and a glimpse into historic ceramic craftsmanship.
Read next: The 8 BEST Day Trips from Melbourne
10. Dandenong Ranges
Tucked just east of Melbourne, the Dandenong Ranges are a peaceful escape, perfect for a scenic road trip.
This lush, mountainous region is best known for its towering forests, cool climate gardens, and quaint small towns that feel worlds away from city life.
Charming villages like Olinda, Sassafras, Belgrave, and Emerald are brimming with cozy cafés, boutique shops, and friendly locals.
One of the most iconic attractions in the region is the Puffing Billy Steam Train. Departing from Belgrave, this century-old train ride winds through lush fern gullies and across historic timber bridges.
It’s especially popular for families and train enthusiasts, but anyone will enjoy the novelty and charm of this classic experience.
For outdoor enthusiasts, the Dandenong Ranges deliver plenty of natural beauty to explore. The 1,000 Steps Kokoda Track Memorial Walk offers a moderate hiking challenge with historical significance and is surrounded by dense rainforest teeming with native birdlife.
Other highlights include Olinda Falls and Sherbrooke Forest, where you can spot lyrebirds or wallabies if you’re lucky.
11. Mildura
Located in the northwestern corner of Victoria, Mildura is a vibrant regional city rich in heritage and brimming with outdoor activities. Set on the banks of the Murray River, it’s a haven for those who love relaxed riverfront living.
Hop on a paddle steamer cruise, kayak along calm waters, or enjoy a sumptuous lunch at a riverside winery.
The Murray River also shapes the region’s laid-back lifestyle and provides a stunning backdrop for everything from fishing to sunset walks.
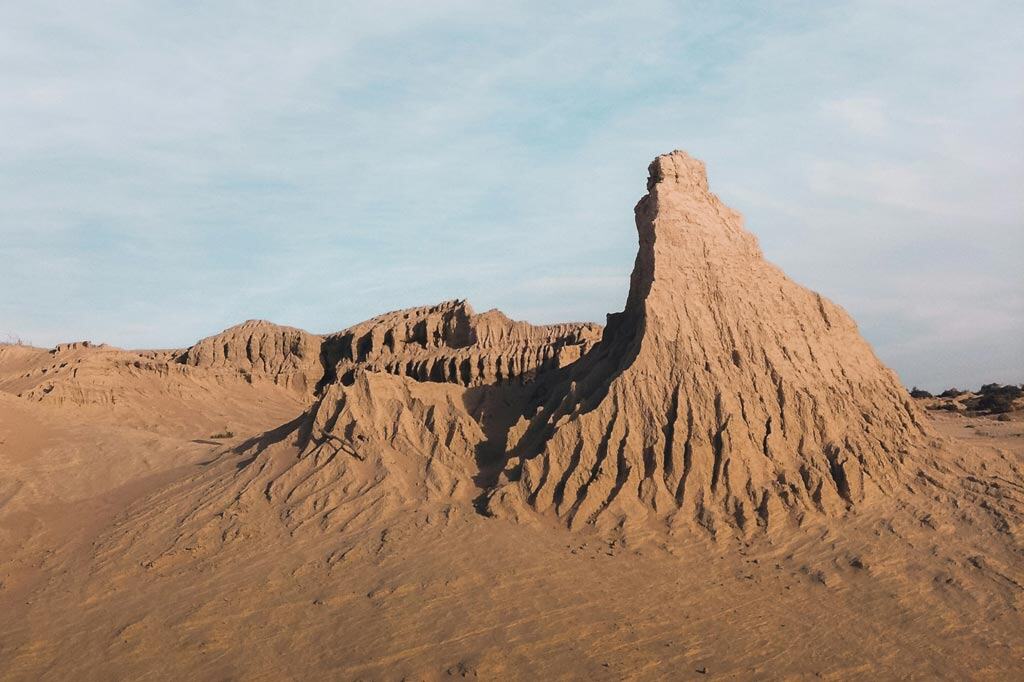
Beyond its river charm, Mildura also serves as a gateway to one of the most extraordinary landscapes in Victoria, Mungo National Park.
Just a couple of hours’ drive away in New South Wales, the Mungo National Park is a UNESCO World Heritage-listed site home to otherworldly sand formations, ancient Aboriginal culture, and the famous Walls of China dunes.
Exploring this park feels like stepping into another era, with guided tours offering insight into some of the oldest human remains found in Australia.
12. Grampians
The Grampians are among Victoria’s most rewarding regions to explore, especially suited for nature lovers, foodies, and culture seekers.
An easy day trip from Melbourne, this picturesque region is best known for the towering sandstone peaks of Grampians National Park, with some of the most scenic hiking trails, cascading waterfalls, and panoramic lookouts.
The park is also home to some of Australia’s most significant Aboriginal rock art sites, providing a deeper cultural connection to the land through ancient stories etched into stone.
Stop by Brambuk, the National Park & Cultural Centre, to learn more about the area’s rich Indigenous heritage.
Families will love quirky spots like Grampians Adventure Golf, where you can play a round surrounded by gardens and local sculptures.
You can also enjoy a relaxing bike ride around the Grampians or spend the day sampling bold reds, especially the region’s signature Shiraz, at one of the renowned wineries.
13. Daylesford
A place of indulgence and serenity, Daylesford is one of Victoria’s most enchanting destinations and a popular choice for a relaxing weekend day trip from Melbourne.
Known as the spa capital of the state, this charming town is a haven for those who love good food, fine wine, and serene surroundings.
Start your getaway by soaking in the region’s natural mineral waters at one of Daylesford’s luxurious bathhouses or spas. Then stroll through the Wombat Hill Botanic Gardens, perched on an extinct volcano, looking out at panoramic views.
The region is also a paradise for food and wine lovers. You’ll find local restaurants and renowned wineries showcasing fresh, seasonal produce and award-winning cool-climate wines.
For a more immersive experience, join a private wine tour and sample the best of the Macedon Ranges.
Nature lovers should venture a little further to Trentham Falls, one of the longest single-drop waterfalls in Victoria.
It’s an easy walk through scenic walking tracks with views that are especially striking after rainfall. You’ll also find boutique art galleries, antique stores, and artisanal markets scattered throughout Daylesford and nearby Hepburn Springs.
Read next: The Ultimate Melbourne To Adelaide Drive Itinerary
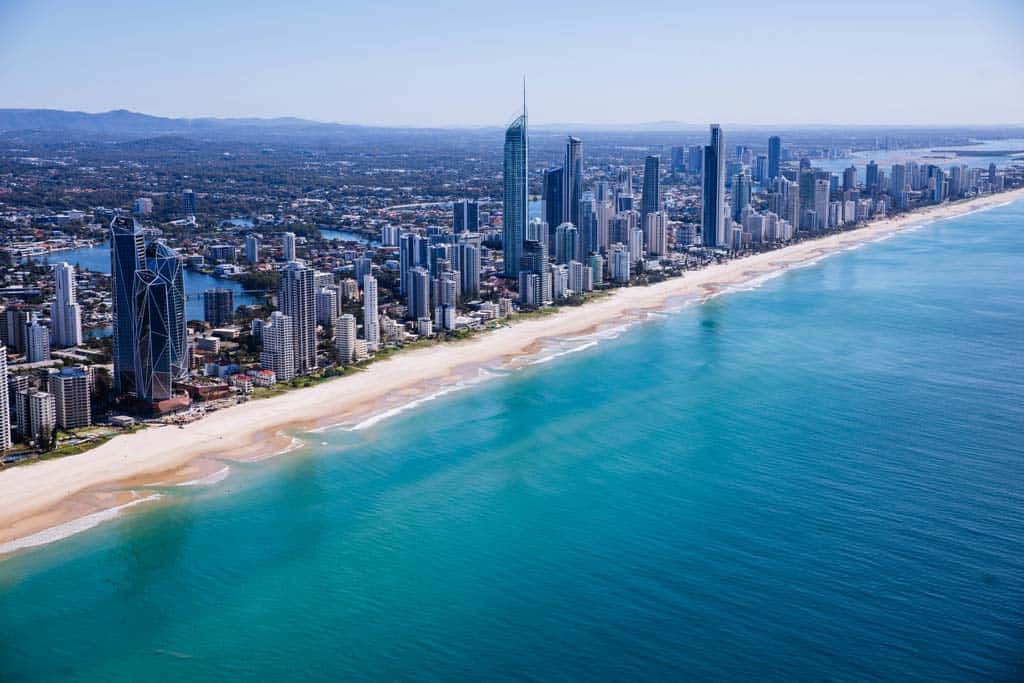
14. Geelong
Just under an hour from Melbourne, Geelong is a vibrant port city that’s often overlooked, but absolutely worth a stop, especially on a road trip through the Great Ocean Road.
With its sparkling waterfront, laid-back vibe, and a growing arts and food scene, Geelong is certainly one of the best places to see in Victoria.
Start by exploring the lively city centre, where you’ll find beautifully preserved heritage buildings, trendy cafés, and a buzzing atmosphere. For a dose of history, step into the National Wool Museum, housed in a former wool store, and learn about Geelong’s important role in Australia’s wool industry.
Nearby, the Geelong Gaol Museum and Geelong Gallery also offer fascinating insights into the city’s past.
Surf lovers can hit the waves at Thirteenth Beach, while foodies will find no shortage of award-winning eateries, breweries, and wineries to satisfy every craving.
For something truly unforgettable, try hot air ballooning at sunrise or even sign up for a rally car experience if you’re after an adrenaline rush.
15. Warrnambool
Located at the western end of the Great Ocean Road, Warrnambool is a vibrant coastal city where you can enjoy fascinating wildlife encounters and discover a rich maritime history.
Whether you’re up for outdoor adventures or simply want to relax by the sea, this charming destination is a great place to include in your itinerary.
Warrnambool’s city centre is full of character, home to cozy cafés, heritage buildings, and cultural attractions, but it’s the coastline that truly steals the show.
If you’re into local wildlife, swing by Tower Hill Wildlife Reserve, a serene volcanic crater where you might spot koalas, emus, and kangaroos in the wild.
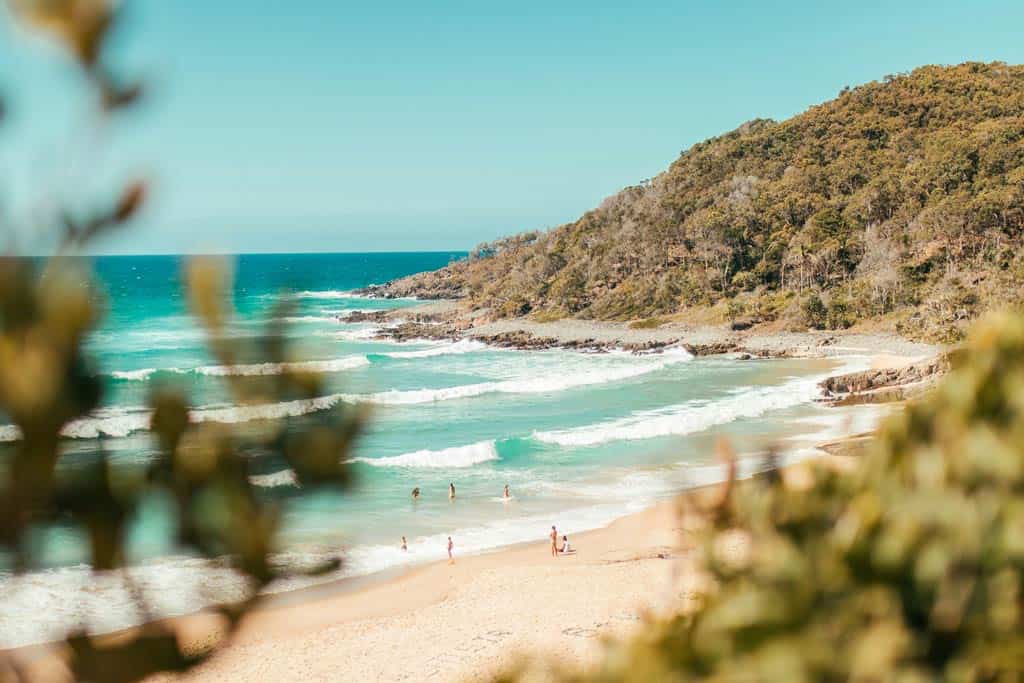
Home to some of Victoria’s most pristine beaches, Warrnambool is a haven for beachgoers and surfers. Head to Leevy’s Beach or Killarney Beach to catch a wave, or simply enjoy the peaceful surroundings and salty air.
From July to October, Logan’s Beach becomes one of the best places in Australia to spot Southern Right whales as they migrate and calve close to shore.
For more breathtaking coastal views, take a walk through Thunder Point Coastal Reserve, where rugged cliffs, ocean spray, and native wildlife create a dramatic landscape.
16. Alpine National Park
Covering over 646,000 hectares, Alpine National Park is the largest national park in the state and offers a diverse range of outdoor activities across all seasons.
From hiking along rugged alpine ridgelines to mountain biking through dense forest trails, this park is a playground for thrill seekers!
In the warmer months, the park comes alive with activities like camping, fishing, and horseback riding along lush valleys and rivers. Winter transforms the region into a snowy wonderland, making it a top spot for skiing and snowboarding.
While many associate Victoria with the coastal beauty of the Great Ocean Road, Alpine National Park proves that the state’s high country is just as captivating.
The best places to go for skiing, snowboarding, or hiking and mountain biking in summer include Mount Hotham or Mount Buller.
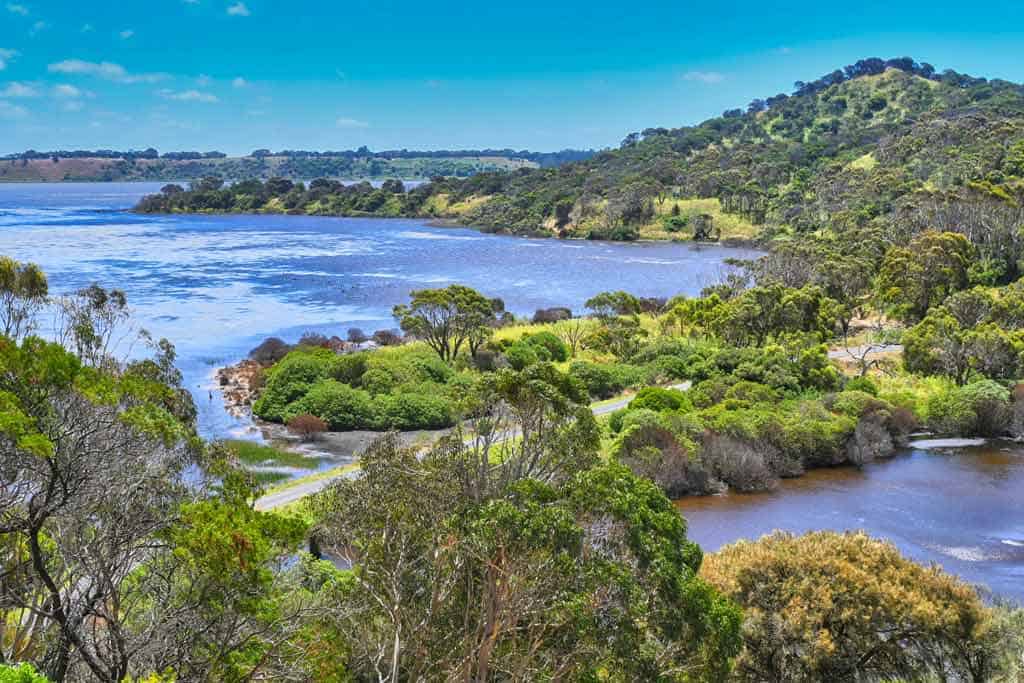
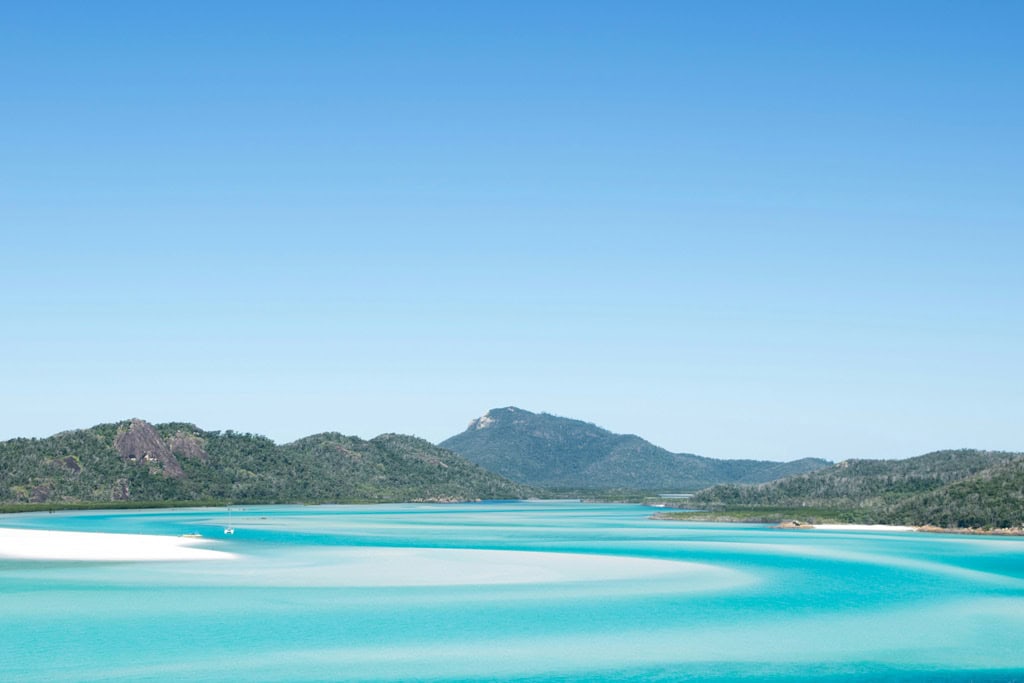
17. Lakes Entrance
Lakes Entrance is one of Victoria’s most amazing places for a coastal escape, luring visitors with its sandy beaches, water-based adventures, and unique attractions.
Just over four hours’ drive from Melbourne, this laid-back town is a great destination for a road trip or a scenic day trip along the coastline.
A highlight of any visit here is the Gippsland Lakes, Australia’s largest inland water system. It’s where you can go boating, kayaking, fishing, or simply watching pelicans glide across the water.
Those looking to unwind can swim in calm waters or enjoy a peaceful picnic by the lake. Just nearby, you’ll find Ninety Mile Beach, one of the longest uninterrupted beaches in the world, where stunning coastline and crashing waves create the ultimate backdrop.
Stop by the Griffiths Sea Shell Museum, a quirky and fascinating place showcasing marine oddities, coral, and thousands of shells.
For a memorable way to explore the area, hop on a cruise through the lake system and feel the sea breeze as you take in the beauty of the water and surrounding bushland.

18. Milawa and King Valley
Tucked away in Victoria’s picturesque High Country, Milawa and King Valley are an ideal stop for a food and wine-focused road trip.
These charming rural regions are known for their scenic beauty and gourmet offerings, perfect for a weekend getaway or a relaxing stop on a longer road trip adventure through Victoria.
King Valley is best known for its strong Italian heritage, with historic winemaking families crafting exceptional varietals like Prosecco, Sangiovese, and Nebbiolo.
The cellar doors here are warm and inviting, often paired with hearty local fare and stories passed down through generations.
Meanwhile, Milawa is famous for the iconic Brown Brothers Winery, where you can savour wine tastings alongside artisan cheeses, fresh bread, and gourmet produce sourced from the region.
Beyond food and wine, there’s plenty to explore in the region. The King River provides a refreshing alternative to sandy beaches, where you can swim and try canoeing or white water rafting. You can even book a hot air balloon ride to take in sweeping views of the vineyards and valleys from above!
Read next: The Best Time to Visit Melbourne, Australia
19. Shepparton
Nestled in the heart of the Goulburn Valley, Shepparton is a vibrant regional city with many exciting attractions – definitely worth a stop on a road trip through northern Victoria.
One standout attraction is the Shepparton Motor Museum. It showcases an impressive classic, vintage, and muscle car collection. There are also interesting motoring memorabilia that tell the story of Australia’s rich automotive history.
The town is also great for avid walkers, with walking tracks around Victoria Park Lake.
Shepparton also boasts a strong local art scene at the Shepparton Art Museum, and the fun and quirky Moooving Art Trail, which features over 90 brightly painted cow sculptures scattered throughout the region.
DISCLAIMER: Some of the links in this article are affiliate links, which means if you book accommodation, tours or buy a product, we will receive a small commission at no extra cost to you. These commissions help us keep creating more free travel content to help people plan their holidays and adventures. We only recommend the best accommodations, tours and products that ourselves or our fantastic editorial team have personally experienced, and regularly review these. Thanks for your support, kind friend!


![GoPro HERO 13 Review – The Ultimate Camera Guide [2025]](https://farasar.ir/wp-content/uploads/2025/07/GoPro-HERO-13-Black-Review-Feature-Image.jpg)


![The BEST Camera Accessories – Photography Essentials [2025]](https://farasar.ir/wp-content/uploads/2025/07/Best-Camera-Accessories.jpg)