Are you looking to book a breakaway but are not sure where to go? We’ve got just the place, and that’s Madeira. Madeira is a stunning Portuguese island located in the Atlantic Ocean, known for its year-round mild climate, dramatic landscapes, and vibrant culture. It’s a destination where you can enjoy great food, stay in a luxurious hotel and not have to break the bank at the same time.
There is also a lot to do in Madeira, so depending on the type of holiday you would like, that will decide how you experience the island. If you’re after an adventure, you could book a walking holiday. If you would like to relax by the beach, there are plenty of hotels which offer sea views, or you could go inland and explore the unique landscape. There is something for everyone.
To give you some insight, we’ve put together a brief guide outlining three reasons why Madeira should be at the top of your list of must-visit destinations.
The food
A good place to start is the food. Madeira is known for its rich culinary scene, blending traditional Portuguese flavours with local island ingredients. From fresh seafood and grilled meats to tropical fruits and locally produced wines, the island offers something to satisfy every palate. If you’re a foodie, this is the place for you – you must try the espada com banana (scabbard fish with banana), bolo do caco (a traditional garlic flatbread), and a glass of sweet Madeira wine.
The many walking routes
We mentioned above that people visit Madeira and book a walking holiday. There is no surprise why, as when you visit, you’ll come across a plethora of hiking routes which you can enjoy. Each route has incredible views and will challenge you in various ways. If you are interested in hiking, a popular route is the one in the southwest of Madeira. Here you will discover Funchal, the capital of Madeira, and Ponta do Pargo, the westernmost point on the island. The best thing about going on a hike is that when you are finished, you’ve burnt plenty of calories, meaning you can eat guilt-free.
It’s a very safe destination
Feeling safe when going away on holiday is very important. The last thing you want is to be walking around your hotel, feeling uneasy or to explore the town and have to avoid unwanted attention. Madeira is known to be a very safe destination for tourists. The island has a low crime rate, and locals are welcoming and respectful toward visitors. The locals can really make a difference when going away, and that’s something Madeira excels at.
Madeira may not always be the first destination that comes to mind when planning a European getaway, but once you’ve been, you’ll be recommending it to everyone. Will you be booking a trip to Madeira, and if so, when are you planning on visiting? What are your reasons for booking a holiday in Madeira, and what type of holiday will you be booking? Let us know in the comment box below. We look forward to hearing from you.
From the Gold Coast to the Tropical North, Queensland beaches are some of the sunniest, splashiest, most stunning gems Australia has to offer.
If Queensland beaches had a fan club, we’d be proud members. Sand so white it glistens, waters so blue they seem Photoshopped, and sunsets that stir the soul make us huge fans of the Sunshine State’s shores.
Whatever your vibe—chasing waves, lounging on the sand, or hunting for the perfect IG shot—there’s a sun-soaked spot waiting for you.
But with over 7,000 km of coastline, where do you even start?
With that in mind, we’re diving into the top Queensland beaches by region.
So whether you’re road-tripping the Sunshine Coast, exploring Tropical North Queensland, or sailing around the Whitsunday Islands, you can start planning your dream getaway.
Queensland has some of the best Australian beaches!
The 19 Best Queensland Beaches
Looking for a secluded shore backed by lush green rainforest? Maybe hip surf beaches are more your bias?
Here are the best beaches in Queensland, where the coast oozes with charm and adventure is just a tide away.
The best way to get around is to rent a car and explore on your own! We recommend Rental Cars, which has the largest range of vehicles for the best value on the market.
Sunshine Coast Beaches
The Sunshine Coast truly lives up to its name, boasting an average of seven hours of sunshine per day and more than 300 sunny days a year.
Then, there are the seaside towns and pristine beaches scattered all along the Sunshine Coast, making this part of Queensland one of our favourite places to be.
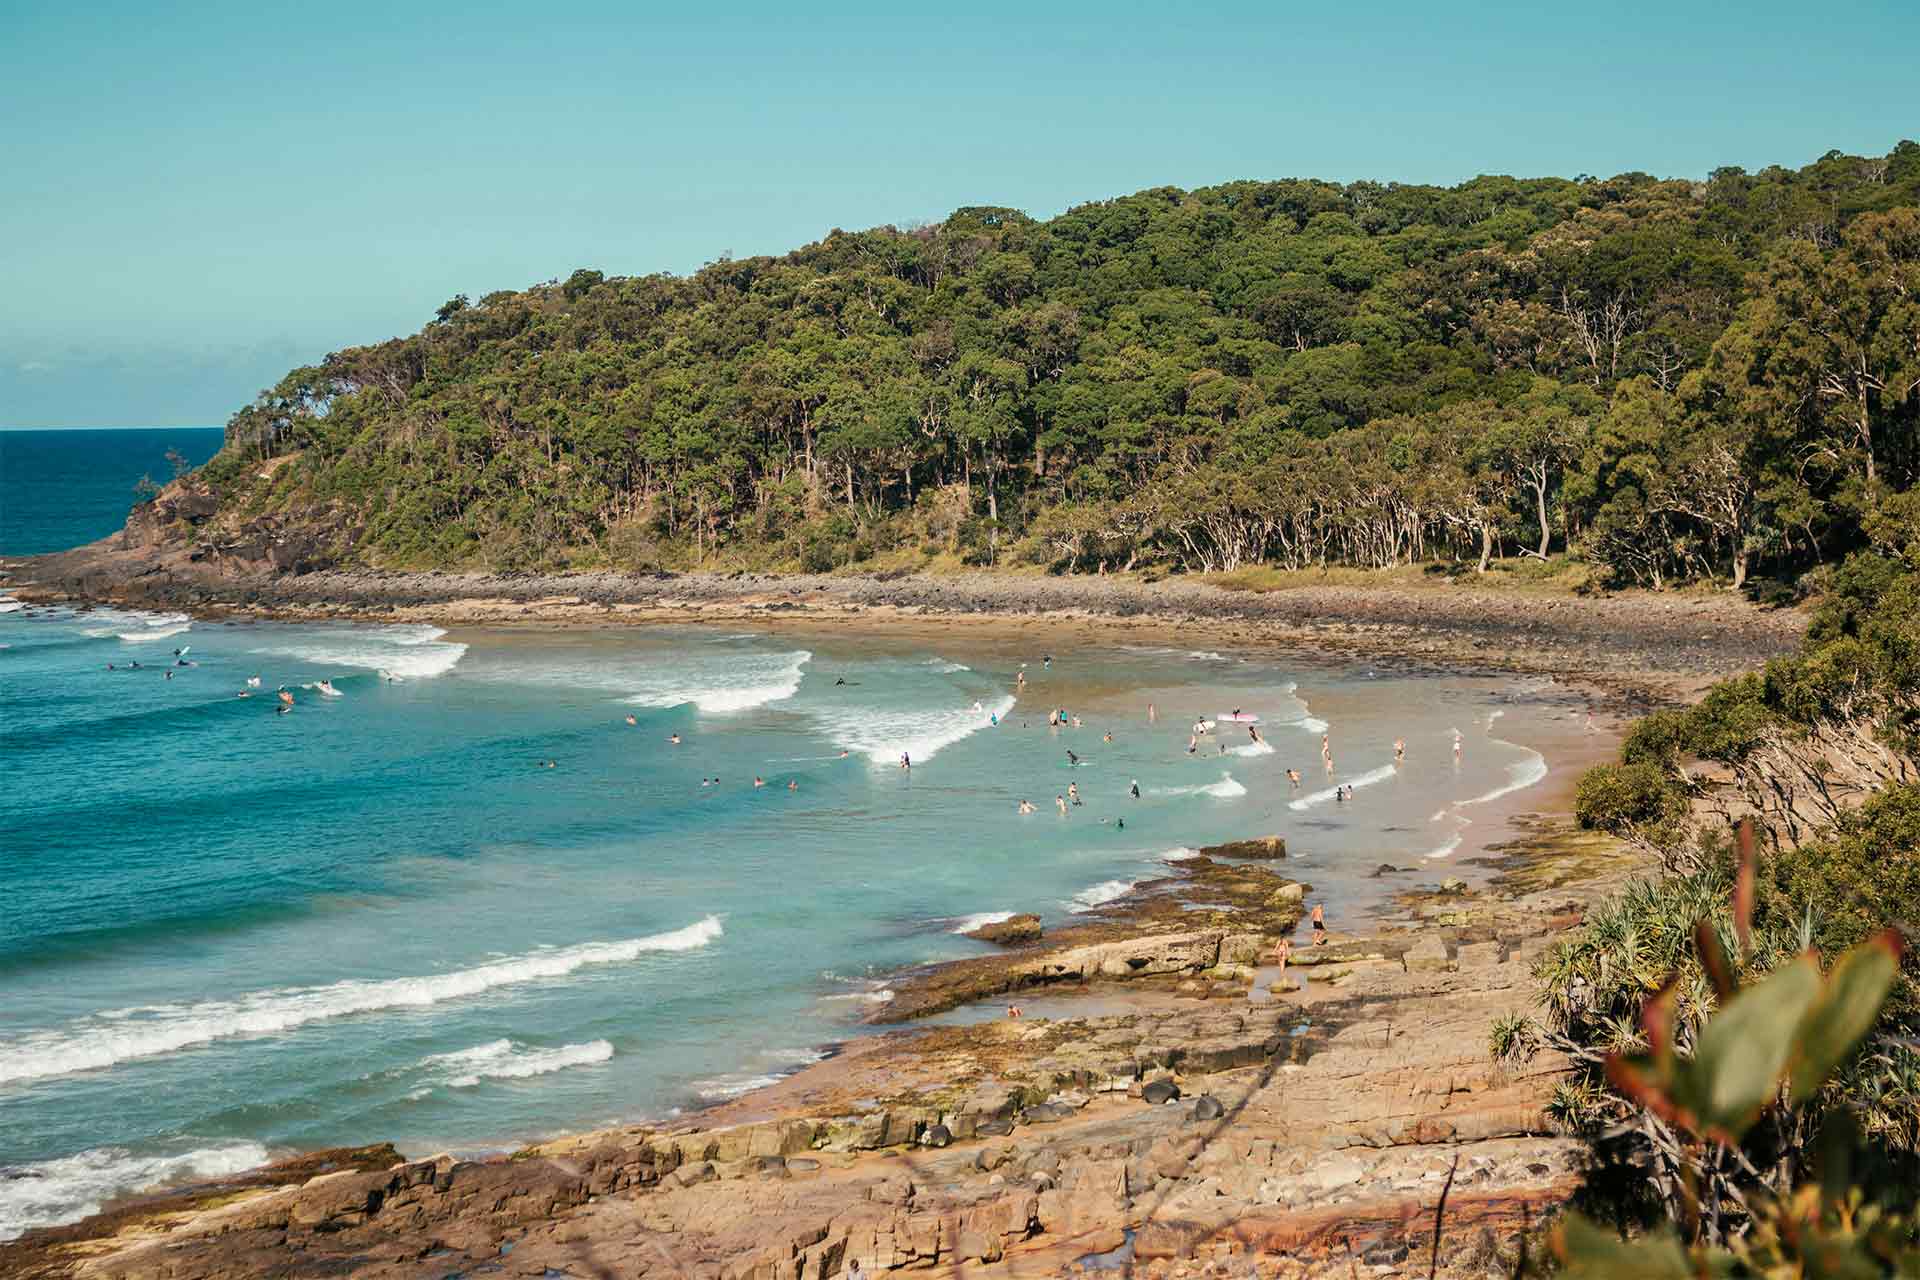
1. Sunshine Beach
Located in the town of Noosa, Sunshine Beach is your go-to all-rounder, open year-round. Though popular among surfers (waves can reach up to 7 feet!), it remains relatively quiet and secluded.
Not a surfer? Take a dip in the balmy waters instead. Lifeguards patrol the beach year-round, making it a safe place to swim, even for younger kids.
If sunbathing is more your vibe, there’s plenty of pristine white sand to stretch out on.
For hikers, Sunshine Beach opens up to a 15-km strip of white sand beaches and great surf. It’s also the endpoint of the 5.4-km scenic walk through Noosa National Park. You can make the journey from Noosa Main Beach to Sunshine in about three hours.
Want to grab a snack or cool off with a drink? A handful of cafés and bars line the beachfront. Enjoy your iced latte and the ocean views.
Quite possibly the most popular holiday destination on the Sunshine Coast, the sleepy town of Noosa draws roughly two million visitors each year. One of its main attractions is the iconic Main Beach.
This rare north-facing beach, one of the few on Australia’s east coast, sits between the rugged Noosa National Park and trendy Hastings Street. That means you get the best of both worlds: raw natural beauty and just the right amount of bustle.
Sheltered from strong winds and currents, Main Beach is generally calm, making it ideal for casual swimmers and beginner surfers.
But on the right day, you can catch the famous Noosa Heads right-hand surf break, one of the longest on the Sunshine Coast.
After a splash, head to Hastings, Noosa’s stylish high street, for a spa session, upscale dining, or boutique shopping.
3. Rainbow Beach
Rainbow Beach is a coastal town famed for its multi-coloured seaside cliffs and glistening golden sand dunes.
The jewel in Rainbow Beach’s crown is the surreal Carlo Sand Blow, a colossal, wind-blown sand mass overlooking the ocean. From its edge, you can take in sweeping views of Fraser Island to the north and Double Island Point to the south.
With such incredible scenery, Rainbow draws avid hikers. The Cooloola Great Walk—a 102-km route across the Great Sandy National Park—ends at the southern edge of town.
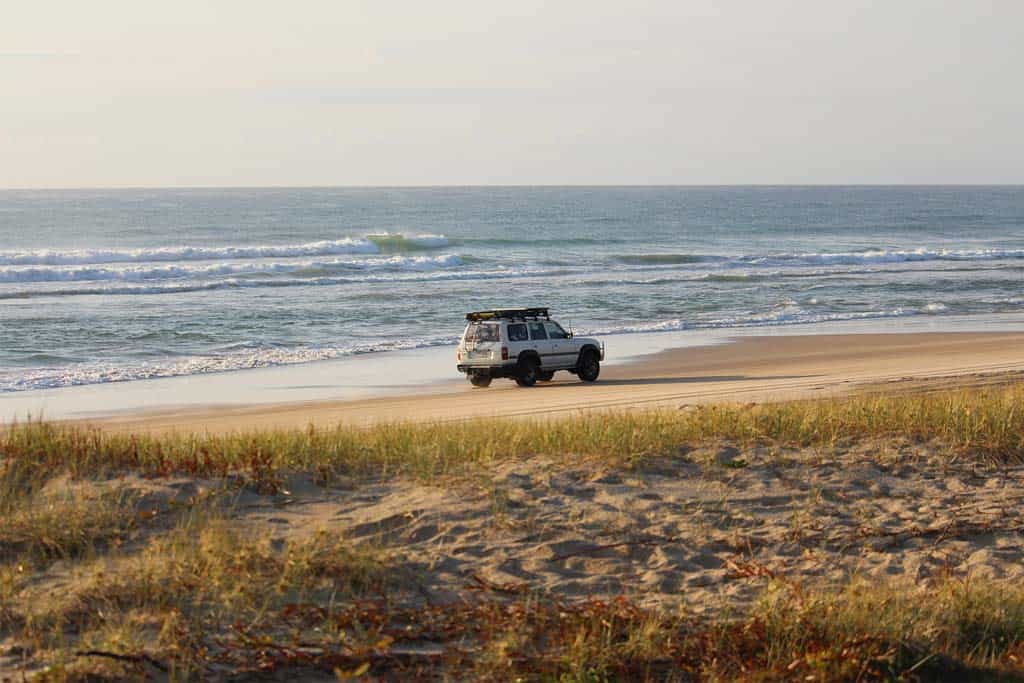
Not into hiking? Rainbow Beach is one of the few places on the Sunshine Coast (and in Australia) where you can drive directly onto the sand.
Hop in a 4WD and explore one of the most stunning beaches in Queensland on a sightseeing tour. Eager to see more? Combine your drive with a three-day tour of K’gari (Fraser Island).
Rainbow Beach, where sandy shores meet colossal cliffs
4. Mooloolaba Beach
Mooloolaba Beach is not only one of the most beautiful beaches in Queensland but also one of the most family-friendly.
This lively, sandy beach takes its stunning scenery seriously. One of its most iconic—and quirky—features is the Loo with a View, a public toilet that looks out over the Pacific Ocean.
With clear, calm waters patrolled by lifeguards year-round, Mooloolaba is an ideal swimming spot for families with young children.
Beyond the water, there’s a lot of room to spread out your towel and chill. But if lounging isn’t your thing, you’ll find lots of activities to keep you entertained—from stand-up paddle boarding to snorkelling and wildlife spotting on a custom-built inflatable raft.
At low tide, explore the rock pools on the shore. Or head to SEA LIFE, a guaranteed hit with kids and adults fascinated by marine life.
Foodie? You’ll love Mooloolaba’s dining scene, with its impressive lineup of restaurants, cafés, and bars.
5. K’gari Beaches
If you’re looking for a secluded island paradise, K’gari (formerly Fraser Island) should be on your itinerary.
Spanning 122 km in length, it’s the largest sand island in the world. That means it’s packed with sandy beaches—likely more than there are people. Inland, you’ll find tropical rainforests and over a hundred freshwater lakes.
On the island, you’ll never run out of places to cool off, even beyond the beach. Our favourite spot for a swim is the crystal-clear Lake McKenzie, though the fizzing Champagne Pools come a close second.
While K’gari (Fraser Island) isn’t technically part of the Sunshine Coast, it’s easily accessible from Rainbow Beach or Noosa on a day trip.
With a name like the Gold Coast and a coastline stretching 40 km, the scenery is bound to be golden, especially when it comes to the beaches.
No matter what kind of beachgoer you are—wave chaser, pro paddler, or die-hard sunbather—the Gold Coast has something for you.
6. Tallebudgera Creek
Technically a creek, but let’s not get hung up on labels—Tallebudgera Creek (or just Talle to locals) is pure beach bliss. Think powdery white sand, glittering blue water, and barely a ripple in sight. It’s ideal for swimming, paddleboarding, or just lazing under the sun.
Tallebudgera Creek is a family favourite, thanks to its calm, patrolled waters and easy access from both Palm Beach and Burleigh Heads National Park.
Got kids, prams, or beach carts? No stress. There’s beach matting, wheelchairs available on weekends, and a car park merely steps from the sand.
Hungry? Right by the shore and just across the street, you’ll find a bunch of cafes and restaurants serving anything from vegan meals to Portuguese tarts.
Nature lovers, keep your eyes peeled for dolphins, cockatoos, and even a kingfisher or two. And if you’re curious about Talle’s cultural roots, follow the walking trail to learn about the Kombumerri people’s deep connection to this special place.
Had enough of the coast? Explore inland with these top Gold Coast hikes!
7. Burleigh Heads
With so many stunning Queensland beaches to choose from, Burleigh Heads Beach still manages to stand out, and for good reason.
Perfectly placed between buzzing Surfers Paradise and chill Coolangatta, this Gold Coast gem is equal parts laid-back charm and world-class waves.
But what makes Burleigh one of the best beaches in Queensland is not just the scenery but also the vibe. There are lovely forest walks right next to the beach in Burleigh Heads National Park.
The beach boasts gentle swimming spots patrolled by lifeguards from 8 am to 5 pm daily and legendary surf breaks around the headland.
Norfolk pines, picnic spots, and paths for bike rides or lazy strolls line the breezy foreshore. From the hilltop, you’ll score lovely views stretching to the city skyline.
When you’ve had your fill of sea and sand, wander through markets and boutiques along James Street for handmade treasures and boho flair.
Burleigh Heads, a gem of the Gold Coast
8. Surfers Paradise Beach
Some people equate beautiful beaches with empty stretches of golden sand—until, of course, they step into Surfers Paradise.
No other beach on the Gold Coast exudes more energy and excitement than Surfers Paradise. But while the ‘burb is best known for its pulsating nightlife and glamorous skyscrapers that pierce the skyline, it does have pockets of peaceful hideaways along its 3 km coastline.
A tried-and-tested, patrolled surf beach, it boasts consistent rolling swells that draw surfers of all skill levels, though the gentler waves are ideal for beginners. Unsurprisingly, surf lessons and surf schools are big here.
Beyond the sand, Surfers has a lot going on—theme park rides, beach markets, waterfront dining, casinos, and a bar scene that doesn’t believe in bedtime.
That’s not to say Surfers isn’t family-friendly. Kids will love attractions like Ripley’s Believe It or Not and mini-golf, while thrill-seekers can ride the elevator to the SkyPoint Observation Deck for jaw-dropping views of the Gold Coast.
9. Palm Beach
If you ever want to escape the bustle of Surfers Paradise, Palm Beach offers a refreshing change of pace. Here, everything slows down, without ever getting boring.
Palm Beach has been crowned the cleanest beach on the Queensland coast not once, but thrice. But that’s not its only claim to fame.
It’s trendy and retro all at once, a vibe you’ll see in the mix of upscale high-rises and vintage beach shacks.
Surfers, swimmers, and sun lovers flock to this expansive sandy beach not just for the relaxed atmosphere, but because it’s made for salty hair, sun-kissed skin, and bare feet.
The Tropical North is where you’ll find some of the most stunning Queensland beaches. The farther north you go, the more exotic they seem to become.
And if it’s a motley of beach varieties you’re after, the Tropical North always delivers—whether it’s palm-fringed coves, wide sandy bays, or secluded islands.
But before you get to wandering around the coast, here are some safety precautions you need to know:
Beach Safety Tips:
The Tropical North is known for its marine stingers like the ‘box jellyfish’ and the Irukandji. The risk of encountering these is higher during the warmer months, typically from November to May.
Be sure to swim only at patrolled beaches. Stay within the safety nets and between the flags. Wear a wetsuit during the stinger season.
Heed warning signs, especially when it comes to currents and crocs. If unsure, seek the advice of the lifesavers on patrol.
Nudey Beach, Fitzroy Island, tucked just off the Queensland coast, is a tropical daydream come true—minus the nudity. Despite the name, it’s strictly swimsuit (and family) friendly!
Perched on the southwestern coast of Fitzroy Island, a designated national park, Nudey Beach is a striking burst of colours: sugar-white sand, aqua-blue water, and weathered grey boulders set against a lush green rainforest.
Getting there is part of the adventure. Hop on a 45-minute ferry from Cairns to Fitzroy Island, then follow the short, scenic trail through groves of acacias, eucalyptus, and beech trees to the beach.
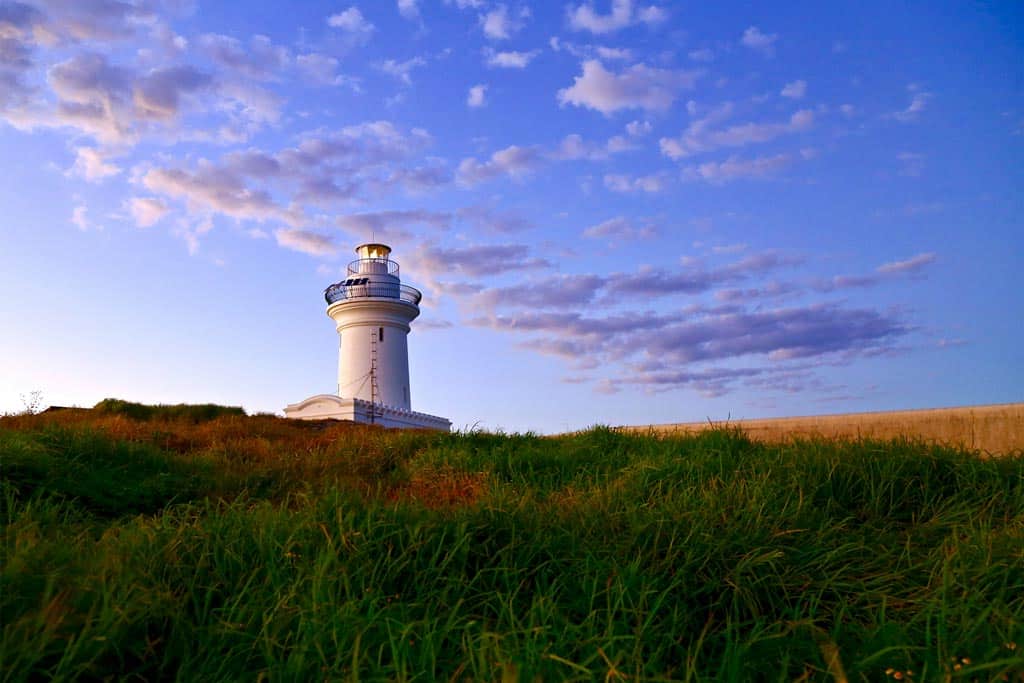
Beyond the beach, hike to the Fitzroy Island Lighthouse where you can see Green Island in the distance. Stop by the Cairns Turtle Rehabilitation Centre if time allows.
There are no eateries at Nudey Beach, and Fitzroy Island has just two restaurants—both may require reservations. Planning to stay all day? Bring your own food and drinks.
11. Palm Cove
Just a breezy 25-minute drive north of Cairns, Palm Cove is a favourite base for exploring North Queensland, including the iconic Great Barrier Reef.
But once you step into this tranquil coastal community—with its palm-fringed beach, paperbark-lined promenade, and vibrant food scene—you might not want to leave.
This quiet suburb is all about slowing down and embracing a laid-back, boho lifestyle. Sunrise yoga one minute, barefoot strolls the next, and sunset kayaking to wrap up your day.
Dinner by the beach? Absolutely. There’s no shortage of delicious options here, including the award-winning Nu Nu Restaurant.
Palm Cove isn’t just one of the best beaches in Cairns. But it’s also one of the safest. During jellyfish season, it’s patrolled and protected by a stinger net, so swimmers and families can splash about worry-free.
Palm Cove Beach is the perfect spot for a stroll.
12. Ellis Beach
Lodged between a rainforest-clad hill and the calm Coral Sea, Ellis Beach proves you don’t have to venture far to find a secret slice of heaven in Queensland.
Almost always empty—even in summer—Ellis is the perfect spot to spread out your towel and soak up the sun. Leaning palm trees frame the 1-km stretch of golden sand, offering dappled shade and a postcard-worthy backdrop.
The water here is typically calm, thanks to the natural shelter of Double Island and Buchan Point, a rocky headland at the beach’s southern tip. Occasionally, small waves roll in—just right for rookie surfers.
Ellis Beach is easily accessed from the Captain Cook Highway. On the beachfront, you’ll find a relaxed bar and grill—a favourite pit stop for savvy road trippers heading to Port Douglas.
Here’s a fun fact: Four Mile Beach is, in reality, four kilometres long, and it got its name after the local Fourmile family, not its length!
Despite its proximity to the resort town of Port Douglas, Four Mile remains delightfully undeveloped. Patrolled year-round with a stinger net in place, it’s as safe as it is scenic. The honey-coloured beach looks even more stunning from atop Flagstaff Hill.
Four Mile may not be a surf beach, but it’s a stand-out when it comes to kite surfing. The waves, typically gentle and even, are also great for boogie boarding.
Smaller crowds, no chain stores—just a dreamy sandy beach with BBQ spots, swaying palm trees, and the occasional croc warning sign to keep things interesting. What’s not to love about Four Mile Beach?
14. Mission Beach
Between the reef and rainforest on the Cassowary Coast is Mission Beach, the textbook definition of a quaint, unhurried coastal getaway.
This 14-km stretch of undiluted raw beauty consists of four seaside villages: Bingil Bay, Mission Beach, Wongaling Beach, and South Mission Beach.
Among the villages, Mission Beach is arguably the liveliest, with its sandy, palm-flanked bay dotted with a few shops and the occasional bar.
While it’s the closest mainland access point to the Great Barrier Reef, it’s refreshingly uncrowded compared to the busier ports in Cairns and Port Douglas.
For safe swimming, there’s an enclosure near Pacific Parade, patrolled daily by surf lifesavers. You can also paddle to nearby Dunk Island or go as far as Beaver Cay for a snorkelling cruise.
The ancient Wet Tropics Rainforest is at your doorstep if you prefer dry land adventures. For an adrenaline rush, try tandem skydiving over Mission Beach.
Of course, you can simply stretch out on the sand and do absolutely nothing but keep an eye out for a cassowary bird or two.
15. Magnetic Island
Granite headlands, hidden bays, and hoop pines dotting the coastline, all these make Magnetic Island a lovely contrast to many of the beaches in North Queensland.
A national park (over 78% of the land area is protected), it shelters an array of wildlife, ranging from rock wallabies and possums to butterflies and 100 bird species.
The star celebrities here, however, are the koalas. It’s one of the few places in Queensland where you’re sure to see these cuddly critters in the wild.
With 23 beaches and bays, Magnetic is indeed a magnet for sun-worshippers. Pick one (or all): Alma Bay is best for a family day trip, Nelly Bay is great for snorkelling, and Radical Bay offers serene seclusion.
Nelly Bay, Magnetic Island
Whitsunday Islands Best Beaches:
The Whitsundays consist of 74 continental islands scattered between Queensland’s northeast coast and the Great Barrier Reef.
While most are uninhabited, all are uniquely beautiful, covered by dense rainforests and fringed by white sand beaches.
16. Horseshoe Bay (Bowen)
Just 150-metre long, Horseshoe Bay is a pint-sized paradise with tremendous charm. Its calm, crystalline waters, sheltered by craggy headlands, are made for a splash or spotting turtles offshore.
The reef fringing the bay teems with marine life, and you can rent snorkel gear right on the beach. Sunbathing is always an option, too.
Then, shake off the sand and hike up to Rotary Lookout for dazzling views. You can also stroll the scenic Cape Edgecumbe Trail linking Horseshoe to neighbouring bays.
Horseshoe Bay is in the idyllic town of Bowen, a 40-minute drive from Airlie Beach, the base for exploring the Whitsundays.
17. Whitehaven Beach
If you visit the best beaches in Queensland and skip Whitehaven Beach, what are you even doing? This place is heaven on earth, or more precisely, heaven in Queensland.
Located on Whitsunday Island, Whitehaven Beach stretches seven kilometres with sand so white, soft, and fine you can’t help but sink your toes in.
The calm waters, a dreamy swirl of teal, turquoise, and emerald, doesn’t disappoint either. Calm and comfortably warm year-round, it’s perfect for swimming.
There’s no coral reef along the shallow shoreline, so you’ll need to head a bit farther out for snorkelling. Don’t worry—there are plenty of great snorkelling spots nearby, easily accessible on day tours around the Whitsunday Islands.
Don’t miss the hike to Tongue Point lookout at the northern end of the beach. From there, you can marvel at the spectacular swirling sands of Hill Inlet.
Want to explore beyond Whitehaven? Book a full-day eco-tour to see more of the stunning Whitsundays.
Best Beaches Near Brisbane
If you’re planning a day trip from Brisbane, check out these gorgeous beaches:
18. North Stradbroke Island
Kangaroos on the shore? What could be more Aussie than that? At North Stradbroke Island, a.k.a. Straddie to the locals, beach vibes meet wildlife.
As the world’s second-largest sand island, it boasts a slew of beautiful beaches.
Chill out on Cylinder Beach, a sun-soaked, family-friendly cove with white sand and gentle waves, or wander to South Gorge Beach for a wilder, more rugged day out.
Hike the stunning North Gorge Headlands and keep your eyes peeled for whales breaching offshore from May to November.
Escape to paradise at North Stradbroke Island!
19. Tangalooma Wrecks Beach
A natural show-stopper, Moreton Island’s Tangalooma is easily one of the most unique Queensland beaches.
What makes it distinct is the cluster of ships half-submerged in the turquoise waters.
Now, it’s one of the best diving spots in Queensland. Not only is the site fascinating, but it’s also a haven for over 100 fish species. Some days, you can spot dugongs and dolphins gliding about.
While you can swim to the wrecks from the beach, we highly recommend you don’t due to the strong currents when the tide is running.
It’s safer to explore the wrecks on a kayak or boat. Or, you can book a guided day cruise.
DISCLAIMER: Some of the links in this article are affiliate links, which means if you book accommodation, tours or buy a product, we will receive a small commission at no extra cost to you. These commissions help us keep creating more free travel content to help people plan their holidays and adventures. We only recommend the best accommodations, tours and products that ourselves or our fantastic editorial team have personally experienced, and regularly review these. Thanks for your support, kind friend!
When people think of Europe, the first destinations that often come to mind are France, Italy, Germany, Spain, and maybe Switzerland. However, Europe is home to dozens of countries, and one of the most underrated regions for travelers is the Balkans. While there’s no universal agreement on which countries belong to the Balkans, the region generally includes Albania, Bosnia and Herzegovina, Croatia, Bulgaria, Greece, Kosovo, Montenegro, North Macedonia, and Serbia, with Romania and Slovenia sometimes considered part of it as well.
Despite being overlooked by many tourists, the Balkans offer stunning landscapes, rich history, and vibrant cultures — all at a fraction of the cost compared to Western Europe. While some places may still be pricey by Filipino standards, they are generally more budget-friendly than their Western European counterparts. If visiting the Balkans is on your travel bucket list, keep reading as we share how we planned our unforgettable Balkan adventure in this article!
As mentioned earlier, the Balkan region generally consists of 11 countries. However, not all of them are part of the Schengen Area.
Schengen Balkan Countries
Only five countries in the Balkan region are included in the Schengen Area. These are the following:
Greece
Croatia
Slovenia
Bulgaria
Romania
Note: Bulgaria and Romania currently only accept Schengen visas at their sea and air borders.
Among the Schengen countries in the Balkans, Greece is the most practical choice for Filipino travelers. Here are the reasons:
Greece has its own embassy in the Philippines, making visa processing more straightforward.
Athens Airport is well-connected, with affordable flights available from many destinations.
Greece is a stunning travel destination, so it’s well worth adding to your itinerary!
Alternatively, you can also apply for a Schengen visa through Slovenia, which is processed by the Belgian Embassy in the Philippines.
TIP! Design an itinerary that requires multiple Schengen entries, making your multiple-entry visa application more justifiable. See sample itinerary in the next section.
Non-Schengen Balkan Countries
Here are the Balkan countries outside of the Schengen Area:
Albania
Bosnia and Herzegovina
Kosovo
Montenegro
North Macedonia
Serbia
If you’re traveling to any of these countries, you’ll need a separate visa specific to that country. For instance, if you’re only visiting Albania, you’ll need to apply for an Albanian visa. Fortunately, there’s a workaround: if you have a multiple-entry Schengen visa, you won’t need a separate visa for many Balkan states.
To take advantage of this, you can apply for a multiple-entry Schengen visa through Greece, Croatia, Slovenia, Bulgaria, or Romania — as long as your itinerary justifies multiple entries. Additionally, many non-Schengen Balkan countries accept a used multiple-entry Schengen visa, meaning you must enter a Schengen country at least once before using it to visit other Balkan states.
2. Plan your route wisely.
Careful route planning is essential — not only to save time, money, and energy but also to justify the need for a multiple-entry Schengen visa.
Creating Your Itinerary
As mentioned earlier, only five Balkan countries are part of the Schengen Area, while the rest require separate visas. However, with a multiple-entry Schengen visa, you can enter many non-Schengen Balkan countries without needing additional visas.
This is why the itinerary you submit to the embassy is crucial. Below is a simplified version of our Balkan travel route. It was more complicated in reality, but this gives you an example of how you can plan your itinerary.
Greece
Romania
Bulgaria
North Macedonia
Kosovo
Albania
Montenegro
Croatia
Bosnia and Herzegovina
Croatia
Spain
This itinerary required us to enter the Schengen Area three times, which strengthened our justification for a multiple-entry visa.
Arrival at Athens Airport
First Entry: Arriving in Greece (Schengen).
Second Entry: Exiting the Schengen Area from Bulgaria to North Macedonia, then re-entering when arriving in Croatia.
Third Entry: Taking a side trip to Bosnia and Herzegovina and Montenegro, then re-entering Croatia.
With three Schengen entries, a multiple-entry visa was justified, allowing us to travel through the non-Schengen Balkan countries without needing separate visas.
Choosing the Best Mode of Transportation
Beyond visas, planning your route wisely also means considering transportation availability. Google Maps is a great tool to check the most logical route between the countries you want to visit. Researching bus routes can help you avoid unnecessary flights, making your trip more budget-friendly and efficient.
Bus from Sofia in Bulgaria to Skopje in North Macedonia
During our Balkan backpacking trip, we primarily traveled by bus. Not only was it the most affordable option, but it also made for a more immersive and adventurous experience.
Checking the Political Landscape
Another critical factor when planning your itinerary is the political landscape of the Balkan region, as some countries have border restrictions due to diplomatic conflicts. For example, Serbia apparently does not allow entry from Kosovo due to conflicts. While this policy may change over time, we took extra precautions when planning our route. Instead of traveling from Kosovo to Serbia, we entered Serbia from Bulgaria first, then later traveled to Kosovo from North Macedonia to avoid potential issues.
By being strategic with your route, you can make your Balkan adventure smoother, more cost-effective, and visa-efficient — all while enjoying the incredible diversity of this fascinating region!
3. Search for affordable flights.
When planning our Balkans trip, we chose Greece as our entry point because it offered the cheapest flights. If you’re booking well in advance or during seat sales, one of the most budget-friendly options from Manila to Athens is SCOOT, which operates flights with a stopover in Singapore. In fact, we’ve flown to Greece with Scoot on previous trips.
However, don’t limit your search to just budget airlines. It’s always worth checking full-service carriers too. Sometimes, you’ll find flights that are either cheaper or only slightly more expensive than low-cost airlines but come with added benefits. For example, when we booked our flight for our Balkans trip, we chose Etihad with a stop in Abu Dhabi. At the time, it was only about ₱5,000 more expensive than Scoot, but that price already included add-ons.
If you noticed in our sample itinerary, our final stop before returning to the Philippines was Spain, even though it’s not part of the Balkan region. The reason? Flight prices. At the time, the cheapest flight back to Manila was from Barcelona. Even after factoring in the cost of a connecting flight from Croatia to Barcelona, the total expense was still lower than flying directly from the Balkans. That’s why we decided to include Spain in our route!
It’s important to note that when applying for a Schengen visa, you don’t need to book your flights yet. Instead, you’ll need a flight reservation, which serves as a temporary booking without requiring full payment. Some people refer to it as a “dummy ticket”, it sounds phony so we avoid using that term. But whatever you call it, what’s important is that embassies recognize flight reservations.
For our visa applications, we get our flight reservations from Gazelle Travel and Tours. If you need one, you can visit this page, fill out the order form, and check the pricing and turnaround time. Once your visa is approved, you can proceed with finalizing your actual flight booking.
4. Consider the season and the weather.
Timing plays a crucial role when planning a trip to Europe, including the Balkan region. We’ve traveled to the Balkans during late spring to early summer and again from late summer to autumn, and we can confidently say — the difference in price is huge.
The summer months (June to September) are considered peak season, meaning higher prices for flights, accommodations, and tours. For example, when we visited Croatia, we noticed that as soon as October arrived, tour prices dropped significantly. This trend applies to hotels and flights as well.
Out of all the seasons we’ve experienced, autumn was the most breathtaking. The weather was comfortably cool — neither too hot nor too cold — and the landscapes were painted in stunning fall colors, making it an unforgettable sight.
Beyond pricing and scenery, seasonal weather also determines what you need to pack. The Balkans have diverse climates, so temperatures can vary greatly depending on where you go. For example, the weather in Romania is different from Croatia’s Dalmatia Region.
Meanwhile, coastal cities along the Adriatic and Aegean Seas — like Split and Dubrovnik in Croatia — have a Mediterranean climate. Inland regions, such as Sofia in Bulgaria and Brașov in Romania, experience a humid continental climate, meaning colder winters and more significant seasonal changes.
If you’re backpacking through multiple countries, expect the weather to shift from place to place. Be sure to research each destination’s climate in advance and pack accordingly to stay comfortable throughout your journey.
5. Don’t assume everything’s the same.
The Balkan region is incredibly diverse, not just in terms of climate but also in culture, language, history, and governance. While there are similarities between countries, each nation has its own distinct identity. The alphabet, religion, political systems, and even cuisines can vary dramatically as you cross borders.
History
This diversity is also reflected in the region’s complex history. Many neighboring countries have long-standing political tensions, which sometimes become evident when speaking with locals. Even historical tours can present conflicting narratives, depending on where you are. For example, North Macedonia and Bulgaria, Serbia and Bulgaria, Serbia and Kosovo, and even Bosnia and Herzegovina all have different perspectives on historical events — and you’ll likely sense this when visiting heritage sites or engaging in conversations.
Cuisine
Each country in the Balkans offers a unique cuisine as well. For example, in Dubrovnik and Montenegro, seafood dominates the cuisine, whereas Romania, Bulgaria, and Serbia favor meat-heavy dishes.
Some of the dishes we tried in Brasov, Romania (Top and Bottom Left) and Kotor, Montenegro (Top and Bottom Right).
Religion
When it comes to religion, countries like Kosovo and Albania are predominantly Muslim, while Croatia is largely Catholic. Meanwhile, Greece, Bulgaria, Serbia, Montenegro, and Romania follow Eastern Orthodox Christianity, each with their own branches — Greek Orthodox, Bulgarian Orthodox, and Serbian Orthodox.
Language
The linguistic diversity is also fascinating. For example, Romanian is a Latin-based language that uses the Latin alphabet, whereas Bulgarian is a Slavic language that uses the Cyrillic script. Greek, of course, has its own distinct Greek alphabet.
Vibe and Personality
Every destination has its own personality. Beyond cultural differences, each city or town exudes its own unique charm. Brașov (Romania) feels like a quaint, fairy-tale town. Sofia (Bulgaria) and Tirana (Albania) have the bustling energy of big cities. Meanwhile, Split and Dubrovnik (Croatia) are straight out of Game of Thrones, serving serious King’s Landing vibes. And Mostar (Bosnia and Herzegovina) and Prizren (Kosovo) look like giant, open-air museums with their well-preserved historical sites.
Affordability
Prices also vary between destinations. While much of the Balkans is known for being budget-friendly, there are notable exceptions. Dubrovnik and Split are among the most expensive cities in the region. When we first visited these parts of Croatia a few years ago, they were already pricey, but during our most recent trip, we noticed prices had skyrocketed, likely due to the influx of tourists. If you plan to visit, be prepared to spend more compared to other Balkan destinations.
The more places you explore, the more you’ll appreciate the region’s incredible diversity. Every stop reveals something new, making the Balkans a truly fascinating place to visit.
6. Inspect your accommodations online.
One of the best things about traveling in the Balkans is the abundance of budget-friendly accommodations. However, price isn’t the only factor to consider when choosing where to stay. We always use two key criteria when booking: central location and accessibility.
We prefer accommodations near the Old Town or city center, within walking distance of key attractions and starting points for walking tours. It’s also important that our lodging is close to major transportation hubs, such as train stations or bus terminals, for easier transfers between destinations.
Finding accommodations that fit these criteria was fairly easy, except in Dubrovnik, where we faced a unique challenge: most budget-friendly rooms only accommodated two people — we were a group of three. As a result, we ended up booking apartments for most of our stay.
By the way, these are all the promo codes that you can use. We have discounts for hotels, tours, and eSIM for internet connection. We even have special rates for travel insurance, exclusive for TPT subscribers.
Beyond location and affordability, it’s also crucial to check the building’s facilities, especially if you’re staying in an apartment within the Old Town. Some buildings are older and lack elevators, which can be a problem if you’re carrying heavy luggage or have mobility problems.
For example, in Brașov, Romania, we stayed at Zinne Apartments, a charming place just two blocks from the main square. However, it was on the second floor, which is third floor for us Pinoys, and since it was in an older building, there was no elevator. Similarly, in Skopje, North Macedonia, we booked Apartment Emilija, which had an amazing location — we could see the main square right from our window. The unit itself was spacious and comfortable, but it was on the fourth floor, which is fifth floor by our standards, with no elevator.
Zinne Apartments in Brasov, Romania.
Before finalizing your accommodation, always check which floor your unit is on and whether the building has an elevator. This small detail can make a big difference in your comfort, especially after a long day of exploring. And, again:
If Klook is your go-to booking site, please use our promo code THEPOORTRAVELERKLOOK for up to P300 OFF or TPTKLOOK5 for up to P500 OFF. These codes might change in the future so best to just visit thepoortraveler.net/klook to redeem updated discount codes!
If you prefer to book via AGODA, use our promo code AGODATPT for 10% discount.
7. Beware of scams and secure mandatory travel insurance.
Like many major cities in Europe, scams exist in the Balkans. Although they are not as rampant as in Paris, Barcelona, or Berlin, scams still exist here. The most common type of scam travelers encounter here usually involves taxis.
We personally experienced a taxi scam in North Macedonia. We usually prefer public transportation, but sometimes, especially when arriving late at night, taking a taxi is the only option. Since there were three of us, we figured splitting the fare wouldn’t be too bad.
Before getting in the taxi, we agreed on a price with the driver. However, when we arrived at our destination, he suddenly demanded more money. When we refused, other taxi drivers surrounded us, trying to intimidate us.
Unfortunately, taxi scams happen in other cities too. If you suspect a driver is overcharging, walk away and find another taxi. To avoid this, you can ask your accommodation host for an estimate of the usual fare from the station to your stay. Many hosts even recommend a trusted transfer service to ensure you’re not overcharged. For example, our host in Skopje went the extra mile to personally take us to the bus station so we wouldn’t have to deal with taxi scams.
In our six weeks of traveling in the Balkans, we only encountered two scams and fell for one. However, there are other scams that travelers have reported, such as as the money collector scam and overpriced menu scam. Thankfully, we didn’t encounter these, but researching common scams before your trip can help you recognize and avoid them.
Since we’re talking about safety, remember that when applying for a Schengen visa, having travel insurance is mandatory. Not just any insurance — it must be Schengen-accredited. For reliable coverage, you can book TravelJoy Plus through PGA Sompo. This ensures you’re protected throughout your trip.
From snorkelling or diving at the Great Barrier Reef to hiking up Flagstaff Hill, these are some of the best things to do in Port Douglas.
Port Douglas is a charming beach town in Far North Queensland, the perfect base for exploring Australia’s incredible natural wonders.
Situated between the Great Barrier Reef and the Daintree Rainforest, both UNESCO World Heritage-listed Sites, this place has everything to delight outdoor lovers.
If you enjoy swimming in crystal-clear waters or hiking through lush rainforests, then Port Douglas is your dream destination. Spend your days snorkelling and diving in the world-renowned reef or travel into the Daintree Rainforest for an unforgettable trek.
In addition, Port Douglas has that laid-back, welcoming vibe that makes it feel like a home away from home! There are also some amazing places to connect with the Indigenous culture of the Kuku Yalanji people.
So don’t miss the chance to visit Port Douglas while you travel Australia!
Port Douglas is a popular holiday spot in Tropical North Queensland.
Fun Things To Do In Port Douglas
There’s no shortage of incredible things to see and do in Port Douglas! If you’re feeling overwhelmed and don’t know where to start – here’s a roundup of some of the most fun things to do in Port Douglas.
It’s a small town that doesn’t necessarily require you to have a car. You can book tours to the reef and rainforest that include transport.
But if you want more freedom to go on day trips and explore nearby destinations outside town on your own, we recommend renting a car!
The best way to get around is to rent a car and explore on your own! We recommend Rental Cars, which has the largest range of vehicles for the best value on the market.
1. Snorkel or Dive at the Great Barrier Reef
No trip to Port Douglas or the tropical Far North is complete without experiencing the magic of the Great Barrier Reef. This natural wonder is a bucket-list destination for adventure-seekers worldwide, and it’s easy to see why.
The vibrant underwater paradise is home to fascinating marine life and breathtaking coral formations. Thanks to Port Douglas’s prime location, you can hop on a snorkelling or diving boat and reach the reef in under an hour!
To make the most of your trip, consider booking with tour operators specializing in snorkeling and diving adventures at the Great Barrier Reef. One great option is the Outer Great Barrier Reef Snorkeling Cruise, a full-day tour, which begins from Port Douglas’ Crystalbrook Superyacht marina near the Dickson Inlet.
Exploring the wonders of the Great Barrier Reef is truly a once-in-a-lifetime experience! Prepare to be amazed by the underwater world’s vibrant colors and diversity, home to over 600 species of corals and 1,500 types of fish.
And that’s not all – you might also encounter graceful manta rays, playful dolphins, and even majestic whales in winter.
If snorkeling or diving isn’t your thing, you can still experience the magic of the Great Barrier Reef with a Glass-Bottom Boat Tour. It’s a fantastic way to marvel at the vibrant coral and marine life without getting wet.
2. Enjoy a Refreshing Swim at Four Mile Beach
One of Port Douglas’ standout features is its lovely beach. While Tropical North Queensland is home to plenty of beautiful beaches, some aren’t the safest for swimming due to the risk of crocodiles.
If you’re looking to take a refreshing dip, Four Mile Beach is the place to go. This gorgeous beach has lifeguards trained to spot crocodiles and other water hazards, so you can relax and enjoy the water safely.
After a refreshing swim, there’s more to enjoy in Four Mile Beach. You can kick back and relax under the shade of the swaying palm trees, or hop on a bicycle and cruise along the sandy beach. If you’re an avid hiker, head towards Flagstaff Hill Lookout for spectacular views.
Feeling adventurous? Why not try kite surfing in the afternoon? Whether you’re a beginner or an experienced kite surfer, the calm and consistent winds at Four Mile Beach make it an ideal spot to give this exciting sport a go.
3. Explore Mossman Gorge and the Daintree Rainforest
Mossman Gorge is a breathtaking section of the legendary Daintree Rainforest, one of the oldest continuously growing rainforests on Earth at 160 million years old!
Nestled in Far North Queensland, just a quick 20-minute drive north of Port Douglas, this natural wonder has been recognized as a UNESCO World Heritage Site since 1988.
Exploring Mossman Gorge feels like stepping back in time, surrounded by ancient lush greenery, sparkling clear streams, and unique wildlife.
If you don’t want the hassles of a DIY adventure, consider booking a Daintree and Mossman Gorge Tour with a Cruise Option. One of the biggest perks of a guided tour is having an experienced guide by your side to point out and explain the wildlife habitat at the Mossman Gorge.
The tour begins at the Mossman Gorge Cultural Centre, where you’ll hop on a shuttle to travel to the heart of Mossman Gorge. From there, you’ll embark on a guided walk through the enchanting rainforest, where you’ll uncover its unique ecosystem, rich history, and diverse wildlife habitat.
You can also join experiences with a Kuku Yalanji guide if you want to learn about the culture and history of the Traditional Owners of the Land here at Mossman Gorge.
Go for a dip at Mossman Gorge.
4. Shop at Port Douglas Markets
If you’re in Port Douglas on a Sunday, you would not want to miss the town’s biggest open-air market at Anzac Park from 8:30 AM to 1 PM. This lively spot is called the “cotter’s market,” which means everything you’ll find here is locally made!
Grab a fresh coconut to sip as you browse through the stalls. The warm and friendly atmosphere makes it a fun place to explore, with local vendors showcasing their wares under the shade of tall palm trees.
You will find all sorts of treasures at the markets – from freshly picked fruits and homemade peanut brittles to lovely flowers, colorful art pieces, and Aboriginal artworks.
Since the market sits next to the stunning Coral Seas, you’ll be surrounded by beautiful ocean views while you shop.
Exploring the markets is an ideal way to immerse yourself in the local culture, shop for one-of-a-kind souvenirs, and enjoy a slice of Tropical North Queensland paradise!
5. Take a Relaxing Stroll Down Macrossan Street
After your shopping spree, take the time to stroll along Macrossan Street, the bustling heart of Port Douglas.
This lively street is packed with charming Australian bars, cozy bistros, and boutique shops, making it the perfect spot to soak in the town’s laid-back vibe.
Feeling thirsty? You will find plenty of tempting spots to grab a cold drink or a bite to eat, but IronBar is a must-visit. This outback-style pub oozes character, with rustic decor and a friendly atmosphere that locals and visitors love. Head upstairs, and you’ll be treated to a fantastic view, making it an ideal place to unwind with a pint or two after a day of exploring.
Not in the mood for a drink? No problem! Macrossan Street has plenty of options to satisfy your cravings. Swing by one of the charming cafés for a freshly brewed coffee or indulge in something sweet – perhaps a scoop of gelato to cool you down in the tropical heat?
If you happen to visit in May, don’t miss the Carnivale. Witness Port Douglas come alive with the region’s most vibrant cultural festival.
It’s an epic celebration that perfectly captures the tropical spirit of North Queensland, drawing tens of thousands of visitors from across Australia and the world!
Witness vibrant street parades featuring colorful floats, fireworks illuminating the night sky, and an energetic atmosphere that buzzes from dawn until dusk.
Spend a delightful day at the beach, enjoying games and activities for all ages. Meanwhile, food enthusiasts can relish the “Longest Lunch”, an exquisite dining experience highlighting the freshest local ingredients of Port Douglas.
Don’t miss the cabaret shows that will leave you in awe with their comedy, acrobatics, and stunning performances.
And, of course – no festival would be complete without music! So, dance beneath the stars to performances from Aussie rock legends and talented local artists.
7. Experience the Scenic Great Barrier Reef Drive
Stretching from Palm Cove to Cape Tribulation, the Great Barrier Reef Drive is hands down one of the most breathtaking roads in Australia!
This stunning stretch of highway takes you on an unforgettable journey through lush rainforests, dramatic mountain ranges, and pristine coastlines, with the sparkling waters of the reef often peeking into view.
If you’re a fan of road trips (or even if you’re not!), this one’s a must-do while visiting Port Douglas. So, buckle up, cruise along the winding roads with windows down, feel the salty sea breeze in your hair, and enjoy the sound of tropical birds in the background.
You’ll pass through picturesque towns like Palm Cove, where you can stop for a coffee, and iconic spots like the Daintree Rainforest before reaching Cape Tribulation.
Feel free to pull over to snap photos along some scenic viewpoints, or perhaps, take a quick, refreshing dip at a secluded beach.
Road trips around the Port Douglas area are stunning!
8. Ride a Horse Along the Beach at Cape Tribulation
When you finally arrive at Cape Tribulation, the grand finale of your road trip, get ready to soak up the magic of this extraordinary place where two World Heritage-listed wonders come together – the Great Barrier Reef and the Wet Tropics Rainforest.
If you’re feeling adventurous, saddle up for a horseback ride to explore the coast. Trot along pristine beaches with the ocean on one side and lush rainforest on the other.
But the adventure doesn’t stop there! Cape Tribulation is a nature lover’s paradise with plenty to do.
Take a guided rainforest walk to uncover the secrets of this ancient ecosystem or venture into the mangrove boardwalks.
Want something more thrilling? Try this Rainforest Canopy Ziplining Tour, where you’ll glide through the lush rainforest canopy, surrounded by jaw-dropping views!
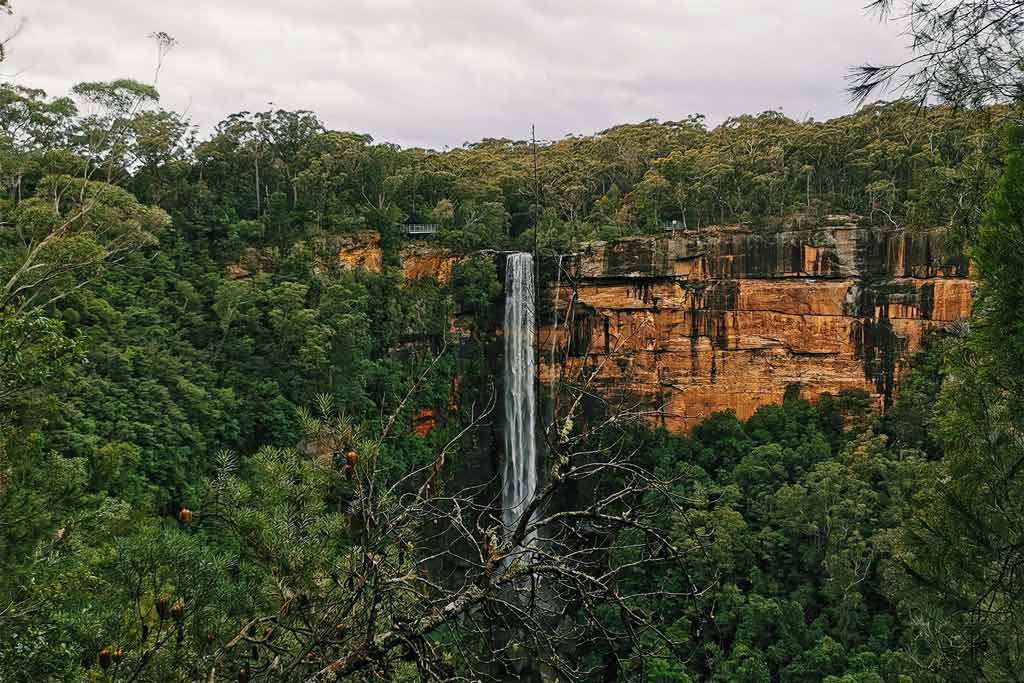
9. Discover Secluded Waterfalls
While in Port Douglas, experience one of the region’s best-kept secrets – swimming beneath some of Queensland’s most stunning waterfalls, such as Spring Creek Falls and Mowbray Falls.
Visiting these secluded spots, tucked away in ancient rainforests and a national park, is a magical way to connect with nature!
Spring Creek Falls, also known as Black Rock Waterfalls, is a local favorite. Getting there involves a rocky 3-kilometre hike through the lush wilderness of Mowbray National Park, but the reward is worth every step.
The swimming hole at the base of the falls is perfect for cooling off, surrounded by dramatic rock formations and the soothing sounds of cascading water.
If you’re up for a challenge, conquer the 4-kilometre trek to Big Mowbray Falls. The journey is an incredible experience, leading you deeper into the lush rainforest. Once you arrive, you’ll be greeted by a tranquil, shallow swimming hole that feels like a secluded paradise.
Nothing like a tranquil rainforest walk that leads to a waterfall!
10. Uncover Aboriginal Artistry at the Janbal Gallery in Mossman
Want to immerse yourself in the Aboriginal cultural experience in Port Douglas? Visit the Janbal Gallery in Mossman.
This charming gallery offers more than just a chance to admire incredible Indigenous artwork – it’s also where you can learn about Aboriginal stories and traditions.
Owned and operated by talented Aboriginal artist Brian “Binna” Swindley, the gallery is a vibrant space filled with colourful, meaningful creations that reflect the rich heritage of the Kuku Yalanji people. But what makes Janbal Gallery special is its hands-on approach to Aboriginal cultural experience.
Visitors will have a chance to join one of Binna’s interactive art classes, where he shares his painting techniques and the cultural significance of the symbols and patterns you will use.
It’s a unique opportunity to express creativity while learning about one of the world’s oldest living cultures.
After all the day’s adventures, kick back and relax with a cold pint at Hemingway’s Brewery.
This laid-back, waterfront craft brewpub sits on the stunning Crystalbrook Superyacht Marina in Port Douglas, with amazing views and a lively vibe to end your day on a high note.
Hemingway’s boasts a fantastic selection of beers brewed on-site. Their core range is a must-try, featuring favorites like the 7th Heaven Tropical Ale, a refreshing, fruity choice, or the bold Wharf St IPA, with hints of grapefruit and citrus that pack a zesty punch.
Feeling hungry? The food here is just as impressive! Dive into a menu of crowd-pleasers like wood-fired pizzas, juicy burgers, flavorful tacos, and fresh salads.
To make the most of your experience, check out the colour-coded stickers on the menu, as they suggest the perfect beer pairing for each dish.
12. Hike up Flagstaff Hill
For a fun and scenic way to experience Port Douglas, trek the Flagstaff Hill Trail! It’s one of the most popular trails in the area, with stunning panoramic views at every turn.
While hiking the trail, you’ll be treated to breathtaking vistas that take in everything, from Four Mile Beach to the lush rainforest and the sparkling Coral Sea.
The trail takes you to the Port Douglas Lookout, where the view is worth the effort. From there, you can take in sweeping views that stretch from Four Mile Beach to Rex Smeal Park – a picturesque spot for some photos and a moment to appreciate the beauty around you.
The walk is a manageable 1.5 kilometers. It starts at the north end of Four Mile Beach and heads up to the Trinity Bay Lookout. The trail is easy to follow and meanders through gorgeous bushland, so you’ll be surrounded by nature the whole time.
After reaching the lookout, the trail loops back through more bushland, eventually bringing you to the peaceful shores of Rex Smeal Park. Here, you can kick back and relax under the shade of fig trees.
If you’re looking for a relaxed, affordable way to experience the Great Barrier Reef without venturing too far, consider venturing into the Low Isles.
Just a short boat ride from Port Douglas, this charming little cluster of islets offers some fantastic snorkeling opportunities. A day trip to the Low Isles is a great option if you’re on a budget compared to those longer trips out to the outer reef.
The Low Isles is very tranquil, where you can kick back and enjoy the reef at your own pace. You can explore the island’s white-sand shores, hang out by the resident lighthouse, or wander around and soak in the laid-back vibe.
While the snorkeling here might not offer the jaw-dropping coral gardens or giant sea creatures you’d encounter on the outer reef, it’s still a lovely way to see the underwater world.
The waters around the Low Isles are home to colorful fish, sea turtles, and vibrant coral, so there’s plenty to discover here.
There is some incredible snorkelling around the Low Isles and Great Barrier Reef!
14. Try Barra Fishing
If you’re a fishing enthusiast with some time to spare, Hook A Barra is a must-stop! Located just half an hour’s drive north of Port Douglas at Wonga Beach, it’s worth stopping when traveling the Great Barrier Reef Drive towards Cape Tribulation or the Daintree River.
You can find this hidden gem on a stunning 49-hectare property between Daintree and the sparkling Coral Sea. Hook A Barra is a locally run business, offering some of Queensland’s best land-based fishing activities.
While here, you can catch some impressive Barramundi, including the rare and beautiful Albino, the striking Speckled (Panda), and the golden-hued Gold Barramundi. The excitement of hooking one of these prized fish is an experience you won’t forget.
Plus, if you’re interested in learning more about the fish, they also offer Farm Tours that take you behind the scenes to explore how they raise their award-winning Daintree Saltwater Barramundi.
DISCLAIMER: Some of the links in this article are affiliate links, which means if you book accommodation, tours or buy a product, we will receive a small commission at no extra cost to you. These commissions help us keep creating more free travel content to help people plan their holidays and adventures. We only recommend the best accommodations, tours and products that ourselves or our fantastic editorial team have personally experienced, and regularly review these. Thanks for your support, kind friend!
For over three decades, Coral Expeditions has been a pioneer in small-ship cruising, offering adventurous travellers the chance to explore some of the most remote and pristine regions of Australia and the rest of the world.
Founded in 1983 to explore the outer reaches of the Great Barrier Reef, the Australian-owned-and-operated Coral Expeditions has grown from a single vessel operation to a renowned expedition cruise company, now boasting a fleet of purpose-built ships designed for intimate and immersive experiences.
The Coral Geographer, the latest addition to their fleet, continues the company’s tradition of delivering exceptional journeys to off-the-beaten-path destinations.
With a focus on exploring Australia’s Kimberley coast, the wilds of Papua New Guinea, and the idyllic islands of the Indian Ocean, Coral Expeditions offers itineraries that are rich in natural beauty, cultural encounters, and unique wildlife experiences.
What sets Coral Expeditions apart is their commitment to small group travel, typically with fewer than 120 passengers on board, ensuring a personalised and enriching experience.
We recently had the immense pleasure and privilege of working onboard the Coral Geographer as ‘Photographers-in-Residence’, spending 17 days navigating the remote atolls of Micronesia and rugged landscapes of West Papua on their Darwin to Yap expedition.
Having travelled the world on multiple expedition cruises, from Antarctica to the Arctic, the Galapagos Islands and now the Indo-Pacific, we have a huge amount of intricate experience on these types of ships, covering the most luxurious right down to rustic Russian research vessels.
And now with the Coral Geographer under our belt, we can confidently vouch for just how superb this purpose-built explorer is for travelling to the most remote regions in the tropics.
In our detailed and firsthand Coral Geographer review we dive deep into our thoughts and experiences of the entire ship, from the cabins and lounge areas to the dining and even safety, so you can make a decision on whether or not you think this vessel is right for you on your next adventure.
The Coral Geographer with one of its Xplorers alongside.
Introducing the Coral Geographer
The Coral Geographer was constructed at the Vard Vung Tau shipyard in Vietnam, renowned for building high-quality expedition vessels.
As the sister ship to the Coral Adventurer, which was launched in 2019, the Coral Geographer shares many design elements but incorporates enhancements based on feedback and experiences from its predecessor.
Both ships are part of Coral Expeditions’ new generation of expedition vessels, designed to offer an intimate and luxurious cruising experience while being capable of accessing some of the world’s most remote and hard-to-reach locations.
The Coral Geographer is equipped with the latest technology and features that enhance exploration, including a fleet of Zodiacs, signature Xplorers, and the capability to venture into shallow bays and hidden inlets that larger ships cannot reach.
Onboard, guests are treated to the expertise of highly experienced expedition teams, who provide insightful commentary, guided excursions, and a deep understanding of the regions visited.
Whether you’re diving the reefs of Raja Ampat, sipping cocktails in ancient ruins, or engaging with local communities, a journey aboard the Coral Geographer is designed to inspire a sense of wonder and discovery, all while maintaining the comfort and elegance of a modern expedition ship.
Eco-Friendly Features: Advanced wastewater treatment system
Specialty Areas: Explorer Lounge, Observation Decks
Cruising Speed: 13.8 knots
Main Engines: Caterpillar 3512C
Flag: Australian
The Coral Geographers’s capable Xplorer tenders are able to get into some pretty spectacular locations, like this cove in Misool, Raja Ampat.
The Cabins and Suites
The Coral Geographer offers a range of elegantly designed cabins and suites, each thoughtfully crafted to provide comfort and luxury while maintaining a connection to the stunning surroundings.
All staterooms feature:
Ocean views
Compact en suite bathrooms
Comfortable bedding
Ample storage space
Climate control
Writing desk
Daily housekeeping
Cabin 413, our Promenade Deck Stateroom on the ship.
Personally we stayed in cabin 413, a Promenade Deck Stateroom with a large window, which stands out for its blend of space, style, and accessibility.
The stateroom is designed with a calming colour palette, hanging wall art and modern amenities, creating a welcoming retreat after a day of exploration.
The ship also features Coral Deck Staterooms with twin portholes, Explorer Deck Balcony Staterooms and Bridge Deck Suites.
Each cabin type provides ample space, luxurious furnishings, and thoughtful, decorative touches.
The bed was enormous, room spacious and bathed with natural light thanks to the large window.
The Bridge Deck Suites in particular offer the ultimate indulgence with expansive private balconies and larger lounge area, perfect for those seeking extra comfort and privacy on their expedition.
The private balcony in these suites provide stunning views and comfortable seating. Additionally, the private balconies in various suite categories include an outdoor daybed, offering a luxurious space for guests to unwind while enjoying scenic views.
No matter which cabin you choose, the Coral Geographer ensures that every guest enjoys a luxurious and comfortable experience, complete with modern amenities and the convenience of a home away from home.
The bathroom is basic but equipped with everything you’d need.
The Explorer Lounge
The Explorer Lounge aboard the Coral Geographer is more than just a gathering space – it’s the ship’s social hub where drinks are shared, games are played and presentations excitedly listened to.
With its panoramic windows, the lounge offers stunning views that make you feel connected to the remote landscapes you’re exploring.
There are more than enough comfortable chairs, lounges and tables for all guests to sprawl out and relax, and a number of TVs to watch movies or the slideshows from the expedition crew.
Naturally there is a well-stocked bar as well which opens up in the afternoons, so you can enjoy a drink while hearing about what the plan is for the next day or while getting to know your fellow passengers.
The Explorer Lounge is a spacious, bright room with massive panorama windows and the social hub of the ship.This is what it looks like most of the time – filled with smiling guests playing games, listening to presentations or simply enjoying a drink.
Library
Tucked next to the entrance to the Explorer Lounge is the ship’s library, with a collection of curated books that cover a wide variety of destinations, wildlife, history and culture that Coral Expeditions immerses their guests in.
There were books on Australian indigenous rock art, the birds of paradise found in Papua.
You are welcome to borrow any of the books you’d like for free. You’re just asked to return them to the library before you disembark.
The library is small but filled with fascinating books related to the cultures and regions that Coral Expeditions explore.
The Dining Room
The Dining Room aboard the Coral Geographer is a beautifully designed space that blends elegance with a sense of warmth.
Large windows offer stunning views, making every meal a visual feast as well as a culinary one.
The atmosphere is relaxed yet refined, with seating arranged to foster a sense of community among guests.
Breakfast is served buffet style, fostering a communal dining experience where guests can choose from various options at their leisure.
This setting allows for a relaxed, casual atmosphere, contrasting with the more formal plated dinners offered in the evenings.
The Dining Room onboard the Coral Geographer.
You can choose to join large tables for multiple people, or grab a more intimate 2-person setup if you’d prefer a bit of tranquility with your meal.
Tables are also set for breakfast, lunch and dinner out on the aft deck for those that would like uninterrupted views and fresh air with their glass of wine.
The natural light during the day and the cozy ambiance in the evening create a perfect setting for guests to gather, share stories, and savour the journey.
READ MORE: Check out our article on our favourite travel photography tips to help you capture epic images on your next adventure.
If you’d prefer you can always enjoy a meal outside as well. With views like this, it doesn’t get much better.
Gym
Just because you’re on holiday doesn’t mean you need to let your fitness regime disappear, because there’s a small yet varied gym aboard Coral Geographer!
Located on the Explorer Deck, the gym features a couple of cardio machines and free weights.
Large windows allow natural light to flood the space, with inspiring views of the surrounding seascape as you work out.
The gym is small but has all you’d need to keep fit on the journey.A variety of free weights are available as well.
The Bridge
The Bridge on the Coral Geographer is the heart and soul of the ship where all navigation and operations are conducted.
Thanks to the Coral Expeditions’ open bridge policy, guests are welcomed to visit during almost any time of the day, with it really only being closed during difficult navigation and when local pilots are onboard who prefer not to have guests in the room.
This unique access provides an inside look at how the crew navigates through remote waters, offering a chance to observe the advanced navigation systems and interact with the captain and officers.
Inside the bridge while navigating through a narrow channel on the way into Palau.
On every voyage an official bridge tour is offered where one of the officers will explain all of the tools they have at their disposal and how they sail the ship.
Having access to the bridge is one of the most interesting aspects of any journey with Coral Expeditions, and we would often wander in to chat with Captain Andrew, Josh, Mohammed and Brock and watch what was going on.
On a side note, the captain and his officers were also the most welcoming, friendly and chatty ship crew we’ve ever come across on an expedition vessel.
Keeping an eye on the weather inside the bridge.
Xplorer Bar and Vista Deck
The Xplorer Bar and Vista Deck on the Coral Geographer is found near the bow of the ship on Deck 7 and is one of the most picturesque and sought-after locations on the entire ship.
When the sun is rising or you’re entering a new destination, this is where you’ll find most guests with a drink in one hand and a camera in the other soaking up whatever is pouring out of the outdoor bars.
A key feature of the Xplorer Bar experience is enjoying sunset drinks while taking in the panoramic views during sunset.
The Vista Deck during a special drinks hour on the Coral Geographer as we leave Raja Ampat.
It offers sprawling 270-degree views, lots of seating areas and of course the Xplorer Bar that opens up for special occasions.
During our journey the Coral team organised a fantastic cocktail party on the upper deck as we sailed out of Raja Ampat.
With the drinks free-flowing and vistas that need to be seen to be believed it became one of the most enjoyable evenings on the entire trip.
While there isn’t always a party happening here though, it is still one of our personal favourite areas on the ship.
Alesha enjoying a delicious drink on the Vista Deck.
Bridge Deck Bar
Smaller, yet often busier, the Bridge Deck Bar on the Coral Geographer is constantly buzzing with guests who would like a book to read or drink to savour as they take in mind-blowing views.
Found at the stern of the Explorer Lounge, the bar is where afternoon drinks are prepared, always with a cocktail of the day designed by one of the talented bartenders.
There are speakers outside as well that project what is being said on the presentations, so if you’d lke to sit outside but don’t want to miss the talks, this is the spot to be.
Sunset photography sessions on the Bridge Deck.Guests enjoying some fresh cocktails out on the Bridge Deck.
Reception and Shop
The Reception on the Coral Geographer is the central hub for guest services and information.
You can’t miss it, as it’s right at the entrance to the Dining Room, and you’ll usually find one of the friendly crew hanging out there answering questions.
If you need to put your name down for any daily activities, check to see what’s on the schedule or just have a query, this is where you’ll end up.
Adjacent to the reception area is the onboard shop, which offers a selection of travel essentials, souvenirs, and expedition gear.
There’s not a lot available, so you can’t rely on it to do all your expedition shopping before arrival or to pick up things like a decent camera, but if you’d like a shirt or something to take home you’ll find something suitable here.
The shop on the Coral Geographer isn’t huge, but has the essentials.
Outer Decks
The outer decks on the Coral Geographer provide guests with ample space to fully experience the surrounding environment during their expedition.
The fantastic wraparound deck on deck 4 allows you to walk pretty much the whole way around the ship (with the bow being closed during operations), making it perfect for photography, wildlife spotting, or simply enjoying the sea breeze.
When operations aren’t underway guests can even walk out to the bow.
The front Coral Geographer decks allow for better views of what’s coming up ahead, while the rear upper deck provides a quieter space to relax and take in the scenery.
These outdoor areas are designed to enhance the overall journey, ensuring guests can fully immerse themselves in the landscapes they’re exploring.
Out on the deck, camera in hand, enjoying the views – where you’ll find us most of the time onboard the Coral Geographer.
The Coral Geographer Experience
The Coral Geographer experience offers a perfect blend of adventure and comfort, with thoughtfully designed spaces, engaging excursions, and a focus on connecting guests to the incredible environments they explore.
The Staff
One thing we really loved about Coral Expeditions is that the entire team, from the officers to the expedition guides to the hotel and restaurant staff, are all part of the same company.
That might be a strange thing to say, but if you’ve ever travelled to the Arctic or Antarctica you know what we mean.
On those trips there are essentially three different crews – the expedition team, the ship crew and the hotel staff.
And while guests are friendly with them all, there is often a large disconnect amongst staff due to cultures, workloads and schedules.
This is not the case with Coral Expeditions, where every team member you meet is part of one big family.
Arron, the chief purser, hosting a wine tasting event in the Explorer Lounge.
The Expedition Team
As with any expedition cruise, the journey is only as good as the team. And luckily with Coral they have some of the most outstanding expedition staff in the industry.
The expedition guides on the Coral Geographer make the adventure truly special, combining professional expertise with a personal touch that resonates with every guest.
From the moment you step aboard you’re greeted with warm smiles and genuine interest in your experience.
In fact the first person we met at the top of the gangway was Captain Andrew, and he was so casual and engaged with all the guests coming onboard we thought he must have worked in customer service, not the boss!
Captain Andrew, one of the coolest captains we’ve ever sailed with.
The crew’s deep knowledge of the regions visited adds layers of insight to the trip, as they share stories and information that bring each destination to life.
The amount of experience held was truly remarkable, with the team consisting of certified dive instructors, Master Reef Guides, marine biologists and lifelong sailors.
Their attentiveness goes beyond the usual, making sure you feel comfortable and cared for throughout the voyage.
Finally what we loved most about the expedition team was how they were so engaging with the guests, and let their sense of humour shine through.
With Coral Expeditions being a premium, luxury product, you might think the team would be discouraged from joking around with the guests, but the opposite is true – they know how to read each person individually, and adjust their interactions accordingly.
The crew’s passion for what they do is evident in every interaction. They create an atmosphere that feels more like a family than typical large cruise ships.
Naomi, Dawn, Jacob, Katie and Chrissy – the incredible expedition guides onboard the Coral Geographer during our trip across to Micronesia.
The Ship Crew
The ship crew on the Coral Geographer are essential to creating a seamless and enjoyable experience for every guest.
The restaurant staff, with their attentive service and warm hospitality, ensure that each meal is a delightful occasion.
The pursers are always on hand to assist with any needs, providing a friendly and helpful presence throughout the voyage.
The housekeepers are respectful with a high attention to detail, and always seem to have a smile on their face.
Meanwhile, the sailors work hard behind the scenes, ensuring the ship’s smooth operation and safety, playing a vital role in the journey.
And they aren’t hidden away in the engine room – they are out on decks cracking jokes with the guests, driving the Xplorers back and forth to excursions and doing what they can to make sure everyone is having the legitimate best time ever.
Together, these dedicated professionals create an environment where guests feel genuinely cared for, making every moment aboard the Coral Geographer a memorable one.
The hotel staff serving up delicious drinks at the Belgica Fort in Banda Neira, Indonesia. These guys looked after us so well.
The Food
We never used to be ‘foodies’, but over time we’ve acquired a passion for enjoying the finer things in life (our previous backpacker selves would be shocked).
We’re clearly not alone either, because when we got chatting to guests who had been multiple Coral trips, they often said that the food was one of the core reasons they keep coming back.
The food aboard the Coral Geographer is a highlight of the journey, offering a diverse and high-quality dining experience that caters to all tastes and dietary requirements.
The kitchen team crafts a wide range of dishes, from fresh seafood and local specialties to international favourites, often inspired by the areas we’re travelling, ensuring that every meal is both delicious and thoughtfully prepared.
The wait staff are fantastic, remembering everyone’s names and special requests from day one and always being on hand to bring whatever you’d like.
Special dietary needs are attentively accommodated, with options available for vegetarian, vegan, gluten-free, and other specific preferences.
Breakfast is a buffet, with lunch and dinner being mostly a-la carte.
Drinks
The drinks packages onboard offer a variety of complimentary options that enhance the dining experience.
House wines, beers, and spirits are available at no extra cost during meal times, allowing guests to enjoy a beverage with their meals.
Non-alcoholic drinks such as soft drinks, zero-alcohol wine and beer (this made Alesha very happy, as they had a wide variety to choose from) and juice are available throughout the day, free of charge of course.
For the coffee lovers out there, which is us through and through, a proper coffee machine is on hand with the trained baristas delivering high-quality brews.
There’s also the automatic coffee machines in both the dining room and the Explorer Lounge that make up a decent batch as well.
For those seeking a bit more luxury, premium drink packages are available, complete with exceptional vintage Australian reds, offering an expanded selection of beverages, and cocktails are available to purchase in the evenings.
Yes, there is a full barista-style coffee machine onboard. Yes, we took full advantage of this.
The Xplorers
One thing that sets Coral Expeditions apart from their competitors are the use of their iconic Xplorer boats rather than the traditional zodiacs most expedition cruises rely on.
The Xplorers on the Coral Geographer are essential for off-ship excursions, designed to provide safe and comfortable access to remote locations with foul-weather protection.
These sturdy, purpose-built tenders are launched directly from the ship’s stern using dedicated platforms, allowing guests to board easily and efficiently, even if they have mobility issues.
Each Xplorer boat can carry 72 passengers and boasts two 300hp motors, making them well equipped to handle all kinds of conditions, from exploring secluded bays to rugged coastlines, and shallow waters.
The Xplorers are used as a floating adventure platform as well for snorkelling and diving activities.
This is one of the Xplorers – large, sturdy, fast and capable, perfect for any conditions.
Getting On and Off the Xplorers
The system that has been developed to board and disembark the Xplorers is very sophisticated, and we were genuinely impressed at the safety, speed and accessibility of how it all worked.
Guests step in and out of the Xplorer boats directly from the Coral Geographer’s specially designed launch platform at the stern of the ship.
A large platform lifts and lowers the Xplorers from the Coral Geographer deck to the water, so there’s no crawling in and out or risk of losing your balance like you find with zodiacs.
You’re scanned when you get on the Xplorers and again when you get back on, which guarantees guests aren’t left behind.
To exit the Xplorers on land (or directly into the sea if snorkelling and diving) there are three exit points; one at the bow and two on port and starboard.
There’s also large, angled step ladders at the stern to make climbing back in from the water very easy.
This setup is designed to accommodate all kinds of sea conditions, providing a safe and comfortable way for guests to explore remote shorelines and other off-ship locations during their expedition.
Beach landings with the Xplorers are safe and easy.
Presentations
Coral Expeditions prides itself on welcoming expert guest lecturers (and sometimes professional photographers too…*cough cough*) to enrich the passenger experience.
The presentations given on the Coral Geographer are an integral part of the expedition, designed to deepen guests’ understanding of the destinations they explore.
These talks cover a wide range of topics, including local history, wildlife, geology, and cultural insights.
The presentations are held in the Explorer Lounge, which provides a comfortable setting with modern audio-visual equipment.
Jarryd giving a photography workshop onboard the Coral Geographer as part of our roles working with Coral Expeditions as guest photographers.
Diving, Snorkelling and Kayaking with Coral Expeditions
A highlight of travelling with Coral Expeditions is the emphasis they place on water activities such as kayaking, snorkelling and even scuba diving.
It really adds an entirely fresh and exciting element to the trips, and with some of the destinations they visit such as the Great Barrier Reef and Raja Ampat being amongst the best marine destinations on the planet, the water activities quickly become the highlight of any departure.
Diving and snorkelling on the Coral Geographer are carefully planned to provide guests with a safe and enjoyable opportunity.
There’s high-quality gear, including masks, fins, snorkels, and wetsuits, available in a range of sizes, and you keep your equipment with you for the duration of the itinerary.
For the certified scuba divers out there, the dive operations are efficient and professional.
Diving the depths of Hatta Island in Indonesia.
A PADI dive instructor leads all dives with a small group (maximum 8 per instructor) and can also organise Discover Scuba sessions for those who want to try it out for the first time.
For our trip we had Jacob as our guide, who was simply phenomenal in looking after all the divers.
The gear were all fairly new ScubaPro BCDs and regulators with built-in dive computers, along with masks, weights and fins supplied.
Scuba diving must be pre-booked when signing up for a trip, and divers must complete a specific medical before coming onboard.
Kayaking is an optional activity at some of the locations, and are free to borrow for all guests.
If you feel like kayaking you can grab one during one of the excursions.
Technology, Sustainability and Environmental Practices
Coral Expeditions keeps sustainability at the forefront of their business principals, being ECO Certified and contributing to many scientific research programs.
The Coral Geographer is designed with a focus on modern technology and environmental stewardship, ensuring that every expedition is both safe and sustainable.
The ship’s navigation and communication systems are state-of-the-art, allowing for precise and reliable operations even in remote areas.
Have you ever seen an engine room this clean before?
Sustainability practices are integrated into daily operations, with an advanced wastewater treatment system and comprehensive waste management protocols to minimise the environmental footprint.
The ship adheres to strict environmental standards, including fuel-efficient engines that reduce emissions, and eco-friendly practices that protect the delicate ecosystems visited during expeditions.
Additionally, the ship’s design allows for minimal disruption to wildlife and habitats, with careful planning and execution of shore excursions to ensure that natural environments remain undisturbed.
Coral Expeditions is committed to responsible travel, and the Coral Geographer embodies this commitment, making it an ideal choice for eco-conscious travellers.
A guests stares out at the Coral Geographer from atop the Belgica Fort in Banda Neira.
Final Thoughts – 9/10
That’s it for our Coral Geographer review, and we hope you now have a thorough understanding of what life is like onboard.
The Coral Geographer is a testament to the evolving world of expedition cruising, offering a harmonious blend of modern design, cutting-edge technology, and a strong commitment to sustainability.
With its spacious cabins, thoughtfully designed public areas, and exceptional dining, the ship provides a luxurious yet authentic platform for exploration.
The crew, with their expertise and genuine hospitality, plays a crucial role in enhancing the overall experience, making guests feel both welcomed and cared for throughout their journey.
While the Coral Geographer excels in many aspects, there are a few areas where improvements could elevate the guest experience even further.
The fitness facilities, though adequate, could be enhanced to offer more advanced options for guests looking to maintain a rigorous exercise routine during their voyage.
The CG in Raja Ampat.
Additionally, extending the selection of included beverages beyond meal times would add an extra layer of convenience and luxury to the overall experience.
Despite these very minor areas for improvement, our review of the Coral Geographer ship remains an outstanding choice for those seeking a blend of comfort, adventure, and environmental consciousness when exploring the most remote places on the planet.
Its ability to navigate isolated and pristine regions, combined with the quality of service and amenities onboard, makes it a top choice for intrepid travellers.
The ship’s dedication to sustainability, without compromising on luxury or guest experience, sets a new standard in expedition cruising.
For travellers looking to explore the world’s most offbeat and beautiful locations, the Coral Geographer offers an unforgettable journey that balances adventure with comfort in a truly unique way.
Thanks for reading our Coral Geographer ship review, and we hope to see you onboard one day soon.
When you book a trip with Coral Expeditions the world is at your fingertips.
DISCLAIMER: Some of the links in this article are affiliate links, which means if you book accommodation, tours or buy a product, we will receive a small commission at no extra cost to you. These commissions help us keep creating more free travel content to help people plan their holidays and adventures. We only recommend the best accommodations, tours and products that ourselves or our fantastic editorial team have personally experienced, and regularly review these. Thanks for your support, kind friend!
Coral Geographer Review
In this detailed Coral Geographer review we explore the features, cabins and amenities that make this one of the best expedition ships for small-group cruising.
The Greek island of Andros in the Cyclades, offers a network of well marked hiking trails, often with a beach to swim at the end. Now that’s my idea of a perfect activity holiday! I spent a week hiking in Andros on the Andros Routes, that offer scenic day hikes, easy circular routes and a 100km long distance trail.
Follow our 7 day itinerary for a hiking holiday in Andros with the best coastal views, charming mountain villages and swimming in river pools.
Hiking in Andros Greece
This article may contain affiliate links that provide commission on purchases you make at no extra cost to you. As an Amazon Associate I earn from qualifying purchases.
Why go hiking in Andros?
Andros is unusual in the Greek islands for offering a well developed network of hiking trails, with something for every ability. Here’s why you should consider Andros for a hiking holiday:
Andros offers 240km of marked hiking trails that are easy to follow, with maps available to plan your hiking routes. The traditional kalderimia or mule paths between villages, have been restored and signposted by a group of volunteers through the Andros Routes organisation.
Hiking in Andros Greece
Unlike the other islands in the Cyclades group, Andros is relatively mountainous with elevations of up to 1000 metres. There are plenty of springs and rivers, that tumble down the hillside to the sea, creating a landscape with beautiful views, green wooded valleys and sheltered beaches for swimming.
While there is no airport, Andros is quick to access by ferry from Athens, making it an ideal add-on from a sightseeing trip in Greece’s capital. Andros is only 2 hours by ferry from the port of Rafina, which is 30 minutes from Athens airport or an hour from central Athens.
Like most of Greece, Andros enjoys a Mediterranean climate, with warm sunny days from March to November. So Andros is the ideal place for an active holiday in spring or autumn, to escape the cold of northern Europe.
Andros Chora Greece
About Andros Routes
Andros has established itself as a top Greek hiking destination, largely due to Andros Routes. The project was formed as a means of promoting sustainable tourism on Andros, to highlight the island’s unique landscapes and culture.
Apikia – Hiking in Andros Greece
In 2012 an initiative was started to restore and repair the island’s ancient paths, traditionally used to get from village to village. Now 240km of paths have been restored and signposted by groups of volunteers, with regular meetups during the low season to walk and maintain the paths.
In addition to the day hikes and shorter circular routes, there’s a 100km continuous long distance trail that links the north of the island with the south. In 2015 the Andros Routes paths were certified as one of the Leading Quality Trails by the European Rambler’s Association.
Due to Andros Routes, we found the hiking trails on Andros extremely easy to follow, with plenty of information and maps on their website to help plan our trip.
Pytharas waterfall Andros Greece
Our 5 days of hiking in Andros
We planned for 5 full days of hiking, with a bit of sightseeing and relaxation thrown in. If you allow a day on either side to travel from Athens to Andros by ferry, this makes an ideal 1 week hiking holiday itinerary.
We recommend staying in the island’s capital Chora, and there are some hotel recommendations later in the article.
We started our walk at Apikia, an attractive village in the hills, which is a 15 minute taxi ride from Chora. A few steps from the hiking information board is a marble water fountain for the Sariza Spring, which is known for its pure drinking quality.
Spring at Apikia – Hiking in Andros Greece
From the road at Apikia, we made a 30 minute circular detour to see the Pytharas waterfalls (Route 2a). The path followed a mountain stream up through a series of shallow pools, to a spot with flat rocks and a small waterfall cascading over the lip.
Pytharas waterfall – Hiking in Andros Greece
Returning to Apikia, the path led us downhill through a pretty rural landscape. We enjoyed a stop at the Agadaki Estate Botanical Garden, with a small museum to explain the unique habitats of Andros with terraces of old olives, fruit trees and aromatic plants.
Agadaki Estate Botanical Garden – Hiking in Andros Greece
At the next village of Stenies we climbed up a side path to see the abandoned stone water mill and ‘Fabrica’ meaning factory, which made bread and pasta in the past. We sat on the bridge below the mill for a picnic, and could have made a detour to see more of the village of Stenies set on the hillside.
Fabrica factory Stenies – Hiking in Andros Greece
With the sea in sight, it was an easy walk downhill to arrive at Gialia beach for a cool drink at the beach restaurant and refreshing swim in the quiet cove. Then we followed the road over the hill to Neimporio Beach, the main beach of Chora and back to the town.
Gialia Beach – Hiking in Andros Greece
Distance: 8.2 km Total time including stops: 6.5 hours
This was the longest day we walked, but thanks to the 15 minute taxi ride from Chora up to the monastery, it was mostly downhill. Although we arrived at the Panachrantou monastery around 9.30am, it was a while before we were invited in, since the friendly monk was busy sweeping the courtyard and chasing away the peacocks.
Panachrantou Monastery in Andros Greece
Panachrantou monastery is well worth a visit, with fortress like walls and ramparts from which we had stunning views over the valley. The monastery is said to have been founded in 960 AD when two monks saw a light which led them to a cave, in which they found an icon of the Virgin Mary.
Panachrantou Monastery in Andros Greece
The small church within the walls was unlocked by a monk, to show us the holy treasures of silver and gold, with beautiful icons and frescoes of the saints (unfortunately photos are not allowed). Then, as is traditional in Greek monasteries, we were offered a Loukoumi sweet in the monastery dining room.
Panachrantou Monastery in Andros Greece
From the monastery we followed the well marked Route 1 down the steep hill, passing the stone walls of a ruined hamlet. With beautiful views towards Chora, we traversed the hillside moving downhill until we crossed the stone arched bridge of Stoicheiomeni where the river bed was dry after the summer but would later fill up with winter rains.
Hiking from Panachrantou Monastery in Andros Greece
From the bridge it was a hot uphill walk, crossing the road at the newer part of Menites village, and a short uphill stretch into the old village with its famous spring. The route between houses and stone terraces was pleasantly shady, alongside a water channel that brought water from the spring, and following the path of the mountain stream.
Spring at Menites – Hiking in Andros Greece
We emerged back onto the road in the old village of Menites, to have a refreshing drink in one of the tavernas near the famous lion heads spouting the cold spring water.
Menites – Hiking in Andros Greece
From Menites it was a scenic walk along the valley past the scattered villages of Lamyra and Ypsilou before the path led us down to the beach just below Andros Chora.
Distance: 11.5 km Total time including stops: 8 hrs
Day 3 – River trekking to Gerolimni waterfall on Route 6
We had seen enticing pictures of the Gerolimni waterfall, with its natural swimming pool, fed by icy water from the spring at Vourkoti mountain village. After a bit of research, we realised that it might be difficult to find on our own, so we decided to book the excursion run by Explore Andros, to take us there.
Gerolimni waterfall – Achla river – Hiking in Andros Greece
Our guide from Explore Andros picked us up at the hotel in Chora and drove us on a steep, winding mountain road, past the scattered village of Vourkoti. This area is the highest point on Andros, often shrouded in cloud, although for us the skies were clear and the views amazing.
We arrived at the monastery of Agios Nikolaos, where we parked the car in the parking area above. Since the monastery was open, we took the opportunity to make a visit, and a lady opened the church to show us the beautiful icons with silver lamps hanging from the ceiling.
Agios Nikolaos monastery – Hiking in Andros Greece
By tradition the monastery is thought to have been built in the 8th century and is renowned for a miraculous icon that streams tears of fragrant myrrh. If you’d like to visit more of the mountain monasteries of Andros, Explore Andros offer this Monasteries of Andros half day tour.
From the monastery, we followed the zig zag path down into the valley of the Achla river, which reaches the coast at Achla beach. Soon, we were in shady woodland, crossing an arched stone bridge from the Venetian period and following the river upstream in the direction of Vourkoti.
Agios Nikolaos monastery – Hiking in Andros Greece
At some point the official Route 6 path veered away from the river, but this is where we continued along a faint path. Sometimes we clambered over boulders and fallen trees, changing levels on the old farming terraces, always keeping the river in sight.
Luckily our guide from Explore Andros knew the path well and was able to help us over any obstacles and guide us to the best footholds.
Achla River – Hiking in Andros Greece
After around an hour’s walking from the monastery, we could hear the waterfall gushing down the rockface, into a deep pool below us. Even though the walk had been mostly shaded by the trees, it was a refreshing sight, and we couldn’t wait to jump into the ice cold water.
Gerolimni waterfall – Achla river – Hiking in Andros Greece
While it was possible to jump or even dive in, I preferred to lower myself gingerly, despite the cold taking my breath away. First dip and we could barely breathe from the cold shock, second dip and we swam around briskly, third dip and we felt positively euphoric from the effects of the icy water!
Stone bridge Achla River – Hiking in Andros Greece
After relaxing a while by the pool, we made our way back on the same route. This time we posed for photos under the old stone bridge, which looked even more impressive from the river level.
Back at the monastery, we could see Achla Beach in the distance. It’s reputed to be one of the most beautiful beaches in Andros, but is only accessible on a long dirt track, or by hiking down from the monastery.
It would be wonderful to walk the whole Route 6 hike, which runs from the mountain village of Vourkoti past Agios Nikolaos monastery to Achla Beach.
The problem is that you need transport to reach the start of the walk at Vourkoti village, a 30-45 minute drive on the winding mountain road from either Batsi or Chora.
Near Vourkoti – view to Achla beach – Hiking in Andros Greece
Achla beach where the walk ends is also very remote, with no bus service. If you want to visit the beach without the hike, it’s probably best to take a boat trip, like the one offered by Explore Andros, allowing you to see some of the more remote northern beaches and coastline.
I’d highly recommend taking the River Trekking tour, but if you prefer to hike Route 6 independently using a hire car, I’d suggest parking at the Agios Nikolaos monastery. From the monastery it’s around 1 hour to hike downhill to Achla Beach and 1 hour back. You can also could attempt to hike in the other direction and try to find the Gerolimni waterfall and pool, again 1 hour there and 1 hour back.
Total time: 3hrs round trip hiking from the monastery to the waterfall, including the stop at the pool. Driving time to Agios Nikolaos monastery from Batsi 45 minutes. Driving time from Chora 30 minutes.
Day 4 – Route 3 – Syneti village – Syneti Beach – Chora
We were hoping to hike to Korthi, the smallest of the four towns of Andros. It sits on the coast in a bowl of mountains, to the south of Chora where we were staying. Korthi is so sleepy, it’s where the residents of laid back Chora go to unwind even more!
Ideally we would have taken a taxi part of the way to Syneti, and from there walked over the crest of the mountain downhill into Korthi. The timetable told us there would be an afternoon bus to bring us back to Chora.
Syneti beach – Hiking in Andros Greece
But on checking at the bus station, the afternoon bus did not seem to run after the end of September. We were worried that a taxi might not be available in Korthi, or be too expensive for the 45 minute drive back. So we decided to cut the route in half and just walk back from Syneti, incorporating a swim at Syneti bay.
Syneti village – Hiking in Andros Greece
Our taxi dropped us off by the road at the top of Syneti village, and we walked down through the mainly pedestrianised streets, with cute houses clinging to the hillside.
Folk Museum at Syneti village – Hiking in Andros Greece
There’s a folklore museum in the middle of the village, housed in an attractive building that was once the village’s primary school. It was closed when we visited, so we continued down the narrow road that snaked down the hillside towards the beach.
Syneti beach – Hiking in Andros Greece
The bay at Syneti is backed by a beach of small pebbles, with clear turquoise water and high rocky cliffs on the southern side. We had the beach entirely to ourselves, apart from a lone white goose who seemed to live there. After a refreshing swim, a couple of locals appeared who also enjoyed a solitary swim, one of them calling to the duck as if it was his friend.
Hiking in Andros Greece – Syneti to Chora
We discovered there was a direct path from the beach up the hillside, although a little overgrown, and used this as a short cut to get back to the village and the road. From there we picked up the Route 3 path, which mainly followed the road but short-cutting its curves.
Hiking in Andros Greece – Syneti to Chora
We had some lovely views over Chora and arrived at the broad sweep of Paraporti beach. Here there’s an area of wetlands along the Megalos river, with a larger flock of ducks, so perhaps our solitary feathered swimming companion was part of this group.
Paraporti beach – Hiking in Andros Greece
Later in the holiday I was able to visit Korthi by car, and the drive along the mountain road gave us stunning views, so it would definitely be worth trying to make the full hike down into Korthi if you get a chance.
Korthi Andros Greece
Day 5 – Route 17 – Easy circular walk from Chora around Livadia
For our final day hiking we decided to make an easy walk from Chora around the area of Livadia.
Livadia – Hiking in Andros Greece
This flat valley close to Chora is irrigated by the Megalos Potamos ( literally Great River ), so it’s full of small fields and citrus orchards, dotted with village houses.
Livadia – Hiking in Andros Greece
It was a peaceful, rural setting, punctuated only by the ubiquitous barking dogs that most home owners seemed to keep as an early warning of visitors.
Livadia – Hiking in Andros Greece
The hike meandered through the valley and up the slope on the other side, before circling back to bring us into Chora on a different path. Because we wanted to spend some of our last day on the beach, we retraced the same path back and arrived at Paraporti beach for a swim.
Paraporti beach – Hiking in Andros Greece
Other hikes to try in Andros
There are numerous other Andros Routes hikes to try depending on where you are staying, whether that’s Chora, Gavrio, Batsi or Korthi. Rather than trying to list them all, we recommend that you buy the map showing all the Andros Routes and check the descriptions on the Andros Routes website.
Ask a local or a taxi driver for the best place to be dropped off, and then walk from the high ground in the centre of the island, back down to the coast, to ensure the best views and minimise the uphill slog!
View of Paraporti beach from Chora – Hiking in Andros Greece
Best months to hike in Andros
The main tourist season in Andros is relatively short, stretching from beginning of May to end of September. The high season months of July and August are too hot for hiking (above 30 degrees C), and even second half of June and first half of September may see days of 25-30 degrees Celcius.
We found the optimum time on Andros to enjoy both good weather for hiking ( 20-25 degrees C) and also find most hotels, restaurants and tourism businesses open, is beginning May to mid June or mid September to mid October.
Hiking to Andros Chora Greece
If you are only there for the hiking and not so worried about having a smaller selection of hotels and restaurants to choose from, the shoulder season of March – April and October- November can have some sunny and warm days (18-25 degrees C) for hiking. Be aware that Greek Orthodox Easter usually falls in April and is a busy time for Greek visitors.
We spent a week hiking in the last week of September and found it to be a perfect time of year to visit, with great weather for both hiking and swimming, as well as the chance to enjoy the atmosphere of restaurants where you could sit outside in the evening.
I stayed on a further week at the beginning of October for sightseeing and noticed a big difference in atmosphere, as the temperatures started to drop in the evening and many restaurants and hotels had closed.
Where to stay in Andros
If hiking is your main purpose, I’d strongly recommend basing yourself for all or most of the time in Andros Chora, also known locally as just ‘Chora’ (pronounced Hora). The island’s capital is a charming small town, with a wide range of accommodation, shops and restaurants.
Andros Chora Greece
Many of the island’s hiking trails start or end in this area. It’s also easy to find a taxi at the taxi rank in the square to take you to a start of the trails that lead back into Chora.
Batsi Andros Greece
Many other hiking routes can be accessed from the island’s other three main towns of Korthi, Batsi and Gavrio. If you have more time, you may wish to tack on a couple of days staying at any of these, to make it easier to hike these routes.
Batsi Andros Greece
If you want to do some more remote mountain trails, add on a couple of days in Korthi, while if you prefer some hiking combined with relaxation, choose Batsi for its holiday resort vibe. Gavrio is mainly a ferry port with no beach, but staying here would allow you to access some of the island’s northern trails.
Korthi Andros Greece
If you prefer to base yourself in one place, but are keen to hike some of the more remote routes to the north or south of Andros, I recommend contacting Explore Andros based in Chora. They have knowledgeable guides and can arrange a bespoke itinerary that includes drop off and pick ups in remote locations where there’s no public transport.
Venetian fort Andros Chora Greece
They are also the ideal partner if you are arranging a group hiking trip, as they also own or manage a range of hotels and other accommodation, so can offer a complete package for a group hiking holiday.
Recommended hotels in Chora
Archontiko Eleni (we stayed here) – this small hotel in a neo-classical townhouse, is a good value option with elegant traditional style. It offers breakfast and is well located by the main square, a short walk from all the restaurants and shops.
With only 8 rooms the hotel feels like staying in someone’s rather grand home. This is a good option for hikers since it opens all year round, and there’s public parking nearby if you have a hire car.
Anemomiloi Andros Boutique Hotel (we stayed here) – a stylish boutique hotel with swimming pool on the edge of Chora town. They offer a good breakfast but there’s also a small kitchenette in the rooms.
The hotel is attractively designed with different level rooms overlooking a central courtyard or countryside views. The family who own the hotel also run Explore Andros, making this a popular choice for walkers who use the tour company to arrange their transport.
Castel Abaso Boutique Apartments – a stylish self catering option in the oldest part of Chora, with 3 separate apartments, two of which have private roof terraces. This part of Chora is entirely pedestrianised and quiet at night, so it’s a good option for those who don’t have a hire car.
The apartments are popular with couples, families or small groups who want to have a bit more space, while being a few steps away from the restaurants and amenities of Chora.
In Batsi, we recommend Hotel Chryssi Akti, which is well located in the centre of the town opposite the beach, but there’s a wide range of accommodation in Batsi. In Korthi there are only a few studio or apartment options – check out the accommodation in Korthi here. Gavrio also has a limited range of accommodation, since it is the island’s main ferry port – check out accommodation in Gavrio here.
What to pack for hiking in Andros
Here’s what you need for tackling the Andros Routes hiking trails, assuming you are mainly doing the day hikes like us. The shorter, circular trails that take a couple of hours don’t need any special equipment, other than trainers or hiking shoes.
Hiking in Andros Greece
Andros Routes map and guidebook
Andros Routes produce a map of all the trails, which is recommended for planning and navigation. The map should be sufficient to guide you, as all the trails are well marked.
However, if you want more information Andros Routes also produce a guidebook, with detailed descriptions of the trails. All profits from the map and guidebook go to support the work of Andros Routes in maintaining the trails – more information here.
You can buy this map on arrival in Andros at a number of hotels and locations, or in the UK from Stamfords bookshops – online order here. The Andros Routes hiking guide can also be purchased on Andros, and the e-book is available to download in English and Dutch – more information here.
Use the Andros Routes map and guidebook showing all the Andros Routes trails for planning and navigation
Hiking / trail shoes
I recommend sturdy hiking shoes, but if you only plan to do one or two trails, well supported trainers would also be fine. Hiking boots are too hot for most times of year in Greece, but fine for early (March / April) or late (November) in the season. My current summer hiking shoes are from Keen – I like the NXIS EVO or Terradora styles.
Andros Chora Greece
Hiking shorts
These are ideal for the warmer months May – September. Full or 3/4 length walking trousers would be suitable for early (March / April) or late (November) in the season. Quick dry fabric is ideal for overnight washing.
A day backpack
I find a 15L or 20L backpack is the ideal size for day hiking. In my backpack I carry water, picnic or snacks, map, small medical kit, sunscreen, spare socks, an extra layer for warmth or waterproof jacket for showery weather. I also keep valuables like cash, bank cards and mobile phone in a separate waist pouch.
Hiking to Andros Chora Greece
Hiking poles
This is an optional item as not everyone likes hiking with poles. However, I always hike with them as they give support on steep or slippery paths and reduce the strain on knees and ankles. My favourites are these collapsible Leki poles.
They aren’t the cheapest, but they are well made, sturdy and best of all collapse down for packing in a case or rucksack. I’ve had years of wear out of mine so they were a good investment.
Other items of clothing
Pack sports t-shirts or any t-shirt that’s comfortable for hiking, a light sweatshirt or waterproof, hiking socks, a hat or cap to protect from the sun, sunglasses.
How difficult is the hiking in Andros?
I’d rate most of the trails in Andros as easy to moderate. The longer day hikes are moderate in length and difficulty, with a few steep climbs or descents. However there are plenty of shorter or easier routes where you can park the car and make a circular trail for an hour or two. The trails are well marked and maintained by the Andros Routes volunteers, so it’s difficult to get lost.
Andros Routes signposts Greece
I consider myself moderately fit and was able to do the trails with no special training. Having said that, we did take care to start the trail at the highest points, so that we could walk downhill for most of the way, which was much more enjoyable than a gruelling uphill slog!
Transport for hiking in Andros
The biggest challenge was the logistics in reaching the start of some of the more remote trails, or how to get back at the end of a one way route, where there’s no public transport.
Since public buses in Andros are designed mainly to take people to the ferry ports, you’ll need to overcome this issue, either by budgeting for longer taxi rides (€20-30) or by making transfer arrangements with a tour company like Explore Andros (ideal if there’s a group of you).
A hire car can be used to reach all the trails, however most of the more remote or scenic trails are one way, so a drop off / pickup is preferable.
Andros Chora Greece
How to get to Andros
Ferry to Andros
There’s no airport on Andros, so most visitors will fly into Athens or Mykonos airports, then take the ferry. Ferries run from the Athens port of Rafina to Andros and then on to neighbouring Tinos and Mykonos. They come back from Mykonos by the same route, stopping at Tinos, Andros and then Rafina.
Ferry at Gavrio Port Andros Greece
Ferries run several times a day from Rafina ( Fast Ferries or Golden Star Ferries) and the journey takes 2 hours, or 1 hour 10 mins on the slightly more expensive Seajets ferry. From Mykonos, the ferry time is 2 hours 25 mins. When we travelled the one way ferry ticket from Rafina to Andros was from €25 per person for a foot passenger.
Although you can buy ferry tickets at the port, we found it easier to book online in advance using a service like Ferryscanner. You’ll receive a ticket with bar code by email so that you can go straight on board the ferry. Check the ferry fares, timetables and book your ferry here.
Ferry at Gavrio Port Andros Greece
On arrival in Andros
The ferries arrive at Gavrio Port in Andros, so you will probably need to arrange a taxi transfer from the port to either Batsi (15 mins) or Chora (45-60 mins), depending on where you are staying. Alternatively, the KTEL public buses run from Gavrio port to Batsi and Chora, and are timed to leave soon after the ferry’s arrival.
How to get to Rafina port
To reach Rafina from Athens Airport, you can take a taxi (30 mins) or a regular KTEL Attikis bus (30 mins) – find the timetable here. The bus stop is opposite the Sofitel Hotel, leaving the arrivals hall by Exit 3.
Ferry at Gavrio Port Andros Greece
To reach Rafina from central Athens you have a few options. You could take the KTEL Attikis bus from Nomismatokopio Station in Athens to Rafina (60 mins). Alternatively take Line 3 of the Athens Metro to Athens airport and from there take the bus or a taxi to Rafina. The most expensive option, but economic if there is a group of you, is to arrange a taxi from any point in Central Athens to Rafina (60 mins).
From start to finish, the adventure was smooth, fun, and a memorable challenge to tick off from the bucket list.
Here’s how our Mount Kinabalu climb went down.
Climbing down from the summit of Mount Kinabalu during a sensational sunrise.
A Bit of Background: The Story of Mount Kinabalu
Before we get into the trip itself, a quick bit of history because this mountain isn’t just a pretty rock.
Mount Kinabalu stands at 4,095 metres (13,435 feet) and dominates the skyline of Sabah, in Malaysian Borneo.
It’s the tallest mountain between the Himalayas and New Guinea, and it holds deep spiritual significance for the local Kadazan-Dusun people.
The name is thought to come from “Aki Nabalu,” meaning “the revered place of the dead,” and according to tradition, it’s where spirits go to rest after passing on.
The first recorded ascent happened in 1851 by British administrator Hugh Low, who made it to the summit plateau (the peak is now named Low’s Peak after him).
But it wasn’t until 1888 that someone – zoologist John Whitehead – actually reached the highest point. Since then, Kinabalu has become a magnet for adventurers, nature lovers, and anyone chasing that feeling of standing on the roof of Borneo.
In 1964 Kinabalu Park was established to protect the area, and in 2000, it became Malaysia’s first UNESCO World Heritage Site thanks to its biodiversity. It is after all one of the most important ecological zones in the world.
So as you can see, it’s more than just a climb. It’s a journey into culture, nature, history and serious altitude.
Summit views on Mount Kinabalu.
Day 1: Kota Kinabalu to Panalaban Base Camp
Our alarm went off at 5am in Kota Kinabalu.
We dragged ourselves out of bed, zipped up our packs, met the Amazing Borneo team downstairs with a comfortable private van, and within moments we were ready to roll.
Coffee in hand and packs in the back, we hit the road toward Kinabalu Park HQ.
The drive took about two hours, winding through jungle hills and past misty ridgelines. When we arrived we signed in, got our permits and tags, met our mountain guide, and did the final prep at Timpohon Gate (1,866m) – the starting point of the climb.
Bertie, Hannah and myself at the starting point of the Mount Kinabalu trek.
Now, I’ll be honest, we weren’t sure how tough it was going to be.
The blogs we had read and friends we spoke with said “it’s not technical,” but that doesn’t mean it’s easy.
Right from the start, it’s a constant slug uphill. You’re on well-built trails, mostly stone steps and packed dirt, but it’s relentless.
We kept a good pace, stopping to rest and hydrate every now and then at the break station.
The higher we climbed, the more the landscape changed, from thick rainforest to cloud forest, then open alpine scrub.
The air got cooler, the mist rolled in, and soon we began to get the real sense of being at altitude.
Gaining altitude quickly on the climb up Mount Kinabalu.
Out of the mist.
After about 4 hours, we arrived at Panalaban Base Camp (3,270m), where climbers sleep before the summit push.
The heated lodge is well-built and surprisingly comfortable. We had expected something extremely basic, but were quite impressed with its standards.
We checked into our dorm beds (which admittedly were jampacked with over 20 people to a room), had a quick hot shower, which we had not anticipated, changed into, clean dry clothes, and poured ourselves a cup of tea while waiting for the mandatory summit briefing.
Arriving at Panalaban Lodge.Our dorm room.The lounge room.Downstairs with the hot shower – a very pleasant surprise.
Once the rest of the hikers had made it to the lodge the mountain guides came and gave us a full breakdown on what the next morning would look like.
Afterwards we wandered down to the common room for a hot buffet dinner. Our timing was spot on and it started pouring just after we arrived. Huge drops hammering the roof, clouds swallowing the view and more impressively waterfalls poured down the huge granite rock faces.
Getting a briefing on the summit push and Via Ferrata the next morning.
Once we realised the rain was settling in for a while we braved the downpour and headed back up to the lodge to prepare for bed.
We sat inside sipping tea, playing cards, and chatting with the other hikers.
There’s a real sense of camaraderie up there. Everyone’s a little nervous, a little excited, and a bit in awe of what they’re doing.
Each person has their own reasons for being up there. For some, it’s just another fun activity to do during their travels. For others it was a lifelong goal. And for quite a few, it was the most extreme thing they had ever done.
The mountain attracts some special people.
By 8pm we crawled into bed, with our alarms set for 2am.
The full buffet spread.
Day 2: The Summit Push
I crashed out hard and managed to sleep right through the night. The provided sleeping bags were very warm and I ended up just wearing underwear to ensure I didn’t overheat.
The room stirred and in the dark we pulled on our thermals, jackets, gloves, headlamps, made ourselves a quick coffee to wake up, and headed out into the cold dark morning.
The climb to the summit is about 2.7km from base camp, but don’t let the distance fool you. It’s steep, rocky, slippery in sections and challenging after a full day of hiking the day before.
First light near the summit.
Guided by only the beams from our headlamps, we hiked through low trees before the trail quickly becomes more exposed.
You’re gripping ropes in some sections, climbing up smooth granite slabs with nothing but moonlight and headlamps to illuminate the way.
It’s not technical, nor dangerous if you pay attention, but it’s a grind.
One step at a time, slowly but surely.
The altitude kicks in hard above 3,500 metres. We were all feeling it in our breathing, but the Diamox we took seemed to help stave off any real symptoms.
We made good time and our guide soon suggested that we slow down and take more breaks in order to not spend the unnecessary time exposed on the summit.
With twilight approaching we reached Low’s Peak at 5am. 4,095 metres above sea level.
All rugged up at the summit of Mount Kinabalu.
The temperature was below freezing, our fingers were numb and noses red from the cold.
But the feeling of standing on Borneo’s highest summit was truly remarkable.
It was still pitch black at the summit and we could just make out the lights of Kota Kinabalu in the distance.
Once we had taken our photos we wandered down from the tiny summit to a protected ledge that had more room to sit.
Watching the sunrise from just below the summit was a spectacular experience.
We wrapped ourselves in all of our layers, snacked on muesli bars and chocolate, and waited for the sun to rise above the magical island.
High above the clouds we wateched the sky morph from pitch black to golden pink. The sky didn’t explode in a kaleidoscope of colour like we had hoped, but that didn’t matter.
Watching the sunrise from the highest point in Borneo with two of my best friends made it one of the most beautiful mornings I’ve ever had.
We stood there, hugged, took some photos, and soaked it all in. You don’t get many moments like that in life.
We made it!
The Descent and the Via Ferrata
Before the sun rose too high in the sky it was time to leave the summit and make our way back down the mountain.
From here there are 3 options that need to be pre-booked.
Either head straight back down to camp and then onwards to the base, or take one of the two Via Ferratas to descend.
A via ferrata is a protected climbing route with steel cables, rungs, and suspension bridges built into the mountain.
You clip in with a harness and two carabiners and make your way across the cliffs. It’s part scrambling, part adventure course.
Bertie coming across the Via Ferrata.
We signed up for the “Walk the Torq” which is the shorter of the two options offered, as the full Via Ferrata was fully booked.
But don’t let that fool you – it’s still a tonne of fun.
We left the track and met our Via Ferrata guides near the ranger’s hut. After a short safety briefing we clipped in and started our descent across sheer granite walls with nothing but 1,000 metres of air beneath us.
It was a fantastic experience. Enough of a rush to get the adrenaline pumping but safe and accessible for most people with moderate fitness.
The views were next-level. We were literally walking across a cliff with sweeping views of the jungle valleys below.
It took about 2 hours to complete the via ferrata, and then it was time to hike back to the Panalaban lodge to collect the rest of our gear and then navigate all the way back down to Timpohon Gate.
We loved the Via Ferrata.
The descent is relentless. Endless steps and switchbacks pounding your calves and knees for hours.
We were tired, sore, and soaked in sweat and rain by the end, but still buzzing from the experience.
At around 1pm we arrived to the gate and met our transfer. We were shutled back to the main base camp and then jumped in our private van to leave the mountain and enjoy the ride back to Kota Kinabalu.
At the bottom of the hike, wet, sore but incredibly happy.
Final Thoughts
Climbing Mount Kinabalu isn’t just a hike, it’s a full-blown adventure. The altitude, the early morning summit push, the changing ecosystems, the cultural significance, the camaraderie with fellow hikers – it all adds up to something truly special.
Amazing Borneo were fantastic throughout the whole experience. Professional, friendly, organised, and passionate about what they do.
Our awesome guide made the experience so much more enjoyable, and safe as well.
Our guide was knowledgeable and supportive, our driver was safe and on time, and the logistics all ran like clockwork.
Once we had made our booking all we had to worry about was the early wake up call on that first day, and they looked after the rest.
If you’re thinking about doing this climb, do it. Book early, train, pack smart, and go with an open mind. You’ll come down with sore legs and a big smile.
And trust me – the sunrise at the summit is worth every single step.
100% worth it for views like this!
Things to Know Before Climbing Mount Kinabalu
Planning to climb Mount Kinabalu? Whether you’re an experienced trekker or this is your first big mountain, there are a few essential things you need to know before lacing up your boots and heading into the clouds.
From when to go to what to pack, this guide will help you prepare for an unforgettable adventure.
Step after step on the way to and from the summit.
1. How to Book Your Climb
Unlike many other hikes around the world, you can’t just show up at Mount Kinabalu and start walking. The mountain is tightly regulated with daily climbing permits capped to protect the environment and ensure safety.
You must book through an approved tour operator, and we highly recommend Amazing Borneo. They handle everything: permits, transport, meals, accommodation, guides, and even the optional via ferrata.
Book early: Ideally 2–3 months in advance, or longer during peak seasons (April to August). The climb often sells out quickly, especially with fewer permits available post-pandemic.
The markers on the climb let you know how far you’ve gone and what altitude you have reached.
2. Best Time of Year to Climb
Mount Kinabalu can be climbed year-round, but March to September is considered the best window. This is the dry season in Sabah, and you’ll have the best chance of clear skies and safe summit conditions.
October to January is wetter, and while it’s still possible to hike, you’ll face more rain, slippery trails, and a higher chance of summit closure due to storms.
Always check the weather forecast before your trek, but remember: on the mountain, conditions change fast. It can be sunny at base camp and stormy at the summit.
3. How Hard Is the Hike?
Mount Kinabalu is not a technical climb, but it is tough. You’ll ascend over 2,200 metres in elevation in just under 9km, and altitude affects everyone differently.
Expect sore legs, short breath, and a test of endurance. But if you’re moderately fit and pace yourself, it’s totally achievable. The key is mental resilience and steady movement, not speed.
The final push to the summit involves some scrambling over granite rock with ropes for support. It’s safe, but you’ll feel it.
In the days that follow you’ll likely be walking funny. Stairs will suck, getting out of bed will be slow and you’ll have a funny shuffle as you bounce around the rest of Borneo.
We highly recommend giving yourelf a few relaxing days after the climb to recover.
Hannah and Bertie enjoying the views.
4. What to Pack
Packing right is essential, especially since you’ll be going from steamy lowlands to freezing altitudes.
Here’s what you’ll need:
Essentials:
Clothing:
Moisture-wicking base layers
Fleece or insulated jacket
Waterproof jacket and pants
Gloves and beanie
Extra socks and underwear
Comfortable clothes for sleeping at base camp
Other useful items:
Altitude sickness tablets (we took Diamox bought in Kota Kinabalu -consult your doctor)
Sunscreen and lip balm
Toiletries (toothbrush, wet wipes, etc.)
Cash for tipping guides and buying snacks at camp
Camera or phone with a power bank
Your operator may carry a porter bag or store overnight gear at base camp, but you’ll need to carry your own daypack during the hike.
You can also hire a porter for an additional fee.
Make sure whatever you take can fit inside a nice, comfortable daypack and doesn’t weigh too much.
5. What’s Included in a Tour
When you book with a reputable company like Amazing Borneo, you’ll typically get:
Return transport from Kota Kinabalu (we opted for the package with the private van and it was well worth it)
Climbing permit and park entrance fees
Certified mountain guide
Meals (dinner and breakfast, as well as a lunch at base camp)
Accommodation at Panalaban Base Camp (shared dorms or private rooms)
Certificate of completion
Optional via ferrata experience (must be booked separately)
All meals are cooked at altitude and are hearty. Think rice, noodles, eggs, vegetables, and chicken. Dietary requirements can usually be catered for with notice.
A sandwich and snacks provided by Amazing Borneo, but we recommend bringing extra.
6. Altitude: How It Affects You
Mount Kinabalu is just over 4,000m high, and altitude sickness is a real risk. You’ll be sleeping at 3,270m and summiting early the next morning.
Symptoms can include headache, nausea, fatigue, dizziness, and shortness of breath. Most people are fine if they hydrate, pace themselves, and don’t overexert.
We took Diamox (acetazolamide) as a precaution and had no issues. You should speak with your doctor before your trip to see if it’s right for you.
7. The Via Ferrata: Should You Do It?
The via ferrata is a highlight of the Mount Kinabalu experience, and the highest one in the world! You clip into a series of steel cables and climb along cliff edges with incredible views.
There are two options:
Walk the Torq: Easier, shorter, and perfect for beginners.
Low’s Peak Circuit: Longer, more exposed, and better for confident adventurers.
You must book the via ferrata when you reserve your climb. You can’t add it on last-minute, trust me I tried to upgrade to Low’s Peak Circuit and couldn’t.
Safety briefings happen the day before at Panalaban, and you need to be at the summit by a certain time to participate, so don’t dawdle in the morning.
Definitely book one of the Via Ferratas!
8. Tips for a Successful Climb
Train beforehand: You don’t need to be a marathon runner, but regular cardio and leg strength training will help.
Take your time: Go slow and steady. The guides are used to all fitness levels.
Layer up: It’s hot at the bottom and freezing at the top. Layers are your best friend and you’ll like strip down and dress up every hour.
Start early: The summit push starts at 2am to catch the sunrise—get to bed early and pack everything the night before.
Respect the mountain: It’s a sacred place for locals. Don’t litter, don’t blast music, and keep your voice down.
9. Staying in Kota Kinabalu
Most people base themselves in Kota Kinabalu (KK) before and after the hike. It’s a relaxed seaside city with good restaurants, a buzzing night market, and affordable accommodation.
We recommend arriving in KK at least a day before your climb to get organised, and spending another night after your descent to rest and recover.
Final Word
Climbing Mount Kinabalu is one of the best adventures in Southeast Asia. It’s tough, stunning, and unforgettable.
Go in with the right mindset, book with a trusted operator like Amazing Borneo, and prepare properly – and you’ll come away with sore legs, big smiles, and a sunrise memory you’ll never forget.
A sunrise view you’ll never forget.
DISCLAIMER: Some of the links in this article are affiliate links, which means if you book accommodation, tours or buy a product, we will receive a small commission at no extra cost to you. These commissions help us keep creating more free travel content to help people plan their holidays and adventures. We only recommend the best accommodations, tours and products that ourselves or our fantastic editorial team have personally experienced, and regularly review these. Thanks for your support, kind friend!
From the ever-popular East Coast to the dramatic landscapes of the West Coast, here are the best beaches in Australia!
Australia has so much to offer, from snowy mountains to arid deserts to ancient rainforests and more.
But what draws in the majority of travellers Down Under? Beaches!
No one can argue that the beaches in Australia are spectacular.
Most beaches are public domain, meaning there are no entry fees, no parking fees, and no exclusive memberships.
Anyone and everyone can enjoy the picture-perfect beaches in Australia, whether you want to surf and scuba dive or relax on the sand.
With such a gigantic and varied coastline, Australia has so many different types of beaches as well!
Head to the Gold Coast or Bondi Beach for glitz and glamour by the beach. Road trip down the South Coast of New South Wales for amazing surf and fewer crowds.
Or go to Tropical North Queensland to dive in the Great Barrier Reef and lounge on idyllic islands.
For some less touristy and wild beach landscapes, head to the remote coastlines of Tasmania or South Australia. Or go west for some iconic Western Australia experiences, like riding a camel across Cable Beach or seeing quokkas on Rottnest Island.
No matter what you want to do, Australian beaches have you covered.
Whether you want to surf in New South Wales, mingle with wildlife in Western Australia, seek out wild coastlines in South Australia, or embark on outdoor adventures in Tasmania, a beach holiday in Australia is always a good idea!
Here are our favourite Australian beaches. They are listed in no particular order – every single one is amazing in its own way.
The best way to get around is to rent a car and explore on your own! We recommend Rental Cars, which has the largest range of vehicles for the best value on the market.
1. Whitehaven Beach, QLD
Whitehaven Beach is truly one of the world’s most breathtaking places.
There are several components of Whitehaven Beach. There is the southern end, which consists of 7km of velvety soft, white silica sand. The northern end of Whitehaven Beach also has soft silica sand and a hiking trail that takes you up to Hill Inlet Lookout.
Nestled between the two ends of Whitehaven Beach is Hill Inlet. Here, the turquoise waters of the Coral Sea and the brilliant white sands swirl together and create a mesmerising scene.
Whitehaven Beach is located on Whitsunday Island, one of the 74 islands in the Whitsundays archipelago of Tropical North Queensland.
Because Whitehaven Beach is located on this remote island, you can only get here by booking a tour or a private charter from Airlie Beach or Hamilton Island.
2. Lucky Bay, WA
Lucky Bay is one of the most pristine beaches in Western Australia. Its white sands and sapphire waters make it exceptionally photogenic.
But most visitors come to Lucky Bay for the wildlife! The beach is known for its resident kangaroos that love to frolic on the beach, particularly at dawn or dusk.
Lucky Bay is located within Cape Le Grand National Park near Esperance, Western Australia. It’s one of the most famous beaches in Australia’s south west, though there are tons of other less-popular beaches in the area that are just as beautiful.
Nestled on the edge of the remote Kimberley region in Western Australia, Cable Beach is truly iconic.
With the turquoise Indian Ocean on one side and the rough red cliffs of the Kimberley on the other, Cable Beach showcases the vibrant natural colours that Western Australia is famous for.
The beach itself is located in Broome, and consists of 22 kilometers of fine, powdery sand.
The best things to do at Cable Beach are watch the sunset over the ocean, or ride a camel across the sand.
Or, combine the two on a sunset camel ride – the ultimate way to experience Cable Beach!
4. Bondi Beach, NSW
As one of Australia’s most popular beaches, few travellers leave New South Wales without a stop in Bondi Beach! Just a short drive or train ride from Sydney Harbour, Bondi Beach is a Sydney hotspot that is full of fun things to do.
A busy esplanade lines Bondi Beach, with colourful murals adorning the concrete walls. There is a skate park, an outdoor gym, and lots of cafes and shops right next to the sand.
At the southern end of the Bondi Beach walking path, you’ll find the iconic Bondi Icebergs and the start of the Bondi to Coogee Coastal Walk.
Bondi Beach itself boasts refreshing waters, golden sands, and lots of space for sunbathing or swimming. Take your Bondi Beach adventures to the next level with scuba diving or surfing!
Just note that Bondi Beach can be crowded, as it is easily one of the most famous places in New South Wales and all of Australia.
5. Squeaky Beach, VIC
Another iconic beach to add to your Aussie bucket list is Squeaky Beach.
Located in Wilsons Promontory National Park, Squeaky Beach is renowned for its unique quartz sand that makes a distinctive squeaking sound underfoot.
In 2024, Squeaky Beach was honored as Australia’s best beach by Tourism Australia, marking the first time a Victorian beach ever received this title.
The beach is accessible via a scenic walk from Tidal River and is a popular spot for swimming, sunbathing, and photography. However, visitors should be cautious of sudden swells and strong currents, as the beach is open to the Bass Strait.
Another beautiful beach to visit in Australia is Horseshoe Bay on the north shore of Magnetic Island.
Just a short ferry ride from Townsville, Magnetic Island is a tropical island paradise where travellers can slow down and reconnect with nature.
Magnetic Island is home to many incredible beaches, but Horseshoe Bay is arguably the best.
Known for its expansive sandy beach and calm waters, Horseshoe Bay is perfect for swimming, paddleboarding, and kayaking. There are water sport equipment rentals readily available, making it a hotspot for both relaxation and adventure.
Surrounding Horseshoe Bay, you can find a variety of cafes and restaurants, such as the Marlin Bar, where visitors can enjoy local cuisine with picturesque sunset views.
7. Wineglass Bay, TAS
Wineglass Bay is an iconic and beautiful beach in Freycinet National Park, Tasmania.
The beach is a long, curved strip of brilliant white sand framed by calm waters, dramatic mountains, and the lush forests of Freycinet National Park.
Not only is Wineglass Bay beautiful to look at, there are lots of fun things to do here and in the surrounding Freycinet National Park.
Take on the Wineglass Bay and Hazards Beach Circuit Walk, or hike up Mount Amos to find sweeping panoramic lookout over the bay.
Or immerse yourself in nature by camping, abseiling, or rock climbing in Freycinet National Park just next to Wineglass Bay.
Situated about 2 hours south of Sydney on the gorgeous South Coast of New South Wales lies Jervis Bay. This coastal territory is like heaven for beach lovers!
Jervis Bay has many incredible beaches with glimmering white sands. The White Sands Walk is the best way to soak in the sights along the glamorous coastline.
Located at the southern end of the White Sands Walk is Hyams Beach, the crown jewel of Jervis Bay.
Hyams Beach has consistently been ranked one of the whitest beaches in Australia thanks to its brilliant sand.
The water is calm and shallow, making it a top spot in Jervis Bay for families. Surrounding Hyams Beach you can find campgrounds, rock climbing spots, scuba diving spots, and more.
You can easily visit Hyams Beach on a day trip from Sydney, or you can stay overnight! Overnight visitors may want to camp in the wilderness at Booderee National Park, or choose a hotel in the nearby town of Huskisson, New South Wales.
9. Almonta Beach, SA
Another one of Australia’s best beaches is Almonta Beach in South Australia. It’s a favoured spot among photographers and those seeking a peaceful retreat on the Eyre Peninsula.
Almonta Beach is located in Coffin Bay National Park, a remote area of South Australia. It’s a very secluded spot with expansive white sands, clear turquoise waters, and serene natural beauty.
Easily accessible via an unsealed road suitable for 2WD vehicles, Almonta Beach offers a tranquil setting ideal for swimming, beachcombing, and wildlife observation.
Other top things to do in this beautiful part of the Eyre Peninsula include 4WDing near the sand dunes in Coffin Bay National Park, swimming with sea lions or cage diving with sharks in Port Lincoln, or sampling fresh seafood at Coffin Bay Oyster Farm.
Burleigh Beach is one of the most notable beaches on the Gold Coast. And that’s saying something, since the Gold Coast is a strip of Southeast Queensland coastline that is quite literally packed with incredible beaches.
Like most Gold Coast beaches, Burleigh Beach has amazing surf, soft sand, and ample space for swimming or sunbathing.
A standout feature of Burleigh is the nearby lush headland of Burleigh Head National Park, where you can enjoy scenic walking tracks with panoramic ocean views.
There is also a wide grassy park right behind the beach with outdoor BBQs and fresh water taps. This makes it a convenient spot for people who are camping or road tripping around the Gold Coast area.
Burleigh Heads Beach
11. Stokes Bay, SA
Kangaroo Island is a gorgeous destination just off the coast of Cape Jervis, South Australia.
Filled with national parks, wildlife, and dramatic cliffs, it’s a hotspot for day trips from Adelaide and multiday camping adventures.
A highlight of Kangaroo Island is Stokes Bay, a beautiful beach on the island’s north coast.
Stokes Bay is renowned for its unique access through a natural rock tunnel that opens onto a pristine stretch of white sand and clear turquoise waters. This hidden gem offers a tranquil scene with plenty of protected rock pools and abundant marine life.
Other nearby attractions to see on Kangaroo Island include Kangaroo Island Wildlife Park, Seal Bay Conservation Park, and the Remarkable Rocks in Flinders Chase National Park.
12. Little Salmon Bay, WA
A must-see destination in Western Australia is the famous Rottnest Island!
Located just a short ferry ride away from Perth, Rottnest Island has quaint biking trails, a gorgeous coastline, and a healthy popular of quokkas (often thought of as Australia’s happiest animals due to their adorable smiles).
While visiting Rottnest Island, exploring the coast is the best way to absorb the natural beauty here.
Little Salmon Bay is one of the top places on Rottnest Island, and is one of the most beautiful beaches in Western Australia.
This sheltered bay offers ideal conditions for swimming and snorkeling, especially during easterly winds when the waters are calm and visibility is excellent. Little Salmon Bay features a designated snorkel trail, guiding visitors through a diverse underwater ecosystem teeming with colorful corals, fish, and other marine creatures.
Accessible by bike or the island’s shuttle bus, Little Salmon Bay provides a tranquil escape for nature enthusiasts and beachgoers.
Surfers Paradise is one of the most famous beaches and neighborhoods on the Gold Coast.
With its glittering skyline, bustling nightlife, and photo-worthy beach, Surfers Paradise is a popular spot for travellers on Australia’s East Coast.
While the beach is a major drawcard, it’s worth noting that it can be prone to strong rips and dumping waves, making it essential for swimmers to heed safety warnings. But experienced surfers and sunbathers should have no problem at this iconic beach.
Another fun idea while visiting the Gold Coast is to take a sunset cruise around Surfers Paradise. This is a lovely way to wind down after a big day of beach-going, and you’ll get the best views of the famous skyline at sunset!
14. Bells Beach, VIC
Bells Beach, situated along Victoria’s iconic Great Ocean Road near Torquay, is revered as one of Australia’s most legendary surf destinations.
Known for its powerful right-hand reef breaks and dramatic sandstone cliffs, it has been the spiritual heart of Australian surfing for decades.
Since 1961, it has hosted the Rip Curl Pro, the world’s longest-running professional surfing competition, drawing elite surfers and passionate crowds each Easter.
Bells Beach is not just a surfing icon, it’s also a beautiful beach to see before you hit the Great Ocean Road.
The surrounding area has scenic walking trails, Indigenous cultural heritage sites, and a vibrant local food scene, making Bells Beach a must-visit for both surf enthusiasts and nature lovers alike.
Bells Beach, Victoria
15. Noosa Main Beach, QLD
Noosa is a hotspot for travellers along the East Coast of Australia. And Noosa Main Beach is often the very first stop people make when they arrive at this beautiful part of the Sunshine Coast!
With crystal clear waters, amazing surf, and the nearby greenery of Noosa National Park, this patrolled beach is safe and stunning.
It’s conveniently located within walking distance of the town centre, making it easy to combine a beach day with your shopping, dining, and sightseeing activities in Noosa.
This beach has consistent waves that are great for beginner surfers. Try a surf lesson or opt for something more chill like a paddleboard rental. Noosa is the perfect place to frolic in the warm water of the Sunshine Coast!
Perth’s Cottesloe Beach is another one of the top beaches in Australia.
A favorite among locals and tourists alike, Cottesloe Beach offers excellent conditions for swimming, surfing, and snorkeling, especially at North Cottesloe where marine life thrives.
Accessible via the Fremantle train line, it’s just a short walk from Cottesloe Station, making it convenient for visitors relying on public transport.
The surrounding area boasts a vibrant café and dining scene, perfect for enjoying sunsets over the Indian Ocean.
Every March, Cottesloe Beach transforms into an open-air gallery during the ‘Sculpture by the Sea’ exhibition, showcasing artworks from around the world.
17. Byron Bay Main Beach, NSW
The Main Beach in Byron Bay is another one of Australia’s best beaches! However, the entire Byron Bay area is filled with amazing beaches, and many would consider the quieter, less popular ones to be better than the Main Beach.
But if you’re just arriving in Byron Bay, New South Wales, head straight for the town’s Main Beach to swim, surf, snorkel, and soak up the sun.
If you have time, join a surf lesson and learn to ride the waves like the locals! Or stroll along the coastal path that winds along the hills and beaches around Byron Bay. You can walk up to the Cape Byron Lighthouse, do some sightseeing, and get the best sunrise views.
Surrounding Byron Bay are the protected waters of Cape Byron Marine Park, where marine life is abundant. Keep an eye out for dolphins and seals year-round or whales in the winter months.
18. Turquoise Bay, WA
Many travellers flock to Western Australia to explore the vibrant marine life and coral gardens of Ningaloo Reef.
Ningaloo Reef is a UNESCO World Heritage site with exceptional snorkeling opportunities. One of the top places to enjoy the rich biodiversity is Turquoise Bay.
This beautiful beach in Cape Range National Park near Exmouth, Western Australia, has crystal-clear waters where you can snorkel in Ningaloo Reef directly from the shore.
The bay’s famous “drift snorkel” allows visitors to effortlessly glide over vibrant coral gardens teeming with diverse marine life, including reef fish, sea turtles, and rays.
Turquoise Bay is a highlight of Western Australia, especially for marine life enthusiasts!
Another spot on our list of the best beaches in Australia is 75 Mile Beach on K’gari (Fraser Island).
This incredibly long strip of pristine golden sand lines almost the entire eastern side of K’gari, which is the world’s largest sand island and a UNESCO World Heritage Site.
75 Mile Beach is not a swimming beach, as the currents off K’gari are quite dangerous. But it still has to be on our list of these spectacular beaches, because it is absolutely breathtaking. It’s also one of the few places where you can drive or camp on the beach!
With a 4WD vehicle, you can cruise up and down this beautiful beach and admire the ancient sand dunes, lush forests, coloured sands, and wild dingos on K’gari.
So although 75 Mile Beach is an unpatrolled beach, it’s one of the many hidden gems on the glorious island of K’gari. Head here for wilderness camping and untouched natural beauty!
Vivonne Bay is another one of the local favourite beaches on Kangaroo Island, South Australia.
With white sands and pristine waters, Vivonne Bay is a fabulous place for a refreshing swim while on the southern shore of Kangaroo Island.
Vivonne Bay offers excellent opportunities for swimming, surfing, and fishing, with Point Ellen nearby providing panoramic views of the rugged coastline.
If you are able to spend longer on Kangaroo Island than just a day trip, do it! You’ll have more time to explore Vivonne Bay, Stokes Bay, and the other beautiful places on this incredible island.
Another one of the most spectacular beaches in Australia is Nudey Beach on Fitzroy Island.
This little slice of paradise on the Great Barrier Reef is known for its mountainous terrain and crystal clear waters.
Fitzroy Island is a quick and easy day trip from Cairns by boat. Once you arrive, spend the day exploring the lush rainforest hiking trails, snorkelling with the marine life offshore, and enjoying the beaches!
The #1 beach on Fitzroy Island is Nudey Beach. It has soft white sand, tranquil waters, amazing snorkelling, and overall picturesque views. The towering green forests behind the beach make for stunning photos as well!
Nudey Beach is definitely one of the best beaches in Tropical North Queensland!
22. Binalong Bay, TAS
Binalong Bay, situated at the southern end of Tasmania’s Bay of Fires, is renowned for its striking white sands, vibrant blue waters, and the iconic orange-lichen-covered granite boulders that dot its shoreline.
The area is ideal for swimming, snorkeling, and exploring the numerous secluded coves along the coast.
Nearby, Cosy Corner and Jeanneret Beach provide additional scenic spots for beachgoers seeking serenity and natural beauty.
Binalong Bay serves as a gateway to the broader Bay of Fires region, and it’s an absolutely beautiful beach to add to your Tasmania itinerary!
DISCLAIMER: Some of the links in this article are affiliate links, which means if you book accommodation, tours or buy a product, we will receive a small commission at no extra cost to you. These commissions help us keep creating more free travel content to help people plan their holidays and adventures. We only recommend the best accommodations, tours and products that ourselves or our fantastic editorial team have personally experienced, and regularly review these. Thanks for your support, kind friend!
Limassol, the vibrant coastal city on the southern edge of Cyprus, is one of the most popular destinations in the country. If Cyprus is part of your European trip, chances are, you’ll be landing at Larnaca International Airport, the main gateway to the island. So, how exactly do you get from Larnaca Airport to Limassol?
In this post, we’ll walk you through your transportation options and break down everything you need to know to get to Limassol.
Before we dive into the transport details, here are a few key things to know that might come in handy for your trip to Limassol from Larnaca in Cyprus:
Currency: Cyprus uses the euro (€) as its official currency. So all fare prices and travel costs we’ll mention in this post are in euro.
Language: Greek. The official language is Greek, but don’t worry — English is widely understood, especially in tourist-friendly areas. You might hit a small language barrier in some local spots, but it’s usually easy to get by.
Main Airport: The main entry point for most international travelers is Larnaca International Airport (LCA), also on the southern coast. From here, Limassol is just about an hour southwest.
How to Get to Limassol from Larnaca
Limassol is nestled along the southern coast of Cyprus. It’s the second-largest city on the island, just next to the capital Nicosia. You have two options to get to Limassol from Larnaca Airport: by Public Bus and by Direct Airport Shuttle or Airport Bus.
Upon landing at the airport, you’ll need to go through the usual arrival formalities like immigration and customs inspection. After picking up your luggage, you’ll be exiting into the Arrival Hall. Your next steps will depend on the transportation you’ll choose.
Larnaca Airport to Limassol By Direct Airport Bus
1. Go to the Airport Shuttle Counter.
Once you exit into the Arrival Hall, turn left. Then, walk all the way to the far end of the terminal. Just before you reach the exit doors, you’ll spot a ticket counter. Heads-up! It’s not possible to reserve a seat in advance for the Limassol Airport Express. Just buy your ticket when you arrive at the airport.
There’s only one direct bus service from Larnaca Airport to Limassol, and it’s run by Limassol Airport Express. It runs from 5:00 AM to 11:15 PM, making a total of 13 trips at varying intervals. As of our last visit in 2023, here’s the schedule:
This is hands down the fastest, most convenient, and hassle-free way to get to Limassol. The journey takes just around 50 minutes, with no transfers and only one quick stop before reaching its final destination.
First stop: Tourist Area, near the St. Raphael Resort, Grand Resort, and Kanika Elias Beach
Second and Final stop: Limassol Airport Express Station at the Agios Georgios Havouzas Station in Limassol’s city center.
2. At Agios Georgios Havouzas Station in Limassol, get a ride to your accommodation.
You’ve got a few options to reach your hotel: you can hail a taxi or use a ride-hailing app. If you prefer using an app, BOLT and CABCY are both popular ride-hailing options in Cyprus. We personally used Bolt, and a driver was assigned to us almost instantly! It was super easy and efficient. If your hotel is located at the Molos area, near Pier Beach, expect to pay around EUR 12.
There’s also an intercity bus that passes by, but unfortunately, we weren’t able to get detailed info about its schedule or route.
By the way, if you get hungry, no worries! You’ll find a few great food spots right beside the station. Here are some of them:
Bean Around. A cozy café, perfect if you’re in the mood for coffee or something light.
Feedos. Check it out if you’re craving something more filling, which is a really good burger joint.
Vending Machines. There are also vending machines scattered around the area, selling drinks and snacks in case you need a quick grab-and-go option.
Larnaca Airport to Limassol By Public Bus
1. Head to the City Bus Boarding Platform.
If you decide to take the public bus route, turn right once you get to the arrival hall. This will lead you to the area where city buses depart. This is the cheaper option, but it takes longer and involves a transfer.
Now, we didn’t try this option ourselves, but we did gather some handy info. Just before the exit, there’s a public transport info desk. We spoke with the friendly lady there, and she explained exactly how to reach Limassol using the public bus system. Here’s what she told us:
From Larnaca Airport, take BUS 425, bound for Dekelia Power Station. A bus leaves the airport every 20 minutes from 6:30 AM until 11:50 PM. Fare is EUR 1.50 during the day and EUR 2.5 at night. Get off at the Old Hospital, which is the 6th stop from the airport.
Transfer to the InterCity Bus to Limassol. The fare is EUR 4. Travel time is one hour 30 minutes.
2. Alight at the Old Hospital and switch to an InterCity Bus to Limassol.
Before your trip, find out which stop is closest to your hotel or destination so you know where to alight. From there, you may hail a cab on site or use an app like Bolt or Cabcy. These are the stops:
Photo Credit: Cyprus InterCity Bus Official Website
The city center is also home to the Old Town of Limassol and the Limassol Marina, making it an ideal base for tourists. Aside from the numerous accommodation options, the area is also dotted with restaurants and is close to several attractions. Here are some of the top-rated hotels according to user reviews online.
For our trip to Larnaca Airport from Limassol, we also took the Limassol Airport Express and simply retraced our steps. But here’s the catch: our flight was scheduled for 5:00 AM, and the first bus leaves Limassol at 5:00 AM, too. Obviously, that wouldn’t work.
So, we decided to take the last bus the night before and spend the night at the airport. Check-in opened at 2:00 AM anyway, so it made sense. At first, we were a bit concerned about availability and even tried calling to reserve seats, but they told us there was no need to reserve — just show up and buy our tickets on-site.
Limassol Airport Express booth at Agios Georgios Havouzas Station
We arrived at Agios Georgios Havouzas Station by 8:30 PM via taxi and bought our tickets for €10 each. The last bus was scheduled to depart at 9:30 PM.
We hadn’t had dinner yet, but thankfully, Feedos, the burger food truck right next to the station, was still open. So of course, we grabbed some burgers — and wow, they totally hit the spot!
The bus departed right on time at 9:30 PM. It was just us and one other passenger, so the ride was super quiet and relaxed. Around 50 minutes later, we arrived at Larnaca Airport, well ahead of time. From there, we just waited for the check-in counters to open.
26 Best Places To Visit In New South Wales, Australia
From famous places like Byron Bay, to lesser known towns, national parks, and beaches, there is no shortage of place to go in New South Wales.
Here is our list of the best places to visit in NSW, Australia!
The best way to get around is to rent a car and explore on your own! We recommend Rental Cars, which has the largest range of vehicles for the best value on the market.
Lord Howe Island
Lord Howe Island is a pristine, UNESCO World Heritage-listed island located in the Tasman Sea, about 600 kilometers east of mainland Australia.
Renowned for its dramatic volcanic landscapes, lush forests, and crystal-clear lagoons, the island offers a rare blend of unique natural scenery and tranquillity.
With visitor numbers capped at just 400 at a time, Lord Howe Island is able to remain unspoiled and peaceful.
Activities such as snorkelling on the world’s southernmost coral reef, hiking Mount Gower, and exploring the unique endemic flora and fauna showcase the island’s ecological significance and charm.
You can fly to Lord Howe Island on a two-hour flight from either Sydney or Port Macquarie in NSW.
Sydney
Of course, the capital city of Sydney has to be on this list!
Sydney is well worth all the hype it gets. Home to the iconic Sydney Opera House and Sydney Harbour Bridge, this fabulous city has world-famous landmarks and a bustling energy.
Visitors to the Sydney CBD can check out Taronga Zoo, the Rocks Markets, Newtown, the Royal Botanic Gardens, and more. Stay in luxurious Sydney hotels or social backpacker hostels right in Sydney Harbour.
You can also venture to the coast and see gorgeous beaches that you wouldn’t even believe are in a massive city. With surf beaches, ocean pools, trendy cafes, and whale watching in winter, Sydney’s coastline is a dream year-round.
Head to Manly and Palm Beach in the Northern Beaches of Sydney, Bondi Beach and Bronte in the eastern suburbs, or Cronulla and the Royal National Park in the south.
Blue Mountains National Park is another UNESCO World Heritage Site in New South Wales.
Packed with scenic hiking trails, stunning waterfalls, rocky cliffs, and quaint mountain towns, the Blue Mountains are the perfect place to escape into nature.
Start your exploration in the charming town of Katoomba, where you can visit the Three Sisters rock formations and visit the family-friendly Scenic World.
You can also venture further outside the tourist centre of the Blue Mountains to discover hidden waterfalls and secluded gullys with world heritage listed rainforest and very few tourists around.
Whether you want a cosy mountain getaway or an off-grid camping experience, the Blue Mountains have it all!
Wollemi National Park
Wollemi National Park, located just a few hours northwest of Sydney in New South Wales, is a vast wilderness area known for its rugged sandstone cliffs, deep canyons, and dense eucalyptus forests.
As part of the Greater Blue Mountains World Heritage Area, it offers spectacular scenery and a rich diversity of plant and animal life, including the rare and ancient Wollemi Pine, a species once thought extinct and only rediscovered in 1994.
The park is a haven for outdoor enthusiasts, offering opportunities for hiking, camping, canyoning, and canoeing. It’s a popular spot for family holidays near Sydney and Newcastle that is slightly less touristy than the Blue Mountains.
Its remote beauty and ecological significance make it one of Australia’s most treasured natural landscapes.
Orange
One of the best places to visit in the Central West of New South Wales is Orange.
Nestled in the Central Tablelands, this vibrant regional city has a cool climate, rich history, and thriving food and wine scene.
Orange boasts fertile volcanic soils that support an incredible viticulture industry, with over 30 cellar doors offering diverse wine experiences.
The city is also celebrated for its seasonal beauty, with parks like Cook Park and the Orange Botanic Gardens showcasing stunning displays throughout the year.
Outdoor adventurers are drawn to Mount Canobolas, an extinct volcano offering panoramic views and hiking trails. There is lots to do in Orange, an underrated destination in New South Wales!
Another top destination in the Central West of New South Wales is Mudgee. Whether you’re on a road trip into the Outback or you’re just hoping to explore more of rural NSW, Mudgee has much to offer!
The picturesque little town sits on the Cudgegong River Valley, approximately 270 km northwest of Sydney.
Mudgee is an iconic wine region in Australia, with over 35 wineries including historic estates like Robert Stein and Lowe Wines.
Beyond its vineyards, the town has heritage-listed buildings, charming cafes, and boutique shops that reflect its colonial past.
Anyone looking for an outdoor adventure can explore nearby attractions such as Windamere Dam and the Mudgee Observatory, or enjoy hot air balloon rides over the rolling hills.
Mudgee is the perfect place for a romantic getaway.
Dubbo
The vibrant regional city of Dubbo is one of the most popular towns on the edge of the NSW Outback.
It’s home to the world-renowned Taronga Western Plains Zoo, where visitors can see exotic and native animals in large, open-range habitats.
Dubbo also offers a glimpse into Australia’s colonial and convict history at the Old Dubbo Gaol, a well-preserved 19th-century prison.
With its thriving arts scene, riverside parks, and nearby Aboriginal cultural sites, Dubbo combines country charm with modern amenities, making it a key stop on any inland New South Wales journey.
Hunter Valley
One of the best wine regions in Australia, the Hunter Valley is another stunning destination in New South Wales.
It’s just a couple of hours from Sydney and Newcastle, making it easy location for day trips or weekend getaways.
With rolling vineyards, gourmet restaurants, and charming cellar doors, the Hunter Valley offers a beautiful escape for food and wine lovers. A full day wine tasting experience is the best way to sample all the best wines with a local expert!
Beyond the wine, the Hunter Valley features luxury retreats, hot air ballooning, golf courses, and scenic countryside dotted with kangaroos and historic towns like Pokolbin and Lovedale.
The Warrambungles
The Warrumbungles are a striking mountain range in central NSW. The relaxed town of Coonabarabran is the Gateway to Warrumbungle National Park, and the perfect place to start your wilderness adventure.
Warrumbungle National Park is Australia’s first Dark Sky Park, meaning there is some world-class stargazing to be done here after dark.
The World Heritage-listed mountain range is home to magnificent hikes and campgrounds, as well as iconic rock formations like the Breadknife.
Bushwalkers and rock climbers from across the country flock to the Warrambungles for a memorable experience surrounded by nature. Whether you want relaxed stargazing or epic rock climbing, this is an amazing place to visit in NSW!
If you’re looking for a glimpse of regional Australia life, head to Broken Hill! This captivating Outback city in the far west of New South Wales has an important mining history that was essential to the early Australian economy.
Established in the 1880s, Broken Hill is the birthplace of BHP and has played a pivotal role in Australia’s industrial development.
Today, Broken Hill is celebrated as Australia’s first heritage-listed city, offering visitors a unique blend of history, culture, art, and natural beauty.
Engage with local artists at Broken Hill Regional Art Gallery, the oldest regional gallery in New South Wales. Or immerse yourself in the mining history of Broken Hill at the Line of Lode Miners Memorial and the Living Desert Sculptures.
No list of the best places to visit in NSW is complete without mentioning Byron Bay!
This laid-back coastal town has skyrocketed to the top of many travellers’ Australia bucket lists, thanks to its trendy town and gorgeous coastline.
The Cape Byron Marine Park extends along the Byron Bay coast, offering diverse displays of marine life. Water sports like surfing, kayaking, scuba diving, and snorkelling are world-class up in Byron Bay!
If you don’t feel like getting wet, you can still enjoy the coastal beauty on the walk up to the Cape Byron Lighthouse. This walk showcases the best of the Byron Bay beaches, surf spots, and marine life.
You can also have a blast exploring the Byron Bay town centre, enjoying the nightlife, or checking out the local farmers market.
Many think that Byron Bay is too busy and popular nowadays, but it’s actually easy to escape the crowds! Also consider exploring the amazing areas on the outskirts of Byron Bay, such as Lennox Head or the nearby Hinterlands.
South West Rocks
South West Rocks is a picturesque coastal town on the Mid North Coast of New South Wales.
It is known for its stunning beaches, relaxed atmosphere, and rich history, and is a popular weekend getaway for those who want some quiet, quality time with the ocean.
Located at the mouth of the Macleay River, South West Rocks is great for fishing, surfing, and diving. it’s home to the famous Fish Rock Cave, which is one of the best dive sites in the country.
The town is also home to the historic Trial Bay Gaol, a heritage-listed site offering panoramic views and insight into Australia’s colonial past.
Surrounded by national parks and pristine waterways, South West Rocks offers a blend of natural beauty and laid-back charm.
It is actually where the remains of Mungo Lady and Mungo Man were discovered (some of the oldest known human remains outside Africa) providing valuable insights into early human history.
The landscape in Mungo National Park is absolutely incredible, with crazy sand, clay, and rock formations scattered across the desert. The striking “Walls of China,” are the most famous site in the park.
Mungo National Park also offers visitors a unique opportunity to connect with Australia’s deep past through guided tours led by Aboriginal rangers, ensuring the preservation and respectful sharing of its rich heritage.
Crescent Head
Crescent Head is another amazing coastal destination on the Mid North Coast of NSW!
This vibrant surf town is celebrated for its iconic right-hand point break that draws surfers from around the globe. The waves are very consistent and great for surfers of all skill levels!
Beyond the waves, the area offers a blend of scenic headlands, tranquil beaches, and lush hinterlands ideal for bushwalking, picnicking, and wildlife spotting.
The township itself maintains a friendly, small-community vibe, with local cafés, markets, and seaside accommodation enhancing its laid-back appeal.
There are some lovely campgrounds, holiday homes, and beachfront cabins around Crescent Head where you can settle in for a lovely weekend of surfing, swimming, and beach-bumming!
Nambucca Heads
Nambucca Heads, also on the Mid North Coast, has similar coastal offerings as South West Rocks and Crescent Head, but it has a bit more to offer in terms of activities and culture.
The town’s name, derived from the Gumbaynggirr word “Ngambagabaga,” translates to “entrance to the waters” or “crooked river,” reflecting the area’s rich Indigenous heritage.
Nambucca Heads has pristine beaches, lush rainforests, and a vibrant arts scene, epitomized by the V-Wall Outdoor Gallery where visitors leave their mark on painted rocks.
Explore the Nyambaga Walking Trail, an interpretive path highlighting the region’s bio-cultural significance, or enjoy a round at the unique Island Golf Club situated in the middle of the river.
Snowy Mountains
Looking for something other than beaches and surf? Head inland to the Snowy Mountains!
This sprawling area of rugged peaks, alpine lakes, and ski slopes is located in the southeast of the state and offers a totally different environment than the coastal areas that many tourists frequent.
The Snowy Mountains form Australia’s highest mountain range and stretches through NSW, VIC, and ACT. In the New South Wales section of the Snowy Mountains, you can explore Kosciuszko National Park and hike to the country’s tallest peak (Mount Kosciuszko, 2,228m).
Renowned for their alpine beauty, the Snowy Mountains transform with the seasons. Visit in winter for snow-covered slopes, scenic drives, and skiing or snowboarding at resorts like Thredbo and Perisher.
Or head to the Snowy Mountains in summer for hiking, mountain biking, camping, and fishing. Nature lovers can have a blast exploring the local flora and fauna of Kosciuszko National Park and beyond year-round!
Hit the slopes in Thredbo, NSW!
Narooma
Another one of the best NSW destinations is Narooma. This relaxed beachside town on the NSW South Coast is known for its vibrant turquoise waters and abundant marine life.
The name “Narooma” is believed to derive from the local Aboriginal word meaning “clear blue waters,” reflecting the town’s stunning coastal vistas.
Situated along the Wagonga Inlet, Narooma has lots of fun activities, from snorkelling with seals at Montague Island to exploring the ancient Glasshouse Rocks.
The town is also celebrated for its fresh seafood, particularly its renowned rock oysters, which can be savoured at local establishments like The Oyster Farmer’s Daughter.
Right at the southern end of the Mid North Coast of NSW lies Port Stephens. This charming coastal town has much to offer in terms of amenities, fun outdoor activities, and natural beauty.
Visitors can dine on fresh seafood at a waterfront restaurant in Nelson Bay, explore walking trails along the coast, go dolphin-spotting or whale watching, and surf at the many golden-sand beaches.
Port Stephens is also home to the incredible Stockton Sand Dunes, a vast array of golden dunes that overlook the ocean. Join a sandboarding tour for an epic day out on the dunes!
Another fun activity to try in Port Stephens is hiking Tomaree Mountain at sunrise. You get the best views of the Pacific Ocean, nearby beaches, and surrounding islands.
Bellingen
Bellingen, nestled in the lush Bellinger Valley on New South Wales’ Mid North Coast, is a lovely place with a rich cultural heritage and stunning natural landscapes.
Originally inhabited by the Gumbaynggirr people, Bellingen’s history includes a timber and dairy industry boom in the 19th century, with its Victorian-era architecture still adorning the town’s streets today.
Surrounded by ancient rainforests, waterfalls, and wild swimming spots like the Promised Land, Bellingen has lots of amazing places to explore nature.
The town’s vibrant arts scene, eclectic cafes, and community markets reflect its bohemian spirit, making it a unique destination for explorers in NSW.
Coffs Harbour
Coffs Harbour is a relatively well-known city on the Mid North Coast of New South Wales. It’s a common stopping point for coastal road trips, mainly because it’s the home of the Big Banana!
The Big Banana is one of Australia’s original “big things,” which serves as both a tourist attraction and a reminder of the region’s rich banana-growing heritage.
Visitors to Coffs Harbour can enjoy a variety of outdoor activities such as surfing, fishing, whale watching, surfing at Emerald Beach, or snorkelling or diving in the Solitary Islands Marine Park.
Beyond its natural beauty, Coffs Harbour offers a growing cultural scene with art galleries, local markets, and a range of dining options featuring fresh local produce and seafood.
The surrounding hinterland is dotted with rainforests, waterfalls, and national parks like Dorrigo National Park, providing plenty of opportunities for bushwalking, birdwatching, and camping.
Escape to the seaside in Coffs Harbour!
Jervis Bay
No list of the best places to visit in NSW is complete without Jervis Bay!
This stunning destination on the NSW South Coast is about 2 hours south of Sydney, making it easy for day trips or weekend trips from the city.
Jervis Bay consists of several charming towns like Huskisson and Vincentia, as well as a string of gorgeous beaches.
The most famous beach in Jervis Bay is Hyams Beach, which is consistently ranked as one of the world’s whitest sand beaches. With soft silica sand and calm turquoise waters, Hyams Beach looks like something out of a postcard.
But Hyams Beach is only one beautiful spot in Jervis Bay! Follow the White Sands Walk for equally stunning and less crowded beaches near Hyams, or head into Booderee National Park for beaches surrounded by bushland and campgrounds.
Besides beach hopping, visitors to Jervis Bay can enjoy water sports, enjoy the delights of town, or go whale watching in the winter months.
Kiama
Another gem of the NSW South Coast is Kiama, located about 1.5 hours south of Sydney.
The most famous landmark in Kiama is the Blowhole, a rocky crag on the coast where waves rush into a natural hole and burst up like a volcano erupting lava. The Kiama Blowhole only performs when the swell is big and the conditions are right, but it’s a cool sight to see!
Kiama also has a Little Blowhole a few minutes away that is equally impressive.
Other amazing things to do in Kiama include cafe-hopping in the charming town centre, enjoying family-friendly fun at the nearby Jamberoo Action Park, exploring the nearby rainforest at Minnamurra Falls, or soaking in the beautiful views along the Great Coastal Walk.
Kangaroo Valley is located in the Southern Highlands, about 2 hours southwest of Sydney. This is a gorgeous place for a trip filled with nature and adventure!
Nestled between the Cambewarra and Barrengarry mountains in New South Wales, Kangaroo Valley is packed with stunning waterfalls, lush rainforests, and rolling pastures.
Visitors can canoe or kayak on the tranquil Kangaroo River, admire heritage-listed buildings, or hike through Morton National Park. A standout landmark is the historic Hampden Bridge, Australia’s last surviving wooden suspension bridge, which adds to the area’s old-world character.
Kangaroo Valley is also a bit of a foodie destination, with local artisan shops selling fresh produce from nearby farmlands.
Located just north of Kangaroo Valley is another area rich in greenery and nature. The Southern Highlands are another waterfall hotspot, with places like Belmore Falls, Fitzroy Falls, and Carrington Falls impressing all who visit.
There are also more tranquil swimming spots like Nellies Glen, and several remote campgrounds for a night in the wilderness.
Known for its elegant gardens, antique stores, and heritage-listed architecture, towns like Bowral, Berrima, Mittagong, and Moss Vale offer a relaxed yet refined atmosphere in the Southern Highlands.
Bowral, the largest town, is famous for the annual Tulip Time Festival, cool-climate wineries, farm-to-table dining, and gourmet markets.
Fitzroy Falls is a must-see in the Southern Highlands.
Merimbula
This beautiful town on the Far South Coast of NSW is well worth a visit.
Merimbula has a thriving seafood industry where you can sample fresh oysters and dine at top-rated restaurants. The quaint town center has some cool shops, wellness centres, cafes, and bars to suit all types of tastes.
Golden sand beaches and lush national parks surround the town, giving visitors the chance to go surfing, diving, camping, hiking, and exploring nature.
Merimbula’s laid-back vibe makes it the perfect place for a bit of rest and relaxation as you explore the Sapphire Coast of NSW.
Port Macquarie
Port Macquarie is a popular place to stop on any road trips along the NSW coast.
Situated at the mouth of the Hastings River, the town has amazing beaches like Town Beach and Lighthouse Beach, ideal for surfing, swimming, and dolphin spotting.
Nature lovers can also explore the Sea Acres Rainforest Centre, featuring a 1.3 km elevated boardwalk through lush subtropical rainforest, or visit the Koala Hospital, dedicated to the care and conservation of koalas.
Established as a penal settlement in 1821, Port Macquarie’s heritage is showcased through sites like the Port Macquarie Museum and the historic St Thomas’ Anglican Church.
The town also offers a thriving arts scene, with venues like The Glasshouse hosting performances and exhibitions.
The best time to travel to New South Wales largely depends on what you want to experience, but overall, spring (September to November) and autumn (March to May) are considered the ideal seasons for visiting.
Spring (September – November)
Spring has mild temperatures, blooming wildflowers, and lush greenery, making it perfect for outdoor adventures, beach visits, and national park hikes. It’s also whale-watching season along the coast.
Autumn (March – May)
If you want comfortable weather, fewer crowds, and stunning autumn foliage in regions like the Blue Mountains and Southern Highlands, Autumn is for you! Prices are also more affordable at this time as opposed to summer.
Summer (December – February)
Summer is peak season in NSW! It’s great for beach lovers, especially along the North Coast and South Coast. Just note that summer can be hot and busy, especially around Sydney and during school holidays.
Winter (June – August)
Winter is dreamy in NSW! Temperatures are cool along the coast and very cold inland or in the mountains. But it’s the perfect time for snow sports in the Snowy Mountains and quieter sightseeing in cities and wine regions.
DISCLAIMER: Some of the links in this article are affiliate links, which means if you book accommodation, tours or buy a product, we will receive a small commission at no extra cost to you. These commissions help us keep creating more free travel content to help people plan their holidays and adventures. We only recommend the best accommodations, tours and products that ourselves or our fantastic editorial team have personally experienced, and regularly review these. Thanks for your support, kind friend!
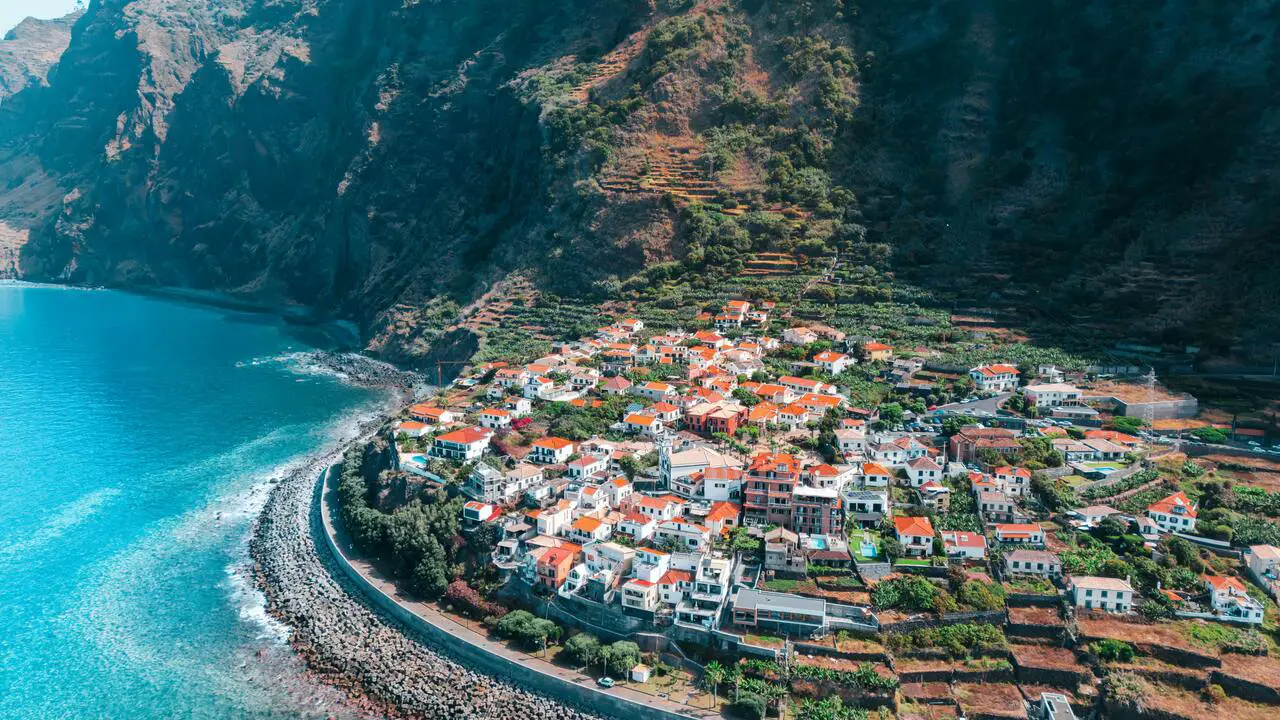
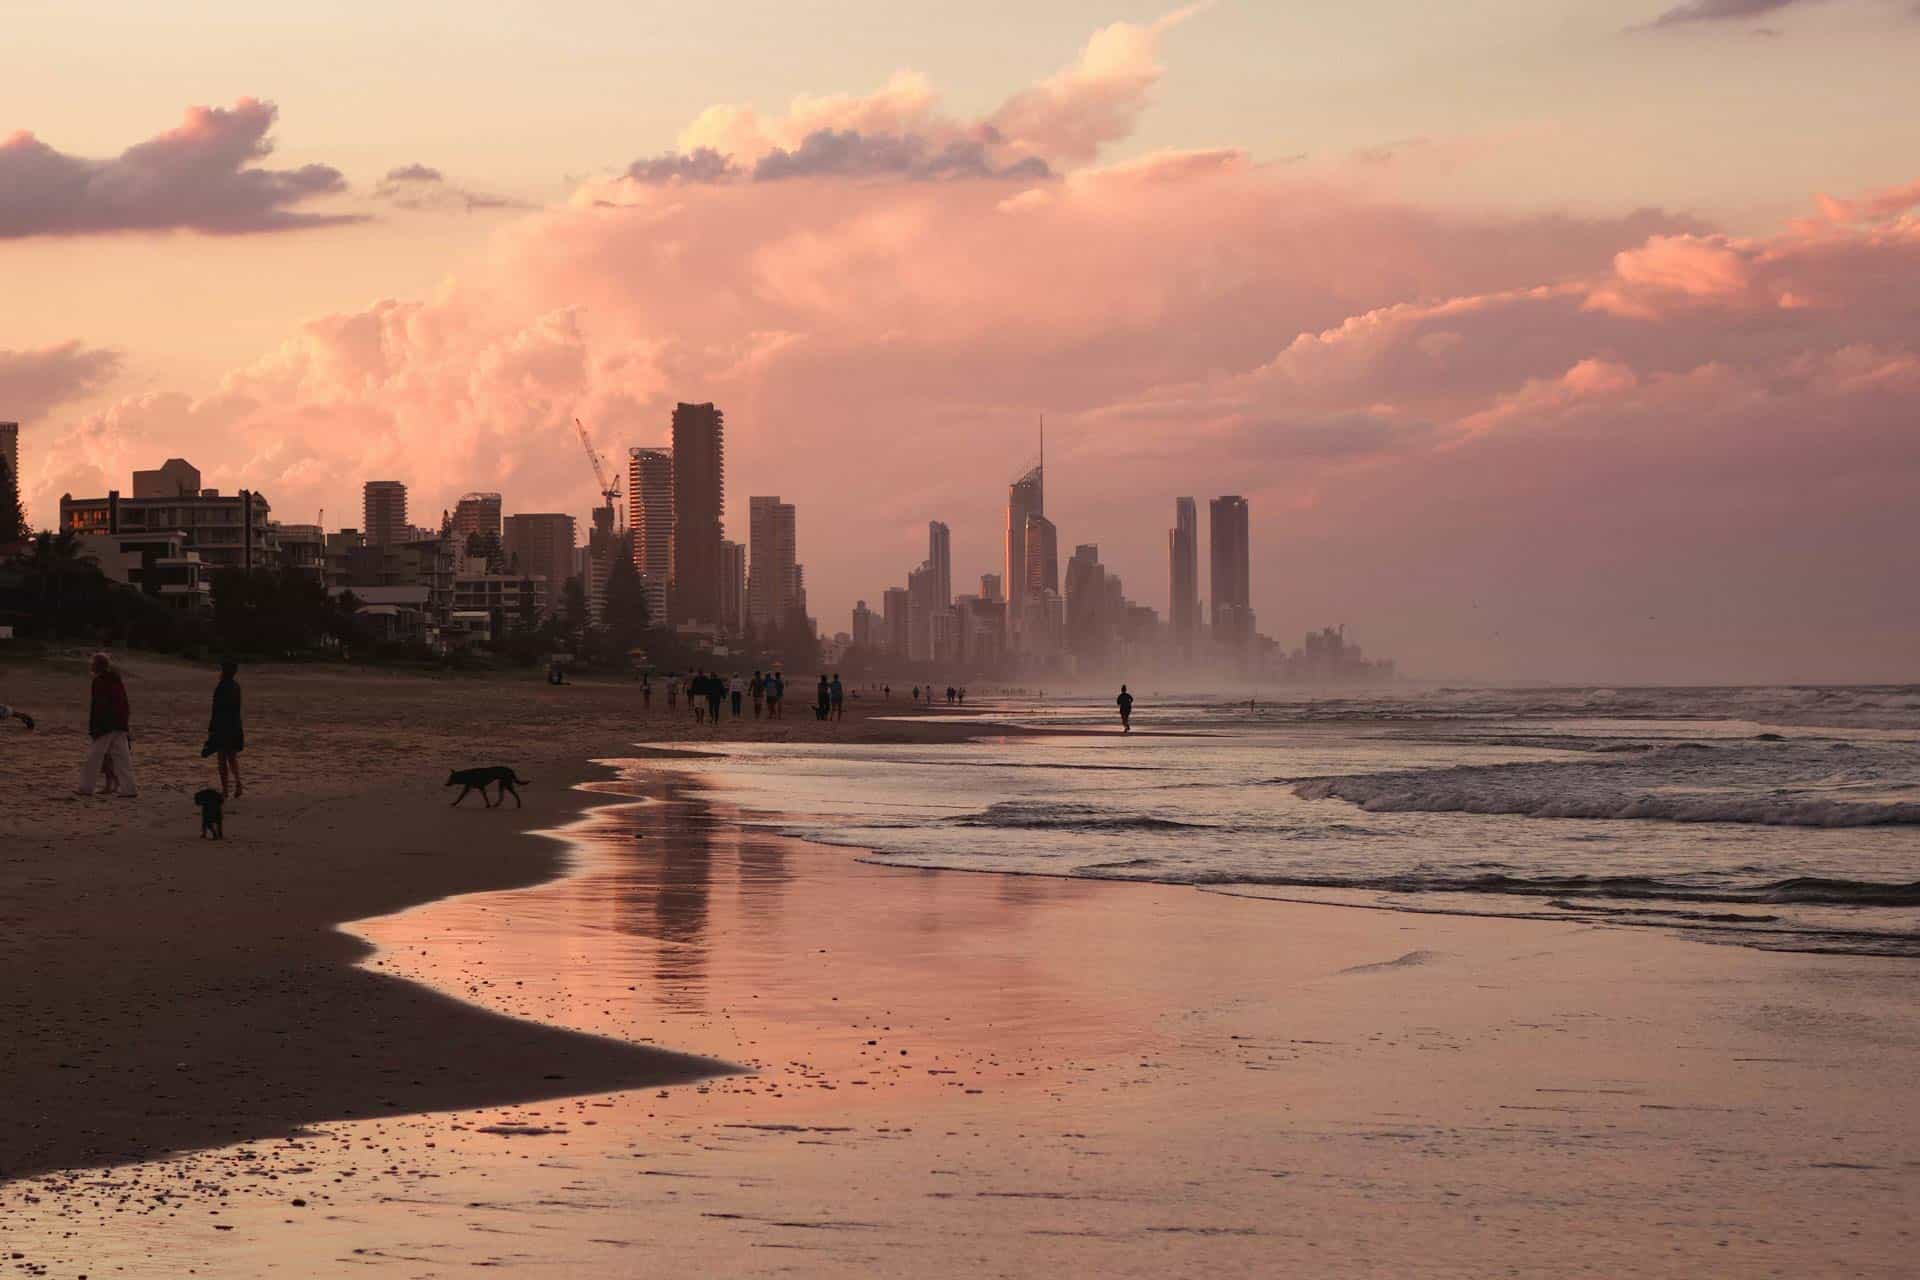
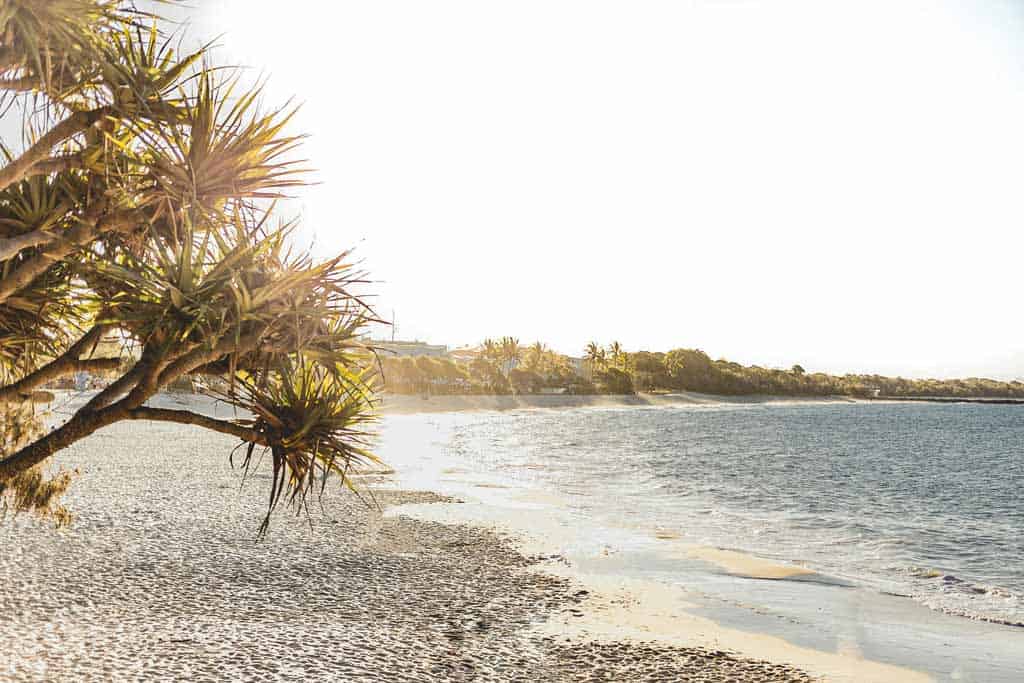

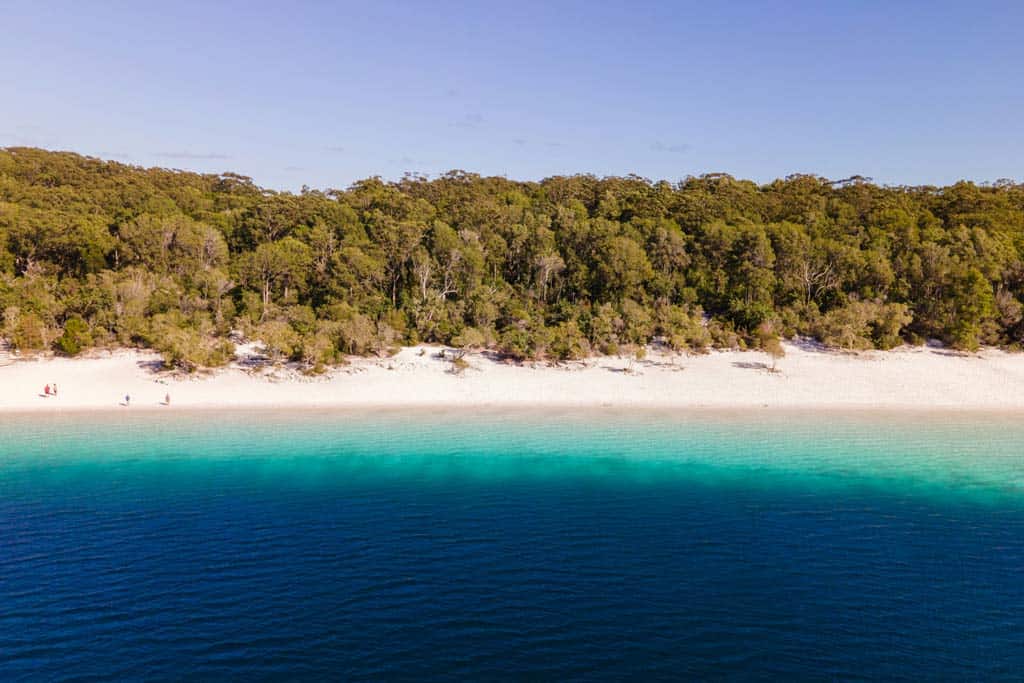
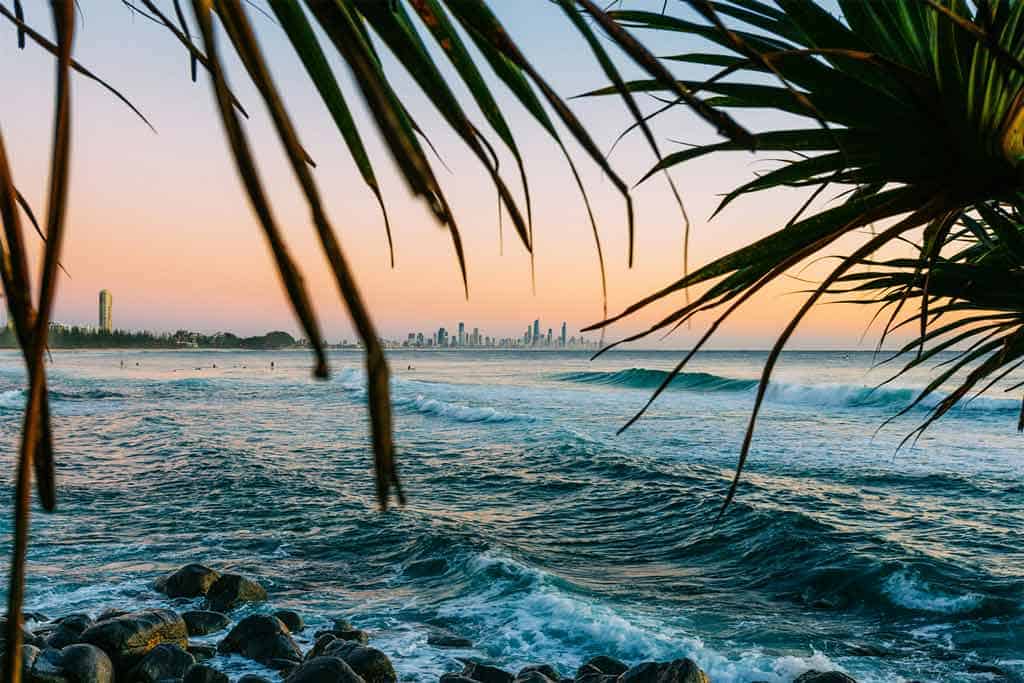

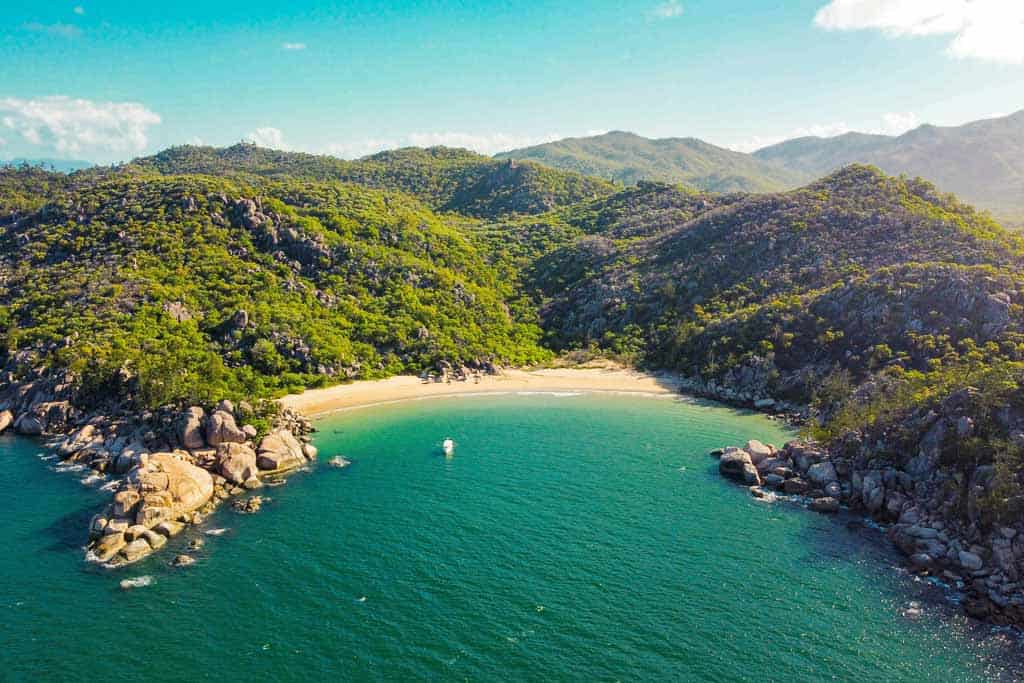
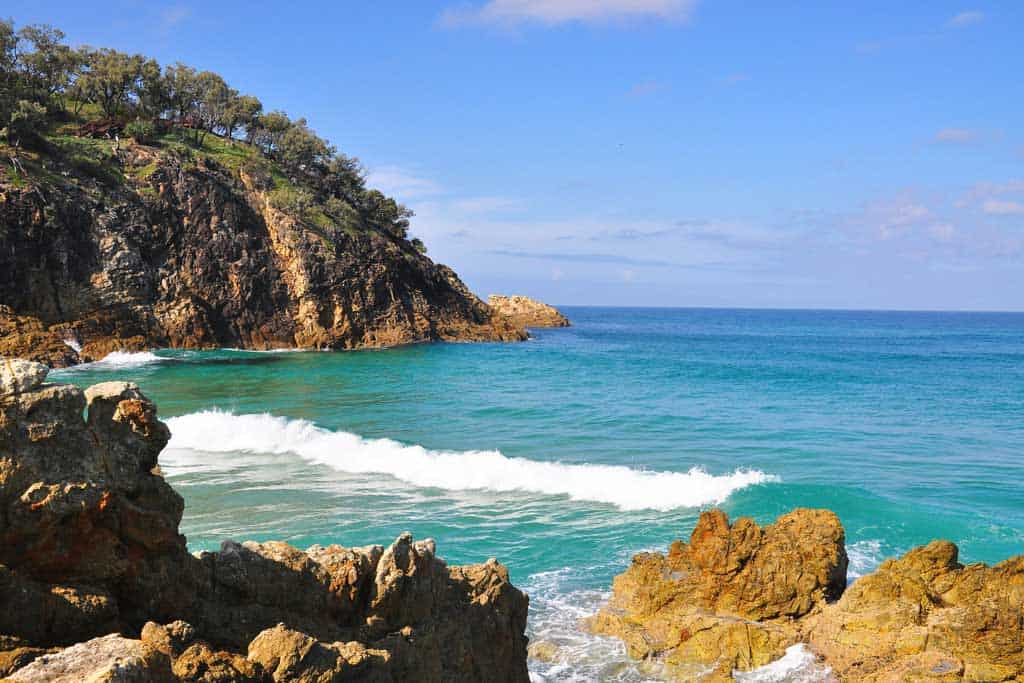


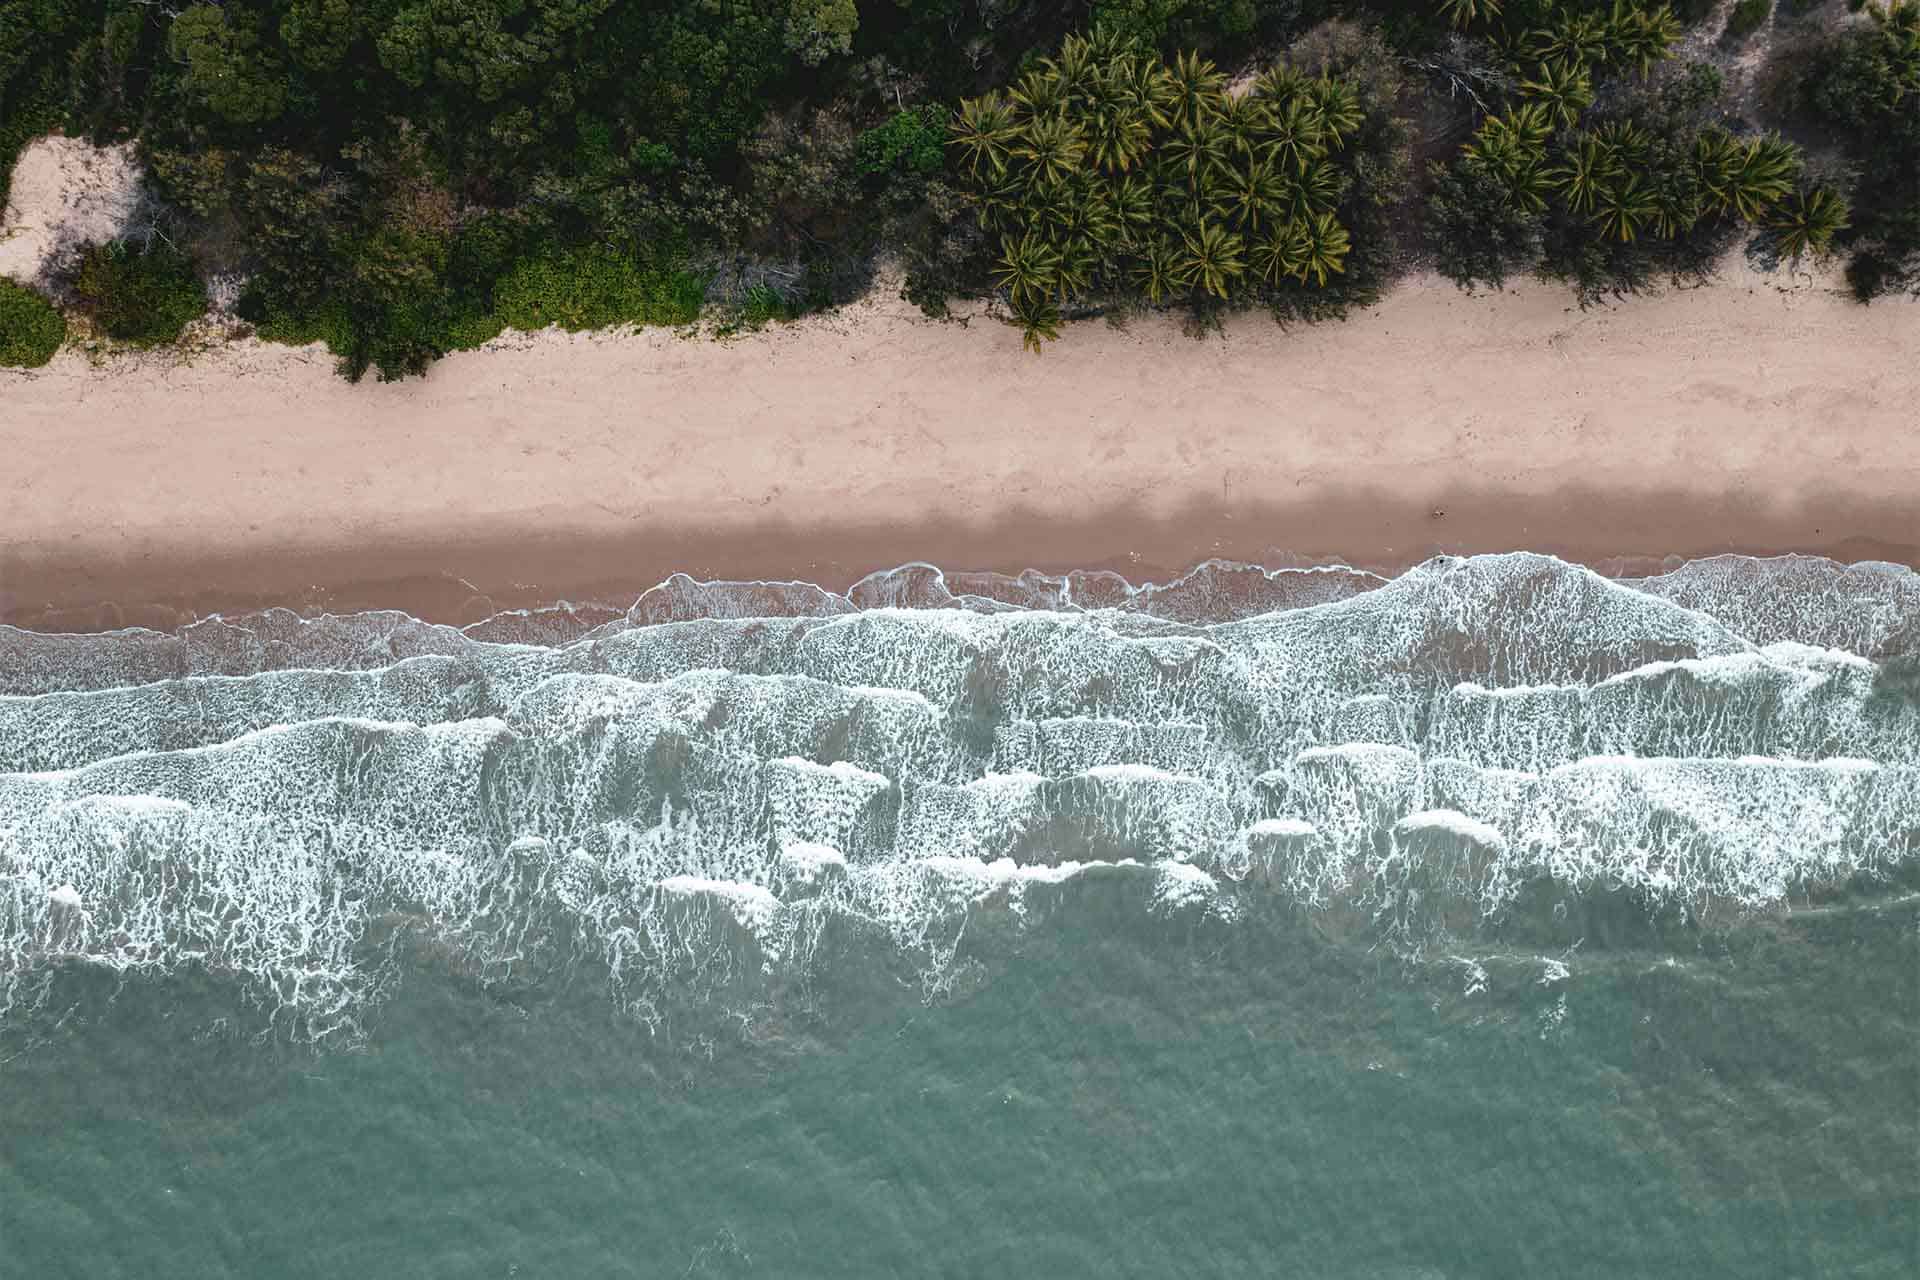
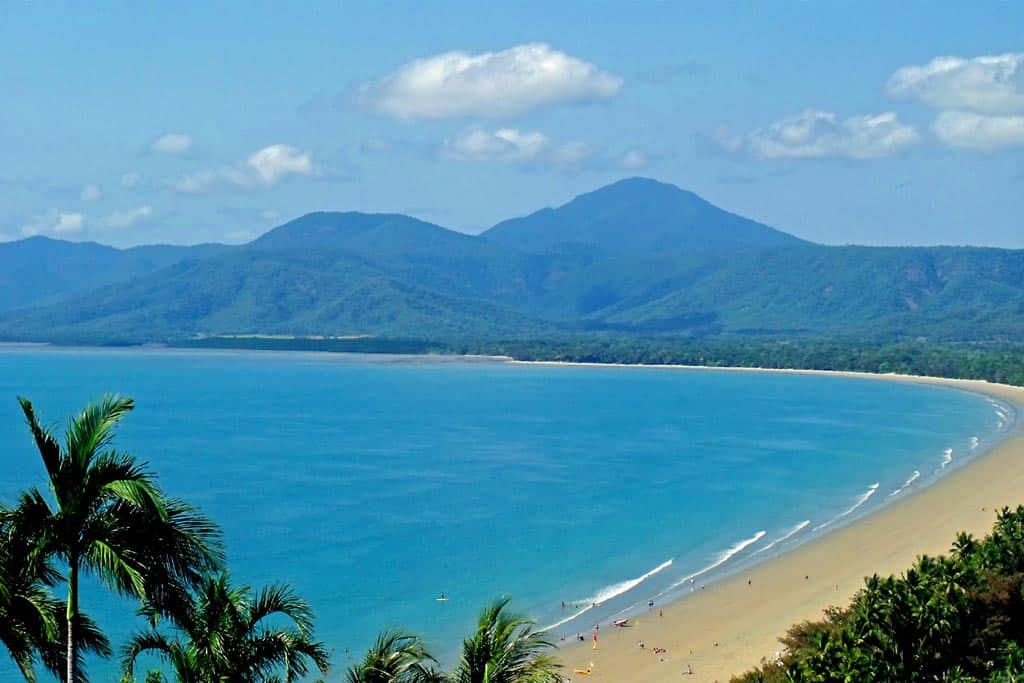
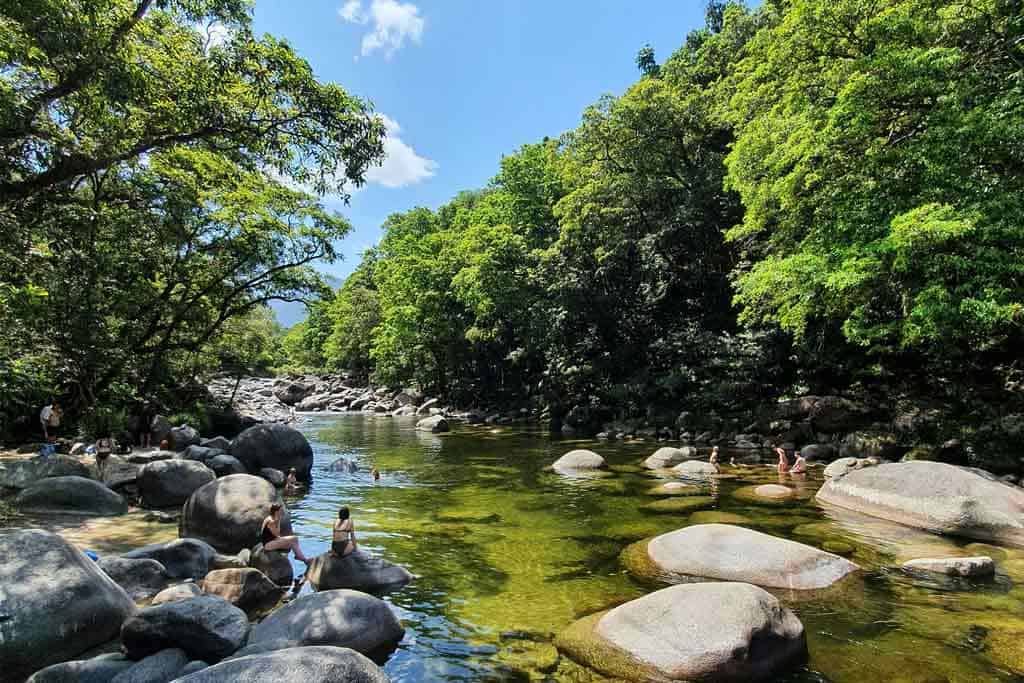
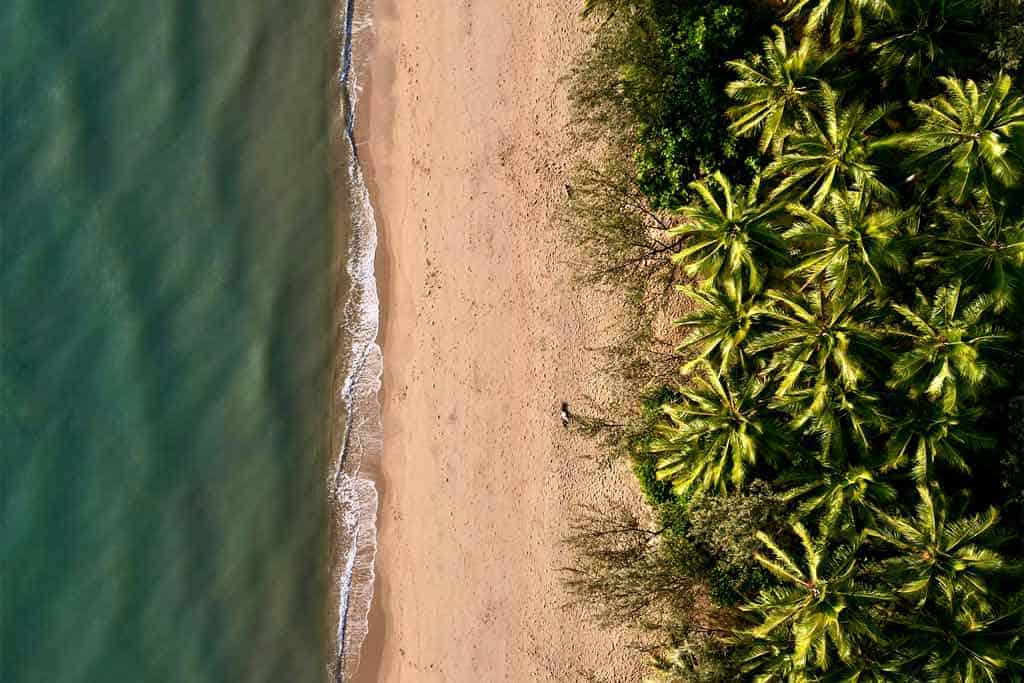
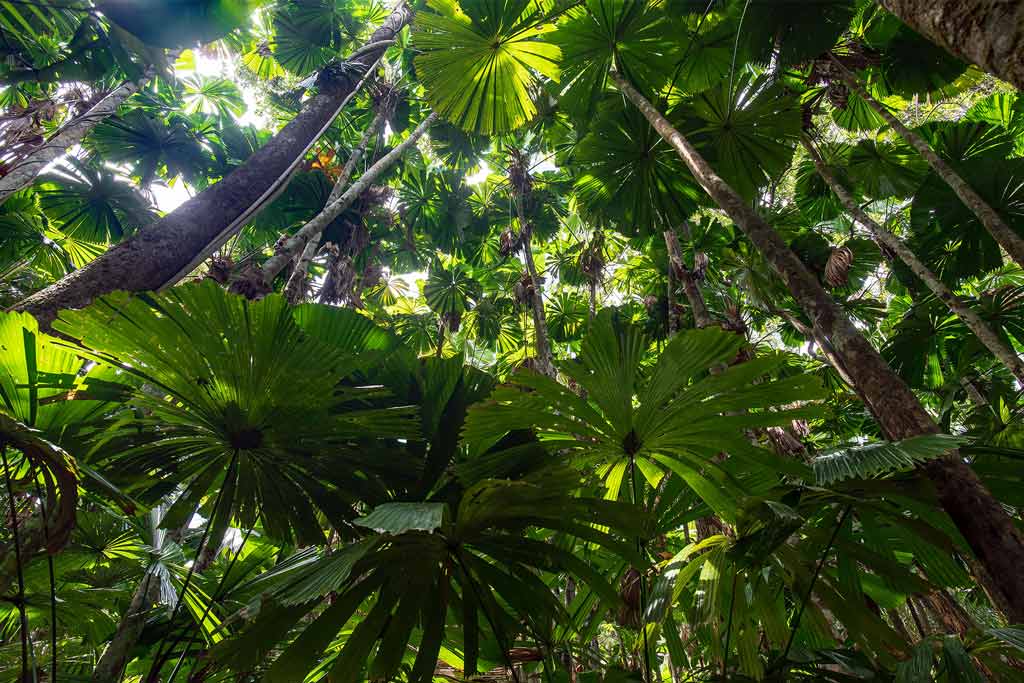
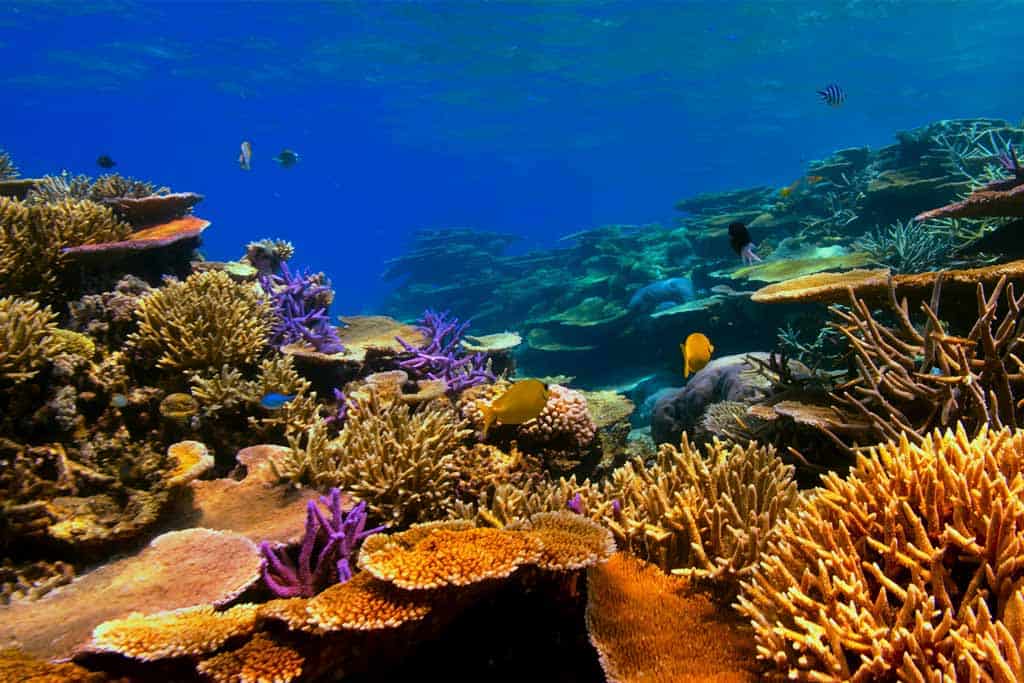
![Coral Geographer Review | Ultimate Expedition Ship [2025]](https://farasar.ir/wp-content/uploads/2025/07/Coral-Geographer-Review-Coral-Expeditions-Ship.jpg)


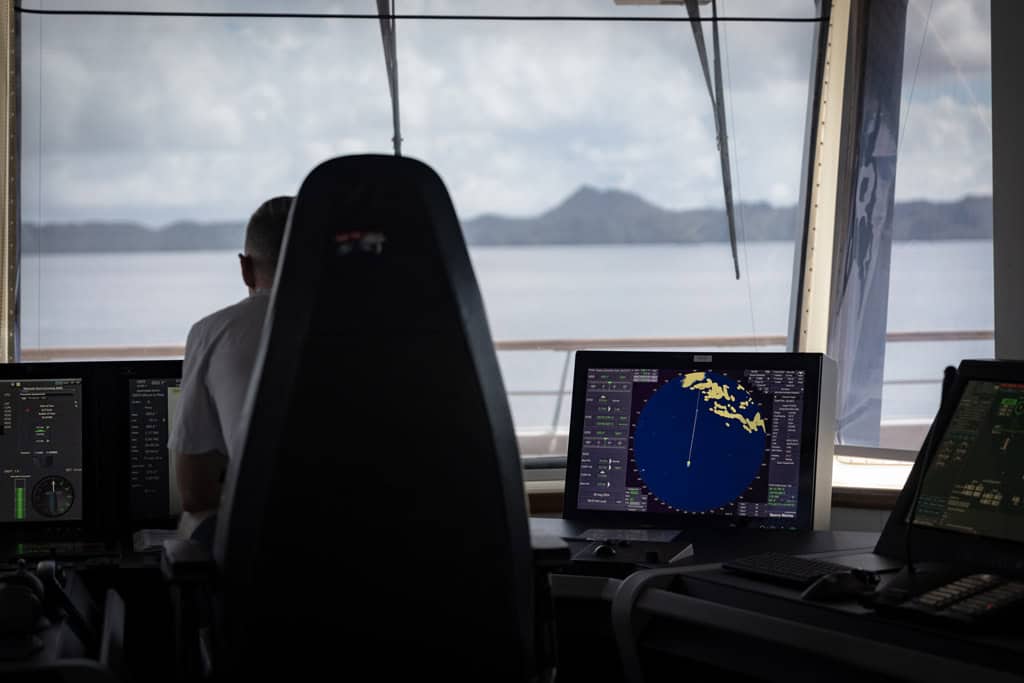


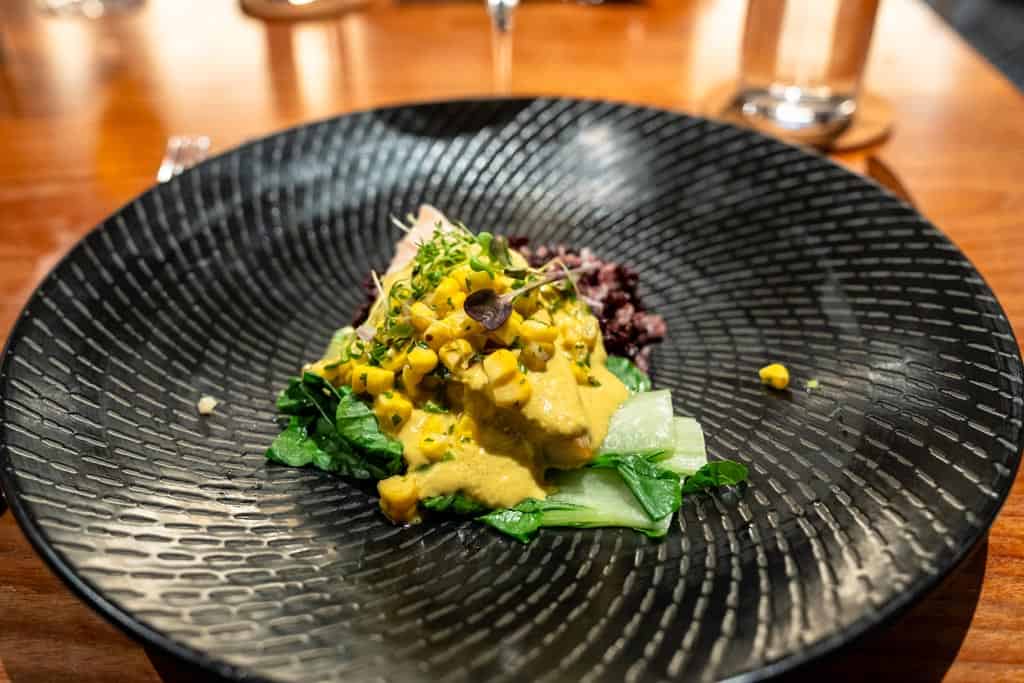


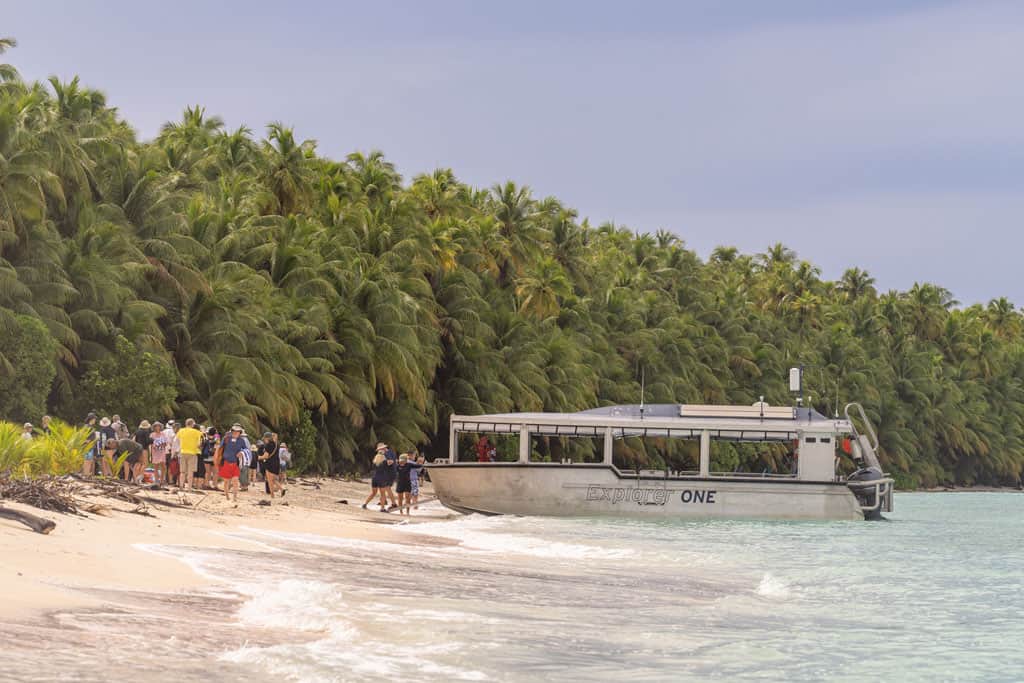
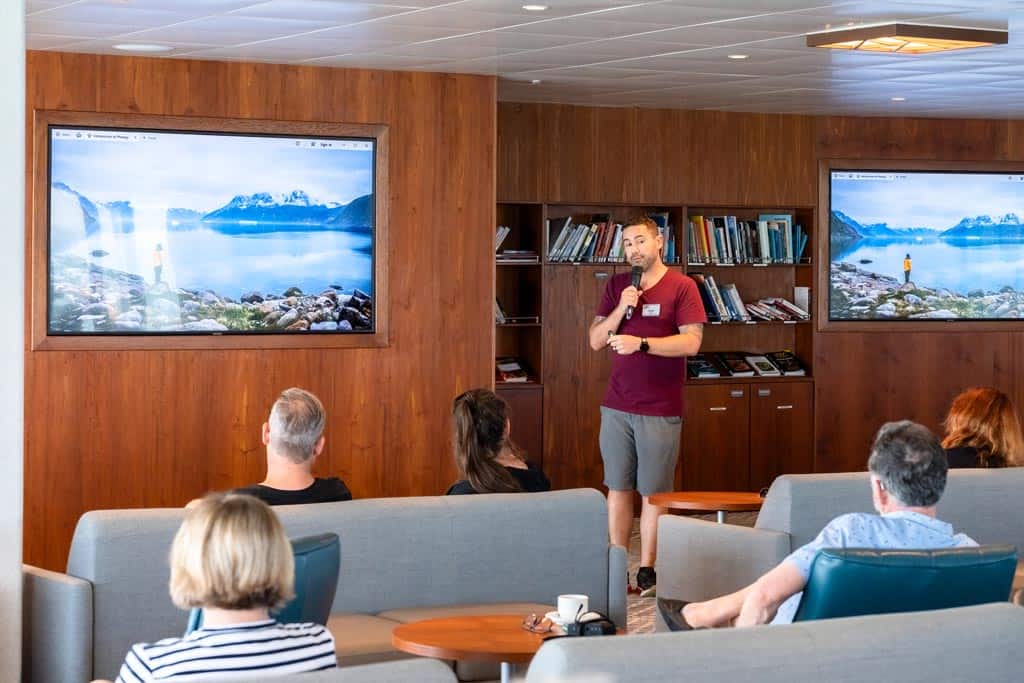


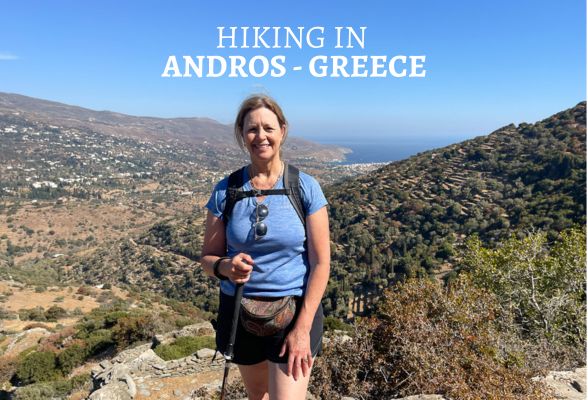
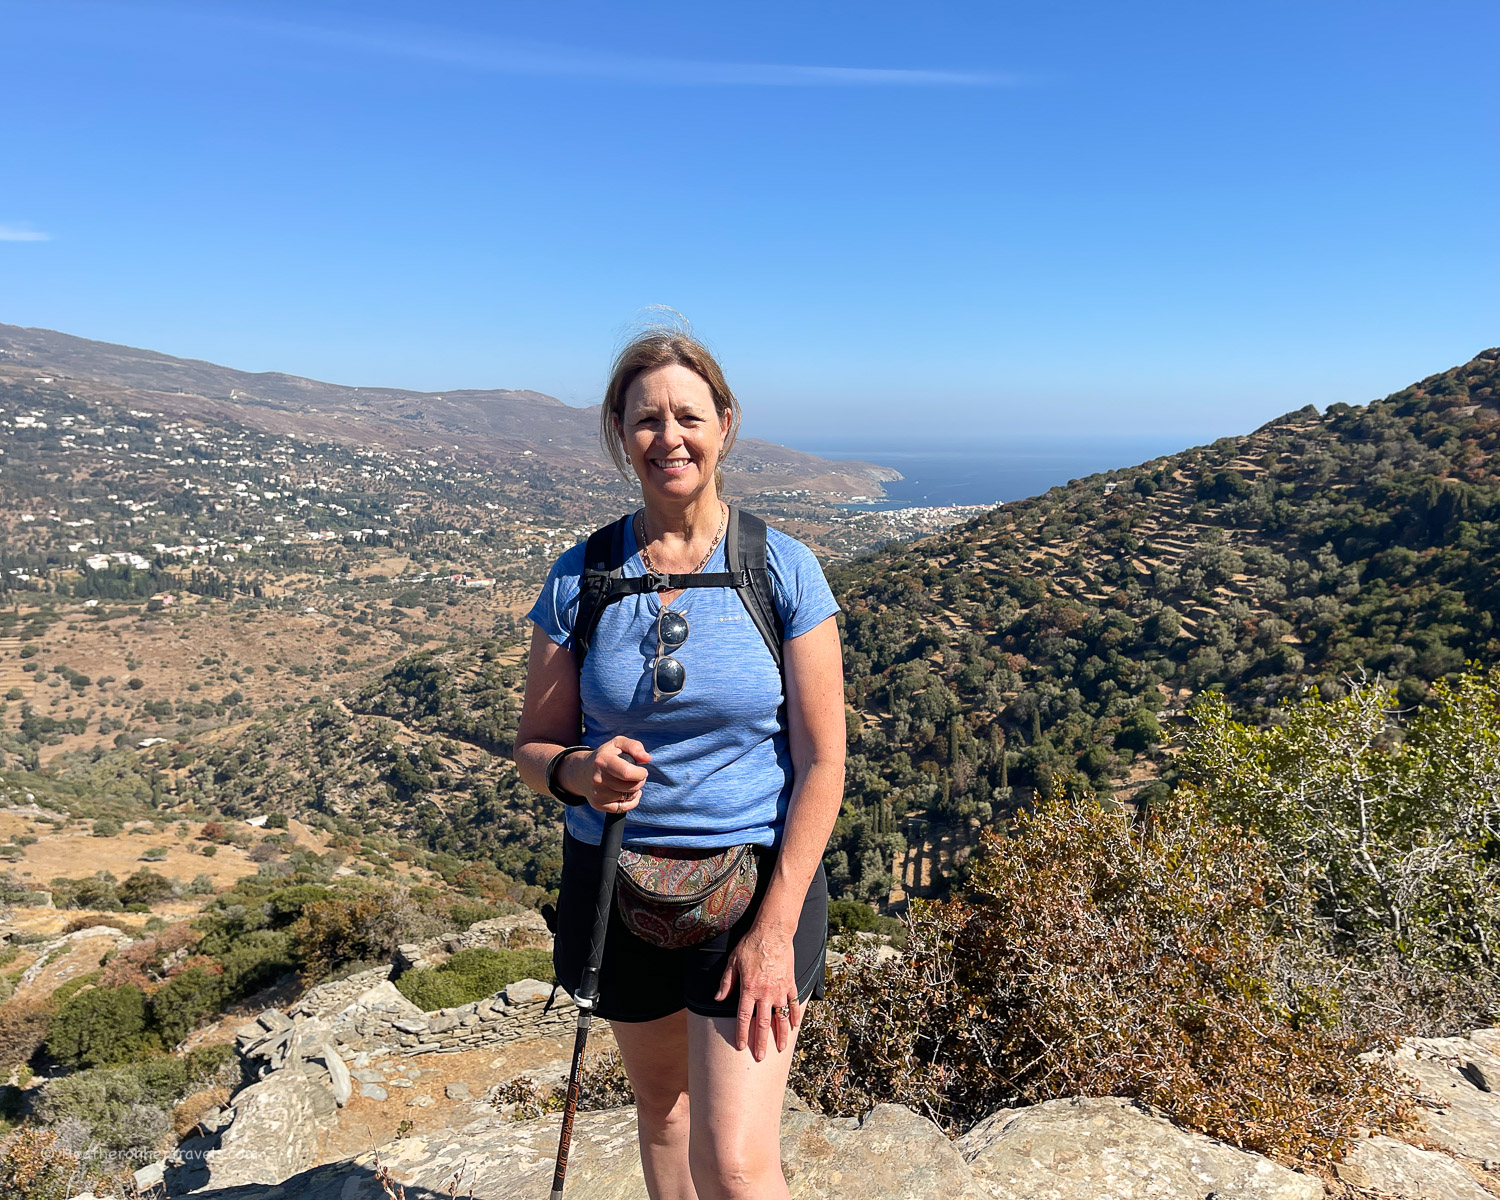
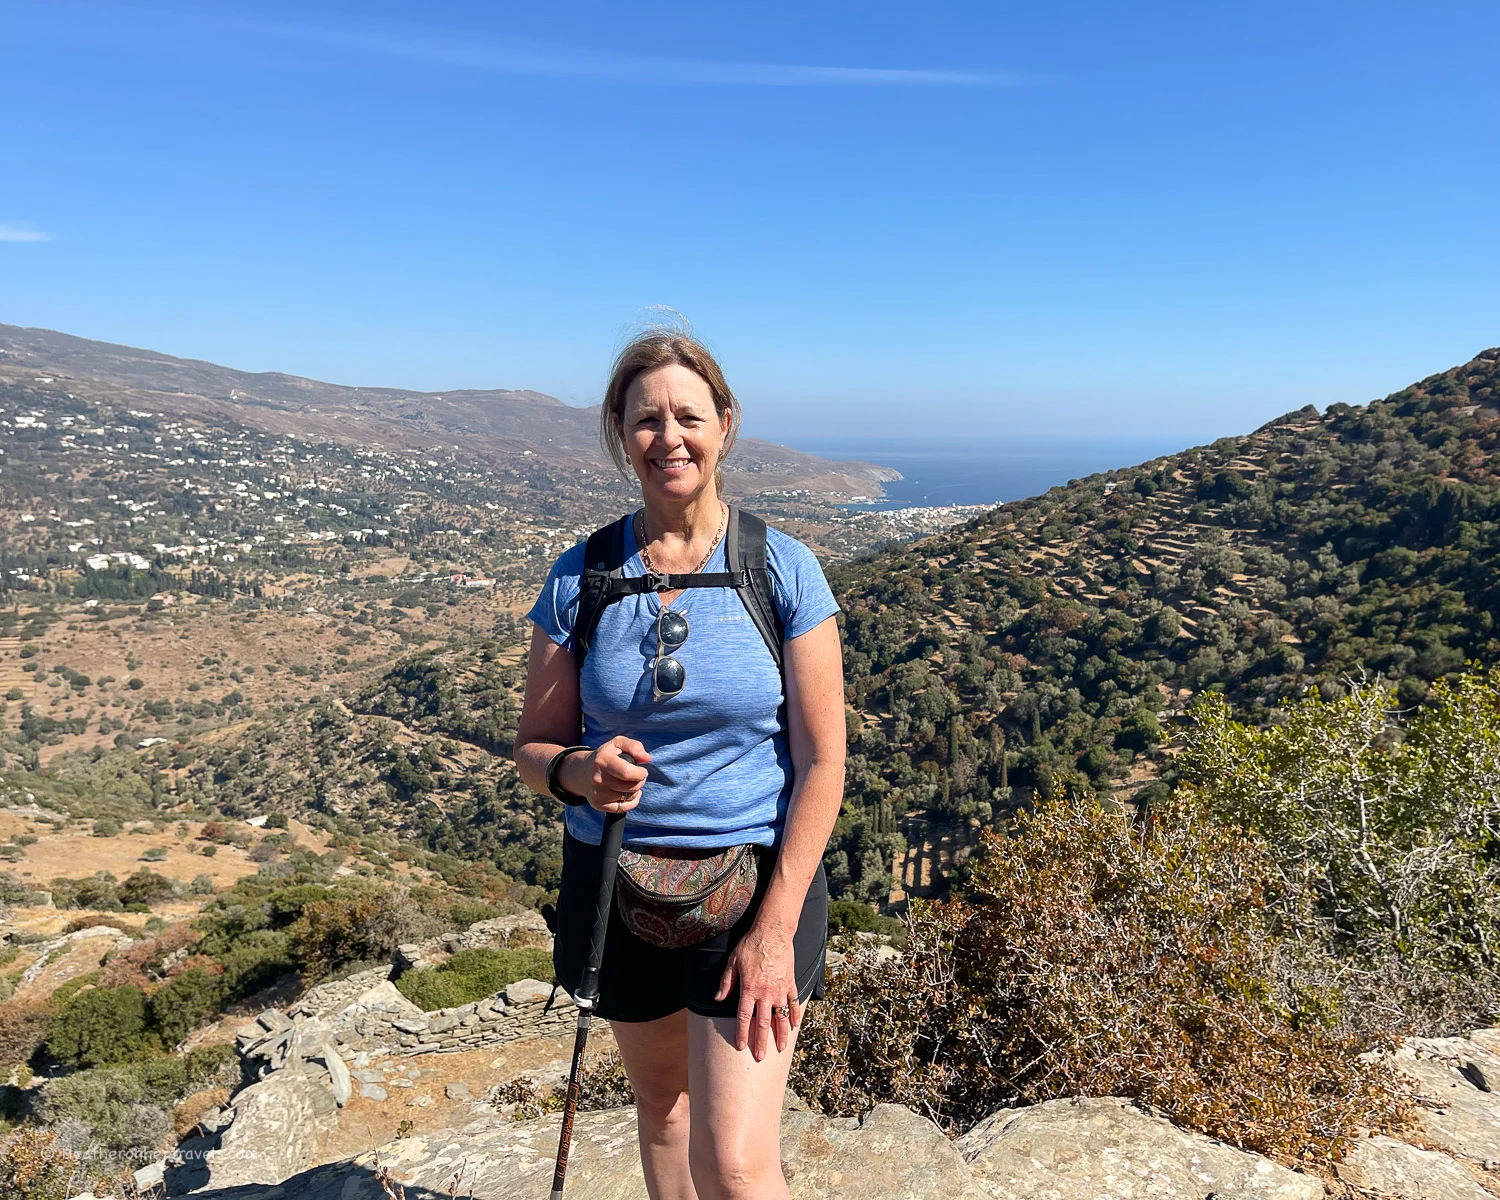

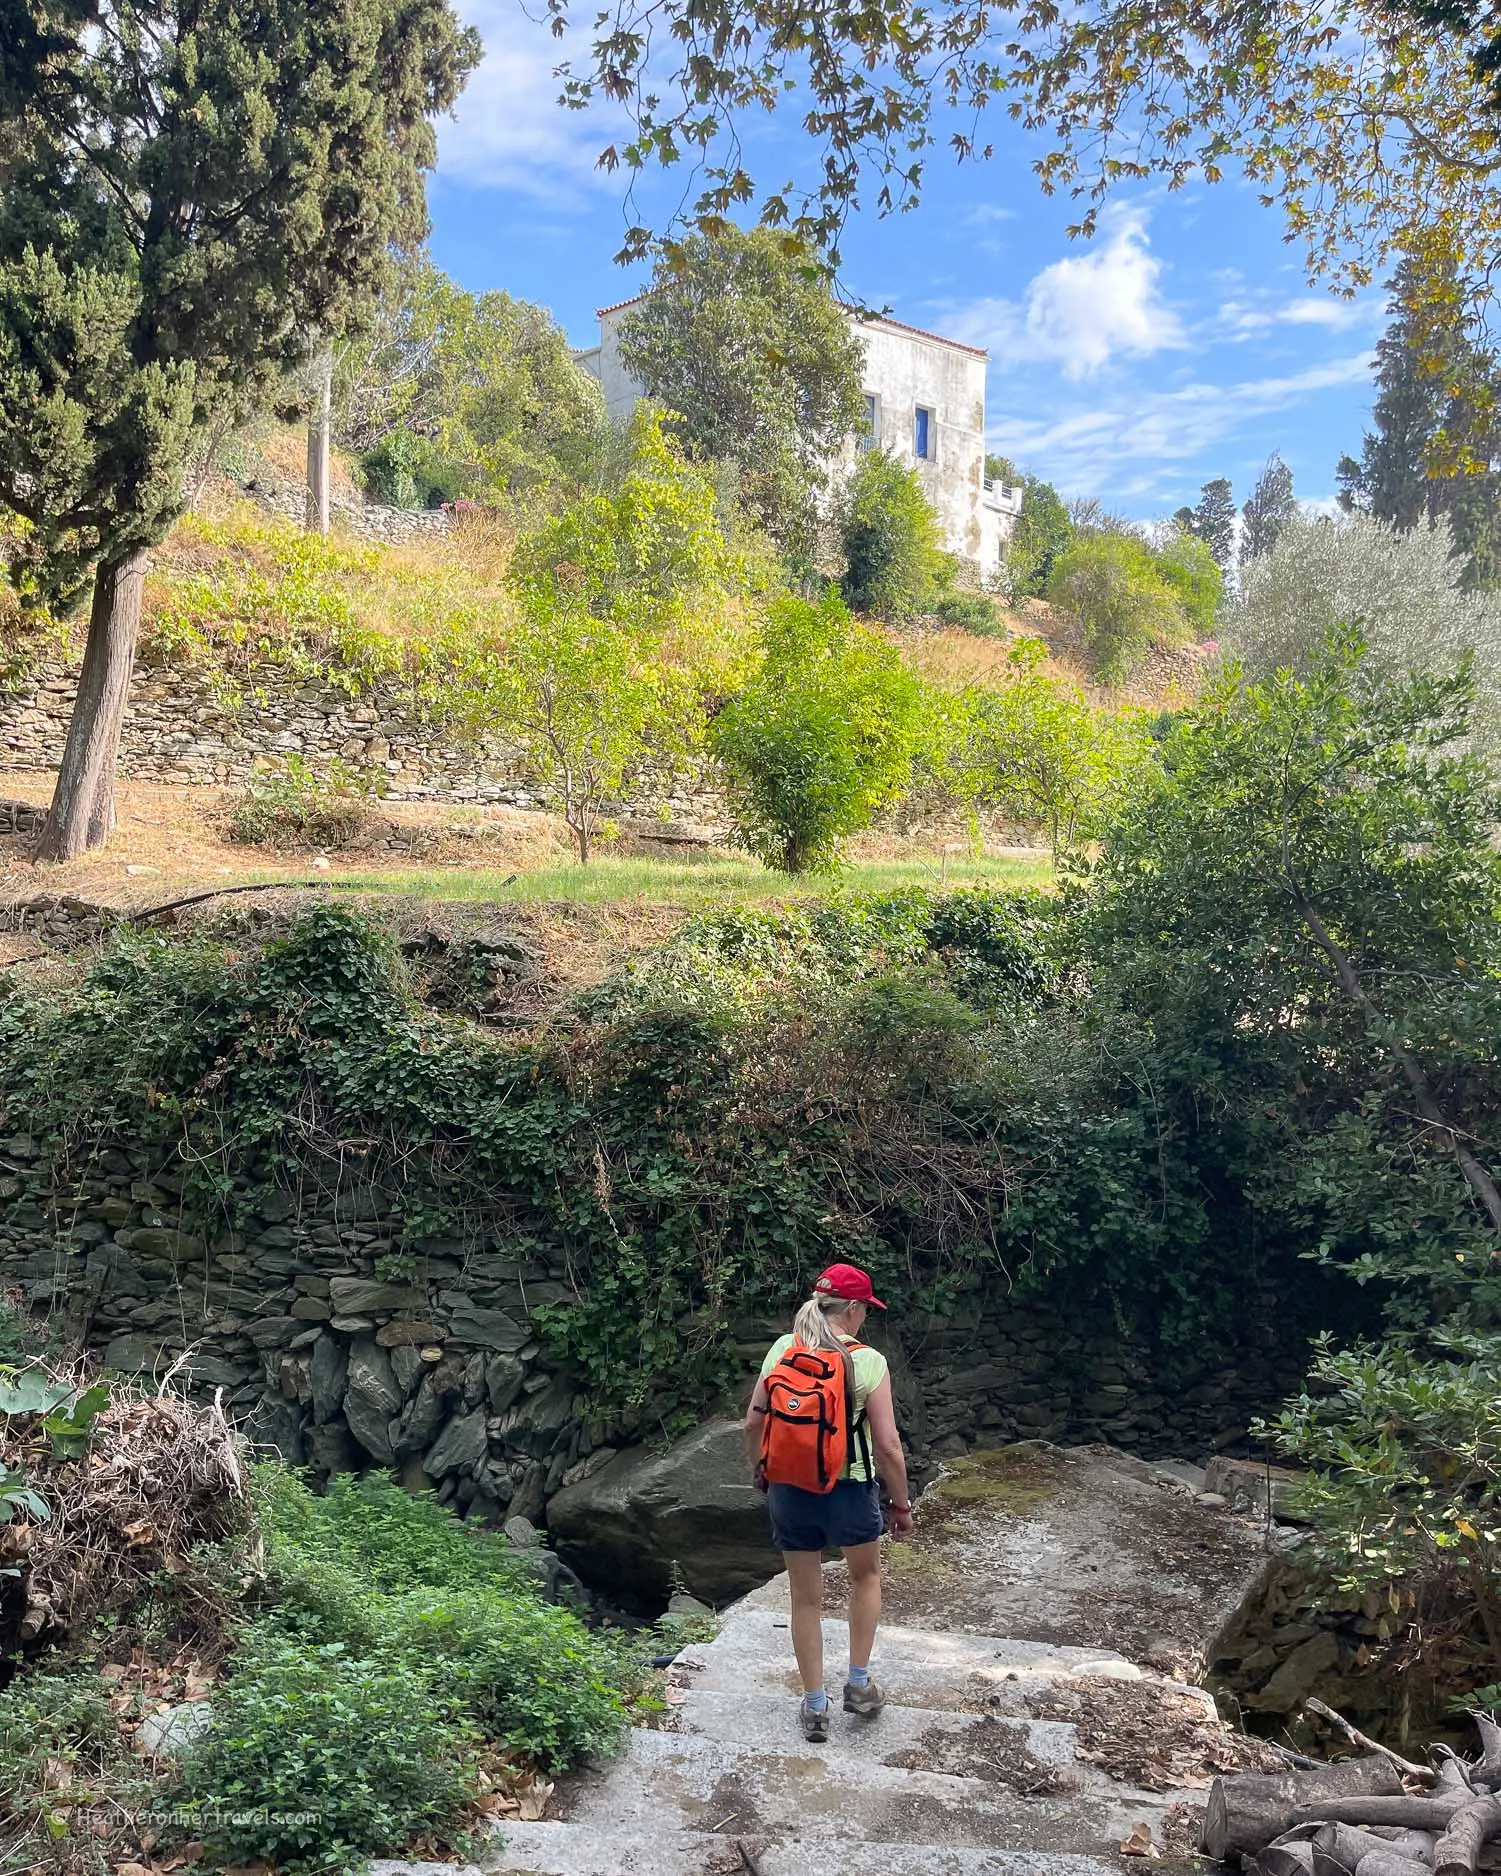
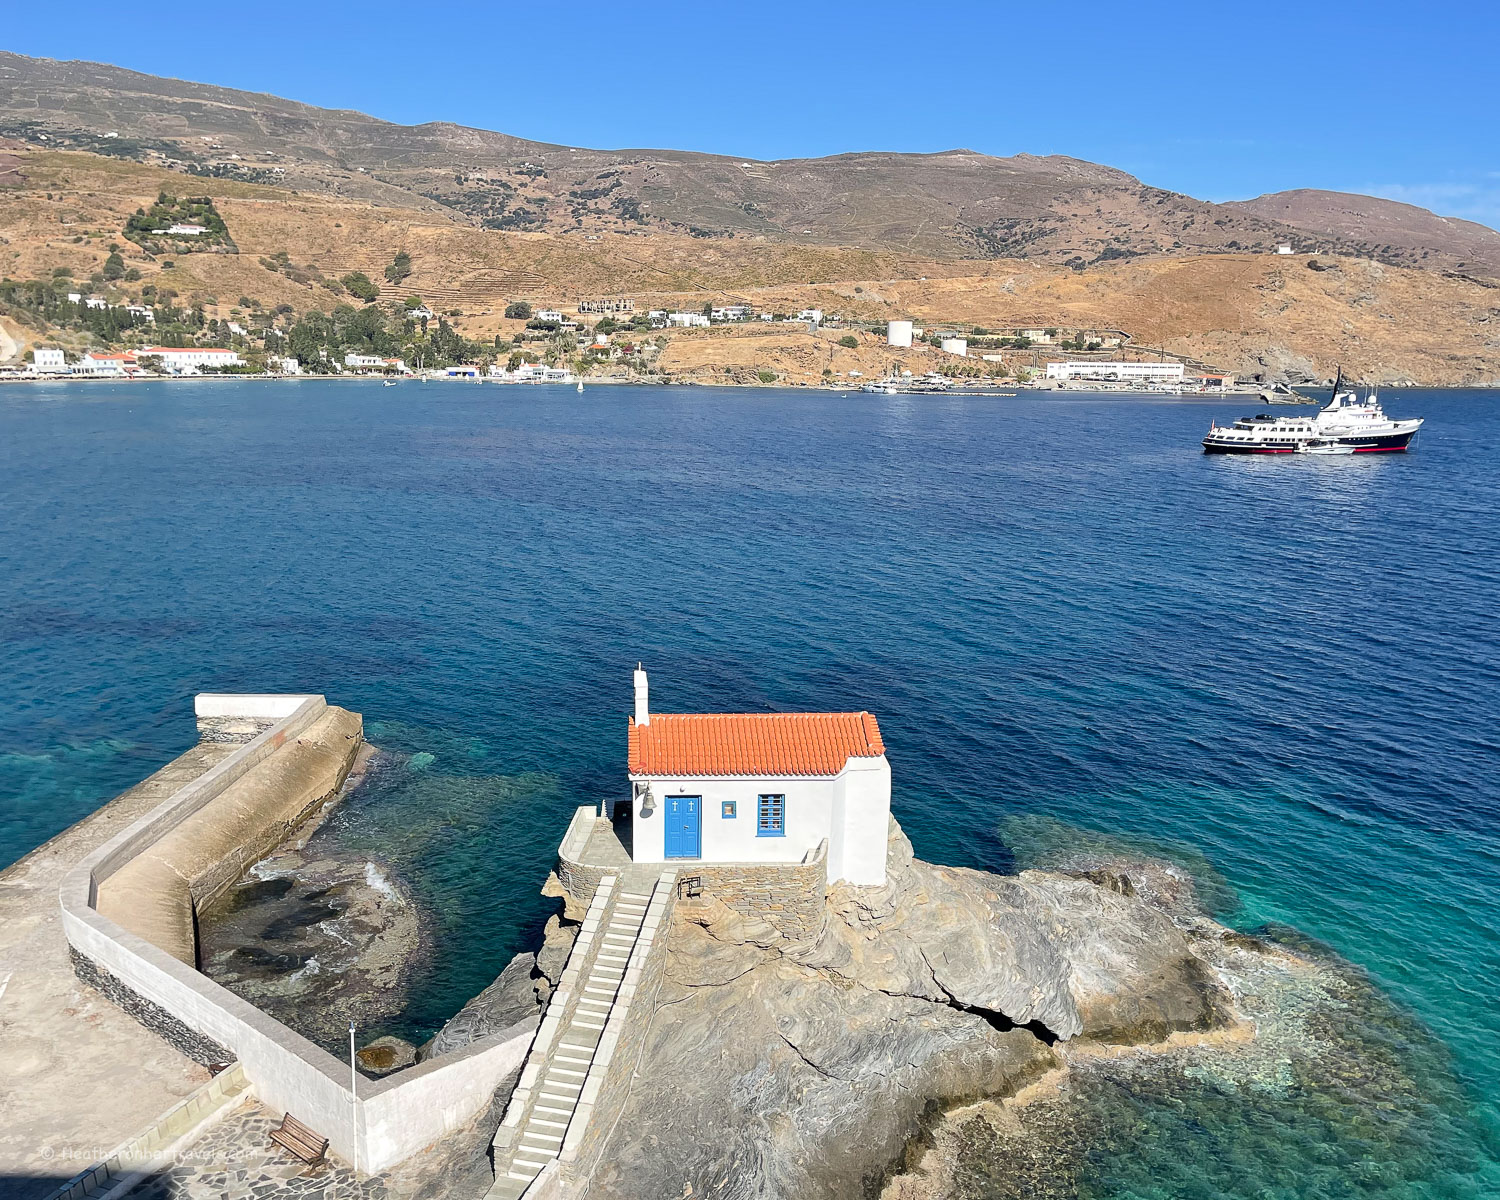

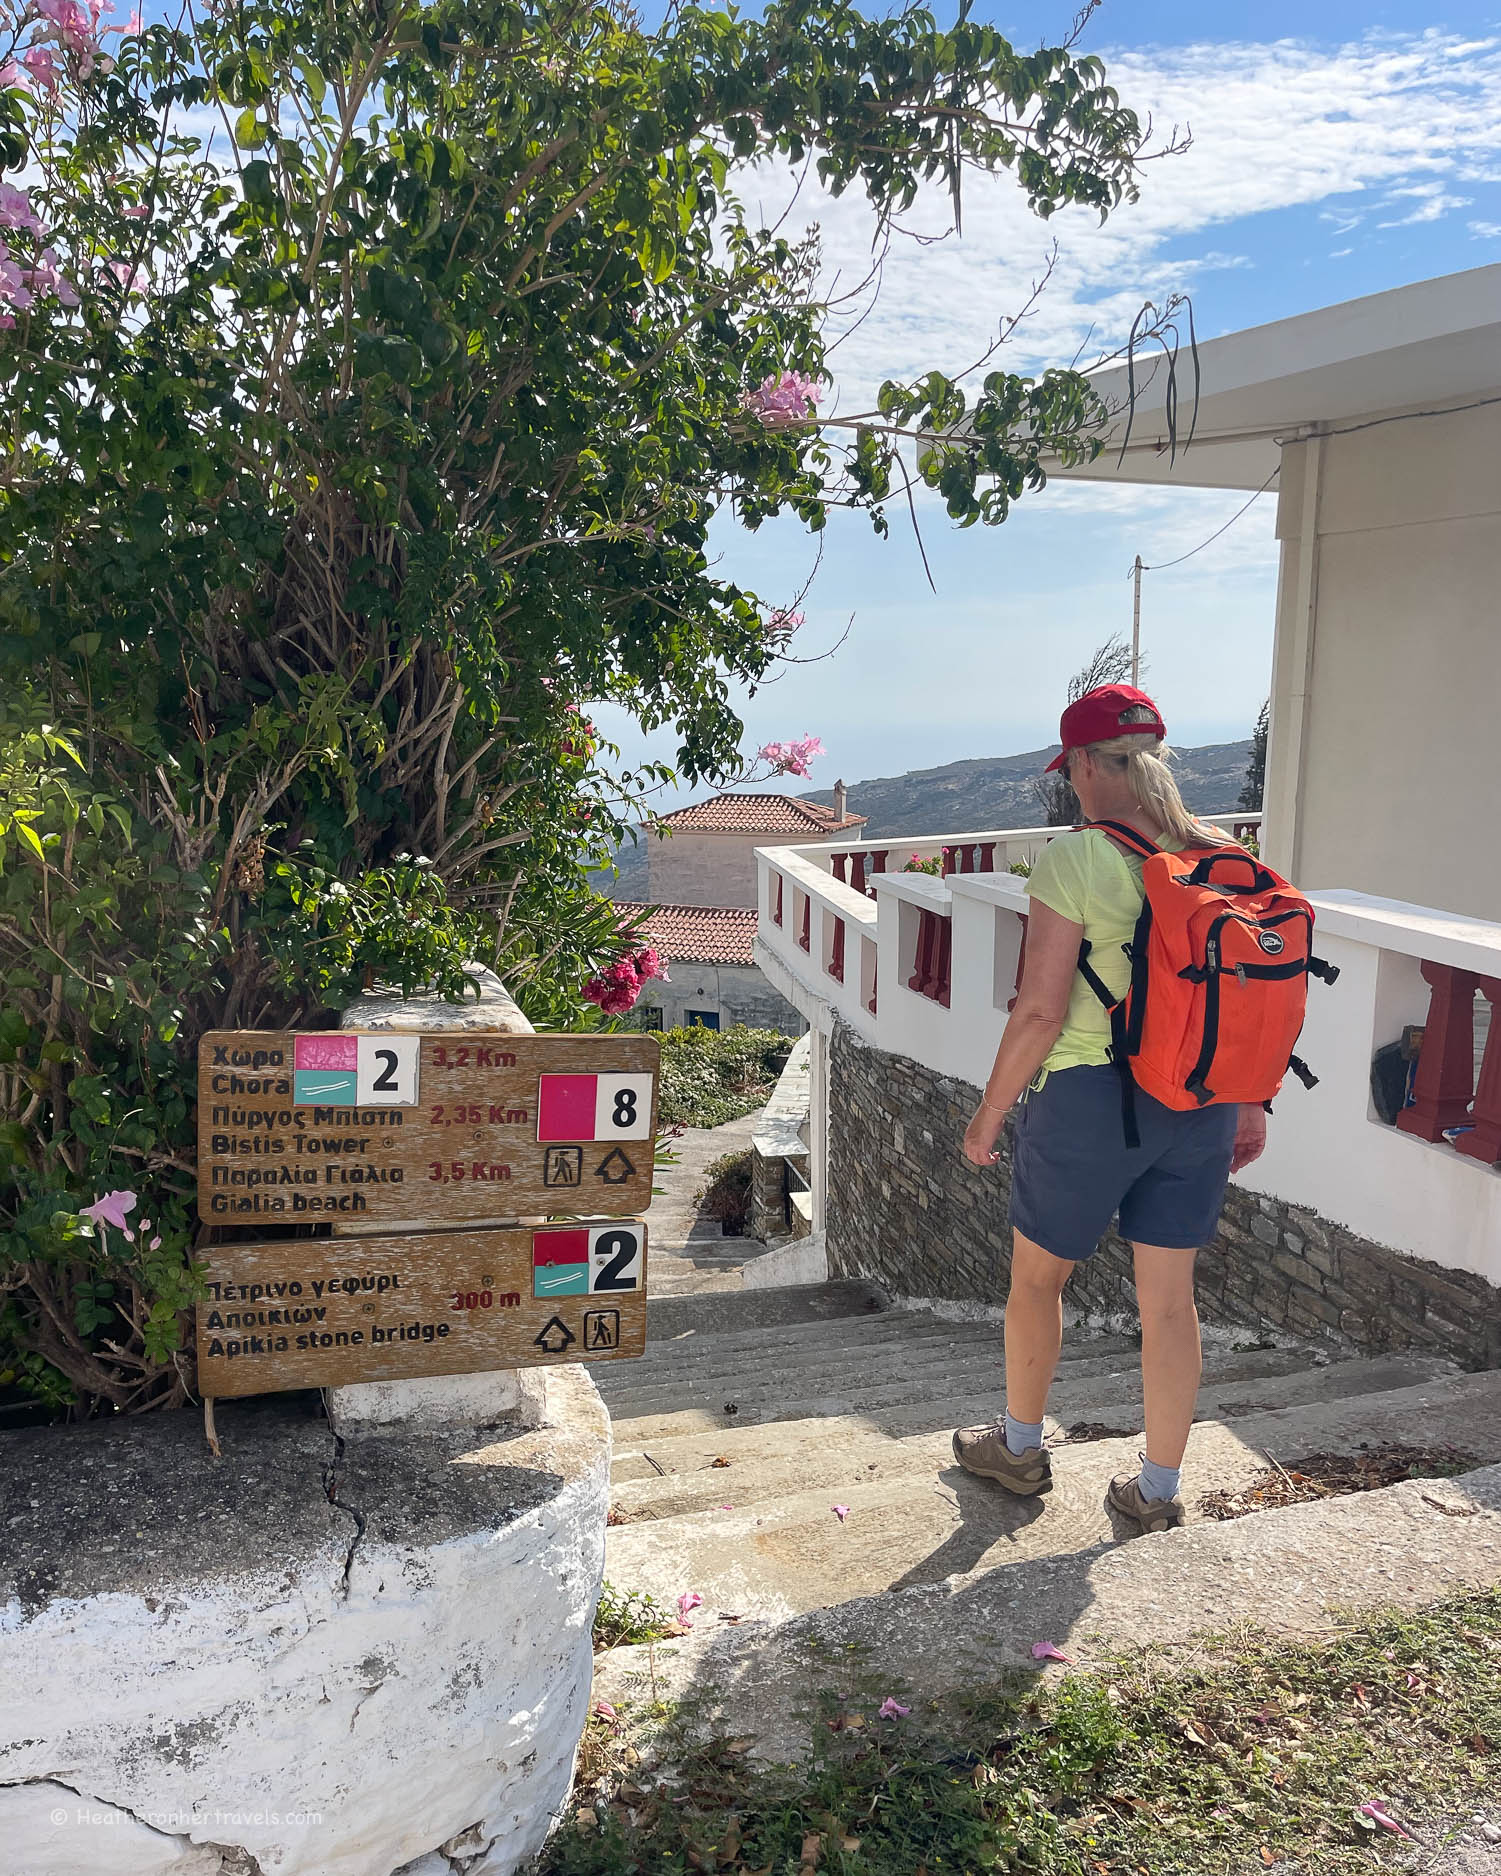
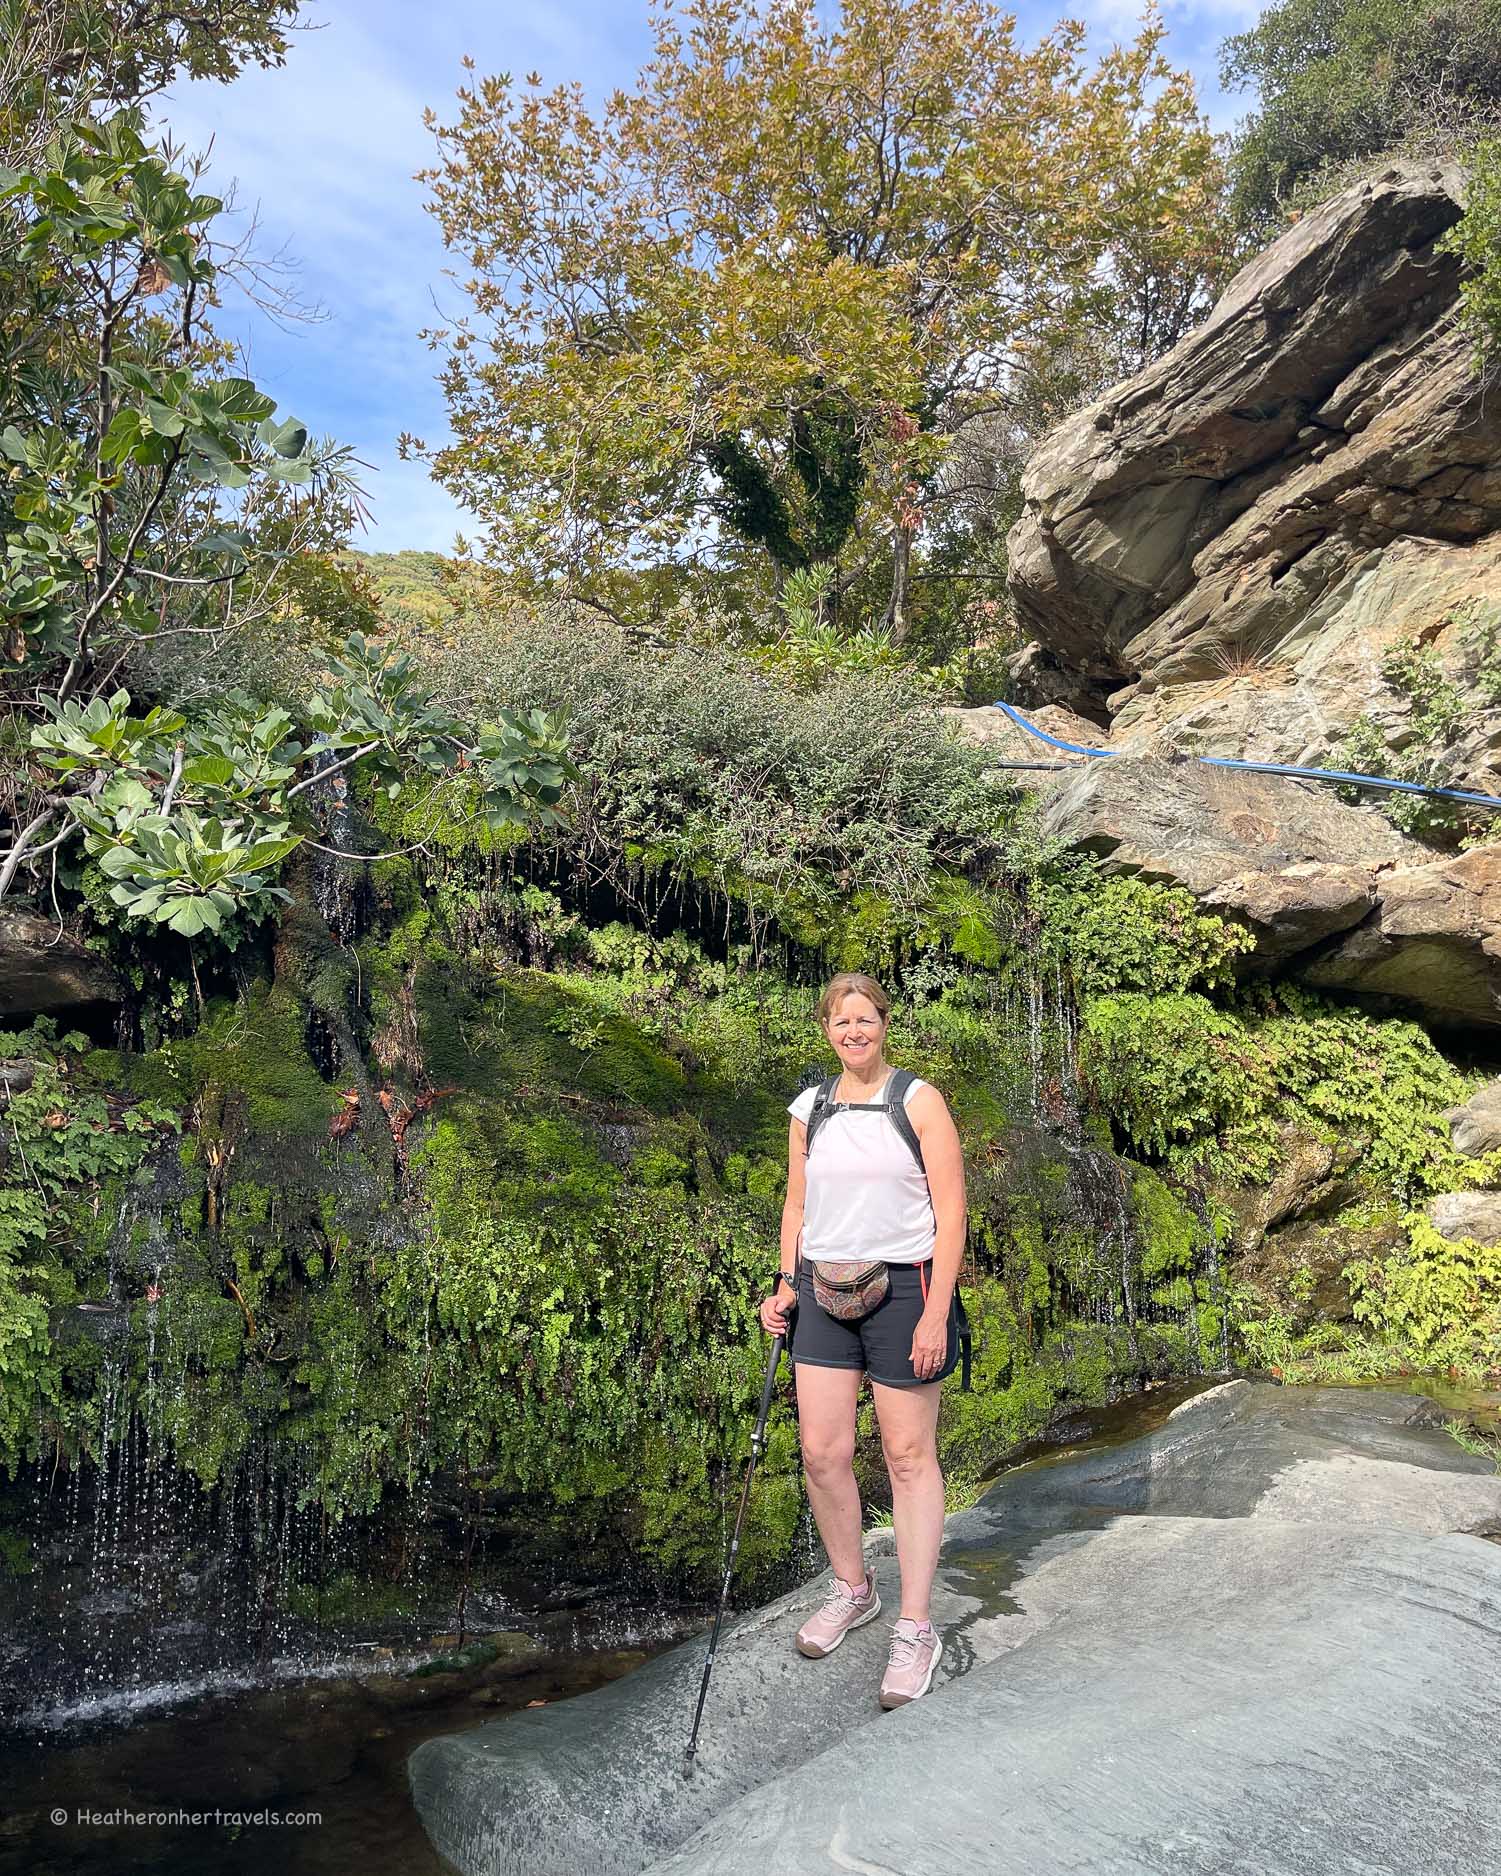

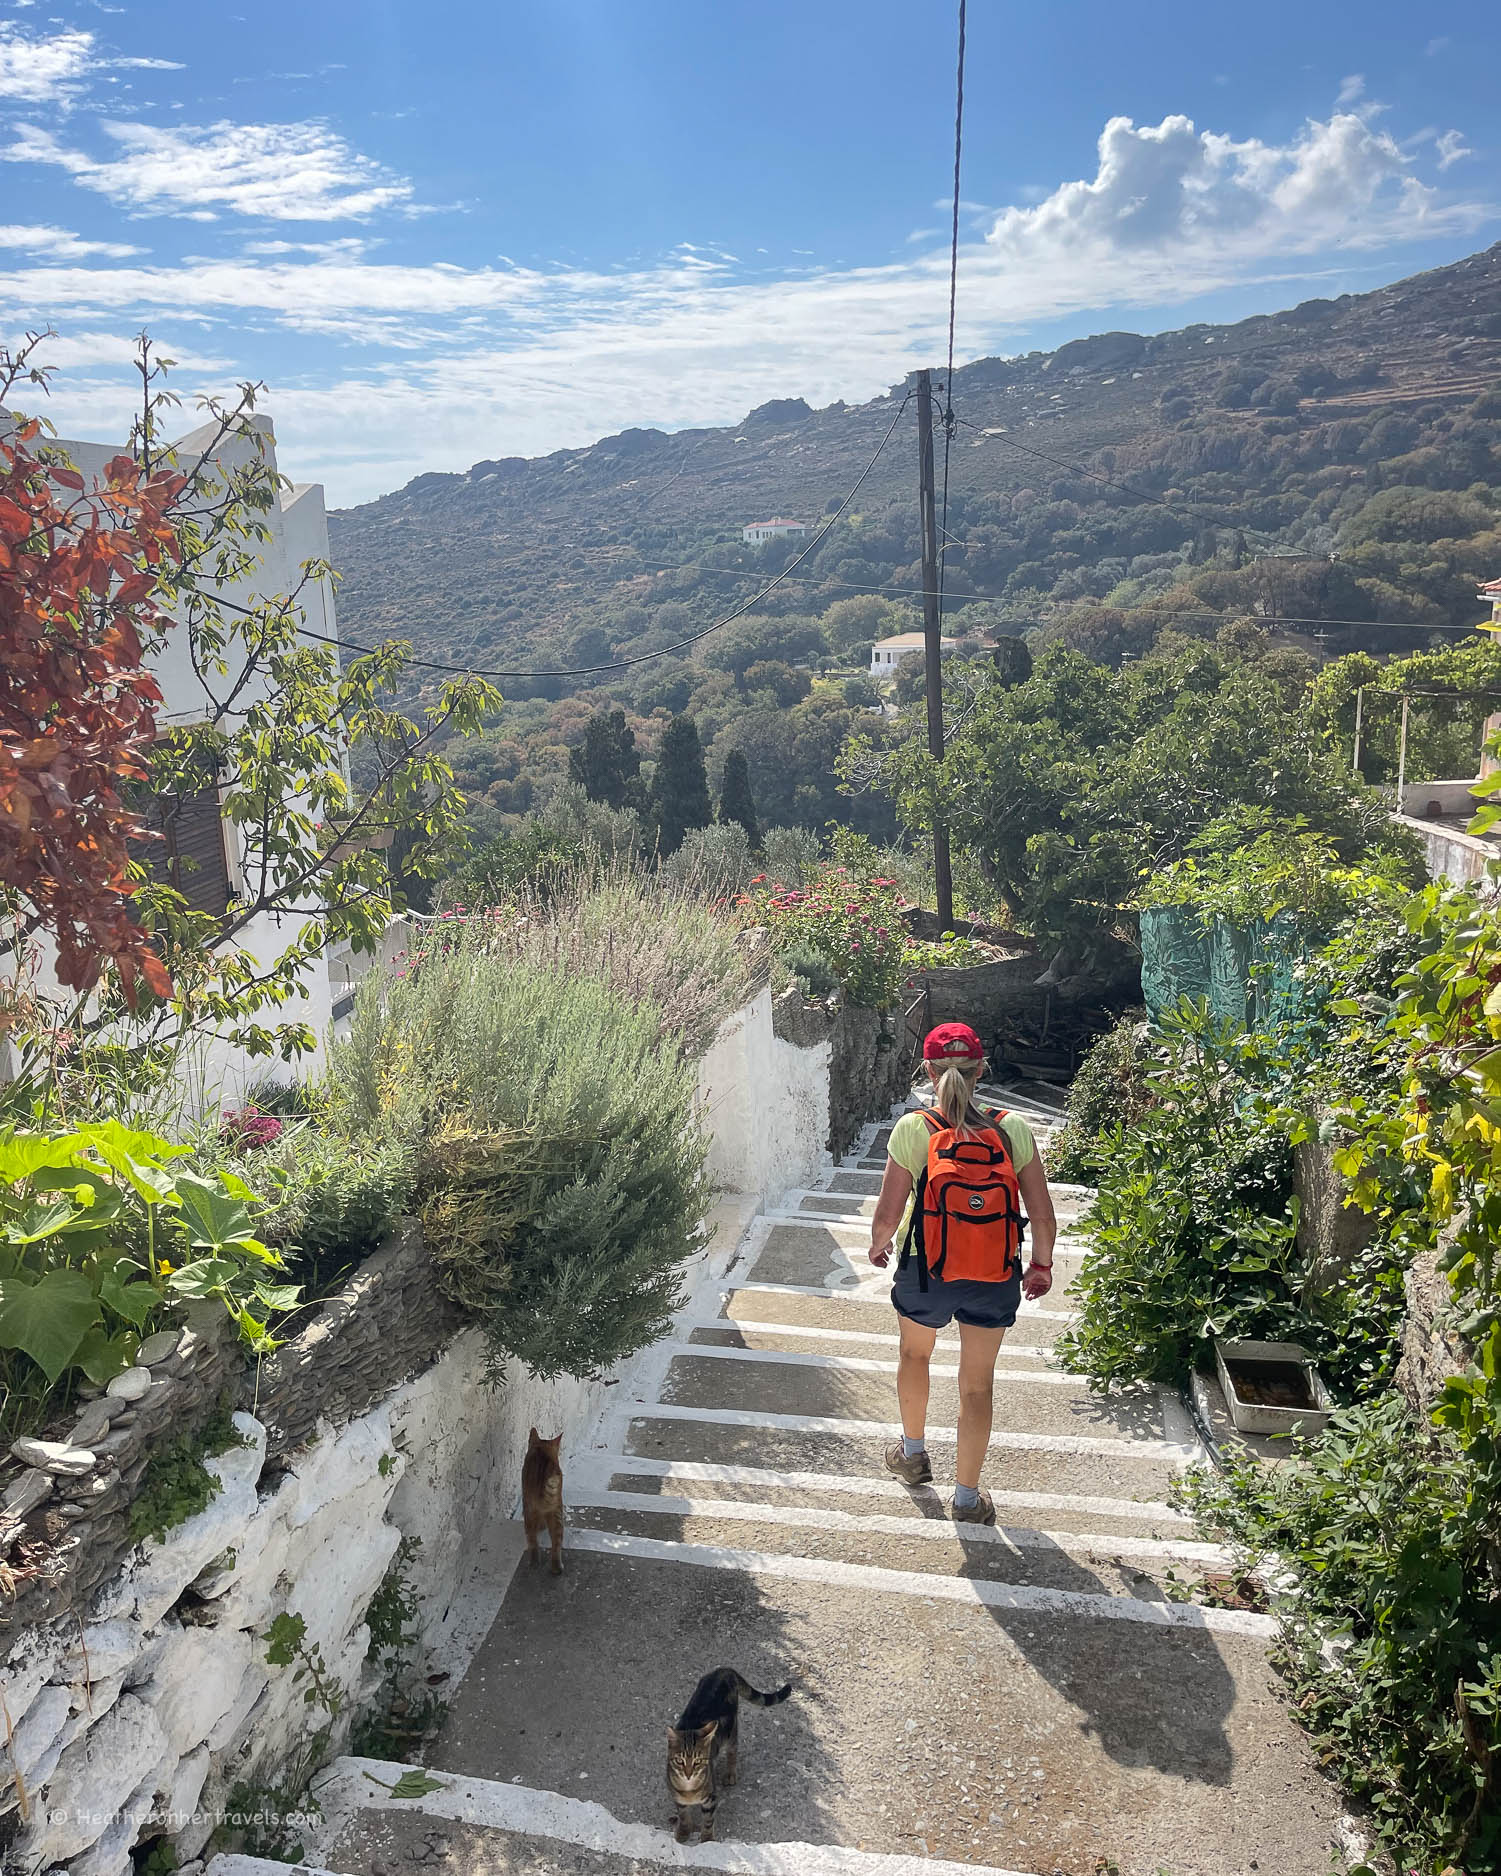
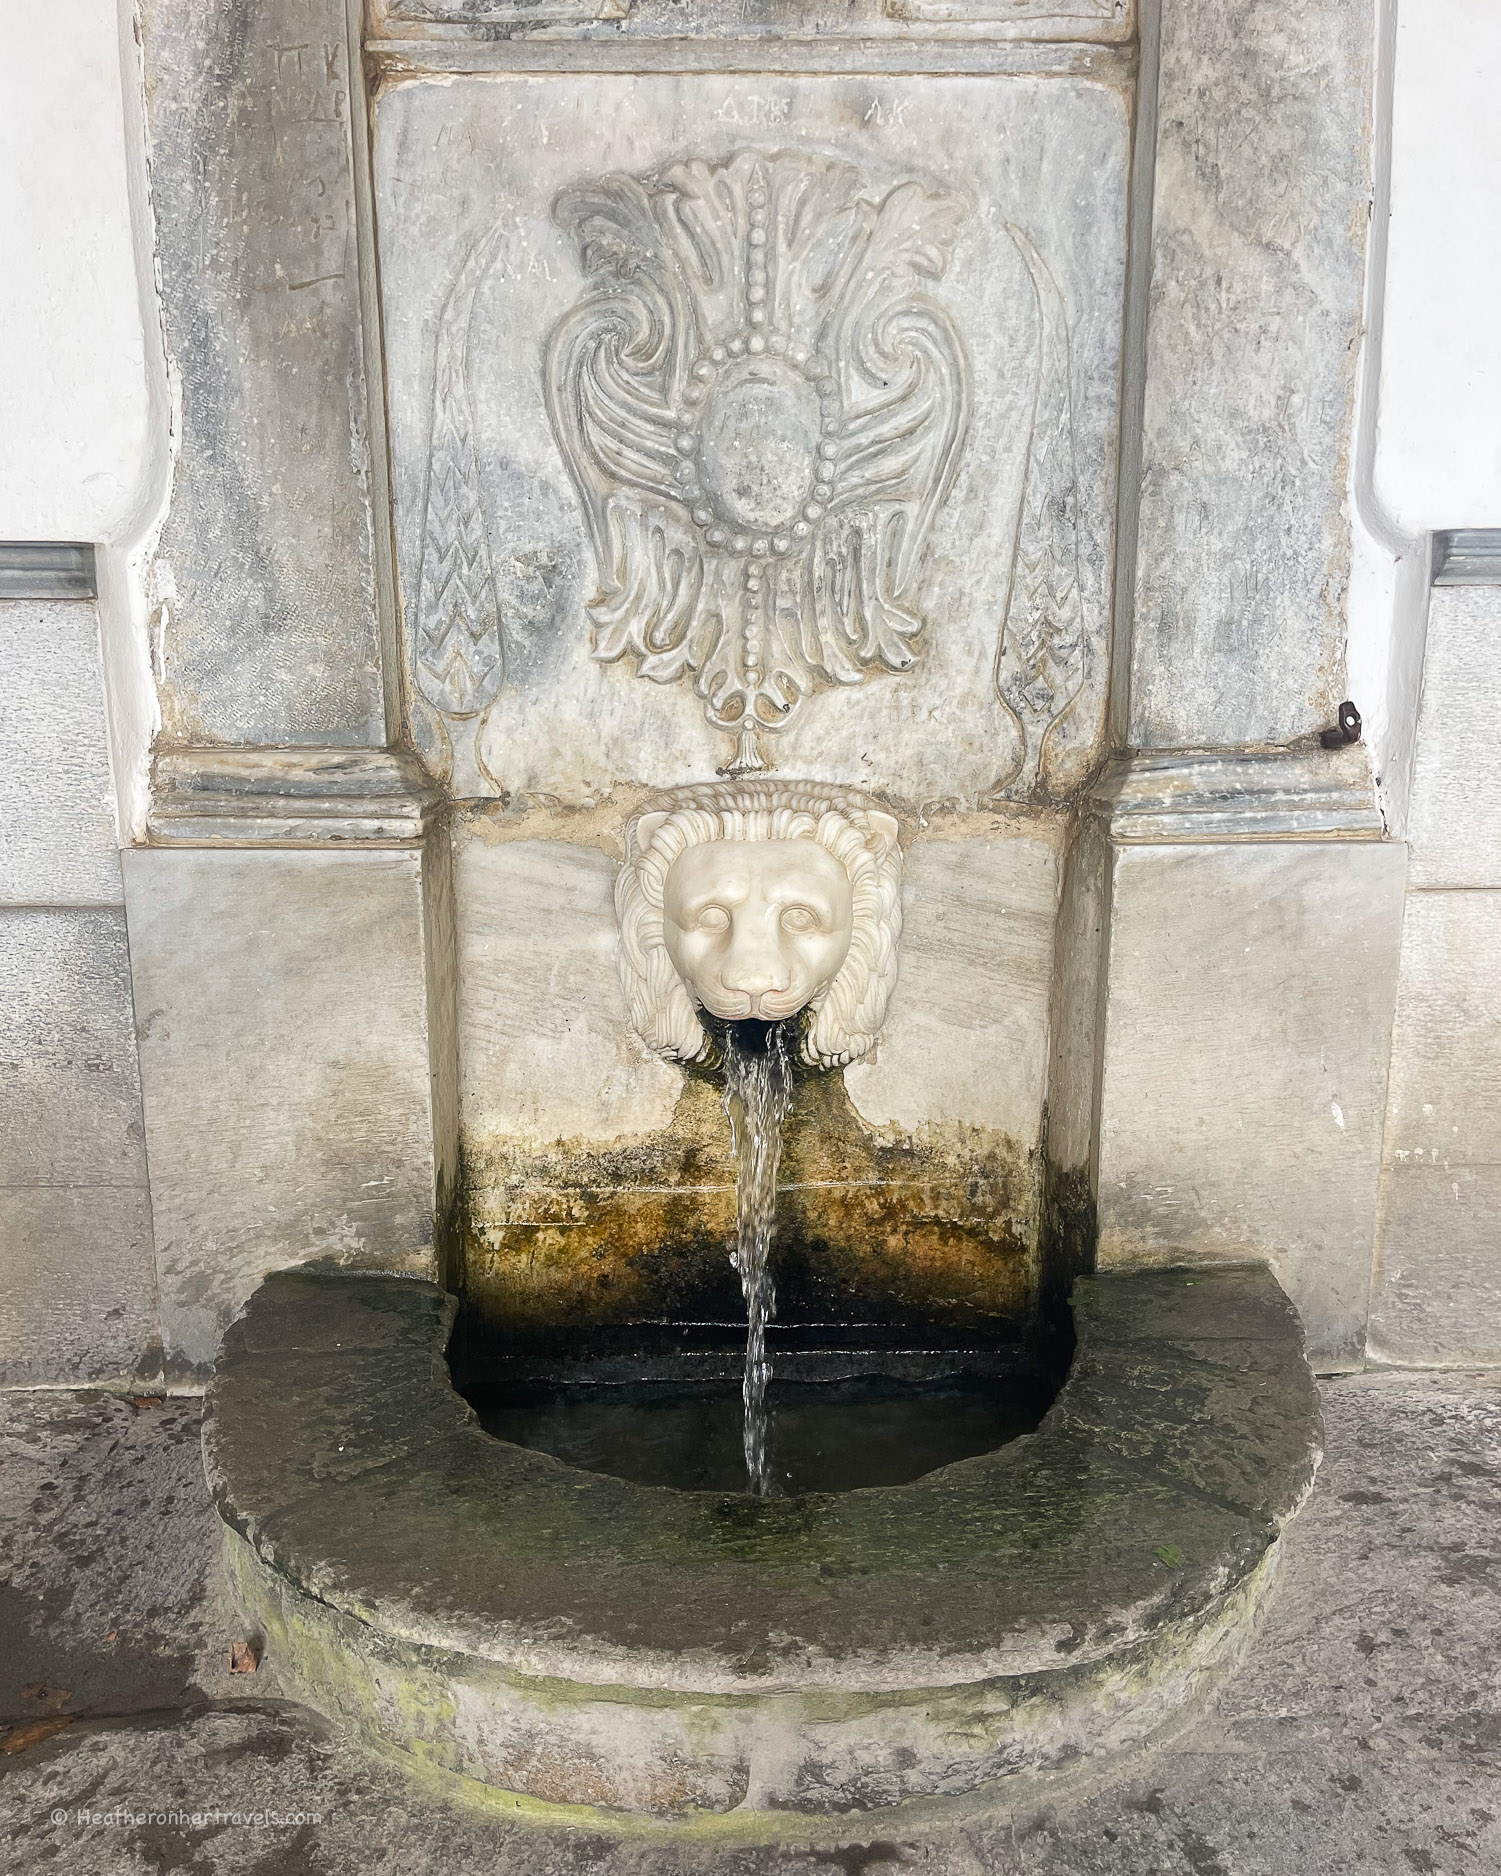
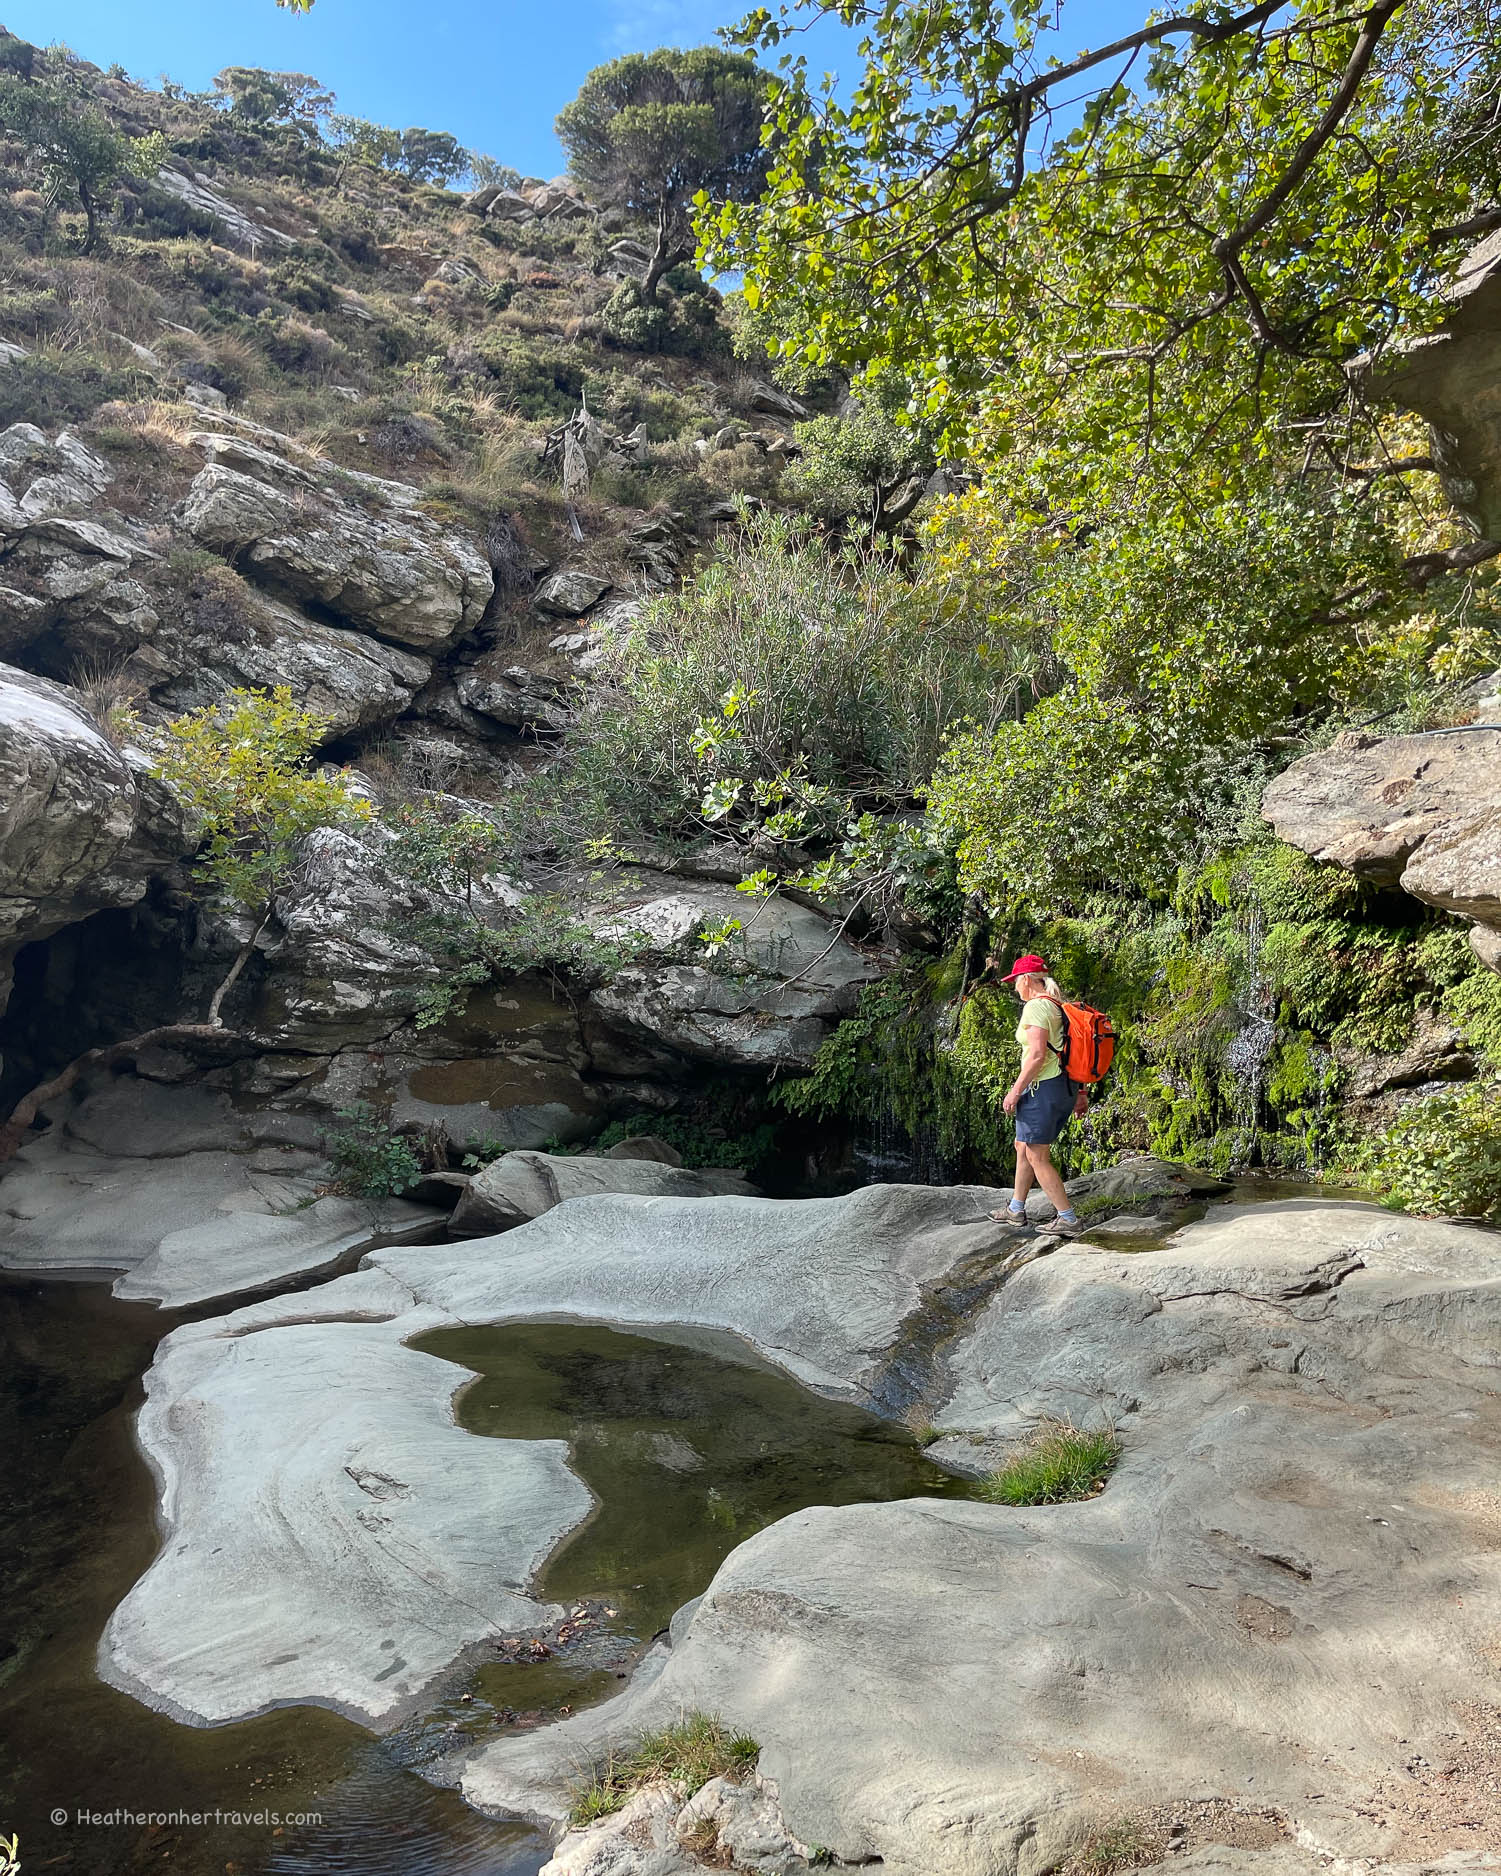
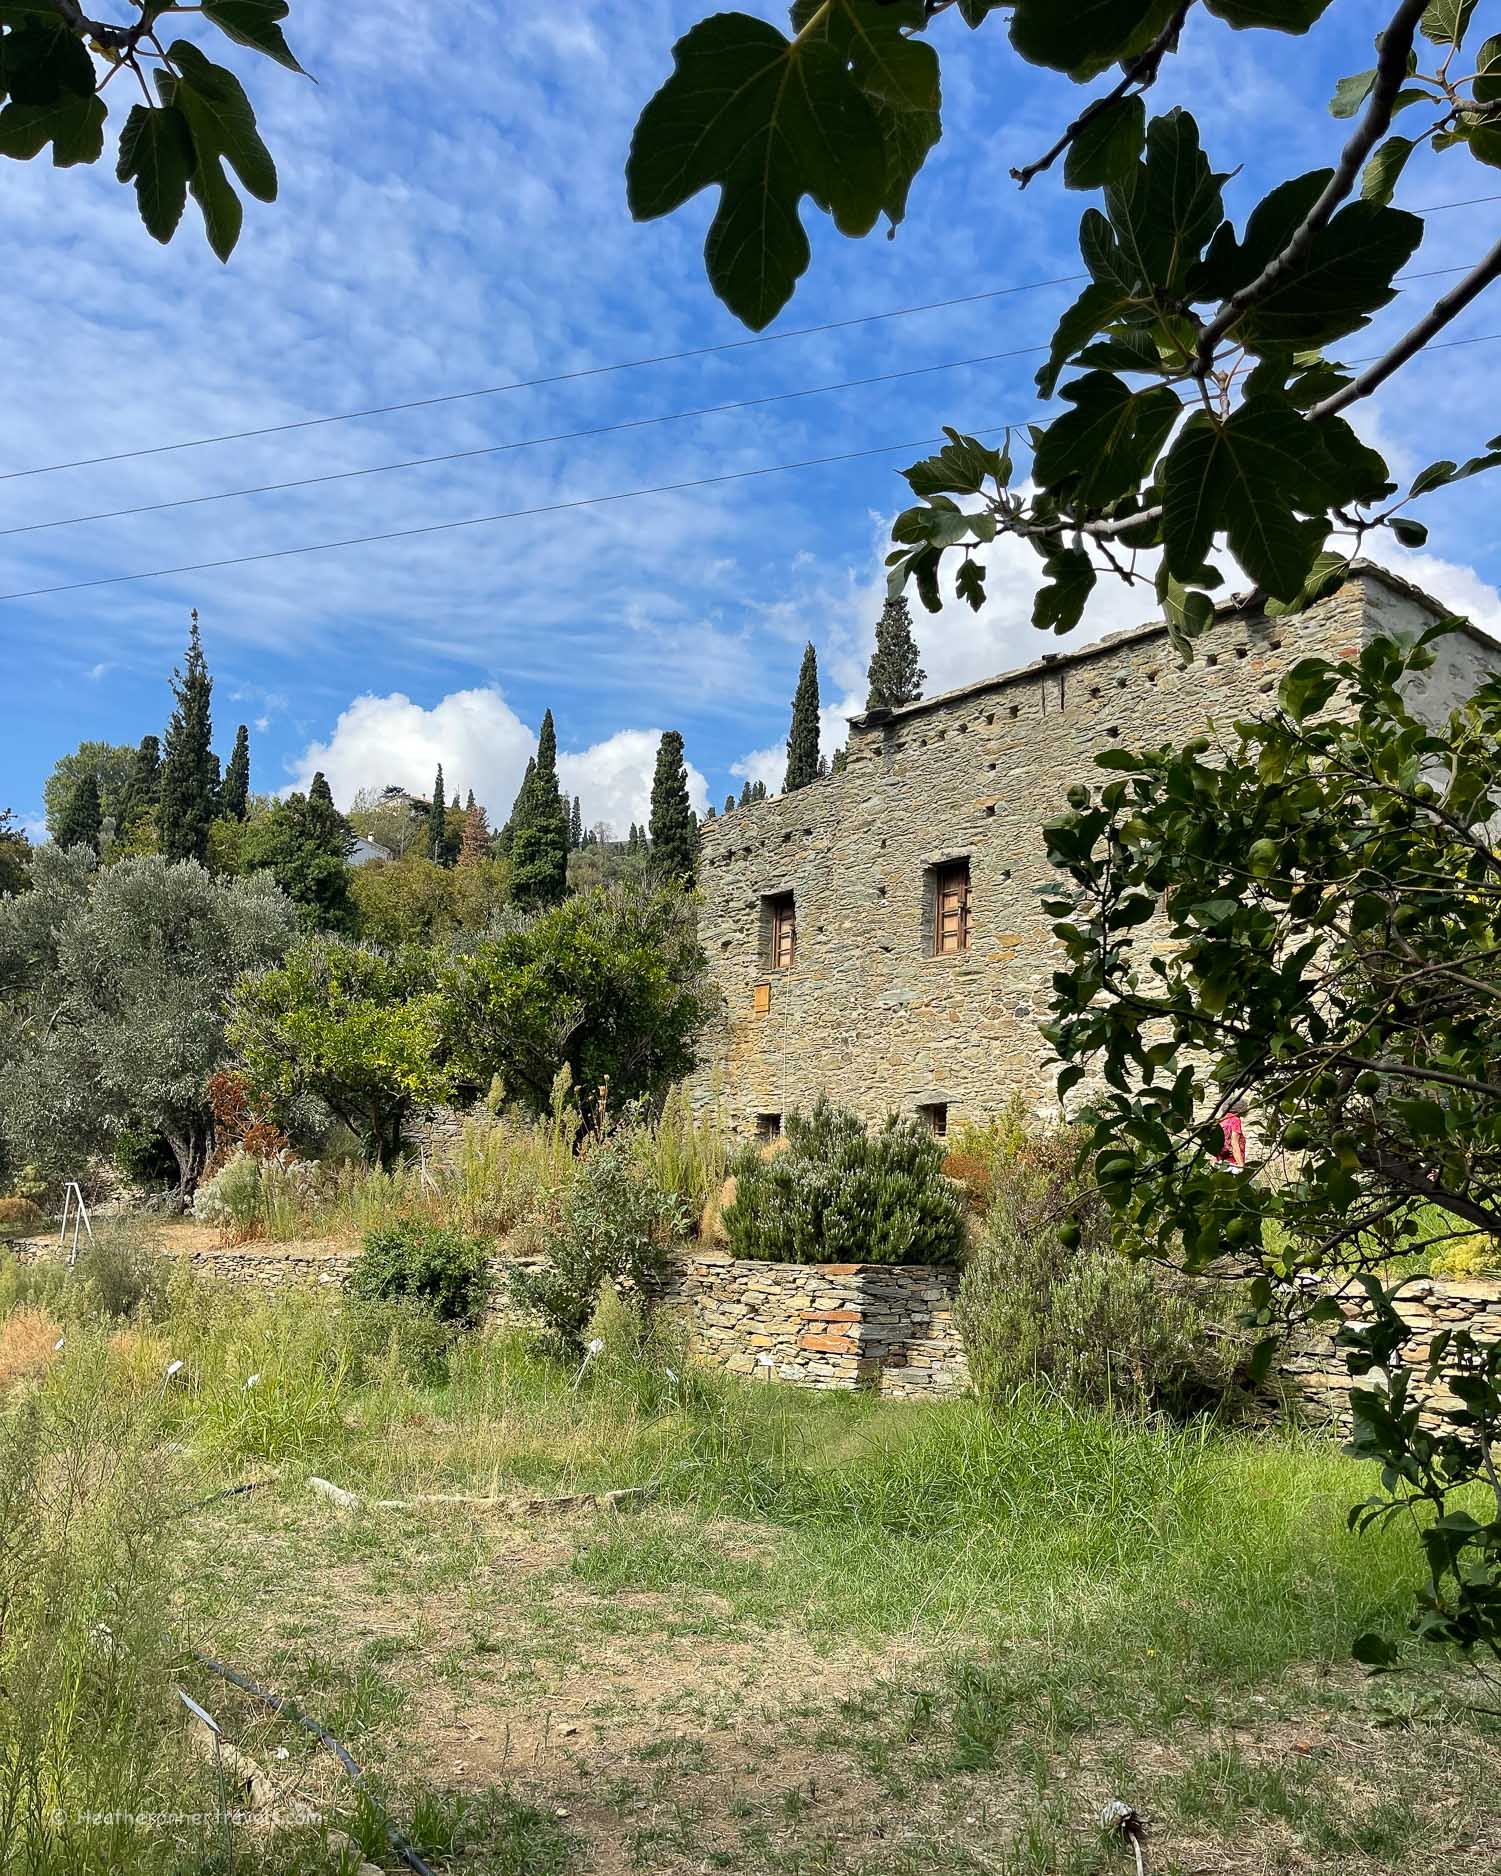
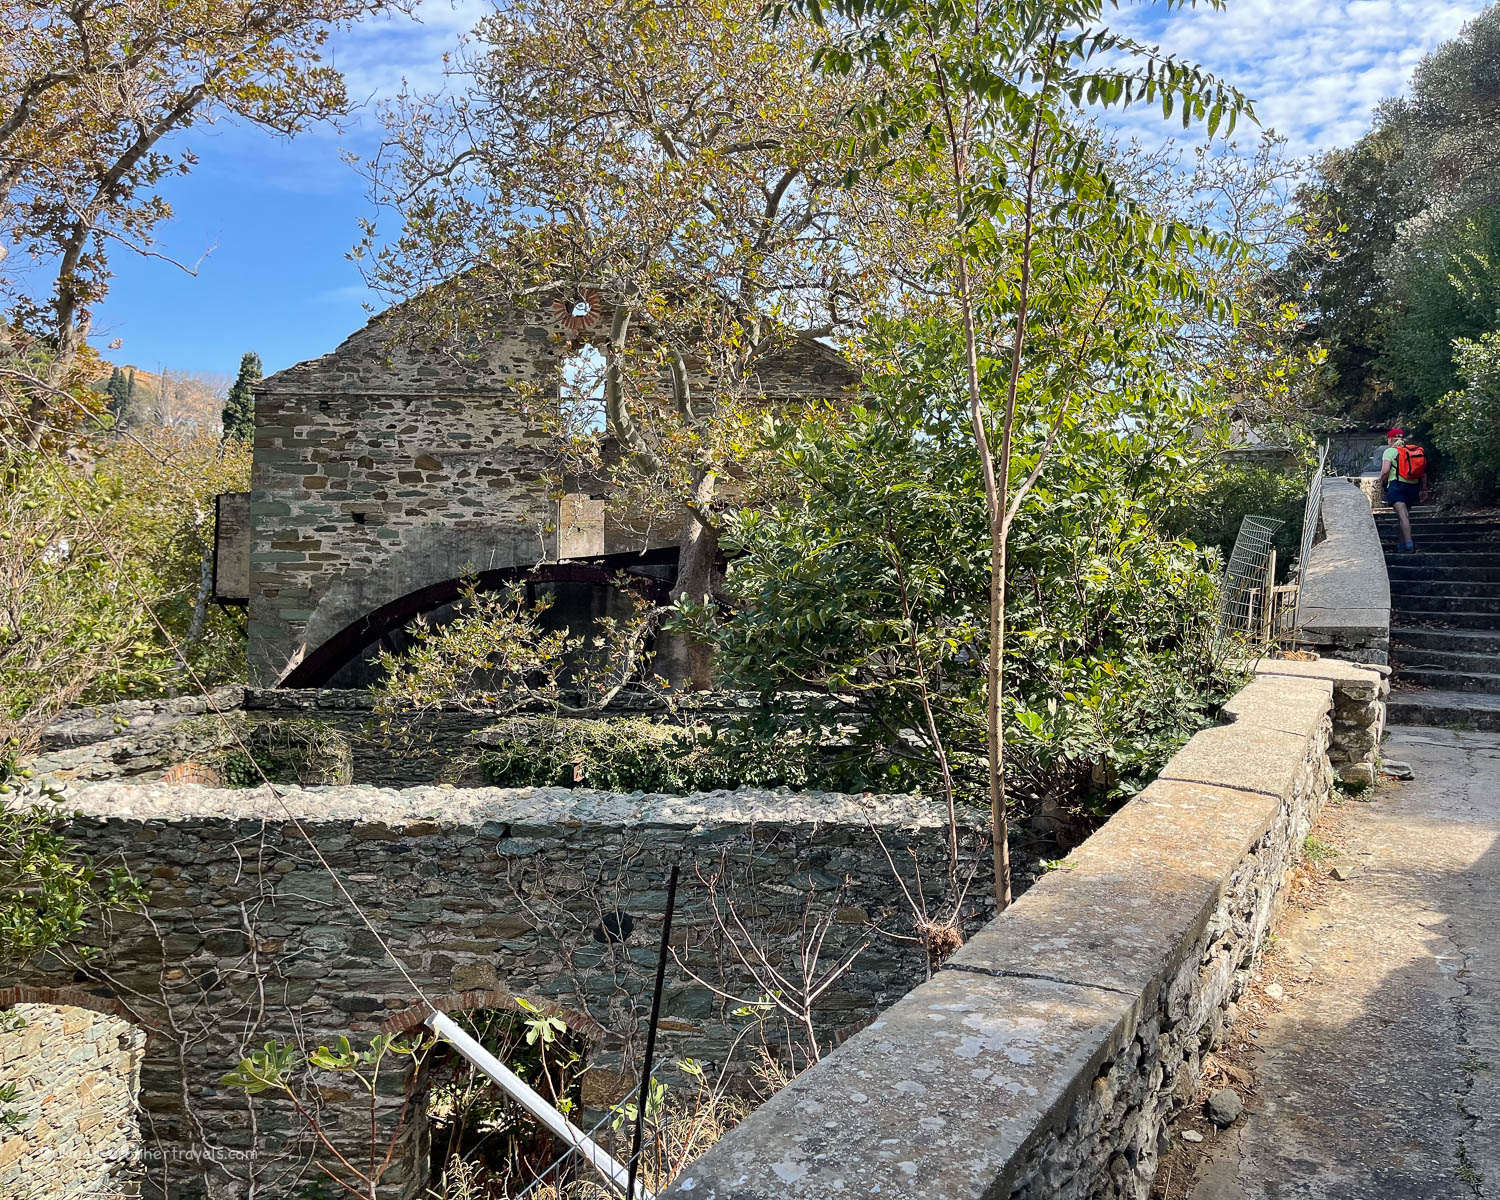
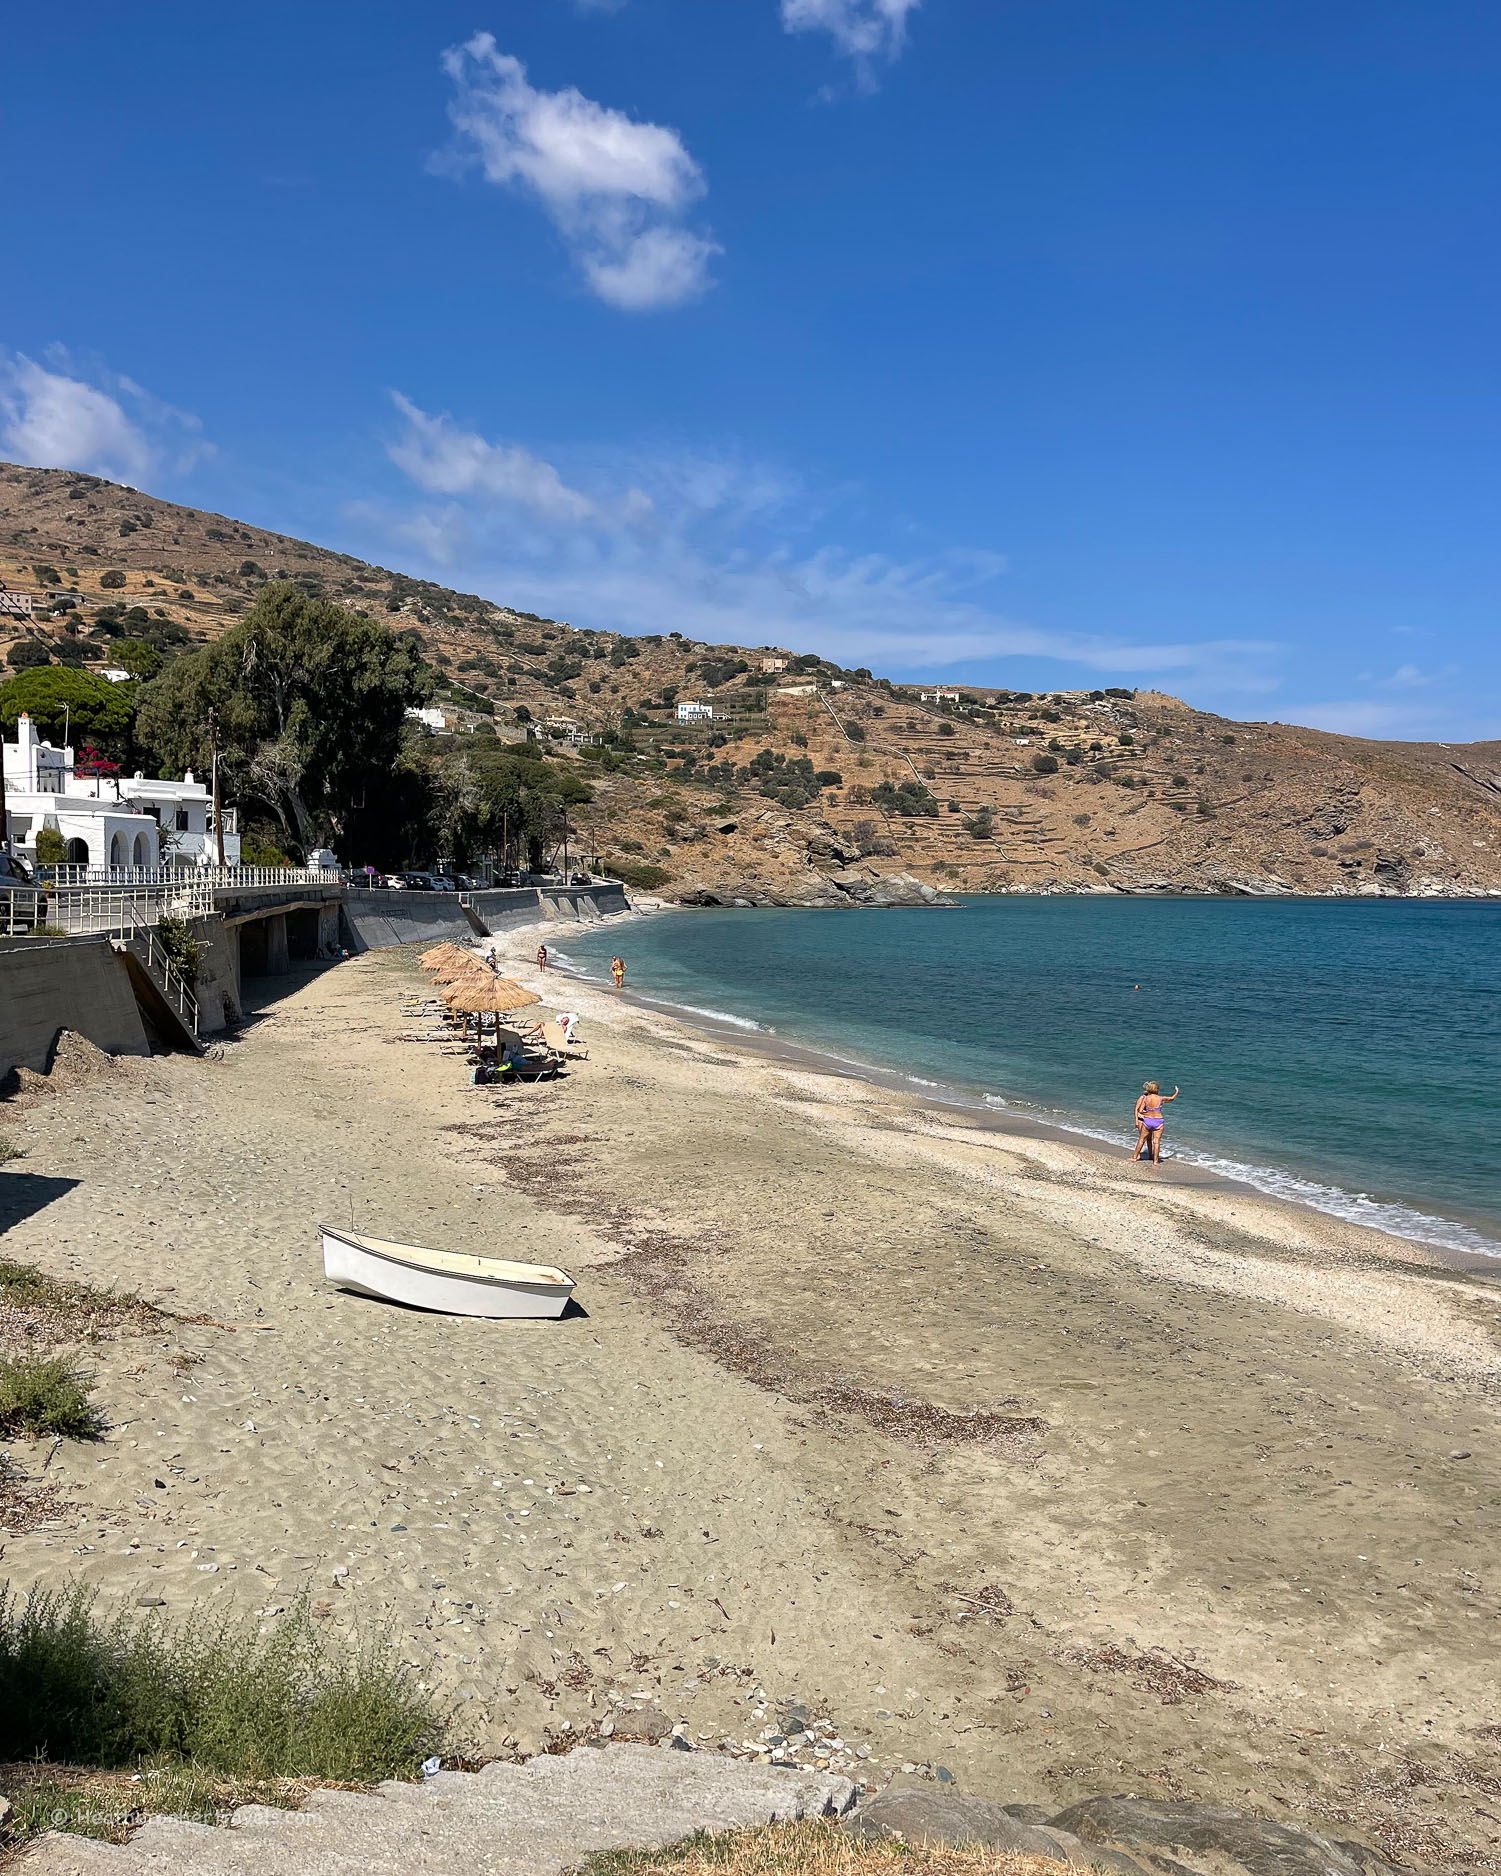
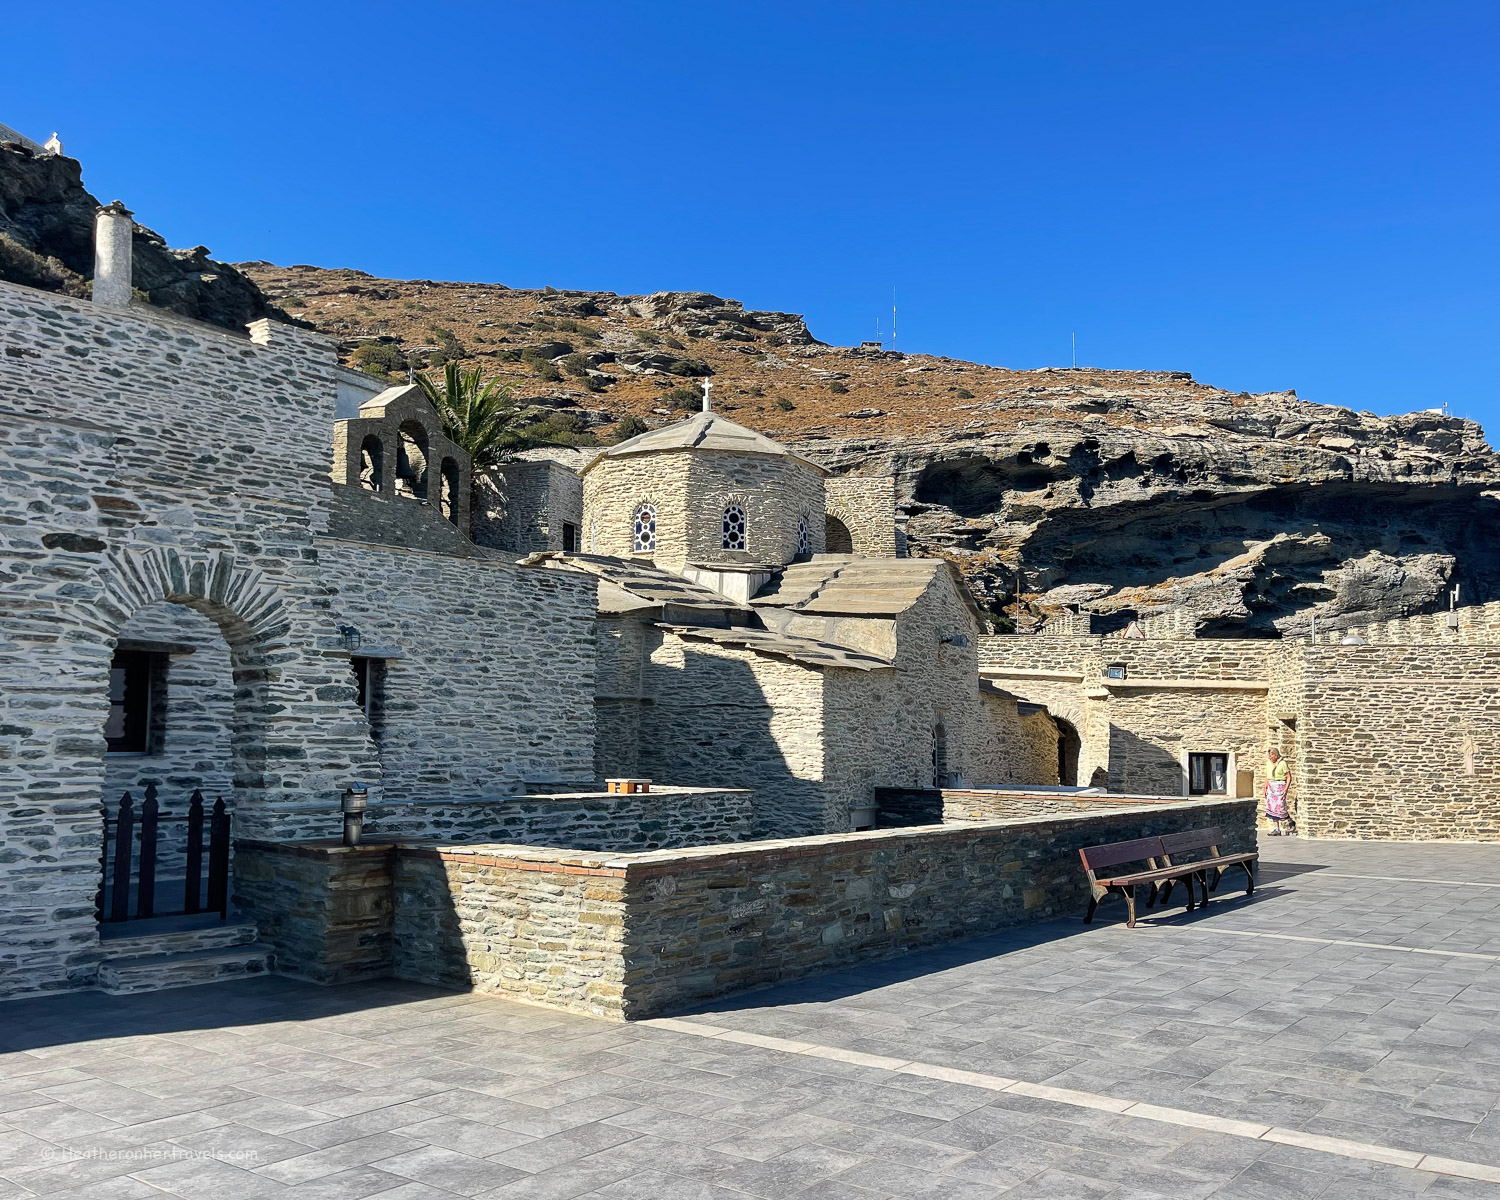

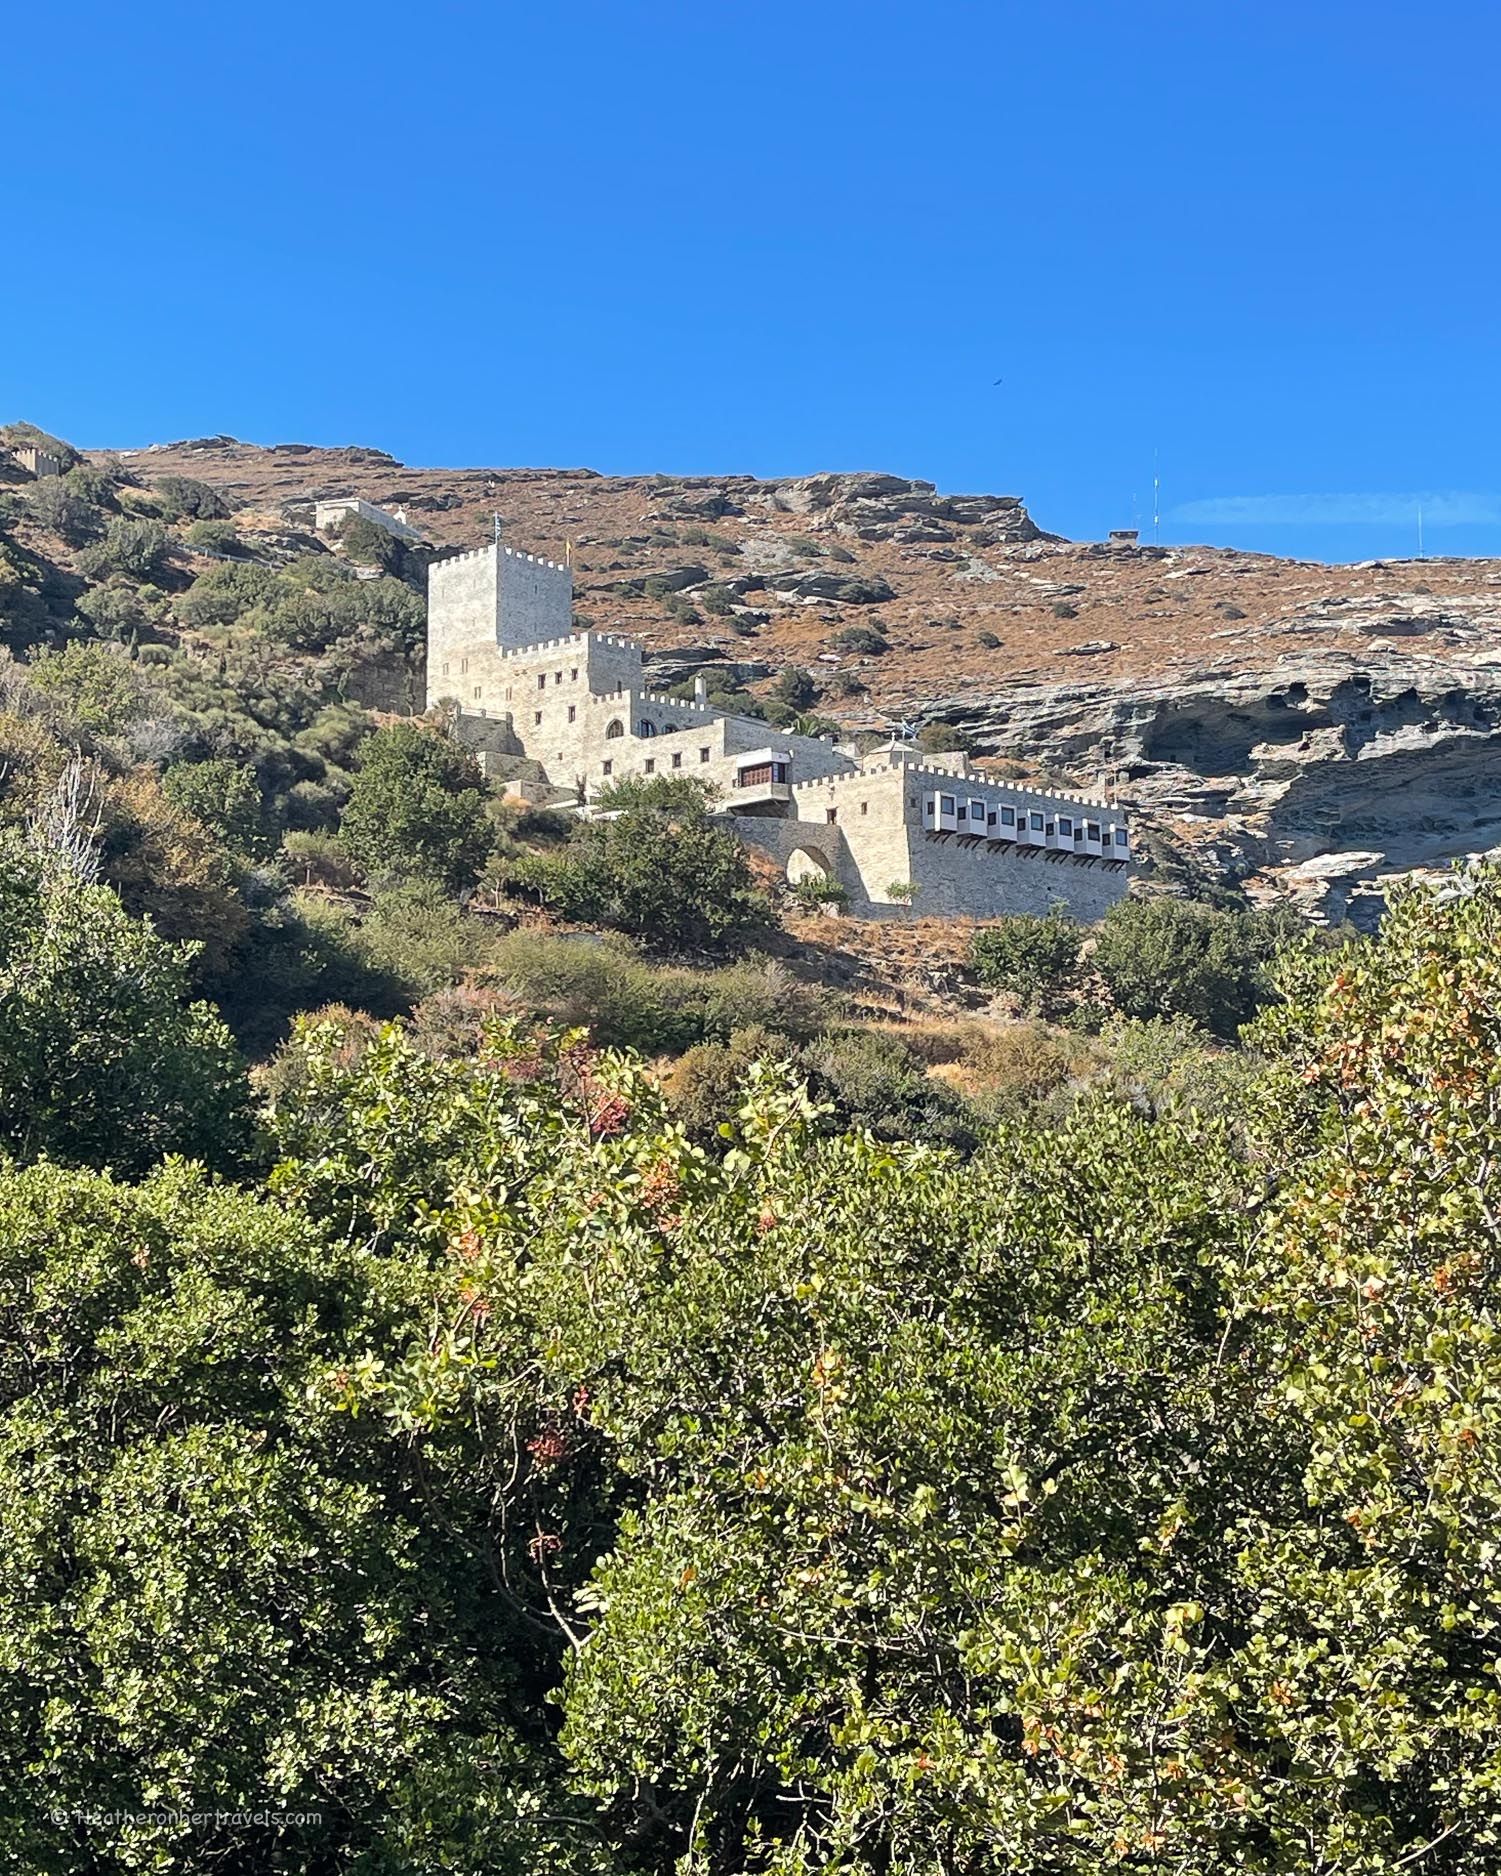
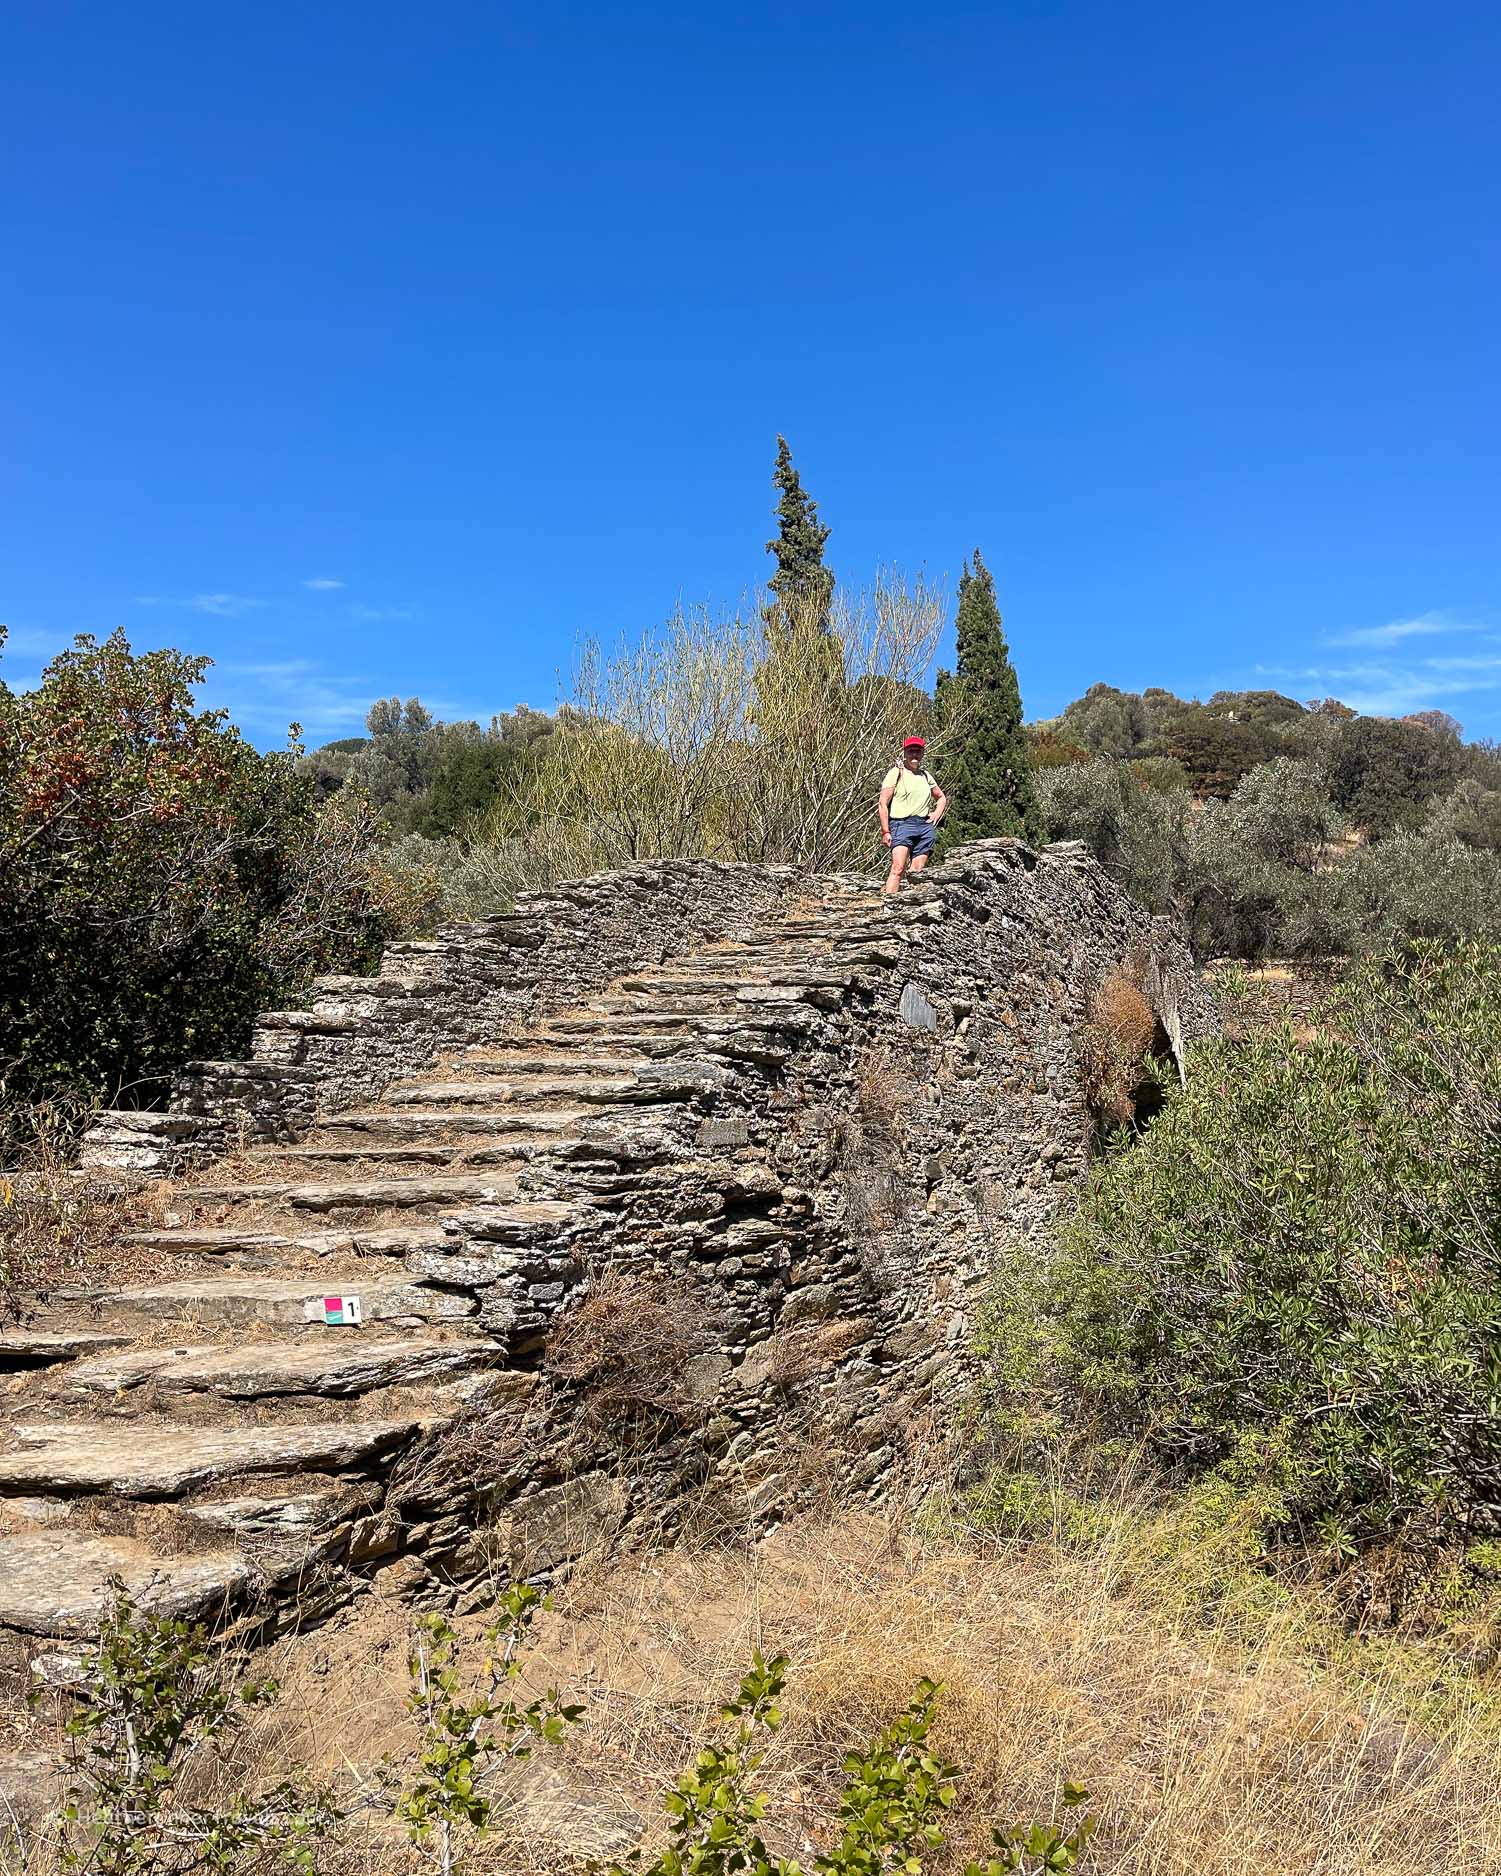
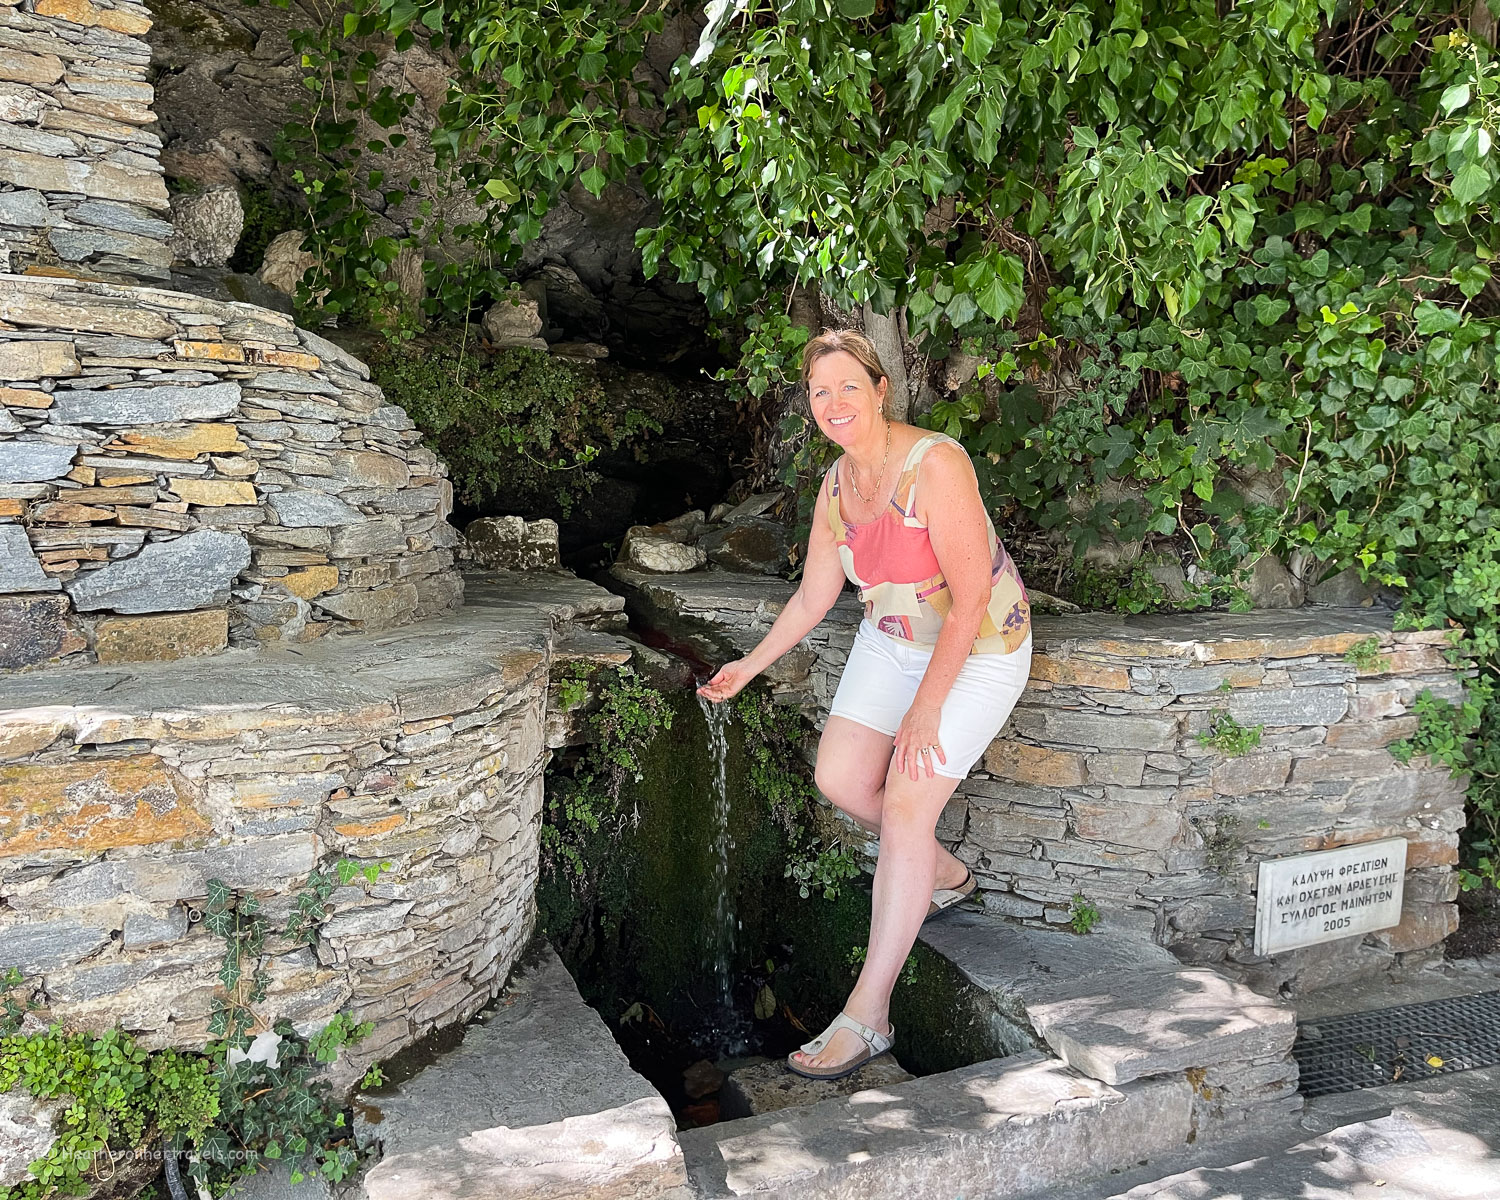
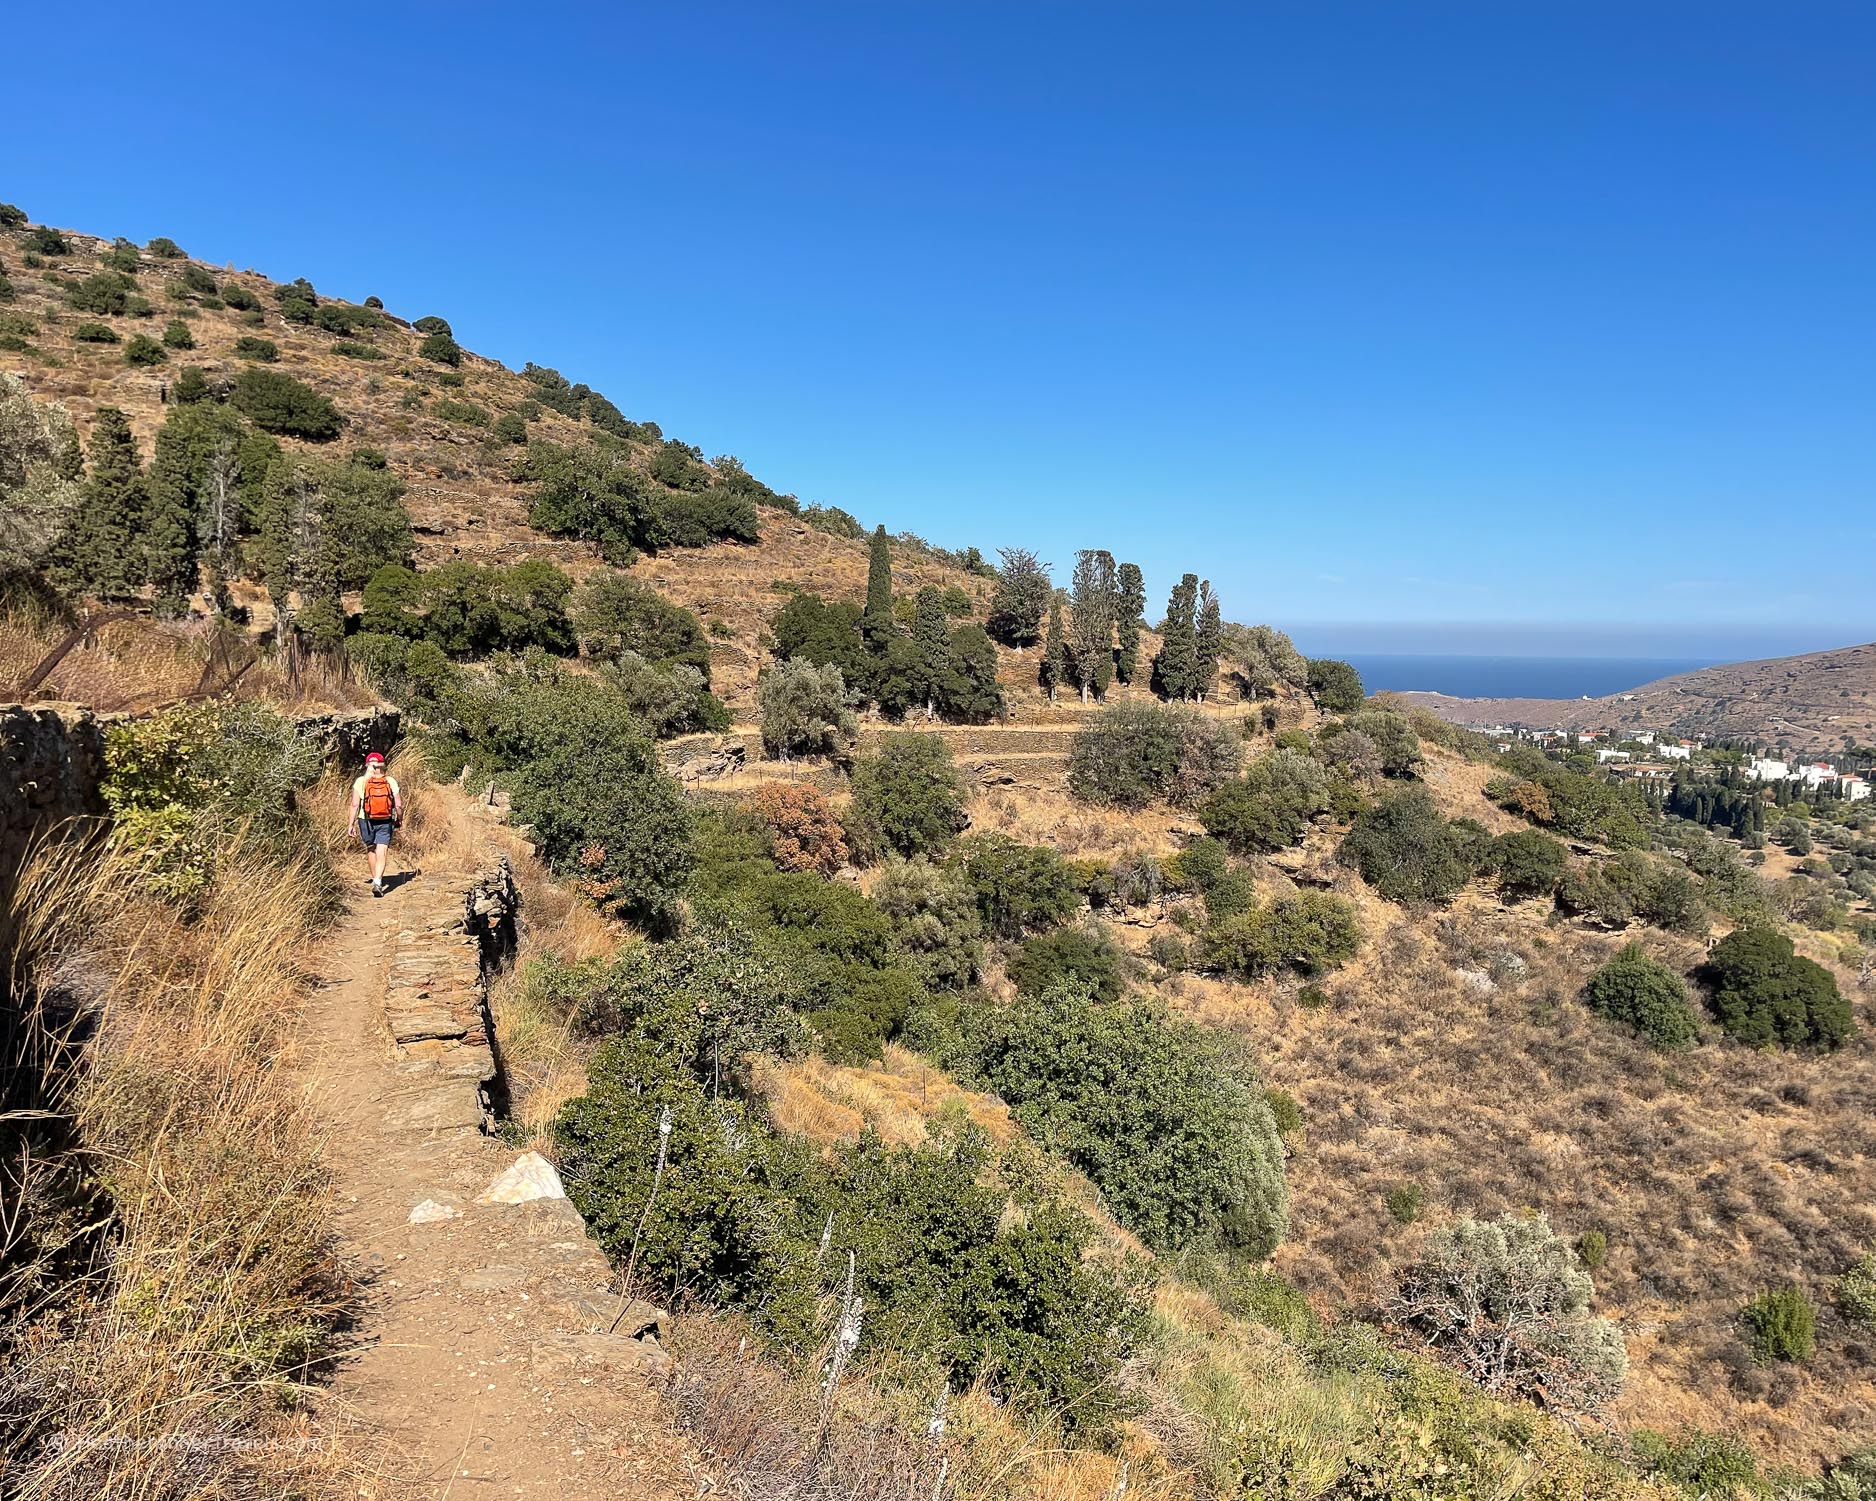
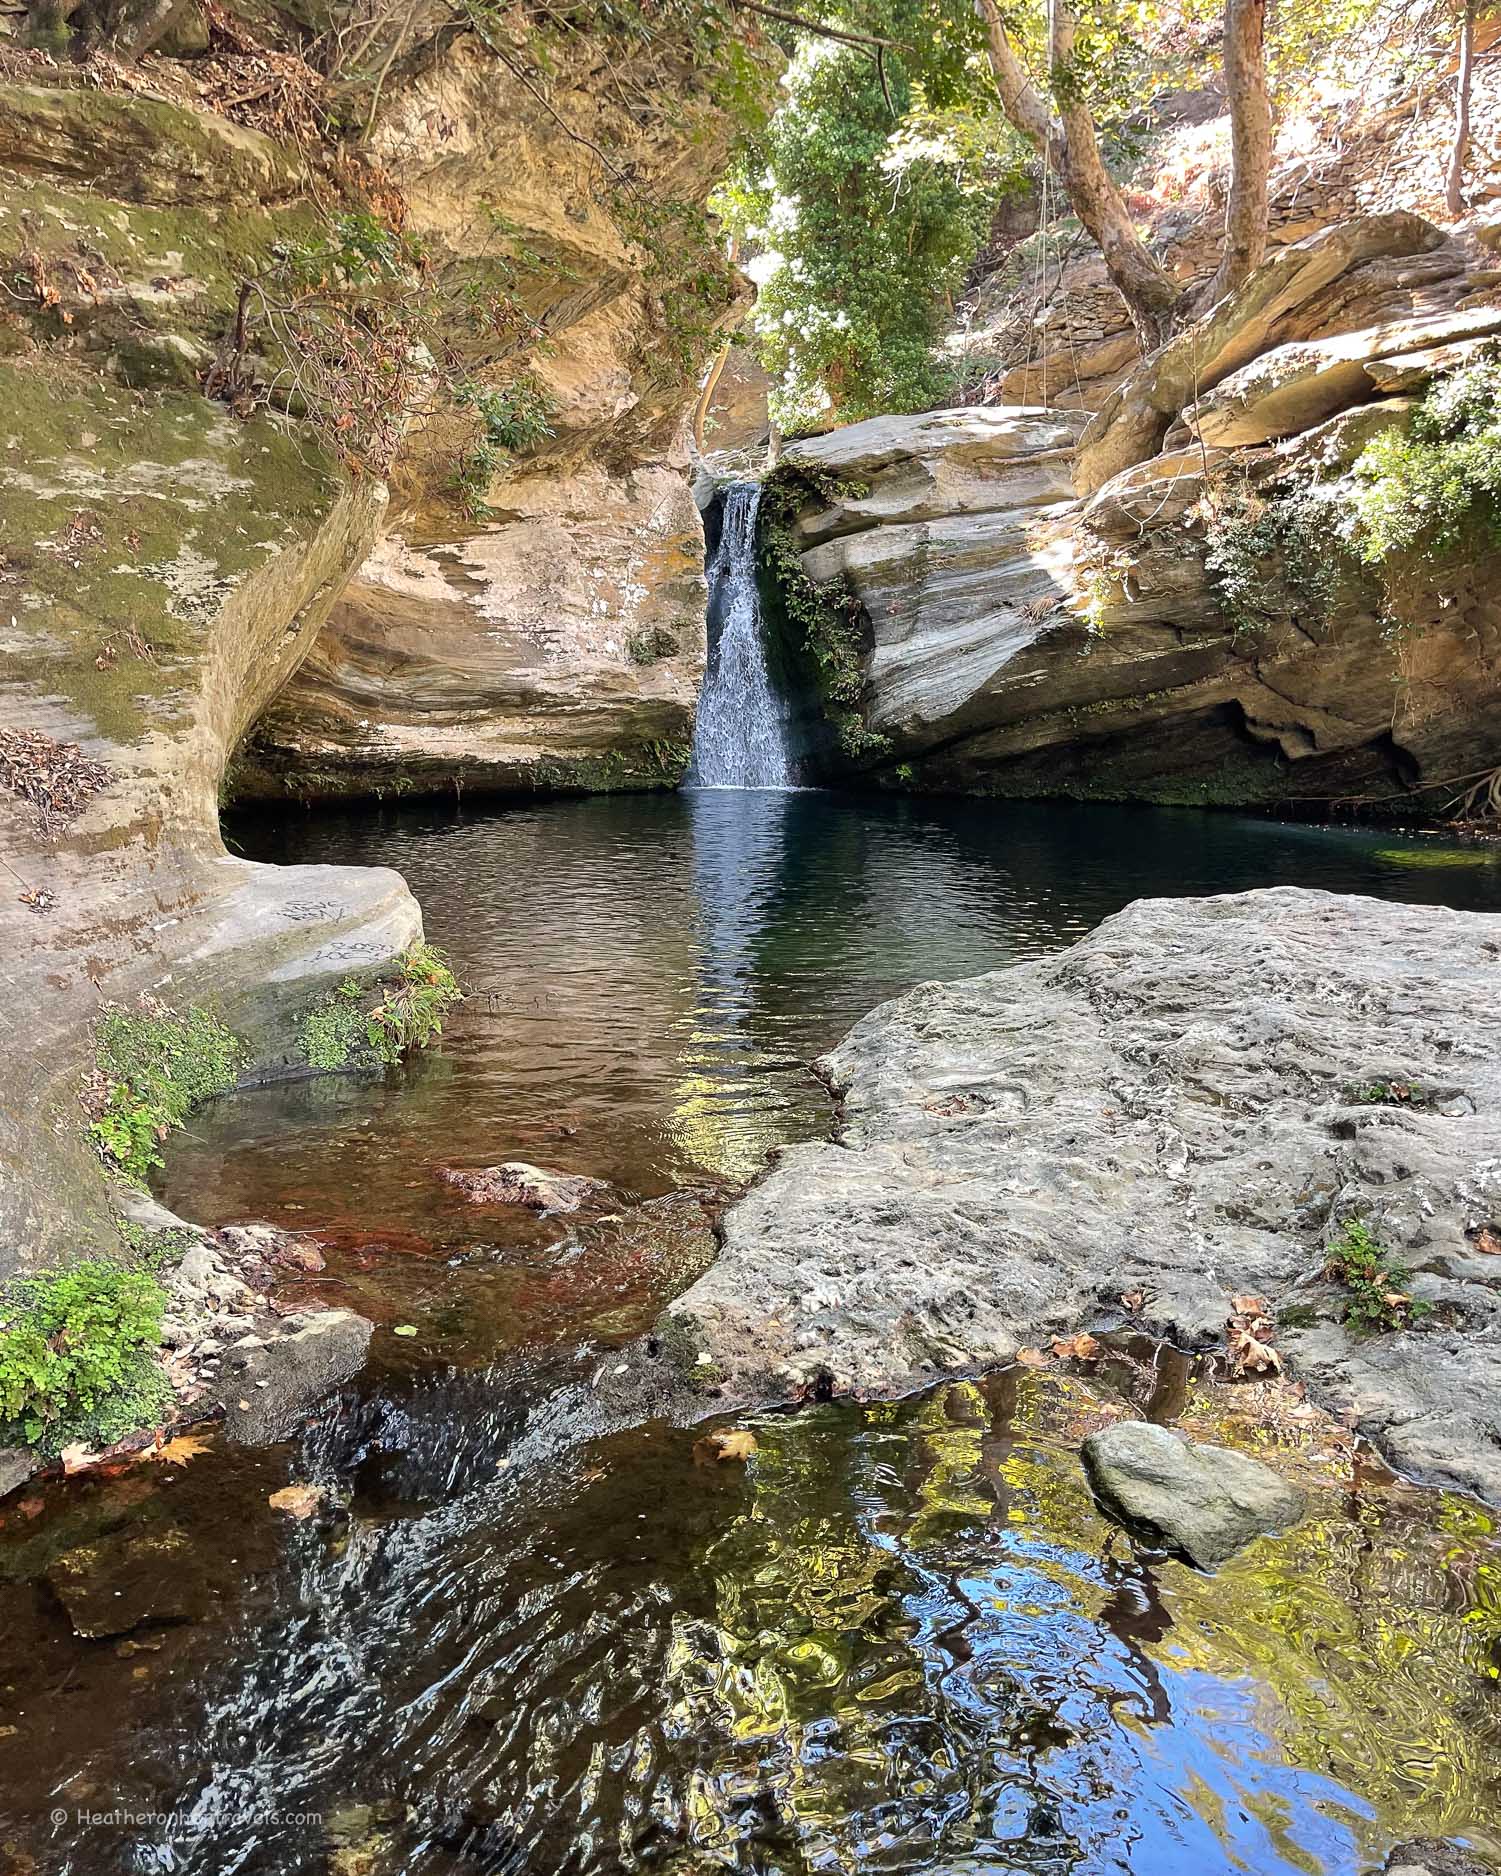
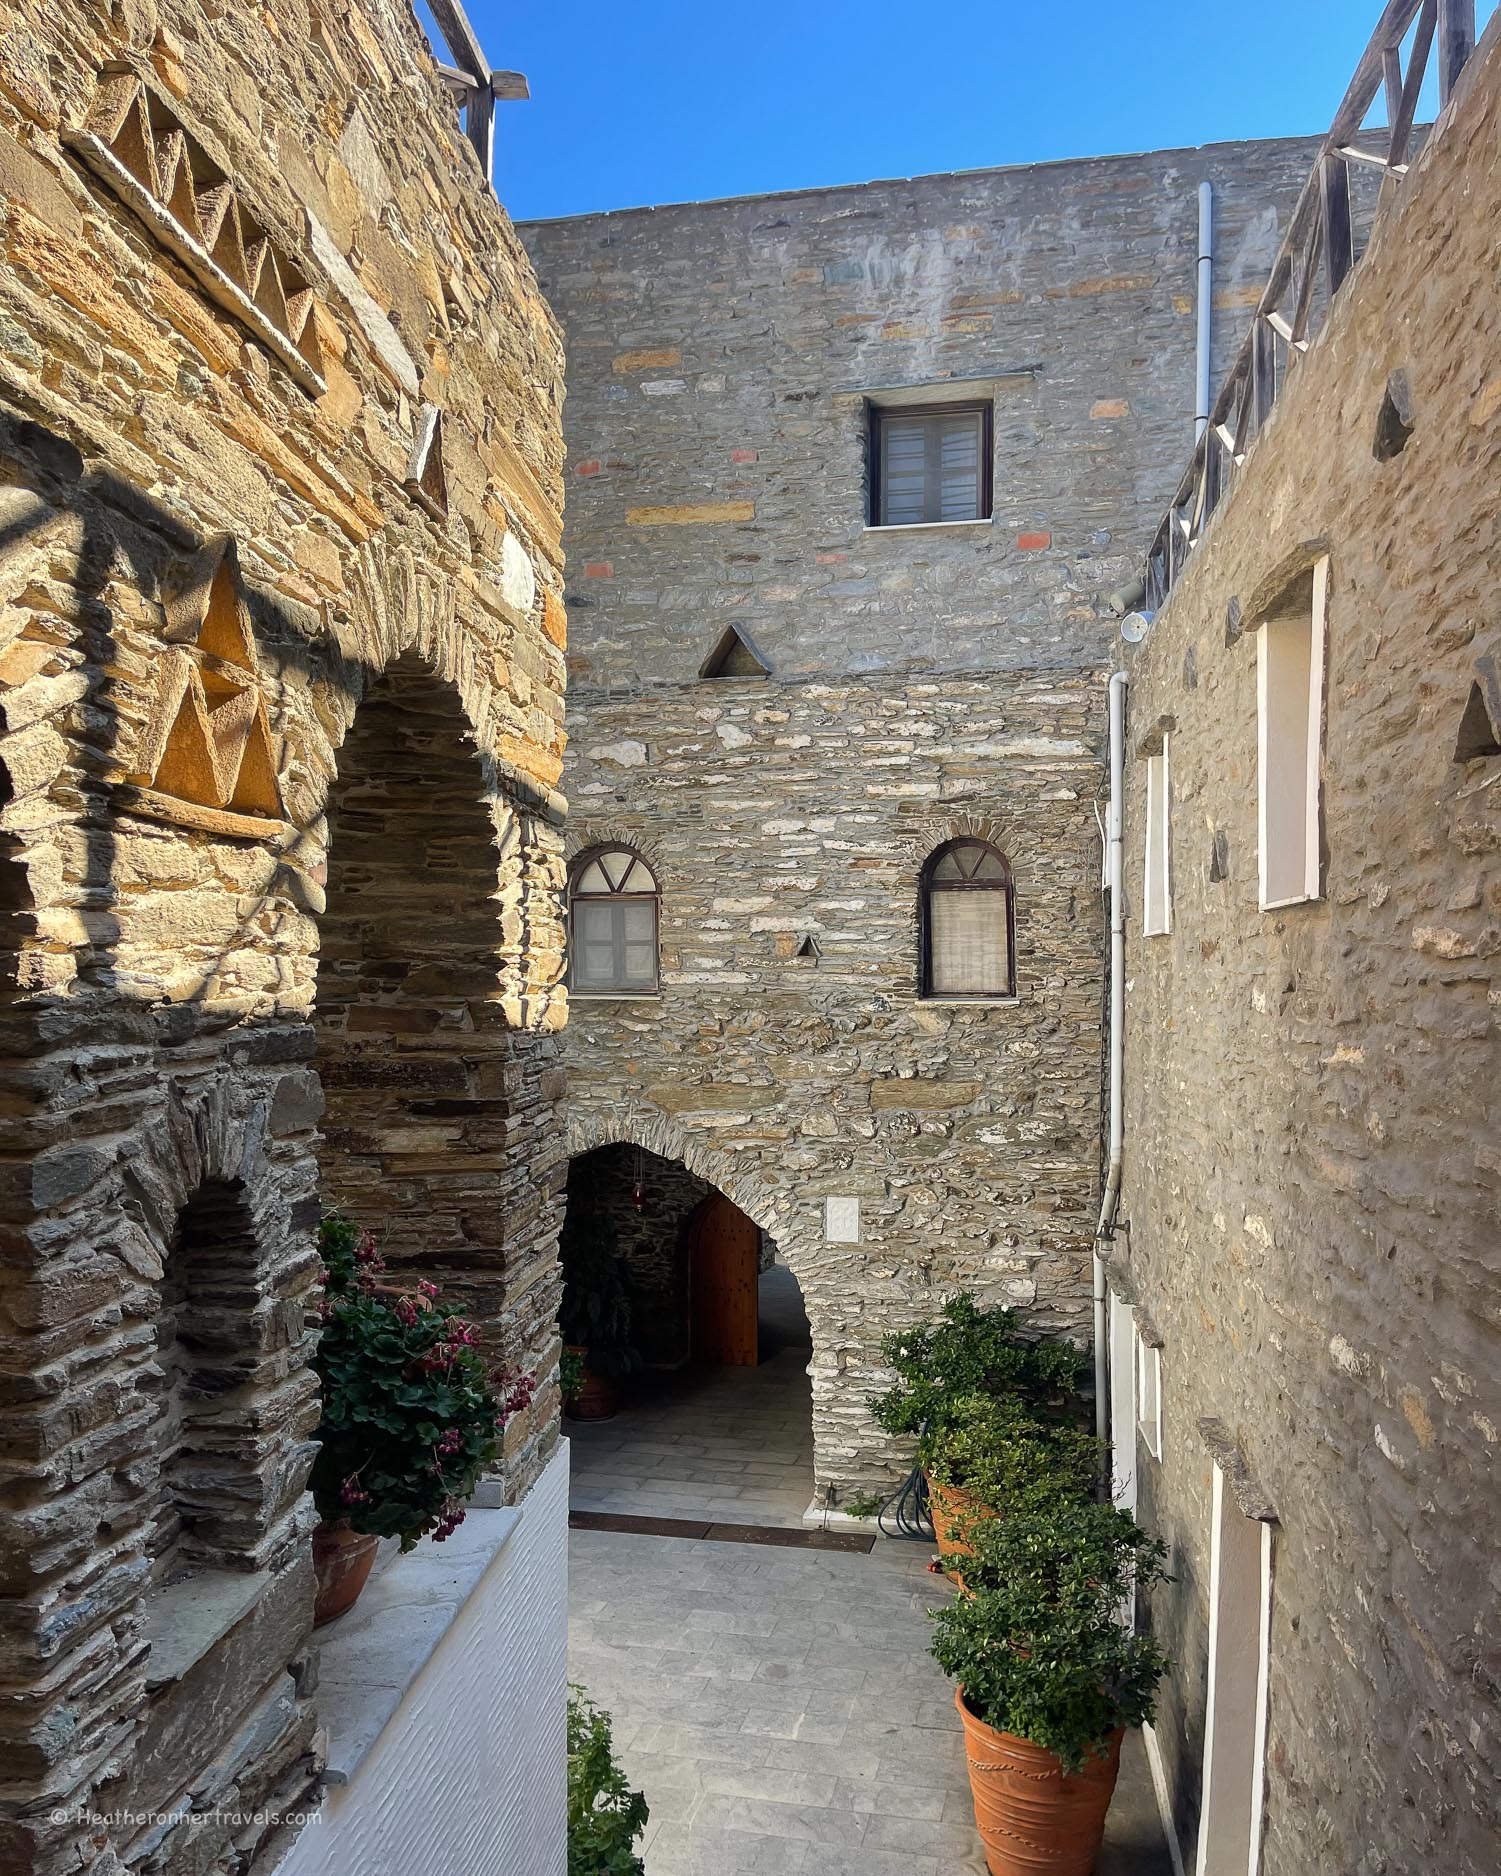
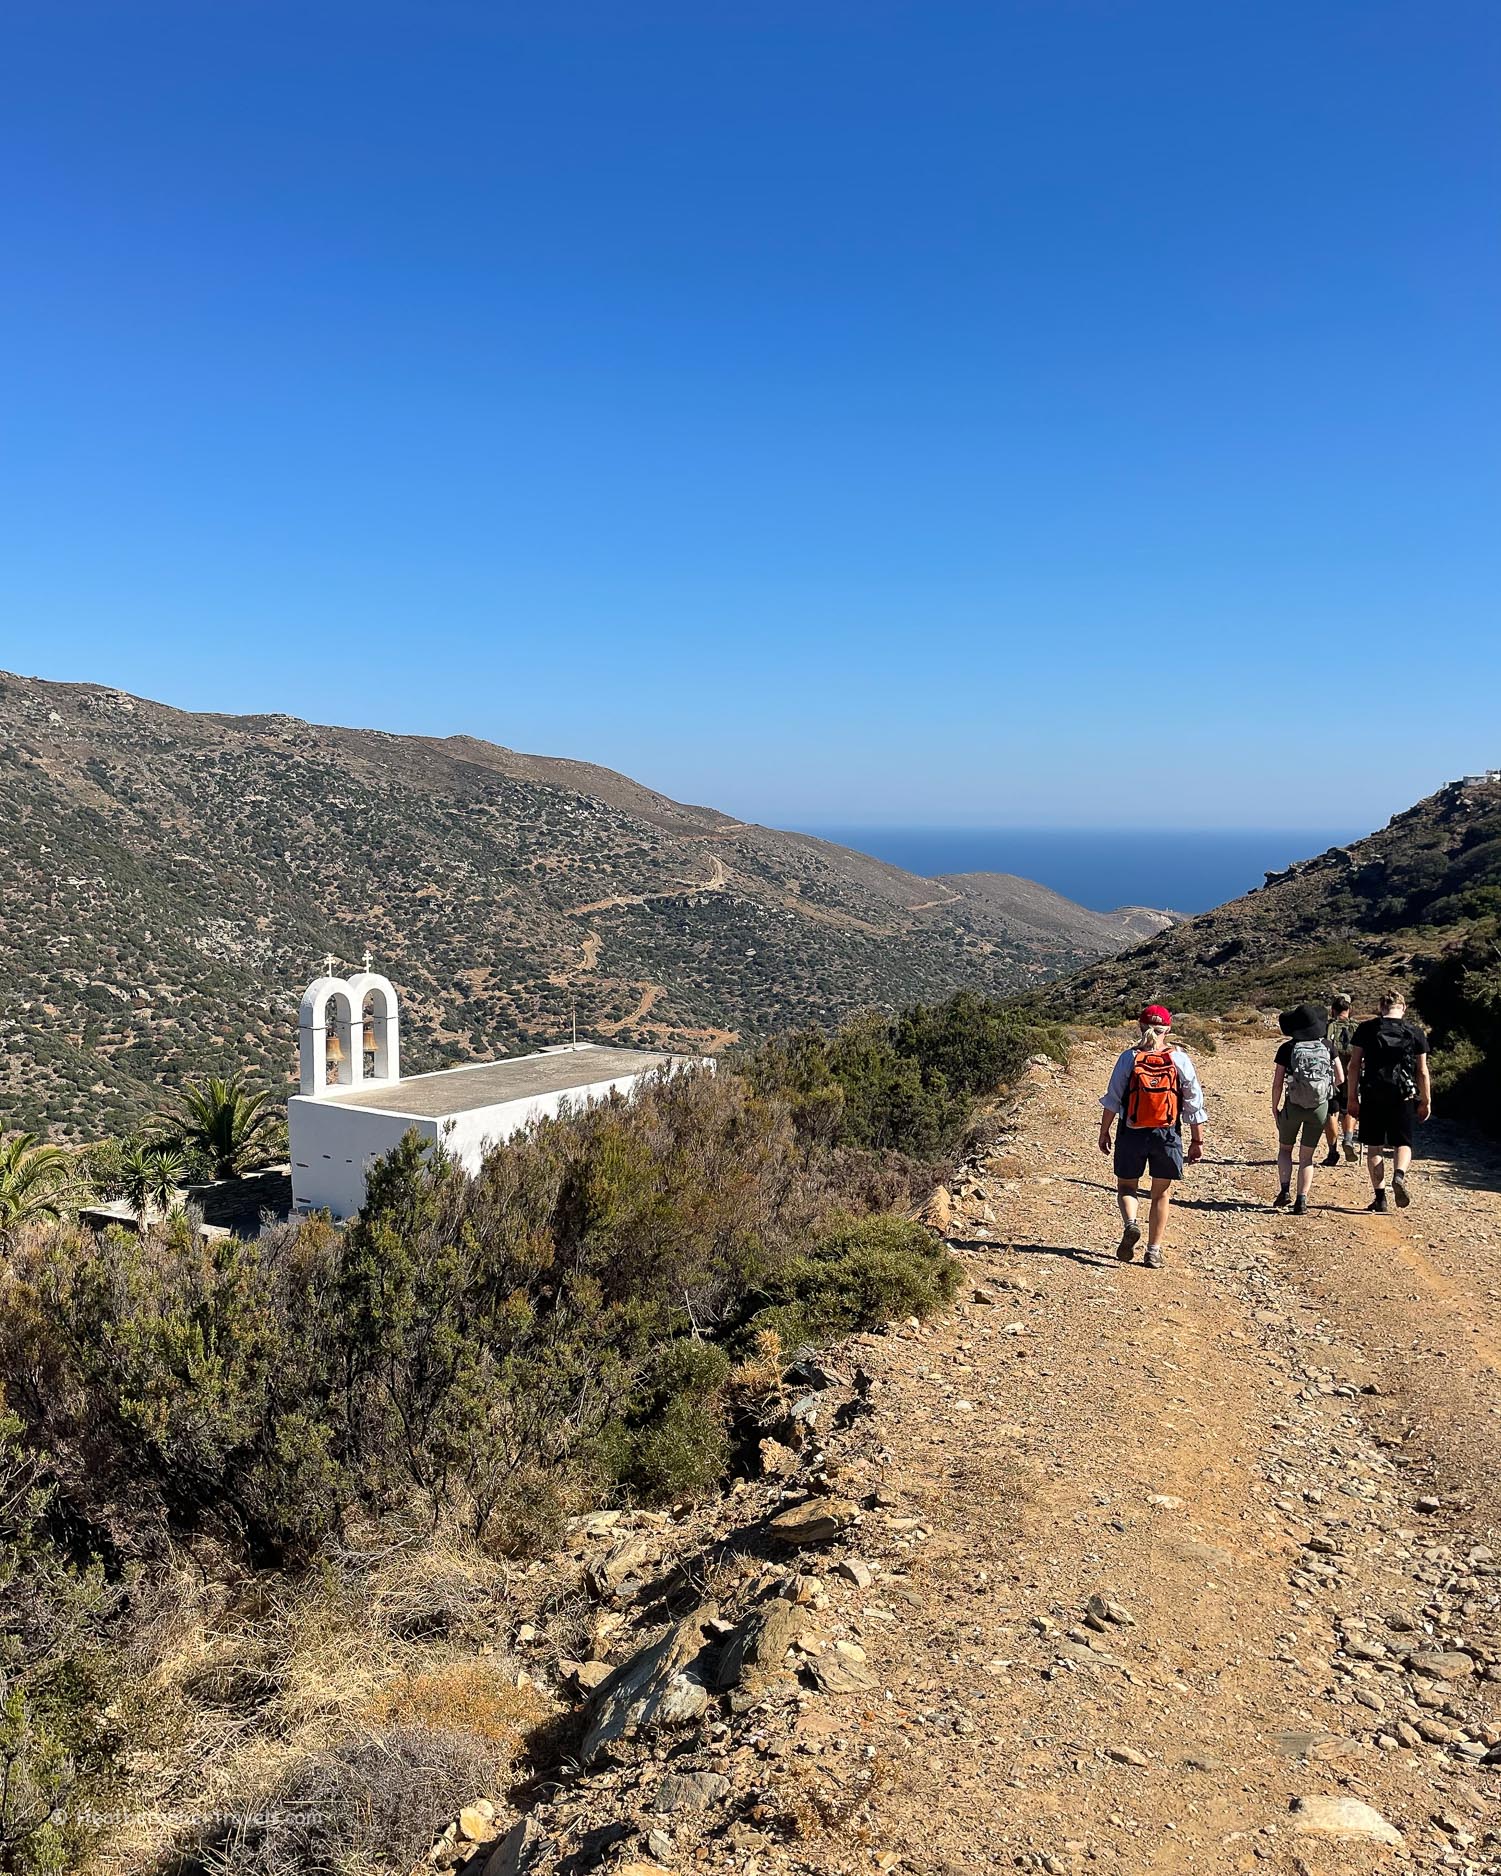
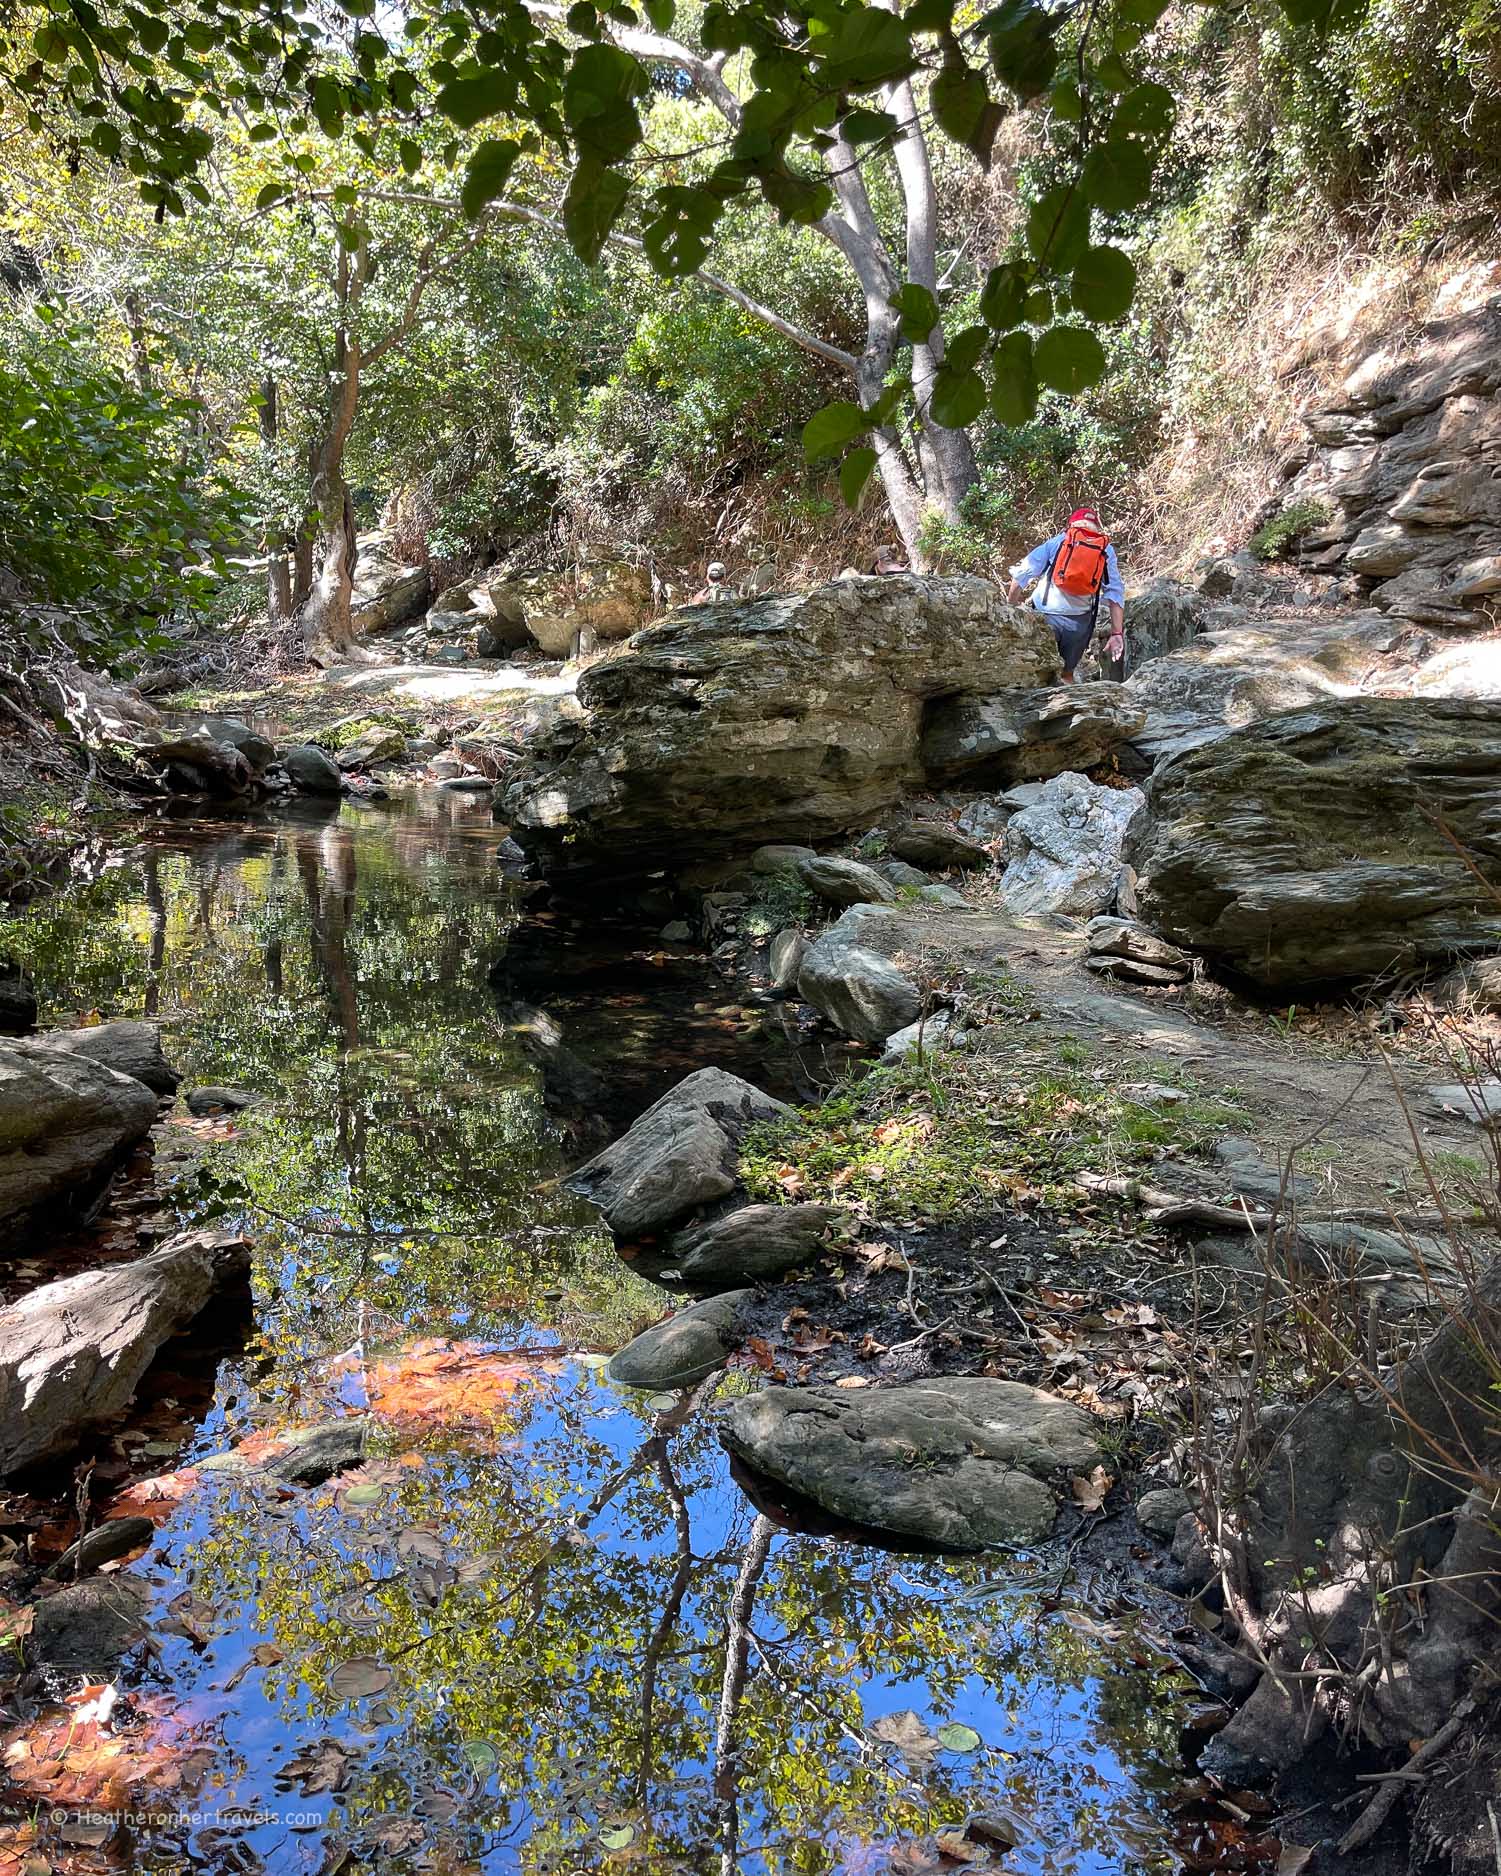
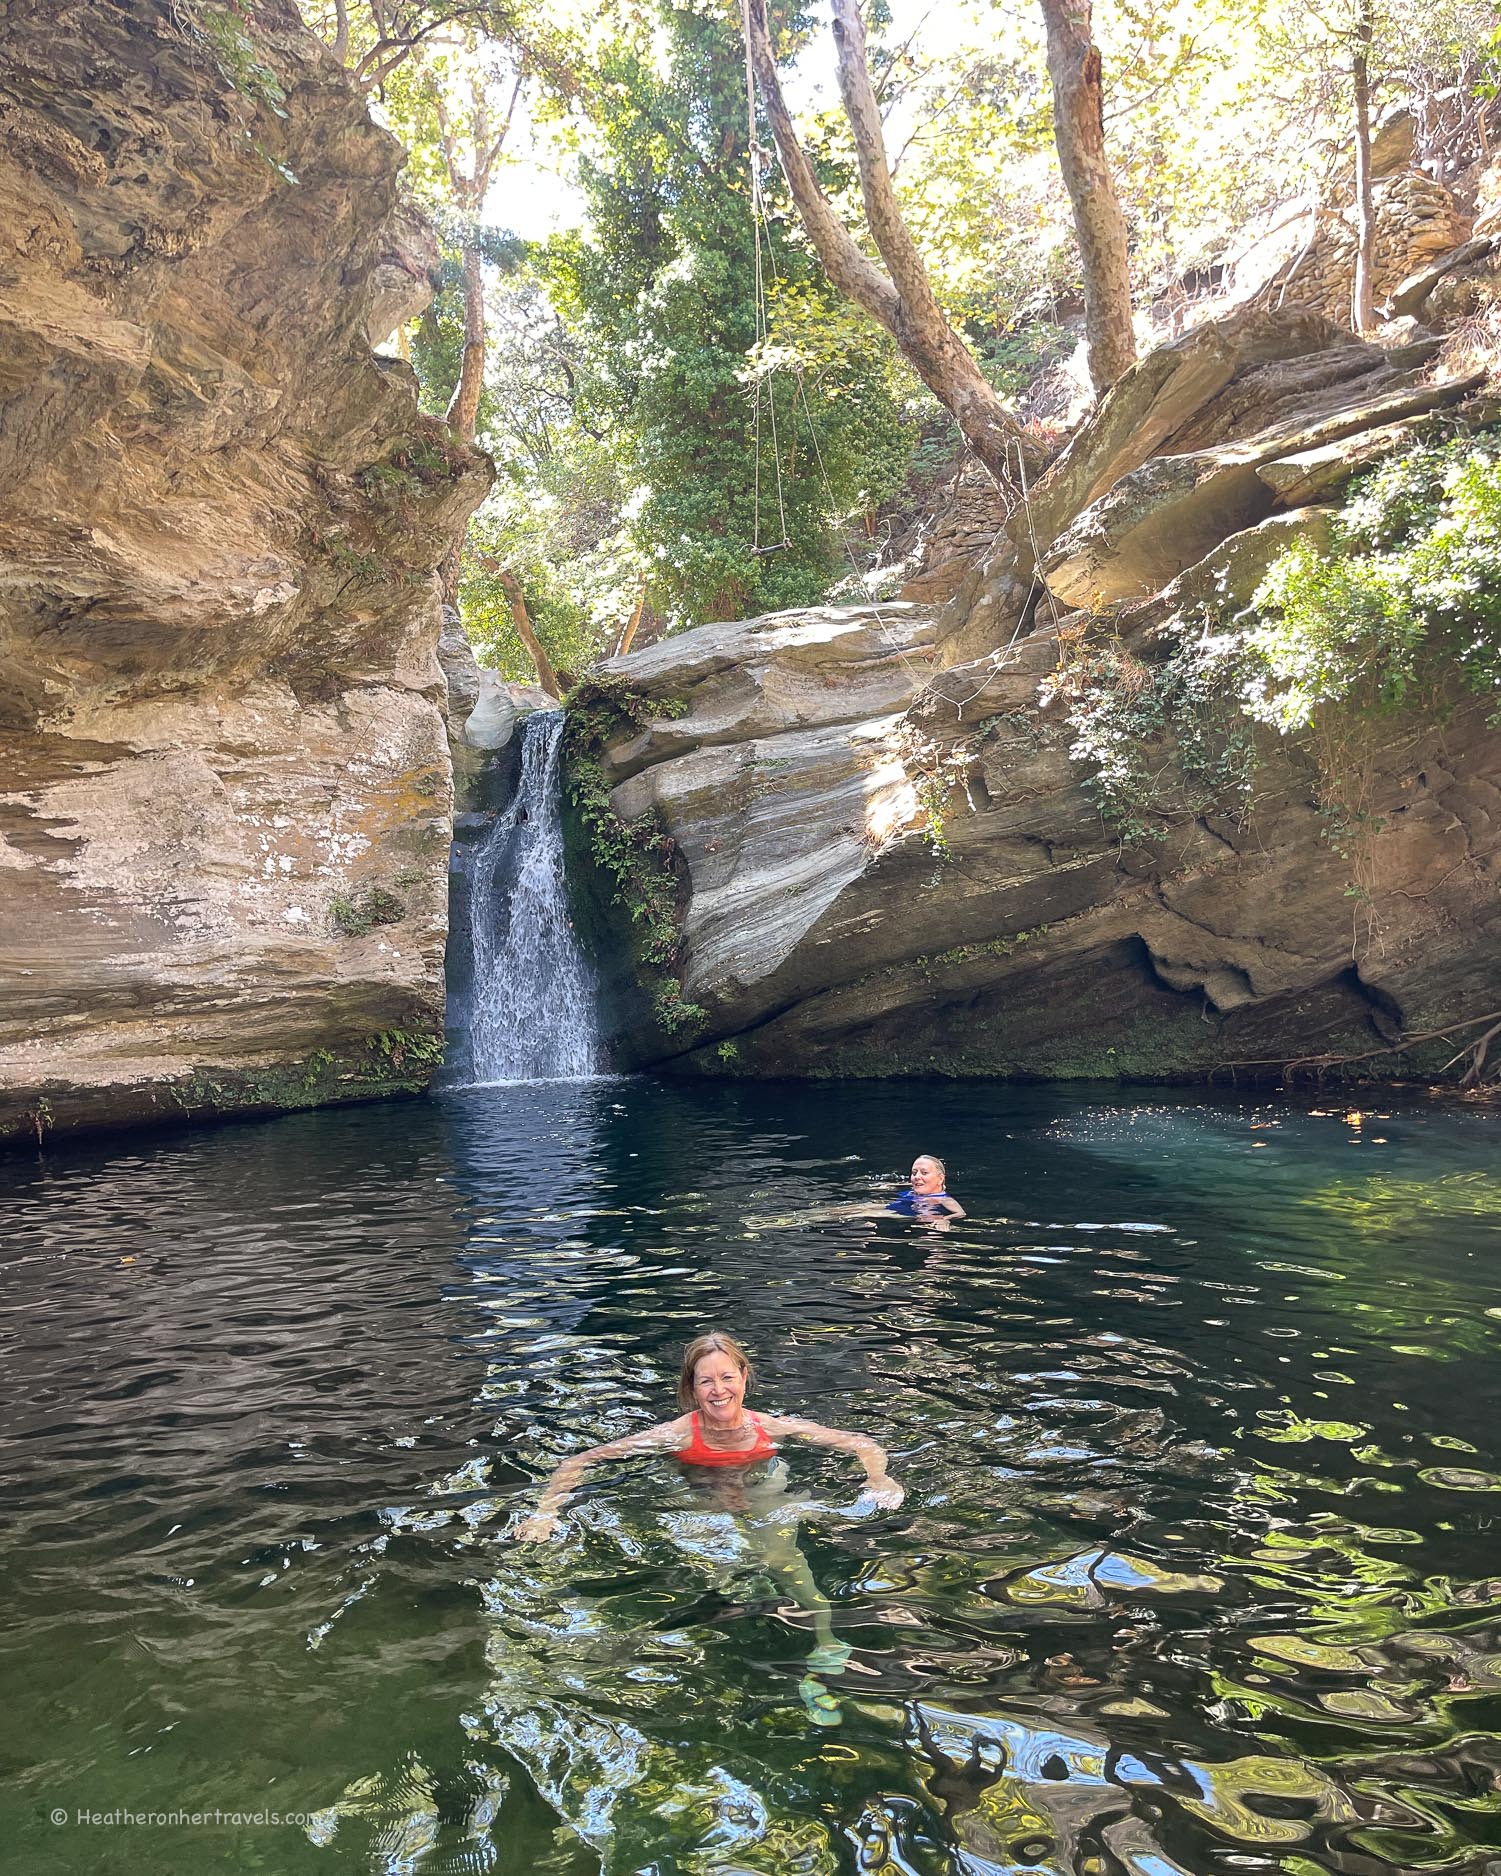
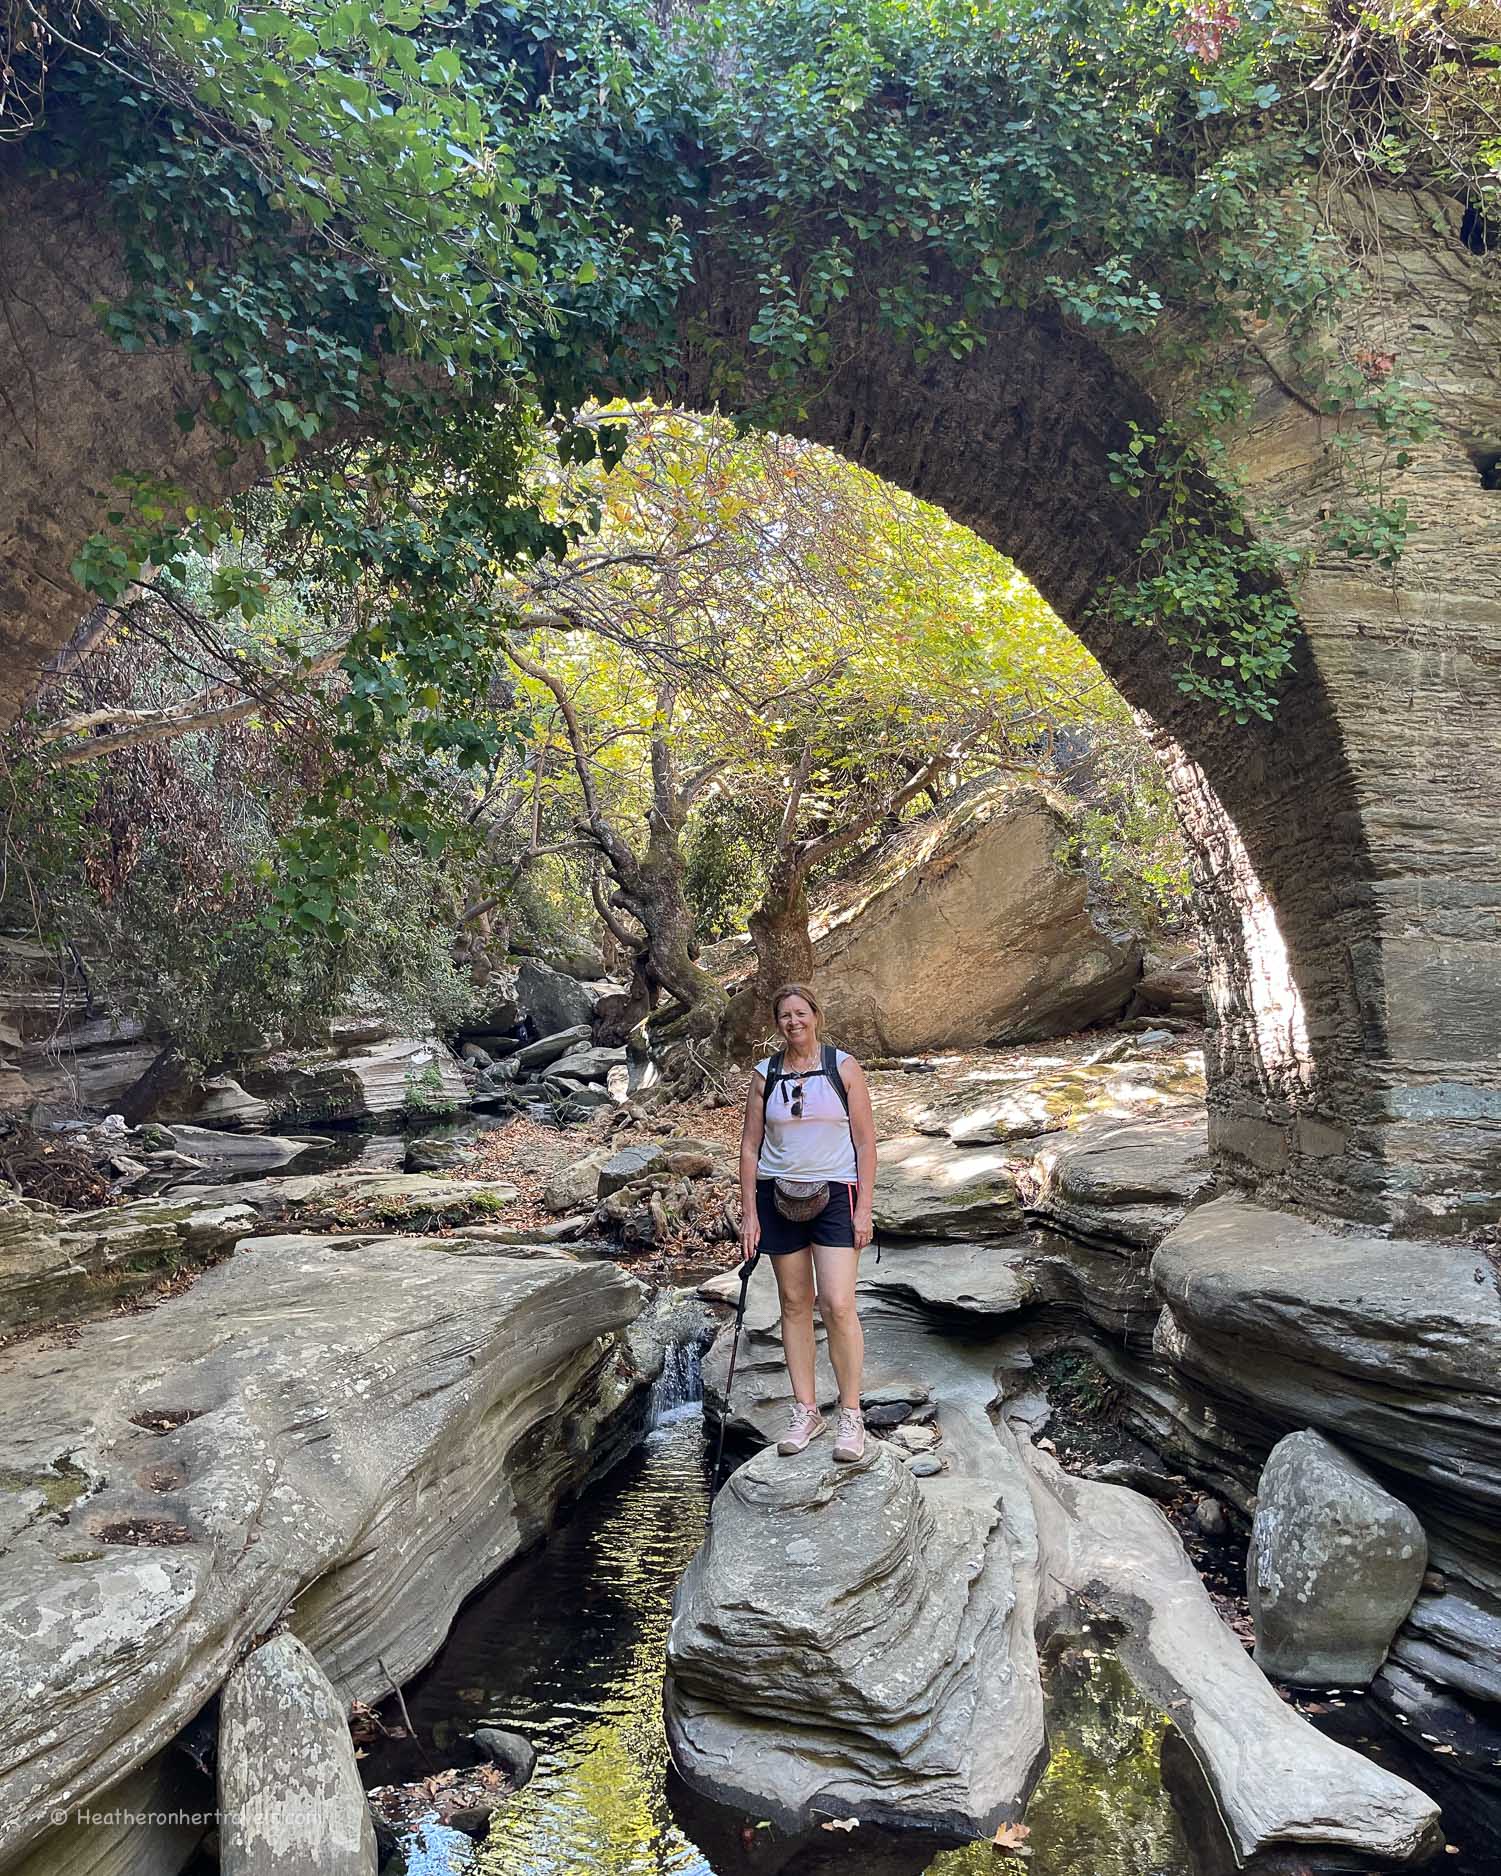
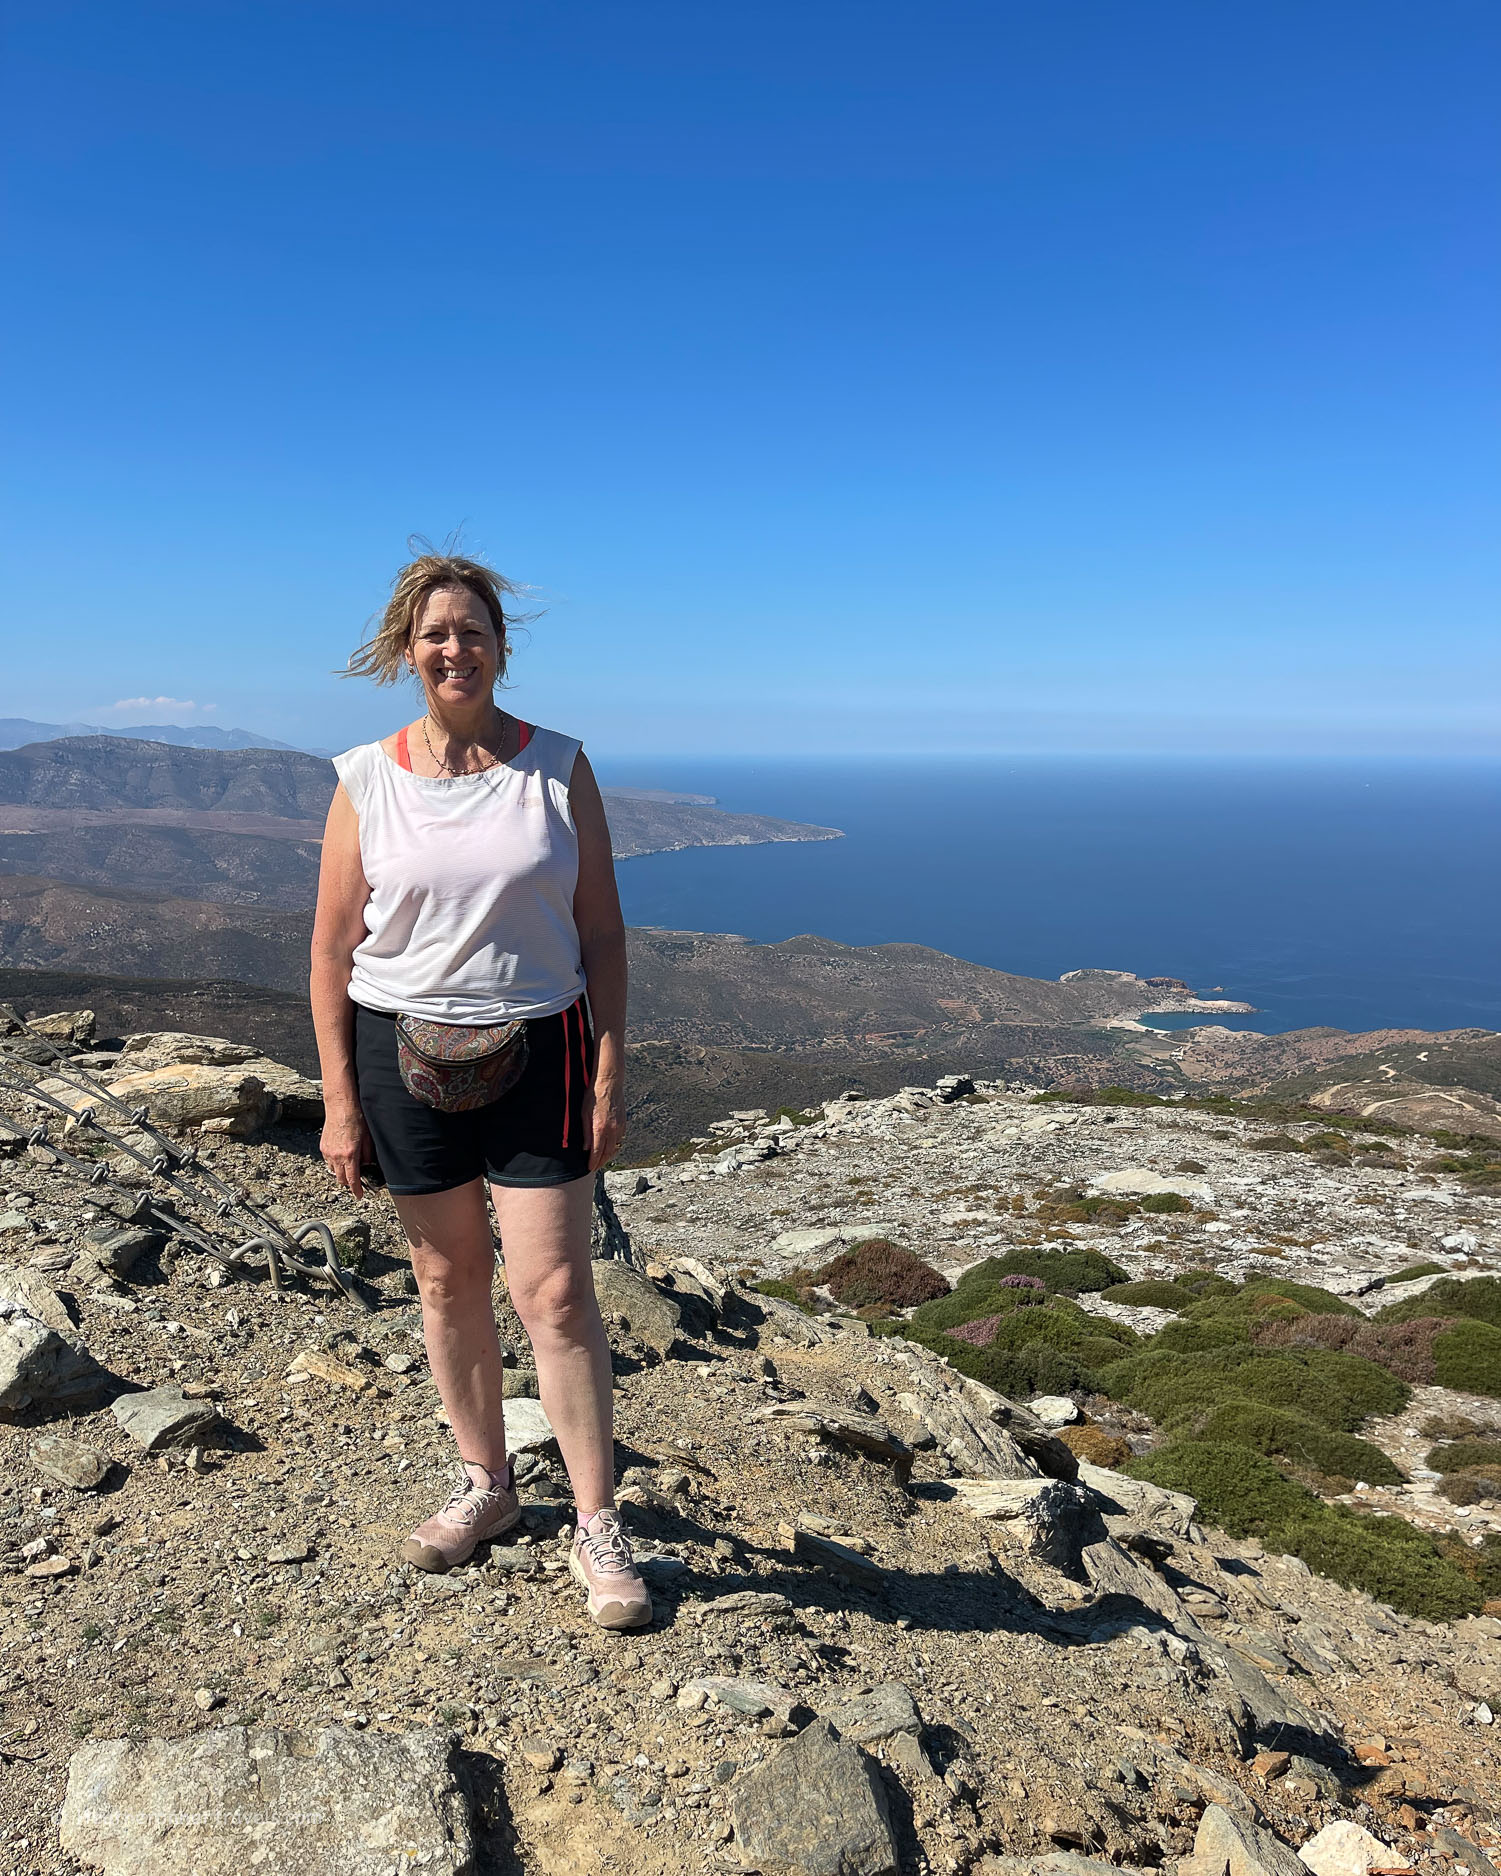
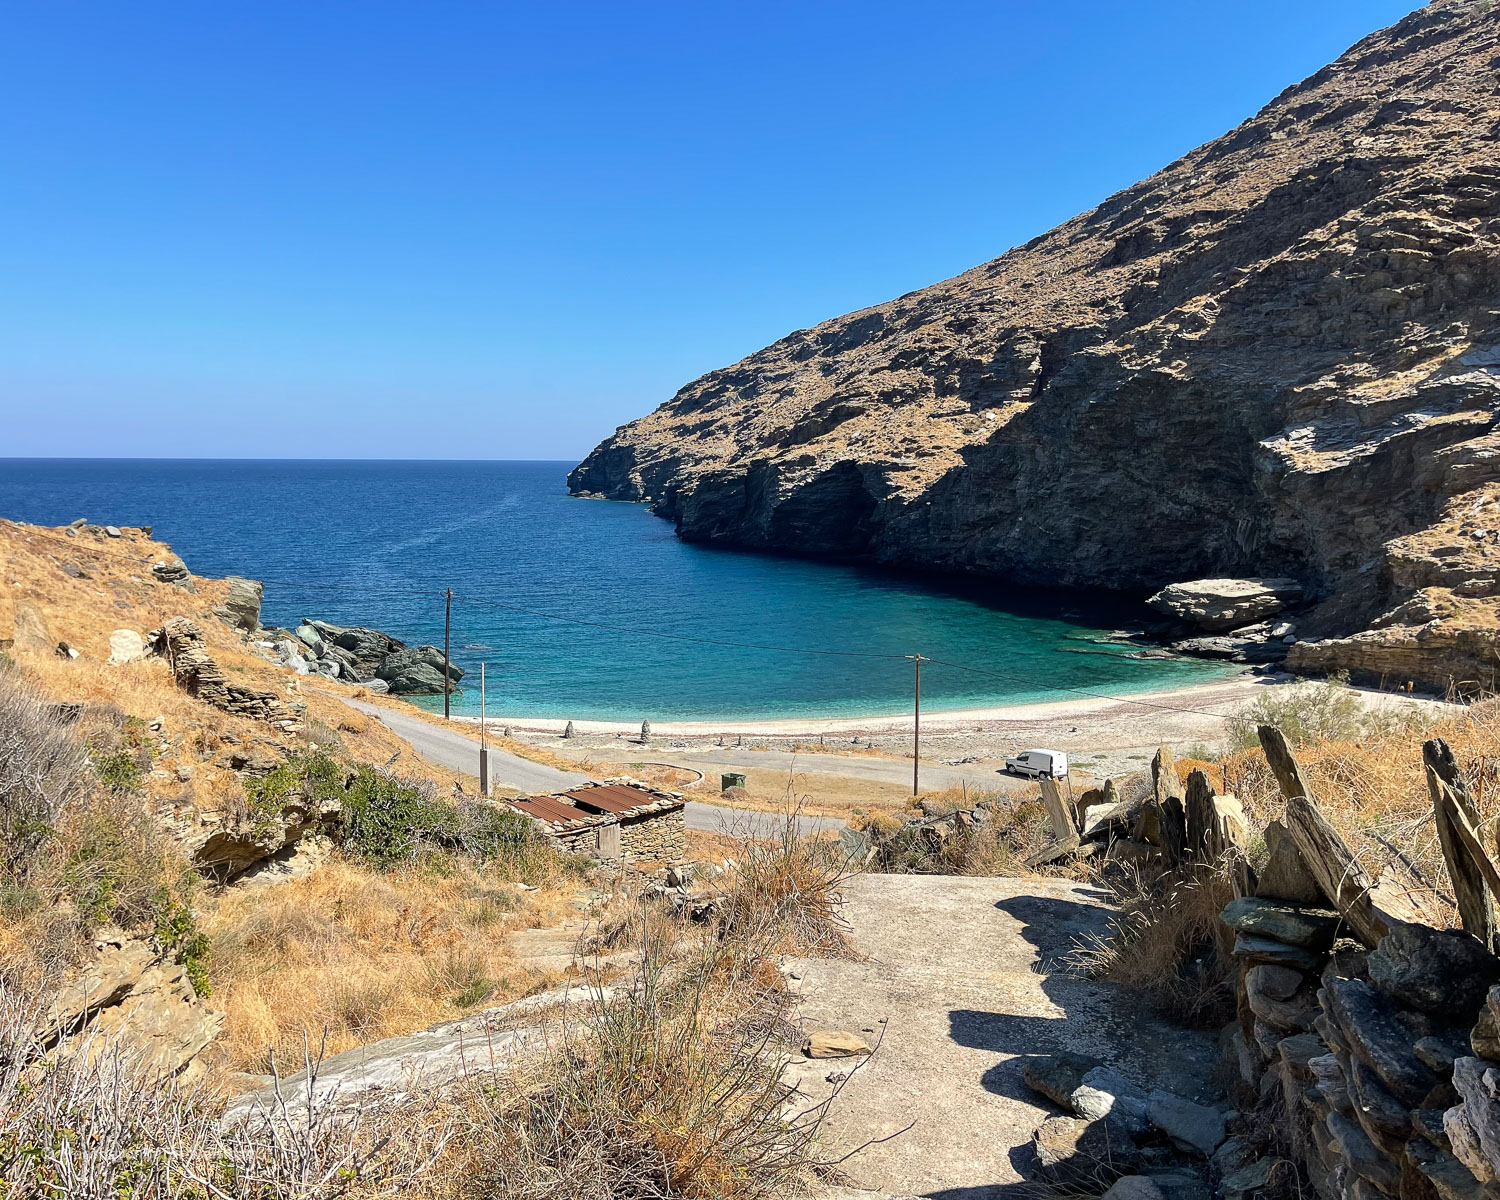

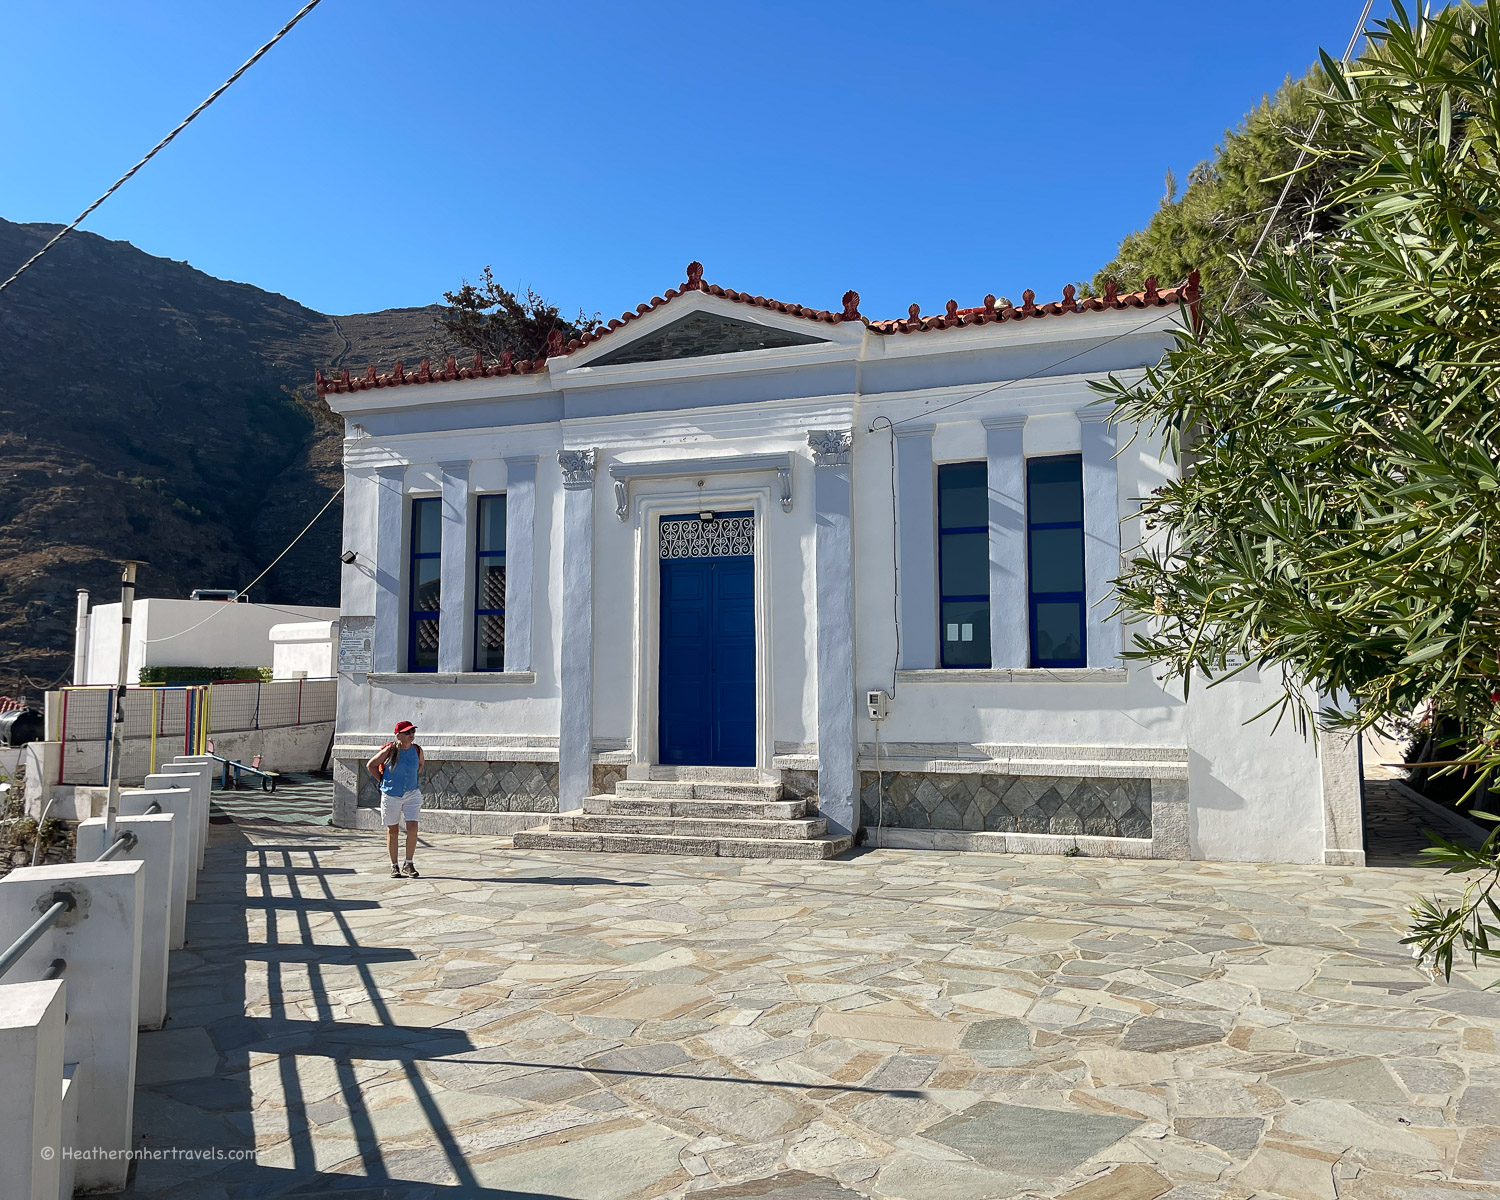
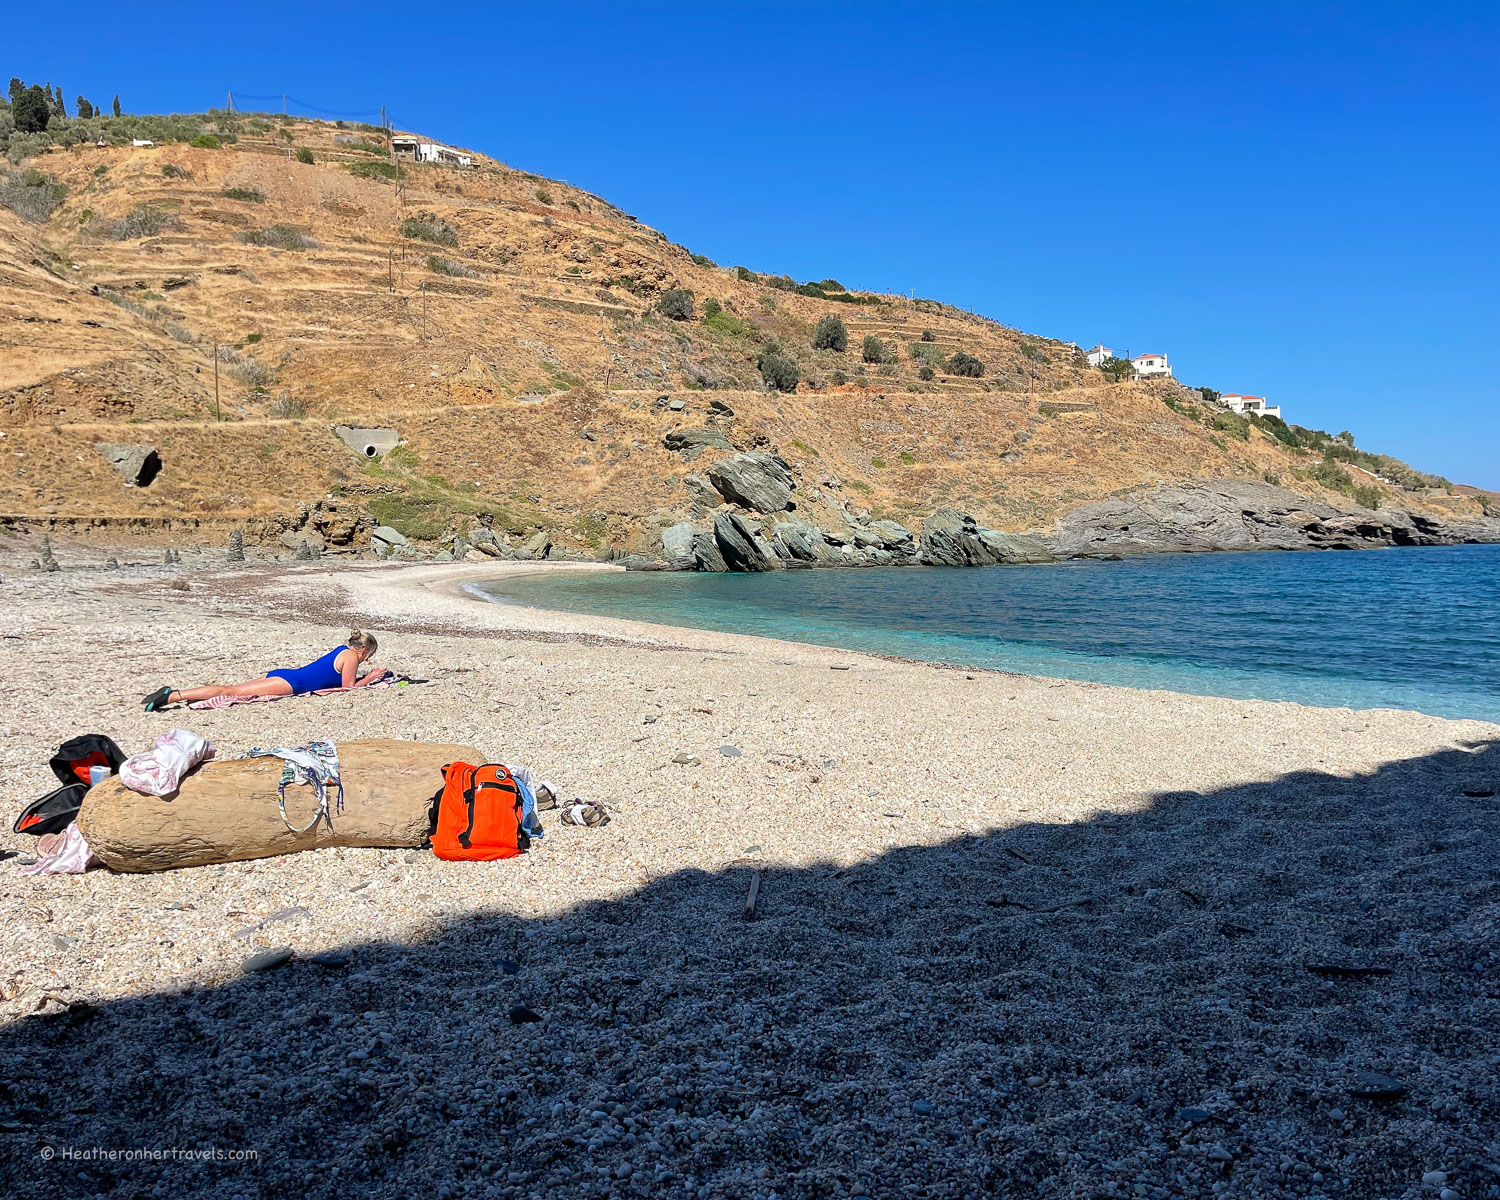
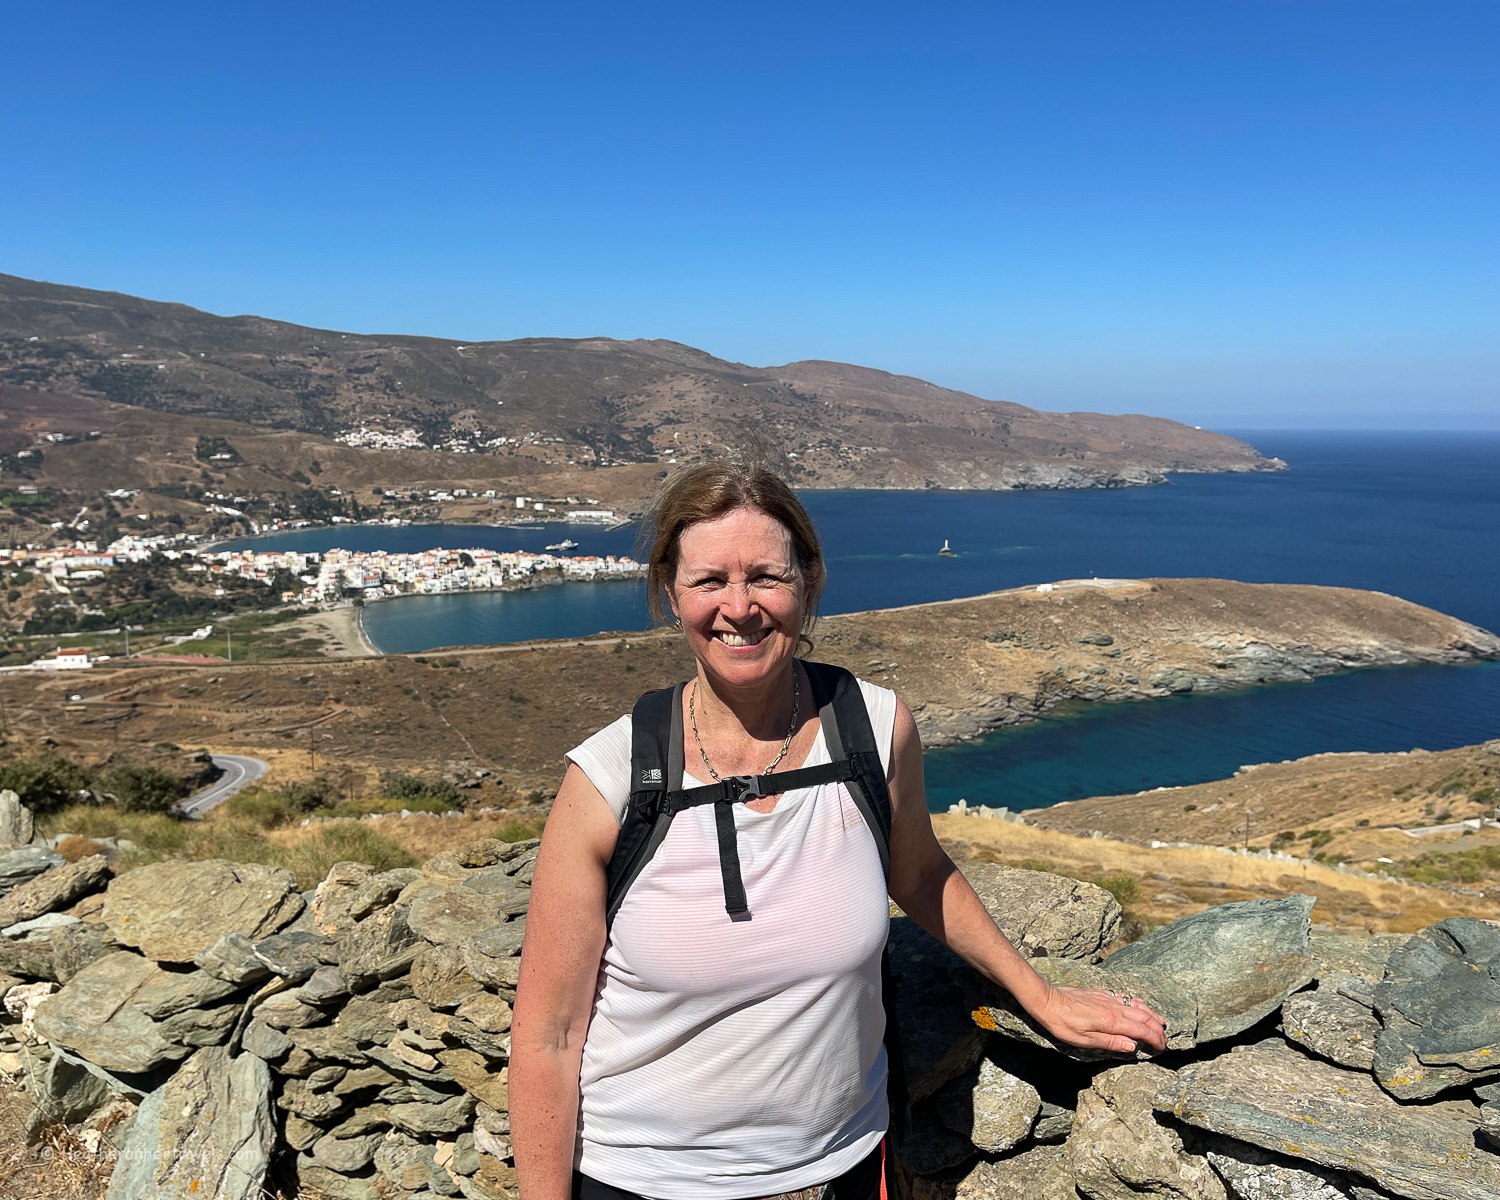
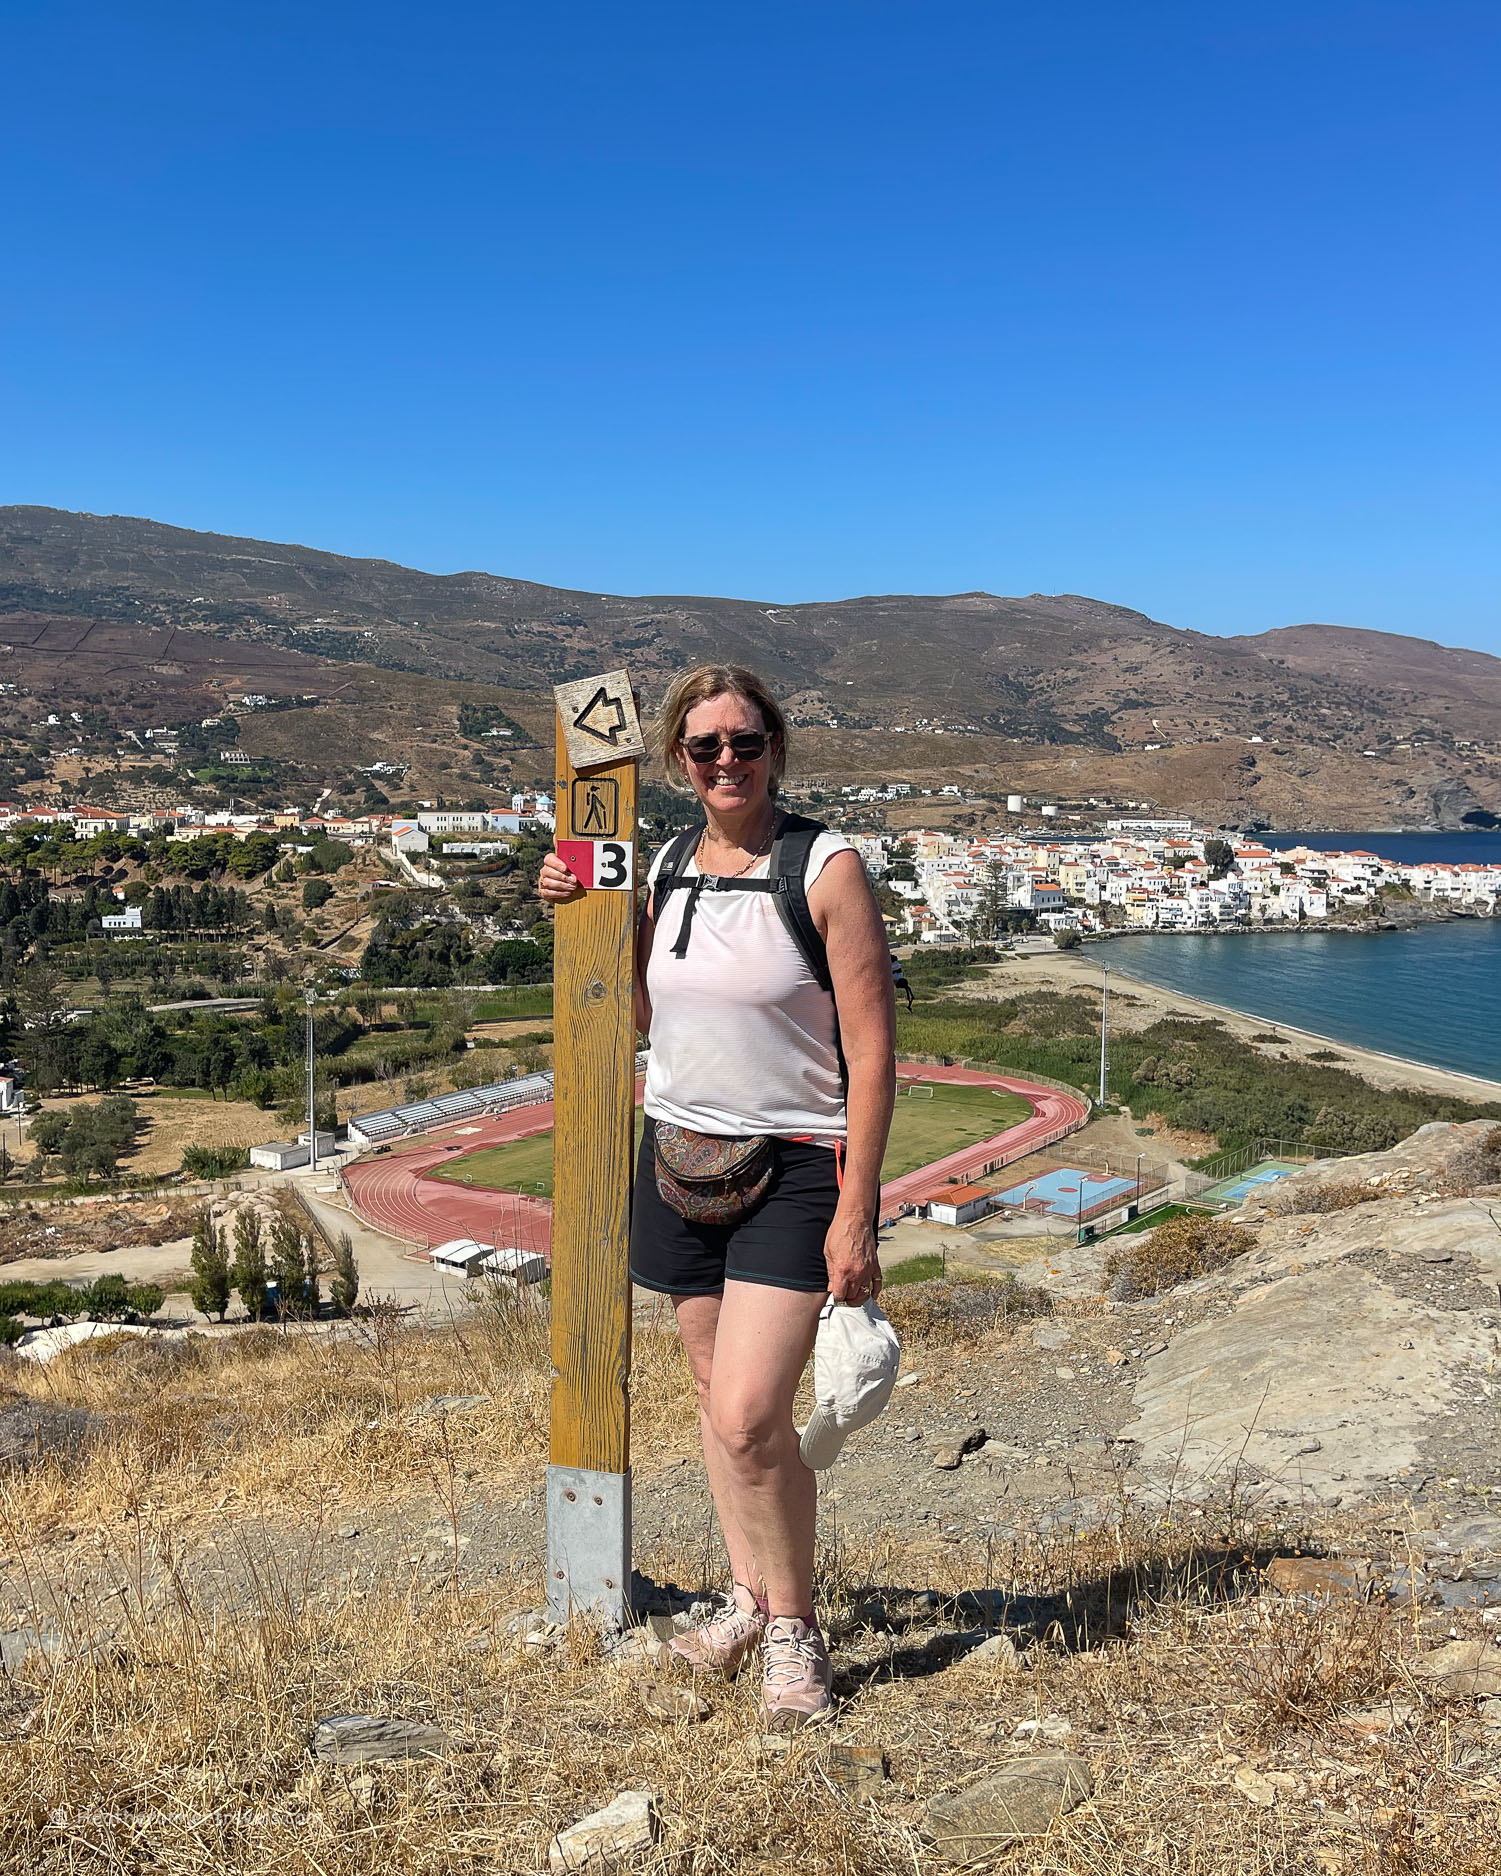
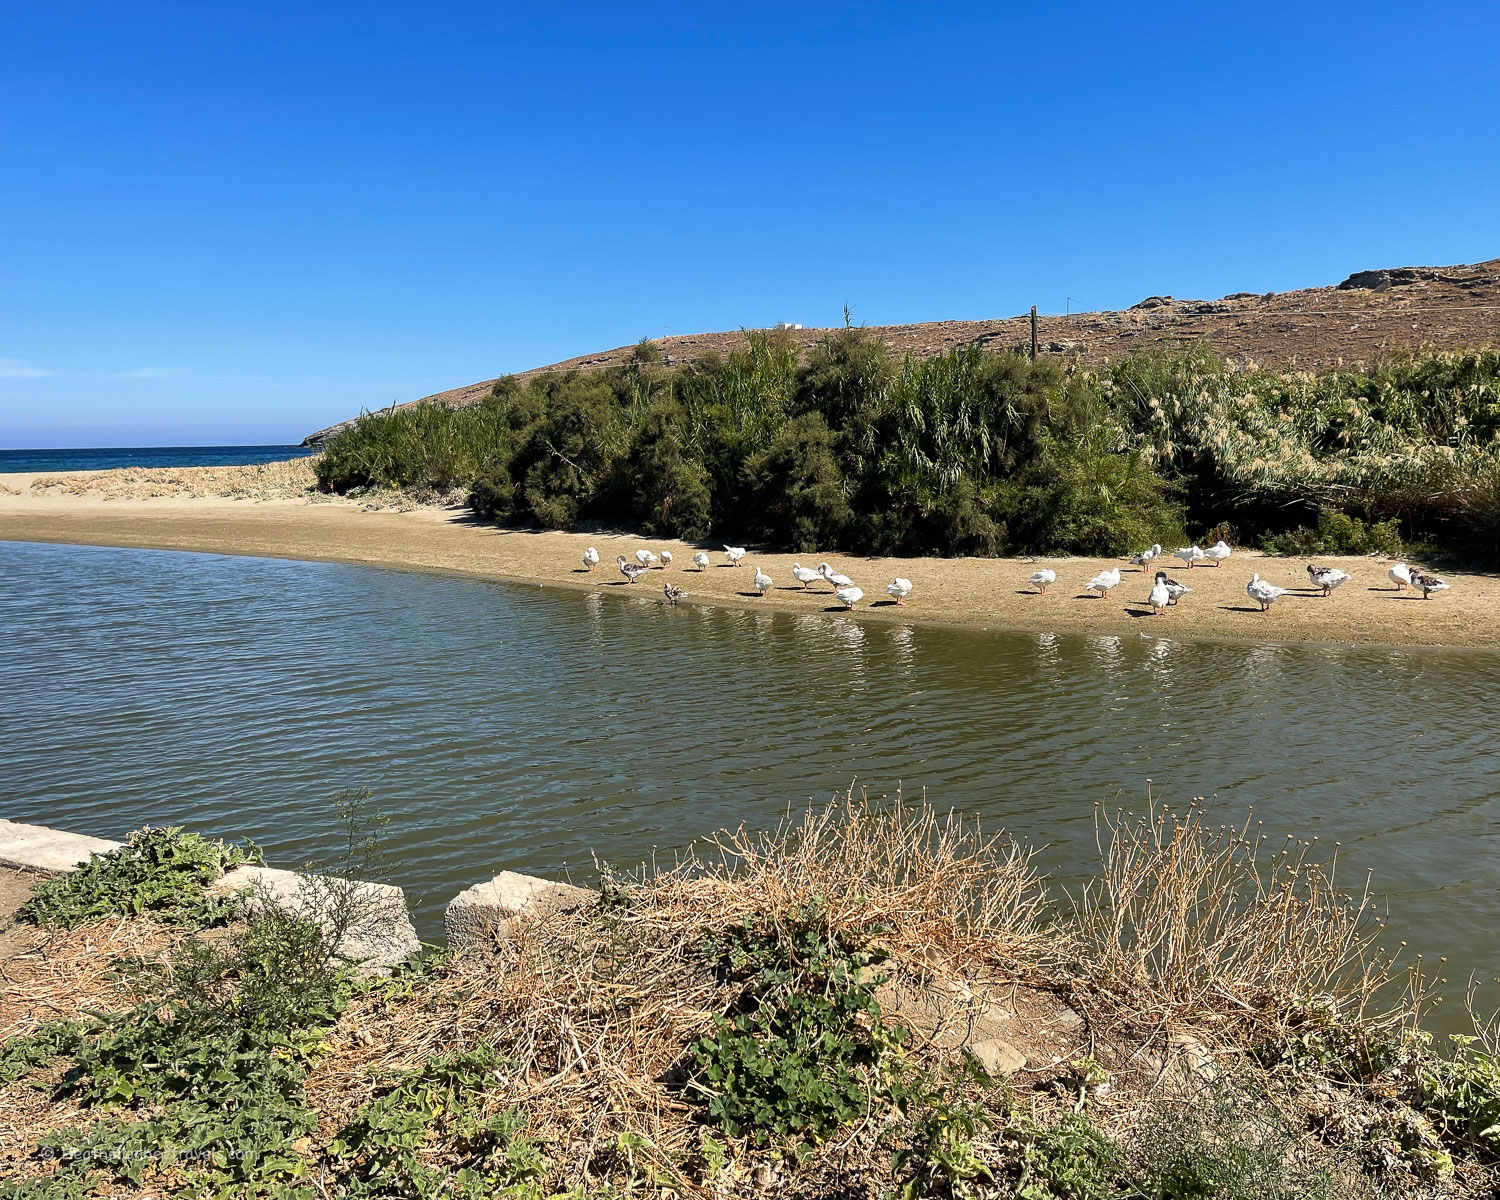
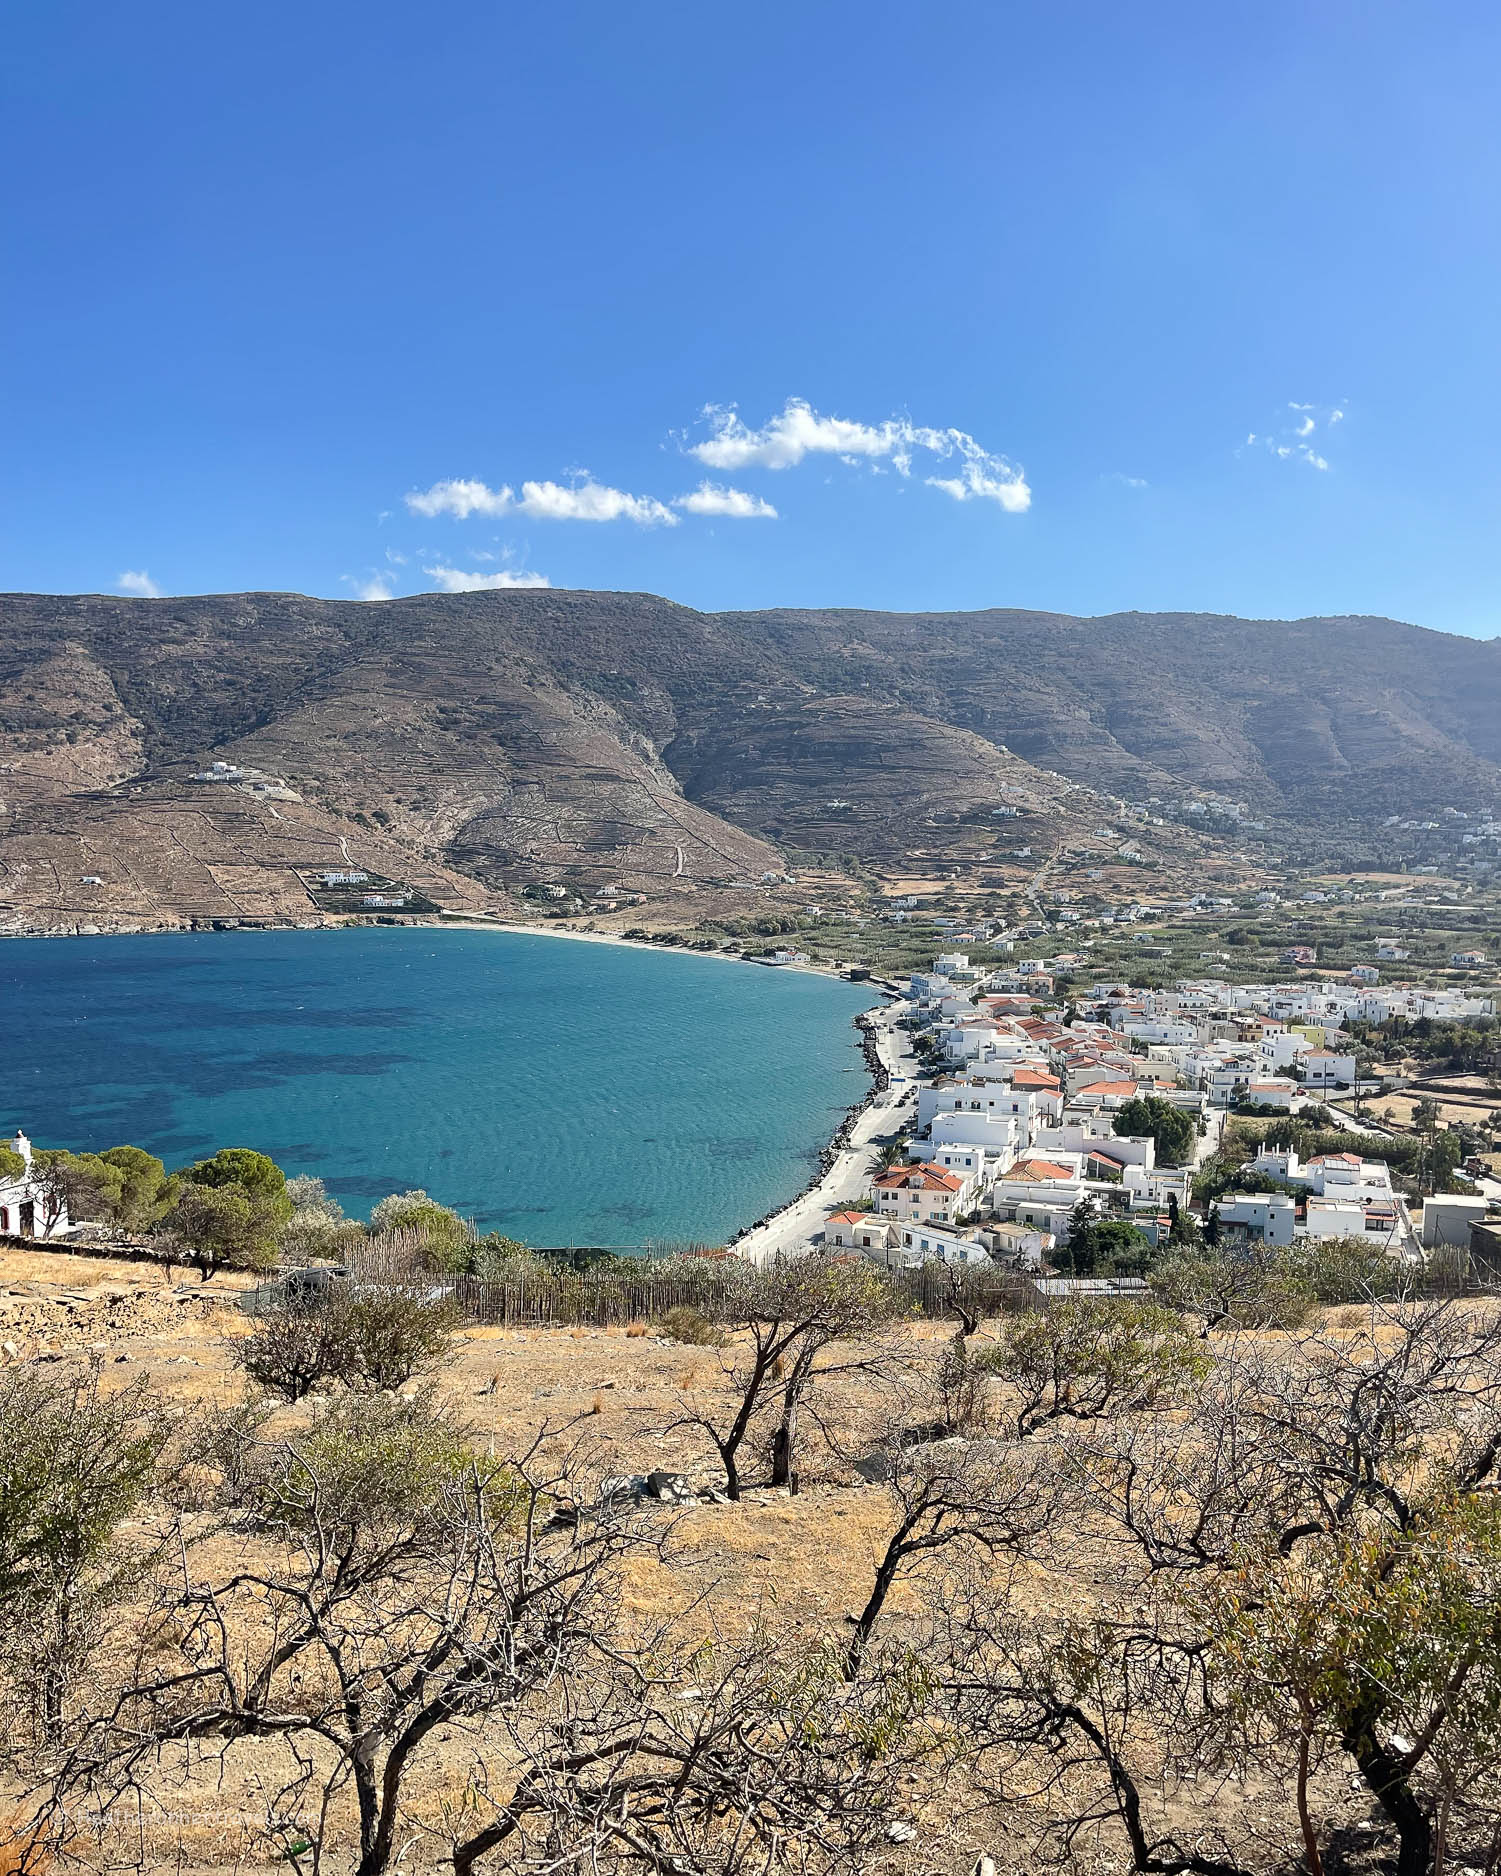
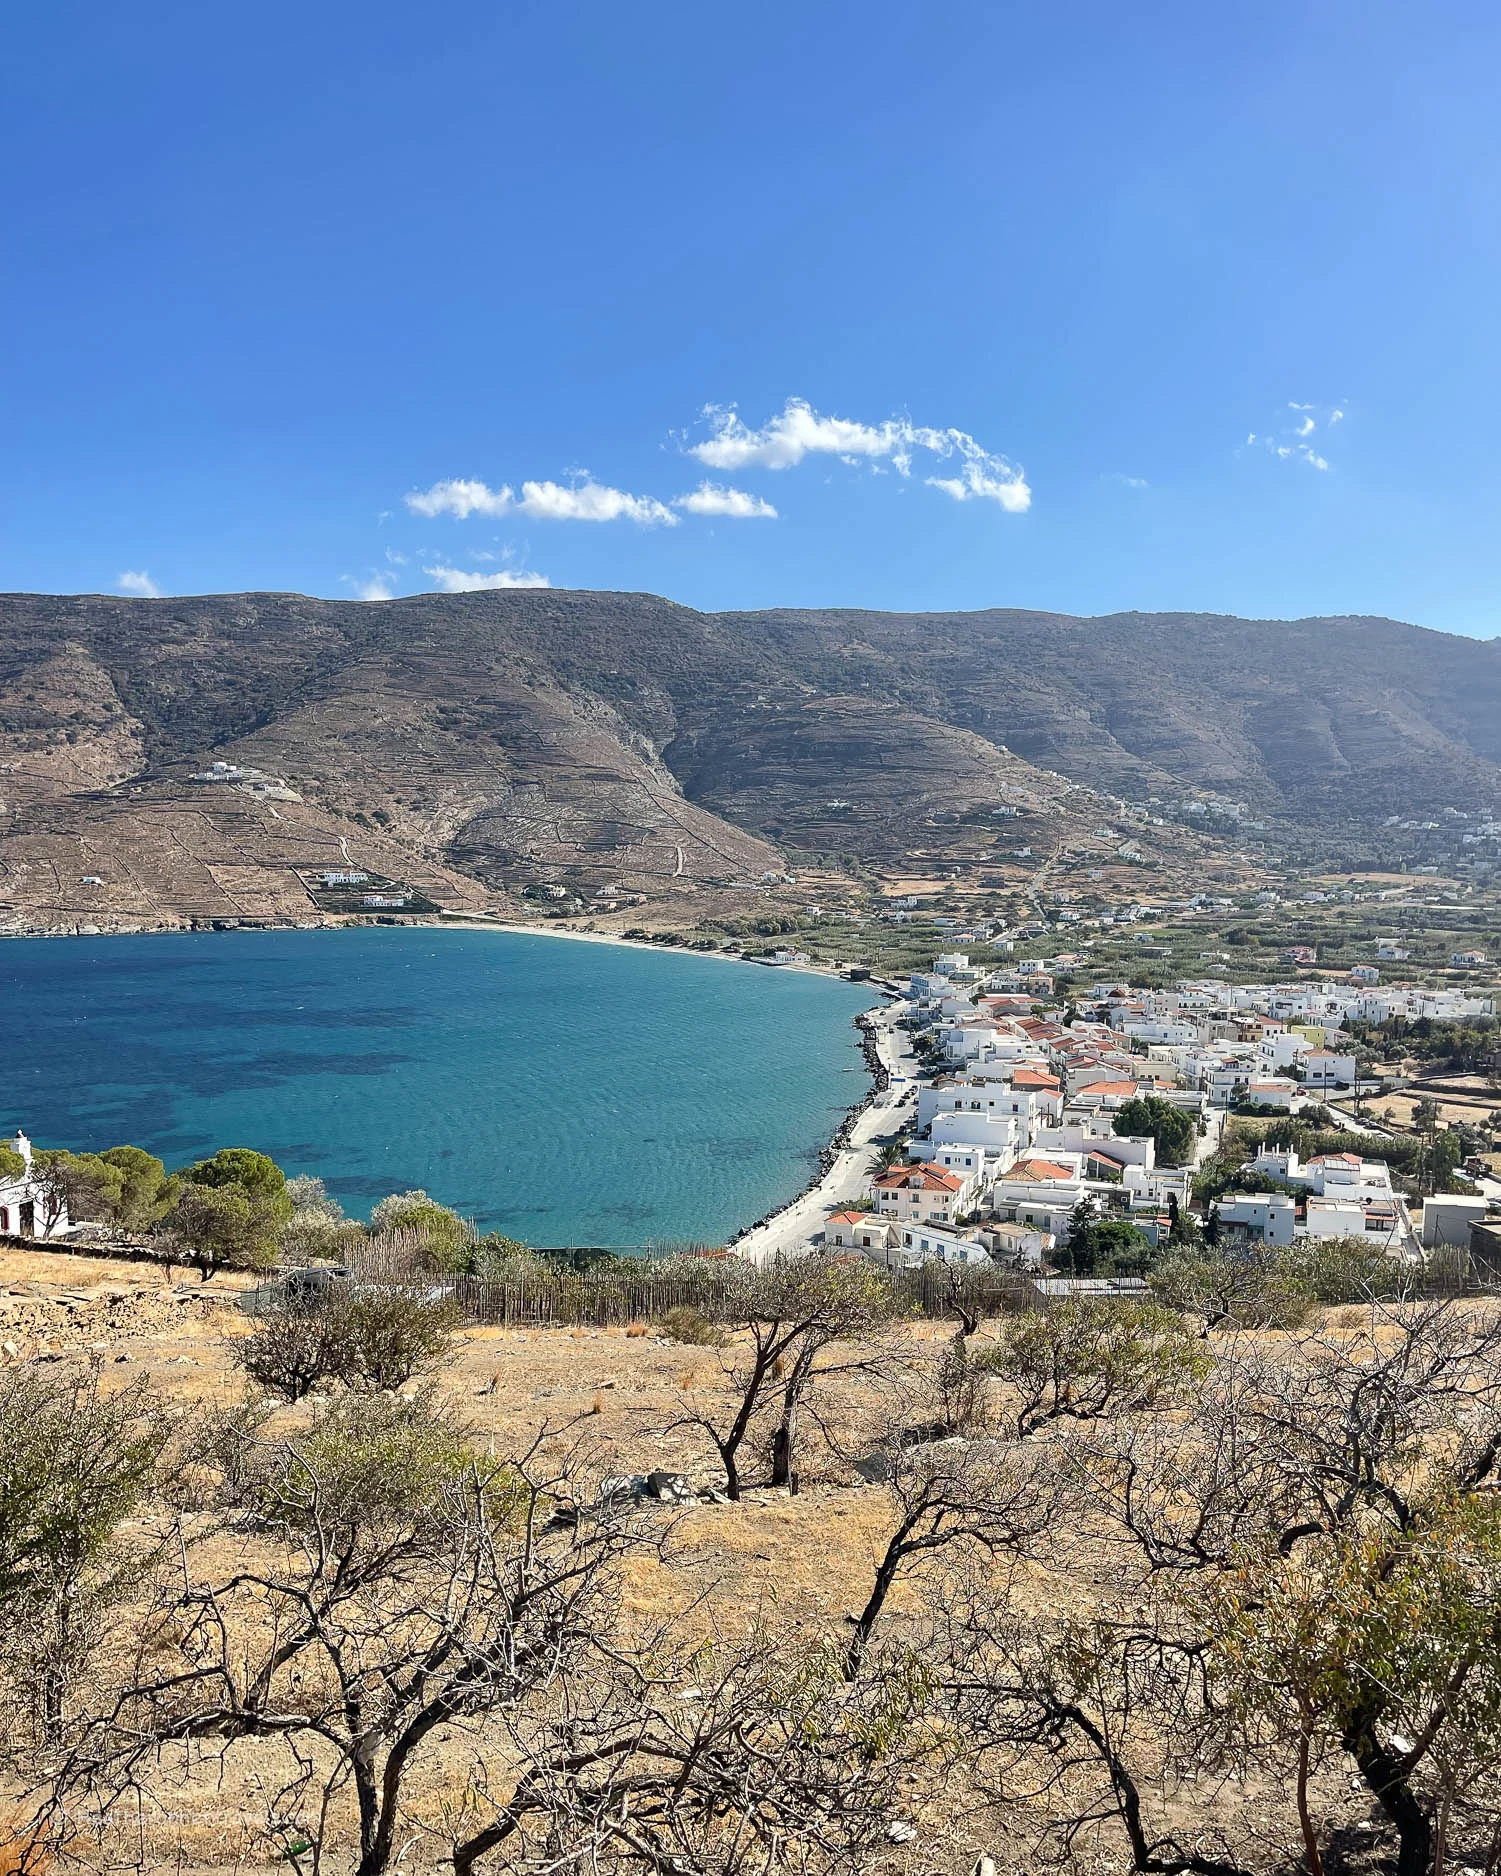
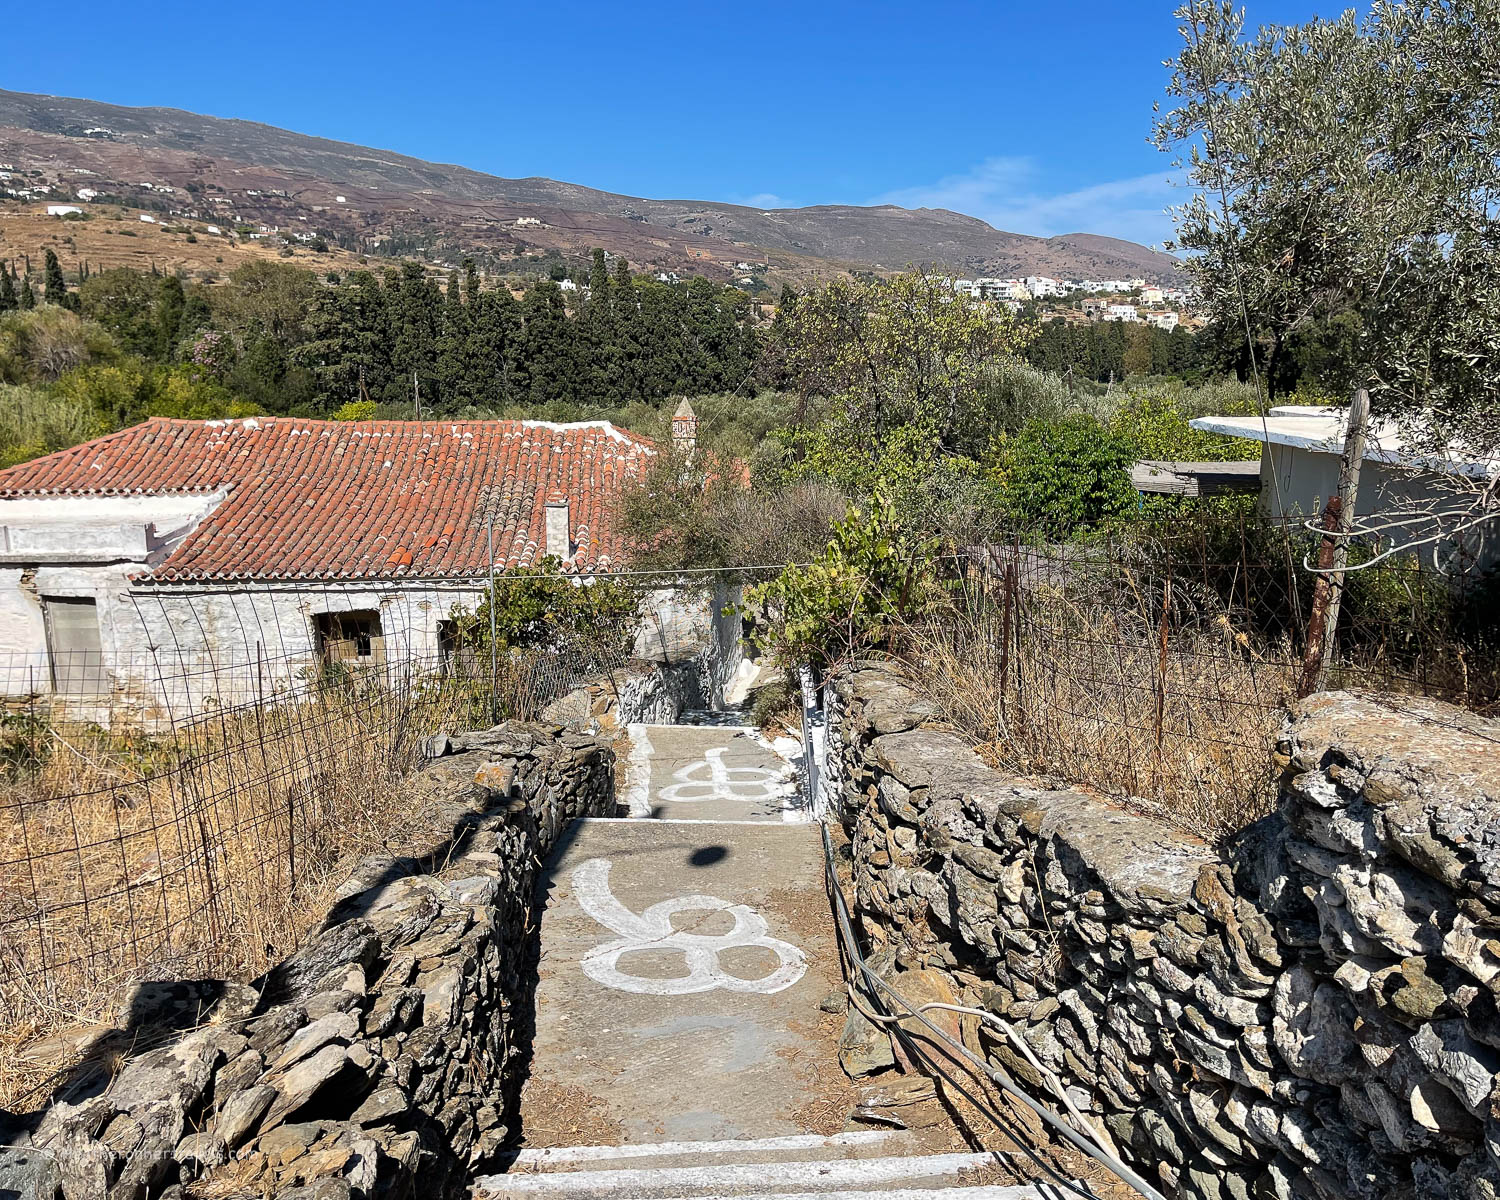
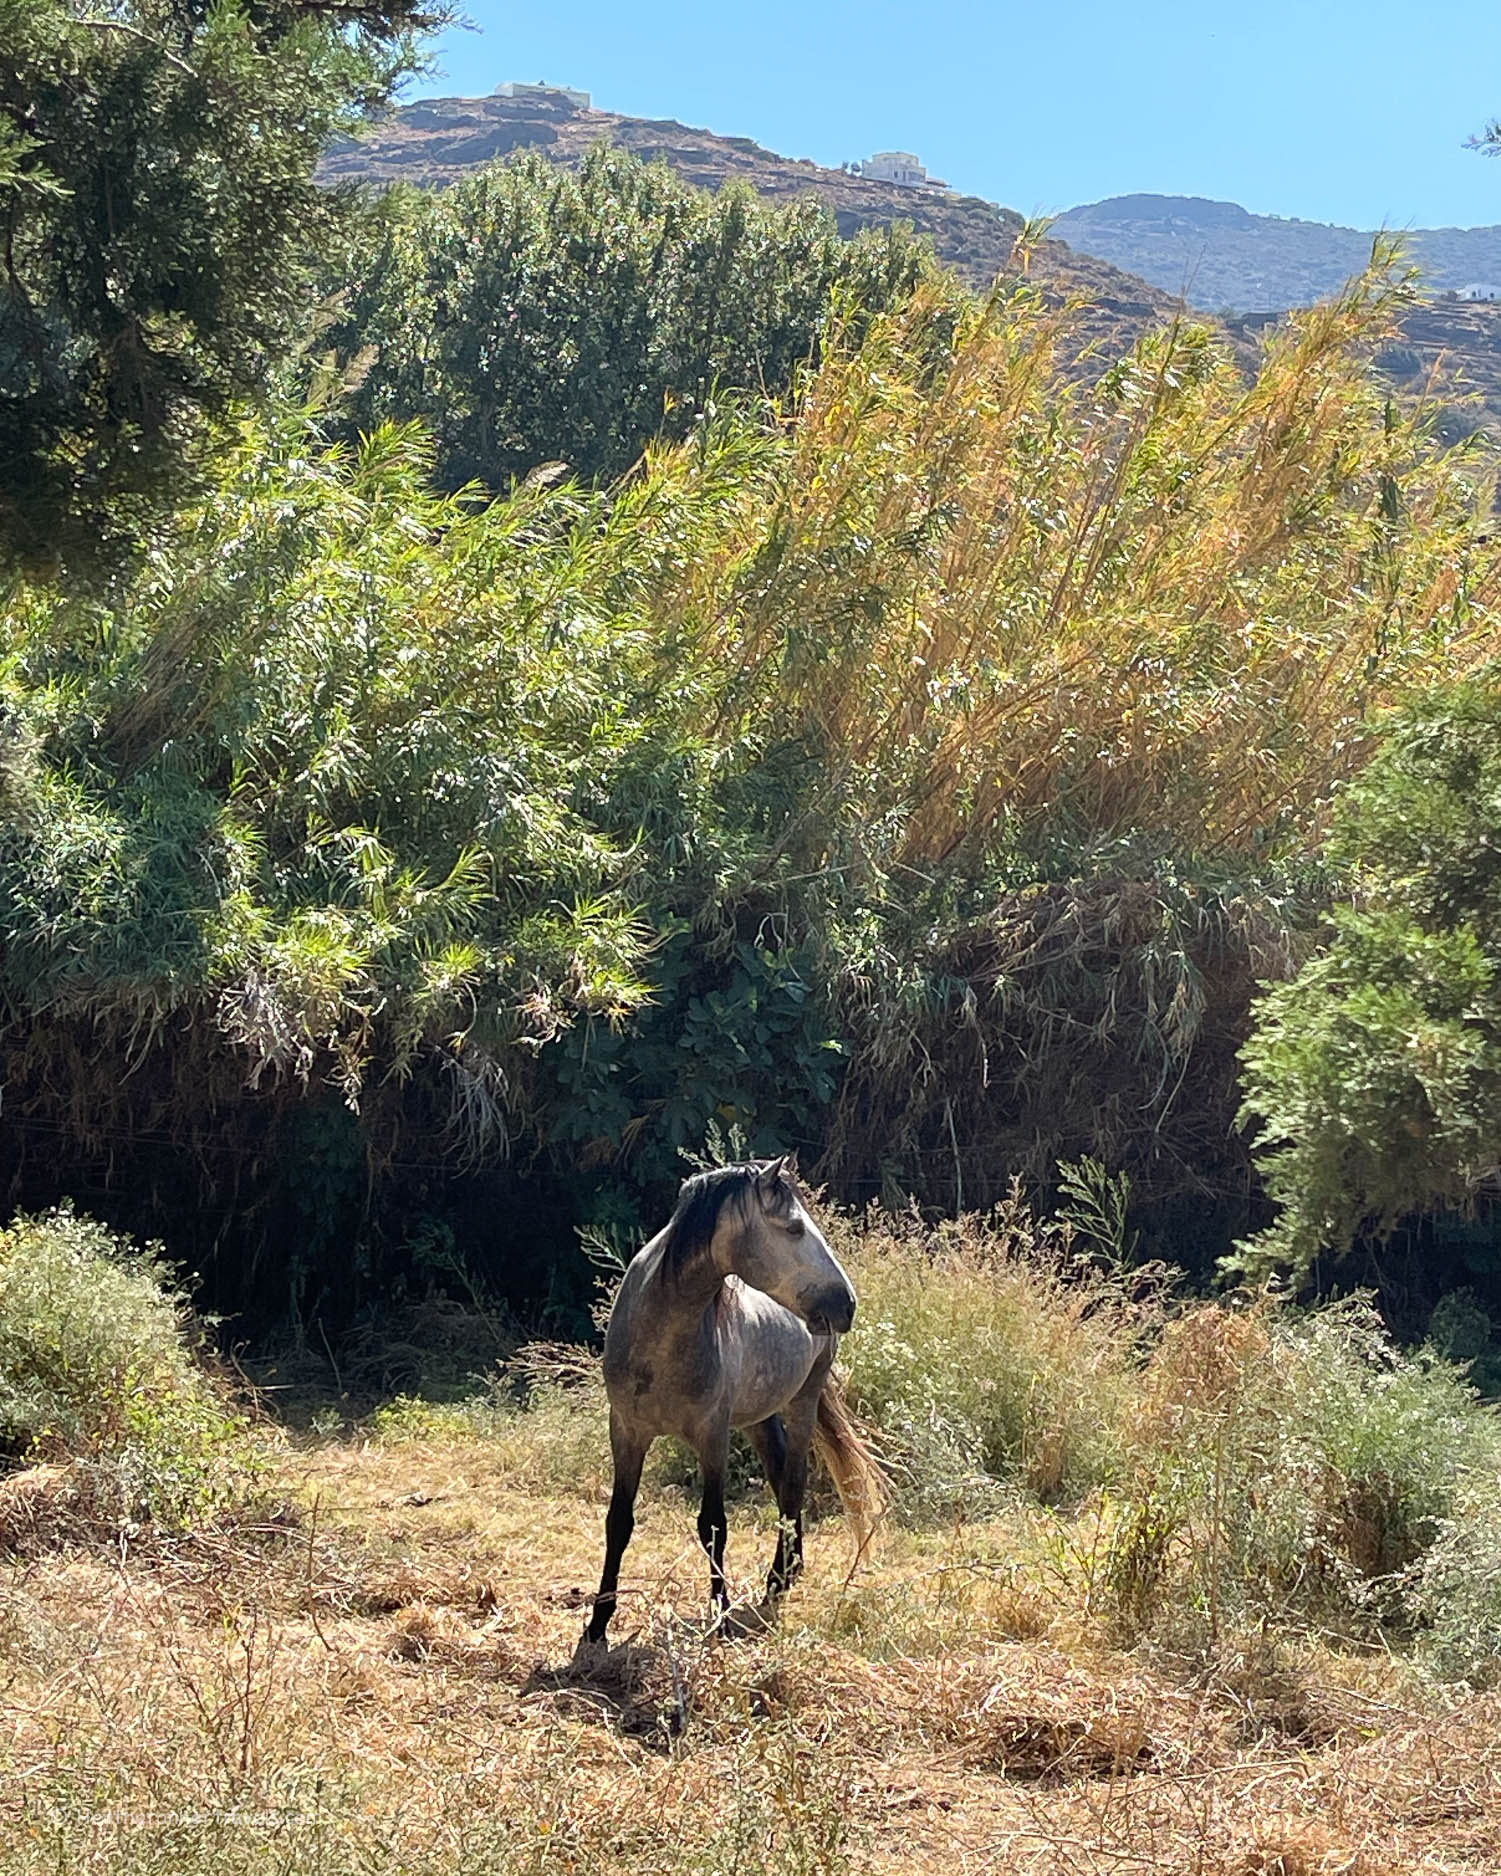
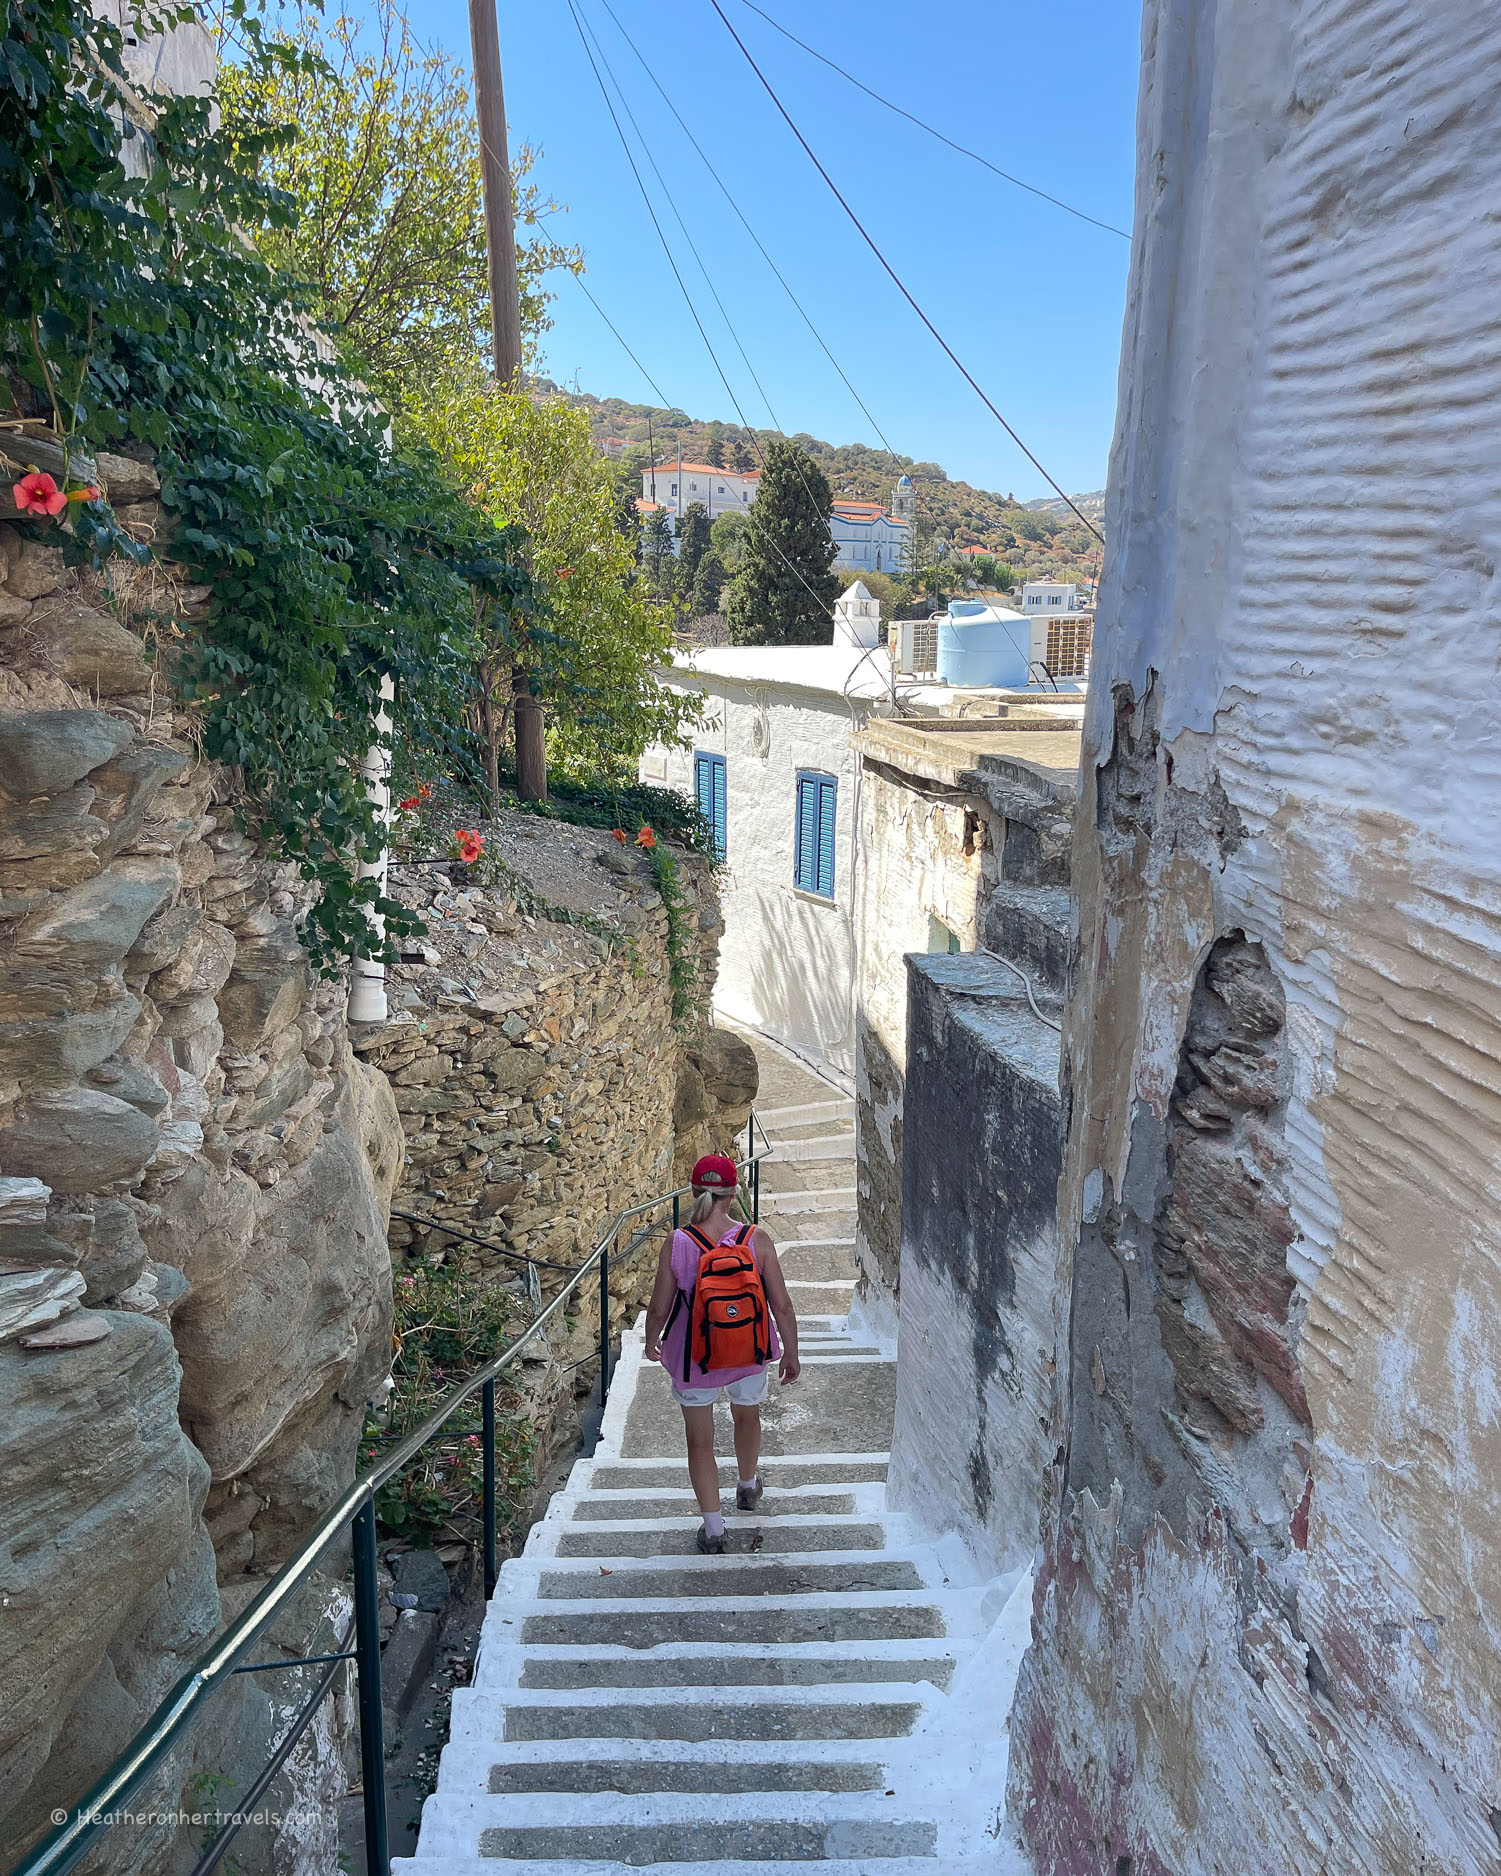
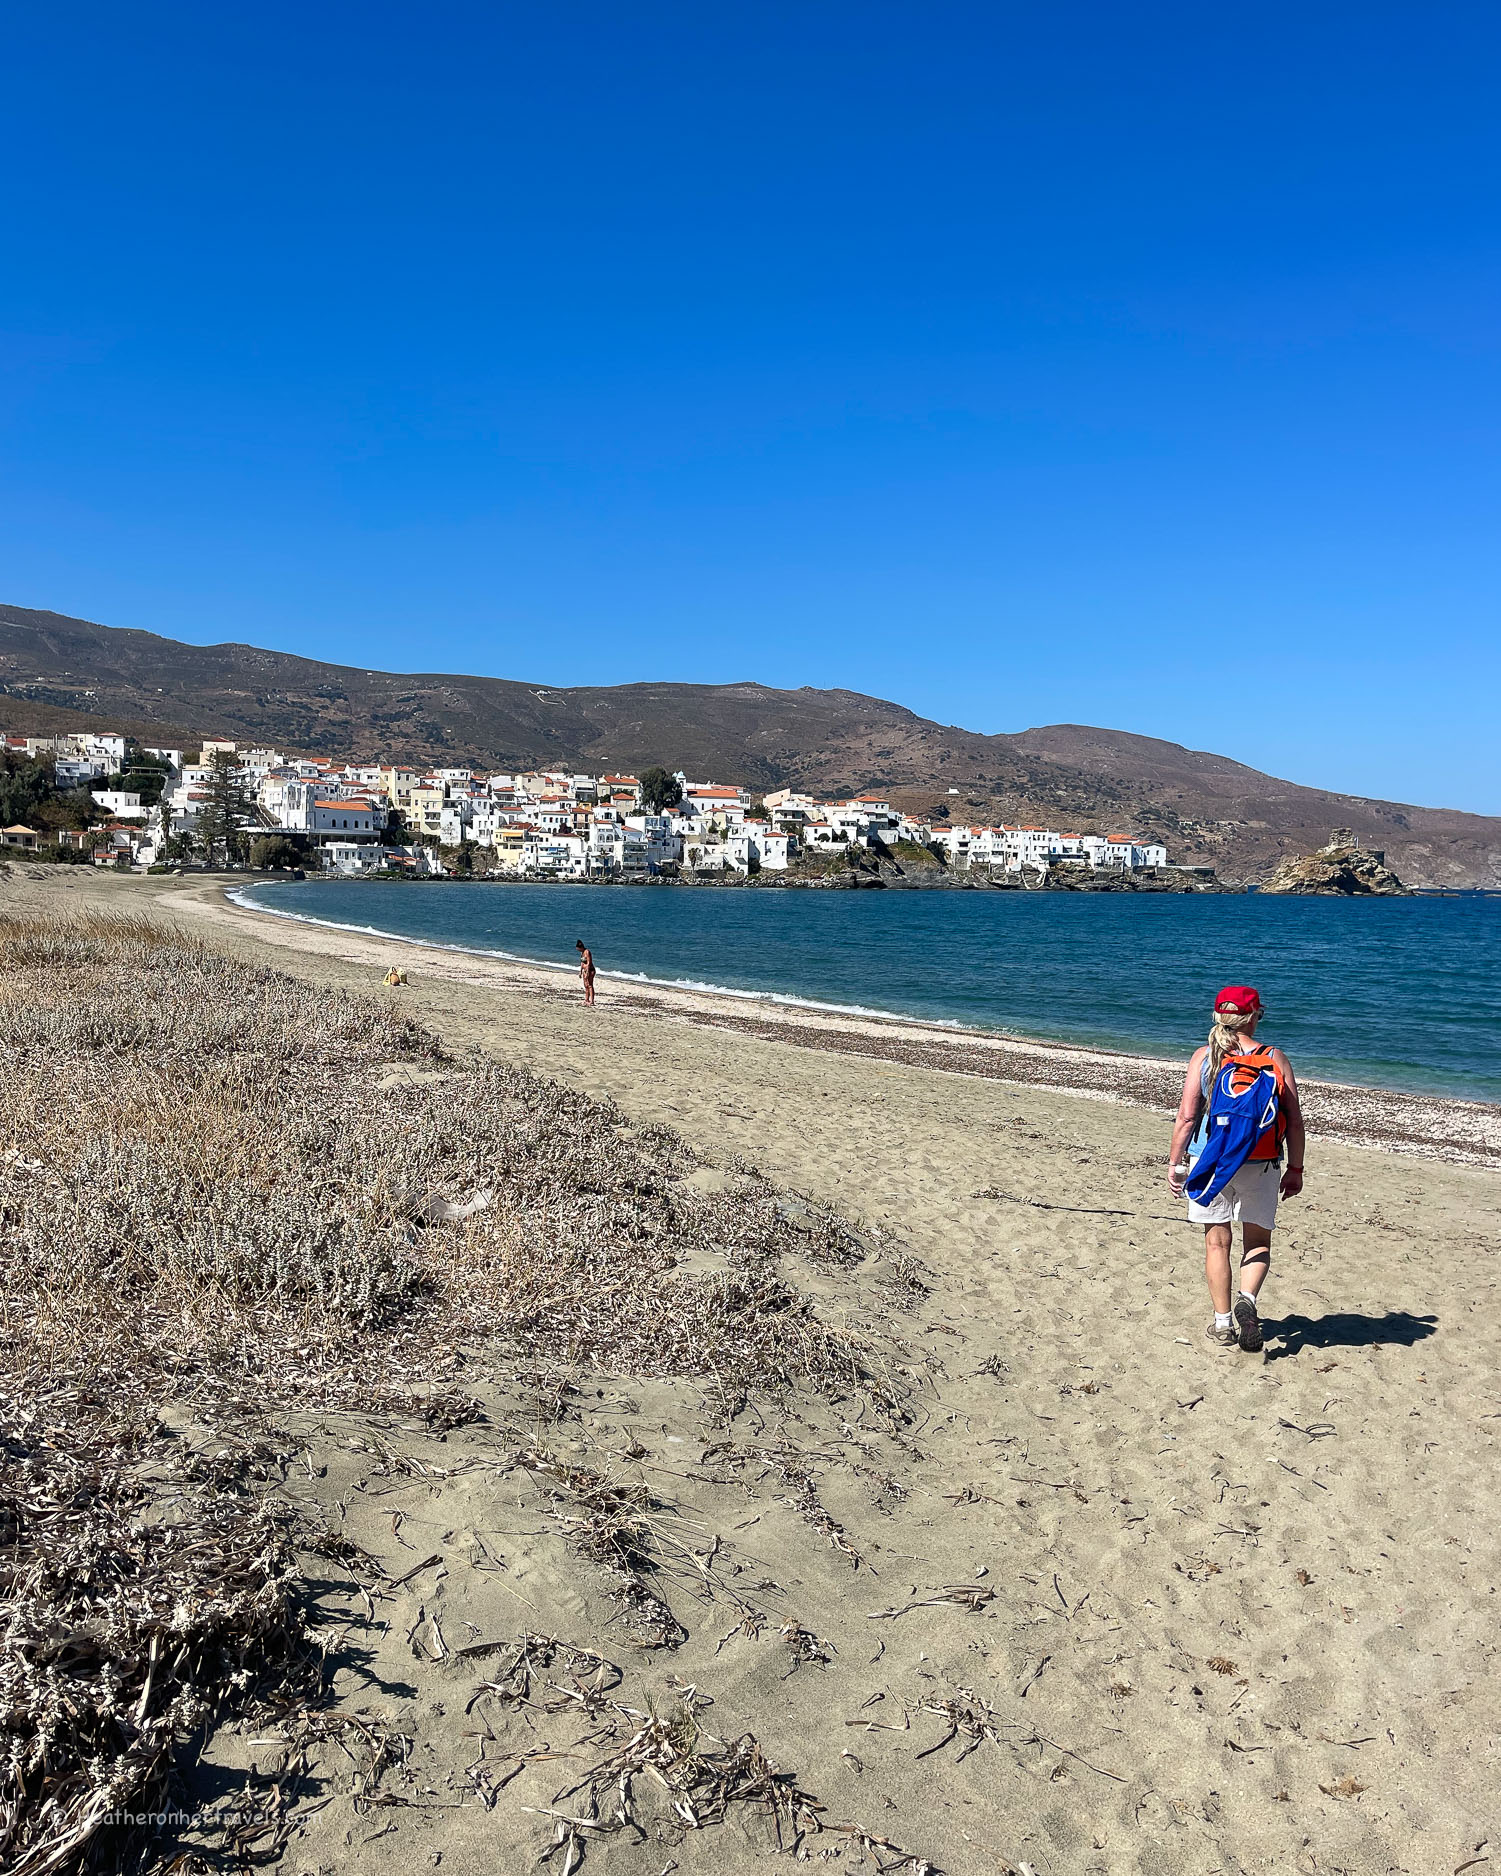
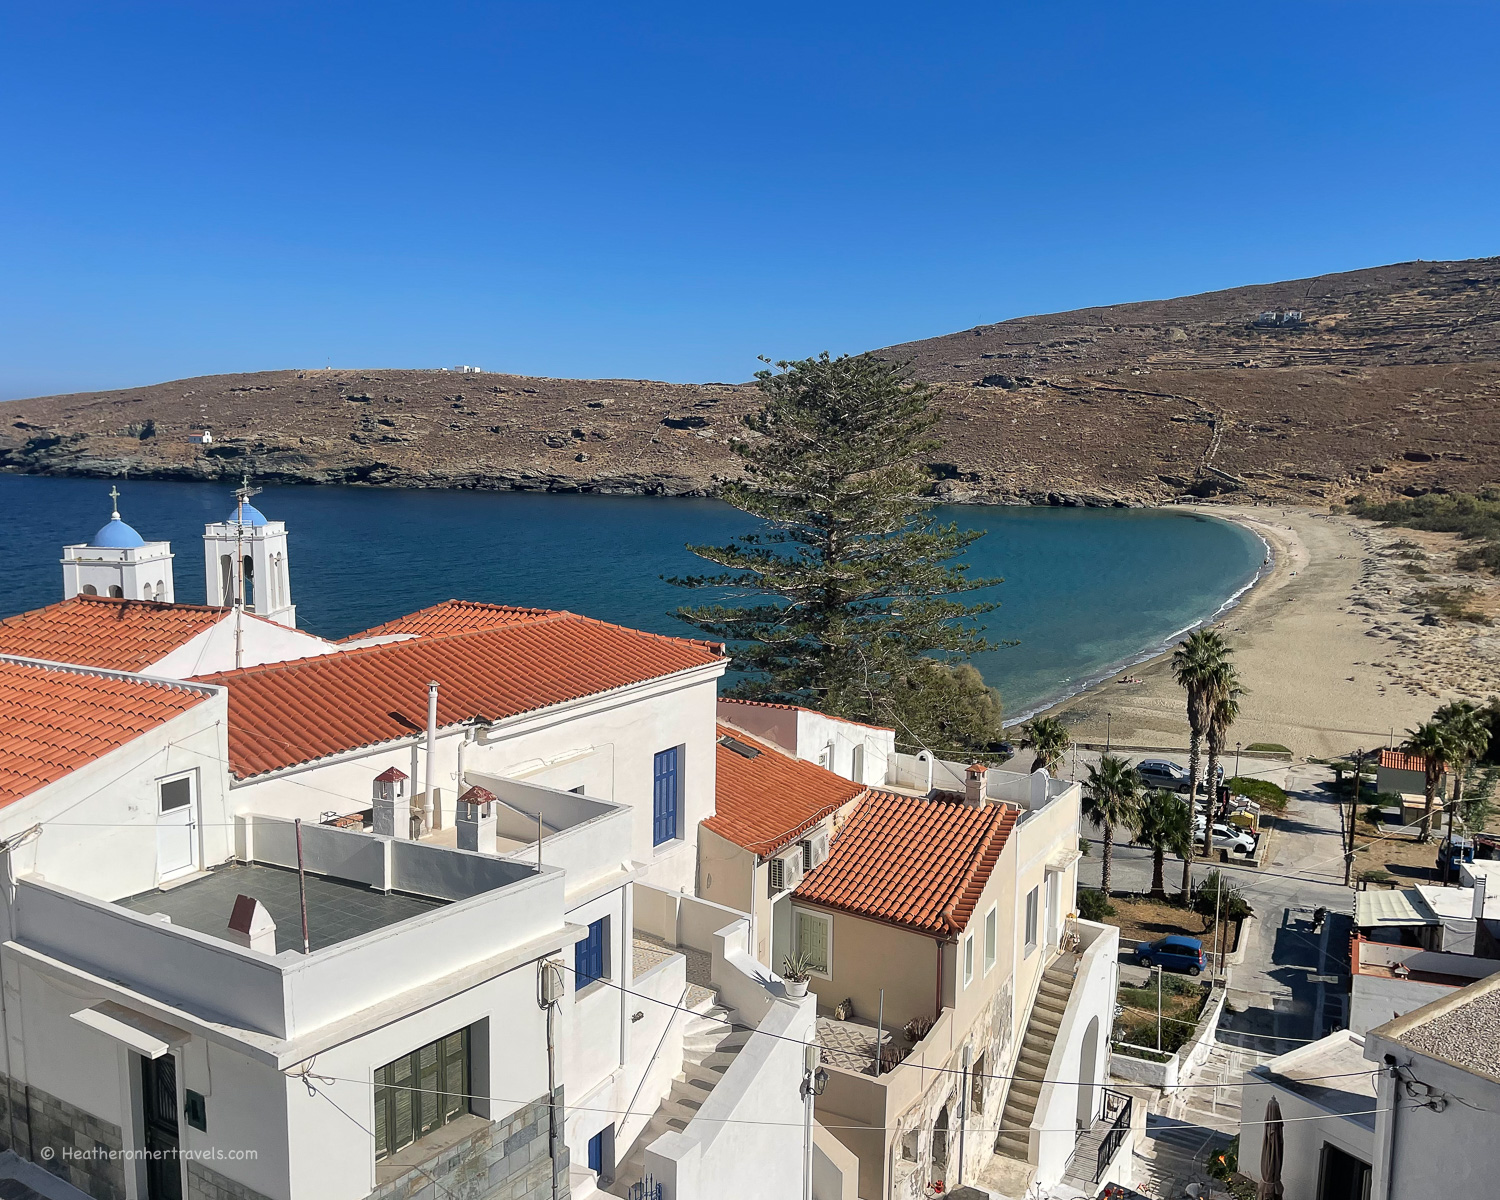
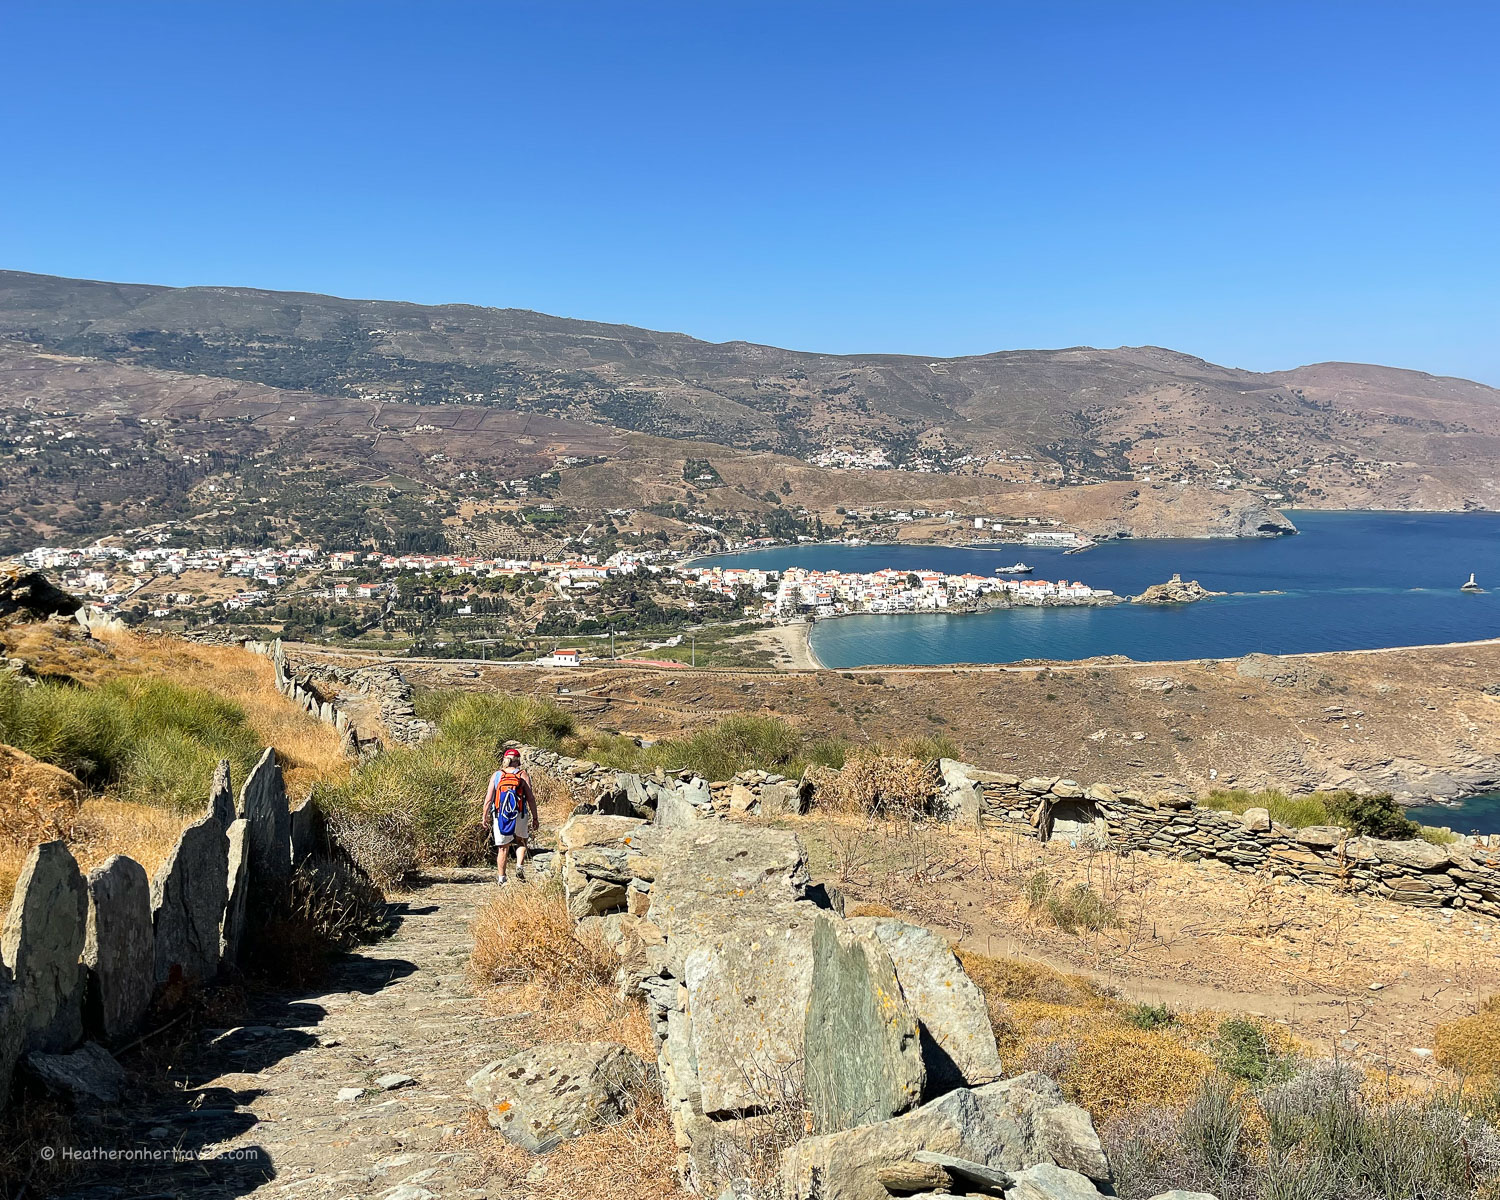

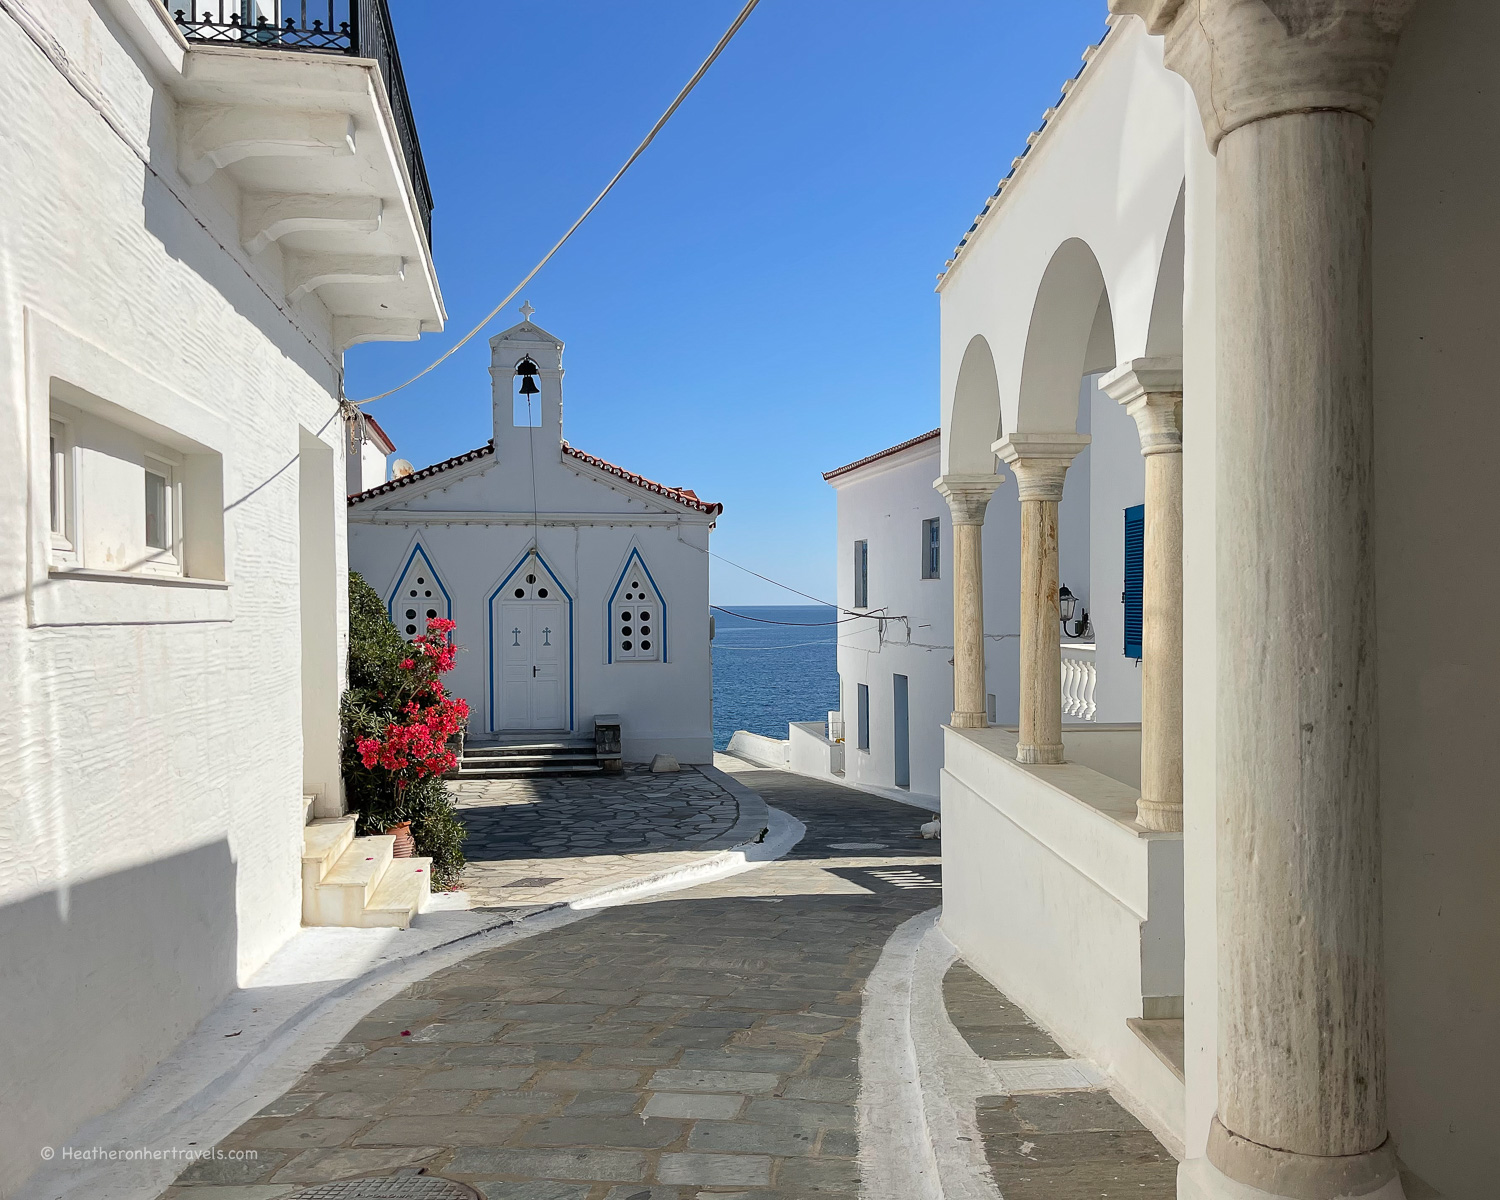

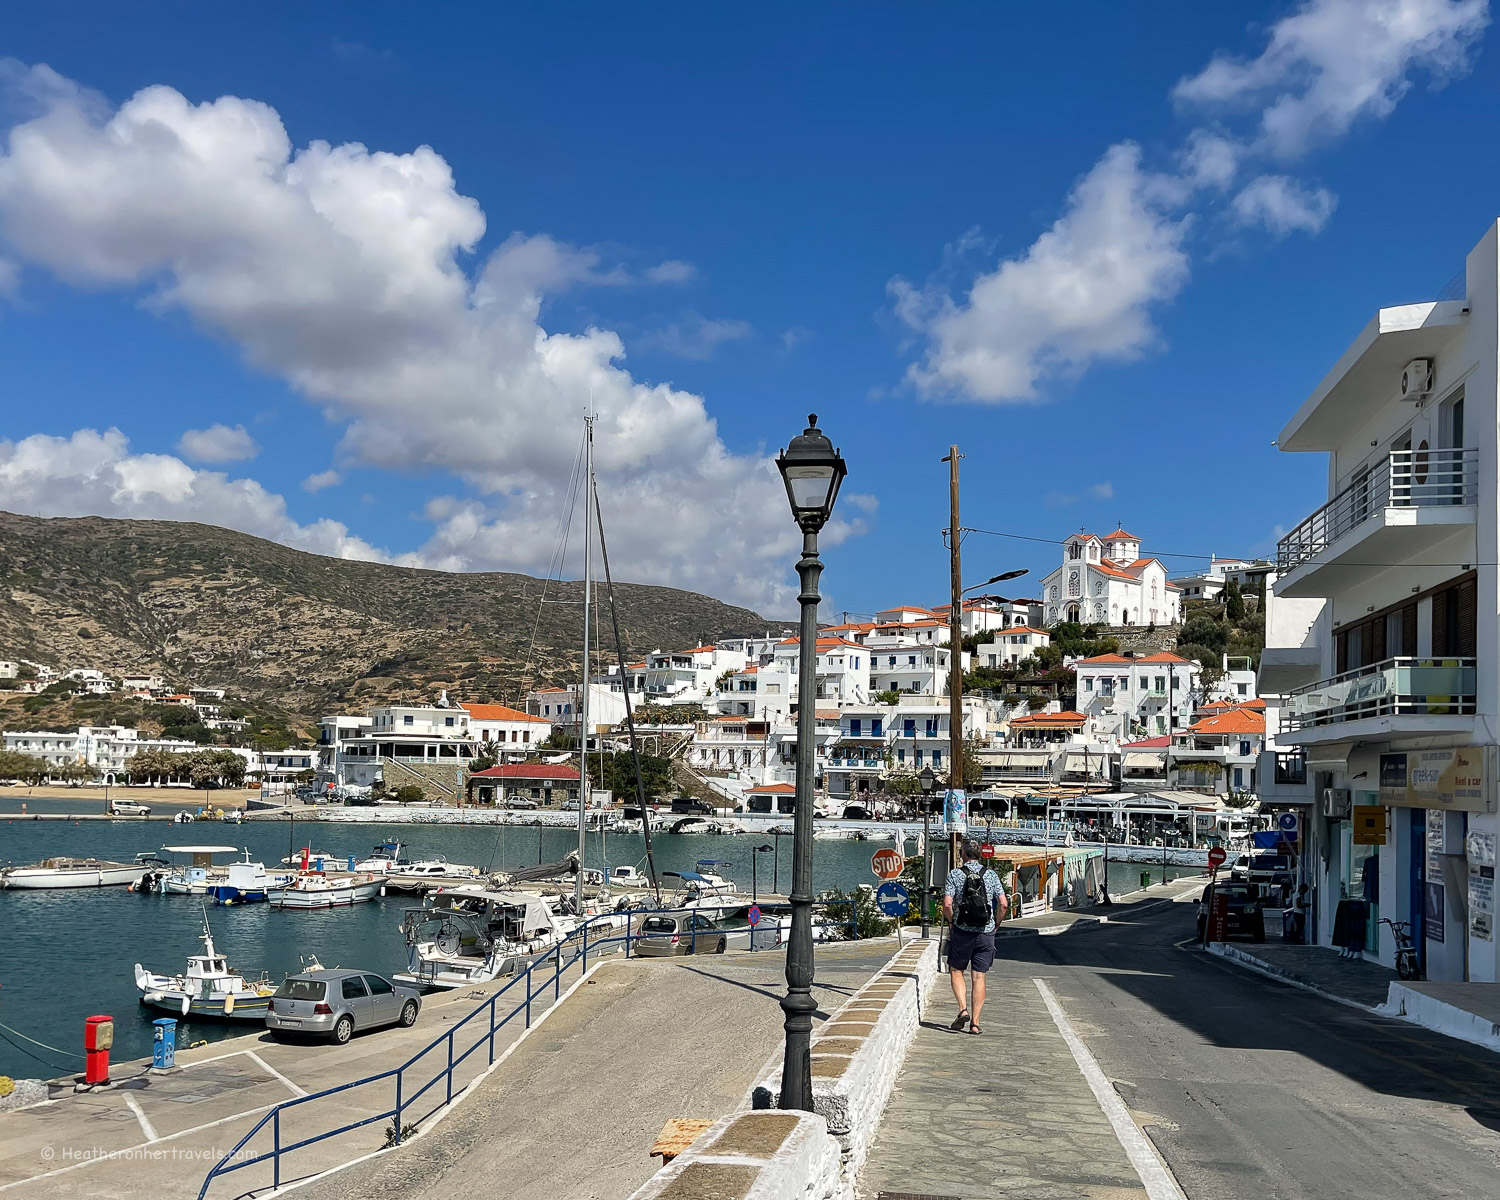

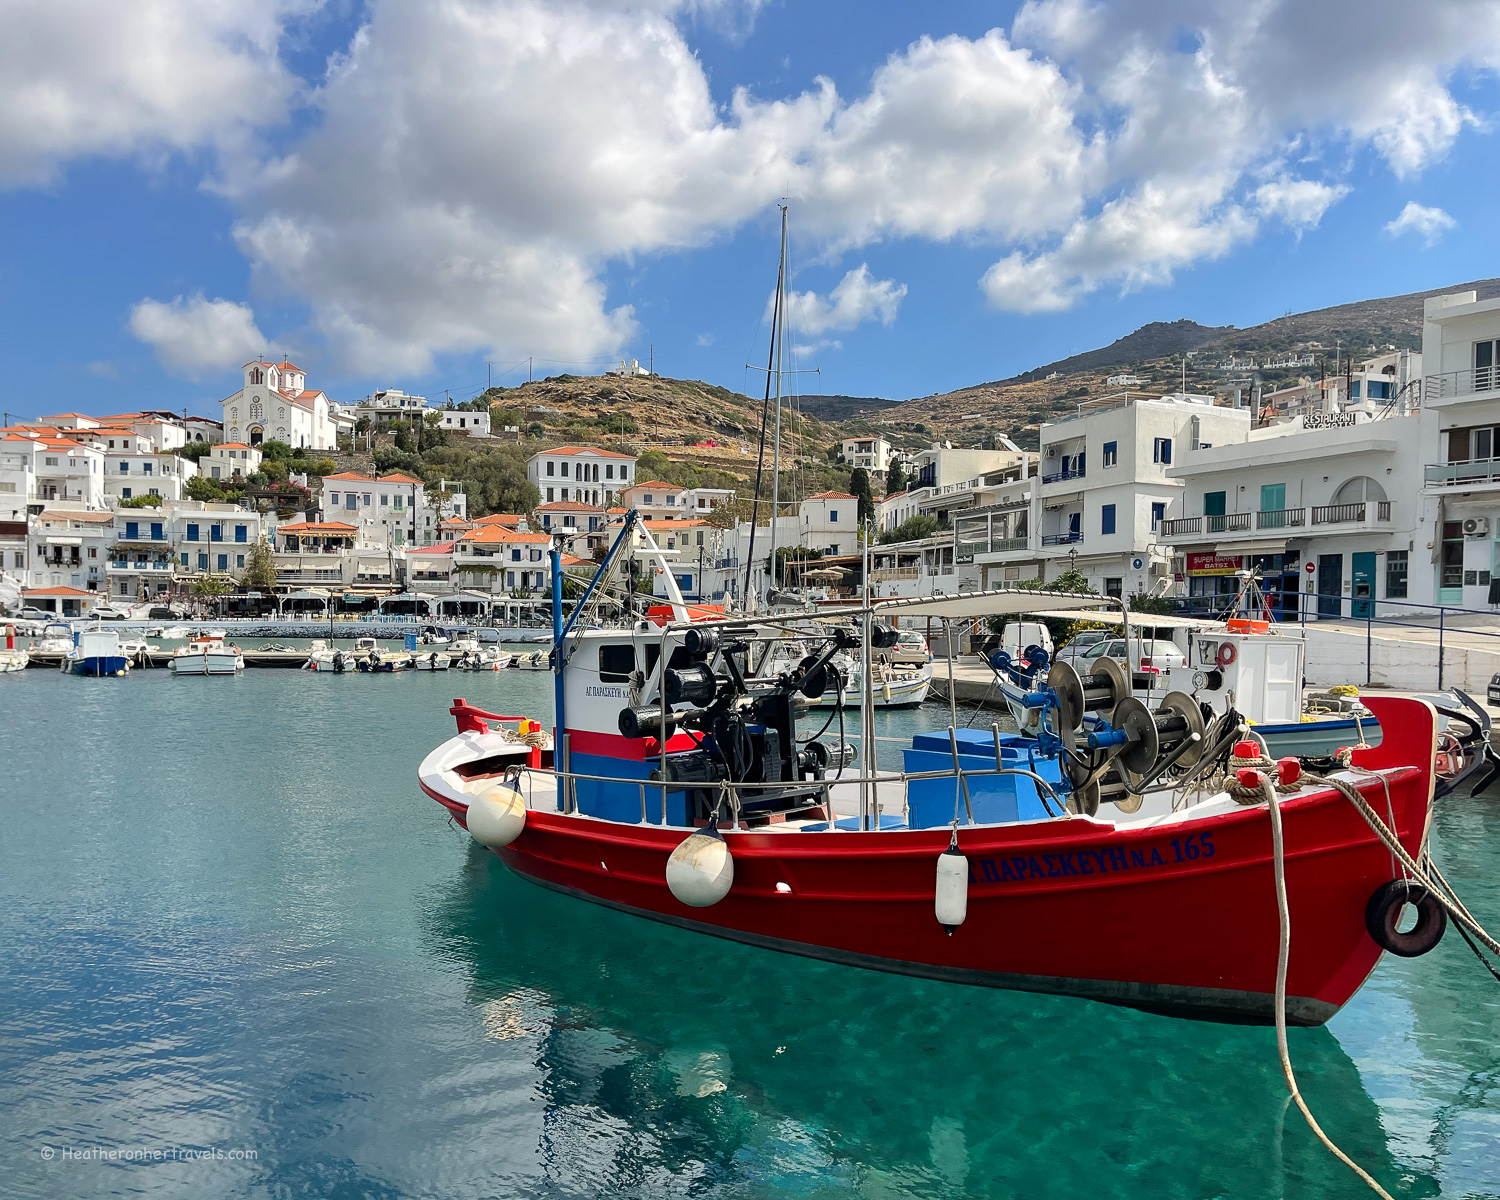
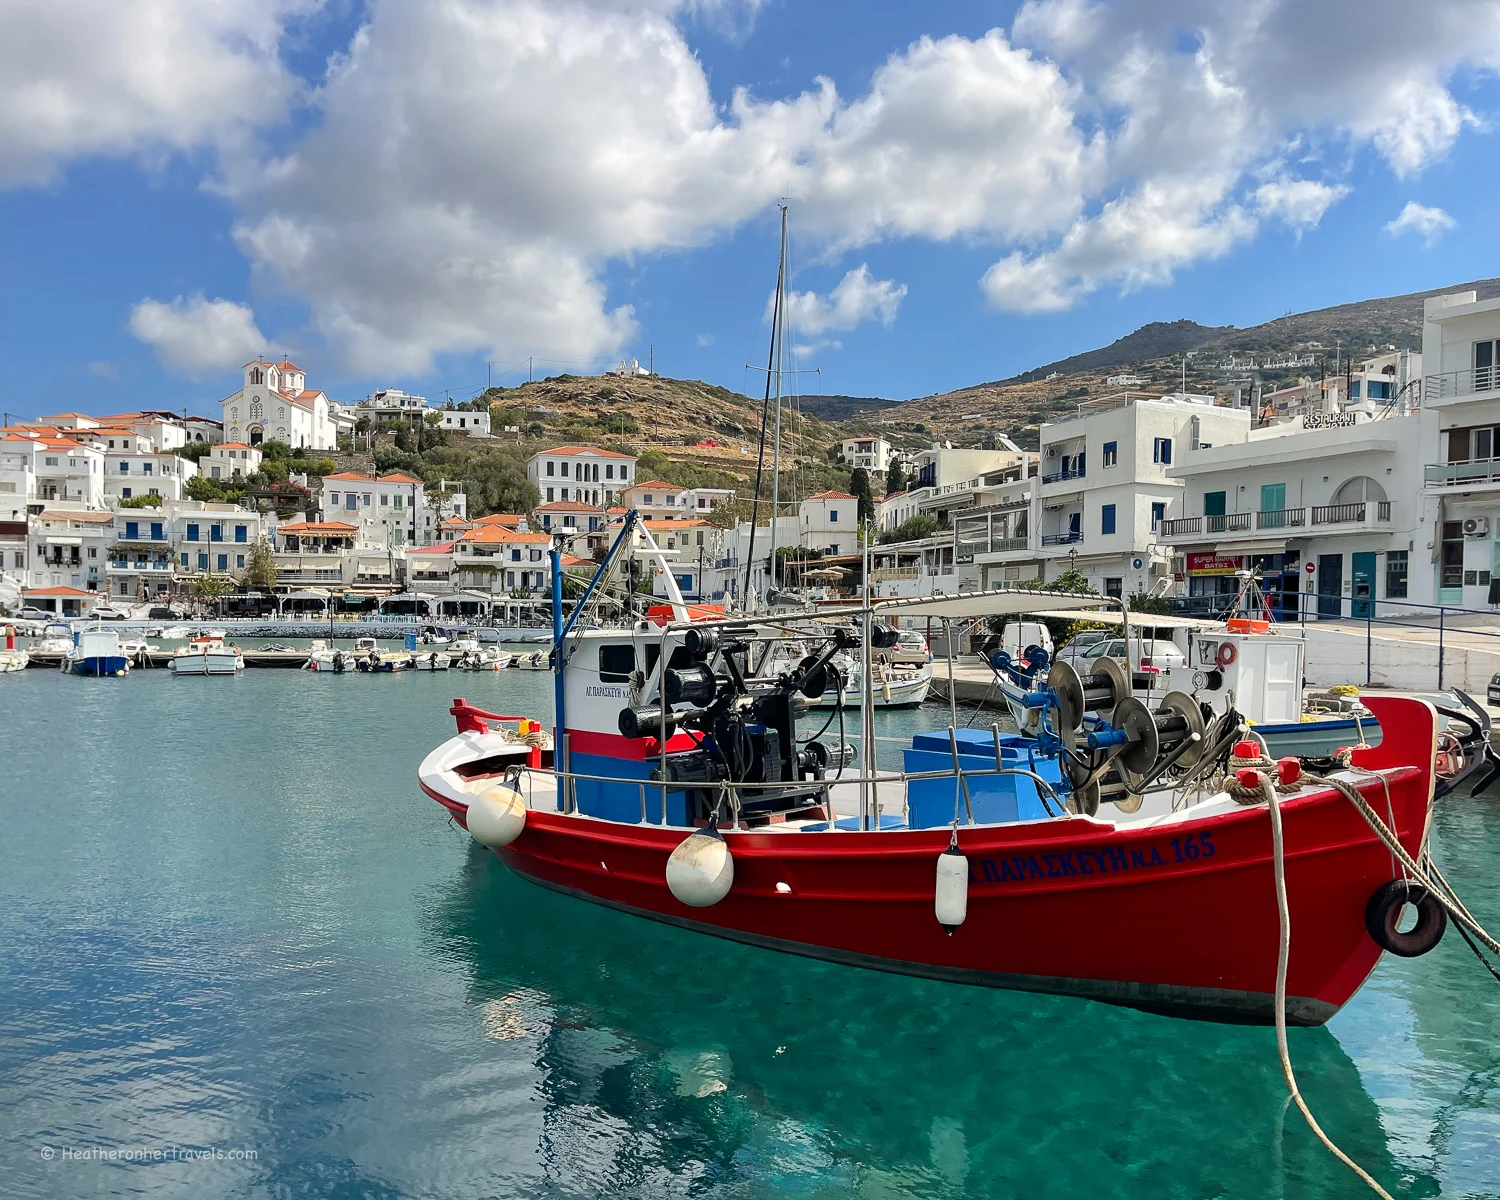
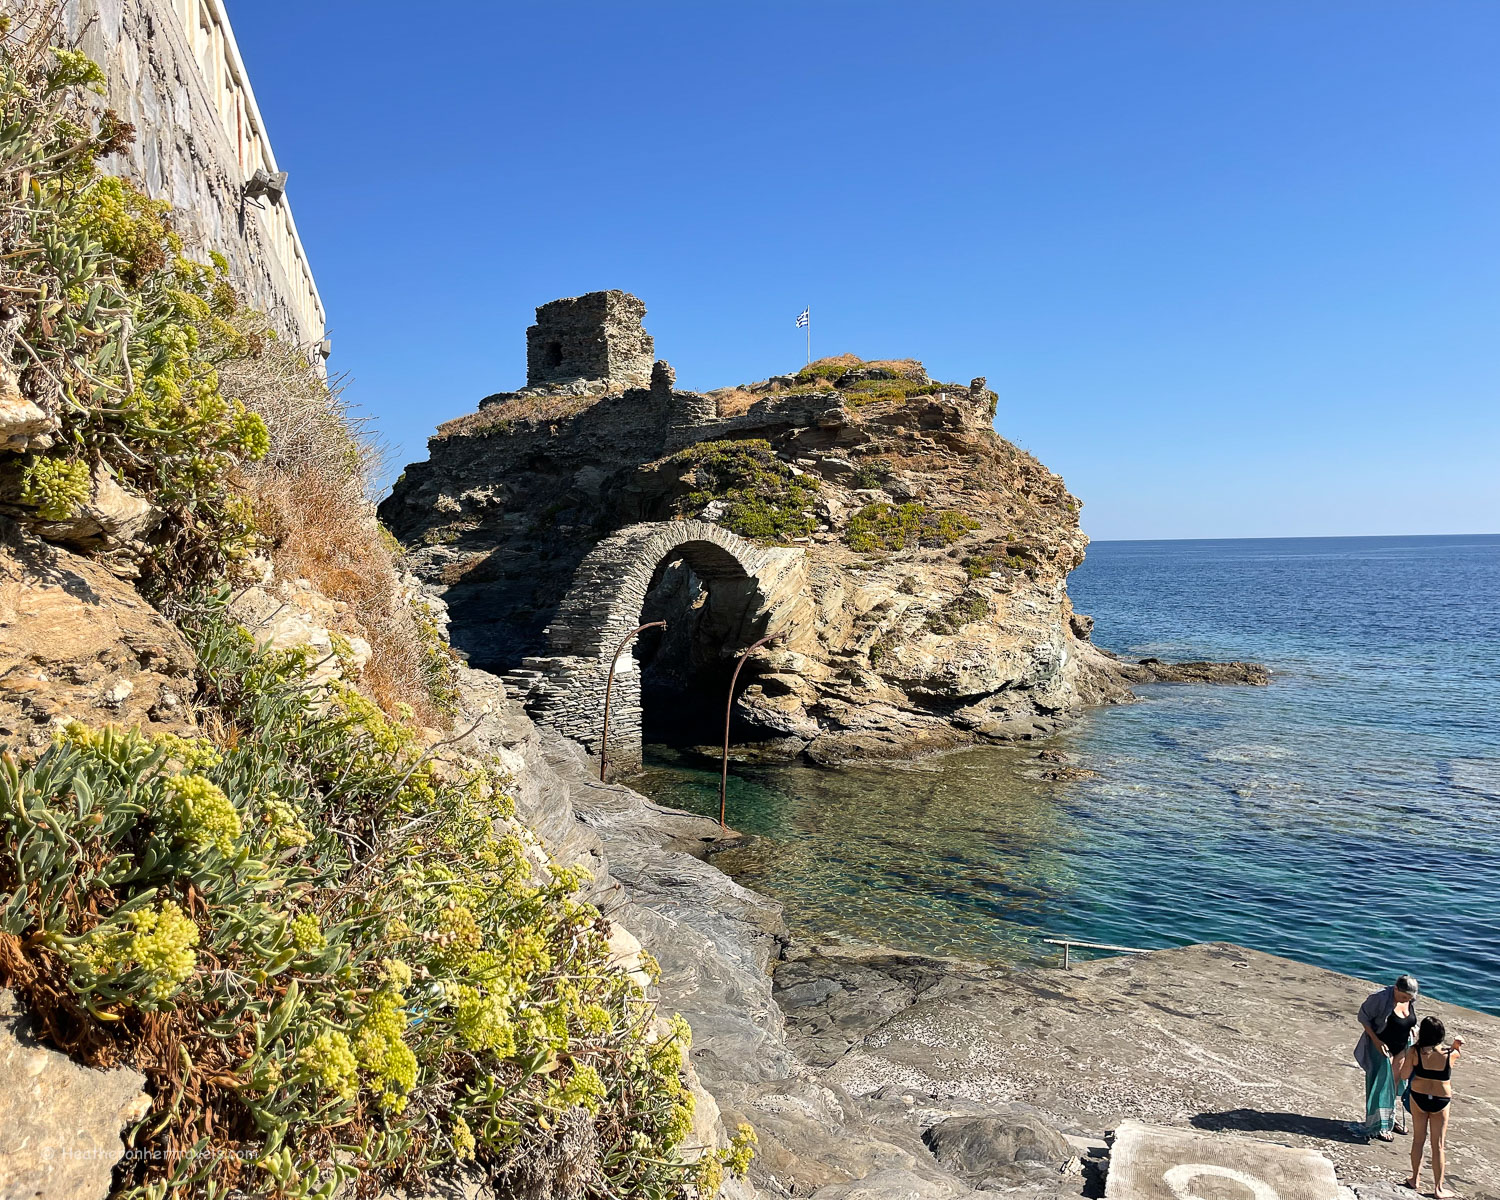


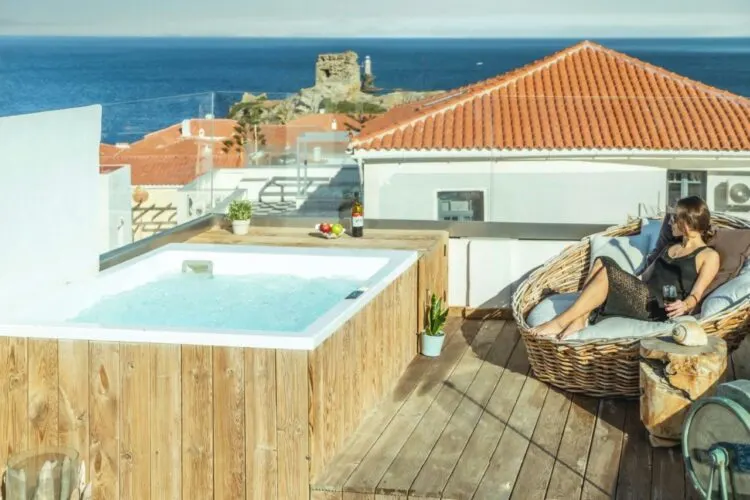

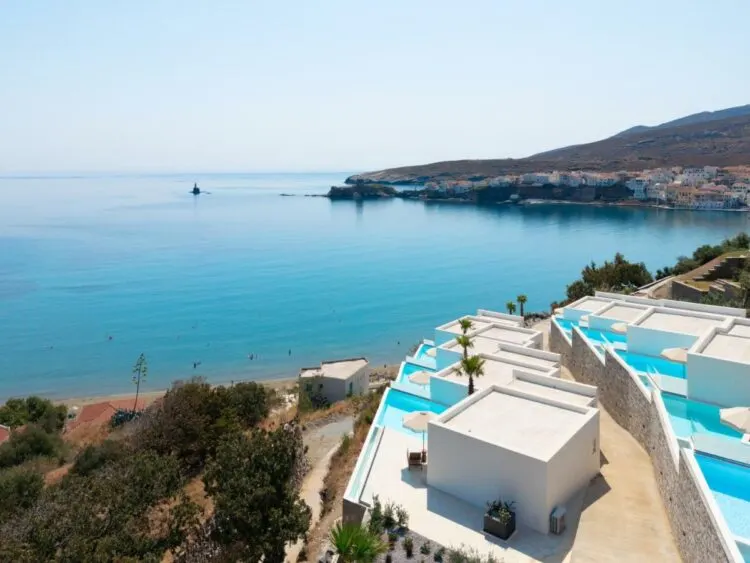

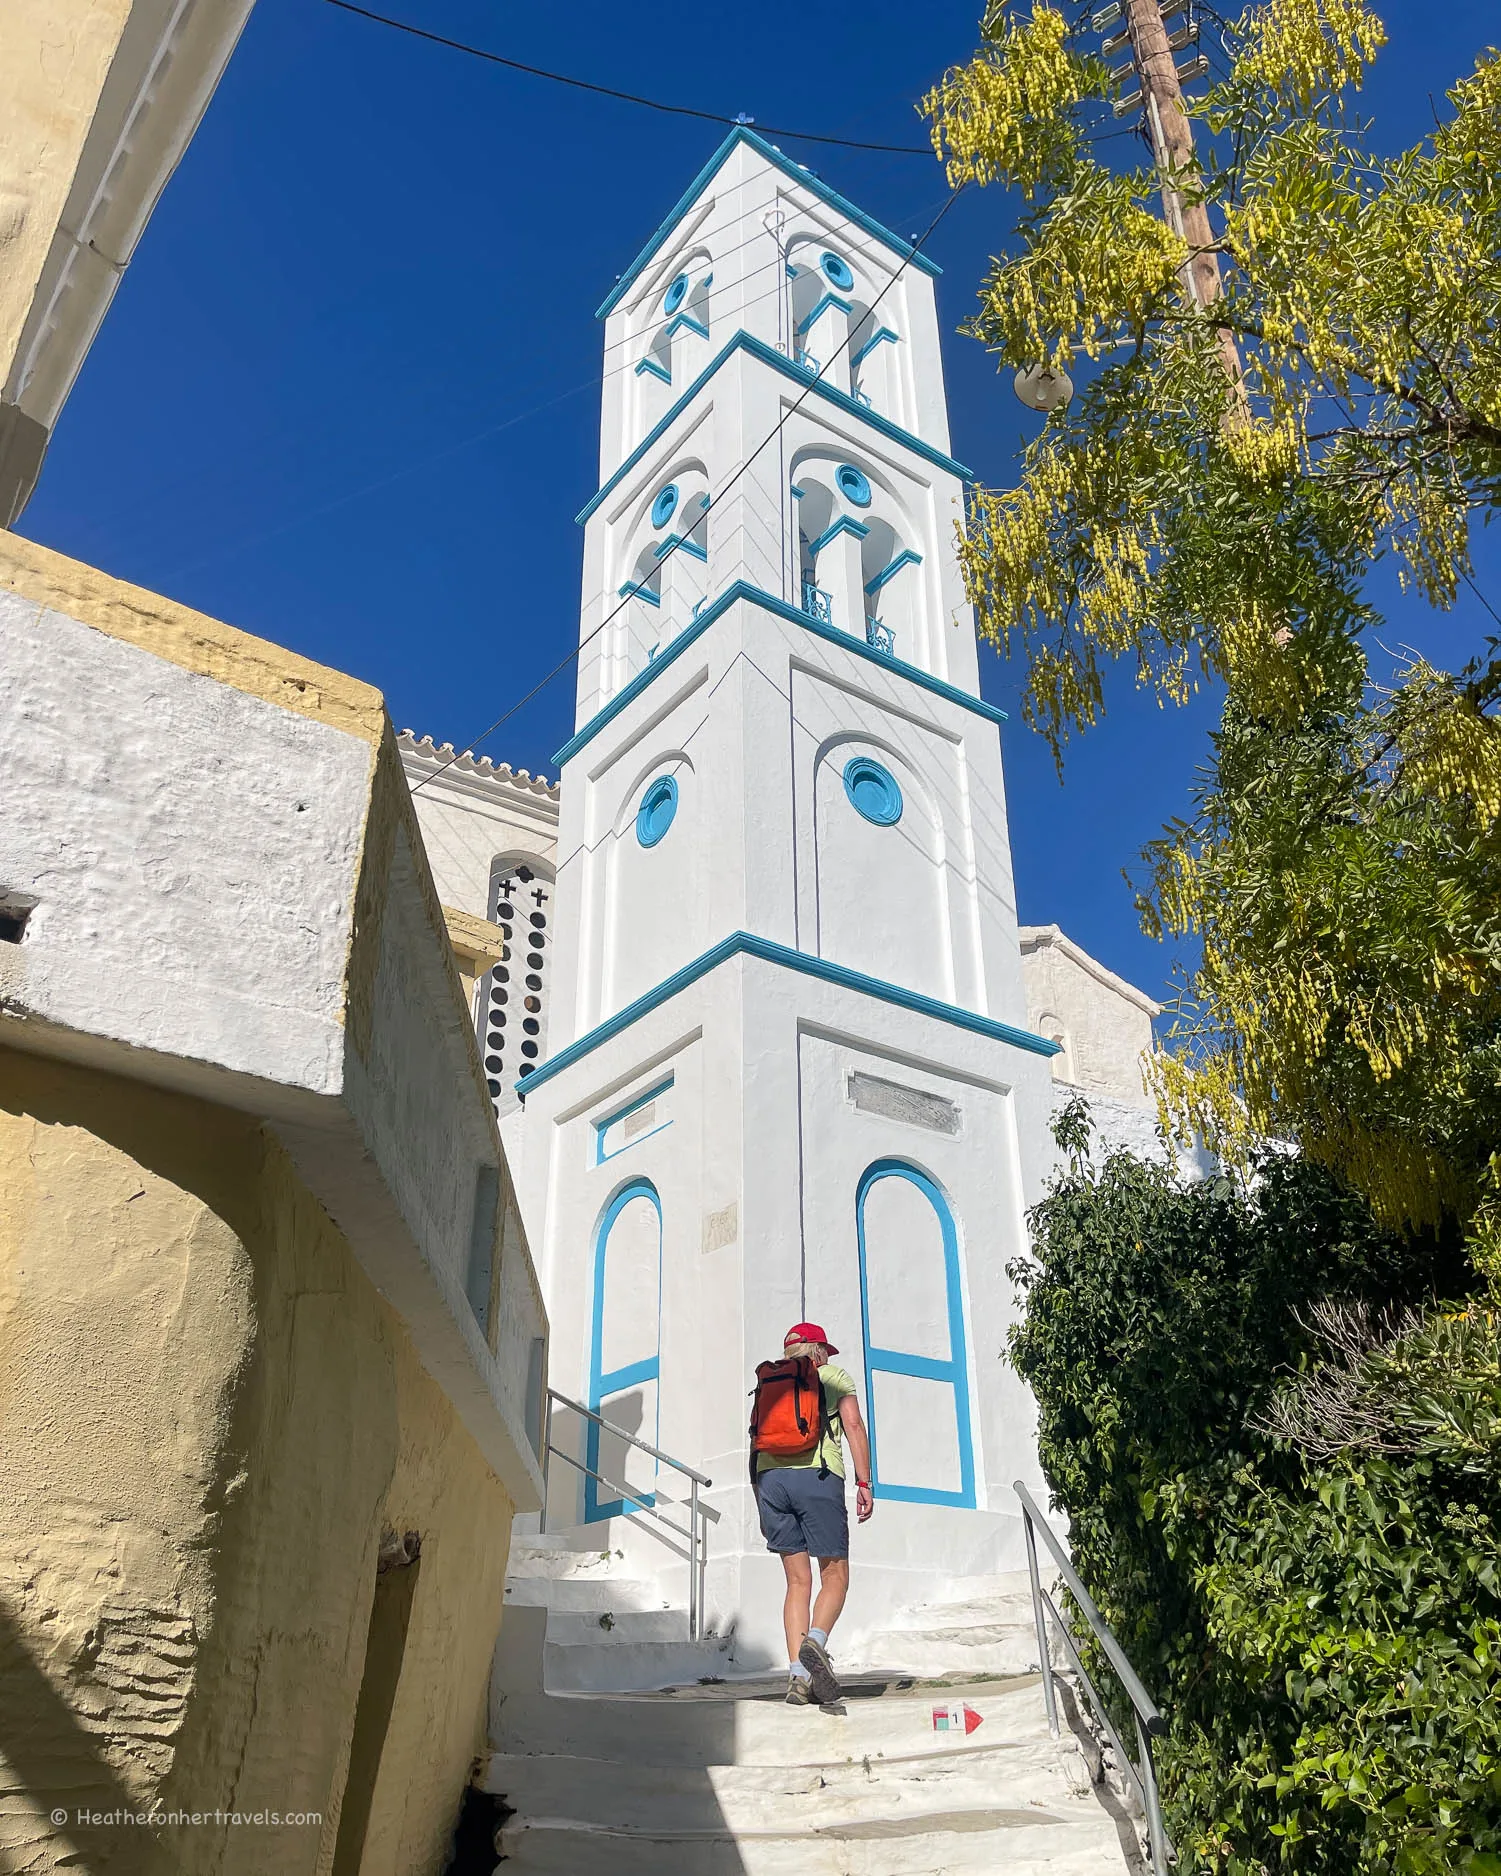
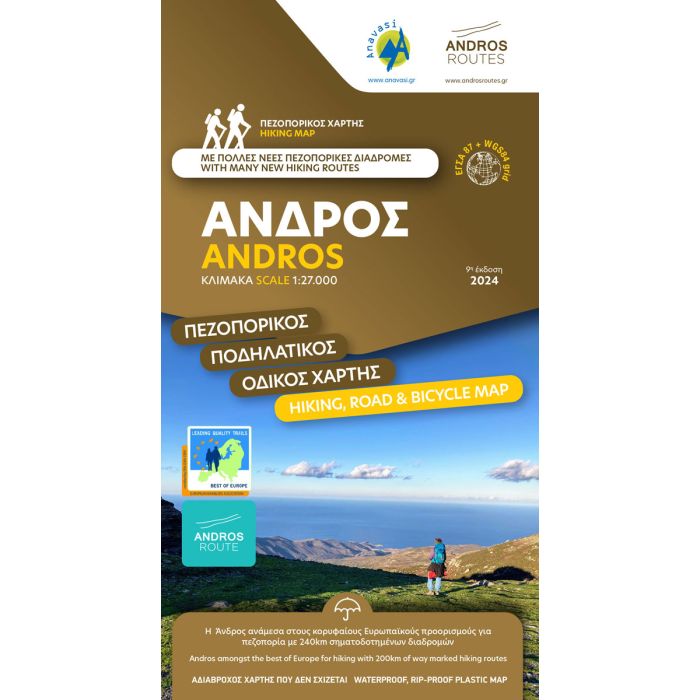


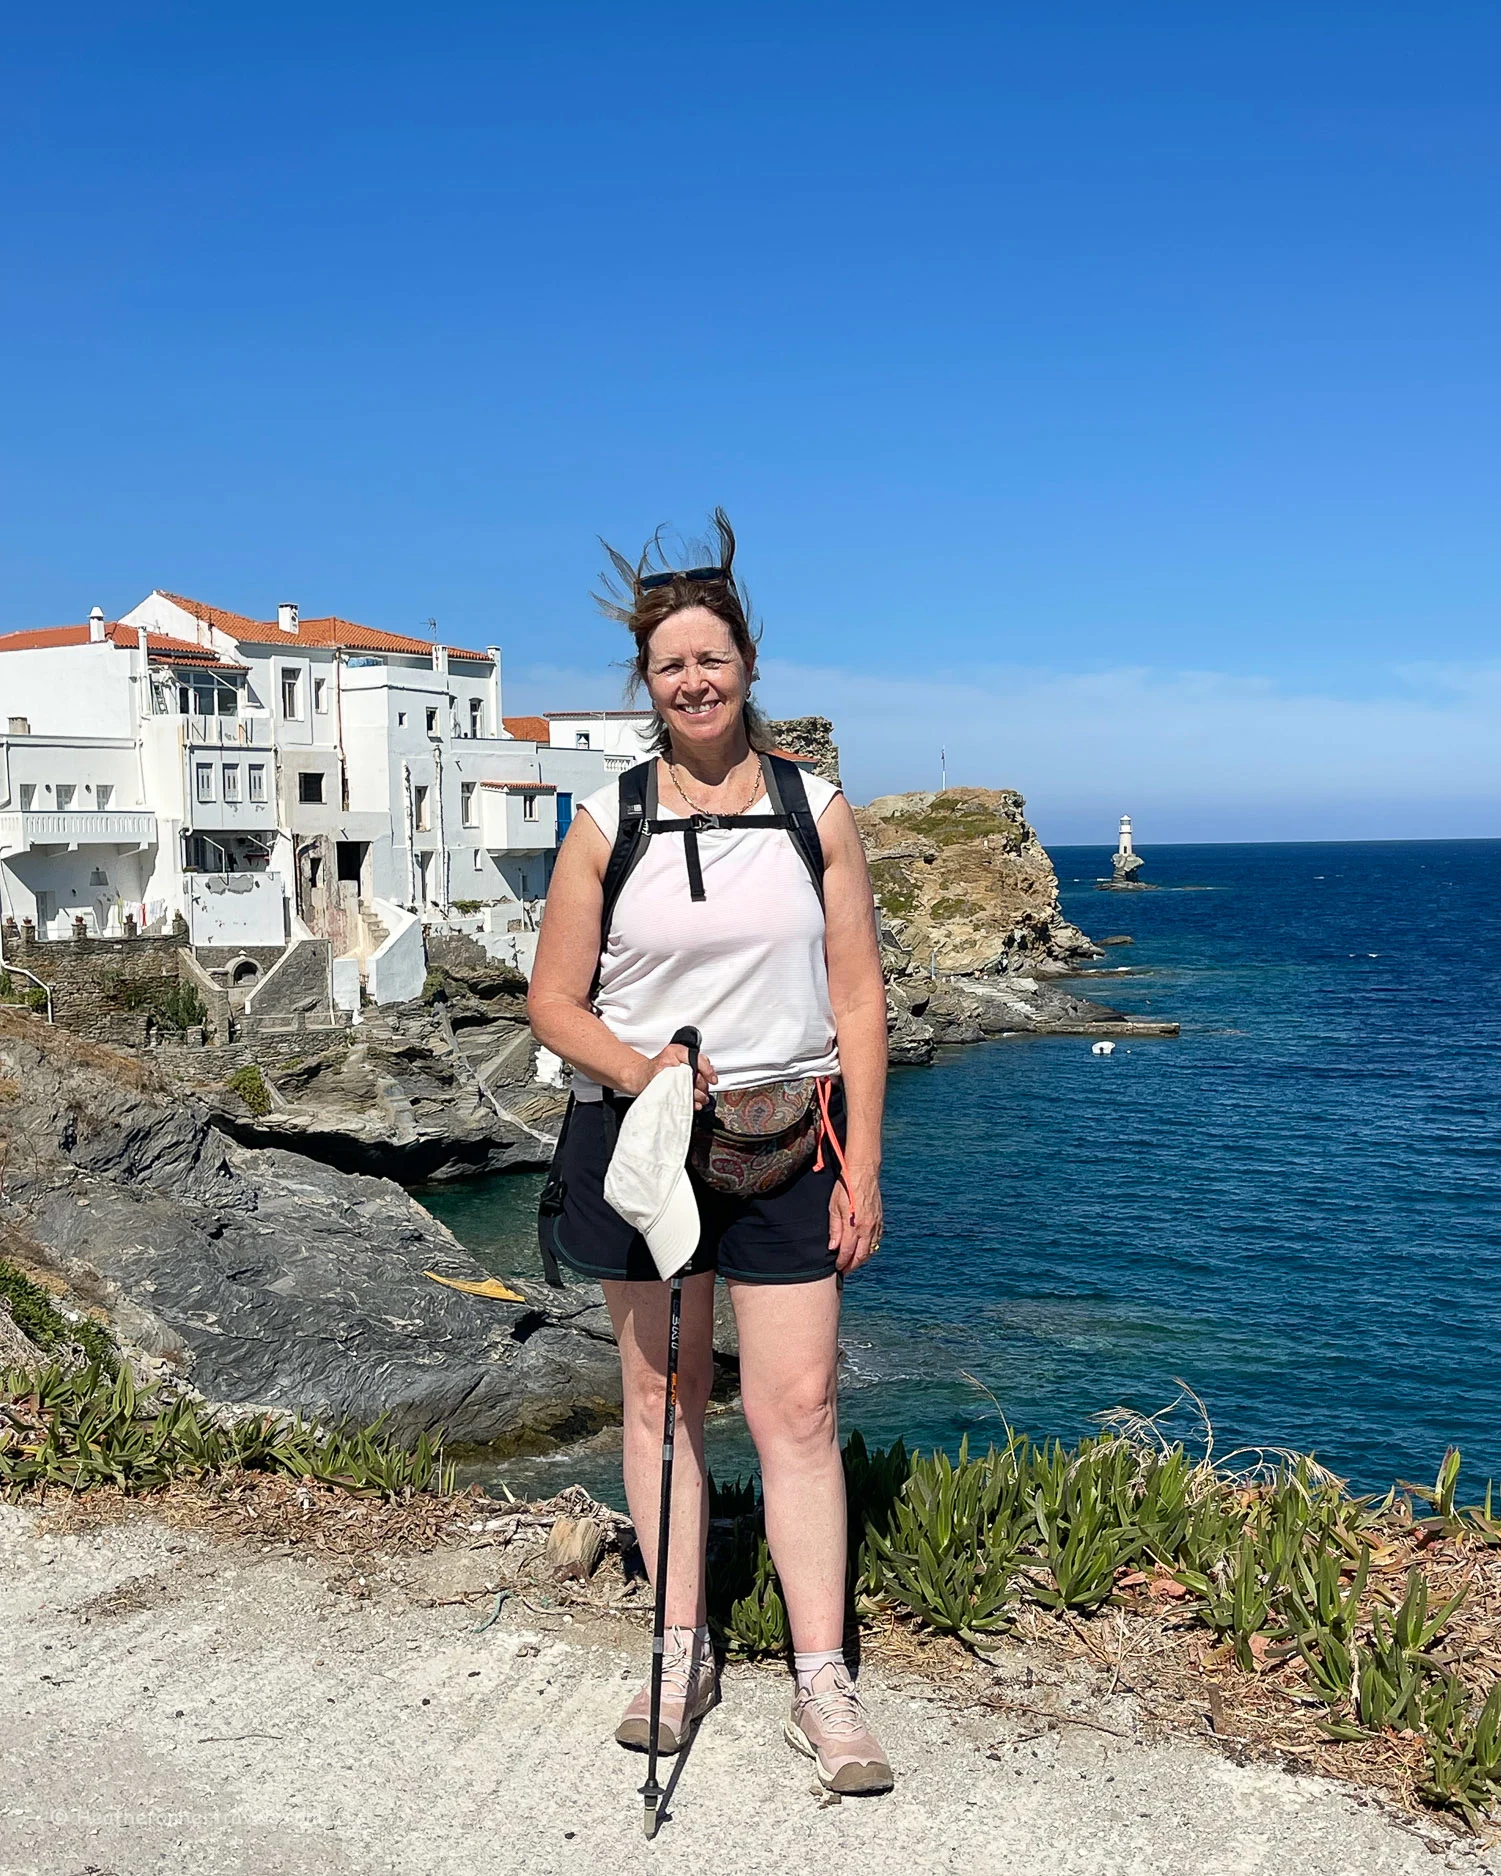


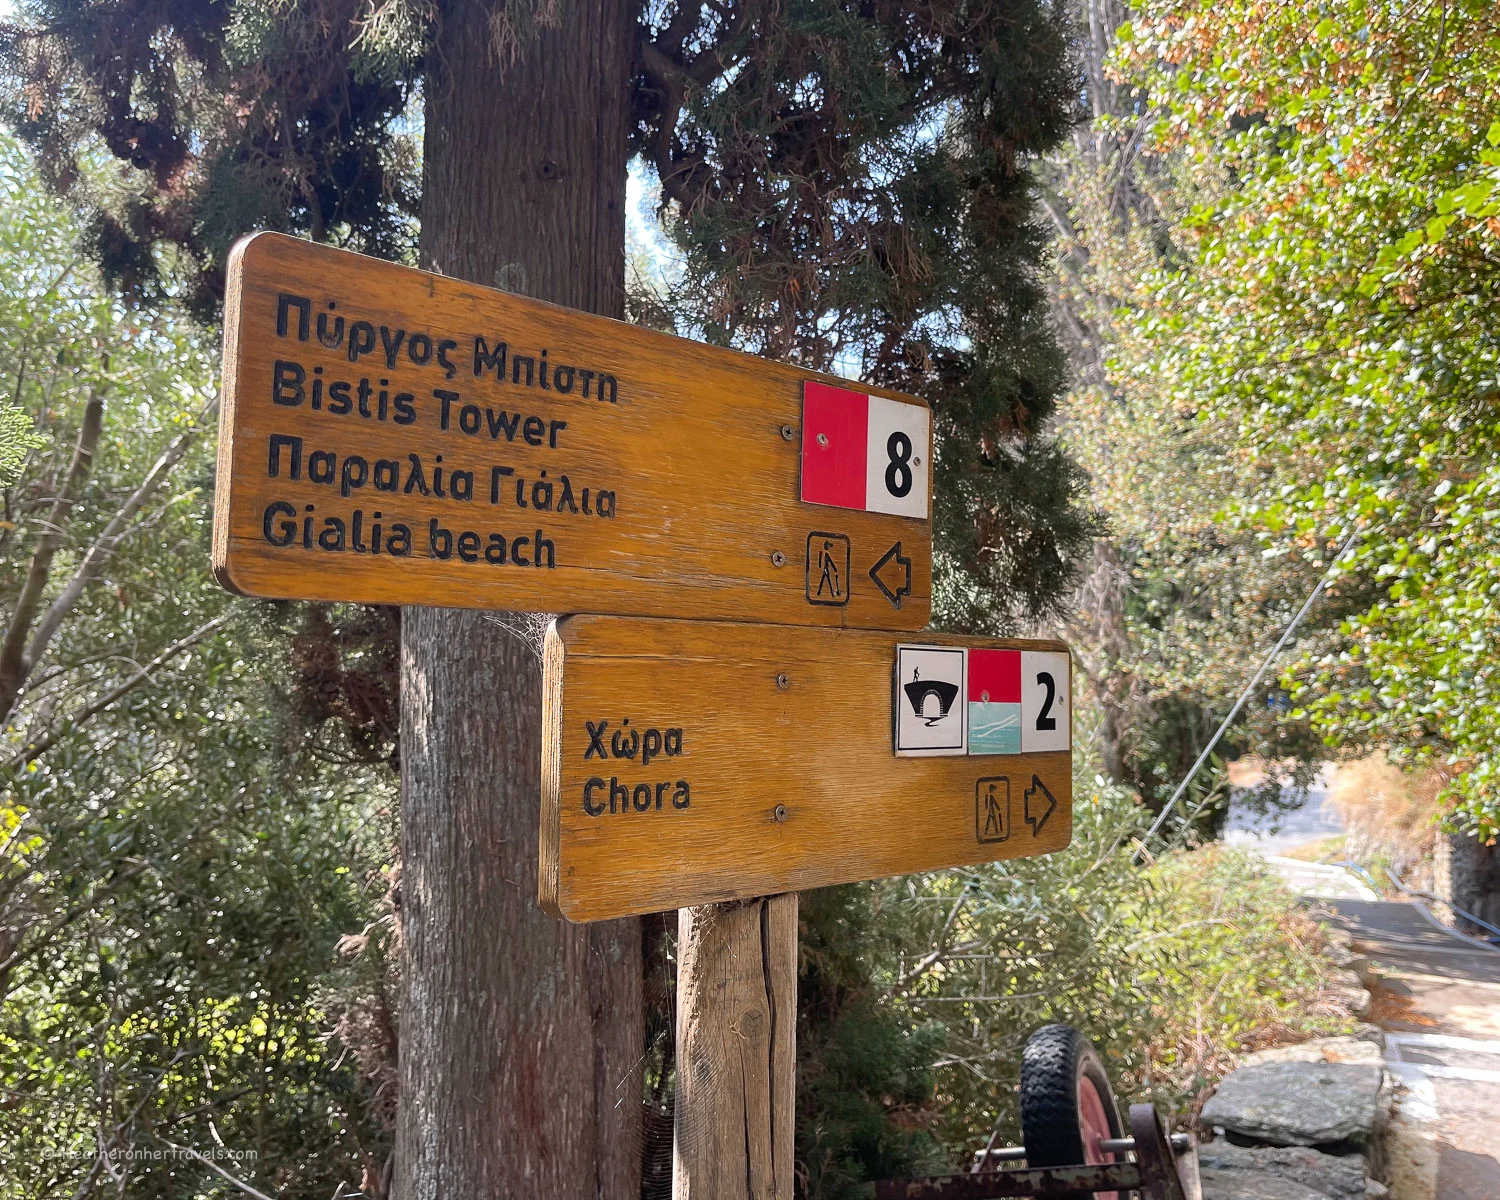

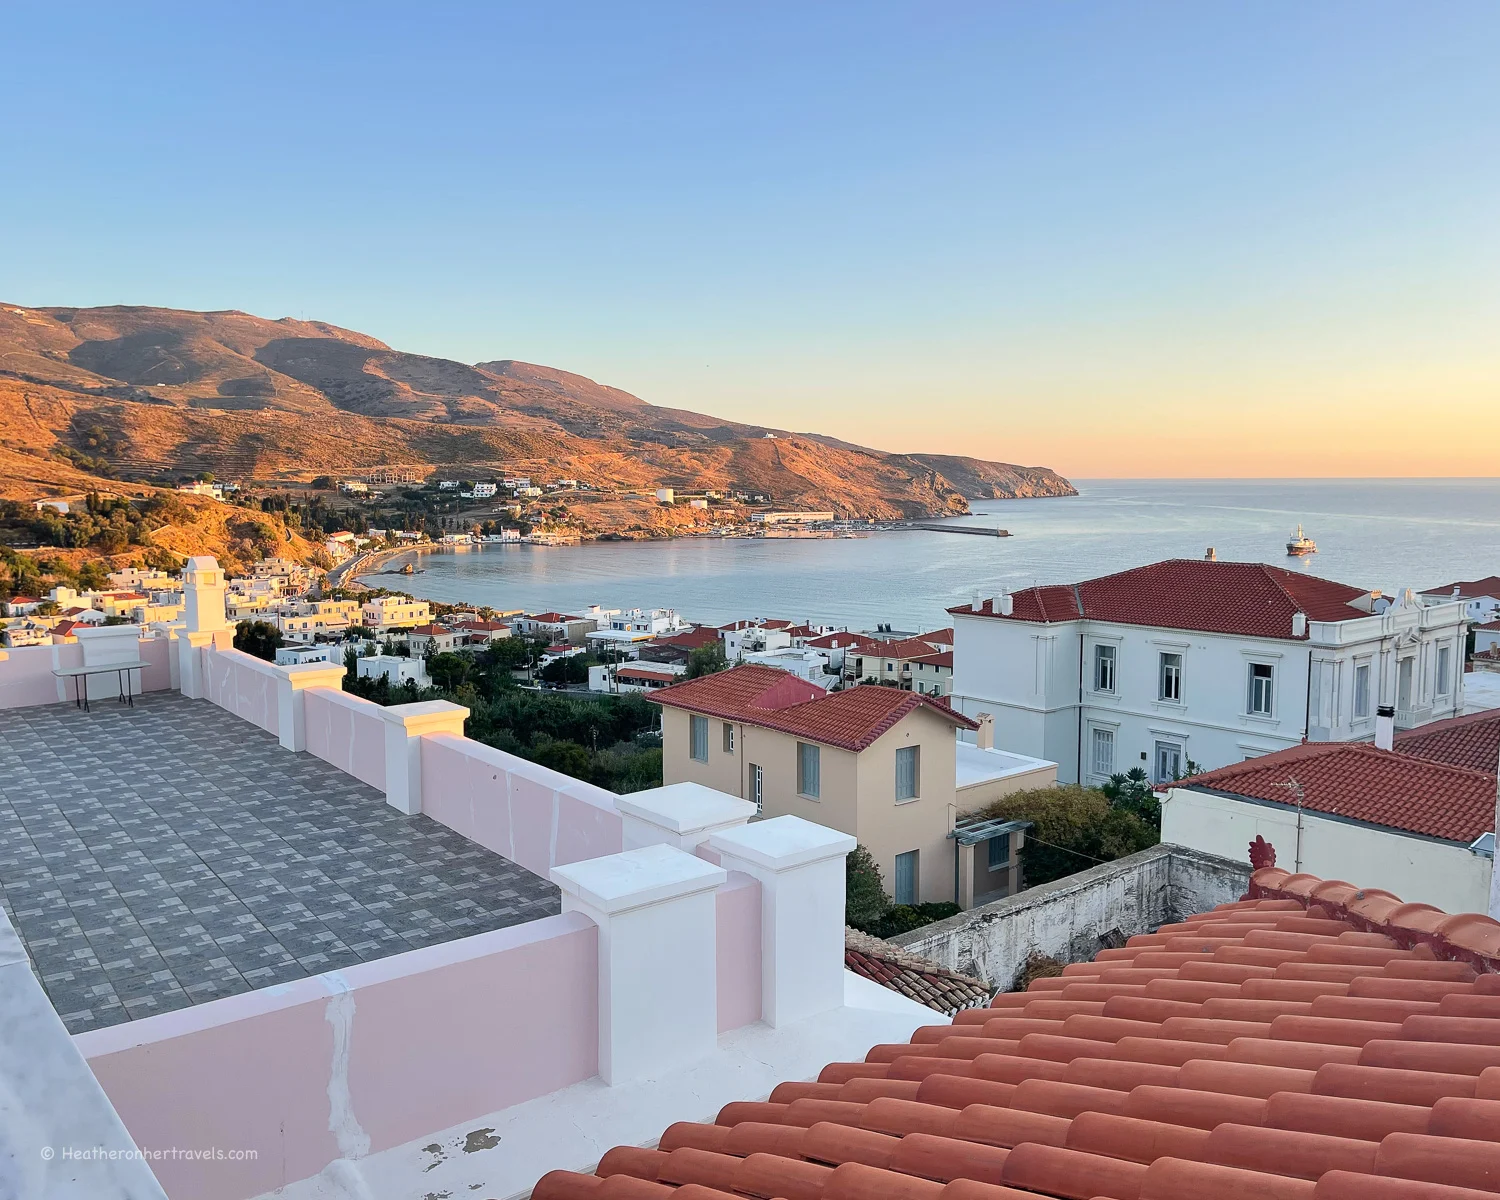
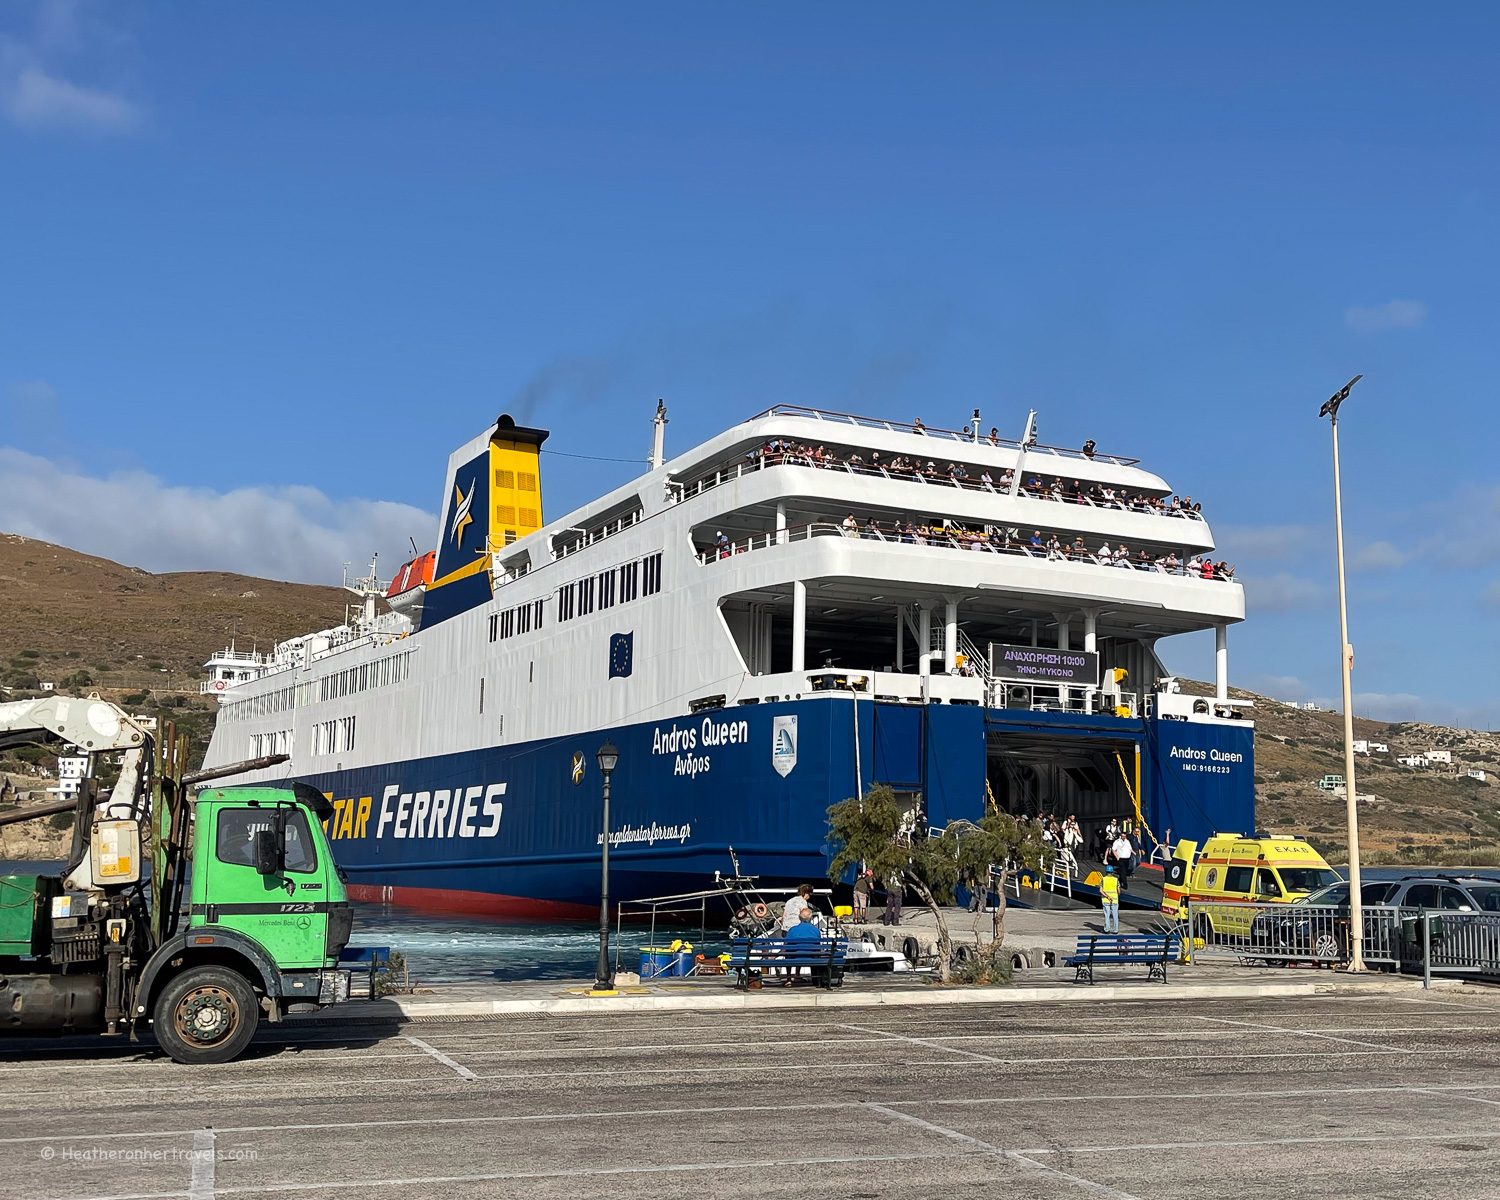


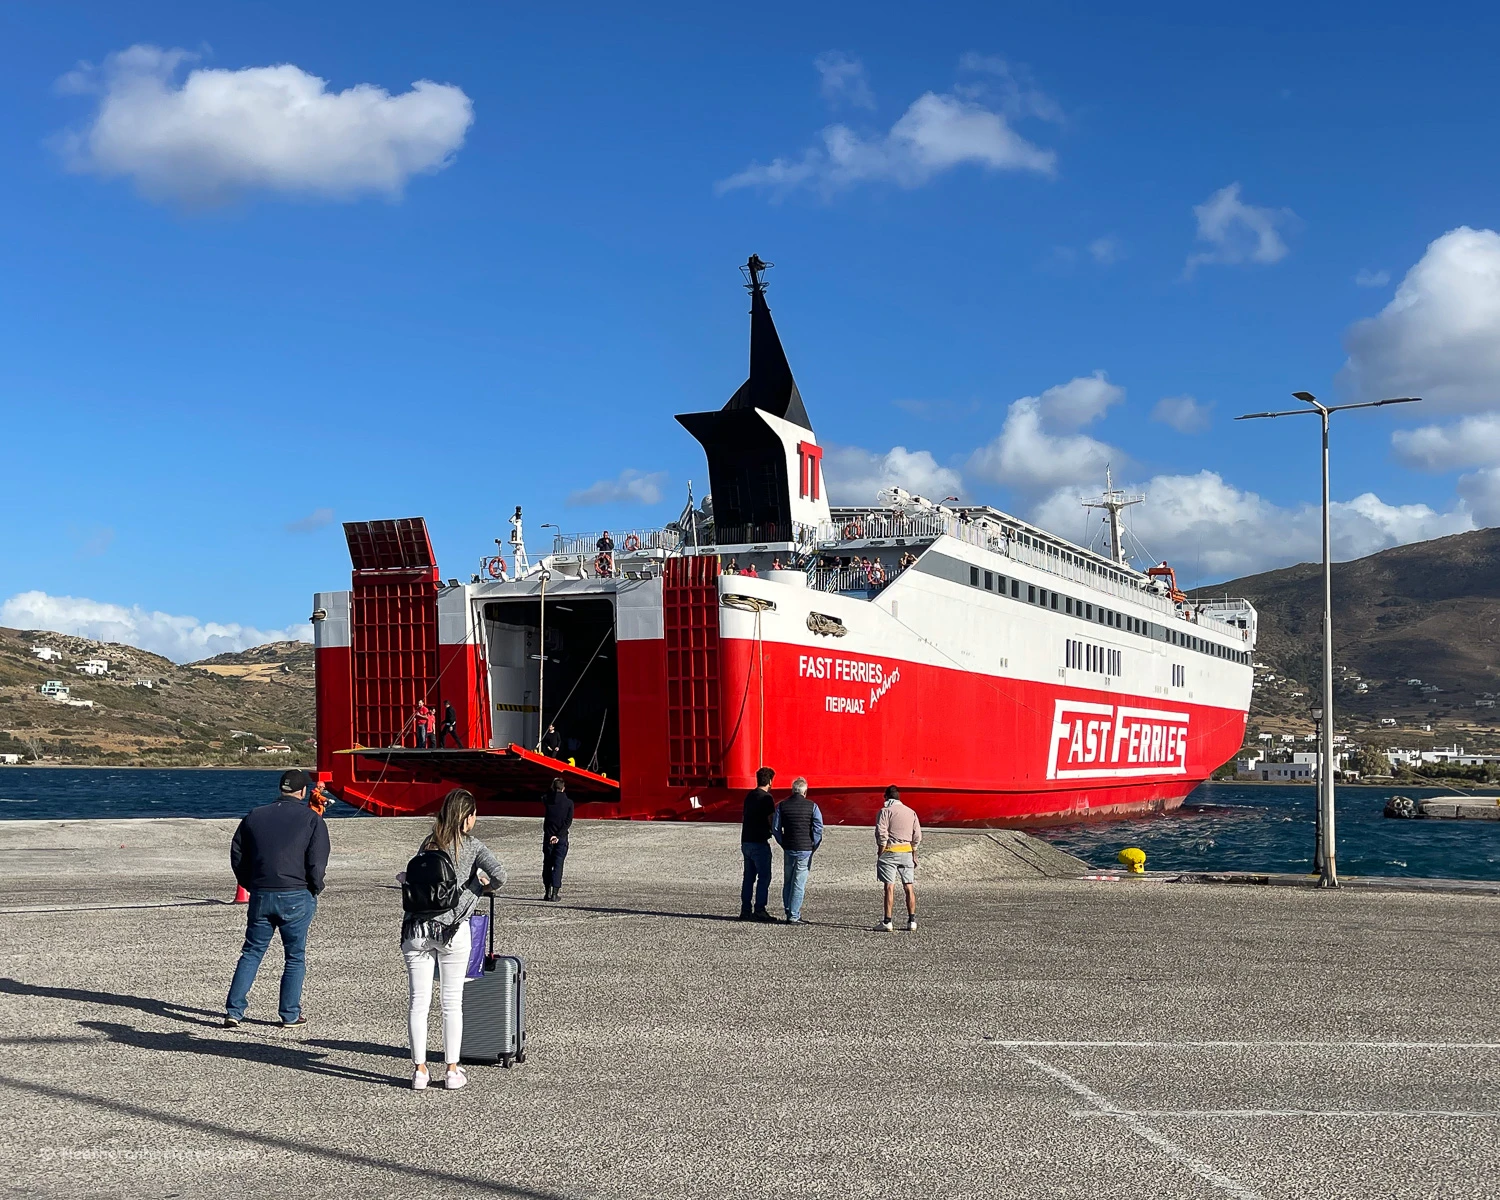

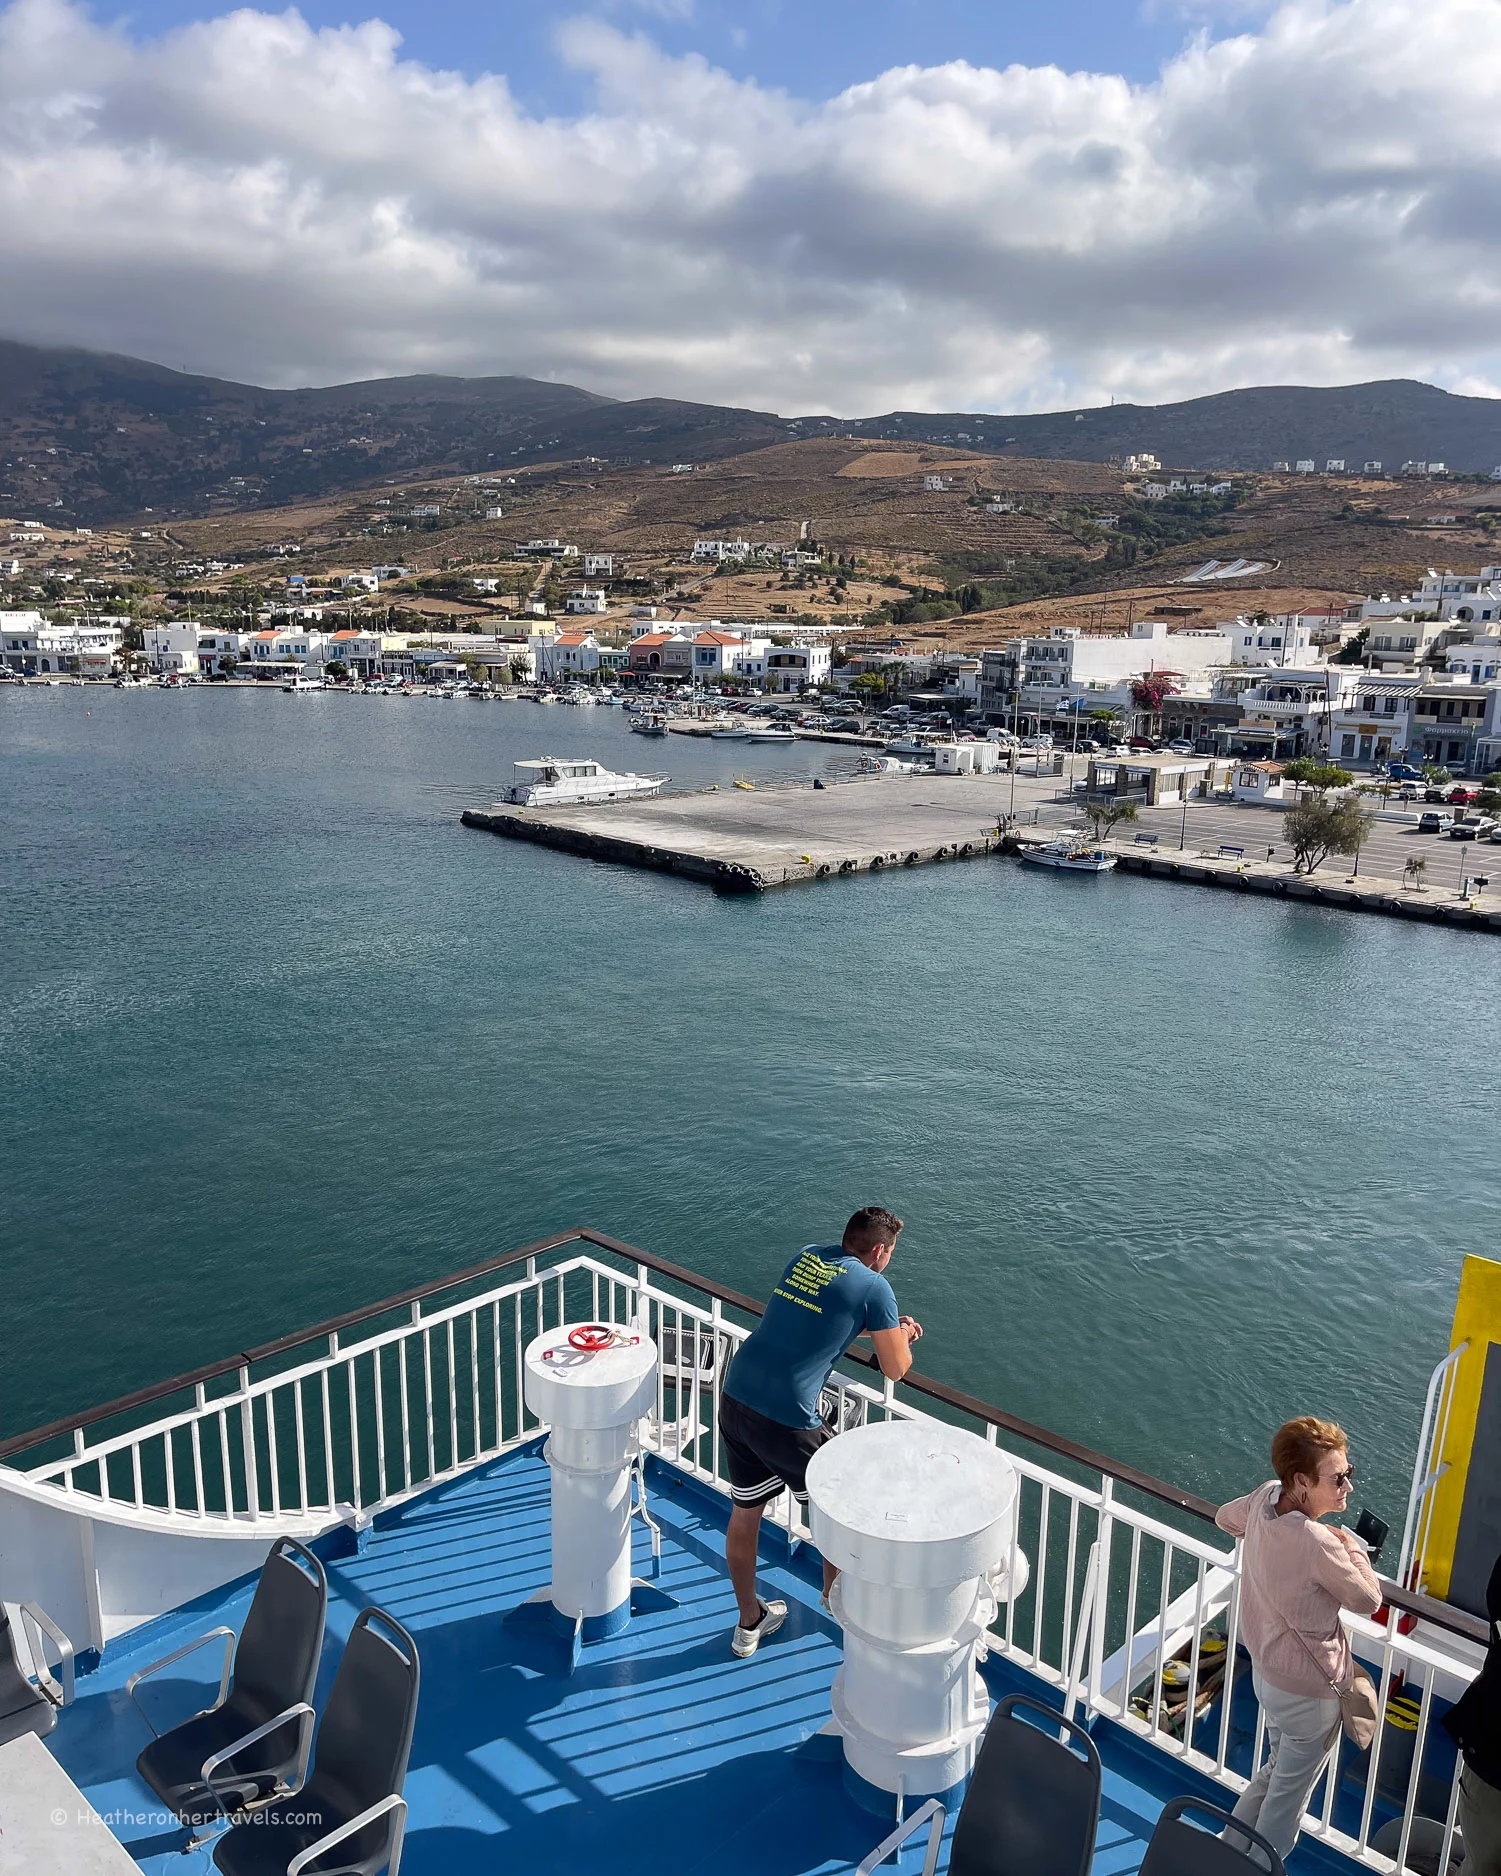

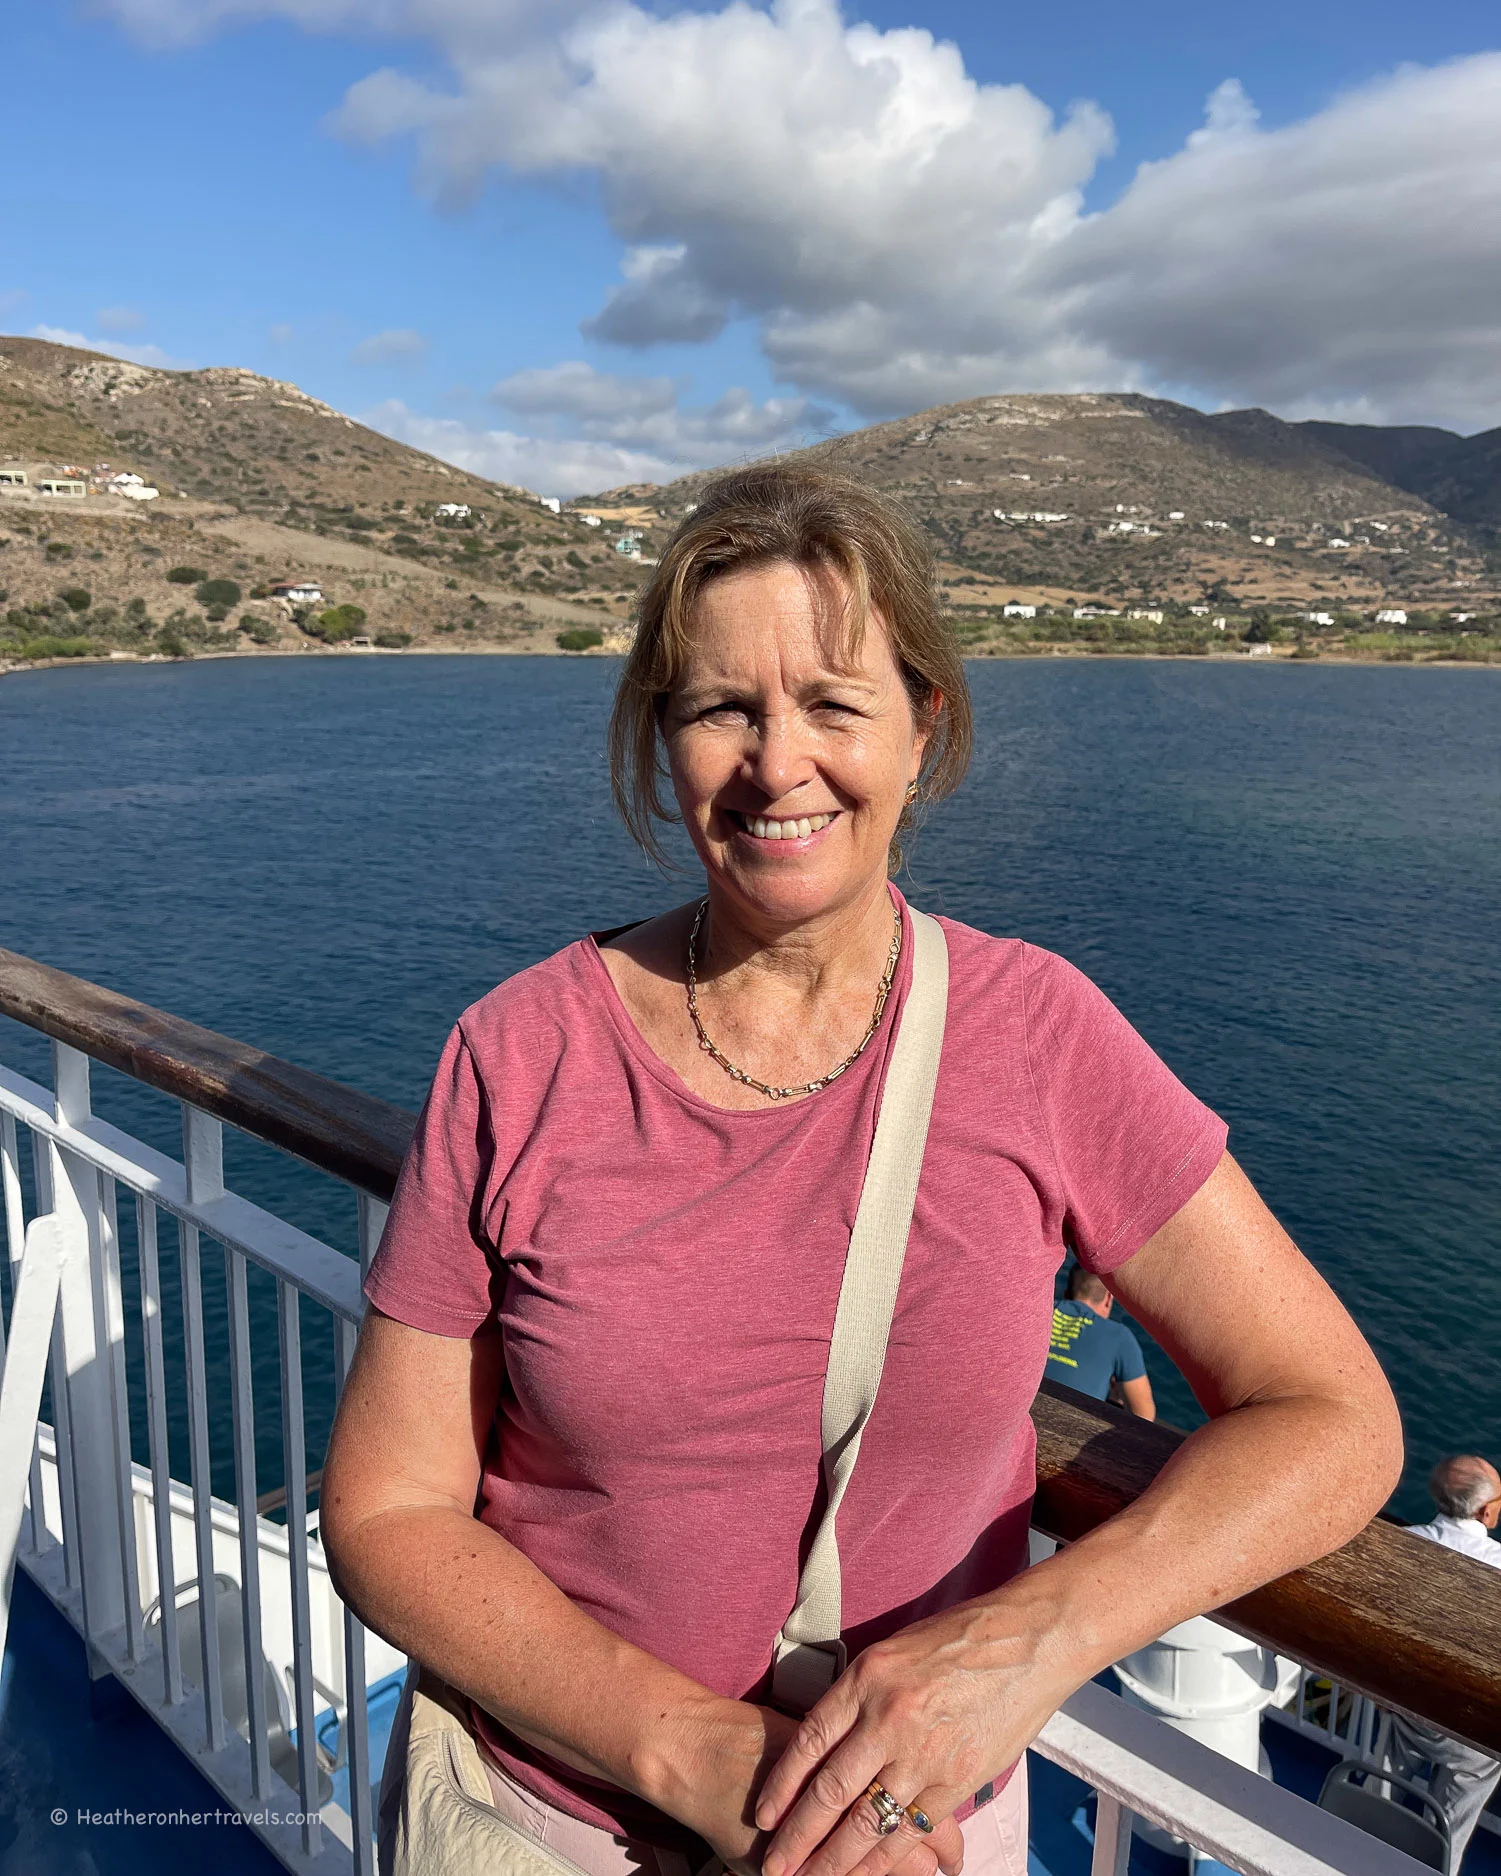
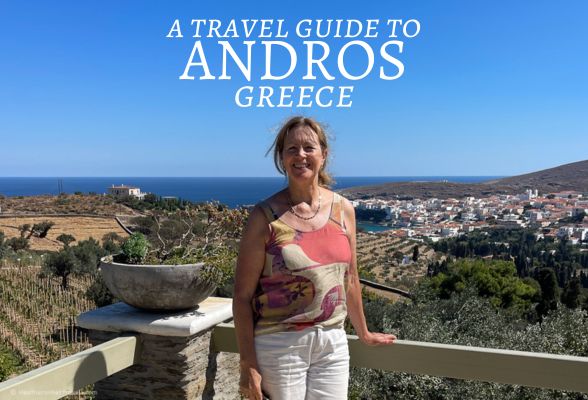


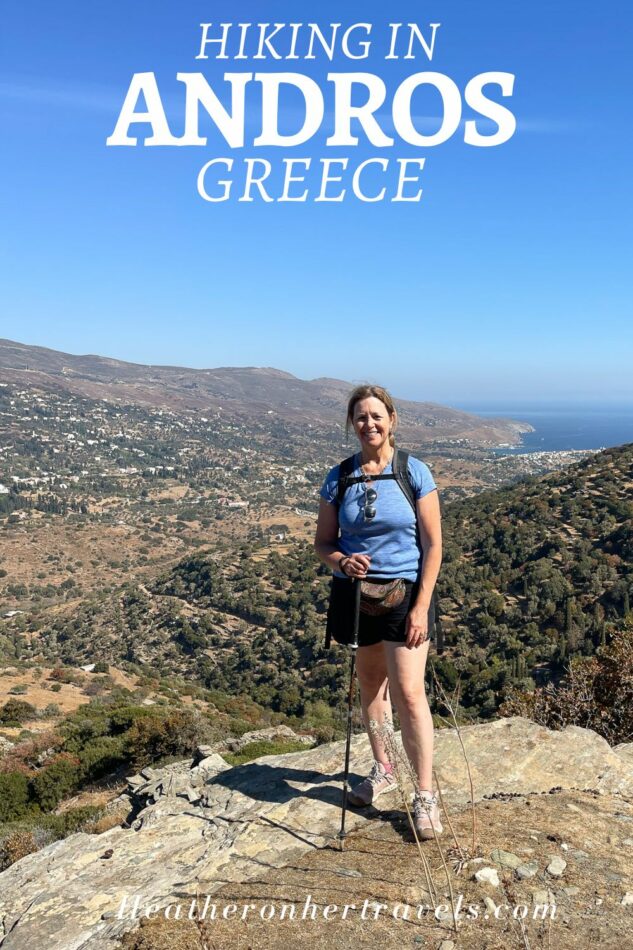


![Climbing Mount Kinabalu – The Ultimate Trekking Guide [2025]](https://farasar.ir/wp-content/uploads/2025/07/Mount-Kinabalu-Climb-Trek-Guide-Featured-Image.jpg)