برچسب: Camera

  • GoPro HERO 13 Review – The Ultimate Camera Guide [2025]

    GoPro HERO 13 Review – The Ultimate Camera Guide [2025]


    We’ve been busy putting the latest action camera to the test in our GoPro HERO 13 review! Let’s dive into the new features, mods and upgrades to see if it’s worth upgrading your gear to the newest GoPro HERO13 Black.

    The wait is over, and it was worth it. We’ve had our hands on the GoPro HERO13 Black for a few weeks now, and it’s everything we hoped for and then some.

    This isn’t just an incremental tech upgrade – it’s a serious leap forward complete with new creative accessories that’s going to change how you capture your adventures.

    Whether you’re diving into the deep blue or scaling mountain peaks, the GoPro HERO 13 is your ultimate sidekick, ready to deliver jaw-dropping footage every step of the way.

    There’s a hell of a lot to be excited about.

    The new 1900mAh battery is a game-changer, giving us up to three hours of recording time at 1080p. Or two full 1-hour scuba dives in Palau on the one battery – yep, honestly.

    No more worrying about your camera dying mid-shoot. The HERO 13 is built to keep up with your most epic adventures.

    And then there’s the new lens mods. There’s the Ultra Wide Lens—capturing a 177-degree field of view which like seeing the world in a whole new way.

    Perfect for those expansive landscapes or getting up close and personal with your subject, without losing any of that sharp detail.

    Like getting up close though? Throw on the Macro Lens Mod for, you guessed it, insane macro shots with an incredibly short focus point.

    Or get real creative with the new Neutral Density (ND) filters, where you can slow the shutter right down in the middle of the day to introduce motion blur.

    And if you’re into cinematic shots, the new Anamorphic Lens Mod is a dream come true, which creates widescreen footage with signature lens flares – like having a Hollywood camera in the palm of your hand.

    But where the HERO 13 really shines is in its usability. The new magnetic latch system makes mounting the camera a breeze, and it feels more secure than ever.

    Plus they’ve thrown in a new magnetic door latch with power cable so you can keep the unit charged up in the elements during long time lapses.

    All of this, plus the continued excellence in stabilisation with HyperSmooth 6.0, makes the GoPro HERO 13 a must-have for anyone serious about capturing life in the most vivid, dynamic way possible.

    But we’re in 2025 after all, and it’s expected for a camera to get better and better every release.

    And with so much competition coming from the likes of Insta360 and DJI, does the new GoPro cut it?

    That’s what we set out to discover by putting the camera to the test. Welcome to our GoPro HERO 13 review, where we’ll dive into all the latest features, how they perform in the real world, and most importantly, is it worth upgrading if you are still rocking an older model.

    (If you’re interested, you can also check out our detailed HERO12 review from last year.)

    SPECIAL DEAL: We have an epic deal happening for NOMADasaurus readers right! Use the code “nomadasaurus10” at checkout to unlock a further 10% discount on top of the already special deals GoPro have available. This discount is exclusive to us. Simply Click the button below to check out the special pricing and bonus items.

    Jarryd Diving Gopro Hero 13 Review
    Straight from the box to underwater in Raja Ampat – all part of the job of testing out the newest camera in our GoPro HERO13 Review.

    Our Honest GoPro HERO 13 Black Review

    Whether you’re upgrading from an older model or jumping into the GoPro ecosystem for the first time, the HERO 13 is up the challenge.

    All the new bells and whistles sound fancy, but what the hell is a neutral density filter anyway and why do you need one?

    And is 1900mAh of battery really that much better than 1720mAh?

    Magnetic latches and improved UI? HLG HDR? Burst Slo Mo?

    Sounds like a bunch of things that aren’t really necessary.

    Or are they?

    Read on to discover everything there is to know about this absolute beast of a camera.

    The Latest Features

    Here is a rundown of the new features on the new GoPro Hero 13.

    We’ll go into more detail on some of these key features later on, but here is a summary of the highlights!

    • Four new HB-Series Lens options to completely revolutionise how you capture content
    • Ultra Wide Lens Mod with new 1:1 aspect ratio
    • New Macro Lens Mod with 4x closer focus than the standard lens
    • New Anamorphic Lens Mod with widest ever FOV – 21:9!!
    • New battery with massive life improvement some settings
    • GPS is back!!! Yep, we asked, they delivered
    • New magnetic door and power cable kit – allows you to easily use external power
    • A third way to mount with the magnetic bottom
    • HLG HDR Video colour profile
    • New burst Slo-Mo feature in 720p400, 900p360, 5.3K120
    • 40% faster Wifi speeds
    • Customisable presets
    • Audio tuning

    And then all the best features that we saw on the 12, such as:

    • Bluetooth
    • 3 microphones and 3-mic processing
    • 4k wide and 1080p wide video settings
    • 2.7K Linear + Horizon Lock
    • 8:7, 16:9, 4:3, and 9:16 video settings
    • Time lapse and night lapse photo options
    • 27 megapixels for photos
    • Hypersmooth 6.0 video stabilisation
    Us Raja Ampat Gopro Hero13
    Interval photo mode shooting a raw image every 3 seconds makes capturing selfies in epic places easier than ever.

    The New HB-Series Lenses – Transforming the GoPro into a Versatile Unit

    One of the most exciting upgrades, and the most obvious really, that we’ll dive into with our GoPro HERO13 Black review is the introduction of new lens mods, each designed to expand your creative possibilities and make capturing incredible footage easier than ever.

    These mods aren’t just accessories – they’re tools that transform the way you shoot, opening up new perspectives and artistic opportunities that were previously out of reach with a standard action camera.

    Let’s see what they have released…

    Macro Lens Mod

    Let’s start with the Macro Lens Mod. This little powerhouse lets you get up close and personal with your subject, capturing intricate details that have always been impossible with previous GoPro models.

    Ever see something awesome and get your GoPro real close to it, only to find out later that the entire subject is out of focus?

    Yep, happens to us all the time. Normally you’d have to shoot far back and crop in heavily, assuming you could even see it properly if you aren’t close.

    That’s where this new mod comes in.

    Whether you’re filming small insects, intricate textures, or any small subject that demands attention to detail, the Macro Mod delivers stunning clarity and sharpness.

    The 3x magnification lets you fill the frame with your subject, turning ordinary shots that were once not possible into extraordinary ones.

    Imagine capturing the dewdrops on a leaf or the texture of a butterfly’s wings in perfect focus. Game changer!

    Macro Shot Taken On Gopro 13
    Using the HB-Series Macro Lens opens up a whole new world of creative possibilities.
    Ultra Wide Lens Mod

    Next up, the Ultra Wide Lens Mod.

    We haven’t managed to get our hands on this one yet, but have been using the Max Lens Mods on the HERO12 for a while and love it.

    With a 177-degree field of view, this mod is the go-to for capturing epic, sweeping landscapes or immersive action shots.

    Whether you’re mountain biking down a gnarly trail dropping in to a sheer face, the Ultra Wide Mod ensures you capture everything in your frame.

    And best of it all it now opens up a new 1:1 aspect ratio too, so you can crop later for social media or YouTube with the one clip.

    It’s perfect for when you want to convey the sheer scale of your environment, bringing a dynamic, cinematic quality to your footage that pulls viewers right into the scene.

    Anamorphic Lens Mod

    The Anamorphic Lens Mod is a bit more niche, but for those that like to add a cinematic flair to their videos, it’s going to be an essential tool.

    This lens gives your footage that widescreen, letterbox look, complete with those gorgeous horizontal lens flares that you usually only see in big-budget movies.

    Picture shooting a sunset or a city skyline at night, and the Anamorphic Mod adds a level of drama and professionalism that’s bound to impress.

    Click here to read more about how to take better GoPro photos in our ultimate guide.
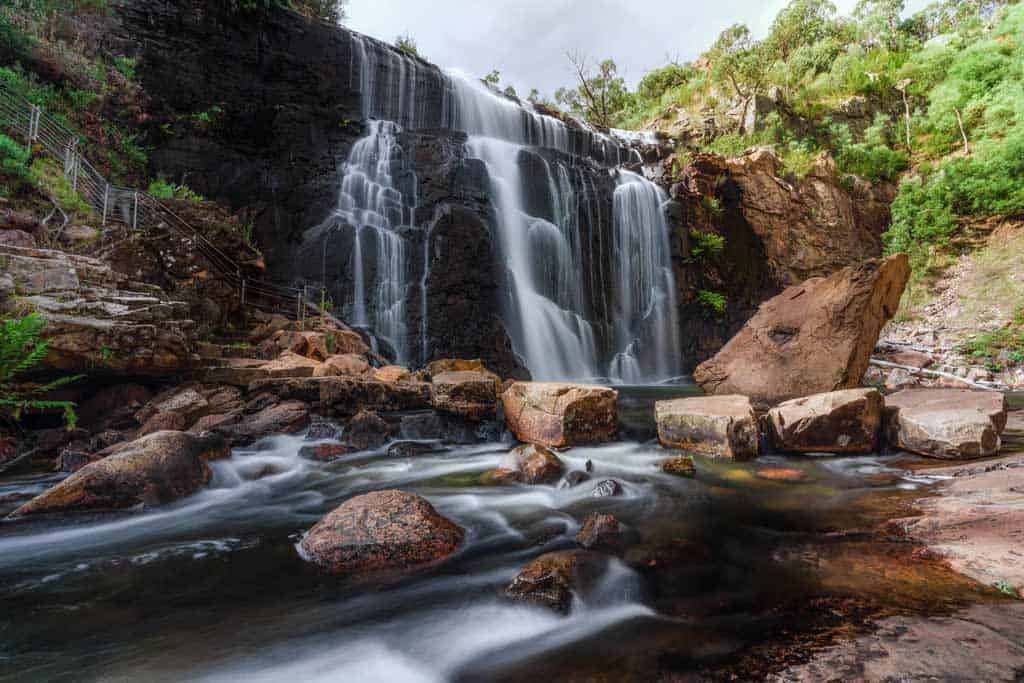
    ND Filters

    And let’s not forget the ND filters. These might not sound as flashy as the other mods, but they’re essential for controlling exposure in bright conditions.

    If you’re capturing video on a sunny day or dealing with tricky lighting situations, ND filters help you maintain that cinematic motion blur by letting you shoot with slower shutter speeds, even in harsh light.

    They’re perfect for creating smooth, professional-looking footage without the dreaded overexposure.

    Or if you’re a photographer, using an ND Filter to slow down the shutter speed allows you to shoot a long exposure in bright conditions.

    Think silky smooth waterfalls or motion blur from cars. The possibilities are endless.

    You can still manually adjust your settings and use Motion Blur Protune to choose the level of blur you want. But the filter does most of the work for you.

    The ND Filter kit comes with 4 different stop levels: ND4, ND8, ND16 and ND32.

    Auto Detection

    What makes these lens mods even more awesome is the new auto-detection feature.

    The HERO13 Black is smart enough to recognise which lens mod you’ve attached and automatically adjust its settings to optimise performance.

    No more fiddling with menus or worrying about whether you’ve got the right setup – the camera does the hard work for you. This means you can focus on what really matters: capturing incredible footage with ease.

    Gopro Macro Lens
    The HB-Series Macro Lens mounted on the front of the GoPro HERO 13 Black.

    Bigger Battery Life

    While the GoPro HERO12 took the already pretty awesome battery life to a new level, the HERO 13 Black takes it a step further thanks to its brand new 1900mAh Enduro Battery, compared to last year’s 1720mAh battery.

    With the most powerful and durable battery that GoPro has ever made, you can enjoy a much higher battery capacity and improved power efficiency.

    That means you can spend longer adventuring out in hot or cold environments because the GoPro HERO 13 can last longer than any other GoPro.

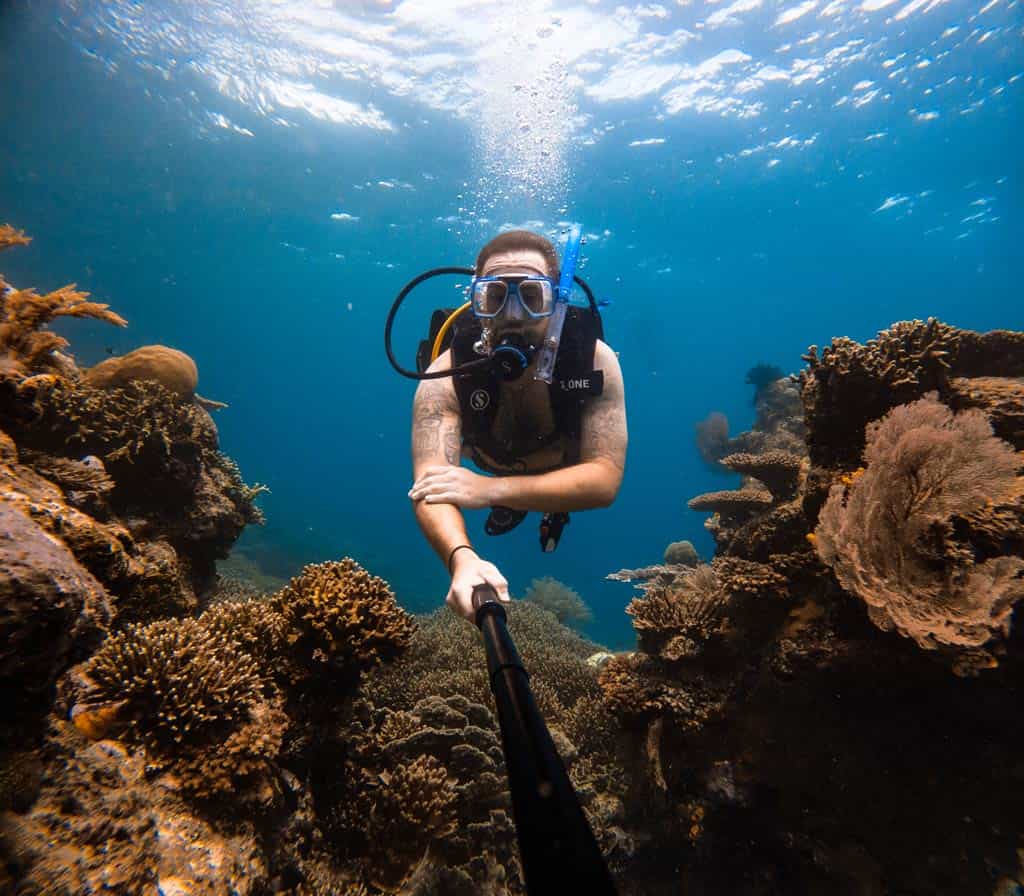
    I’ve been testing this new battery out while scuba diving around Raja Ampat, Palau and Micronesia, and can happily say that one full charge easily lasts two dives, with enough life left to shoot a bunch of b-roll on the way back to land.

    This new battery can now record for more than 2.5 hours at 1080p30, and more than 1.5 hours at 4K30 / 5.3K30.

    The biggest difference with the new battery is how well it performs when there is no airflow though, such as when it’s in a housing.

    Gopro Hero 13 Black Enduro Battery Improvement Chart
    A quick rundown at the battery life improvements with airflow on the new 1900mAh Enduro Battery on the HERO13 Black.
    New Gopro Enduro Battery Hero13 No Airflow
    And this is how well the new Enduro battery performs without airflow compared to the older battery.

    GPS

    When the GoPro HERO12 hit the market in 2023, there was one massive feature omitted for the first time in almost a decade – GPS.

    This strange decision to not include it left millions of diehard action cam lovers scratching their heads as to why.

    Well, never fear, fellow content adventurer! GPS is back in the GoPro HERO13 Black!

    For filming on the go, you can now share your speed, path, terrain, altitude, and g-force overlap from the Quik app. There is also a geo-tagging feature which can help you find your favourite content in your third-party photo library apps.

    For those who often film while biking, hiking, or doing any sort of outdoor or travel activity, the GPS is a great feature to have.

    Contacto Magnetic Door and Power Cable Kit

    The GoPro HERO 13 introduces a slick new accessory that’s going to make powering your camera easier and more reliable than ever—the Contacto Magnetic Door and Power Cable Kit.

    This isn’t just a minor upgrade; it’s a smart solution that simplifies the way you keep your GoPro charged during those long shoots or intense adventures.

    Previously to keep the camera charged doing overnight time lapses for example, we’d have to open up the door and run the risk of water, condensation or dust getting inside.

    Not any more.

    The Contacto Magnetic Door is a practical replacement for the standard battery door, integrating magnetic contact points directly into its design.

    This allows for a seamless connection with the Magnetic Power Cable, letting you charge the camera without opening the door and exposing the internal components.

    This new cable perfectly pairs with the new door, snapping into place effortlessly with a strong magnetic connection.

    The cable itself is tough, designed to handle the rough and tumble of outdoor adventures, while also providing fast charging to keep your always GoPro ready for action.

    Don’t forget to use our GoPro discount code ‘nomadasaurus10’ at checkout to get a further 10% off on the latest camera and accessories!

    Improved Slo-Mo Capabilities

    The new HERO13 has boosted slow-motion video capabilities so you can capture every detail in your shots.

    Find the highest resolutions and highest frame rates with the GoPro HERO 13’s new Burst Slo-Mo, which shoots smooth and crisp short clips in slow motion.

    You can play back 720p400 in 3-minute, 20-second clips, 900p360 in 3-minute clips, and 5.3K120 in 20 second clips.

    Three Mounting Options

    The GoPro HERO 13 Black has a brand new mount option to go along with the two we know and love (the fold-down mounting fingers and the tripod mounting thread).

    The most secure is the classic fold-down mounting fingers, which is low-profile, stable and perfect for intense activities or sports. This is the one we use about 90% of the time.

    You can also choose the 1/4-20 Mounting Threads which work with most standard tripod. This is a great option for professional photographers and videographers who already have the gear and want absolutely zero movement between the camera and the tripod.

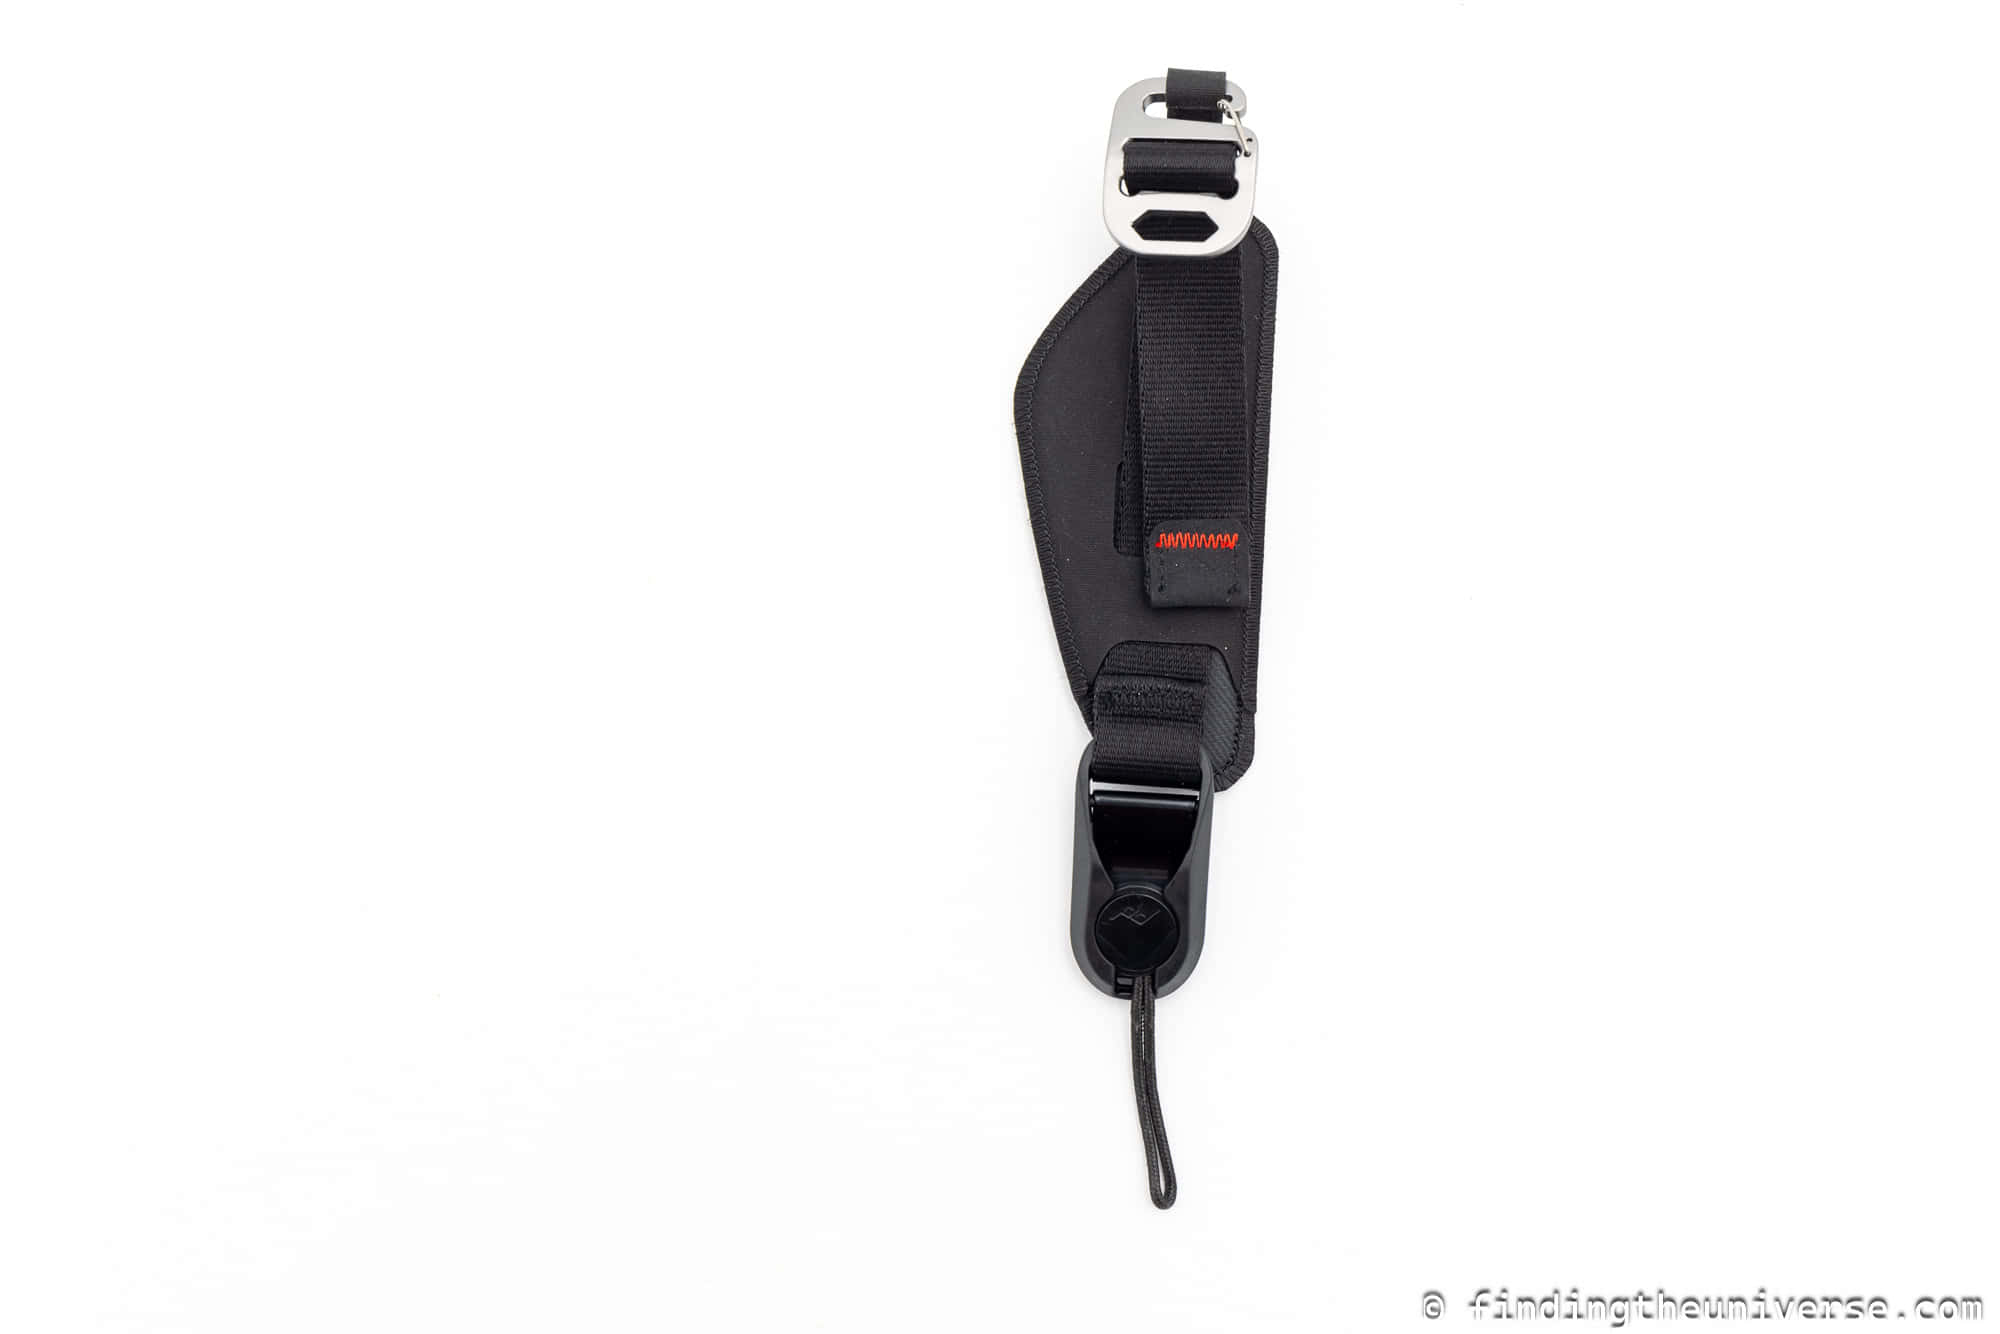
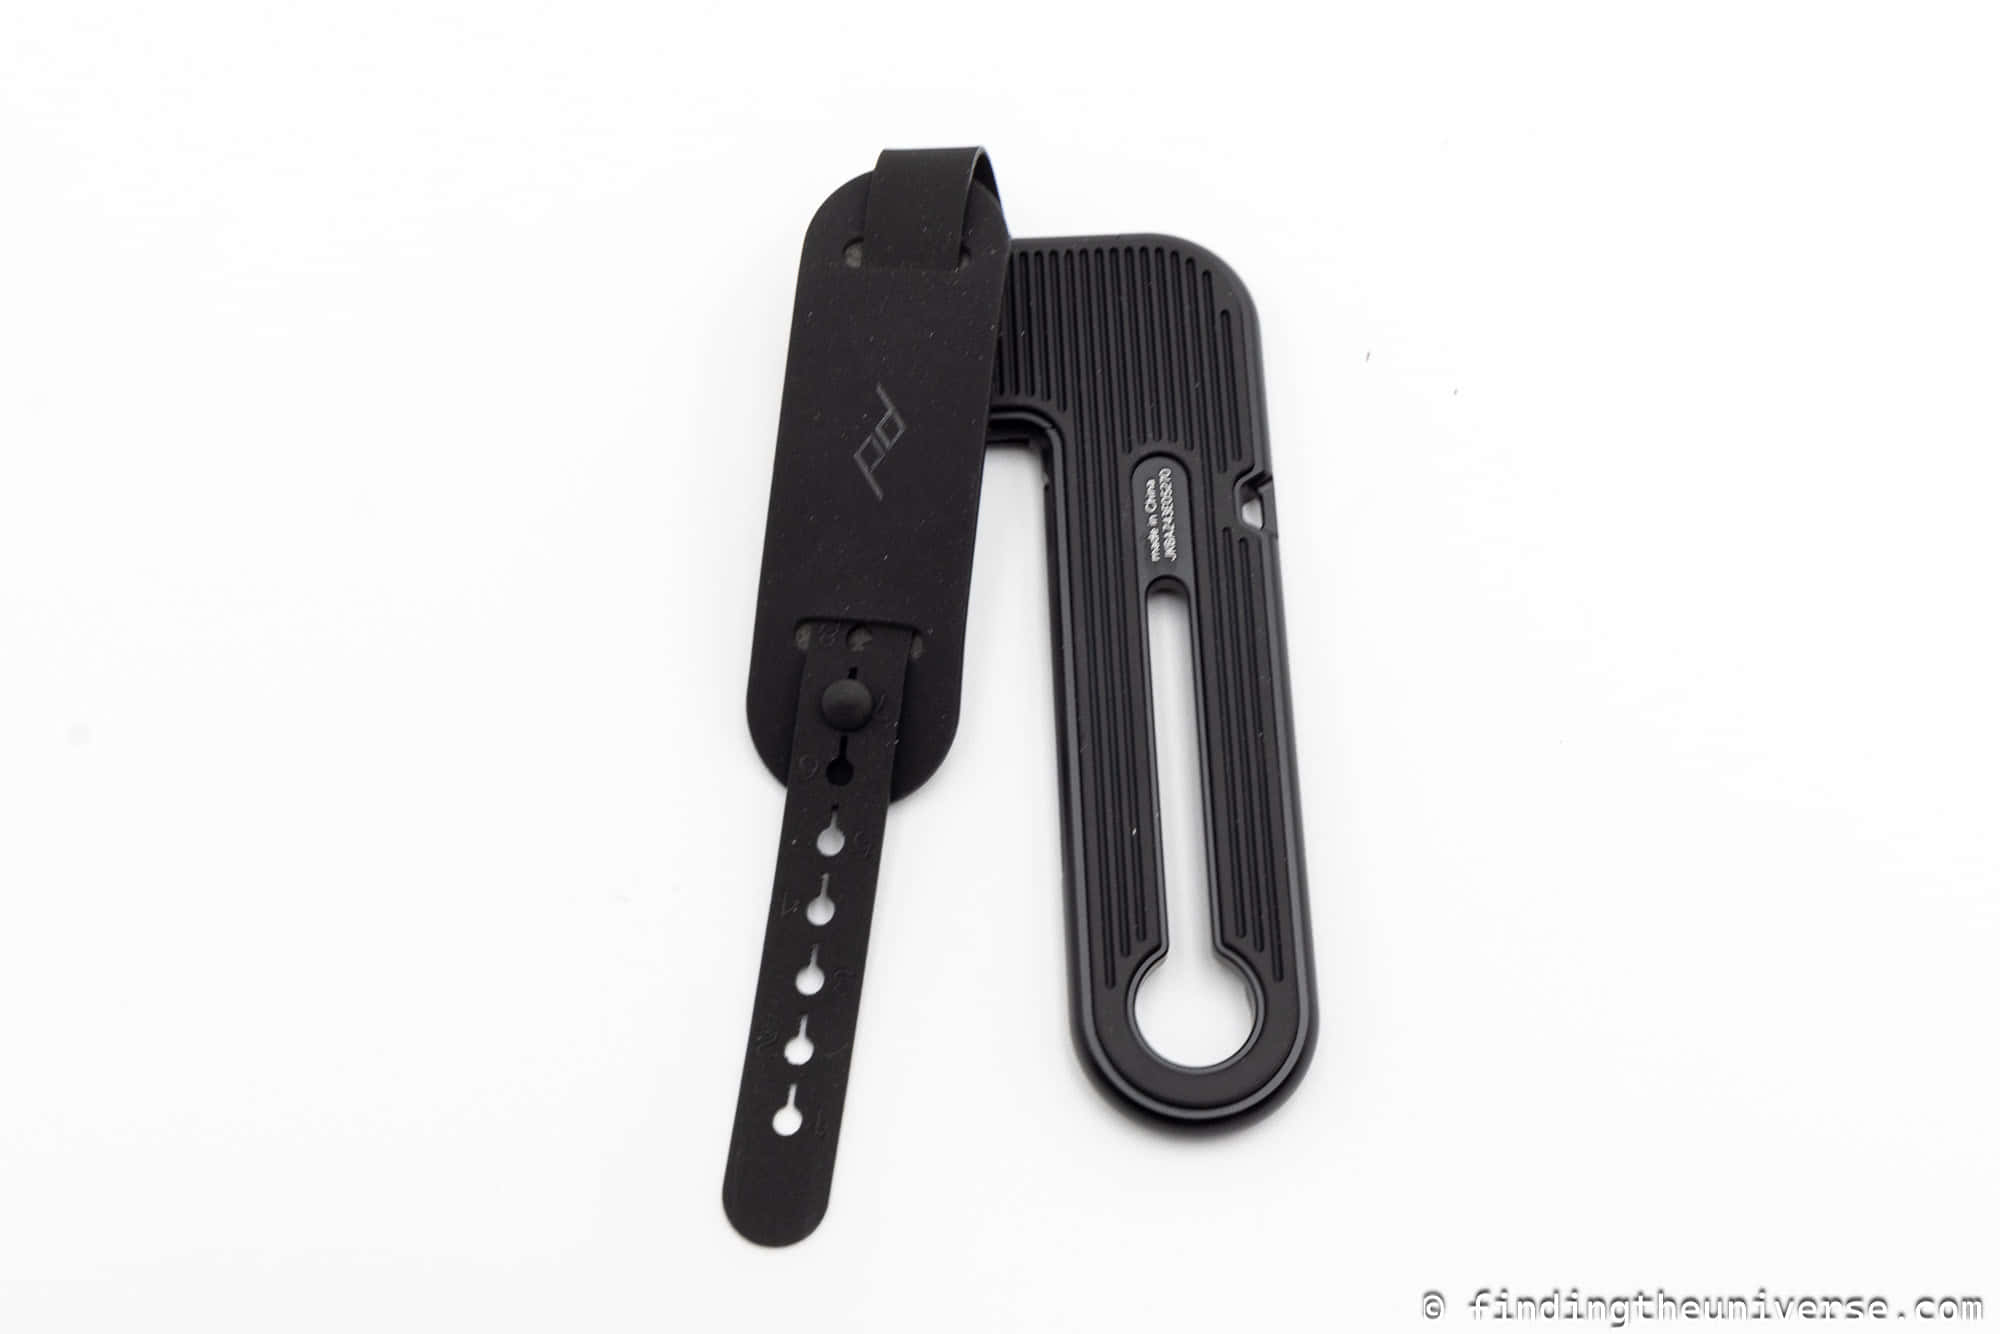
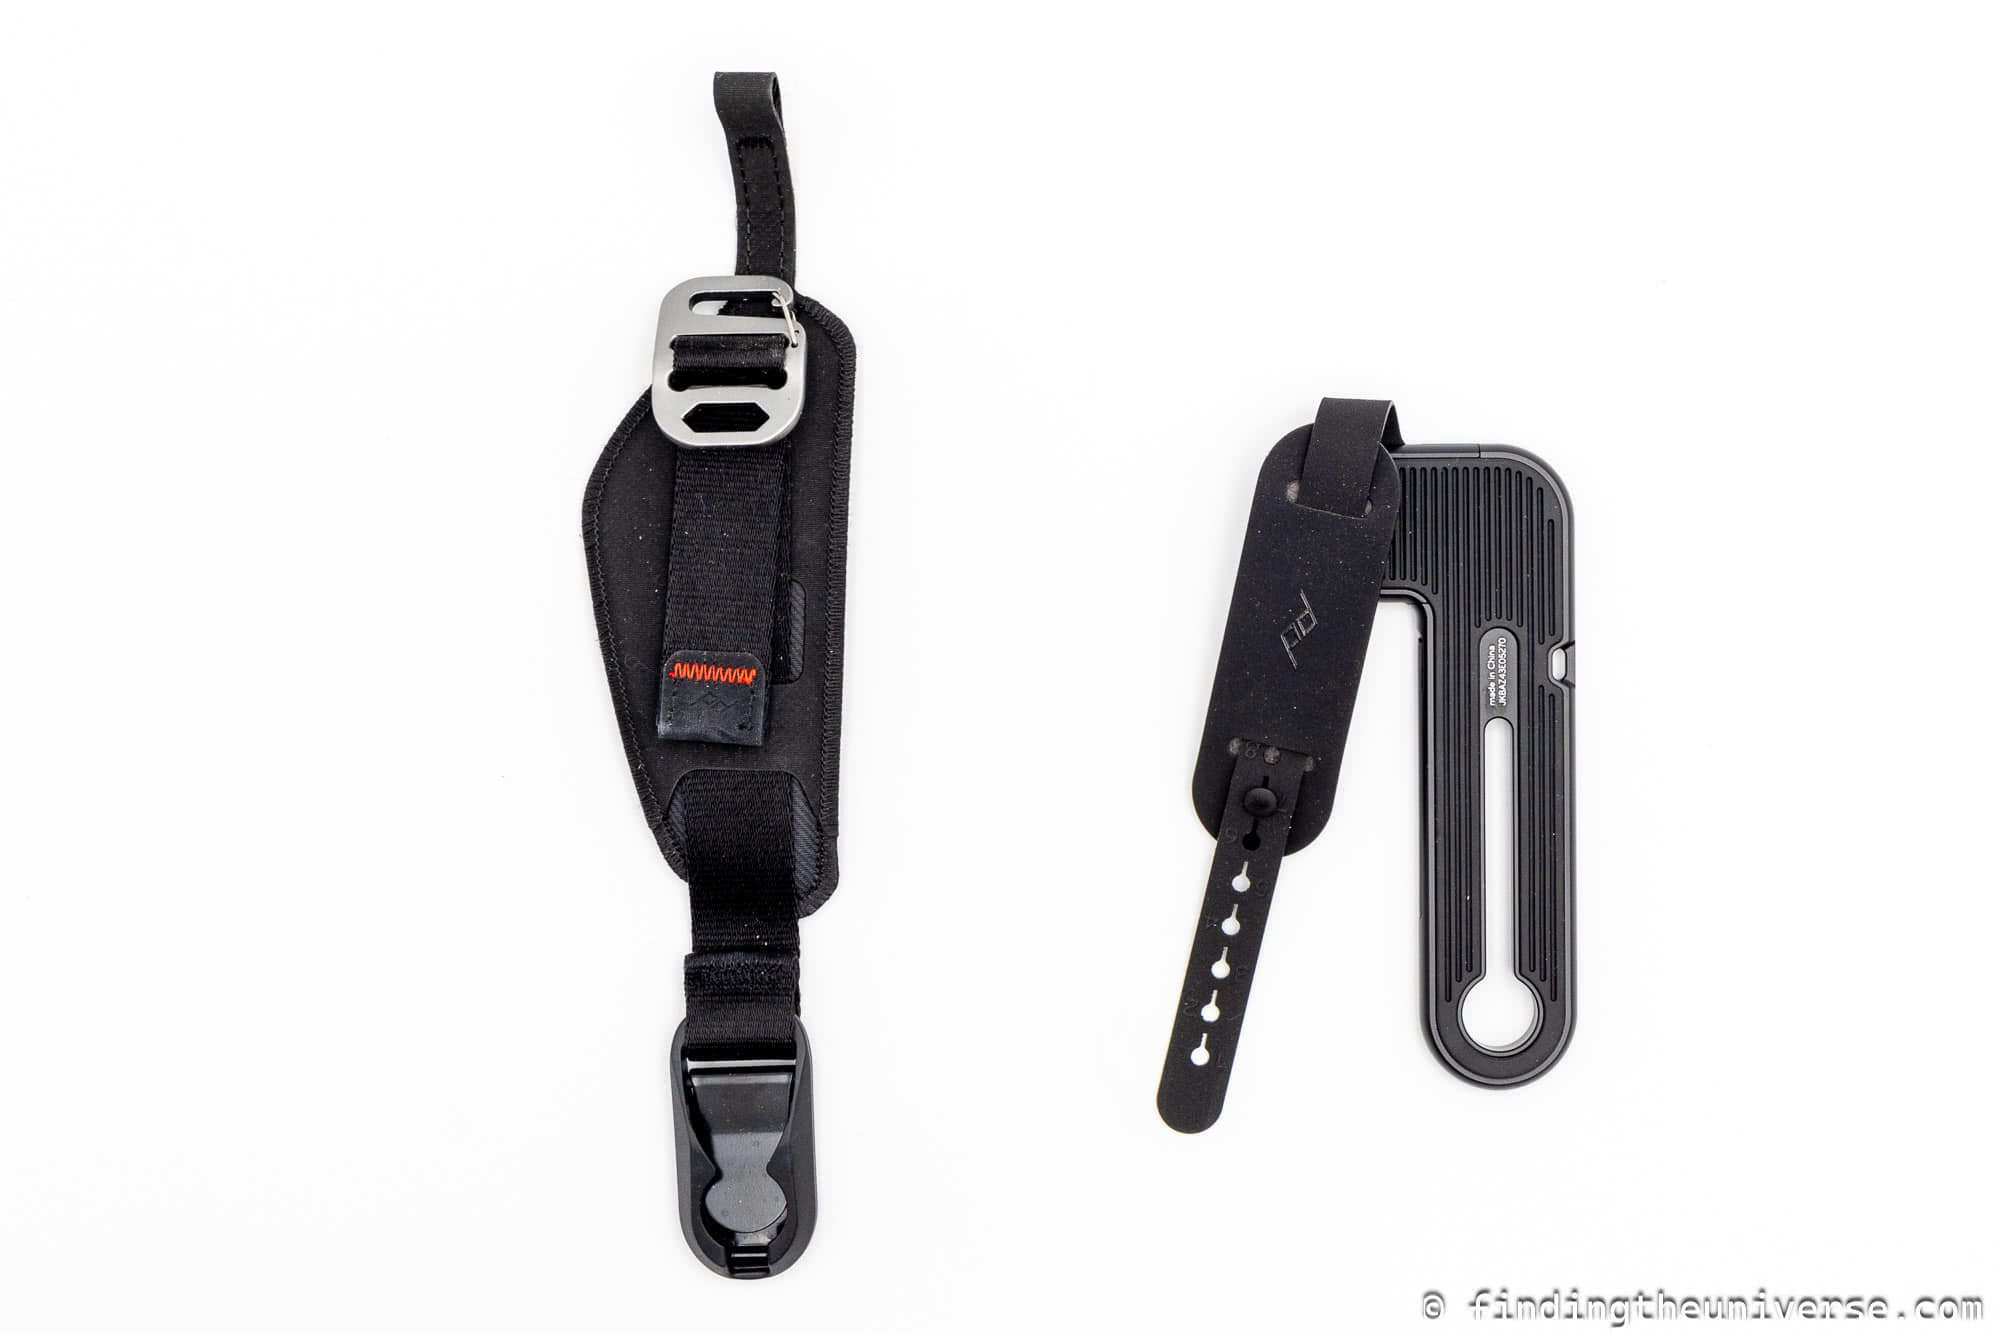
    And now, to really increase the versatility of the world’s favourite action cam, there is the new Magnetic Latch and Ball Joint Mounts.

    This secures your camera by snapping it in place on the auto-engaging dual latch magnets. Then you can attach the magnetic latch to any other GoPro mount for the ultimate flexibility!

    Just remember that it is magnetic after all, and while it’s super useful if you want to quickly switch the GoPro to different mounting locations, we would not recommend it for any kind of mounting option where there is a lot of movement or jarring.

    Reefs Of Micronesia.
    Exploring the reefs of Micronesia with GoPro 13.

    HLG HDR Video

    The GoPro HERO 12 introduced HDR video for the best-looking videos on the market, as well as a flat setting, mimicking a log profile, for those that like to colour grade their footage.

    The new GoPro HERO 13 takes this to the next level, with proper hybrid-log gamma (HLG) technology.

    Now you can record in 10-bit and Rec. 2100 colour space and have the benefit of a wider colour gamut.

    This is aimed at more of the professional creators out there, but it’s a very worthwhile upgrade.

    Faster Wifi

    While the older model had Wifi 5 Technology, the GoPro HERO 13 Black steps it up with even better specs!

    The new option uses Wifi 6 Technology, offering more reliable and faster connectivity for transferring your content when using the GoPro Quik app.

    You can still use a USB-C cable to your laptop or PC as well for ultra-fast transfers.

    Audio Tuning

    There aren’t too many differences between the audio feature of the 12 and 13, but the 13 offers a slightly more sophisticated approach to audio on your content.

    There is now audio tuning which is optimised to your activity, meaning you get more balanced and realistic sound.

    The new Voice Audio Mode also makes sound clearer, as it prioritises your voice over other ambient sounds in the background. For vlogging enthusiasts, this new feature gives your content a more optimised and crisp sound.

    Or do what we do – use the Media Mod and run a shotgun mic or wireless microphone setup for the best audio possible when vlogging.

    Alesha In Raja Gopro Hero 13 Black Review
    Life looks better on GoPro.

    All the Other Same Features from Last Year

    As we mentioned earlier, the best features from the 12 are still found on the 13, and these include:

    1/1.9″ Sensor with 8:7 Aspect Ratio

    It took us a little while to get used to the 8:7 aspect ratio, paired with GoPro’s 1/1.9″ sensor, but now we use it pretty much 90% of the time. It’s just so damn useful.

    Capture one shot and crop it multiple ways – for YouTube, Instagram/TikTok, web or print.

    Our go-to is 8:7, 4k and 60 fps for most action scenes, and 5.3k at 30fps for vlogs.
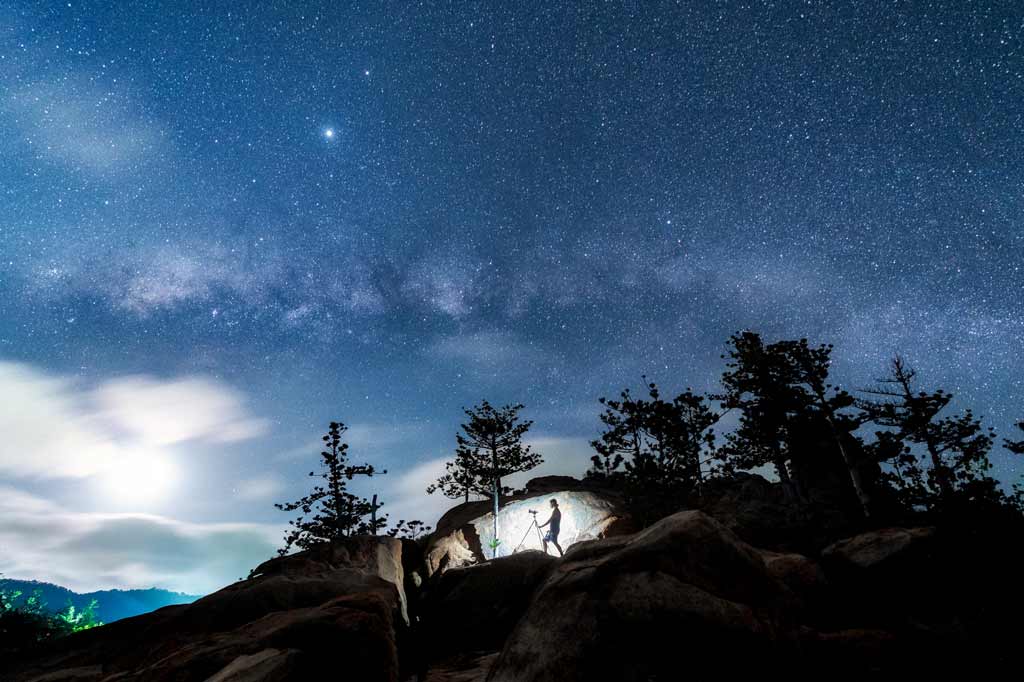
    Night Effects

    We love the night effects, such as star trails, light painting and night lapses, and of course they’re still here on the 13.

    HyperSmooth 6.0 with 360 Degree Horizon Lock

    Basically HyperSmooth makes your footage as smooth as using a gimbal, without of course needing a gimbal.

    It’s epic. It’s flawless. It’s practically essential.

    In fact it’s so good that we often find ourselves wanting to vlog on the GoPro for run-and-go shooting rather than our top-line Sony cameras.

    And the 360-Degree Horizon Lock means you can literally spin the camera in a full circle and it will magically keep the horizon straight.

    While you might not be spinning the camera around fully all the time, it’s great if you’re trying to shoot a scene from something like a boat in rough seas for example.

    Our Other Favourite Features

    These are the ones we use with our GoPro all the time, and while not new, are worth highlighting again:

    Scheduled Capture

    Set your GoPro up somewhere for a time lapse (or night lapse), pick a time in the future to start recording, and then walk away.

    Why we love it? Means you don’t need to start recording early and risk killing your battery, or need to set a reminder to go out and switch the GoPro on in case you’re busy, or asleep.

    Raw Photos

    SuperPhoto is cool, but we always prefer to edit our images the way we like. That’s why we leave our GoPro set to Raw images all the time.

    Why we love it? Really push the colours in your images hard when editing.

    Presets

    If you’re always switching between different modes, like 5.3k30 and 4k60 like us, having these exact settings saved as a preset means you can change in a moment.

    Why we love it? Makes life so much quicker and easier.

    This video was shot on the HERO12, but it works the exact same on the HERO13.

    GoPro Quik Desktop App

    We just want to talk about the GoPro Quik App again this year, because it’s just always getting better and better.

    The GoPro Quik app on your smartphone is excellent, especially for importing your footage and making quick edits to share on social media.

    It’s so good we recommend it as essential downloading for anybody who comes with us on our NOMADasaurus Adventure Tours.

    The desktop app is also excellent, and while we don’t really use it for editing videos (we use Adobe Premiere Pro and CapCut for that), it makes grabbing a frame out of your video as a photo very quick and easy.

    The ‘Mods’ and ‘Mounts’ – The HB Lens Mods + Media, Max Lens, Display and Light Mod

    We had a massive write-up about the HB Lens Mods above (the ND, Macro and Anamorphic Lenses that suit the GoPro HERO 13 Black), but we can’t forget about the other mods GoPro has available.

    The Display Mod isn’t something we really use, nor recommend, and there’s a new Ultra Wide Lens Mod to replace the Max Lens, but the Light Mod is really handy and we always throw a few in our camera bags for trips.

    The Media Mod on the other hand is essential if you’re a content creator.

    This allows you to use an external microphone for audio, and has a few hot shoe attachments for other units like the light mod.

    Plus there’s all the cool mounts you can purchase to place the HERO13 just about anywhere you can imagine.

    And yes, for another year in a row, the GoPro HERO13 Black is the exact same size as the previous four cameras, so there’s no need to throw out your old accessories.

    Some of our favourites are the Dive Housing, El Grande, Jaws, Bite Mount and Floaty.

    Check out our full list of our top GoPro accessories.

    Don’t forget to use our GoPro discount code ‘nomadasaurus10’ at checkout to get a further 10% off on the latest camera and accessories!

    What About the GoPro HERO – A New Smaller Camera?

    Yes, there is a new, smaller, no-frills GoPro HERO camera coming out, and while it’s not as good as the HERO13, for a lot of people this is going to be more than enough.

    Think of it as the Session making a comeback.

    We’ll update this article once we get our hands on one to test.

    Puffer Fish Gopro Hero13
    Hanging out with a puffer fish in Palau. How good is the quality on the 13 for underwater shots?!

    Is the HERO13 Any Good in the Real World?

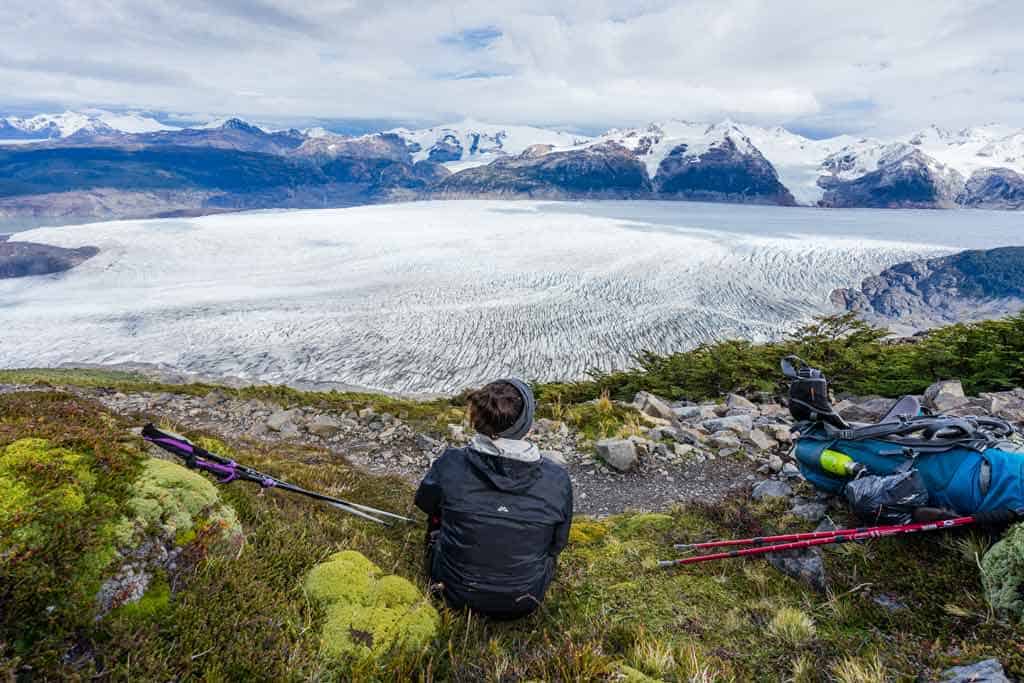
    We picked up the GoPro HERO13 Black literally on the way to the airport to fly out to a photography assignment on an expedition ship through West Papua, Palau and Micronesia.

    So our testing of the new camera was literally baptism by fire.

    There was no fancy unboxing, spending time going through all the settings, etc.

    It was grab the camera, turn it on, do a basic setup based on what we know with older GoPros, throw it in a dive housing and hit the water.

    Luckily, it worked flawlessly from day one.

    The menu is practically the same as previous years, meaning it’s clear, concise and easy to navigate.

    After a few minutes of dialling in the settings we wanted – 10 bit natural colour, 8:7 at 4k60 with minimum and maximum ISO selected, we descended down to 30 metres.

    And, just as expected, it just worked.

    No freezing, no lag between switching between video/photo, and best of all the footage just popped right out of the camera.

    The interval photo mode, capturing raw files every 3 seconds, was truly awesome to have on hand.

    With a couple of days of diving and snorkelling under our belt we took the GoPro HERO13 Black on a hike around Raja Ampat and absolutely loved how it all worked.

    HyperSmooth? Perfect.

    Colours? Vibrant and clean.

    Photo mode? Quick and easy to use.

    And then when we pushed the colours in post processing, the RAW files really shined, particularly on the dive shots with minimal light.

    In full transparency we only used the ND filters quickly for a test, and they did exactly as expected. Nothing flash, nothing fancy – they are just high quality ND filters that have practically no colour casting and slow the shutter down without interference in bright conditions.

    That might sound like it’s not worth getting, but as people who love the natural motion blur you get when you shoot video at the correct settings, and of course who play around with long exposure photography a lot, these are now going to live full-time in our camera bags.

    We threw on the Macro Lens for a quick trial on some flowers and sure enough, it’s a decent macro lens.

    Again, doesn’t sound like much. But this is the first time there has been a native GoPro macro lens mod, and opens up an entirely new world of possibilities for video and photos.

    Just like the ND filters, this is a welcome addition and now considered a must-have in our list of camera gear.

    We sadly didn’t get a chance to test out the Ultra Wide Lens Mod or the Anamorphic Lens Mod, but trust us, as soon as we do we’ll update this article with our experience of them.

    All in all, it’s a very powerful, very durable, and very easy to use professional content creation powerhouse.

    What We Don’t Like

    It’s taken us a few weeks of using this every single day in a variety of situations to try to figure out what we don’t like about in our GoPro HERO13 Black review.

    Is it perfect?

    Of course not.

    But in all honesty, the years of saying “Yea GoPros are cool but I hate that they…” are pretty much over.

    We do wish they brought in the rumoured 1-inch sensor for better resolution and low-light performance, but realise that would make the unit a fair bit larger.

    And again there’s no optical zoom. With the HB Series Lenses though perhaps there’s a zoom lens on the horizon?

    A dedicated 1:1 aspect ratio would be awesome, as would a built-in visual grid so you could frame in 9×16 and 16×19 easily enough.

    It’s still early days though, and we’ll update this article if we find anything we don’t like.

    Diving In Indonesia Gopro
    The new camera works equally awesome above and below water.

    GoPro HERO13 vs GoPro HERO12 vs GoPro HERO11 – What’s the Difference?

    We actually rocked our previous 12 while exploring Micronesia as well to compare the two in our brand new GoPro HERO 13 Black review, and if you’re familiar with the older model as well you might be wondering if there’s been much of an upgrade this year.

    Or if you have the HERO11 or HERO12, or maybe don’t even own a GoPro, you’re probably curious if there’s any difference at all.

    So let us lay it out in absolute laymen’s terms for you.

    The biggest differences that the majority of moderate users would notice are:

    • More battery life
    • A variety of creative lens mods
    • GPS
    • Magnetic Mount

    The other upgrades like HLG HDR video colour profiles, audio tuning, burst slo-mo and faster wifi are more things that heavy users or professionals would be excited about.

    Let’s check out the differences in our comparison table.

    27MP + SuperPhoto and all RAW modes

    27MP + SuperPhoto and all RAW modes

    27MP + SuperPhoto and all RAW modes

    In-Camera with 360° Angle and Horizon Lock

    In-Camera with 360° Angle and Horizon Lock

    In-Camera with 360° Angle and Horizon Lock

    720p400, 900p360, 
    5.3K120

    1.4″ Color LCD with Smoother Live Preview 

    1.4″ Color LCD with Smoother Live Preview 

    1.4″ Color LCD with Smoother Live Preview 

    2.7″ Color LCD with Improved Touch Sensitivity

    2.7″ Color LCD with Improved Touch Sensitivity

    2.7″ Color LCD with Improved Touch Sensitivity

    Media Mod, Max Lens Mod, Display Mod, Light Mod, Volta

    Media Mod, Max Lens Mod, Display Mod, Light Mod, Volta

    Media Mod, Max Lens Mod, Display Mod, Light Mod, Volta

    HLG HDR, Flat, Natural, Vibrant

    1080p with HyperSmooth 6.0

    1080p with HyperSmooth 5.0

    1080p with HyperSmooth 5.0

    Is it Worth Upgrading?

    We’re nearing the end of our GoPro HERO 13 review, and every year we get routinely get asked two questions all the time (in the past couple of weeks on this ship we’ve been asked this multiple times a day):

    “I don’t own a GoPro, which one should I buy?”

    And…

    “I have a GoPro HERO12/11/10, should I upgrade to the newer model?”

    So, here we go, the exact same advice we give our friends, our family, clients and guests.

    Is it worth upgrading to the HERO13?

    You Don’t Have a GoPro

    If you don’t have a GoPro and are curious if you should rush out and buy the newest HERO13 for travel, underwater, content creation, social media, sport or lifestyle, our honest answer is:

    Yes, it’s 100% worth buying the HERO13 Black, if it’s within your budget.

    If it’s not, but you still want a GoPro, you will probably be very, very happy with the HERO12.

    Reason we say ‘if it’s within your budget’ is because the main upgrades such as the HB Series Lenses and very nice to haves, but not essentials for most people.

    Yes, the 13 is the newer, better, more capable camera.

    And if the price difference isn’t much, then get it.

    You Have a GoPro HERO10 or Earlier Model

    If you own a GoPro HERO10 or older camera, do yourself a favour and jump on this immediately.

    The GP2 processor, larger sensor, 8:7 aspect ratio, massive battery increase, improved UI and just about everything else makes the HERO13 night and day compared to the older models.

    Just do it, you won’t regret it.

    You Have a GoPro HERO12 Black or HERO11 Black?

    Now this is a bit of an interesting one, and harder to answer.

    Side by side, do we noticed much of a difference between our HERO12 and the HERO13?

    No, not really.

    Is the HERO13 better?

    Of course it is! So much so that we’ll be selling our 12s and just using the 13s.

    But we use our GoPros all the time as professional content creators.

    What if you just use your GoPro now and then, for a short holiday or on the one time every few months you might go mountain biking, skiing or snorkelling?

    It might not be worth you spending the extra cash if you won’t use it.

    Honestly, you’ll still love what you capture with your HERO12 or HERO11.

    Now, if the HB Series Lenses sound interesting to you (they’re awesome), and the power upgrades with the 1900mAh Enduro Battery and Conacto Magnetic Power Latch pique your interest, then upgrade to the HERO13.

    So what do we recommend you to do?

    The easiest way to break it down is with this:

    UPGRADE IF: I use my GoPro more than once a week, would use the ND, Macro or Ultra Wide Lenses, appreciate more battery life and like to colour grade my video footage.
    DON’T WORRY IF: I use my camera less than once a month, don’t really edit my footage, never drain a battery and don’t need nicer video clips.

    If you’ve just recently purchased an 12 though, don’t throw it away. The 12 is still awesome and will serve you well for many more years.

    Final Verdict – 9/10

    Well family, that’s it for our GoPro HERO13 review. It’s made it across the Indo Pacific and Micronesia with us on a crazy adventure, captured some insane content and never missed a beat.

    It’s an absolute weapon, and we love it.

    We personally give the GoPro HERO 13 Black a rock solid 9/10.

    The HB Series Lenses completely revolutionise how you can use the new GoPro, the bigger battery is a life saver, the UI improvements are fantastic and of course 5.3k60 is wild.

    Next up we’ll be throwing this little unit into the content battlefields across Africa, Antarctica, Patagonia, Borneo and the Arctic.

    If you do purchase the GoPro HERO 13 Black, also grab the GoPro Cloud Storage too.

    Thanks very much for reading our GoPro HERO13 Black review. If you have any questions please leave a comment below and we’ll answer them as soon as possible.

    Don’t forget to use our GoPro discount code ‘nomadasaurus10’ at checkout to get a further 10% off on the latest camera and accessories!

    DISCLAIMER: Some of the links in this article are affiliate links, which means if you book accommodation, tours or buy a product, we will receive a small commission at no extra cost to you. These commissions help us keep creating more free travel content to help people plan their holidays and adventures. We only recommend the best accommodations, tours and products that ourselves or our fantastic editorial team have personally experienced, and regularly review these. Thanks for your support, kind friend!

    Is the GoPro HERO13 better than the GoPro HERO12?

    The GoPro HERO13 has a number of excellent upgrades over the HERO12, including a much bigger 1900mAh battery, HB-Series Lens compatibility, improved UI, Burst Slo-Mo mode, HLG HDR video and a Magnetic Latch and Power Cable adaptor.

    Is it worth upgrading to the GoPro HERO13?

    If you have the HERO11 model or earlier, use your GoPro more than once a week or make social media content, then it is definitely worth upgrading to the GoPro HERO12 to enjoy the extra battery life and HB Series Lenses.

    Is the GoPro HERO 13 good for still photos?

    The GoPro HERO 13 Black is fantastic for still photos thanks to the 27 megapixel, 1/1.9″ sensor being powered by the GP2 processor and full RAW capabilities.

    What are the differences between the GoPro HERO13 and HERO12?

    The biggest changes between the GoPro HERO13 and HERO12 are the extra battery life, HB-Series Lenses with Auto Detect, HLG HDR video profiles, better UI and Burst Slo-Mo.

    GoPro HERO 13 Black Review
    Gopro Hero 13 Black Review Feature Image

    In our detailed GoPro HERO 13 review we’ve personally put the camera to the test to see if it’s worth the upgrade and see what’s new on the GoPro HERO13 Black.

    Pros

    • [object Object]
    • [object Object]
    • [object Object]
    • [object Object]
    • [object Object]
    • [object Object]

    Cons

    • [object Object]
    • [object Object]


    Source link

  • The BEST Camera Accessories – Photography Essentials [2025]

    The BEST Camera Accessories – Photography Essentials [2025]


    Ready to take your photography to the next level? Our expert guide to the best camera accessories will help you narrow down the exact essentials you need to consider.

    Once you start getting more and more into photography you quickly realise that there are certain tools that are essential tot make your life easier, and your photos more creative.

    Some of these accessories are necessary for your camera to work, and some will simply help you take better photos.

    After the success of our popular best travel cameras article (helping over 2 million photographers to date!) we received countless emails from people asking what photo camera accessories we use and recommend.

    Whether you’ve bought the best travel camera you can find or are just a hobbyist, trying to choose the best camera accessories is something you seriously need to consider.

    Our Expert Guide to the Best Camera Accessories and Essentials

    With the thousands of photo camera accessories on the market these days it can be quite overwhelming trying to figure out what every photography actually needs.

    Even more confusing is trying to determine how much you should spend on what. How can one SD card be worth $5, while another one is $200? Why do some tripods come in at over $1500?

    And camera bags? Don’t even get us started on the different choices in camera bags…

    Well never fear, because after working as professional photographers for a decade we have worked our way through the endless options and have now narrowed down the exact camera essentials budding photographers need, right down to the best brands and products!

    We’ve put together this camera accessories list, not necessarily just for the professionals out there, but also for the entry-level and amateur photographers who want to know where to start.

    All of these are products that we’ve owned, used, or had personal experience with in our journey going from complete amateurs to professional travel photographers.

    We don’t recommend something that we wouldn’t use ourselves, or tell our best friend to buy.

    If you already know what you are looking for, jump to the top camera accessories you are interested in:

    This isn’t a comprehensive list of every single camera attachment on the market. Instead it is mainly for the recommended camera accessories that most photographers would need.

    We’ve left out the high-end specialist accessories like microphones (side note, we love the Rode Videomic) sliders, gimbals and light boxes, because these aren’t the kinds of things most photographers need.

    But if you are interested in these types of camera equipment leave a comment below and we’ll give you our top recommendations!

    Now, let’s dive into the article.

    Amir Timur Mausoleum Best Camera Accessories
    Once you have all the camera accessories you need you can focus on getting out there and taking great photos!

    Best SD Memory Cards

    In order for digital cameras to save photos, you are going to need to buy memory.

    This is the most common camera accessory, and the absolute first thing you should be looking at after you buy your digital camera (along with a SD card reader to import your images).

    An SD (Secure Disk) card is the small memory chip that goes into your camera that will store all your photos and videos. Every digital camera on the market needs one of these cards to work.

    Where it can get confusing is when you start looking at size and speeds. Let’s start with size to give you an idea of what each memory card can hold, remembering that larger capacity means more photos.

    Note – For this assessment we are using a 16 megapixel camera shooting in JPEG mode as the base.

    • 8gb – 1430 images
    • 16gb – 2861 images
    • 32gb – 5722 images
    • 64gb – 11,444 images
    • 128gb – 22,888 images

    Now you might look at that and think, “Wow, I would never take 5000 images! A 32gb memory card will last me forever!” and you might be right.

    But it’s important to keep in mind that each camera model will have a different size file, and if you shoot video, or photos in RAW card format, then this will chew up your memory faster.

    Let us give you an idea of how much memory we use as professional travel photographers – We only shoot in RAW and depending on the camera we use, each file is around 24mb (or 48mb image quality for our Sony A7Riii’s larger camera sensor).

    This means we can take about 1333 photos on a 32gb memory card. Seems like a lot? Well, we can easily go through 2 or 3 memory cards on a heavy day of shooting.

    One cool thing to consider now is that memory is getting cheaper and cheaper, and a 32g card and SD card reader can be bought for as little as $20 in some places (for a low quality one). So don’t even consider getting anything smaller.

    But we don’t necessarily recommend going out to buy a bunch of 128gb (or 256gb) memory cards either, for two reasons:

    • Not all cameras can read cards that are larger than 32 or 64gb. We made that mistake when we bought 128gb cards for our old GoPro and it couldn’t read them.
    • If you take all your photos on one large SD card and you lose it/have it stolen/it gets corrupted, then you will lose all your photos in one go.

    For that reason alone we recommend buying either 32gb or 64gb memory cards, despite the limited capacity.

    Now let’s look at speed and ‘class’ of SD cards.

    The transfer speeds of an SD card is measured in mb/s, or megabytes per second, and is properly known as the ‘Maximum Read Speed’.

    The class of memory card is actually an outdated metric these days as all newer memory cards will include the transfer speeds as well.

    However they still include the number on your SD cards these days, and they come in Class 2,4,6 and 10.

    Hot Tip – You will need a class 10 memory card.

    Just like storage, speed on memory cards is improving rapidly as cameras come out with better features so let’s look some common write speeds to see what you’ll need as a minimum:

    • 40mb/s – The absolute minimum you should be considering. Fine for taking low number of photos on a beginner camera if shooting in JPEG.
    • 80mb/s – A much better speed that will be fine for taking a couple of photos in a matter of seconds. Ok for shooting in RAW.
    • 90mb/s – Great for taking photos in JPEG if using burst mode, shooting exclusively in RAW, or if you are looking to film video as well.
    • 95mb/s – What you’ll be needing if you shoot exclusively in RAW and hit the shutter frequently. Adequate for shooting in 4K.
    • 150/260/300 or faster – You film cinematic 4K video or are primarily a sports or wildlife photographer. The best of the best. These higher speeds are often found on CF cards, but newer SD cards are matching these speeds now.

    Make sure you also get a memory card reader if your computer or laptop doesn’t have a memory card reader built in.

    Antarctica Clouds Camera Essentials
    Having lots of extra SD cards is vital if you’re travelling somewhere beautiful, such as Antarctica.

    Probably the second most important must have camera accessory you will need after SD cards is spare batteries. Trust us, there’s nothing worse than being out taking pictures and having your battery die on you.

    When it comes to extra batteries you have two options – buy native batteries, or buy 3rd party batteries. There’s benefits to both.

    Obviously if you own a Sony mirrorless camera, buying Sony batteries or a dedicated battery grip are going to be the best for it.

    They are of the highest quality and more importantly you won’t have your warranty voided if for some very unlikely reason they damage your camera.

    However native batteries are usually more expensive.

    Going for a 3rd party battery is your next best option, and you can often pick up 2 spare batteries for the same price as one without jeopardising battery life.

    But when you start to look at 3rd party batteries you can be overwhelmed with all the random brands out there.

    So what batteries should you go for in your photography accessories list?

    Torres Del Paine Views Sd Cards
    Stopping for a lunch break in Torres del Paine National Park. We trekked and camped for 8 days, so having spare batteries was essential to make sure our cameras lasted the adventure.

    Best Tripod for Travel

    No list of photographic gear would be complete without one of these!

    If you’re getting serious about photography and want an essential camera accessory, then you’ll have to buy a tripod to eliminate camera shake.

    Tripods are honestly one of the most essential camera accessories any photographer can own, whether you’re trying to take photos in low light, long exposure shots, do time lapses, do steady filming or even just taking a photo of yourself in a cool location.

    This is also one of those photo accessories that can range in price from very, very cheap to very, very expensive.

    How much you want to spend really depends on your goal for photography, and your budget.

    We’re not going to bombard you with a million different types of tripods (you can do that by reading our ultimate guide to the best travel tripods). Instead we’re going to focus on the best, lightweight and portable mini tripod you should get.

    Best Full Size Tripod

    If you’re looking for the next step up, are serious about getting excellent landscape shots or shooting astrophotography, then you’re going to need a full-size sturdy tripod – something that’s more heavy duty and can withstand any kind of weather or heavy gear.

    This is where tripods get expensive, and it’s not unheard of to see some going for close to $2000!

    But don’t worry, you don’t need to spend that much to get something amazing! And having tested out dozens of tripods over the years, we can safely say that our personal recommendation (and what we use) is the Manfrotto BeFree GT XPRO Carbon Fibre.

    Long Exposure Camera Tripod
    Using a tripod allowed us to take this long exposure photo of Narrabeen rock pool at sunrise.

    Best Portable Light

    You may be wondering why a portable light would make it onto the list of best camera accessories?

    The reason is having a little LED light can help you add a huge amount of creativity and opportunities to your photos!

    We use portable lights to mount on top of our camera when vlogging to light up our faces (also perfect when taking photos or people or subjects in dark rooms or at night), to illuminate a backdrop and even to add depth to scenes in low light.

    The best ones out there are waterproof, can connect to your phone via Bluetooth and have different colour shields to change white balance.

    Having tested a whole bunch of them, we now only use the Lume Cube 2.0

    Lume Cube 2.0 Astrophotography Portable Lighting
    We used our Lume Cube 2.0 to light up the rock behind our buddy Matt so that he stood out in this Milky Way shot.

    Best Circular Polarising Filter

    Once you start to dive into the world of filters for your camera (no, not the Instagram kind), you’ll quickly become overwhelmed with all the different types there are out there.

    Circular polarising filters, neutral density filters, graduated filters, UV filters, infrared light filters – the list seems to be almost never-ending.

    But if you’re looking for the top recommendation for the first filter to buy and why, you need to check out CPLs, or circular polarisers.

    These fantastic filters screw onto the front of your new lens and act to cut out glare in reflective surfaces, such as water, glass, snow, blue skies, etc.

    Seriously, if you’re looking at stepping up your photography game and take better quality photos these are the best camera accessories you should consider.

    Especially for landscapes (check out our top landscape photography tips here), a CPL will help make your images pop, even in the middle of the day.

    They work by essentially having two neutral density filters screwed together that rotate in opposite directions.

    By rotating the front filter it eliminates the rays of light that bounce off these surfaces.

    Like most things when it comes to photography, you can either go as cheap or as expensive as you want with filters.

    Our best tip though is to not buy a super cheap filter. These will just put a weird colourcast over your entire photo, which could look terrible once you start looking at them on the computer or in print.

    Note – Many camera stores will try to sell you a UV filter or clear filters, and tell you that they are good for protecting your camera and lens. If you have any lens that is half decent we do not recommend these. Why would you spend $3000 on a high quality lens to put a $10 piece of crappy glass on the front?

    Waterfall Grampians Circular Polariser Filter
    Using a CPL allowed us to cut out the glare of this waterfall, even in the middle of the day.

    Best Neutral Density Square Filter Systems

    Neutral density filters are the dark pieces of glass that you put on the front of your camera that limit the amount of light hitting the sensor, allowing you to create long exposures and use a slow shutter speed, even in the middle of the day.

    Not quite sure what we mean? Ever seen an image of a waterfall where the water is silky smooth?

    That’s long exposures, and depending on the ambient light and if it was taken in the middle of the day, then neutral density filters were most likely used.

    READ MORE: While you’re at it, check out our expert guide to waterfall photography tips to take your cascade images to another level!

    The best way to purchase and use ND filters (or any filters if you’re using a multi-lens set up with different sizes), is by using a square filter kit that screws onto the front of your camera lenses.

    The filters come in square glass panels, usually 100x100mm, 100x150mm or 150x150mm, and they slide into a holder that attaches to the front of your camera and lens.

    They usually come with adaptors of different sizes meaning you can put one system on any thread size, and have no issues mounting to the front of wide angle lenses.

    This falls more into the category of professional camera accessories, as they gives you greater freedom in what levels of density you apply to your photographs. Having larger filters also reduces vignetting in your images.

    They are also a lot more expensive than screw-on filters, but if you’re serious about this type of artistic photography then it’s a great investment.

    By having a square filter system you can get different stops of NDs (and stack them if you want), and have graduated filters and apply them to different parts of the shot.

    Use Nd Filter Puerto Varas Long Exposure
    A sunrise in Puerto Varas, Chile. An 80 second exposure using our NISI 10-Stop ND Filter, which allowed us to caputre the cloud movement while smoothing out the water of the lake.

    Best Remote Shutter Release/Intervalometer

    Having a remote shutter release or an intervalometer is an excellent camera accessory for a whole range of different photography situations.

    The first style is cable shutter releases, which plugs into the side of your camera using micro USB or USB C.

    You push the button on the remote and it releases the shutter for you, so you can take a picture without disturbing the camera (think long exposure photos) or even if you’re not actually right next to the camera.

    Intervalometers do the same thing, but with a few extra features. The most important of these is the ability to set the camera to continuously take photos, which is great for taking time lapse photography.

    Both of these also allow for bulb photos, in case you want to do a long exposure past the standard 30 seconds allowed by most cameras.

    The third one is for those that love putting themselves in the picture, but perhaps at a far distance – wireless remotes.

    A wireless remote usually slides into the hot shoe connection on the top of your camera or connects via USB C.

    Then with handheld remote controls you can press the shutter release from as far away as your device allows (sometimes over 100m!).

    Chorillo Del Salto El Chalten
    Using a remote shutter release allowed us to set the camera up on some slippery rocks for this shot of a waterfall in El Chalten, Argentina, then step back so we were standing somewhere safer to keep taking pictures.

    Best Camera Strap

    Most cameras will come with a standard strap that you can hang around your neck, and to begin with this is fine.

    But if you want something a bit more comfortable (especially if you have larger cameras), you’re going to want to upgrade your neck strap.

    You can get ones that have super thick padding, are worn like a harness or clip to the side of your belt. Some attach to the normal camera strap rings, while others screw into your tripod plate thread.

    After using the standard straps for years, and having them dig into our necks and shoulders when being out in the field for hours at a time, we decided it was time to invest in better camera straps, and are glad we did when we found Peak Design!

    Magsar Reindeer King
    Having a good camera strap means you can keep your camera around your body, and still have instant access when you want to capture those perfect moments, whether its portrait photography or travel.

    Best Camera Bags

    Getting a camera bag is obviously a must have camera accessory that you will buy. Depending on whether you have a small point and shoot, a series of mirrorless cameras or a bunch of different bodies and lenses, you’ll need to get a camera bag to match whatever you’re carrying around.

    READ MORE: See our brand new, comprehensive guide to the best backpacks for photographers!

    You’ll have to decide what camera bag is best for you in terms of your activities as well. Do you just carry your gear from the car/house to your photography location, or do you go trekking for days at a time with it?

    For us we are always out hiking so need a bag that not only fits all of our camera gear (including a large zoom lens or two), but on the other hand also holds clothes, jackets, snacks, water and more.

    A camera bag should also be very durable, water resistant and have lots of padding (both inside and out).

    This is quite a personal thing, but in our experience after using (and ditching) close to 20 different bags, there’s one main company you should start your search with.

    Uzbek Lady Silk Weaving
    A lady weaving silk in Uzbekistan. Having a good camera bag means we can carry all our lenses with us at all times, allowing us to choose what we want to shoot with in the field.

    Cleaning Kit

    Keeping your camera clean with the right accessories is very important to have it perform at its best.

    Wherever you go bits of dust and dirt will cover the camera, and if you have interchangeable lenses, you’ll probably end up with dust on the camera sensors as well. Not ideal!

    Unfortunately there’s nothing you can do to stop every single bit of dirt getting on your camera, unless you decide to never take it out of its case. Instead you just have to get used to cleaning it.

    These days you can get decent camera cleaning kits for very cheap. This is especially important when considering the best camera accessories for dSLRs.

    You’ll definitely need a blower, microfibre cloth and some other items, so let’s get into it.

    IMPORTANT – Whatever you do, don’t attempt to clean your sensor unless you 100% know what you are doing. If you scratch it, your camera is pretty much ruined. Using a blower to get dust specs off it is fine, but even then make sure you are careful. This is not to scare you, it’s just to save you from making a costly mistake. If your sensor is very dirty take it to a camera store to get professionally cleaned.

    Sunrise Cleaning Kit Accessories For Cameras
    Keeping your camera clean is very important in the field. This photo had quite a few dust specs across the camera lens, meaning we had to spend a bit of time in post-processing to clean them up.

    External Hard Drive

    Once you get more and more into photography, you’re going to need a place to store all your photos. Images quickly stack up, and if you’re anything like us you want to make sure you don’t lose them.

    Eventually you may get to the level where you need something dedicated like a NAS backup system, but until then external hard drives will be your friend.

    You have two options when it comes to external drives – desktop hard drives and portable hard drives. We always suggest getting a desktop hard drive for your home, which you back everything up to, and a portable one for travelling.

    Iceberg In Antarctica
    We took over 500gb worth of photos and video in Antarctica. It’s easy to see why.

    Conclusion to Our Top Camera Accessories and Essentials

    We hope our list of essential camera accessories has been helpful for you. Please feel free to reach out to us if you have any questions or ideas about what we should add to this article as well.

    The most important thing, regardless of equipment, is just getting out there to take lots of nice photos! The more and more you practice, the better your images will get.

    READ NEXT: Looking for GoPro-specific recommendations? Check out this post on the top GoPro accessories for any photographer!

    What else would you recommend people get for the best photo camera accessories? Leave a comment below to let us know.

    DISCLAIMER: Some of the links in this article are affiliate links, which means if you book accommodation, tours or buy a product, we will receive a small commission at no extra cost to you. These commissions help us keep creating more free travel content to help people plan their holidays and adventures. We only recommend the best accommodations, tours and products that ourselves or our fantastic editorial team have personally experienced, and regularly review these. Thanks for your support, kind friend!

    The BEST Camera Accessories – Photography Essentials [2025]
    Best Camera Accessories

    We’ve spent a decade testing all the best camera accessories on the market, and in our comprehensive guide to the top camera essentials we dive into exactly…


    Source link

  • Peak Design Camera Straps Review

    Peak Design Camera Straps Review


    I’ve used many camera setups through my years as a professional photographer. However, one thing that has remained the same for a long time across multiple camera setups is the camera strap system I’ve been using. In this guide, I’m going to be reviewing all the Peak Design camera straps to help you decide which is best for you.

    Since I first bought my Peak Design Slide and Clutch camera straps in 2015, Jess and I have been pretty much exclusively using the Peak Design strap system across all our DSLR and mirrorless cameras.

    Over the years, I’ve tried and tested pretty much every Peak Design camera strap that they make.

    I’ve taken them all around the world, from far below zero temperatures photographing the northern lights to the hot and humid jungles of Uganda on gorilla trekking and birdwatching trips.

    My Peak Design camera straps have been rained on, snowed on, covered in mud, stuffed in a camera bag, and generally been through the wringer.

    One has even been chewed on by a fox (more on that later!).

    Fox with Peak Design camera strap by_

    After all that, I thought it was about time I put together a review of the Peak Design camera straps, based on my experiences actually using them.

    I’ll cover the good, the bad, my experience with Peak Design’s customer service, who the straps are for, the options available, and lots more.

    Peak Design make a variety of straps for a range of uses and camera sizes. By the end of this review, you should have a good idea of whether or not this strap system is a good option for your camera setup, as well as which specific model might be right for you. Let’s start with a quick introduction to Peak Design.

    Who is Peak Design?

    Peak Design is a U.S. based company, founded in 2010 by Peter Dering. The company launched its first product in 2011, a camera clip system called Capture, which is still available today.

    Peak Design primarily creates products which are designed to help people organize, protect, pack, and use their photography gear. These include camera straps and clips, camera bags, tripods, etc.

    Given their popularity, they have also introduced some more general products designs for travelers and commuters, including packing cubes, wash bags, commuter backpacks, and mobile phone cases.

    They aim to create products which look good and last a long time. They come with a lifetime warranty as standard.

    Peak Design is known for their innovative and stylish designs. Many of their products are also designed to work well together, so for example you can use the strap to carry the tripod bag as well as a camera.

    They also have solid environmental credentials, being fully carbon neutral, a registered B Corp, and they also donate 1% of all their revenue to environmental nonprofits.

    You can buy Peak Design products directly on their website here, or you can buy them from Amazon here.

    Peak Design Clutch and Slide straps by Laurence Norah-3


    What is so special about Peak Design camera straps?

    Peak Design started when its founder, Peter Dering, was looking for a more comfortable camera strap system after a long trip back in 2010.

    The company’s first products were their innovative camera clips and straps, and it was these products that initially made them popular among photographers.

    The standout features of their straps, which I will cover in more depth, are their comfort, durability, attachment system, materials and warranty.

    Peak Design now make lots of different products and I think get a lot of buzz for their bags. I do own several other Peak Design products. For example, I currently have a Peak Design camera backpack, some camera packing cubes, and a Peak Design travel tripod.

    I also own all the Peak Design straps that they’ve made to date, as well as the original Peak Design Capture clip.

    Peak Design product range by Laurence Norah

    While I have liked many of their other products I have tried, I think that their camera strap system remains their hero products for many photographers such as myself.

    I first bought a Peak Design Slide strap back in 2015 and have never used another camera strap system since. I now own three of their Slide straps as well as a number of their other straps and continue to recommend them to other photographers based on my experience with them.

    The main straps Jess and I use on a day-to-day basis are the Slide straps and the Clutch strap. However, we have experience with all the straps and they all work well.

    In this review I am going to focus on the Peak Design camera straps and go over the various straps available and share my personal review and experiences with them.

    Peak Design Strap Review by Laurence Norah


    Peak Design Camera Strap Choices

    Peak Design make a variety of straps, with the main differences being the size of the strap (width, weight and length), as well as how the strap is designed to be worn.

    These differences make the various strap models suitable for different purposes, with some straps being more suited to larger camera models and others suiting more compact camera models for example.

    Some straps are also well suited to other purposes beyond being as camera strap, such as for binoculars or as a strap for your tripod or camera bag.

    Peak Design Slide strap on binoculars by Laurence Norah

    Some Peak Design camera straps are designed as a full body strap to be worn over a shoulder, around the neck, or as a sling, whilst other straps are designed as wrist or hand straps.

    The main camera straps that Peak Design offer are as follows.


    Peak Design Slide Strap

    This is the main strap that Jess and I use for our cameras, we currently own three of these straps. They have had slight tweaks over the years but the main design is the same.

    The strap is designed so you can wear it in three ways, as a neck strap, a shoulder strap and a sling strap. My personal favorite is wearing it as a sling strap.

    The strap is made out of a strong nylon webbing material, which is honestly quite like a seatbelt strap in texture and feel. The majority of the strap is smooth and slides easily.

    The area which sits around your neck or shoulder (depending on how you wear it) is padded internally for comfort. It also has a gripped surface on one side to prevent the strap from sliding around.

    The strap is adjustable, with a quick release handle that lets you quickly and easily adjust how long the strap is. The maximum length is 57″ (145cm) and the minimum length is 39″ (99cm).

    The strap comes with an anchor mount, four anchor connectors, a hex wrench and a microfiber pouch. It can handle gear up to 200lbs.

    This is the strap I would generally recommend for carrying a larger setup such as a bigger mirrorless or DSLR camera as well as larger telephoto lenses. It’s also a good choice if you just prefer a wider strap as the weight is distributed more evenly.

    See more about the Peak Design Slide strap here.

    Peak Design Slide strap box by Laurence Norah Peak Design Slide strap Coyote color by Laurence Norah-3


    Peak Design Slide Lite Strap

    The Slide Lite is honestly very similar to the Slide, it’s just a bit thinner. However, it can handle the same weight load and has the same features.

    So you still get the anchor point system, comfortable smooth nylon webbing with padding and a grippy side, and adjustability. You also get all the same products in the box.

    However, the strap is 1.3″ wide (32mm) compared to the 1.8″ (45mm) of the original Slide. So if you feel the Slide is a bit chunky for your tastes, then the Slide Lite might be for you. It still has the same maximum length of 57″ (145cm) and minimum length of 39″ (99cm).

    It can also support the same weight, but I’d recommend it for slightly smaller mirrorless cameras, bridge cameras, and binoculars rather than the largest of devices.

    This isn’t because it can’t take the weight, but rather is more to do with comfort over long periods of wearing the strap.

    A slightly thinner strap means the weight isn’t distributed over as much area, so over time the Slide is likely to be more comfortable with particularly heavy setups.

    We really like the Slide Lite though, we think it looks very stylish and is a great alternative to the Slide if you want all the functionality in a slightly slimmer design.

    See more about the Peak Design Slide Lite strap here.

    Peak Design slide lite by Laurence Norah Laurence with Peak Design Slide Lite by Laurence Norah


    Peak Design Leash

    If you’re a minimalist but you still want a high performing camera strap, then the Peak Design Leash is likely the strap for you.

    This is the thinnest regular strap that Peak Design offers. As with the Slide and Slide Light, it can be configured as a sling, neck or shoulder strap. It includes the anchor link system but does not have a grippy section or padded area as the Slide straps do.

    There are some other differences with Leash compared to the Slide straps. First, Leash is only 0.75″(19mm) wide. The max length of 57″ is the same, but you can actually make Leash shorter, down to 32.6″ (83cm).

    Leash also comes with a mounting system so you can attach the camera either to the tripod plate, or to the side or top mounting points that many smaller cameras have.

    On our Sony RX100 for example, there are small mounting points on either side of the camera body. The Leash strap comes with the hardware to set these mount points up with anchor links.

    It actually makes more sense in my opinion to mount the Leash strap on the sides of the camera like this. The mounting plate for the tripod screw that comes with the Leash is a mini version, but even so it is likely to block your cameras SD / battery slot (it does on our RX100).

    So that sort of negates the benefits of the easy access system if you have to remove the anchor plate when you want to change battery or memory card!

    I think Leash is a good option if you want a really minimalist camera strap. I’d recommend it for smaller camera setups, such as compact cameras. This is especially the case if you plan to carry them around for a prolonged period of time.

    I wouldn’t recommend Leash for a larger mirrorless or DSLR camera setup as whilst it can support the weight, the comfort wouldn’t be there.

    See more about the Peak Design Leash strap here.

    Peak design Leash by Laurence Norah Peak design Leash by Laurence Norah-3


    Peak Design Cuff Wrist Strap

    Not everyone wants a long camera strap that goes around their whole body, and if you are one of those people, Peak Design has you covered with a number of options. The first of these is Cuff.

    Cuff is a wrist strap which, as the name suggests, lets you put your camera on a strap which you secure around your wrist. And I do mean secure, as there’s an adjustable locking slider which lets you cinch Cuff around your wrist so it can’t slip off over your hand.

    Of course, you don’t have to do that, but it’s probably a good idea if you do.

    In terms of the strap itself, it is made of the same nylon webbing as Peak Design’s other straps. There’s no grip but there is a highlight area which goes around your wrist, which is available in either leather or a material called Hypalon which is vegan. Width wise it’s the same as Leash, at 0.75″ (19mm).

    The strap also has a magnetic clasp, which cleverly lets you wear it as a bracelet when not in use as a camera wrist strap, which is pretty neat for when you are out and about.

    In terms of what it can carry, because it uses the same material and anchor link system as the other straps, it can handle up to 200lbs (90kg) of gear as well.

    So, if you don’t like to wear a big strap but still want to keep your gear safe when it’s in your hands, Cuff is an excellent option.

    I’d say it’s better for folks who tend to put a camera away in a bag and take it out again regularly rather than wearing a camera over their body all the time.

    We really like Cuff for our smaller compact camera

    See more about the Peak Design Cuff strap here.

    Peak Design Cuff by Laurence Norah-3 Peak Design Cuff by Laurence Norah-3


    Peak Design Clutch Strap

    Clutch is Peak Design’s hand strap. It’s basically designed to sit on the side of your camera and goes around your hand when you are gripping your camera.

    This gives you more peace of mind when holding your camera, especially if you are using a heavier camera without a strap around you.

    Clutch uses the same anchor link design at one end as their other straps, which attaches to the camera’s base using the included tripod compatible base plate.

    I’ve had my Clutch for the same amount of time as I’ve had my Slide straps. I will admit that it took a bit of time to adjust to using it on my camera as initially my hand wasn’t used to having a strap around the outside of it when holding my camera.

    However, I quickly got used to it, and then I found using a camera body without it felt odd!

    I’ve actually had two versions of Clutch. The first version I had for a long time, but the strap where it attached to the camera wore through from friction over the years.

    I contacted Peak Design and they sent me the newer version which replaced the version I bought. This features a different type of material at the point mine failed which I am pleased to report has not suffered from this issue.

    Overall, I would say if you are looking for a hand strap for a larger camera, definitely consider Clutch. It’s a little large for smaller cameras, but obviously Peak Design has a solution for that issue in the form of the next product in this list!

    See more about the Peak Design Clutch strap here.

    Peak Design Clutch Strap by Laurence Norah Peak Design Clutch and Slide straps by Laurence Norah-4


    Peak Design Micro Clutch

    Micro Clutch is basically a smaller version of the Clutch strap. It’s designed specifically for smaller mirrorless camera systems, with the idea being that instead of putting your whole hand in it, you only use it with between two and four fingers.

    This results in a small and unobtrusive strap that still gives you the security of a hand strap.

    This one doesn’t actually come with the anchor link system, however the base plate does have loop attachment points so you can use the supplied base plate with other Peak Design straps if you want to mix and match.

    Overall, Micro Clutch is a good idea if you want a really small strap for your camera. Note that it’s not compatible with every camera. Helpfully, Peak Design has a camera compatibility guide for micro clutch which you can see here.

    You can see more about the Peak Design Micro Clutch strap here.

    Peak Design Micro clutch by Laurence Norah Peak Design Micro clutch by Laurence Norah

    Peak Design Clutch vs Micro Clutch by Laurence Norah
    Peak Design Clutch next to Micro Clutch


    Peak Design Strap Features

    As you can see, there are a number of Peak Design straps to choose from. Now I’m going to go through the key features of the straps.


    Anchor Link System

    The anchor link system is, in my opinion, what makes the Peak Design straps so unique and versatile.

    The anchor link is the way that the majority of Peak Designs straps attach to your camera, binoculars, bag, or whatever else you want to carry. Once you have used it with your gear it’s honestly hard to imagine using any other system.

    The anchor link is a quick release strap system which is made up of two parts.

    The first part is the quick connector which is attached to the strap. Peak Designs straps all come with the quick connector already attached, but you can also buy them to attach to any existing camera strap you own.

    The second part of the system is the anchor connector. This is a small round tab with a nylon loop. These are designed to easily attach to a range of products, including cameras, bags, and the Peak Design quick release tripod plate, which is how I attach them to my cameras.

    Despite their diminutive size, the anchor system is rated to support 200lbs (90kg) of weight, which should be more than enough for even the heaviest camera setup. I’ve used mine for years and never had a failure.

    Peak Design Anchor Link System by Laurence Norah
    Peak Design Anchor Connectors


    Peak Design tripod plate attachment by Laurence Norah
    Peak Design Tripod Plate on base of cameras (and also on lens tripod mounting collar on left camera)


    Peak Design Anchor Link on tripod
    Camera on Peak Design Tripod with strap still attached


    Peak design Leash by Laurence Norah
    Using the Anchor link system on existing strap holders


    Smooth Nylon Webbing

    Most of Peak Design’s straps are made from a strong nylon webbing, which is similar in texture and feel to a seatbelt strap. Seatbelt straps are obviously incredibly strong, given their intended purpose, and Peak Design straps are also incredibly strong.

    What I really like about them is that they don’t seem to lose structural integrity if you happen to damage them slightly.

    As an example, I was shooting at sunset in cemetery in Glasgow, Scotland one evening, and a curious fox came over to see what I was up to.

    I put one of my cameras down on the ground and started taking pictures of the fox, at which point he decided he wanted to steal my camera in case it was edible. He did this by grabbing the Peak Design strap in his teeth and dragging my camera away.

    Obviously, I stopped him, but not before he’d put some nice sharp teeth holes in my strap!

    Fox stealing camera by_

    I’ve continued to own and use that strap for years since the fox incident, and the hole hasn’t impacted performance or gotten any bigger. It’s just a neat reminder of a cool encounter I had once!

    Now, obviously I wouldn’t encourage anyone to damage their strap to see how it performs. But my experience has shown that the straps continue to perform well even after extended use, and some rather unusual damage!

    The webbing on most of the straps also have a very grippy section which stops the straps from sliding around on your body as you move around.

    Peak Design Slide Strap grip by Laurence Norah


    Lifetime Warranty

    Peak Design offers a lifetime warranty for their products against manufacturing defects, and failures or breakages that render part or all of your product to become non-functional.

    This doesn’t cover cosmetic blemishes, scratches, stains, or wear & tear. Nor does it cover failures or breakages due to misuse, neglect, or intentional damage.

    In my case, I’m not sure the fox encounter would be covered, although given that the strap works great, that’s not been an issue.

    I have had two occasions to use the lifetime warranty, and in both cases Peak Design honored it. The first was to replace my Clutch which wore through, and as I said, they had already identified and addressed this problem with the newer version. You can see the wear in the image below.

    Worn out Peak Design Clutch

    The other issue I had was with a limited edition red colored version of the Peak Design Slide.

    This one had a different type of grip material to other versions I’ve owned, which was a sort of rubber compound.

    This worked great until I took it trekking in the Ugandan jungle looking for gorillas. Unfortunately, a combination of heat and humidity, coupled with a lot of movement, caused the rubber to essentially melt all over my shirt.

    The strap became a sticky mess (although it obviously still worked fine as a strap). You can see how this ended up in the image below.

    Melted Peak Design strip grip by Laurence Norah-2
    Strap damaged due to heat, replaced with newer model that has resolved this issue under lifetime warranty

    I contacted Peak Design about this, and they dispatched a replacement strap to me free of charge. They also let me know that they had since changed the material used for the grip area, so this problem wouldn’t happen again.

    I’ve been using the replacement strap for a couple of years now and I can confirm it has held up well with no meltdowns yet, and the grip material is indeed totally different.


    Adjustability

    Obviously, everyone is built differently, so having a one size fits all strap isn’t going to work for everyone.

    Peak Design’s straps can be adjusted. The exact mechanism and range of adjustment varies slightly depending on the strap model, but the main thing is that they can be adjusted to suit the requirements of the individual user.

    Peak design strap adjuster by Laurence Norah
    Peak Design Slide adjustment


    Strap Colors

    Peak Design offer their straps in a variety of colors. Colors vary depending on the product.

    In the case of Slide for example, you currently have a choice of classic black, sage green, midnight blue, ash grey, and coyote brown. They also occasionally do special edition straps of different colors.

    Depending on the type of photography you do, you might prefer a different strap color.

    For example, wildlife photographers will probably like the coyote brown color as it blends in nicely with camo style and natural colors. Black is a great color that work great for those that just want something that will go with everything and matches most camera bodies.

    Peak Design Slide straps by Laurence Norah Peak Design Leash vs Slide vs Slide Lite by Laurence Norah


    Peak Design Camera Strap Review

    I’ll now go into some more detail regarding my personal experience using the Peak Design camera straps, including what I like, and areas I feel could be improved.


    What I Like About Peak Design Straps

    The thing I love most about my Peak Design straps is the anchor link system. I think it’s really clever, and it makes attaching and removing straps super easy.

    Let me explain why I like it so much for my personal setup.

    The way Jess and I typically wear our Peak Design straps is crossbody, like a sling. The strap attaches to the underside of the camera, where the tripod thread hole is.

    This is a fairly common design feature for sling straps, where the camera is inverted around your midsection area.

    Peak Design Slide strap Coyote color by Laurence Norah-4 Peak Design Slide strap Coyote color by Laurence Norah-5

    I find this to be a comfortable way to wear a camera for a prolonged period of time, certainly way more comfortable and practical than having it bouncing around on a neck strap.

    The problem with many sling style camera straps that use the camera’s tripod mount point is that they require you to put an attachment into the camera’s tripod mount hole to attach the strap to.

    This means you can’t attach it to a tripod without fully removing the strap system.

    The thing is, I always have a quick release tripod plate attached to my camera bodies and telephoto lens collars. I use a tripod a lot (see my reasons why you need a tripod here for why), and for ease of use I exclusively use tripods which have a quick release plate system.

    This means that I attach a special tripod plate to the base of the camera, which means I can attach my camera to a tripod very easily without having to screw or unscrew things.

    So you can see the conundrum. I want a strap system I can leave on all the time, that uses the tripod mount point on my camera, but also lets me use a quick release tripod plate system.

    Thankfully, the Peak Design system does just that. By using the tripod compatible Peak Design mounting plate on my camera, I can attach my camera to any Arca compatible tripod head (Manfrotto compatible plates are also available) without having to remove the strap system. It’s seamless and easy to use.

    Peak Design Straps by Laurence Norah-5 Peak Design Straps by Laurence Norah-5

    The flexibility and ease of use of the quick release system is also great. For example, I also have a pair of large telephoto lenses, where I prefer to attach the strap to the tripod collar rather than the body of the camera, as it is more balanced that way when I carry the camera.

    With the quick release anchor system, I just need to have anchor connectors on the lenses tripod collar.

    When I switch lenses from a wide angle to a telephoto, I can quickly move my Peak Design strap from the camera body anchor connectors to the telephoto anchor connectors. I can even use a seperate strap, and just carry the telephoto lens over my other shoulder if I want.

    Of course, the flexibility continues. You can have anchor points on the camera’s top strap connector hooks if you want. Pretty much every camera out there has standard strap connecting points on the upper body of the camera where the standard strap that comes with the camera attaches.

    So if you put anchor connections here, you can go from carrying your camera sling style, to carrying it the more traditional way around your neck, or over your shoulder.

    Ok, that was a lot about the Peak Design anchor system. What else do I love about the Peak Design straps?

    Well, obviously they are really comfortable. The padded section of the strap is comfortable, and I have literally worn mine for many hours on long hikes without feeling uncomfortable or like it’s rubbing in any way.

    If I’m shooting events, or any other situation where I want easy access to a couple of lenses at the same time, I usually wear two straps, crossbody. This gives me easy access to a camera on each hip, cutting out the time needed to change lenses, which could be time where I’m missing a shot. That’s also incredibly comfortable.

    Peak Design straps crossbody by Laurence Norah

    I also like that the straps are easy to adjust, and that they just work. My experience with customer service has also been great when I needed it.

    Obviously, no-one wants a product to have issues, but for a company to rise to the occasion and solve the problem as they have done every time, speaks volumes in my book.


    How Could Peak Design Improve their Straps?

    What I like about Peak Design is that they are always improving on their products based on customer feedback. For the most part, the new version of the product replaces the old version of the product.

    Most upgrades are iterative, so you don’t necessarily need to upgrade if you already own the product.

    However, if you are a new user, you can be confident knowing that you are getting the best version of the product to date. With my example of the strap that melted into my shirt, that problem was addressed with a new material.

    However, not all the changes are necessarily upgrades.

    As an example, when I first bought my Peak Design Slide straps, they came with a tripod compatible plate. This meant that I could attach them to my camera and use them with a tripod straight away.

    Unfortunately, the majority of their straps now only come with an anchor mount which is not compatible with tripod quick release plates. So, you have to buy that part separately, with both an Arca compatible plate and a Manfrotto RC2 compatible plate available.

    Now, if you happen to buy a Peak Design travel tripod, this does come with the necessary plate. So maybe now that Peak Design also make tripods, they feel it makes more sense to bundle the tripod plate with the tripod. Additionally, as they can’t tell what kind of tripod plate the end-user requires, sending them an incompatible plate isn’t a great customer experience.

    Still, I liked it when I got my Arca compatible plate when I first bought my Peak Design Slide strap as it let me use the strap directly with the tripod I had at the time without needing to fork out for more accessories. So I would like to see it as an option perhaps at checkout for a small upgrade cost even if it’s not included again.

    Another area that has concerned some users of Peak Design straps is that the adjustment mechanism is a metal loop, and I have seen reports that these can scratch a camera body when packed in a bag. Personally, I’ve not had this problem, but my camera bodies get pretty banged up anyway!

    However, if this is a concern, you might want to pack the strap separately.

    Finally, in terms of improvements, it might be nice to see a system for carrying two cameras that doesn’t involve just having a “X” shape of straps across my body. Some camera strap systems offer a dual carry system which is more like a body harness, and I’d be interested to see if that’s something Peak Design could offer.

    That’s just an idea rather than a criticism though as I’ve honestly been comfortable wearing the two straps crossbody.

    Other than the above, I’ve not got much else to say about the Peak Design strap system that needs improvement! Obviously, they are relatively expensive as straps go, but I do feel you are getting a well-made and quality product that will last a long time.

    Peak Design straps on safari by Laurence Norah


    How to Choose the Best Sized Camera Strap for You and Your Camera

    You may be wondering which Peak Design camera strap to buy for your camera. This decision will largely come down to the size and weight of your camera setup.

    I’d say if you have a heavy camera setup, especially if you are going to use telephoto lenses, to go for the Peak Design Slide.

    For most camera setups except the heaviest, I would say the Slide Lite would be my recommended option. It has all the features of the Slide in a slightly narrower, more lightweight package. This makes it easier to pack and carry. This is also a great option for most binoculars.

    For the smallest cameras and very light set ups, I would also consider the Leash. Just note that the narrow strap can be uncomfortable with heavier setups but perfect for lightweight compact cameras. This strap is easier to fit into a purse or smaller bag.

    Although I do highly recommend everyone keep a neck strap on their cameras for the best protection, not everyone loves a strap around their neck or shoulders.

    If you prefer a less obtrusive setup and don’t want a neck strap, consider the Cuff wrist strap, which offers security in a minimal package. This can work well for  lighter mirrorless setups, bridge cameras, action cameras, and point and shoot cameras.

    Finally, if you want more security and stability when gripping your camera, you may consider also getting a hand strap such as the Clutch or Micro Clutch. I’d say Clutch works for larger cameras and personally I’d recommend the Micro Clutch for smaller cameras.

    Honestly, I think whichever product you choose you will be happy with its performance, build quality, and longevity.

    Peak Design Leash vs Slide vs Slide Lite by Laurence Norah-6


    Peak Design Camera Strap Review Summary

    As I said at the start of this review, I have been using the Peak Design straps for many years, across multiple camera bodies and lenses. In all that time they have kept my gear safe, which is the main purpose of the strap.

    I also find them incredibly comfortable to wear even for long periods of time.

    I think they offer one of the best strap systems on the market, with straps that are comfortable and secure. Their lifetime warranty is also something they stand by. So I am definitely happy to recommend the Peak Design camera strap system for your camera!

    Photography on safari by Laurence Norah Peak Design strap at Old Man of Storr on Isle of Skye Peak Design Straps by Laurence Norah-2


    Where to Buy Peak Design products

    If you are interested in purchasing Peak Design products, or just looking to see what they have on offer, you have a few options.

    First, you can buy Peak Design products online directly on their website here. Peak Design sells globally through their official website and can ship products worldwide to over 100 countries.

    Alternatively, you can buy them online from Amazon here. Peak Design has their own store on Amazon so you can be sure you are getting legitimate products. Prime members will probably appreciate the free and fast shipping if choosing Amazon.

    Finally, you can also of course buy products in person if you live near a store selling Peak Design products. Peak Design has three of its own store locations: two in the USA (NYC and San Francisco) and one in Tokyo, Japan.


    Further Reading

    That’s it for my review of the Peak Design strap system – I hope you found it helpful. Before you go, I wanted to share some of our other content which we think you will find useful.

    And that’s it! As always, if you have any comments or questions on this post, just pop them in the comments section below and we’ll respond as soon as we can!

    Detailed review of the Peak Design camera strap system


    Source link