Let’s explore the top Litchfield National Park walks, perfect for those looking to explore this breathtaking gem of the Top End in Australia.
Litchfield National Park is one of those places you shouldn’t miss if you’re heading to the Northern Territory. It’s best known for its rugged beauty, crystal-clear swimming holes, and iconic waterfalls.
At 1,500 square kilometres, there’s a vast area to explore at the park.
As you wander around, you’ll come across towering termite mounds, lush monsoon forests, rocky escarpments, and plunge pools for a refreshing dip.
You could come across some fascinating wildlife, too! Watch out for wallabies, flying foxes, or even the odd croc (keep a safe distance, of course!).
Litchfield is located 100 km southwest of Darwin, making it an easy day trip. But if you have more time, consider spending a few days. There’s so much to see and do here, especially for avid walkers visiting the Northern Territory.
Explore the stunning waterfalls of Litchfield National Park!
8 Best Litchfield National Park Walks
There are many fantastic walking tracks in Litchfield National Park showcasing the very best of what this park has to offer.
We’ve put together this list so you can easily pick the best walks for your visit to this beautiful slice of the Northern Territory. Be sure to check local alerts on the official website to ensure your chosen attractions and walks are open.
If you’re not joining a guided tour, the best way to get around the park is with your own car. Rent one in Darwin and set off on your adventures!
The best way to get around is to rent a car and explore on your own! We recommend Rental Cars, which has the largest range of vehicles for the best value on the market.
1. Walker Creek
Distance – 3.5 km return
Duration – 1–1.5 hours
Difficulty – moderate
Start / Finish Points – Walker Creek car park, off Litchfield Park Road near Batchelor.
If you prefer to walk in a peaceful spot away from Litchfield’s busier waterfalls, you’ll love the Walker Creek Trail. This is one of those hidden trails that feels like your own little slice of the park.
The trail is about 3.5 km return. It’s an easy-to-moderate walk that winds alongside a scenic creek. Along the way, you’ll find eight numbered campsites, each with a private swimming hole. Even if you’re not camping, feel free to stop, dip your feet, and soak up the tranquillity of the place.
One of the best things about this trail is how peaceful it is. You can often have the creek all to yourself. You’ll also love the lush greenery, gentle cascades, and plenty of birdlife. Keep an eye out for little fish and water monitor lizards too.
If you want to see a different side of Litchfield, one that’s slower, quieter, and full of shady spots to cool off, Walker Creek is hard to beat!
Difficulty – hard (remote terrain, limited facilities)
Start / Finish Points – multiple access points, commonly at Florence Falls, Greenant Creek, Wangi Falls, or Walker Creek trailheads
If you’re keen for a real adventure in Litchfield National Park, the Tabletop Track is the way to go. This epic 39 km circuit takes you deep into the park’s rugged heart. It’s a multi-day hike that shows off parts of Litchfield that many visitors never see.
Along the way, you’ll pass through pockets of shady monsoon forest, cross open sandstone ridges, and come across hidden waterfalls. Highlights of the Tabletop Track include stunning lookouts, peaceful creeks, and plenty of native wildlife, such as wallabies, goannas, and even dingos at night.
The Tabletop track links up with popular spots like Florence Falls, Greenant Creek, and Wangi Falls, allowing you to cool off with a refreshing swim after a long day’s walk. Campsites are dotted along the trail, making it perfect for a few days of real bush camping under the stars.
Note that the Tabletop Track is not for beginners. But if you’re up for the challenge, the Tabletop Track is hands down one of the best hikes in Litchfield National Park.
Florence Falls, a gem of Litchfield National Park
3. Wangi Falls Walk
Distance – 1.6 km loop
Duration – 30–45 minutes
Difficulty – easy to moderate (short and steep sections and steps)
Start / Finish Points – Wangi Falls car park, off Litchfield Park Road
The Wangi Falls Walk is one of the easiest ways to see just how gorgeous Litchfield National Park can be. It’s a short 1.6 km loop that starts right at the Wangi Falls car park.
The track takes you up through lush rainforest, across a little creek, and then rewards you with views back over the twin falls and the surrounding sandstone cliffs. It’s especially pretty early in the morning when everything is cool and the birds are out.
Back at the base, you can take a swim in the large plunge pool (always check for croc warnings!). It’s a great spot to cool off and float around while gazing up at the waterfalls.
If you want a walk that’s quick, beautiful, and ends with a swim, the Wangi Falls Walk is perfect!
Start / Finish Points – starts and ends at the Florence Falls car park
The Florence Falls Walk or Shady Creek Walk is one of the highlights of Litchfield National Park, giving you a taste of everything, from shady monsoon forest to dramatic views, and a cool plunge pool waiting at the end.
Starting and finishing at the Florence Falls car park, this track leads you down into the gorge, with a fantastic lookout where you can take in sweeping views of Florence Falls and the rugged sandstone country around it.
As you make your way along the trail, you’ll spot Florence Creek winding through the trees below, part of the same lush area locals sometimes call Shady Creek because of its cool, sheltered feel.
Follow the trail along the Florence Creek until you reach the plunge pool at the base of Florence Falls, where you can stop for a swim or to capture that iconic photo of water cascading into the pool.
The Florence Falls Walk, often called Shady Creek by locals, is a short trail packed with things to see. It’s one of the best places to soak up the shady, peaceful side of Litchfield.
5. Buley Rockhole to Florence Falls Track
Distance – 3 km return
Duration – 1–1.5 hours
Difficulty – easy
Start / Finish Points – starts at Buley Rockhole and finishes at Florence Falls
The Buley Rockhole to Florence Falls Track is one of the short walks to enjoy two of Litchfield National Park’s favourite spots in one easy walk.
Starting at Buley Rockhole, you’ll follow a gentle trail alongside Florence Creek, passing through shady monsoon forest all the way to Florence Falls.
As you get closer to Florence Falls, you’ll notice the landscape starts to change. The hiking trail moves out of the thick greenery and into the end sandstone country, with rocky ground and more open views.
The walking trail is especially spectacular in the dry season, when the track is easy to follow and the water is clear and calm.
In the wet season, flows are stronger and some areas might be closed, so it’s always good to check conditions first.
At the end, cool off with a swim at the waterfall, or head back to relax in the cascading plunge pools at Buley Rockhole.
Start / Finish Points – Tolmer Falls car park, off Litchfield Park Road
The Tolmer Falls Walk is a lovely loop walk that starts right from the car park, making it super easy to access. It’s about 1.6 km return and takes you through some beautiful monsoon forest before opening up into the end sandstone country, where the views are mindblowing!
Along the way, you’ll follow part of the Tolmer Creek walk, with the track gently winding near Tolmer Creek as it heads upstream.
In the dry season, the trail is clear and perfect for spotting wildlife, while in the wet season, the area comes alive with rushing water and lush green growth.
The real highlight is the Tolmer Falls lookout. From here, you get a breathtaking view of Tolmer Falls plunging into a deep pool below, surrounded by rugged cliffs. The Tolmer Falls Lookout is also one of the best spots in Litchfield National Park to capture that classic photo op.
Look out for wildlife on your hikes in Litchfield National Park!
7. Greenant Creek Walk to Tjaetaba Falls
Distance – 2.7 km return
Duration – 1–1.5 hours
Difficulty – moderate (steady uphill climb)
Start / Finish Points – Greenant Creek car park, off Litchfield Park Road; the track heads up along Greenant Creek to a lookout above Tjaetaba Falls, then returns the same way
The Greenant Creek Walk to Tjaetaba Falls is one of the best short walks in Litchfield National Park.
It starts right from the car park, making it super easy to access for walkers of all levels. The track winds steadily uphill through lovely monsoon forest, following Greenant Creek as it makes its way toward the falls.
It’s about 2.7 km return, so perfect if you want a gentle adventure that still gets your legs working. In the dry season, the trail is clear and the forest is alive with birds and rustling leaves. Come the wet season, everything turns lush and green, though it’s worth checking track conditions, as heavy rain can change things fast.
At the top, you’ll reach a lookout above Tjaetaba Falls, where the creek spills into a hidden gorge. There’s also a small plunge pool above the falls. It’s a great swimming hole to cool off in. But remember, swimming is only allowed upstream from the falls for safety and cultural reasons.
8. Tjaynera Falls Walk (Sandy Creek Falls)
Distance – 3.4 km return
Duration – 1.5 hours
Difficulty – moderate (some rocky sections and short climbs)
Start / Finish Points – Tjaynera Falls car park, off the Reynolds River 4WD track in Litchfield National Park
The Tjaynera Falls Walk is a real treat if you’re looking to explore one of the quieter corners of Litchfield National Park. This trail follows Sandy Creek, with the track winding through open woodland and past palms and paperbarks.
As you make your way along the creek, keep an eye out for little waterholes and the occasional tiny pool, perfect for dipping your feet in. The trail leads you upstream to the main highlight – a stunning plunge pool at the base of Sandy Creek Falls, surrounded by rugged red cliffs!
If you’ve still got energy after this walk, or plan to explore more, you could pair it with a visit to places like Cascades Creek, where small waterfalls tumble over rock ledges into more hidden pools.
DISCLAIMER: Some of the links in this article are affiliate links, which means if you book accommodation, tours or buy a product, we will receive a small commission at no extra cost to you. These commissions help us keep creating more free travel content to help people plan their holidays and adventures. We only recommend the best accommodations, tours and products that ourselves or our fantastic editorial team have personally experienced, and regularly review these. Thanks for your support, kind friend!
Svalbard sits on the edge of the map, a land of glaciers, polar bears, and remote fjords where the Arctic Ocean meets the pack ice.
At 78° North, this Norwegian archipelago is one of the wildest places on Earth, and joining a Svalbard cruise with Aurora Expeditions is the best way to experience it.
Being fortunate enough to work in the polar regions since 2017, with over 20 expeditions to Antarctica and 5 to the Arctic under our belts, it’s safe to say we have developed a deep passion for the far reaches of the planet.
Yet still the attraction remains stronger than ever, and with Svalbard being arguably the icon of Arctic travel, we couldn’t be more thrilled to finally visit together.
In August 2025 we boarded the Greg Mortimer for their 11-day Svalbard Odyssey voyage through Spitsbergen and the high Arctic, chasing polar bears, walrus, reindeer, ivory gulls, beluga whales, and countless seabirds.
Along the way we explored historic sites like Ny-Ålesund and Virgohamna, cruised beneath towering glaciers such as Lilliehöökbreen and Negribreen, and pushed as far north as 82°39’ into the drifting sea ice.
No two polar expeditions are ever the same. The itinerary in Svalbard changes daily, dictated by weather, ice, and wildlife.
This is our detailed review of the Aurora Expeditions Svalbard itinerary, showcasing the landings, wildlife encounters, and onboard life that made our voyage unforgettable.
If you’re planning a trip to the Arctic and want to know exactly what to expect on a Svalbard cruise with Aurora Expeditions, this guide covers everything: the highlights, the surprises, and the moments that make expedition travel so special.
EXCLUSIVE – We have partnered with the world’s top polar tour operator, Aurora Expeditions, to offer readers of NOMADasaurus a very special deal on any trip to Antarctica or the Arctic! Contact us (hello@nomadasaurus.com) if you’d like to learn more about these exclusive discounts. Or simply mention the code “NOMAD” when booking direct with Aurora to activate the deal.
Epic landscapes and incredible wildlife – there’s so much to experience on an adventure to the high Arctic. Read on to discover what it’s like on an Aurora Expeditions Svalbard cruise itinerary.
Note: Expedition cruising in Svalbard is highly flexible. Ice, weather, and wildlife dictate where you go each day, so no two voyages are alike. This is a review of our exact journey in August 2025.
Day 1 – Leaving Longyearbyen Behind
Few places feel like the edge of the world quite like Longyearbyen.
Tucked between sharp peaks and glacial valleys at 78° North, this coal-mining town is a curious mix of frontier grit and Arctic charm.
It’s also the launch point for almost every expedition into Svalbard, and for us it marked the beginning of an adventure we’d been dreaming about for years.
Arriving at the pier there was a buzz of energy. Expedition jackets, tripods, backpacks, and wide-eyed excitement all mingled together as we caught our first glimpse of the Greg Mortimer – the sleek expedition ship that would carry us deep into the Arctic Ocean.
The crew met us at the gangway with warm smiles, inside the hotel staff welcomed the expeditioners with trays of canapés and genuine enthusiasm.
The first hours onboard slipped by in a blur. Bags were dropped into cabins, cameras laid out for the days ahead, and before long we were sitting in the lecture theatre for introductions.
Alesha out on deck photographing the landscapes as we depart Longyearbyen.
Expedition Leader Isabelle set the tone with calm confidence, introducing her team of guides, historians, scientists, and Zodiac drivers.
Safety briefings followed, along with fittings for jackets, muck boots, and kayak equipment for those that had signed up.
It was part orientation, part initiation – the moment where the trip stopped being abstract and suddenly became very real.
That evening, as the Greg Mortimer eased away from the dock, Longyearbyen’s colourful houses grew smaller against the mountains until they vanished completely.
Phones were tucked away, chatter quietened, and a hush fell across the decks. The Arctic stretched out ahead – endless, icy, and wild.
Civilisation was behind us now, and in its place was something infinitely more exciting: the unknown.
The first full day of our Arctic voyage began with breakfast served against a staggering backdrop – the Lilliehöökbreen Glacier.
Stretching across Krossfjord in a wall of jagged blue, it was our first real taste of the landscapes that define Svalbard.
The Greg Mortimer glided slowly past, icebergs drifting silently in the fjord while fulmars skimmed the water’s surface.
Cameras clicked over coffee cups, and the ship’s railings filled with expeditioners wide-eyed at the scale of it all.
The Lilliehöökbreen glacier.Early morning light breaks through the clouds.Admiring the views of Lilliehöökbreen.
But before anyone could set foot ashore, there was work to do. In the lecture theatre the Expedition Team ran us through the realities of travel in the high Arctic: how to behave in polar bear territory, the ins and outs of Zodiac operations, and the importance of biosecurity.
Every backpack was scrubbed, boots vacuumed, and Velcro checked for seeds – a small but vital ritual to keep Svalbard’s fragile ecosystem intact.
By afternoon the wind was up, but the team had something special planned.
Zodiacs bounced through choppy water into Kongsfjord, landing us at Ny-Ålesund, one of the northernmost communities in the world.
Once a mining settlement, today it’s a hub for international Arctic research. Walking between brightly painted buildings, we learned about the polar expeditions that set off from here – dreams of reaching the North Pole etched into the town’s legacy.
After a guided wander we had time to explore on our own. Some browsed the small museum and shop, while others sent postcards stamped with the magic of the high Arctic.
That evening we gathered back onboard for the Captain’s Welcome Cocktail, glasses raised in celebration.
The ship hummed with stories of glaciers and research towns, and as we toasted to the days ahead, it felt like the expedition had truly begun.
Day 3 – Walrus, Whalers, and Foxes in Raudfjord
By the third morning at sea the Arctic had revealed its rhythm: a quiet breakfast broken by the hum of Zodiacs dropping into the water, cameras slung over shoulders, and the sense that anything could happen once we left the ship.
Our destination was Smeerenburg, once the busiest whaling station in the Arctic and now a lonely spit of land at the top of Spitsbergen.
The name itself translates to “Blubber Town,” and it was here in the 17th century that Dutch whalers rendered countless whales into oil.
The Greg Mortimer anchored in front of a large glacier in Raufjorden on day 3.
Today the furnaces are long gone, replaced by drifting ice and the heavy forms of walrus sprawled across the beach.
We floated in our Zodiacs just offshore, watching as these enormous pinnipeds rolled over each other, splashed into the shallows, and lifted their tusked heads in lazy acknowledgement of our presence.
The water was thick with jellyfish and ctenophores, delicate and otherworldly, while Arctic terns and glaucous gulls wheeled overhead.
History may have emptied Smeerenburg of people, but wildlife has reclaimed it in full.
Nearby, at Virgohamna, the ghosts of Arctic exploration lingered.
Here in the early 1900s, adventurers like Salomon August Andrée and Walter Wellman built their bases in a desperate bid to reach the North Pole.
Neither succeeded, and the ruins of their camps remain as weathered reminders of ambition meeting the reality of the Arctic.
Around the shoreline we spotted harbour seals stretched on rocks, geese picking through the grass, and black guillemots drifting silently on the water.
By afternoon the Greg Mortimer nosed into Raudfjord, its peaks reflected on glassy water.
We landed at Alicehamna, splitting into small groups to explore on foot.
One of the highlights of travelling the Arctic compared to the Antarctic is the ability to really stretch the legs and enjoy long hikes, under the safety of trained polar bear spotters and rifle handlers, of course.
We hiked a few kilometres, stopping along the way to hear the expedition team share details of the flora and fauna that make Alicehamna, and Svalbard, so interesting.
That night, as the ship pointed north toward the ice, conversation over dinner circled back to the day’s sightings.
The Arctic was revealing itself in contrasts: history and survival, silence and abundance, fragility and resilience.
READ MORE: Keen to explore elsewhere in the Arctic? Why not check out a Greenland cruise!
An old trapper’s hut at Alicehamna.Fiona (expedition photographer) and Alesha enjoying the views from the top.Stretching the legs on a wonderful hike in Alicehamna.Our group getting a geology lesson from expedition guide Gaby.What a backdrop.
Day 4 – Into the Sea Ice: First Glimpse of the King
The coastline of Spitsbergen slipped away overnight, and by morning the world outside had transformed.
The Greg Mortimer moved slowly through bands of drifting fog, the sea flat and glassy, the air sharp enough to sting our cheeks.
The ship’s coordinates ticked steadily north — 80°, then 81° — each degree a milestone that carried us further from land and deeper into the Arctic.
Outside the oily slick of the ocean started to become peppered with pack ice, remnants of the long Arctic winter that was now retreating back towards the North Pole.
The silence was broken by a shout that rippled through the corridors: “Bear!”
Within moments, the decks were crowded. Cameras and binoculars appeared in every hand, lenses aimed at a single patch of ice where a polar bear wandered around on a floe.
Our first polar bear of the trip – spotted on the sea ice at 82 degrees north. A sighting none of us will ever forget. Shot with a telephoto lens at a distance, adhering to all responsible wildlife viewing regulations.
It rolled lazily, paws in the air like it had not a care in the world, before standing and ambling across the ice with powerful, unhurried strides.
For many onboard it was their first encounter with the animal that had drawn them here – a defining moment that would never be forgotten.
Keeping a safe distance and adhering to all responsible wildlife viewing regulations, we enjoyed our time with the bear and then continued our journey north.
The ship pressed deeper into the pack, floes scraping along the hull with hollow cracks.
By midday we had reached 82°39’ North, our highest latitude of the voyage, and the furthest north the Greg Mortimer had ever reached, surrounded by a frozen jigsaw of white and electric blue.
A kittiwake on the wing.Moon bow.Entering the pack ice.The bow of the Greg Mortimer nudging into the pack ice.Polar bear footprints spotted on the ice.
The fog lifted briefly and the sun broke through, lighting the ice as though we had entered another world.
At the bow, passengers gathered for a celebratory photo, cheeks flushed from cold and excitement.
We continued our search for more wildlife, but alas the elusive polar bear did not reappear this time around.
Conversation buzzed as we relived the morning’s sighting, the bear’s movements already etched into memory and we counted our lucky stars that we had seen one, knowing that some trips never have that opportunity.
That night at dinner the story was retold again and again, each version carrying the same awe: the moment the Arctic gave us our first polar bear.
Views from the bow.The textures in the pack ice are incredible.The hydraulic drop-down wings of the Greg Mortimer were lowered so everyone could get a close-up view of the sea ice.Alesha enjoying the views of the pack ice from our private balcony.Alesha on the hydraulic platform.
Day 5 – History in Stone, Courage in Ice
Sunlight poured across the deck as the Greg Mortimer threaded through Beverlysundet, a narrow stretch of water separating Chermsideøya from Nordaustlandet.
From a distance the island looked like little more than a barren rise of rock, but as Zodiacs touched the shore its history came into focus.
Etched into boulders above the landing site were markings left in 1928 by the crew of the Russian icebreaker Krasin, who had sailed north in search of the missing Italian explorer Umberto Nobile.
READ MORE: At the other end of the earth, learn everything you need to know about travelling to Antarctica!
These scratched names and dates, still visible nearly a century later, carried the weight of desperation and hope from an earlier age of polar exploration.
The expedition team offered a variety of hikes for those who wanted to go to shore and wander the tundra under a pale sky – a long, fast walk, a medium pace, and a short stroll for anyone that felt like just sitting on a rock and contemplating the majesty and history around them.
Two hours later our fast group was picked up at the other side of the island and the Zodiacs whisked us back to the Greg Mortimer.
Back onboard the mood shifted from reflective to electric. The call went out for the polar plunge, and more than thirty passengers lined up on the gangway.
One by one they leapt into the Arctic Ocean, shrieking as the 6°C water clamped around them, surfacing with wild grins before scrambling back to the ladders.
The cheers from the railings rang louder than the splash of the waves.
Alesha did the plunge as well, an enormous milestone after her cardiac arrest. Her doctors had originally told her that a polar plunge was something she could never do again, but with her incredible recovery she had been given the approval earlier in the year to do it again, on the condition she slid in, not jump.
And now she can proudly say she has done the polar plunge in both Antartica and the Arctic AFTER suffering a cardiac arrest.
Nothing can stop her!
Alesha about to do the polar plunge above 80 degrees North!
The afternoon brought a different kind of challenge. The plan was to land at Phippsøya, but the weather closed in fast.
Fog rolled across the sea until Zodiacs could hardly see one another. Instead, we explored by boat around Parryøya, each group vanishing into the white before reappearing like ghosts on the horizon.
Out of the haze came flashes of life: the tusks of walrus breaking the surface, a scatter of eider ducklings, and for one lucky boat, the pale outline of a distant polar bear.
By the time everyone returned to the ship, GPS guiding drivers through the fog, the story of the plunge and the fog-bound cruise filled the dining room.
History etched in stone, adrenaline in icy water, and wildlife emerging from the mist – it had been a day that captured every side of the Arctic.
A pod of walrus at Parryøya.
Day 6 – The Bird Cliffs of Alkefjellet
Rain tapped softly on our hoods as Zodiacs skimmed across choppy water toward Alkefjellet, one of the most dramatic seabird colonies in the Arctic.
Dark dolerite cliffs rose sheer from the sea, streaked with moss and guano, and alive with the calls of thousands upon thousands of Brünnich’s guillemots.
The air was filled with movement – birds wheeling overhead, diving into the waves, or balancing awkwardly on narrow ledges carved into the rock.
Tens of thousands Brünnich’s guillemots flying overhead at Alkefjellet – one of the Arctic’s most impressive sights.
Up close, the cliffs seemed to hum. Every ledge was packed with guillemots chattering in a deafening chorus.
Some chicks had already taken their leap of faith, tiny bundles of fluff paddling beside their fathers on the water.
Others hurled themselves from dizzying heights, wings flapping furiously before splashing into the sea – a rite of passage repeated for millennia.
Black-legged kittiwakes soared in the wind, while an Arctic fox darted across the shoreline, searching for any chick unlucky enough to stray.
It was raw, noisy, messy, and utterly captivating.
By afternoon the weather had other ideas. The plan was to land at Torrellneset, often a reliable spot for walrus, but the fog thickened until the coastline disappeared entirely.
Even the Zodiacs could barely keep sight of one another. The decision was made to cancel, a sharp reminder that the Arctic is always in control.
A waterfall tumbles from the Torrellneset glacier.
Instead, the day turned inward. Back on the Greg Mortimer, naturalist John delivered a powerful lecture on polar bears, weaving together science, photography, and personal stories of encounters in the wild.
As the fog clung to the ship, his words painted vivid pictures of the King of the Arctic moving across the ice.
That night the crew rolled out a surprise: a barbecue in the main restaurant. Decked out in wigs and funny hats, we all tucked in to a delectable spread of meats, vegetables and salads with music playing over the speakers.
Portrait of an Arctic fox.
Day 7 – Kvitøya: White Island and the Bear Bonanza
Through the night the Greg Mortimer pressed northeast, swallowed by fog so thick it felt like the ship had been erased from the world.
By morning, the haze hadn’t shifted – a ghostly white pressing in from every side.
Then, just as breakfast ended, the curtain lifted. Out of the mist loomed Kvitøya, or “White Island,” a desolate place almost entirely buried beneath an ice cap.
Few people ever set foot here, and for good reason.
This remote island is tied to one of the Arctic’s most tragic stories – the doomed 1897 balloon expedition of Swedish explorer Salomon August Andrée, who perished with his companions on these very shores.
We had hoped to land at Andreeneset, where a memorial marks the site, but the fog rolled back in, smothering the coastline and dashing the chance.
What we found instead was something far rarer, and far greater. Along the beaches and across the ice, polar bears appeared. Over a dozen!
A polar bear wanders down the rocks at Kvitøya.
At first it was a shape moving on the shoreline, then another sprawled on a snowbank, then more padding across the rocks.
Before long, whispers of “another one!” rippled across the Zodiacs until we’d counted at least eleven bears in sight.
Some lifted their heads lazily to watch us, others wandered with steady, powerful strides, their creamy fur blending into the fog.
It felt surreal – the Arctic’s top predator, not a distant dream on the horizon but a presence everywhere we looked.
The landing might have been impossible, but no one minded.
This was a once-in-a-lifetime spectacle, the kind of encounter you hope for but never expect.
Back onboard, the afternoon was filled with lectures on sea ice, polar bears, and the ship itself, yet the conversation always circled back to Kvitøya.
That night, the dining room buzzed with a single story, told in different words but always the same at heart: the day the fog lifted, and the Arctic revealed eleven polar bears on a single island.
Another bear emerges from the fog.
Day 8 – Negribreen: Ghost Birds in the Mist
The morning broke in silence. A pale mist hung over Negribreen, one of Svalbard’s largest glaciers, its jagged front spilling icebergs into the fjord.
Zodiacs slipped quietly between glowing blocks of ice, each one a sculpture of shifting blues and greens. The world felt still, muffled by fog, every sound softened by the weight of the ice.
Then came a cry – not from us, but from above. The sharp call of an ivory gull cut through the mist.
Out of the whiteness, a pair appeared, circling a large berg before settling on its crest.
An ivory gull soars overhead at Negribreen.
Their snow-white feathers blended perfectly with the glacier, so pure it was hard to distinguish bird from ice.
Moments later, more arrived, until a small flock wheeled above us, their movements ghostlike against the sky.
These elusive gulls are among the rarest seabirds in the Arctic, and seeing them here – so close, so fleeting – felt like witnessing a secret few ever glimpse.
Back onboard, bird expert Meike brought the encounter to life in an engaging lecture, explaining the fragile future of ivory gulls and the challenges Arctic seabirds face across their long migrations.
The morning’s magic turned into knowledge, deepening the experience.
The afternoon brought another change of plans. A landing at Sundneset was cancelled when both reindeer and a polar bear were spotted near the site.
Instead, the Greg Mortimer pushed toward Hornsund, while onboard life filled the hours: I gave a photo-editing workshop, a North Pole tale from historian Jamie, and a lively game run by the Expedition Team.
Evening drinks carried on with stories of foxes, birds, and glaciers, but it was the gulls that lingered. They seemed to embody the Arctic itself — elusive, fragile, and unforgettable.
Day 9 – Bamsebu: Bones and Belugas
Fog swallowed our morning once again, forcing the Expedition Team to abandon plans for Calypsobyen and divert to Bamsebu, a lonely beach marked by one small cabin.
From a distance it looked unremarkable – a weathered hut above a seaweed-strewn shore. But as we landed, the truth of the place became clear.
Scattered across the beach were the remains of more than 550 beluga whales, slaughtered in the 1930s when this site served as a whaling station.
The old trapper’s hut at Bamsebu.
The bones lie there still, bleached by the Arctic sun and tide, a haunting monument to an era when wildlife was nothing more than a commodity.
Walking among them was sobering, a reminder that the Arctic is not only a wilderness of ice and silence, but also a witness to human exploitation.
Yet, as if on cue, the Arctic offered balance.
The fog finally lifted, and the fjord opened into a panorama of mountains and islands.
Kayakers paddled into the wide bay, their bright boats small against the vast landscape. The mood lightened, spirits lifted by the sheer scale of where we stood.
Dr Leo, marine biologist and expedition guide, on polar bear watch.Whale bones of Bamsebu.
That afternoon, a second attempt at Calypsobyen was thwarted once again by fog, but fortune redirected us into Recherchefjord.
There, a dozing polar bear rested on a hillside while reindeer grazed on the next hill.
Another polar bear spotted on the hill!
Overhead, an Arctic tern attacked a flock of kittiwakes with fearless fury, defending its nest against birds much larger than itself.
Rene cruised us into a berg-filled bay with a stunning glacier emerging amongst the fog.
The face was active, with small chunks of ice tumbling down and the glacier cracking and groaning as it shifted so slightly into the sea.
Suddenly an enormous piece of ice calved from the glacier, crashing into the bay and sending waves in all directions.
Incredibly luckily to witness this galcier calving at Recherchefjord.
We cheered and basked in the experience, from a safe distance of course, before making our way back towards the Greg Mortimer.
And then came the sight none of us expected: a pod of beluga whales, surfacing in the fjord, some with calves at their side.
Their white backs rolled through the grey water, a living echo to the bones we had seen earlier that day.
From tragedy to resilience, Bamsebu had shown us both the darkest chapter and the most hopeful future of the Arctic.
Day 10 – Poolepynten & Alkhornet: The Last Step
Our final full day in Svalbard dawned clear, the fog that had defined so many mornings finally gone.
The Greg Mortimer anchored off Poolepynten, a low-lying spit known for its walrus haul-outs.
But in true expedition style, the animals weren’t there to greet us. Instead, the beach revealed a different kind of drama.
We walked across soft mosses and driftwood, the air alive with bird calls.
Kittiwakes filled the sky, while Arctic terns dived fearlessly at anyone who strayed too close to their nests.
Along a lake, a sly Arctic fox prowled in plain sight, constantly harassed by furious birds intent on keeping it away from their chicks.
A lonely walrus, weary and battered from an age of battles, dozed on the beach.
In the distance, reindeer grazed under a low ceiling of clouds, indifferent to our presence. It was a reminder that the Arctic doesn’t always deliver what you expect, but it always delivers something.
A resting walrus at Poolepynten.
By afternoon we sailed into Isfjorden, a sign that civilisation was near.
Yet before Longyearbyen came into view, we had one last landing — Alkhornet.
Beneath its sheer dolomite cliffs, thousands of kittiwakes wheeled in chaotic circles, their calls echoing across the fjord.
On the tundra below, dozens of reindeer wandered, far more than we had seen all trip.
Finally we had the chance to see reindeer up close.
The abundance was overwhelming, a fitting finale that seemed to sum up the richness of Svalbard in a single view.
As we stood beneath the cliffs, watching the last light soften over the mountains, the journey replayed itself in our minds: walrus sprawled on ancient whaling beaches, guillemot chicks plunging into the sea, ivory gulls circling out of the mist, and polar bears – so many polar bears – etched forever in memory.
The Arctic had given us everything: beauty, unpredictability, and a raw wildness that cannot be tamed. It was the perfect closing chapter.
A puffin flies overhead near Alkhornet.The landing site.A reindeer wanders downhill.Our expedition vessel, the Greg Mortimer.Alkhornet is a fantastic place to stretch the legs.Guests of the Greg Mortimer quietly observe a reindeer. Shot with a telephoto lens, all wildlife viewing regulations were followed.
Day 11 – Longyearbyen: The End of the Road
The mountains of Isfjorden came back into view as the Greg Mortimer eased toward Longyearbyen, the place where it had all begun.
After ten days in the wild, the colourful houses along the shore looked almost surreal, a reminder that civilisation still existed beyond the silence of glaciers and sea ice.
Disembarkation was bittersweet. Bags lined the corridors, jackets were handed back, and friends embraced with promises to stay in touch.
The ship that had become our floating home was suddenly just a vessel again, ready for its next voyage.
But the memories lingered: the first polar bear rising from a floe, the ivory gulls wheeling out of the mist, the walrus sprawled on beaches, and the reindeer grazing beneath Alkhornet’s cliffs.
Svalbard had been more than a destination – it was an experience that had reshaped the way we saw wilderness.
Longyearbyen might have been the end of the road, but the Arctic had already followed us home.
Thank you to the legendary expedition team at Aurora Expeditions for a fantastic experience.
About the Greg Mortimer
For this voyage we sailed aboard the Greg Mortimer, Aurora Expeditions’ purpose-built expedition ship.
With its innovative X-BOW® design, the vessel handled the open seas with remarkable stability, giving us a smooth ride even when the Arctic threw its weight around.
Life onboard was relaxed and welcoming. Days flowed between lectures in the theatre, casual meals in the dining room, quiet moments in the library, and time out on deck watching the scenery roll past.
The mudroom made Zodiac operations seamless, and the cabins were comfortable sanctuaries to return to after long days in the field.
We’ve written a full review of the Greg Mortimer, covering the cabins, dining, and onboard experience in more detail — you can read it here: Greg Mortimer Ship Review.
Aurora Expeditions’ first X-Bow vessel at the base of a glacier in Svalbard. Read our full Greg Mortimer ship review to see what life is like onboard.
Top 10 Tips for a Svalbard Expedition
Planning a voyage into the High Arctic? Here are our best tips to help you get the most out of your Svalbard expedition cruise:
Pack Layers, Not Bulk The weather changes fast – from fog and drizzle to sunshine and snow in the same day. A good base layer, insulating mid-layer, and waterproof shell will cover you for every landing.
Bring a Dry Bag for Your Camera Zodiac spray, sleet, and rain are a constant threat. A simple waterproof dry bag (or even a roll-top backpack liner) will keep your gear safe between ship and shore.
Learn Your Camera Before You Go Wildlife doesn’t wait while you fumble with settings. Practice at home with your zoom lens, fast shutter speeds, and burst mode so you’re ready when a polar bear steps onto the ice.
Don’t Skip the Biosecurity Checks Cleaning Velcro and vacuuming gear may seem tedious, but it’s essential. Svalbard’s ecosystem is fragile, and these steps protect the environment you came to see.
Respect Wildlife Distances The Expedition Team sets strict approach limits for good reason. Staying back ensures both safety and natural behaviour – and with long lenses, you’ll still capture stunning photos.
Expect Plans to Change Fog, ice, or a wandering bear can cancel a landing in seconds. Embrace the flexibility. Often, the backup plan turns into one of the trip’s highlights.
Take Advantage of the Lectures The onboard talks are more than filler – they deepen the experience. Learning about Arctic history, geology, or seabirds makes every landing richer.
Get Out on Deck Often Some of the best wildlife sightings happen while the ship is underway. Whales, seabirds, and even polar bears can appear out of nowhere. Always keep your binoculars handy.
Join the Polar Plunge (If You Dare) It’s cold. It’s ridiculous. But leaping into the Arctic Ocean is a memory you’ll never forget – and the hot shower afterwards feels like luxury.
Soak It All In Between cameras, lectures, and logistics, it’s easy to stay busy. But don’t forget to simply stand on deck, breathe the icy air, and watch the Arctic drift by. These moments of stillness often become the most treasured memories.
Verdict – Our Thoughts on Svalbard with Aurora Expeditions
Svalbard is one of those rare places that feels more like another planet than another country.
From the silence of drifting sea ice to the chaos of bird cliffs, from ivory gulls and walrus to the unforgettable thrill of spotting polar bears, every day brought something different – and often something completely unexpected.
What stood out most was not just the landscapes or the wildlife, but the way expedition cruising works in the Arctic.
Plans shifted constantly – landings cancelled, routes adjusted, surprises embraced – yet each change revealed something we might never have experienced otherwise.
That flexibility is the essence of Svalbard, and Aurora Expeditions handled it with skill, safety, and genuine passion.
The Greg Mortimer proved the perfect platform: comfortable, welcoming, and designed to take us deep into the ice without sacrificing the intimacy of a small-ship voyage.
The Expedition Team were exceptional – knowledgeable, approachable, and clearly in love with this wild corner of the world.
Their expertise turned every landing into more than just a visit; it became an education.
Would we recommend it? Absolutely. If you’ve ever dreamed of standing at 82° North watching a polar bear pad across the ice, of drifting beneath seabird cliffs so alive they shake with sound, or of kayaking beneath a glacier face glowing blue in the mist, a Svalbard expedition with Aurora delivers it all — and more.
It’s not just a cruise; it’s an adventure into the unknown, where every day feels like a gift from the Arctic itself.
Ninoy Aquino International Airport (NAIA), also known as the Manila International Airport, is the busiest airport in the Philippines. And with Metro Manila’s notorious traffic, just getting there can feel like a trip on its own.
While taxis and ride apps are an option, they can get pricey. Public transport works too, but it’s not always the easiest with luggage and multiple transfers. Enter UBE Express — a premium P2P bus service that offers direct and affordable rides to and from NAIA, not just around Metro Manila, but also in places like Santa Rosa in Laguna and Imus in Cavite.
Here’s everything you need to know about the UBE Express Bus service — available routes, tickets, schedules, and frequently asked questions.
As of writing, UBE Express has seven available routes — five in Metro Manila, one in Santa Rosa, Laguna, and another one in Imus, Cavite. These are the following:
UBE Express Bus Routes – Metro Manila
NAIA – PITX
NAIA – Victory Liner Pasay
NAIA – Robinsons Place Manila
NAIA – Araneta City Cubao
NAIA – Vista Terminal Exchange Alabang
UBE Express Bus Route – Laguna
NAIA – Robinsons Santa Rosa
UBE Express Bus Route – Cavite
NAIA – The District Imus
NOTES:
Routes to and from One Ayala, Robinsons Galleria, and Ayala Malls Manila Bay used to be available, but they’re temporarily suspended until further notice.
Schedules and route availability are subject to change, so it’s best to check the official Facebook page, which is very active and posts updates daily.
UBE Express NAIA Loop
UBE Express buses heading to NAIA from any of the seven available routes mentioned above also run the NAIA Loop route. Meaning, they go around all the NAIA terminals, picking up and dropping off passengers throughout the day.
The free inter-terminal shuttle buses are only for passengers with connecting flights. If you are landing at Terminal 1 or 2 and need to get to Terminal 3, but you have no connecting flight, the UBE Express NAIA Loop is your best option.
Operating Hours
Daily, 4:00 AM – 8:00 PM
As of: 26 August 2025 Fare: P50/person Payment Method: Cash and Beep Card
Across Bay 12 – NAIA Terminal 3
There’s no fixed departure time for this route, though. Buses run within operating hours, and the wait time can be anywhere from 30 minutes to an hour. Here’s how the route goes:
ORIGIN: PITX | Victory Liner Pasay | Robinsons Place Manila | Araneta City Cubao | Vista Terminal Exchange Alabang | Robinsons Santa Rosa | The District Imus
1ST STOP: NAIA Terminal 1 Arrivals Area, Beyond Bay B6 – Near Grab Booth
2ND STOP: NAIA Terminal 2 Arrivals Area, Across Bay 18
3RD STOP: NAIA Terminal 4 As of June 2025, Closed for Renovation
FINAL STOP: NAIA Terminal 3 Arrivals Area, Across Bay 12
REMINDERS!
The last stop on the NAIA Loop is always NAIA Terminal 3. From there, you can transfer to another UBE Express Bus to reach your intended location.
If you’re coming from Terminal 3 and need to transfer to Terminal 1 or 2, you’ll need to take a taxi or book a ride through apps like Grab, InDrive, or JoyRide. UBE Express currently doesn’t offer this reverse route.
NAIA – PITX
The Parañaque Integrated Terminal Exchange (PITX) is the first landport in the Philippines. It’s your main gateway if you’re heading out of Metro Manila by land to almost anywhere in the country. PITX is also very accessible, with a direct connection to LRT-1 and just a short distance from NAIA.
PITX to NAIA 1, 2 & 3
04:45 AM
05:45 AM
07:15 AM
08:45 AM
10:00 AM
11:20 AM
01:30 PM
02:30 PM
04:15 PM
05:00 PM
06:45 PM
07:45 PM
As of: 26 August 2025 Boarding Platform: PITX Gate 5, Bus Bay 32 (Near Entrance 2 and Concierge)
Fare: P150 Payment Method: Cash and Beep Card. You can also purchase your ticket in advance online through the UBE Express official website or through the link below:
As of: 26 August 2025 Boarding Platform: NAIA Terminal 3, Arrivals Area, Bay 12 (Outer Lane)
Fare: P150 Payment Method: Cash and Beep Card. You can also purchase your ticket in advance online through the UBE Express official website or through the link below:
Victory Liner is one of the top bus lines connecting Metro Manila to provinces in the north, with several terminals located around the city, including one in Pasay. From here, you can catch a ride to places like Baguio, Olongapo, Iba, Santa Cruz, Dagupan, Lingayen, Santiago, Cauayan, and Tuguegarao.
This route has no fixed departure time. The bus will run during operating hours and passengers should anticipate a waiting time of 30 minutes to an hour.
Operating Hours
As of: 26 August 2025 Boarding Platform: Across Passenger Entrance, Victory Liner Pasay Bus Terminal, 712 EDSA, Barangay 143, Zone 15, Pasay City
Fare: P150 Payment Method: Cash and Beep Card. You can also purchase your ticket in advance online through the UBE Express official website or through the link below:
Robinsons Place Manila, also known as Robinsons Ermita, is the biggest branch of the retail chain in the country. It first opened its Main Mall in 1980, then added the Padre Faura Wing in 2000 and the Midtown Wing in 2008.
Sitting right in the middle of everything — government offices, schools, hospitals, hotels, tourist spots, and even nightlife, the mall draws in both locals and tourists.
Robinsons Place Manila to NAIA 1, 2 & 3
07:30 AM
10:30 AM
03:00 PM
06:30 PM
As of: 26 August 2025 Boarding Platform: Midtown Wing Mall Entrance (Beside Arya Restaurant)
Fare: P150 Payment Method: Cash and Beep Card. You can also purchase your ticket in advance online through the UBE Express official website.
NAIA Terminal 3 to Robinsons Place Manila
06:00 AM
09:00 AM
01:00 PM
04:20 PM
As of: 26 August 2025 Boarding Platform: NAIA Terminal 3, Arrivals Area, Bay 12 (Outer Lane)
Fare: P150 Payment Method: Cash and Beep Card. You can also purchase your ticket in advance online through the UBE Express official website.
NAIA – Araneta City Cubao
Araneta City in Cubao, formerly known as Araneta Center, is one of the busiest transport hubs in Metro Manila. It has everything: bus terminals, MRT and LRT-2 stations, malls, restaurants, condos, and even concert venues. Situated right at the intersection of EDSA and Aurora Boulevard, it’s a major spot for both daily commuters and travelers heading to the provinces or catching flights at NAIA.
Araneta City Cubao to NAIA 1, 2 & 3
06:00 AM
07:00 AM
09:00 AM
11:00 AM
12:30 PM
03:00 PM
04:30 PM
06:30 PM
08:00 PM
As of: 26 August 2025 Boarding Platform: Araneta City Bus Port, G/F Manhattan Heights, General Romulo Avenue, Cubao, Quezon City
Fare: P200 Payment Method: Cash and Beep Card. You can also purchase your ticket in advance online through the UBE Express official website or through the link below:
As of: 26 August 2025 Boarding Platform: NAIA Terminal 3, Arrivals Area, Bay 12 (Outer Lane)
Fare: P200 Payment Method: Cash and Beep Card. You can also purchase your ticket in advance online through the UBE Express official website or through the link below:
The site where Starmall Alabang used to stand is now home to The Terminal, an open-air mall with chill dining spots and shops to explore. And right next to it is Vista Terminal Exchange Alabang, or simply VTX Alabang.
VTX is now a major transport hub down south, connecting folks from Muntinlupa, Las Piñas, Cavite, Laguna to other parts of Metro Manila and provinces, including South Luzon, Bicol, and even as far as Iloilo, Samar, and Davao. The terminal hosts buses, jeepneys, and modern jeepneys.
VTX Alabang to NAIA 1, 2 & 3
07:00 AM
10:30 AM
04:00 PM
08:30 PM
As of: 26 August 2025 Boarding Platform: Entrance Area, Vista Terminal Exchange Alabang
Fare: P200 Payment Method: Cash and Beep Card. You can also purchase your ticket in advance online through the UBE Express official website or through the link below:
As of: 26 August 2025 Boarding Platform: NAIA Terminal 3, Arrivals Area, Bay 12 (Outer Lane)
Fare: P200 Payment Method: Cash and Beep Card. You can also purchase your ticket in advance online through the UBE Express official website or through the link below:
Situated at the corner of Aguinaldo Highway and Daang Hari Road, The District Imus is the go-to spot in Cavite for catching up with friends, spending time with family, or just taking a break after work. Whether you’re here to shop, chill, or grab a bite, this place has you covered. This area’s super urbanized, making it a great pit stop for commuters, including those heading to or from NAIA.
The District Imus to NAIA 1, 2 & 3
05:00 AM
06:30 AM
09:30 AM
11:30 AM
02:30 PM
04:00 PM
06:30 PM
08:30 PM
As of: 26 August 2025 Boarding Platform: Mall Main Entrance (Near UV Express Terminal)
Fare: P200 Payment Method: Cash and Beep Card. You can also purchase your ticket in advance online through the UBE Express official website or through the link below:
As of: 26 August 2025 Boarding Platform: NAIA Terminal 3, Arrivals Area, Bay 12 (Outer Lane)
Fare: P200 Payment Method: Cash and Beep Card. You can also purchase your ticket in advance online through the UBE Express official website or through the link below:
Located along the National Highway in Barangay Tagapo, Robinsons Santa Rosa is a no-frills, three-level mall that’s perfect for bargain hunters and anyone looking to get some errands done. It’s right in the middle of one of the busiest areas in Laguna.
This UBE P2P Bus station also boasts the very first Airport Transport Express Passengers’ Lounge.
Robinsons Santa Rosa to NAIA 1, 2 & 3
05:00 AM
06:00 AM
07:00 AM
08:45 AM
09:30 AM
11:00 AM
12:00 AM
01:00 PM
02:00 PM
03:30 PM
04:30 PM
05:30 PM
06:30 PM
07:30 PM
09:00 PM
10:00 PM
As of: 26 August 2025 Boarding Platform: Mall Main Entrance Driveway
Fare: P300 Payment Method: Cash and Beep Card. You can also purchase your ticket in advance online through the UBE Express official website or through the link below:
As of: 26 August 2025 Boarding Platform: NAIA Terminal 3, Arrivals Area, Bay 12 (Outer Lane)
Fare: P300 Payment Method: Cash and Beep Card. You can also purchase your ticket in advance online through the UBE Express official website or through the link below:
Can I get off the bus before it reaches the designated bus stop?
Since UBE Express runs on a point-to-point system, the bus only stops at NAIA and its assigned drop-off point. That means, no getting off just anywhere along the way. So make sure you’re on the right route before hopping on!
Do the buses leave exactly on schedule?
Not always. Things like weather, traffic, or road conditions can cause delays, so departure times might shift a bit. It’s best to allot extra time for unforeseen events.
How early should I be at the airport?
For domestic flights, aim to be there two to three hours ahead of your departure time. For international, give yourself four to five hours. Better to be early and relaxed than rushing — or worse, missing your flight!
Are the routes always available?
Routes or trips can change or get canceled for the day due to things like mechanical issues. To stay updated, it’s best to check the official UBE Express Facebook page before your trip! For other inquiries, you can reach out to them through any of the following contact info:
Social Media Accounts: UbeExpress (Facebook) | @ubeexpress (IG and Twitter) | @ubenatayo (TikTok)
Where can I get tickets?
Simply proceed to the bus stop or boarding platform and pay your fare upon boarding or when the conductor/driver comes around to collect the payment. Both cash and Beep card (reloadable stored-value card) are accepted.
The best way to explore the beaches of New South Wales is with your own car. Check out our list of the best NSW road trips for some fun exploration ideas, or browse our favourite things to do in NSW.
However you choose to get around, New South Wales is a stunning state that is sure to impress.
The best way to get around is to rent a car and explore on your own! We recommend Rental Cars, which has the largest range of vehicles for the best value on the market.
Hyams Beach, Jervis Bay
What better way to start the list than with the beach that boasts the whitest sand in the world? That’s not a matter of personal opinion. That’s according to the Guinness World Records.
It’s not just the sand that people visit Hyams Beach for. The calm, clear waters are perfect for swimming, snorkelling, and stand-up paddleboarding. Plus, the scenery is divine.
Hyams Beach gets quite busy during summer and long weekends, but there’s plenty of room to spread out across the 2.8 km stretch, so you don’t have to worry about elbowing fellow beachgoers for space.
The main issue will be finding parking, especially between midday and mid-afternoon. As a quick fix, you can park at Greenfield Beach and then hike the White Sands Walking Track to Hyams Beach.
The idyllic white sands and blue waters of Hyams Beach
Murrays Beach, Jervis Bay
Murrays Beach, located in Booderee National Park, is almost the spitting image of Hyams Beach.
It has the same blue waters and sugar-white sand backed by lush bushland. The difference is that it has fewer people.
If you’re looking for a family-friendly beach in Jervis Bay, Murrays Beach is your best bet. Protected by Bowen Island, the waters are calm and suitable for casual swimmers and young children. It also abounds with rich marine life, making it great for snorkelling.
For hikers, the beach offers self-guided walks, like the low-tide trail, where you can explore the shoreline and its marine life.
You can access Murrays via the Jervis Bay Road. Please note that there’s a fee to enter the national park.
Sydney is iconic for its cosmopolitan charm, but it also has some of the best beaches in NSW. Among these is Palm Beach, roughly 41 km from the city centre.
Palm Beach is the northernmost of Sydney’s beaches. It’s mostly quiet and uncrowded, thanks to its remote location.
Because Palm Beach faces the ocean, it often has big waves. This makes it popular among surfers but not so much with swimmers.
If you want to swim, head to the southeastern end of the beach, where you’ll find a 50-metre-long rock pool with relatively calm waters.
Nearby is the Bible Garden, a set of well-manicured terraces overlooking the ocean and the shore.
Don’t skip a hike to the Barrenjoey Lighthouse, known for its spectacular scenery and whale sightings in winter.
Shelly Beach, Sydney
Just a 20-minute walk from Manly Beach, you’ll reach Shelly Beach. This small swath of sand is a quieter alternative to Manly, one of the busiest beaches in NSW.
Shelly Beach is part of Cabbage Tree Bay, a protected marine reserve. It’s popular among scuba divers and snorkellers mainly because of its rich sea life, which is visible in shallow water.
If you’d rather stay on land, hike the bush trail around the headland for incredible views. You can also sunbathe or have a picnic on the sand.
Shelly Beach has free electric barbecues, showers, and toilets. There’s also a café called The Boathouse.
Tamarama Beach, Sydney
Tamarama is the perfect beach for people-watching. This 80-metre narrow strip is a favourite hangout among the trendy and attractive, often A-listers, earning it the nickname Glamarama.
Celebrity sightings or not, we think Tamarama is one of the best beaches in NSW because of its scenery. Nestled between two headlands, it offers gorgeous ocean views.
The beach is a well-known stop on the Bondi Beach to Coogee Coastal Walk. Backing the beach is a grassy parkland with a playground, barbecue facilities, picnic areas, toilets, and changing rooms.
Tamarama Beach is an iconic stop on the Bondi to Coogee Coastal Walk.
Bondi Beach, Sydney
Of course, a list of the best New South Wales beaches is incomplete without mentioning Bondi!
Possibly Australia’s most famous beach, Bondi Beach is a dazzling strip of sand with lots of nearby attractions.
Walk along the Esplanade and stop at the skate park, admire the colourful murals, or hit the outdoor gym.
Just a short walk south of Bondi, Bronte is perhaps the most family-friendly among the Sydney beaches.
At the southern end, you’ll find a kid-friendly rock pool and an ocean-fed lap pool, both free to use.
Confident surfers can chase waves near the rocky headland. Everyone else can relax in the grassy park behind the sand for picnics, frisbee, or a barbecue.
Bronte Beach also has a kiosk, changing rooms, toilets, and even the world’s oldest surf lifesaving club.
Avoca Beach is a 1.7 km stretch of golden sand tucked between two giant sandstone headlands and fringed by Norfolk Island Pines.
It’s mainly a surfing beach. The more sheltered northern end is ideal for beginners, while the southern part, with its point break, is suitable for expert surfers.
The waters can be rough, so always seek the advice of the lifesavers if you want to swim.
There’s also an ocean rock pool at the southern end of the beach, near the Surf Life Saving Club, where recreational swimmers and young kids can splash safely.
Umina Beach, Central Coast
Perched on the Central Coast’s southern coastline, Umina is another popular family beach in New South Wales.
Not only is the beach patrolled, but the waters are also calm and shallow, with waves that never get too big for swimmers and novice surfers.
If you want to take a break from splashing in the water, head to the playground near the Surf Life Saving Club. It’s the biggest one on the Central Coast and features a skate park, bike track, climbing rocks, and more.
For adults, there’s an outdoor café beside the playground that serves brunch, coffee, and ice cream.
Added perk? Umina is dog-friendly, with designated off-leash areas, including the northern end leading up to Ocean Beach.
Try to catch the sunrise at Umina Beach!
Mollymook Beach, South Coast
Mollymook Beach boasts a 2.3 km sweep of golden sand and swells that can get as high as 1.5 metres along its southern reef.
On the southern end of the beach, you’ll find a natural rock pool that’s great for swimming and snorkelling. The rocky headland on the opposite side is ideal for fishing and diving.
Mollymook is mostly quiet, but in summer, it turns into one of the liveliest NSW beaches as it hosts markets and surfing events.
From September to October, you can spot humpback and southern right whales passing by the beach. Dolphins are also a common sight, no matter the season.
Surfing kangaroos? Pebbly Beach, one of the jewels of Murramarang National Park, is the place to go to see these intriguing critters on the shore.
No, they won’t be swimming, let alone surfing (that was a myth). But they’ll be close enough to the water to appear like it.
If you’re looking for a spot to sunbake, swim, or surf, Pebbly Beach is not the best option. It’s unpatrolled, and the waters often get choppy. Plus, the pebbles make it uncomfortable to sunbathe.
Still, Pebbly Beach is one of our favourite beaches in NSW. The views are stunning, the ambience serene, and it’s great for camping.
Zenith Beach, Port Stephens
Flanked by two colossal headlands, Zenith Beach in Tomaree National Park is one of the best beaches in NSW, purely for its sheer beauty.
It’s small, just 400 metres long, but it plays a huge role in wildlife conservation as a sanctuary for birds and dolphins.
The waters look inviting, but Zenith is unpatrolled, and high tide often brings strong rips. So, take extra caution if you swim or surf.
Zenith is the perfect strolling beach. Walk to the summit of Tomaree Head to enjoy jaw-dropping vistas of the shore, the ocean, and the offshore islands around Port Stephens.
Zenith Beach is one of the best places in Port Stephens.
Anna Bay, Port Stephens
Anna Bay is not one beach but two: One Mile Beach and Birubi Beach. The bay, however, is best known as the gateway to the massive sand dunes in the Worimi Conservation Lands.
Here, you can surf and spot dolphins one minute, then sandboard down a sandy slope the next. At sunset, you can go on a camel or horse ride along the shore.
Anna Bay also has dozens of rock pools you can explore. For more marine life encounters, visit the Irukandji Shark and Ray Encounters to pet and feed sharks and rays.
Caves Beach, Lake Macquarie
Love caves? Then Caves Beach should be on your list of the top places to visit in New South Wales.
This 300-metre beach got its name from the network of sea caves at its southern end. The northern part is more sandy and quieter.
You can access the caves only at low tide. When the water is out, you’ll also find rock pools along the shore.
The beach is patrolled on weekends and in summer, so it’s safe for swimming.
There are barbecue facilities, toilets, picnic areas, and a surf life saving club on the beach.
Treachery Beach, Seal Rocks
Secluded, spectacular, and “secret”, Treachery Beach is hands down one of the most beautiful beaches in New South Wales. But barely anyone knows where it is.
Treachery Beach is on the southern end of Seal Rocks, a small coastal settlement three hours from Sydney. You can access the beach in two ways: via the Treachery Camp or through the Treachery Headland walking trail.
The coast is serene, pristine, and made for long beach walks. It boasts consistent swells and big waves. Despite this, you’ll rarely see anybody else on the shore except for a few spirited surfers.
Bongil Beach, Bundagen
Set in Bongil Bongil National Park near Coffs Harbour, this 7 km, nearly empty stretch is a haven for nature lovers.
Bongil Beach is a tranquil escape from the busier beaches on the NSW north coast. It’s also popular among seasoned surfers and anglers.
But what we love most about this quiet beach is the wildlife. It’s one of the best beaches on the north coast for birdwatching and dolphin spotting from the shore.
And if you venture off the beach into the national park’s eucalyptus forest, you might find koalas perched in the trees.
Wategos Beach, Byron Bay
A long, crescent-shaped strip of white sand, Wategos is one of the prettiest beaches in Byron Bay.
It’s the ultimate family beach, with calm waters, barbecues, picnic tables, and plenty of space to sprawl on.
Sheltered by a headland, Wategos Beach has gentle waves. It’s an excellent spot for longboarding and learning to surf.
Lounge on the sand and keep an eye out for bottlenose dolphins, which are known to play in the rolling waves. You can also take the 3.7 km Cape Byron Walking Track to the Cape Byron Lighthouse.
Ride the waves at Wategos Beach, Byron Bay!
Main Beach, Byron Bay
Right smack in the heart of Byron Bay, Main Beach is arguably the most popular beach on the NSW north coast.
Patrolled every day year-round, Main Beach has calm waters and mild waves that are good not only for swimming but also for learning to surf.
The beach itself has barbecues, showers, a playground, and a grassy area with picnic tables. Across the street are shops, cafés, a swimming pool, and the iconic Beach Hotel.
Main Beach, being the centre of Byron Bay, is often a jump-off point for many tours, including kayak tours.
In summer, the beach can get crowded. For somewhere quieter, head to the nearby Wategos Beach, only a short walk away.
Tallow Beach, Byron Bay
This 2.5 km beach spans between Cape Byron and Broken Head Beach. While it has its share of bustle during summer, it’s nearly deserted outside the peak season.
Tallow is a lovely beach for birdwatching. White-bellied sea eagles and ospreys are the most popular residents here. In spring and winter, you can watch humpback whales from the shore.
As Tallow is an exposed beach, the waves often get rough. It’s also unpatrolled, so recreational swimming is not recommended.
Named after the red rock formations dotting the shore, this 5.2 km cove is one of the most amazing north coast beaches in New South Wales. Red Rock is a short drive from the buzzing Coffs Harbour, but it’s way more tranquil.
Surf lifesavers patrol the beach during summer. There are plenty of sandy spots where you can relax. At low tide, you can hike to the tiny Red Rock Island.
Red Rock is also fantastic for stand-up paddle boarding, kayaking, and fishing. If you want to surf, head to the reef at the northern end of the beach.
Seven Mile Beach, Shoalhaven
This unspoiled sweep of almost white sand is one of those NSW beaches that caters to all kinds of beach lovers, whether they’re looking for adventure or a secluded spot to unwind.
Seven Mile Beach is a long beach, so you’ll find plenty of space to surf. It’s also known for windsurfing and kitesurfing.
If you want to swim or kayak, stay in the area near the mouth of the Crooked River, where the waters are calmer and the waves are gentler.
What makes Austinmer one of the best beaches in NSW? We say it’s the vibe. No, it isn’t your typical secluded beach, but it’s a local favourite with serious charm.
Just over an hour from Sydney via the famous Sea Cliff Bridge, Austinmer is perfect for a chill afternoon or an adventurous day out.
It has golden sand, clear waters, and not one but two ocean rock pools for casual swimming and cooling off. There’s also a playground, picnic areas, and ample parking.
Austinmer is a stunning beach in the Wollongong area.
Bennetts Beach, Hawks Nest
Bennetts Beach in Hawks Nest is big, beautiful, and often surprisingly empty. One of the loveliest NSW beaches, it spans over 14 km and boasts sparkling white sand.
The northern end offers calmer waters, while the southern end, known as the Dolphin’s Playground, is perfect for catching waves. Nearby is the Yacaaba Headland, from where you can bask in sweeping views.
The beach is patrolled during the swimming season and even has a surf club with parking and toilets. Dogs are welcome, with off-leash zones north and south.
Jibbon Beach, Royal National Park
Jibbon Beach is an 800-metre crescent-shaped stretch of sand with calm waters that sparkle like turquoise in the sun.
The beach is the starting point for scenic coastal walks, including the Jibbon Loop Track and the multi-day Coast Track.
Along the way, you’ll find Aboriginal rock engravings, including images of kangaroos, whales, and the sky spirit Baiame.
Tucked inside Bouddi National Park on the NSW Central Coast, Maitland Bay is a secluded beach that rewards those willing to hike for it.
This peaceful 600-meter beach is only accessible by foot via a 1-km trail that winds through lush bushland. Two headlands protect the bay, so the waters are generally calm.
You’ll often have the beach to yourself. There are no lifeguards, and even mobile phone reception can be limited.
At low tide, you can walk to Bouddi Point and see the wreck of the SS Maitland.
DISCLAIMER: Some of the links in this article are affiliate links, which means if you book accommodation, tours or buy a product, we will receive a small commission at no extra cost to you. These commissions help us keep creating more free travel content to help people plan their holidays and adventures. We only recommend the best accommodations, tours and products that ourselves or our fantastic editorial team have personally experienced, and regularly review these. Thanks for your support, kind friend!
Fuel your passion for exploring the Earth’s most incredible wonders with our list of the top adventure activities in Antarctica!
Antarctica cruises are on many travellers’ bucket lists. You can explore the vast, icy, and remote Polar regions in a safe and controlled environment.
Admiring the jaw-dropping landscapes of Antarctica is already a once-in-a-lifetime event. But if you want to spice up your expedition cruise, consider trying some adventure activities!
Many Antarctica cruises are customisable and have lots of add-on activities. These often cost extra, but it’s worth it!
Go wildlife spotting and see majestic Emperor penguins or King penguins. Or look for humpback whales from your kayak or zodiac excursions.
Try something crazy like a polar plunge, or scuba dive below the depths of the Southern Ocean. Hike across the rugged terrain of South Georgia Island.
Brave the rough seas of the Drake Passage or snowshoe over the continent’s pristine snow.
From wildlife encounters to advanced sports, any of these adventure activities can enhance your Antarctic experience and give you some epic stories to tell at dinner parties!
Antarctica is the ultimate adventure destination.
Top Antarctic Adventure Activities To Try
Here are some mindblowing adventures to try when you visit Antarctica.
All activities will be subject to the Antarctic weather – safety always comes first down here! If there are certain activities you really want to try, make sure you check the itineraries and inclusions of the Antarctic expedition ships beforehand.
Every Antarctic itinerary is different, and some ships have more offerings than others. Some activities may require certain experience levels or gear as well.
A trip to Antarctica is not something you want to just wing. Lots of advance planning is required to make sure your trip is as seamless as possible.
Ready to get inspired for some life changing Antarctica trips? Here is our list of the best adventure activities to try when you experience Antarctica!
Important Note! Before you book any international trip, we honestly recommend getting travel insurance. You never know when things will go wrong, and medical bills can add up quickly if you get sick or injure yourself overseas.
Our personal recommendation based on our own experience is World Nomads.
Kayaking
Kayaking in Antarctica is a guided activity offered by many expedition cruise operators as an optional add-on. You can usually ride in stable, two-person sea kayaks with all cold-weather gear included, such as dry suits, gloves, and life vests.
Kayaking typically takes place in calm bays and sheltered coastal areas, such as Paradise Bay, Neko Harbour, or the Lemaire Channel.
Participants are usually required to have some prior kayaking experience and must attend safety briefings before heading out. But once you’re out there, it is an absolutely dreamy way to sightsee around the Antarctic Continent!
Antarctica kayaking allows for closer and quieter access to wildlife and ice formations compared to motorised zodiac cruises.
Curious penguins may swim alongside the kayak, while seals lounge on ice floes and whales surface nearby. The serene stillness of the Southern Ocean, which is filled with sea ice and marine mammals, is an incredible thing to witness when you visit Antarctica.
Alesha kayaking around Antarctica
Ice Climbing
Ice climbing in Antarctica is a niche activity offered by a small number of specialised expedition cruise operators. It’s generally only available to those with prior climbing experience and a high level of physical fitness.
Climbs are typically conducted on glacial ice walls or steep snow slopes in controlled environments on the Antarctic Peninsula.
All gear, including crampons, harnesses, helmets, and technical ice tools, is provided, and participants are supervised by qualified mountain guides with polar experience.
Routes are chosen based on weather, safety, and environmental considerations, and all activity follows strict protocols to minimize impact on the terrain.
Due to the challenging conditions, space is limited and advance booking is usually required. If you’re an experienced ice climber, this is an amazing way to experience Antarctica and its ancient, colossal glaciers!
Another one of the coolest things to do on the Antarctic Peninsula is hiking.
Hiking in Antarctica is a structured shore-based activity included in most expedition cruises, allowing passengers to explore some incredible sites on foot.
Hikes are typically short to moderate in length, ranging from casual walks to more strenuous climbs, depending on the location and weather conditions.
Common hiking spots around Antarctica include Cuverville Island and Port Lockroy. Hikers can traverse volcanic terrain, climb ice-covered ridges, or walk past penguin colonies.
South Georgia Island also has amazing hikes that may be included in longer Antarctica cruises. Common routes on South Georgia Island include the viewpoints above Fortuna Bay or Grytviken, or sections of the historic Shackleton route between Fortuna Bay and Stromness.
The South Shetland Islands, including Deception Island, King George Island, and Livingston Island, also have epic hiking routes.
All hikes are led by a knowledgeable expedition team that will ensure environmental protection and safety.
While the terrain can be uneven and slippery, basic fitness is usually sufficient, and proper gear such as waterproof boots and layered clothing is required.
Hiking is one of the best ways to get up close to some Antarctic wildlife, particularly the land-dwelling penguin species. Bring a camera, some drinking water, and get ready to trek across the Southernmost continent!
Hiking across Antarctica is a wild experience.
Snowshoeing
Another one of the best shore excursions to try on your Antarctic adventure is snowshoeing.
Snowshoeing in Antarctica is offered on some expedition ships, and you’ll likely need to register in advance.
Usually, no prior experience is required, though a basic level of fitness is recommended. Snowshoes and trekking poles are provided, and group sizes are kept small to ensure safety and reduce environmental impact.
Snowshoeing allows you to trek across the snowy terrain and explore the Antarctic continent more in-depth. Outings are typically moderate in difficulty and take place at selected landing sites on the Antarctic Peninsula, depending on snow conditions and weather.
Led by expedition staff, these snowy hikes are a stable and comfortable way to walk over deep snow while observing the icy landscape and incredible wildlife.
Penguin Spotting
Looking for penguin colonies is a highlight of many Antarctic expeditions. This may not be a traditional adventure activity, but the excitement you will feel from seeing penguins in the wild is truly thrilling!
Penguin spotting is included in nearly all shore landings and zodiac excursions to the Antarctic Peninsula.
Visitors commonly encounter large colonies of Adélie penguins, gentoo penguins, and chinstrap penguins at sites such as Paulet Island, Danco Island, and Half Moon Island.
Another popular spot is Snow Hill Island in the Weddell Sea, where visitors can see huge colonies of Emperor Penguins. Or you can see King Penguins on the Falkland Islands or South Georgia Island.
If you’re lucky, you may even get to see penguin rookeries and adorable penguin chicks!
Expedition guides provide context on behavior, breeding cycles, and species identification during these visits so you can learn more about the iconic Antarctic creatures.
The guides will also ensure that wildlife distance regulations are maintained. These are usually five meters, and they ensure that the penguin colonies are undisturbed.
Most sightings occur on land, but penguins can also be seen swimming near boats or resting on ice floes. The adventure activity requires no special equipment beyond standard cold-weather gear and is suitable for all ages and fitness levels.
Seeing emperor penguins, and their chicks, in a colony is one of the world’s most exclusive and remarkable wildlife experiences.
Mountaineering
Similar to ice climbing, mountaineering is a thrilling activity to include in your Antarctic trip.
Experienced climbers can explore some of the most remote and rugged terrain on the planet by mountaineering in Antarctica.
Expeditions often take place on the Antarctic Peninsula or in inland ranges like the Ellsworth Mountains, home to Mount Vinson—the highest peak in Antarctica at 4,892 meters (16,050 feet).
Climbs typically require technical skills, prior alpine experience, and the ability to operate in extreme cold and isolation.
Specialized tour operators offer guided ascents, often involving multi-day expeditions with glacier travel, crevasse navigation, and high-altitude camping.
Due to the continent’s unpredictable weather and logistical complexities, mountaineering in Antarctica is both a physical and logistical feat. It’s always subject to the weather conditions, and it’s only offered on some more adventerous expedition ships.
For the ultimate wilderness experience, consider trying camping excursions during your Antarctic cruise.
Camping in Antarctica is an optional activity offered by some expedition cruise ships, providing a unique opportunity to spend a night on the ice.
It typically involves minimalist, non-intrusive gear such as bivy bags or special cold-weather sleeping systems rather than traditional tents, in accordance with Antarctic environmental regulations.
Campsites are selected by expedition staff based on weather and safety conditions, often on snow-covered areas near the coastline.
Popular camping spots include Deception Island, one of the South Shetland Islands known for its volcanic black sand beaches and geothermal activity. Danco Island is another popular camping spot, which offers stunning views of the mountains and nearby penguin colonies.
Visitors are briefed thoroughly and must follow strict guidelines, including no food, no waste left behind, and no disturbance to wildlife.
The experience is basic but safe, with support staff nearby and emergency protocols in place. If you want a physically and mentally challenging way to engage with the polar environment, consider joining a camping adventure on your next Antarctic cruise!
Camping in Antarctica – an experience like no other.
Polar Plunge
Imagine the thrill of diving into the frigid Antarctic waters! One crazy but iconic Antarctica experience to try is the famous polar plunge.
The polar plunge is a short, voluntary activity offered by many Antarctica cruises. You’ll get to jump into the near-freezing Southern Ocean, typically at a controlled site near a landing beach or the cruise ship.
It is supervised closely by the expedition team, with safety personnel, towels, and warm drinks provided immediately afterwards.
Participants often wear swimsuits, and some choose to jump from the shore while others use a platform on the vessel.
Water temperatures are usually around 0°C (32°F), making it a physically and mentally challenging activity to try.
Most people who try the polar plunge are only in the water for a few seconds. But that rush of adrenaline you’ll get from the freezing water of the polar regions will make you feel so alive!
Another activity to try on your Antarctic adventure is scuba diving.
Scuba diving on Antarctica trips is a specialised activity offered by a limited number of expedition operators and is only available to experienced, cold-water certified divers.
Dives are conducted from zodiac cruises in select locations with relatively stable ice and weather conditions, such as around the Antarctic Peninsula.
Divers must use dry suits and carry their own gear, including redundant air systems, due to the extreme conditions. Safety always comes first, and there are very few dive sites on Earth that are as wild and unpredictable as the Antarctic waters!
But scuba diving around the Antarctic continent is breathtaking. Underwater visibility can be excellent, and divers may encounter ice formations, marine invertebrates, and occasionally seals or penguins.
All dives are guided by polar-certified dive professionals, and strict safety protocols are in place.
Scuba diving requires a high level of physical fitness and preparation, and participation is subject to approval by the expedition leaders.
Scuba diving is an incredible way to see Antarctica from below the surface.
Whale Watching
Like penguin spotting, whale watching isn’t a physically demanding activity, but it is a highlight of Antarctica cruises. And again, you can definitely feel a spike in adrenaline when you see these magnificent ocean giants right next to the cruise ships!
Whale watching in Antarctica is a regular part of Antarctica cruises, especially between January and March when whale activity peaks.
Sightings typically occur during zodiac cruises or from the ship itself, with species such as humpback whales, minke whales, and orca whales making frequent appearances.
While sightings are not guaranteed, they are frequent in areas like Wilhelmina Bay, the Gerlache Strait, and the Lemaire Channel.
Expedition guides can help identify whale species and interpret their behaviours like breaching, tail-slapping, and feeding. No special equipment is needed, though binoculars and cameras with zoom lenses are recommended!
Encounters are usually passive and non-intrusive, following international guidelines to maintain safe distances and minimise disturbance to the whales.
There is nothing quite like a majestic whale encounter in Antarctica!
Imagine spotting a whale that close from a kayak!
Crossing the Antarctic Circle
Crossing the Antarctic Circle is a special achievement that you may be able to cross off your bucket list in Antarctica. But fewer than 20% of Antarctica cruises can actually cross the Antarctic Circle, so it’s a rare occurrence.
Officially located at latitude 66°33′ South, the Antarctic Circle marks the point where, for at least one day a year, the sun does not rise or set. This circle also signifies the start of the Antarctic region proper.
Antarctica cruises can only cross the circle when conditions permit. There is denser ice coverage and colder temperatures this far into the region, so it’s not always viable.
It is only accessible on certain expedition cruises during the austral summer, typically from late January to early March when sea ice has receded sufficiently.
Reaching this point is often commemorated with a special ceremony or activity on board, as it represents a rare and adventurous achievement on your Antarctic cruise!
Crossing the Drake Passage is another iconic adventure that you may encounter on some Antarctica cruise lines.
The Drake Passage lies between the southern tip of South America and the Antarctic Peninsula, spanning approximately 800 kilometers (500 miles).
Known for its notoriously rough seas, the passage is where the cold Antarctic waters meet the warmer waters of the Atlantic and Pacific Oceans, creating some of the most turbulent conditions on Earth.
But expedition ships are well equipped to deal with these conditions, so it’s more nerve-wracking than actually dangerous.
The journey typically takes around 48 hours by ship and is a rite of passage for Antarctic travellers.
Conditions vary widely—from calm, glassy waters known as the “Drake Lake” to powerful storms and swells referred to as the “Drake Shake.”
Despite the potential for rough seas, crossing the Drake Passage on your way from South America to Antarctica is a monumental adventure.
Scenic Flights
You can also enjoy Antarctica from the air! Scenic flights over the Antarctica Peninsula offer a unique way to experience the continent’s vast, untouched beauty without setting foot on the ice.
Departing primarily from cities like Melbourne, Sydney, or Perth, these day-long charter flights are often aboard a Boeing 787 or similar aircraft.
You’ll fly over iconic Antarctic landmarks such as the South Magnetic Pole, the Transantarctic Mountains, the Ross Sea region, and massive glaciers and ice shelves.
Passengers can witness dramatic landscapes including towering icebergs, crevasse-streaked ice fields, and sweeping coastlines from large panoramic windows, with expert commentary provided onboard.
Some expedition cruises also offer short scenic flights that depart from the ship or from the continent itself.
Operated by helicopters or small planes from specially equipped expedition vessels, these flights allow you to soar over dramatic landscapes such as towering icebergs, sprawling glaciers, and remote mountain ranges that are otherwise inaccessible by sea.
Popular routes may include views of the Antarctic Peninsula, the Weddell Sea, or even Emperor penguin colonies if conditions allow.
Seaplane on the Antarctic continent
DISCLAIMER: Some of the links in this article are affiliate links, which means if you book accommodation, tours or buy a product, we will receive a small commission at no extra cost to you. These commissions help us keep creating more free travel content to help people plan their holidays and adventures. We only recommend the best accommodations, tours and products that ourselves or our fantastic editorial team have personally experienced, and regularly review these. Thanks for your support, kind friend!
StarCruises continues to provide affordable and accessible cruise experience as its newly revamped legacy vessel, Star Voyager, calls Hong Kong its new homeport!
From June 27 to November 2025, Star Voyager is cruising from Hong Kong to some of Asia’s top destinations, including Taiwan, Japan, China, Vietnam, and the Philippines! It’s the perfect way to visit multiple countries in one trip, minus the usual travel stress. Here’s another plus point: if you’re holding a passport that normally needs a visa for Japan or China, you might be able to skip that requirement when you cruise with them.
Whether you’re a first-time cruiser or just itching for a new kind of getaway, this is your chance to have a hassle-free journey across Asia, with everything you need already on board! Keep reading to learn more about the ship, discover the perks, and get tips on how to make the most of your cruise experience.
Below are the itineraries for sailings departing from Hong Kong from June 27, 2025 to November 2025. For the updated timetable, visit the official website.
It all comes down to your budget and what kind of cruise experience you’re after. Whether you are cruising on a budget or going all out for luxury, Star Voyager has a room to match your preference.
Different Types of Accommodations
There are four main types of staterooms with different sizes and features.
Interior Stateroom
If you plan to spend most of your time exploring the ship and want the most practical option, go for the Interior Stateroom. It’s simple, economical, and gives you all the essentials without breaking the bank. This is the most budget-friendly option. It’s cozy, compact, and windowless.
Maximum Capacity: 2-4 pax
Interior Room with Twin Beds (Top Left) and Interior Room with Bunk Bed (Bottom Left)
Balcony/Balcony Deluxe Stateroom
If you’re looking for a bit more comfort and value, the Balcony Stateroom strikes a great balance. You’ll enjoy a spacious cabin and your own private balcony. This also comes with two lounge chairs and a small table.
Maximum Capacity: Balcony Deluxe, 2-3 pax; Balcony, 2-4 pax
Oceanview Stateroom
The Oceanview Stateroom is ideal if you’re after a sea view but don’t necessarily need a balcony. It’s a nice middle ground between price and experience. This room has no balcony, but you’ll get a window with a view.
Maximum Capacity: 2-4 pax
The Palace Suites
Thinking of treating yourself? The Palace is an all-suite section, offering upscale rooms with upgraded perks and services.
Guests staying in The Palace suites enjoy exclusive access to The Palace Restaurant, curated menus at designated specialty dining restaurants, and priority services throughout the ship. Take a peek inside one of Star Voyager’s The Palace suites here:
All cabins, no matter what type, are provided with these essentials: toiletries, towels, a hairdryer, a mini fridge, an in-room safe, a water kettle, complimentary bottled water, and packets of tea, coffee, and sugar.
If you are staying in The Palace, expect extra comforts, upgraded amenities, and added touches of luxury.
Daily housekeeping is available across all room types.
What to prepare before the cruise?
For a smooth embarkation process, these are the things you need to prepare prior to your cruise.
Online Check-in
Once you receive your ‘Booking Reservation’, don’t forget to go to the web check-in page to complete the mandatory online check-in. You’ll also find the link conveniently included in your ‘Cruise Ticket’. Just a heads-up: online check-in closes 48 hours before your cruise departs. If you failed to do this, you can still check in manually at the terminal on the day of sailing.
Travel Documents
Here are the documents you need to secure:
Valid Passport. This must be valid for at least six (6) months.
Photocopy of your passport’s bio page. This will be your copy. Upon boarding, a staff member will collect your passport and secure them throughout the duration of the cruise. Don’t worry — it will be returned a day before disembarkation.
Cruise ticket (printed or digital copy). You’ll have to show this when dropping off your luggage and checking in at the cruise terminal.
Visa (if applicable). Philippine passport holders don’t need a visa since the home port is Hong Kong. If your chosen itinerary includes stops in Japan or China destinations, you still won’t need to secure a visa, BUT a tourist arrival fee applies to those joining a shore excursion.
Onboard Currency and Time
Currency. Since Star Voyager sails out of Hong Kong, all onboard transactions are in Hong Kong Dollars (HKD). Credit cards are widely accepted for hassle-free purchases, but it’s still a good idea to bring cash just in case.
Time. The ship follows Hong Kong time, which is the same as the time in the Philippines, Taiwan, and China. However, note that Vietnam is an hour behind, while Japan is an hour ahead. We know it’s a bit tricky. Here’s our suggestion: turn off the ‘Set Automatically’ option on your devices and manually set it to Hong Kong time.
Pack Your Luggage
Clothes & Outfits. A good rule of thumb is to pack two sets of outfits per day — casual wear for daytime activities and dressy attire for evening shows or fine dining. And of course, don’t forget to pack proper swimwear for pools and waterslides.
For footwear, bring a pair of closed-toe shoes or comfortable sneakers if you’re planning to try out activities like zip line, rope obstacles, and wall climbing.
Toiletries. Every stateroom is stocked with shampoo, conditioner, shower gel, lotion, toothpaste, toothbrush, shaving kit, and tissues, so you don’t have to bring your own. However, feel free to do so if that’s what you prefer. You’ll also find bath towels, hand towels, bathrobes, and hotel slippers.
Universal Socket Adapter. Lastly, be sure to include a universal adapter in your to-pack list. The ship uses China-style power outlets, so you’ll encounter Type A (two flat parallel pins), Type C (two round parallel pins), or Type I (three flat pins in a V shape). Your cabin also comes with USB ports for more charging options.
Prohibited Items
For safety and security, these items are not allowed on board the Star Voyager:
Photo Credit: StarCruises (formerly Resorts World Cruises)
Flammable materials and explosives
Pressurized containers
Sharp objects
Illegal drugs and substances
Alcoholic beverages
E-cigarettes/vapes
Weapons, firearms, and ammunition (including replicas, stun devices, and blunt weapons)
Electrical items and heating devices (like clothes iron, coffee maker, and cooking appliances)
Extension cords
Raw food (such as dairy, meats, eggs, pastries, fruits, etc.)
Other objects that could pose a risk to fellow passengers (like hoverboards and laser pointers)
Travel Insurance
This is optional, but we highly recommend this, especially when traveling abroad. Travel can be unpredictable, and though we hope we’ll never use it, having it gives us peace of mind in case of unexpected delays, cancellations, or emergencies.
For this cruise, you can avail of PGA Sompo’s TravelJOY Plus insurance. You can GET IT HERE. Don’t forget to use WORTHIT for a special affordable rate.
Where to Stay in Hong Kong?
Flight delays and other travel setbacks can eat up your time, and might even cause you to miss your cruise. For a smoother trip, we highly recommend flying into Hong Kong at least a day before the ship sets sail.
The Star Voyager departs from Ocean Terminal, located at the southern tip of the Kowloon Peninsula, right by Victoria Harbour. Staying at a hotel nearby can make things easier and more convenient on embarkation day.
That said, anywhere in the city center works well, whether you’re staying in Central on Hong Kong Island or in Tsim Sha Tsui on Kowloon. Just be sure to give yourself plenty of time to get to the terminal on your sailing day. Here are some top-rated options based on online user reviews.
Make sure to check your cruise’s departure time and final boarding time. To avoid any rush or delays, plan to arrive at the terminal at least two hours before gate closes. This gives you enough time to go through the entire embarkation process.
Here’s a step-by-step guide to boarding Star Voyager from Hong Kong:
1. Head to Ocean Terminal.
This is where Star Voyager departs — not to be confused with Kai Tak Cruise Terminal in Kowloon Bay. The nearest MRT stop is the Tsim Sha Tsui Station (Tsuen Wan Line). You can also take a taxi or Uber. Landmarks nearby are Hong Kong Cultural Centre, Time Ball Tower, Hong Kong Space Museum, Hong Kong Museum of Art, and Avenue of Stars.
💡 Address: Harbour City, 3-27 Canton Road, Tsim Sha Tsui, Hong Kong
2. Hand over your luggage at the bag-drop counter.
Head to the departure area and search for the baggage drop counter. Show your cruise ticket so staff can tag your luggage with your deck and stateroom number. Your bags will be delivered to your cabin later.
3. Check in and get your sea pass card.
Balcony and Palace guests check in on the ground floor, while Interior and Oceanview guests do it on the second floor. Present your passport and cruise ticket to get your sea pass card, which serves as your cabin key and payment tab for onboard purchases.
4. Clear immigration and customs.
Proceed through immigration, then have your hand-carry items scanned at the security checkpoint.
5. Surrender your passport.
This is standard procedure, so don’t fret. You will have your passport back the day before disembarkation.
6. Board through your Assembly Station.
Your sea pass card reflects your assigned Assembly Station. It will be scanned as you board, and you’ll be encouraged to watch/attend the safety or muster drill.
7. Welcome aboard Star Voyager!
Enjoy exploring the ship and its amenities — try different activities, stuff your face with delicious food, take a relaxing dip in the pool, watch world-class shows, join fun events and games, and more!
What to do after boarding?
These are typically what guests do right after boarding the ship:
Watch/Attend the safety drill. Follow instructions to watch or attend the safety briefing. Use this time to get familiar with the ship’s layout and know the emergency exit locations.
Eat or explore. While waiting for your cabin to be ready, you can start exploring the ship or — if you’re already hungry — eat in one of the exclusive restaurants.
Settle in your cabin. Check if your luggage has arrived. You might find it already waiting for you outside your door. If there’s a delay, you can ask the Reception for an update.
Is there a WiFi on board?
Yes! WiFi is available on board. Stay connected at sea by choosing from two internet packages:
Standard. Ideal for browsing, checking e-mails, messaging apps, and scrolling through social media
Premium. Includes everything in Standard, plus support for video streaming and faster speeds.
Rates depend on the number of devices, the number of days, and your chosen plan.
Photo Credit: StarCruises
What are the things to do while cruising?
Whether you’re craving action, relaxation, or family-friendly fun, Star Voyager has something for every kind of traveler. From adrenaline-pumping activities to laid-back leisure, there’s no shortage of things to do — indoors or outdoors. And yes, kids and teens are covered too, with many spaces and programs designed just for them. Here’s a quick look at what’s in store:
Complimentary Activities and Amenities
All guests have free access to these onboard attractions and amenities:
Waterslides and Aqua Park
Make a splash at the onboard water park, where both kids and grown ups can enjoy slides and the water zones. Don’t forget to wear proper swimwear, follow the rules, and listen to the staff’s instructions.
Location: Deck 15, Aft
Main Pool Area
Cool off or soak it up with two swimming pools and two hot tubs. This is perfect for either family fun or quiet lounging.
Location: Deck 12, Midship
Adventure Park
Thrill-seekers, Adventure Park is for you! Test your courage with Wall Climbing, Walk the Plank, and Zip Line for that adrenaline rush.
Location: Deck 12 & 14, Midship
Symphony Gym
Stick to your fitness goals while at sea. The Symphony Gym offers a full range of equipment to help you stay on track. Note that operating hours apply, so check first before going.
Location: Deck 12, Aft
Shows and Events
Odyssey (Left) and Hong (Right)
Catch dazzling live performances at Zodiac Theater (Deck 7, Forward), featuring a variety of production shows. Plus, don’t miss out on fun pop-up events, workshops, and game shows happening throughout the cruise.
Cinema at Sea
Cinema at Sea: Main Pool Area (Left) and Lobby (Right)
Movie night, reimagined. Depending on the schedule, the Lobby (Deck 5, Midship) and the Main Pool Area (Deck 12, Midship) transform into pop-up cinemas!
Lawn Bowls/Bowling
No traditional lanes? No problem! Have casual fun with lawn bowling in a relaxed setting.
Location: Deck 11, Aft
Paid Activities and Amenities
Beyond the thrills and entertainment, Star Voyager also invites you to recharge and enjoy a little indulgence on board.
Shopping
In the mood for some retail therapy? Browse through duty-free finds, souvenirs, and gifts at The Starlight Boutiques for duty-free goodies and souvenirs. This is a good way to treat yourself or pick up something special for home.
Location: Deck 6, Midship
Little Dreamers Club and Vibe Check Arcade
These fun zones are packed with games, activities, and excitement for kids, teens, and the young at heart.
Location: Deck 12, Aft
Beauty and Wellness
Time to pamper yourself! Whether you’re up for a soothing massage or a fresh cut, the spa and salon are both conveniently tucked into one peaceful space. Location: Deck 12, Aft
What are the dining options on board?
When it comes to dining on Star Voyager, you’ve got choices — lots of them! Dining spots come in two categories: inclusive restaurants, which are covered by your cruise fare, and specialty restaurants, which come with an extra charge.
Inclusive Restaurants
No need to spend extra when dining at these onboard restaurants, so you can eat to your heart’s content!
North Star Dining Restaurant
Steamed Orange Roughy Fish (Top Left), Stir Fried Prawn Meat (Top Right), Shandong Style Braised Duck (Bottom Middle), and Marinated Baby Octopus with Cucumber (Bottom Right)
Specializing in Chinese set menus, North Star Dining Restaurant also offers Western-style set menus for breakfast. Open for breakfast, lunch, and dinner, this is a go-to spot for full-course meal throughout the day.
Location: Deck 5, Midship
The Lido Buffet
Buffet Meal
The Lido is definitely a crowd favorite, offering a wide selection of Asian and international buffets, including Halal and vegetarian options. Open for breakfast, lunch, dinner, and even snack times (morning and afternoon).
Location: Deck 14, Forward
Sophia
Taking the place of the former Bistro, Sophia now serves up a variety of international dishes.
Location: Deck 6, Midship
Specialty Restaurants
These restaurants are not included in your cruise fare, but they are worth checking out if you’re in the mood for something extra special. Dining at specialty restaurants offers a more elevated cruise experience.
This is a 24-hour cafe, serving breakfast to midnight snacks and meals.
Location: Deck 14, Forward
Red Tail Café
Drinks, Pastries, and more!
Location: Deck 8, Midship
Gelateria
Homemade Gelato.
Location: Deck 12, Midship
Bars and Clubs
Looking to meet fellow cruisers or just chill with a drink? Whatever your vibe, there’s a perfect spot onboard to end the night right. Here are the bars and clubs you can check out:
Sky Bar and Pool Bar (Left), Ocean Bar (Top Right), and Palm Court (Bottom Right)
Sky Bar: Deck 15, Forward
Oasis Bar: Deck 14, Aft
Pool Bar: Deck 12, Midship
Ocean Bar: Deck 7, Forward
Palm Court: Deck 7, Forward
Velvet Lounge: Deck 7, Midship
What other onboard services are available?
Star Voyager Reception
Clinic: Deck 4, Aft
Reception: Deck 5, Midship
Palace Reception: Deck 5, Midship
Shore Excursion (Shorex)
One of the best things about cruising? Ypu get to explore multiple destinations without giving up the comforts of the ship. From June 2025 to November 2025, Star Voyager by StarCruises offers two- to five-night sailings departing from Hong Kong, with ports of call (stops) in Taiwan, Japan, China, Vietnam, and the Philippines.
Sailings with Ports of Call
2N KAOHSIUNG CRUISE -Hong Kong –Kaohsiung (Taiwan) -Hong Kong
2N XIAMEN CRUISE -Hong Kong –Xiamen (China) -Hong Kong
3N KAOHSIUNG – PENGHU CRUISE -Hong Kong –Kaohsiung (Taiwan) –Penghu (Taiwan) -Hong Kong
5N NAHA – ISHIGAKI CRUISE -Hong Kong -High Seas –Naha (Japan) –Ishigaki/Miyakojima (Japan) -High Seas -Hong Kong
5N ISHIGAKI – NAHA CRUISE -Hong Kong -High Seas –Ishigaki (Japan) –Naha (Japan) -High Seas -Hong Kong
5N ISHIGAKI – KEELUNG – PENGHU CRUISE -Hong Kong -High Seas –Ishigaki (Japan) –Keelung (Taiwan) –Penghu (Taiwan) -Hong Kong
5N NAHA – KEELUNG – PENGHU CRUISE -Hong Kong -High Seas –Naha (Japan) –Keelung (Taiwan) –Penghu (Taiwan) -Hong Kong
5N NHA TRANG – DA NANG – SANYA CRUISE -Hong Kong -High Seas –Nha Trang (Vietnam) –Da Nang (Vietnam) –Sanya (China) -Hong Kong
5N HALONG BAY – DA NANG – SANYA CRUISE -Hong Kong -High Seas –Halong Bay (Vietnam) –Da Nang (Vietnam) –Sanya (China) -Hong Kong
5N BORACAY – CORON CRUISE -Hong Kong -High Seas –Boracay (Philippine) –Coron (Philippines) -High Seas -Hong Kong
Shorex vs DIY Tour
At every stop or port of call along your cruise, you have two ways to explore:
Join a Shorex Tour. Star Voyager offers guided group tours in partnership with trusted local tour operators. They arrange everything for you, including transportation, itinerary, and often lunch too. All you have to do is be on time. You can book these tours at Shorex kiosk on Deck 5, Midship.
Go D-I-Y. Prefer to explore at your own pace? A do-it-yourself trip gives you the freedom to create your own itinerary. And this is usually the cheaper option. However, keep in mind that the ship departs on schedule, so make sure to return to the port on time, or earlier, to avoid being left behind.
No matter how you choose to explore, you’ll be provided with essential disembarkation info, including return instructions, port name, and port address, so you’ll always know how to get back on board.
Reminders
Don’t forget to bring your Sea Pass Card and a photocopy of your passport bio page. You’ll need to show your card when leaving and re-entering the ship.
Carefully check the itinerary of the tours. Some tours involve long walks or intense physical activity. Be sure to review the activities and consider your comfort and fitness level before booking.
Tours may be canceled. This can happen due to weather conditions, low participation, or other unexpected reasons. Always have a backup plan just in case.
What to do before the cruise ends?
Here are a few things to take care of before disembarkation:
How to disembark?
When it’s time to leave the ship, disembarkation is done in an orderly manner to ensure everything goes well. Just follow these steps:
1. Head to your assigned departure area.
The Disembarkation Notice indicates the designated location and time for you to leave the ship. Make sure to follow the your schedule.
2. Present your sea pass card.
Scan your sea pass card at the exit pont. If there are any unpaid charges on your account, you will be asked to go to the Reception on Deck 5 to settle them before disembarking.
3. Go through immigration.
Head to the immigration counters for arrival clearance, and have your passport ready for inspection.
4. Pick up your luggage.
Claim your check-in luggage at the Baggage Claim Area. Inspect and check the bag tag to make sure you are taking the right one.
5. Proceed to customs area.
After collecting your luggage, you will pass through the customs check before exiting the terminal.
IMPORTANT! Accomplish the eTravel Pass before DEPARTING from and ARRIVING in the Philippines.
More About StarCruises
With over 30 years of legacy, the redefined StarCruises focuses on providing affordable yet premium lifestyle-driven cruising experiences to new generations. It features two cruise ships — Star Voyager (formerly Star Scorpio) and Star Navigator (previously Resorts World One).
When you think of Greece, what’s the first image that comes to mind? Perhaps it’s the sun-kissed Greek isles, the ancient ruins of Athens, or a scene straight out of Greek mythology. While these iconic destinations are undoubtedly breathtaking, there’s one gem that often gets overlooked, yet it’s one you should definitely add to your travel list — Kastoria.
Nestled in the middle of a picturesque lake, this charming city doesn’t always make it to the top of the list for most travelers. But it should. With its serene beauty, fascinating history, and stunning natural surroundings, Kastoria is a place that promises to captivate those who seek to explore beyond the typical tourist spots. And in this article, we’ll share with you some of the things you need to know about this city, along with some tips. Hopefully, you can fall in love with it the way we did!
Kastoria can refer to two things: one is the regional unit in Greece, something like a prefecture, and another is its capital city. In this article, we’ll primarily be referring to the city.
Located in the region of Western Macedonia in northern Greece, near the border with Albania, Kastoria sits gracefully in the middle of the stunning Lake Orestiada. In photographs, it might seem like an island, but it’s actually perched on a promontory that juts out into the water.
Kastoria is perhaps best known for its rich collection of Byzantine churches and its once-thriving fur industry, which played a major role in its economy for many years. However, in recent times, the city’s other attractions have started to draw more attention, opening it up to tourism. While some of its wonders may not be traditionally associated with Greek culture, they’re definitely worth experiencing. With its unique charm and historical significance, Kastoria is a destination that should be on every traveler’s radar.
Language: Greek. Greece has its own alphabet, which can be a bit intimidating at first, especially if you’re not familiar with it. While there may be a slight language barrier, the good news is that many locals speak English well. Additionally, most street signs are written in both Greek and English, so getting around is fairly easy and straightforward.
Timezone: UTC+02:00 (EET – Eastern European Time). Daylight saving time is observed from the last Sunday in March to last Sunday in October, pushing it an hour ahead (+03:00). So depending on the time of the year, it’s six or five hours ahead of the Philippines, Singapore, and Malaysia.
Modes of Payment: Cash is still the most common, but credit card payments are accepted in some establishments.
Electricity Info: 230 V, 50 Hz. Power sockets are Type F, which also accept Type C plugs.
By the way, Greece is part of the Schengen Agreement, which means that travelers from most countries, including the Philippines, will need to secure and present a Schengen Visa to enter. Make sure to plan ahead and get your visa sorted before your trip to avoid any hiccups along the way! We’ll be updating our Schengen Visa article, so make sure to check our website regularly.
Where to Stay in Kastoria
Let’s start by getting familiar with the geography of Kastoria. As mentioned, the city is nestled on a peninsula that extends into Lake Orestiada, almost entirely surrounded by water except for its western part. The easternmost tip is marked by limestone peaks, creating a striking landscape. While the city also spans parts of the mainland, its heart and soul lie on the narrow strip of land near the peninsula’s neck.
Despite its hilly terrain, Kastoria is a small city, and you can easily walk from one end to the other — whether that’s from coast to coast or north to south. No matter where you stay, you’ll find that most places are within easy walking distance.
Top Hotels in Kastoria
During our time there, we had the chance to visit three remarkable hotels that offer a mix of comfort and unique experiences.
Hotel Orologopoulou Mansion. Built in the 19th century, this 250-year-old mansion has been transformed into a 9-room hotel that mixes modernity and history. It’s located in the Doltso area, near Doltso Square, in the southeastern side of the city proper, which is very convenient. Around the area are restaurants and cafes, and even the lakeside is just a quick stroll away. A room costs around EUR 89 per night, inclusive of breakfast. Check Rates & Availability! ✅
Vergoula’s Mansion. One of the oldest hotels in the city, it was constructed around 200 years ago. It is perched on a cliff, overlooking the lake, offering one of the best views in the city. A stay here costs EUR 81 a night, inclusive of breakfast. Check Rates & Availability! ✅
Esperos Place Luxury and Spa Hotel. Located in the Chloe area, outside the peninsula but still close to key attractions. It is modern, elegant, and grand, housing 54 spotless and spacious rooms, 14 of which are suites, each filled with many conveniences you’d expect from five-star properties — from anatomical beds to fragrant toiletries to bathrobes. Check Rates & Availability! ✅
Hotel Orologopoulou Mansion
These three are the properties that our hosts and other locals we talked to sang highest praises for, but there are more options.
Afkos Grammos Boutique Hotel Resort. If you’re heading to Nestório for the iconic River Party music festival or simply want to explore the area in comfort, this hotel is a great option This four-star gem offers a luxurious retreat with sweeping views of both the Aliakmonas River and the Grammos Mountain. The rooms are tastefully appointed, and the on-site restaurant serves up hearty, traditional Greek dishes. Don’t miss the terrace — it’s the perfect spot to soak in the scenery. Check Rates & Availability! ✅
Krystal Resort. Kastoria also makes a great stop if you’re on a Balkan adventure! If you’re planning to cross the Greece–Albania border, consider spending a night in the peaceful village of Krystallopigi. Krystal Resort is a great option. The rooms here are spacious and the in-house restaurant is perfect for grabbing a satisfying meal before continuing your journey across the region. Check Rates & Availability! ✅
Top Budget Hotels & Guesthouses in Kastoria
For budget travelers, you’ll find pocket-friendly properties for as low as EUR 40 per night for a double or twin room. Here are some options on Booking.com and Hotels.com.
The nearest airport to Kastoria is the Kastoria Airport Aristotle (KSO), located in the nearby town of Argos Orestiko. However, it only serves a limited number of domestic flights, mostly from Athens, and flights aren’t available every day. If you happen to find a flight that fits your schedule, this is the quickest way to get there.
If not, your next best option is Thessaloniki Airport (SKG), located about 145 km away. It’s the closest international airport, offering more flight options and better connectivity.
Thessaloniki Airport to Kastoria
Since we flew in from Manila, we had to make a connection in Athens. From there, we caught a domestic Sky Express flight to Thessaloniki. Our host family kindly arranged a pick-up at the airport, so we didn’t have to worry about transfers. However, if you’re planning to use public transportation, here’s what we found from each agency’s official websites.
Take Bus 01X or Bus 01XN to the Makedonia Intercity Bus Station (operated by KTEL). Trip Frequency: – Bus 01X: Every 20-25 minutes from 6:10 AM to 10:40 PM – Bus 01N: Every 30 minutes from 11:10 PM to 5:55 AM Travel Time: 50-55 minutes Fare: €1.80
Catch a KTEL bus bound for Kastoria. Trip Frequency: There are only 5-6 journeys per day. The earliest bus is scheduled at 9:00 AM, and the last bus leaves the station at 8:30 PM on most days, or 9:30 PM on Friday and Sunday. Travel Time: 3 hours Fare: €17.60
This schedule might change, so double check by visiting KTEL website and click “Itineraries Outside the Prefecture”.
Athens to Kastoria
If you’re coming from Athens, the fastest option is, as mentioned, by taking a flight to Kastoria Airport. However, if flying isn’t an option for you, you can also take the bus as an alternative way to reach Kastoria. You have the option between a direct bus and a bus via Kosani.
DIRECT BUS
Frequency: Once a day
Schedule: 9:30 AM
Travel Time: 12 hours, 30 minutes
Via/Stops: Lamia, Larissa, Kozani
Fare: €48.50
BUS VIA KOZANI
This is a much more complicated route since you’ll have to take another bus to Kastoria. You’ll also have to take into consideration the layover waiting time when you take this option because buses are few and far between.
Athens to Kozani: 7 hours
Kozani to Kastoria: 75 minutes
Note: Total travel time might still equal the direct bus, depending on your timing.
What are the Top Things to Do in Kastoria
Kastoria is brimming with attractions that are absolutely worth your time and energy! Whether you’re into nature, history, or culture, this enchanting lakeside city has something for you. From mystical limestone caves to panoramic hilltop viewpoints, and from neolithic sites to centuries-old Byzantine churches, Kastoria is a treasure trove waiting to be explored. Every corner seems to whisper a story, and you’ll find yourself constantly discovering something new and fascinating. It’s a small city, yes — but it’s packed with big experiences.
Lake Orestiada
Nestled in the heart of Kastoria, Lake Orestiada, also known as Kastoria Lake, is a natural wonder over 10 million years in the making, fed by springs and rivulets. Rooted in ancient myth, its name comes from the mountain nymphs of Greek legend, and its beauty shifts with the season: fiery foliage in autumn, a frozen wonderland in winter, and tranquil waters in warmer months.
Home to over 200 bird species and edged by scenic walking paths, it’s a haven for birdwatchers and peace-seekers alike. Whether you’re snapping photos, feeding ducks, or sipping coffee by the shore, the magic of Orestiada is impossible to miss.
Dragon’s Cave
One of the most captivating attractions by Lake Orestiada is Dragon’s Cave, a natural wonder steeped in legend and shaped by nature over millions of years. Named after a local myth about a dragon that once lived inside, the cave stretches about 300 meters into the limestone hill by the lake. It features striking rock formations, underground lakes, and chambers lined with stalactites and stalagmites.
Discovered only in the 1940s, it has revealed ancient secrets, including cave bear bones over 10,000 years old. Easily accessible with a well-maintained trail, it’s a magical, walkable adventure right at the edge of Kastoria.
Location: Sougaridi, Kastoria 521 00, Greece Official Website: www.spilaiodrakoukast.gr/en/index
Byzantine Churches
When we first drove around Kastoria, it wasn’t the lake or grand mansions that caught our eye. It was the abundance of tiny, timeworn chapels scattered across the city. “Byzantine churches,” our guide said, and as we explored further, they kept appearing — nearly 80 in total, each one telling a story of faith, history, and heritage.
Some are grand and frescoed, others modest and privately cared for, but all are deeply woven into the city’s identity. Highlights include Panagia Koubelidiki, Agios Stefanos, and Agioi Anargyroi, among others. And just outside the center, the newly built Saint Nicanor church adds a modern flourish to this ancient spiritual landscape.
The Hill of Prophet Elias
One of the best spots for panoramic views in Kastoria is the Hill of Prophet Elias, home to a peaceful church and the Profitis Ilias Lounge Café. Perched above the city, this cozy café with glass walls and comfy couches offers stunning views of the lake — rain or shine.
We dropped by on a gloomy day, but the misty atmosphere only made it more magical. We warmed up with three kinds of hot chocolate (yes, three!), served with a smile by Kristos, the friendly owner. It’s a must-visit for a quiet escape and a scenic coffee break.
Food Trip
Out of all the Balkan cities we visited, Kastoria stood out for its incredible food. It’s fresh, flavorful, and rooted in tradition. Local staples like sarmades or stuffed pickled cabbage rolls, giant Kastorian beans which are baked in herbs and tomato, and batzo or cheese fried saganaki-style are just the start.
Carnivores will love the grilled meat platters loaded with lamb, pork, beef, and even wild boar. And for dessert? Don’t miss the candied fruits or fruit confit, especially the lime-infused cake we tried in Krystallopigi near the Albanian border — simple, sweet, and unforgettable. We’ll cover the restaurants and food spots we tried in the next section.
These are just some of the highlights. If you want a more detailed post with more suggestions, you can read our Top 12 Things to Do in Kastoria article.
Where to Eat in Kastoria
Kastoria might not be the first place that comes to mind when you think of foodie destinations in Greece, but it should be! Among all the stops on our Balkan trip, this idyllic lakeside city served up some of the most unforgettable meals we had. Every single ingredient — from the famed Florina peppers to the melt-in-your-mouth lamb chops — was bursting with flavor and freshness. The quality? Top-notch.
Here are some of the places you shouldn’t miss when you visit Kastoria. We also included the opening hours as of writing, but make sure to check the updated schedules before you go.
Palia Poli
This lovely mansion-turned-restaurant is a hidden gem that blends history, flavor, and a touch of romance. Its cozy courtyard offers the perfect setting for al fresco dining. The menu highlights traditional Kastorian cuisine, starting with comforting classics like sarmades (€5.50), which are pickled cabbage leaves stuffed with minced meat and rice, and Kastorian butter beans (€4.50), baked with herbs, carrots, and tomatoes. Don’t miss the batzo (or bajo) (€5.00), a brined cheese seared saganaki-style and topped with a fried egg.
For something lighter, the Kraneia salad is a refreshing surprise. It’s a vibrant mix of arugula, spinach, and lettuce, with sun-dried tomatoes, pomegranate seeds, and slices of crab apple — all drizzled with a tangy cranberry sauce that ties everything together beautifully.
And as a bonus? The restaurant sits just steps away from the lake, so after your meal, you can stroll along the waterfront and soak in the postcard-worthy views.
Speaking of stunning views, few spots in Kastoria can compete with the panorama from Prophet Elias Lounge Café. Perched atop a hill, this cozy café boasts plush couches lined up beside expansive glass walls, offering an unobstructed, postcard-perfect view of the entire peninsula. Whether you’re here for a quick caffeine fix or a long, slow afternoon, the setting is nothing short of magical.
This café ticks all the right boxes: great coffee, delectable desserts, and a serene atmosphere. We sampled their strawberry, cookies-and-cream, and classic hot chocolate, each one rich and satisfying. It’s the kind of place that invites you to slow down. Honestly, if we had more time, I would’ve happily spent hours here, with a good book on one hand and a warm drink on the other.
Location: Aristeidi Aggelidi, Kastoria 521 00, Greece Opening Hours: Daily, 11:00 AM – 12:00 AM
Diacheirós kai sti Ladókolla – Souvlákia
If you’re looking for a delicious yet budget-friendly meal in Kastoria, Diacheiros kai sti Ladokovolla Souvlakia is a must-visit. Believe it or not, many of their mouthwatering skewers, including pork kebab, chicken kebab, and sausage, are just €1 each! Even sides like crispy fries and creamy tzatziki sauce go for just €1 per order.
But don’t let the price fool you. The flavor is anything but cheap. Each bite is packed with savory goodness, making this spot a true hidden gem for foodies on a budget. It’s the perfect place for a quick snack or a satisfying meal that won’t break the bank.
Location: Arti 11, Kastoria 521 00, Greece
Taverna Ammoudara
During our stay in Kastoria, one of the most memorable meals we had was at Taverna Ammoudara, a humble yet exceptional eatery located in the village of Ammoudara, about 20 minutes from the city center. While it’s a bit off the beaten path, it ended up being our favorite meal of the entire trip, mostly because of the authentic, homecooked charm.
The taverna serves traditional northern Greek or Macedonian dishes, but each plate had a little something extra — a heartwarming quality that made the meal feel incredibly special. We started with a cheese-filled pita that was so delicious we could have easily called it a meal on its own. Then came the sarmades (cabbage rolls), which were the best we’d ever tried, a bit more sour than usual.
We were also treated to a variety of salads: eggplant salad, Russian salad and beetroot salad with yogurt and walnuts. All three were fantastic. The cabbage salad, which was soaked in salt for months and mixed with bell peppers, celery, and dill, was also refreshing. And for a bit of contrast, we also had batzo, which was a bit oily but wonderfully flaky and crispy.
As if that wasn’t enough, the main course brought a smorgasbord of grilled meats, but the standout was definitely the pancetta — smoky and cooked to perfection. The meatballs were incredibly tender, bursting with fresh flavor and no processed taste. We were also served a unique wild boar sausage, reminiscent of Filipino longganisa with its rich, fatty bite.
All in all, our lunch at Taverna Ammoudara was a standout not only in Kastoria but throughout the entire Balkan region. It was a feast full of heart, flavor, and warmth. Surely, one we’ll never forget!
Kastoria might not be known for its wild nightlife, but there are still a few places where you can unwind and enjoy a drink. One of the best spots for this is Nautical Hall, a modern bar-club-restaurant nestled by the lake. This cozy venue blends nostalgic decor with muted lighting, creating a relaxed and intimate atmosphere.
At Nautical Hall, you’ll find an impressive selection of drinks — from wines and beers to their signature cocktails. The bar food is also tasty, though it’s a bit on the pricier side compared to other places in the city. If you want to take in the view, step out onto the terrace and you’ll be treated to a stunning sight of the city lights shimmering on the serene lake below. It’s the perfect place to enjoy a drink and soak in the quiet beauty of Kastoria at night.
Location: Sougaridi 1, Kastoria 521 00, Greece Opening Hours: Monday to Tuesday, CLOSED; Wednesday to Thursday, 6:00 PM – 12:00 AM; Friday to Sunday, 10:00 AM – 4:00 AM Facebook: www.facebook.com/NauticalHallKastoria (Nautikos Omilos – Kastoria) Instagram: nautikos_omilos_kastoria
When is the Best Time to Visit Kastoria
We visited Kastoria in May, and it turned out to be the perfect time for our trip. The weather was lovely, with a comfortable temperature. And since it was before peak season, we enjoyed affordable prices.
We were also lucky enough to witness the glorification ceremony for Saint Sophia, a newly proclaimed saint in the Greek Orthodox Church, held every May 6 at the Moni Panagias Kleisouras Monastery, which has stood for over 700 years.
However, locals assured us that Kastoria is a fantastic destination all year round. May is considered a shoulder month leading into the summer season, which, while bringing slightly higher prices and more tourists, still offers a great experience compared to other popular Greek spots.
If you visit during the summer, you’ll also get to experience the River Party in Nestorio, Kastoria’s music festival, where 50,000 people gather for a massive celebration by the river in August.
But Kastoria’s charm doesn’t stop there. While we were strolling around, we couldn’t help but imagine how stunning the city must look in autumn, with maple trees lining the lakeshore and the surrounding hills covered in deciduous forests.
And during winter, the city transforms into a winter wonderland — the lake freezes over, creating a magical scene. For those looking for winter adventures, the Vitsi Ski Resort attracts beginners. There’s also Ragoutzaria, a wild winter festival in early January that celebrates Dionysus, the ancient Greek god of wine, festivity, pleasure, and ecstacy!
It’s clear that Kastoria offers something unique for every season!
Have Peace of Mind While Traveling!
Getting a travel insurance is optional, but we highly recommend this, especially when traveling abroad. Travel can be unpredictable, and though we hope we’ll never use it, having it gives us peace of mind in case of unexpected delays, cancellations, or emergencies.
For international destinations, consider PGA Sompo’s TravelJOY Plus insurance. You can GET IT HERE. Don’t forget to use WORTHIT for a special affordable rate.
Updates Log
2025 8 11 – First uploaded
Written by: Yosh Dimen and Mariah Cruz Photos by: Yosh Dimen Edited by: Asta Alvarez
Here are the best beaches in Western Australia, from the remote Kimberley, to the Perth area, to the white sands around Esperance.
Western Australia beaches are some of the most famous Down Under.
With soft white sand, the turquoise waters of the Indian Ocean, and far fewer crowds than Australia’s East Coast, many would argue that the West is best when it comes to beaches in Australia!
Western Australia is also such a massive state, so there is incredible diversity in the coastline.
Up north, you have rich red cliffs, remote Indigenous communities, and wild 4WD tracks. Picture camel rides on the beach and vibrant sunsets with no one else around.
A bit further south, you have the marine life-filled waters of Ningaloo Reef.
Then you have the busy and accessible coastline around Perth. South of that, you can find epic surf breaks around Margaret River and more gleaming white sand beaches around Esperance.
Western Australia honestly has some of the best beaches in the world!
Cottesloe Beach in Perth
Best Beaches In Western Australia
From the remote coves and bays of the Kimberley to the powdery white sands of Esperance, Western Australia has some truly spectacular beaches.
Here is our list of the best Western Australia beaches to add to your bucket list. The best way to get around is with a rental car, or even a 4WD if you plan to explore Cape Leveque and the Kimberley.
The best way to get around is to rent a car and explore on your own! We recommend Rental Cars, which has the largest range of vehicles for the best value on the market.
Best Beaches In The Northwest
These beaches are situated in the northern corner of Western Australia, from Ningaloo Reef up to the Kimberley.
The incredible Cable Beach near Broome
Cable Beach
The iconic Cable Beach is one of Australia’s most well-known destinations.
Located in Broome, Western Australia, Cable Beach has 22 kilometres of pristine white sand framed by striking red cliffs and the turquoise waters of the Indian Ocean.
With calm, warm waters perfect for swimming during the dry season, Cable Beach is a fabulous place to spend the day. Camel rides on the beach are also popular, particularly at sunset.
A sunset camel ride across the stunning sands of Cable Beach while the sun sets over the ocean is a must-do in Western Australia!
Roebuck Bay
Roebuck Bay, nestled along the eastern shores of Broome, is a vibrant marine sanctuary celebrated for its ecology and culture.
Designated as a Ramsar wetland and part of the Yawuru Nagulagun Roebuck Bay Marine Park, the bay’s expansive tidal mudflats serve as vital feeding grounds for hundreds of thousands of migratory shorebirds.
The bay’s diverse habitats include mangroves, seagrass beds, and cliffs, all of which support lots of different wildlife.
Culturally, Roebuck Bay holds deep importance for the Yawuru people, the area’s Traditional Owners, who continue to engage with the land and sea through traditional practices.
Pender Bay
Pender Bay is a National Heritage-listed coastal wilderness on the remote Dampier Peninsula of the Kimberley region.
Accessible only by four-wheel drive, the bay is one of the most secluded and gorgeous beaches in Western Australia.
From June to September, the bay serves as a calving ground for one of the world’s largest populations of humpback whales, making it a prime location for land-based whale watching.
The area is also rich in cultural heritage, traditionally recognised as a shared space among the Bardi, Nyul Nyul, and Nimanburr peoples.
Visitors can explore Aboriginal rock art sites, join cultural tours, or enjoy the beach by swimming, snorkelling, or fishing.
Perched at the northernmost tip of Western Australia’s Dampier Peninsula, Cape Leveque is an isolated coastal gem with much to offer.
The area is traditionally owned by the Bardi Jawi people, who have inhabited the region for thousands of years and continue to share their deep connection to the land and sea through cultural tours and storytelling.
Access to Cape Leveque has improved with the sealing of the Cape Leveque Road, though a four-wheel-drive vehicle is recommended for the final stretch.
The beaches of Cape Leveque have rich red sandstone cliffs, white sand beaches, and crystal-clear turquoise waters.
Insane views around Cape Leveque on the Dampier Peninsula
Ardyaloon (One Arm Point)
Ardyaloon, also known as One Arm Point, is a remote Aboriginal community situated at the northern tip of the Dampier Peninsula in Western Australia.
Home to the Bardi Jawi people, the community is renowned for its strong cultural traditions and deep connection to the sea.
Visitors can explore the Ardyaloon Hatchery, an Indigenous-run aquaculture center that cultivates trochus shells and other marine species.
The area also has stunning coastal vistas and beaches, including views of the Buccaneer Archipelago and the dramatic tidal movements of King Sound.
While there is no accommodation within Ardyaloon itself, nearby communities such as Lombadina and Cape Leveque provide lodging options.
Access to Ardyaloon requires a visitor permit, so make sure you get this in advance.
Best Beaches In The West
Here are the best beaches along the west coast of the state. This coastline stretches from Perth up to Ningaloo Reef!
Osprey Bay is a highlight of Cape Range National Park on Western Australia’s Coral Coast.
The bay has crystal-clear waters for snorkelling, where you can see sea turtles, diverse fish species, and vibrant coral formations just meters from the shore.
Osprey Bay Campground is also one of the best camping spots on the Coral Coast. There are 44 unpowered sites where you can camp right next to the beach and fall asleep to the sounds of the sea.
Accessible via Yardie Creek Road, the campground is a short drive from Exmouth and serves as a perfect base for exploring the surrounding natural wonders.
Turquoise Bay
Consistently ranked among Australia’s top beaches, Turquoise Bay is another highlight of Cape Range National Park near Exmouth.
Renowned for its pristine white sands and crystal-clear waters, Turquoise Bay has some incredible snorkelling spots that you can access right from the shore.
As part of the UNESCO World Heritage-listed Ningaloo Coast, here you can observe vibrant coral gardens that rival that of the Great Barrier Reef on the East Coast.
Turquoise Bay has a “drift snorkel” where you can cruise with the current, and there are also calmer waters for families and beginner snorkellers.
The Ningaloo Coast – where stunning coral reefs lie right offshore!
Coral Bay
Coral Bay is a must-visit for any avid divers or nature lovers. If you want to explore the UNESCO World Heritage-listed Ningaloo Reef, Coral Bay is the perfect gateway!
You can snorkel in the exquisite coral gardens right from the shore. The bay’s crystal-clear waters are home to over 500 species of fish, manta rays, turtles, and, seasonally, whale sharks and humpback whales.
Coral Bay is a popular place for guided swimming or snorkelling tours, where you can swim right alongside marine life such as manta rays or whale sharks.
For those preferring to stay dry, glass bottom boat tours provide a window into the underwater wonders.
When you visit Shell Beach, you’ll realise it’s accurately named as the entire shore is composed of tiny white cockle shells! These shell fragments blanket the coast for over 60 kilometers. It’s an incredible natural phenomenon to see.
Visitors to Shell Beach can enjoy the serene, clear waters ideal for swimming and snorkeling, with the high salinity providing extra buoyancy.
Easily accessible via Shark Bay Road, about 45 kilometers southeast of Denham, Shell Beach offers an otherworldly experience unlike any sandy beach.
Jurien Bay Beach
Another one of the best beaches in Western Australia is Jurien Bay Beach.
Situated approximately 220 kilometers north of Perth, the beach offers a serene setting for swimming, fishing, and kayaking in the calm waters.
The beach is also home to the Jurien Bay Jetty, a popular landmark that extends into the ocean. It’s the perfect place for a scenic stroll or a day of fishing.
Nearby, the Jurien Bay Marine Park has amazing coral reefs and a healthy popular of rare Australian sea lions.
Sea lions in Jurien Bay Marine Park
Best Beaches In The Perth Area
If you’re not planning to stray from the Perth area, here are the best beaches around the city and the nearby Rottnest Island.
Cottesloe Beach
Easily one of the most beautiful beaches in Perth, Cottesloe Beach has white sand, sapphire waters, and a vibrant community atmosphere.
Located just 15 minutes west of Perth’s city center, Cottesloe Beach is the perfect escape from the city for a day of swimming, snorkelling, surfing, and sunbathing.
The beach is sheltered by offshore reefs and patrolled by lifeguards, ensuring a safe environment for visitors of all ages.
A highlight of Cottesloe Beach is the annual Sculpture by the Sea exhibition, where local artists display incredible sculptures along the shoreline.
The beach is also home to the historic Indiana Tea House, a landmark building with lovely ocean views.
A few of the best Western Australian beaches are located on Rottnest Island. This is one of the best day trips from Perth!
Rottnest Island has countless beautiful beaches, but Pinky Beach is one of the best.
Located on the island’s northern shore, Pinky Beach is sheltered from prevailing winds and has calm, clear waters ideal for swimming and beginner snorkelling.
A highlight of Pinky Beach is its proximity to the historic Bathurst Lighthouse, which provides a picturesque backdrop and can be reached via a scenic staircase from the beach.
The beach is also a prime spot for sunset viewing, with the setting sun casting a beautiful pink hue over the waters, giving the beach its name.
Parakeet Bay is another one of the best beaches on the northern shore of Rottnest Island.
This serene and secluded beach has gleaming white sands and calm, turquoise waters. It’s also sheltered by rocky outcrops and usually has tranquil conditions for swimming or snorkelling.
The gentle, shallow waters of Parakeet Bay make it a safe spot for families and less experienced swimmers.
Accessible by bike or the Island Explorer bus, Parakeet Bay provides a perfect escape for those looking to unwind amidst Rottnest Island’s stunning coastal scenery.
Rottnest Island has some of the best beaches in Western Australia!
Little Salmon Bay
Another one of the most stunning beaches on Rottnest Island is Little Salmon Bay.
Tucked away on the southern edge of the island, Little Salmon Bay also has the white sand and turquoise water that Western Australia beaches are so famous for.
This sheltered cove is part of a protected marine sanctuary. There is a marked snorkel trail at Little Salmon Bay, where underwater signs guide visitors through vibrant coral gardens.
Flanked by rocky outcrops and grassy dunes, Little Salmon Bay is a gorgeous island destination.
Elevate your experience by combining the ferry ride with skydiving over Rottnest Island! The view of the beaches from the sky is unparalleled.
Bathers Beach
Beach lovers should also consider a visit to Bathers Beach while they visit Perth. This lovely beach in Fremantle provides a historical journey through time.
Also known as Manjaree by the Whadjuk Noongar people, Bathers Beach is rich in cultural and historical significance.
It served as a vital meeting and trading place for the Whadjuk community throughout history. In 1829, Captain Charles Fremantle landed here, marking the beginning of European settlement in the region.
Bathers Beach is located beneath the historic limestone cliffs of Arthur Head Reserve, home to the Round House—the oldest public building in Western Australia.
The beach itself also offers gorgeous sunsets and swimming conditions.
Scarborough Beach
Scarborough Beach is another contender for the most picturesque beach in Perth. It’s actually often considered one of the best Western Australian beaches!
Just 15 minutes northwest of Perth’s city center, Scarborough Beach is a scenic beach but also a dynamic and vibrant coastal destination.
The beachfront has lots of nice amenities, including a heated ocean pool, a skate park, and the family-friendly Whale Playground.
There is some great surf, and the beach is patrolled year-round. The bustling esplanade also has lots of cafes, bars, and restaurants.
These amazing beaches are located south of Perth, along the southwest and south coast of Western Australia. From the iconic Lucky Bay to the beaches around Margaret River, there are lots of beautiful places to explore!
Meelup Beach
As you head south of Perth into the southwest of Western Australia, there are stunning beaches galore.
The Margaret River region has some fabulous beaches, notably Meelup Beach near Dunsborough.
Nestled within Meelup Regional Park, this northeast-facing beach offers calm, sheltered conditions ideal for swimming, snorkeling, and paddleboarding.
There are also some shaded grassy areas, picnic tables, and barbecue facilities nearby, making Meelup Beach the perfect place for a relaxing day by the sea.
Surrounded by native bushland and granite outcrops, Meelup Beach also serves as a starting point for scenic coastal walks, offering visitors breathtaking views of Geographe Bay and opportunities to spot local wildlife.
There is some world-class whale watching in this part of the Margaret River region as well!
Hamelin Bay
Another one of the best Western Australia beaches is Hamelin Bay in the Margaret River region. It’s just 30 minutes south of Margaret River town.
The bay is particularly famous for its friendly stingrays, including smooth stingrays, black stingrays, and eagle rays. These rays often glide gracefully through the shallow waters near the shore, offering visitors an unforgettable wildlife experience.
Beyond the marine life, Hamelin Bay has opportunities for swimming, snorkelling, and exploring nearby shipwrecks.
The surrounding Ngari Capes Marine Park and coastal cliffs provide scenic walks and panoramic views as well. There is lots to do in the beautiful Hamelin Bay!
Hamelin Bay, a gem of the Margaret River region
Shelley Beach
Shelley Beach, nestled within West Cape Howe National Park near Albany, Western Australia, is a secluded coastal gem perfect for outdoor adventures.
Surrounded by ancient granite boulders estimated to be over 1 billion years old, Shelley Beach is a beautiful spot for swimming and relaxing.
It’s also a fantastic fishing spot, with opportunities to catch species like Australian salmon, mulloway, whiting, and herring.
Hikers can explore nearby walking trails, including sections of the renowned Bibbulmun Track.
As the only section of West Cape Howe National Park that is accessible by two-wheel-drive vehicles, Shelley Beach is a highlight of Australia’s southwest.
Top things to do at Misery Beach include fishing, swimming, and taking on the scenic coastal trails.
Lucky Bay
One of the most iconic beaches in all of Australia is Lucky Bay. With fine white sand and pristine waters, Lucky Bay is picture-perfect.
Travellers flock to Lucky Bay to spot the iconic kangaroos that love to hang out on the sand. There is nothing quite as Australian as seeing kangaroos on the beach!
Lucky Bay is located in Cape Le Grand National Park near Esperance. This pristine stretch of coastline is perfect for swimming, fishing, kayaking, snorkelling, and relaxing in an idyllic setting.
Visitors can also explore nearby hiking trails like the Coastal Trail, which provides breathtaking views of the surrounding landscapes.
For those wishing to extend their stay, the Lucky Bay Campground offers facilities such as solar-heated showers and picnic areas.
Kangaroos on Lucky Bay Beach
Greens Pool and Elephant Rocks
Greens Pool and Elephant Rocks in William Bay National Park near Denmark, Western Australia, are two of the region’s most captivating natural attractions.
Greens Pool is known for its gorgeous turquoise waters surrounded by a ring of giant granite boulders.
A short walk from Greens Pool leads to Elephant Rocks, where massive, rounded granite rock formations resemble a herd of elephants wading in the shallow waters.
Visitors can descend a staircase between the rocks to access the secluded Elephant Cove, a picturesque beach perfect for photography.
Greens Pool and Elephant Rocks are both unique geological sites that showcase the natural beauty of Western Australia.
Little Beach is one of the most beautiful beaches near Albany, Western Australia.
This secluded cove offers panoramic views towards Mount Manypeaks and Waychinicup National Park.
A short walk from Little Beach leads to Waterfall Beach, where a seasonal waterfall cascades onto the shore.
Accessible via a well-maintained path from the car park, Little Beach is part of a protected area that supports diverse wildlife, such as the endangered noisy scrub-bird.
Whether you’re seeking relaxation or adventure, Little Beach in Two Peoples Bay Nature Reserve is a fabulous place to visit!
Waterfall Beach
Another one of the most beautiful beaches in Western Australia is Waterfall Beach.
This secluded crescent of white sand and turquoise water is just a 1km walk from Little Beach.
Combine the two into one trip! The walk between the beaches is beautiful as well.
Waterfall Beach is sheltered by rugged granite outcrops and is unpatrolled, so it really feels like a hidden gem.
From the rocks about Waterfall Beach, a waterfall cascades through the vegetation onto the shore. Hence the name!
Hellfire Bay is another highlight of Cape Le Grand National Park near Esperance.
I might be sounding like a broken record, but Hellfire Bay also has captivating white sands and turquoise water. Western Australia is absolutely packed with beaches like this!
The rugged mountains and granite cliffs add a bit of texture to the classic beach vibes.
Explore the best of the area by hiking the Cape Le Grand Coastal Trail, which connects Hellfire Bay with nearby Thistle Cove and Le Grand Beach.
Or join a guided 4×4 tour of Cape Le Grand National Park to see Hellfire and some other beaches and sand dunes with an expert guide!
Twilight Beach
All the beaches around the Esperance area are incredible. But Twilight Beach is often considered one of the best!
This picture‑perfect coastal haven has, of course, stunning natural colours with its brilliant white sand and vibrant blue waters.
Protected on its western end by offshore rock formations, the pristine beach offers calm, shallow waters perfect for young children and beginner surfers. The eastern side of Twilight Beach has bigger waves ideal for more experienced surfers.
Twilight Beach is beautiful even in cloudy weather.
Wharton Beach
Last but not least on our list of the best beaches in Western Australia is Wharton Beach.
Easily accessed via a 4WD beach drive or by parking above at Duke of Orleans Bay Caravan Park, Wharton Beach is popular yet manages to feel wild and secluded.
This seldom‑crowded gem is perfect for swimming, snorkelling, fishing, surfing (particularly near the western end), and even dolphin spotting.
Stretching across a sweeping 4.5 km crescent, Wharton Beach is consistently praised as one of Australia’s most stunning beaches!
DISCLAIMER: Some of the links in this article are affiliate links, which means if you book accommodation, tours or buy a product, we will receive a small commission at no extra cost to you. These commissions help us keep creating more free travel content to help people plan their holidays and adventures. We only recommend the best accommodations, tours and products that ourselves or our fantastic editorial team have personally experienced, and regularly review these. Thanks for your support, kind friend!
Visiting Disneyland is a bucket list item for many of us, whether you grew up watching Disney movies or you simply want to experience the magic of the happiest place on earth. And if you’re Filipino, Hong Kong Disneyland is where you’ll probably see fairy tales come to life for the first time. Located on Lantau Island, Hong Kong Disneyland is roughly a two-and-a-half-hour flight away from Manila.
If you’re planning a visit to this magical theme park, this guide is for you! Whether it’s your first time or you’re coming back after a few years, this post will help you plan your trip and make the most of your visit to Hong Kong Disneyland. We’ll take you through everything you need to know, including ticket prices, must-see attractions, food options, and some tips for your most magical Disneyland experience!
Hong Kong has a subtropical climate, so it can get really hot and humid. If you want to visit during the cooler months, the best time would be between November to April when the temperature ranges from around 10 to 20°C. Meanwhile, May to October are the hottest months with temperatures reaching up to 30°C. However, it’s important to note that these months also experience more rainfall, so if your trip will be within these months, make sure to pack not only sun protection, but rain gear as well.
Weekends are generally busier in the park, so if you can, plan your visit on a weekday to possibly avoid large crowds. Also, remember that the park will likely be crowded as well during holidays like Christmas and Chinese New Year.
Where to Get Tickets
There are different types of park tickets, but for tourists or short-term visitors, the best options are the 1-day or 2-day tickets.
Hong Kong Disneyland Ticket Rates
1-Day Ticket: General Admission, HK$ 849; Child (3-11 y/o) and Senior, HK$ 639
2-Day Ticket: General Admission, HK$ 859 to HK$ 1039; Child (3-11 y/o) and Senior, HK$ 669 to HK$ 805
Note: If you purchase a 2-day ticket, your park visits must be two consecutive days.
Hong Kong Disneyland Add-Ons
Aside from the admission tickets, you can also purchase add-ons like the early park entry pass or Disney Premier Access.
Early Park Entry Pass: HK$ 199
Disney Premier Access: HK$ 199 to HK$ 749
Early Park Entry Pass
The Early Park Entry Pass allows you to enter Hong Kong Disneyland up to one hour prior to the official opening time, giving you an opportunity to experience the popular areas, such as the World of Frozen and Fantasyland, before the general crowd rushes in.
During this time, you can enjoy the following attractions:
Cinderella Carousel
Dumbo the Flying Elephant
The Many Adventures of Winnie the Pooh
Frozen Ever After
Wandering Oaken’s Sliding Sleighs
Disney Premier Access
Meanwhile, Disney Premier Access serves as a fast pass that will give you one-time priority entry or allow you to skip the lines at select attractions and/or give you access to designated viewing areas for select shows, depending on the package you avail. If you want to secure a perfect viewing spot for the “Momentous: Party in the Night Sky”, you can purchase a package that covers this show/experience.
Walk-in vs Online Purchase
You can purchase your tickets at the Hong Kong Disneyland Park’s Main Entrance Ticket Booths and Guest Relations, but it is highly recommended and more convenient to get your tickets in advance online. Guests are also required to make a reservation for their park visit after purchasing tickets. We’ll discuss how to make a reservation in the next section of this article. For discounted tickets, book by clicking the link below.
Once you’ve purchased a ticket, you need to make a reservation for your visit date on Disneyland Hong Kong’s official website. This is a requirement for all guests. However, if you book through third-party merchants like Klook or KKDay, park visit reservations might already be included in the package. So make sure to read the package details carefully when you book a ticket to find out whether or not you need to make a reservation on Disneyland’s website.
You can make a reservation as early as 90 days prior to your intended date of visit. This is Hong Kong Disneyland’s measure to manage the number of people entering the park on any given day. Once their quota is full, reservations will be closed. Those who don’t have a prior reservation may be refused entry into the park once the full capacity is reached.
Photo Credit: Hong Kong Disneyland Official Website
Here’s how you can make a reservation:
Visit Disneyland’s reservation website. Click “Next” to start your registration.
Create a MyDisney HK account by clicking the “Create Account” button. Then, enter the following details: Last Name, First Name, Birthday, Place of Residence, Mobile Number, Email Address, and Password. Once you’re done, agree to the terms of use and click “Create Account”.
Once you’re account is set up, go back to the park reservation page. Click “Reserve”.
On the Ticket Registration page, click “Register Now”. Select the admission type and enter your ticket reference number.
Choose your preferred date. Finally, confirm your reservation.
How to Get to Hong Kong Disneyland
With Hong Kong’s efficient transportation system, getting to Disneyland is easy peasy. When taking public transportation, you have the option to take the bus or the train. To help you navigate, you can easily use Google Maps or the MTR app or website. For reference, here’s how you can get to Hong Kong Disneyland from the airport, Central, and Tsim Sha Tsui.
From the Airport
Via Airport Express
Board the train at Airport Platform 2 towards Hong Kong.
Get off at Tsing Yi Station and transfer to Tung Chung Line. Hop on the train at Platform 3 towards Tung Chung.
Get off at Sunny Bay Station. Transfer to Disneyland Resort Line on Platform 3.
Alight at Disneyland Resort Station.
Via Bus
At the Airport Ground Transportation Centre, board a bus bound for Lantau Link Bus – Bus Interchange. These are bus routes that starts with ‘A’, serviced by CityBus or Long Win Bus. During our trip, we hopped on the A11 bus.
Alight at Lantau Link Bus – Bus Interchange. This is two stops away from the airport.
Board the R8 bus to Hong Kong Disneyland. The bus stop for the R8 bus is at the far end of the interchange, near the stairs going to the underpass.
Get off at Hong Kong Disneyland stop.
From Central
Via MTR
Get on the Tung Chung Line at Hong Kong Station. Board the train at Platform 3 or 4 towards Tung Chung.
Alight at Sunny Bay Station and transfer to the Disneyland Resort Line.
Ride the train at Sunny Bay Station Platform 3 and hop off at Disneyland Resort Station.
From Tsim Sha Tsui
Via MTR
Board the Tsuen Wan Line at Tsim Sha Tsui Station. Hop on the train at Platform 1 towards Tsuen Wan.
Alight at Lai King Station, then transfer to a Tung Chung-bound train on the Tung Chung Line.
Get off at Sunny Bay Station. Transfer to the Disneyland Resort Line and board a train to Disneyland Resort Station.
Hong Kong Disneyland Opening Hours
Hong Kong Disneyland’s usual operating schedule is 10:00AM to 9:00PM. However, opening hours varies depending on different factors. To know the exact park opening hours on your intended time of visit, you may check Disneyland’s park calendar.
Things to Do at Hong Kong Disneyland
Hong Kong Disneyland has eight themed areas that you can explore: Main Street, U.S.A., Tomorrowland, Fantasyland, World of Frozen, Adventureland, Toy Story Land, Mystic Point, and Grizzly Gulch. Each zone has rides, attractions, shops, and food spots that you can try and check out during your visit. Here’s a rundown of what you will find in each zone.
Main Street, U.S.A.
This zone welcomes you as you enter the park. Along this street is where you can catch the “Friendtastic!” Parade, where you will see many Disney characters parading on floats and cast members dancing along.
Attractions & Experiences
Art of Animation
Animation Academy
Main Street Vehicles
Hong Kong Disneyland Railroad – Main Street Station
Tomorrowland
Tomorrowland is Disneyland’s futuristic zone. This is where sci-fi themed attractions and rides are located. If you’re a marvel or star wars fan, this is the zone for you!
Rides & Attractions
Hyperspace Mountain
Ant-Man and the Wasp: Nano Battle!
Iron Man Experience
Iron Man Tech Showcase
Fantasyland
This is where your fairytale dreams will come true at Disneyland. Towering over this zone is the most iconic structure in Disneyland — the Castle of Magical Dreams. Surrounding the castle are rides and attractions inspired by classic Disney characters.
Rides & Attractions
Mad Hatter Tea Cups
The Many Adventures of Winnie the Pooh
Cinderella Carousel
Dumbo the Flying Elephant
Mickey’s PhilharMagic
It’s a Small World
Mickey and the Wondrous Book
Fairy Tale Forest
Fantasy Gardens
World of Frozen
Hong Kong Disneyland’s newest themed zone is the World of Frozen. When you enter this zone, you’ll feel like you are transported to Arendelle. This is also one of the most, if not the most, popular zones in Hong Kong Disneyland right now, so expect longer wait times on the frozen rides.
Rides & Attractions
Frozen Ever After
Wandering Oaken’s Sliding Sleighs
Playhouse in the Woods
Adventureland
Adventureland is an island-themed area. There are a few rides and attractions located here including shows you can watch.
Rides & Attractions
Jungle River Cruise
Moana: A Homecoming Celebration
Festival of the Lion King
Liki Tikis
Toy Story Land
Here in Toy Story Land, Andy’s toys come to life. Not only are the rides toy-themed, but this whole area is also decorated with toys from the famous Disney franchise. You’ll even get to meet toy soldiers walking around this zone!
Toy Soldier Parachute Drop (Left) and RC Racer (Right)
Rides & Attractions
RC Racer
Toy Soldier Parachute Drop
Slinky Dog Spin
Barrel of Fun
Mystic Point
Mystic Point is a section exclusively made for Hong Kong Disneyland. It is home to Mystic Manor, which, for us, is one of the park’s best attractions. On this ride, you’ll learn about the story of Mystic Manor and meet a monkey named Albert.
Rides & Attractions
Mystic Manor
Garden of Wonders
Mystic Point Freight Depot
Grizzly Gulch
This zone is inspired by the American frontier or the Old West similar to the Frontierland in Disneyland in Anaheim, California. In Hong Kong Disneyland, Grizzly Gulch is home to only one ride — a thrilling rollercoaster-type that will take you around a mountain and a gold mine.
Rides & Attractions
Big Grizzly Mountain Runaway Mine Cars
Geyser Gulch
Wild West Photo Fun
Most Popular Rides
If you’re visiting Hong Kong Disneyland for the first time and you’re looking for recommendations for rides you shouldn’t miss, here are the most popular attractions in the park.
Frozen Ever After (Left), Jungle River Cruise (Top Right), and Mystic Manor (Bottom Right)
Frozen Ever After
Location: World of Frozen Type: Indoor Reminder! Children below 7 years old must be accompanied by a person 16 years old and above. Pregnant women should not ride.
Mystic Manor
Location: Mystic Point Type: Indoor Reminder! Children below 7 years old must be accompanied by a person 16 years old and above.
Big Grizzly Mountain Runaway Mine Cars
Location: Grizzly Gulch Type: Outdoor, Thrill Reminder! Not recommended for: (1) guests with high blood pressure, heart, back or neck problems, motion sickness, or other conditions; (2) guests with a height of 112cm and below; (3) pregnant women. Children below 7 years old must be accompanied by a person 16 years old and above.
Hyperspace Mountain
Location: Tomorrowland Type: Indoor, Thrill Reminder! Not recommended for: (1) guests with high blood pressure, heart, back or neck problems, motion sickness, or other conditions; (2) guests with a height of 102cm and below; (3) pregnant women. Children below 7 years old must be accompanied by a person 16 years old and above.
Iron Man Experience
Location: Tomorrowland Type: Indoor Reminder! Not recommended for: (1) guests with high blood pressure, heart, back or neck problems, motion sickness, or other conditions; (2) guests with a height of 102cm and below; (3) pregnant women. Children below 7 years old must be accompanied by a person 16 years old and above.
RC Racer
Location: Toy Story Land Type: Outdoor, Thrill Reminder! Not recommended for: (1) guests with high blood pressure, heart, back or neck problems, motion sickness, or other conditions; (2) guests with a height of 120cm and below; (3) pregnant women. Children below 7 years old must be accompanied by a person 16 years old and above.
Toy Soldier Parachute Drop
Location: Toy Story Land Type: Outdoor, Thrill Reminder! Not recommended for: (1) guests with a height of 81cm and below; (2) pregnant women. Children below 7 years old must be accompanied by a person 16 years old and above.
It’s a Small World
Location: Fantasyland Type: Indoor Reminder! Children below 7 years old must be accompanied by a person 16 years old and above.
Jungle River Cruise
Location: Adventureland Type: Outdoor Reminder! Children below 7 years old must be accompanied by a person 16 years old and above.
Other Activities
Parades and Shows. Parades and shows will complete your magical experience in Disneyland, so you shouldn’t miss them. Among the shows you should watch is the Disney Friends Live: Party at the Castle, which happens at the Castle Stage multiple times throughout the day. You can also see more Disney characters at the “Friendtastic!” Parade along Mainstreet, U.S.A. The parade happens twice daily (1:00 PM and 5:15 PM). And of course, the highlight show of Hong Kong Disneyland is Momentous: Party in the Night Sky, which happens at 8:30 PM and is the best end to your Disneyland adventure.
Meet Disney Characters. If you want to get up close to your favorite Disney character, you can meet them during character greetings. You can interact and take photos with them at designated areas around the park. Keep in mind that these usually have specific schedules too, so you’ll need to check the schedule first. Check the Hong Kong Disneyland app for the schedule and location of the character experiences.
Souvenir Shopping. During your trip, if you want to grab a souvenir for yourself and pasalubong for your loved ones, there are multiple shops throughout the park. Along Main Street, you’ll find a few stores you can go to for different Disney merchandise. Each themed zone and some attractions also has their own souvenir stores.
Where to Eat
When you get hungry while you’re at the park (and for sure, you will), there are many food options available. You’ll find various restaurants, food stalls, snack carts, and cafes to choose from. But keep in mind that, like other theme parks and tourist destinations, food and drinks in Hong Kong Disneyland are on the pricier side. If you’re on a budget and still want to complete your Disneyland experience, grab a snack or two!
Marvel Burger Meal (Left) and Two-Piece Fried Chicken Meal (Right)
Another experience you can add to your Disneyland adventure is the Arendelle Royal Breakfast Buffet. Here, you’ll enter the park an hour earlier to enjoy breakfast at World of Frozen. If you or your kids are Frozen fans, this is the best addition because you’ll also get to meet Anna and Elsa and the Royal Arendellian Troubadours. You can book this breakfast buffet and other dining packages by following the link below.
Here’s a list of restaurants and cafés across the park and their location. This includes quick service or fast-food type restaurants and table service or casual dining. There are also various food kiosks or outdoor carts in different zones, so if you’re in need of a quick snack, it won’t be hard to find.
Table Service/Casual Dining Restaurants
Main Street Corner Cafe Location: Main Street, U.S.A.
Plaza Inn Location: Main Street, U.S.A.
Explorer’s Club Restaurant Location: Mystic Point
River View Cafe Location: Adventureland
Quick Service/Fast Food Restaurants
Main Street Bakery Location: Main Street, U.S.A.
Market House Location: Main Street, U.S.A.
Comet Cafe Location: Tomorrowland
Starliner Diner Location: Tomorrowland
Golden Crocus Inn Location: World of Frozen
Tahitian Terrace Location: Adventureland
Royal Banquet Hall Location: Fantasyland
Clopin’s Festival of Food Location: Fantasyland
Other Tips and Reminders
To help ensure that you can make the most out of your trip, here are some tips and reminders to help you plan your trip.
Check the park calendar before your trip. Disneyland’s opening hours often vary. Before your trip, make sure to double-check the park calendar to see the park hours, especially if you plan on being there as soon as it opens.
Download the Hong Kong Disneyland App. This app has everything you will need during your Disneyland visit. It has a map where you can find the locations of restaurants, shops, bathrooms, and of course, the attractions. But aside from the location, you can also see the wait times of each attraction in real time, which can help you decide which attraction to go to next. Schedules of shows and parades are also available. You can even purchase a Disney Premiere Access Pass for attractions on the app if you decide last minute.
Avail Early Park Entry Pass or Disney Premiere Access Pass. If you think you won’t have enough time to explore Disneyland with a regular ticket during regular park hours, you can avail of these add-ons to maximize your time.
Bring a reusable water bottle. As mentioned earlier, food and beverages at the park are on the pricey side. A bottled water or soda, for example, is usually HK$ 30. To save money, bring a reusable water bottle and refill it at the drinking fountains across the park.
Wear Comfortable Clothing. Let this be your warning: you’ll do A LOT of walking. Keep your feet from hurting and avoid blisters by wearing your most comfortable shoes. If you’re visiting during summer, wear light clothing and don’t forget to use sun protection too! And if your visit is during the rainy season, make sure to bring a rain jacket with you.
For an even more magical Disney experience, book your stay at one of the Disney hotels at Hong Kong Disneyland Resort. These are the three hotels to choose from:
Where to Stay in Hong Kong
Outside of Disneyland, the closest area to Disneyland is Tung Chung and Hong Kong SkyCity. These areas are also near the airport. However, if you’re also exploring other parts of Hong Kong during your trip, you may also consider other areas like Tsim Sha Tsui or Central.
For more details about different areas to stay in Hong Kong, you can check out our Where to Stay in Hong Kong article. But you may also check out these top accommodations in Hong Kong based on online user reviews for recommendations.
Getting a travel insurance is optional, but we highly recommend this, especially when traveling abroad. Travel can be unpredictable, and though we hope we’ll never use it, having it gives us peace of mind in case of unexpected delays, cancellations, or emergencies.
For international destinations, consider PGA Sompo’s TravelJOY Plus insurance. You can GET IT HERE. Don’t forget to use WORTHIT for a special affordable rate.
Updates Log
2025 7 30 – First uploaded
Photos by: Mariah Cruz, Yosh Dimen, and Asta Alvarez
We’ve been busy putting the latest action camera to the test in our GoPro HERO 13 review! Let’s dive into the new features, mods and upgrades to see if it’s worth upgrading your gear to the newest GoPro HERO13 Black.
The wait is over, and it was worth it. We’ve had our hands on the GoPro HERO13 Black for a few weeks now, and it’s everything we hoped for and then some.
This isn’t just an incremental tech upgrade – it’s a serious leap forward complete with new creative accessories that’s going to change how you capture your adventures.
Whether you’re diving into the deep blue or scaling mountain peaks, the GoPro HERO 13 is your ultimate sidekick, ready to deliver jaw-dropping footage every step of the way.
There’s a hell of a lot to be excited about.
The new 1900mAh battery is a game-changer, giving us up to three hours of recording time at 1080p. Or two full 1-hour scuba dives in Palau on the one battery – yep, honestly.
No more worrying about your camera dying mid-shoot. The HERO 13 is built to keep up with your most epic adventures.
And then there’s the new lens mods. There’s the Ultra Wide Lens—capturing a 177-degree field of view which like seeing the world in a whole new way.
Perfect for those expansive landscapes or getting up close and personal with your subject, without losing any of that sharp detail.
Like getting up close though? Throw on the Macro Lens Mod for, you guessed it, insane macro shots with an incredibly short focus point.
Or get real creative with the new Neutral Density (ND) filters, where you can slow the shutter right down in the middle of the day to introduce motion blur.
And if you’re into cinematic shots, the new Anamorphic Lens Mod is a dream come true, which creates widescreen footage with signature lens flares – like having a Hollywood camera in the palm of your hand.
But where the HERO 13 really shines is in its usability. The new magnetic latch system makes mounting the camera a breeze, and it feels more secure than ever.
Plus they’ve thrown in a new magnetic door latch with power cable so you can keep the unit charged up in the elements during long time lapses.
All of this, plus the continued excellence in stabilisation with HyperSmooth 6.0, makes the GoPro HERO 13 a must-have for anyone serious about capturing life in the most vivid, dynamic way possible.
But we’re in 2025 after all, and it’s expected for a camera to get better and better every release.
And with so much competition coming from the likes of Insta360 and DJI, does the new GoPro cut it?
That’s what we set out to discover by putting the camera to the test. Welcome to our GoPro HERO 13 review, where we’ll dive into all the latest features, how they perform in the real world, and most importantly, is it worth upgrading if you are still rocking an older model.
(If you’re interested, you can also check out our detailed HERO12 review from last year.)
SPECIAL DEAL: We have an epic deal happening for NOMADasaurus readers right! Use the code “nomadasaurus10” at checkout to unlock a further 10% discount on top of the already special deals GoPro have available. This discount is exclusive to us. Simply Click the button below to check out the special pricing and bonus items.
Straight from the box to underwater in Raja Ampat – all part of the job of testing out the newest camera in our GoPro HERO13 Review.
Our Honest GoPro HERO 13 Black Review
Whether you’re upgrading from an older model or jumping into the GoPro ecosystem for the first time, the HERO 13 is up the challenge.
All the new bells and whistles sound fancy, but what the hell is a neutral density filter anyway and why do you need one?
And is 1900mAh of battery really that much better than 1720mAh?
Magnetic latches and improved UI? HLG HDR? Burst Slo Mo?
Sounds like a bunch of things that aren’t really necessary.
Or are they?
Read on to discover everything there is to know about this absolute beast of a camera.
The Latest Features
Here is a rundown of the new features on the new GoPro Hero 13.
We’ll go into more detail on some of these key features later on, but here is a summary of the highlights!
Four new HB-Series Lens options to completely revolutionise how you capture content
Ultra Wide Lens Mod with new 1:1 aspect ratio
New Macro Lens Mod with 4x closer focus than the standard lens
New Anamorphic Lens Mod with widest ever FOV – 21:9!!
New battery with massive life improvement some settings
GPS is back!!! Yep, we asked, they delivered
New magnetic door and power cable kit – allows you to easily use external power
A third way to mount with the magnetic bottom
HLG HDR Video colour profile
New burst Slo-Mo feature in 720p400, 900p360, 5.3K120
40% faster Wifi speeds
Customisable presets
Audio tuning
And then all the best features that we saw on the 12, such as:
Bluetooth
3 microphones and 3-mic processing
4k wide and 1080p wide video settings
2.7K Linear + Horizon Lock
8:7, 16:9, 4:3, and 9:16 video settings
Time lapse and night lapse photo options
27 megapixels for photos
Hypersmooth 6.0 video stabilisation
Interval photo mode shooting a raw image every 3 seconds makes capturing selfies in epic places easier than ever.
The New HB-Series Lenses – Transforming the GoPro into a Versatile Unit
One of the most exciting upgrades, and the most obvious really, that we’ll dive into with our GoPro HERO13 Black review is the introduction of new lens mods, each designed to expand your creative possibilities and make capturing incredible footage easier than ever.
These mods aren’t just accessories – they’re tools that transform the way you shoot, opening up new perspectives and artistic opportunities that were previously out of reach with a standard action camera.
Let’s see what they have released…
Macro Lens Mod
Let’s start with the Macro Lens Mod. This little powerhouse lets you get up close and personal with your subject, capturing intricate details that have always been impossible with previous GoPro models.
Ever see something awesome and get your GoPro real close to it, only to find out later that the entire subject is out of focus?
Yep, happens to us all the time. Normally you’d have to shoot far back and crop in heavily, assuming you could even see it properly if you aren’t close.
That’s where this new mod comes in.
Whether you’re filming small insects, intricate textures, or any small subject that demands attention to detail, the Macro Mod delivers stunning clarity and sharpness.
The 3x magnification lets you fill the frame with your subject, turning ordinary shots that were once not possible into extraordinary ones.
Imagine capturing the dewdrops on a leaf or the texture of a butterfly’s wings in perfect focus. Game changer!
Using the HB-Series Macro Lens opens up a whole new world of creative possibilities.
Ultra Wide Lens Mod
Next up, the Ultra Wide Lens Mod.
We haven’t managed to get our hands on this one yet, but have been using the Max Lens Mods on the HERO12 for a while and love it.
With a 177-degree field of view, this mod is the go-to for capturing epic, sweeping landscapes or immersive action shots.
Whether you’re mountain biking down a gnarly trail dropping in to a sheer face, the Ultra Wide Mod ensures you capture everything in your frame.
And best of it all it now opens up a new 1:1 aspect ratio too, so you can crop later for social media or YouTube with the one clip.
It’s perfect for when you want to convey the sheer scale of your environment, bringing a dynamic, cinematic quality to your footage that pulls viewers right into the scene.
Anamorphic Lens Mod
The Anamorphic Lens Mod is a bit more niche, but for those that like to add a cinematic flair to their videos, it’s going to be an essential tool.
This lens gives your footage that widescreen, letterbox look, complete with those gorgeous horizontal lens flares that you usually only see in big-budget movies.
Picture shooting a sunset or a city skyline at night, and the Anamorphic Mod adds a level of drama and professionalism that’s bound to impress.
And let’s not forget the ND filters. These might not sound as flashy as the other mods, but they’re essential for controlling exposure in bright conditions.
If you’re capturing video on a sunny day or dealing with tricky lighting situations, ND filters help you maintain that cinematic motion blur by letting you shoot with slower shutter speeds, even in harsh light.
They’re perfect for creating smooth, professional-looking footage without the dreaded overexposure.
Or if you’re a photographer, using an ND Filter to slow down the shutter speed allows you to shoot a long exposure in bright conditions.
Think silky smooth waterfalls or motion blur from cars. The possibilities are endless.
You can still manually adjust your settings and use Motion Blur Protune to choose the level of blur you want. But the filter does most of the work for you.
The ND Filter kit comes with 4 different stop levels: ND4, ND8, ND16 and ND32.
Auto Detection
What makes these lens mods even more awesome is the new auto-detection feature.
The HERO13 Black is smart enough to recognise which lens mod you’ve attached and automatically adjust its settings to optimise performance.
No more fiddling with menus or worrying about whether you’ve got the right setup – the camera does the hard work for you. This means you can focus on what really matters: capturing incredible footage with ease.
The HB-Series Macro Lens mounted on the front of the GoPro HERO 13 Black.
Bigger Battery Life
While the GoPro HERO12 took the already pretty awesome battery life to a new level, the HERO 13 Black takes it a step further thanks to its brand new 1900mAh Enduro Battery, compared to last year’s 1720mAh battery.
With the most powerful and durable battery that GoPro has ever made, you can enjoy a much higher battery capacity and improved power efficiency.
That means you can spend longer adventuring out in hot or cold environments because the GoPro HERO 13 can last longer than any other GoPro.
I’ve been testing this new battery out while scuba diving around Raja Ampat, Palau and Micronesia, and can happily say that one full charge easily lasts two dives, with enough life left to shoot a bunch of b-roll on the way back to land.
This new battery can now record for more than 2.5 hours at 1080p30, and more than 1.5 hours at 4K30 / 5.3K30.
The biggest difference with the new battery is how well it performs when there is no airflow though, such as when it’s in a housing.
A quick rundown at the battery life improvements with airflow on the new 1900mAh Enduro Battery on the HERO13 Black.
And this is how well the new Enduro battery performs without airflow compared to the older battery.
GPS
When the GoPro HERO12 hit the market in 2023, there was one massive feature omitted for the first time in almost a decade – GPS.
This strange decision to not include it left millions of diehard action cam lovers scratching their heads as to why.
Well, never fear, fellow content adventurer! GPS is back in the GoPro HERO13 Black!
For filming on the go, you can now share your speed, path, terrain, altitude, and g-force overlap from the Quik app. There is also a geo-tagging feature which can help you find your favourite content in your third-party photo library apps.
For those who often film while biking, hiking, or doing any sort of outdoor or travel activity, the GPS is a great feature to have.
Contacto Magnetic Door and Power Cable Kit
The GoPro HERO 13 introduces a slick new accessory that’s going to make powering your camera easier and more reliable than ever—the Contacto Magnetic Door and Power Cable Kit.
This isn’t just a minor upgrade; it’s a smart solution that simplifies the way you keep your GoPro charged during those long shoots or intense adventures.
Previously to keep the camera charged doing overnight time lapses for example, we’d have to open up the door and run the risk of water, condensation or dust getting inside.
Not any more.
The Contacto Magnetic Door is a practical replacement for the standard battery door, integrating magnetic contact points directly into its design.
This allows for a seamless connection with the Magnetic Power Cable, letting you charge the camera without opening the door and exposing the internal components.
This new cable perfectly pairs with the new door, snapping into place effortlessly with a strong magnetic connection.
The cable itself is tough, designed to handle the rough and tumble of outdoor adventures, while also providing fast charging to keep your always GoPro ready for action.
Don’t forget to use our GoPro discount code ‘nomadasaurus10’ at checkout to get a further 10% off on the latest camera and accessories!
Improved Slo-Mo Capabilities
The new HERO13 has boosted slow-motion video capabilities so you can capture every detail in your shots.
Find the highest resolutions and highest frame rates with the GoPro HERO 13’s new Burst Slo-Mo, which shoots smooth and crisp short clips in slow motion.
You can play back 720p400 in 3-minute, 20-second clips, 900p360 in 3-minute clips, and 5.3K120 in 20 second clips.
Three Mounting Options
The GoPro HERO 13 Black has a brand new mount option to go along with the two we know and love (the fold-down mounting fingers and the tripod mounting thread).
The most secure is the classic fold-down mounting fingers, which is low-profile, stable and perfect for intense activities or sports. This is the one we use about 90% of the time.
You can also choose the 1/4-20 Mounting Threads which work with most standard tripod. This is a great option for professional photographers and videographers who already have the gear and want absolutely zero movement between the camera and the tripod.
And now, to really increase the versatility of the world’s favourite action cam, there is the new Magnetic Latch and Ball Joint Mounts.
This secures your camera by snapping it in place on the auto-engaging dual latch magnets. Then you can attach the magnetic latch to any other GoPro mount for the ultimate flexibility!
Just remember that it is magnetic after all, and while it’s super useful if you want to quickly switch the GoPro to different mounting locations, we would not recommend it for any kind of mounting option where there is a lot of movement or jarring.
Exploring the reefs of Micronesia with GoPro 13.
HLG HDR Video
The GoPro HERO 12 introduced HDR video for the best-looking videos on the market, as well as a flat setting, mimicking a log profile, for those that like to colour grade their footage.
The new GoPro HERO 13 takes this to the next level, with proper hybrid-log gamma (HLG) technology.
Now you can record in 10-bit and Rec. 2100 colour space and have the benefit of a wider colour gamut.
This is aimed at more of the professional creators out there, but it’s a very worthwhile upgrade.
Faster Wifi
While the older model had Wifi 5 Technology, the GoPro HERO 13 Black steps it up with even better specs!
The new option uses Wifi 6 Technology, offering more reliable and faster connectivity for transferring your content when using the GoPro Quik app.
You can still use a USB-C cable to your laptop or PC as well for ultra-fast transfers.
Audio Tuning
There aren’t too many differences between the audio feature of the 12 and 13, but the 13 offers a slightly more sophisticated approach to audio on your content.
There is now audio tuning which is optimised to your activity, meaning you get more balanced and realistic sound.
The new Voice Audio Mode also makes sound clearer, as it prioritises your voice over other ambient sounds in the background. For vlogging enthusiasts, this new feature gives your content a more optimised and crisp sound.
Or do what we do – use the Media Mod and run a shotgun mic or wireless microphone setup for the best audio possible when vlogging.
Life looks better on GoPro.
All the Other Same Features from Last Year
As we mentioned earlier, the best features from the 12 are still found on the 13, and these include:
1/1.9″ Sensor with 8:7 Aspect Ratio
It took us a little while to get used to the 8:7 aspect ratio, paired with GoPro’s 1/1.9″ sensor, but now we use it pretty much 90% of the time. It’s just so damn useful.
Capture one shot and crop it multiple ways – for YouTube, Instagram/TikTok, web or print.
Our go-to is 8:7, 4k and 60 fps for most action scenes, and 5.3k at 30fps for vlogs.
Night Effects
We love the night effects, such as star trails, light painting and night lapses, and of course they’re still here on the 13.
HyperSmooth 6.0 with 360 Degree Horizon Lock
Basically HyperSmooth makes your footage as smooth as using a gimbal, without of course needing a gimbal.
In fact it’s so good that we often find ourselves wanting to vlog on the GoPro for run-and-go shooting rather than our top-line Sony cameras.
And the 360-Degree Horizon Lock means you can literally spin the camera in a full circle and it will magically keep the horizon straight.
While you might not be spinning the camera around fully all the time, it’s great if you’re trying to shoot a scene from something like a boat in rough seas for example.
Our Other Favourite Features
These are the ones we use with our GoPro all the time, and while not new, are worth highlighting again:
Scheduled Capture
Set your GoPro up somewhere for a time lapse (or night lapse), pick a time in the future to start recording, and then walk away.
Why we love it? Means you don’t need to start recording early and risk killing your battery, or need to set a reminder to go out and switch the GoPro on in case you’re busy, or asleep.
Raw Photos
SuperPhoto is cool, but we always prefer to edit our images the way we like. That’s why we leave our GoPro set to Raw images all the time.
Why we love it? Really push the colours in your images hard when editing.
Presets
If you’re always switching between different modes, like 5.3k30 and 4k60 like us, having these exact settings saved as a preset means you can change in a moment.
Why we love it? Makes life so much quicker and easier.
This video was shot on the HERO12, but it works the exact same on the HERO13.
GoPro Quik Desktop App
We just want to talk about the GoPro Quik App again this year, because it’s just always getting better and better.
The GoPro Quik app on your smartphone is excellent, especially for importing your footage and making quick edits to share on social media.
It’s so good we recommend it as essential downloading for anybody who comes with us on our NOMADasaurus Adventure Tours.
The desktop app is also excellent, and while we don’t really use it for editing videos (we use Adobe Premiere Pro and CapCut for that), it makes grabbing a frame out of your video as a photo very quick and easy.
The ‘Mods’ and ‘Mounts’ – The HB Lens Mods + Media, Max Lens, Display and Light Mod
We had a massive write-up about the HB Lens Mods above (the ND, Macro and Anamorphic Lenses that suit the GoPro HERO 13 Black), but we can’t forget about the other mods GoPro has available.
The Display Mod isn’t something we really use, nor recommend, and there’s a new Ultra Wide Lens Mod to replace the Max Lens, but the Light Mod is really handy and we always throw a few in our camera bags for trips.
The Media Mod on the other hand is essential if you’re a content creator.
This allows you to use an external microphone for audio, and has a few hot shoe attachments for other units like the light mod.
Plus there’s all the cool mounts you can purchase to place the HERO13 just about anywhere you can imagine.
And yes, for another year in a row, the GoPro HERO13 Black is the exact same size as the previous four cameras, so there’s no need to throw out your old accessories.
Some of our favourites are the Dive Housing, El Grande, Jaws, Bite Mount and Floaty.
Don’t forget to use our GoPro discount code ‘nomadasaurus10’ at checkout to get a further 10% off on the latest camera and accessories!
What About the GoPro HERO – A New Smaller Camera?
Yes, there is a new, smaller, no-frills GoPro HERO camera coming out, and while it’s not as good as the HERO13, for a lot of people this is going to be more than enough.
Think of it as the Session making a comeback.
We’ll update this article once we get our hands on one to test.
Hanging out with a puffer fish in Palau. How good is the quality on the 13 for underwater shots?!
Is the HERO13 Any Good in the Real World?
We picked up the GoPro HERO13 Black literally on the way to the airport to fly out to a photography assignment on an expedition ship through West Papua, Palau and Micronesia.
So our testing of the new camera was literally baptism by fire.
There was no fancy unboxing, spending time going through all the settings, etc.
It was grab the camera, turn it on, do a basic setup based on what we know with older GoPros, throw it in a dive housing and hit the water.
Luckily, it worked flawlessly from day one.
The menu is practically the same as previous years, meaning it’s clear, concise and easy to navigate.
After a few minutes of dialling in the settings we wanted – 10 bit natural colour, 8:7 at 4k60 with minimum and maximum ISO selected, we descended down to 30 metres.
And, just as expected, it just worked.
No freezing, no lag between switching between video/photo, and best of all the footage just popped right out of the camera.
The interval photo mode, capturing raw files every 3 seconds, was truly awesome to have on hand.
With a couple of days of diving and snorkelling under our belt we took the GoPro HERO13 Black on a hike around Raja Ampat and absolutely loved how it all worked.
HyperSmooth? Perfect.
Colours? Vibrant and clean.
Photo mode? Quick and easy to use.
And then when we pushed the colours in post processing, the RAW files really shined, particularly on the dive shots with minimal light.
In full transparency we only used the ND filters quickly for a test, and they did exactly as expected. Nothing flash, nothing fancy – they are just high quality ND filters that have practically no colour casting and slow the shutter down without interference in bright conditions.
That might sound like it’s not worth getting, but as people who love the natural motion blur you get when you shoot video at the correct settings, and of course who play around with long exposure photography a lot, these are now going to live full-time in our camera bags.
We threw on the Macro Lens for a quick trial on some flowers and sure enough, it’s a decent macro lens.
Again, doesn’t sound like much. But this is the first time there has been a native GoPro macro lens mod, and opens up an entirely new world of possibilities for video and photos.
Just like the ND filters, this is a welcome addition and now considered a must-have in our list of camera gear.
We sadly didn’t get a chance to test out the Ultra Wide Lens Mod or the Anamorphic Lens Mod, but trust us, as soon as we do we’ll update this article with our experience of them.
All in all, it’s a very powerful, very durable, and very easy to use professional content creation powerhouse.
What We Don’t Like
It’s taken us a few weeks of using this every single day in a variety of situations to try to figure out what we don’t like about in our GoPro HERO13 Black review.
Is it perfect?
Of course not.
But in all honesty, the years of saying “Yea GoPros are cool but I hate that they…” are pretty much over.
We do wish they brought in the rumoured 1-inch sensor for better resolution and low-light performance, but realise that would make the unit a fair bit larger.
And again there’s no optical zoom. With the HB Series Lenses though perhaps there’s a zoom lens on the horizon?
A dedicated 1:1 aspect ratio would be awesome, as would a built-in visual grid so you could frame in 9×16 and 16×19 easily enough.
It’s still early days though, and we’ll update this article if we find anything we don’t like.
The new camera works equally awesome above and below water.
GoPro HERO13 vs GoPro HERO12 vs GoPro HERO11 – What’s the Difference?
We actually rocked our previous 12 while exploring Micronesia as well to compare the two in our brand new GoPro HERO 13 Black review, and if you’re familiar with the older model as well you might be wondering if there’s been much of an upgrade this year.
Or if you have the HERO11 or HERO12, or maybe don’t even own a GoPro, you’re probably curious if there’s any difference at all.
So let us lay it out in absolute laymen’s terms for you.
The biggest differences that the majority of moderate users would notice are:
More battery life
A variety of creative lens mods
GPS
Magnetic Mount
The other upgrades like HLG HDR video colour profiles, audio tuning, burst slo-mo and faster wifi are more things that heavy users or professionals would be excited about.
Let’s check out the differences in our comparison table.
27MP + SuperPhoto and all RAW modes
27MP + SuperPhoto and all RAW modes
27MP + SuperPhoto and all RAW modes
In-Camera with 360° Angle and Horizon Lock
In-Camera with 360° Angle and Horizon Lock
In-Camera with 360° Angle and Horizon Lock
720p400, 900p360, 5.3K120
1.4″ Color LCD with Smoother Live Preview
1.4″ Color LCD with Smoother Live Preview
1.4″ Color LCD with Smoother Live Preview
2.7″ Color LCD with Improved Touch Sensitivity
2.7″ Color LCD with Improved Touch Sensitivity
2.7″ Color LCD with Improved Touch Sensitivity
Media Mod, Max Lens Mod, Display Mod, Light Mod, Volta
Media Mod, Max Lens Mod, Display Mod, Light Mod, Volta
Media Mod, Max Lens Mod, Display Mod, Light Mod, Volta
HLG HDR, Flat, Natural, Vibrant
1080p with HyperSmooth 6.0
1080p with HyperSmooth 5.0
1080p with HyperSmooth 5.0
Is it Worth Upgrading?
We’re nearing the end of our GoPro HERO 13 review, and every year we get routinely get asked two questions all the time (in the past couple of weeks on this ship we’ve been asked this multiple times a day):
“I don’t own a GoPro, which one should I buy?”
And…
“I have a GoPro HERO12/11/10, should I upgrade to the newer model?”
So, here we go, the exact same advice we give our friends, our family, clients and guests.
Is it worth upgrading to the HERO13?
You Don’t Have a GoPro
If you don’t have a GoPro and are curious if you should rush out and buy the newest HERO13 for travel, underwater, content creation, social media, sport or lifestyle, our honest answer is:
Yes, it’s 100% worth buying the HERO13 Black, if it’s within your budget.
If it’s not, but you still want a GoPro, you will probably be very, very happy with the HERO12.
Reason we say ‘if it’s within your budget’ is because the main upgrades such as the HB Series Lenses and very nice to haves, but not essentials for most people.
Yes, the 13 is the newer, better, more capable camera.
And if the price difference isn’t much, then get it.
You Have a GoPro HERO10 or Earlier Model
If you own a GoPro HERO10 or older camera, do yourself a favour and jump on this immediately.
The GP2 processor, larger sensor, 8:7 aspect ratio, massive battery increase, improved UI and just about everything else makes the HERO13 night and day compared to the older models.
Just do it, you won’t regret it.
You Have a GoPro HERO12 Black or HERO11 Black?
Now this is a bit of an interesting one, and harder to answer.
Side by side, do we noticed much of a difference between our HERO12 and the HERO13?
No, not really.
Is the HERO13 better?
Of course it is! So much so that we’ll be selling our 12s and just using the 13s.
But we use our GoPros all the time as professional content creators.
What if you just use your GoPro now and then, for a short holiday or on the one time every few months you might go mountain biking, skiing or snorkelling?
It might not be worth you spending the extra cash if you won’t use it.
Honestly, you’ll still love what you capture with your HERO12 or HERO11.
Now, if the HB Series Lenses sound interesting to you (they’re awesome), and the power upgrades with the 1900mAh Enduro Battery and Conacto Magnetic Power Latch pique your interest, then upgrade to the HERO13.
So what do we recommend you to do?
The easiest way to break it down is with this:
UPGRADE IF:
I use my GoPro more than once a week, would use the ND, Macro or Ultra Wide Lenses, appreciate more battery life and like to colour grade my video footage.
DON’T WORRY IF:
I use my camera less than once a month, don’t really edit my footage, never drain a battery and don’t need nicer video clips.
If you’ve just recently purchased an 12 though, don’t throw it away. The 12 is still awesome and will serve you well for many more years.
Final Verdict – 9/10
Well family, that’s it for our GoPro HERO13 review. It’s made it across the Indo Pacific and Micronesia with us on a crazy adventure, captured some insane content and never missed a beat.
It’s an absolute weapon, and we love it.
We personally give the GoPro HERO 13 Black a rock solid 9/10.
The HB Series Lenses completely revolutionise how you can use the new GoPro, the bigger battery is a life saver, the UI improvements are fantastic and of course 5.3k60 is wild.
Next up we’ll be throwing this little unit into the content battlefields across Africa, Antarctica, Patagonia, Borneo and the Arctic.
If you do purchase the GoPro HERO 13 Black, also grab the GoPro Cloud Storage too.
Thanks very much for reading our GoPro HERO13 Black review. If you have any questions please leave a comment below and we’ll answer them as soon as possible.
Don’t forget to use our GoPro discount code ‘nomadasaurus10’ at checkout to get a further 10% off on the latest camera and accessories!
DISCLAIMER: Some of the links in this article are affiliate links, which means if you book accommodation, tours or buy a product, we will receive a small commission at no extra cost to you. These commissions help us keep creating more free travel content to help people plan their holidays and adventures. We only recommend the best accommodations, tours and products that ourselves or our fantastic editorial team have personally experienced, and regularly review these. Thanks for your support, kind friend!
Is the GoPro HERO13 better than the GoPro HERO12?
The GoPro HERO13 has a number of excellent upgrades over the HERO12, including a much bigger 1900mAh battery, HB-Series Lens compatibility, improved UI, Burst Slo-Mo mode, HLG HDR video and a Magnetic Latch and Power Cable adaptor.
Is it worth upgrading to the GoPro HERO13?
If you have the HERO11 model or earlier, use your GoPro more than once a week or make social media content, then it is definitely worth upgrading to the GoPro HERO12 to enjoy the extra battery life and HB Series Lenses.
Is the GoPro HERO 13 good for still photos?
The GoPro HERO 13 Black is fantastic for still photos thanks to the 27 megapixel, 1/1.9″ sensor being powered by the GP2 processor and full RAW capabilities.
What are the differences between the GoPro HERO13 and HERO12?
The biggest changes between the GoPro HERO13 and HERO12 are the extra battery life, HB-Series Lenses with Auto Detect, HLG HDR video profiles, better UI and Burst Slo-Mo.
GoPro HERO 13 Black Review
In our detailed GoPro HERO 13 review we’ve personally put the camera to the test to see if it’s worth the upgrade and see what’s new on the GoPro HERO13 Black.


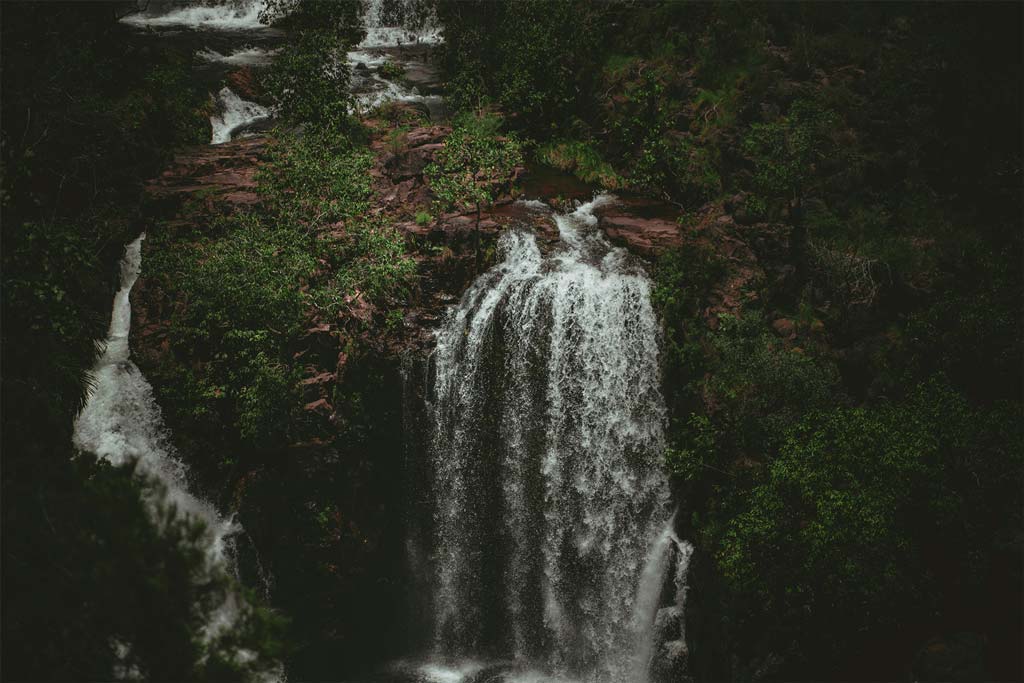

![Aurora Expeditions Svalbard Cruise Review [2025 Guide]](https://farasar.ir/wp-content/uploads/2025/09/Aurora-Expeditions-Svalbard-Cruise-Review-Feature-Image.jpg)
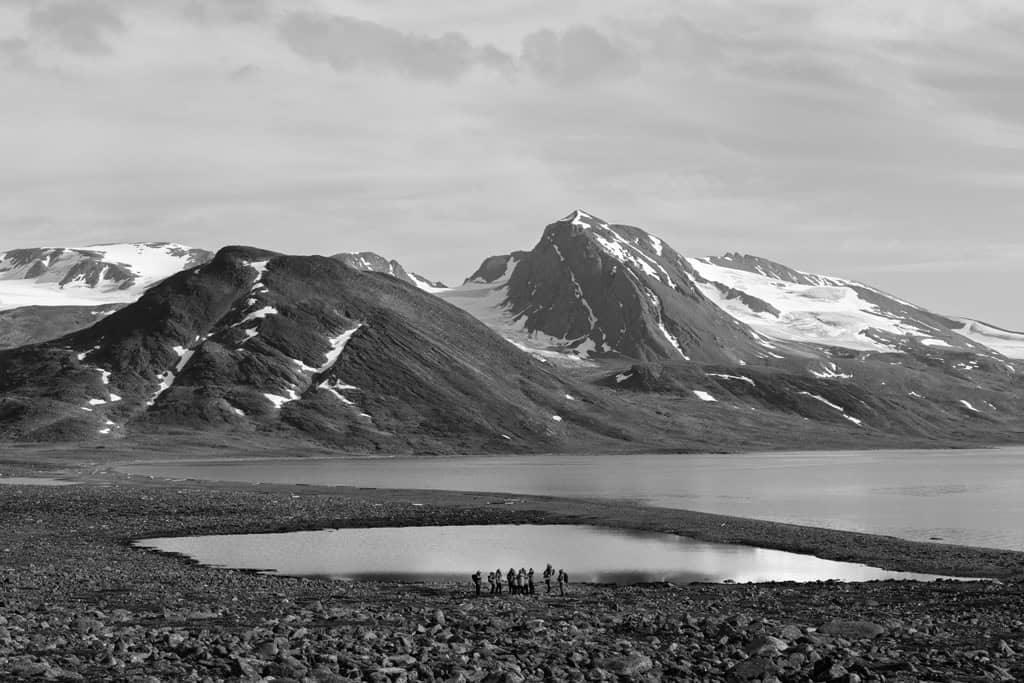
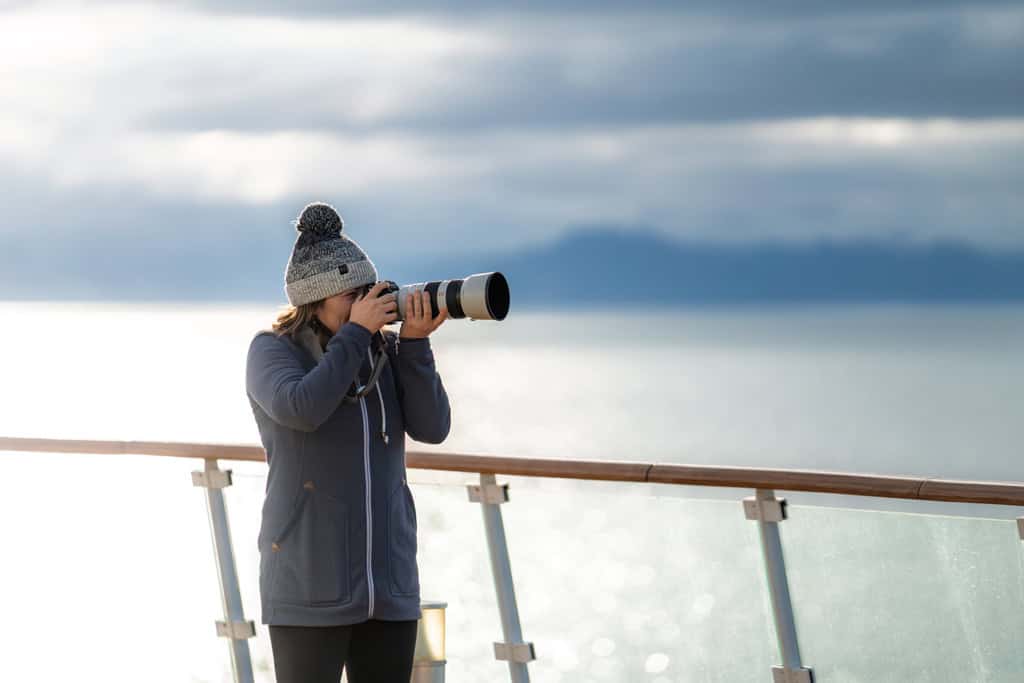
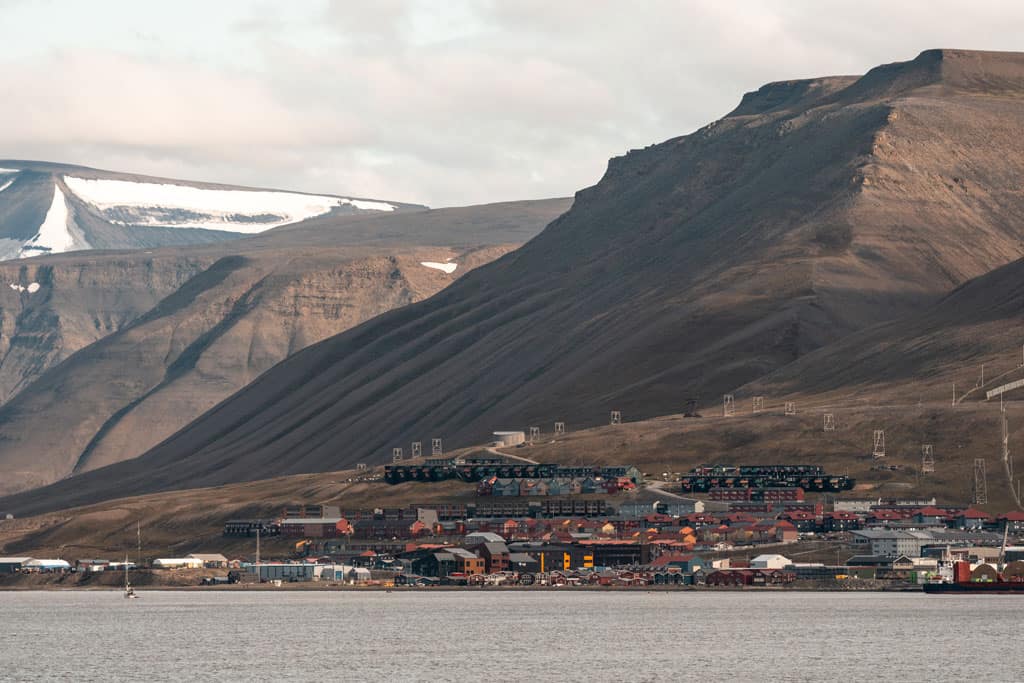
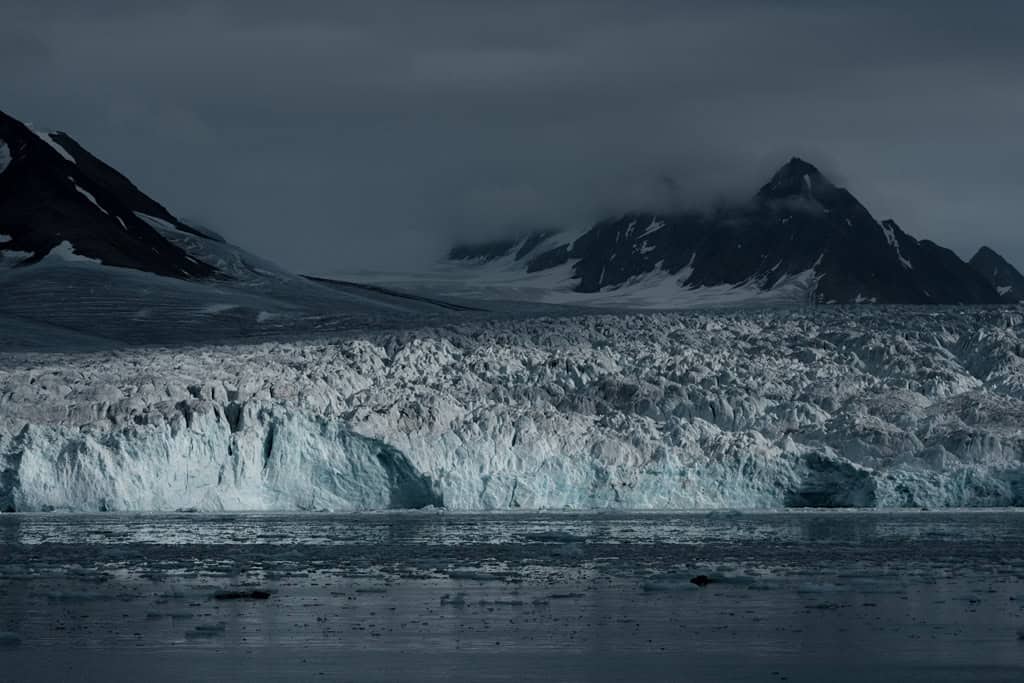
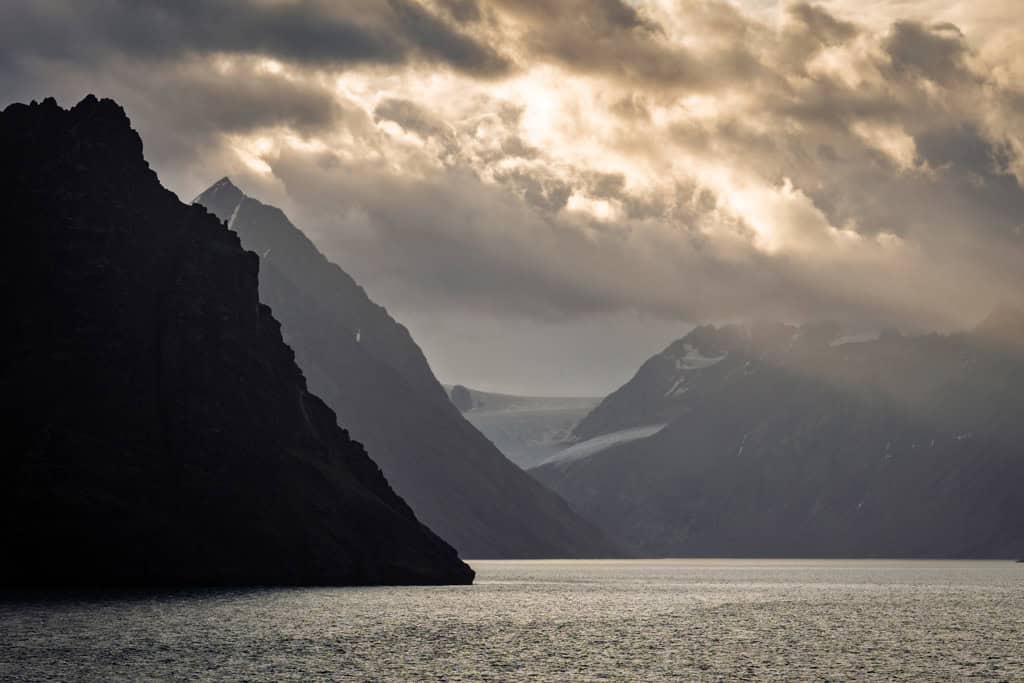

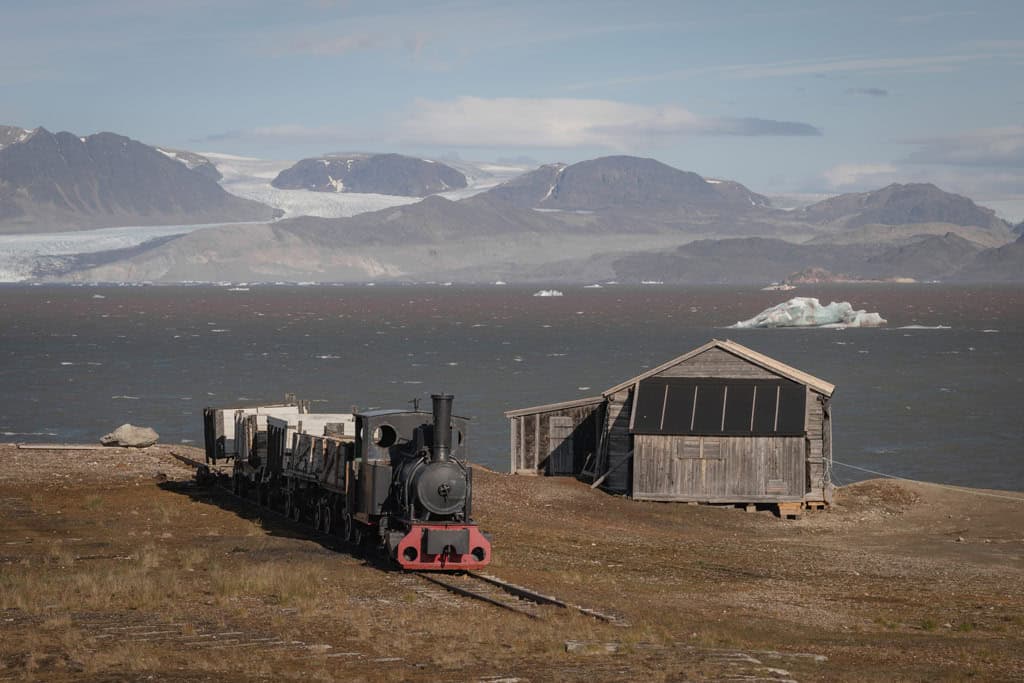
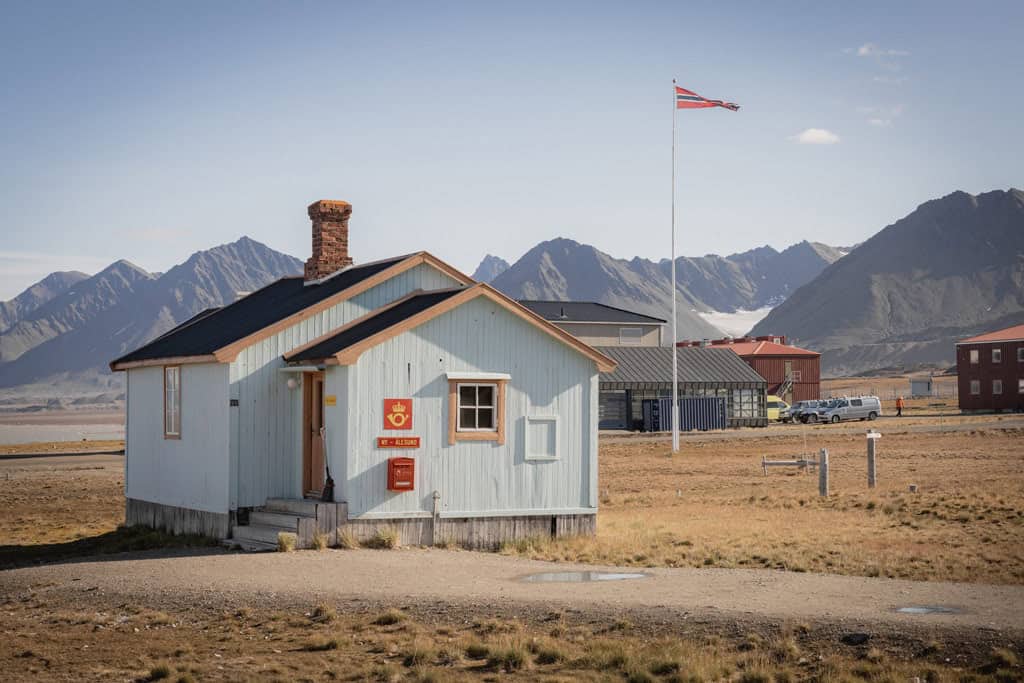
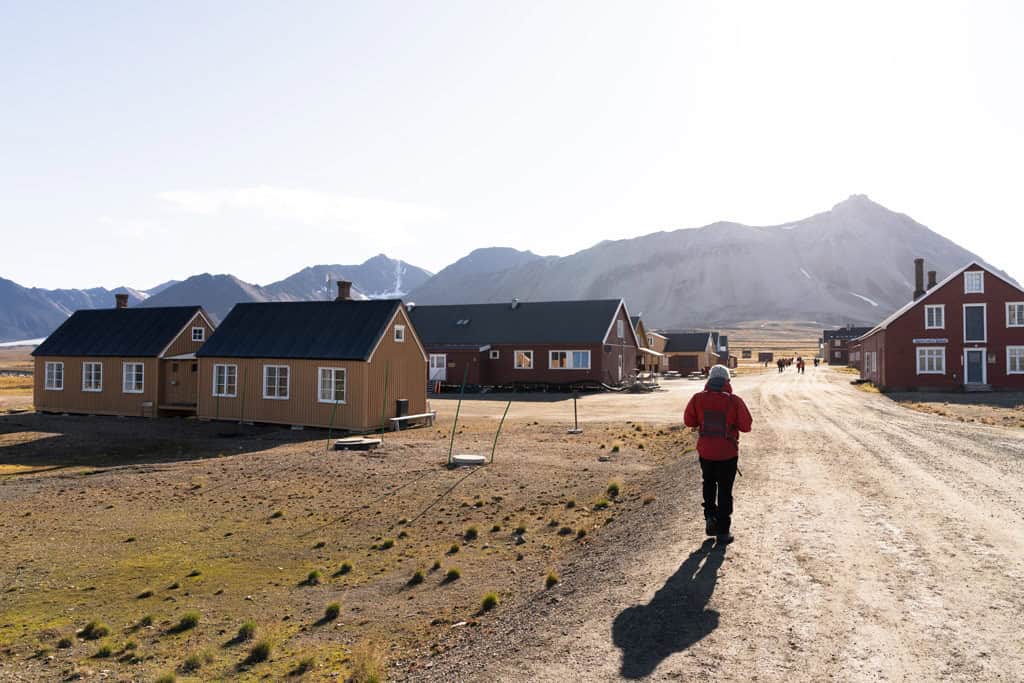
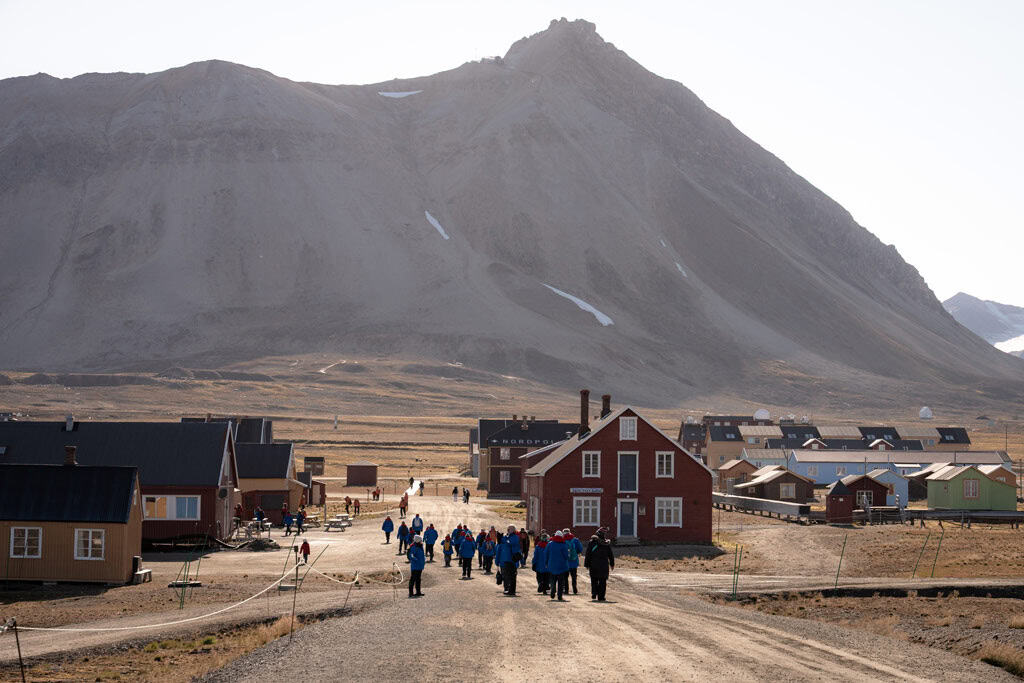
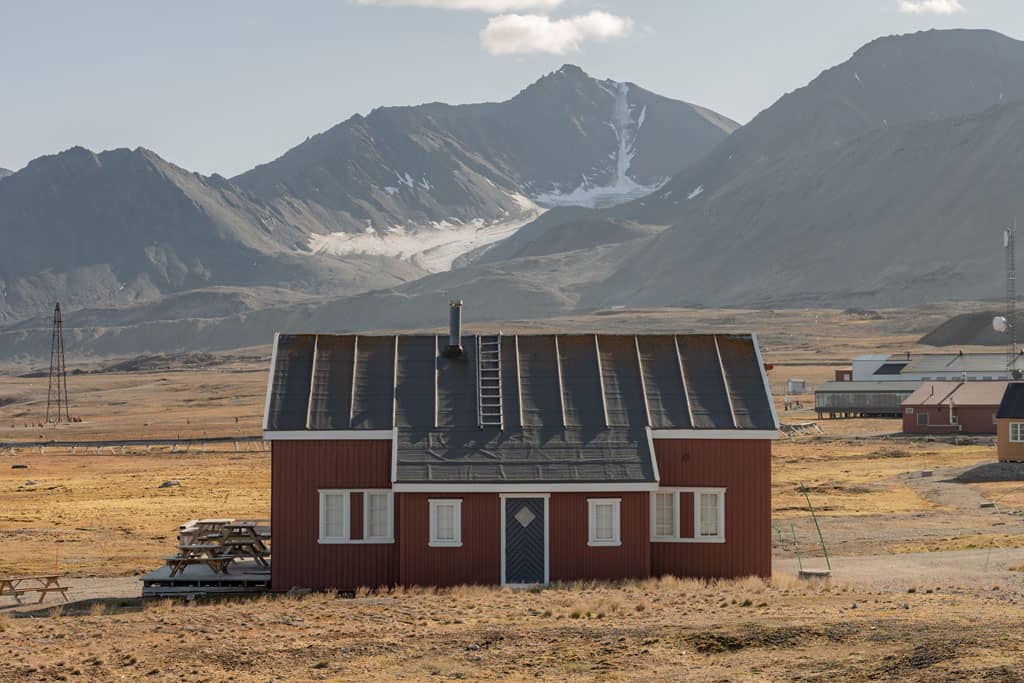
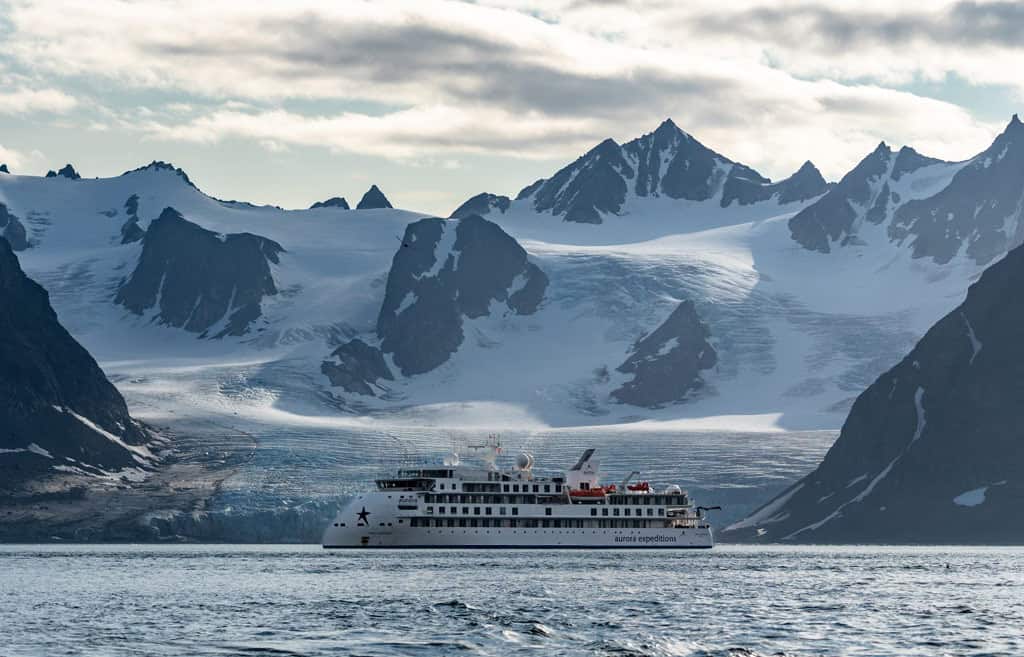
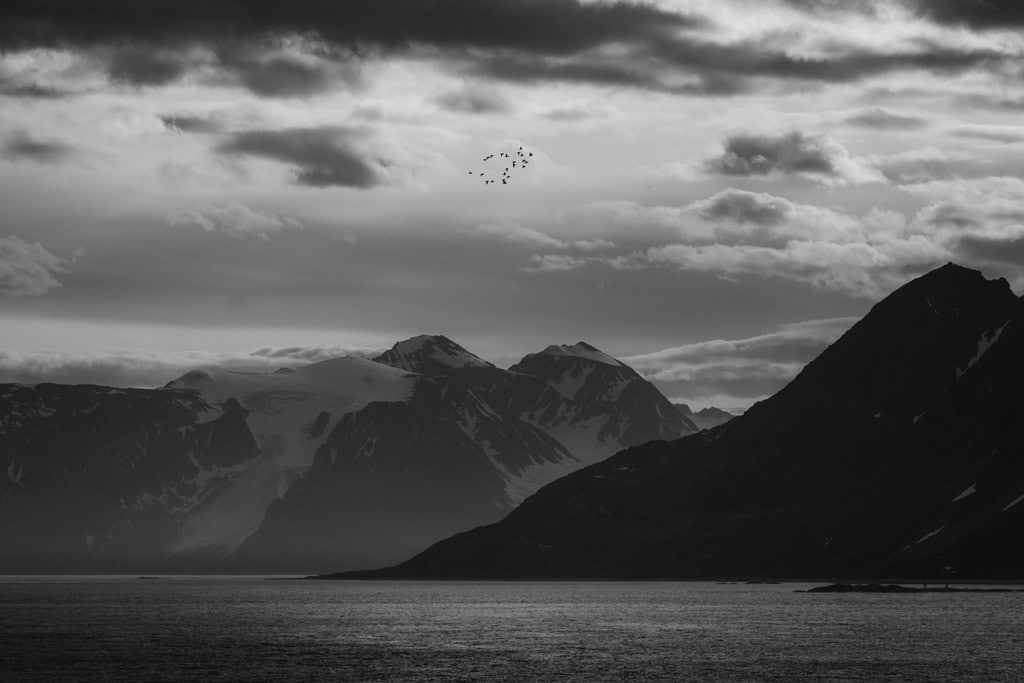
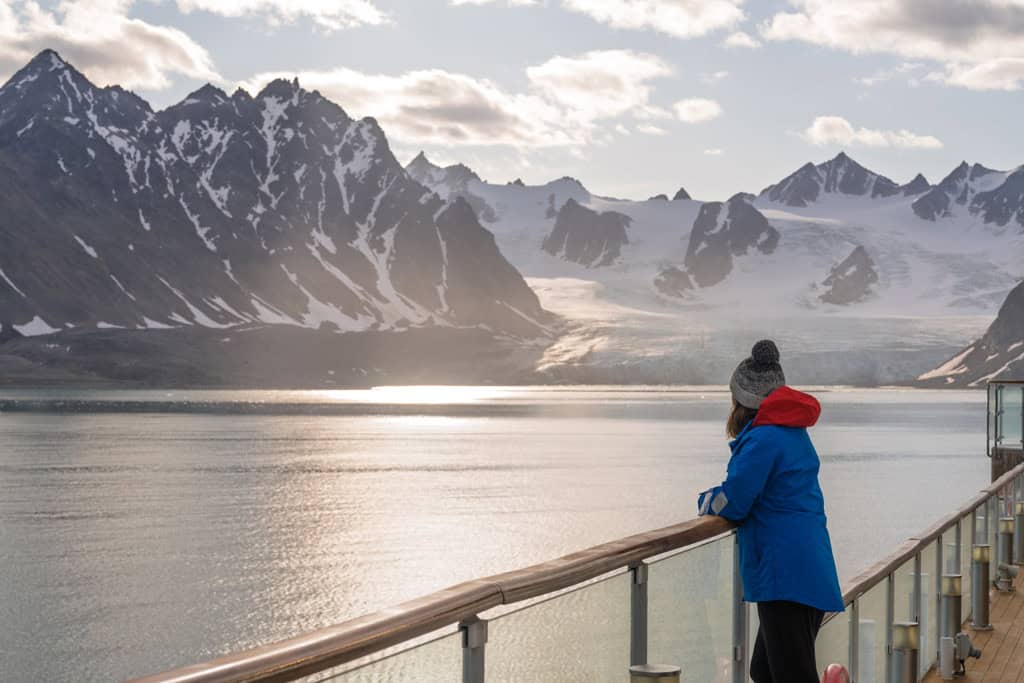
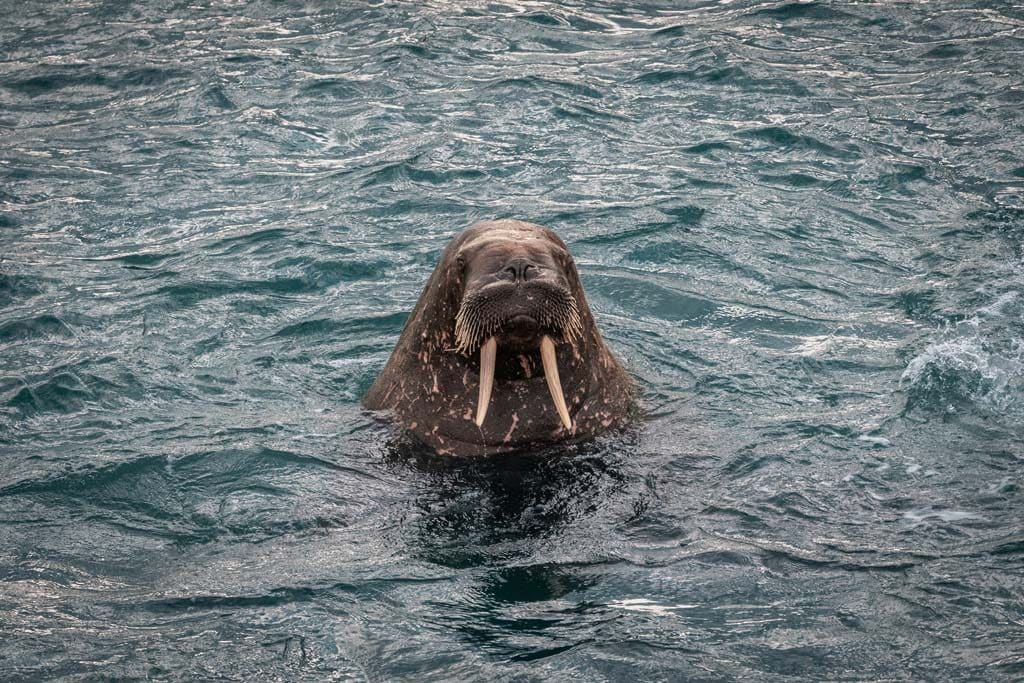
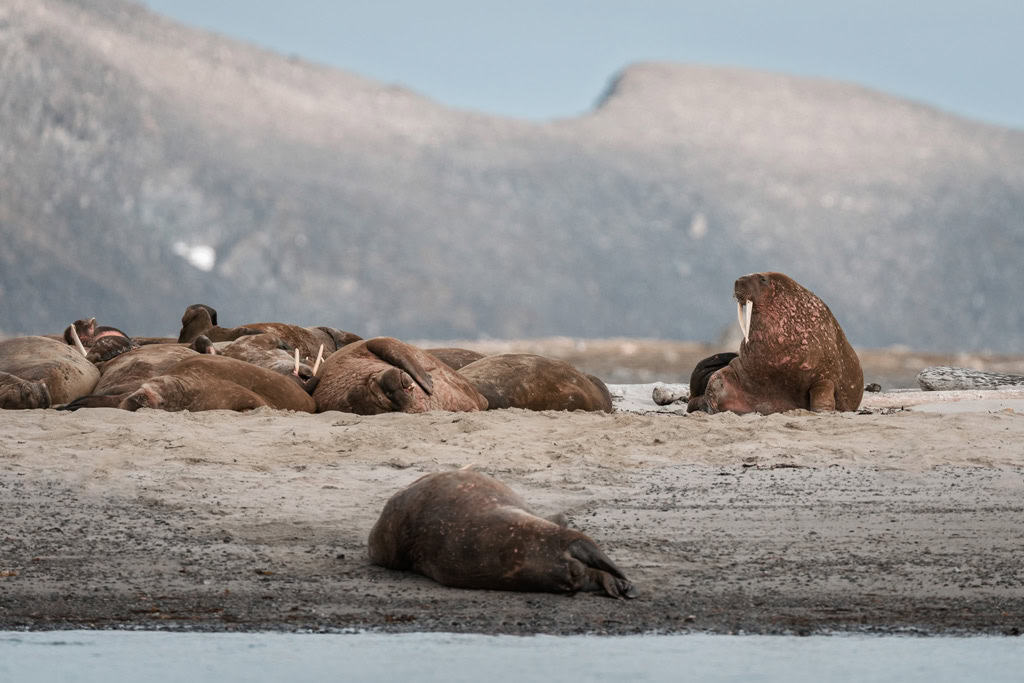

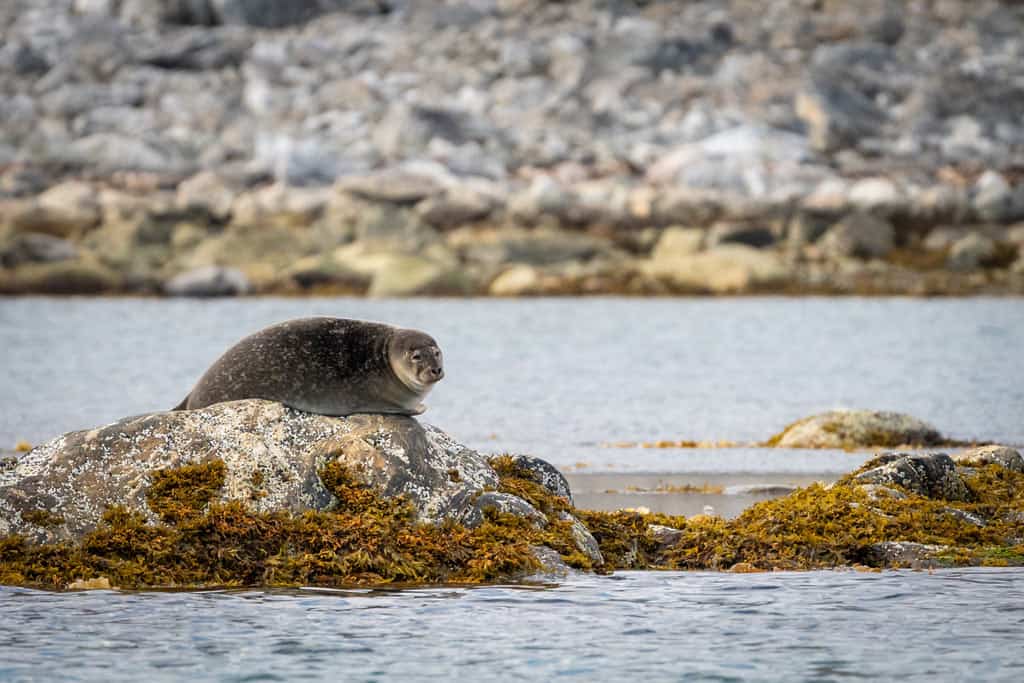
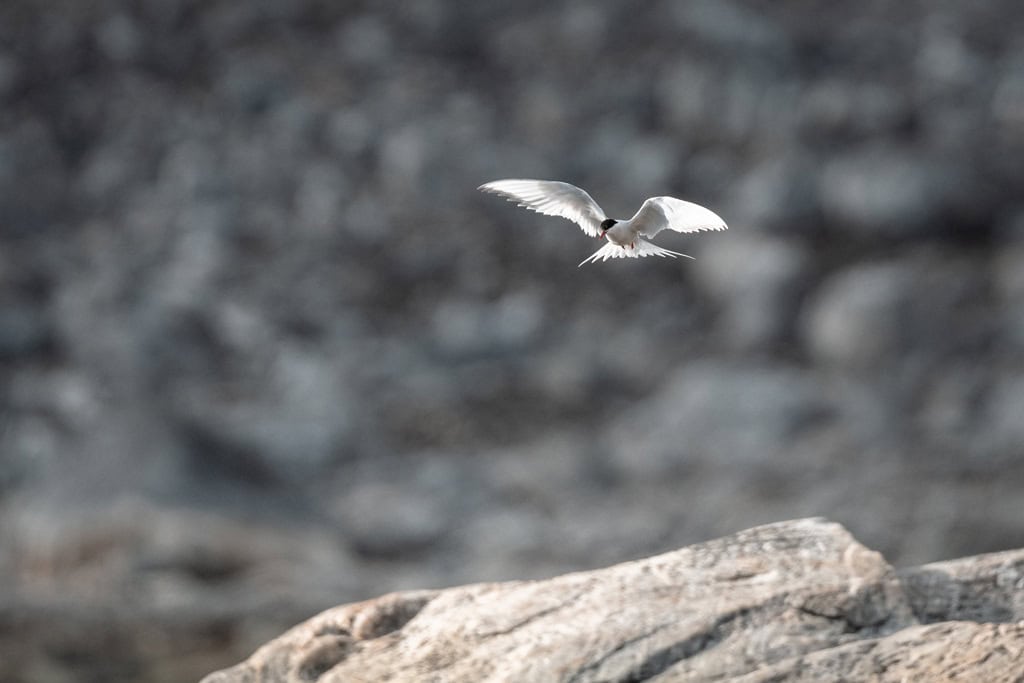
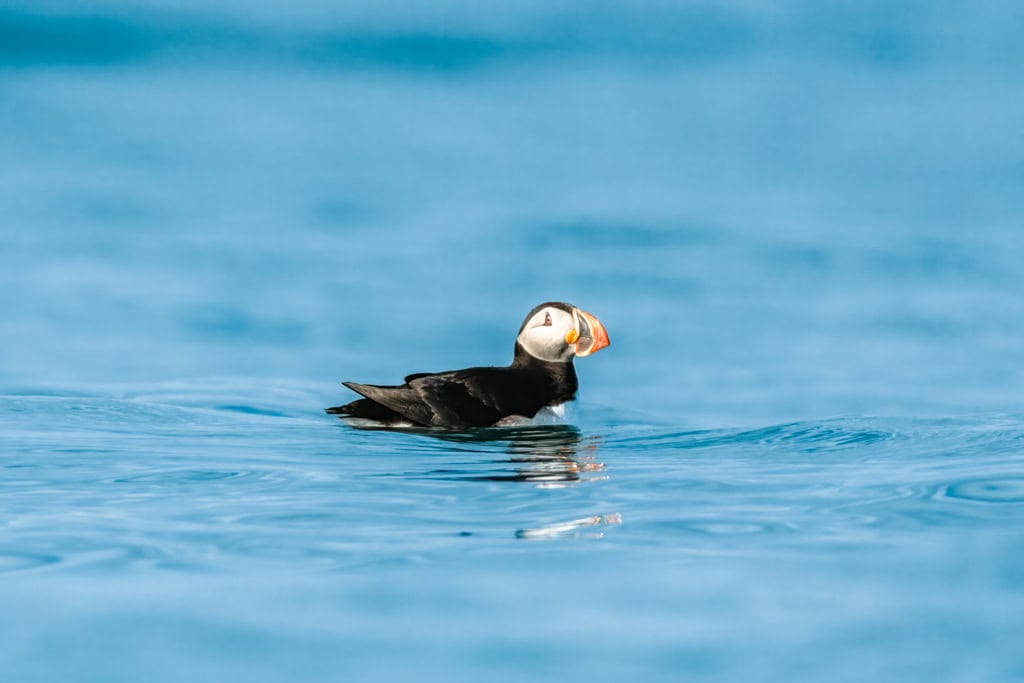
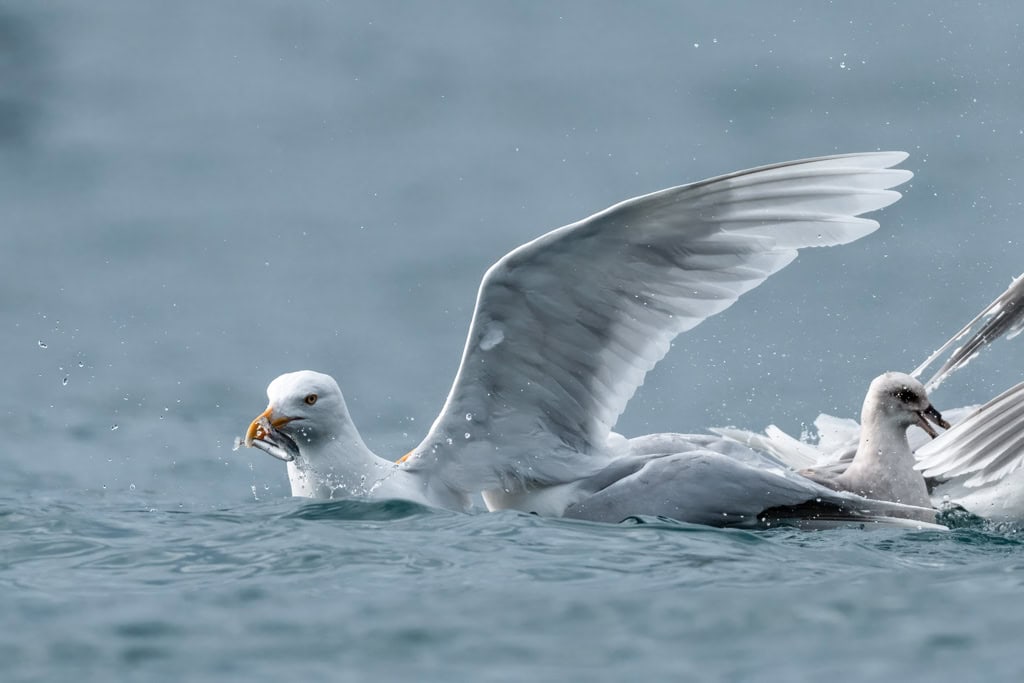
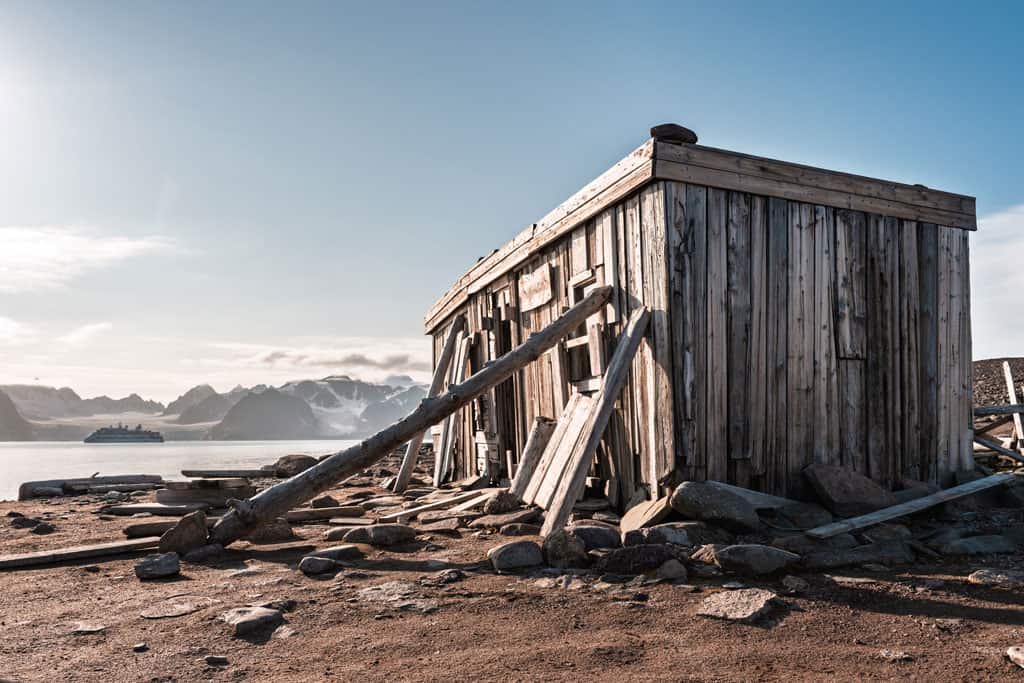
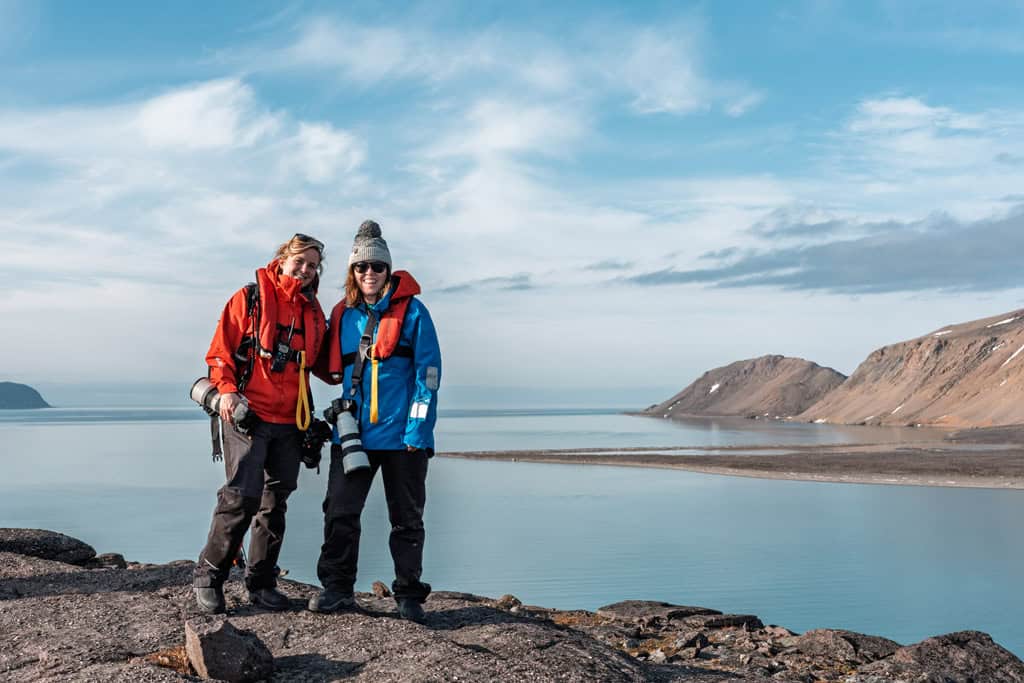
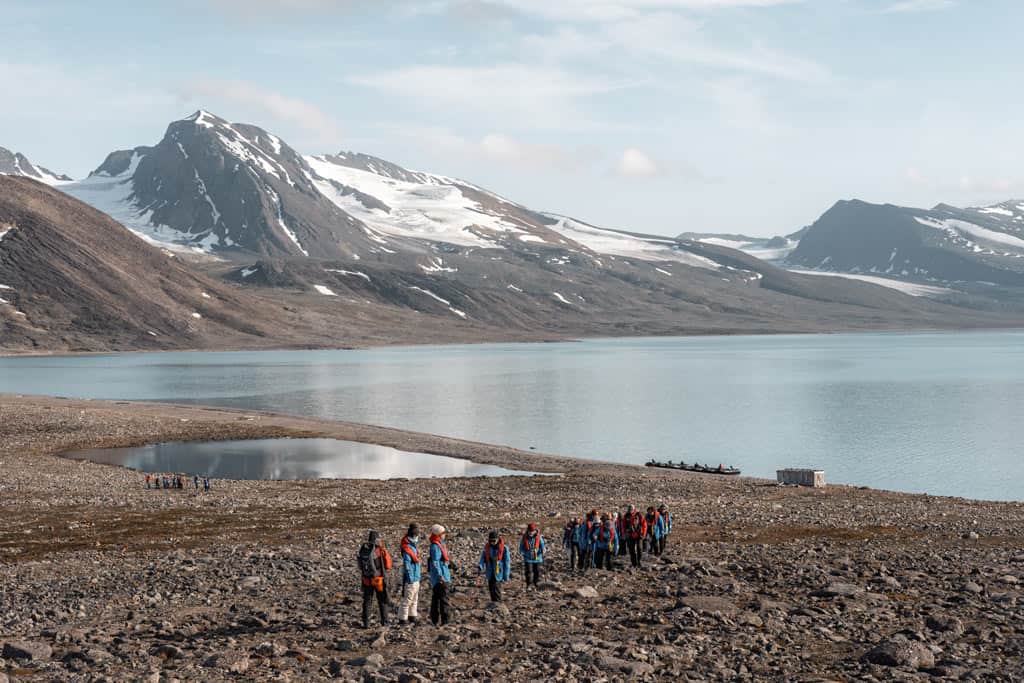
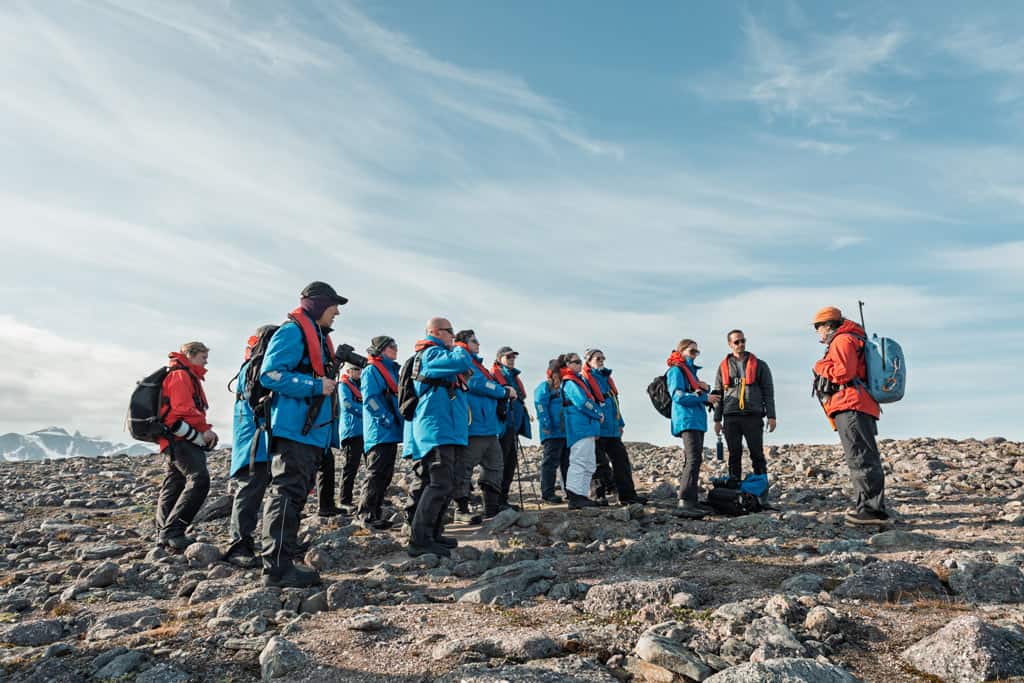
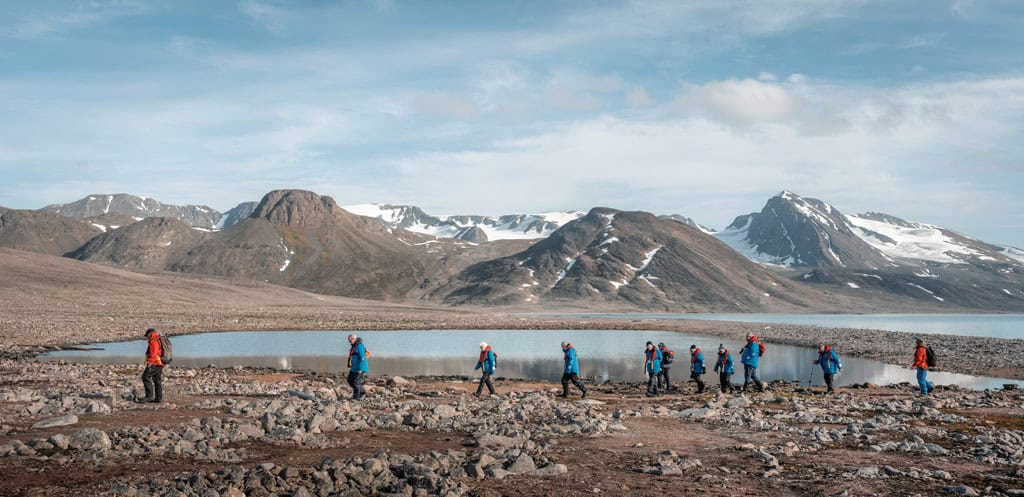
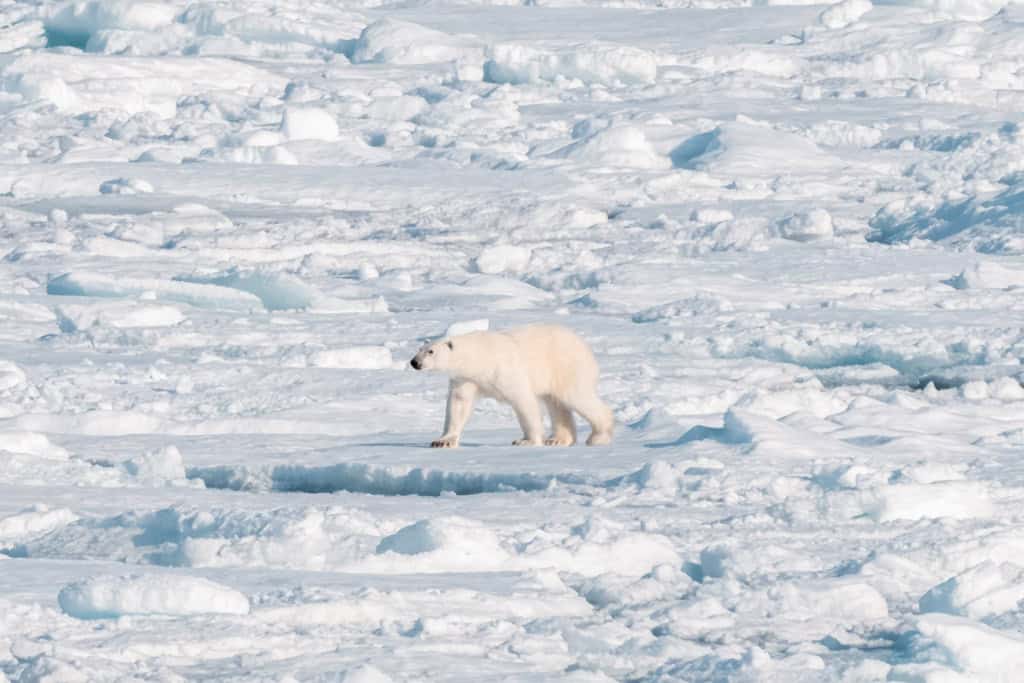
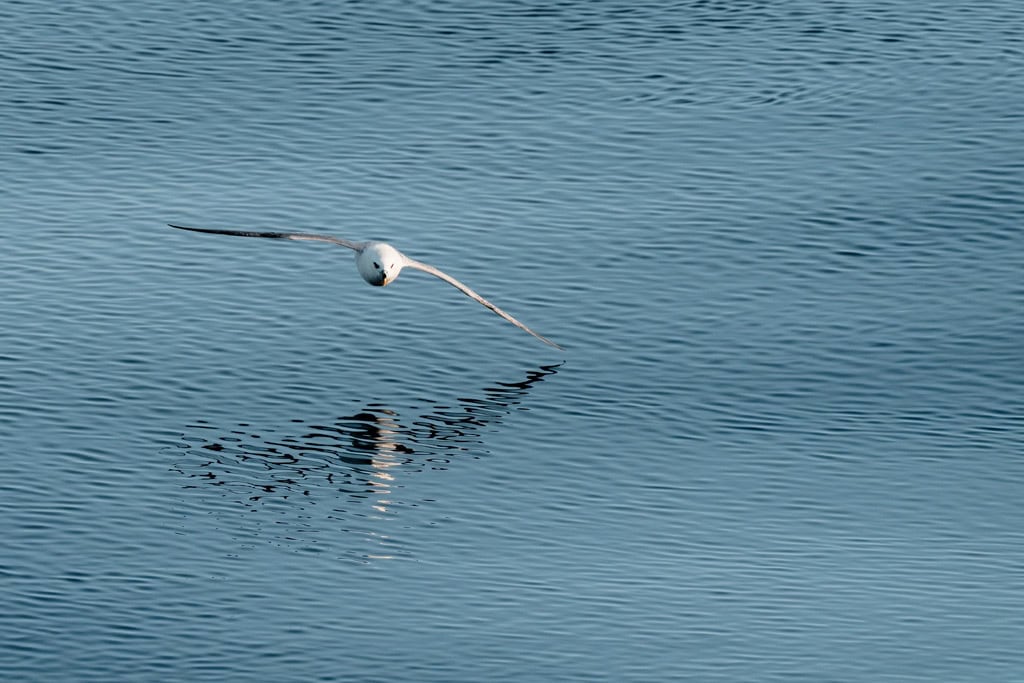
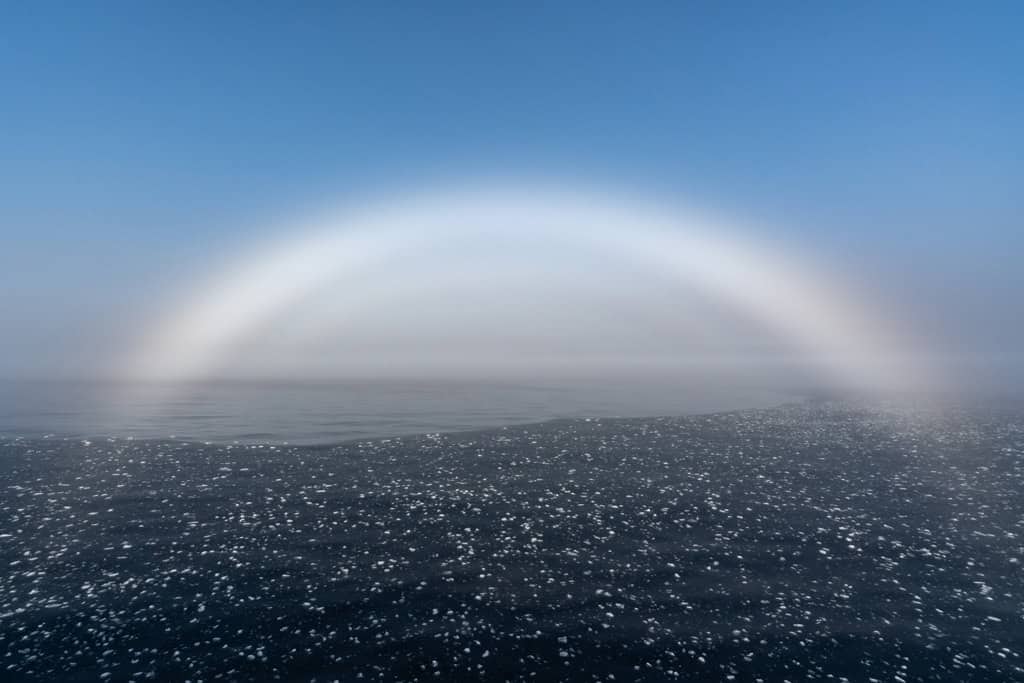

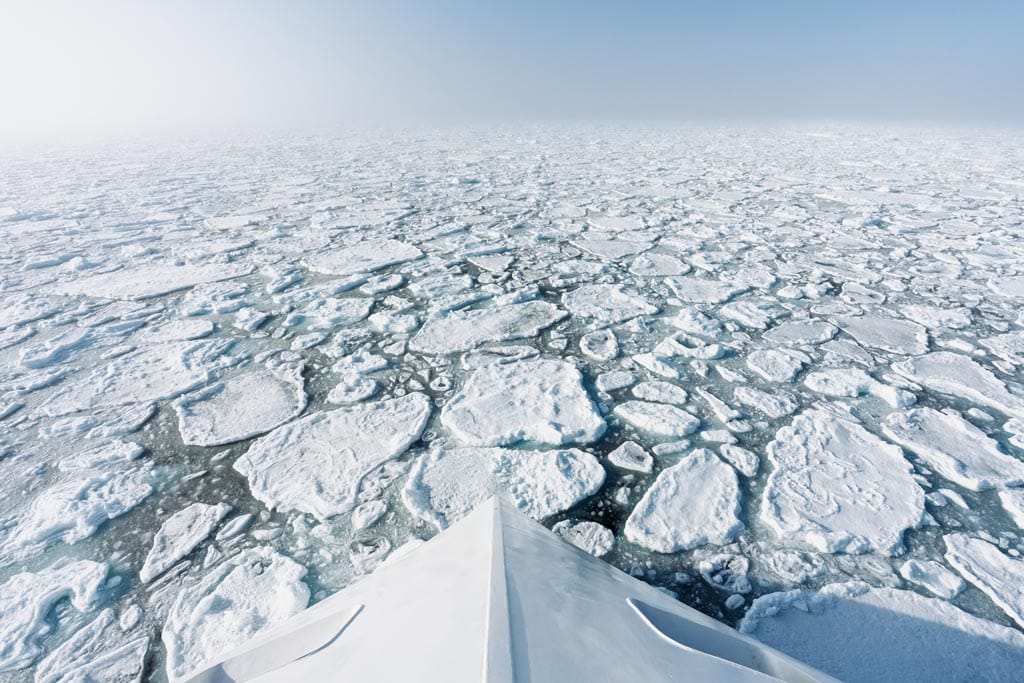

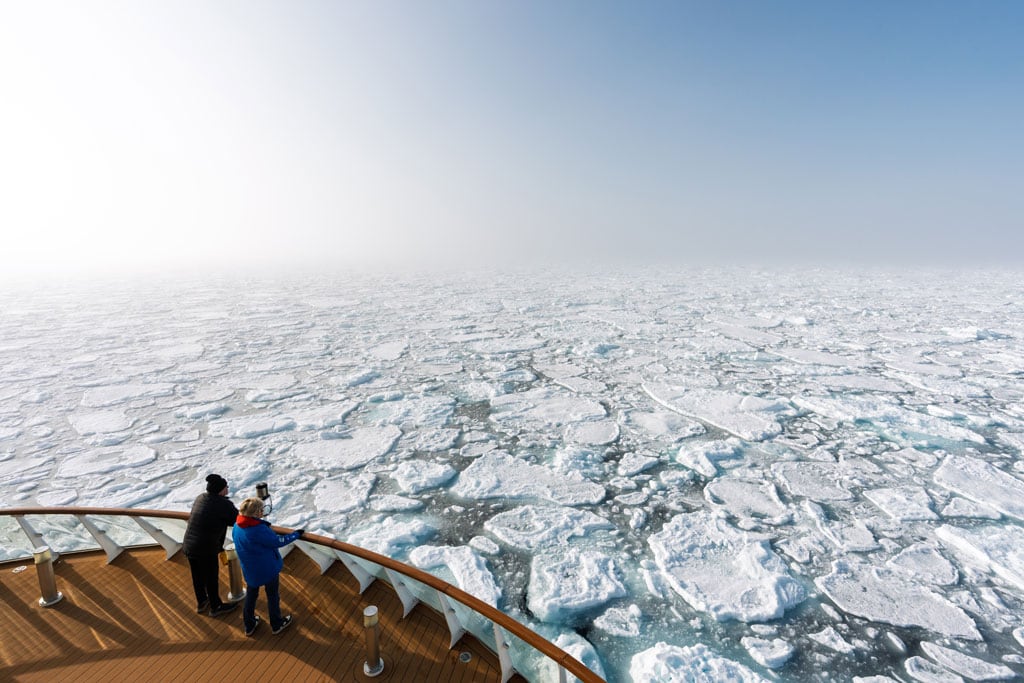

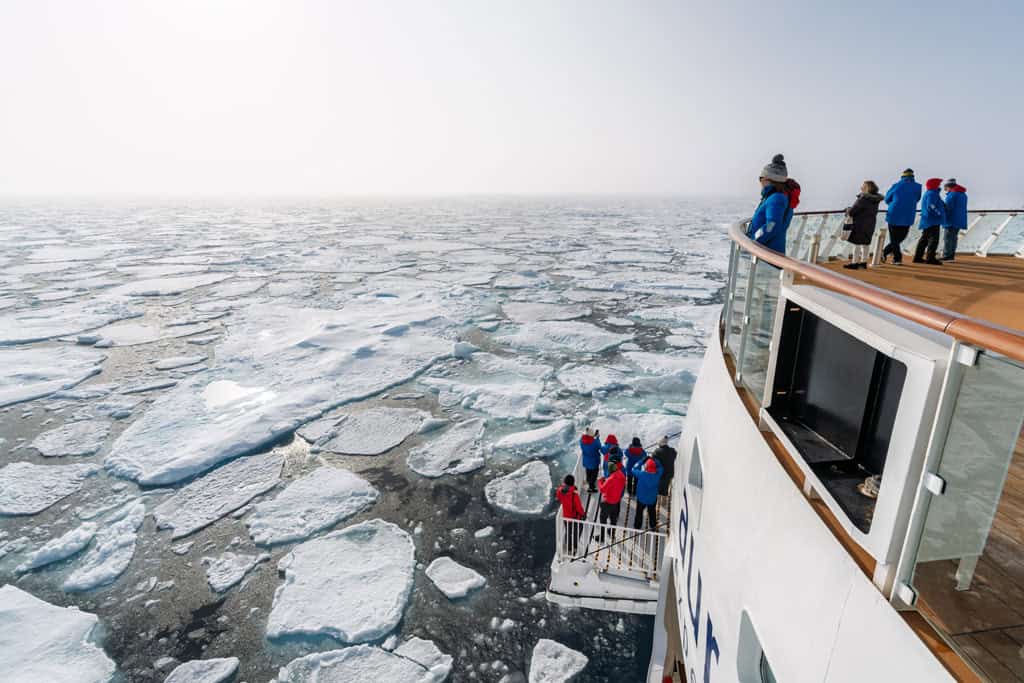
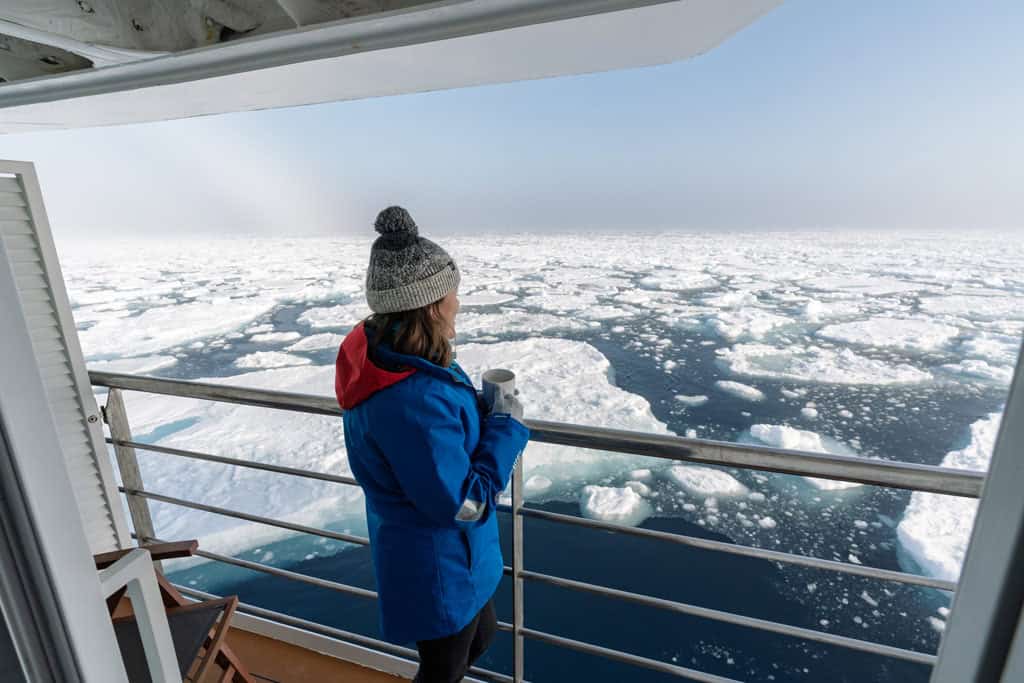
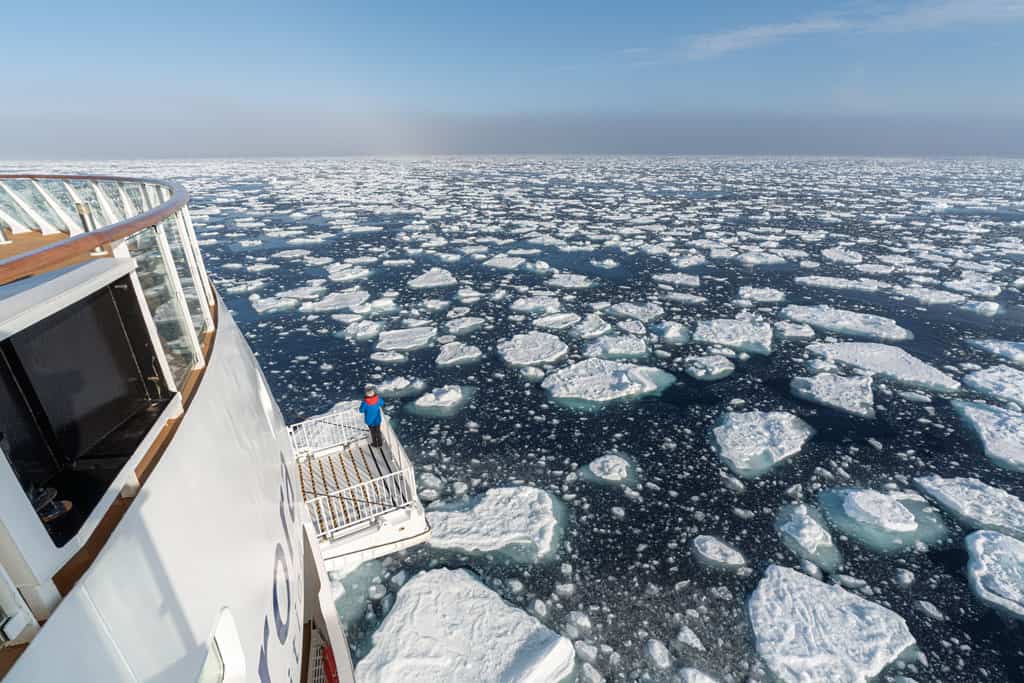

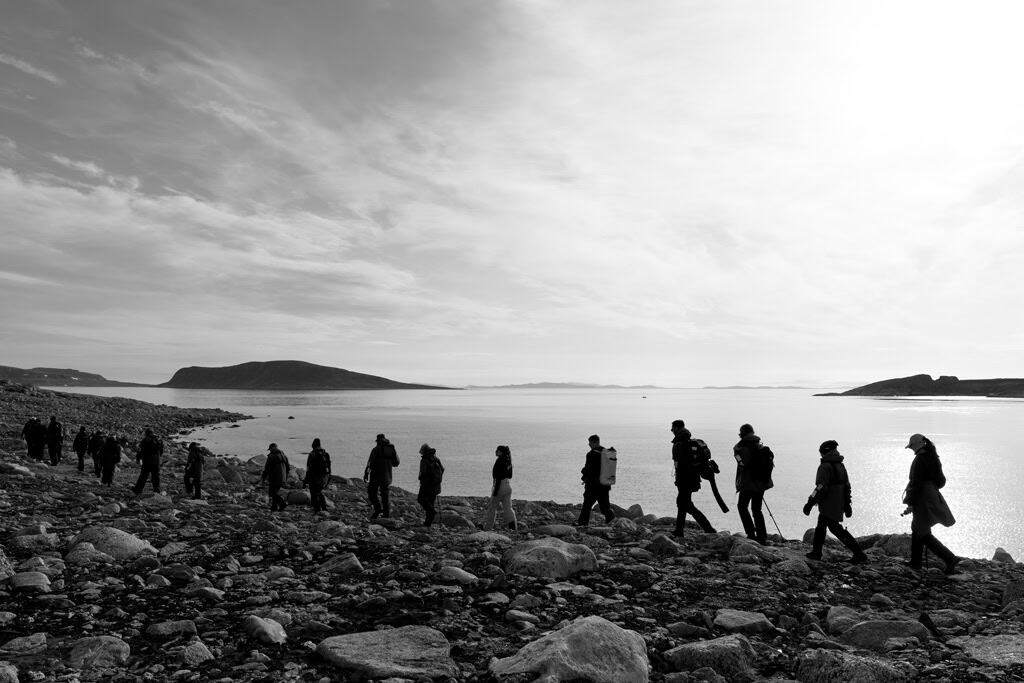
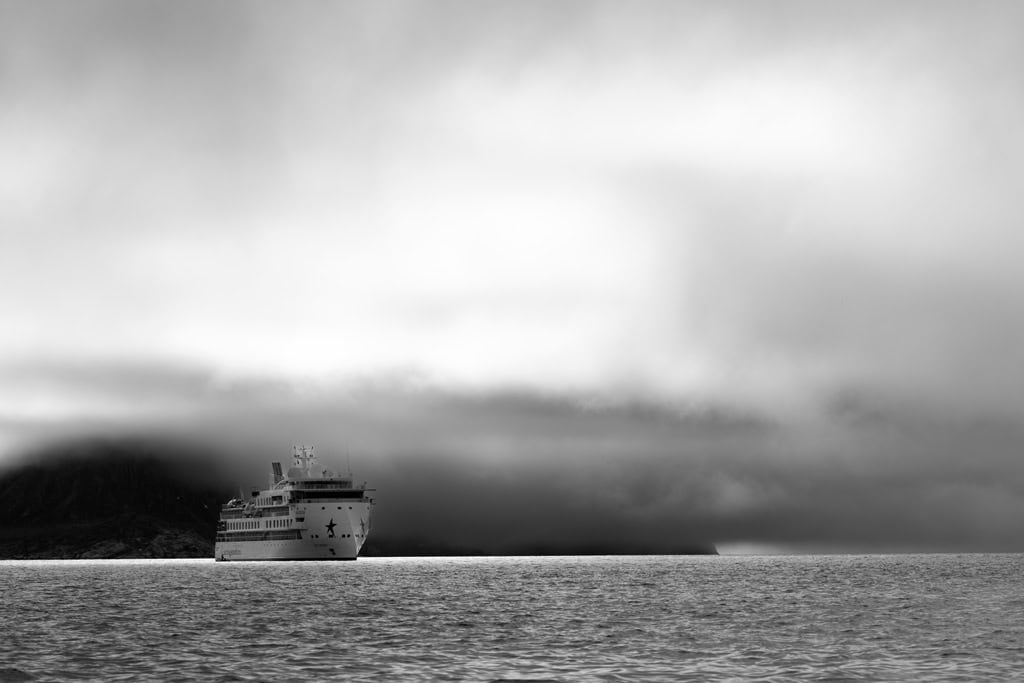
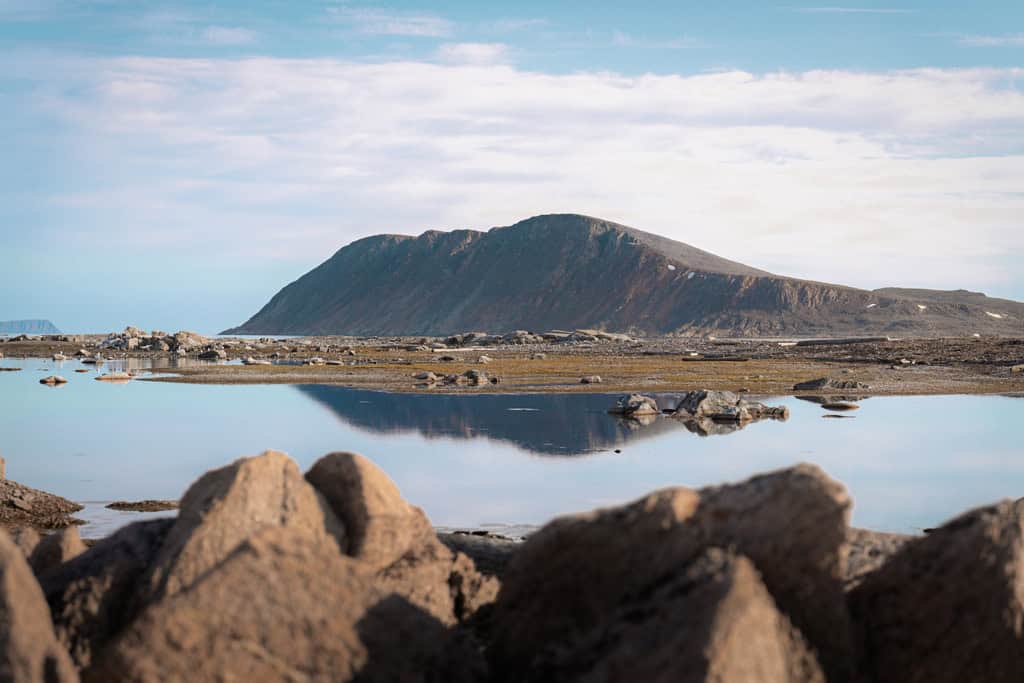
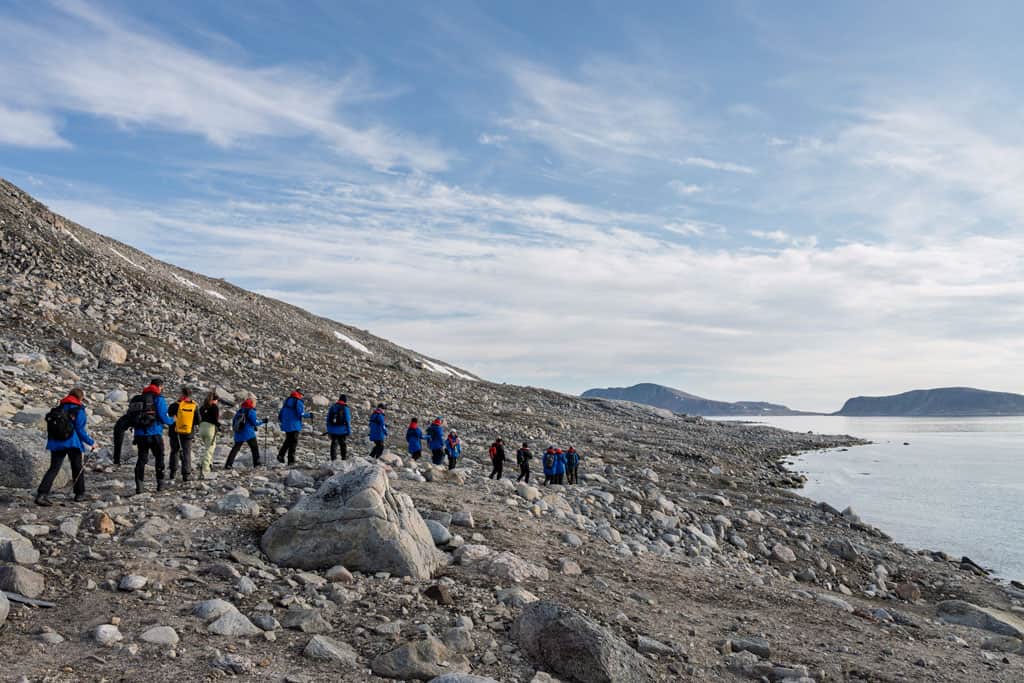
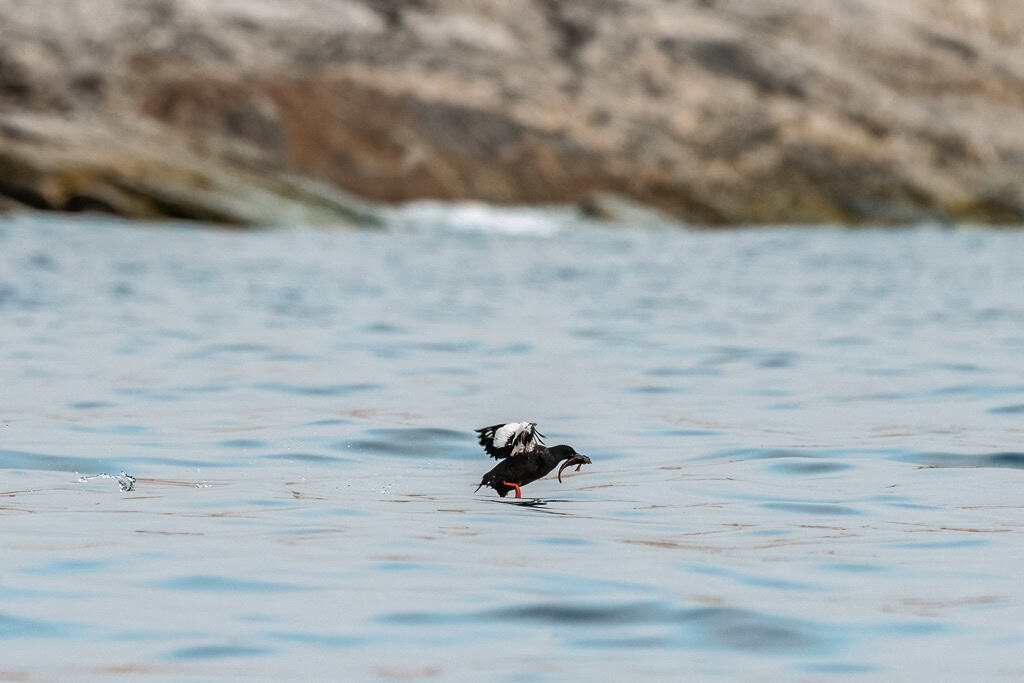
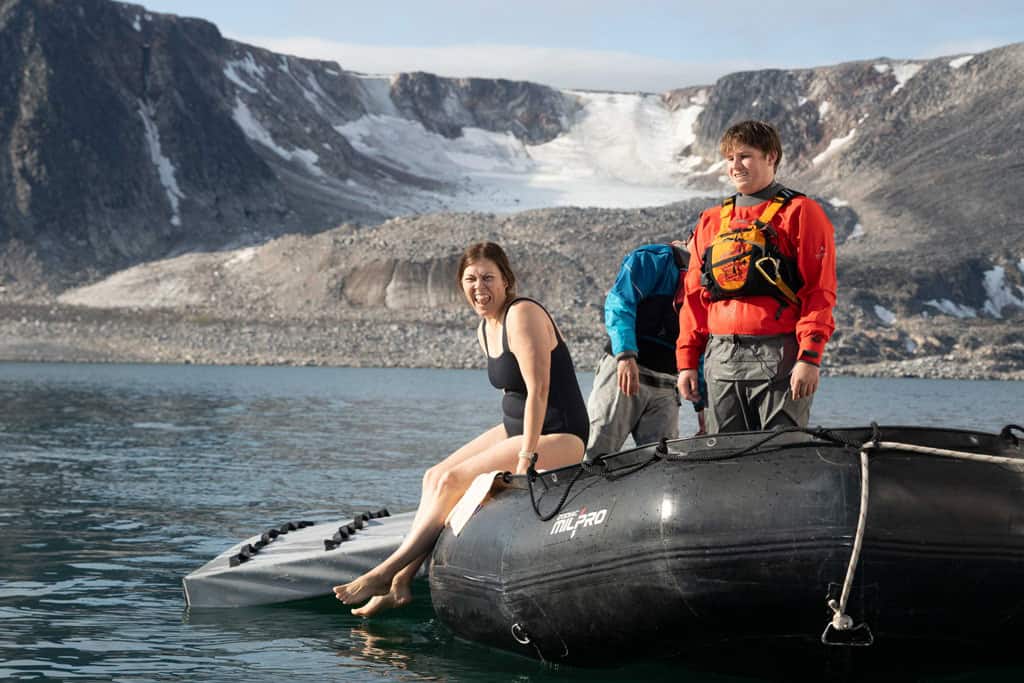
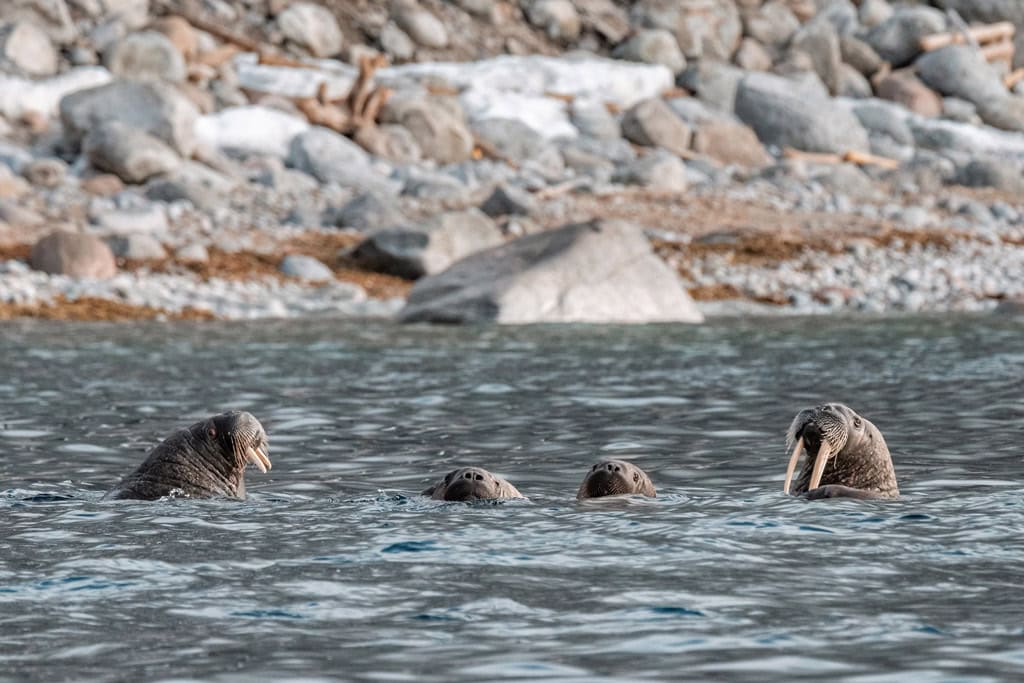
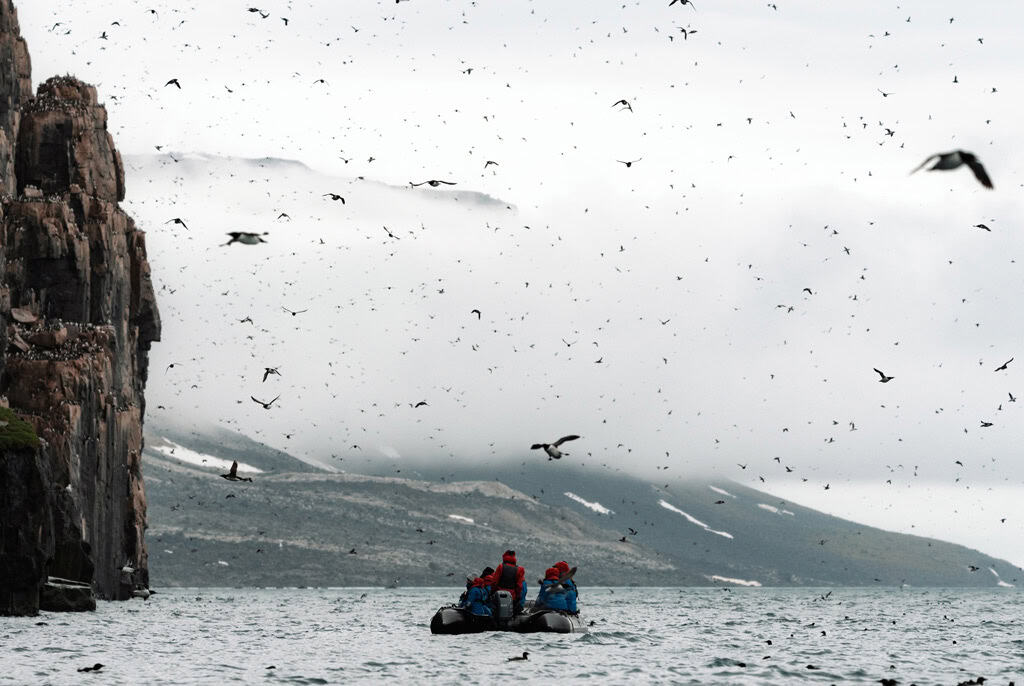
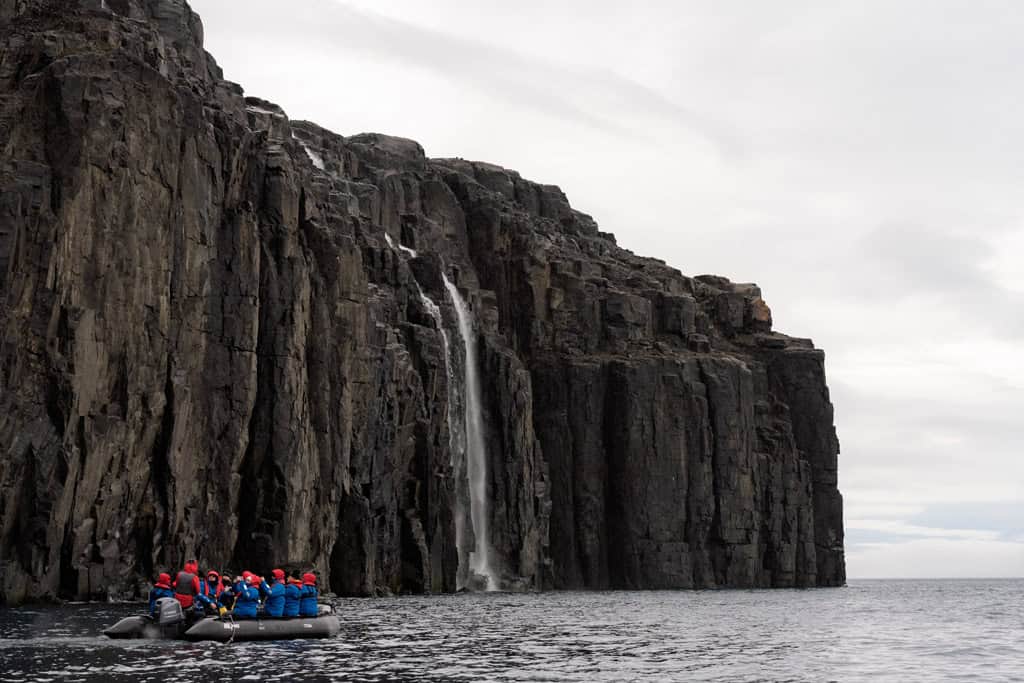
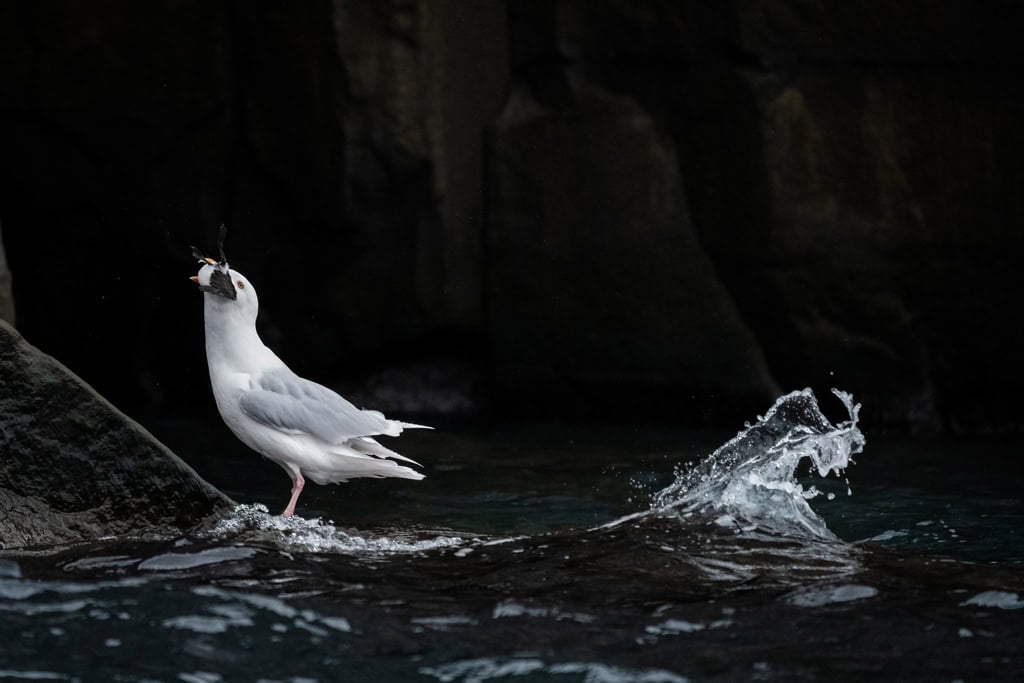

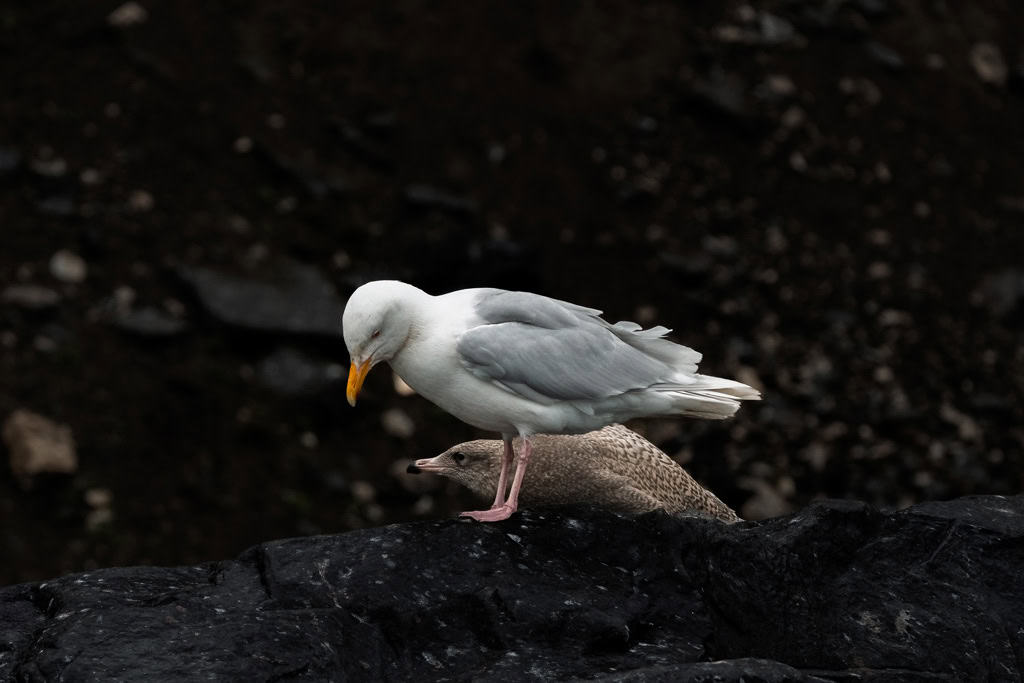
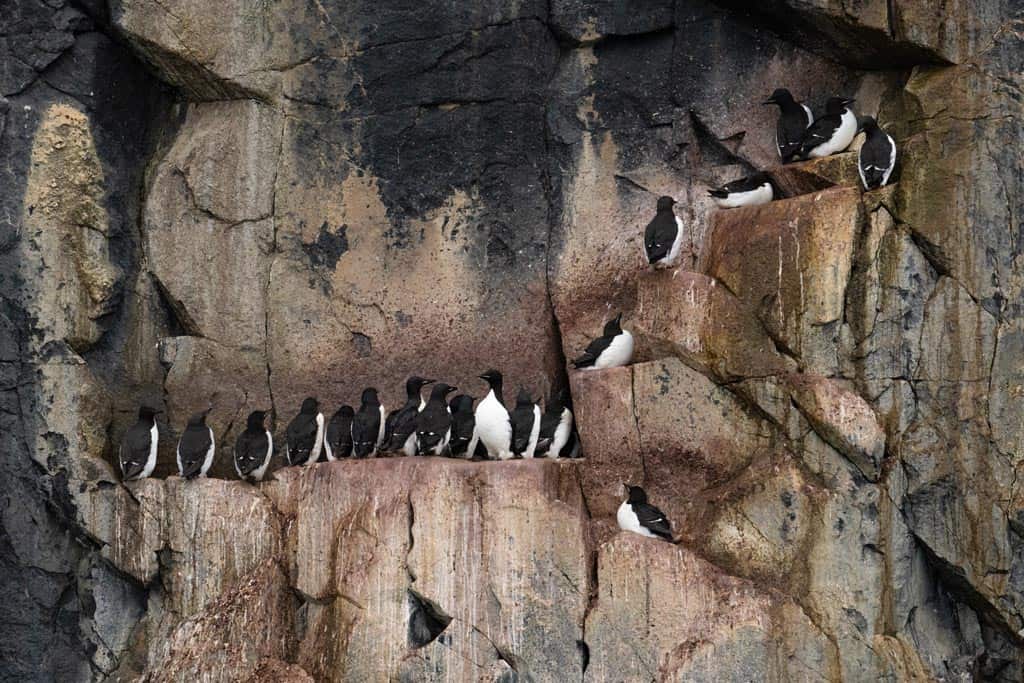
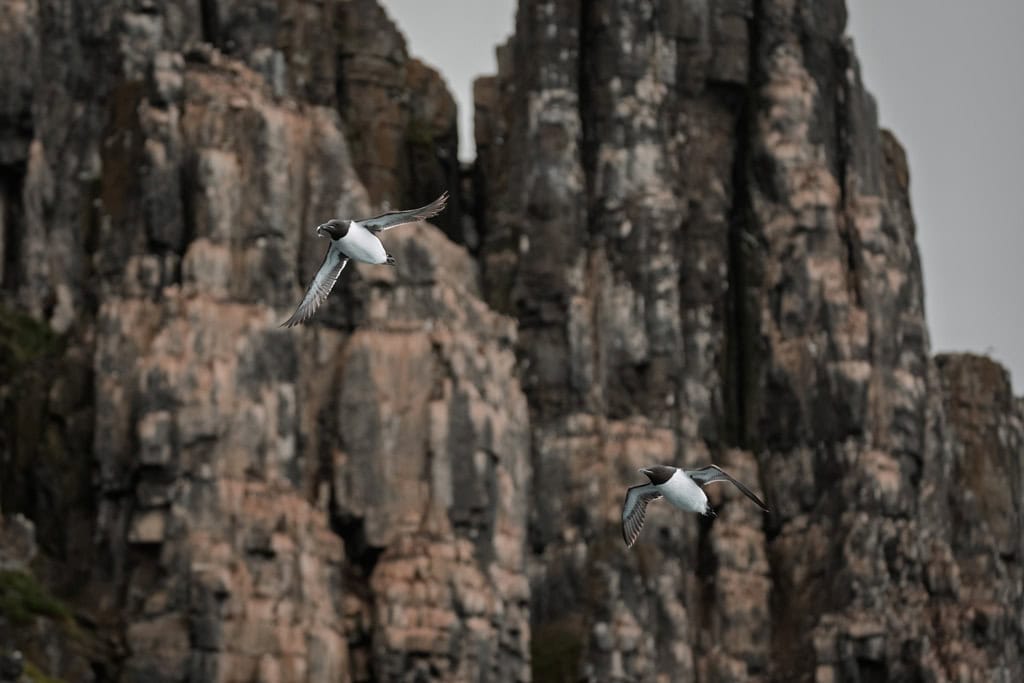
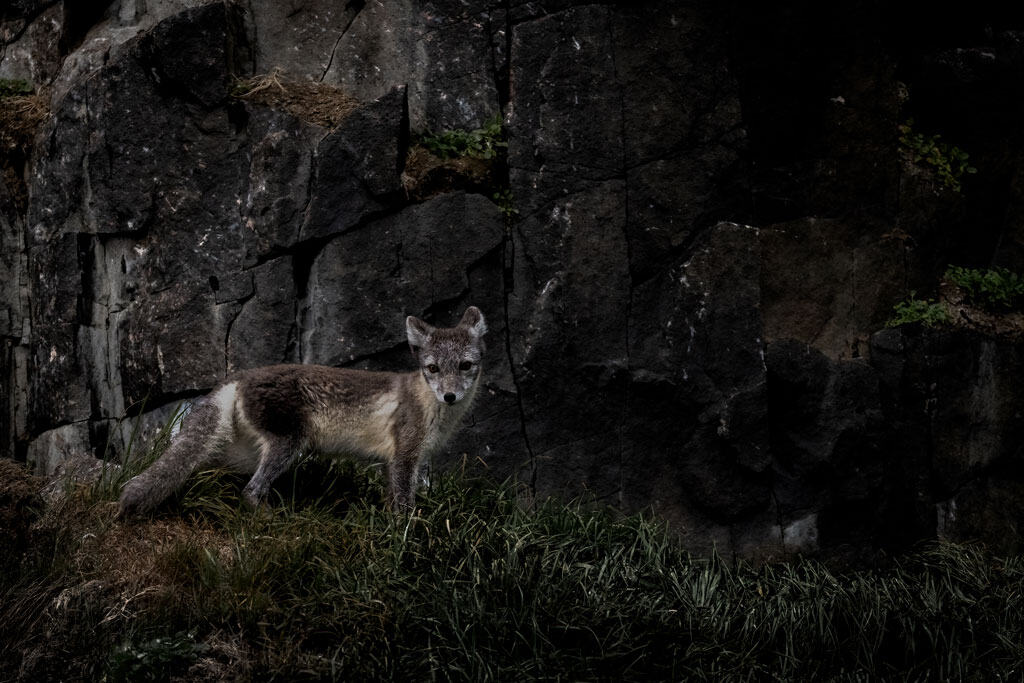
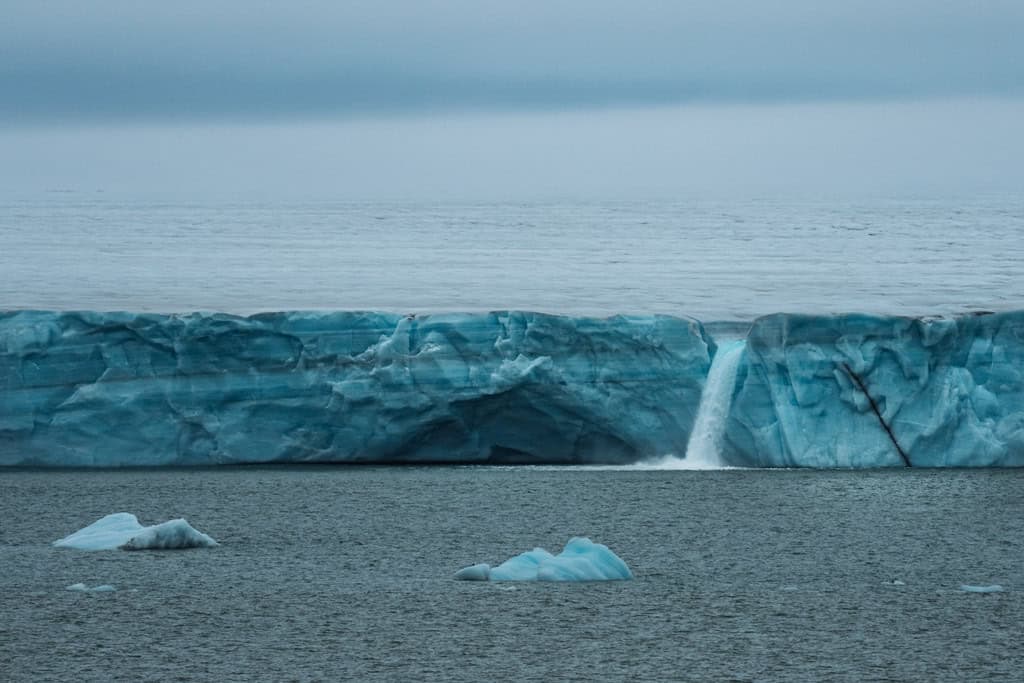

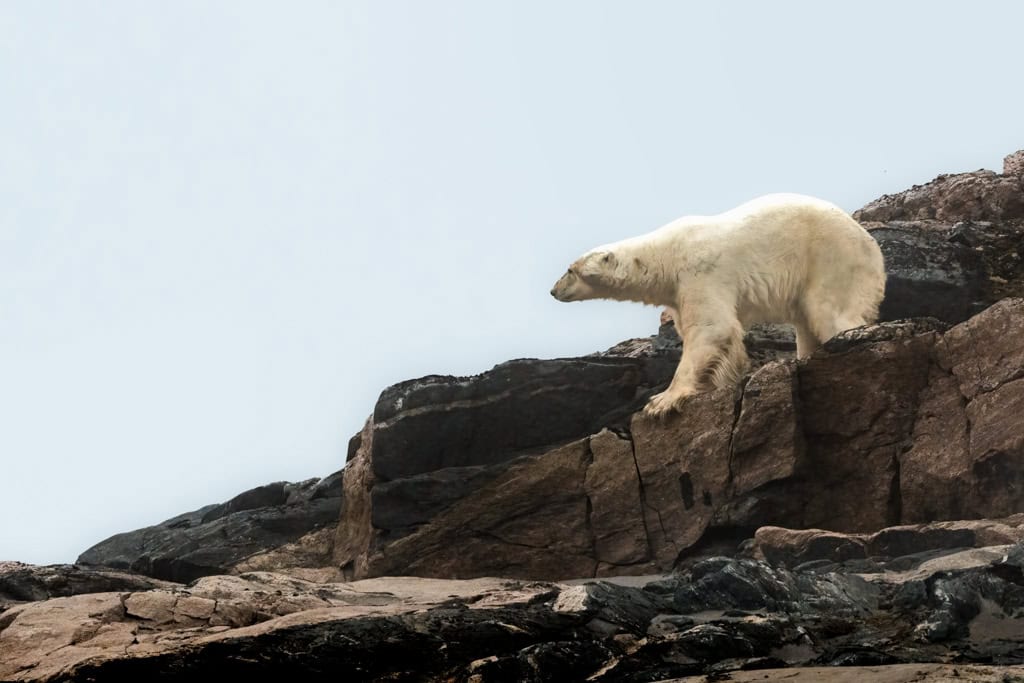
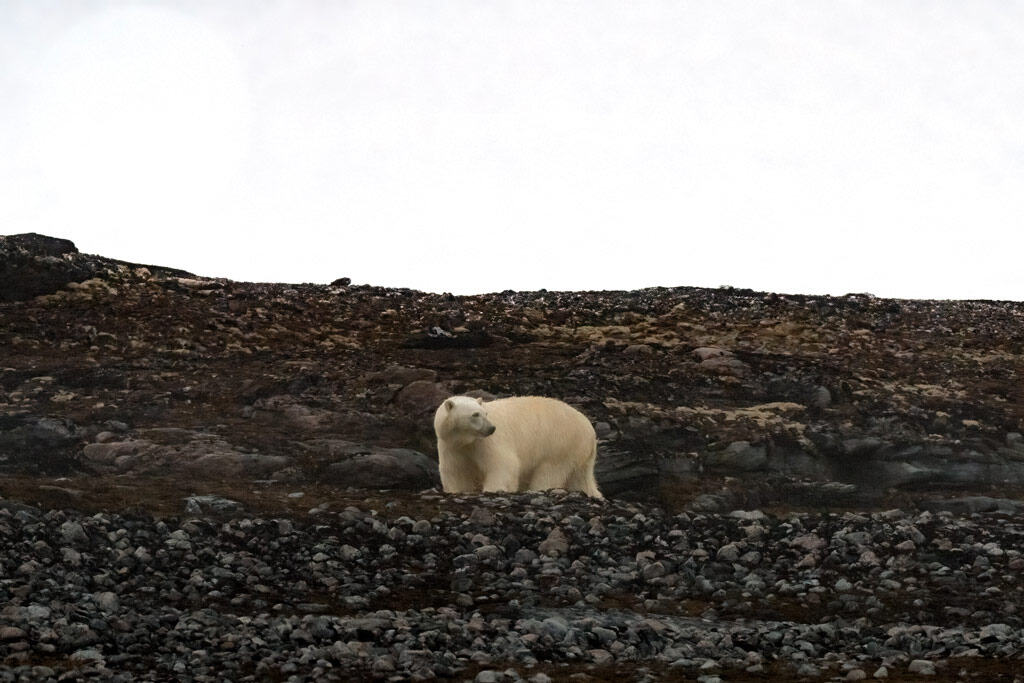

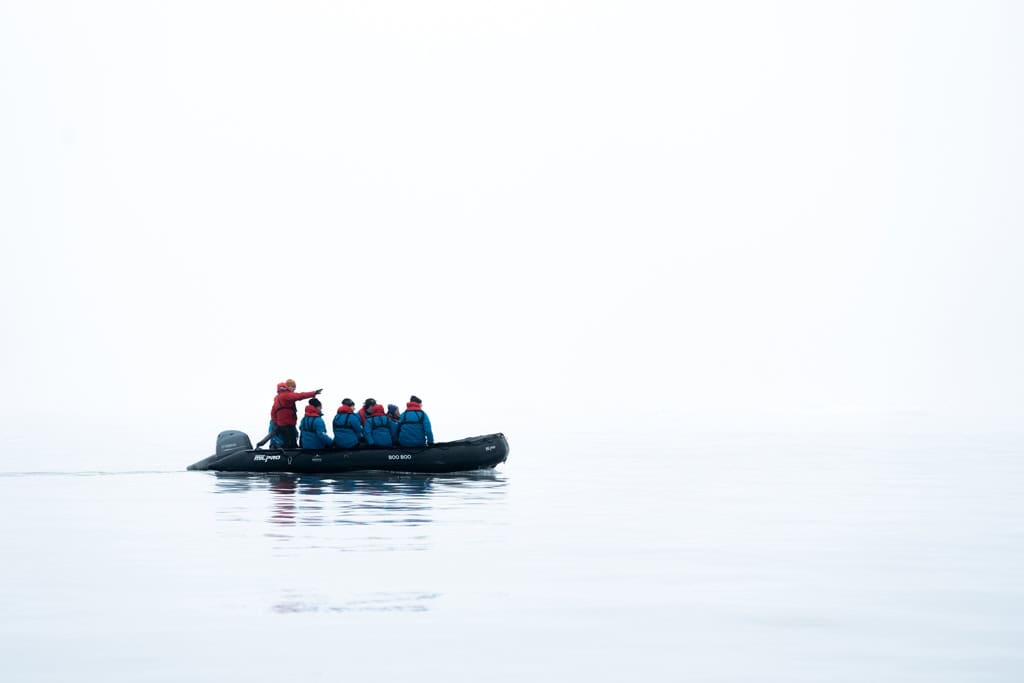

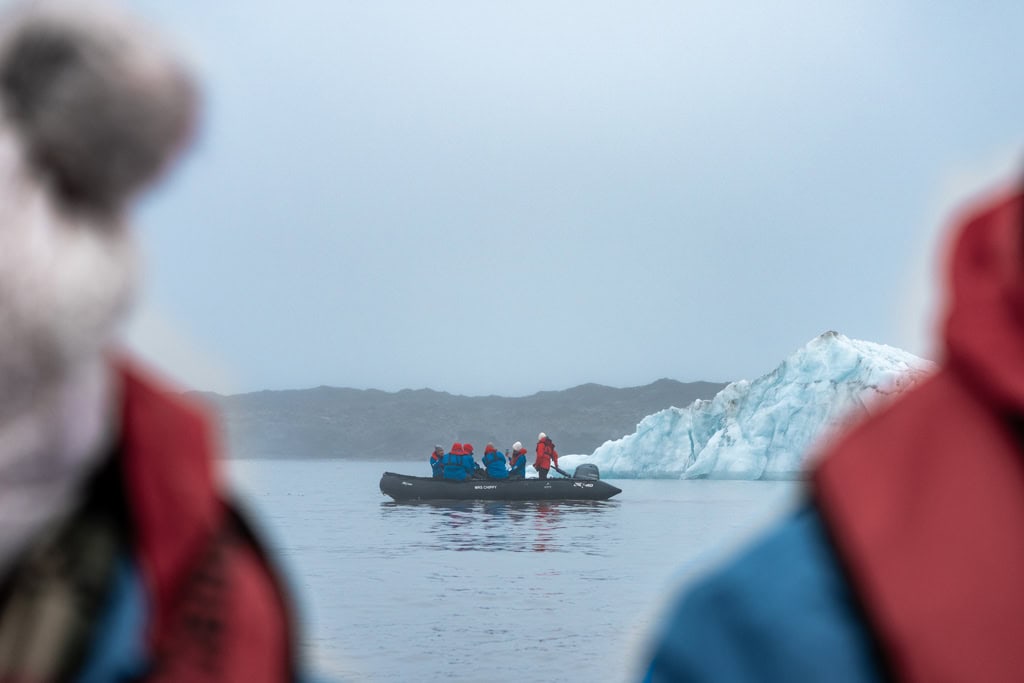
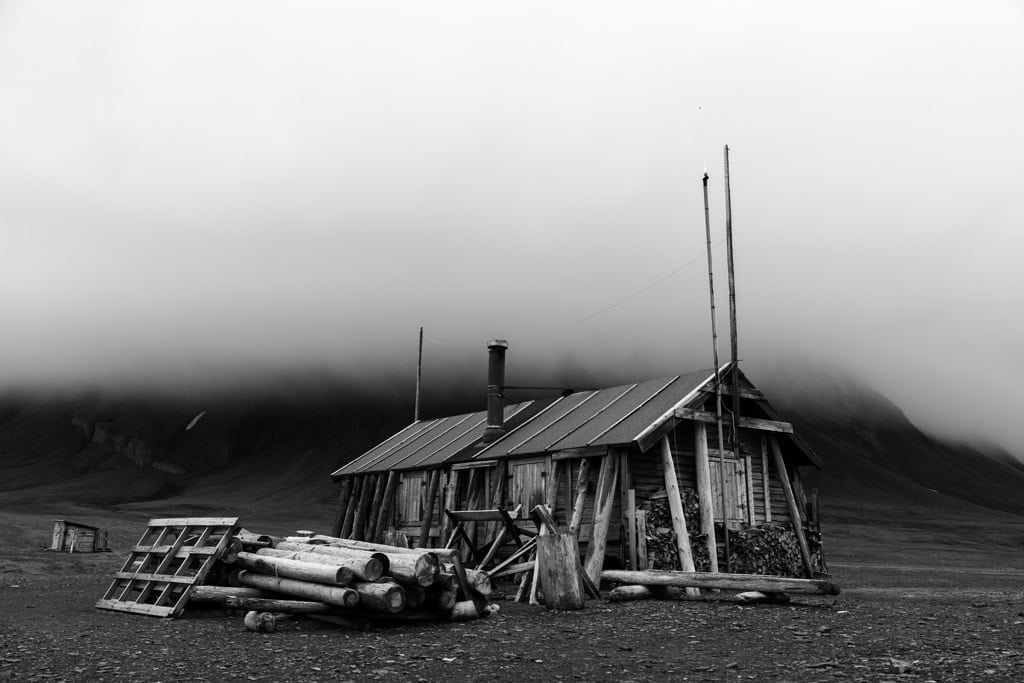
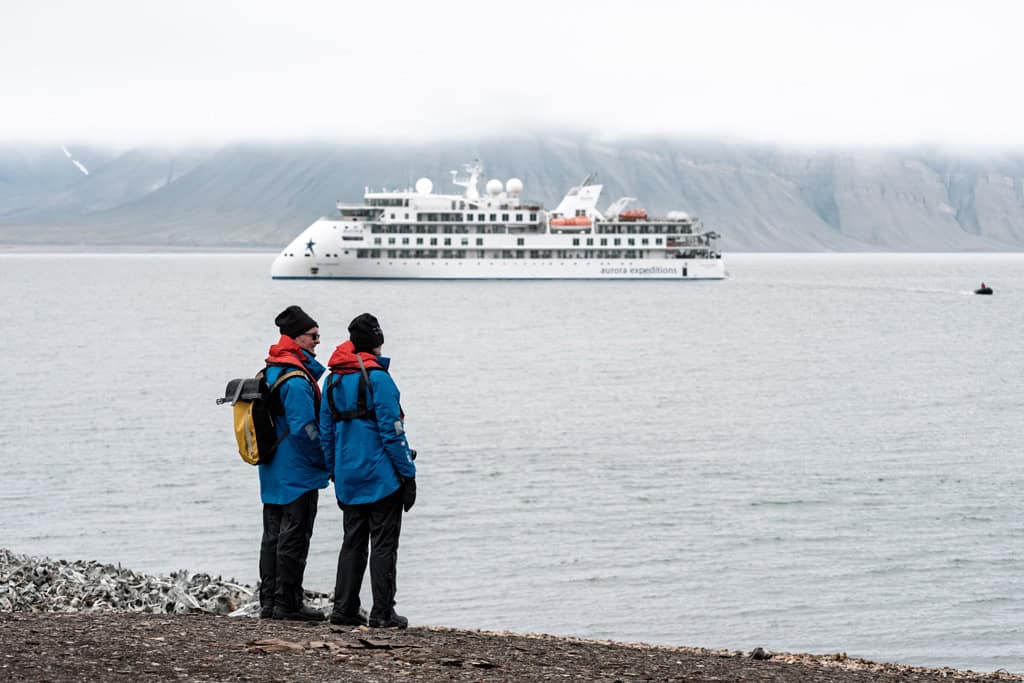
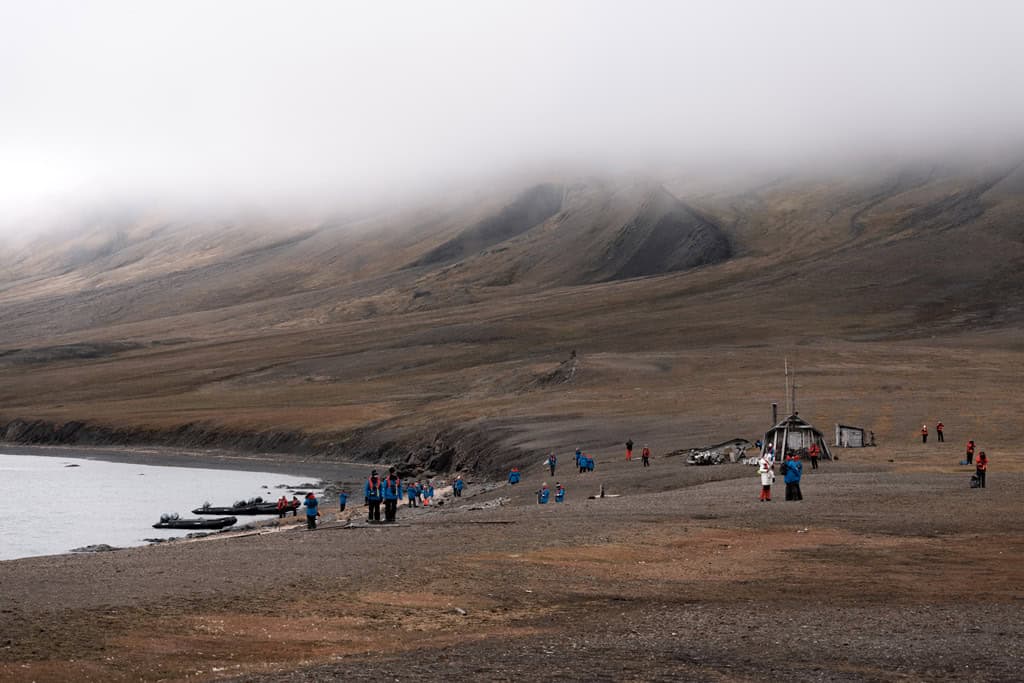
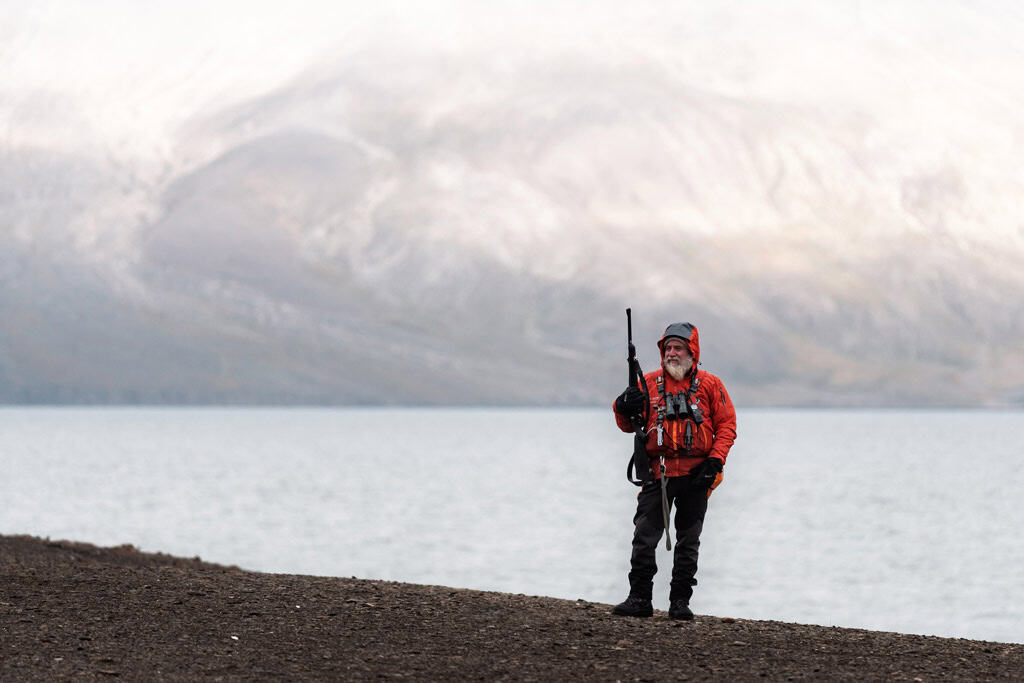
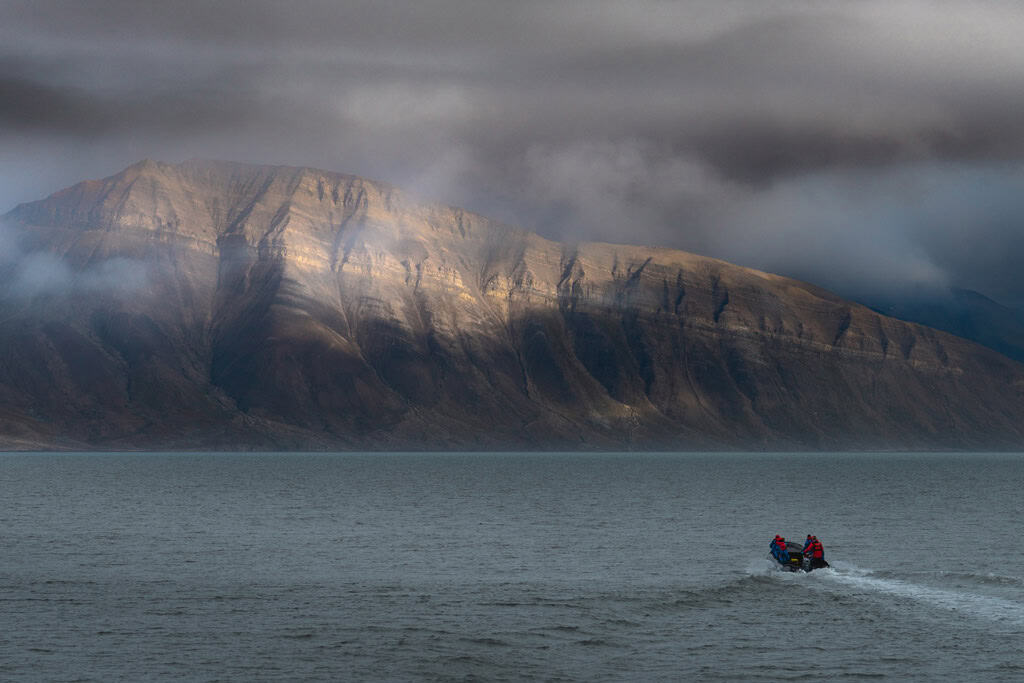
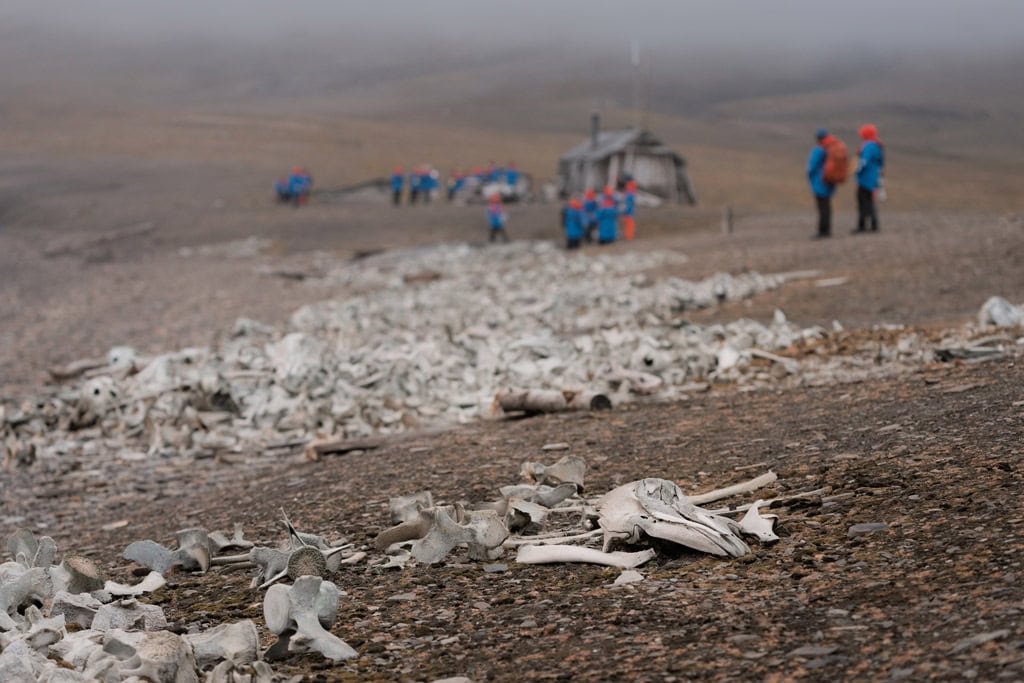

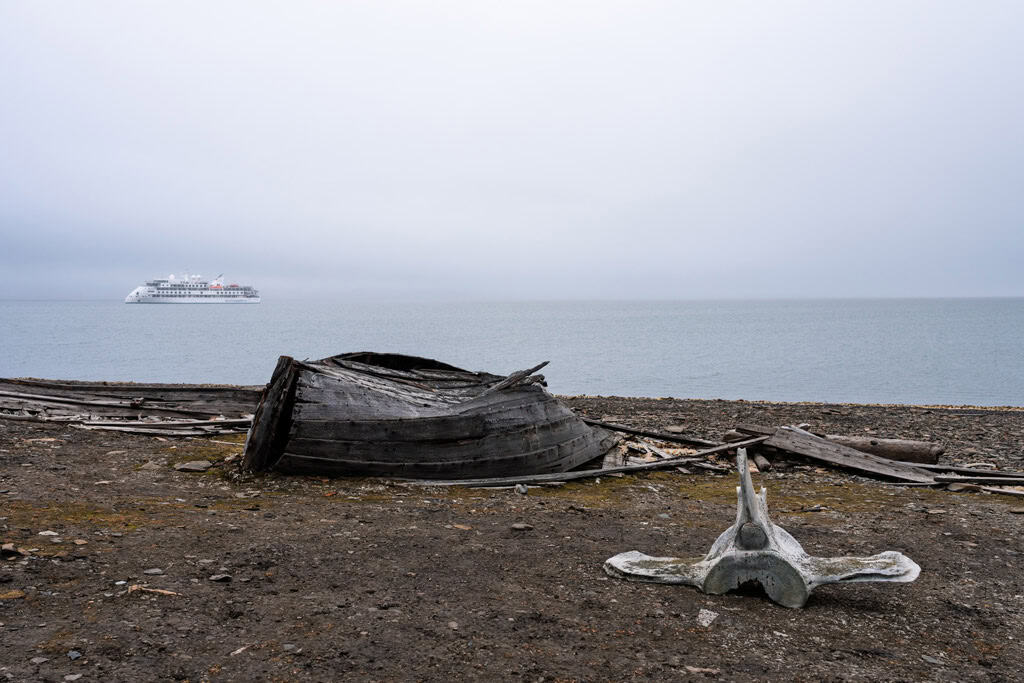
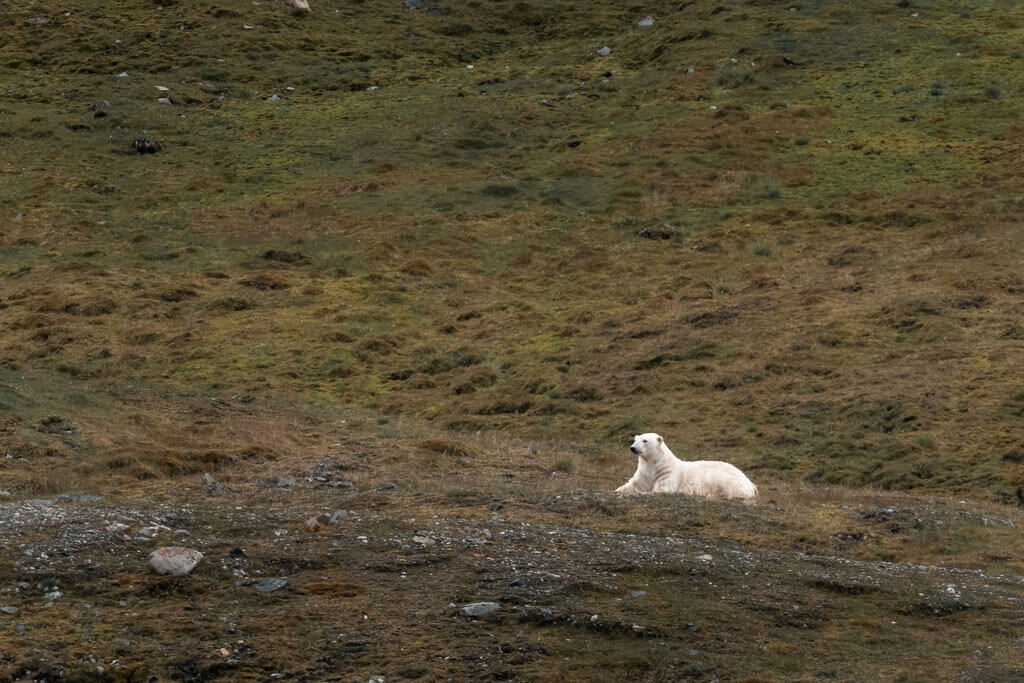
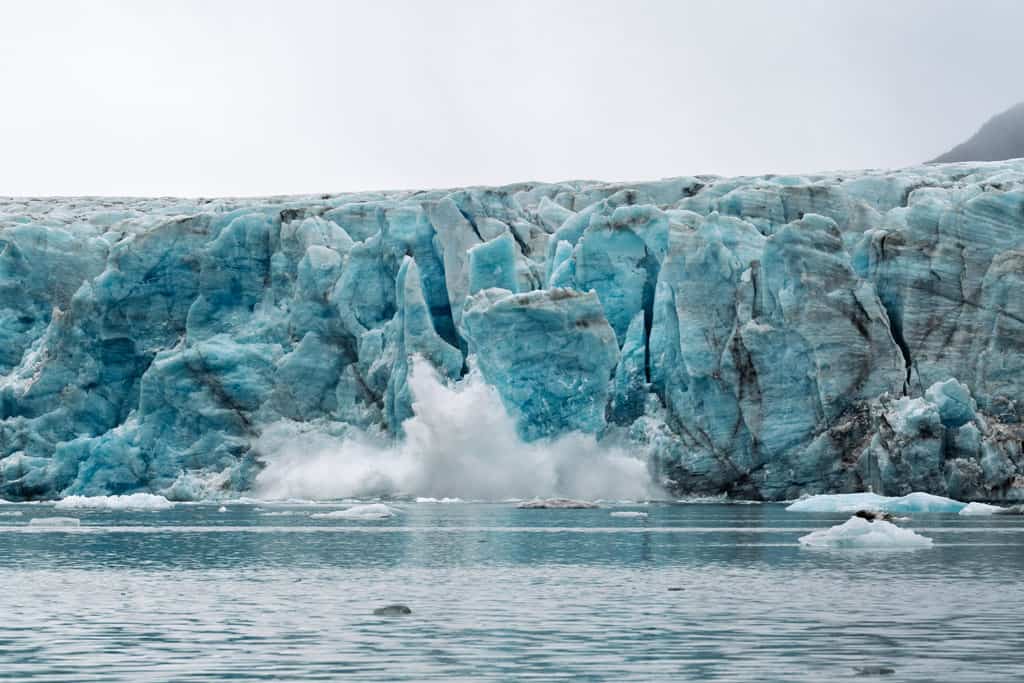

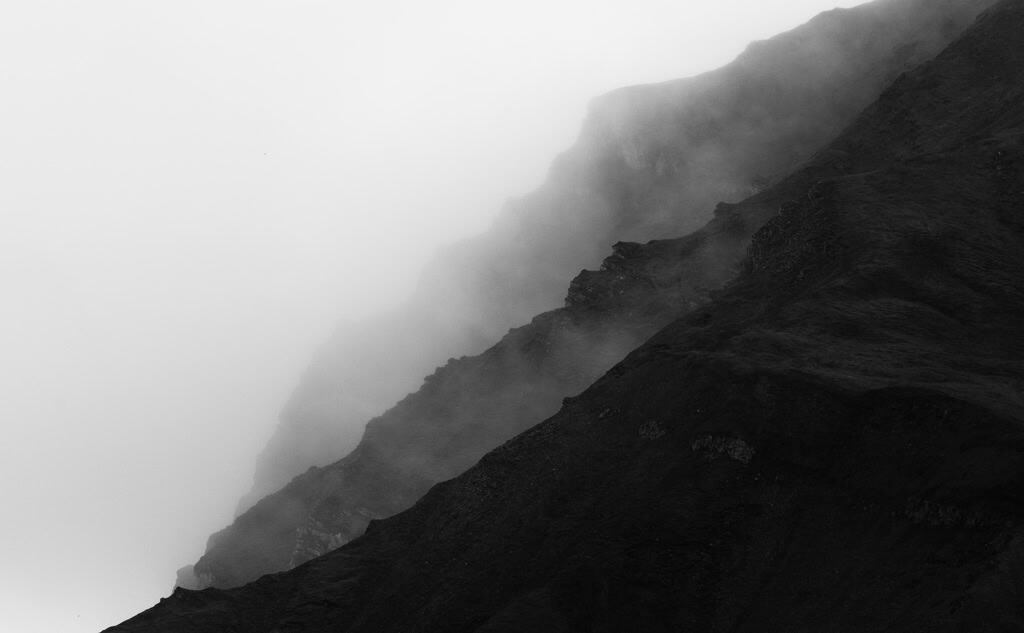
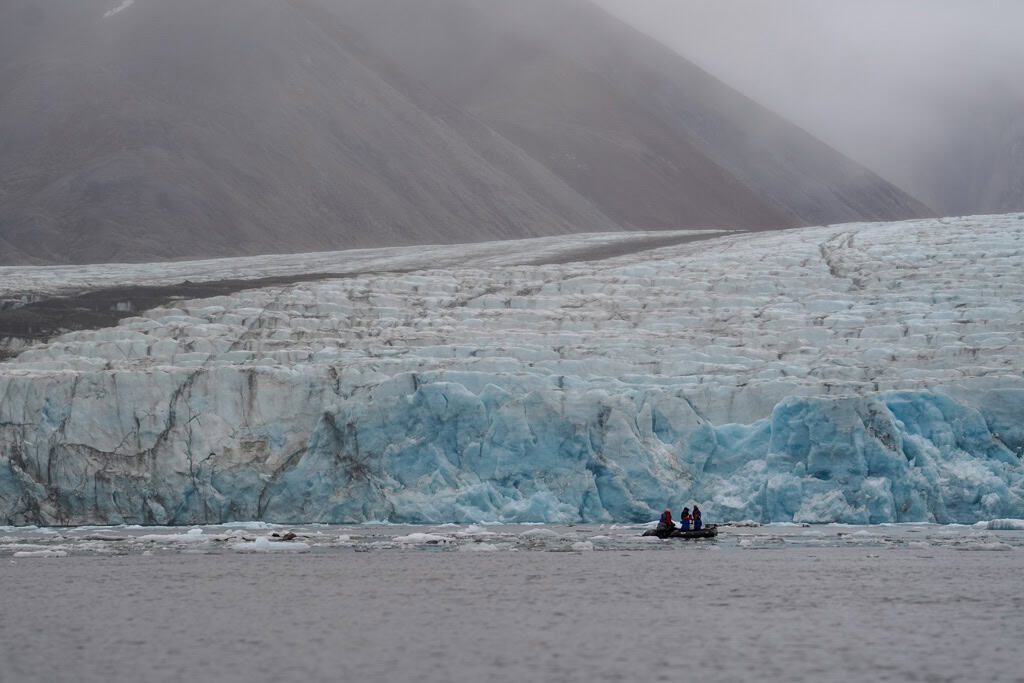
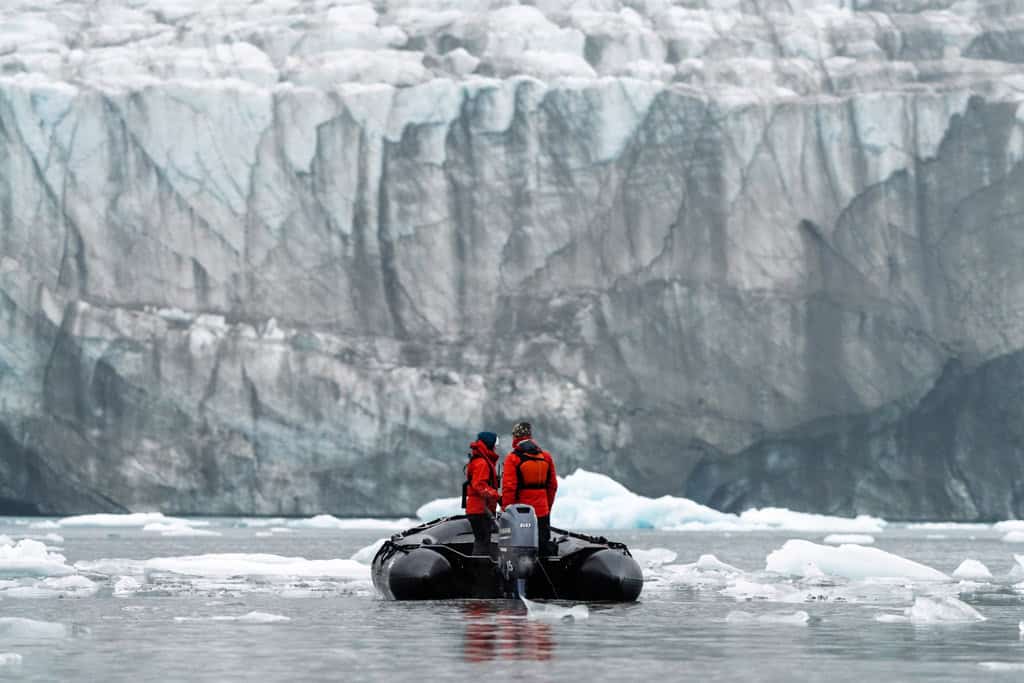
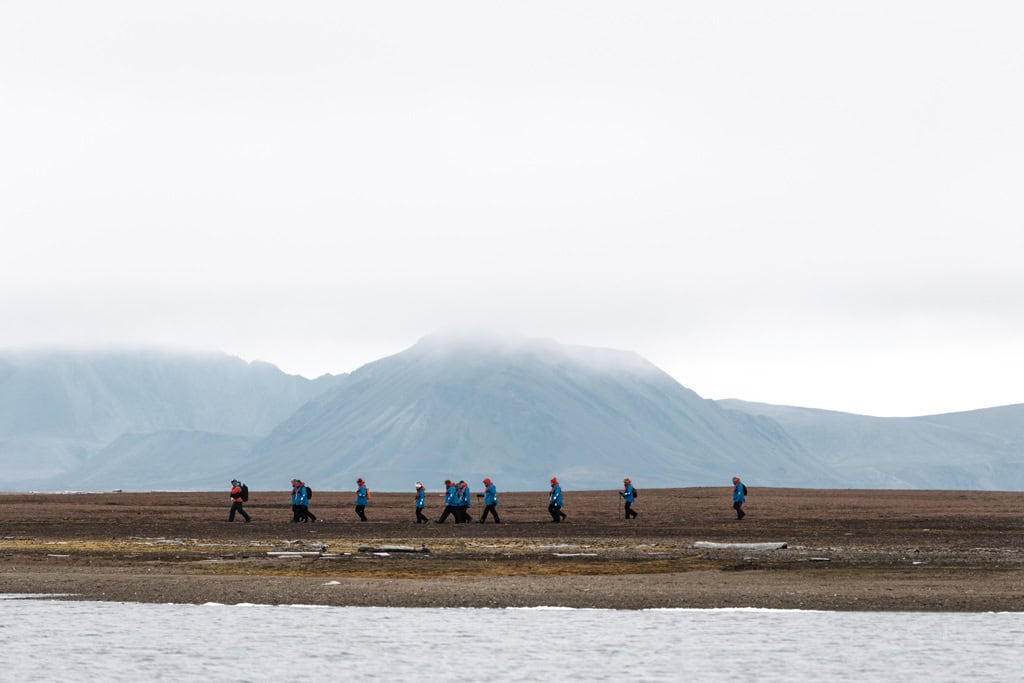
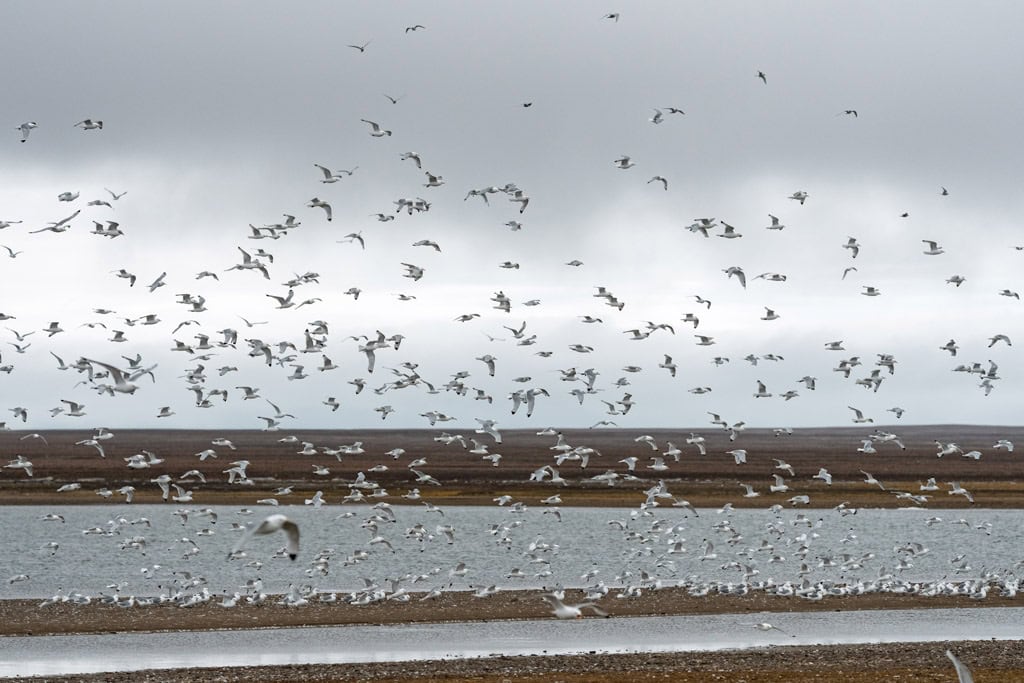

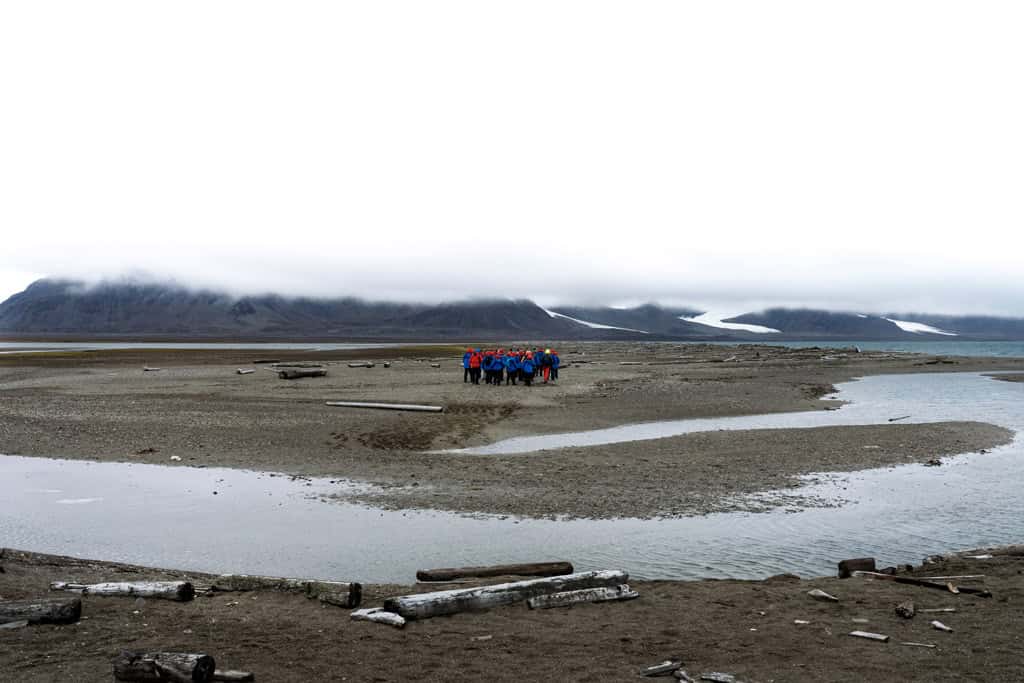


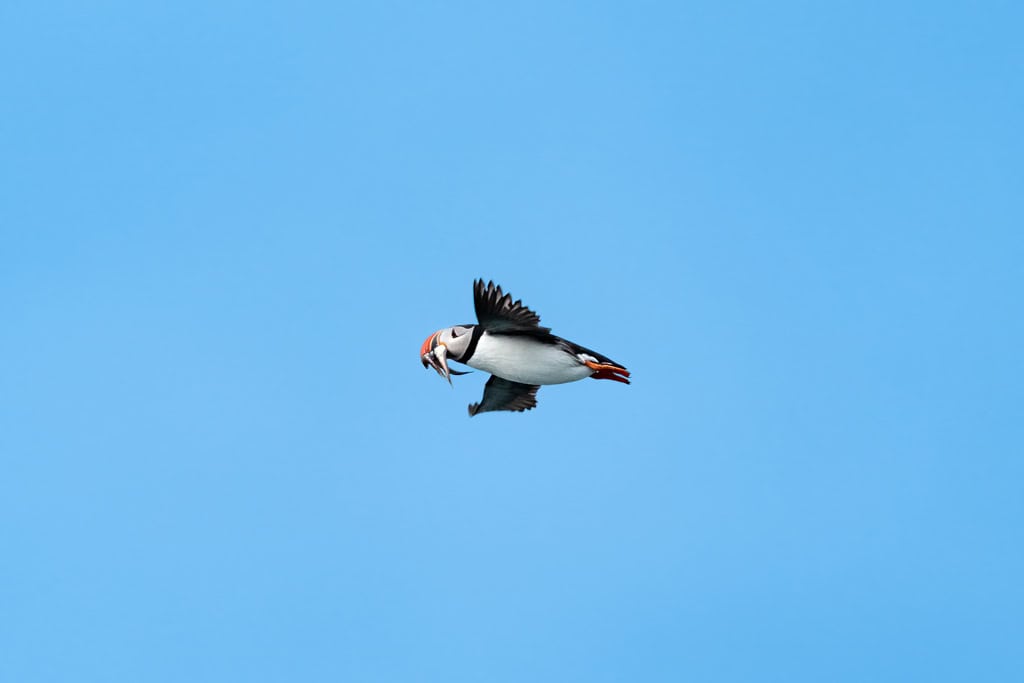
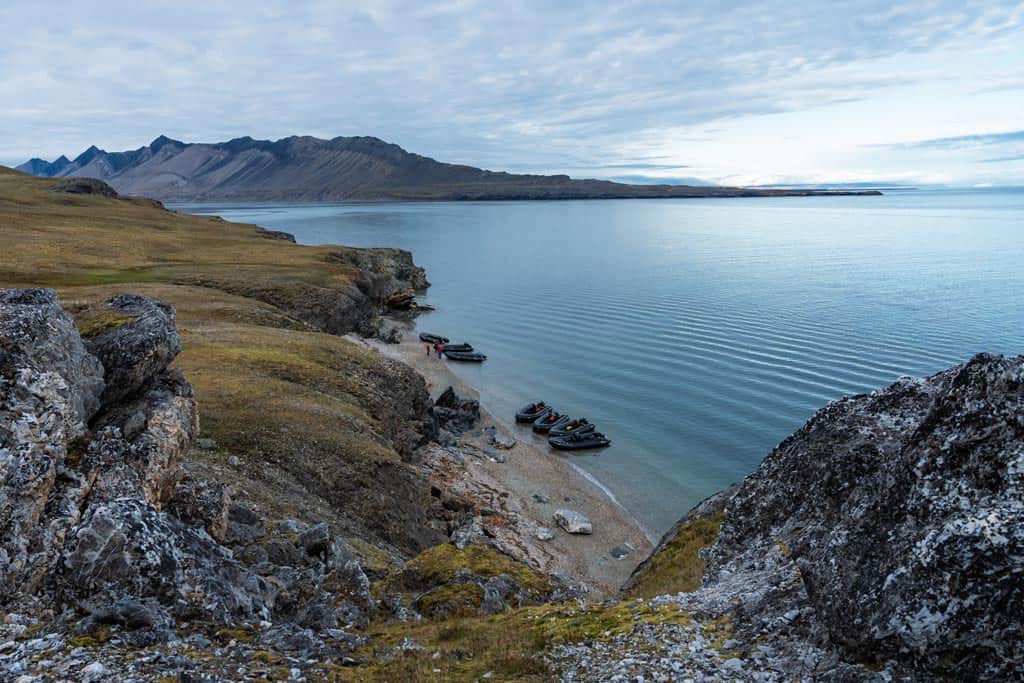
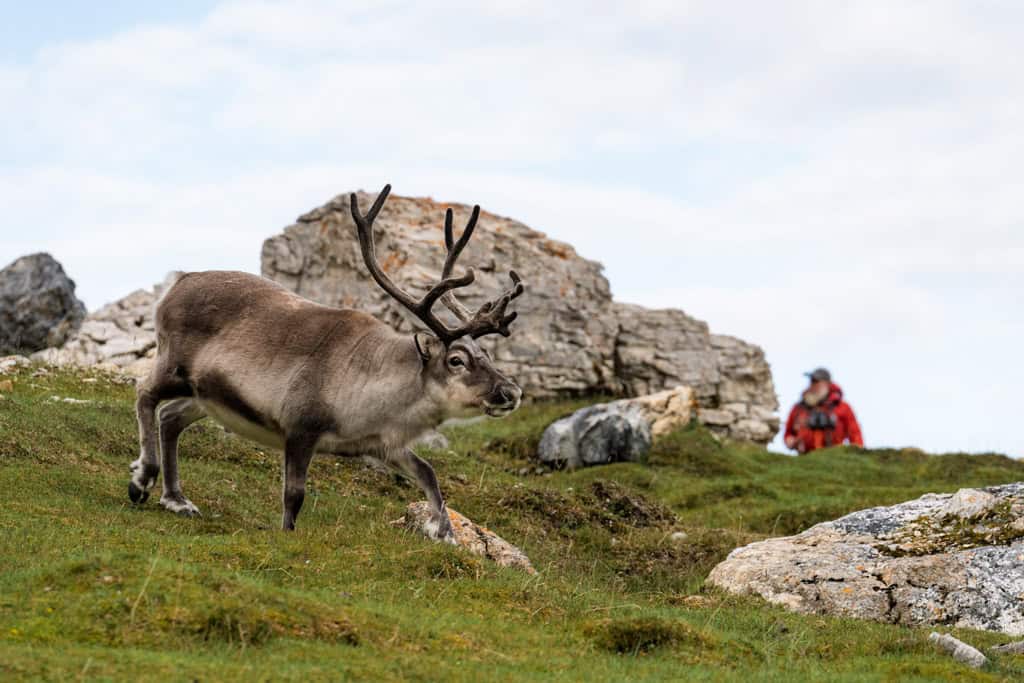
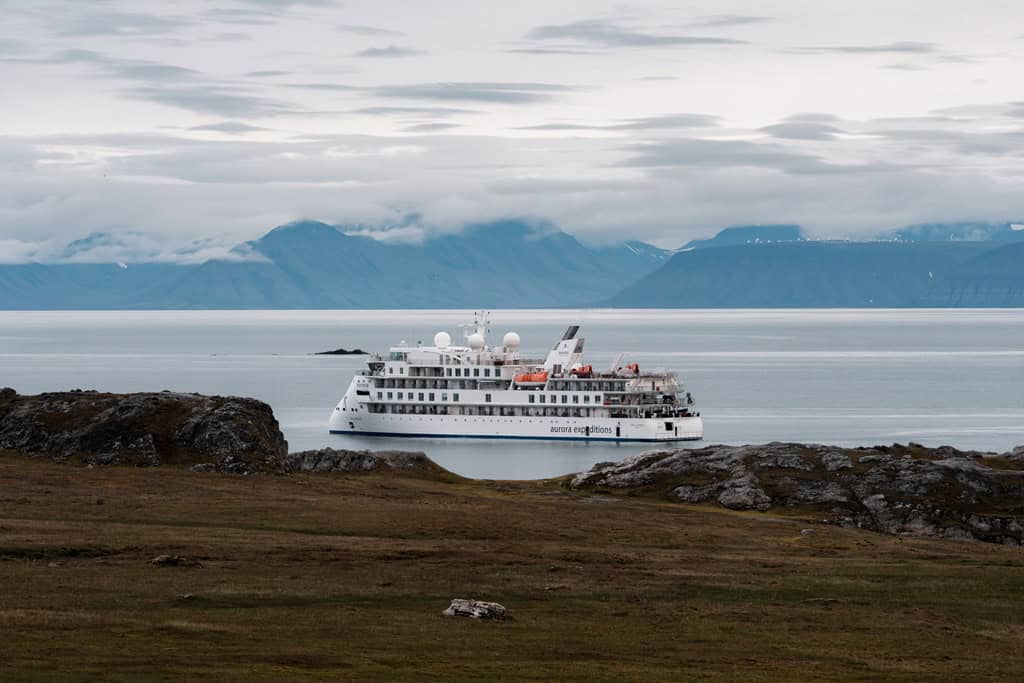
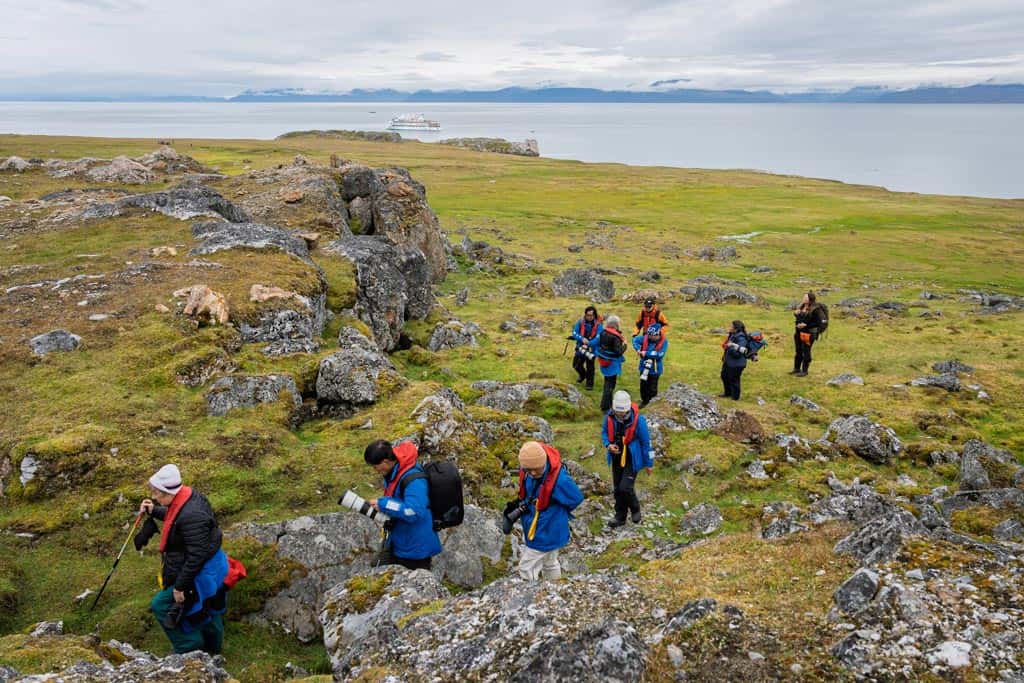
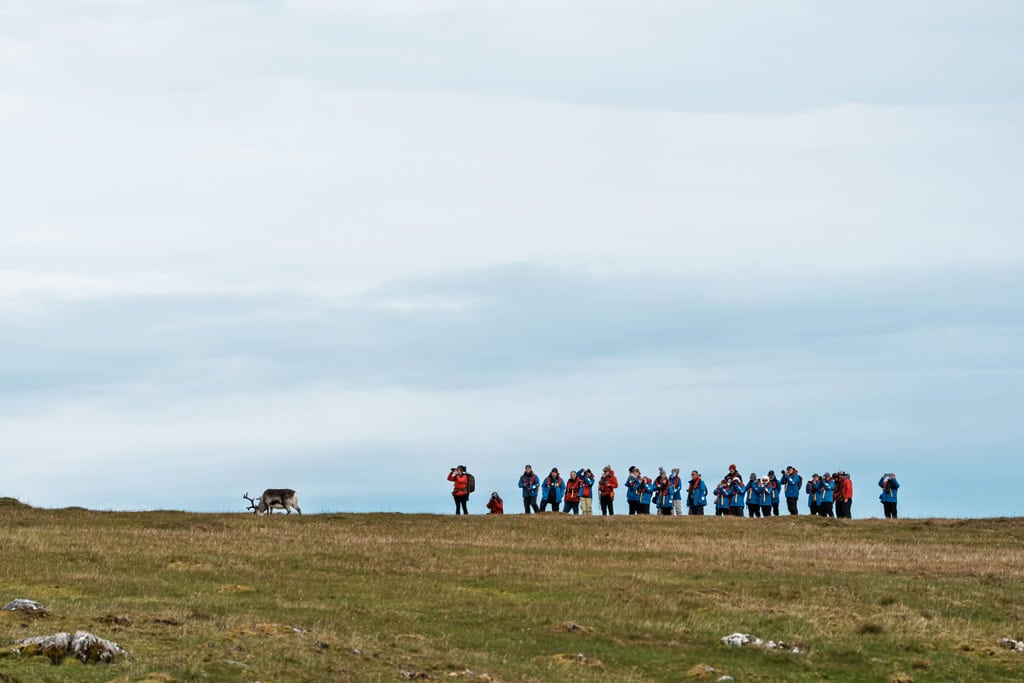
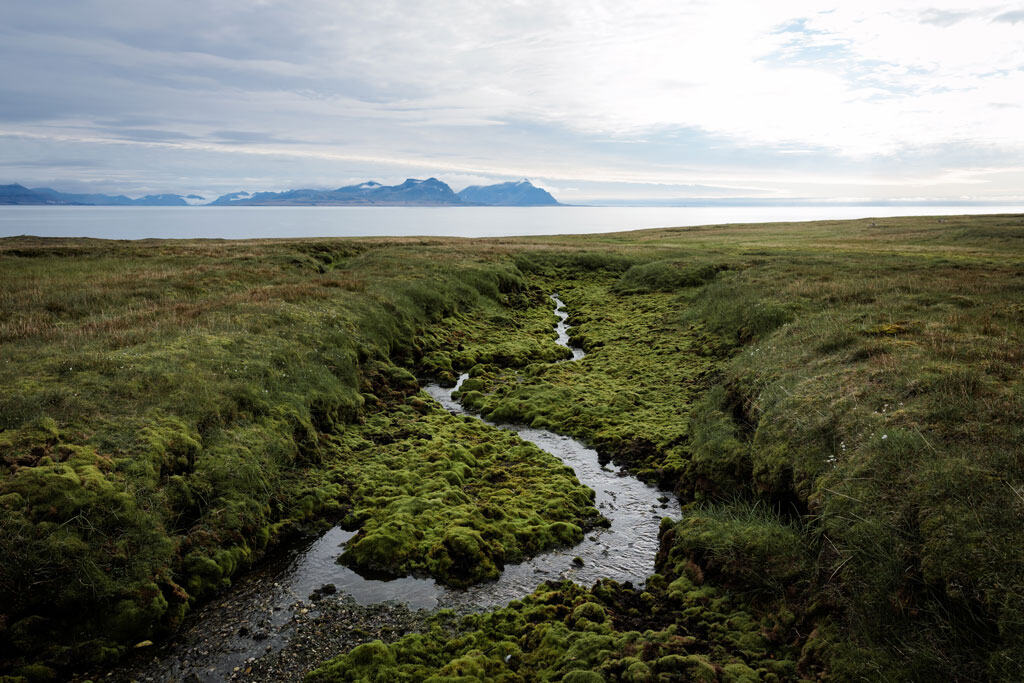
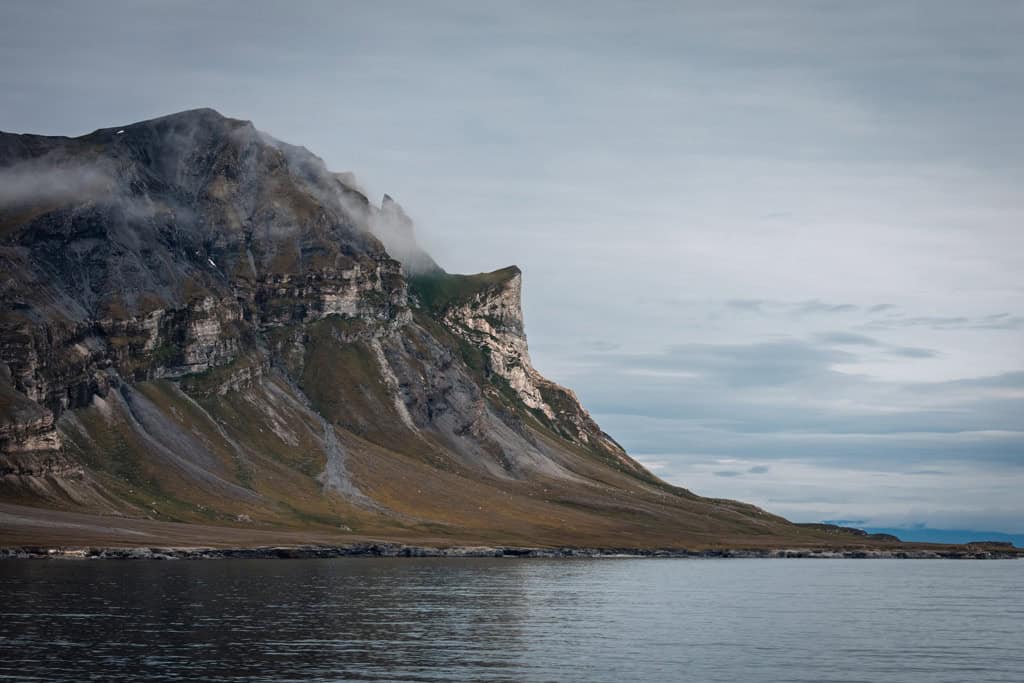
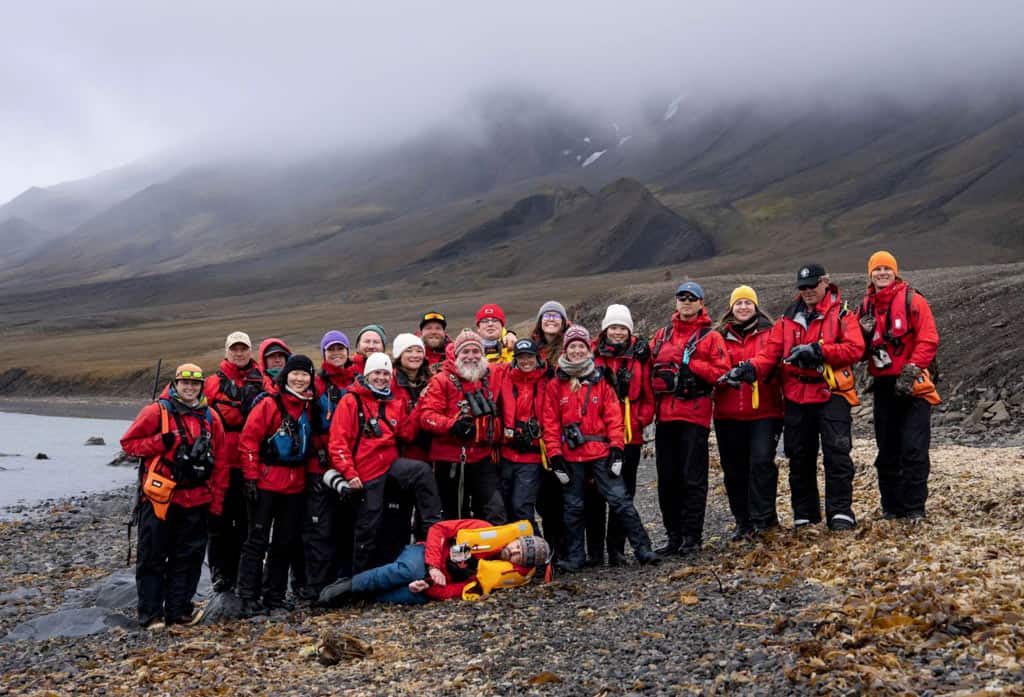
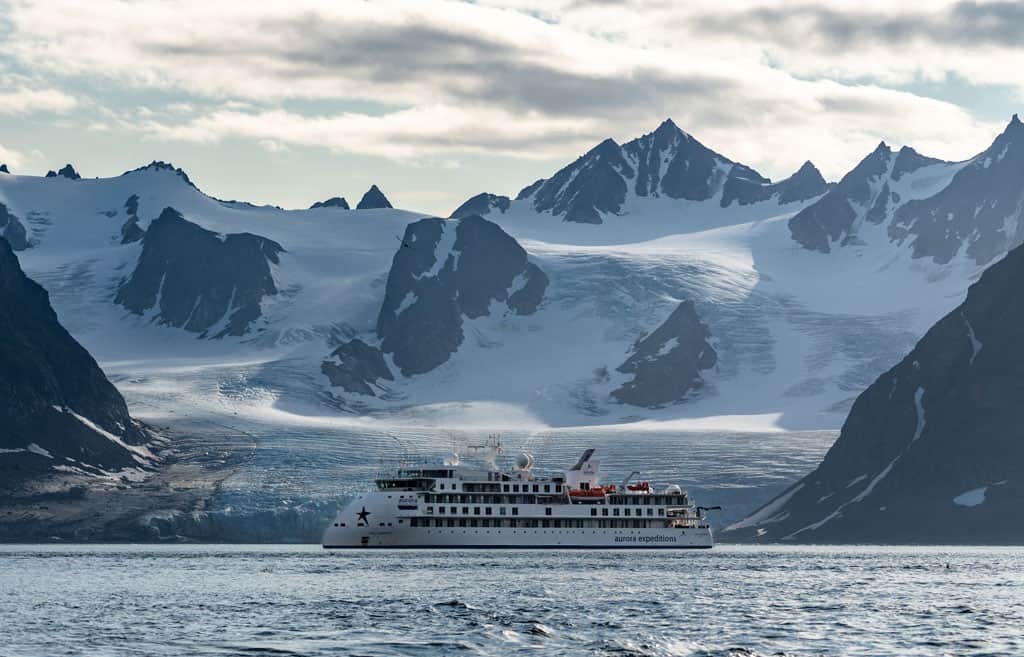


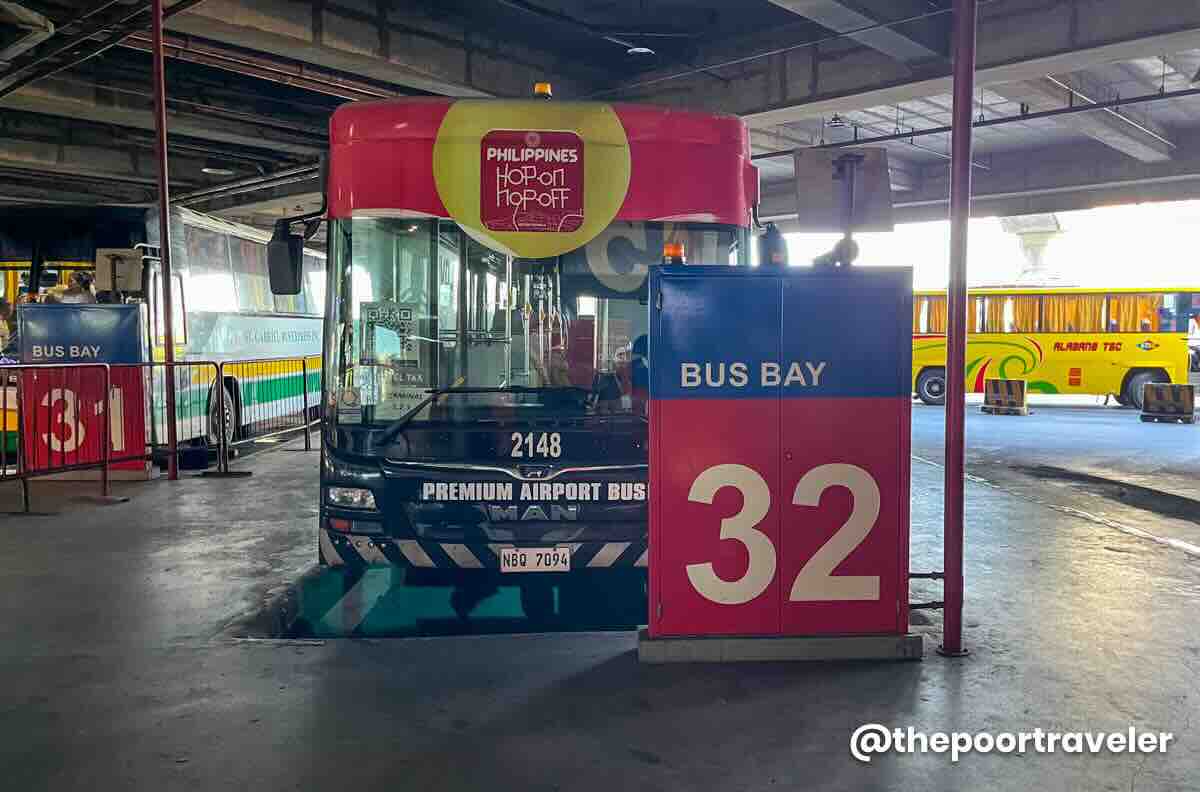


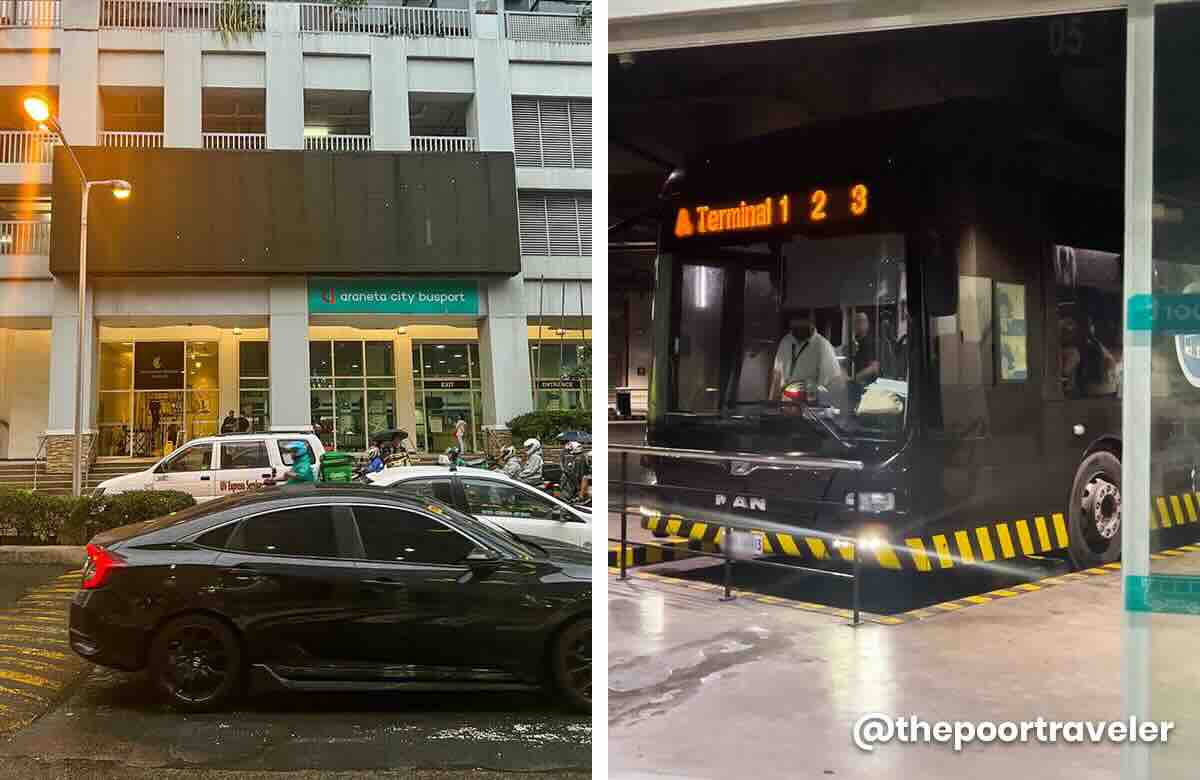


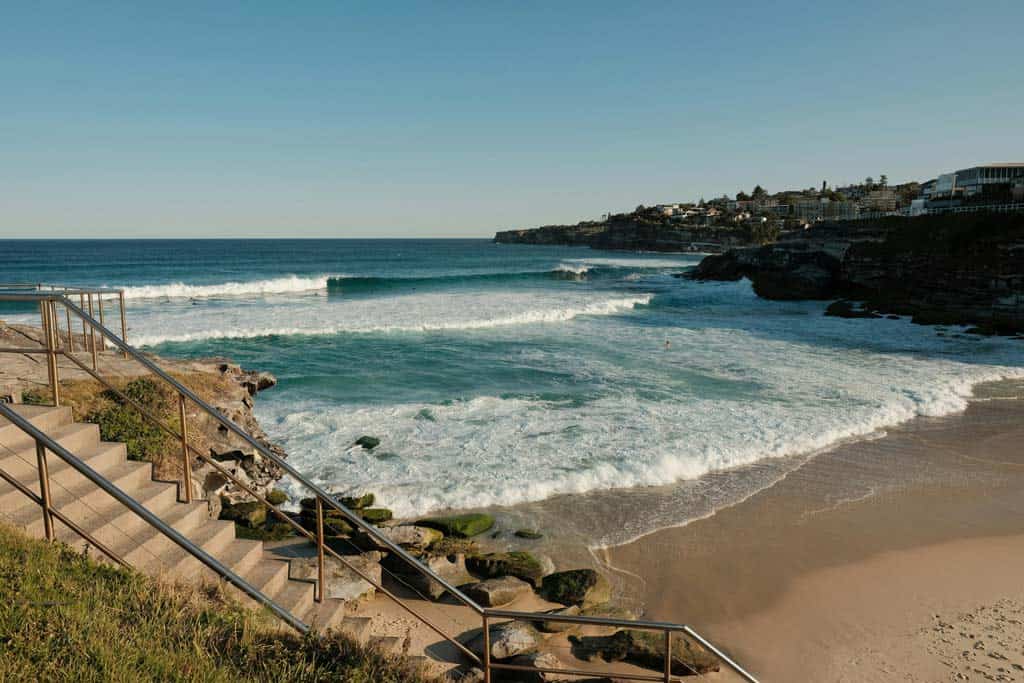
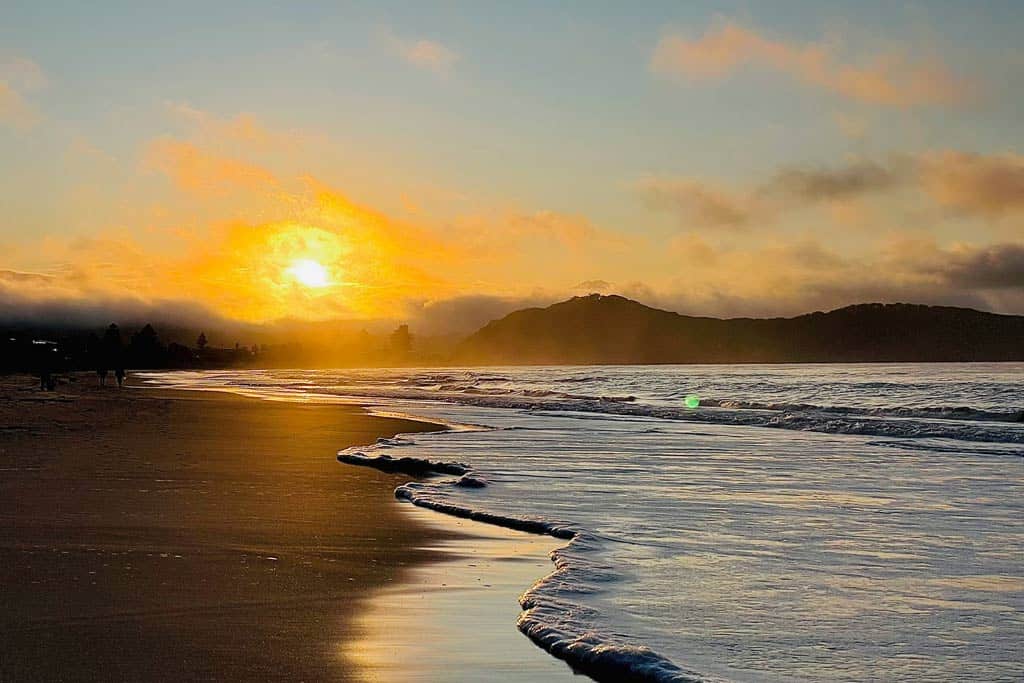
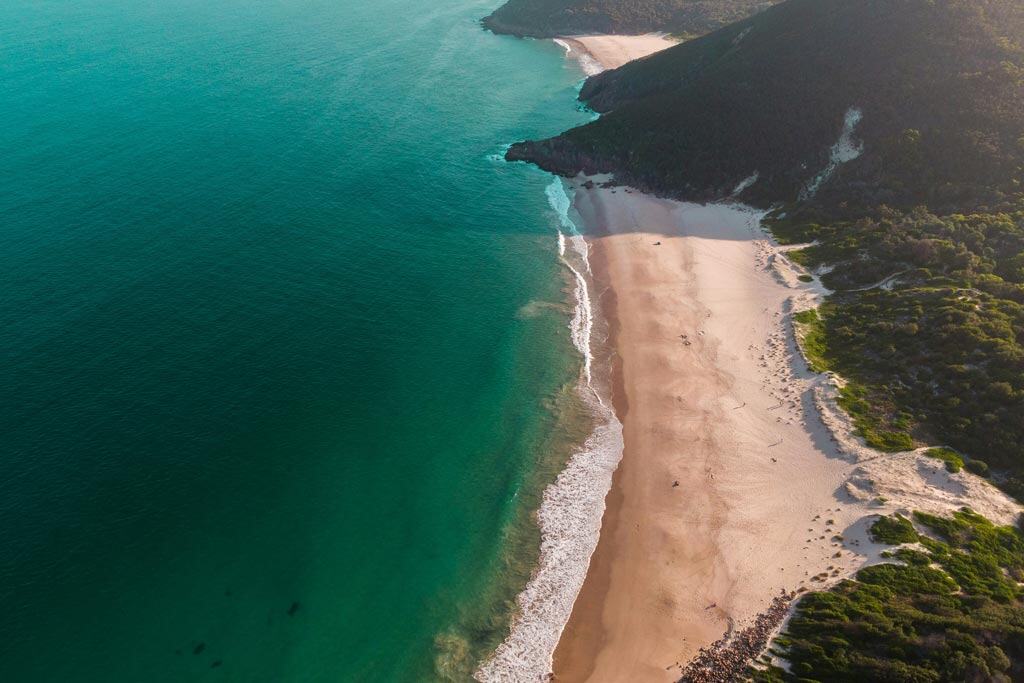
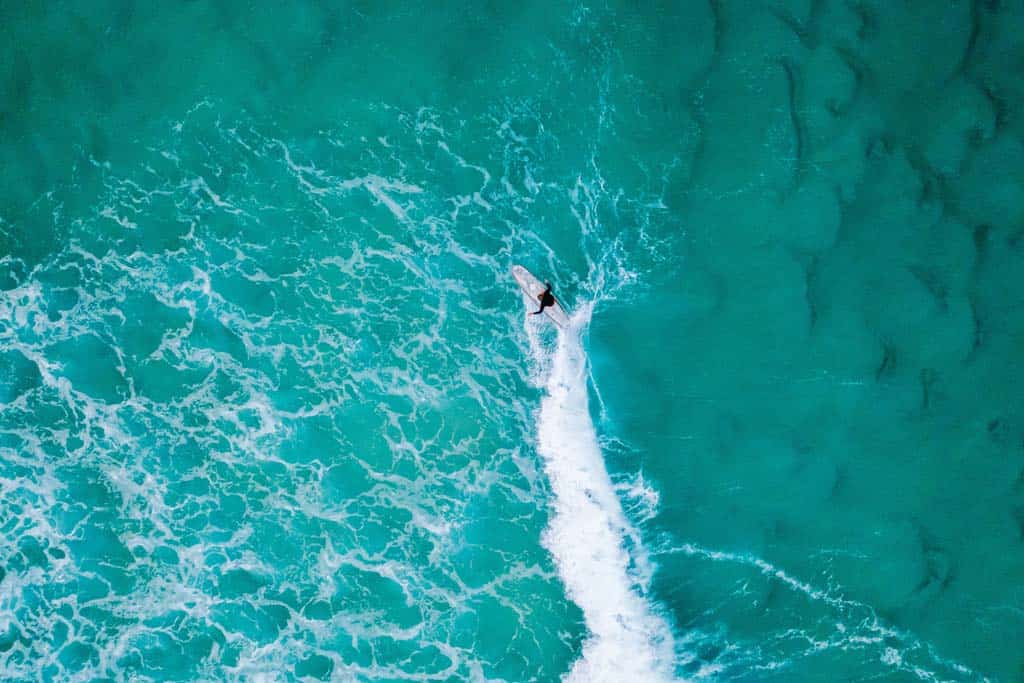
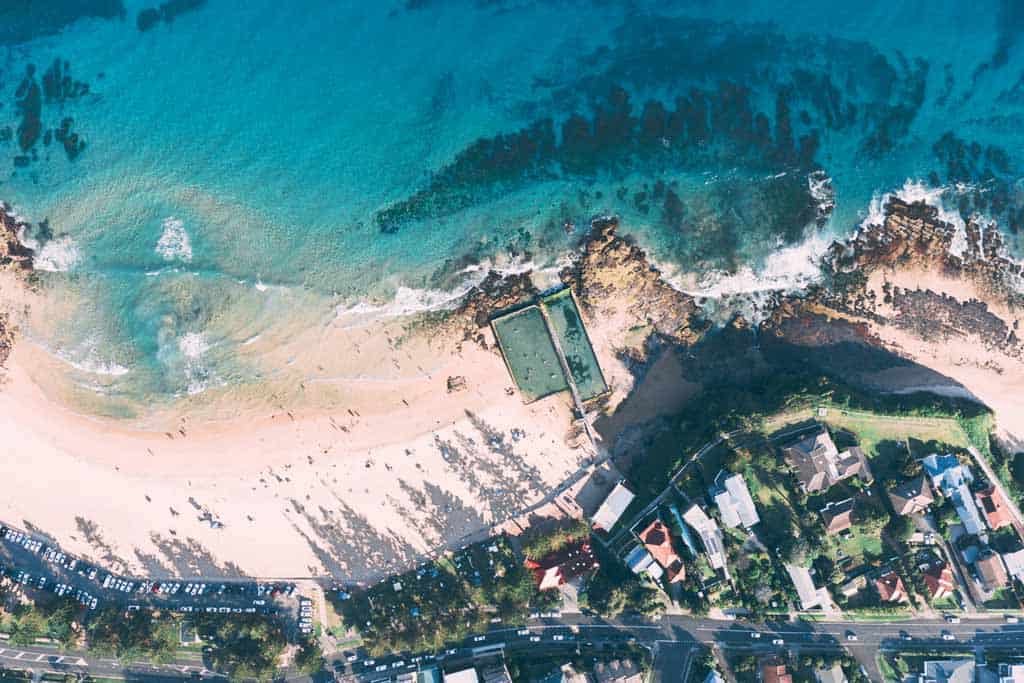
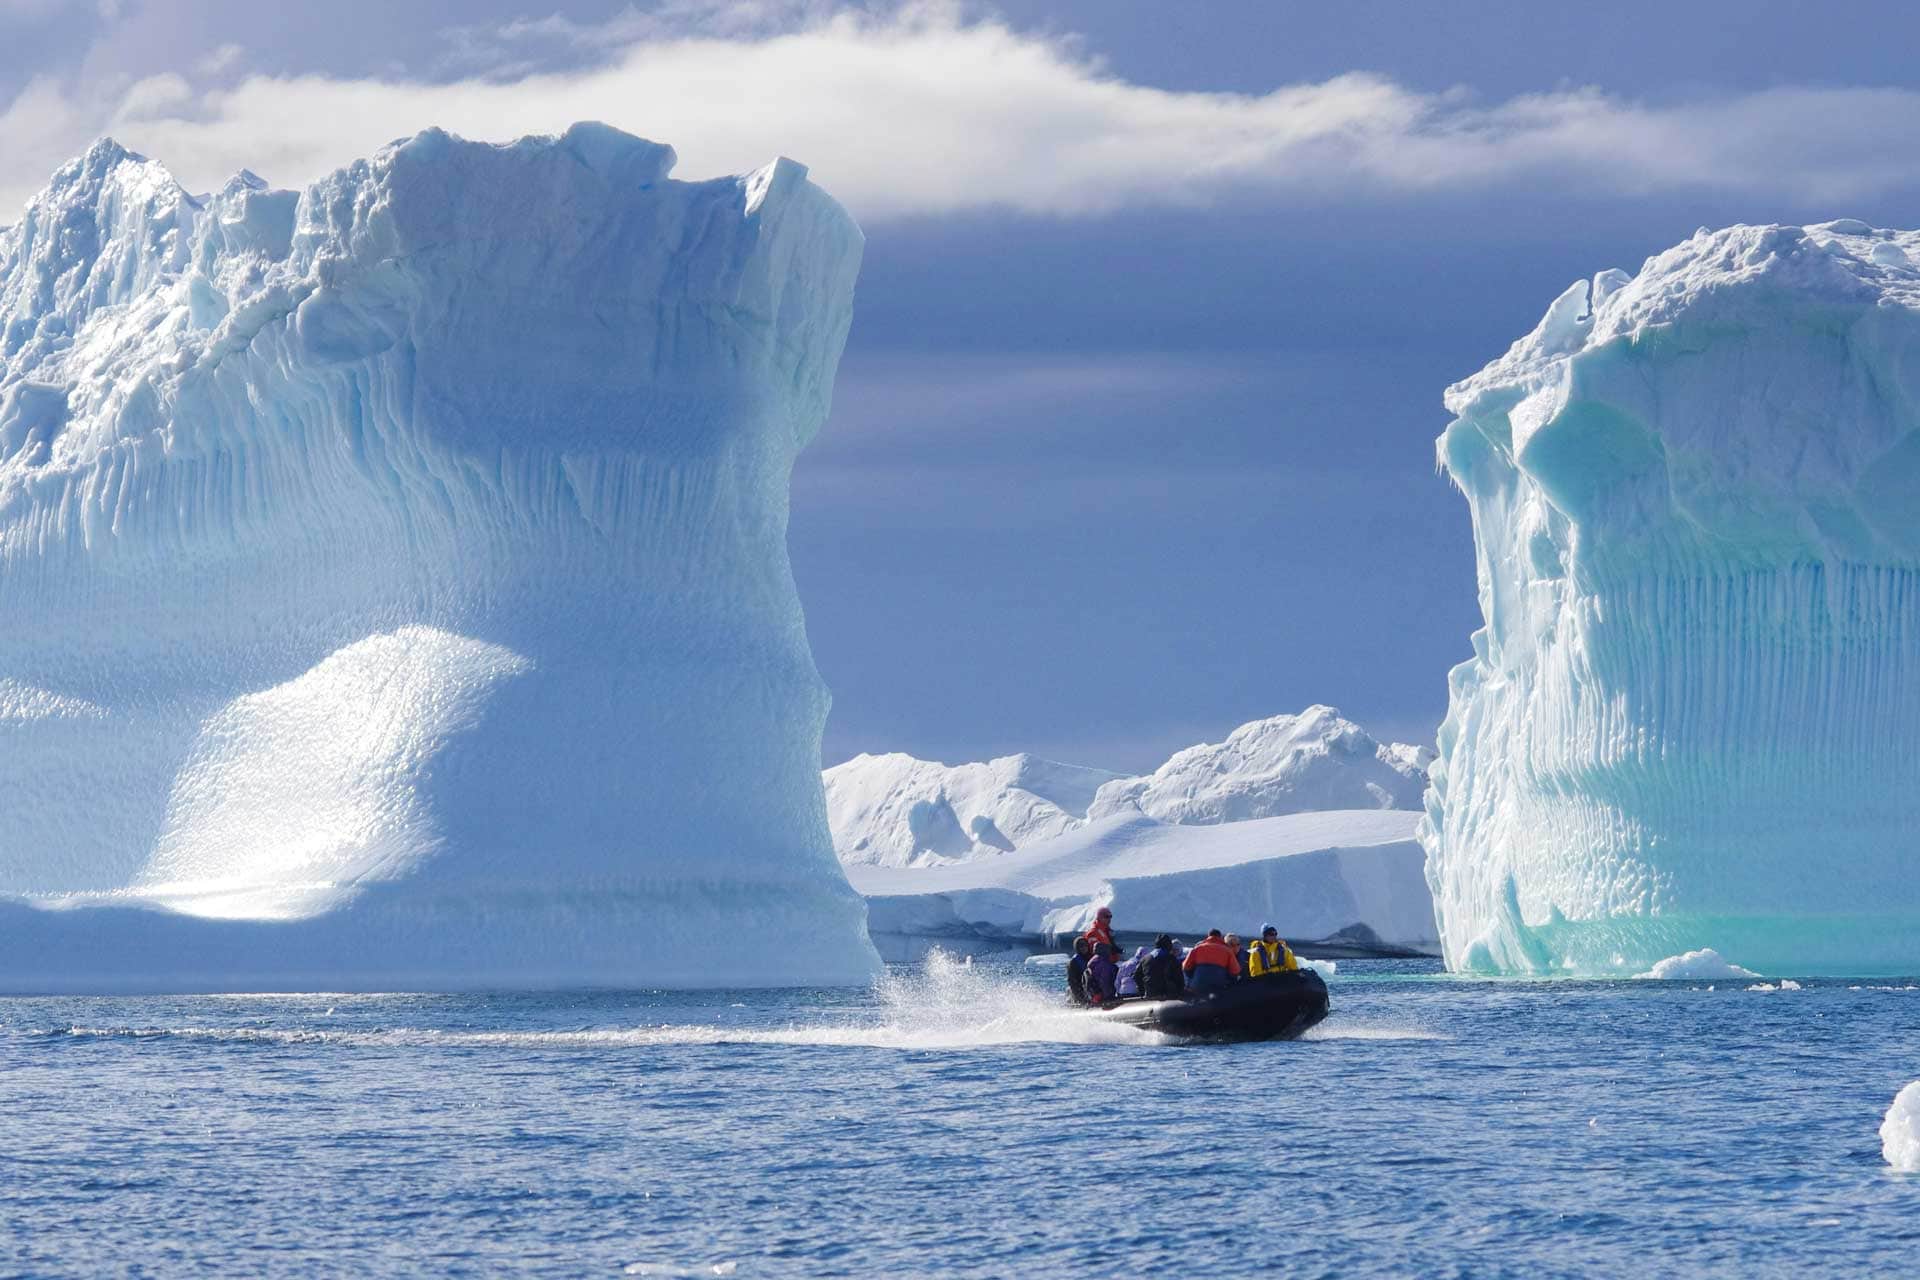

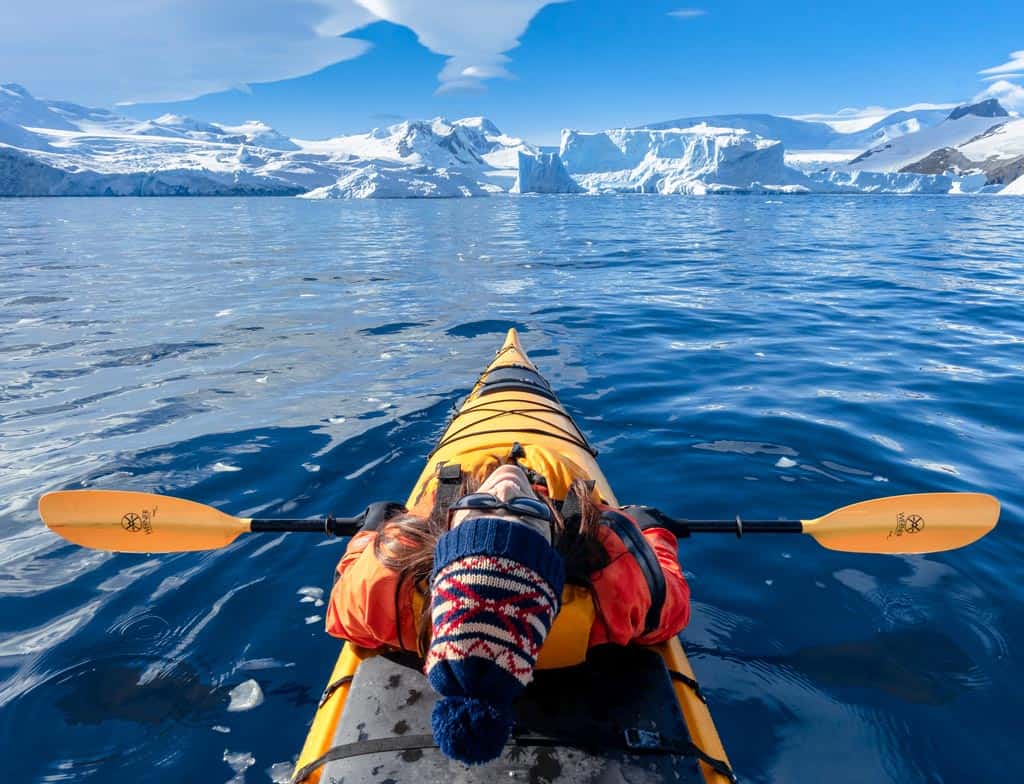
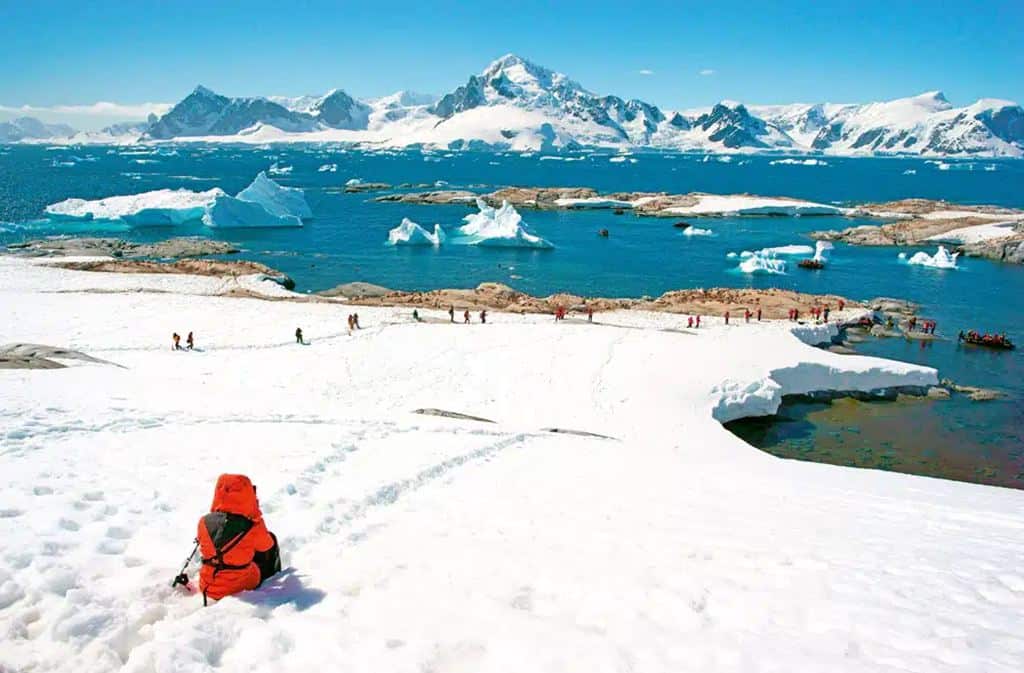

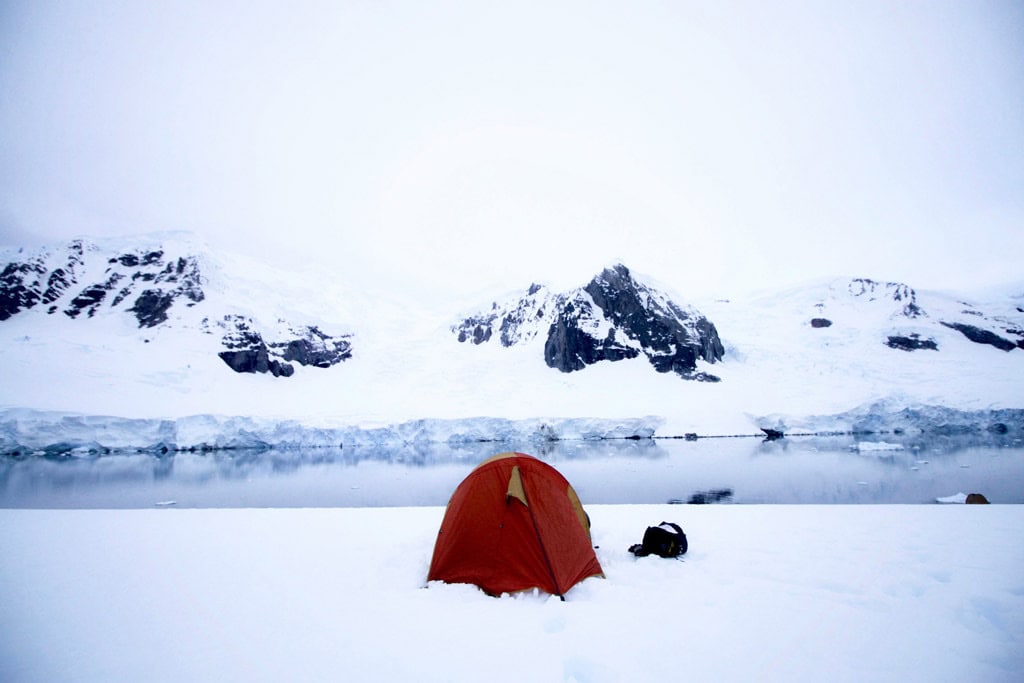

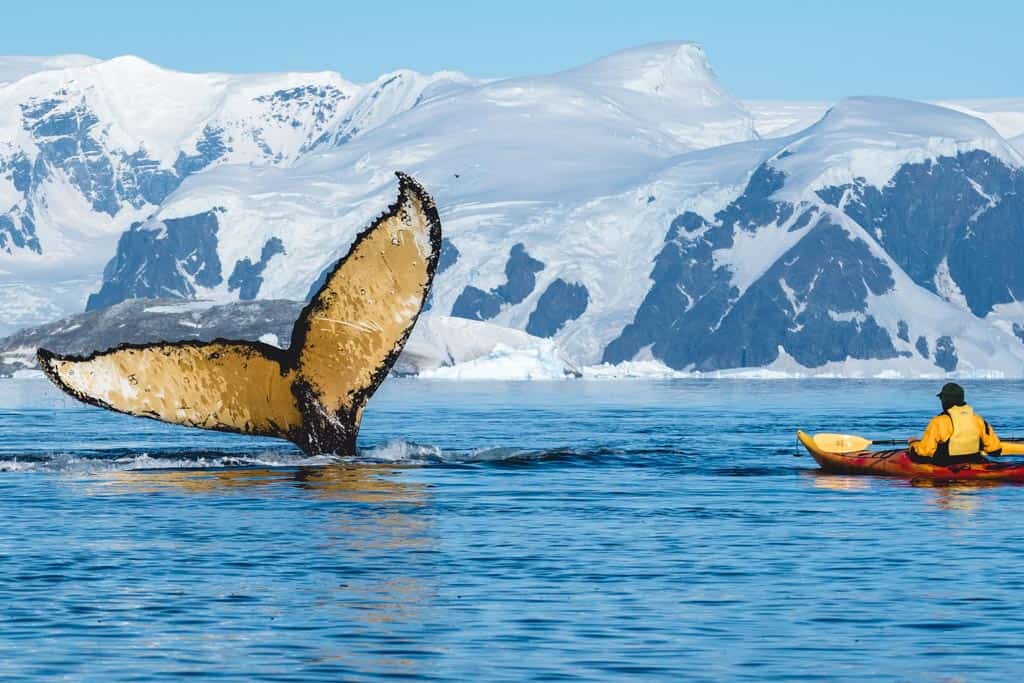

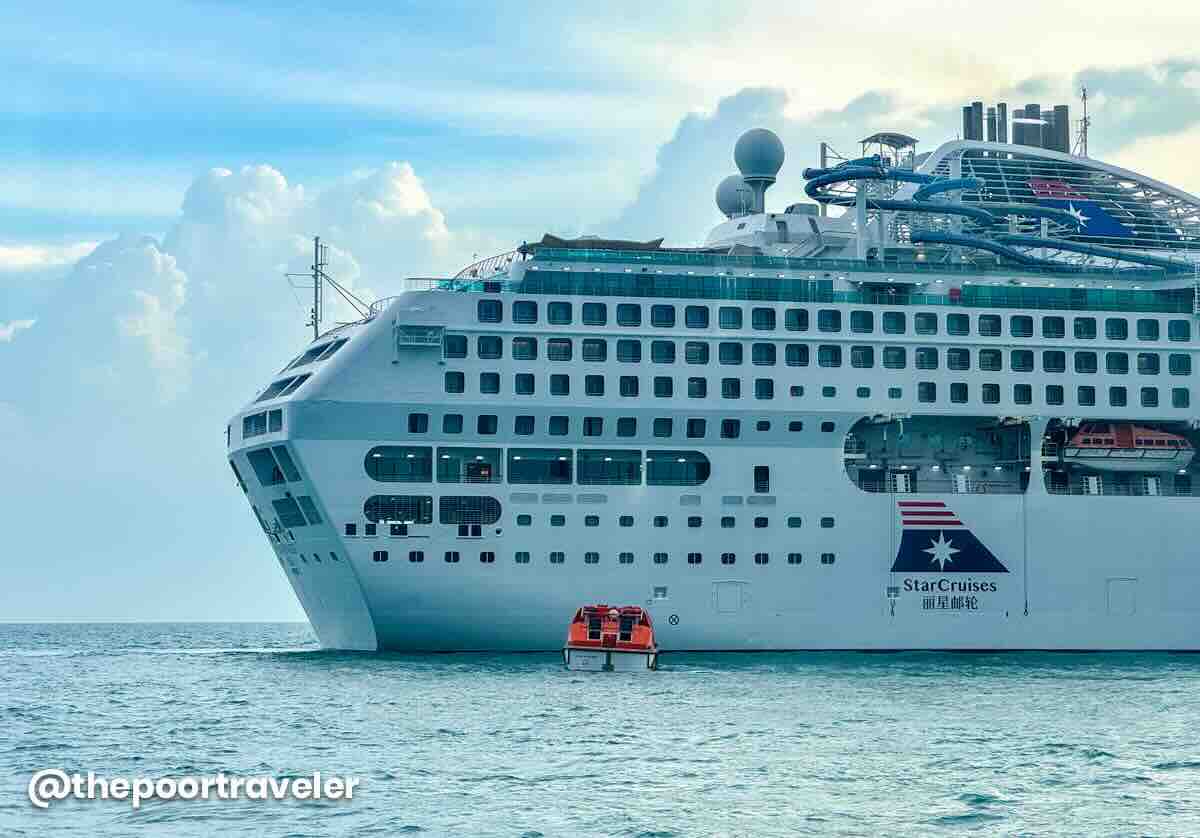
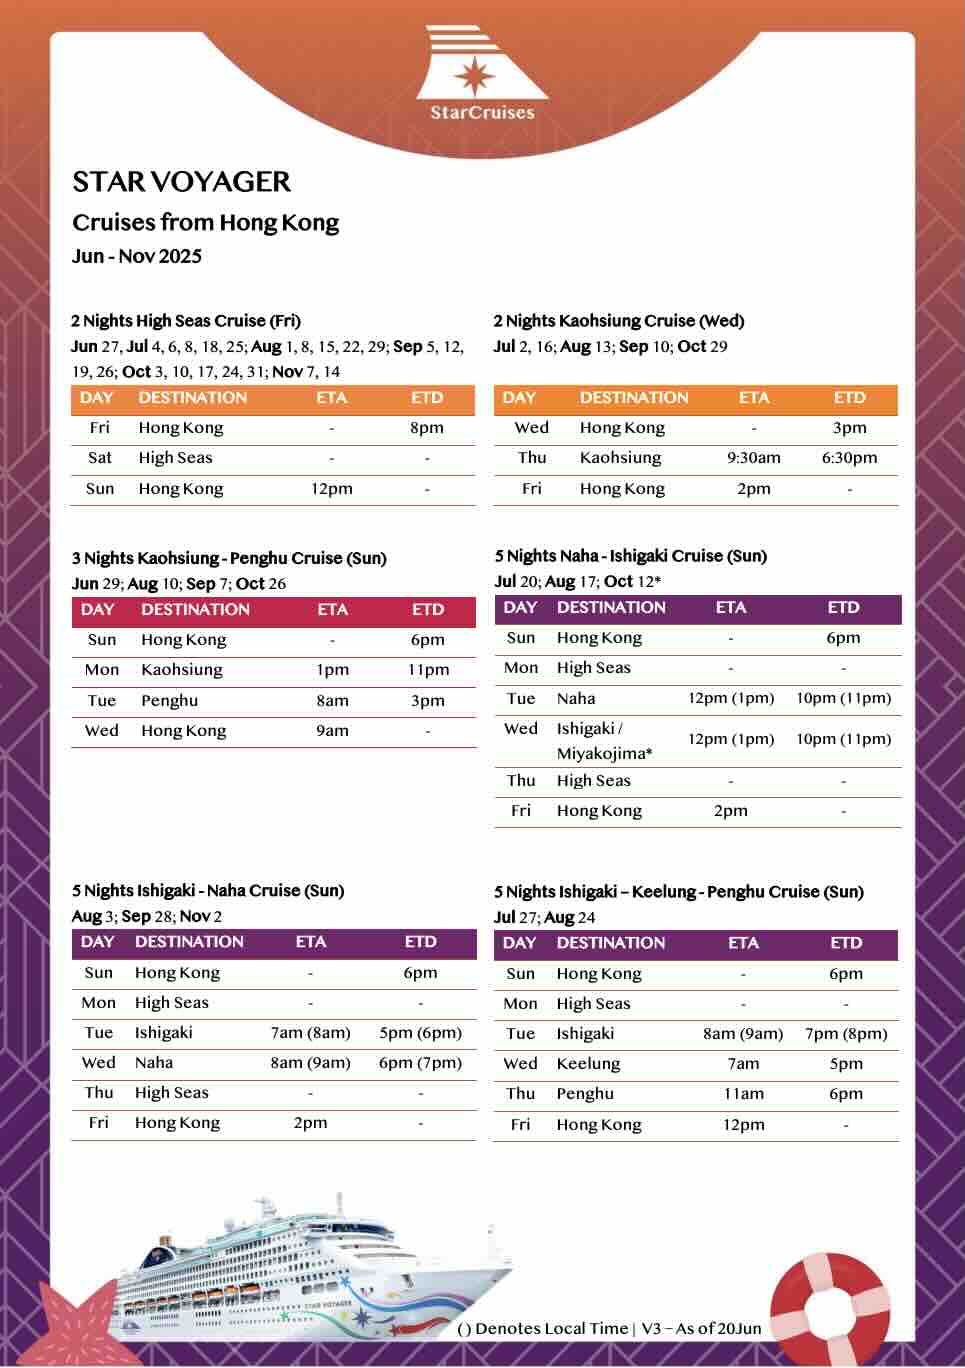

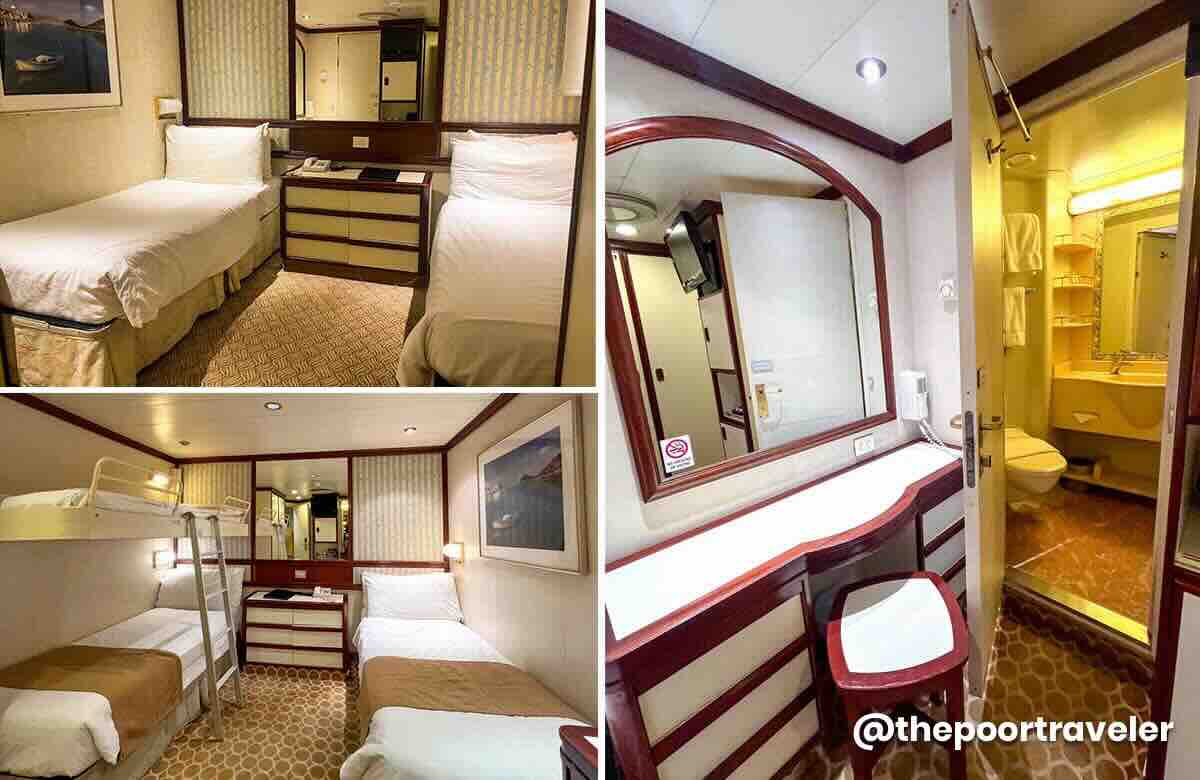
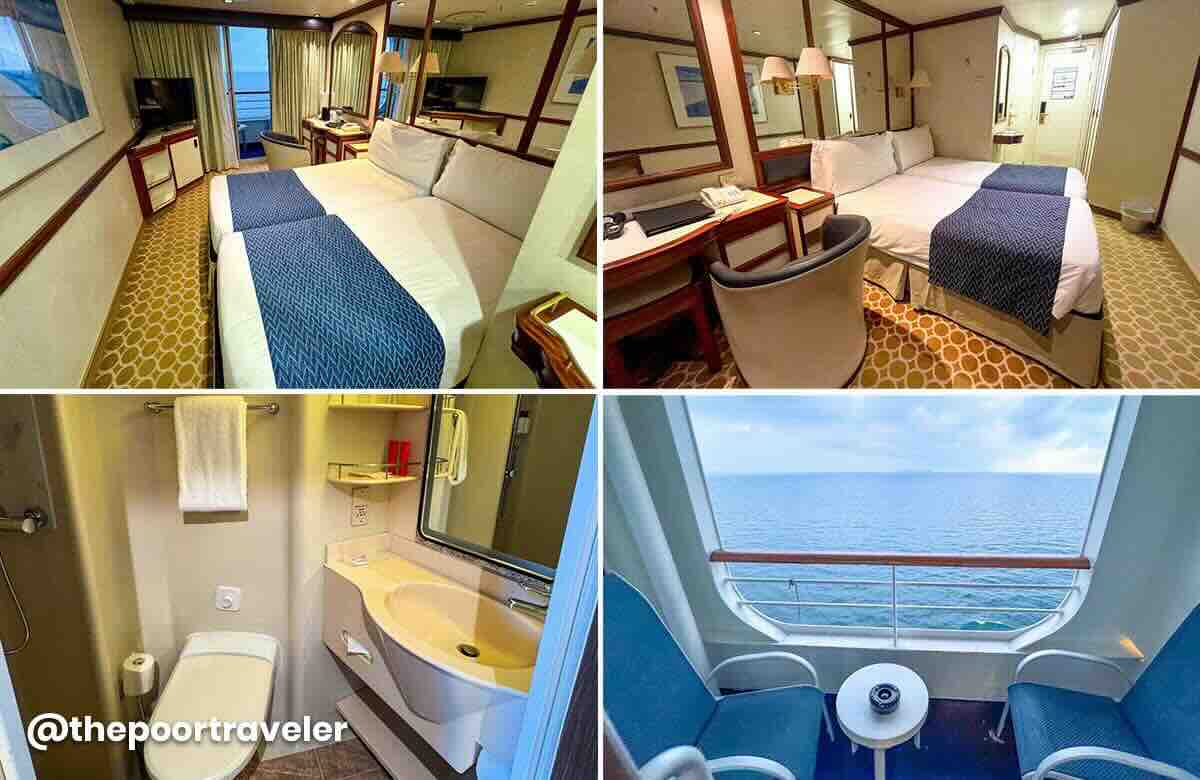
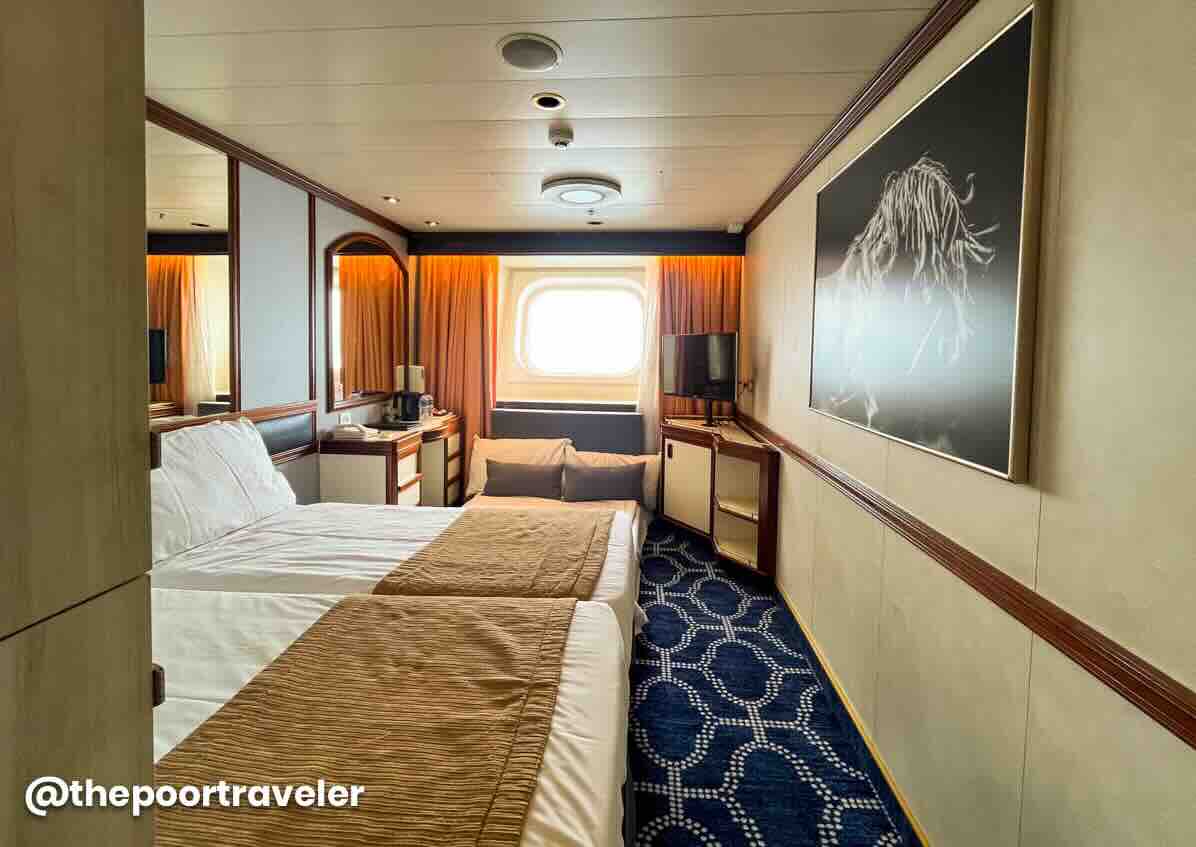
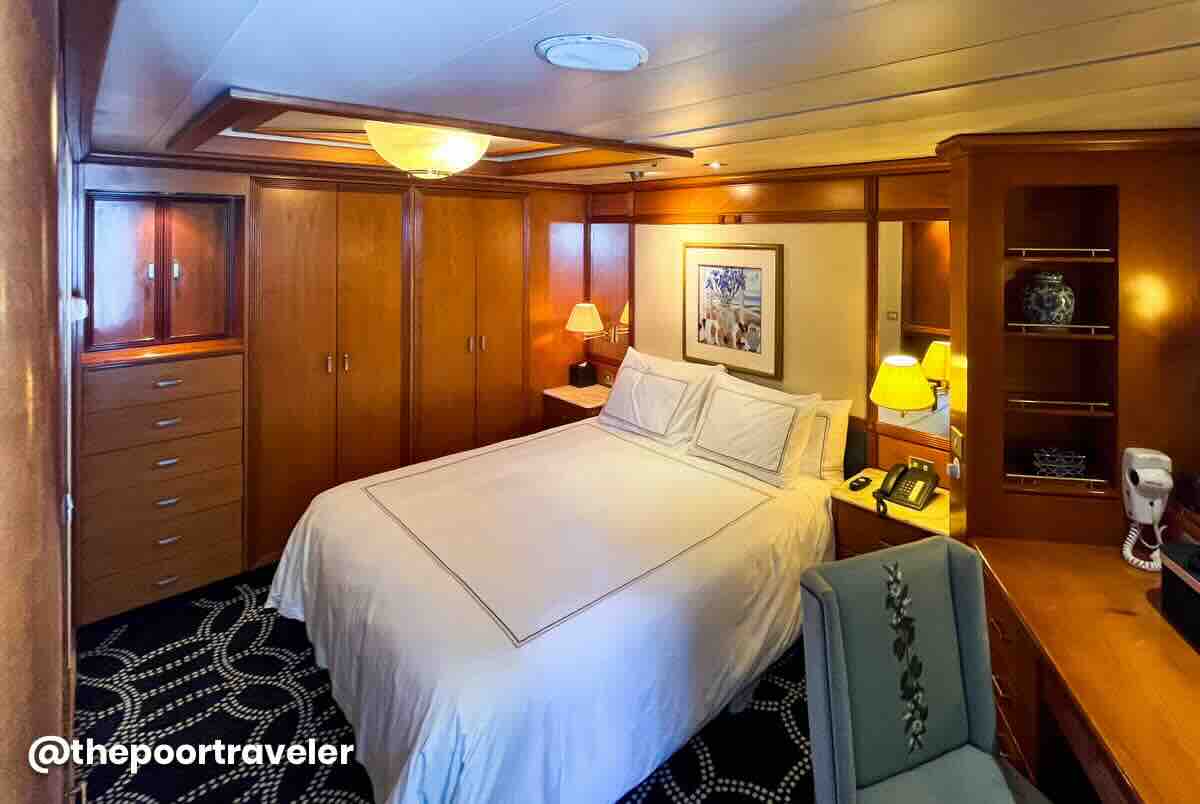


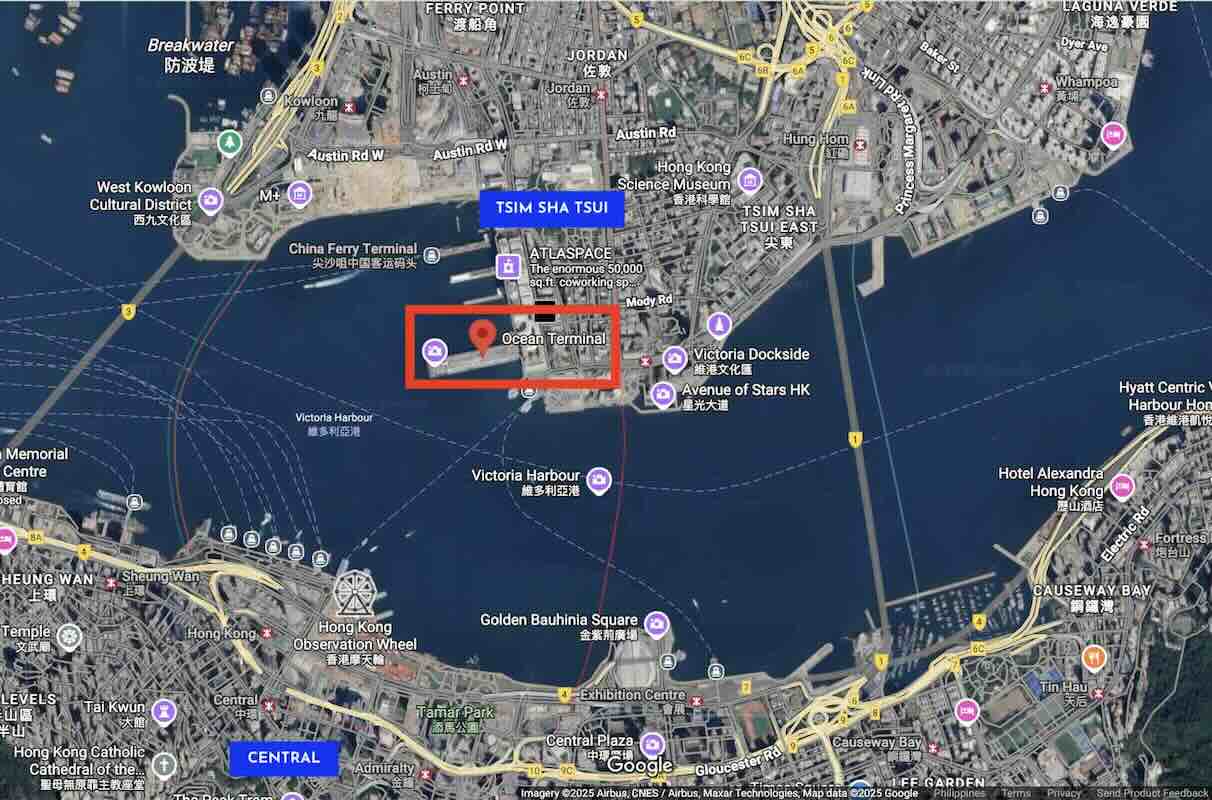


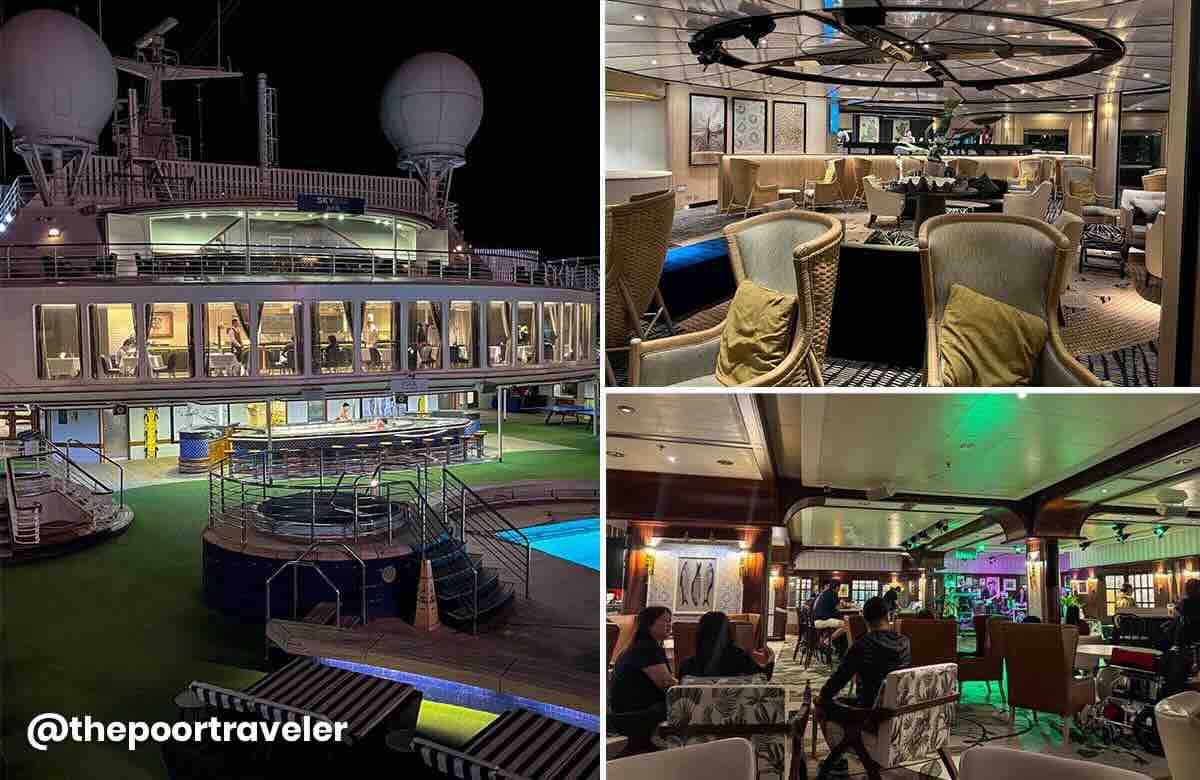
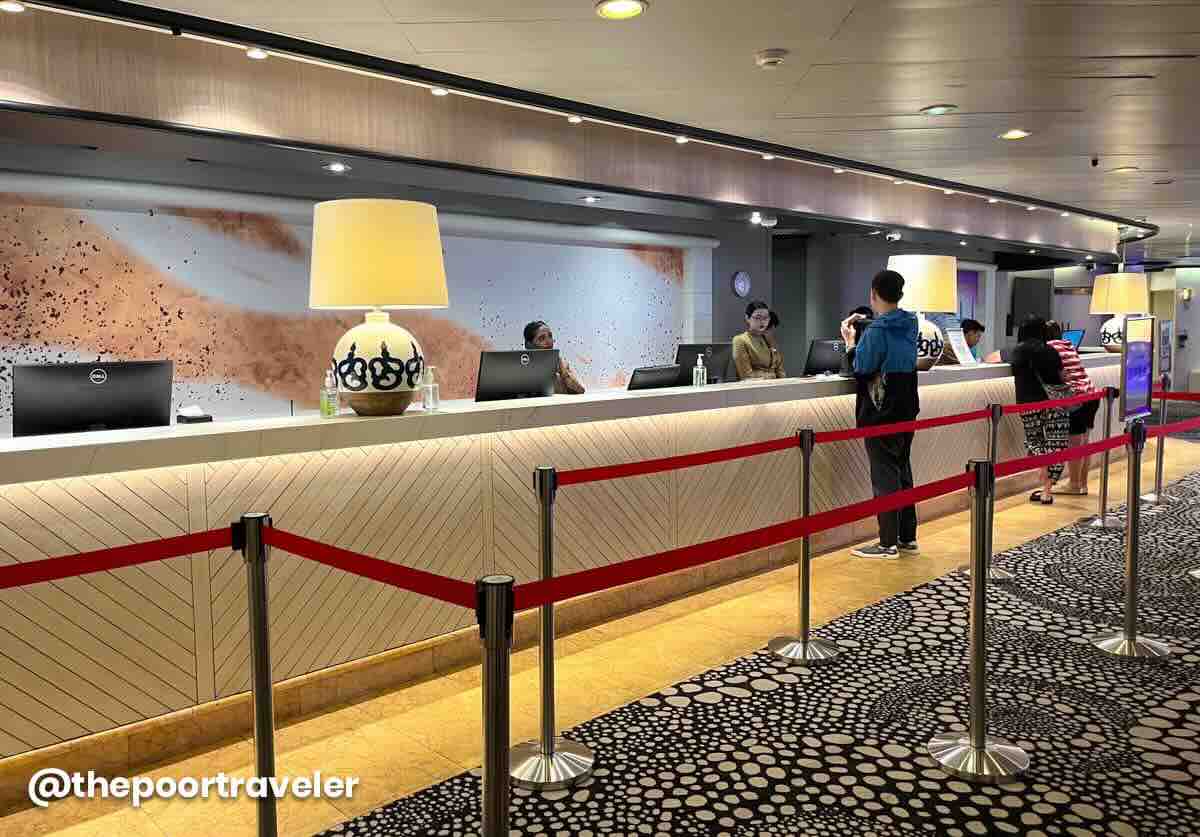
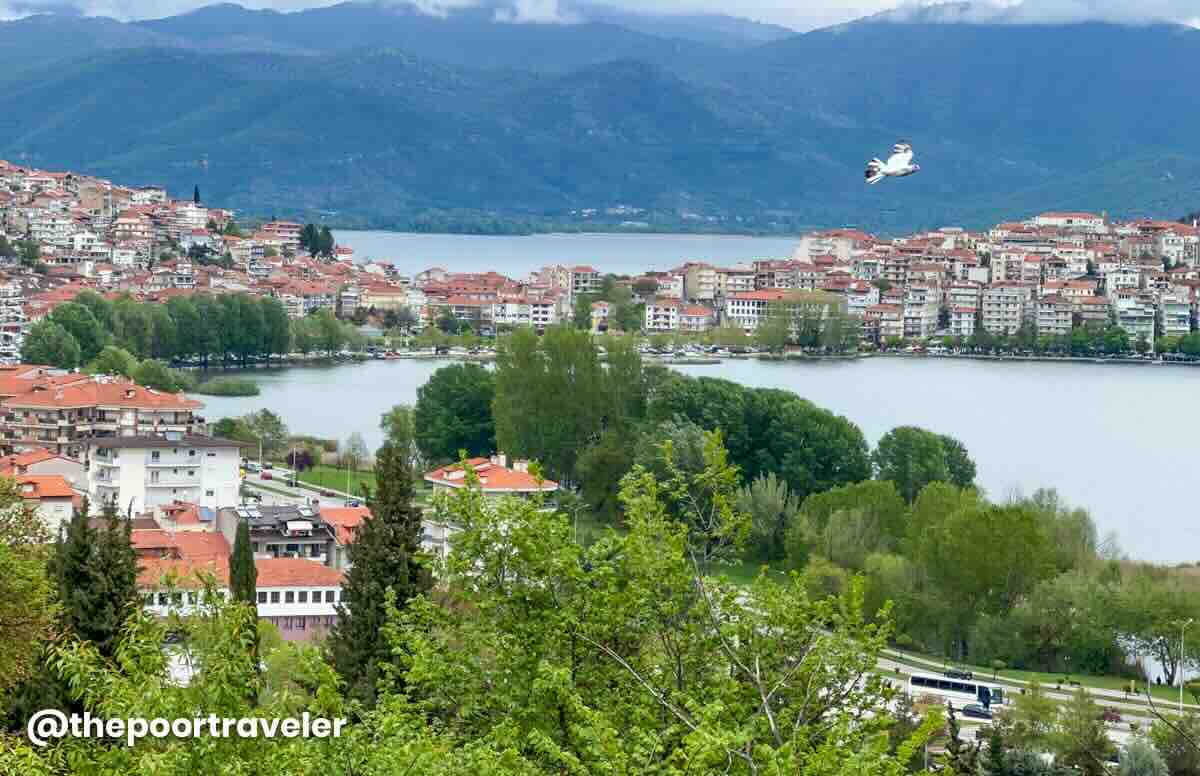

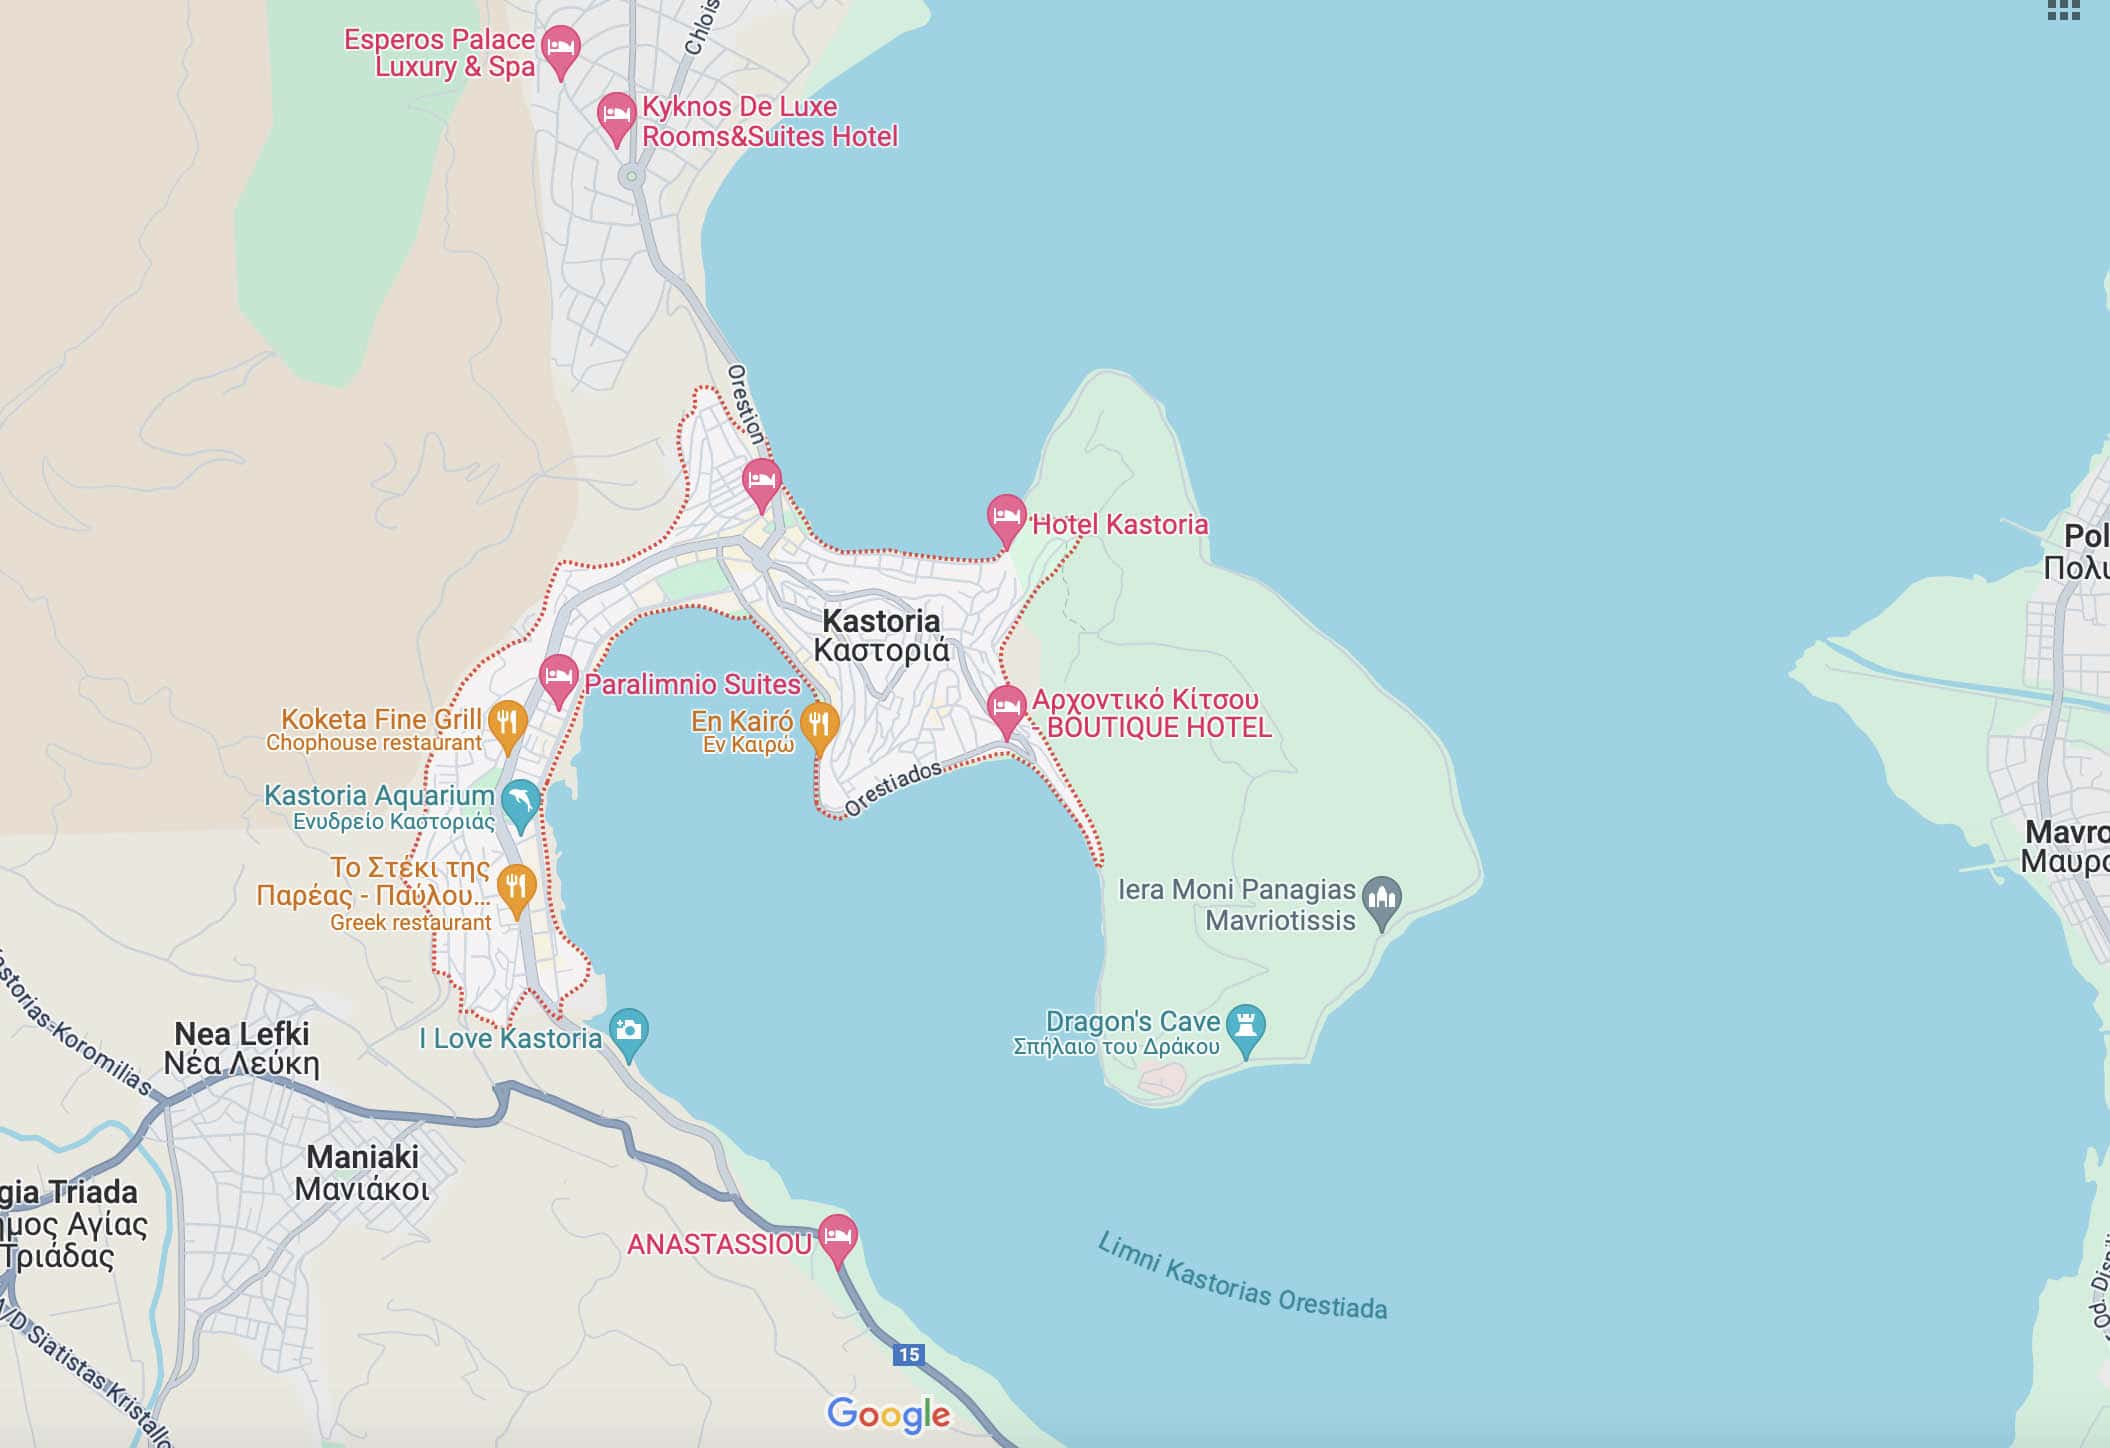

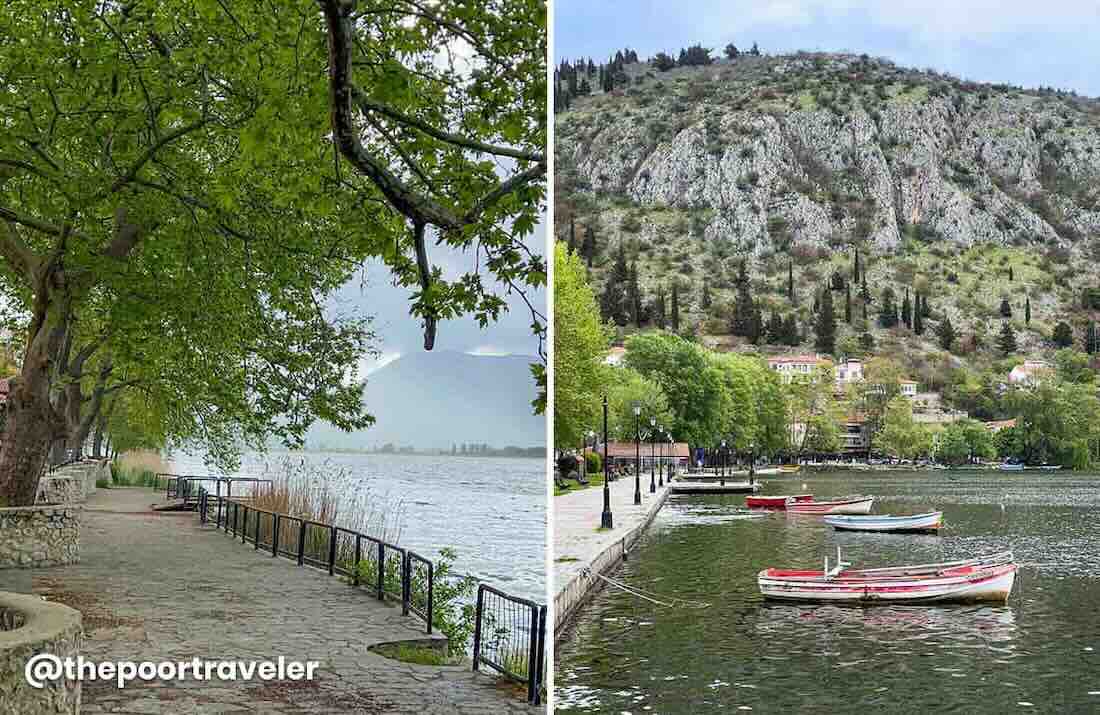
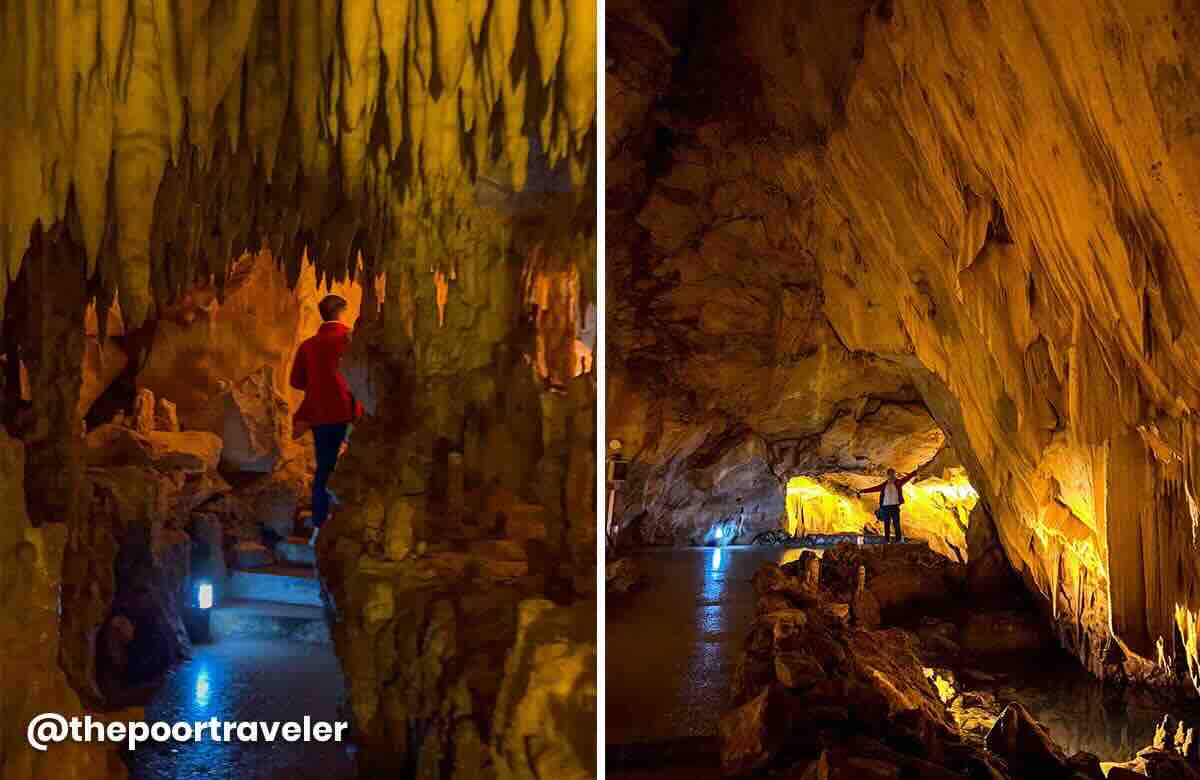
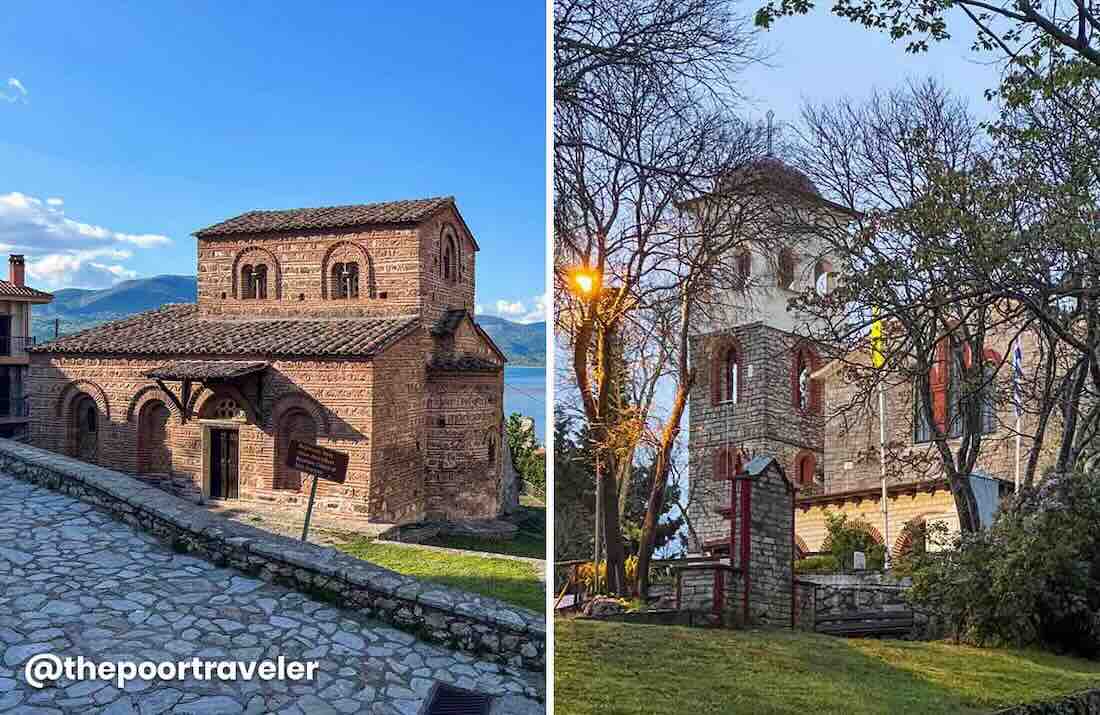
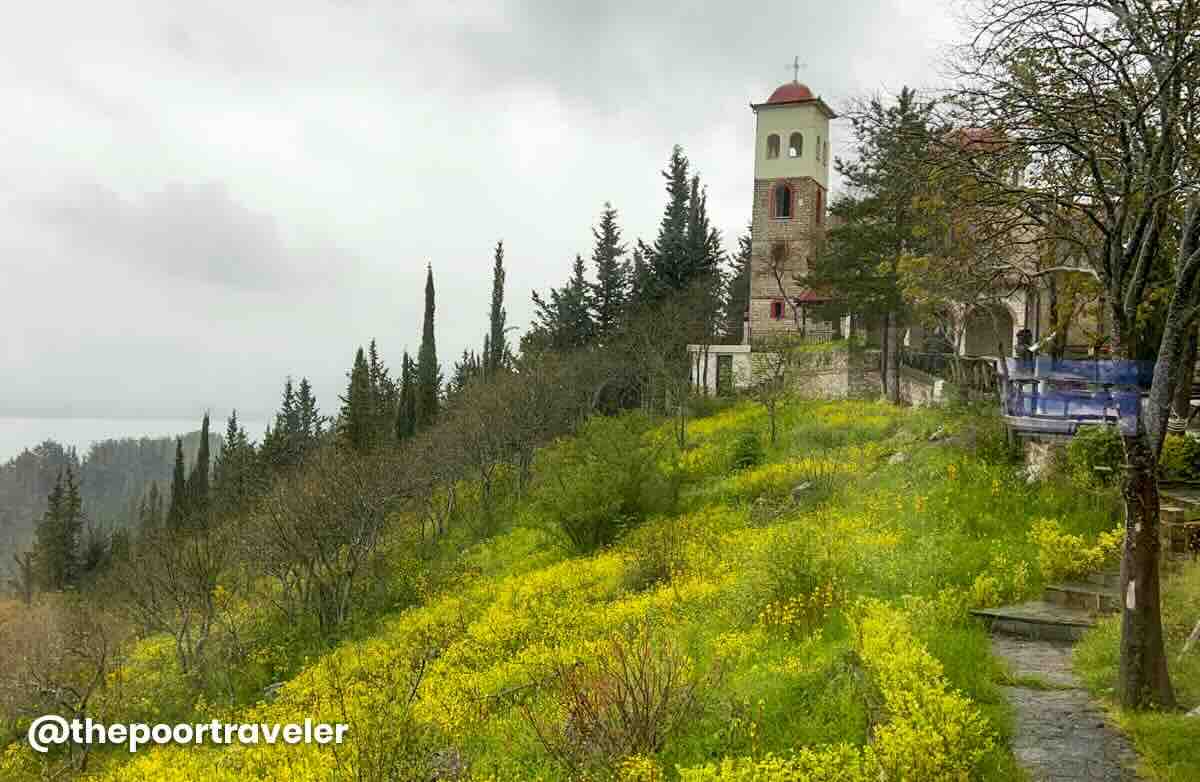


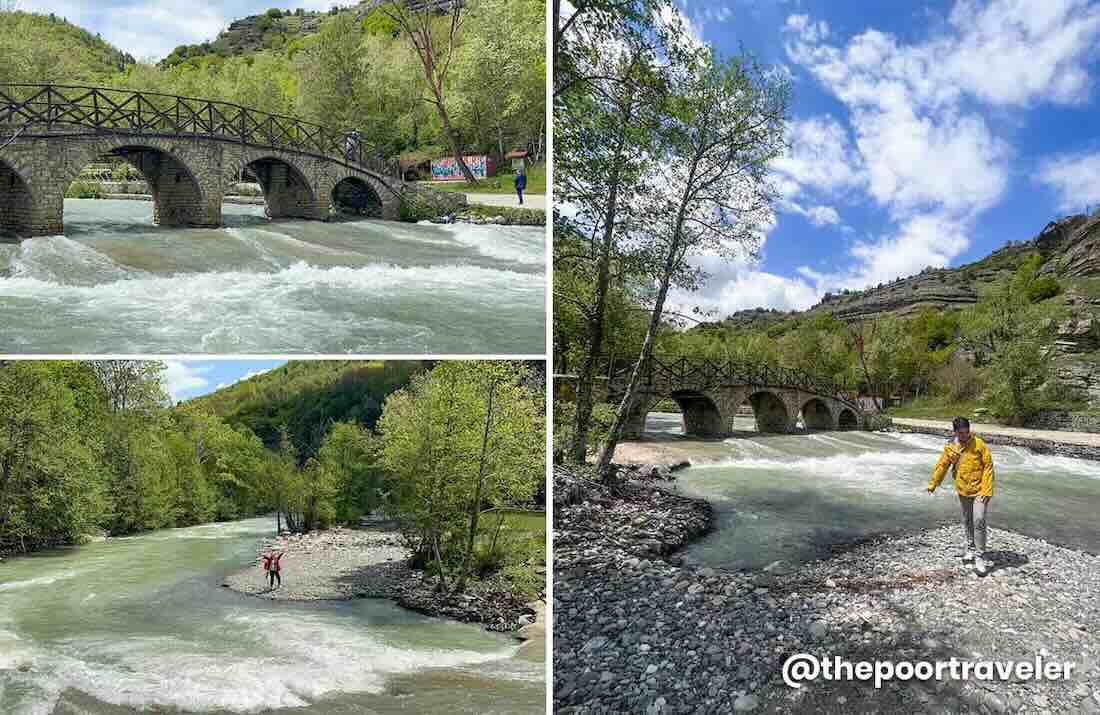
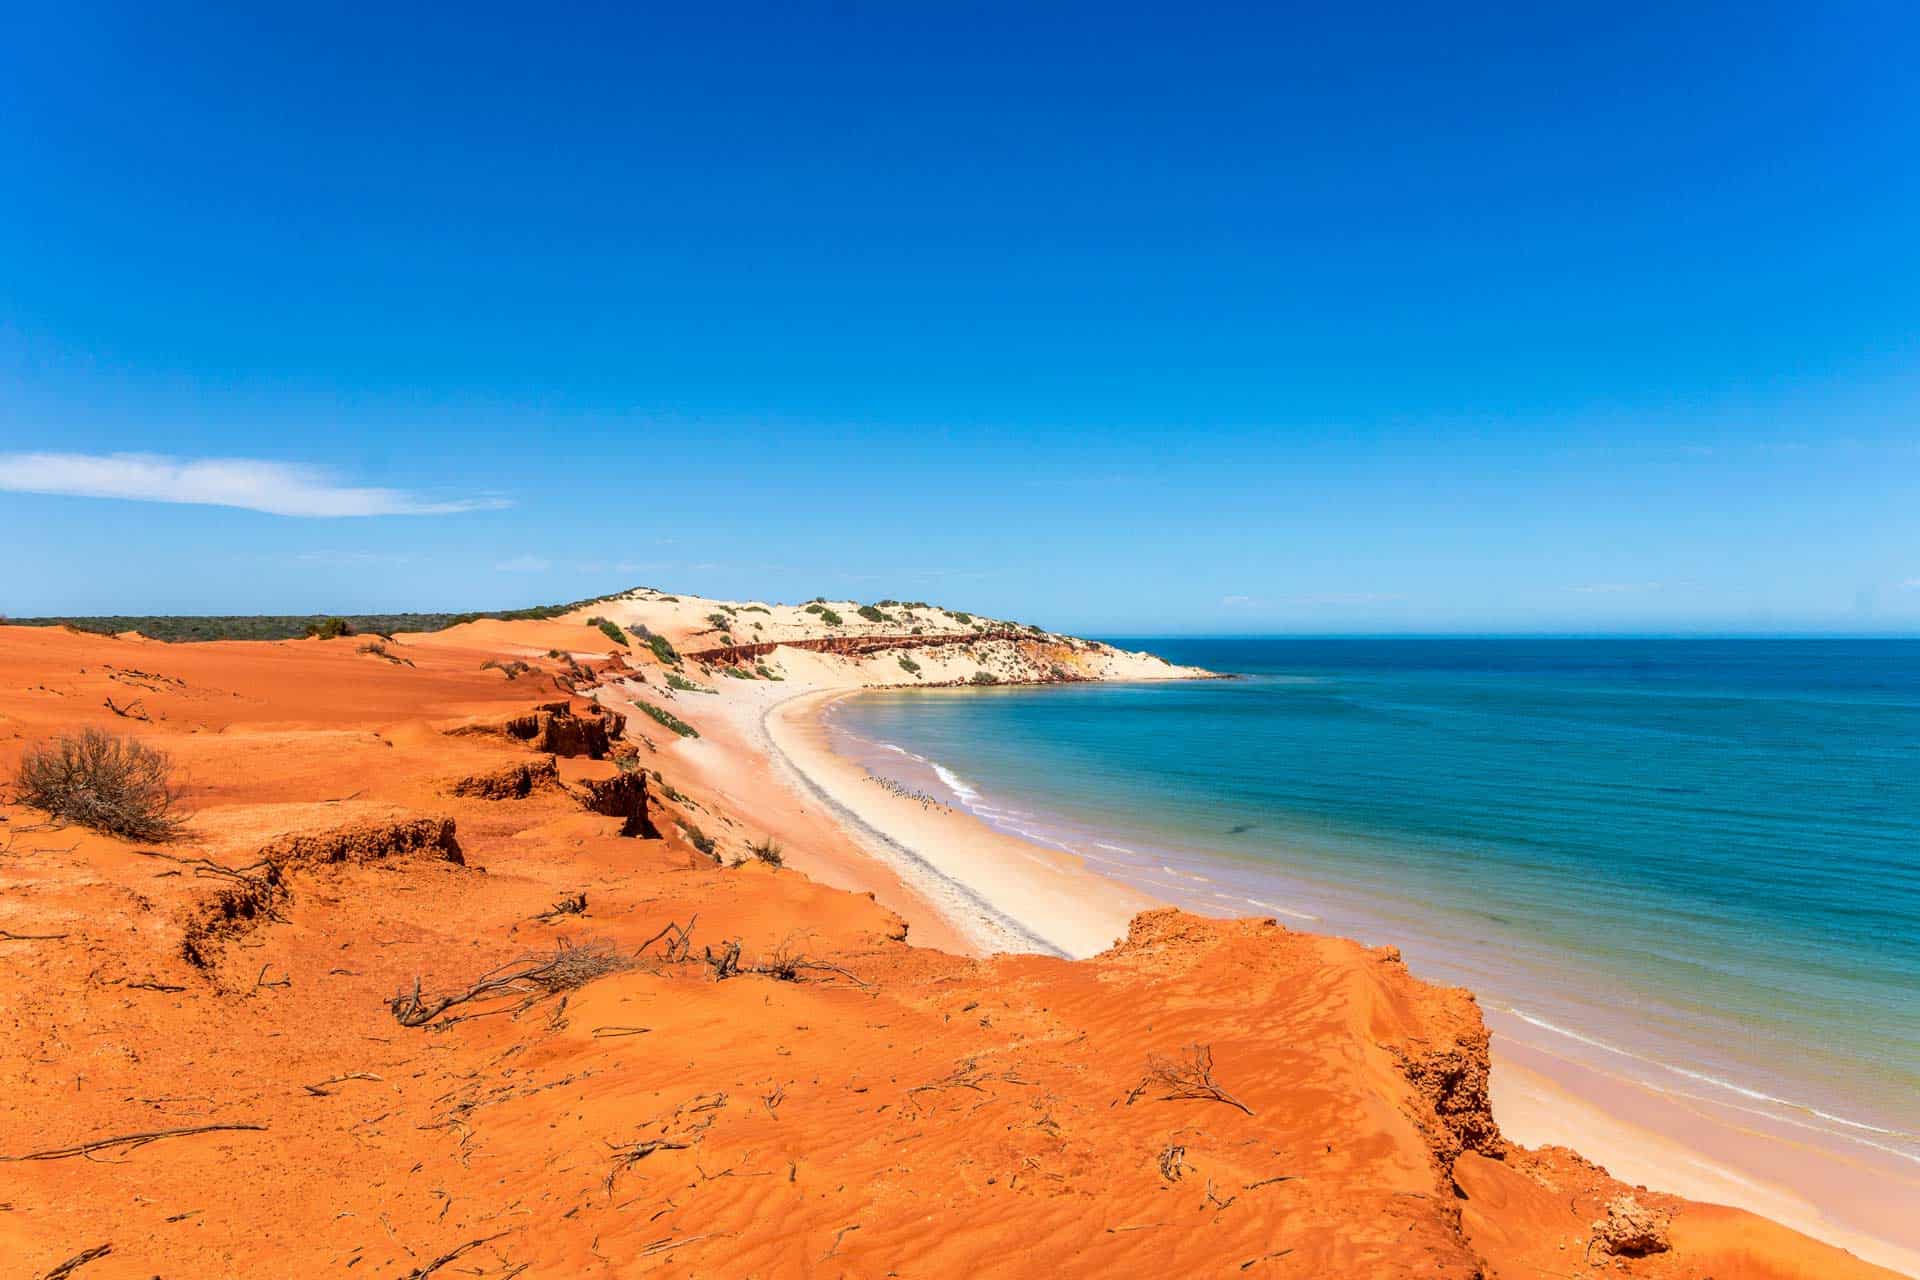


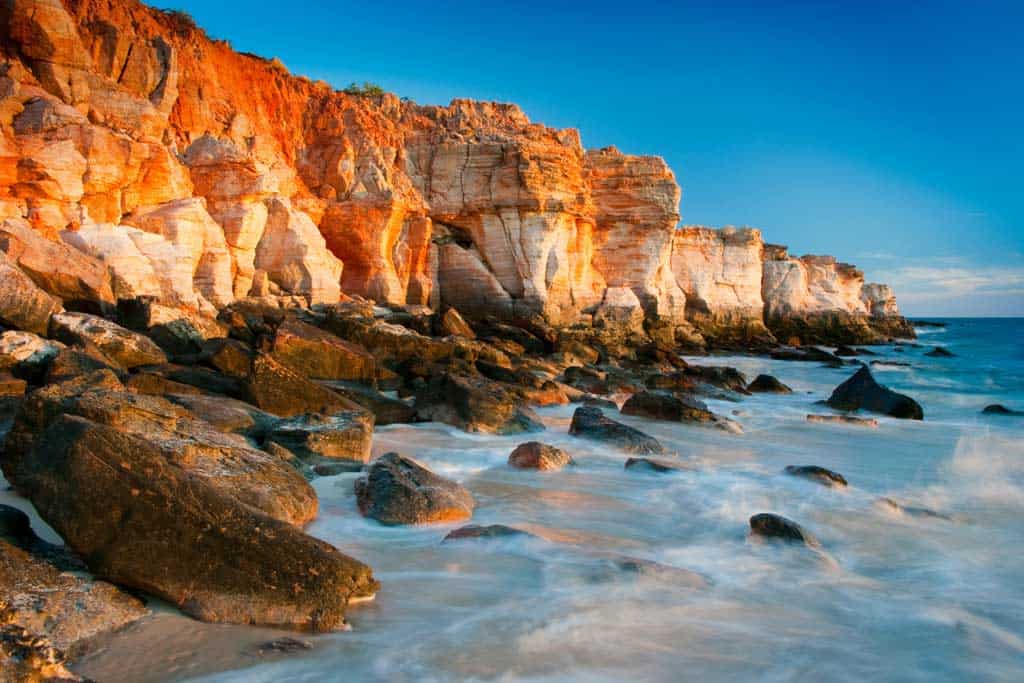
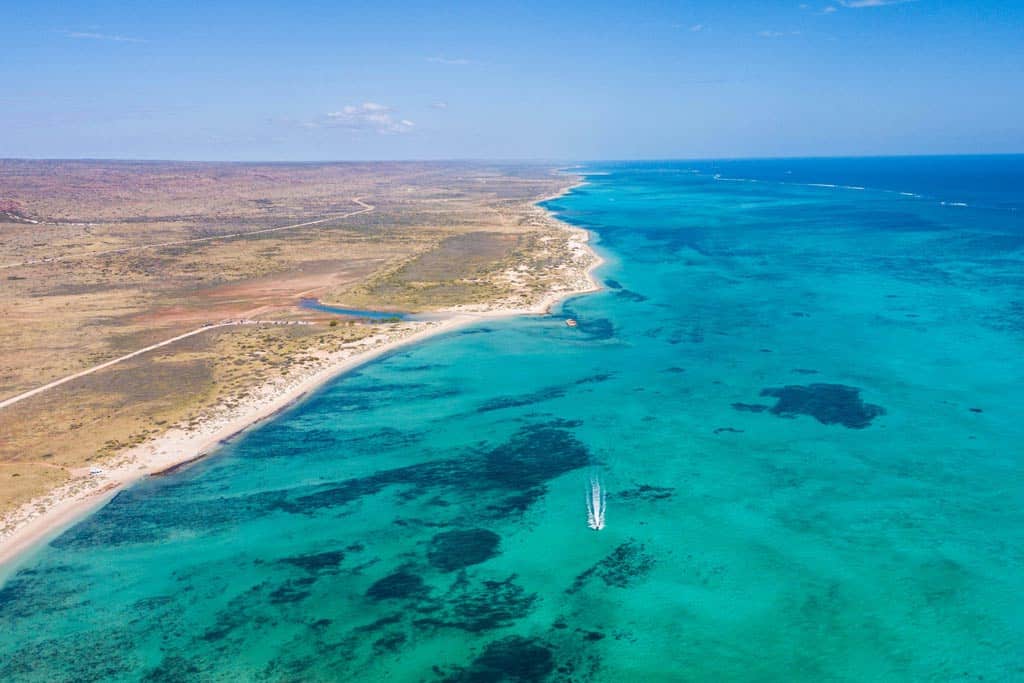
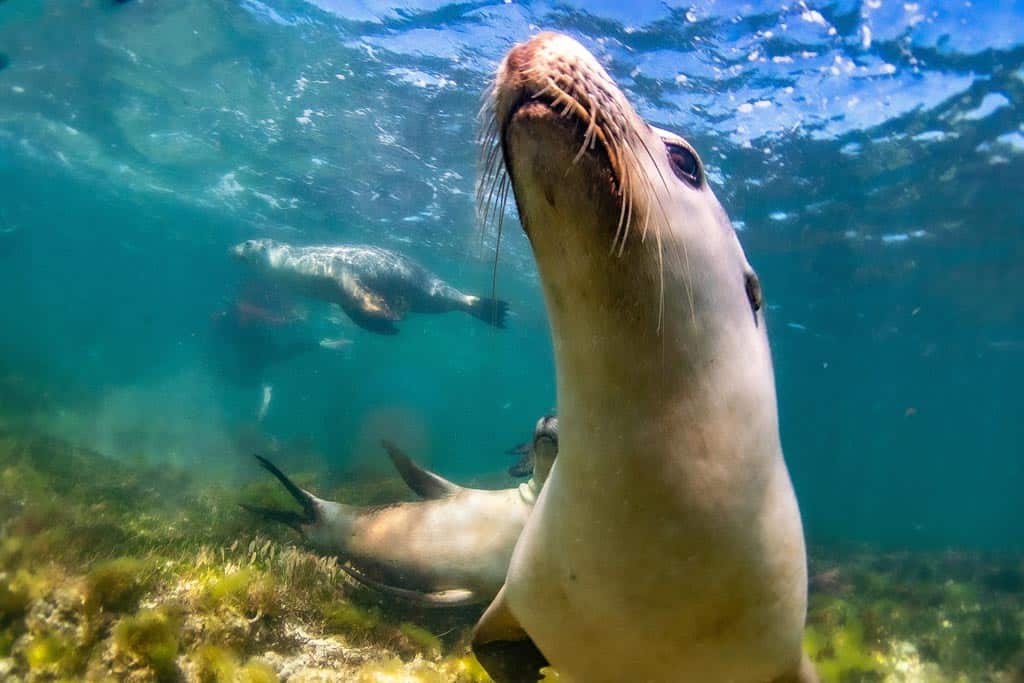
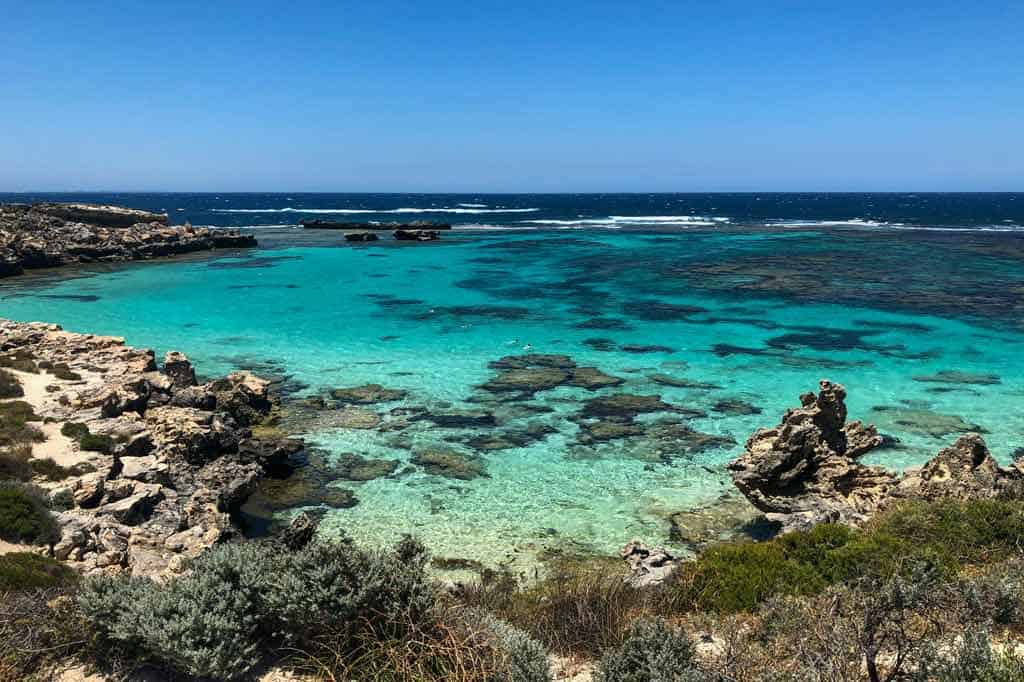
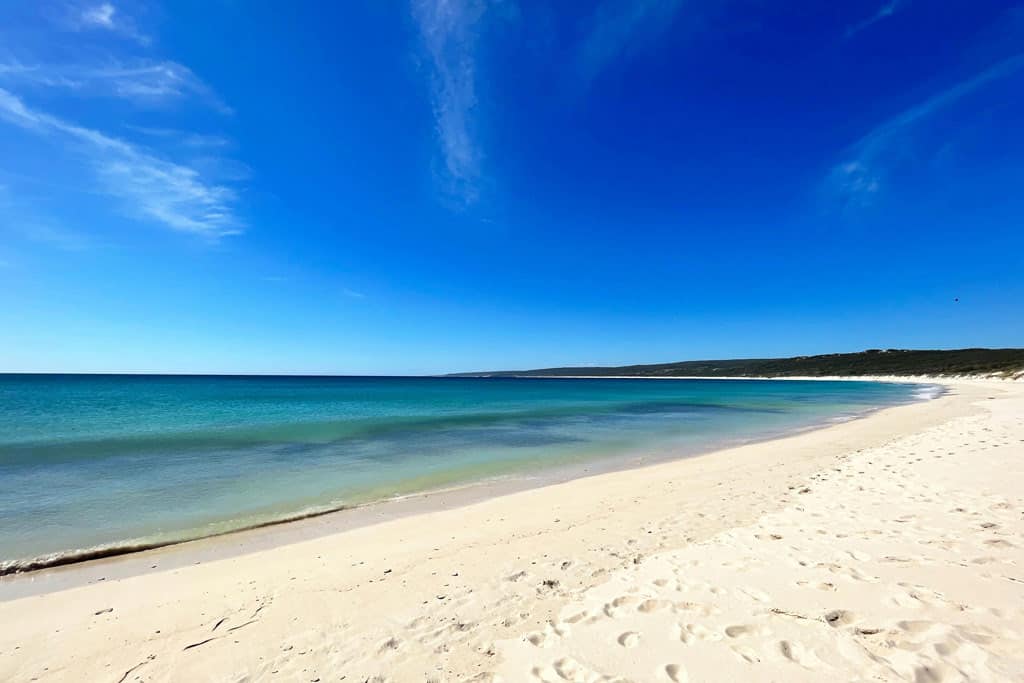
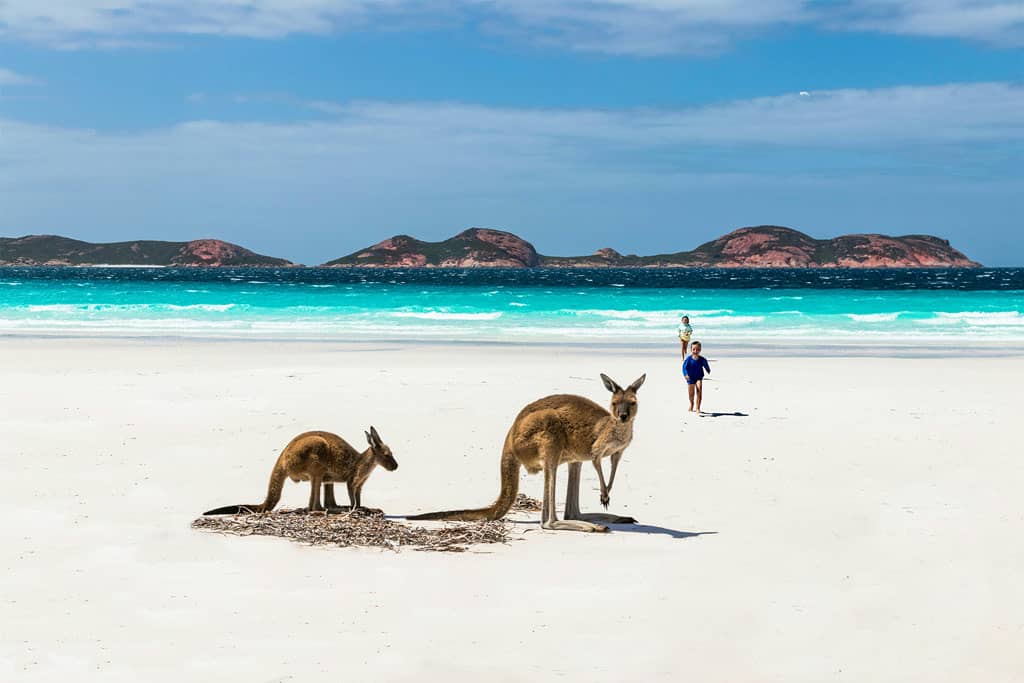
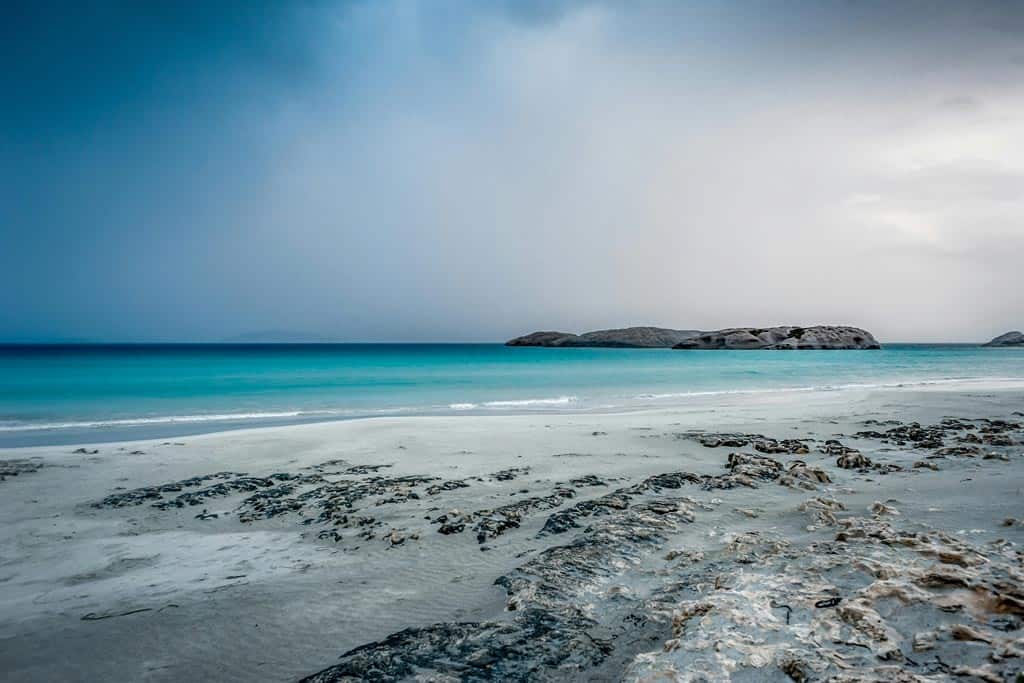


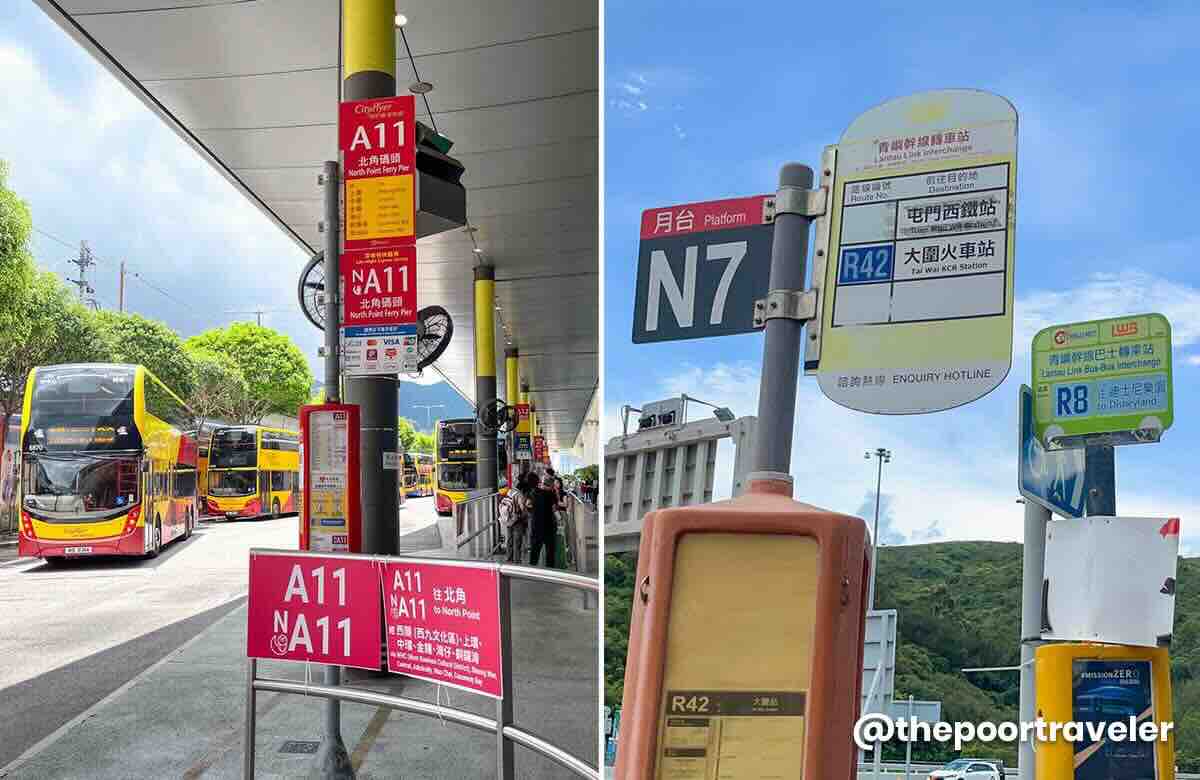
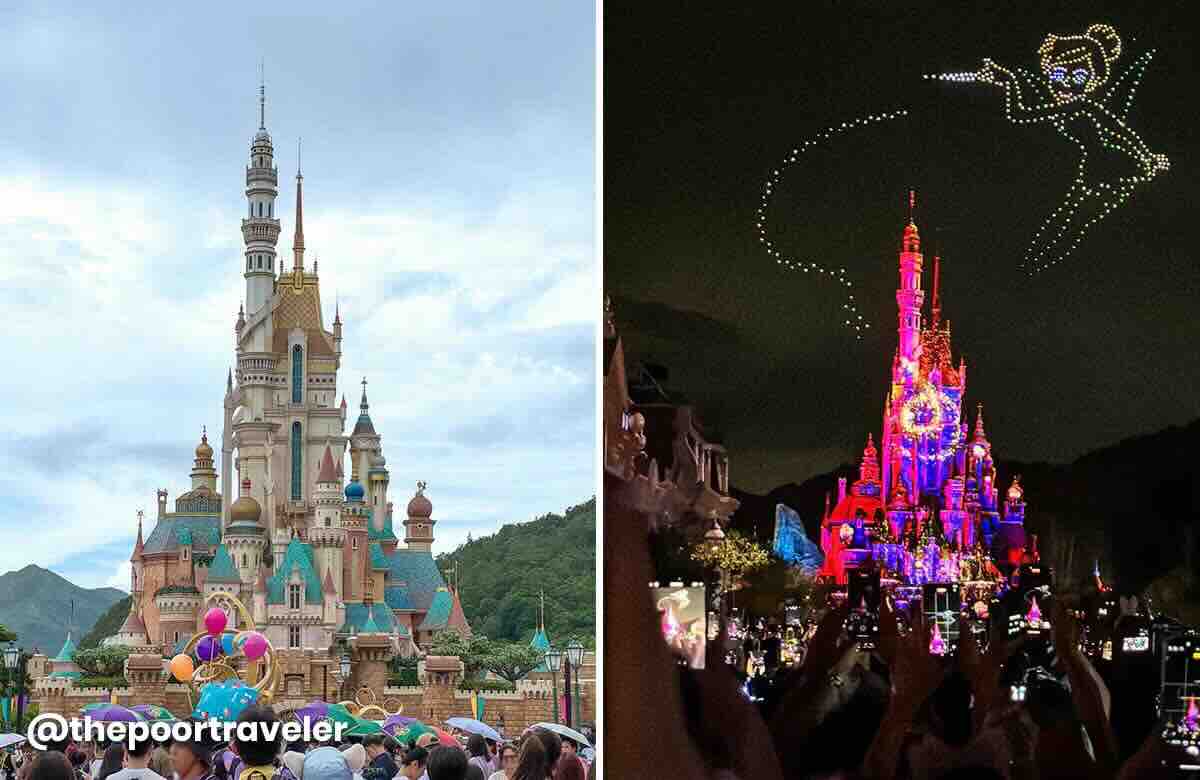


![GoPro HERO 13 Review – The Ultimate Camera Guide [2025]](https://farasar.ir/wp-content/uploads/2025/07/GoPro-HERO-13-Black-Review-Feature-Image.jpg)