Leave a comment
Last updated on October 7, 2025
Wanna travel to Mongolia with Against the Compass?
Join a group of like-minded travelers in our next scheduled tour in Mongolia on:
June 23rd to July 2nd, 2026 – APPLY NOW
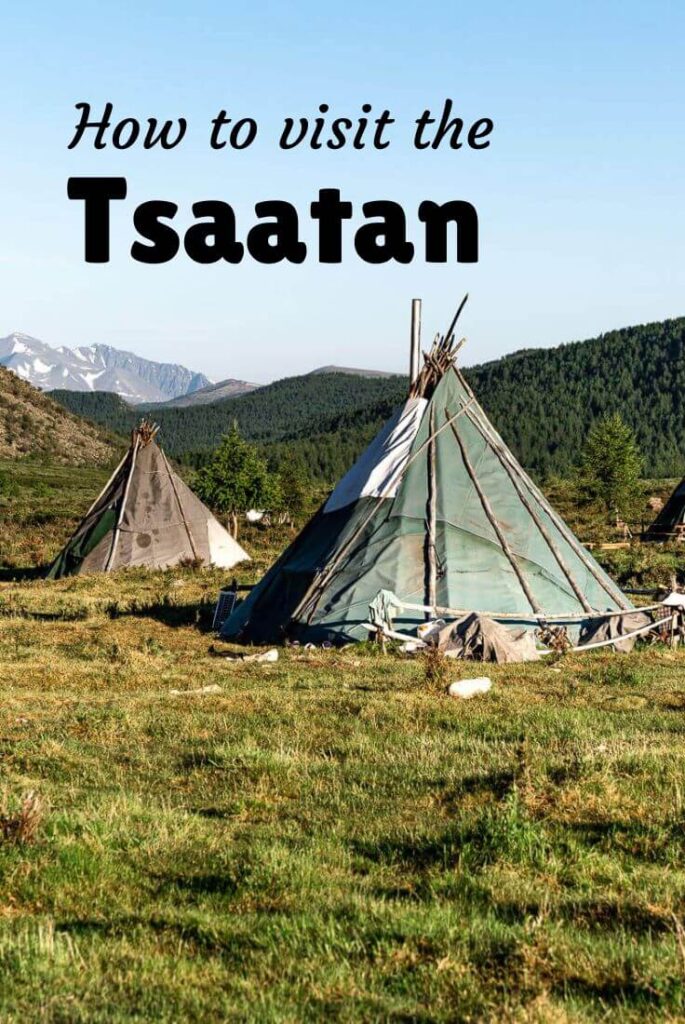
Far away in the northernmost region of Mongolia, deep in the taiga bordering Siberia, lives one of the smallest yet most unique communities in Central Asia: the Tsaatan.
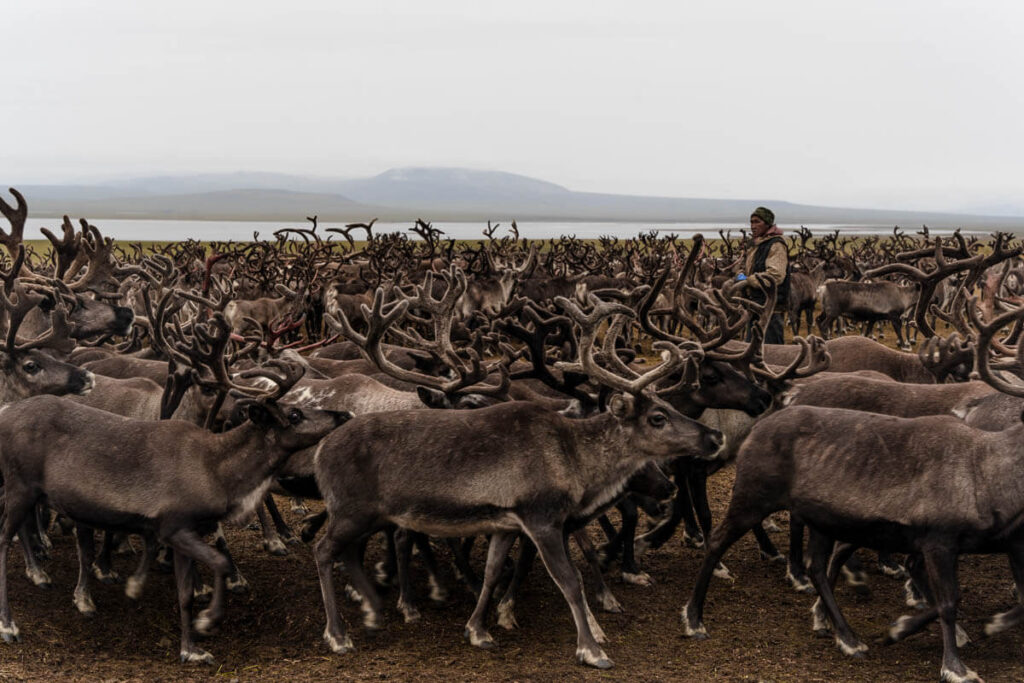
They are one of the world’s last nomadic societies that still depend entirely on reindeer for survival.
This is off the beaten track, raw Mongolia.
This post will tell you everything you need to know for meeting the Tsaatan, the reindeer herders of Mongolia.
In this travel guide to visit the Tsaatan, you will find:
📰 Introduction to meeting the Tsaatan
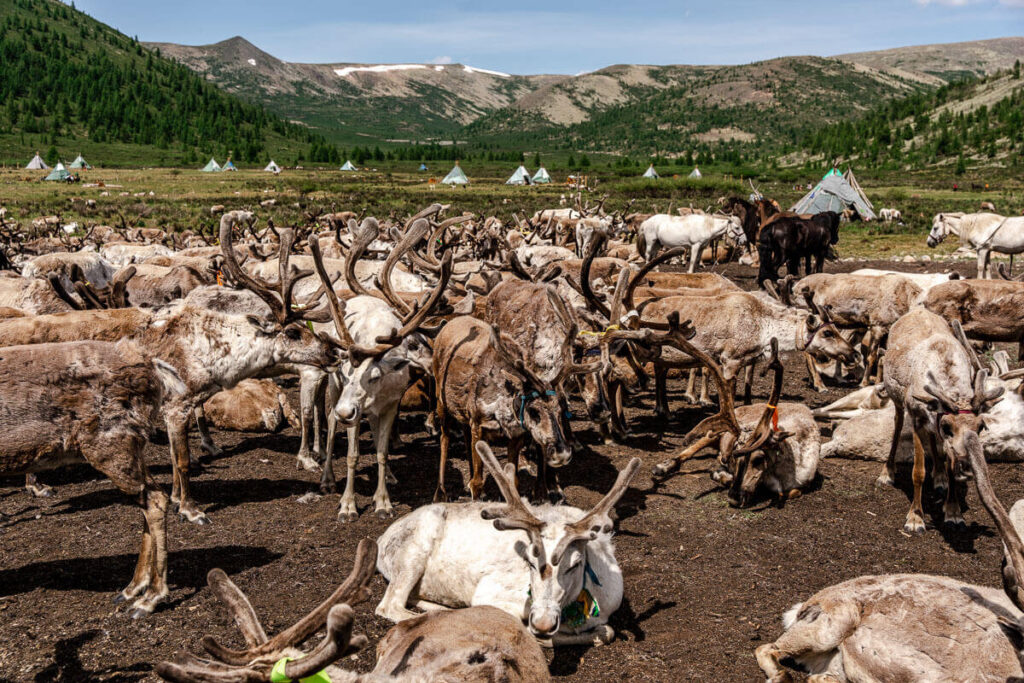
Numbering no more than 300 people, the Tsaatan are an ethnic group of nomadic reindeer herders whose lives still fully revolve around their animals. They depend on reindeer for dairy products as well as transportation, maintaining a fully nomadic lifestyle that has prevailed for generations.
The Tsaatan are actually not originally from Mongolia, but they belong to a Siberian ethnic group called the Tuvans, who live mainly across the Russian border in the Tuva Republic, a region named after them.
During World War II, fearing that Stalin would call their men into the Soviet Army, thousands of Tuvans fled Russia into Mongolia, where they remained for decades.

Over time, many returned to Russia, but a few hundred families stayed, became Mongolian, and were renamed Tsaatan, a word derived from tsaa, meaning reindeer in Mongolian.
Today, they still practice this ancestral way of life, moving across the taiga between 10 and 15 times a year, following the needs of their herds.
Unlike the Nenets, the Chukchi, or other reindeer herders of far northern Siberia, the Tsaatan are relatively more accessible, yet their region remains one of the most isolated and least visited corers of Mongolia.
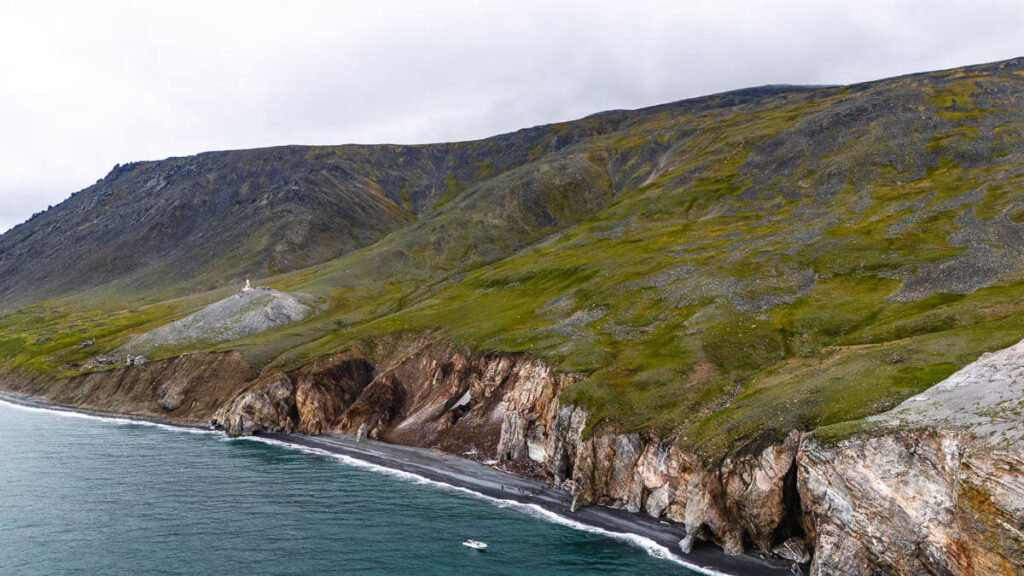
Read: How to travel to Chukotka (land of the Chukchi)
👥 Where do Tsaatan people live?
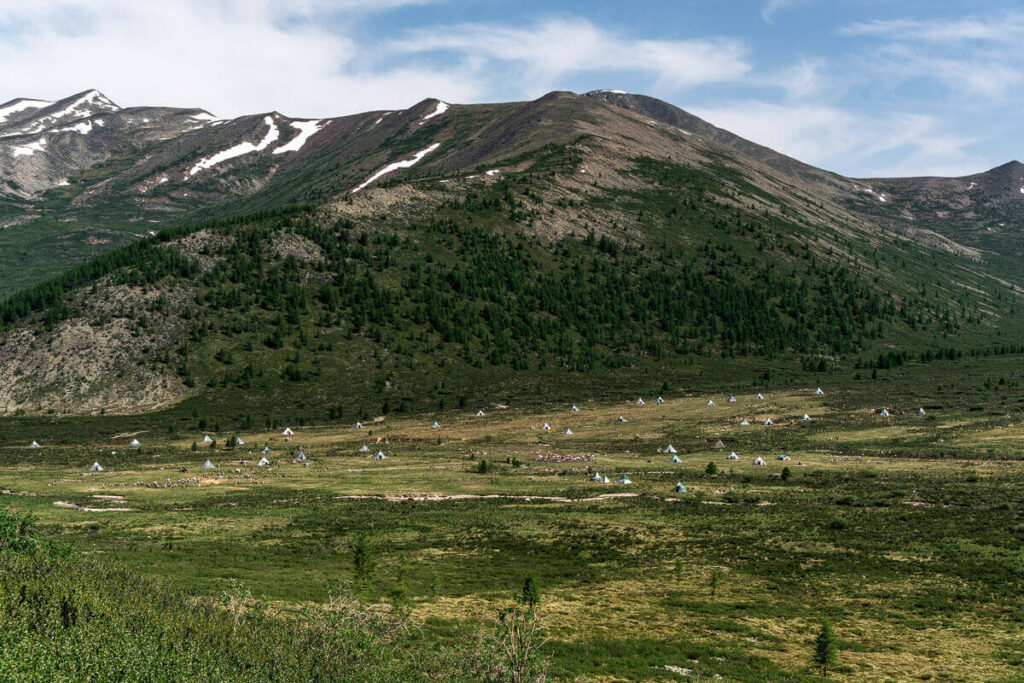
The Tsaatan people live in the taiga (check map on next section).
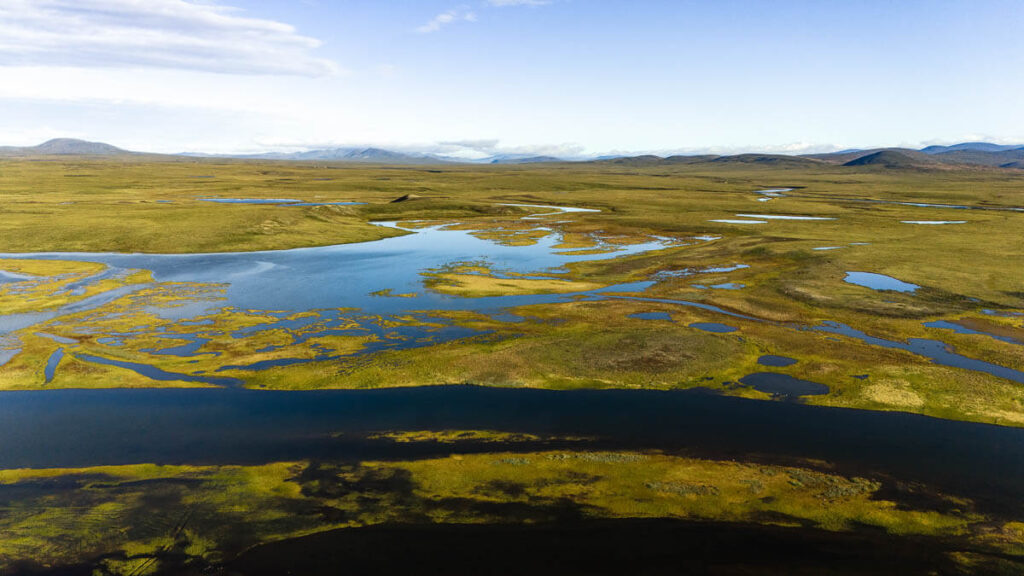
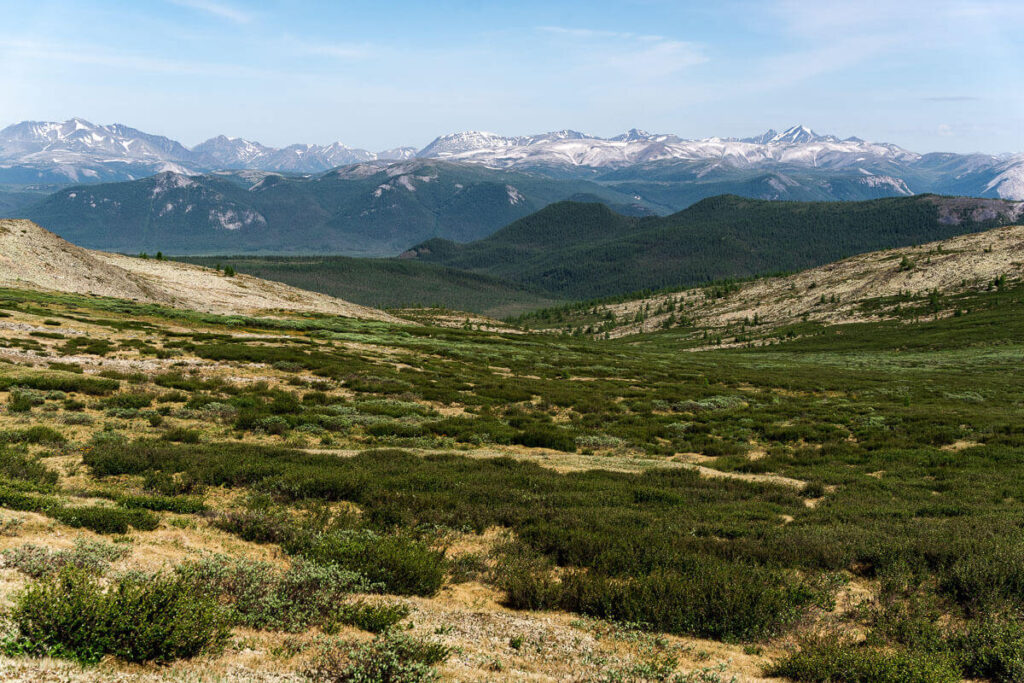
The taiga is a vast boreal forest that stretches mainly from Scandinavia across Russia, but also covers parts of Mongolia and North America. It is the world’s largest forest ecosystem, but in Mongolia it appears only in the far north, in a remote region bordering Siberia.
This area is unlike anywhere else in Mongolia. Unlike the open, vast, and endless steppe, the taiga consists of dense forest, wetlands, and permafrost.
The nearest large settlement is Tsagaannuur, reachable from Mörön after another full day’s drive.
🛫 How to get to the Tsaatan nomadic camp (day by day)
The camp where the Tsaatan people live is not only remote, but it also takes several days to reach from Mongolia’s capital, Ulaanbaatar (UB).
Map: How to reach the Tsaatan region
Step 1 (Day 1): UB to Mörön
The Tsaatan camp is located in Khovsgol province, and Mörön is the main city and gateway into the taiga and northernmost part, where they live.
Backpackers should know there are direct buses between the two cities, though the journey takes around 15 hours (that’s how long it took me).
A long trip, yes, but overland travel in Mongolia is always part of the adventure.
Buses from UB depart from Dragon Bus Terminal.
Alternatively, you can fly. Both MIAT Mongolian Airlines and Hunnu Air operate flights into Mörön, but they don’t run daily, so be sure to check the schedules in advance.
Step 2 (Day 2): Mörön to Tsagaannuur
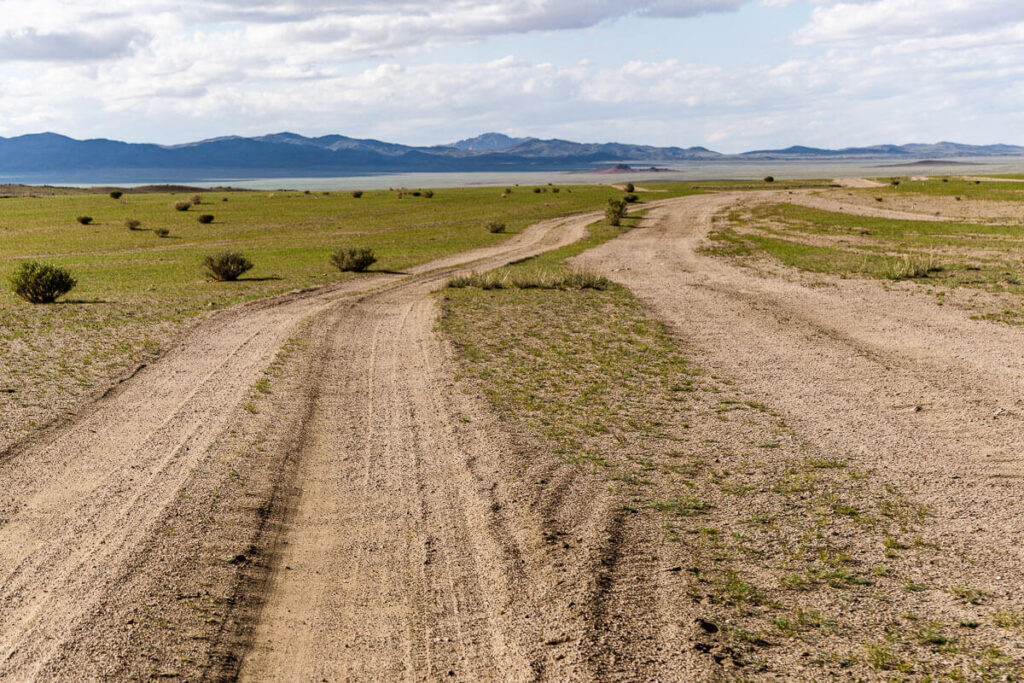
Tsagaannuur is the last relatively large settlement before entering the taiga. It’s more than 300 km from Mörön, and the journey takes a full day, at least 10 hours on a rough, bumpy road through hilly steppe landscapes.
A pretty long ride, but the scenery is absolutely stunning.
By the way, if you have your own vehicle, consider breaking the journey in two and spending the night in Ulaan Uul, which is roughly halfway between Mörön and Tsagaannuur.
Public transportation to Tsagaannuur isn’t reliable. Shared minivans don’t run every day, and when they do, they often leave in the evening.
Hitchhiking is possible if you have the time and patience, but the most practical option is to hire a taxi. Mongolia is still relatively inexpensive, and a ride to Tsagaannuur shouldn’t cost more than about 100 USD, which you can split with fellow travelers.
Step 3. Tsagaanuur to the actual taiga
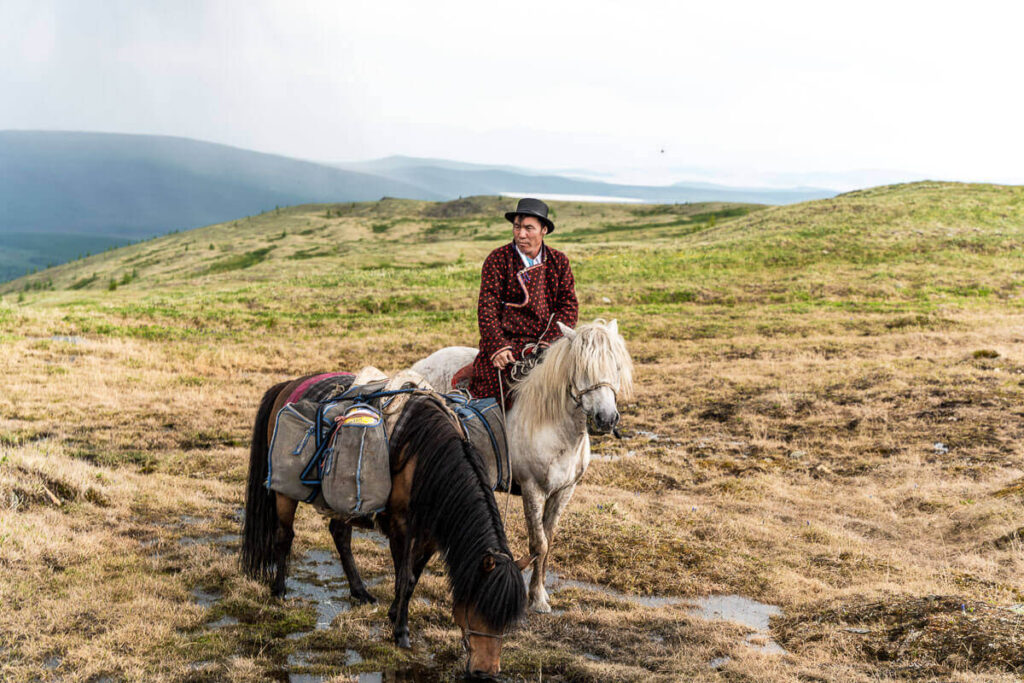
From Tsagaannuur, reaching the Tsaatan nomadic camp takes another full day. The journey includes a 2-hour drive on rough tracks, followed by a 6-hour ride on horseback through the taiga. Walking is technically possible, but much of the route crosses swampy terrain, difficult on foot. Horses are by far the best option.
This leg of the trip cannot be done independently, but you’ll need to find a local contact who can arrange horses and guide you into the forest. In Tsagaannur, you can find one, it shouldn’t be difficult.
Important: a permit will be required.
Due to its proximity with Russia, a border permit s required to visit this part of Mongolia.
It usually takes 1–2 days to be issued. You can apply for it directly in Tsagaannuur, or arrange it in advance, whichever is more convenient.
The people running Erden’s Guest House in Tsagaannuur.
Also, remember that we are running a full 10-day expedition into this part of Mongolia, scheduled for June 23rd to July 2nd. All details are here.
🌥️ Best time to visit
The best time to visit the Tsaatan is during the summer, from June to September, when the weather is mild and the forest is lush and green.
It can vary from week to week, but when I was there (at the end of June), days were surprisingly hot, while nights were kind of chilly.
The photos you see in this Tsaatan travel blog are from that period.
Summer is also the high season across Mongolia — the easiest time to travel anywhere in the country, since winters here are brutally cold.
That said, the Tsaatan live in the taiga all year round, and it’s possible to visit them at any time, even in the depths of winter. Just like with the Nenets of northern Siberia, visiting reindeer herders in winter can be rough but immensely photogenic, a great blend of traditional clothes, reindeer, and snow-capped landscapes.
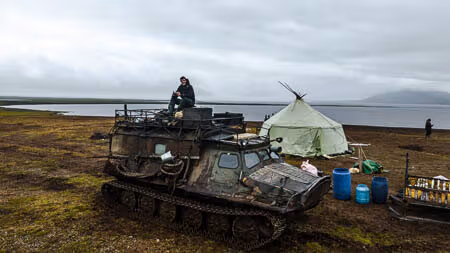
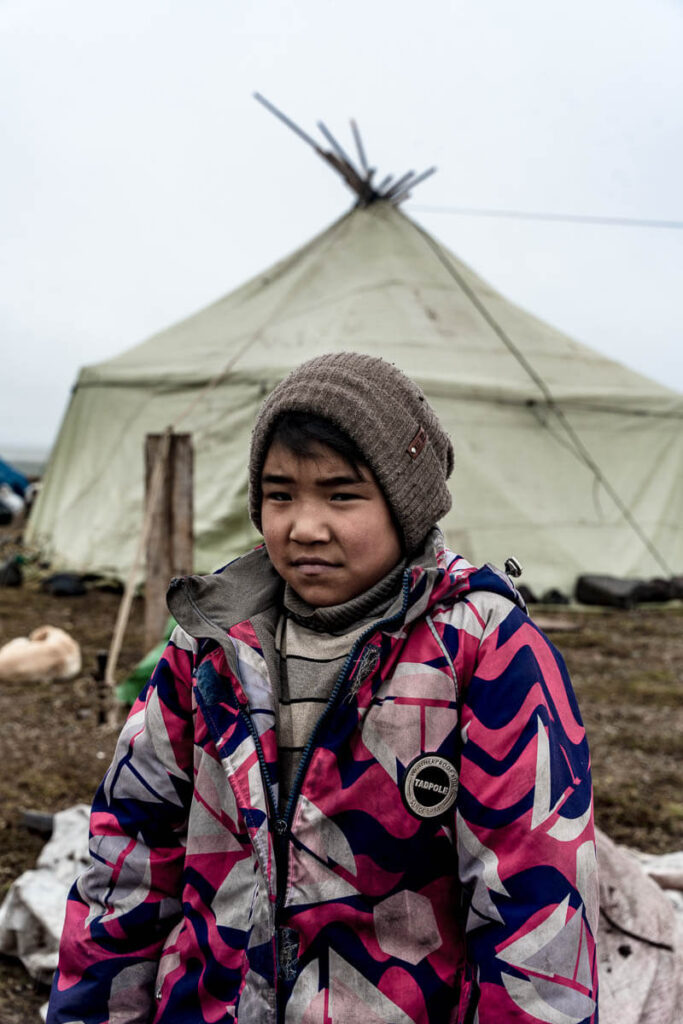
🏕️ Life in the nomadic camp, what to expect as a traveler
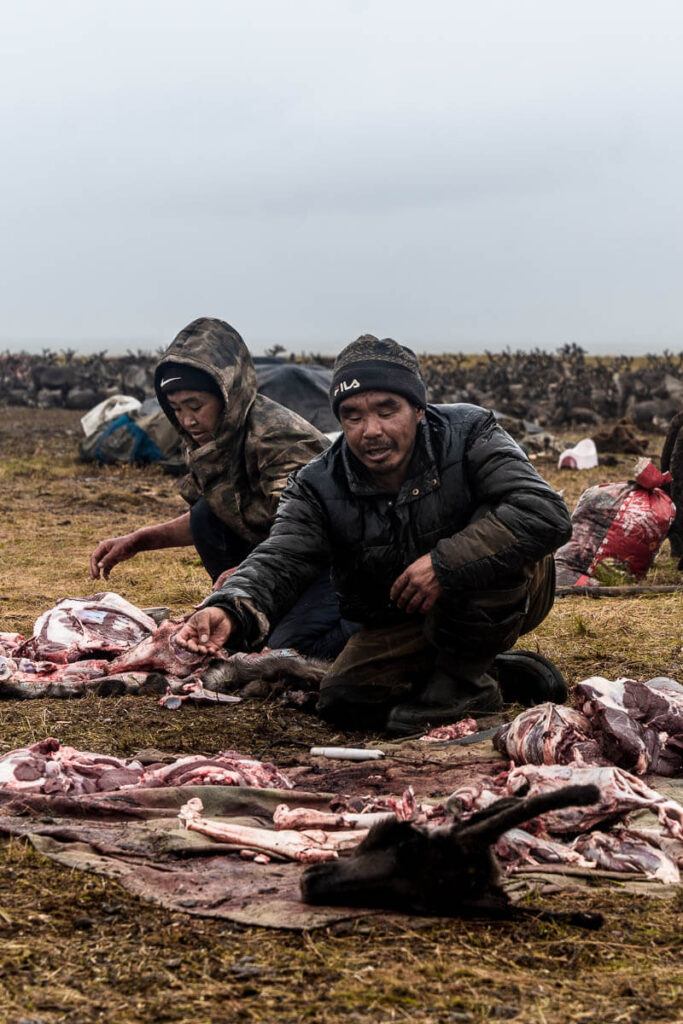
The Tsaatan are full-time nomads who move across the taiga around 10 to 15 times a year. It’s a rough, inconvenient lifestyle that they have maintained for generations, and only a handful of families still live this way today.
Their lifestyle is so unique that the Government of Mongolia actively contributes to preserving this way of life by providing a monthly salary, most likely just enough to cover the most basic needs of those living deep in the taiga.
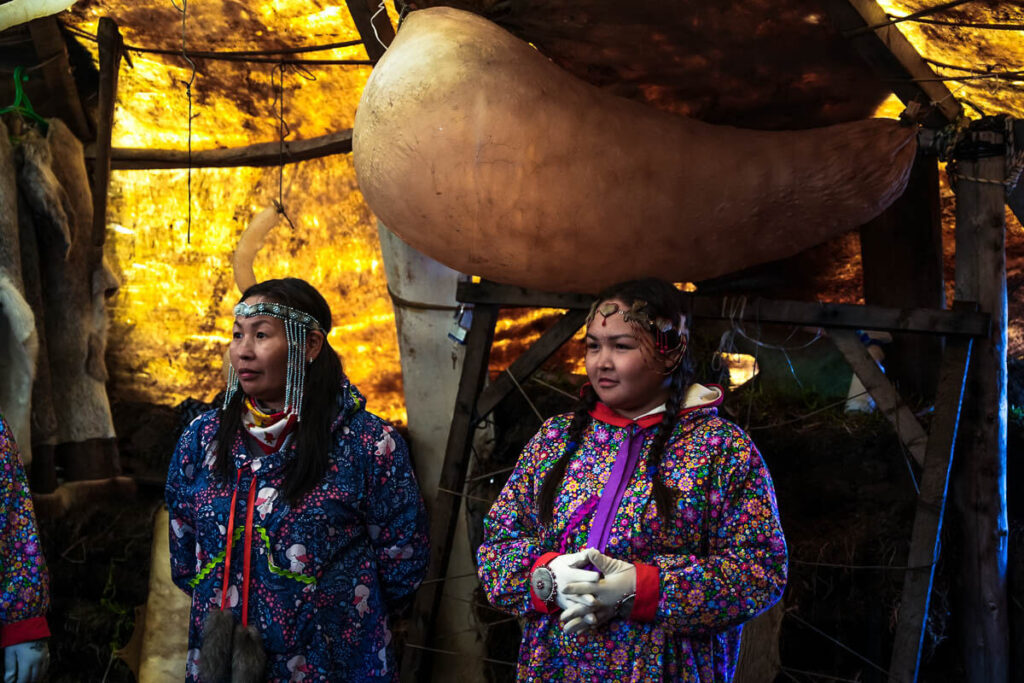
What you’ll see there is raw and authentic. In summer, when temperatures are pleasant and the forest turns green, their way of life might seem almost idyllic, but remember they also spend the winter there, when temperatures drop to –30 °C.
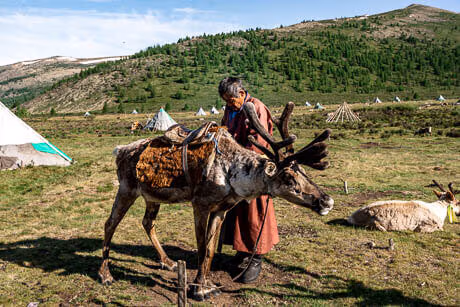
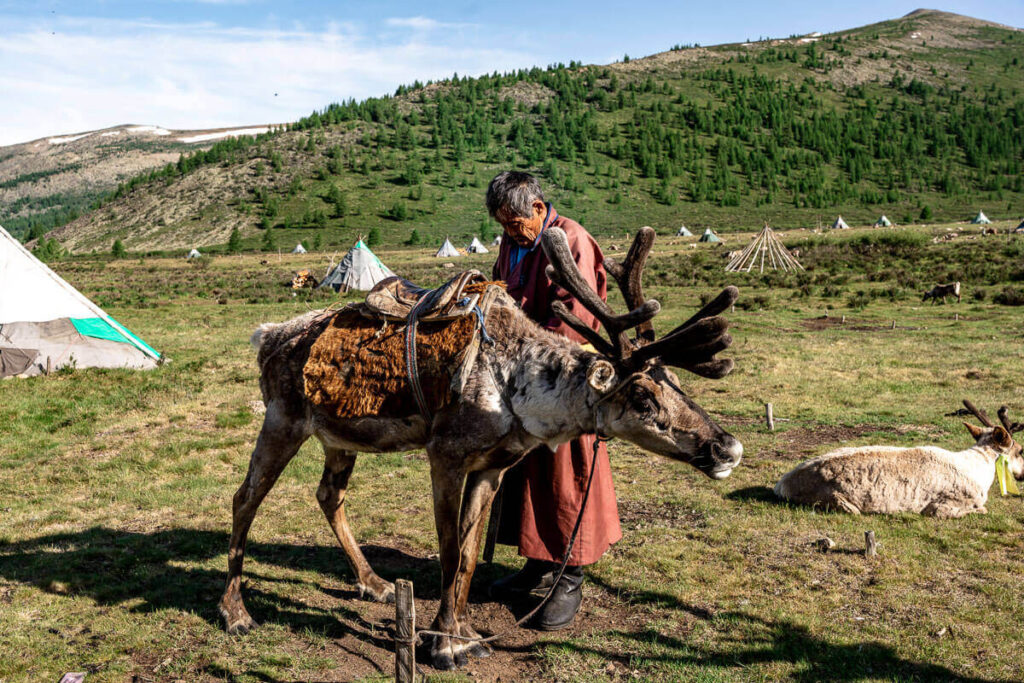
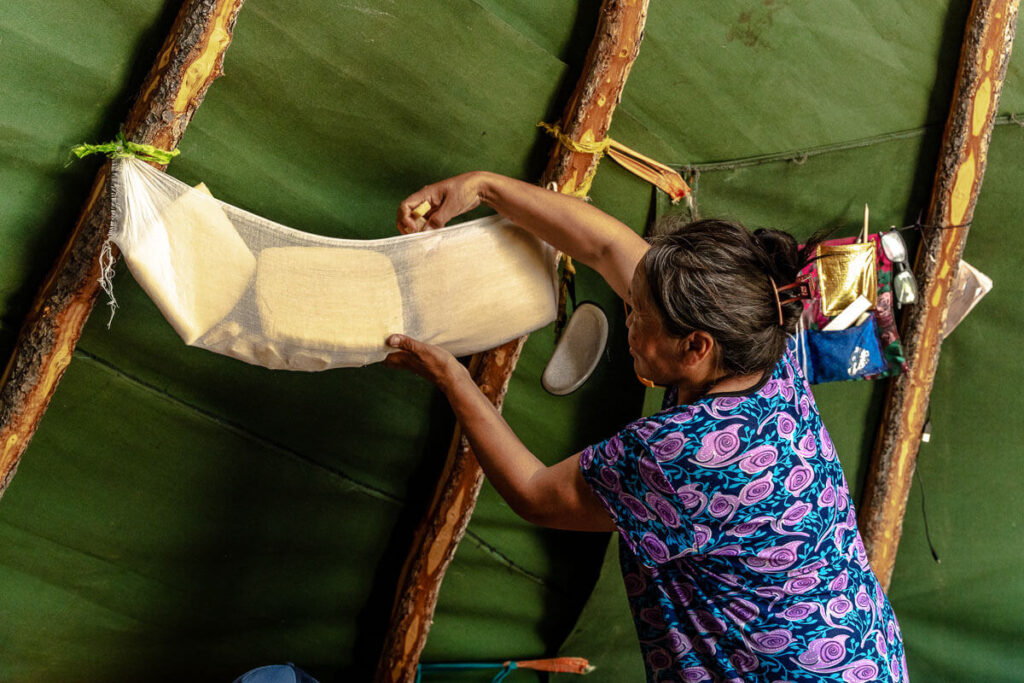
They live entirely off their reindeer and what they can carry in their tents, so everything they own is extremely basic.
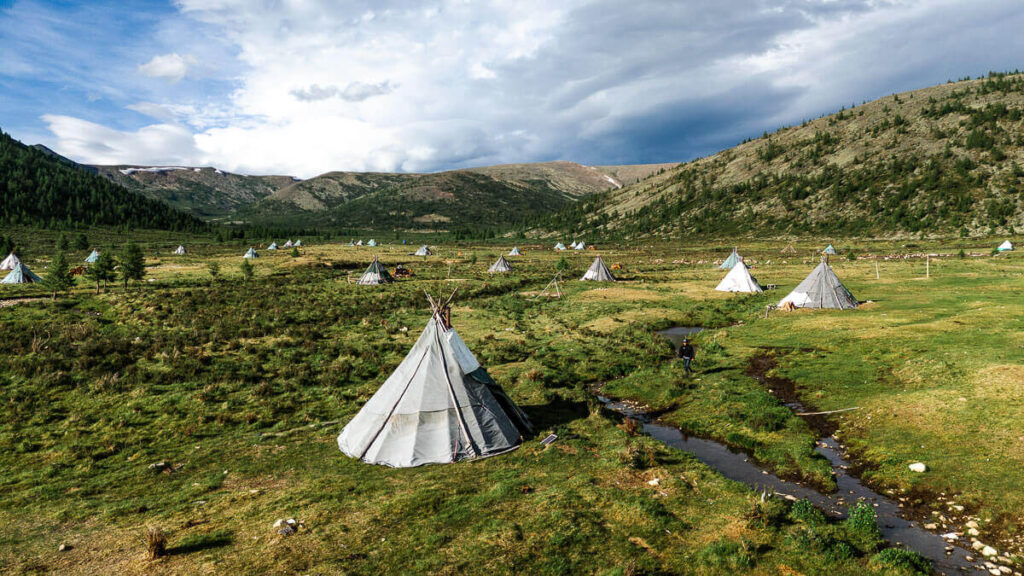
Unlike most Mongolian nomads, they live in cone-shaped tents, similar to Native American tipis, and the reason is that reindeer herders need to move more frequently than steppe nomads, and these tents are lighter and easier to assemble.
During the summer months, a few Tsaatan camps receive occasional visitors. Yet even those few tourists who make it this far into the haven’t changed the nomads’ lifestyle. As a traveler, expect a raw, unaltered experience, therefore also uncomfortable.
Here’s what you need to expect as a traveler.
Food
When I visited, I personally brought everything I needed for 3-4 days. In Mörön, there’s a decent supermarket where you can stock up on supplies before heading into the taiga. If you’re joining an organized trip from Ulaanbaatar, your tour company will most likely bring a cook. On our expedition to northern Mongolia, for instance, we always travel with one.
Next departure to meet the Tsaatan in Northern Mongolia:
June 23rd to July 2nd, 2026 – APPLY NOW
Sleep
As mentioned earlier, the Tsaatan live in tipi-like tents.
Because they move so often, their homes are extremely simple, just a single section with a small stove for cooking and thin mattresses laid on the ground.
As a visitor, you’re usually welcome to stay in one of their tipis, as long as you’ve arranged it beforehand. When I visited, blankets were provided, but I strongly recommend bringing a warm sleeping bag.
If you haven’t organized accommodation in advance, it should be fine to pitch your own tent near their camp, nobody will say anything.
Facilities
Facilities in the nomadic camp are non-existent, like there are no toilets, no showers, nothing. Some camps have built a very basic, improvised toilet, but I strongly recommend walking a few hundred metres further, and do your necessities somewhere else.
Interacting with the Tsaatan nomads
The Tsaatan don’t speak English or Russian, only Mongolian, at least in my experience. Communication will therefore be limited unless you have a translator or a guide with you.
It’s important to remember that the nomads aren’t there to entertain you. During the day, they’re busy with their reindeer and daily chores, and then they simply get on with their lives.
However, they’re also aware of the benefits that tourism can bring, and most families are friendly, curious, and open to visitors who show genuine respect and interest. They are OK with photography as well.

Things to do in the taiga
While staying with the Tsaatan, there isn’t much to “do” in the conventional sense, but that’s what is cool about it.
Most of your time will be spent simply observing the nomads doing their daily routines: milking reindeer, preparing food, collecting firewood, or saddling their reindeer before heading out into the forest. It’s OK to help them too.
In the evenings, the atmosphere is a bit more relaxed. Some families gather to chat or play simple board games, while the youth tend to play volleyball. If you’re not too shy, feel free to join in.
It’s important to keep in mind that the taiga isn’t a place for activities. But a place to disconnect, watch and learn about a particular way of life.

Internet
In the taiga, there isn’t any service, but nomads have now Starlink, which they turn on one hour per day, almost every day, so you won’t be fully offline.
There’s no mobile service in the taiga, but the entire camp shares one Starlink connection, which is usually turned on for about an hour almost every day so, while you’ll be mostly offline, you’ll still get a short daily window to send messages and check your email.
🗓️ How many days are needed?
Visiting the Tsaatan is quite a long journey from Ulaanbaatar, but if you’re referring to the time spent in the camp itself, one or two full days are usually enough to get a glimpse of what life is like for a full-time reindeer herder.
However, you also need to take into account the horseback journey to reach the camp and return, plus the journey to Mörön.
From Ulaanbaatar, the trip can easily take 10 to 12 days in total.
This is the itinerary we follow in the expedition we have scheduled for June 23rd to July 2nd, 2026.
- Arrival in Ulaanbaatar
- Amarbayasgalant Monastery
- Mörön
- Ulaan Ul, coexisting with yak breeders
- Tsagaanur, coexisitng with nomadic family
- Tsaatan reindeer herders camp
- Tsaatan reindeer herders camp
- Back to Ulaan Ul
- Lake Khövsgöl
- Flight to Ulaabaatar
🧳 What to bring, recommended packing list for visiting the Tsaatan
The following packing list isn’t only useful for visiting the Tsaatan nomads, but should be good for any trip to Mongolia.
- Hiking shoes
- Sandals (or any comfortable shoes) to wear in the nomadic camps
- Windbreaker and raincoat (weather could change all of a sudden)
- Thermal underwear (base layers)
- Sunhat and sunglasses for strong sun exposure
- Warm clothes, including a down jacket
- Sunscreen
- Lip balm
- Hand sanitizer
- Reusable water bottle
- Thermos
- Toiletries: shampoo, wipes, etc.
- Power bank and spare batteries
- Sleeping bag rated for -5ºC to -10ºC
- Sleeping mat (optional)
- Headlamp or flashlight
- Small daypack
- Snacks like nuts or energy bars (optional)
❗More information
📢 In my Travel Resources Page you can find the list of all the sites and services I use to book hotels, tours, travel insurance and more.
Travel guides to other countries in Central Asia