برچسب: JAPAN

  • 2025 StarCruises STAR VOYAGER Hong Kong Guide (Sailing to Taiwan, Japan, China, Vietnam & More!)

    2025 StarCruises STAR VOYAGER Hong Kong Guide (Sailing to Taiwan, Japan, China, Vietnam & More!)


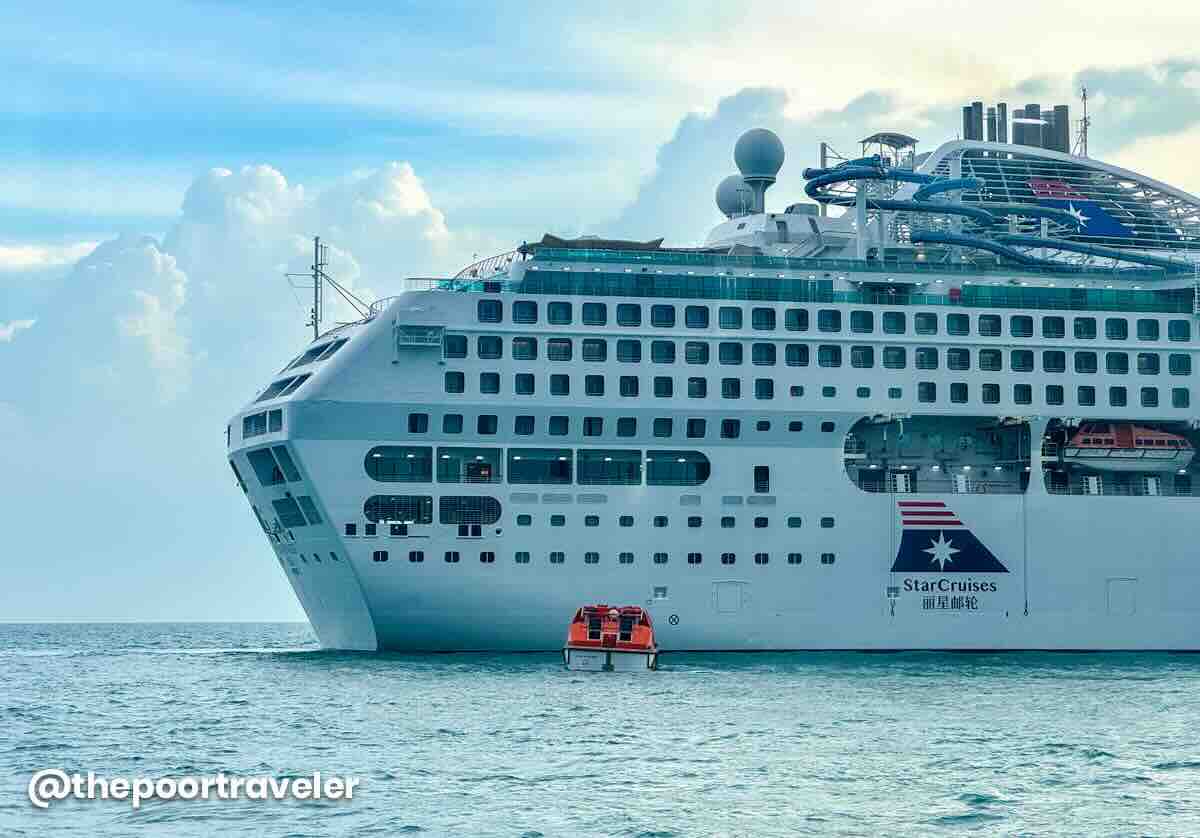
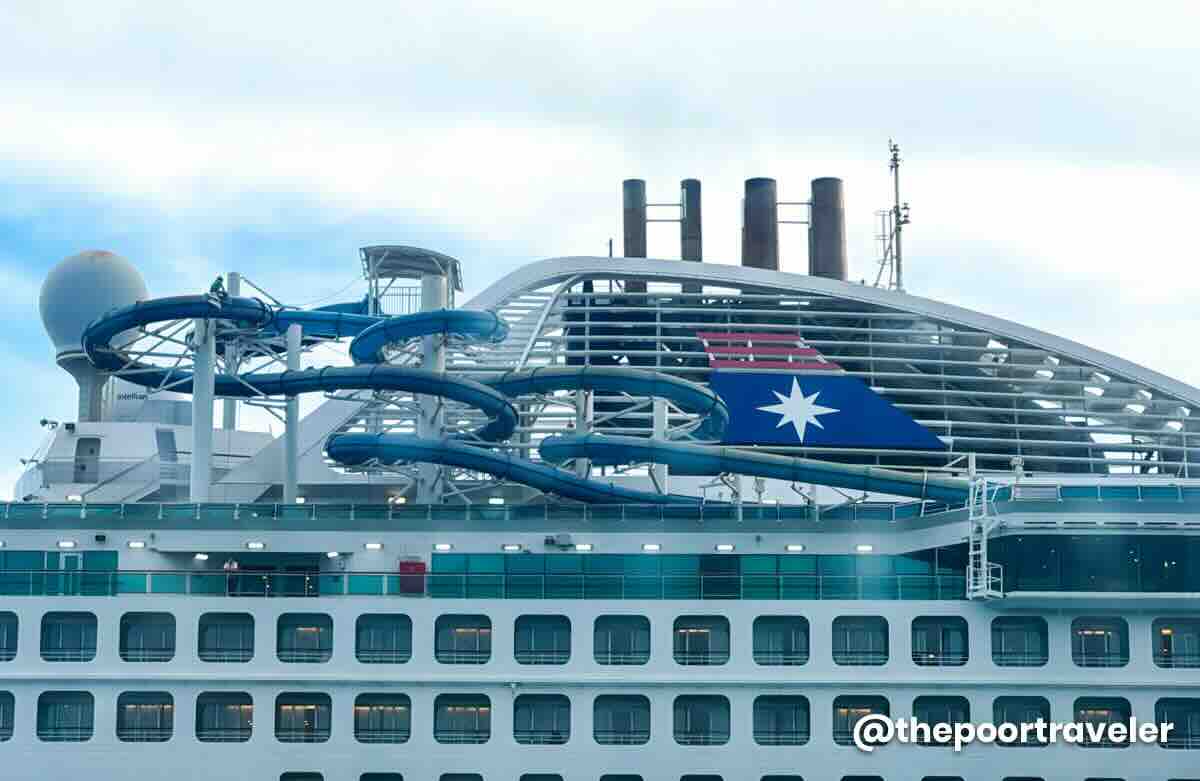
    StarCruises continues to provide affordable and accessible cruise experience as its newly revamped legacy vessel, Star Voyager, calls Hong Kong its new homeport!

    TPTKLOOK5
    BlogDisclaimer

    From June 27 to November 2025, Star Voyager is cruising from Hong Kong to some of Asia’s top destinations, including Taiwan, Japan, China, Vietnam, and the Philippines! It’s the perfect way to visit multiple countries in one trip, minus the usual travel stress. Here’s another plus point: if you’re holding a passport that normally needs a visa for Japan or China, you might be able to skip that requirement when you cruise with them.

    Star Voyager Ship

    Whether you’re a first-time cruiser or just itching for a new kind of getaway, this is your chance to have a hassle-free journey across Asia, with everything you need already on board! Keep reading to learn more about the ship, discover the perks, and get tips on how to make the most of your cruise experience.


    WHAT’S COVERED IN THIS GUIDE?

    How to book a cruise?

    Online Booking


    Available Cruise Schedule

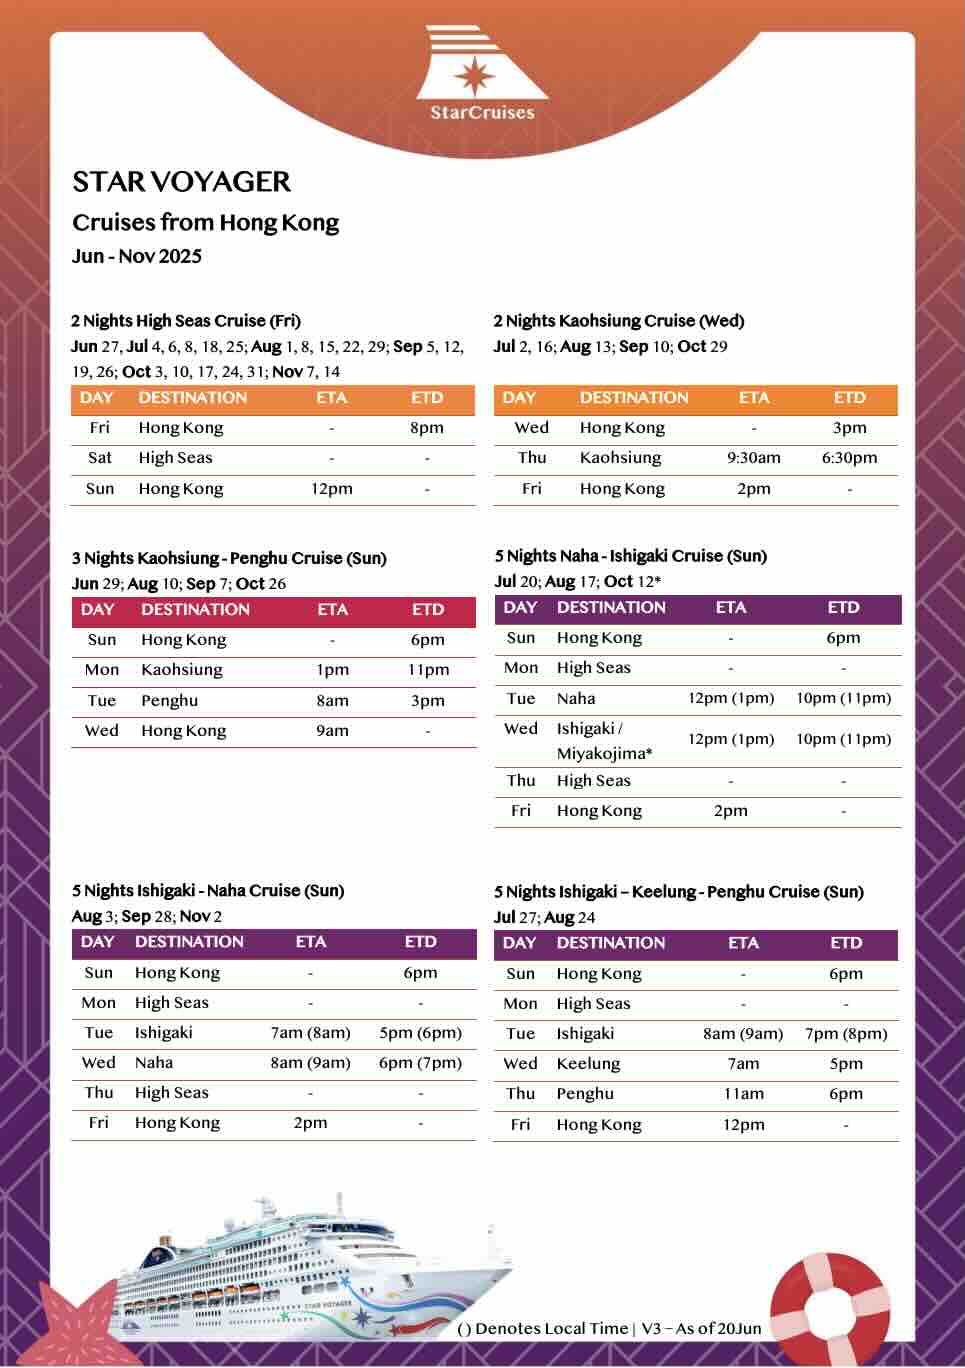
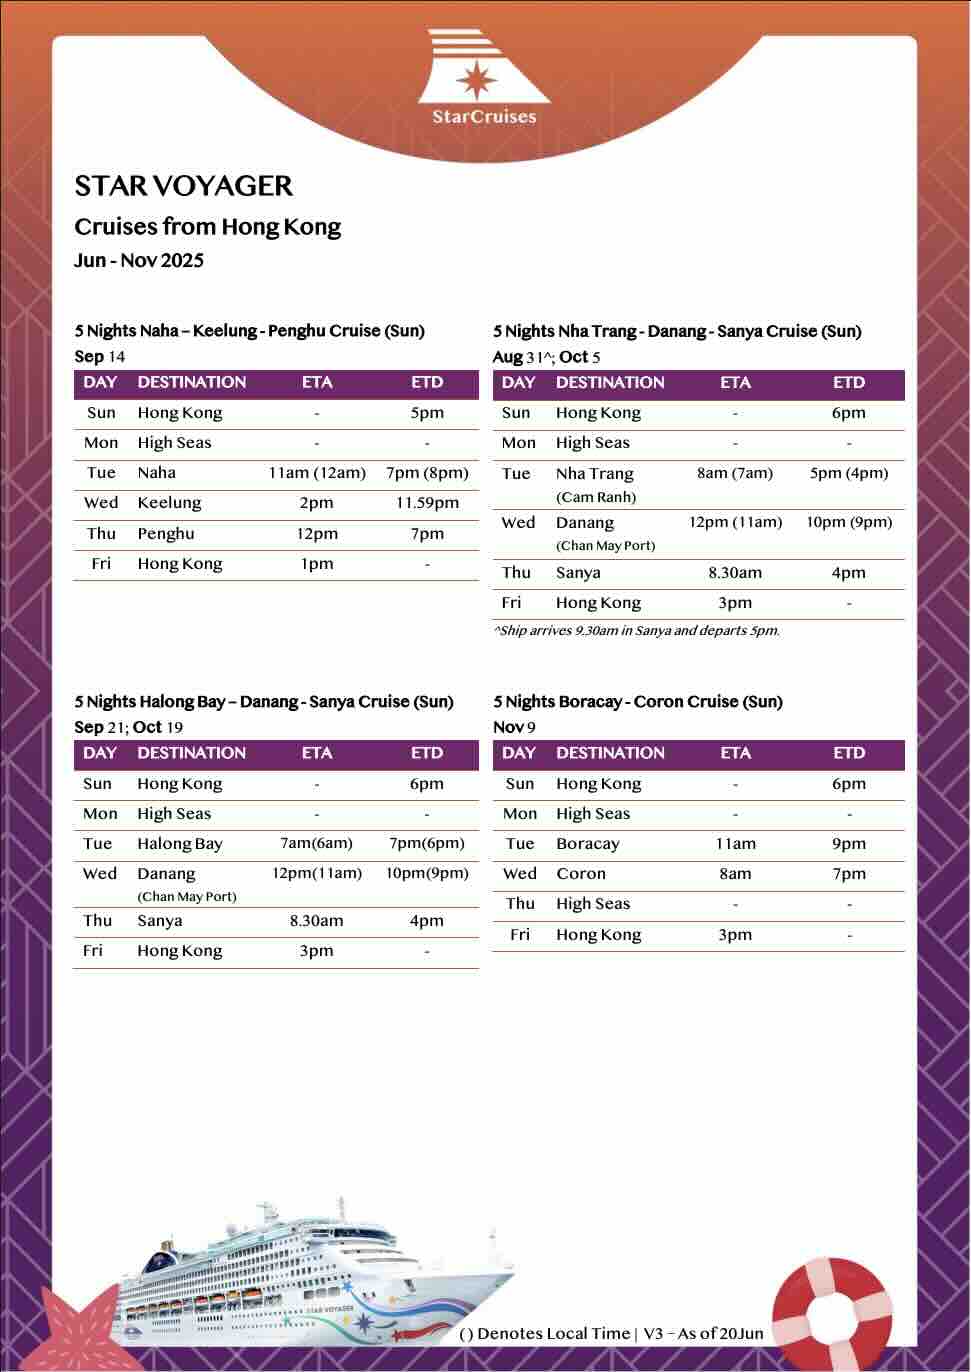
    Below are the itineraries for sailings departing from Hong Kong from June 27, 2025 to November 2025. For the updated timetable, visit the official website.

    Star Voyager Cruises Jun_Nov 2025 1
    Photo Credit: StarCruises
    Star Voyager Cruises Jun_Nov 2025 2
    Photo Credit: StarCruises

    What is the best room to book?

    It all comes down to your budget and what kind of cruise experience you’re after. Whether you are cruising on a budget or going all out for luxury, Star Voyager has a room to match your preference.

    Different Types of Accommodations

    There are four main types of staterooms with different sizes and features.
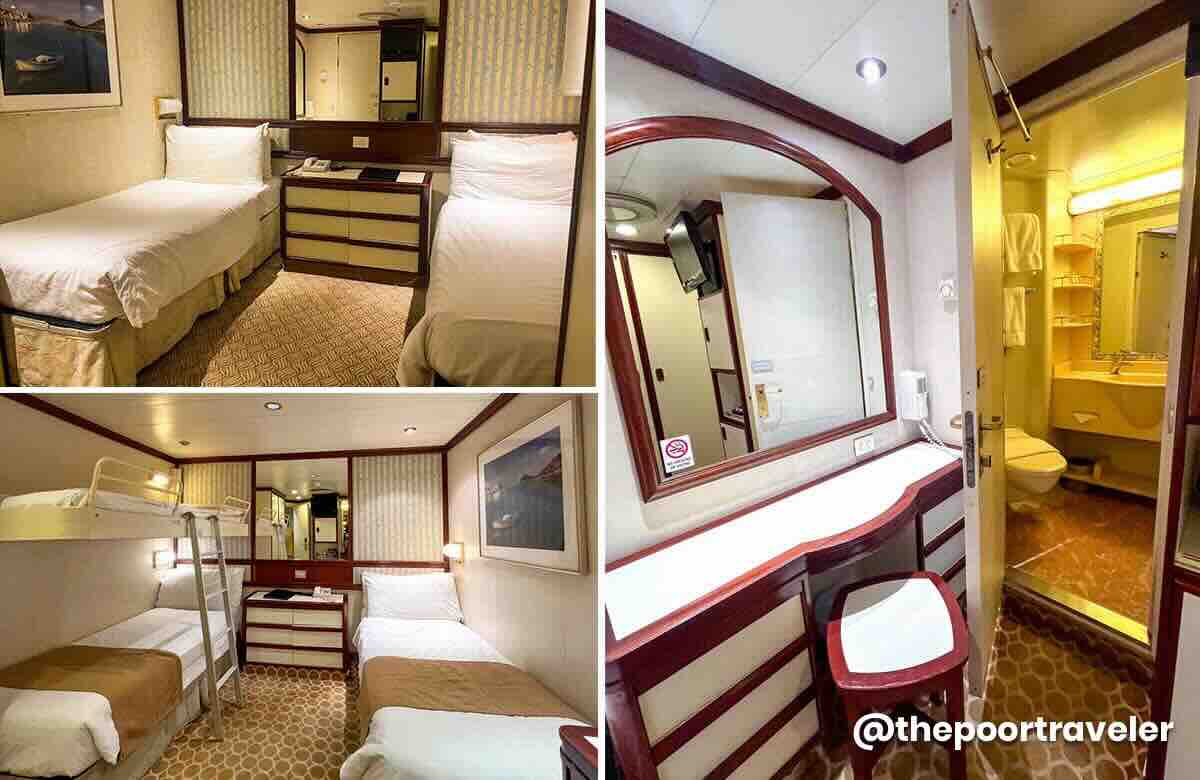
    Interior Stateroom

    If you plan to spend most of your time exploring the ship and want the most practical option, go for the Interior Stateroom. It’s simple, economical, and gives you all the essentials without breaking the bank. This is the most budget-friendly option. It’s cozy, compact, and windowless.

    Maximum Capacity: 2-4 pax

    SVO Interior Stateroom
    Interior Room with Twin Beds (Top Left) and Interior Room with Bunk Bed (Bottom Left)

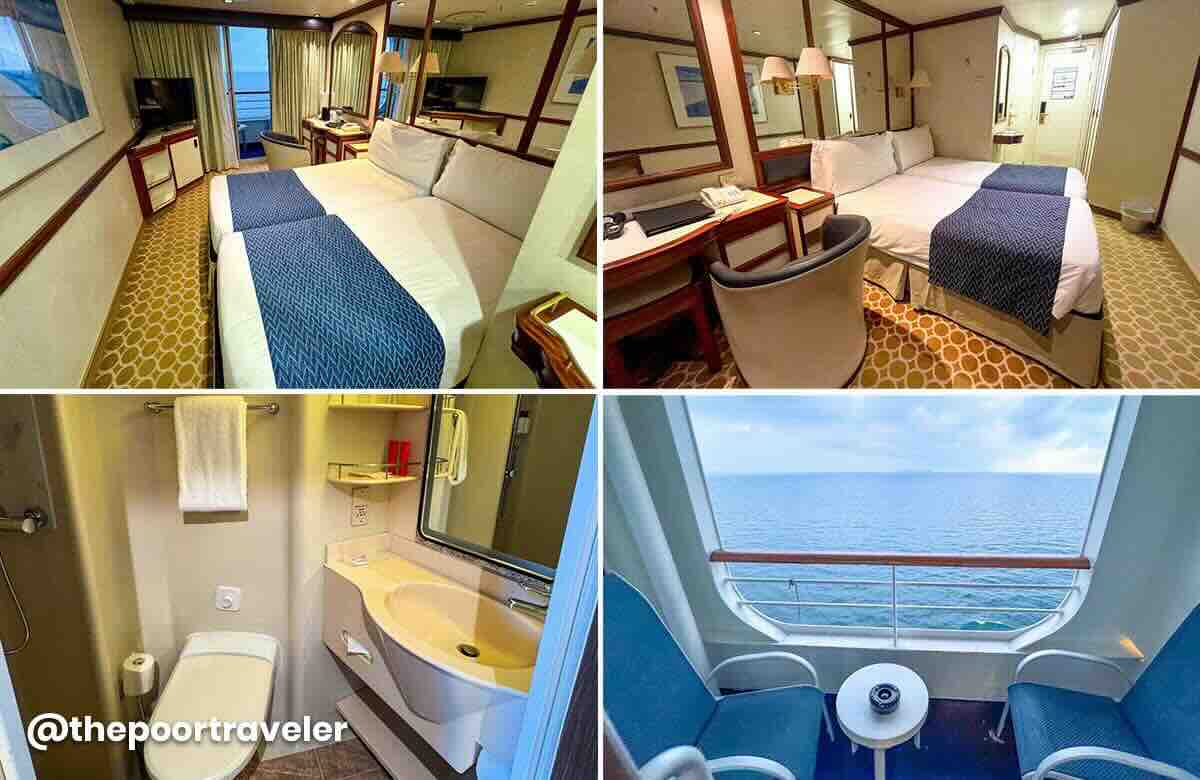
    Balcony/Balcony Deluxe Stateroom

    If you’re looking for a bit more comfort and value, the Balcony Stateroom strikes a great balance. You’ll enjoy a spacious cabin and your own private balcony. This also comes with two lounge chairs and a small table.

    Maximum Capacity: Balcony Deluxe, 2-3 pax; Balcony, 2-4 pax
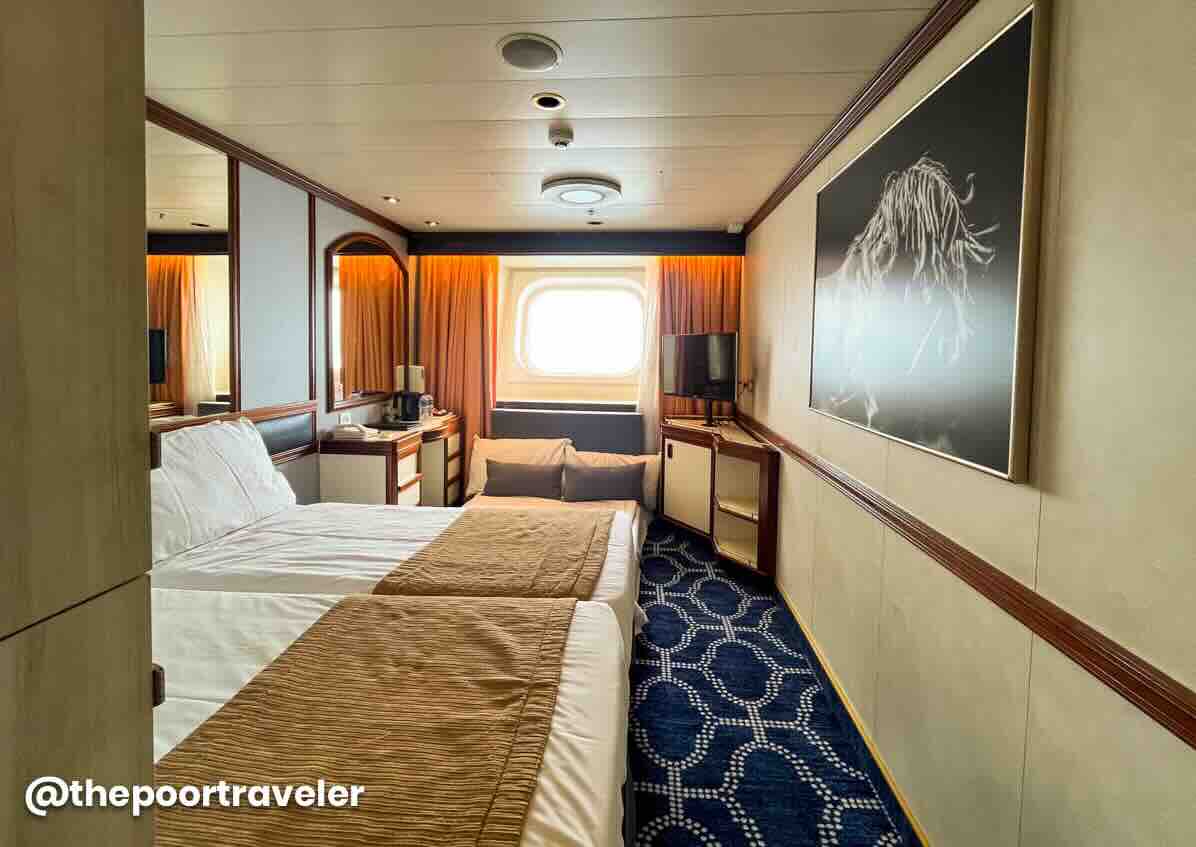
    SVO Balcony Stateroom


    Oceanview Stateroom

    The Oceanview Stateroom is ideal if you’re after a sea view but don’t necessarily need a balcony. It’s a nice middle ground between price and experience. This room has no balcony, but you’ll get a window with a view.

    Maximum Capacity: 2-4 pax

    SVO Oceanview Stateroom


    The Palace Suites

    Thinking of treating yourself? The Palace is an all-suite section, offering upscale rooms with upgraded perks and services.

    Guests staying in The Palace suites enjoy exclusive access to The Palace Restaurant, curated menus at designated specialty dining restaurants, and priority services throughout the ship. Take a peek inside one of Star Voyager’s The Palace suites here:

    SVO The Palace Suite

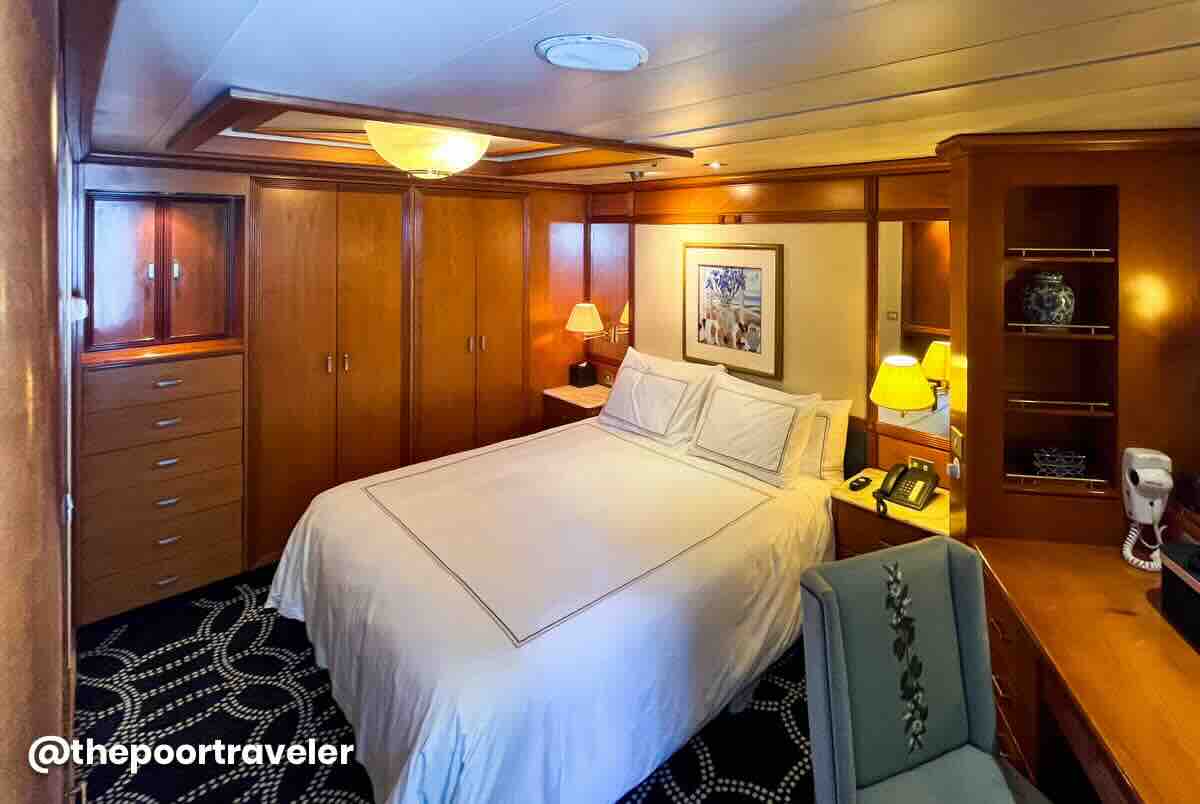
    Maximum Capacity: Palace Balcony, 3 pax; Palace Suite, 3-4 pax; Palace Deluxe Suite, 4 pax; Palace Penthouse, 4 pax

    Notes

    • All cabins, no matter what type, are provided with these essentials: toiletries, towels, a hairdryer, a mini fridge, an in-room safe, a water kettle, complimentary bottled water, and packets of tea, coffee, and sugar.
    • If you are staying in The Palace, expect extra comforts, upgraded amenities, and added touches of luxury.
    • Daily housekeeping is available across all room types.

    What to prepare before the cruise?

    For a smooth embarkation process, these are the things you need to prepare prior to your cruise.

    Online Check-in

    Once you receive your ‘Booking Reservation’, don’t forget to go to the web check-in page to complete the mandatory online check-in. You’ll also find the link conveniently included in your ‘Cruise Ticket’. Just a heads-up: online check-in closes 48 hours before your cruise departs. If you failed to do this, you can still check in manually at the terminal on the day of sailing.


    Travel Documents

    Here are the documents you need to secure:

    • Valid Passport. This must be valid for at least six (6) months.
    • Photocopy of your passport’s bio page. This will be your copy. Upon boarding, a staff member will collect your passport and secure them throughout the duration of the cruise. Don’t worry — it will be returned a day before disembarkation.
    • Cruise ticket (printed or digital copy). You’ll have to show this when dropping off your luggage and checking in at the cruise terminal.
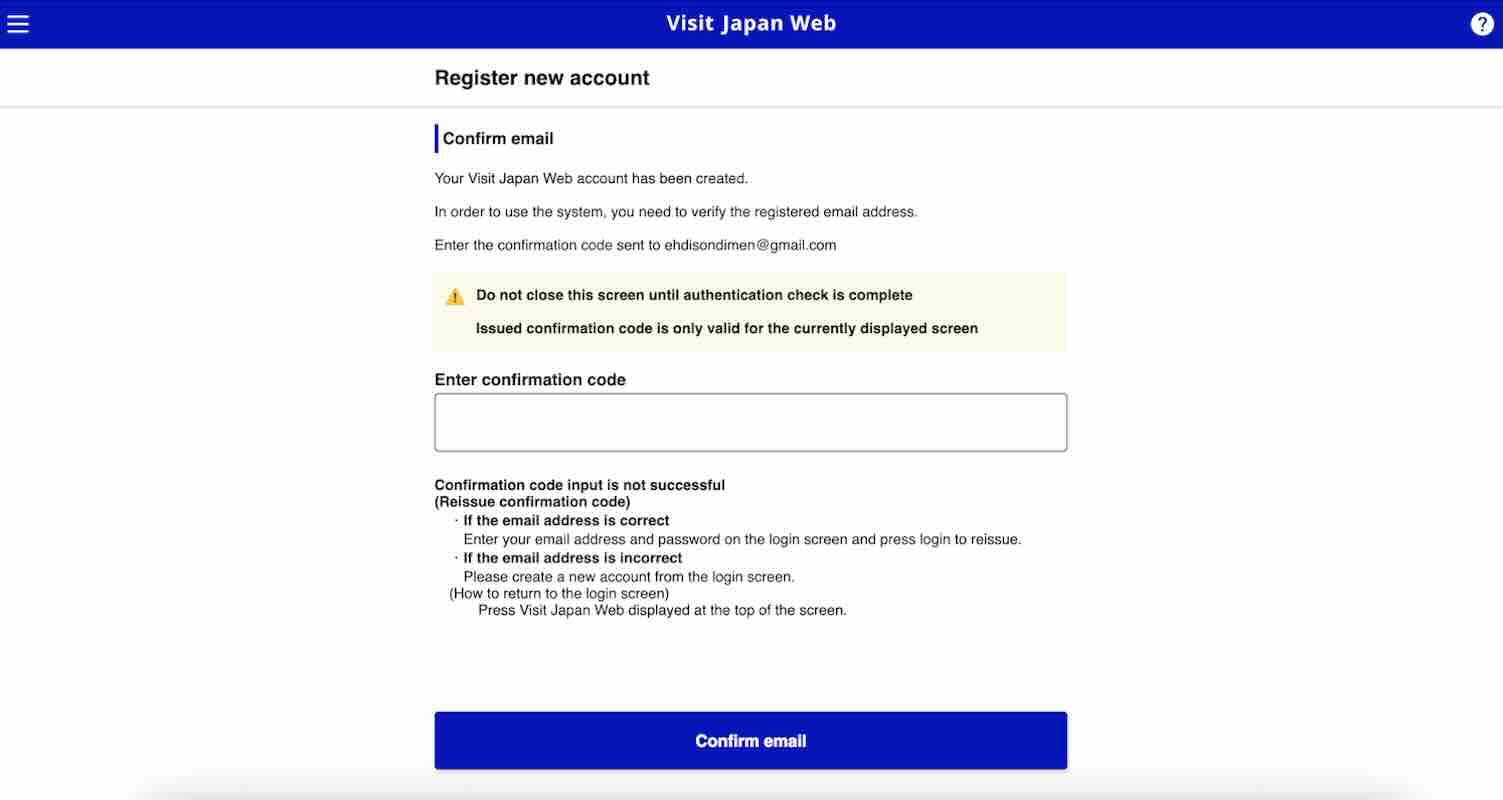
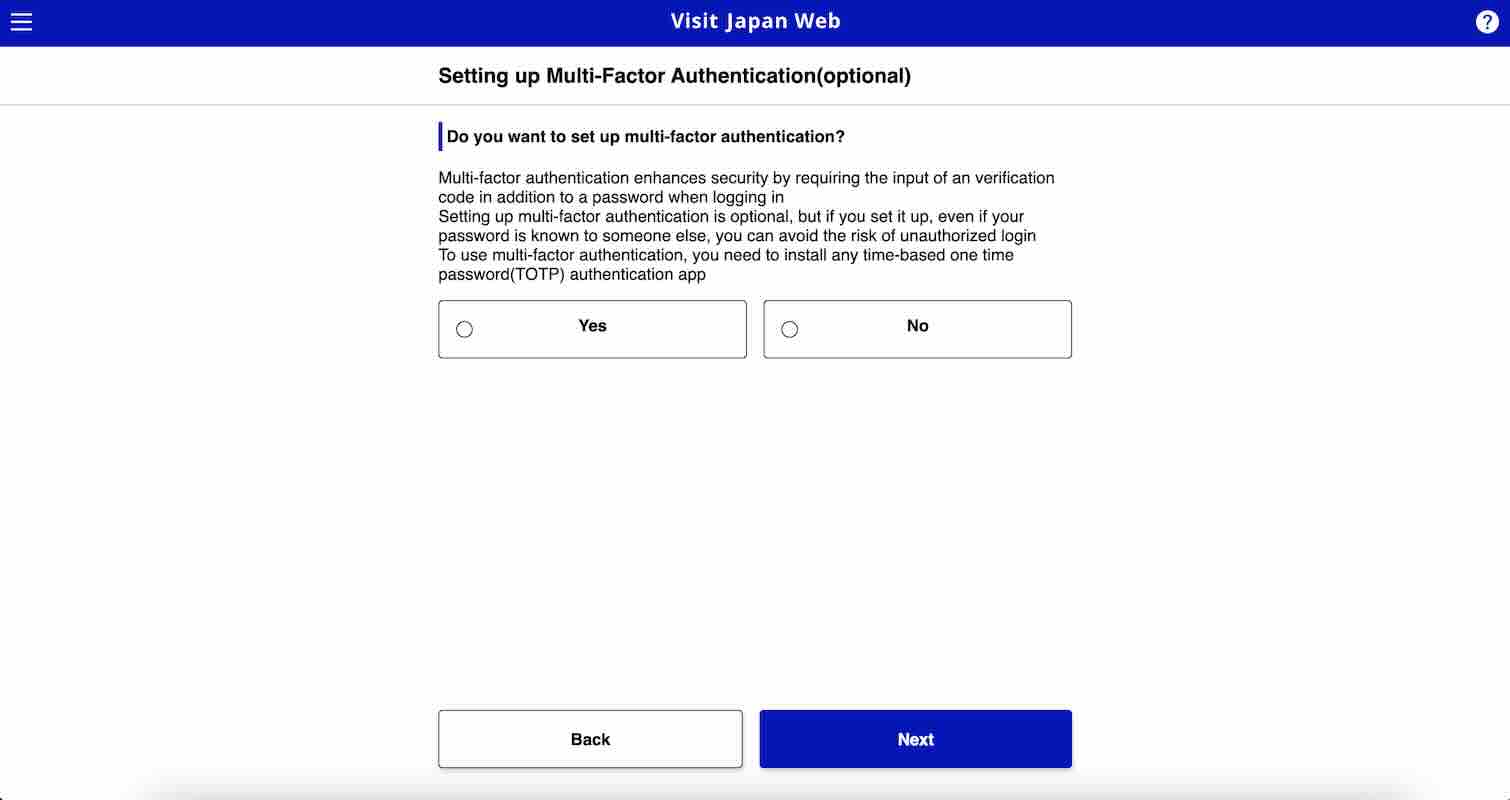
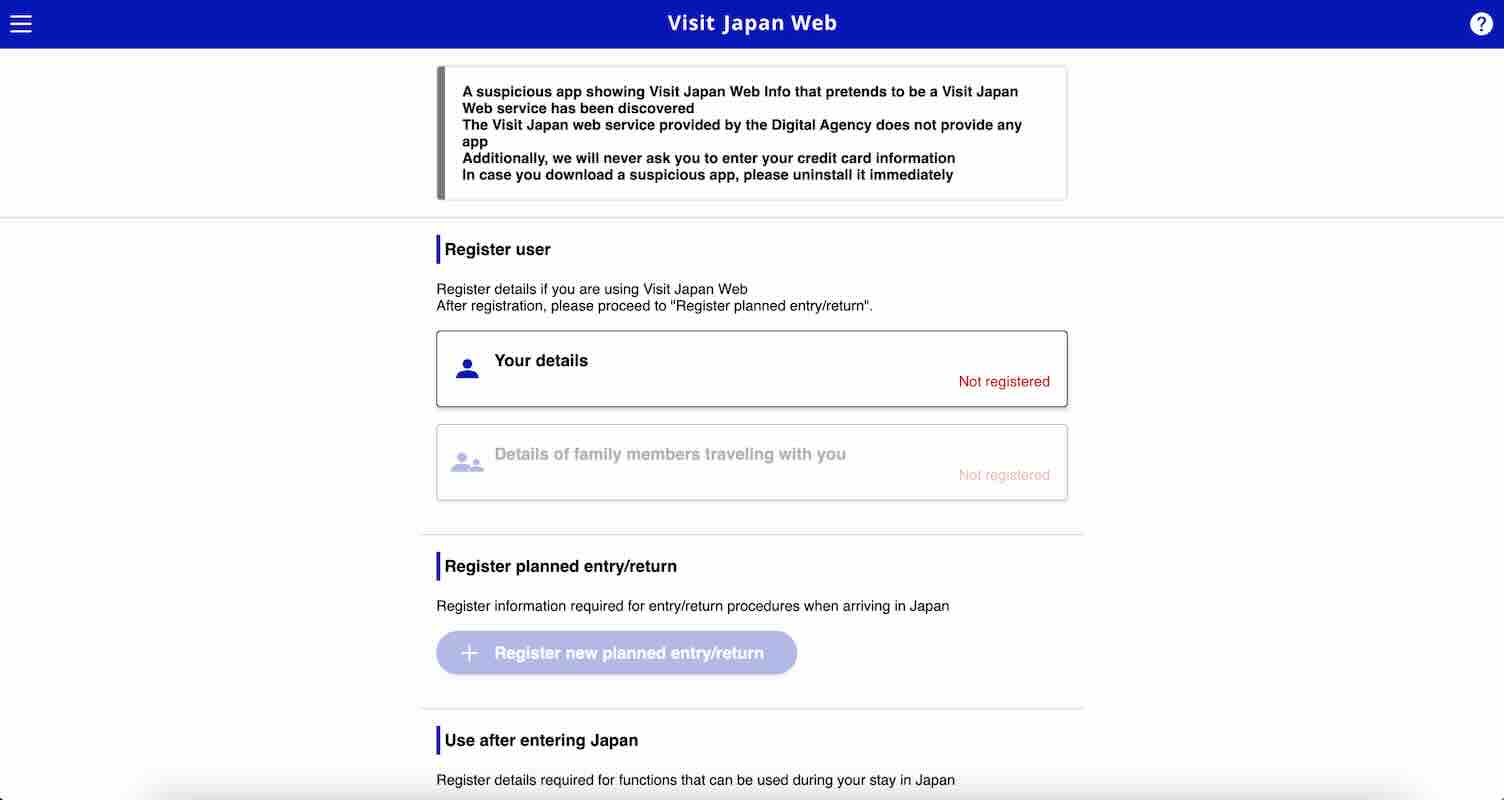
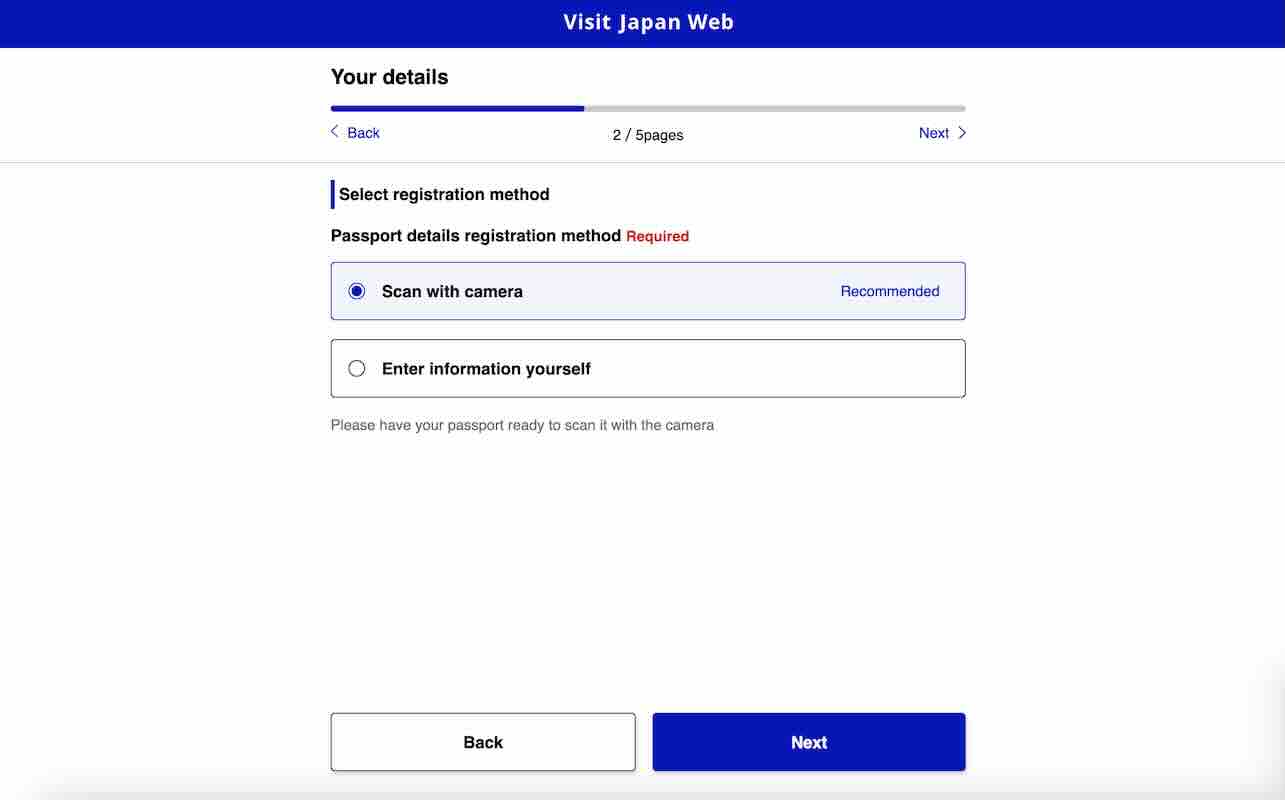
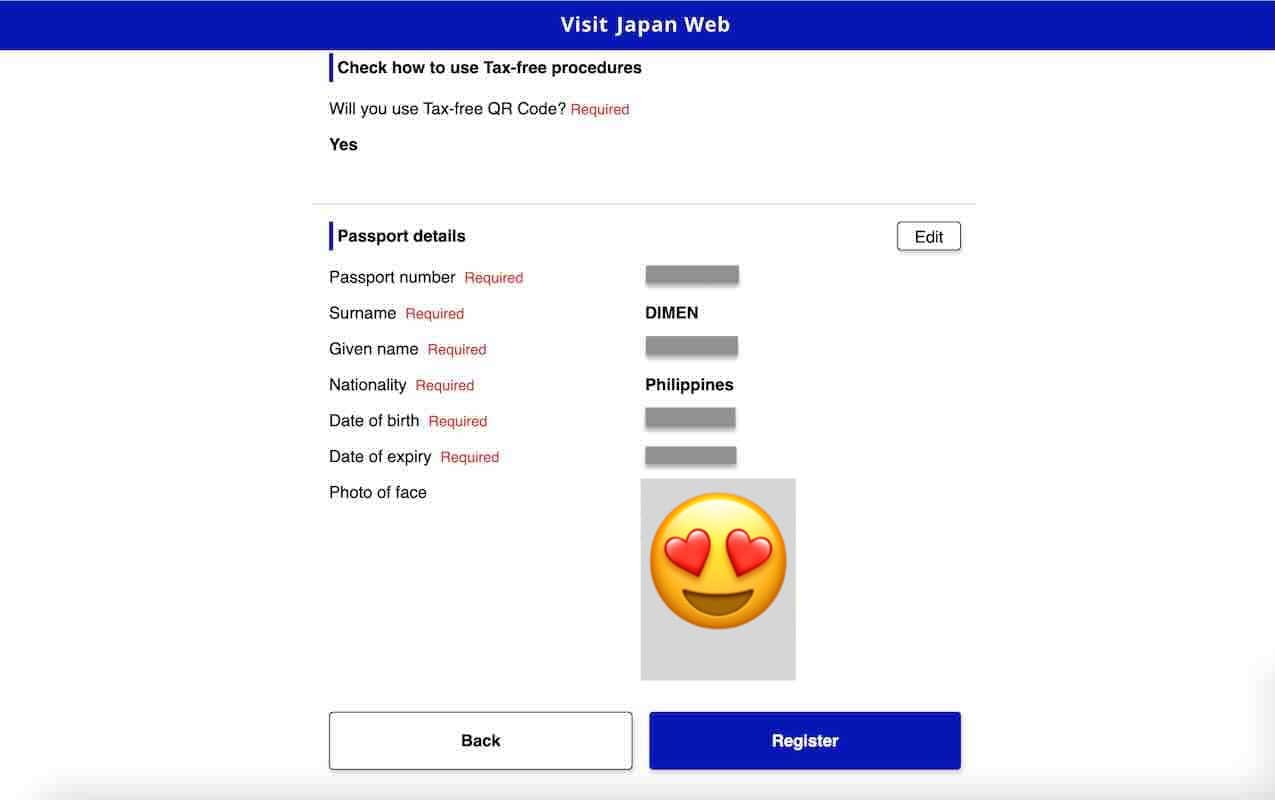
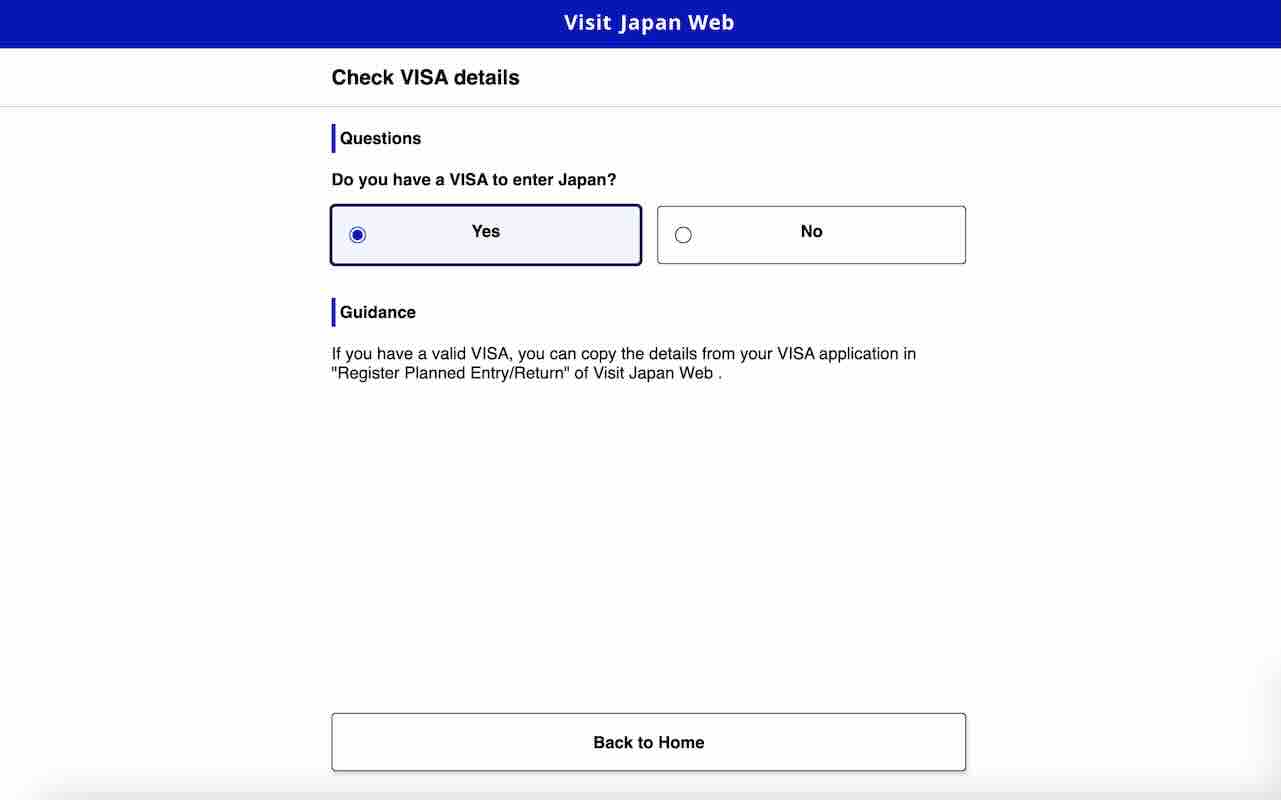
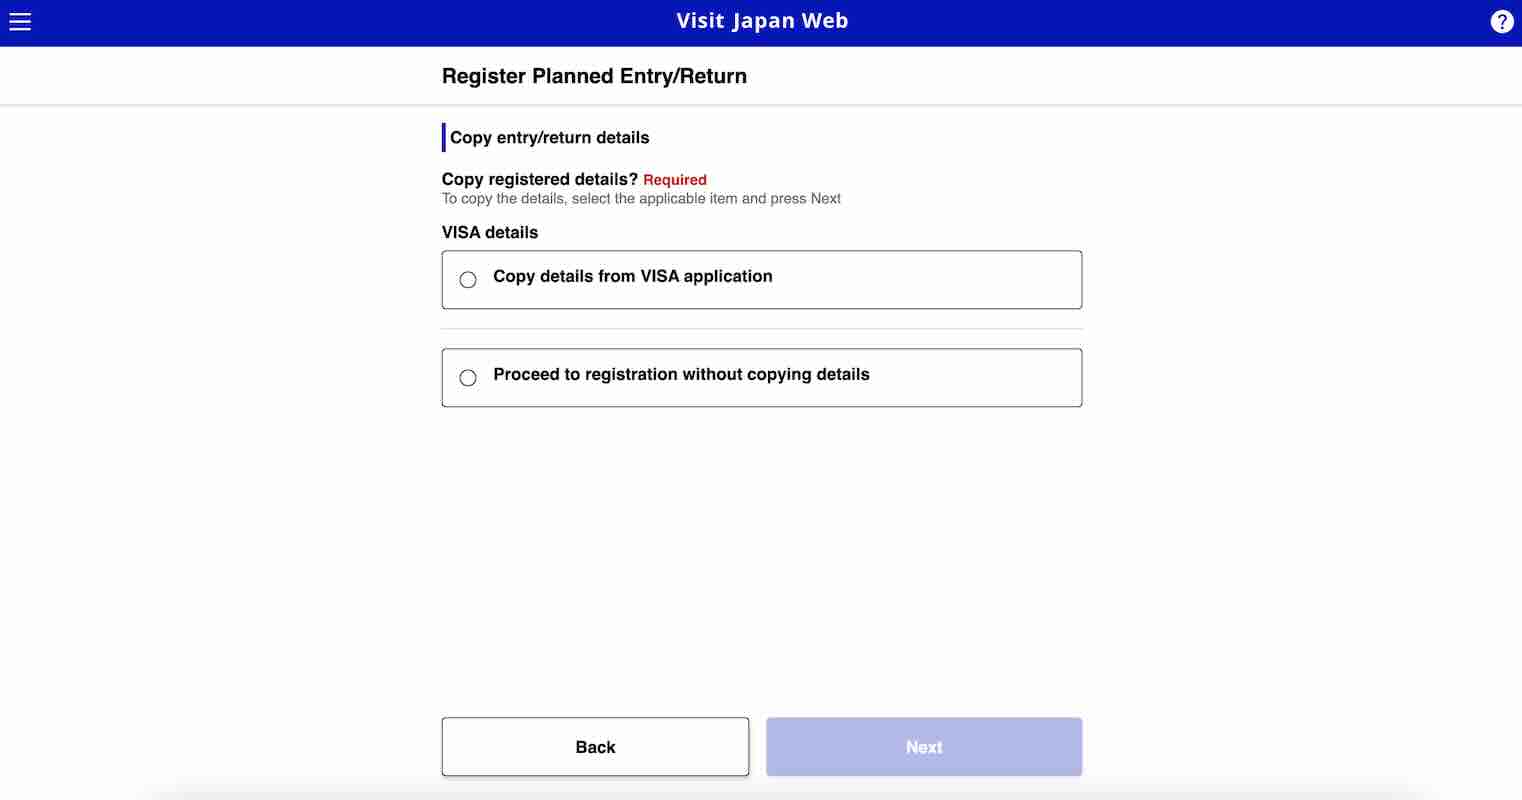
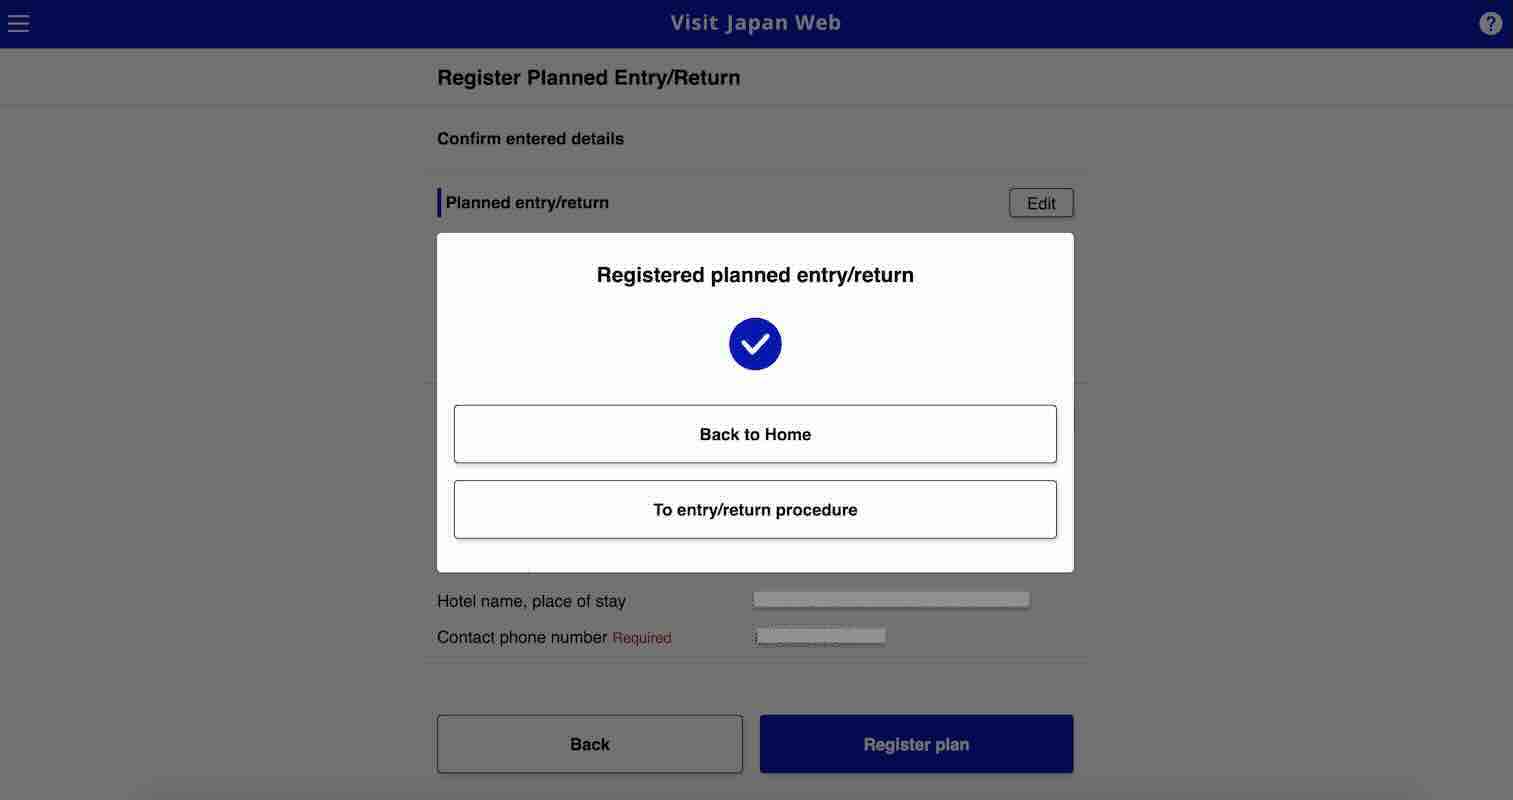
    • Visa (if applicable). Philippine passport holders don’t need a visa since the home port is Hong Kong. If your chosen itinerary includes stops in Japan or China destinations, you still won’t need to secure a visa, BUT a tourist arrival fee applies to those joining a shore excursion.

    Onboard Currency and Time

    • Currency. Since Star Voyager sails out of Hong Kong, all onboard transactions are in Hong Kong Dollars (HKD). Credit cards are widely accepted for hassle-free purchases, but it’s still a good idea to bring cash just in case.
    • Time. The ship follows Hong Kong time, which is the same as the time in the Philippines, Taiwan, and China. However, note that Vietnam is an hour behind, while Japan is an hour ahead. We know it’s a bit tricky. Here’s our suggestion: turn off the ‘Set Automatically’ option on your devices and manually set it to Hong Kong time.

    Pack Your Luggage

    • Clothes & Outfits. A good rule of thumb is to pack two sets of outfits per day — casual wear for daytime activities and dressy attire for evening shows or fine dining. And of course, don’t forget to pack proper swimwear for pools and waterslides.
       
      For footwear, bring a pair of closed-toe shoes or comfortable sneakers if you’re planning to try out activities like zip line, rope obstacles, and wall climbing.
    • Toiletries. Every stateroom is stocked with shampoo, conditioner, shower gel, lotion, toothpaste, toothbrush, shaving kit, and tissues, so you don’t have to bring your own. However, feel free to do so if that’s what you prefer. You’ll also find bath towels, hand towels, bathrobes, and hotel slippers.
    • Universal Socket Adapter. Lastly, be sure to include a universal adapter in your to-pack list. The ship uses China-style power outlets, so you’ll encounter Type A (two flat parallel pins), Type C (two round parallel pins), or Type I (three flat pins in a V shape). Your cabin also comes with USB ports for more charging options.

    Prohibited Items

    For safety and security, these items are not allowed on board the Star Voyager:

    RW Cruises Prohibited Items
    Photo Credit: StarCruises (formerly Resorts World Cruises)
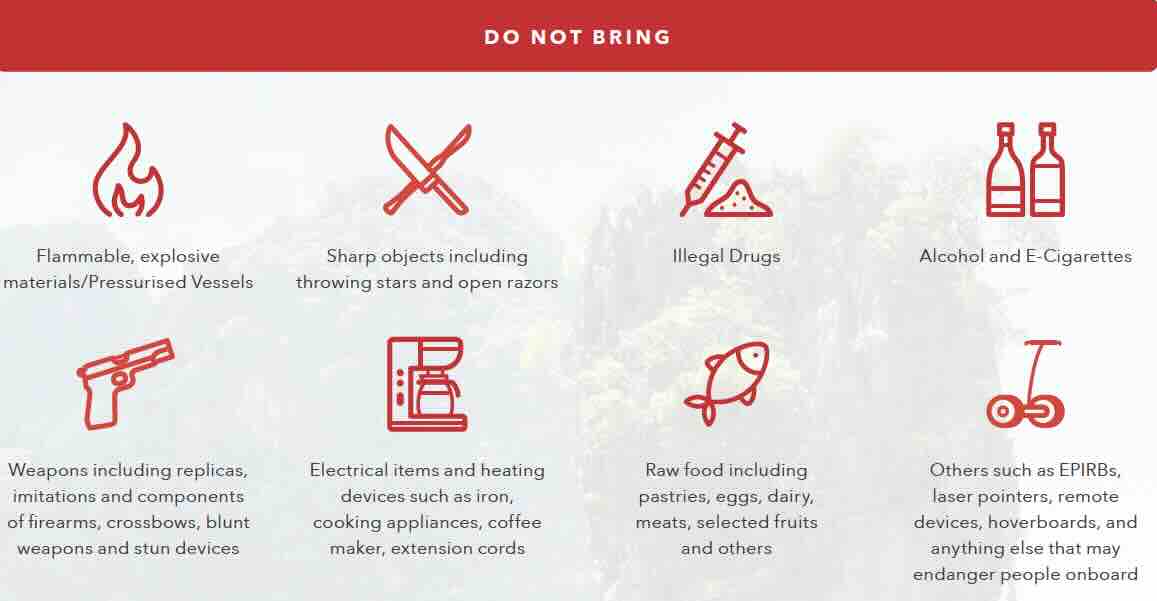
    • Flammable materials and explosives
    • Pressurized containers
    • Sharp objects
    • Illegal drugs and substances
    • Alcoholic beverages
    • E-cigarettes/vapes
    • Weapons, firearms, and ammunition (including replicas, stun devices, and blunt weapons)
    • Electrical items and heating devices (like clothes iron, coffee maker, and cooking appliances)
    • Extension cords
    • Raw food (such as dairy, meats, eggs, pastries, fruits, etc.)
    • Other objects that could pose a risk to fellow passengers (like hoverboards and laser pointers)

    Travel Insurance

    This is optional, but we highly recommend this, especially when traveling abroad. Travel can be unpredictable, and though we hope we’ll never use it, having it gives us peace of mind in case of unexpected delays, cancellations, or emergencies.

    For this cruise, you can avail of PGA Sompo’s TravelJOY Plus insurance. You can GET IT HERE. Don’t forget to use WORTHIT for a special affordable rate.

    TravelJoy PGA Sompo Code 2025


    Where to Stay in Hong Kong?

    Flight delays and other travel setbacks can eat up your time, and might even cause you to miss your cruise. For a smoother trip, we highly recommend flying into Hong Kong at least a day before the ship sets sail.

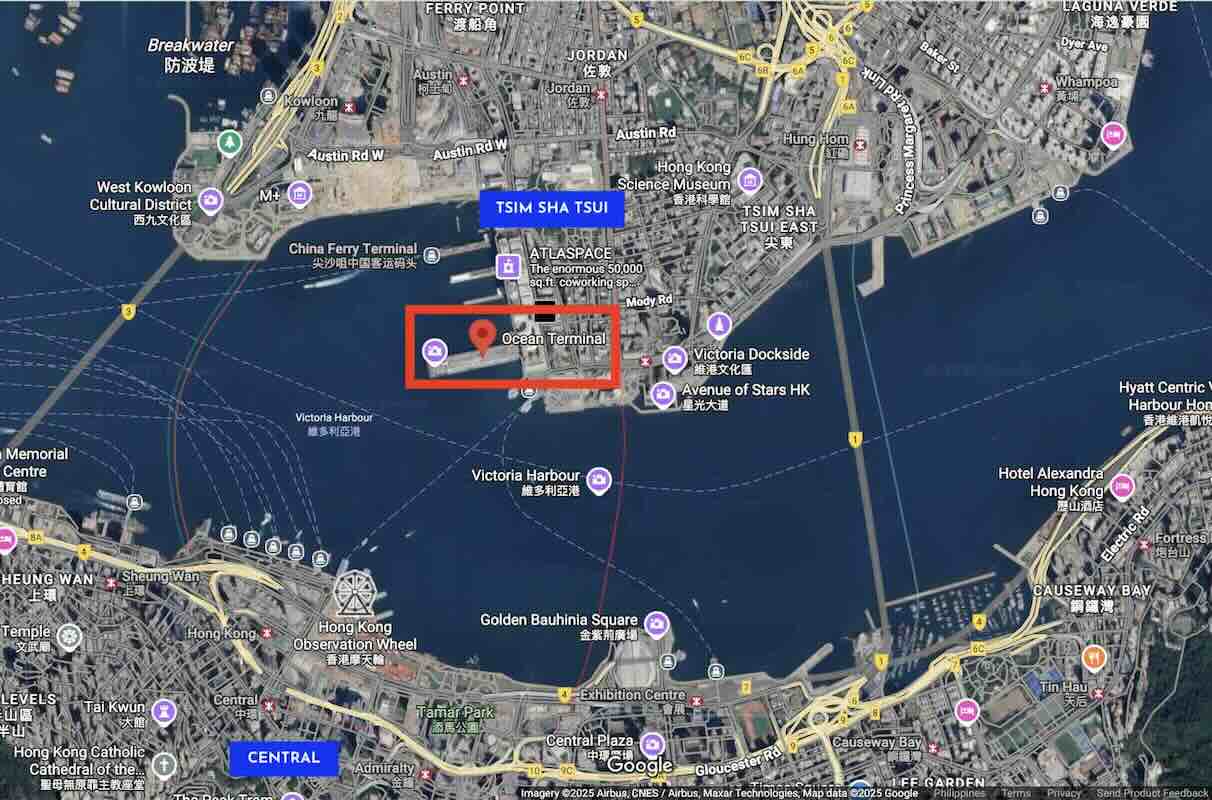
    The Star Voyager departs from Ocean Terminal, located at the southern tip of the Kowloon Peninsula, right by Victoria Harbour. Staying at a hotel nearby can make things easier and more convenient on embarkation day.

    That said, anywhere in the city center works well, whether you’re staying in Central on Hong Kong Island or in Tsim Sha Tsui on Kowloon. Just be sure to give yourself plenty of time to get to the terminal on your sailing day. Here are some top-rated options based on online user reviews.

    Search for more Hong Kong Hotels!

    Hotel Codes

    What to expect during boarding?

    Make sure to check your cruise’s departure time and final boarding time. To avoid any rush or delays, plan to arrive at the terminal at least two hours before gate closes. This gives you enough time to go through the entire embarkation process.

    Here’s a step-by-step guide to boarding Star Voyager from Hong Kong:

    1. Head to Ocean Terminal.

    This is where Star Voyager departs — not to be confused with Kai Tak Cruise Terminal in Kowloon Bay. The nearest MRT stop is the Tsim Sha Tsui Station (Tsuen Wan Line). You can also take a taxi or Uber. Landmarks nearby are Hong Kong Cultural Centre, Time Ball Tower, Hong Kong Space Museum, Hong Kong Museum of Art, and Avenue of Stars.

    💡 Address: Harbour City, 3-27 Canton Road, Tsim Sha Tsui, Hong Kong

    SVO Ocean Terminal Hong Kong

    2. Hand over your luggage at the bag-drop counter.

    Head to the departure area and search for the baggage drop counter. Show your cruise ticket so staff can tag your luggage with your deck and stateroom number. Your bags will be delivered to your cabin later.

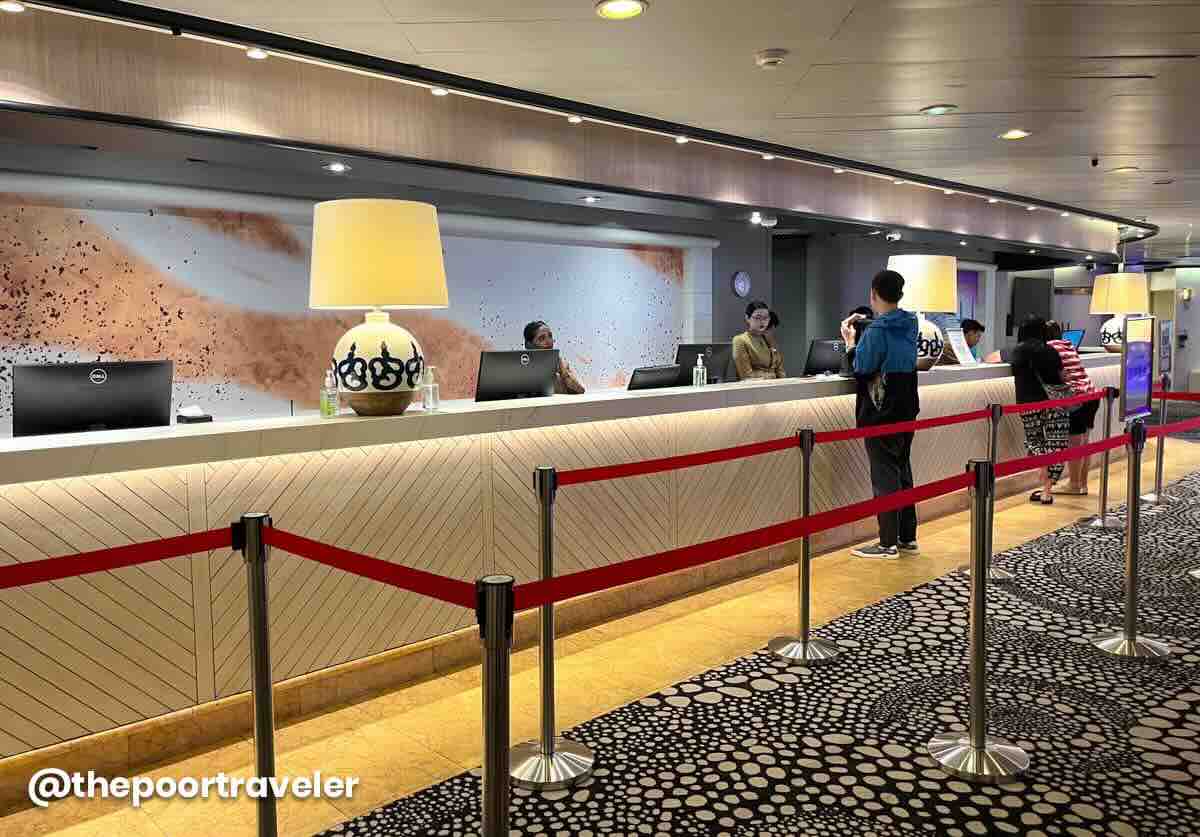
    3. Check in and get your sea pass card.

    Balcony and Palace guests check in on the ground floor, while Interior and Oceanview guests do it on the second floor. Present your passport and cruise ticket to get your sea pass card, which serves as your cabin key and payment tab for onboard purchases.

    4. Clear immigration and customs.

    Proceed through immigration, then have your hand-carry items scanned at the security checkpoint.

    5. Surrender your passport.

    This is standard procedure, so don’t fret. You will have your passport back the day before disembarkation.

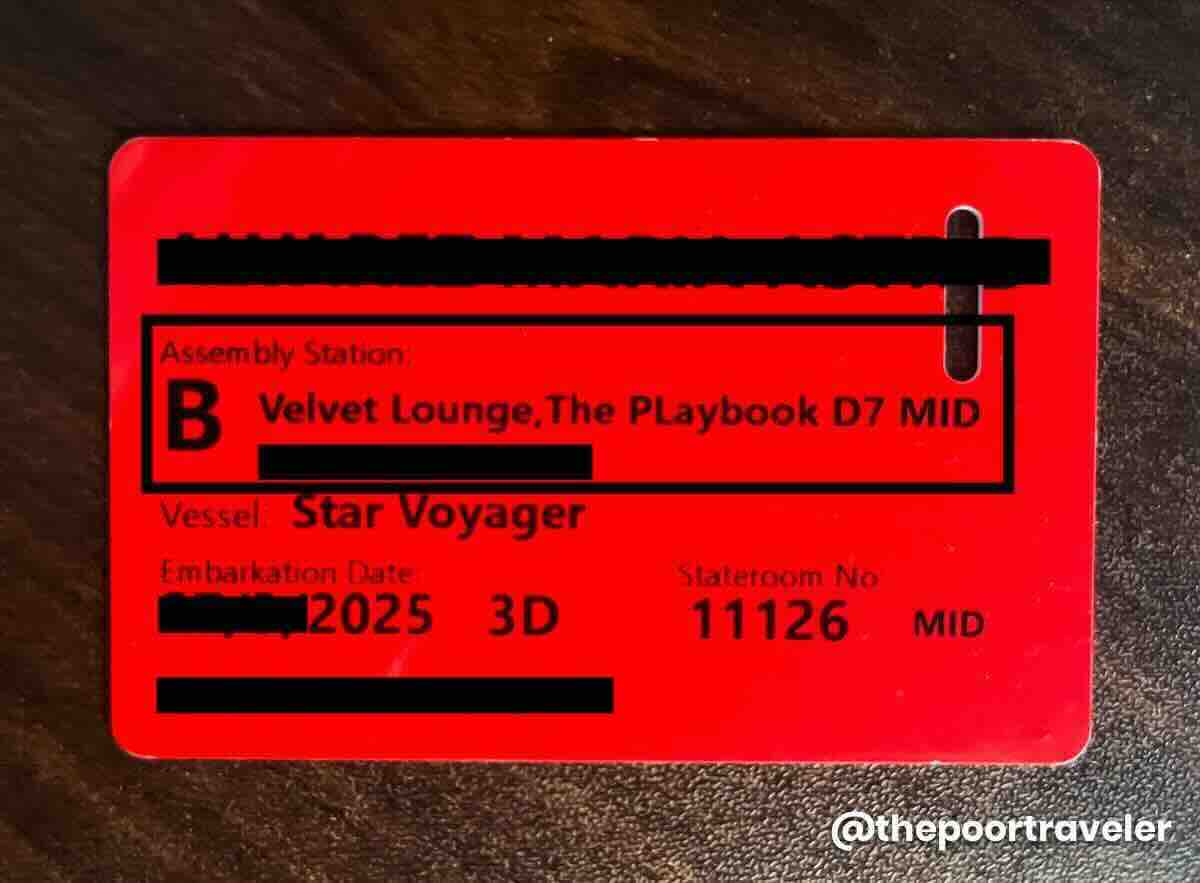
    6. Board through your Assembly Station.

    Your sea pass card reflects your assigned Assembly Station. It will be scanned as you board, and you’ll be encouraged to watch/attend the safety or muster drill.

    SVO Sea Pass Card HK

    7. Welcome aboard Star Voyager!

    Enjoy exploring the ship and its amenities — try different activities, stuff your face with delicious food, take a relaxing dip in the pool, watch world-class shows, join fun events and games, and more!


    What to do after boarding?

    These are typically what guests do right after boarding the ship:

    • Watch/Attend the safety drill. Follow instructions to watch or attend the safety briefing. Use this time to get familiar with the ship’s layout and know the emergency exit locations.
    • Eat or explore. While waiting for your cabin to be ready, you can start exploring the ship or — if you’re already hungry — eat in one of the exclusive restaurants.
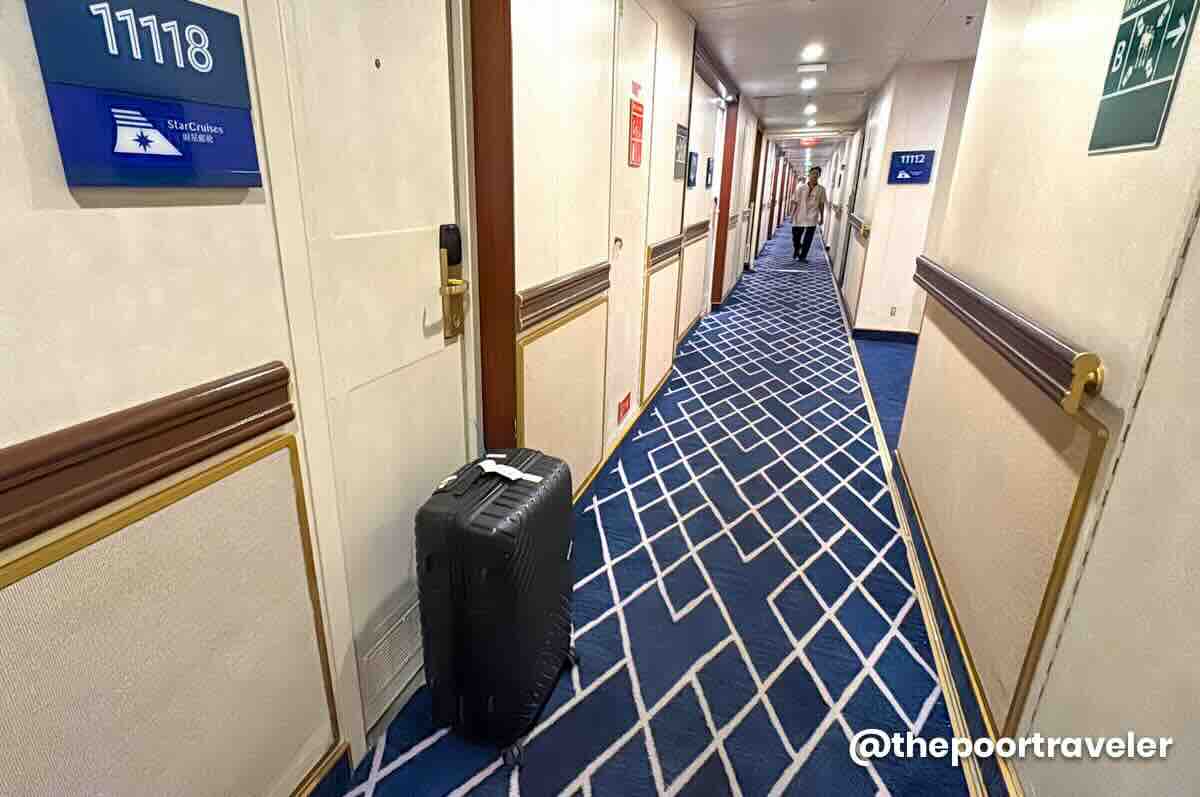
    • Settle in your cabin. Check if your luggage has arrived. You might find it already waiting for you outside your door. If there’s a delay, you can ask the Reception for an update.

      SVO Luggage Delivery


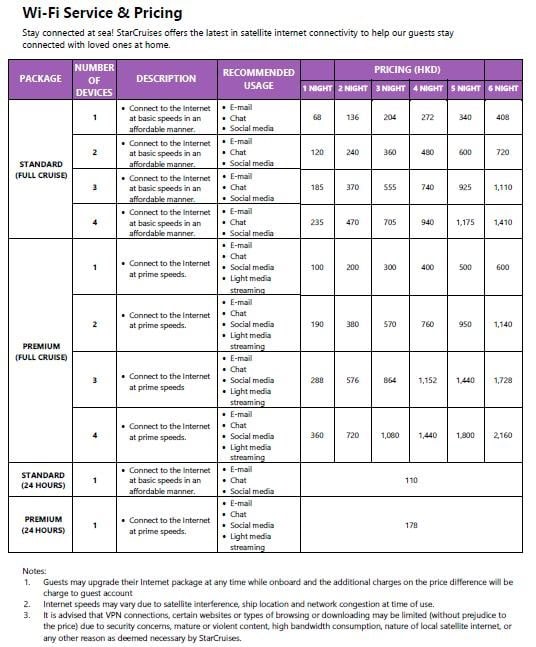
    Is there a WiFi on board?

    Yes! WiFi is available on board. Stay connected at sea by choosing from two internet packages:

    • Standard. Ideal for browsing, checking e-mails, messaging apps, and scrolling through social media
    • Premium. Includes everything in Standard, plus support for video streaming and faster speeds.

    Rates depend on the number of devices, the number of days, and your chosen plan.

    SVO WiFi Package Hong Kong
    Photo Credit: StarCruises

    What are the things to do while cruising?

    Whether you’re craving action, relaxation, or family-friendly fun, Star Voyager has something for every kind of traveler. From adrenaline-pumping activities to laid-back leisure, there’s no shortage of things to do — indoors or outdoors. And yes, kids and teens are covered too, with many spaces and programs designed just for them. Here’s a quick look at what’s in store:

    Complimentary Activities and Amenities

    All guests have free access to these onboard attractions and amenities:

    Waterslides and Aqua Park

    SVO Waterslides

    Make a splash at the onboard water park, where both kids and grown ups can enjoy slides and the water zones. Don’t forget to wear proper swimwear, follow the rules, and listen to the staff’s instructions.

    Location: Deck 15, Aft


    Main Pool Area

    SVO Main Pool Area

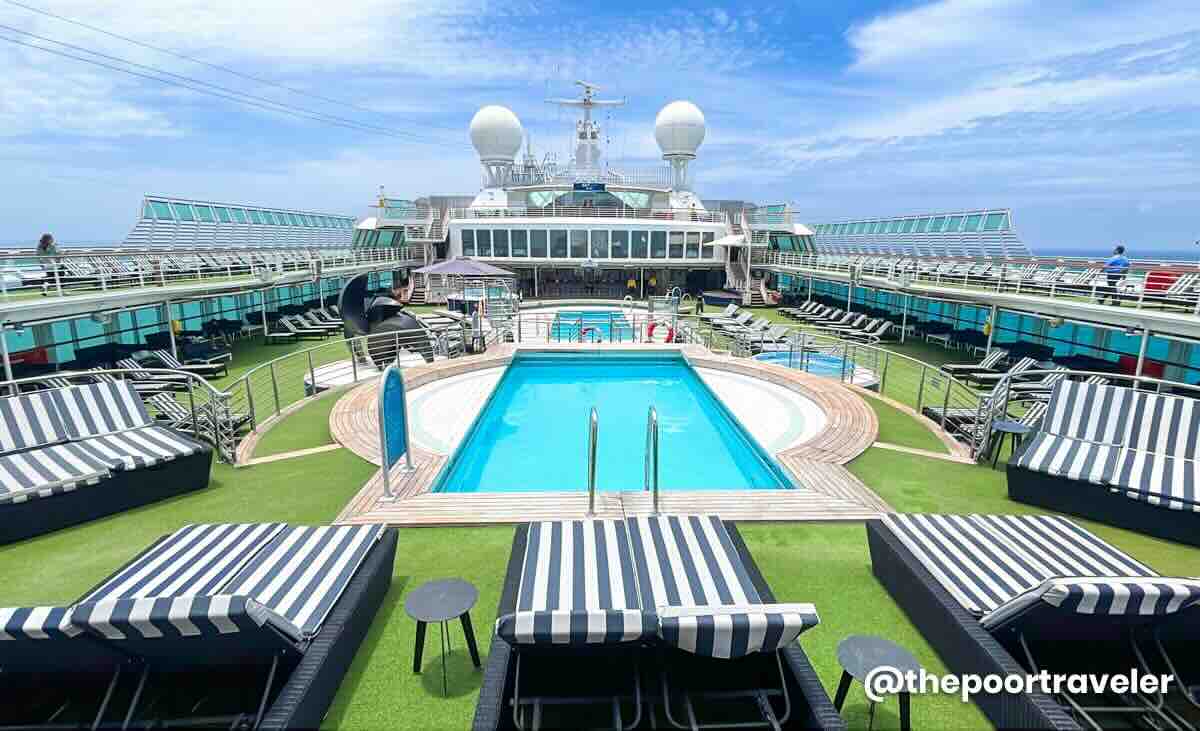
    Cool off or soak it up with two swimming pools and two hot tubs. This is perfect for either family fun or quiet lounging.

    Location: Deck 12, Midship


    Adventure Park

    SVO Adventure Park

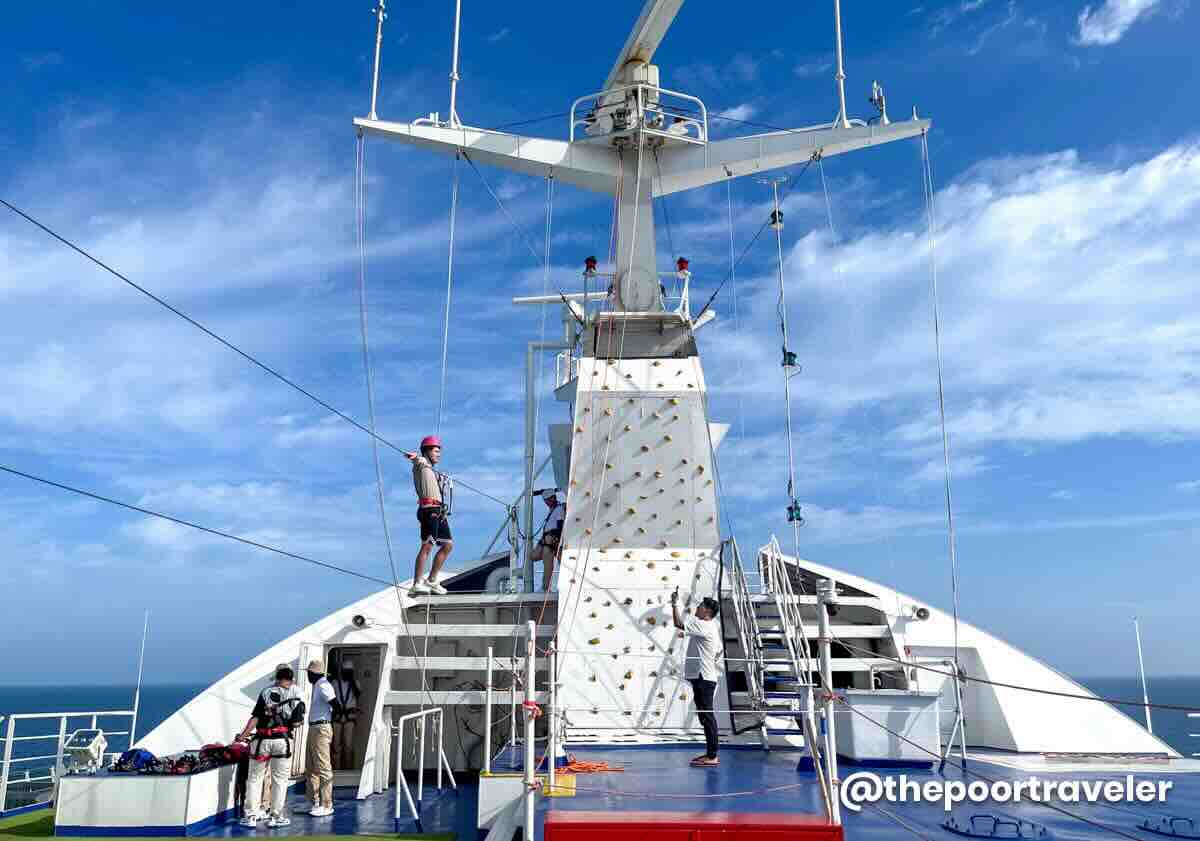
    Thrill-seekers, Adventure Park is for you! Test your courage with Wall Climbing, Walk the Plank, and Zip Line for that adrenaline rush.

    Location: Deck 12 & 14, Midship


    Symphony Gym

    SVO Symphony Gym

    Stick to your fitness goals while at sea. The Symphony Gym offers a full range of equipment to help you stay on track. Note that operating hours apply, so check first before going.

    Location: Deck 12, Aft


    Shows and Events

    SVO Zodiac Theater
    Odyssey (Left) and Hong (Right)

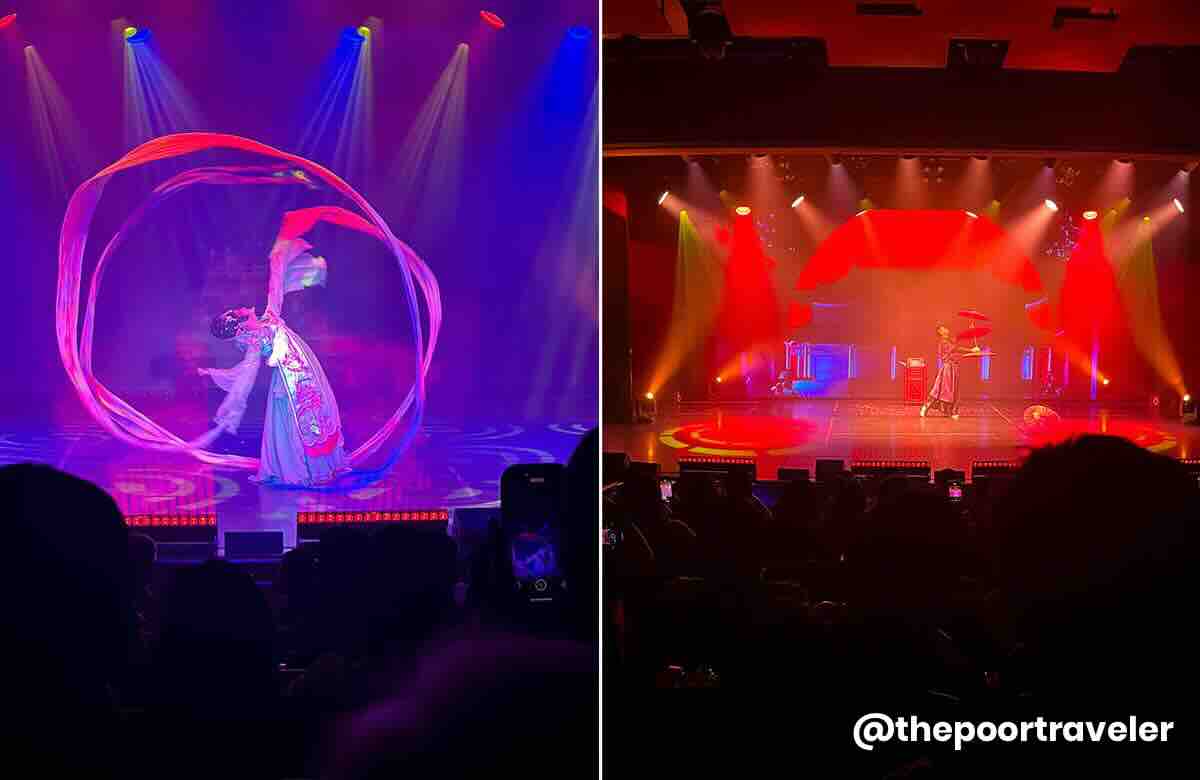
    Catch dazzling live performances at Zodiac Theater (Deck 7, Forward), featuring a variety of production shows. Plus, don’t miss out on fun pop-up events, workshops, and game shows happening throughout the cruise.


    Cinema at Sea

    SVO Cinema at Sea
    Cinema at Sea: Main Pool Area (Left) and Lobby (Right)

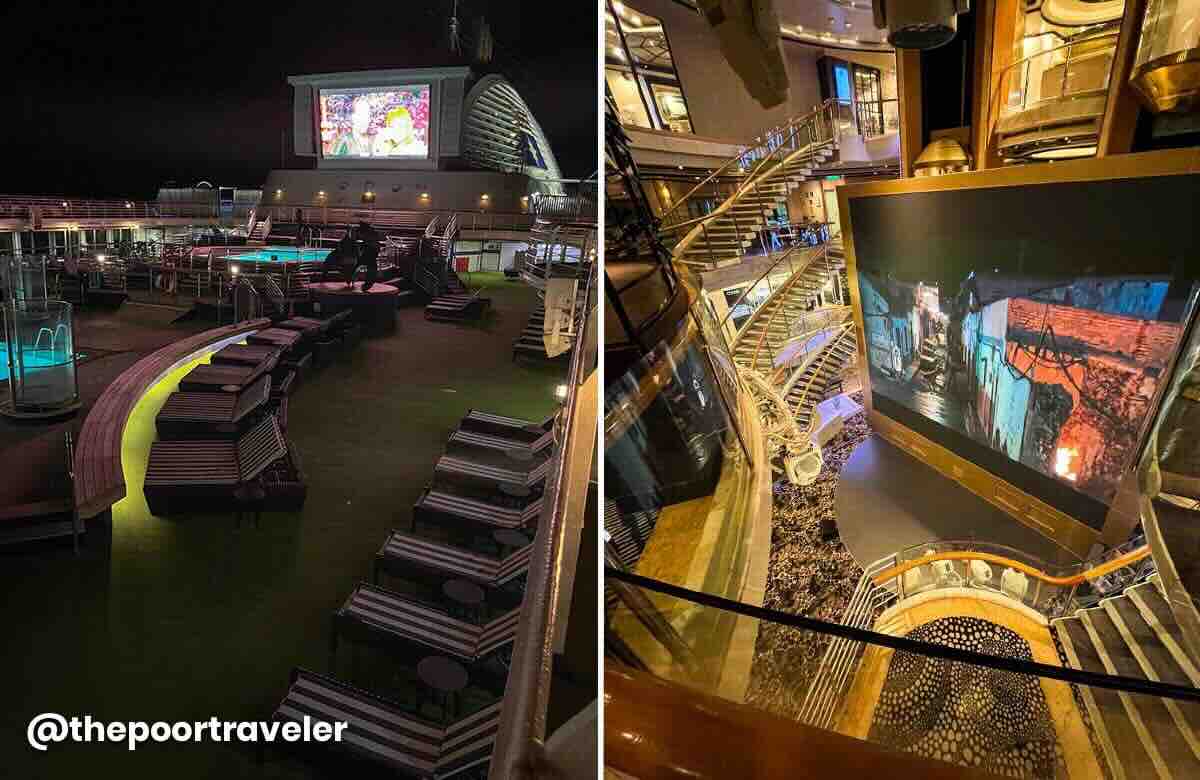
    Movie night, reimagined. Depending on the schedule, the Lobby (Deck 5, Midship) and the Main Pool Area (Deck 12, Midship) transform into pop-up cinemas!


    Lawn Bowls/Bowling

    No traditional lanes? No problem! Have casual fun with lawn bowling in a relaxed setting.

    Location: Deck 11, Aft


    Beyond the thrills and entertainment, Star Voyager also invites you to recharge and enjoy a little indulgence on board.

    Shopping

    SVO Shops

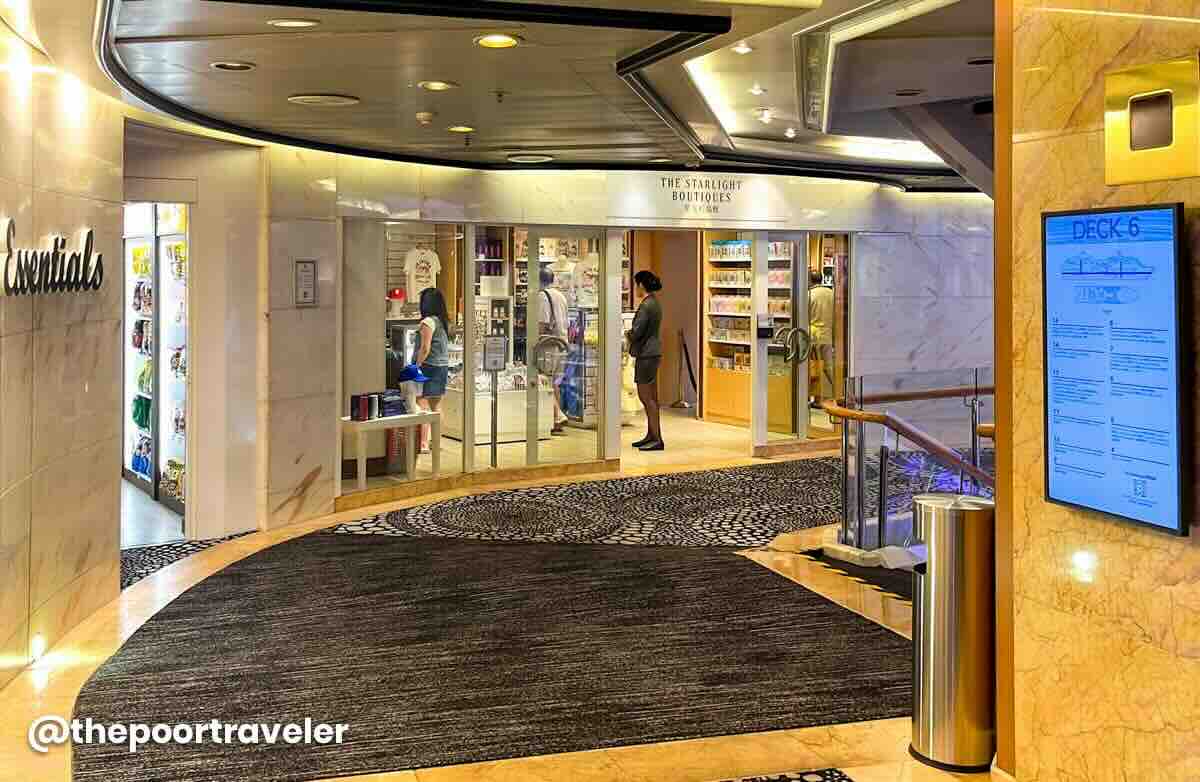
    In the mood for some retail therapy? Browse through duty-free finds, souvenirs, and gifts at The Starlight Boutiques for duty-free goodies and souvenirs. This is a good way to treat yourself or pick up something special for home.

    Location: Deck 6, Midship


    Little Dreamers Club and Vibe Check Arcade

    These fun zones are packed with games, activities, and excitement for kids, teens, and the young at heart.

    Location: Deck 12, Aft


    Beauty and Wellness

    Time to pamper yourself! Whether you’re up for a soothing massage or a fresh cut, the spa and salon are both conveniently tucked into one peaceful space. Location: Deck 12, Aft


    What are the dining options on board?

    When it comes to dining on Star Voyager, you’ve got choices — lots of them! Dining spots come in two categories: inclusive restaurants, which are covered by your cruise fare, and specialty restaurants, which come with an extra charge.

    Inclusive Restaurants

    No need to spend extra when dining at these onboard restaurants, so you can eat to your heart’s content!

    North Star Dining Restaurant

    SVO North Star Dining Restaurant
    Steamed Orange Roughy Fish (Top Left), Stir Fried Prawn Meat (Top Right), Shandong Style Braised Duck (Bottom Middle), and Marinated Baby Octopus with Cucumber (Bottom Right)

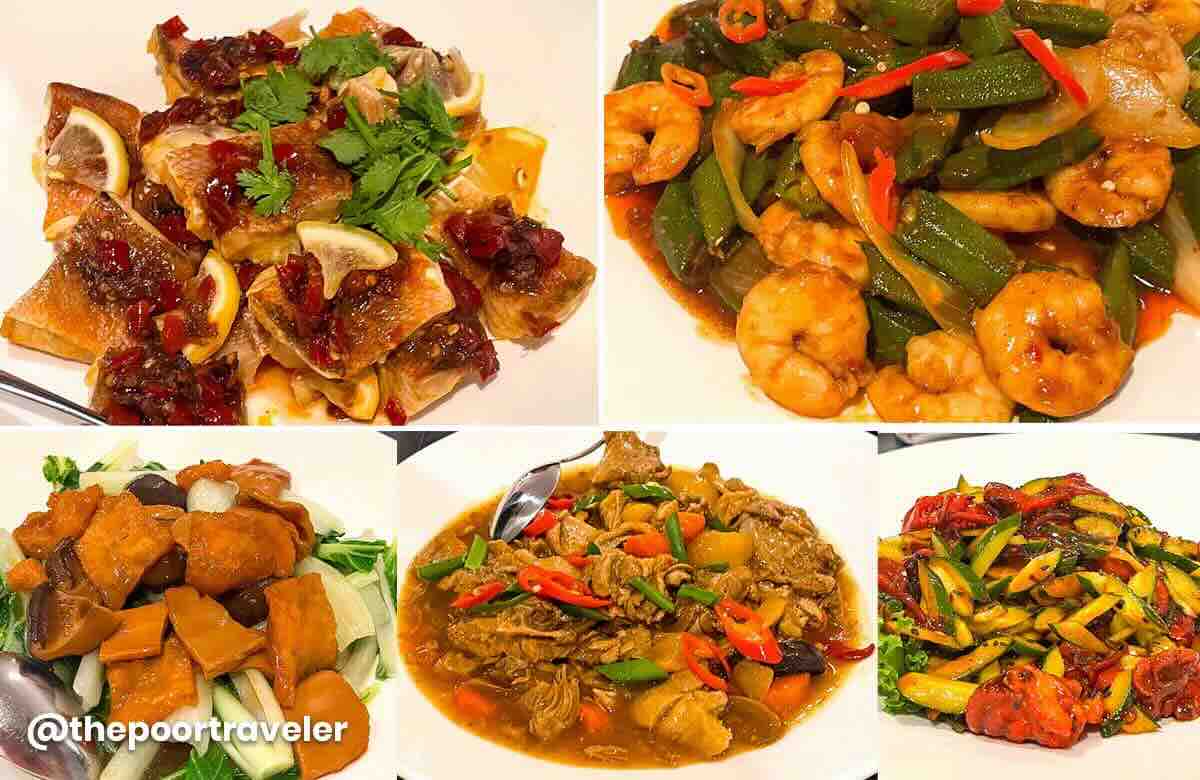
    Specializing in Chinese set menus, North Star Dining Restaurant also offers Western-style set menus for breakfast. Open for breakfast, lunch, and dinner, this is a go-to spot for full-course meal throughout the day.

    Location: Deck 5, Midship


    The Lido Buffet

    SVO The Lido
    Buffet Meal

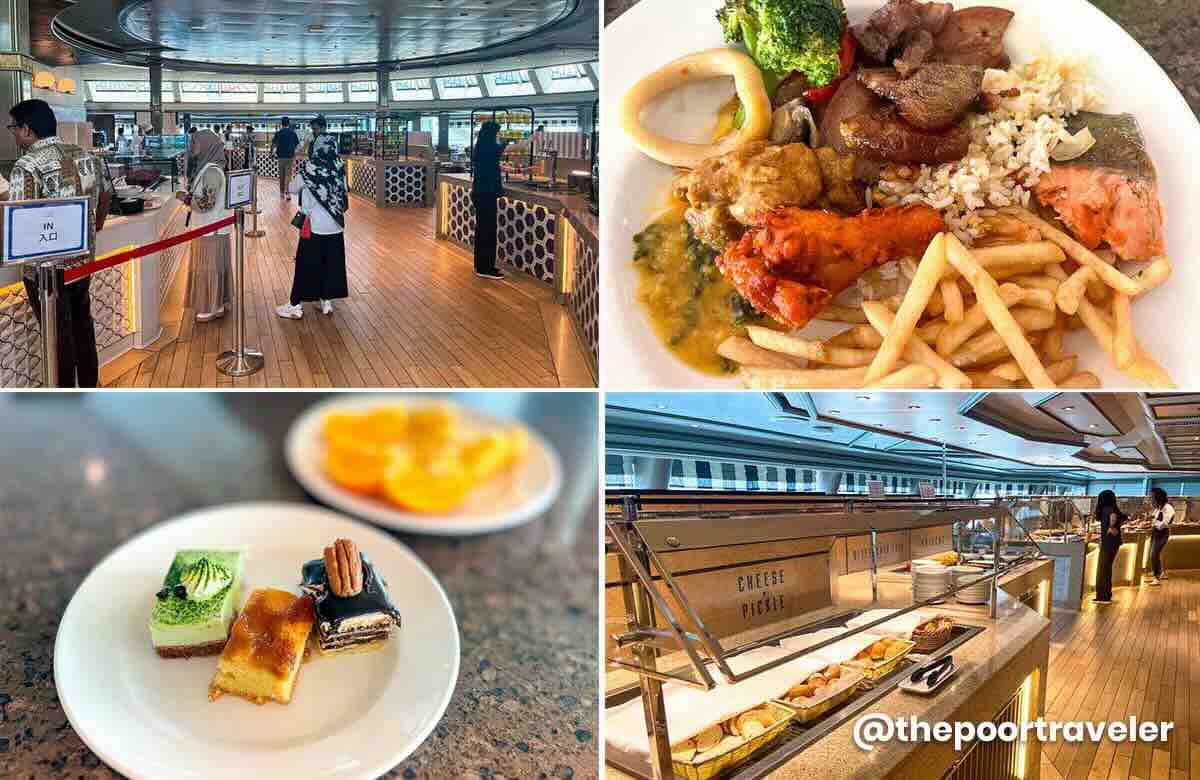
    The Lido is definitely a crowd favorite, offering a wide selection of Asian and international buffets, including Halal and vegetarian options. Open for breakfast, lunch, dinner, and even snack times (morning and afternoon).

    Location: Deck 14, Forward


    Sophia

    Taking the place of the former Bistro, Sophia now serves up a variety of international dishes.

    Location: Deck 6, Midship


    Specialty Restaurants

    These restaurants are not included in your cruise fare, but they are worth checking out if you’re in the mood for something extra special. Dining at specialty restaurants offers a more elevated cruise experience.

    Silk Road

    SVO Silk Road
    Jumbo Prawns (Top Left), Steamed Cod Fillet (Top Right), Stir Fried Duck Meat (bottom Left), and Japanese Tokusen Sashimi Moriawase (Bottom Right)

    Chinese (and Japanese) Fine Dining.

    Location: Deck 6, Midship


    Lobby Café

    SVO Lobby Cafe

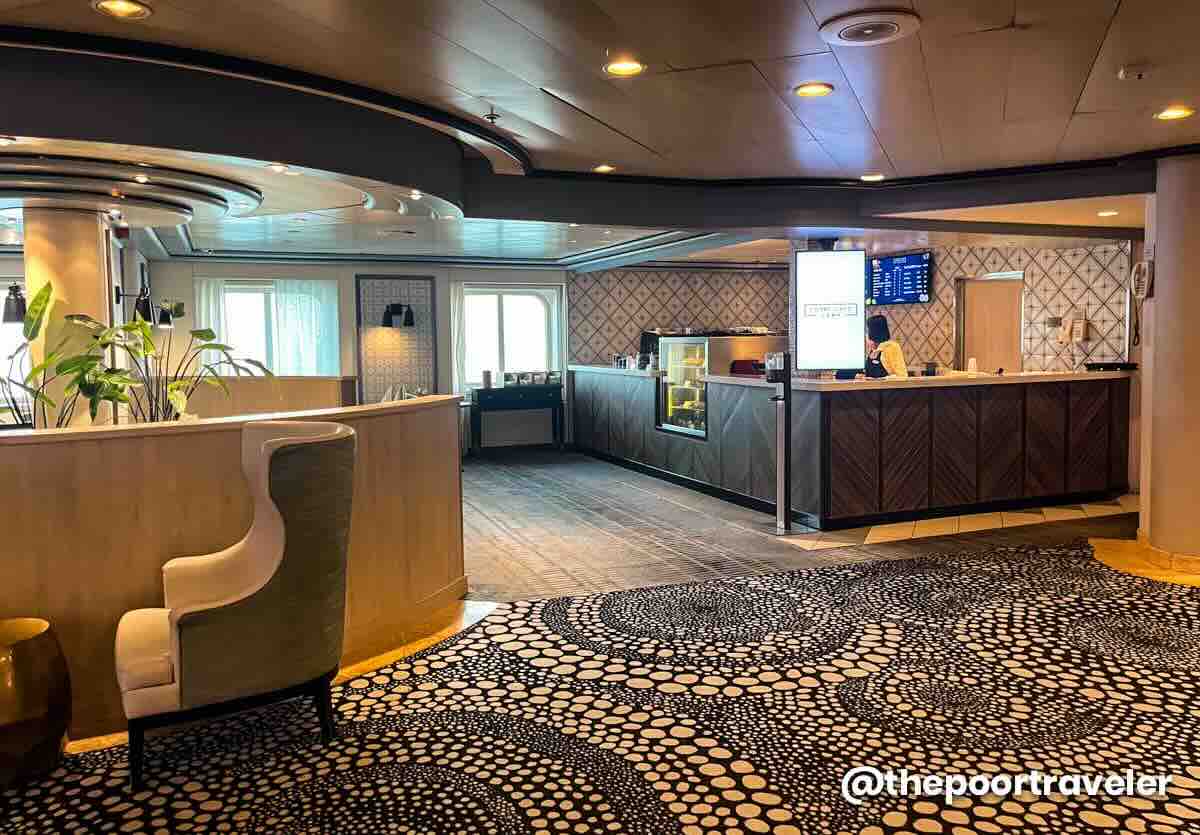
    Coffee, Tea, Juices, Cakes, and Pastries.

    Location: Deck 5, Midship


    Blue Lagoon

    SVO Blue Lagoon
    Laksa (Left) and Char Kway Teow (Right)

    This is a 24-hour cafe, serving breakfast to midnight snacks and meals.

    Location: Deck 14, Forward


    Red Tail Café

    Drinks, Pastries, and more!

    Location: Deck 8, Midship


    Gelateria

    Homemade Gelato.

    Location: Deck 12, Midship


    Bars and Clubs

    Looking to meet fellow cruisers or just chill with a drink? Whatever your vibe, there’s a perfect spot onboard to end the night right. Here are the bars and clubs you can check out:

    SVO Bars and Clubs
    Sky Bar and Pool Bar (Left), Ocean Bar (Top Right), and Palm Court (Bottom Right)
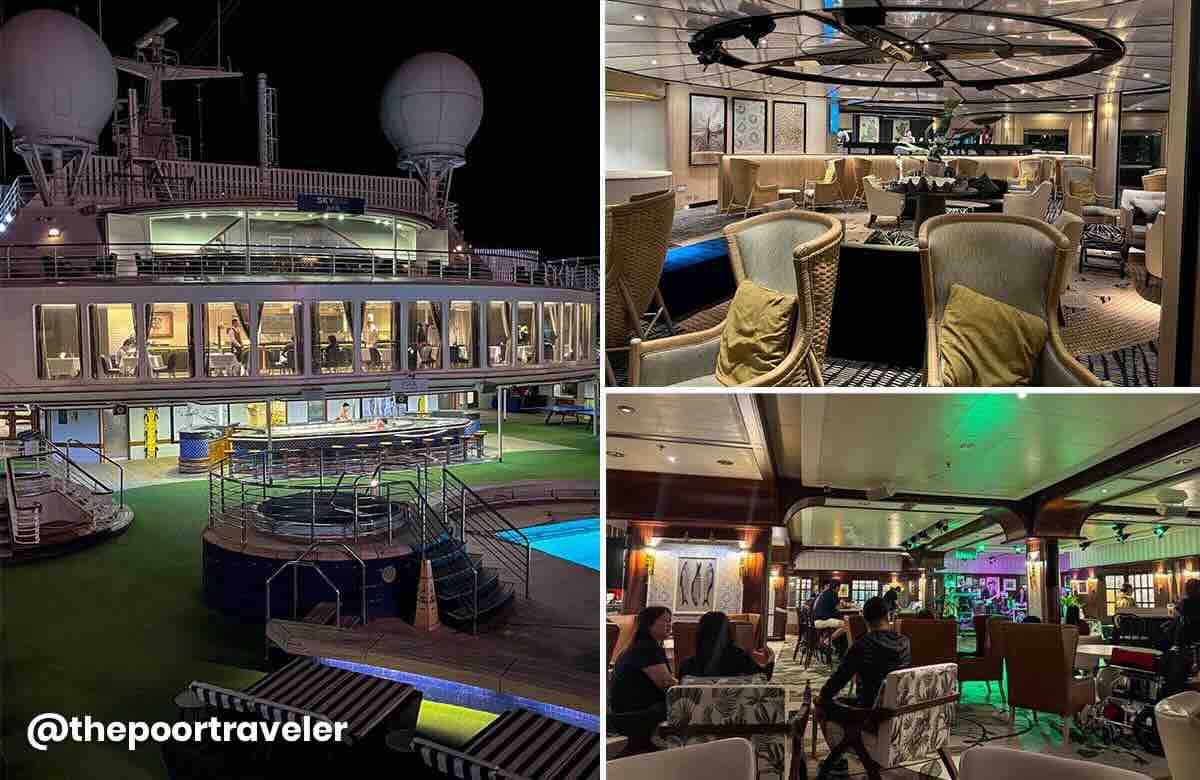
    • Sky Bar: Deck 15, Forward
    • Oasis Bar: Deck 14, Aft
    • Pool Bar: Deck 12, Midship
    • Ocean Bar: Deck 7, Forward
    • Palm Court: Deck 7, Forward
    • Velvet Lounge: Deck 7, Midship

    What other onboard services are available?

    SVO Reception
    Star Voyager Reception
    • Clinic: Deck 4, Aft
    • Reception: Deck 5, Midship
    • Palace Reception: Deck 5, Midship

    Shore Excursion (Shorex)

    One of the best things about cruising? Ypu get to explore multiple destinations without giving up the comforts of the ship. From June 2025 to November 2025, Star Voyager by StarCruises offers two- to five-night sailings departing from Hong Kong, with ports of call (stops) in Taiwan, Japan, China, Vietnam, and the Philippines.

    Sailings with Ports of Call

    • 2N KAOHSIUNG CRUISE
      -Hong Kong
      Kaohsiung (Taiwan)
      -Hong Kong
    • 2N XIAMEN CRUISE
      -Hong Kong
      Xiamen (China)
      -Hong Kong
    • 3N KAOHSIUNG – PENGHU CRUISE
      -Hong Kong
      Kaohsiung (Taiwan)
      Penghu (Taiwan)
      -Hong Kong
    • 5N NAHA – ISHIGAKI CRUISE
      -Hong Kong
      -High Seas
      Naha (Japan)
      Ishigaki/Miyakojima (Japan)
      -High Seas
      -Hong Kong
    • 5N ISHIGAKI – NAHA CRUISE
      -Hong Kong
      -High Seas
      Ishigaki (Japan)
      Naha (Japan)
      -High Seas
      -Hong Kong
    • 5N ISHIGAKI – KEELUNG – PENGHU CRUISE
      -Hong Kong
      -High Seas
      Ishigaki (Japan)
      Keelung (Taiwan)
      Penghu (Taiwan)
      -Hong Kong
    • 5N NAHA – KEELUNG – PENGHU CRUISE
      -Hong Kong
      -High Seas
      Naha (Japan)
      Keelung (Taiwan)
      Penghu (Taiwan)
      -Hong Kong
    • 5N NHA TRANG – DA NANG – SANYA CRUISE
      -Hong Kong
      -High Seas
      Nha Trang (Vietnam)
      Da Nang (Vietnam)
      Sanya (China)
      -Hong Kong
    • 5N HALONG BAY – DA NANG – SANYA CRUISE
      -Hong Kong
      -High Seas
      Halong Bay (Vietnam)
      Da Nang (Vietnam)
      Sanya (China)
      -Hong Kong
    • 5N BORACAY – CORON CRUISE
      -Hong Kong
      -High Seas
      Boracay (Philippine)
      Coron (Philippines)
      -High Seas
      -Hong Kong

    Shorex vs DIY Tour

    At every stop or port of call along your cruise, you have two ways to explore:

    • Join a Shorex Tour. Star Voyager offers guided group tours in partnership with trusted local tour operators. They arrange everything for you, including transportation, itinerary, and often lunch too. All you have to do is be on time. You can book these tours at Shorex kiosk on Deck 5, Midship.
    • Go D-I-Y. Prefer to explore at your own pace? A do-it-yourself trip gives you the freedom to create your own itinerary. And this is usually the cheaper option. However, keep in mind that the ship departs on schedule, so make sure to return to the port on time, or earlier, to avoid being left behind.

    No matter how you choose to explore, you’ll be provided with essential disembarkation info, including return instructions, port name, and port address, so you’ll always know how to get back on board.


    Reminders

    • Don’t forget to bring your Sea Pass Card and a photocopy of your passport bio page. You’ll need to show your card when leaving and re-entering the ship.
    • Carefully check the itinerary of the tours. Some tours involve long walks or intense physical activity. Be sure to review the activities and consider your comfort and fitness level before booking.
    • Tours may be canceled. This can happen due to weather conditions, low participation, or other unexpected reasons. Always have a backup plan just in case.

    What to do before the cruise ends?

    Here are a few things to take care of before disembarkation:


    How to disembark?

    When it’s time to leave the ship, disembarkation is done in an orderly manner to ensure everything goes well. Just follow these steps:

    1. Head to your assigned departure area.

    The Disembarkation Notice indicates the designated location and time for you to leave the ship. Make sure to follow the your schedule.

    2. Present your sea pass card.

    Scan your sea pass card at the exit pont. If there are any unpaid charges on your account, you will be asked to go to the Reception on Deck 5 to settle them before disembarking.

    3. Go through immigration.

    Head to the immigration counters for arrival clearance, and have your passport ready for inspection.

    4. Pick up your luggage.

    Claim your check-in luggage at the Baggage Claim Area. Inspect and check the bag tag to make sure you are taking the right one.

    5. Proceed to customs area.

    After collecting your luggage, you will pass through the customs check before exiting the terminal.

    IMPORTANT! Accomplish the eTravel Pass before DEPARTING from and ARRIVING in the Philippines.


    More About StarCruises

    With over 30 years of legacy, the redefined StarCruises focuses on providing affordable yet premium lifestyle-driven cruising experiences to new generations. It features two cruise ships — Star Voyager (formerly Star Scorpio) and Star Navigator (previously Resorts World One).

    This post is brought to you by StarCruises.


    Updates Log

    2025 8 11 – First uploaded

    Photos by Yosh Dimen and Asta Alvarez


    Source link

  • Top 10 Usual Tourist MISTAKES in OSAKA & KYOTO, Japan

    Top 10 Usual Tourist MISTAKES in OSAKA & KYOTO, Japan


    Many of those who travel to Japan for the first time go to Osaka. It serves as the primary gateway to Kansai Region and it has a lot to offer to tourists. Along with that, travelers also often go to Kyoto on the same trip since it is Osaka’s neighboring city. These two neighboring cities make for a very colorful Japan trip.

    TPTKLOOK5
    BlogDisclaimer

    Osaka has a vibrant and modern vibe. It is known for its street markets, entertainment districts, and a haven for food lovers. Meanwhile, Kyoto transports tourists to a more old-fashioned world that showcases Japan’s heritage. You can explore ancient temples, visit traditional teahouses, and spend time in stunning gardens. With a blend of old and new, these two destinations will surely give you an unforgettable journey.

    And if you’re planning a trip to Osaka and Kyoto, we’ll share with you common mistakes tourists commit so you can avoid them. We also have a separate article where we list down the travel planning dos and don’ts and social faux pas or things that are considered rude and disrespectful in Japan.


    WHAT’S COVERED IN THIS GUIDE?

    Osaka & Kyoto Travel Mistakes

    1. Bad Timing and Big Crowds

    Kansai region is undoubtedly one of Japan’s most popular destinations, and it’s no surprise that many of its iconic sites get really crowded, especially on weekends and during peak seasons. If you’re visiting famous spots in Osaka and Kyoto like Osaka Castle, Universal Studios Japan, Arashiyama Bamboo Forest, Fushimi Inari Shrine, Higashiyama, and Kiyomizu-dera, you can expect large crowds if you don’t plan ahead.

    Yosh and Vins in Kyoto

    The trick to beating the crowds is simple: get up early! The earlier you arrive, the fewer people you’ll encounter. As the day goes on, more visitors flood the attractions. So, if you want to bag that perfect Instagram shot without photobombers, set your alarm and get there before everyone else.

    That said, it’s also important to remember that most visitors tend to stick to specific areas of these sites. For example, at Fushimi Inari Shrine and Arashiyama Bamboo Forest, crowds gather near the entrance, but if you walk further into the site, it’s much quieter. At Osaka Castle, there are hidden spots that many overlook, making for perfect photo opportunities without the crowds.

    Universal Studios Japan is notorious for being packed, with long wait times, especially on weekends. But did you know that school field trips are typically scheduled on Mondays and Tuesdays? So, if you can avoid those days, try to visit on a Wednesday or Thursday for a more relaxed experience. If you can’t help but visit on those peak days, try to get there early and hit the Harry Potter attractions first, as those tend to have the longest lines.

    However, not every crowded spot is a dealbreaker. For places like Dotonbori and Shinsaibashi, we actually enjoy the energy that comes with a bit of crowd. The festive vibe adds to the charm of these bustling districts, so don’t stress if there are people around — just soak it all in and enjoy the lively atmosphere!

    Dotonbori Osaka Japan


    2. Dismissing Osaka Amazing Pass

    If you’re visiting Osaka for the first time, the Osaka Amazing Pass is an absolute must-have! This all-inclusive sightseeing pass comes in 1-day and 2-day versions, and it’s packed with value. Note: If you opt for the 2-day pass, keep it mind that it needs to be used on two consecutive days.

    Osaka Tourist Spots

    With the Osaka Amazing Pass, you’ll get unlimited access to the subway, tramway, and bus systems in Osaka, which is perfect for exploring the city without worrying about transport costs. But what makes this pass even more worth it is the free access to many major attractions, including the iconic Osaka Castle Main Tower, the Umeda Building’s Floating Garden Observatory, HEP FIVE Ferris Wheel, Tombori River Cruise, Dotonbori Tour, and more.

    The 1-day pass costs around JPY 3500 (P1333), while the 2-day version is priced at JPY 5000 (P1905). It’s a great deal, especially when you consider that just the ticket for the Umeda Sky Building Observatory alone is JPY 2000, and the Tombori River Cruise costs JPY 1500. The Osaka Castle Museum also charges JPY 600. If you plan on visiting those three attractions, you’d be spending JPY 4100! But with the Osaka Amazing Pass, you get all of that plus unlimited transportation, making it a major bang for your buck.

    You can get the Osaka Amazing Pass here!

    GET OSAKA AMAZING PASS HERE!


    3. Using the Wrong Pass

    Aside from the Osaka Amazing Pass, the Kansai Region offers a variety of other tourist passes, each catering to different travel needs. The best pass for you really depends on your itinerary, so let’s break it down a bit. Each pass has its nuances, so it’s important to choose one that matches your travel plans.

    If you’re mainly staying within Osaka City, the Osaka Amazing Pass is your best bet. But if you’re exploring beyond the city, adding other passes like the JR West Kansai or Kansai WIDE Pass could help you maximize your time and budget. For a clearer picture, refer to the table below to see which pass fits best with your itinerary.

    If you’re only planning to explore the Kansai Region, which includes cities like Kobe, Kyoto, Osaka, Nara, and more, the JR West Kansai Area Pass is a great option. It comes in 1 to 4-day versions, but keep in mind that the usage days must be consecutive. This pass is perfect if most of the places you want to visit are near JR stations, as it only works on JR Lines.

    However, if your target destinations are mostly along non-JR lines such as Hankyu, Hanshin, Kintetsu, or Keihan, the Kansai Railway Pass (formerly known as the Kansai Thru Pass) is the better choice. It covers almost the same areas as the JR pass, but the major advantage is that you don’t have to use it on consecutive days, making it more flexible for your itinerary.

    If you’re planning a day trip or a two-day visit to Kyoto from Osaka, the Kyoto-Osaka Sightseeing Pass is a good choice. It works on Keihan Lines, which connect Osaka and Kyoto. The downside is that there’s no Keihan station near Arashiyama, so you’d need to buy a separate ticket to reach that area. However, with this pass, you can easily visit Gion District and Fushimi Inari Shrine.

    Now, if Arashiyama is a must-visit for you and you’re coming from Osaka, then the Hankyu-Hanshin One-Day Pass is the better option. This pass also works for traveling to Kobe, making it a convenient choice if you’re planning to visit both cities in one day. However, if your itinerary includes Okayama, Tottori, or even Takamatsu, then you’ll need the JR West Kansai Wide Area Pass (emphasis on WIDE), which covers a much broader area.

    There are plenty of other passes available, and we have a separate article where we discuss them in more detail. The passes are definitely worth it, but since each one has its limitations, it’s rare to find a single pass that covers every attraction in your itinerary. With this in mind, don’t let the passes dictate your trip. If there’s a place that you really want to visit but isn’t covered by your pass, just buy a separate ticket. After all, you’re already in Japan, so make the most of your trip and go wherever your heart takes you!


    4. Confusing Train Stations

    Many train stations in Osaka have similar-sounding names but are operated by different railway companies and serve different types of trains. This can be really confusing, especially when you’re in a hurry or navigating through crowded areas.

    Take Namba, for example. There are three main stations here:

    • Namba Station: served by Nankai Railway and Osaka Subway
    • JR Namba Station: operated by JR West
    • Osaka Namba Station: serviced by Kintetsu and Hanshin Railways

    On a map, these stations seem to be right next to each other, but in reality, they’re quite far apart. Walking from one to another takes time, and if you’re in a rush and go to the wrong station, you might miss your train.

    Shin-Osaka Station
    Shin-Osaka Station

    Another common mix-up happens between Osaka Station and Shin-Osaka Station. Despite their similar names, these are two completely different stations, and they’re not close to each other. The key difference? Shin-Osaka Station serves Shinkansen or bullet train, while Osaka Station does not. The word “shin” means “new” in Japanese, and in this case, Shin-Osaka is the newer station.

    If you have a bullet train to catch, make sure to go to Shin-Osaka Station. And once you’re there, remember that the Shinkansen has its own separate entrance, so check the signs carefully and enter the correct gate.


    5. Sticking to Trains and Taxis

    Osaka and Kyoto have extensive train networks, and most attractions are easily accessible by train. However, not all sites have train stations nearby. In Kyoto especially, some of the most important landmarks are best accessed by bus rather than by train.

    Kyoto Bus 205
    Kyoto Bus 205 to Kinkaku-ji Temple

    Two UNESCO World Heritage Sites in Kyoto are far from train stations. The first is the Golden Pavilion or Kinkaku-ji Temple, which isn’t along any major train line. The best way to reach it from Kyoto Station is by taking Bus #205 from the B3 bus terminal in front of the station. REMINDER! Just be careful not to board the RAPID 205 bus, as it doesn’t stop near the temple.

    Another major site that’s far from the train lines is Kiyomizu-dera Temple. The nearest train station, Kiyomizu-Gojo Station (Keihan Line), is a 25-minute walk away. If you’d rather cut that time in half, take a bus instead. The nearest bus stop, Gojozaka, is only a 12-minute walk from the temple. While you still have to walk uphill, it’s much shorter than coming from the train station. Plus, the Higashiyama district along the way has lots of attractions to enjoy. If you’re coming from Kyoto Station, take Bus #206 or Bus #86 to reach Gojozaka.

    Kyoto Bus 206
    Kyoto Bus 206 to Gojozaka

    Using Kyoto’s city buses is quite simple. Most buses have two doors: one at the front, near the driver and another at the back or middle. Typically, you board through the rear door. Most buses charge a flat fare, so you don’t need to tap your IC card or take a ticket when boarding. When you’re ready to get off, exit through the front door, where you’ll pay using an IC card or cash. Note: If you choose to pay in cash, make sure to have the exact amount, as no change is given.

    If the bus has only one door, always let passengers exit first before you board.

    As for taxis, we haven’t tried taking one in Osaka or Kyoto because they are expensive. The only thing we can tell you is that the doors open automatically, which is pretty cool!


    6. Staying in the Wrong Area

    Osaka and Kyoto offer many great districts for tourists, and in general, as long as your accommodation is near a train station in the city center, you’ll be fine. The train system here is extensive and reliable, making it easy to get around. However, each district has its own pros and cons, so choosing the right area depends on your travel plans.

    Osaka Where to Stay in Kyoto

    As mentioned earlier, Osaka is the usual base for tourists exploring the region. Here are the popular areas:

    Kita Ward

    Kita Ward (North Ward) is a top choice for tourists. This district is home to Osaka Station and Umeda Station, two of the busiest and most well-connected stations in the region. Many consider this area the heart of Osaka, especially in terms of transportation and shopping. If you plan to visit Kyoto, Kobe, or Nara, staying in Kita Ward is ideal because these destinations are easily accessible from here. Plus, long-distance buses to Tokyo also depart from this area. The downside? Hotels here tend to be more expensive due to the prime location. However, if you explore the inner parts of the district, you can still find some affordable accommodations.

    If you are planning to stay in this area, here are some of the top-rated properties according to online user reviews.

    Minami Ward

    Another fantastic area is Minami Ward (South Ward), which includes Namba and Dotonbori, two of the most vibrant and tourist-friendly areas in Osaka. If you want to be close to Dotonbori’s neon lights, street food, and nightlife, book a hotel in this area. Minami Ward is also a transportation hub, with multiple train stations and the Osaka City Air Terminal (OCAT), where you can catch buses to other prefectures like Tottori or Hiroshima.

    If you are planning to stay in this area, here are some of the top-rated properties according to online user reviews.

    Near Shin-Osaka Station

    If you plan to take the Shinkansen or bullet train multiple times and use Osaka as your base, staying near Shin-Osaka Station is a smart choice. On a recent trip, we stayed at APA Hotel, just a couple of blocks from Shin-Osaka Station, and had a great experience. The area is quiet, but there are plenty of convenience stores or konbini and fast-food restaurants nearby, making it a practical option for travelers.

    If you are planning to stay in this area, here are some of the top-rated properties according to online user reviews.

    Search for more Osaka Hotels!

    Hotel Codes

    7. Standing on the Left on the Escalator

    In Japan, there’s an unwritten rule when it comes to using escalators, and it differs by region. In most parts of Japan, including Tokyo, people stand on the left side, leaving the right side open for those who want to walk or overtake. However, in Kansai Region, it’s the opposite — people stand on the RIGHT side, and those who want to walk or overtake use the left.

    The origin of this regional difference is uncertain, but one theory suggests that it dates back to the Osaka Expo in 1970. According to an article from nikkei.com, organizers followed the global standard of standing on the right for escalator etiquette, and the practice has continued in Kansai ever since. While some question whether this is the real reason, what’s important is that in most of Kansai region, people generally stand on the right when using an escalator.

    Osaka Escalator (Hankyu Railway Entrance)
    Hankyu Railway Entrance Gates Escalator in Osaka. People standing (right) and overtaking/walking (left).

    However, Kyoto is one notable exception. Unlike the rest of Kansai, locals in Kyoto prefer to stand on the LEFT, like in Tokyo. But in reality, escalator etiquette in Kyoto Station can be confusing because some people stand on the left while others stand on the right. This might be due to the large number of tourists from different regions, leading to mixed practices.

    To avoid making mistakes, the best approach is to observe the people around you when you step onto an escalator. The purpose of this etiquette is to keep one side open for those who need to walk or are in a hurry. So, if everyone is standing on the right, do the same. If they’re standing on the left, follow suit. This way, you can blend in seamlessly and avoid blocking people who are rushing.


    8. Not Exploring Wider and Further

    We’ve mentioned earlier that most tourists tend to flock to a specific spot of a site. For example, in Arashiyama Bamboo Forest, a lot of visitors stay near the entrance and don’t venture farther in. But there is so much more to Arashiyama than just its famous bamboo grove.

    Tenryuji Temple and Sogen Pond

    Right next to the bamboo forest is Tenryuji Temple, a UNESCO World Heritage Site. And yet, every time we visit, we notice that while the bamboo grove is packed, the temple itself remains relatively quiet. It’s a great place to enjoy some peace, but at the same time, we can’t help but think that many tourists are missing out on seeing this important historical site.

    Beyond the temple, Arashiyama has even more to offer. The Togetsukyo Bridge is a scenic landmark worth visiting, while Nonomiya Shrine and Horinji Temple offer additional cultural experiences. You can also embark on a yakatabune boat tour, which takes you on a serene ride down the Oi River. The views are breathtaking, especially during autumn, when the foliage is in full display. If you’re lucky, you might even see a paddling of ducks gliding across the water. The tour costs around JPY 4000 for two people, with an additional JPY 1000 per extra person, which might feel a bit pricey, but the experience is well worth it.

    Osaka Castle

    Similarly, if you visit Osaka Castle, many visitors only stay outside to take photos. While that’s not necessarily a mistake, entering the castle is highly recommended. Inside, you’ll find exhibits showcasing Osaka’s rich history, and it gives you a deeper appreciation of the landmark beyond just its stunning exterior. The entrance fee is JPY 600, but if you have the Osaka Amazing Pass, entry is FREE.

    And if you have more time and budget, don’t limit yourself to just Osaka and Kyoto — especially if it’s not your first time visiting. These cities are fantastic, but they also serve as jump-off points to other amazing destinations. Consider exploring Kobe, Himeji, Nara, Wakayama, Shiga, and Mie. If you’ve been to Osaka multiple times, trying out these less-visited cities will give you a fresh perspective on Kansai’s diverse beauty.


    9. Limiting Your Food Options to Konbini and Fast Food

    Japan is one of those countries where convenience stores and supermarkets offer an abundance of delicious and affordable food. You’ll find pre-cooked meals that are not only budget-friendly but also surprisingly tasty. However, while it’s tempting to rely on these options, it’s important to find a balance between grocery store meals and dining at local restaurants. After all, Osaka is considered “Japan’s Kitchen“, and Kyoto boasts an impressive number of Michelin-starred restaurants.

    Osaka’s Okonomiyaki VS Kyoto’s Negiyaki

    Exploring Japan’s food scene doesn’t have to be complicated. Sometimes, all it takes is opening your Google Maps app to discover a fantastic local restaurant near your hotel. This way, you can fully appreciate Japan’s rich food culture. If you’ve had your fill of ramen, try switching things up with a bowl of udon or soba. And while takoyaki is a must-try Osaka street food, don’t stop there. Step into an okonomiyaki restaurant to experience why it’s an Osaka icon and learn how Kyoto’s betayaki and negiyaki differ from Osaka’s version.

    If you’re looking for a highly recommended food spot, head to Endo Sushi near the port. It was the first sushi bar we ever visited in Japan, and even after multiple trips, we still can’t forget it. In fact, we make it a point to visit almost every time we’re in Osaka.

    Endo Sushi
    Sushi Plate #3: Ebi (shrimp), Tamago (sweet omelet), Awabi (abalone), Tekka (tuna roll), and Tako (octopus)

    10. Underestimating the Weather

    We’ve explored the Kansai Region in all four seasons, and the contrast is stark. We’ve experienced getting all sweaty in the summer and have felt the biting cold of winter, especially when venturing beyond Osaka.

    If you’re visiting during summer, particularly in July or August, wear light, breathable clothing to stay comfortable, especially if you plan on exploring the outdoors. The heat and humidity can be intense, so dressing appropriately will help you enjoy your trip without feeling overwhelmed by the weather.

    For a winter trip, proper outerwear is essential, especially if you plan on hiking or skiing. There are many types of jackets, and the best one depends on your cold tolerance and comfort level. If you have a high tolerance for the cold, you may not need too many layers. However, if you’re someone who gets chilly even from air conditioning, expect that you might need a puffer jacket along with heat tech innerwear.

    If you’re exploring the city in winter, choose a jacket that’s easy to take off, as trains and indoor establishments are well-heated. A bulky jacket that’s difficult to remove can become inconvenient when constantly moving between the cold outdoors and warm indoor spaces. Dressing smartly for the season ensures you stay comfortable and make the most of your Kansai adventure!


    Have Peace of Mind While Traveling!

    Getting a travel insurance is optional, but we highly recommend this, especially when traveling abroad. Travel can be unpredictable, and though we hope we’ll never use it, having it gives us peace of mind in case of unexpected delays, cancellations, or emergencies.

    For international destinations, consider PGA Sompo’s TravelJOY Plus insurance. You can GET IT HERE. Don’t forget to use WORTHIT for a special affordable rate.

    TravelJoy PGA Sompo Code 2025


    Updates Log

    2025 5 10 – First uploaded


    Source link

  • Top 15 Usual Tourist MISTAKES in JAPAN

    Top 15 Usual Tourist MISTAKES in JAPAN


    Japan is a destination that attracts travelers from all over the world. With its rich culture, stunning landscapes, and warm hospitality, it’s no wonder tourists keep coming back. There are just so many places to explore that every trip feels like visiting an entirely new destination. Whether you’re hunting for the freshest sushi, exploring centuries-old castles, or trying to see the cherry blossoms, Japan promises an unforgettable experience.

    TPTKLOOK5
    BlogDisclaimer

    Aside from the Philippines, Japan holds a very special place in our hearts — it’s actually our most visited country ever. But we still remember our first trip to the Land of the Rising Sun, partly because we ran into quite a few hiccups along the way. So we want to share with you some of the things we wish we had known or done differently when we started traveling to Japan. Hopefully, you can learn from our experience and avoid committing the same mistakes.


    WHAT’S COVERED IN THIS GUIDE?

    Japan Budget Travel Mistakes

    1. Bad Timing

    Japan is a fantastic year-round destination, offering something interesting in every season. However, to make the most of your trip, it’s crucial to align your expectations with your timing.

    For instance, if you’re dreaming of seeing cherry blossoms, keep in mind that their blooming season is fleeting — typically lasting just a couple of weeks. Since sakura blooms at different times across Japan, you’ll need to plan accordingly. Blossoms appear earlier in southern cities such as Fukuoka and Nagasaki and later in northern areas like Hokkaido. To catch them at their peak, be sure to check sakura forecasts for your specific destination online before booking your trip.

    Tokyo Skytree Cherry Blossoms

    If you visit during sakura season, expect major parks to be packed with both locals and tourists. To enjoy a quieter experience, consider seeking out smaller, lesser-known parks that are less crowded. Additionally, if you prefer to avoid crowds and high prices, steer clear of Japan’s busiest travel periods. Major holidays see a surge in domestic travel, making transportation and accommodations harder to book and more expensive. Here are some key holidays to take note of:

    • Golden Week: April 29 – May 5
    • Obon Festival: August 13 – 15

    For those traveling in winter, keep in mind that daylight hours are shorter and many establishments close earlier, especially around New Year’s Day. On the other hand, if you’re visiting during summer, be prepared for intense heat and humidity, sometimes even hotter than in the Philippines. If your trip falls in July or August, make sure to pack light, breathable clothing to stay comfortable while exploring.


    2. Dismissing Hotel Location

    As budget travelers, our top priority when booking accommodations is always the price. However, cost isn’t the only factor to consider. Location plays a significant role too. Whether we’re booking a hotel, hostel, or apartment, we always aim for accommodations that are near a train station. Japan’s transportation system, particularly its trains, is vast and efficient, and many of the country’s major attractions are easily accessible from train stations. In fact, train stations in many cities also serve as hubs for bus pickups and drop-offs, making them central points for getting around.

    Umeda Sky Building Skyline
    View of Umeda Area from Hotel Hanshin Osaka

    While it’s not always possible to find a place that’s right next to everything, having a train station within walking distance can greatly simplify your travel experience, whether you’re taking the train or hopping on a bus. It doesn’t have to be very close to the main station. As long as it is within walking distance, it’s good. Japan is also known for being very safe, so walking even at night is generally fine.

    That said, you might be tempted to go for a cheaper accommodation that’s farther from the station. While this can save you money upfront, consider the extra cost and time of transportation. The money you save on a more distant place might be offset by train or bus fares, and you’ll also spend more time commuting and walking, which can drain your energy. In these cases, it’s often worth it to spend a little more on a place that’s closer to the station, as the convenience and time saved can make the slightly higher price worthwhile in the long run.


    3. Traveling Without Insurance

    Japan is one of the safest countries in the world, with a low crime rate, exceptionally polite people, and well-planned cities that make navigating urban areas seamless. However, safety doesn’t mean immunity from unexpected incidents. No one plans to get sick, have an accident, or lose their baggage, but these things can happen, and dealing with them while traveling can be stressful and costly.

    Travel Insurance Online

    That’s why, even though travel insurance isn’t mandatory when visiting Japan, we highly recommend getting one. It ensures that you’re covered in case of medical emergencies, trip cancellations, lost luggage, or accidents, allowing you to enjoy a worry-free trip. Travel is unpredictable, and no matter how carefully you plan, risks are always present. We know several travelers who have encountered unexpected illnesses or accidents but didn’t have to worry about expenses because they were insured.

    So, whether you’re traveling to Japan or any other destination, investing in travel insurance is always a smart decision. It’s a small price to pay for peace of mind and financial protection while exploring the world.

    For international destinations, consider PGA Sompo’s TravelJOY Plus insurance. You can GET IT HERE! Don’t forget to use WORTHIT for a special affordable rate.

    TravelJoy PGA Sompo Code 2025


    4. Getting Confused About Tourist Passes

    Japan’s transportation industry is incredibly competitive, with numerous railway and bus companies offering a wide variety of passes. From city-specific and prefectural passes to regional and nationwide options, each comes with its own advantages and limitations. Choosing the right one can be overwhelming, but selecting the most cost-effective pass depends entirely on your itinerary.

    The most well-known pass is the JR Nationwide Pass, but a common question we get is whether it’s actually worth it. The short answer? It depends on your travel plans. Many people assume they need a JR Pass, but if your trip involves just one or two nearby cities, it’s often not worth it. The JR Nationwide Pass provides the best value when your trip includes multiple long-distance journeys. If you’re only traveling between Tokyo and Yokohama or exploring Osaka, Kyoto, Nara, and Kobe, you won’t need a nationwide pass. In these cases, a regional pass is the better option.

    Speaking of regional passes, Kansai alone offers a staggering number of choices, including the Osaka Amazing Pass (city-wide), Kansai-Thru Pass, Hankyu Pass, Hanshin Pass, Kintetsu Pass, and JR Kansai Pass. The best one for you depends on your itinerary and which train lines you’ll use most often. If you need a detailed breakdown of these passes, check out this article: JAPAN TRAIN & BUS PASSES.

    Beyond Kansai, Chubu (Central Japan), Kyushu, and Tokyo also have their own transportation passes, giving travelers an abundance of options. With so many choices, it can be challenging to find the best fit. But in most cases, there’s a regional or city pass that will be more useful than a nationwide JR Pass. Before purchasing any pass, always compare prices with individual tickets and choose the one that best matches your planned routes!


    5. Sticking to Trains

    Many tourists, especially Filipinos, are easily amazed by Japan’s trains — and for good reason. The Shinkansen or bullet train is an engineering marvel, offering a smooth, fast, and efficient way to travel. Plus, with Japan’s extensive railway network, it’s easy to default to trains as the primary mode of transportation. However, train fares — especially for bullet trains — can be quite expensive, particularly if you don’t have a rail pass.

    If you’re on a budget, buses are a great alternative worth considering. For example, when traveling between Fukuoka and Hiroshima, a bus ticket is significantly cheaper than a Shinkansen fare. Yes, the travel time is longer, but the savings can be substantial.

    For longer journeys, overnight buses offer even more benefits. First, the fare is much cheaper than taking a train. Second, because you’re sleeping on the bus, you save on one night of accommodation, which is a big deal considering how expensive hotels in Japan can be. Third, some places in Japan are not accessible by train, but buses can take you there conveniently. And don’t worry — the buses in Japan are clean, quiet, and comfortable.

    Inside Hiroshima Bus Center

    Of course, overnight buses aren’t for everyone. If you’re traveling with kids or prefer a more relaxed journey, it might not be the best option. But if you’re physically able and don’t mind sleeping on a bus, you can save a lot while still exploring Japan efficiently!


    6. Eating Out All the Time

    One of the biggest expenses when traveling is food. While we absolutely encourage you to try local restaurants and immerse yourself in Japan’s amazing food scene, eating out all the time isn’t the most budget-friendly option.

    When we visit Japan, we try to strike a balance between eating at good restaurants and saving money by buying meals from supermarkets. Japanese supermarkets are a great place to explore, especially if you love Japanese food products. But more importantly, many of them sell pre-cooked or ready-to-eat meals at a much lower price than restaurants — or even convenience stores!

    TIP! Visit the supermarket around 7 PM or 8 PM, just before closing time. Many supermarkets discount their remaining ready-to-eat meals, sometimes by up to 75%, just to sell out their stock. If your accommodation is near a supermarket, this can be a huge money-saver!

    Of course, this doesn’t mean you shouldn’t eat at restaurants. You definitely should! Japan has plenty of affordable options, including random ramen shops, so you don’t always have to break the bank to enjoy good food.

    One last thing: Japan is full of vending machines. You’ll find them on every street corner, offering a quick and convenient way to grab drinks or snacks. But as tempting as they are, buying from vending machines all the time adds up. Supermarkets and even convenience stores usually sell the same drinks at a lower price. So if you’re on a budget, try to limit your vending machine purchases!


    7. Leaving Passport at the Hotel

    Did you know that foreign tourists can enjoy big discounts when shopping in licensed tax-free shops in Japan? Just look for the “Tax-Free” sign or logo! If your one-time purchase is at least ¥5000, you don’t have to pay the tax.

    Some stores, like Don Quijote, have dedicated tax-free counters where you can process your purchase without tax. REMINDER! You must present your passport at checkout. If you forget it, they won’t honor the tax-free discount, so always bring it with you when shopping. After processing, the store will attach a receipt to your passport, which will later be collected at the airport before you go through Immigration when leaving Japan.

    That said, if you have the budget, don’t hold back on experiencing the best of Japan! Whether it’s a fancy sushi dinner, a ski trip to a snow resort, or a relaxing dip in an onsen, go for it! These experiences are unique to Japan, and indulging in them isn’t just rewarding but also a great way to support the local economy.


    Japan Dos and Don’ts

    The Japanese are known as some of the most polite and helpful people in the world, often going out of their way to assist tourists. As visitors, it’s only right that we show the same respect by learning and following their customs. In Japan, many unwritten rules shape everyday life — rules that both locals and tourists are expected to follow. The more familiar you are with these cultural nuances, the smoother and more rewarding your trip will be.

    We are also listing down some common faux pas or social slip-ups that many tourists unknowingly commit. While these are not illegal — and it’s highly unlikely that you’ll be thrown in jail for them — they can leave a poor impression. So, knowing what to avoid can go a long way in helping you connect respectfully with locals and fully enjoy your trip.


    8. Talking Loudly on Public Transport

    Japan’s public transportation system is not only efficient and reliable but also remarkably quiet. Whether you’re on a train or a bus, it’s important to keep noise to a minimum. While it’s okay to chat with your travel companions, make sure your voice is low and respectful. Other passengers don’t need to hear your conversation.

    Japan_Bus Ride

    One thing you should absolutely avoid is talking on the phone while commuting. In Japan, many locals use their travel time to rest or unwind, especially because of the country’s demanding work culture. As tourists, it’s essential to respect this unwritten rule and help maintain the peaceful atmosphere.


    9. Ignoring Escalator & Elevator Etiquette

    Japan has many unwritten rules when it comes to using escalators and elevators, and as tourists, it’s good to follow local etiquette to avoid unnecessary disruptions.

    In most of Japan, including Tokyo, people stand on the LEFT side of the escalator and leave the right side open for those who want to walk or overtake. However, Osaka and most of Kansai do it the opposite way — you stand on the RIGHT side, and people walk on the left.

    Japan_Tokyo Solamachi Escalator
    One of Tokyo Solamachi’s escalators.

    Why the difference? According to a nikkei.com article, during the Osaka Expo in 1970, they adopted the global standard of standing on the right. However, a lot of people also question whether this is the real reason.

    But just remember, for most of Kansai Region, you stand on the right of the escalator. That includes Osaka, Kobe, Nara, Wakayama, and more. However, Kyoto is an exception, because apparently, the locals prefer to stand on the LEFT. But once you’re there, you’ll notice that both left and right standing can be seen, possibly due to the high number of tourists. To be safe, just observe the people around you and follow what they’re doing.

    Some cities, like Nagoya and Saitama, have actually started banning walking on escalators due to safety concerns. More places may follow suit in the future. However, since it takes time for people to adjust, you might still see people walking on escalators in these areas.

    Japan Elevator

    Japan also has unspoken rules for using elevators. First, give priority to PWDs or Persons with Disabilities. If you’re not carrying anything heavy and are able, consider using the stairs instead. Second, hold the door. If you’re standing next to the control panel, you’re expected to press the buttons for others and hold the door open. And if everyone is getting off at the same floor, you should exit last after holding the door for others.

    These small gestures are part of Japan’s culture of respect and consideration, which makes public spaces more efficient and pleasant for everyone!


    10. Blocking Dedicated Pathways

    Walking around Japan is such a fun experience! The streets are clean, the surroundings are peaceful, and there’s always something interesting to see. Sometimes, even if we can take the train, we choose to walk because it just makes us happy. But if you plan on exploring on foot, there are a few things you should know.

    Japan Sidewalk and Pedestrian

    First, pay attention to the sidewalk signs. In many places, there are designated lanes for pedestrians and cyclists, so make sure you’re walking on the correct side. If you ever hear a small bell ringing, that’s a cyclist politely asking you to step aside — there won’t be any loud honking here! Also, if you’re new to the area, try not to wear earphones while walking. They might prevent you from hearing important signals like bike bells.

    You’ll also notice yellow, textured pathways on sidewalks, stairs, crossings, and train platforms. These are called Tenji blocks, and they help visually impaired individuals navigate the area. Just be mindful not to block these paths!

    Shibuya Crossing, which many regard as the world’s busiest intersection.

    At pedestrian crossings, you might hear a bird-like sound coming from the stop lights. It starts slow and speeds up as time runs out to cross. This is super helpful for visually impaired individuals, but it’s also a great way to remind yourself when you need to hurry up!

    Japan’s infrastructure is designed to be efficient and accessible for everyone, making walking not just easy but also an amazing way to experience the country. So go ahead, take a stroll, and enjoy every step of your adventure, but always make sure to be considerate of others too.


    11. Eating While Walking

    Eating in public spaces isn’t illegal in Japan, but eating while walking? That’s a big no-no. It’s just not part of the culture. If you grab a snack from a convenience store, the best thing to do is eat it while you’re still in the area, either inside the store or just outside, as long as you’re not on the move. If you’re at a park, find a bench and take your time. And if you buy a drink from a vending machine, it’s common practice to drink it right there next to the machine instead of sipping while walking.

    Japan_Nara Melon Pan
    We enjoyed our melonpan right next to the store.

    There are some practical reasons for this, like avoiding spills and keeping the streets clean, but there’s also a cultural side to it. A Japanese tour guide once told us, “If you eat, just eat. Respect your food.” They take food seriously, and they believe you should be present in the moment while eating. Honestly, it makes a lot of sense because you enjoy your food more when you’re not distracted. So next time you grab a bite in Japan, take a moment, find a spot, and really savor it!


    12. Miscalculating Food Serving Size

    Japan_Nagoya Kishimen Dinner

    Someone once asked us if it’s okay to leave leftovers when eating out in Japan or if it’s considered rude. The short answer? It’s best to avoid it. Wasting food is generally frowned upon anywhere, but in Japan, food is deeply respected, along with the people who prepare it. If a local invites you to their home for a meal, finishing everything on your plate is a must. Leaving food behind might make your host think you didn’t enjoy it.

    If you’re dining at a small, family-run ramen shop, a mom-and-pop restaurant, or a sushi bar — especially if the chef prepares your meal right in front of you — leaving leftovers is considered impolite. The one exception? Ramen broth. It’s pretty normal for people to leave some soup behind.

    At food courts or fast food places, nobody will call you out if you don’t finish your meal, but it’s still best to avoid wasting food. We get it: sometimes it’s hard to gauge portion sizes in a different country. In Japan, though, certain dishes tend to come in big servings by default. Ramen is always a hefty bowl, okonomiyaki is usually large and great for sharing, and donburi (rice bowls) often have a lot of rice, even if the toppings don’t seem like much. Some meals even come with unexpected side dishes.

    That said, portions in Japan aren’t always huge. They can actually be smaller compared to Western countries. It really depends on the dish and the restaurant. So when in doubt, just ask! If you’re feeling shy, the safest approach is to assume the serving size is big. You can always order more if needed, but leaving food behind can feel disrespectful to the person who cooked it, especially in smaller eateries. Better to play it safe and order extra later than risk wasting food!


    13. Keeping Shoes on at Certain Sites

    One thing you’ll notice while exploring Japan is how much the culture values cleanliness. It’s a pretty big deal here, and it extends to the simple act of taking off your shoes when entering certain places. Sure, in most hotels and restaurants, you’re fine keeping your shoes on, but there are definitely places where you’ll need to leave them at the door.

    Japan_Remove Shoes Policy

    Temples and original castles are prime examples. When you visit these spots, you’ll usually find an area dedicated to shoe removal. Often, there’s a shoe cabinet where you can store them while you explore, or in some cases, they’ll even give you a plastic bag to carry your shoes around with you.

    Traditional restaurants also have this rule, as do some churches. So, when you’re touring around Japan, be ready for that moment when you’ll have to slip off your shoes. So make sure your socks are up to the task — nothing too old, no holes, and definitely no funky smells! LOL


    14. Stepping into an Onsen Right Away

    One of the most relaxing and unique experiences you can have in Japan is soaking in an onsen, but there are a few things you should know before diving in.

    First, if you have tattoos, you might hit a small roadblock. Traditionally, tattoos carry a stigma in Japan, and many onsens do not allow them. However, there are tattoo-friendly onsens in several cities, so just do a little research online. Sometimes, small tattoos are okay, but when in doubt, it’s always best to ask the staff beforehand.

    Kozeniya Tottori Onsen
    Kozeniya Tottori Private Onsen

    When it comes to the type of onsen, there are two main options: public and private. For both, you’ll need to get comfortable with the idea of being completely naked. Yes, all clothing — swimsuits, trunks, anything — is a no-go. But don’t worry, the areas for men and women are separate, and honestly, no one will be staring at you. People are just there to relax. However, if you’re not ready to strip down in front of strangers, a private onsen in a ryokan or a traditional inn might be a better choice.

    If you choose to go to a public onsen, there are some important rules to follow. First, make sure to wash yourself thoroughly before dipping in. Most onsens provide shower areas with handheld shower heads. The key is to be clean before soaking!

    Onsen in Japan.

    Second, remember that onsens are all about relaxation. Keep the noise level down, and don’t splash the water around. It’s not a swimming pool, so avoid any kind of swimming or vigorous activity. Third, while it’s common to bring a small towel with you, make sure it doesn’t touch the water. Some people like to place it on their head, but it shouldn’t be wet or wrung out in the water.

    Finally, after you’re done soaking, be sure to wipe off any excess water before heading back to the locker room. This keeps things clean for everyone else. Enjoy your onsen experience, and just remember: it’s all about relaxation and respecting the space!


    15. Tardiness

    Being punctual in Japan is extremely important, and it’s something that’s ingrained in the culture. We know it can be easy to run late, but especially in Japan, where everything operates with impeccable precision, being late is a big no-no. We’ve even experienced a situation where a train was delayed, and the staff personally apologized to every single passenger, one by one. Not just over the intercom, but face to face.

    If you’re joining a group tour, showing up on time is crucial. When you’re part of a group, it’s not just about you— other people are depending on you. That means you should always be aware of the meeting times, especially when it comes to getting back to the bus or group rendezvous points. If you cause a delay, don’t be surprised if the guide calls you out. We’ve seen it happen. Once, someone was just five minutes late, and it was a huge deal. The guide and the rest of the group were visibly frustrated. Thankfully, we’ve managed to avoid such situations, even after late nights!

    Japan Shinkansen

    When you’re traveling on your own, it’s a bit more relaxed, but there are still some things to consider. First, remember the time schedules for public transportation, particularly for bullet trains with reserved seats. If you miss your scheduled train, you’ll likely have to rebook and lose time and money — and no one wants that. Also, some attractions are a bit far from the city center, and buses may only run on an hourly schedule. Miss your bus, and you’ll be stuck waiting for another hour, which can throw off your plans.

    Another thing to keep in mind is that many places close earlier during the winter months, so if you arrive too late, you may miss out on some opportunities. Also, when visiting popular photo spots, be considerate of others. Don’t hog the perfect shot and give other visitors a chance. The same goes for onsens and hotel checkouts. If you’ve booked a private onsen, make sure to show up on time and don’t overstay your reservation. And when it comes to hotels, be sure to check out on time to allow housekeeping enough time to prepare for the next guests.

    Being mindful of time will help you make the most of your trip and keep everything running smoothly!


    Updates Log

    2025 5 3 – First uploaded


    Source link

  • How to Register for VISIT JAPAN WEB • A Step-by-Step Guide

    How to Register for VISIT JAPAN WEB • A Step-by-Step Guide


    Japan is among the most visited countries for Filipino travelers, and it isn’t difficult to understand why. There’s so much to love about Japan that its proximity to the Philippines is just a bonus. Even our team has visited The Land of the Rising Sun over a dozen times.

    TPTKLOOK5
    BlogDisclaimer

    The country has a good mixture of ancient tradition and modernity that makes for a memorable travel experience. With a total of 47 prefectures, it is packed with countless stunning landscapes, an excellent culinary scene, a rich history, and hospitality like no other. One thing is for sure: you’ll end your trip wanting for more.

    Another thing travelers love about Japan is the convenience it offers. One, its train system connects every major city, making many attractions easily accessible. Two, it is never short of accommodation and food options. Another thing that Japan made more convenient in recent times is their immigration procedures. They now have Visit Japan Web for a smoother arrival clearance at the immigration area.

    In this article, we’ll guide you on how to accomplish your Visit Japan Web and how you can use it for your trip to Japan.


    What is Visit Japan Web?

    Visit Japan Web is a website that allows travelers going to Japan to pre-register the necessary information for immigration procedures. Once you register, you will get a QR code that you can use for immigration clearance and customs declaration. With this, you can go through the arrival process quicker, saving you a lot of time. Tourists can also use this service to create a tax-free QR code that they can use when making tax-free purchases at eligible stores.


    How to Register for Visit Japan Web

    1. Create an account.

    Go to Visit Japan Web site. You can do this on your mobile device or your computer. Click “Sign up” for a new account at the bottom of the page.

    Visit Japan Web Sign Up

    Then, read the Terms of Use and Privacy Policy. Tick the boxes to agree and click “Next” to proceed.


    2. Enter account details.

    Visit Japan Web Email and Password

    Type in your email address. Make sure that it’s a working email address that you can access since a confirmation will be sent here. Then, create a password and make sure it meets the following criteria:

    • Has 10 characters or more
    • Has both uppercase and lowercase letters
    • Has numerical values
    • Has one or more of these symbols: +-*/=.,:;`@!#$%?|~^()[]{}_

    Re-enter your password and complete the captcha. Then, click “Create account”.


    3. Confirm email.

    A confirmation code will be sent to the email address you used to register. Check your email and enter the code. Then, click “Confirm email”.

    Visit Japan Web Email Confirmation

    If the confirmation is successful, a pop-up window will appear with that message. Click “Go To Login Screen”.


    4. Login to your account.

    Enter the email and password you registered and click “Login”.

    Visit Japan Web Multi-Factor Authentication

    After this, you can opt to set up multi-factor authentication. This will give you extra security to your account. But note that choosing to set up multi-factor authentication will require you to install an authentication app like Google Authenticator or Microsoft Authenticator.

    If you don’t want to use multi-factor authentication, click “No”. Then, click “Next”.


    5. Choose your entry/return procedure category.

    Click “Your details” to start entering your personal information.

    Visit Japan Web Personal Details

    On the first page for this section, you’ll answer the following questions for the entry/return procedure category:

    • Do you have a passport issued by the Japanese government?
    • Do you live in Japan and will re-enter Japan with a (special) re-entry permission?

    If you’re a tourist, your answer to both these questions will most likely be “No”. Then, proceed to answering whether you’ll use a tax-free QR code or not. After that, click “Next”.


    6. Register passport details.

    Make sure to have your passport with you when you do this step. You have two options to register your passport details: scan with camera and manually entering the information. Choose which method you prefer, then click “Next”.

    Visit Japan Web Register Passport

    If you’re entering the information manually, here are the details you would need to provide:

    • Passport Number
    • Surname
    • Given Name
    • Nationality
    • Date of Birth
    • Date of Passport Expiry

    Once you’ve successfully entered all the details, click “Next”.


    7. Confirm the details you entered.

    In this page, you’ll see a summary of all the details you provided. If there’s any mistake, just click the “Edit” button on the right side of the section you need to edit. If everything is correct, click “Register”.

    Visit-Japan-Web-Confirm-Details Website


    8. Check visa details.

    Upon successful registration, you will see a pop-up window telling you so with a prompt to check whether you need to apply for a visa. Click “Check VISA requirement”.

    Visit Japan Web Check Visa Details

    Then, click “Yes” to confirm if you have a VISA to enter Japan. After that, click “Back to Home”.


    9. Register Planned Entry/Return.

    On the homepage, click “Register new planned entry/return”. You can choose to copy the details of your trip from your visa application or enter the details manually.

    If you choose to copy the details from your visa application, you’ll need to enter your visa issue number.

    Visit Japan Web Copy Details from Visa

    Meanwhile, if you opt to enter your details manually, here are the fields you need to accomplish:

    • Trip Name
    • Planned Arrival Date in Japan
    • Airline Name
    • Flight Number

    After completing all these details, click “Next”.

    On the next section, you need to enter the address of your accommodation in Japan. Here are the details you’ll need to provide:

    • Prefecture
    • City
    • Address
    • Hotel Name
    • Contact number

    Once you’re done entering all the necessary details, click “Confirm entered details”.

    Visit Japan Web Registered Entry Details

    Then, on the pop-up page, click “To entry/return procedure” to proceed to the next step.


    10. Generate QR code for immigration clearance.

    On this page, you’ll see that you can also link your visa here, but that’s optional. We’ll skip that process here and proceed to the preparation for immigration clearance.

    Visit Japan Web Disembarkation Card

    Click “Disembarkation Card for Foreigner”. This is the form you’d typically fill out manually before landing. On the pop-up window, click “Next” to start your registration process.

    Here are the details you need to fill out:

    • Home Address
    • Purpose of Visit
    • Last Flight Number
    • Duration of Stay
    • Prefecture
    • City
    • Address
    • Hotel Name
    • Contact Number

    After entering all these information, click “Next”. Then you’ll need to answer a few questions. Once everything is set, click “Confirm entered details”.

    Visit Japan Web Customs Questions

    On the next page, you’ll be shown a summary of all the details you entered. If everything is correct, click “Register”. Then click “Back to Entry/Return” to proceed to the next step.


    11. Generate QR code for customs declaration.

    On a pop-up window, you can read about how the electronic customs declaration works. Once you’ve read the details, click “Next” to start filling out the form.

    Visit Japan Web_Customs Declaration

    Below are the details you need to submit:

    • Occupation
    • Date of Arrival in Japan
    • Flight No./Name of Vessel
    • Point of Embarkation

    After typing in all the required details, click “Next”.

    Visit Japan Web Companions

    On the next page, you need to enter the number of family members traveling with you. If you’re not traveling with any family, just leave them at zero (0) and click “Next”.

    11.1 Declaration Information

    In this section, you’ll answer questions about items you’re bringing into Japan. Among the prohibited items are firearms and explosives. There are also restricted items including meat products, fruits, vegetables, and plants. Read every item to be informed about the restrictions and other information you need to know for customs declaration.

    Visit Japan Web Customs QR Code

    Once you’re done, click “Next” to generate your QR code for customs declarations.


    Have Peace of Mind While Traveling!

    Getting a travel insurance is optional, but we highly recommend this, especially when traveling abroad. Travel can be unpredictable, and though we hope we’ll never use it, having it gives us peace of mind in case of unexpected delays, cancellations, or emergencies.

    For international destinations, consider PGA Sompo’s TravelJOY Plus insurance. You can GET IT HERE. Don’t forget to use WORTHIT for a special affordable rate.

    TravelJoy PGA Sompo Code 2025


    Updates Log

    2025 4 25 – First uploaded


    Source link