If you’ve ever road-tripped the Natchez Trace Parkway, you’ve likely breezed right past Ridgeland, Mississippi without realizing this vibrant city is one of the Trace’s best-kept secrets. Situated just north of Jackson along I-55, Ridgeland really leans into its outdoors scene: kayaking on the Barnett Reservoir, biking the local multi-use trail, picking flowers in the community wildflower fields. So if you’re visiting Mississippi, here’s how to experience the outdoors in Ridgeland so you don’t waste a single moment.
This project is in partnership with Explore Ridgeland. All opinions are our own.
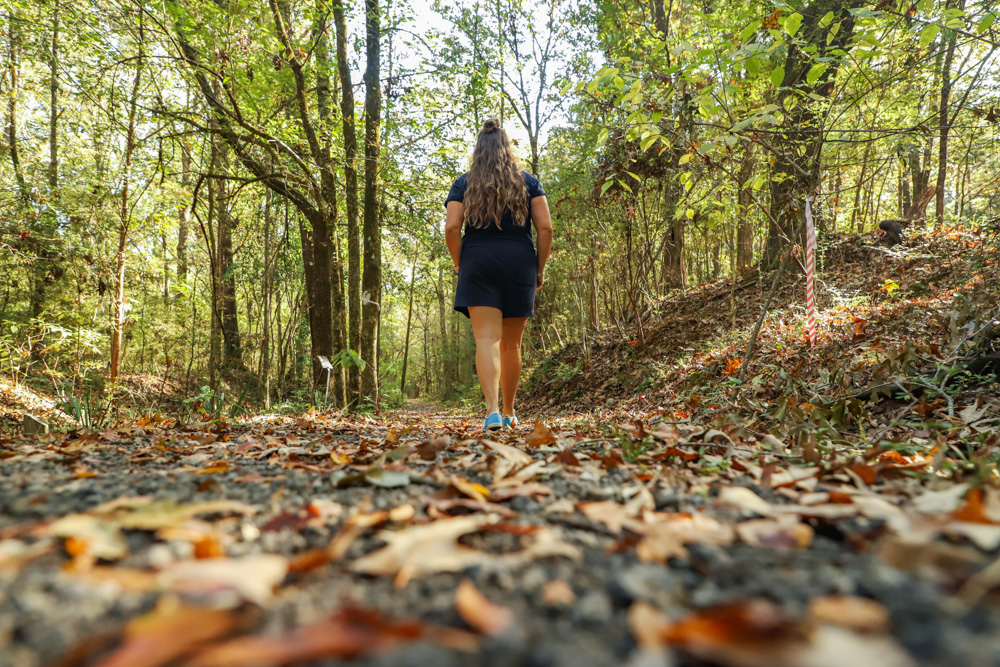
Getting outdoors in Ridgeland
Over the past few years, we’ve visited Ridgeland a handful of times en route to or from other Mississippi cities like Tupelo, Jackson, Natchez. We’ve come to find that Ridgeland is more than just a stop along the Trace—it’s a stand-alone destination in its own right. The first time we ever visited during the South’s dreamy, temperate fall weather, we were immediately smitten with all the green space Ridgeland offered, not to mention the fact that everyone seemed to move around by bike.
Cycling in Ridgeland
Ridgeland, which has long been designated an official Tree City, is an ideal weekend getaway for anyone looking to get around by two wheels, whether to hit the Retail Trail, skirt the edge of Mississippi’s largest reservoir, observe the region’s many wildlife habitats or simply log a bit of exercise.
With eight different access points spread throughout the city, the Chisha Foka Multi-Use Trail is one of the best ways to experience the outdoors in Ridgeland. You can start near the Natchez Trace Parkway and pedal past the wildflower fields, grab a cold drink or seafood platter at one of the waterfront restaurants like Pelican Cove Grill, then take a break to browse Mississippi-made art at the Bill Waller Craft Center.
The trail winds along the Barnett Reservoir, where overlooks and parks offer plenty of stops for resting, picnicking or a round of disc golf. In Ridgeland proper, the Railroad District is a more urban biking destination where you can grab lunch or shop local boutiques before hopping back on the path.
If you’re not traveling with your own bike, you can make use of Explore Ridgeland’s free bikeshare program. Simply download the Koloni app before you go, create a free account, then pick up a bike at either the Ridgeland Bikeshare at The Bike Crossing or the Ridgeland Visitors Center in the Renaissance at Colony Park. Helmets are required and included with the rentals.
Natchez Trace Parkway
Ridgeland has one of the most convenient and scenic access points to the Natchez Trace Parkway, making it a natural hub for travelers exploring the historic 444-mile route that launches in Nashville and terminates in Natchez, Mississippi. The Parkway literally runs through the city, so you can easily hop on and off whether you’re driving the whole byway or just enjoying a shorter day trip.
From Ridgeland, you can head north toward Tupelo and Nashville or south toward Natchez, and the stretch around town is especially appealing thanks to multi-use trails that parallel the Parkway. Cyclists, runners, and walkers love this section because of its paved paths, water views, and easy access to Barnett Reservoir (“The Rez”), which borders the Trace here.
In short: Ridgeland is both a practical and scenic gateway to the Parkway: It’s the only city in Mississippi where you’ll find direct access combined with a strong visitor infrastructure—lodging, dining, shopping, trailheads—directly off the Natchez Trace Parkway.
Ross Barnett Reservoir
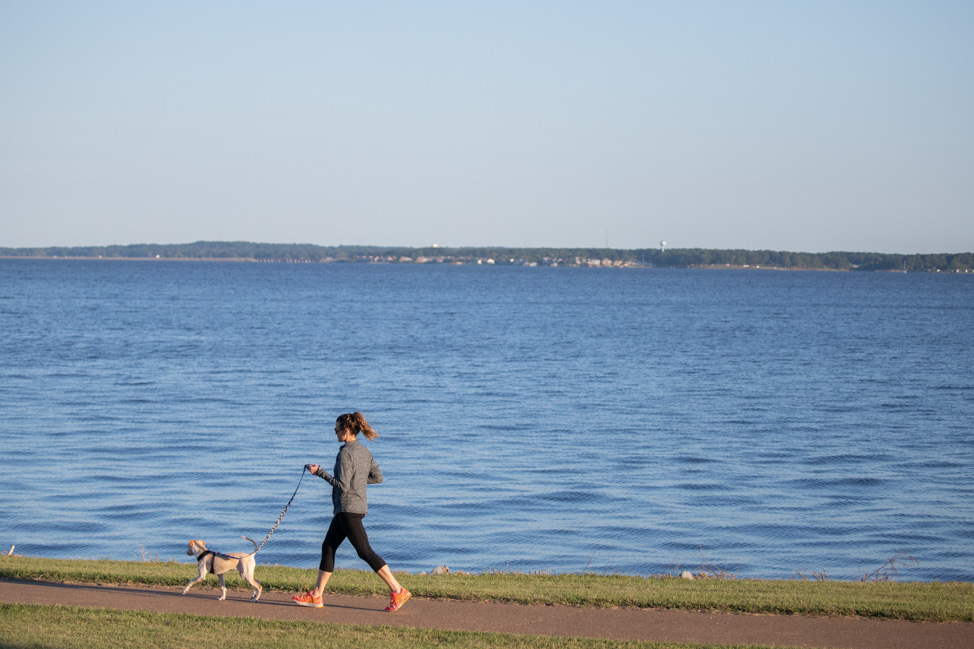
Arriving from the north, your first glimpse of Ridgeland will be an expanse of mirror-blue water that stretches out over 33,000 acres. Not only is Barnett Reservoir a peaceful respite, but it’s popular for cardio enthusiasts who jog, walk or hike the trails, many with dog companion in tow.
You could easily rent a waterfront home and spend the entirety of your weekend in Ridgeland making use of Barnett Reservoir’s many facilities. The 33,000-acre Barnett Reservoir, known to locals as “The Rez,” boasts five campgrounds, 16 parks, 22 boat launches, handicapped accessible trails and 18 miles of paved walkways. In other words? It’s a water enthusiast’s playground.
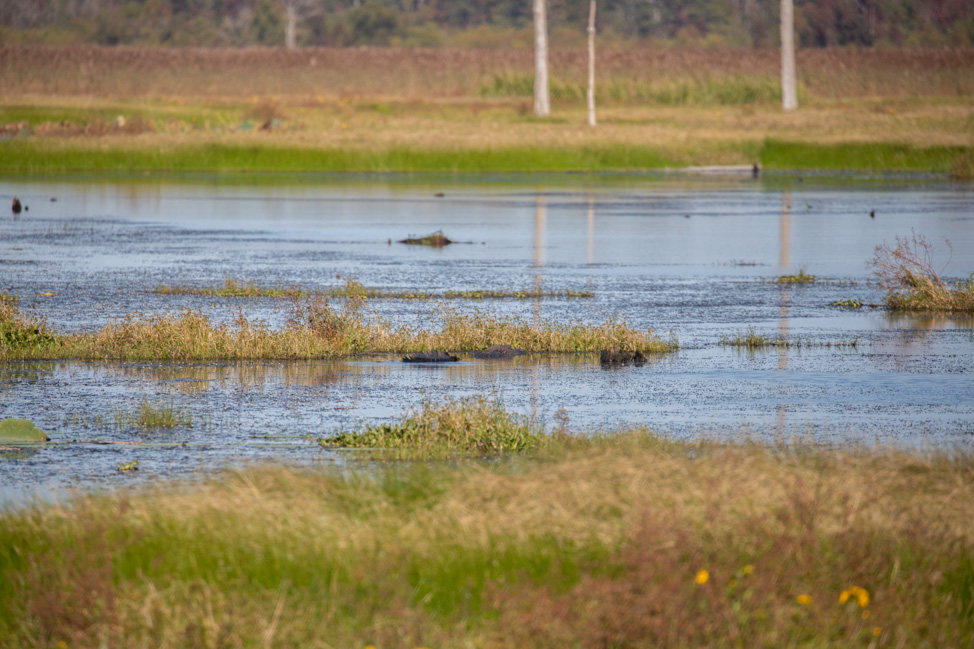
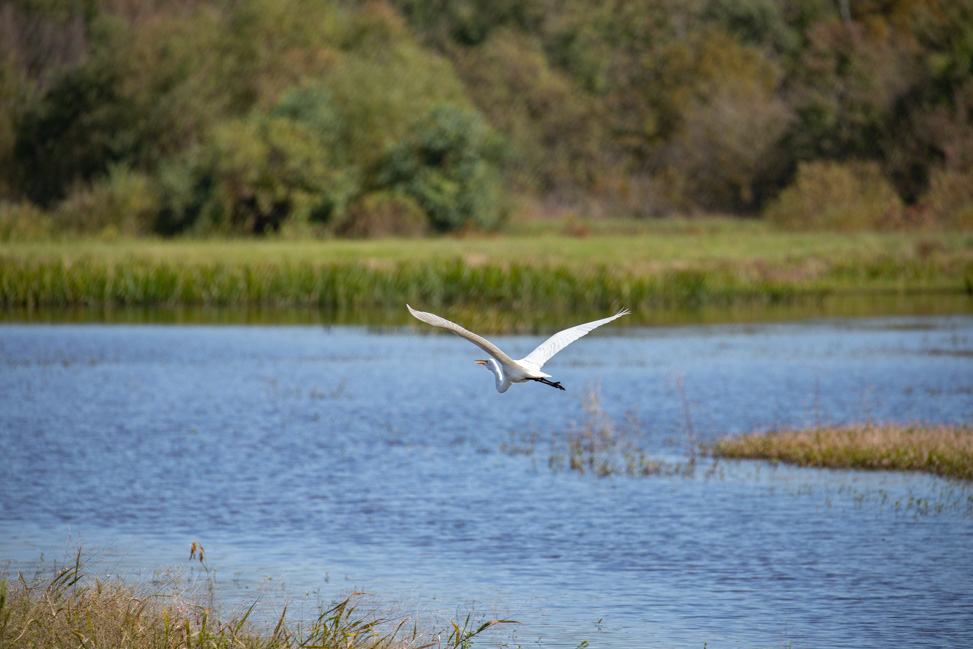
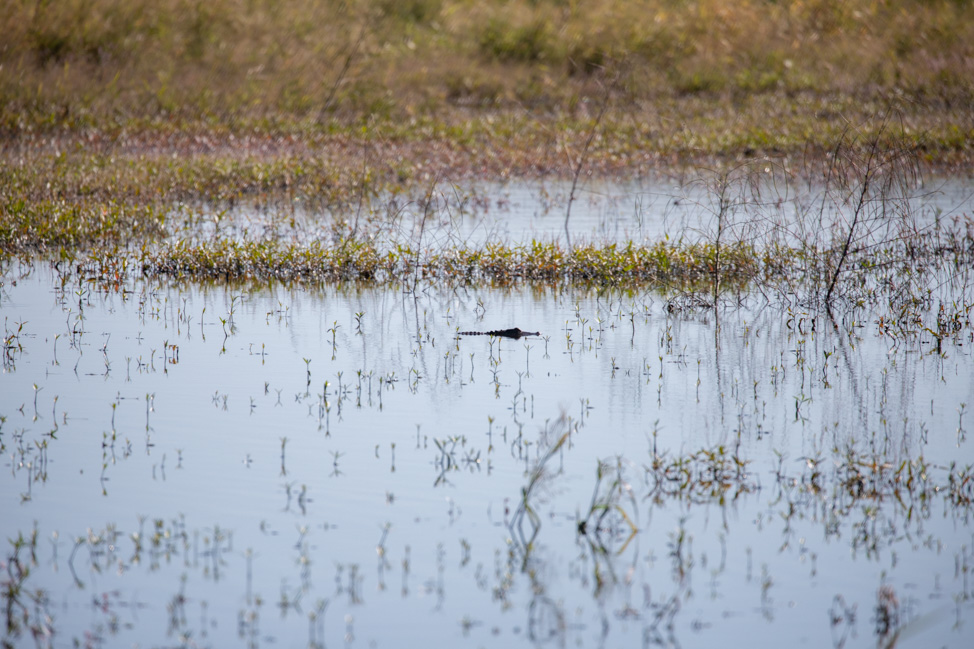
One of our favorite places in Ridgeland is Pearl River State Wildlife Management Area, an area adjacent to the Natchez Trace Parkway that’s alive with native flora and fauna. Just past the Trace before you cross the bridge, there’s also a bird-viewing station where you can admire the various waterfowl that inhabit the marsh from close up.
On our weekends in Ridgeland, we have returned to this refuge on multiple occasions to enjoy the fresh air and get our bird-watching. Keep your eyes peeled for alligators, too: We spotted quite a few lurking just beneath the water’s surface!
Ridgeland Wildflower Fields
Closer to the heart of the city are the Ridgeland Wildflower Fields started many years ago by the Ridgeland Chamber of Commerce and Keep Ridgeland Beautiful as a local beautification effort and way to provide residents and visitors alike with a joyful experience. To find them, map to the Seabrook Paint Company right off Interstate 55 and park in the back parking spaces by the fields.
This time of year, you’ll catch the tail end of wildflower season before the zinnias and other multi-colored blooms start to materialize.
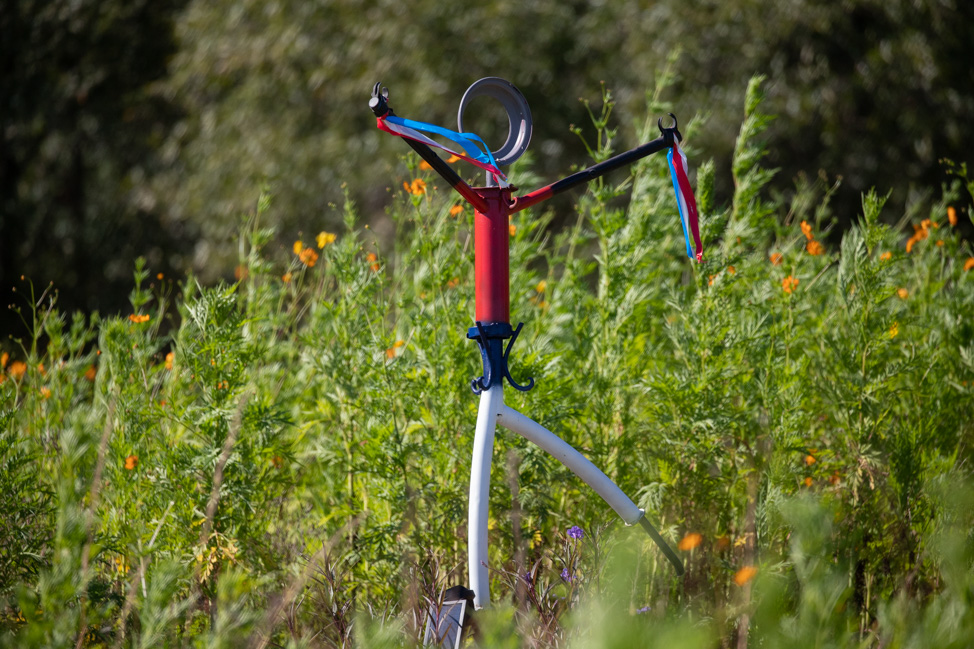
But even in the between seasons when the fields aren’t awash in color, they’re still fun and interesting to visit—and, did I mention, free?—as they feature walking paths adorned with whimsical sculptures created from recycled and upcycled metal. Every time we’ve visited, more 3D art has been added, and you know we love a good public art installation!
TopGolf
If you want to be outdoors in Ridgeland without expending too much energy, the city is home to Mississippi’s first Topgolf venue. If you’ve never played a round, you’re in for a treat. Topgolf Ridgeland isn’t your typical driving range—it’s an all-out experience where you can tee off from climate-controlled bays outfitted with TVs while aiming at colorful, high-tech targets that track your shots. Or mix it up with a round of 9-hole mini golf course that’s great for families and groups.
Add in a menu of food, beer and craft cocktails, and you’ve got the recipe for an easy night out in Ridgeland whether you’re working on your swing or just there for the social side of things.
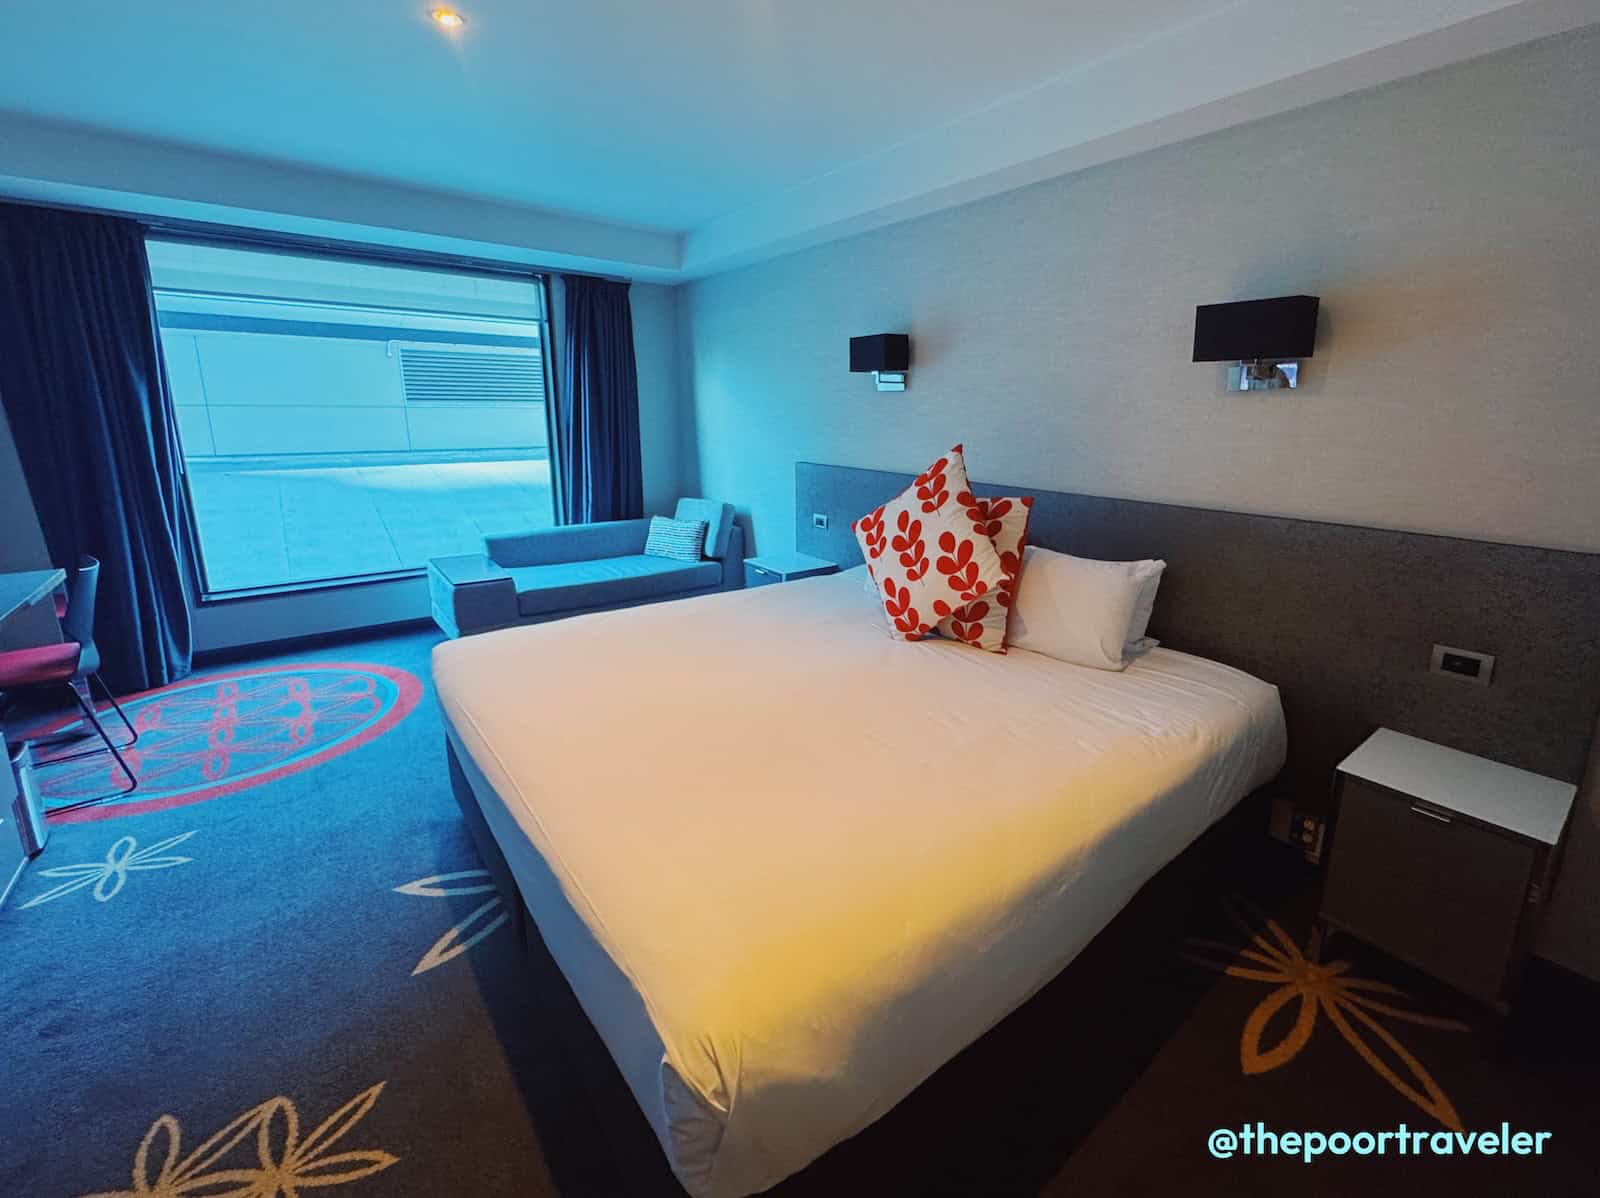
Where to stay in Ridgeland, Mississippi
The area engulfing the Township at Colony Park is where the majority of hotels in Ridgeland are located. We have stayed at the Hampton Inn & Suites, as well as the SpringHill Suites, which has an outdoor pool that is very refreshing in the summer months. The nice thing about the Colony Park area of town is its walkability, as well as proximity to the bulk of Ridgeland’s restaurants and retail.
There are plenty of shops and eateries—like Taste Italian Kitchen, Local 463, Caet, Anjou—at Renaissance at Colony Park so you can easily navigate the neighborhood by foot or bicycles. If you aren’t traveling with your own set of two wheels, the free bikes available at the Ridgeland Visitors Center make it convenient for exploring if you want to ditch your car for the day.
One thing is for sure, no matter where you wind up for dinner, the after-party is at the Renaissance every night without fail: The fountain in front of the Malco Renaissance theatre lights up in a Vegas-style show marrying light and audio on the hour from 6 to 9pm nightly.
If you’re Bali-bound, you probably know that there’s a LOT to see and do in this province of Indonesia. Supporting much of the province’s income is its appeal to tourists as it’s an ideal spot for travelers seeking nature, culture, and adventure.
It’s difficult not to get over-excited with the natural attractions you’ll find across its map. So much so that sometimes we tend to overlook the other aspects of a trip that could lead us to making bad decisions.
This article gives you a rundown of mistakes you should avoid when traveling to Bali.
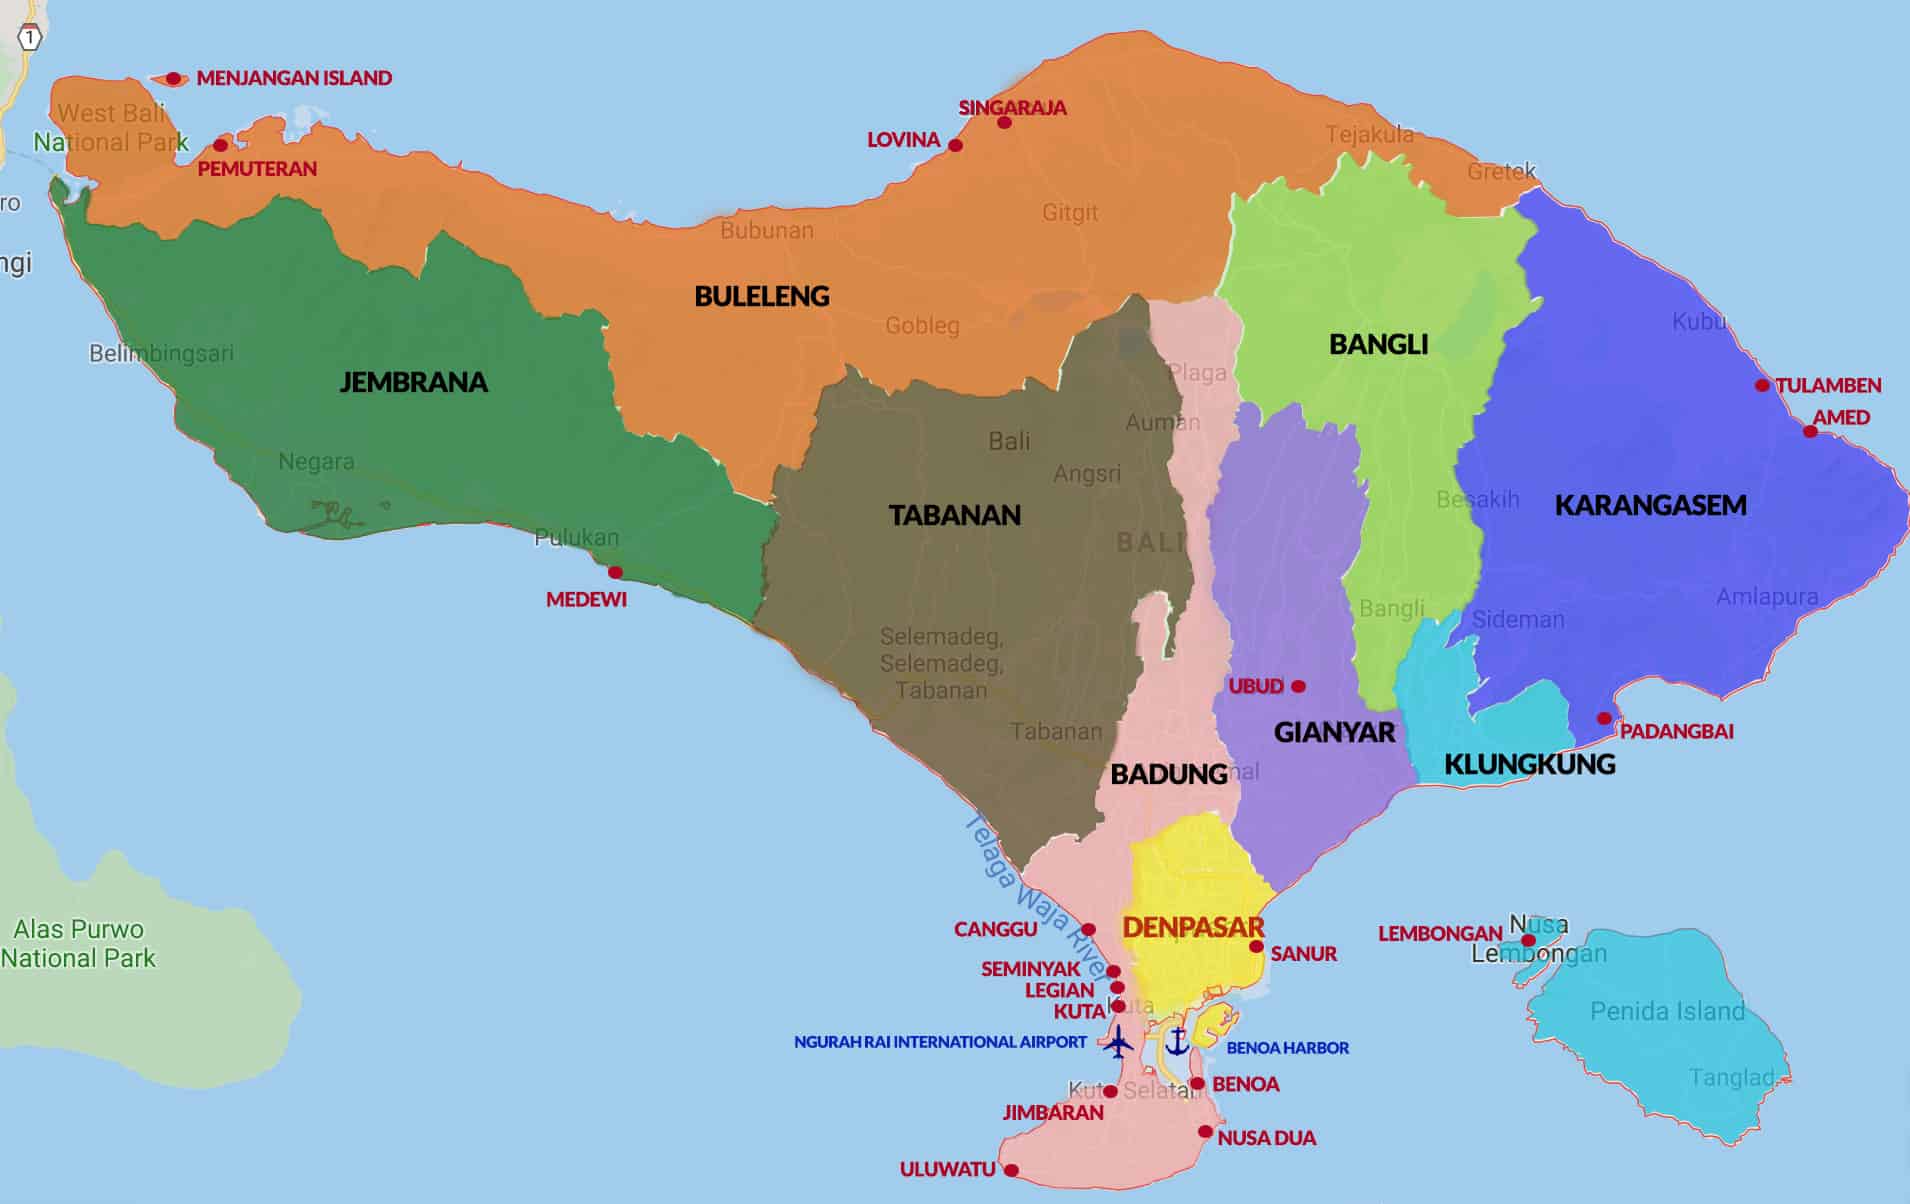
I made my first mistake even before I arrived in the island. For some reason, I assumed that Bali is just as small as Phuket or Santorini or Singapore. My friends, Bali is a hell of a lot bigger than that. It is huge! It is eight times bigger than Singapore, 10 times bigger than Phuket, 64 times bigger than Santorini, 500+ times larger than Boracay! (But it’s more comparable to the entire Cebu or Leyte Island.)
Keep that in mind when building your itinerary. Don’t schedule your activities immediately after another if they’re in different parts of the island. For example, getting from Kuta to Ubud does not take just a few minutes. It takes a couple of hours. And those faraway temples like Lempuyang or Ulun Danu, much longer. Depending on your itinerary and what you’re in Bali for to begin with, you need to pick the most ideal area to stay so you won’t waste too much time on the road. Speaking of the best area to stay…
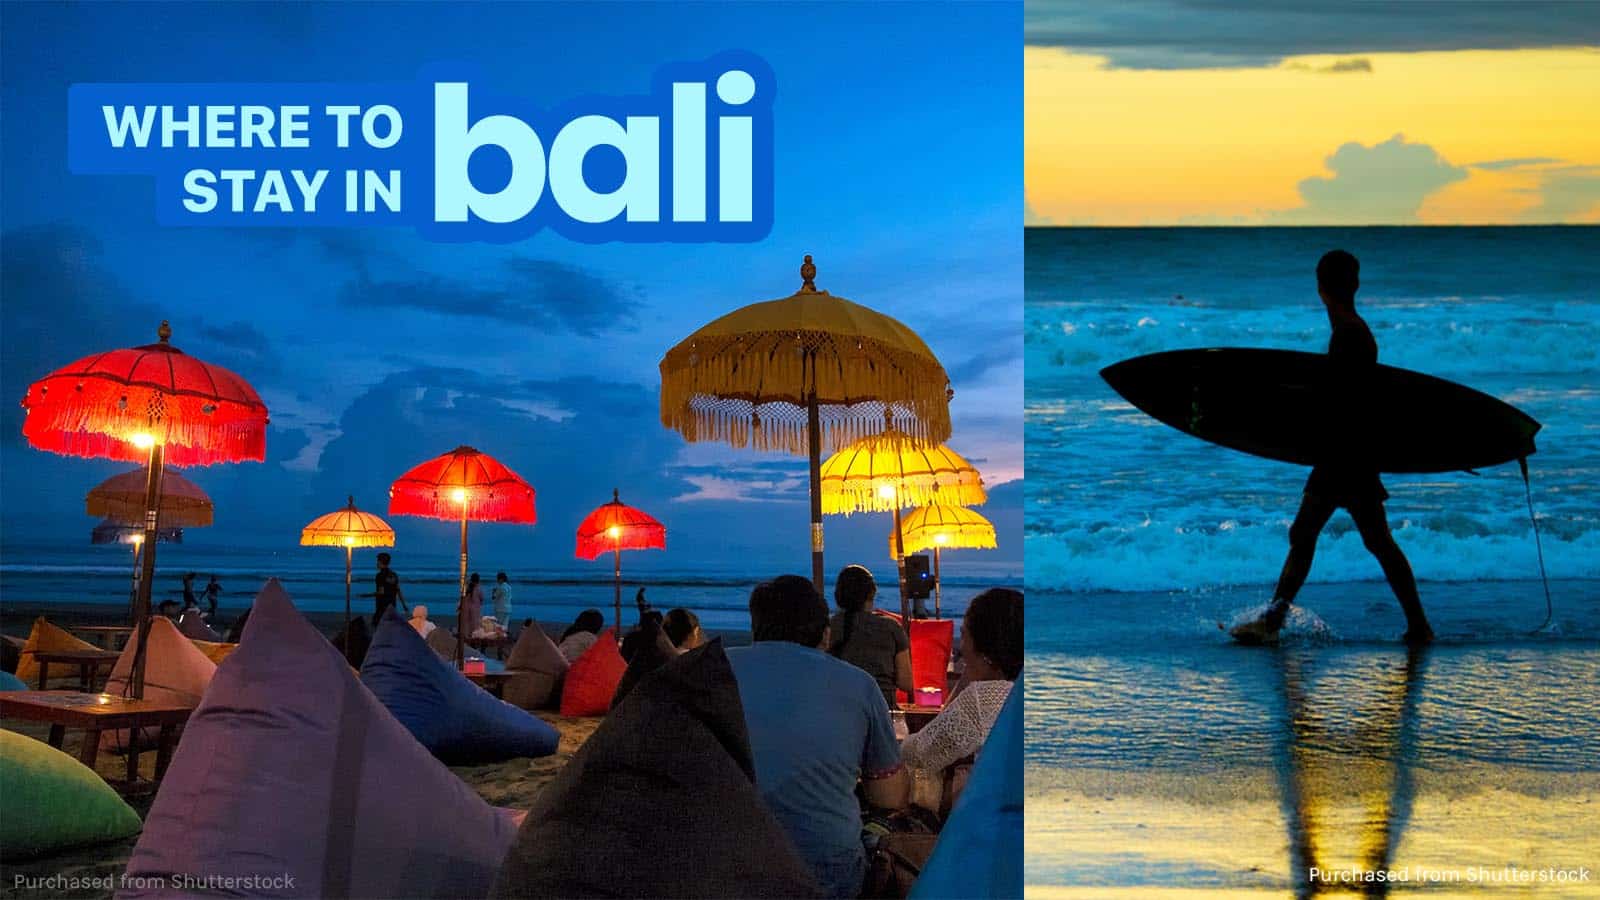
2. Don’t pick the wrong area to stay.
The Kuta-Seminyak area seems to be the busiest and the epicenter of most of the action in the island. It probably has the highest concentration of lodging and dining establishments. But is it the best area? Well, not really. The best place to stay depends on why you’re in Bali in the first place.
If you’re after a relaxing time, you’re not gonna find it in Kuta. It’s not even the most central location. That distinction belongs to Ubud, which is at the geographic center of the island. From Ubud, it’s easier to see the temples, terraces, and waterfalls of the north and the east. And while the city center gets busy too, it is still much less chaotic than Kuta and Seminyak. Many of the scenic rentals you see on Instagram are situated around Ubud. But note that there’s no beach here.
For that, maybe Uluwatu and Nusa Dua are worth considering. Most properties here are pretty upscale, but they offer a quieter, more romantic beach experience.
If you are staying in Bali long term, check out the rental properties in Canggu (Changgu). This is a favorite among digital nomads because it’s more affordable here.
If you’re a foodie, however, Denpasar seems to be a great base because you could have a great selection of not only Balinese fare, but also other Indonesian and other Southeast Asian cuisines.
Again, the best place to stay in Bali largely depends on your reason for visiting. If you decide to stay in the Kuta/Seminyak area, there’s another thing you shouldn’t underestimate: the traffic.
3. Don’t underestimate the traffic.
Bali welcomes millions and millions of visitors per year. In fact, in 2024, it has recorded almost 6.4 million foreign tourist arrivals, the highest recorded in the past decade. And a great fraction of them chose to stay in and around Kuta and Seminyak, and most of them do not use public transportation, which is not as reliable as one could hope.
Most tourists prefer a private tour by car or booking Grab or Gojek to get from one place to another. It’s no wonder traffic buildup is a constant occurrence here. So if you have a tour, a show, or a flight to catch, it’s always best to have plenty of lead time.
Traffic is not as bad in other areas, though. But I also noticed traffic jams in Ubud’s city center, too!
4. Don’t fall for taxi and motorbike scams.
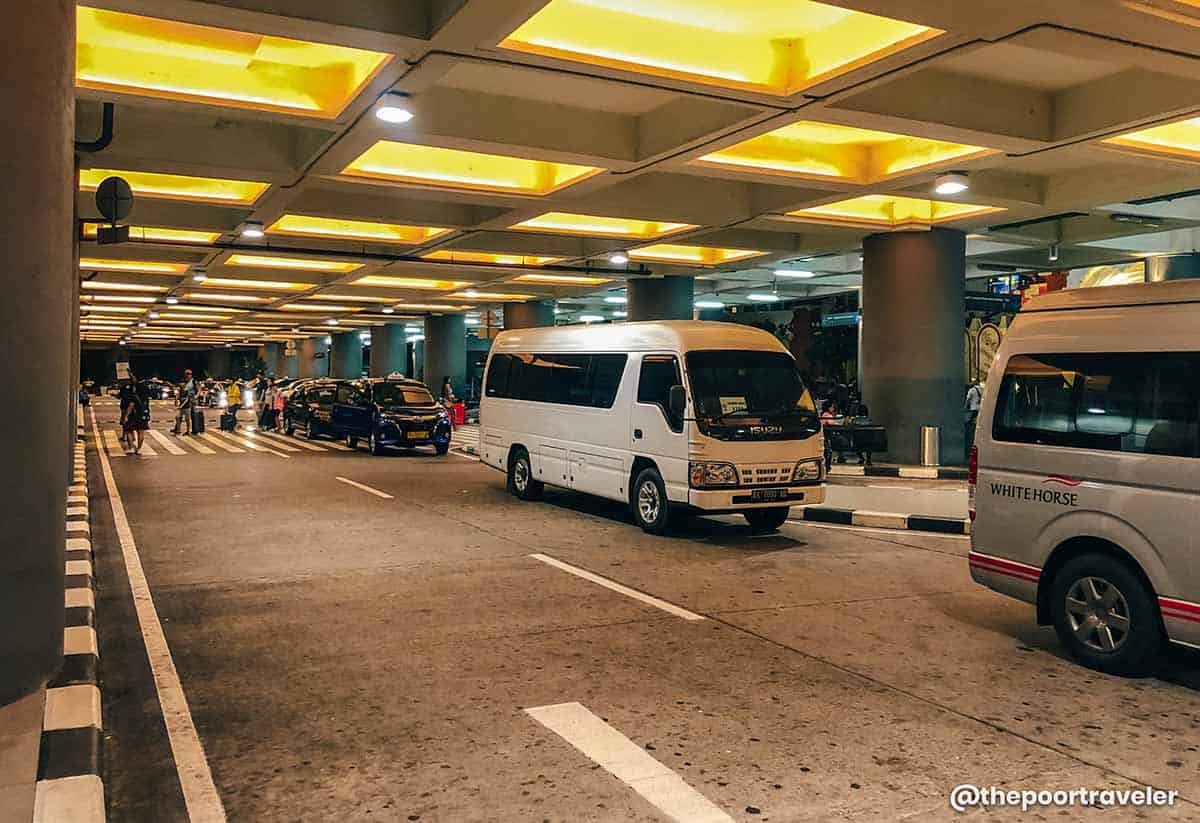
Overpricing taxis are rampant in Bali. In fact, we have been told by the locals we met to not hail a cab, but use Grab or GoJek instead. And if we must, only ride BlueBird, the only reputable taxi company on the island. If coming from the airport, you may also pre-arrange a pickup service online.
Bali Airport Pre-arranged Transfer
If you prefer traveling by motorbike, beware of scams, too. I don’t rent motorcycles abroad so this isn’t something I’m concerned about. But I had been warned about rental shops that would charge you for pre-existing damages on the bike. Police scams are said to be prevalent too. They say that some officers would just stop motorbike drivers for whatever reason they could think of just so you could pay them to let you go.
But if you insist on renting a motorbike, make sure you have the proper driving license and always wear a helmet!
5. Don’t dismiss local cuisine.
Partly because of the many expats who call this island home, Bali has a vibrant international food scene! Before coming to Bali, my friends told me I should try a myriad of restaurants with the best burgers, or the best tacos, or even the best Greek food. Lots of fast food chains and cafes too. And that’s great and all, but don’t leave without digging into local food.
Babi guling from Babi Guling Bu Desak Pejeng
Balinese cuisine is spectacular to say the least — from the mouthwatering babi guling (spit-roasted pork, similar to lechon) to the ubiquitous sate and nasi campur to traditional cakes. The best part, they’re everywhere, too! You’ll find them at high end restaurants to humble warung (small family-run eateries). Most of them serve homey, hearty meals.
But if you want the insider scoop, best to book a guided food tour! By joining a food tour, you’ll get to know the local favorites and sample them while learning more about the Balinese food culture and other tips.
We personally booked an Authentic Food Tour from Ubud with GetYourGuide and it did not disappoint! Our guide Jon K. was polite, friendly, and knowledgeable and could communicate in English really well. He brought us to a babi guling place outside the city center and to Gianyar Night Market where he introduced to us more traditional dishes like betutu and an assortment of desserts! In between food stops, we dropped by rice terraces and Tirta Empul, one of the holiest temples in the island.
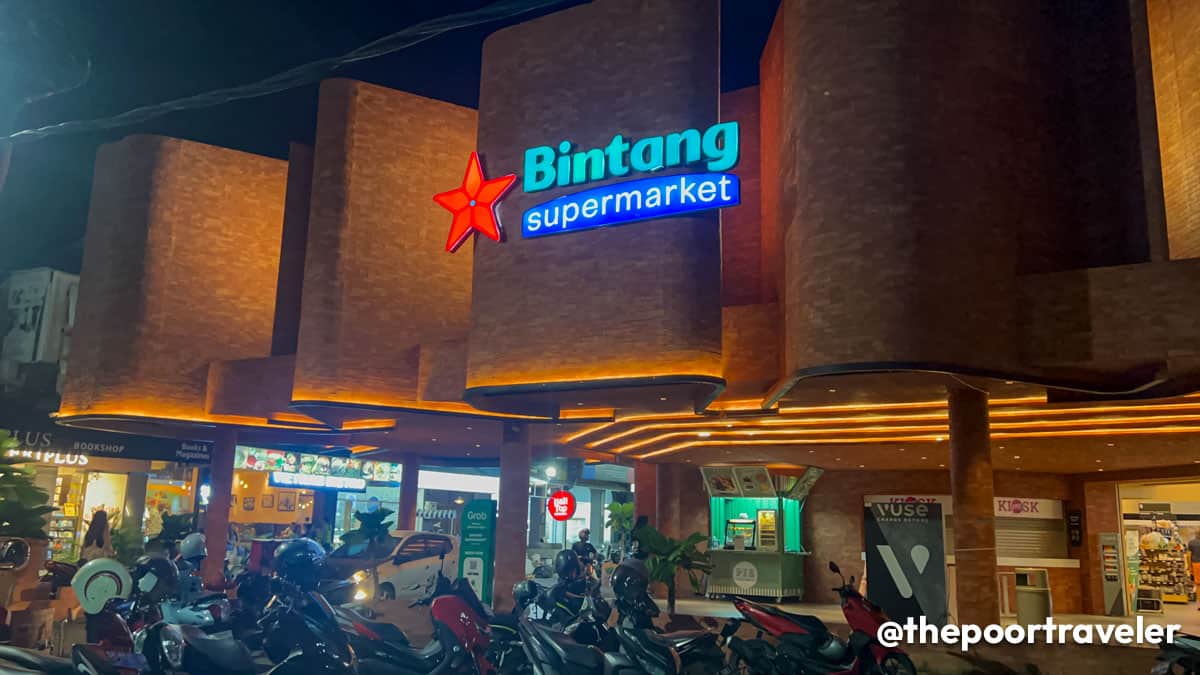
While we’re on the subject of food, I can’t stress this enough: do not drink tap water! Not even the locals do this and they highly discouraged me too. Most accommodations provide filtered water. If not, head to the grocery and buy those giant containers and just refill your reusable bottle every now and then.
Just one of the supermarkets in Indonesia where you can buy potable water
Why? Because tap water in Bali is gonna whoop your insides like it did mine. I never really believed in the term “Bali belly” until it was happening to me. I spent an entire night in the toilet, without coming out, because every 15 minutes something inside me was starting a revolution. So no, don’t drink tap water.
And don’t forget to bring anti-diarrhea meds!
7. Don’t trust street ATMs easily.
And by street ATMs, I mean those cash machines that you see in the streets, out in the open and can easily be tampered with. If you need to withdraw from an ATM, choose a machine that is inside a bank or other guarded or enclosed establishments like malls. But the bank is your best bet, and you’ll find a lot of various reputable banks throughout the island.
If you must withdraw from one on the street ATMs, always double check for signs of tampering. When in doubt, don’t do it and just find another way to pay or get cash. Speaking of cash…
8. Don’t overpay by mistake.
In Bali, the official currency is the Indonesian rupiah. And 100 USD is roughly 1.6 million rupiah. (And 100 pesos is roughly 28,000 rupiah.) The highest denomination is 100,000 rupiah. Yes, that’s 1 followed by five zeroes.
Banknotes of the Indonesian rupiah
For those who are familiar with the currency, the notes can be easily differentiated by the size and the color. 100,000 is big and red; 50,000 is blue; 20,000 is green, and so on. But for us who aren’t used to seeing that many zeroes, it can be a bit confusing especially because these zeroes don’t have a thousands separator. No period, no comma, no space. So it’s easy to think that 10,000 is 100,000. It was so easy to make that mistake. And just like any other destination, you may run into someone who is willing to take advantage when the opportunity presents itself.
It was already my fourth day when I finally got the hang of it. But maybe I’m just slow in general. LOL.
But thankfully, I never really had to pay cash that much. Most of my tours had been pre-booked, and I usually paid by card when available. Fortunately, the supermarket in front of our hotel accepted credit cards.
9. Don’t hold your phone up in the streets.
Bali is generally safe and has a relatively low crime rate, considering how busy and touristy it is. But like many other tourist hotspots, petty crimes do exist in Bali especially within developed areas like Kuta.
Don’t hold your phone, purse, or wallet out in the open when walking or standing by the road because someone on a motorbike might just snatch it away. Keep it away from other people’s reach. And don’t leave them unattended on the beach or use them to reserve a table at a food court. This is not Japan, Dubai, or Singapore.
10. Don’t get trapped in similar attractions.
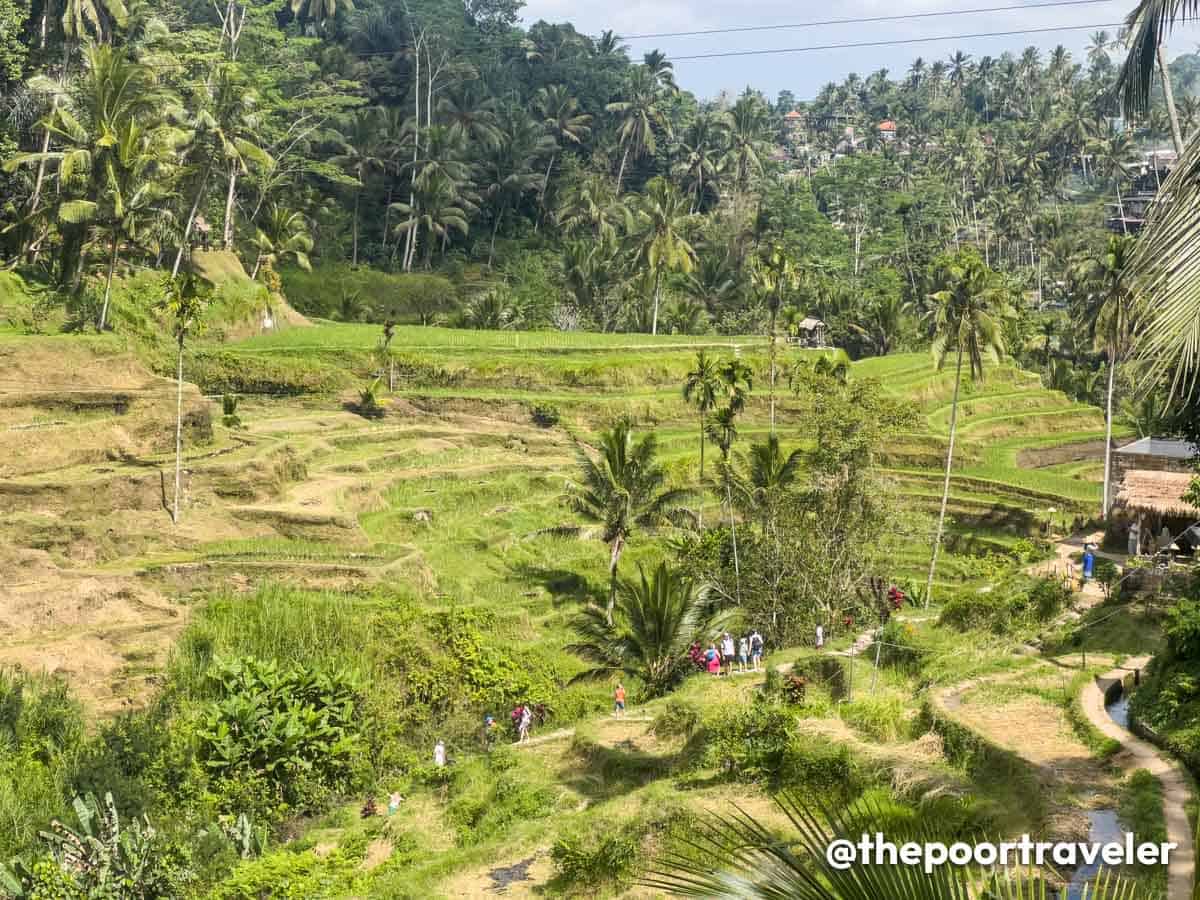
Before you book multiple day tours, check the itinerary first. Most tours in Bali have similar attractions. There’s often a stop at Tegallalang Rice Terraces, a coffee farm where you could taste a variety of coffee and tea flavors, and Instagrammable sites with giant swing and the like. And to be honest, if you’ve experienced one of each kind, you’ve experienced them all.
Tegallalang Rice Terraces
So if you’re booking more than one private tour, ask your contact or guide if you could replace some of these spots to avoid a repetitive journey and you could experience more of Bali. We’ve done it before and every guide obliged because it’s not difficult to find another point of interest along the route.
11. Don’t expect too much from Bali’s beaches.
When we think of Bali, images of its beaches instantly come to mind. Growing up, I thought of Bali as a beach paradise. But when I was there, I realized that Bali’s biggest assets are not its sandy shores, but its well-preserved culture and inland natural attractions. I was much more awed by its temples and waterfalls and cuisine than by its beaches.
The beaches here are not bad. Not at all. But just to manage your expectations, if you’ve been to other beaches in Indonesia (or Thailand or the Philippines for that matter) and you’re expecting Bali to give you the same sparkling beachscape, then you’ll be underwhelmed. That’s not to say that you shouldn’t come to Bali because you definitely should, you must! But there’s so much more to Bali than its shores.
12. Don’t disregard the queuing times at Instagram spots.
Of all the destinations I had set foot in, Bali is perhaps the most Instagram or IG-worthy. It’s just bursting with pciture-worthy spots, both natural and man-made.
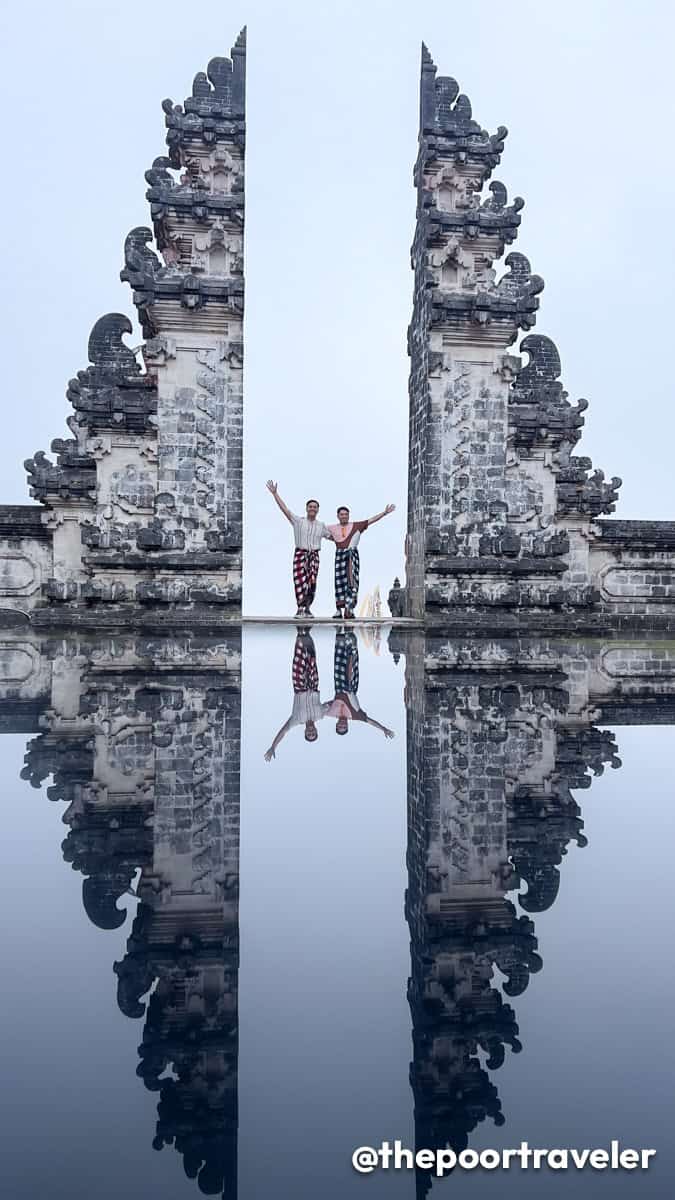
Vins and I at the Gate of Heaven at Lempuyang Temple in East Bali
By now, you probably know about the Gate of Heaven at Lempuyang Temple. And you might already be aware that the reflection created is a mirror trick and that there is no body of water on site. But that’s not the only thing you should be aware of. You see, it’s so popular that the line for this photo can get crazy long. We’re talking about up to three hours of waiting time for just a minute of photo session.
On our last trip, we arrived in the afternoon — just in time for the sunset — and we waited two and a half hours! They say that to avoid waiting times, go in the early morning. My teammate Pycan did just that, in time for sunrise. They were second in line.
But even if your timing is right, don’t expect everything to be picture perfect. Most photos you see were either taken under the best conditions or enhanced digitally. Often, the skies don’t cooperate. It’s more likely that you’ll get a plain white backdrop because the mountain is hiding behind the clouds or fog.
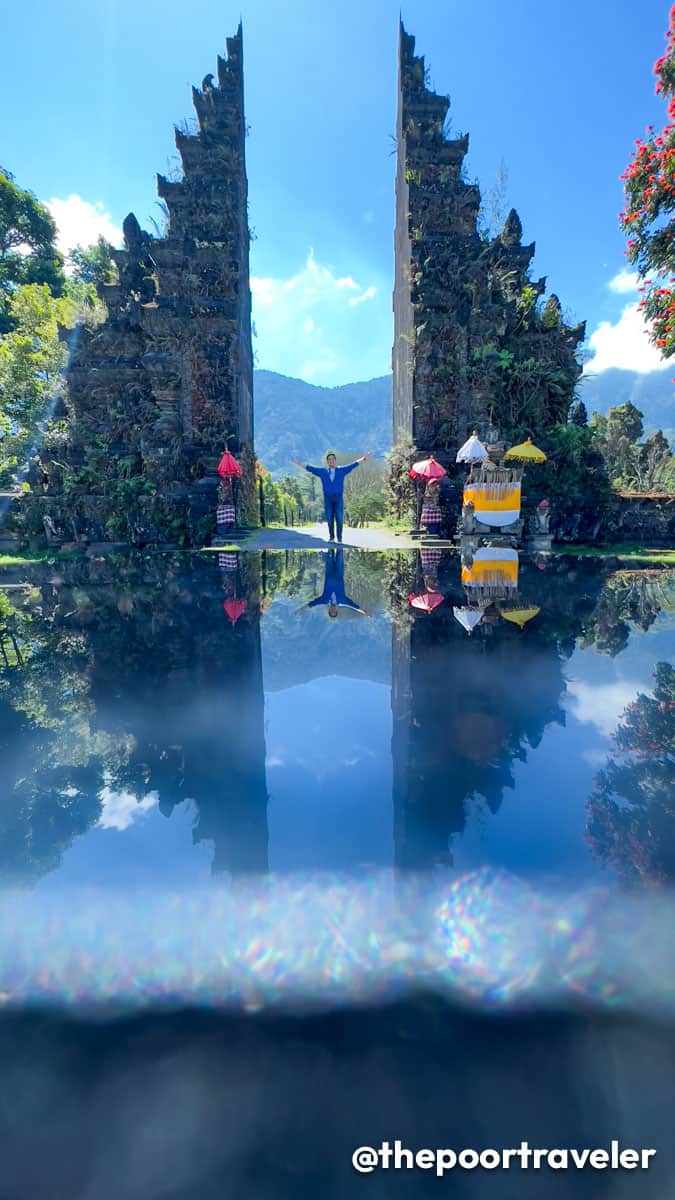
Posing at the Handara Gate in North Bali
A look-alike can be found in the north — the Handara Gate. This also has the same effect. It’s not as popular as the Gate of Heaven, but you could still end up waiting 40 minutes to an hour for your turn.
Personally, I don’t mind the waiting times because I know how to keep myself busy. I usually spend the time chatting with our guide and other locals. But if you’re not really into IG-worthy spots and you want to maximize your stay, you might just be wasting a lot of time queuing. There are other picturesque but less crowded attractions elsewhere in the island. But if you really want those shots you see on the internet, go ahead. You’re already in Bali, might as well experience the full package, queues and all.
13. Don’t forget to bring mosquito repellent.
Mosquitos are common in Bali, so it’s best to be prepared. We didn’t think of it until we checked in to our hotel, which provided a mosquito repellent spray, free to use. And we realized some places and some months are more prone than others. But to be on the safe side, just bring one with you when touring.
14. Don’t disrespect the local culture.
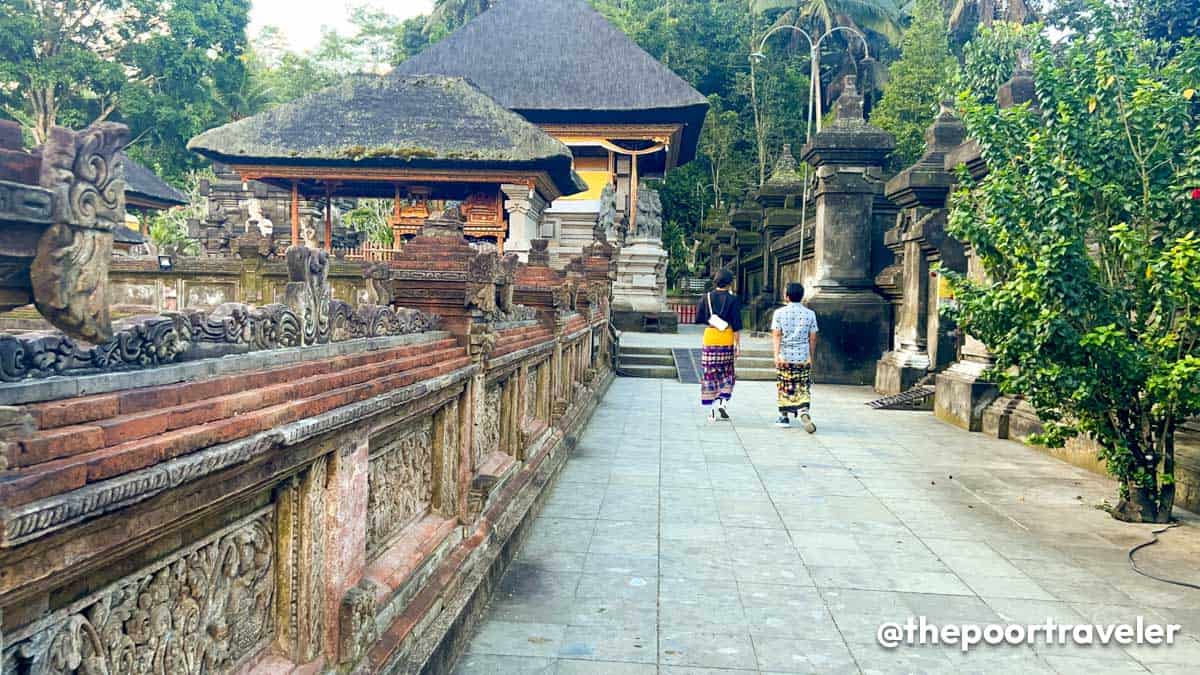
If you are into temple-hopping, know that you must dress modestly within the vicinity. Some temples provide sarongs that you may borrow, but to be safe, just wear something that covers your shoulders, upper arms, and legs. This applies to men and women. If you’re bleeding — say, you have an open wound or, for women, if currently menstruating, you should not enter the temples.
Visitors, regardless of gender, are urged to dress modestly within temples.
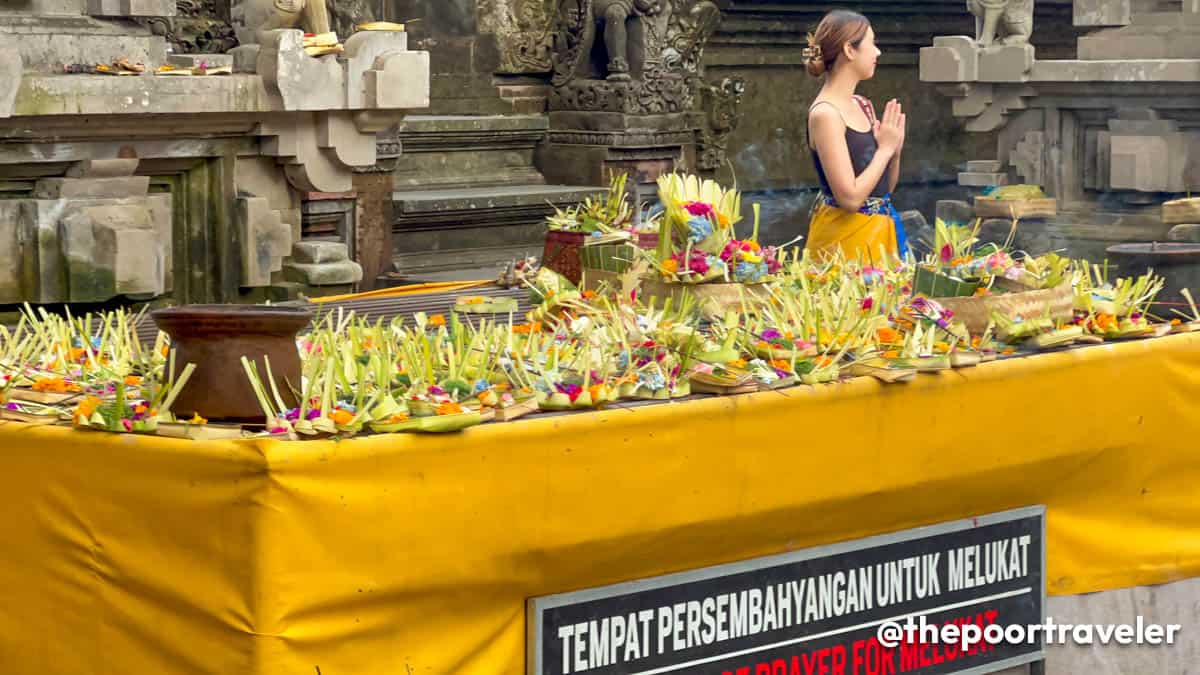
Even when there’s a lot of tourism activity in the island, Bali remains religious, conservative, and traditional. It’ll become apparent to you on your first day, just by taking a short walk.
In front of the houses and on the sidewalk, you’ll see small palm trays with flowers and food. These are canang sari (chanang sari), which are daily offerings to the Supreme God of Indonesian Hinduism (Sang Hyang Widhi Wasa) as a symbol of gratitude. So, watch your step and make sure you don’t walk on them.
Canang sari, which are daily offerings to Sang Hyang Widhi Wasa
Also, when handing out something to a local, always use your right hand. Your left hand is considered dirty and is for toilet duties. And never touch anyone’s head, which is considered a sacred part of the body.
15. Don’t do illegal drugs.
I know it sounds obvious, but it is very important that you know this.
First of all, don’t do drugs anywhere you travel to, but especially here in Bali because Indonesia has some of the strictest laws when it comes to drugs.
Possession is punishable by imprisonment for 4 to 12 years or, if the amount is big enough, you can be imprisoned for life, plus fines of up to 8 billion rupiah. For trafficking, the death penalty may be imposed.
That’s not the kind of adventure you want to experience abroad.
Vins and I recently traveled to New Zealand. And yes, New Zealand was a dream. Like, ridiculously beautiful. One of those places where you start questioning if it’s even real. But as stunning as it is, traveling around came with a few surprises, missteps, and “Wait, WHAT?” moments we didn’t exactly see coming. Now that we’re back (a little sunburned, slightly broke, but very much in love with the country), we thought we’d round up the travel mistakes we personally made or almost made, so you don’t have to.
From underestimating drive times to forgetting just how intense that Kiwi sun really is, consider this our humble little PSA from one set of travelers to another. Because as magical as New Zealand is and how friendly Kiwis are, New Zealand can also humble a traveler real quick, especially if it’s your first time.
So before you pack your bags and say “Kia ora!” to the adventure of a lifetime, continue watching this video featuring our list of travel mistakes to avoid.
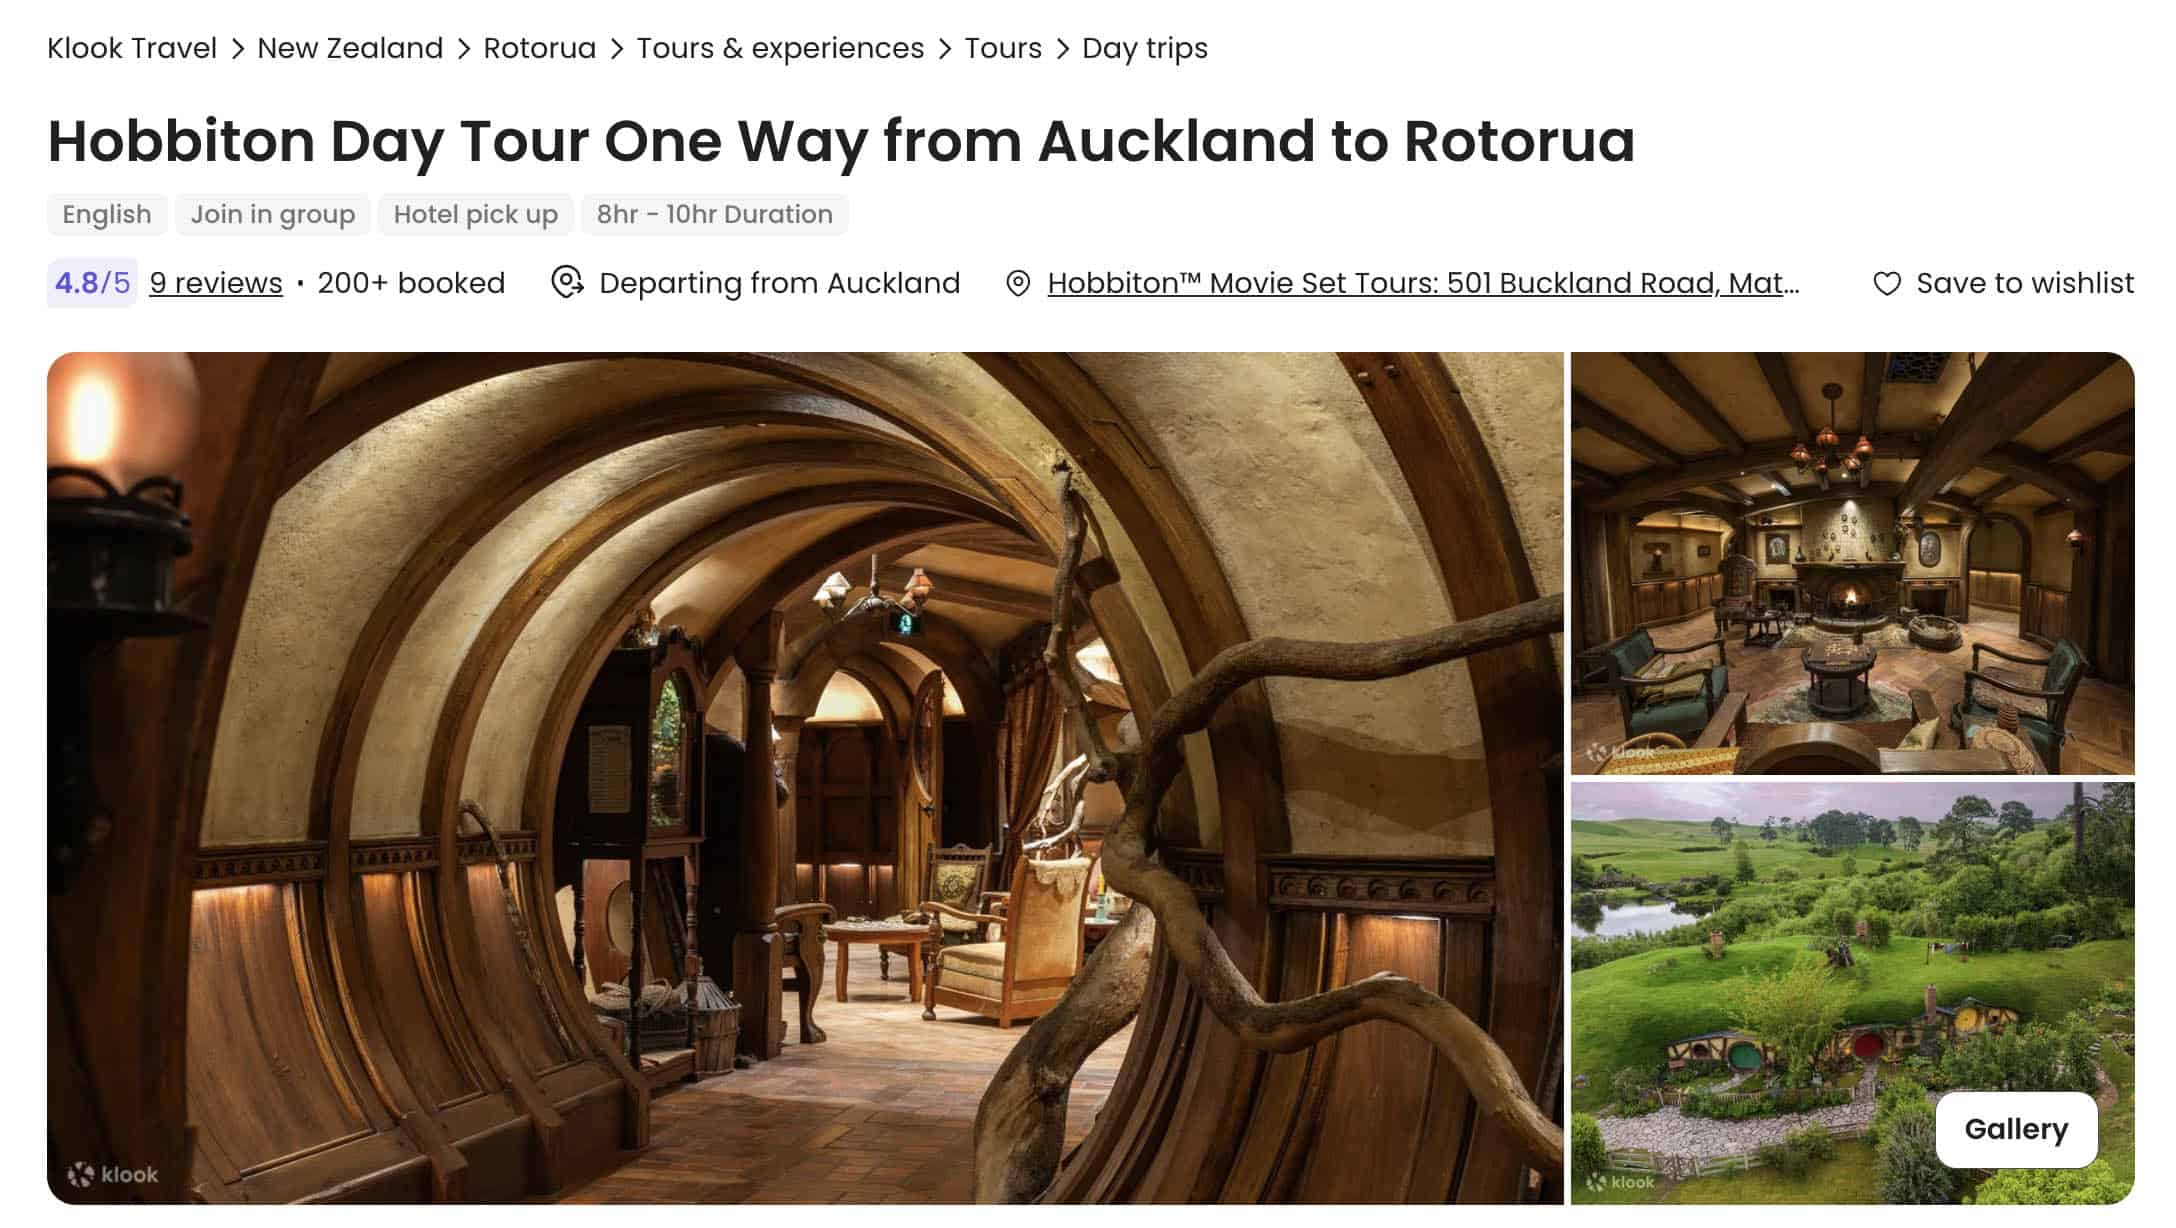
We almost didn’t make it to Hobbiton. And it would’ve been such a shame because it’s one of the biggest attractions that we were looking forward to before the trip, and we almost failed to grab tickets.
One thing you should know about Hobbiton is that these days, you can only explore it with a guide, so you must book a Hobbiton Movie Set Tour. There are many ways to do it:
If you prefer to drive or take a public bus on your own, you can just purchase a ticket.
You can join a day tour from Auckland or Rotorua, which already includes transfers. Most tours depart from the Shire’s Rest, a café that serves as the gateway to Hobbiton.
When we tried to book, tickets were sold out! This was one month before our target date. We knew it was popular, but we were waiting for everyone in the group to be granted a visa before we book.
Thankfully, there are a few tours departing from Matamata iSite. We were a group of five, and by sheer luck, we were able to get the LAST 5 TICKETS! Talk about meant to be. Everything went well in the end.
But yes, whether you’re joining a tour or buying a ticket only, best to secure it in advance.
If you’re required to secure a visa prior to arrival in New Zealand, like us, I have good news and bad news. The good news is, it’s actually pretty easy to apply for a visitor visa. The list of requirements isn’t too long and the whole process (100% of it) is done online.
The bad news is, just because it’s easy to apply doesn’t mean it’s easy to be granted a visa. This is not just a formality or simple e-Visas given by other less strict countries; they really do evaluate applications meticulously, so you can’t just wing it.
For example, when you look at the list of supporting documents, only three are tagged as REQUIRED: passport, photo, and itinerary. You can technically submit an application with just those three attachments. But that doesn’t mean you’ll get approved. Of course, it is recommended that you upload other documents that visa officers can use to assess your application especially evidence of genuine intent or rootedness, and evidence of funds if you declare you’re shouldering the cost of the trip yourself.
It is important that you paint a full picture of your background and your plans in New Zealand, and prove that you intend to leave the country and not overstay.
I know people who have been denied a visa, so take your application seriously.
Speaking of denied…
3. Not reapplying when rejected.
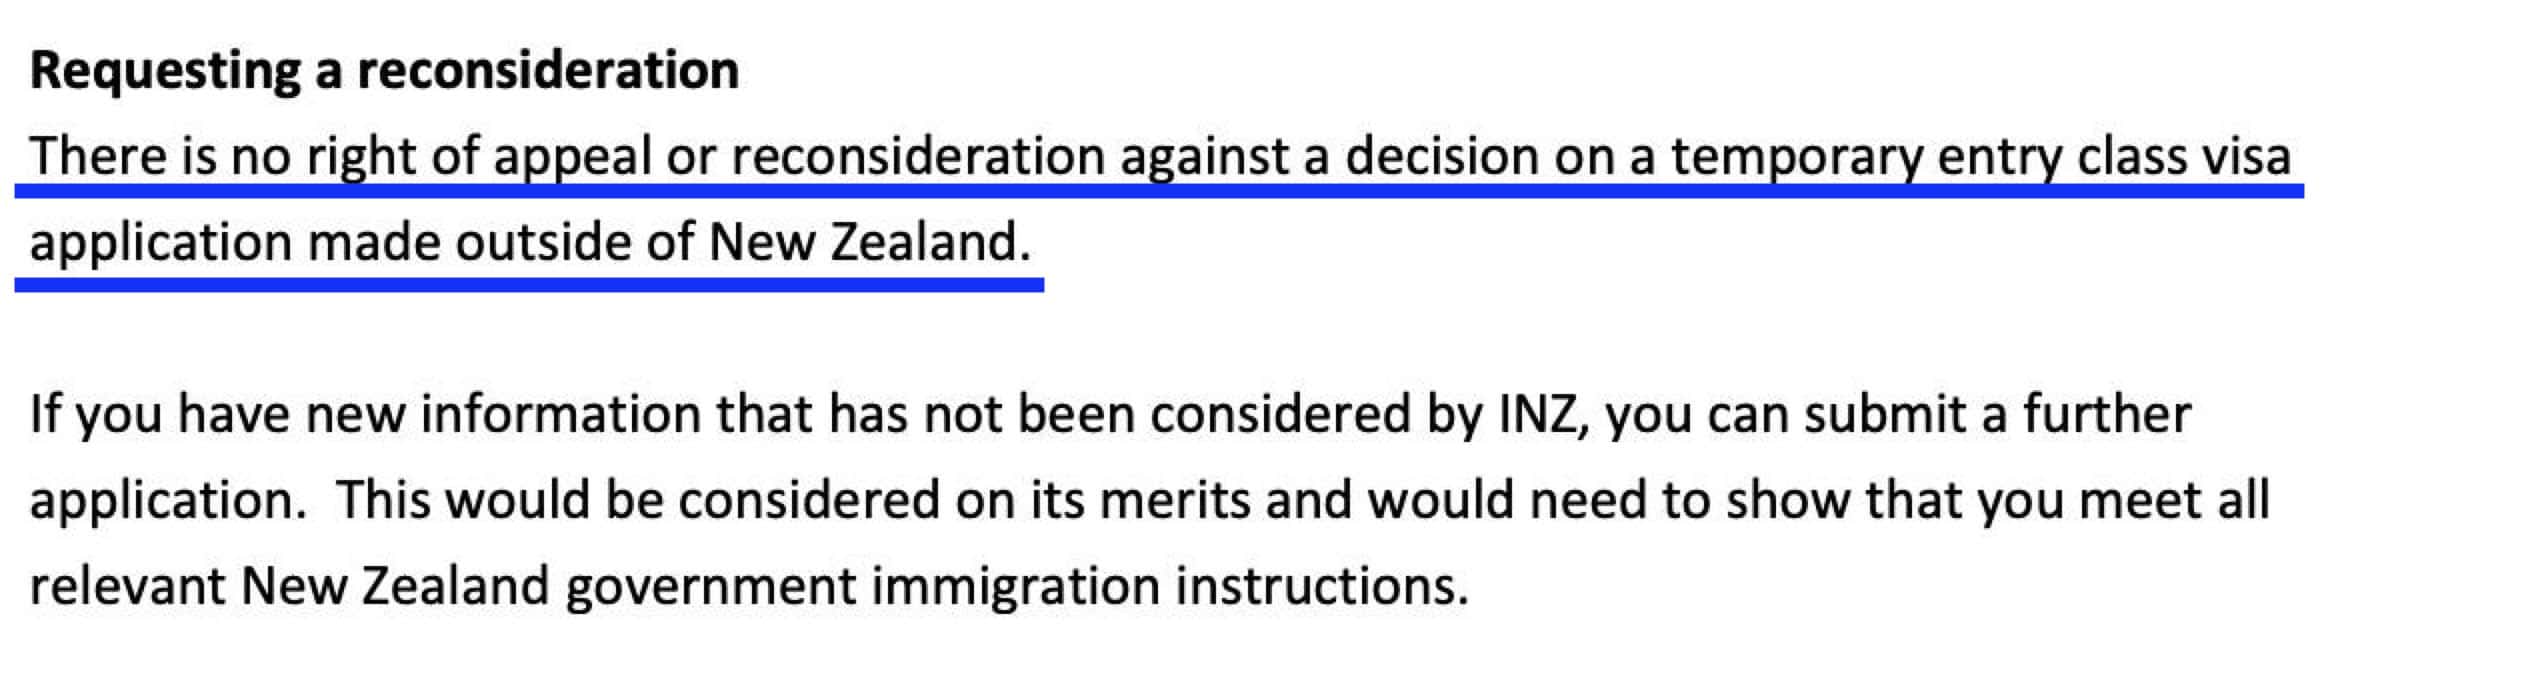
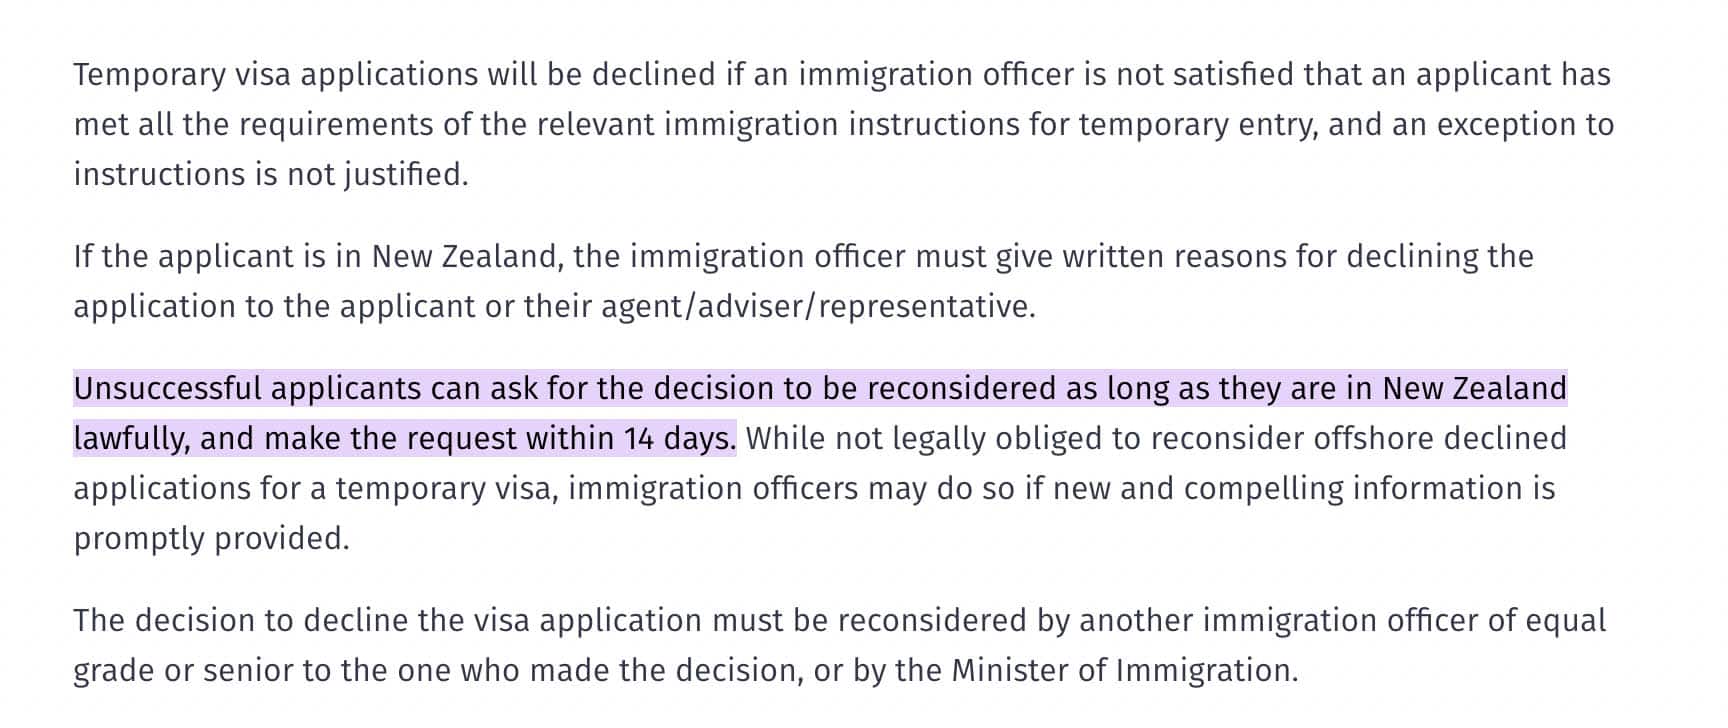
Let’s say your application is declined and you are refused a visa. What now? Can you appeal or ask for reconsideration?
NO, if you applied outside New Zealand and I’m assuming most of you reading this are not based in NZ. Here’s an excerpt from a refusal letter that my friend received.
Here’s an excerpt from the Refusal Letter that a friend received when she was denied a New Zealand visa.
But that doesn’t mean there’s nothing else you can do. What you can do is reapply. This means you’ll need to start a new application and pay another visa fee.
But before you reapply, make sure you have new supporting documents to add that could address the reasons for refusal. If you’ll be submitting the exact same pile of documents, you might just be wasting another NZD 100.
If you’re currently in New Zealand, YES, you can appeal as long as you make the request within 14 days.
This screenshot is from the official New Zealand Immigration website
But please note that what I share should NOT be taken as official Immigration advice. Think of me as just a friend sharing my experience. Check out the official New Zealand website or consult an immigration advisor for official advice or assistance.
4. Failing to Declare Risk Items Upon Entry
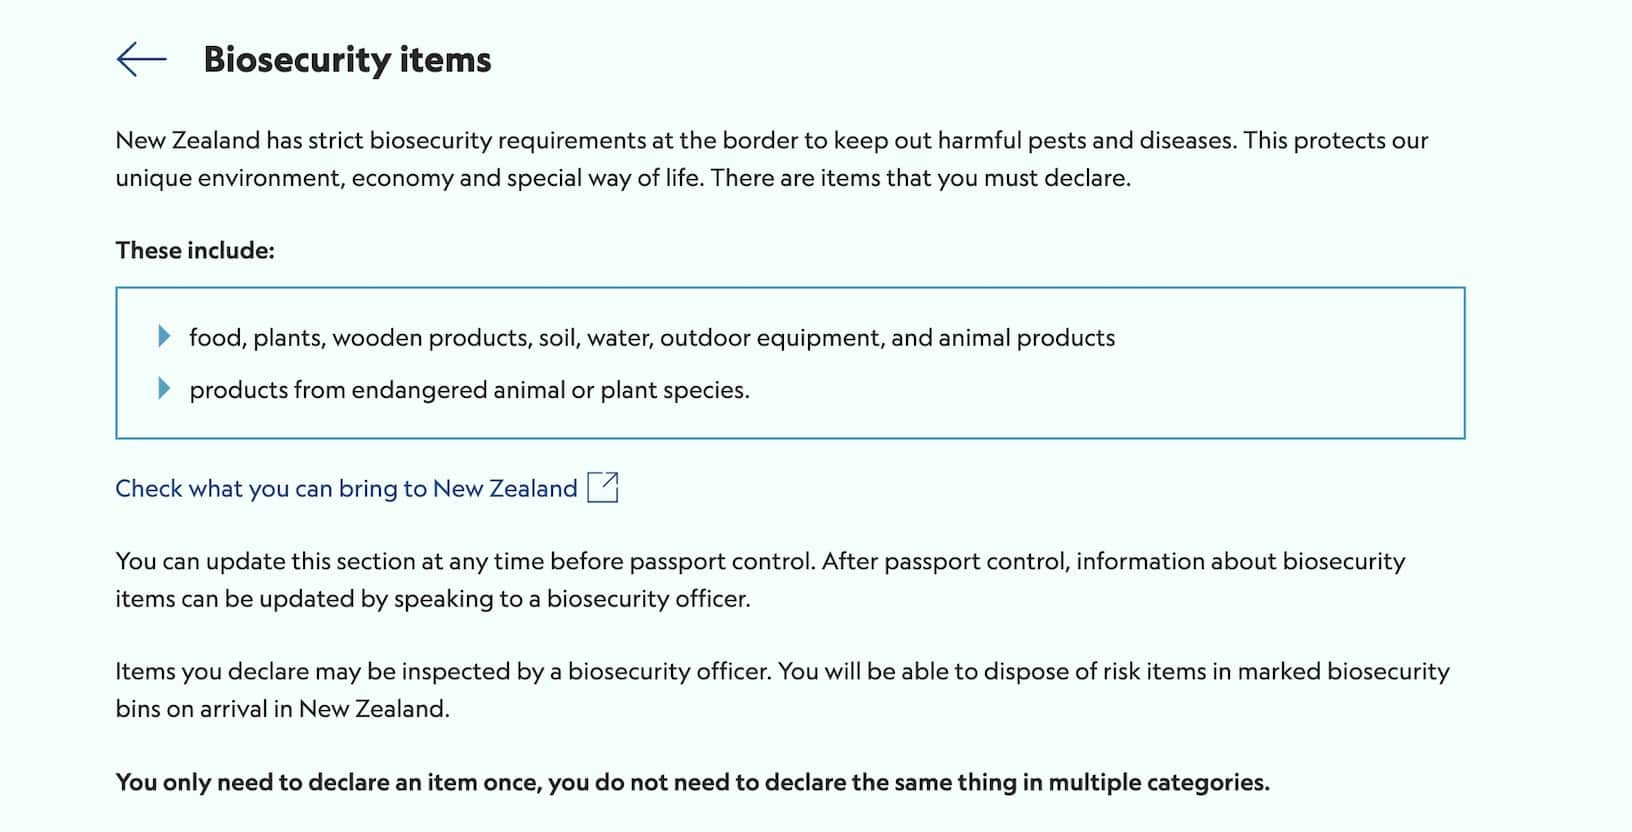
Agriculture and tourism are two of New Zealand’s biggest industries, and the government does everything they can to protect the environment and ensure biosecurity. That’s why they are very strict when it comes to what enters their border.
It is important that you’re familiar with items that are allowed, restricted, and downright prohibited, and follow their policies so you won’t run into any problem at the airport. You must also be aware of the items that you must declare.
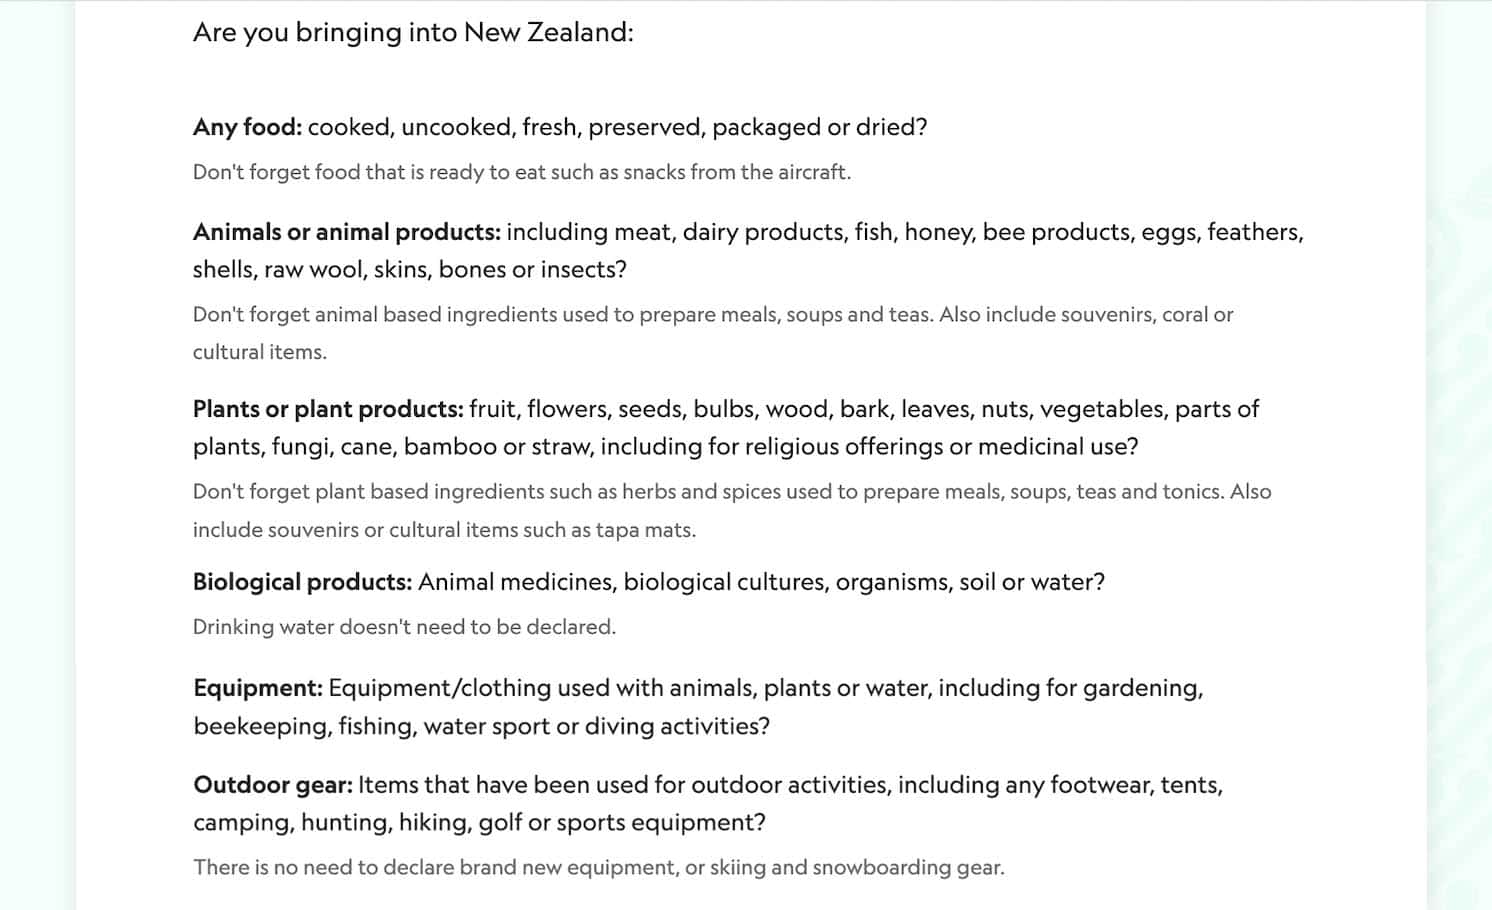
Before your trip to New Zealand, you will be required to accomplish the New Zealand Traveller Declaration Form, which has two sections specifically about what you’re bringing into the country. The first is BIOSECURITY, and you have to declare if you carry in your hand luggage or check-in luggage items like:
Risk Items
Screenshot of a page on the official website
Any food: cooked, uncooked, fresh, preserved, packaged or dried, including chocolate, candies, potato chips, crackers, biscuits, cookies, instant noodles, coffee, tea bags, soft drinks and even snacks served inside the plane.
Animals or animal products: including meat, dairy products, fish, honey, bee products, eggs, feathers, shells, raw wool, skins, bones or insects
Plants or plant products: fruit, flowers, seeds, bulbs, wood, bark, leaves, nuts, vegetables, parts of plants, fungi, cane, bamboo or straw, including for religious offerings or medicinal use
Biological products: Animal medicines, biological cultures, organisms, soil or water
Equipment: Equipment/clothing used with animals, plants or water, including for gardening, beekeeping, fishing, water sport or diving activities?
Outdoor gear: Items that have been used for outdoor activities, including any footwear, tents, camping, hunting, hiking, golf or sports equipment
I was carrying chocolates and other food products, so I just declared them.
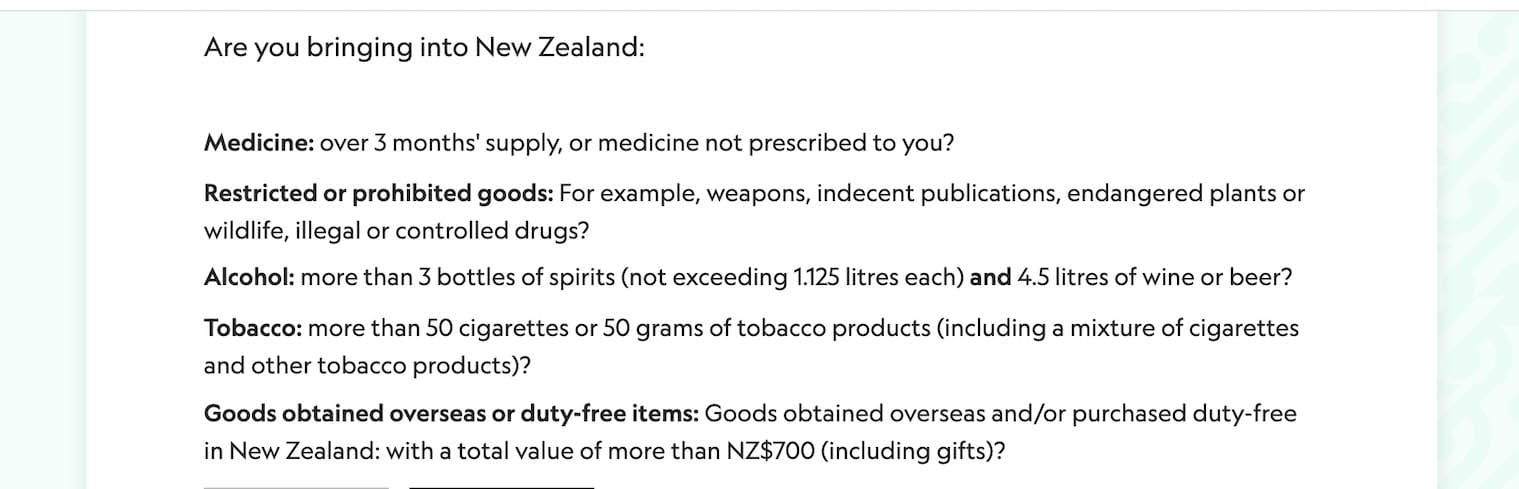
Restricted Items
You’ll also be asked if you’re carrying more than the allowed amount of restricted items like medicine and alcohol.
At the airport, the border officers just asked what items I declared and directed me to the right lane. It was pretty smooth. I’m guessing because it’s just chocolates and snacks.
So if it’s meant to be declared, declare them. You can get fined if you fail to do so.
5. Underestimating New Zealand’s size and distances.
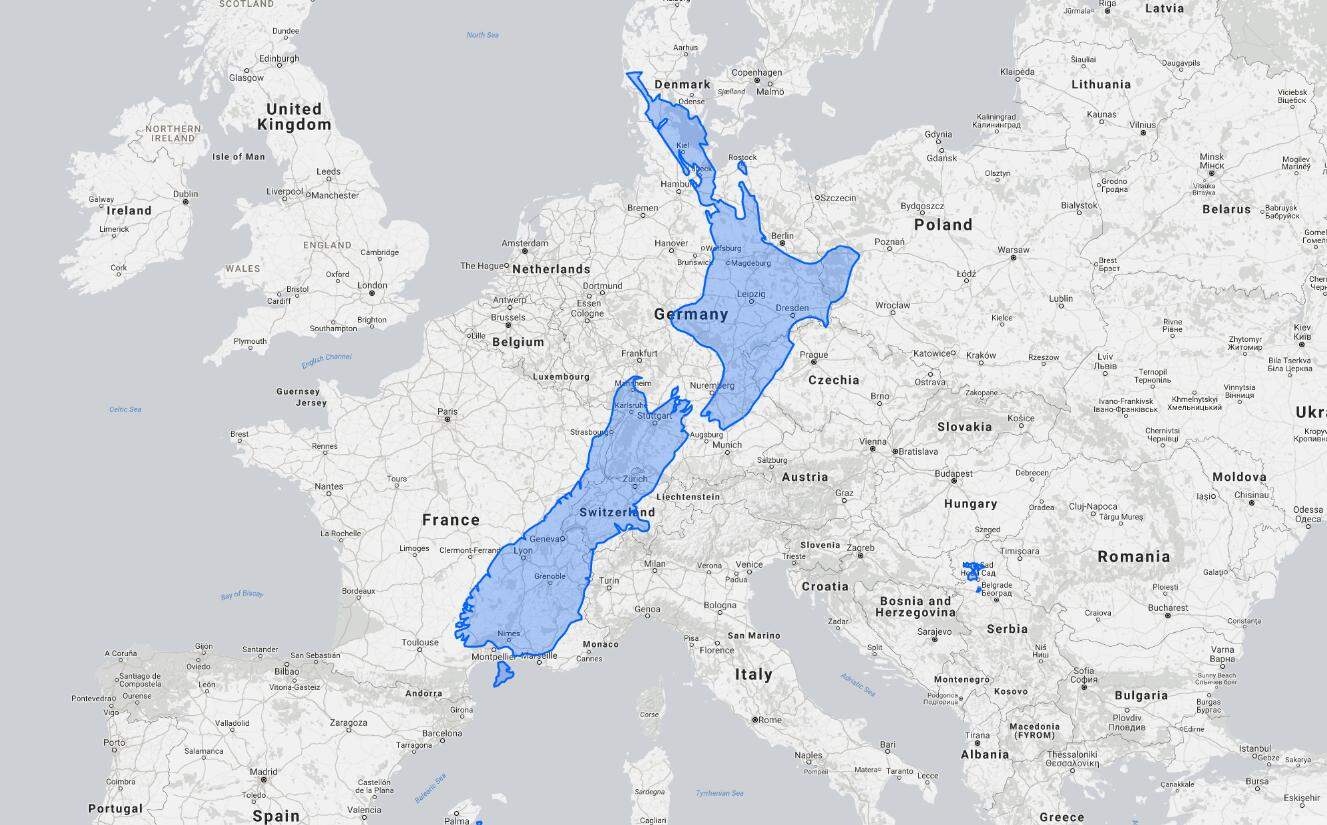
When you’re looking at a map, it’s easy to see New Zealand as a group of small islands in the far corner of the Pacific, especially when the ginormous Australia is in the same frame. It just looks snack-size compared to its neighbor, which is a full continent, but don’t assume New Zealand is small. New Zealand’s land area is bigger than the UK and just a bit smaller than the Philippines. If you superimpose it on Europe, you’ll find that it stretches from Denmark all the way to the South of France.
So no, it will be impractical to assume it only takes a few days to explore or that you can see it all in a week. Same goes for distances. Just because Milford Sound appears to be sitting pretty next to Queenstown doesn’t mean it only takes a quick drive. To get there from Queenstown, the route goes around the mountains and takes almost four hours, excluding stops and trust me, you will make some stops because the route is just so scenic.
Waitomo Caves, which is often a favorite destination from Rotorua or Auckland, is actually 2 to 2 and a half hours away. Even Hobbiton is not “just outside Auckland”. It’s 2 hours from the city center, too.
This is why it’s important to build a strategic and solid itinerary, especially if you’re driving.
6. Driving on the Wrong Side of the Road
Driving in a foreign country is often unnerving. But while in theory, driving in New Zealand should be easy because most roads are paved and there are plenty of signs everywhere, there are a few things you need to remember before you decide to take the wheel.
First, New Zealand drives on the left side of the road. And if you’re used to driving on the right like where I’m from, it’s pretty disorienting. It takes some getting used to. It’s not just the position of the wheel inside the vehicle or your position on the road. You’ll have to unlearn certain things especially when taking a turn at intersections.
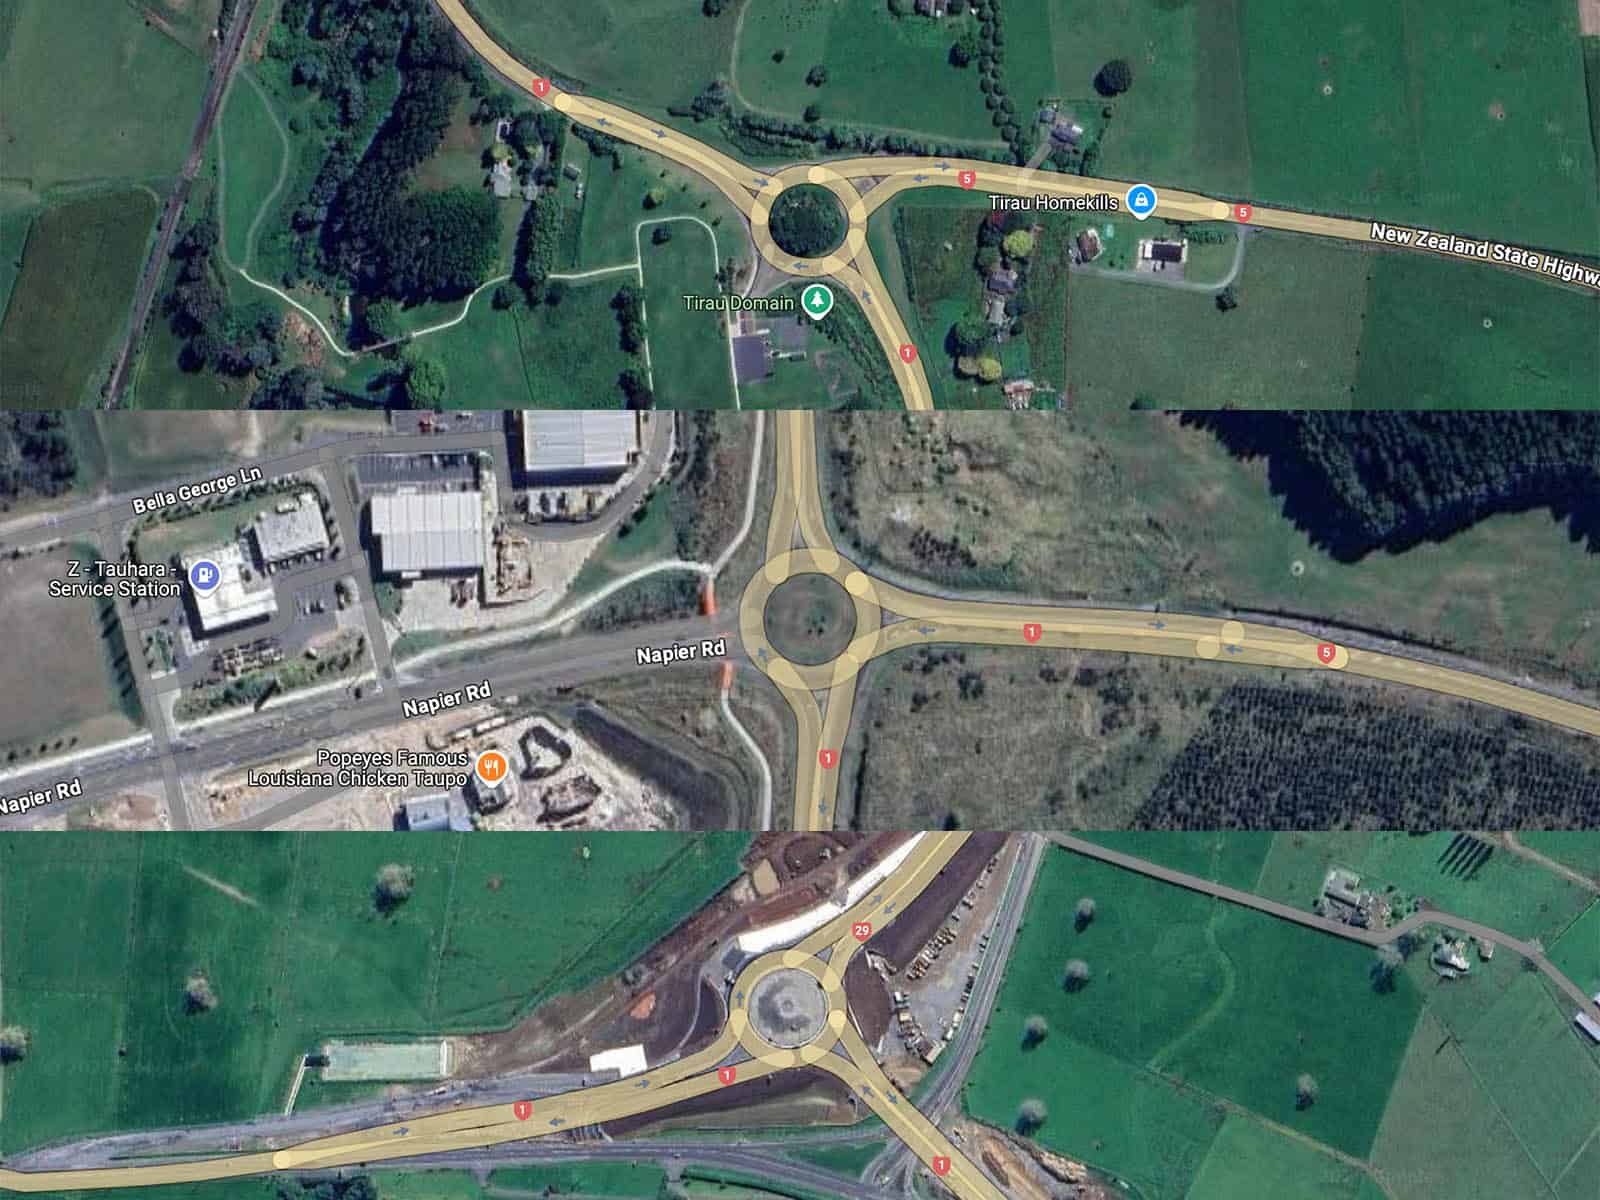
I also noticed that New Zealand’s roads deeper into the countryside are usually two-lane and narrow, but vehicles move fast here. And instead of stoplights, there are a lot of roundabouts, which is great in minimizing traffic jams.
But know that when you’re using Waze or Google Maps, you’ll be counting exits a lot. It’s not difficult, but it just takes some getting used to.
It’s best to have a navigator or a co-pilot riding shotgun so you can focus on the driving and there is someone to remind you in case you get confused.
Also, gas stations or petrol stations are few and far between especially when driving between cities, so when you see one, grab the chance and fill up because the next one might be many, many miles away.
7. Thinking It’s Difficult to Explore for Non-Drivers
When we started posting about our New Zealand trip on Instagram, we received a lot of questions about whether it is possible to explore the country even if you don’t know how to drive. And the answer is YES.
They say that the best way to explore New Zealand is to rent a vehicle and drive. And I agree. It’s also cost-efficient if you’re a group. But not everyone is able or willing to drive. For that, you can take public transportation like Intercity Buses. But make sure you sync your itinerary with the available bus journeys because for some routes, the options are limited.
Some non-drivers would take the bus to another city and then take a day tour of another attraction. Example, a common practice is to stay in Auckland then go on a day trip of Hobbiton and then return to Auckland. Then the next day, take the bus to Rotorua.
But there are one-way tours available. For instance, there is an Auckland-Hobbiton-Rotorua one-way tour. This way, once you’re done with Auckland, this tour can pick you up in the city, make a stop in Hobbiton so you could explore and then after, drop you off at your next hotel in Rotorua. It’s like a tour and transfer in one. And yes, you can bring your luggage with you.
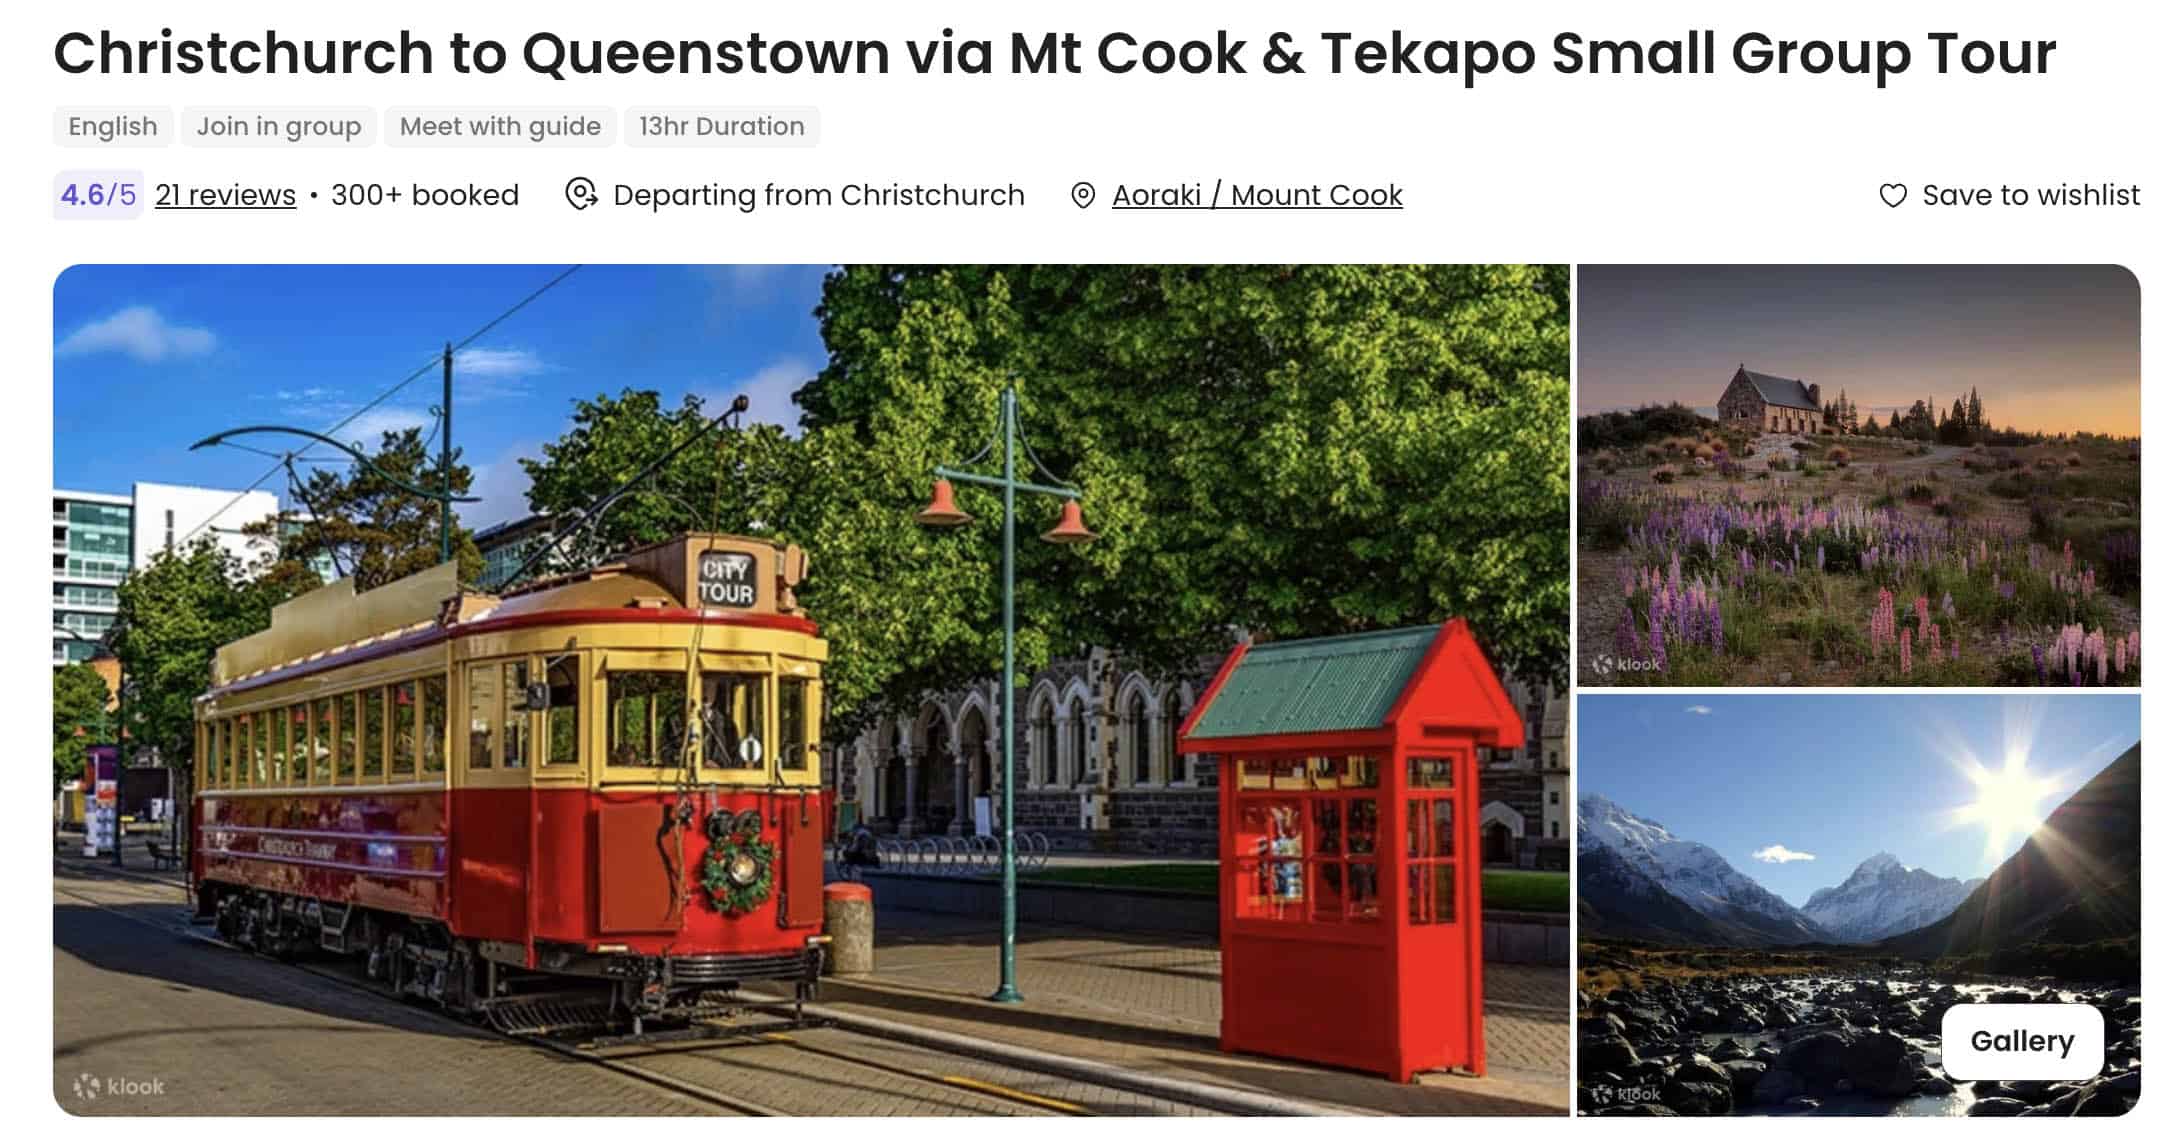
We got to try the Christchurch-Queenstown one-way tour. The shuttle picked us up at our hotel in Christchurch along with our bags. And along the way, we stopped at various tourist spots like Lake Tekapo and Hooker Valley in the shadows of Mt. Cook before terminating in Queenstown.
It’s a good option for non-drivers and will end up less costly than taking a roundtrip tour one day and then boarding an intercity bus separately.
Whether you’re booking tours or hotels, redeem our exclusive discount voucher by visiting www.thepoortraveler.net/klook or use our promo codes TPTKLOOK5 for up to P500 OFF or THEPOORTRAVELERKLOOK for up to P300 OFF. These codes may change in the future, so check the description or pinned comment for the updated codes and links.
8. Skipping sunscreen.
New Zealand’s climate is pretty mild, and it can still get cool even in summer months, so you might think “Sunscreen? Nah, I’m good.” And by lunchtime? Boom—your face is redder than a blushing teenager. This happened to me. Well, sort of. I apply sunscreen before leaving the hotel but I usually forget to reapply.
The chilly atmosphere can lull you into a false sense of safety. But the thing is: New Zealand has one of the highest UV levels on the planet especially under the crisp, clear summer skies.
So don’t forget to bring sunscreen with plenty of SPF and actually use it. And pack a hat, while you’re at it.
9. Missing the operating hours.
If you’re used to staying out until late night, know that in many destinations in New Zealand, some establishments close much earlier, especially in smaller towns. For example, in Rotorua and even in Queenstown, most cafes tend to close at around 3 or 4pm. Some as early as 2pm. Starbucks in Rotorua closes at 5pm most days, and Starbucks Queenstown at 6pm. That’s not to say that ALL cafes are like that. You can still find some that remain open at night, but it will be harder. But don’t worry, bars and malls tend to be open much later than cafes.
This isn’t unique to New Zealand, though. We also noticed this in some cities in Australia. Could be something to do with wages and work-life balance.
Some attractions also close early. Te Puia in Rotorua is only open until 4pm and Wai-o-Tapu until 4:30pm, understandably. Christchurch Gondola only operates until 5pm and the last ride down is at 5:30PM.
We also noticed that car rental companies close early, with the exception of airport branches. Europcar in Auckland city center closes at 4pm on weekdays, and 12 noon on weekends. Some branches are closed on Sundays too. So make sure to check operating hours when building your itinerary.
10. Paying for water.
Tap water in most places in New Zealand is safe to drink. At least in all the destinations we visited. So you don’t really need to spend money on bottled water at the convenience store or supermarket. It’s not cheap. If you have a refillable water bottle, you can just fill it up at your hotel or when you can. It’s just a matter of taste, sometimes.
If you’re joining full day tours like Milford Sound or Lake Tekapo and Hookers Valley, there’s a big chance they will be providing a bottle of water too.
11. Underestimating Prices.
New Zealand is expensive. My local friends always tell me that the cost of living here is pretty high. And so is the cost of travel.
The accommodation rates alone could eat up a big chunk of your budget. There’s a reason Auckland is the only stop where we stayed at a proper full-service hotel. In Rotorua, Christchurch and Queenstown, we spent our nights at a hostel primarily because of the cost.
This is how much we paid for a private room for 2 per night.
Just look at how much we paid per night for our Queenstown room. This was already the cheapest centrally-located properties we found at the time — the cheapest – and this room does not have its own toilet and bath. We still had a great stay, though. We actually loved all these hostels.
We’re probably gonna create a separate review of all these lodging options, so if you don’t want to miss that, make sure to subscribe to this channel, ring the bell beside it and select ALL so you’re always updated.
For a meal, prepare to shell out:
Fast food: NZD 15-20 (USD9-12, PHP506-675)
Full-service restaurant: NZD 25-40 (USD 15-24, PHP 845-1350) for a main course, but higher for more premium dishes like steak or ribs
But one thing I noticed is that a serving is usually huge, even when they say it’s good for just one person. Even their burgers here are ginormous. Since we were a group, we usually just share the food and split the bill, although some restaurants have a one meal per person policy.
One of the reasons we like staying at hostels is they usually have kitchens where you can prepare your own food. It’s especially useful for long-term travelers. Eating out every day may not be sustainable. If budgeting gets a little tight, just buy something at a supermarket or convenience store and eat at the hostel.
12. Not staying long enough.
This is one thing we’re guilty of. One of the first things we said when we got home from our New Zealand trip was, “That was quick.” We spent 10 days thinking it was long enough, but we really felt like we should have extended our trip. And we would have if we had more moolah to spend.
New Zealand isn’t really a stopover kind of destination. It’s the main event. The headliner. The Beyonce of your itinerary. And much like Beyonce, she deserves your time and money. Hahaha.
The best destinations in New Zealand are spread out, so the drives are long. They’re worth it, but they’re long. And there’s a lot to do in every destination. Queenstown alone can oh-so-easily fill a week-long itinerary.
We also regretted not spending more days in Christchurch. We just didn’t expect it to be so full of charm. And because we wanted to see a lot, we tumbled into the pitfall of treating our trip as a list of sights to tick. But when we were there, we found New Zealand to be a place to slow down, linger, and absorb the surroundings.
So give yourself at least two weeks if you want to explore both islands without spiraling into an Amazing Race episode. More if you can swing it.
If you have questions, sound off in the comments section below or tag us on your Instagram stories and X (Twitter) posts. You can also follow us there and on Tiktok.
That’s all for now, remember, plan smart, travel safe, and make every trip WORTH IT!
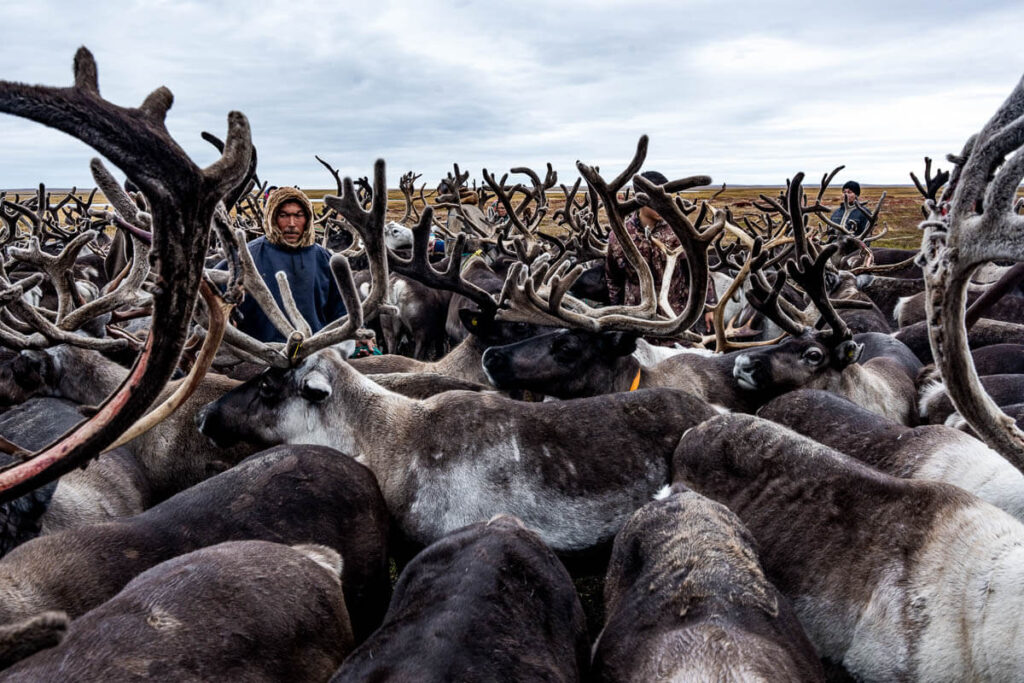
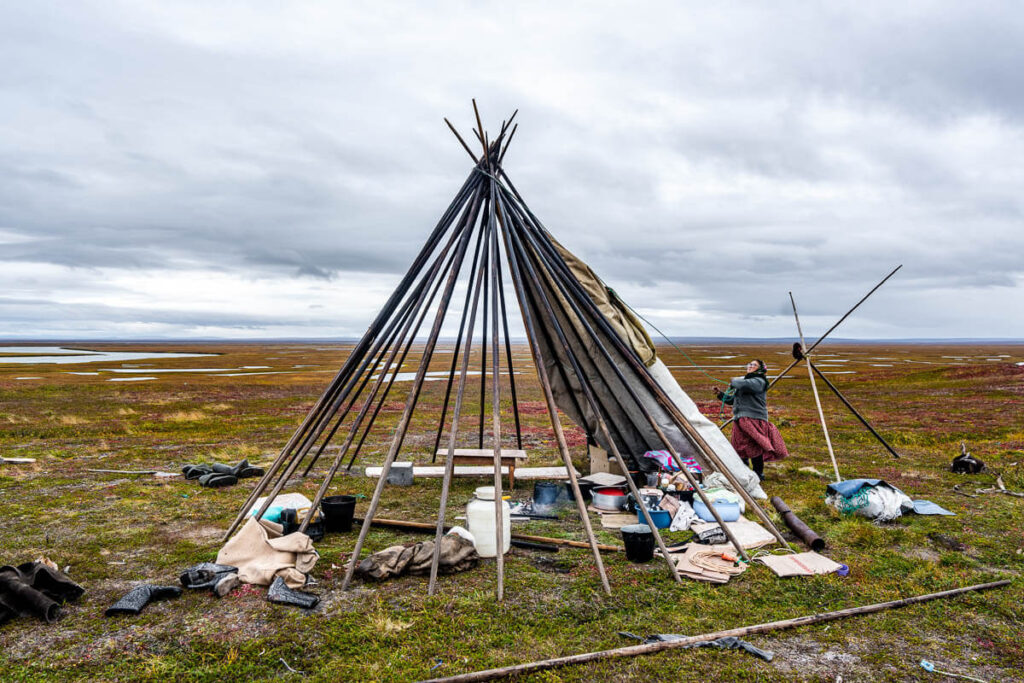
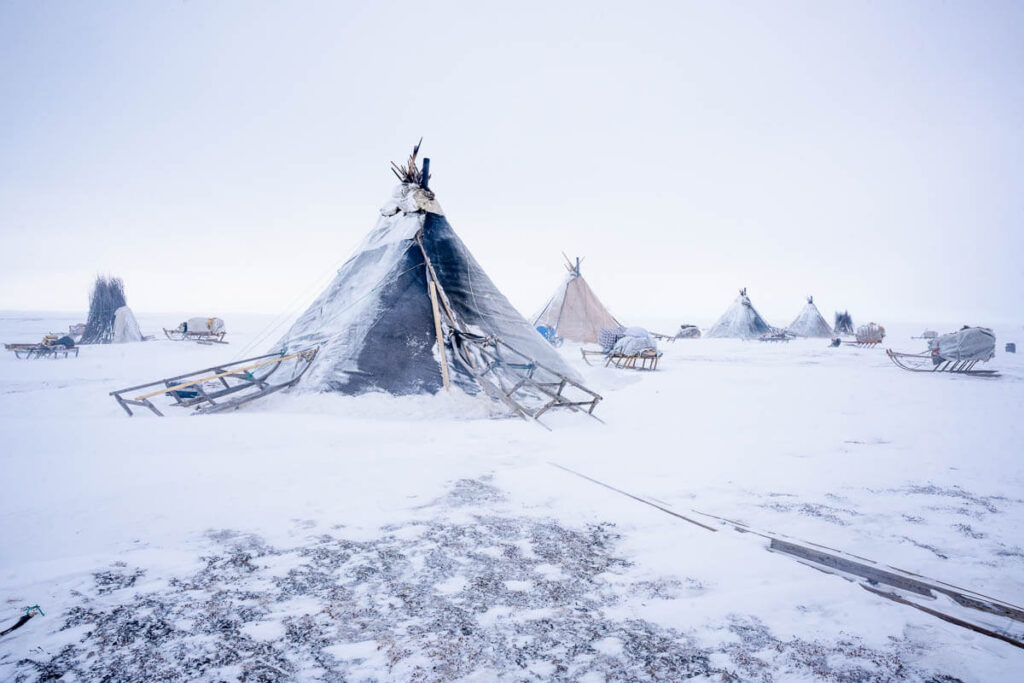
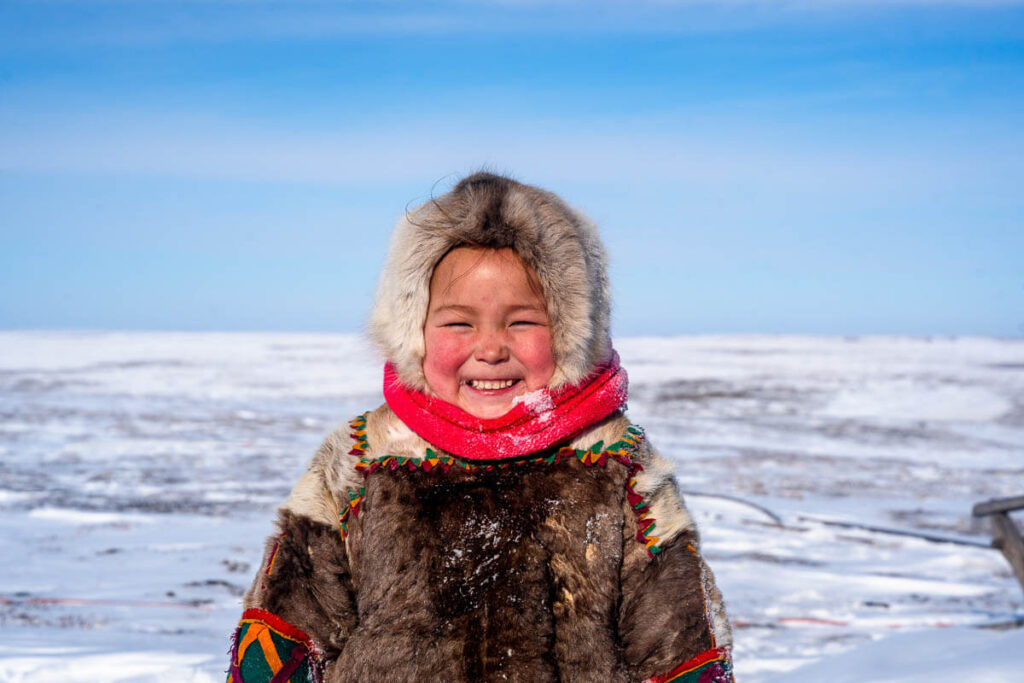
The Nenets are an Indigenous people of Arctic Russia, renowned for their nomadic lifestyle and deep connection to reindeer herding in the remote, unforgiving tundra of northern Siberia, in a region named Yamalia.
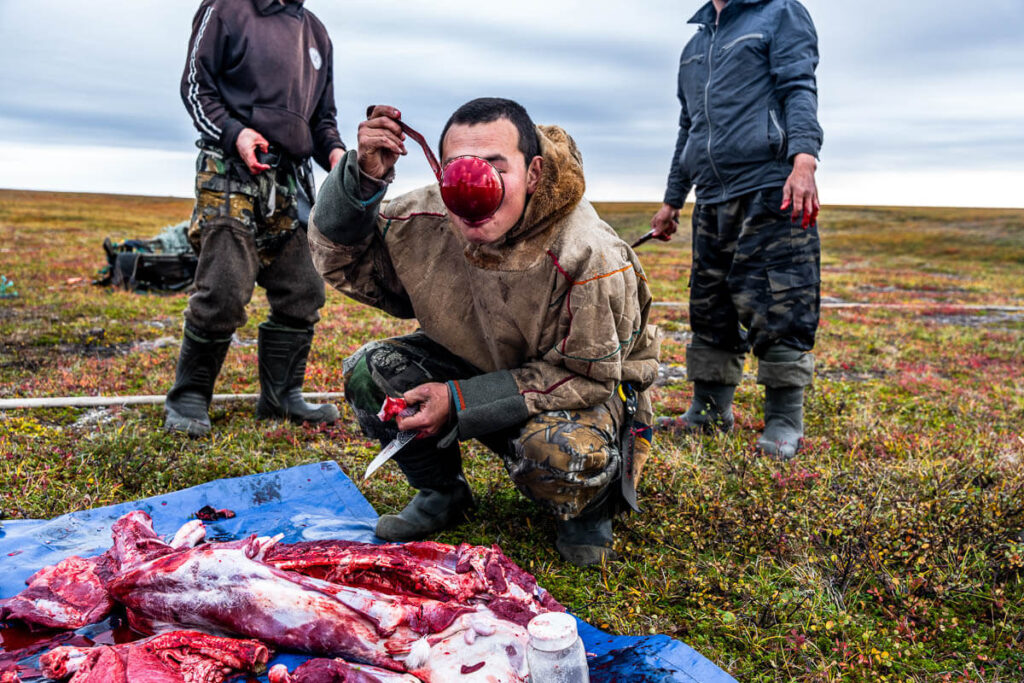
Despite their isolation, it is now possible for travelers to visit Nenets camps, a rare opportunity to meet a truly nomadic culture, while witnessing one of the rawest travel experiences.
When it’s best to visit the Nenets: winter or summer?
Travelers interested in this particular part of Russia are often not sure about which season is best for going to Yamalia.
The truth is that both seasons offer incredible experiences, but they’re dramatically different. Here are 30 photos that will help you decide which season is best to travel with us to Yamalia.
Remember that we have the following shceuded for Nenets:
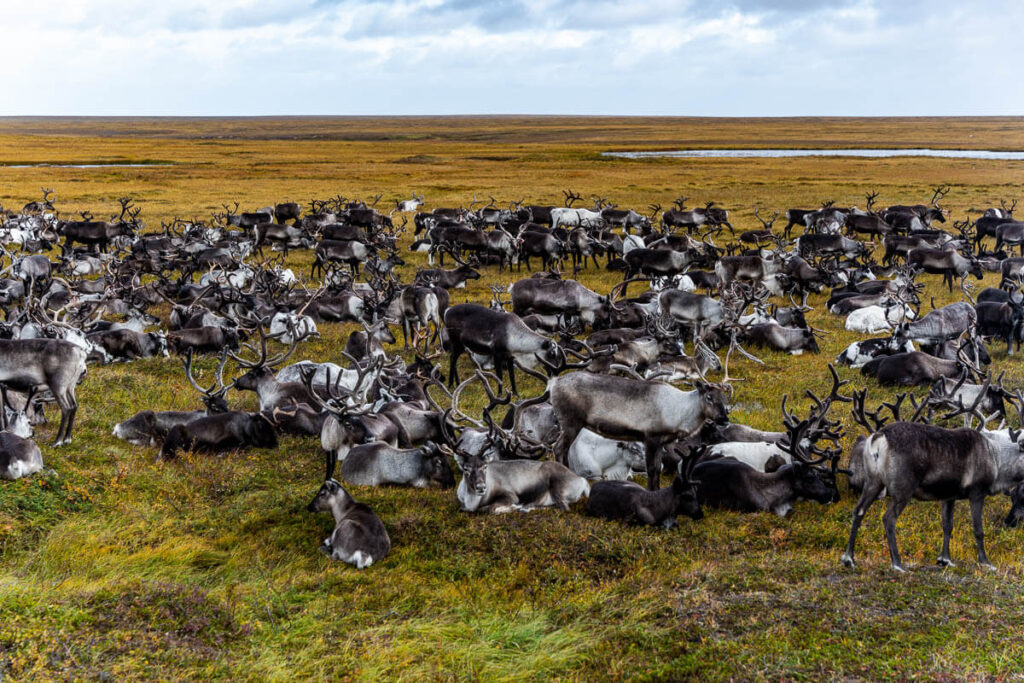
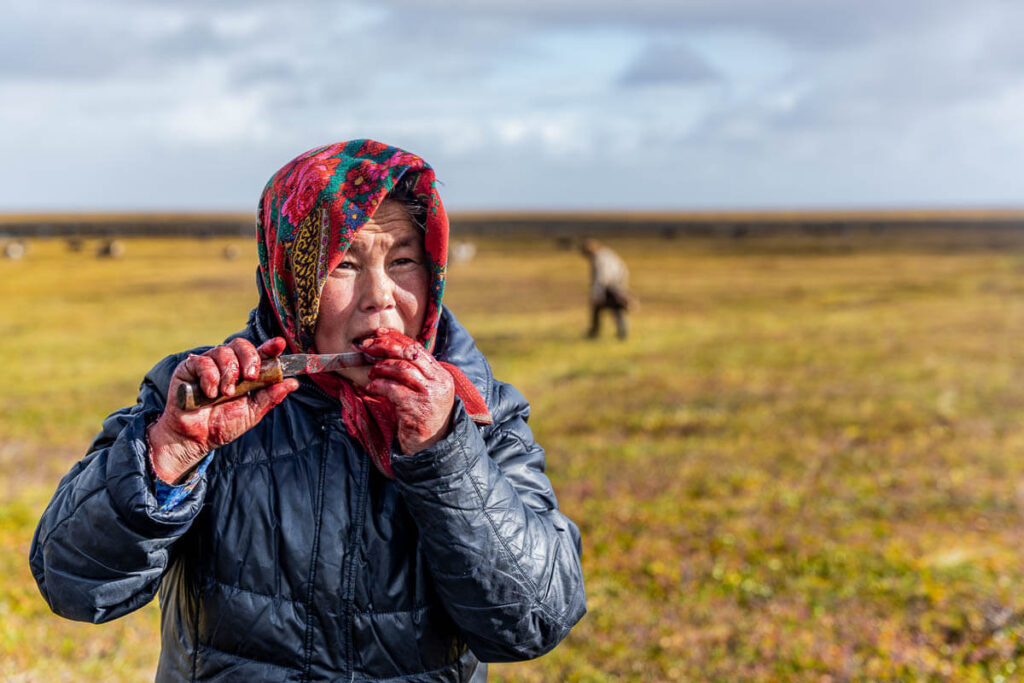
In summer, the landscape is more beautiful, with the tundra being green and covered in wildflowers.
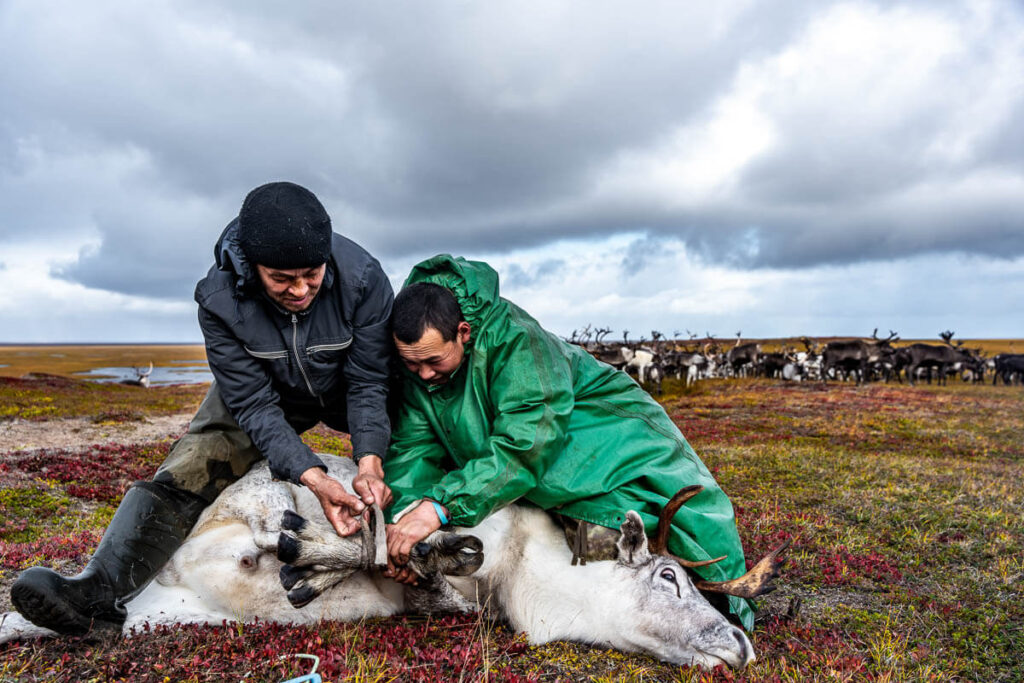
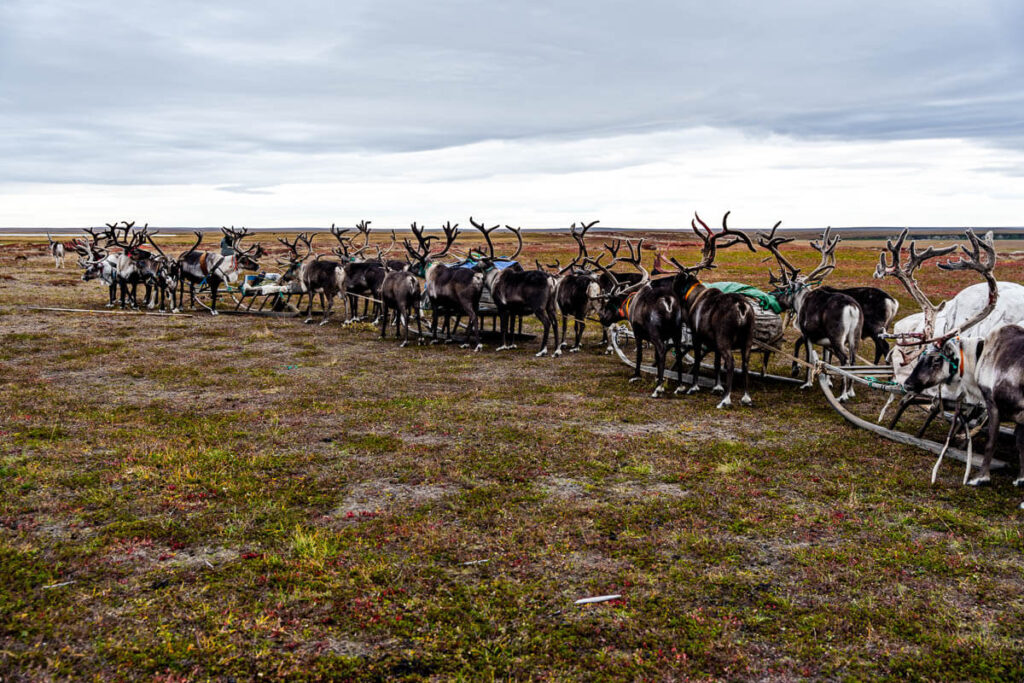
Another great advantage is that you are going to see much more reindeers, since in summer, Nenets need to gather them every day for carrying out different types of tasks.
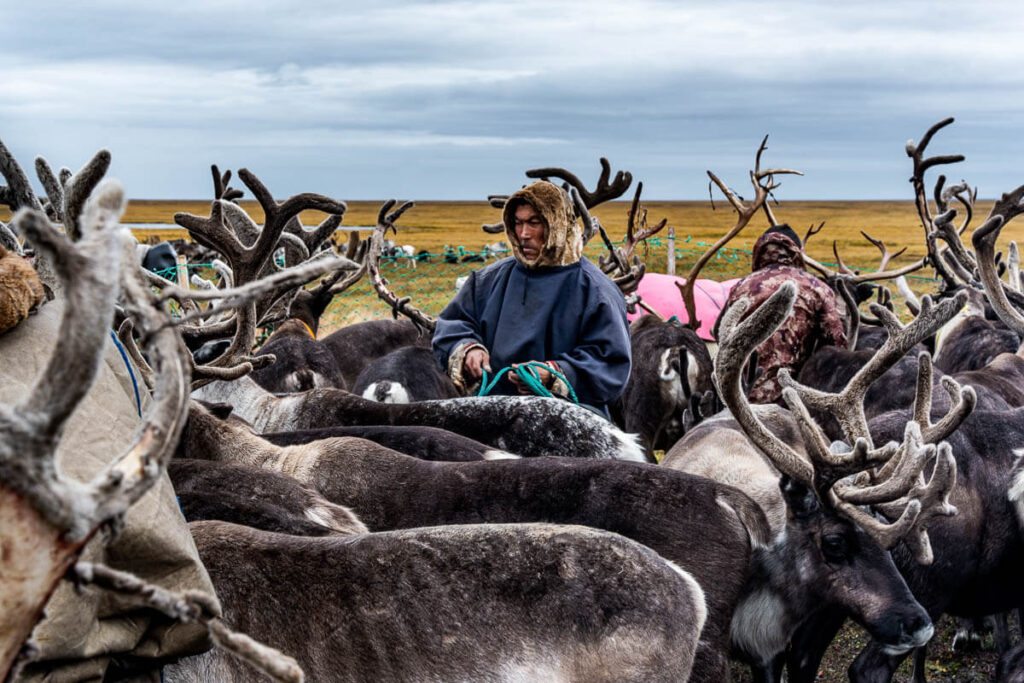
In summer, Nenets often don’t wear their traditional reindeer-made clothes, but that doesn’t mean you can’t take amazing photos, plus remember the weather is much more pleasant than the freezing Siberian winter.
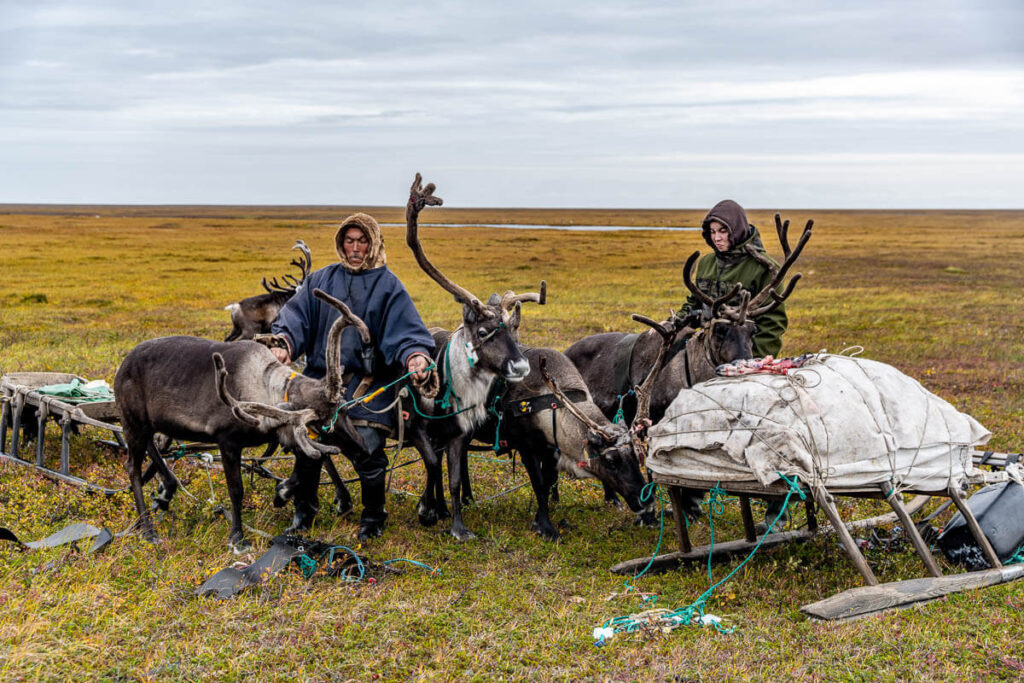
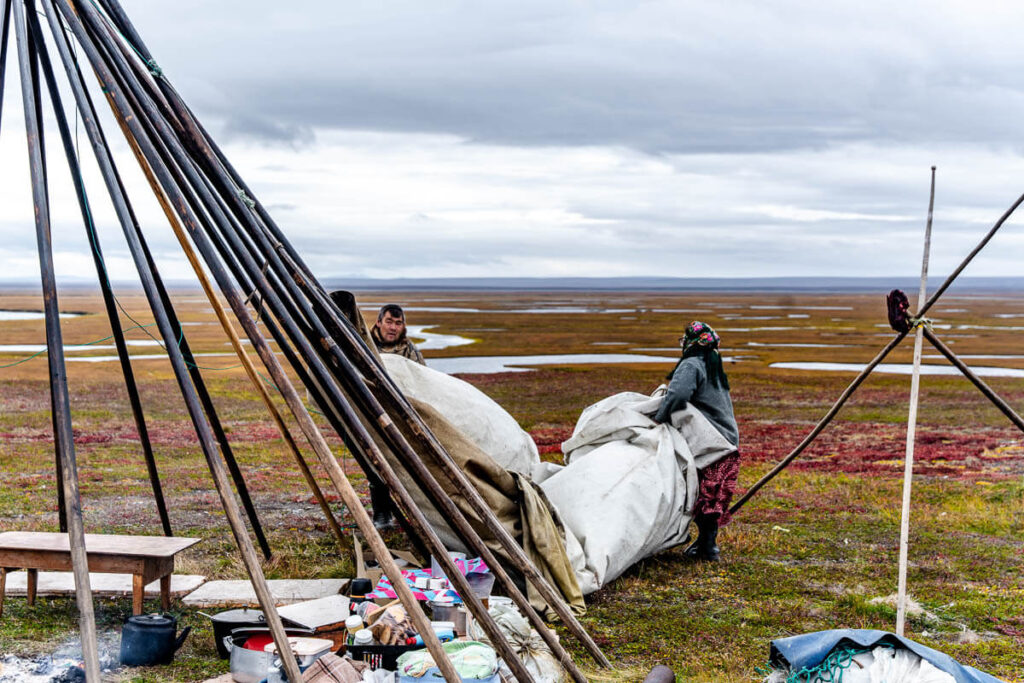
However, the main advantage of coming here in summer is that you’ll get to witness the migration, as Nenets families move with their reindeer and sledges every one or two days—a dynamic, ever-changing scene that few outsiders ever get to see.
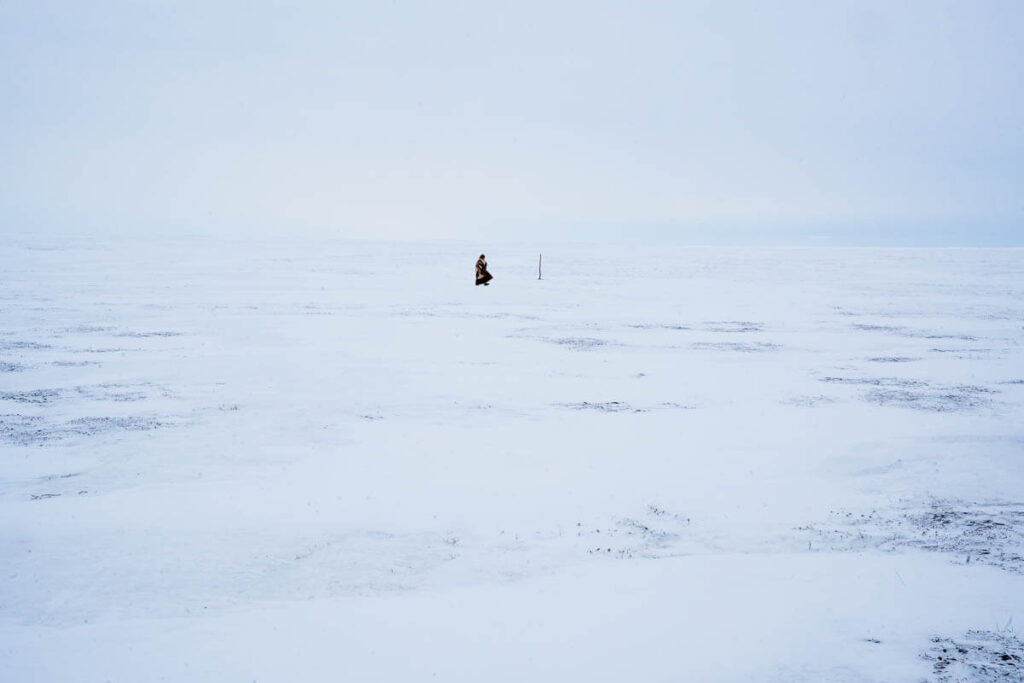
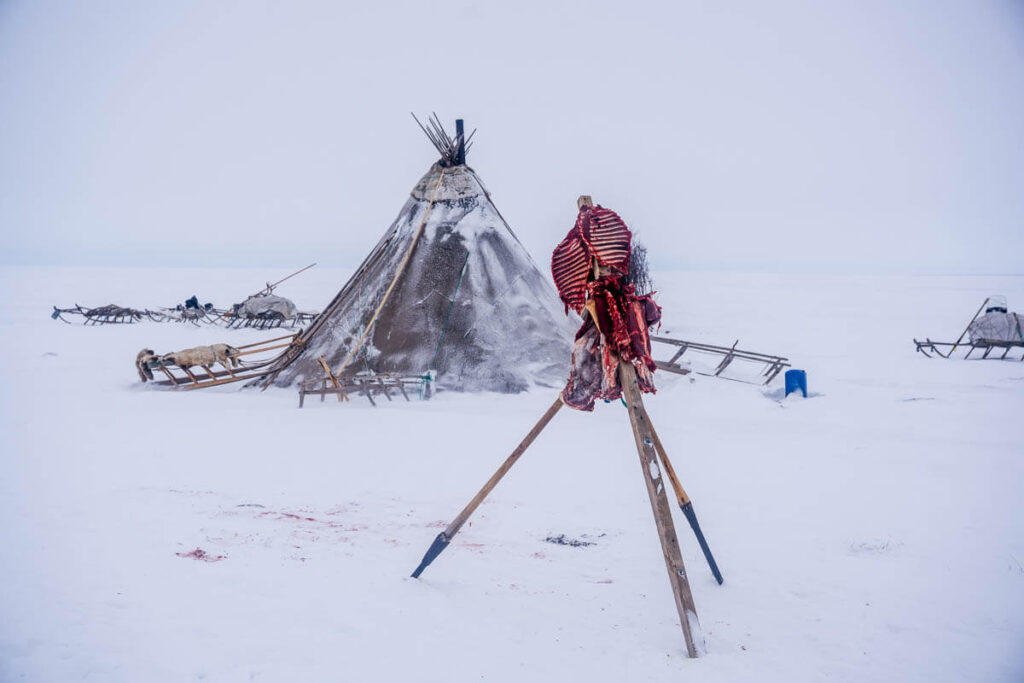
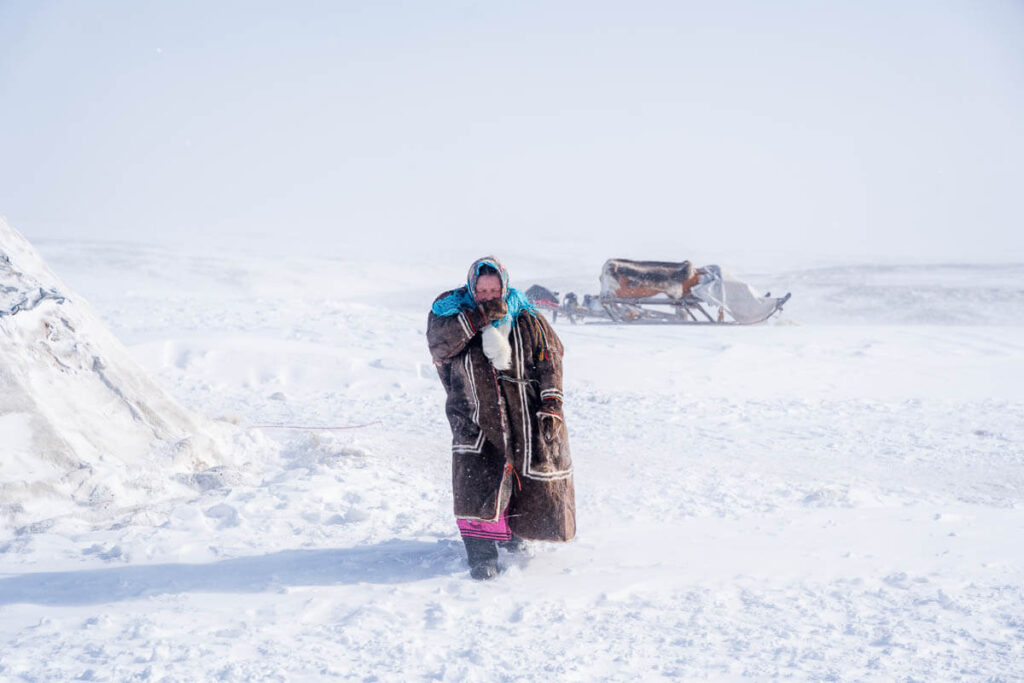
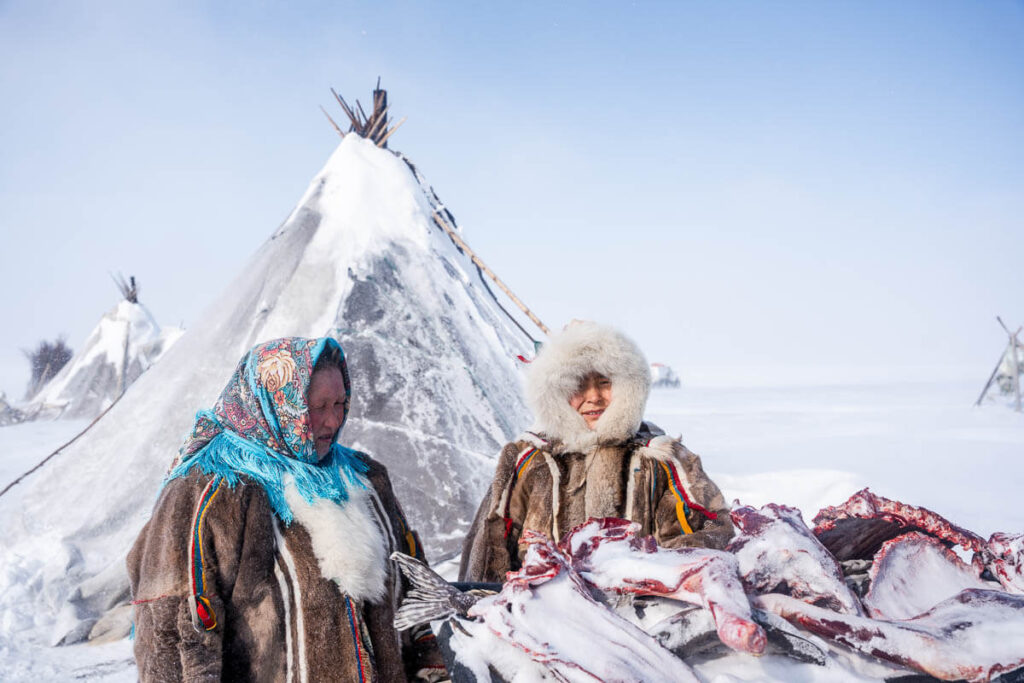
In winter, the whole tundra is frozen, and temperatures drop down to -20ºc and -40ºc. The tundra isn’t as beautiful as in summer but the weather and snow add an epic touch into it. From a weather perspective, it’s colder and more uncomfortable, but don’t worry, chums (local tents) are warm and cozy.
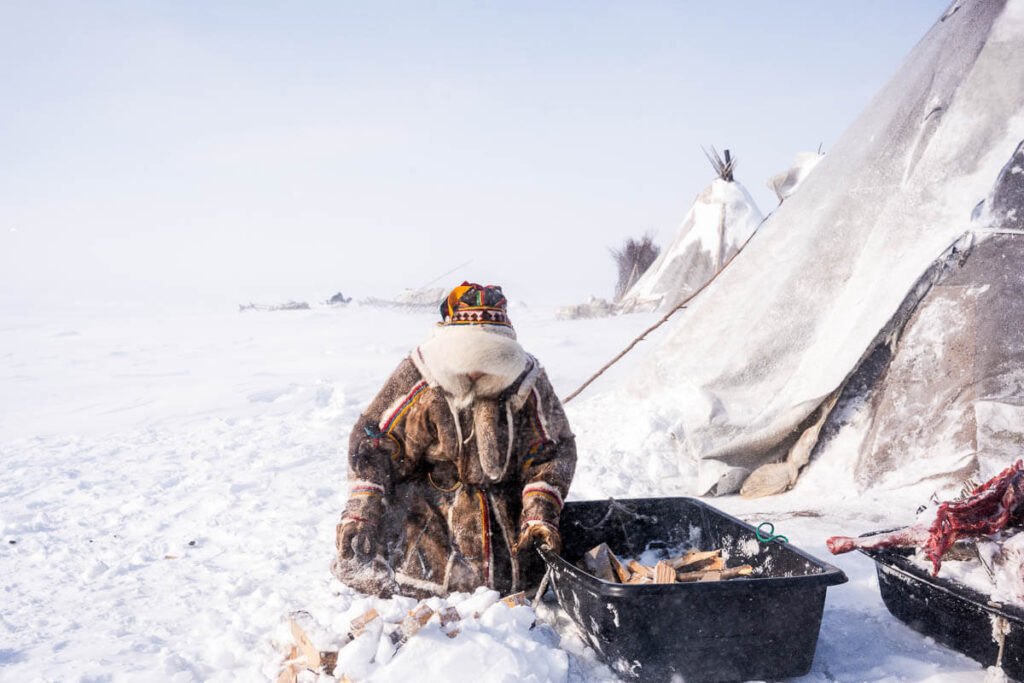
Nenets wear their traditional, reindeer-made clothes, making them particular photogenic.
In winter, you won’t witness Nenets migration (unless staged) but you will be able to see other activities like ice-fishing, or ice collection for their water.
A gap year, as the name suggests, is a year-long break students often take between high school and college or between undergraduate and postgraduate studies. It provides them with an opportunity to step away from academics and explore various facets of life.
The concept isn’t new, but its popularity has surged in recent times. Young adults now more than ever are choosing to travel, volunteer, or work during this period, seeking both adventure and personal growth. The world becomes their classroom, where every experience is a lesson.
Benefits of Taking a Gap Year
Taking a gap year can profoundly impact personal development. This period allows for intense self-discovery, where individuals often learn more about their passions, strengths, and aspirations outside the confines of structured education.
Another undeniable advantage is the broader world perspective one gains. Platforms like Essaypro best essay writing service emphasize the importance of global awareness in modern education, and nothing expands horizons like traveling and interacting with diverse cultures. It fosters empathy, understanding, and a more rounded worldview.
Lastly, the array of new skills and experiences acquired is vast. From language proficiency to survival skills or even culinary abilities, the learning curve during a gap year is steep and varied.
Planning Your Gap Year
Beginning a gap year journey starts with setting clear objectives and goals. Whether you aim to volunteer, learn a new language, or simply explore, defining these aspirations ensures a purposeful and rewarding trip. It acts as a roadmap, guiding the direction and activities you pursue.
Budgeting and finance management are crucial. Establishing a realistic budget helps in avoiding overspending and ensures that the adventure doesn’t prematurely end due to financial constraints. It’s vital to account for unexpected expenses, ensuring a smoother travel experience.
Lastly, researching potential destinations is key. Understand the cultural nuances, check for travel advisories, and be informed about local customs. This proactive approach not only keeps you safe but also enriches the overall travel experience.
Types of Gap Year Travels
One of the most enriching types of gap year travels is volunteering abroad. Engaging in such endeavors allows individuals to make tangible differences in communities, offering services in areas like education, health, or conservation. Not only does this benefit the host community, but volunteers also gain unique insights and a deeper understanding of global issues.
Cultural immersion programs are another avenue to explore. These programs often include homestays, language classes, and cultural workshops. Participants absorb the nuances of local customs, traditions, and lifestyles, promoting global understanding and fostering personal growth.
For the adrenaline junkies and nature enthusiasts, adventure and nature exploration provide the thrill of discovery. From trekking in the Himalayas to scuba diving in the Great Barrier Reef, these expeditions offer unmatched encounters with the natural world, pushing boundaries and expanding horizons.
Safety Precautions and Preparations
An essential first step before embarking on any travel is ensuring that you’re covered with adequate health and travel insurance. These policies act as safety nets, covering unexpected medical expenses or trip interruptions, giving travelers peace of mind in unfamiliar territories.
Another significant consideration is understanding cultural sensitivities and etiquettes of the destinations. By respecting local customs and behaviors, travelers not only prevent potential misunderstandings but also enrich their cultural experiences, forging genuine connections with locals.
Lastly, always arm yourself with a list of emergency contacts, such as the local embassy or consulate, and try to gain as much local knowledge as possible. This preparation can be crucial when faced with unforeseen situations, allowing travelers to navigate challenges confidently and safely.
Embarking on a gap year adventure doesn’t have to break the bank. It’s entirely possible to travel on a budget by adopting savvy saving strategies, such as setting a daily spending limit, opting for hostel accommodations, or using local transportation instead of taxis. Pre-trip planning and sticking to a set budget can greatly stretch the travel dollar.
Another avenue to explore is work-travel programs. These arrangements allow travelers to earn as they journey, covering expenses while gaining unique work experiences. This can range from teaching English in a foreign country to working on organic farms.
Lastly, being a student or a young traveler often comes with hidden perks. Many organizations, hostels, and tour operators offer discounts and benefits explicitly tailored for this demographic. Always carry a valid student ID and inquire about potential deals to maximize these benefits.
Maximizing Learning on the Road
Traveling isn’t just about sightseeing; it’s a unique opportunity for education beyond the classroom. Attending local workshops or classes can enrich your understanding of a place. Whether it’s a traditional dance class in Bali or a pottery workshop in Morocco, these hands-on experiences offer deep cultural insights while teaching new skills.
Interacting directly with locals is another invaluable learning method. Conversations at local markets, participating in community events, or just chatting with a fellow diner can lead to a genuine understanding of people’s daily lives, traditions, and perspectives.
Lastly, documenting your journey plays a significant role in consolidating your experiences. Keeping a journal or starting a blog not only captures memories but also encourages reflection. Through writing, you process what you’ve seen, learned, and felt, making the journey an ongoing lesson even after you’ve returned home.
Returning Home: Transitioning Back
Coming home after a gap year is a journey in itself, marked by personal evolution. Reflecting on the experiences, one can identify significant growth and change. Many find that using the best assignment writing services helps in consolidating thoughts, experiences, and learnings during this transition.
The richness of the gap year can also be harnessed for future endeavors. Whether it’s university applications, job interviews, or personal projects, the unique experiences can set you apart and provide a fresh perspective.
Reintegrating into academic or work life might seem daunting, but it’s essential to remember that this period of exploration has enhanced your worldview. Bringing this enriched perspective can make the return more rewarding and productive.
Conclusion
A gap year, filled with exploration and discovery, possesses a transformative power that reshapes one’s perspective on life. Through various adventures, challenges, and new experiences, individuals often emerge with a deeper understanding of themselves and the world around them.
Encouraging others to embark on this journey can spread the benefits further. Everyone should consider this enriching experience at least once in their lives, as it paves the way for personal growth and broadened horizons.