If you’re planning to get married, apply for certain types of visas, or dealing with legal matters in the Philippines, you’ve probably heard about the CENOMAR. But what exactly is it?
CENOMAR or Certificate of No Marriage Record is exactly what its name means. It is a certification issued by the Philippine Statistics Authority (PSA) that serves as proof that a person is single or has not contracted any marriage. This is also referred to as a certificate of No Record of Marriage or Certificate of Singleness. It is one of the requirements to get a marriage license as this shows that you are free to marry without any legal impediments. For certain types of visas, this certificate is also required.
You can get your CENOMAR from PSA by visiting a PSA Civil Registry System (CRS) outlet near you. But a more convenient way is to get it online, right in the comfort of your home. In this article, we’ll walk you through the step-by-step process of getting your CENOMAR online and other details you might need to know when acquiring this document.
PSA Serbilis is PSA’s online facility for requests of copies of civil registry records including CENOMAR. Just go to www.psaserbilis.com.ph to visit the website.
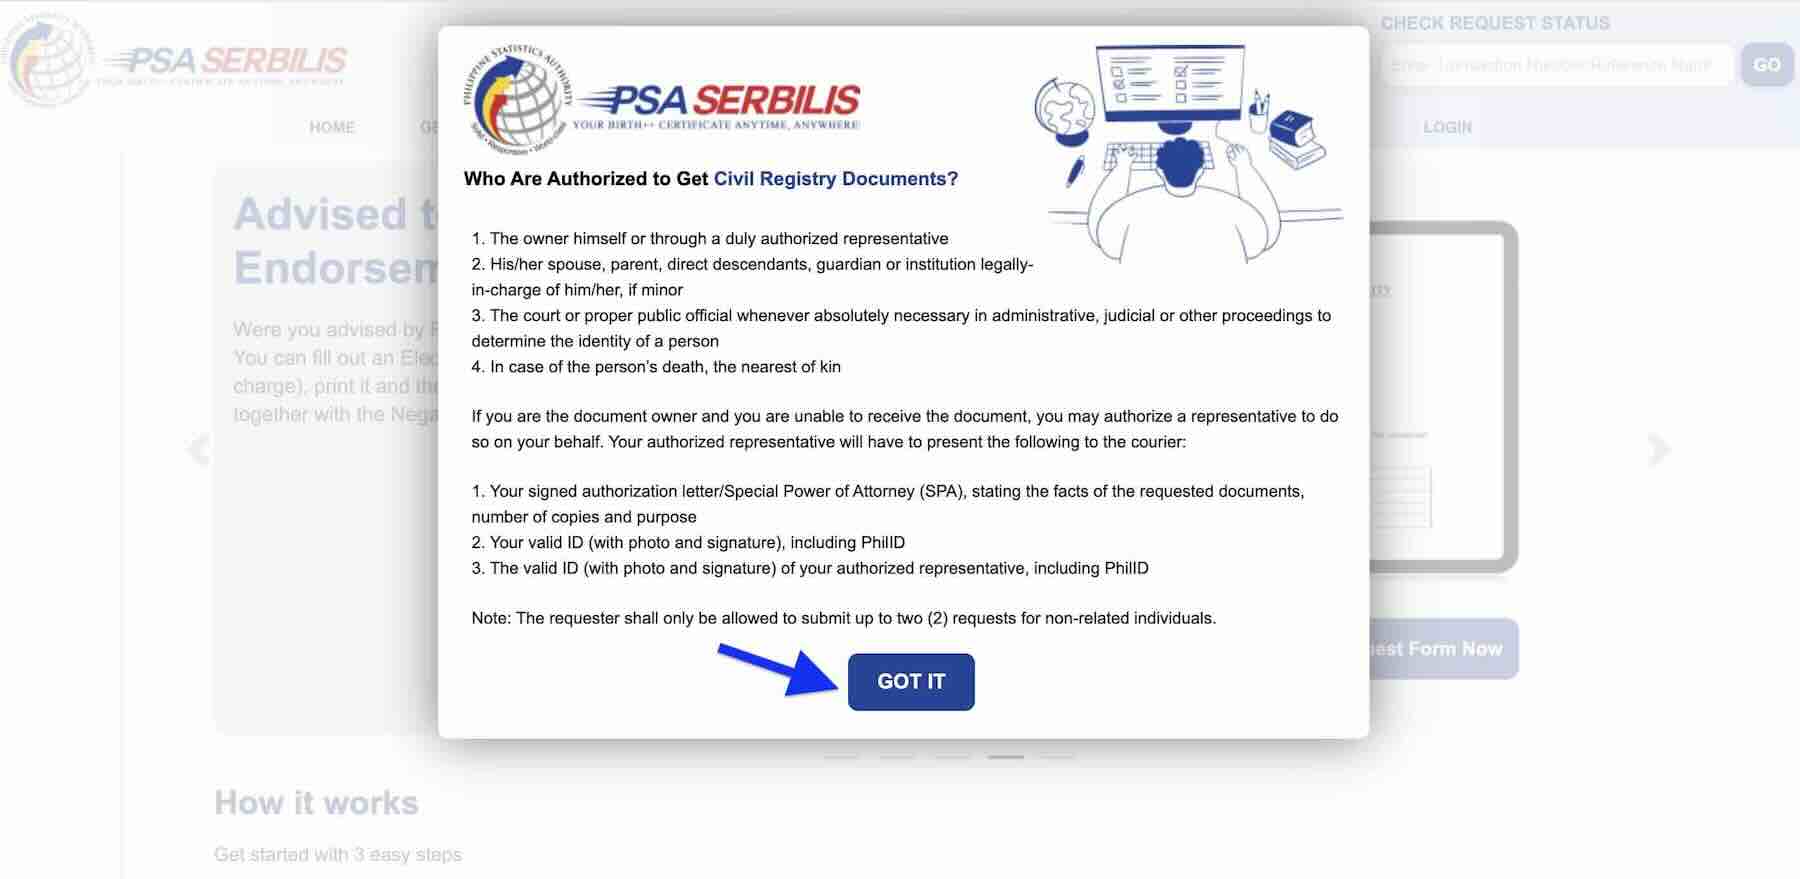
When you go to the PSA Serbilis website, there is a pop-up that tells you who can request civil registry documents and the requirements if an authorized representative will receive the document on your behalf. Click Got it.
2. Choose CENOMAR
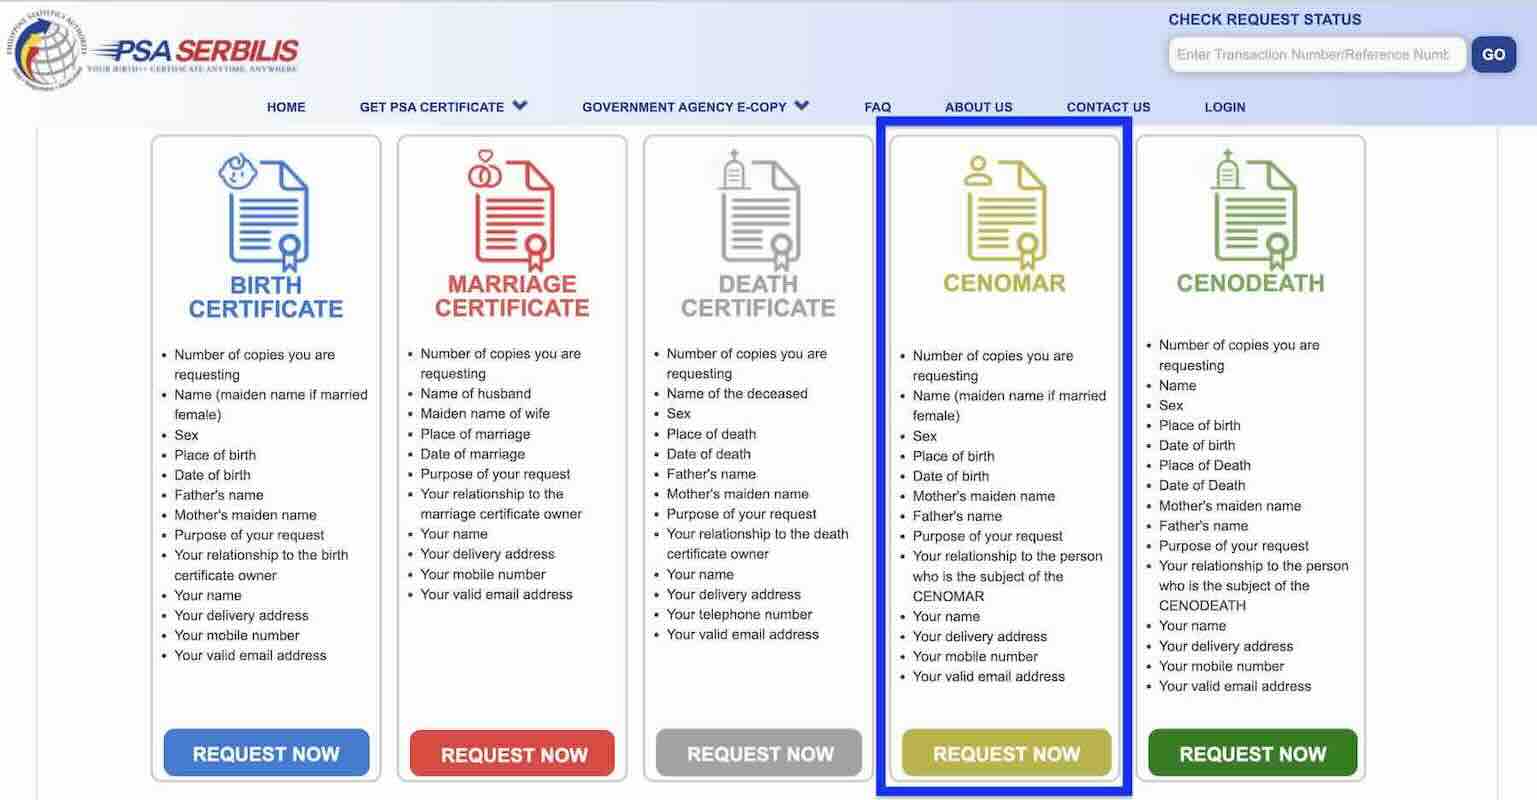
On the website’s home page, you can choose which document you need to request. Click the “Get PSA Certificate” on the main menu, and then choose “Online Application”. Alternatively, you can go to “How it works” section, then click the “Request Certificate” button under “Step 1 – Application Entry”. Either of the two will direct you to the online application page.
Choose CENOMAR, then tap the “Request Now” button.
3. Read the Terms & Conditions
On the next page, read the terms and conditions and tick the box if you agree. Below that, you’ll find the Data Privacy Notice. Read it and tick the box as well if you agree. Then, click NEXT.
4. Enter the Request Details
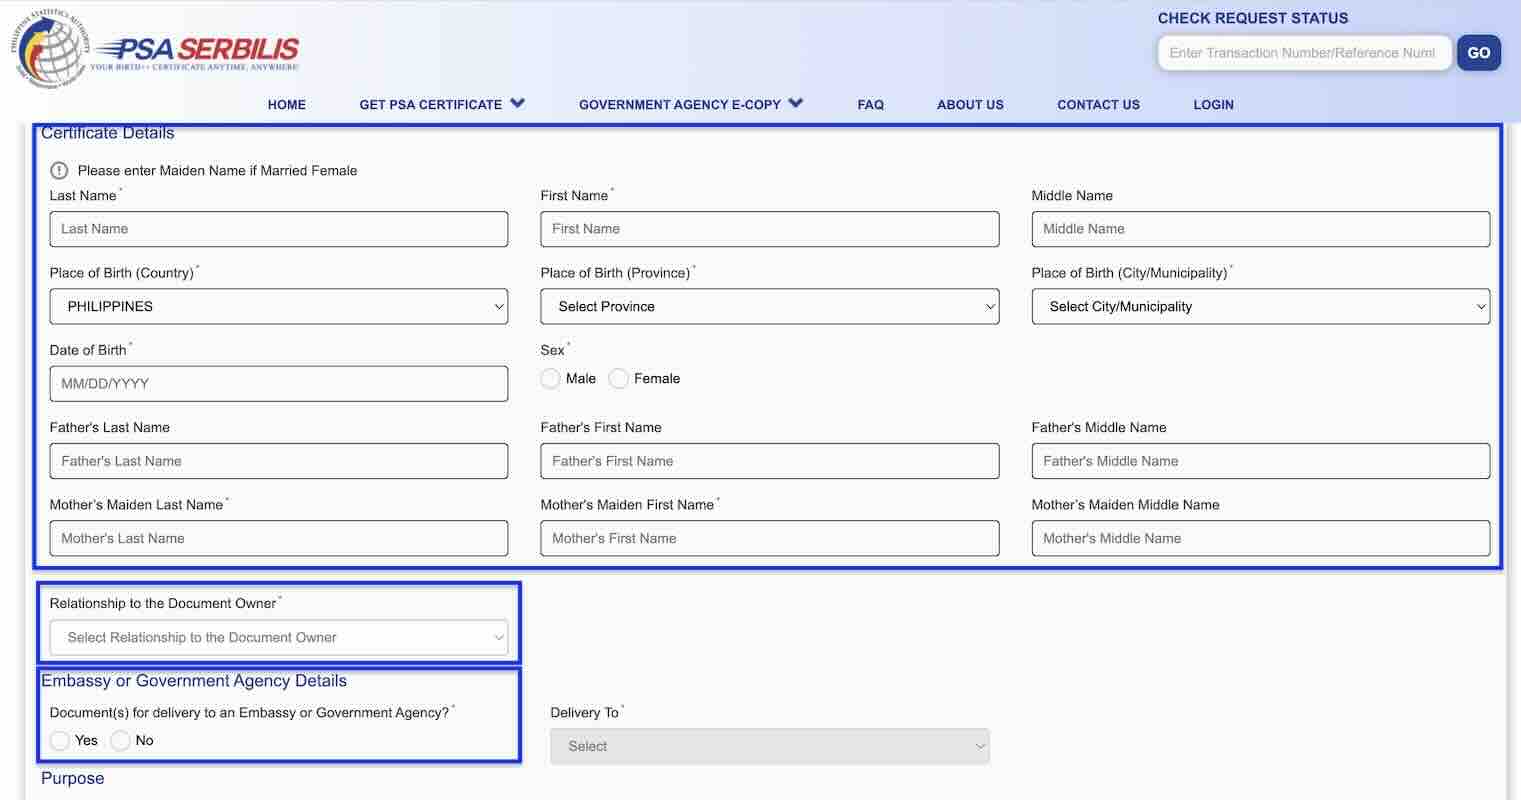
First, you need to enter how many copies you want to request. Note that the CENOMAR is paid per copy. Then, enter the certificate details. This includes full name, place of birth, date of birth, father’s full name, and mother’s maiden name. If you’re requesting the CENOMAR for someone else, this is where you enter their details. These are the details that will appear in the certificate.
Next, select your relationship to the document owner. If you’re requesting for your own CENOMAR, choose SELF. Then, indicate if it’s for delivery to a government agency or Embassy. If not, click “NO” and proceed to choosing the purpose of request. One you filled in all the details, click NEXT.
5. Confirm all the details
In this pop-up page, you can double check all the details you entered previously. If you spot a wrong detail or a typographical error, click EDIT. If everything is correct, click CONFIRM.
6. Enter the requester’s & delivery details
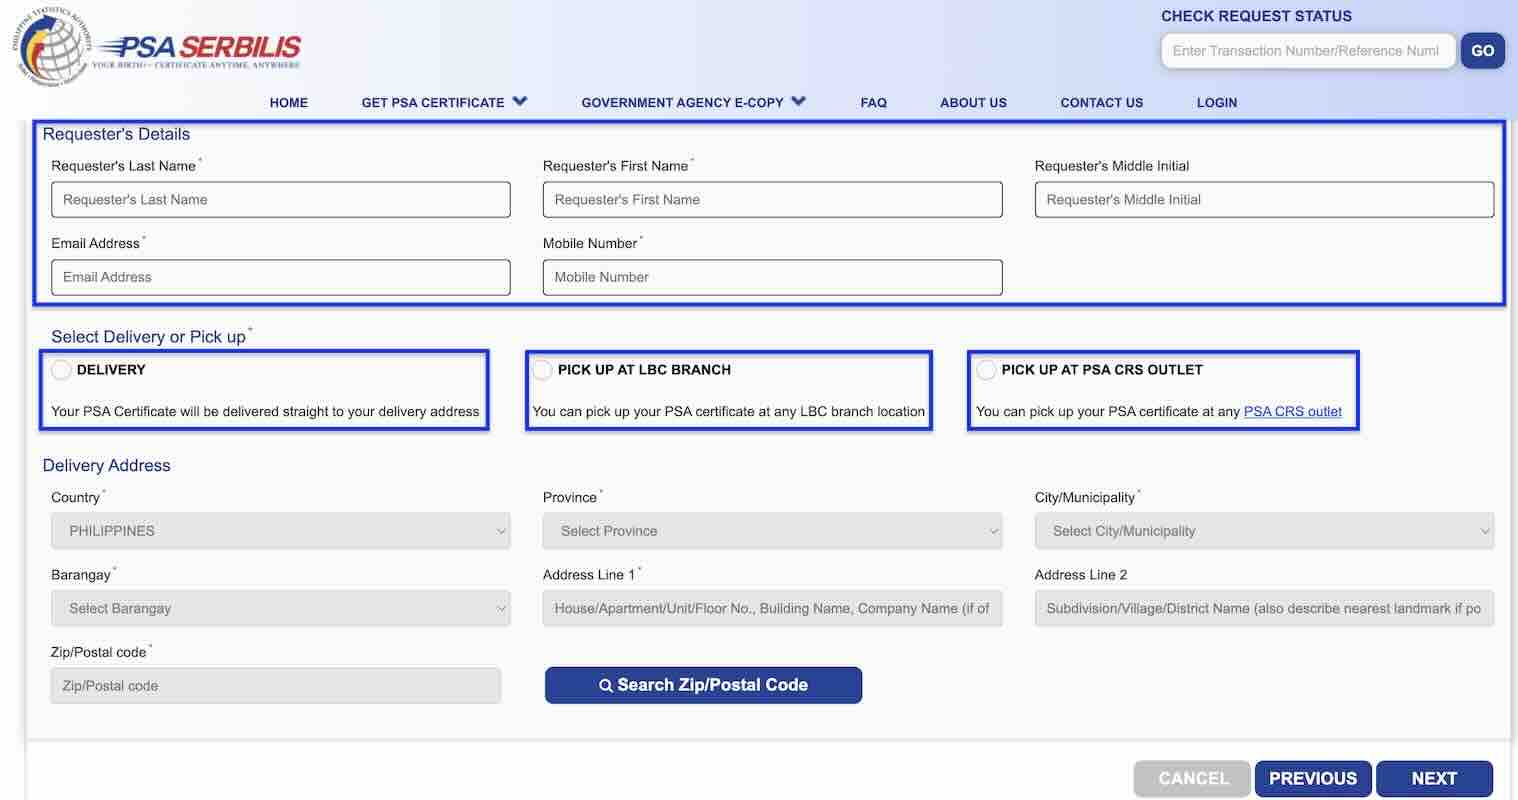
Enter the requester’s full name, email address, and mobile number. Then, choose whether you want the document to be delivered or if you prefer to do a pick up at an LBC Branch or a PSA CRS Outlet.
If you choose delivery, enter your complete delivery address. Meanwhile, if you choose pick up, select the LBC branch or PSA CRS Outlet nearest you. After completing all the details, click NEXT.
7. Double check the delivery details
You will find all the details you entered in a pop-up page. Double check all the details and make sure they are correct. If there is an error or you need to change some details, click EDIT. If everything is accurate, click NEXT.
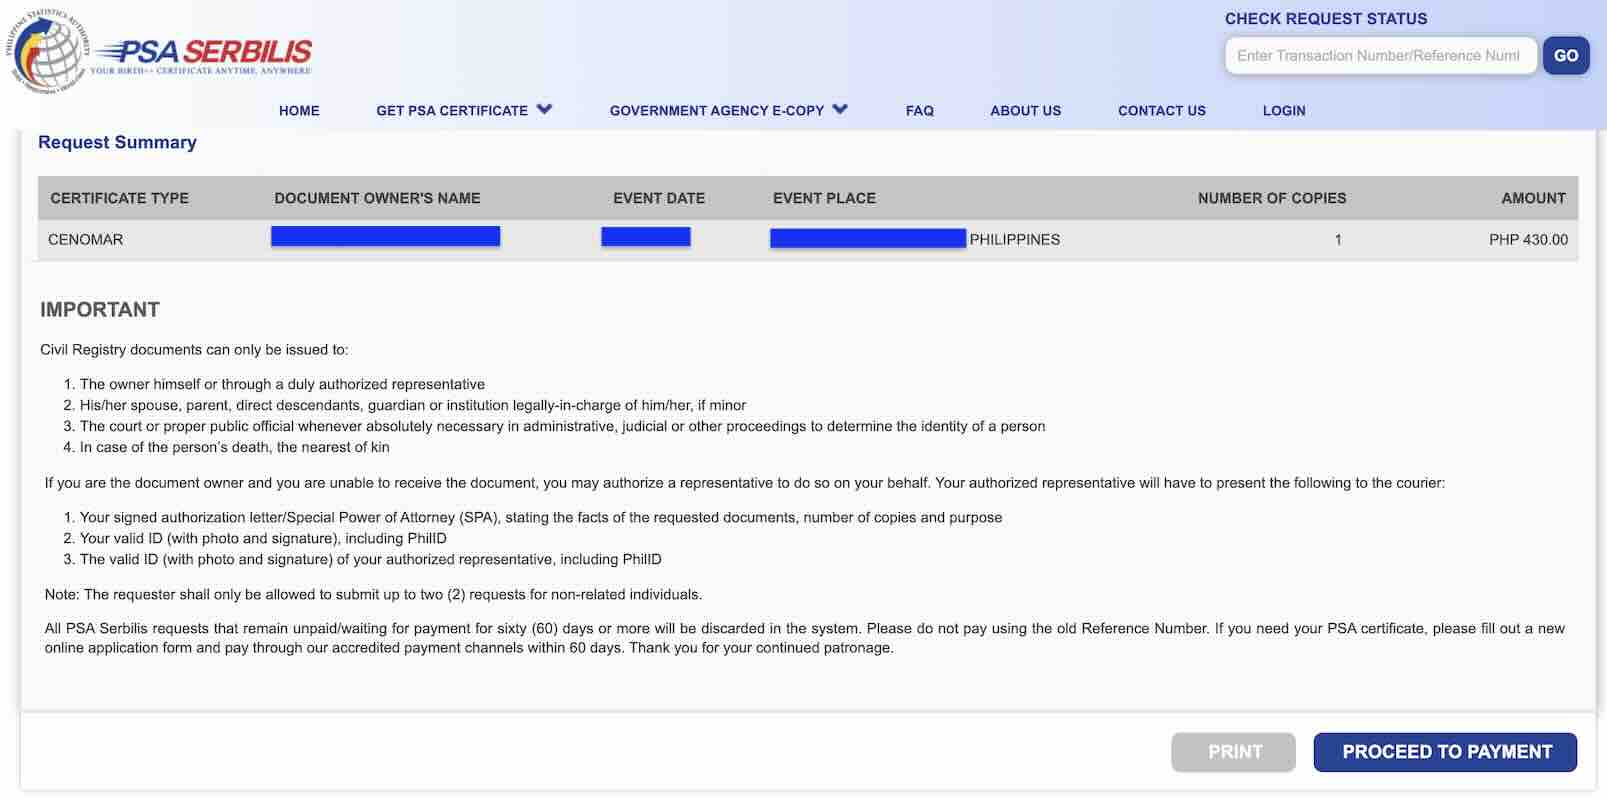
8. Review the summary
In this page, you will see all the details you’ve entered — the details of the certificate you’re requesting, the requester’s details, and the delivery address. This is your last chance to edit these details before payment. After payment, you can no longer change the details of your request.
If everything is in order, click NEXT.
9. Acknowledgement
If you’re planning to pay for the document through designated banks and other authorized payment partners, you need to print two (2) copies of this acknowledgement. However, if you’re paying online, there’s no need to print this. This acknowledgment will also be sent to your email address.
Next, click PROCEED TO PAYMENT.
10. Pay for the CENOMAR
There are multiple ways to pay for the CENOMAR. You can choose to pay online using your credit card, debit card, or e-wallets like GCash, Maya, and Shopee Pay. Another option is to pay through accredited payment centers and banks like Bayad Center, 7Eleven, BDO branches, and UnionBank branches.
If you’re paying online click PAY NOW. You will be shown a summary of your details and the amount you need to pay. Click PROCEED.
On the next page, choose which payment method you will be using by clicking their corresponding logo. You will then be directed to the payment page for your corresponding mode of payment. Once you completed your payment, screenshot or save a copy of your transaction for reference.
After that, you will be redirected to the PSA Serbilis website and see the payment acknowledgement.
That’s it! You’ve successfully requested for a CENOMAR. Now all you have to do is wait for it to be delivered to your doorstep or be ready for pick-up.
Frequently Asked Questions
How much does it cost to get a CENOMAR online?
Each copy of a CENOMAR costs P430. This covers the delivery fee as well.
How many days will it take for the CENOMAR to be delivered?
If within Metro Manila, it usually takes 4-6 working days. Meanwhile, provincial deliveries usually take 6-8 working days.
Can I request for a CENOMAR on behalf of a relative?
Yes, however, you would need a signed authorization letter from the certificate owner to receive it. Only a spouse or parents/guardian for minors can receive civil registry documents.
If you’re requesting for someone else’s CENOMAR or someone would receive your CENOMAR for you, you would need to prepare the following:
Signed authorization letter from the document owner.
Valid government ID of the document owner.
Valid government ID of the authorized representative.
How to apply for a New Zealand tourist visa? In this article, we’ll be enumerating all the requirements we submitted and the steps we’ve taken in order to be granted a short-stay New Zealand visa for tourism or visiting family or friends. Please note that this is simply a compilation of everything I know based on my own and my friends’ personal experience. This should NOT be taken as official Immigration advice. If you’re after a Resident visa, student visa, or work visa, know this article will not be able to help you as it is focused only on Visitor Visa.
New Year, new adventure! It does feel like a new start because last year, we have closed our country count at 60. And what better way to kick off a new era than by exploring the breathtaking landscapes of New Zealand! Yes, New Zealand is our Country #61!
Whether you’re dreaming of hiking through Milford Sound, saying hello to the glowworms of Rotorua, or finally living out your Lord of the Rings fantasy, there’s one thing you’ll need before booking that flight: a New Zealand visa.
The good news? The entire application process can be done online! No need for embassy visits or long queues: just a few clicks, some documents, and you’re on your way to Middle Earth. In this guide, we’ll walk you through the step-by-step process of applying for a New Zealand visa for Filipinos, including requirements, fees, and some tips to boost your chances of approval. Let’s get started!
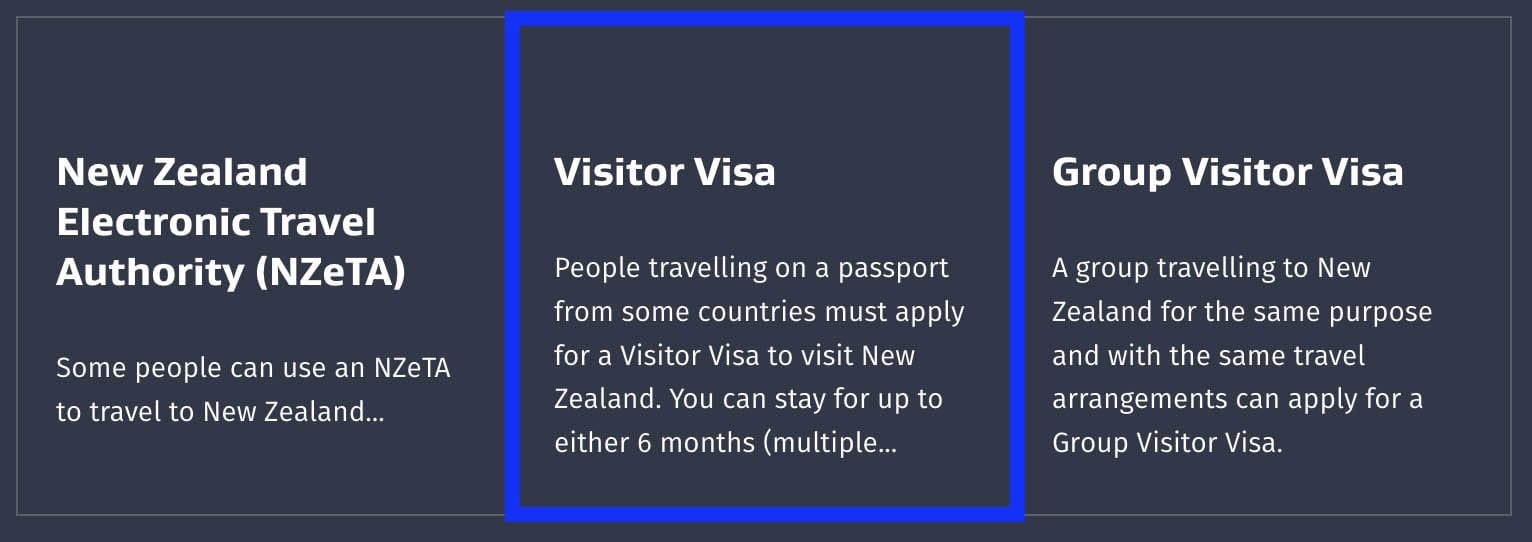
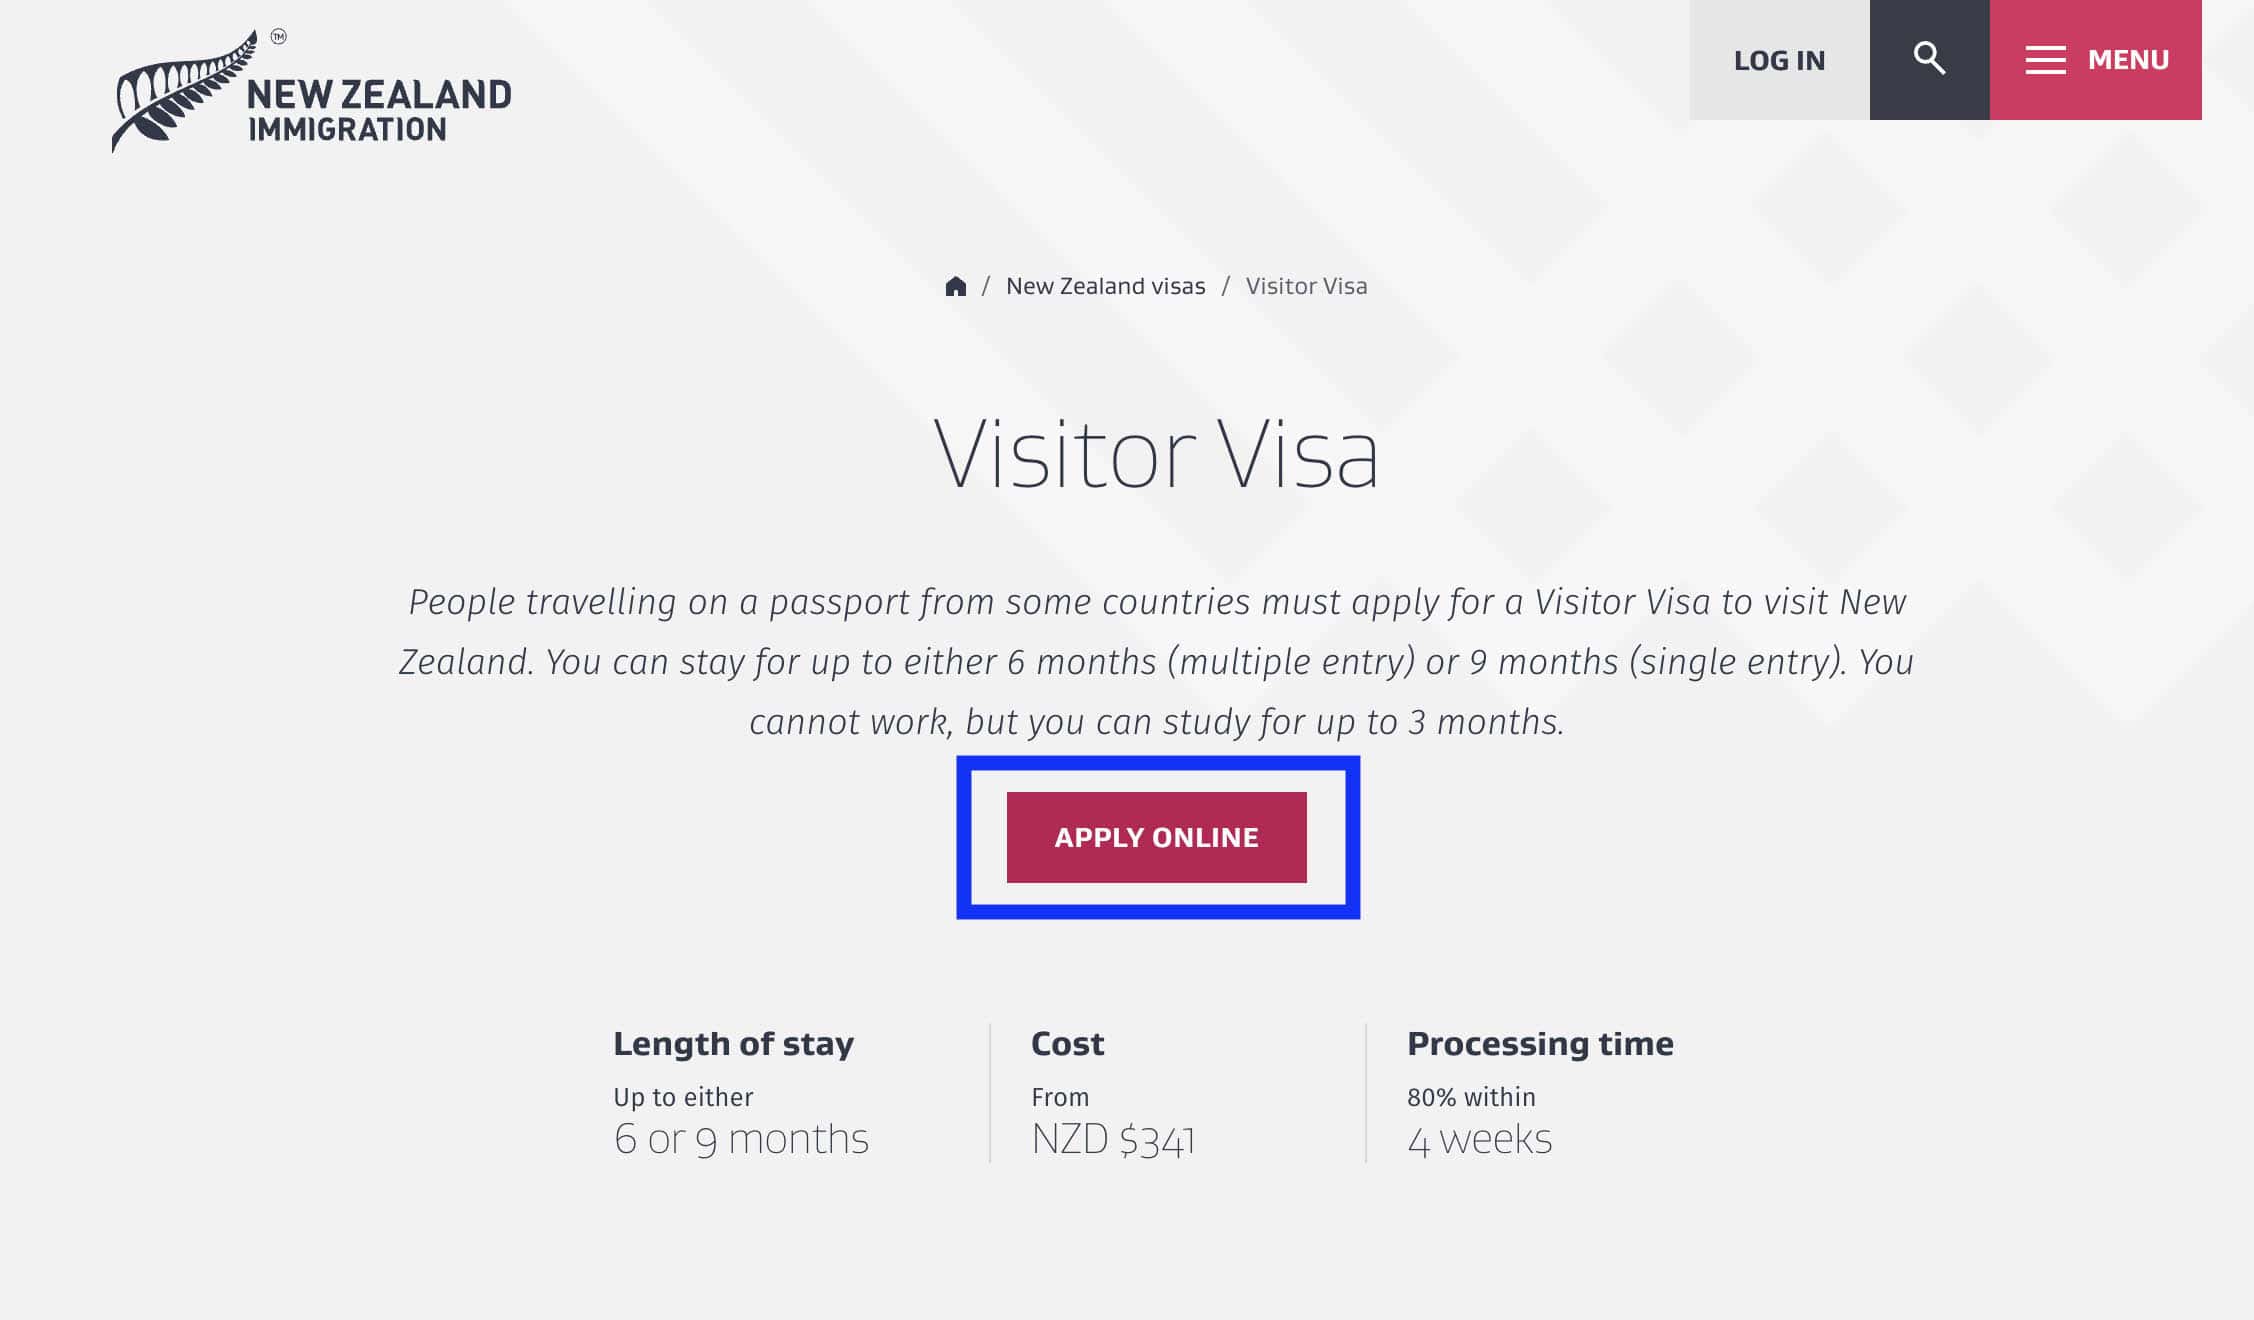
New Zealand offers plenty of visit visa options, with varying lengths of stay allowed and documents required. If your purpose of visit is tourism and you enter it on the official Immigration website, you’ll mainly be presented with three types:
New Zealand Visitor Visa Types
New Zealand Electronic Travel Authority (NZeTA), the e-visa version, but unfortunately, most Filipinos are not eligible for this for now unless they’re arriving by cruise ship. You may check eligibility criteria here.
Visitor Visa, which will allow you to visit on a holiday or for tourism, stay with family and friends, play amateur sport, or get married in New Zealand.
Group Visitor Visa, similar to the regular Visitor visa but a more convenient option for groups traveling together with the same purpose and travel arrangements (same flights, same accommodations).
In this article, we’ll be focusing on the Visitor Visa only because that’s what I applied for.
2. Complete the requirements.
While the entire application can be done online, before you start the process, you must first gather all the requirements. But take note of the following:
Scan all these documents and save them as a PDF file, except the photo which must be JPEG.
You can only upload one file per item. If your document has multiple individual pages, combine them all in one file. For example, if your bank statement has one page per month, make sure to merge all these pages to create just one file.
Submit as many document types as you can for better chances of approval. Only the first three items — passport, photo, and itinerary — are tagged as “required” on the website. The other items on this list are marked “Optional”. Technically, you can submit your application with just the passport, photo, and itinerary. But of course, we highly urge you to also submit the other documents, too, because it is not realistic to expect being granted a visa with only those three.
Anyway, below is the list of the documents to submit for your New Zealand visa application.
a. Passport
Must be valid. Make sure you still have at least 6 months of validity so you won’t run into PH Immigration problems later.
Text must be readable.
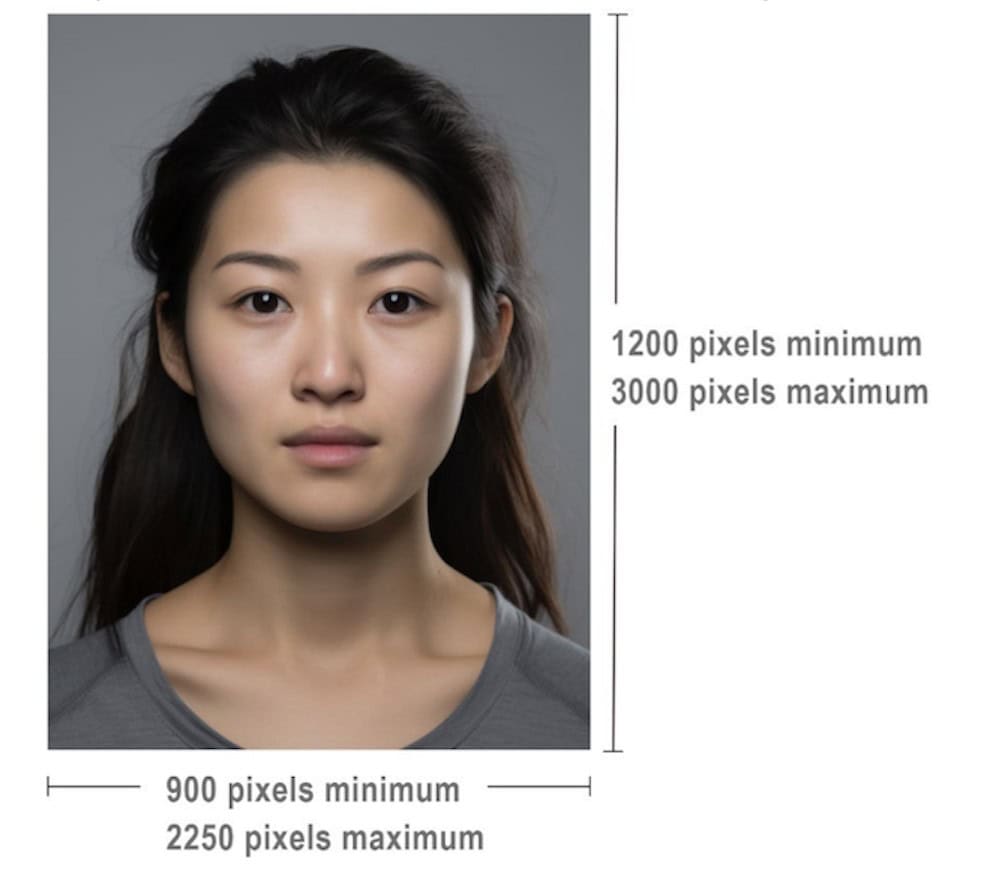
b. Photo
Passport-size. Dimensions should NOT be smaller than 900 x 1200 pixels, but not larger than 2250 x 3000 pixels.
Soft copy (JPEG). File size should be between 500 KB and 3 MB.
Non-white background. Gray, ideally.
You can take the photo yourself as long as you follow the specifications listed by the government. You can find the full photo guidelines here.
But I suggest that you just go to a photo studio and let the professionals do it.
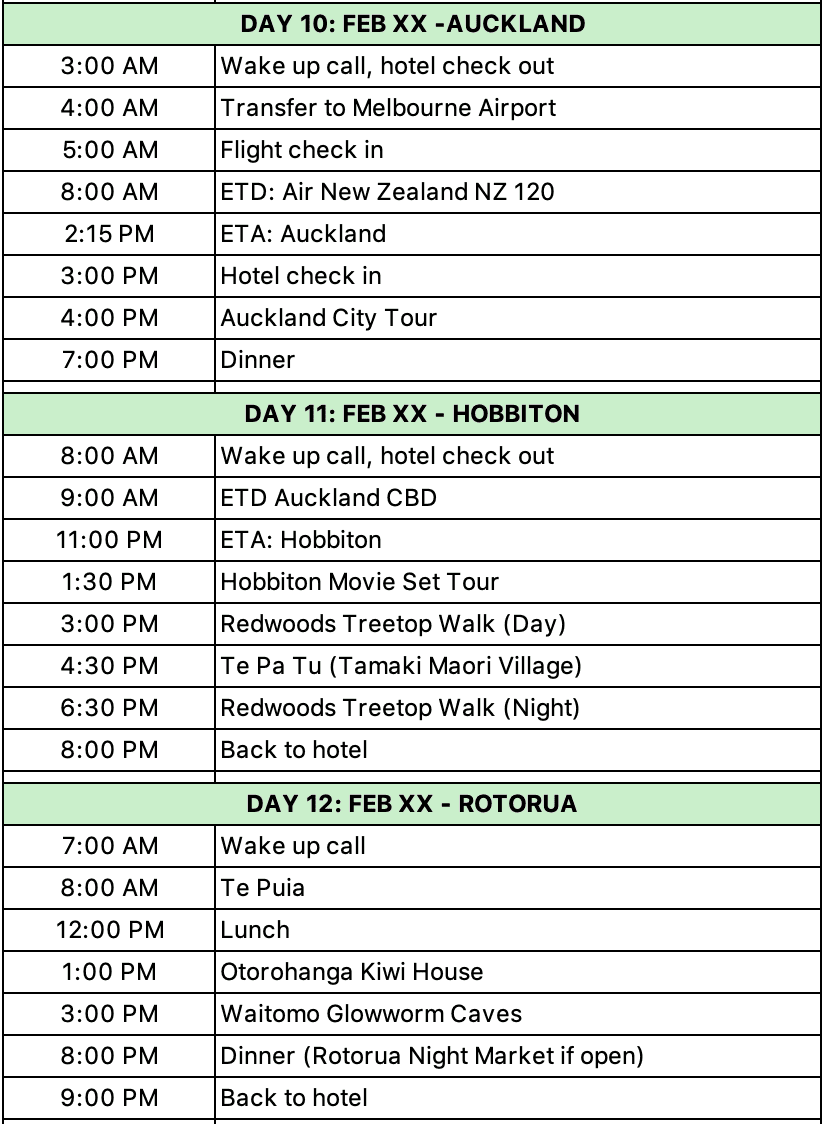
c. Evidence of Purpose of Visit
This can be an itinerary detailing your day-by-day stay in New Zealand.
This is the format I submitted:
d. Evidence of Genuine Intent
With this, you must prove that the purpose of travel that you declared is true, and that you will be coming back home after your trip. You can submit any or all of the following:
Proof of leave of absence from work, showing that you have a job to return to after the trip. I submitted a Certificate of Employment that also indicates that my leave of absence has been filed and approved.
Passport stamps and visas, proving you have visited other countries before.
Proof of accommodations, which can be a hotel booking for tourists. This is optional and you may choose to skip this. But if you want to submit to increase your odds, book a hotel that has a FREE CANCELLATION policy so you can easily refund should you be refused a visa. Search for free-cancellation hotels here! Make sure the room you’re booking is marked “Free cancellation.” Use promo code THEPOORTRAVELERKLOOK for extra discount!
Flight booking, to show you plan to exit New Zealand. Again, this is optional only. If you already have this, then go ahead and submit. But if you don’t have it yet, you may opt to not submit. But if you really want to submit this for better chances, don’t submit an actual ticket. Submit a flight reservation instead, which can be cancelled in case you get denied a visa. You can get this from travel agencies. We usually get ours from Gazelle Travel & Tours, a licensed and accredited travel agency here in the Philippines. You can order flight reservations online here!
Australian visa, only if applicable. If you don’t have this, you can ignore this. If you do, submit it. I think this could massively help your application. In our group, those who submitted an Australia visa got approved a lot faster than those who didn’t.
e. Evidence of Funds
This can be bank statements and/or bank certificates.
I submitted two bank accounts: payroll account and savings account. I created one PDF file per bank account. One file, I uploaded under Evidence of Funds, while the other under Other Evidence (which I will discuss below).
f. Evidence you are visiting family or friends
Only if applicable. If you have family or friends in New Zealand that you plan to visit, you must provide your contact’s:
names
addresses
contact numbers
their New Zealand visa or citizenship status
I didn’t provide any of these because I was traveling for tourism.
If you’re visiting a partner or family member working in New Zealand but they cannot support a visa for you, you may also be asked to submit a cover letter stating the details of your trip and the purpose of your visit.
g. Credit card or debit card
You will be paying the NZD 100 visa fee online, so make sure you have a valid credit card of debit card.
Other Optional Documents
You’ll also encounter a section for “Other Evidence.” This refers to other documents that can help prove your character and genuine intent. It can be any of the following:
Cover letter
ITR (tax document)
Certificate of Employment
Additional bank accounts (other financial information)
Birth certificate
Yes, I also uploaded a cover letter because remember, everything’s online. Having a cover letter allowed me to properly explain my purpose of travel and clarify any aspect that needs clarification. You can use the cover letter to explain if you’re just new at your current job or why your bank account is newly opened, or whatever.
I also uploaded a birth certificate only because I had a digital copy of it. If you don’t have one, it’s OK. I don’t think it’s going to make or break your application. But if you have it, feel free to submit it.
3. Create a RealMe Account.
RealMe is the official account management portal of the New Zealand Immigration department. To be able to apply for a New Zealand visa, you must first register for a RealMe account. Here’s how:
Click on the LOG IN button. It will then take you to the REALME page.
Click on CREATE A REALME LOG IN button. If you’re viewing the site on a mobile phone, you first need to tick off “I need to create a log in” in order for the log-in button to appear.
Enter a valid email address. Then click SEND CODE. Check your inbox and enter the confirmation code in the designated field. Click CONFIRM CODE.
Set a username and password. Click CONTINUE.
Enter your mobile number. You’ll also be asked a choose security questions and provide answers. Click the CONTINUE button.
That’s it!
You’ll be redirected to your RealMe dashboard. You may be asked to log in again.
4. Start your online application.
To do this:
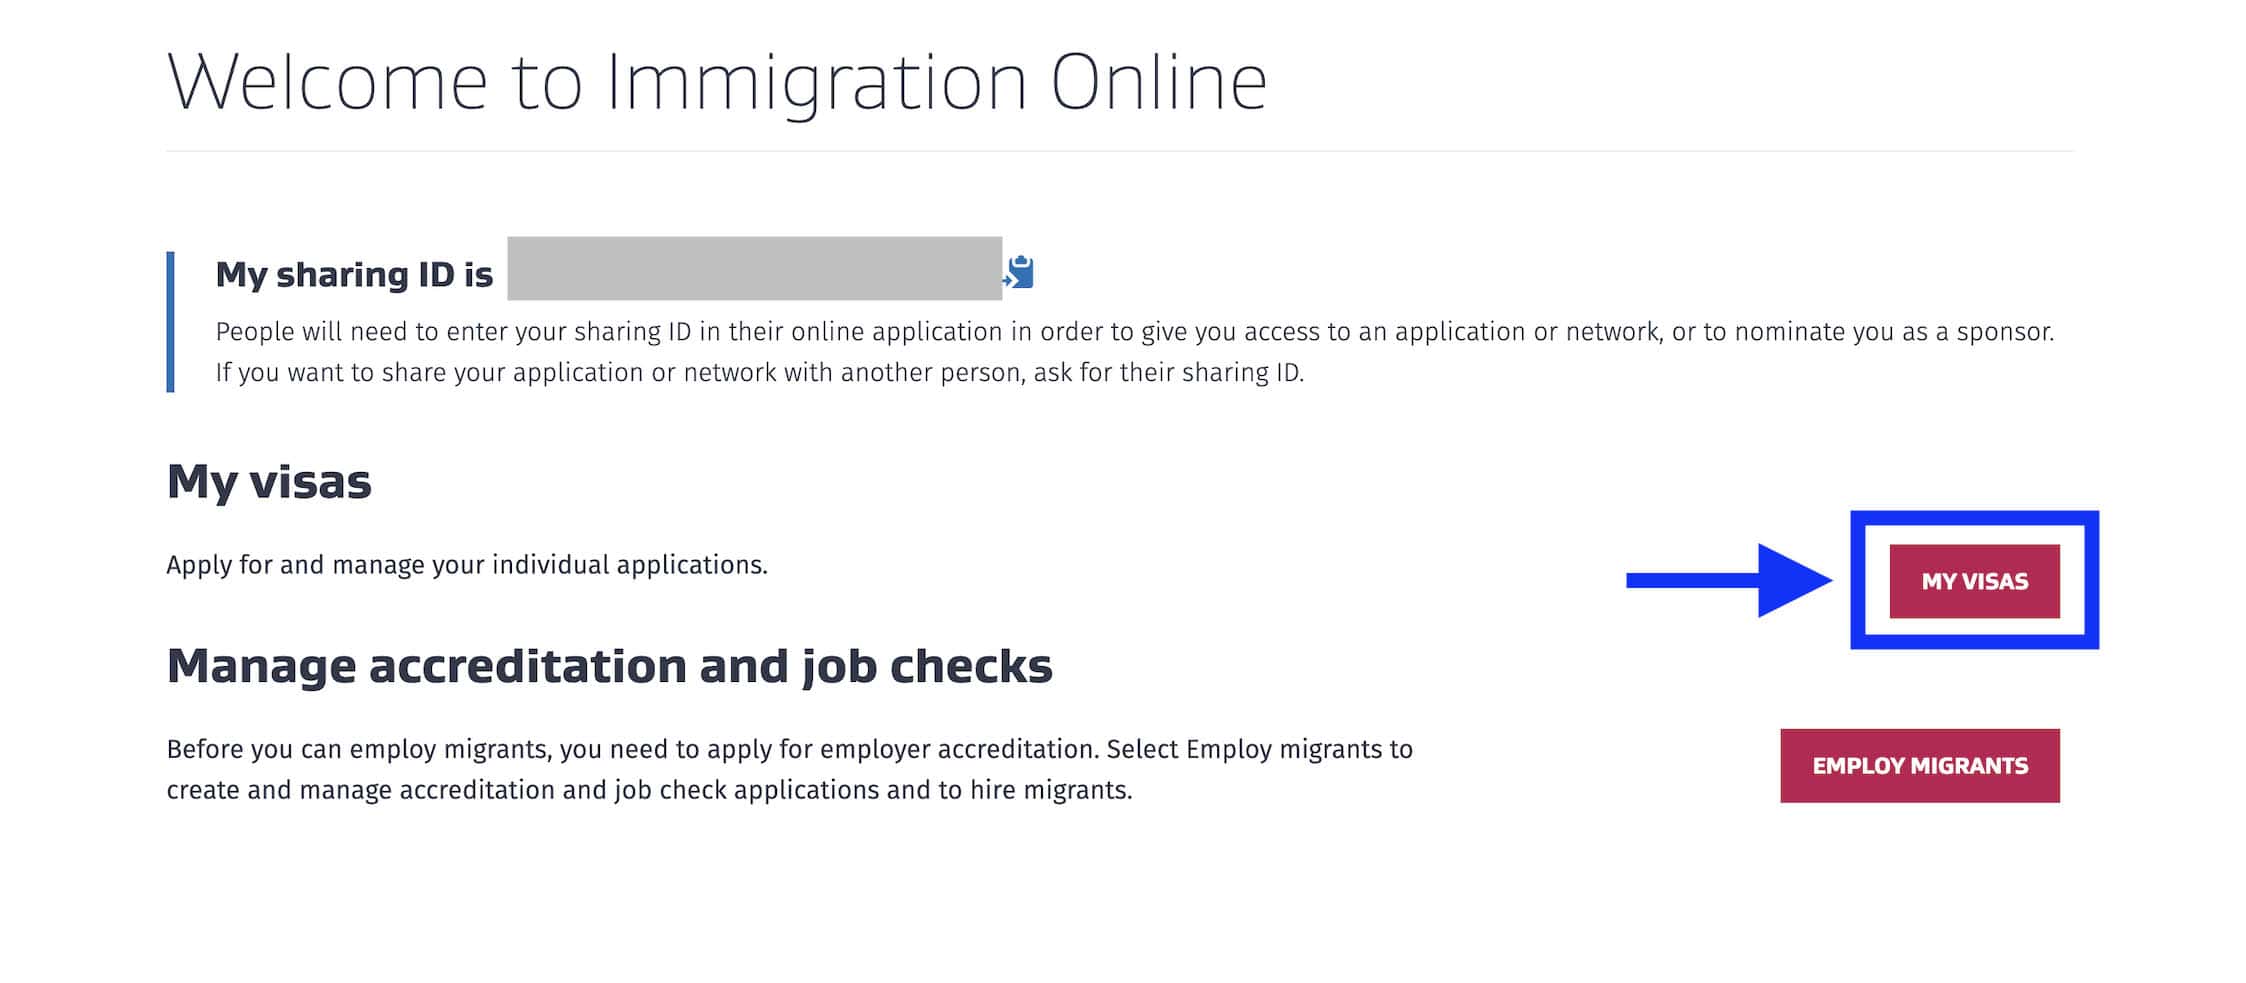
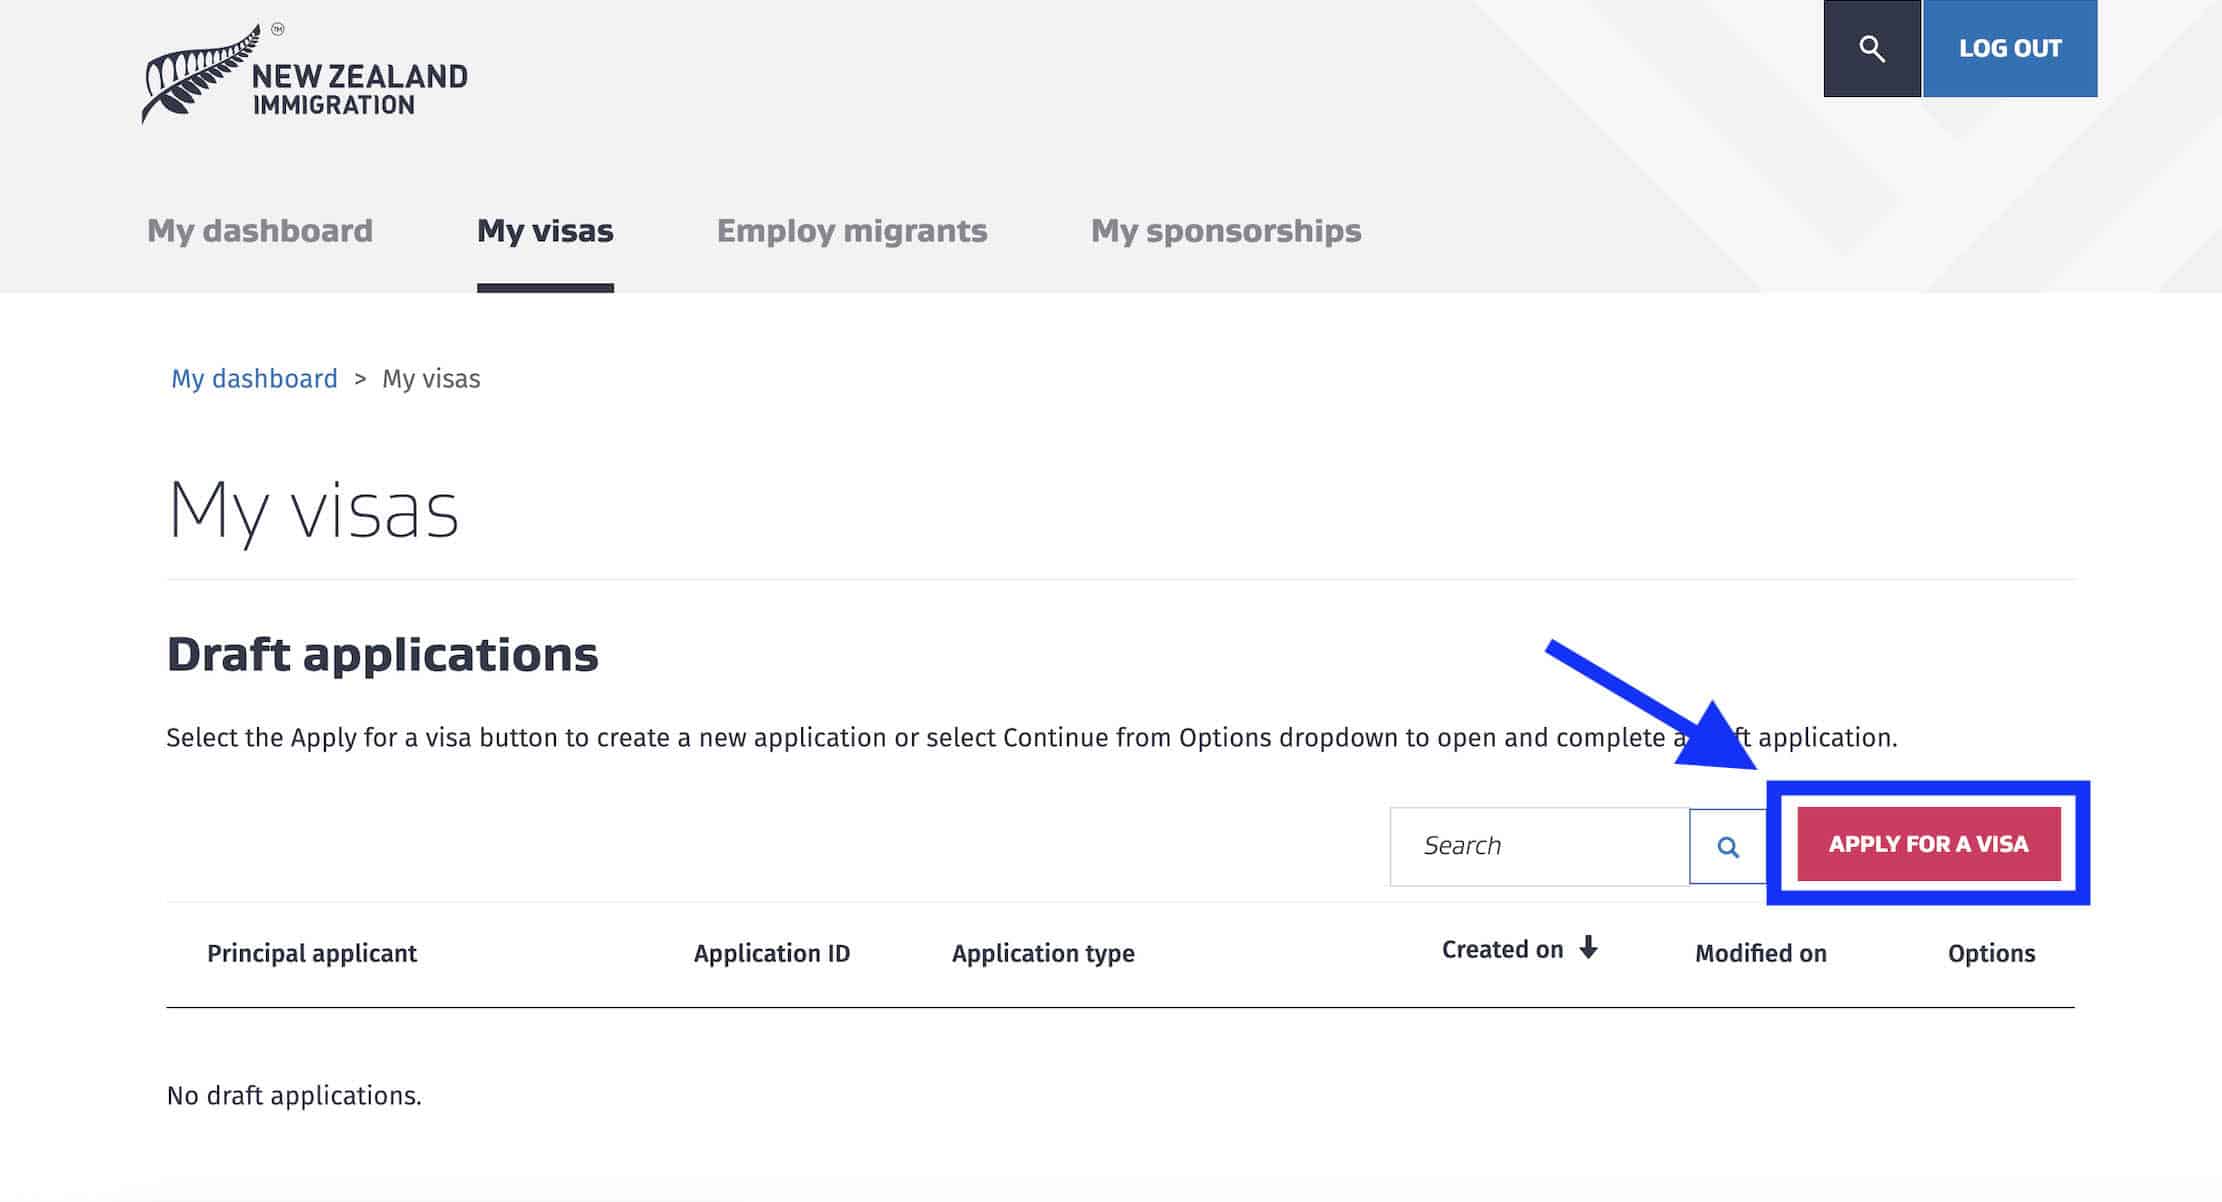
Click on MY VISAS. On the next page, you’ll find a section called DRAFT APPLICATIONS.
Click on APPLY FOR A VISA. On the next page, scroll down.
Under YOUR SITUATION, select TEMPORARY VISA. Since this guide is for those traveling for tourism only, make sure you select answers pertaining to TOURIST or HOLIDAY purpose. Towards the bottom of the page, you should see GENERAL VISITOR VISA.
Click on START MY APPLICATION.
That’s it. Now, it’s time to fill out the application form.
5. Fill out the application form.
If you’re coming from the application dashboard and you’re applying for yourself, look for the row labeled PRINCIPAL APPLICANT under the APPLICANTS section. Then click CONTINUE on the same row. It will then take you to the application form.
The good news is: this form is not too complicated. There are only a few questions. Unlike the US Visa and Australian visa application form which have around 20 pages, the New Zealand visa application form has only seven (7) pages, which are about the following:
Page 1: Identity Details. You’ll be asked to enter your name, passport details, immigration history, photo with gray background, email address, contact numbers, and physical address.
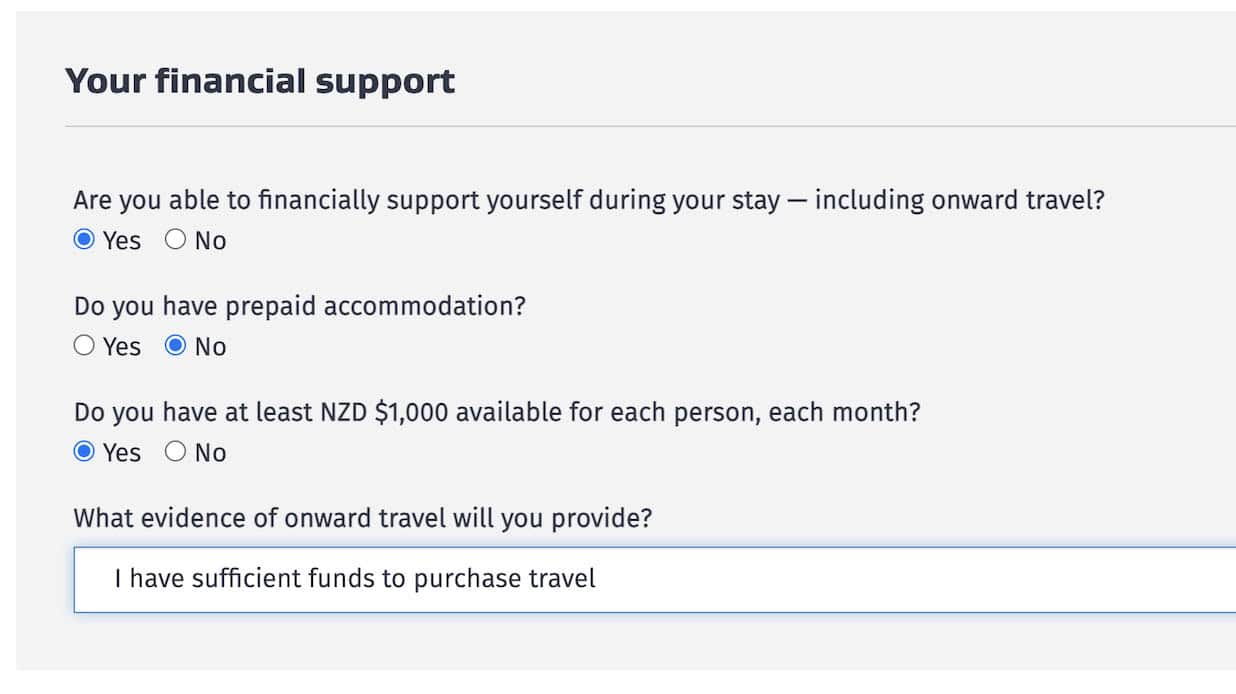
Page 2: Purpose of Visit. You’ll be asked to declare that you can afford to pay for this trip. It will also ask you if you possess NZD 1000 per person per month, if you have already booked your accommodations, and if there is anyone below 16 in this application.
Page 3: Character. Questions are about whether you have been convicted for a crime, deported from another country, or refused a visa before. You must answer truthfully.
Page 4: Health. In particular, you’ll be asked whether you have tuberculosis, whether you’ll be needing medical care during your stay in New Zealand, and whether you have undergone a medical examination for this application. The last bit made me pause for a bit because it made me think a medical test was required. But don’t panic. I answered NO to this but I was not asked for medical test results.
Page 5: Employment History. Input your employer’s details including the name of the company and how long you have been employed. If you’re self-employed, enter your business information. The form only requires your CURRENT employment.
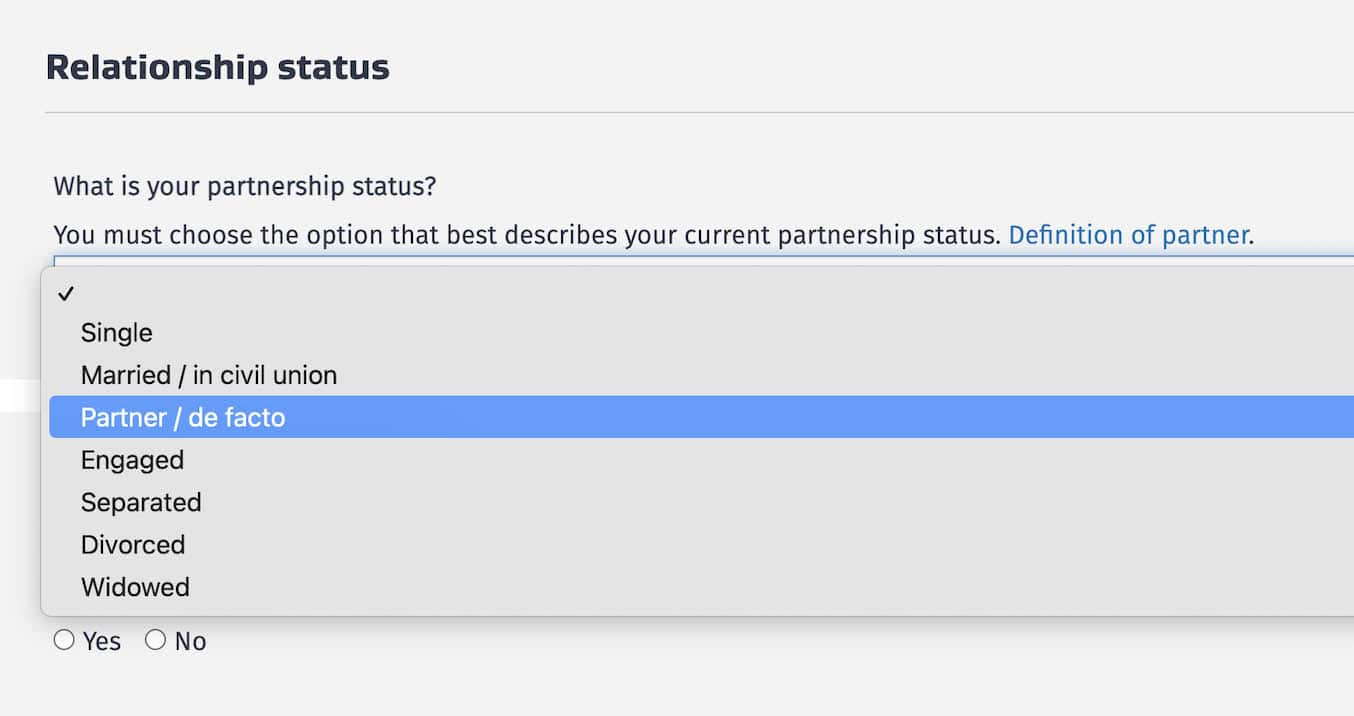
Page 6: Relationships. You’ll be asked for your relationship status: single, married, engaged, widowed, etc. You’ll spot a Partner/De Facto option, which refers to people in a relationship and live together in the same address for a considerable length of time. Straight and LGBTQIA+ relationships are covered here. You’ll also be asked if your partner is included in this visa application. If so, enter their details.
Page 7: Immigration Assistance. You need to declare whether you’re accomplishing the form on behalf of someone else or you have sought the assistance of an Immigration adviser. I answered NO to both questions.
That’s it!
💡 TIP! At any point, you can SAVE your progress. You don’t need to complete the form in one sitting. If there are details that you don’t have yet or are unsure of or you simply cannot finish it, you can click on SAVE & EXIT to save your progress and pick up where you left off another time.
But once you’re through, you’ll be led to the next section, which is….
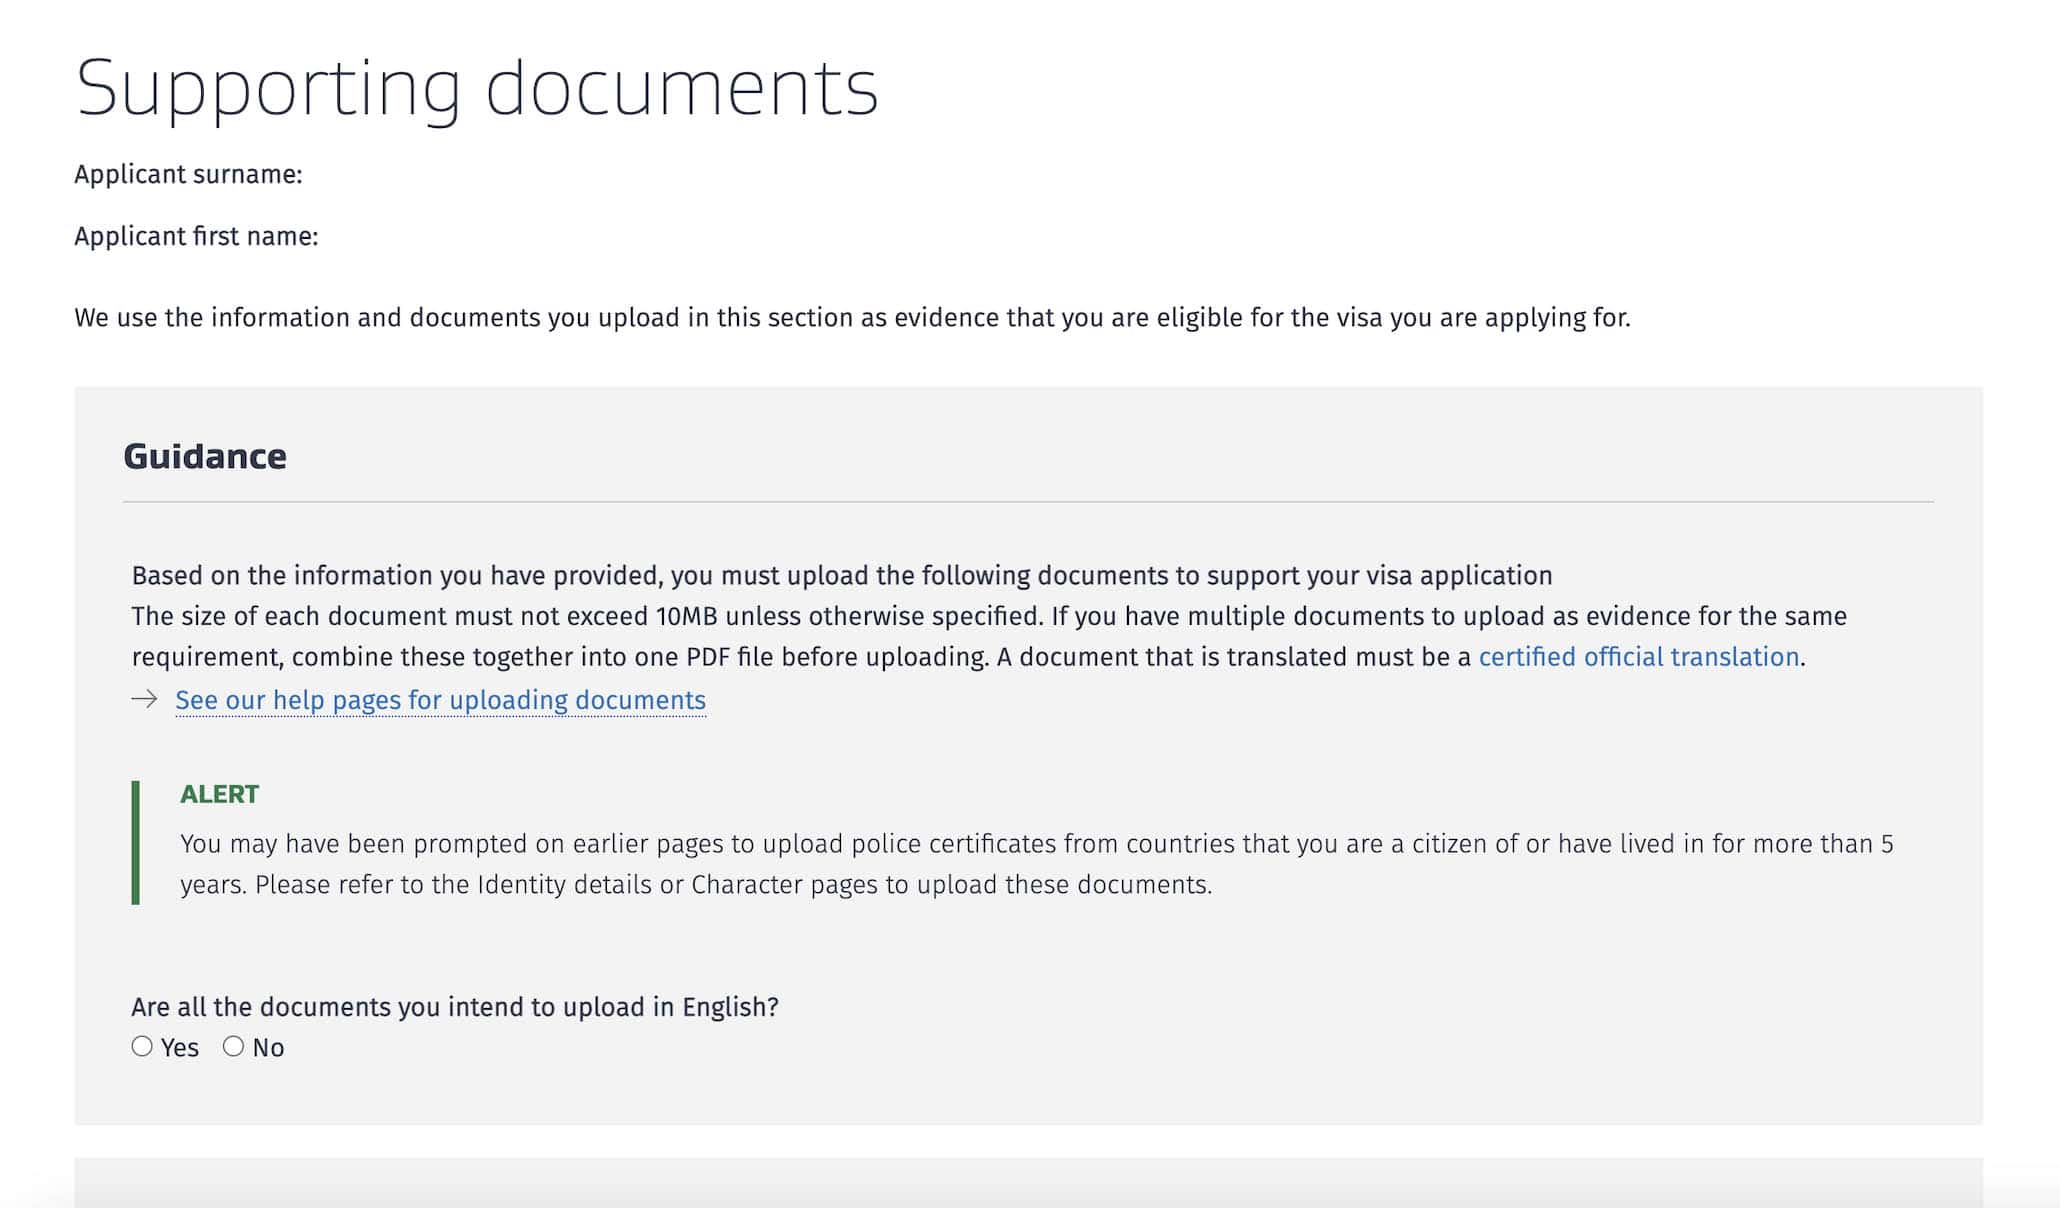
6. Upload supporting documents.
Before you could upload, you’ll be asked if all the documents you’re submitting are in English. If so, select YES. Having your documents in English will make things easier.
Then it’s time to upload your supporting documents. To do that, just click on BROWSE and select the file you intend to upload.
Identity evidence: a copy of your passport. You’ll also find this question: Are you living in a country that is not your country of citizenship? If you’re based in the Philippines, answer NO.
Purpose of visit evidence: detailed itinerary.
Evidence of genuine intent. proof from employer that your leave of absence is approved. There is also a section about Australian visa. An AU visa is NOT required, but if you have one, upload it because it’ll help improve your chances. Otherwise, you can just skip this part. You’ll also be encouraged to upload other documents that can serve as proof of genuine intent. I attached a Certificate of Employment, flight reservation, and hotel booking.
Evidence of funds. Under “Are you providing bank or financial statements…?”, answer YES, upload your bank documents, and enter the details of your bank account.
Other evidence. You can upload your BIR Income Tax Return (ITR) and additional bank accounts under OTHER FINANCIAL INFORMATION. You can also submit a cover letter.
💡 IMPORTANT NOTES!
Your documents must all be in PDF file format. Make sure they are all readable and NOT password-protected. Bank statements, especially those downloaded online, are usually encrypted. If that’s the case, ensure that you remove the password before uploading so the evaluator could access them.
If you upload the wrong file, you can delete and replace it with the right one. It’s not final until you submit the application.
If everything looks good and correct, check the tickboxes under DECLARATION and click SAVE & CONTINUE.
7. Submit and pay for your application.
After uploading, on the next page…
Review all the information you entered. If you spot a mistake, you can go back and correct it.
If everything is in order, click READY FOR SUBMISSION. You’ll be redirected back to the Application dashboard.
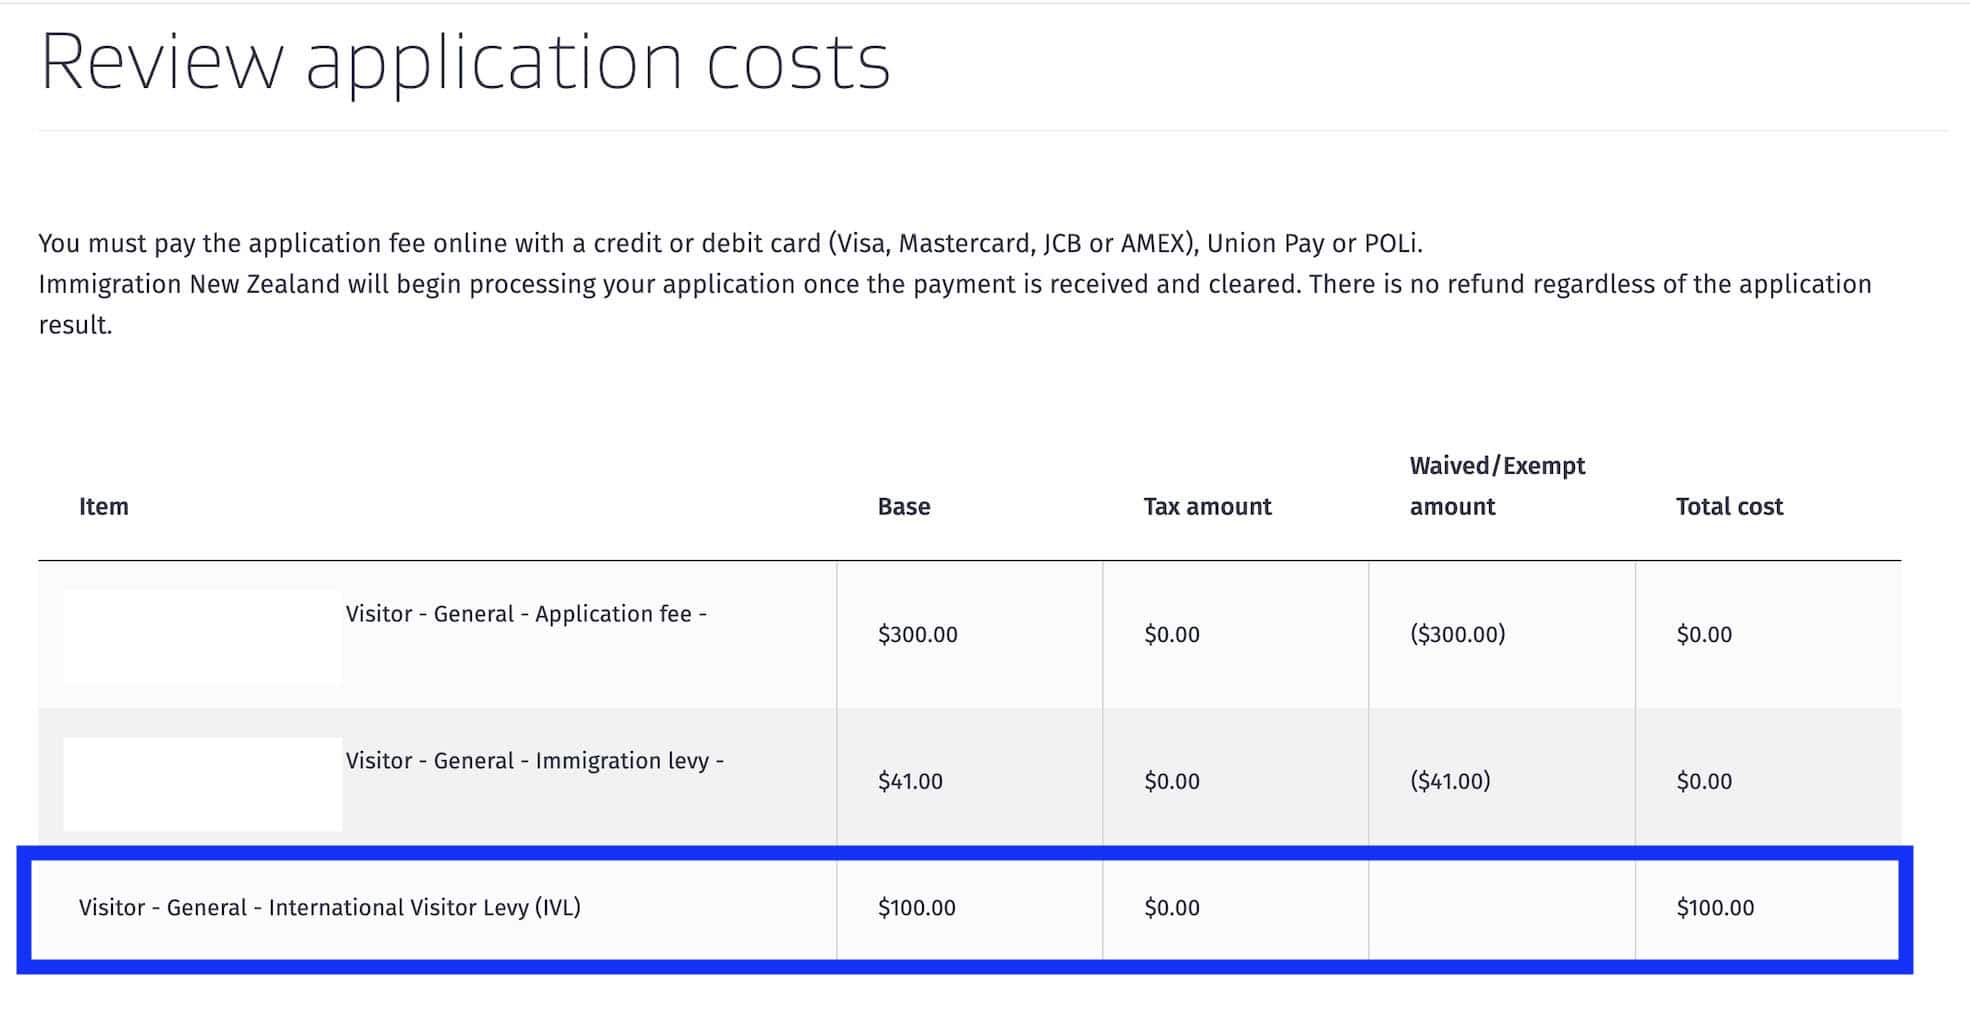
On the right side of the dashboard, find the button labeled PAY & SUBMIT APPLICATION. Hit it and review the application costs.
The total amount for a Visitor Visa is only NZD 100 (roughly PHP 3,300).
You can pay via credit card, debit card, or Union Pay. Once done, you should receive a message stating that the transaction is successful.
After this, there’s nothing else you can do but wait.
8. Wait for the result.
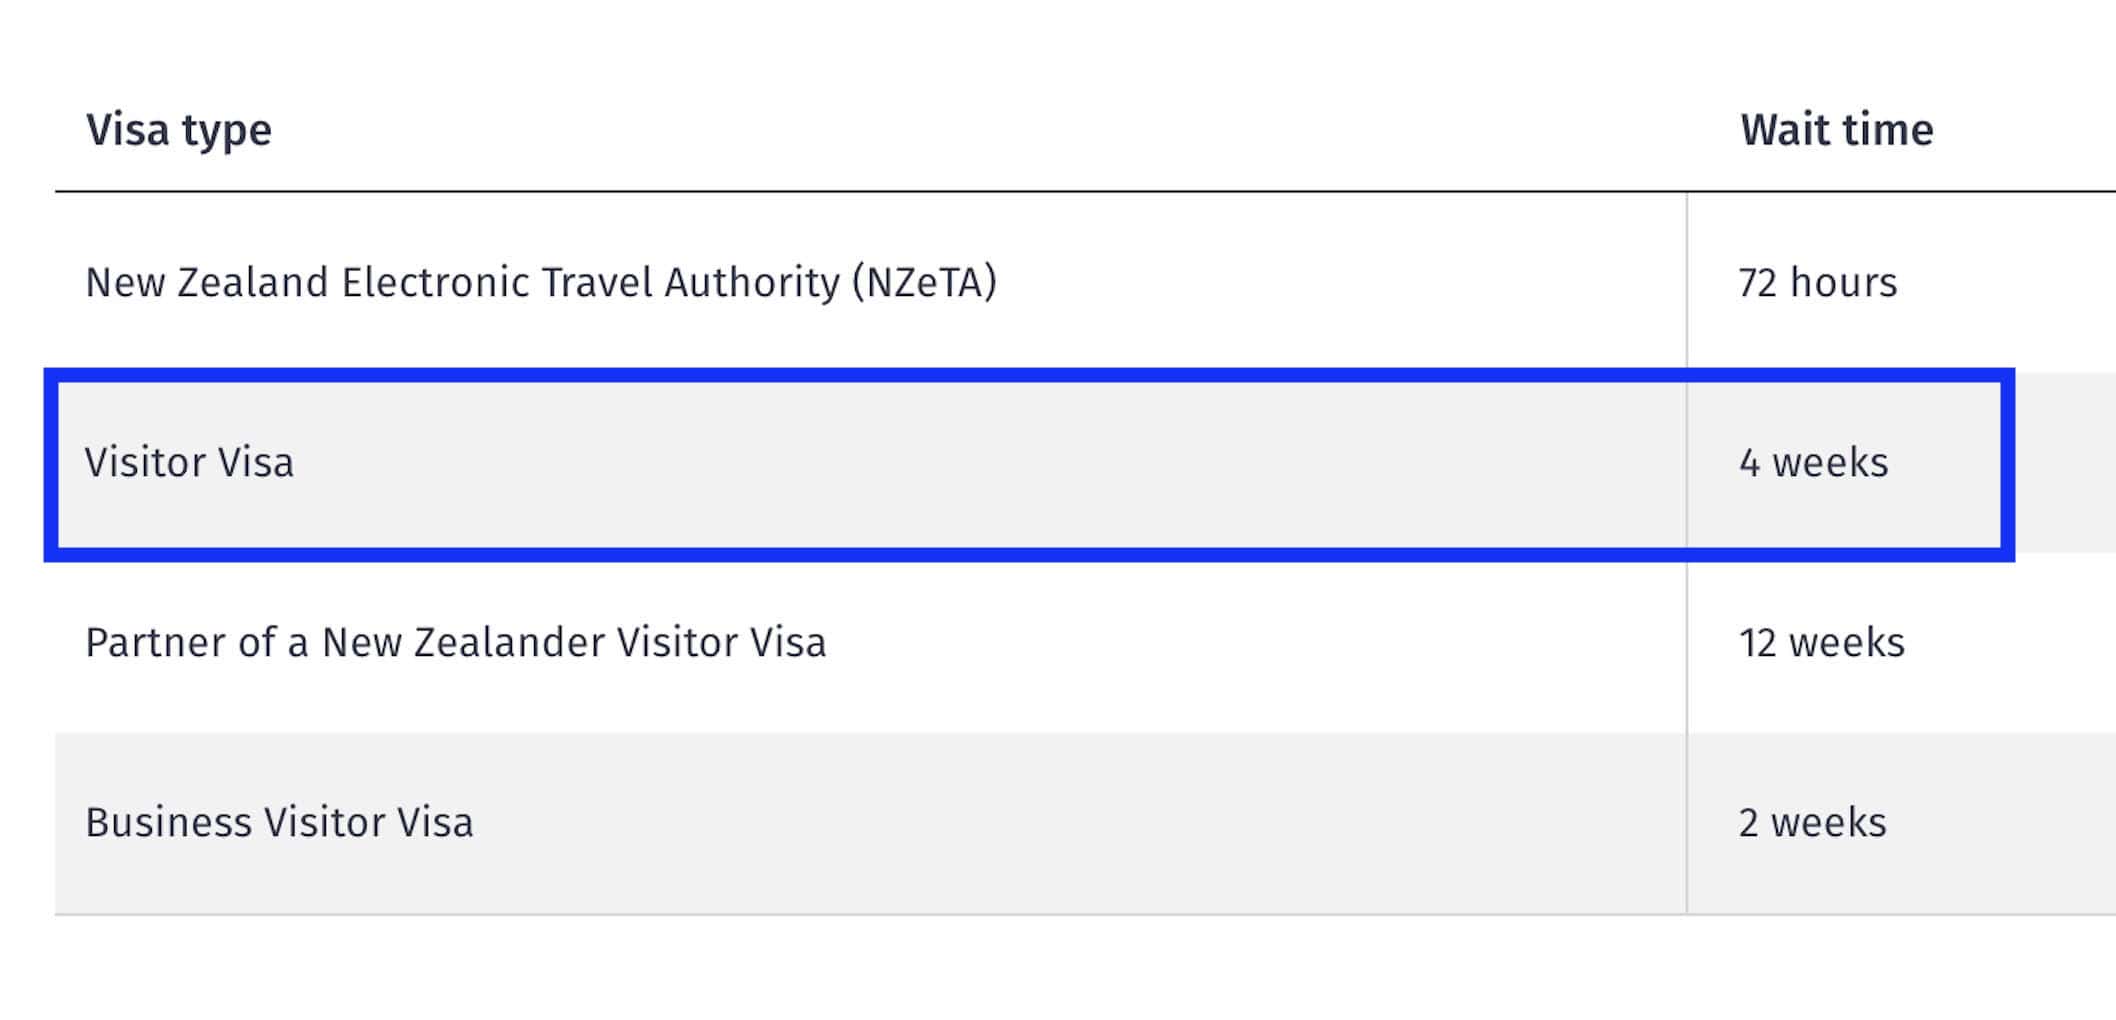
According to the New Zealand Immigration website, the usual wait time is 4 weeks.
But to be honest, I got my visa after only 2 days, while Vins got his after 6 days. Below are our timelines:
YOSH December 11 – I submitted my application December 13 – I received the visa (approved)
VINS December 21 – Vins submitted his application December 27 – Vins received the visa (approved)
Note that both Vins and I had valid Australian visas, too, and submitted them as supporting docs. One of our companions who didn’t have an AU visa got approved after exactly two (2) weeks or 14 days.
That said, you’re highly encouraged to apply early and have at least four weeks of allowance to be safe. We actually applied two months before our travel date.
FREQUENTLY ASKED QUESTIONS
What is the validity period of the visa?
I was granted a multiple-entry visitor visa, valid for one (1) year, starting on the day the visa was issued.
How long can I stay in New Zealand?
Two months per trip, in our case.
How much money should you have to get approved?
No idea. At the very least, you should have NZD 1000 per month because that’s what’s indicated on the application form. But of course, you should have more.
At one point in the uploading process, you will be asked the following questions:
It’s important to remember, however, that it’s not just the funds that are being inspected. More importantly, you should be able to show that you have strong rootedness or ties to the Philippines and that you have no reason to overstay in New Zealand.
Is flight ticket required?
No, flight booking is optional. But if you already have one — say, you got it from a seat sale — go ahead and submit. If you don’t have one yet, you may opt to not submit.
But if you really want to submit this for better chances, don’t upload an actual ticket. Use a flight reservation instead. This is different from an actual flight booking because a flight reservation can be cancelled in case your application is rejected. You can get one from travel agencies.
We usually get our flight reservation from Gazelle Travel & Tours, a licensed and accredited travel agency here in the Philippines. Since we’re always asked about where we get ours, we decided to put up a page where you can easily order one.
No, this is optional and you may choose to skip this. But if you want to submit to increase your odds, book a hotel that has a FREE CANCELLATION policy so you can easily refund should you be refused a visa. Search for free-cancellation hotels here!
Here are some top-rated hotels available online. Make sure the room you’re booking is marked “Free cancellation.” Use promo code THEPOORTRAVELERKLOOK for extra discount!
NO, a cover letter is NOT required. But we recommend submitting one especially if your case is complicated or if you have to explain something.
Remember, there will be NO interview, so a cover letter is your only opportunity to explain away anything that could be confusing or dubious.
What are the common reasons for visa denial?
I don’t know what the most usual reasons for refusal are, but a friend of mine who was denied a visa showed me the refusal letter. In her case, the main reasons cited were “weak ties in home country” and “weak family ties.”
This is why you should submit as many relevant supporting documents that you could, especially those proving genuine intent and rootedness in the Philippines. You must be able to show that you have a good life here in the Philippines and you have a stable job or source of income here.
We think that in particular, the reason for her denial was that she has just transferred to a new company, so the employer details in the application form and the employer in her ITR didn’t match. And she didn’t submit a cover letter to explain this, either.
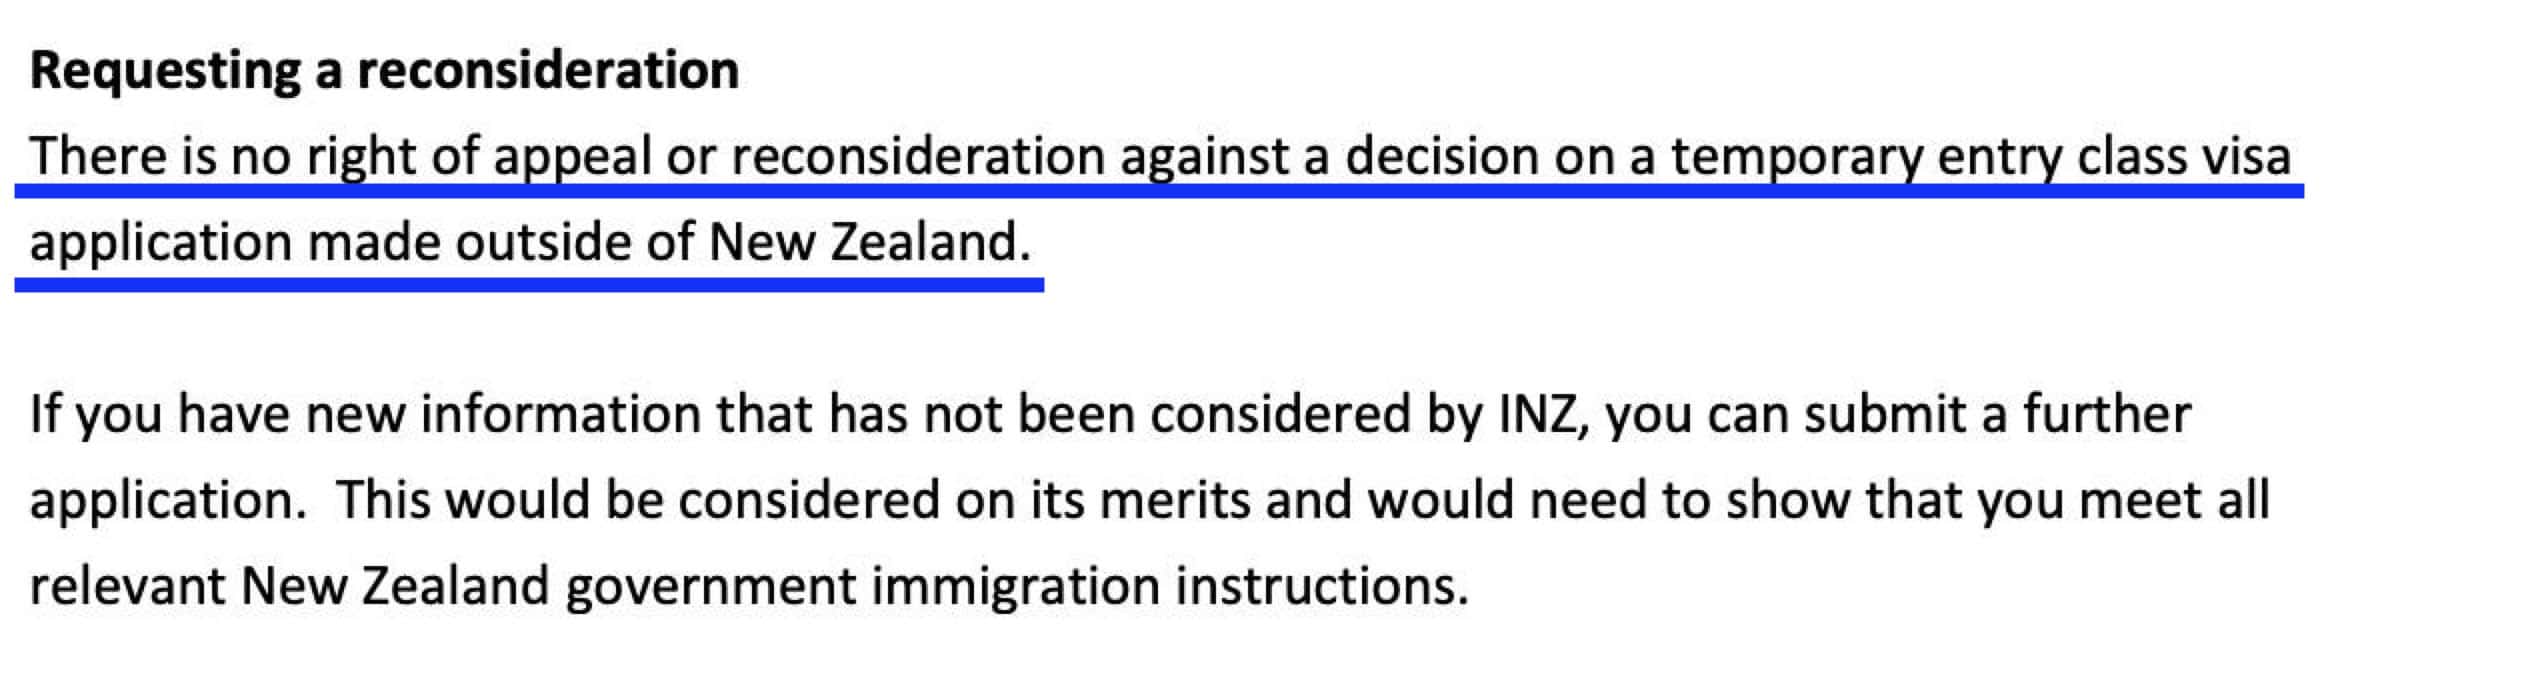
Can you appeal after being rejected a visa?
NO, if you applied outside New Zealand. I’m assuming most of you reading this article are not based in NZ.
Here’s an excerpt from the Refusal Letter that a friend received when she was denied a New Zealand visa.
What you can do is reapply. This means you’ll need to start a new application and pay another visa fee. But before you reapply, make sure you have new supporting documents to add that could address the reasons for refusal. If you’ll be submitting the exact same pile of documents, you might just be wasting another NZD 100.
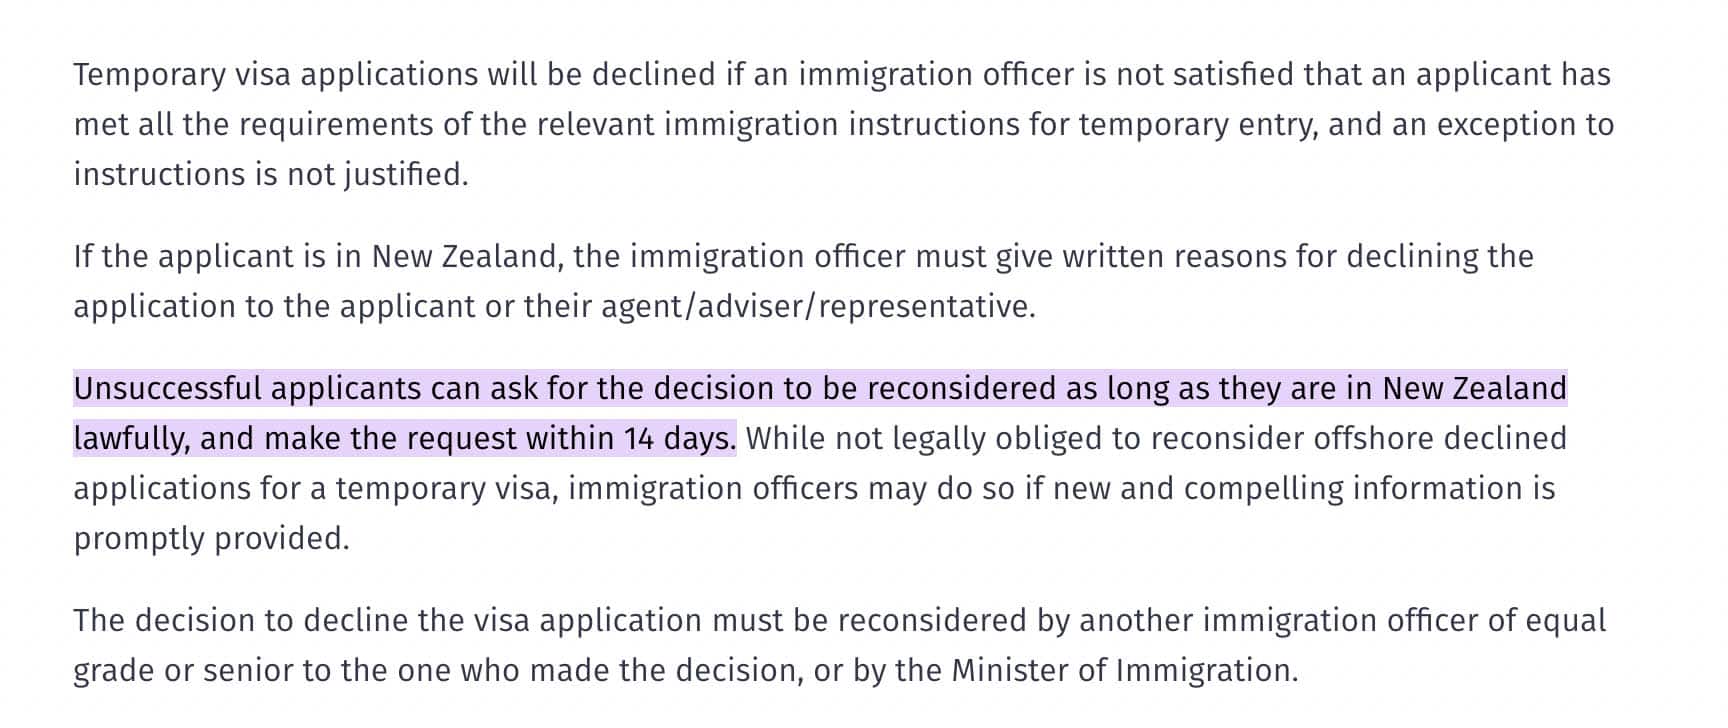
If you’re currently in New Zealand, YES, you can appeal as long as you make the request within 14 days.
This screenshot is from the official New Zealand Immigration website
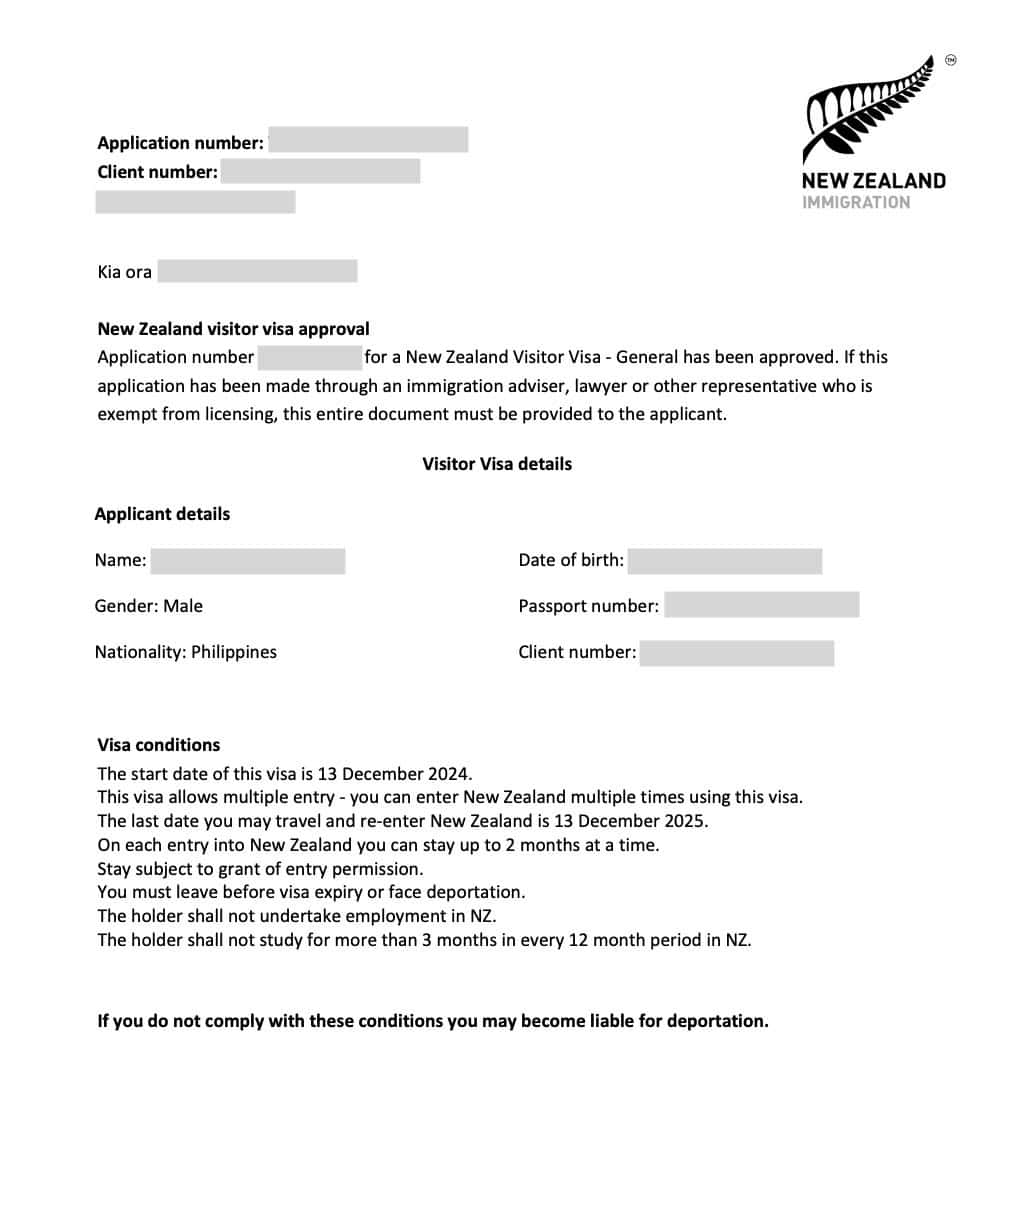
What does a New Zealand visa look like?
Like this:
It’s a simple PDF file with an NZ Immigration logo and visa conditions. It’s NOT the sticker type that is affixed on the passport.
That’s all for now. Remember, plan smart, travel safe, and make every trip WORTH IT!
Being the second largest country in the world, Canada has a wide variety of attractions that draw tourists. It has natural wonders, rich cultural diversity, and vibrant cities. Its most notable natural wonder, the Niagara Falls, is just one of the several waterfalls you can see in the country. Countless national parks, some of which are recognized as a UNESCO World Heritage Site or UNESCO Biosphere Reserve, also await nature lovers. And in between its towering rockies and extensive coastlines, you can admire its pristine lakes, prairies, and wildlife.
Aside from its stunning geography, Canada has a rich culture and history too. You can get glimpses of that within its cities like Vancouver, Toronto, and Montreal. To top it all off, Canada is also among the places where you can see the elusive Northern Lights. Every corner of Canada really offers something for different types of travelers to enjoy. It’s no wonder why millions of tourists around the world goes to the Maple Leaf Country to explore.
But how do you get to Canada? This would depend on which country you’re from. Some countries enjoy visa-free travel, while others need to secure a visa. For some visa-required countries, their citizens may be eligible to apply for an electronic travel authorization or eTA instead of a visa. In this guide, we’ll explain who is eligible to apply for a Canada eTA and discuss the step-by-step application process on how you can get one.
An eTA or electronic travel authorization is a requirement for visa-exempt foreign nationals who are entering Canada by air. Travelers from select visa-required countries including the Philippines can also apply for an eTA provided that they meet the ALL of these requirements:
You’ve held a Canadian visitor visa (temporary resident visa) in the past 10 years OR you have a valid US non-immigrant visa on the day of your eTA application.
You’re going to Canada for a temporary stay (usually for 6 months or less).
You’re flying to or transiting through an airport in Canada using a valid passport from an eligible visa-required country.
Eligible Visa-Required Countries
As of 2025, here is a list of select visa-required countries that are eligible to apply for an eTA:
Antigua and Barbuda
Argentina
Brazil
Costa Rica
Mexico
Morocco
Panama
Philippines
St. Kitts and Nevis
St. Lucia
St. Vincent and the Grenadines
Seychelles
Thailand
Trinidad and Tobago
Uruguay
eTA-Eligible Visa-Exempt Countries
As of 2025, here is a list of visa-exempt countries that require an eTA if flying to Canada:
Andorra
Australia
Austria
Bahamas
Barbados
Belgium
British Citizen
British National (Overseas)
British Overseas Citizen (re-admissible to the United Kingdom)
British Overseas Territory Citizen with citizenship through birth, descent, naturalization or registration in one of the British overseas territories of: -Anguilla -Bermuda -British Virgin Islands -Cayman Islands -Falkland Islands (Malvinas) -Gibraltar -Montserrat -Pitcairn Island -Saint Helena -Turks and Caicos Islands
British Subject with a right of abode in the United Kingdom
Brunei Darussalam
Bulgaria
Chile
Croatia
Cyprus
Czech Republic
Denmark
Estonia
Finland
France
Germany
Greece
Hong Kong Special Administrative Region of the People’s Republic of China (must have a passport issued by Hong Kong SAR)
Hungary
Iceland
Ireland
Israel (must have a national Israeli passport)
Italy
Japan
Republic of Korea
Latvia
Liechtenstein
Lithuania
Luxembourg
Malta
Monaco
Netherlands
New Zealand
Norway
Papua New Guinea
Poland
Portugal
Romania (electronic passport holders only)
Samoa
San Marino
Singapore
Slovakia
Slovenia
Solomon Islands
Spain
Sweden
Switzerland
Taiwan (must have an ordinary passport issued by the Ministry of Foreign Affairs in Taiwan that includes the personal identification number)
United Arab Emirates
Vatican City State (must have a passport or travel document issued by the Vatican)
How to Apply for a Canada eTA
1. Prepare the necessary information.
Before you start filling out the application form, make sure you have the following with you:
Valid Passport
Valid Email Address
Debit or Credit Card
You will need these to fill out the form and pay for the eTA fee.
2. Find out if you’re eligible for a Canada eTA.
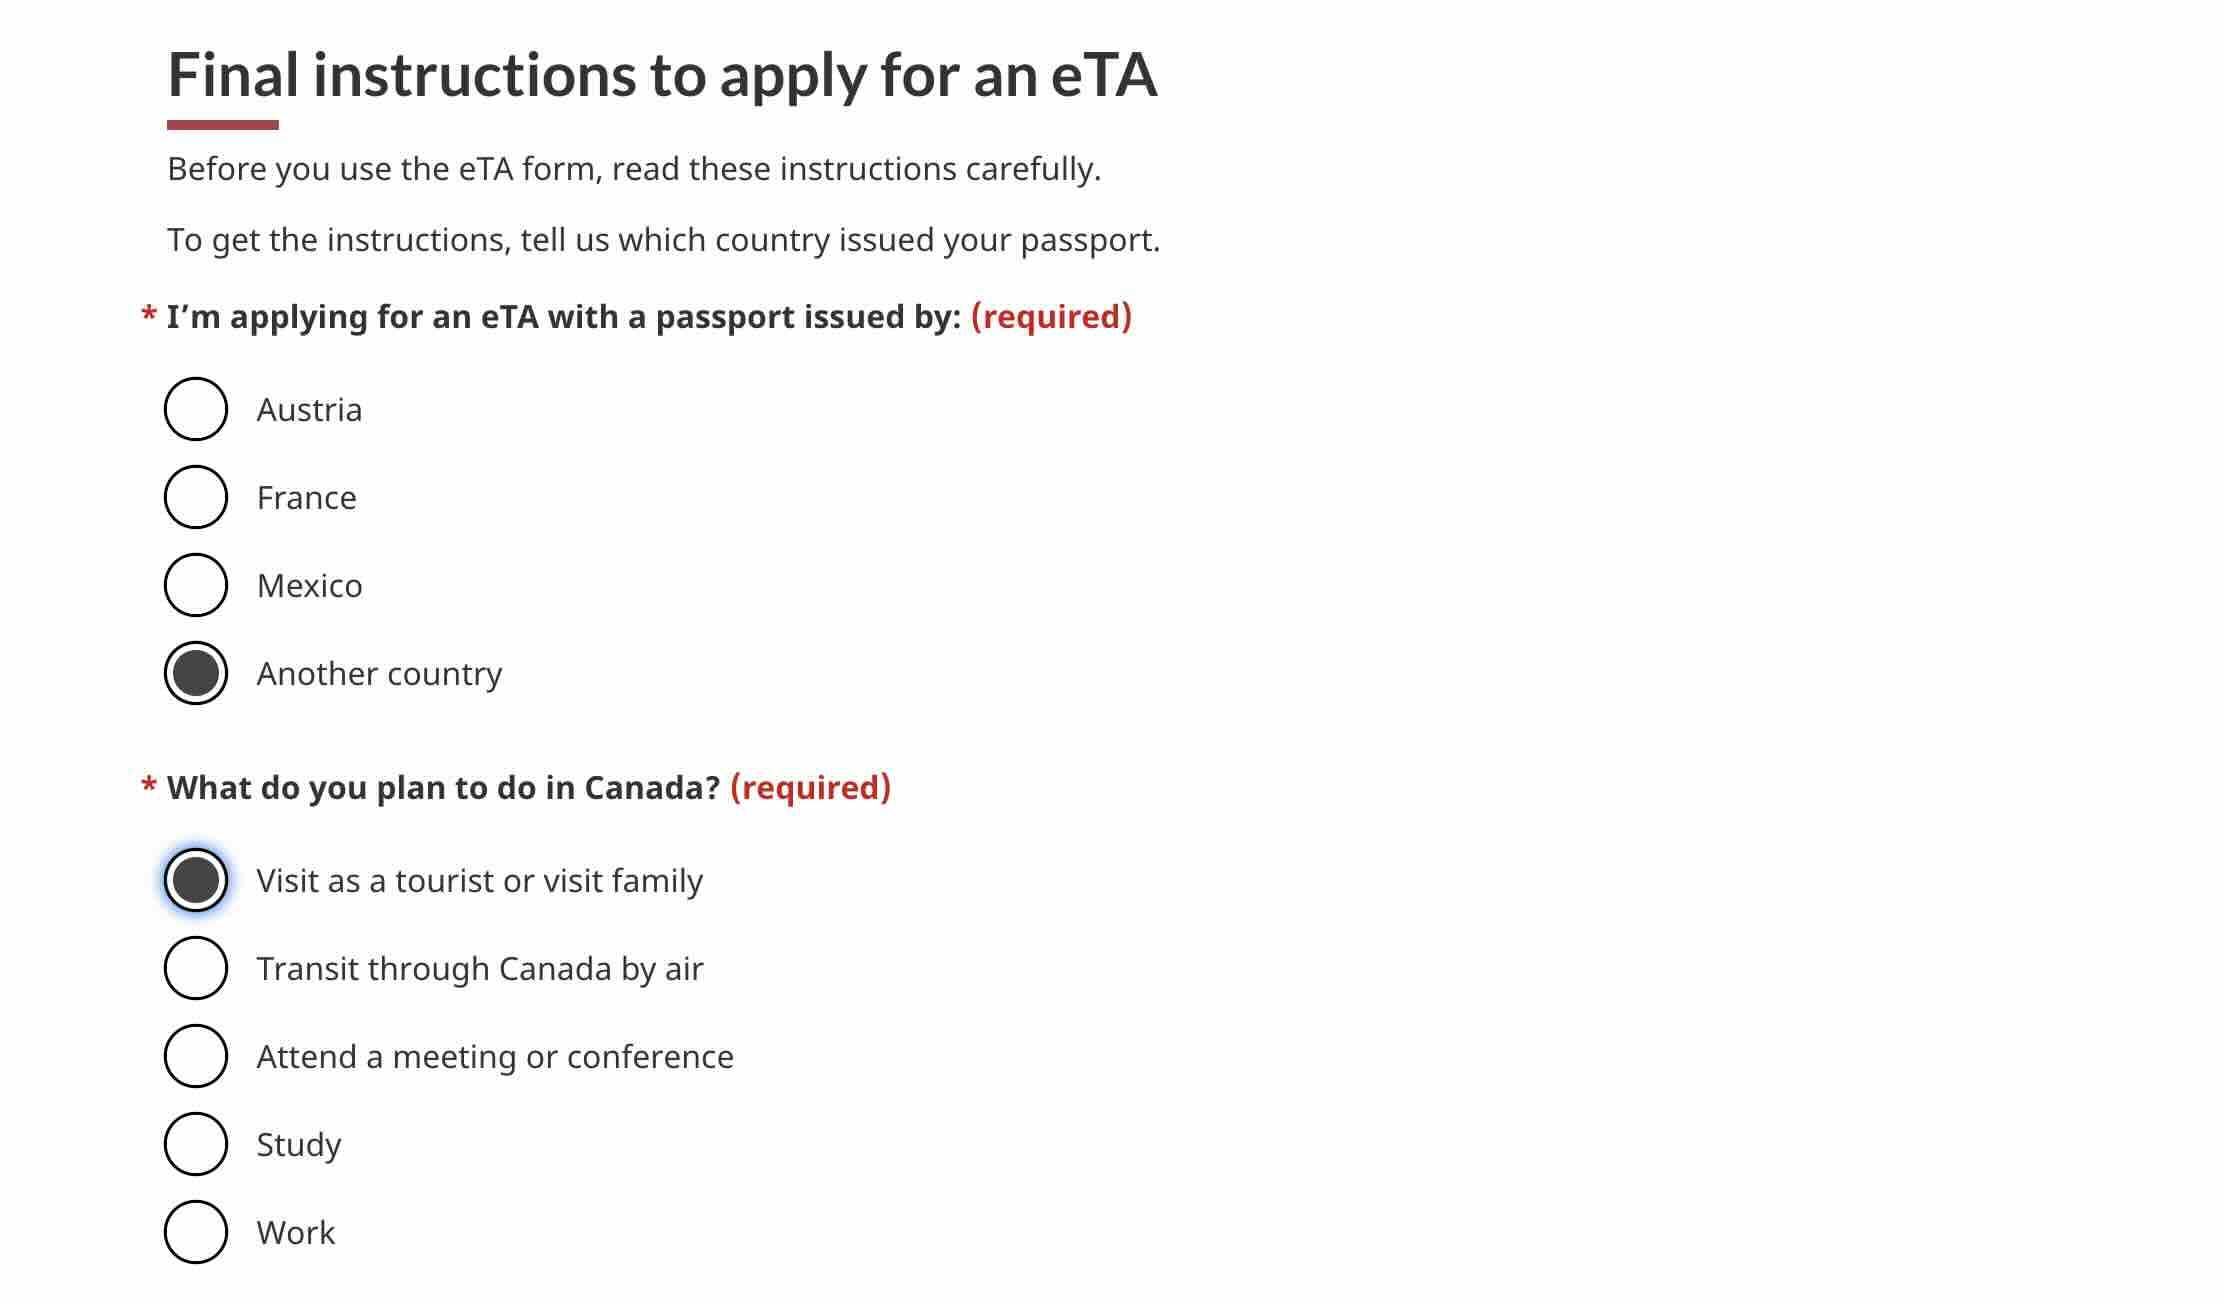
Go to the Canada eTA website. You will be led to a page where you have to answer which country issued your passport and the purpose of your travel to Canada. After that, you will be directed to the actual eTA form.
Then, you will answer a few questions to determine whether you’re eligible to apply for an eTA. If you’re not eligible, you will see a note that will tell you that you cannot apply for an eTA and you may need a visa or other type of document to travel to Canada. If you are eligible, you will see the next part of the application form.
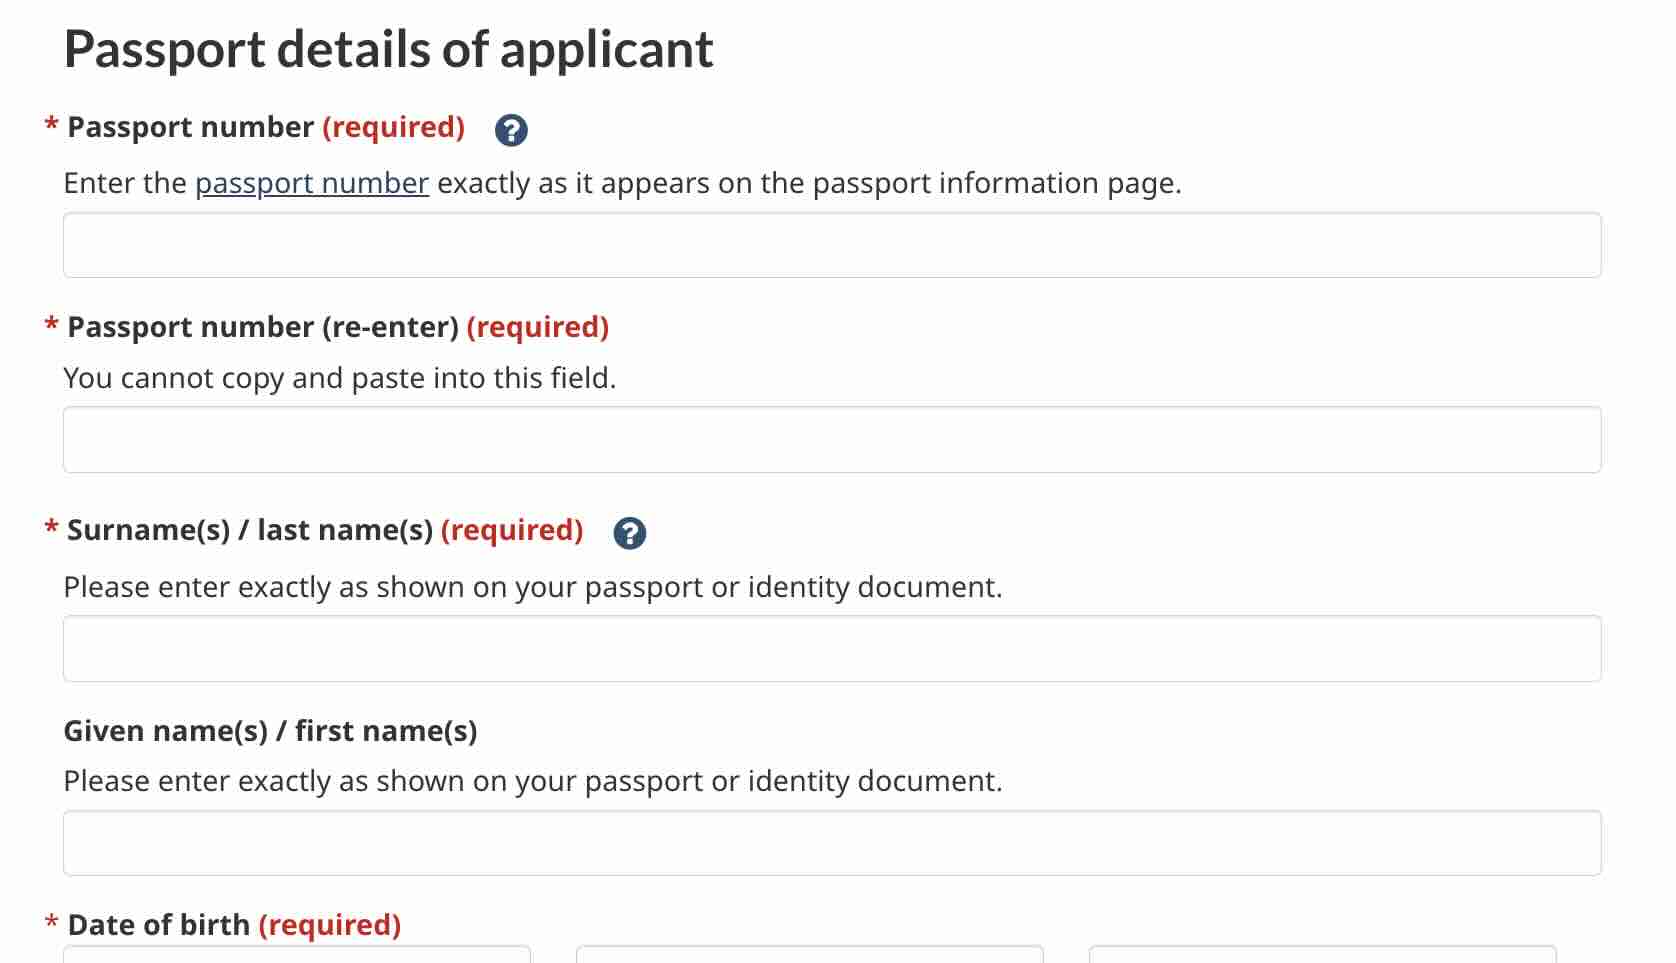
3. Enter your passport details.
You will be asked to enter your passport number, surname, given name, and date of birth among other passport details. Make sure to enter the correct details as indicated on your valid passport.
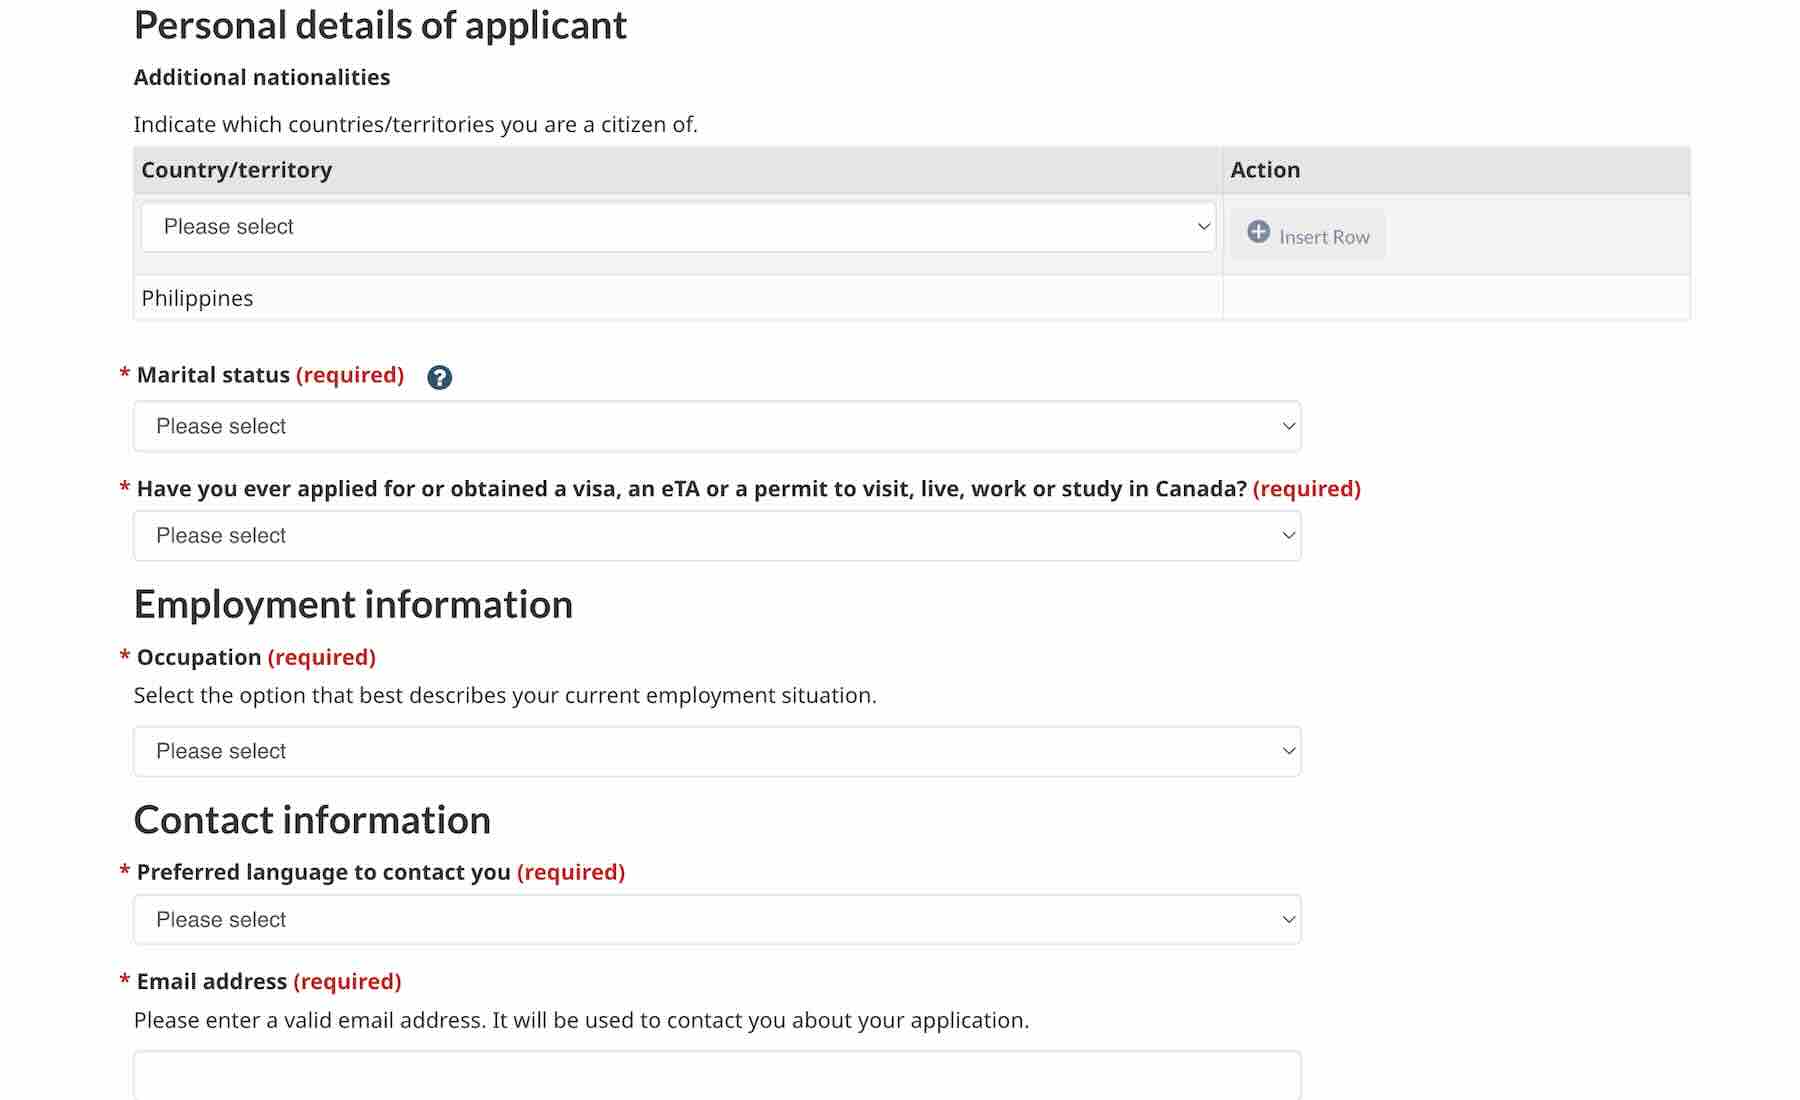
4. Enter your personal details.
In this part of the form, you need to answer whether you’ve previously applied for or held a visa, an eTA, or permit to enter Canada. If you have, you may enter your Unique Client Identifier (UCI) or visa/eTA or permit number.
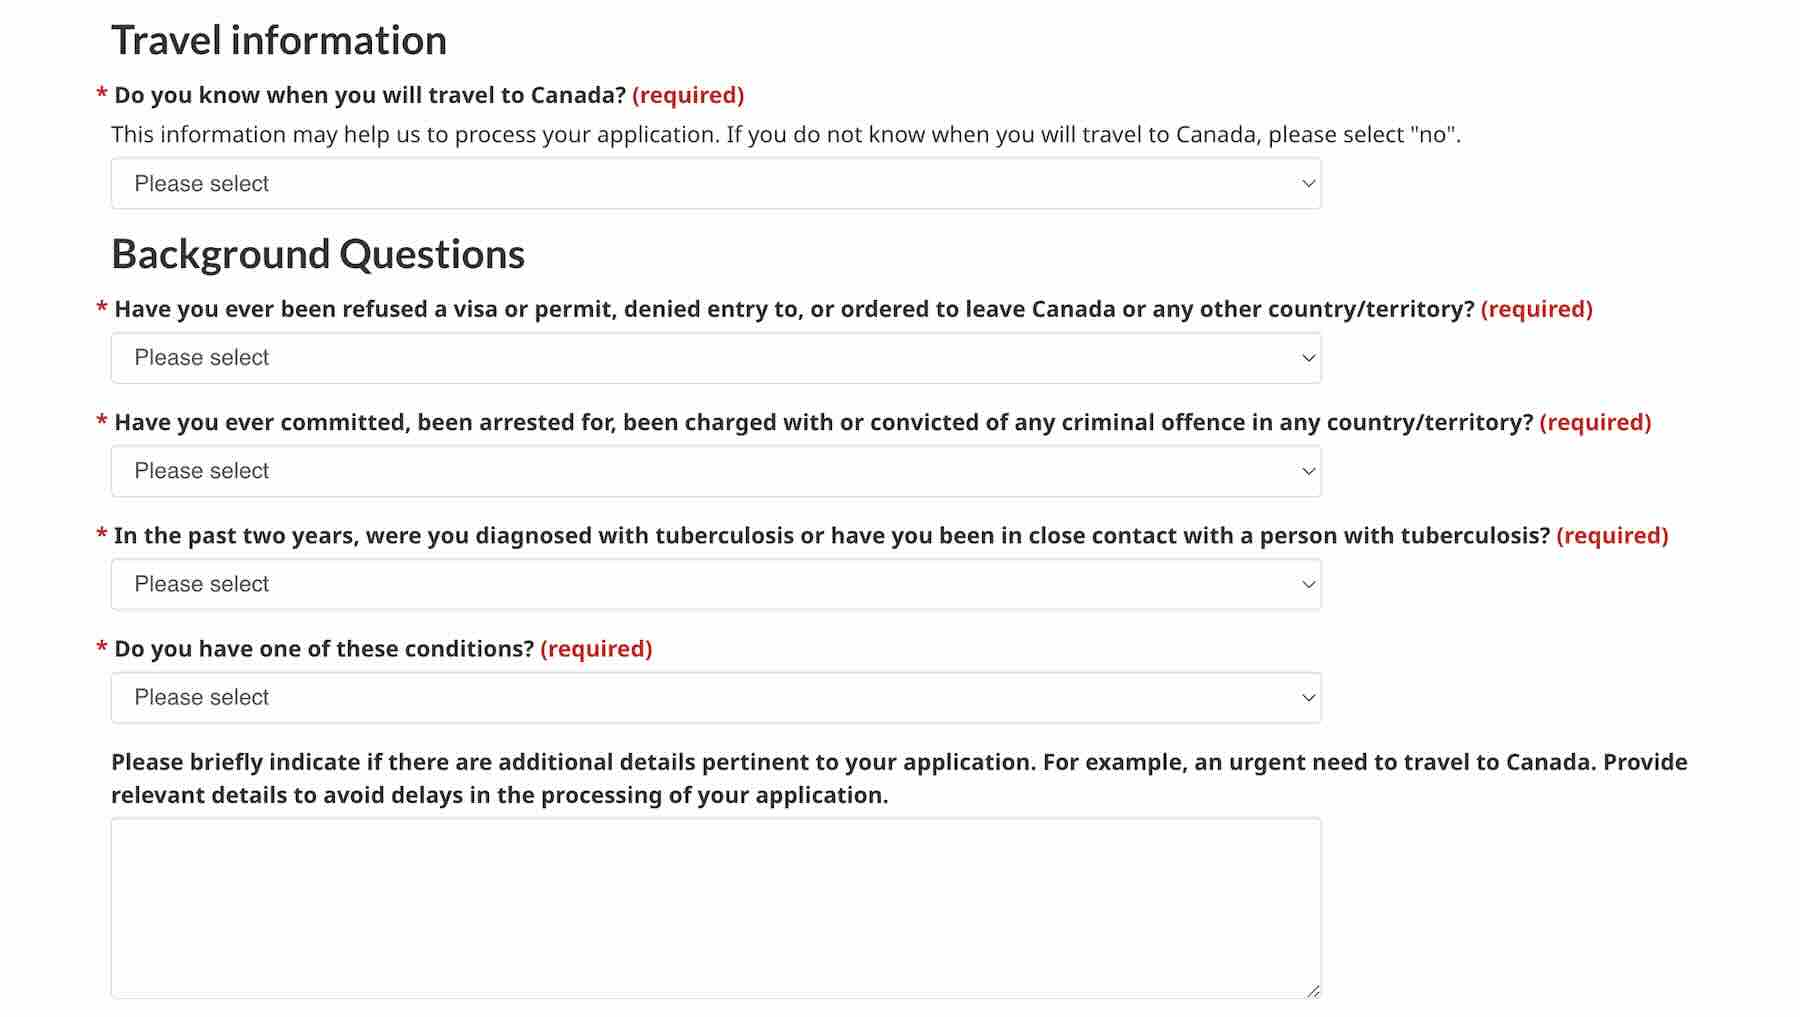
Next, you need to enter your employment information, contact information and residential address. If you already know when you’re traveling to Canada, you will be required to enter your travel information too. If not, just select no and proceed to answering the background questions.
Once you’ve completed all the information, double check if they are correct. Then, read the privacy notice and click ‘I Agree’ and enter your complete name as indicated on your passport to sign.
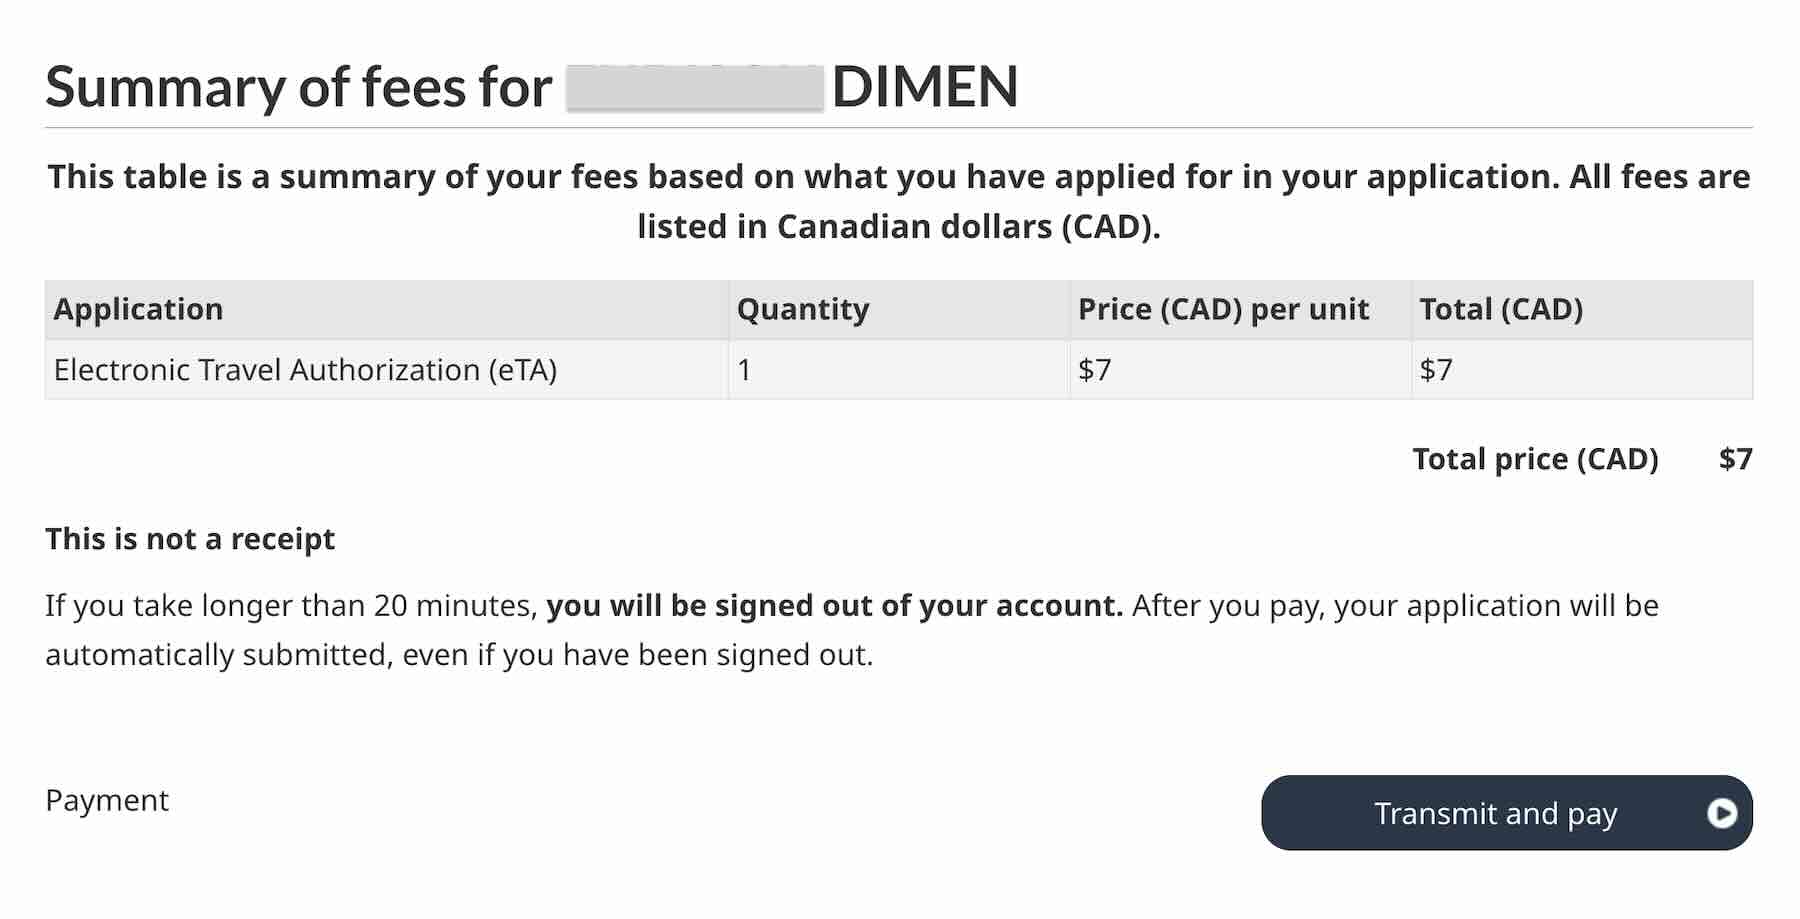
5. Pay the eTA fee.
After filling out the application form, click Proceed to Payment. You’ll be directed to a summary of fees, which is a total of CAD 7 for the eTA. Then, click Transmit and Pay.
Enter your debit or credit card information and click checkout. You might need to enter an OTP to verify your transaction.
Once you’ve successfully paid, your application will be automatically submitted.
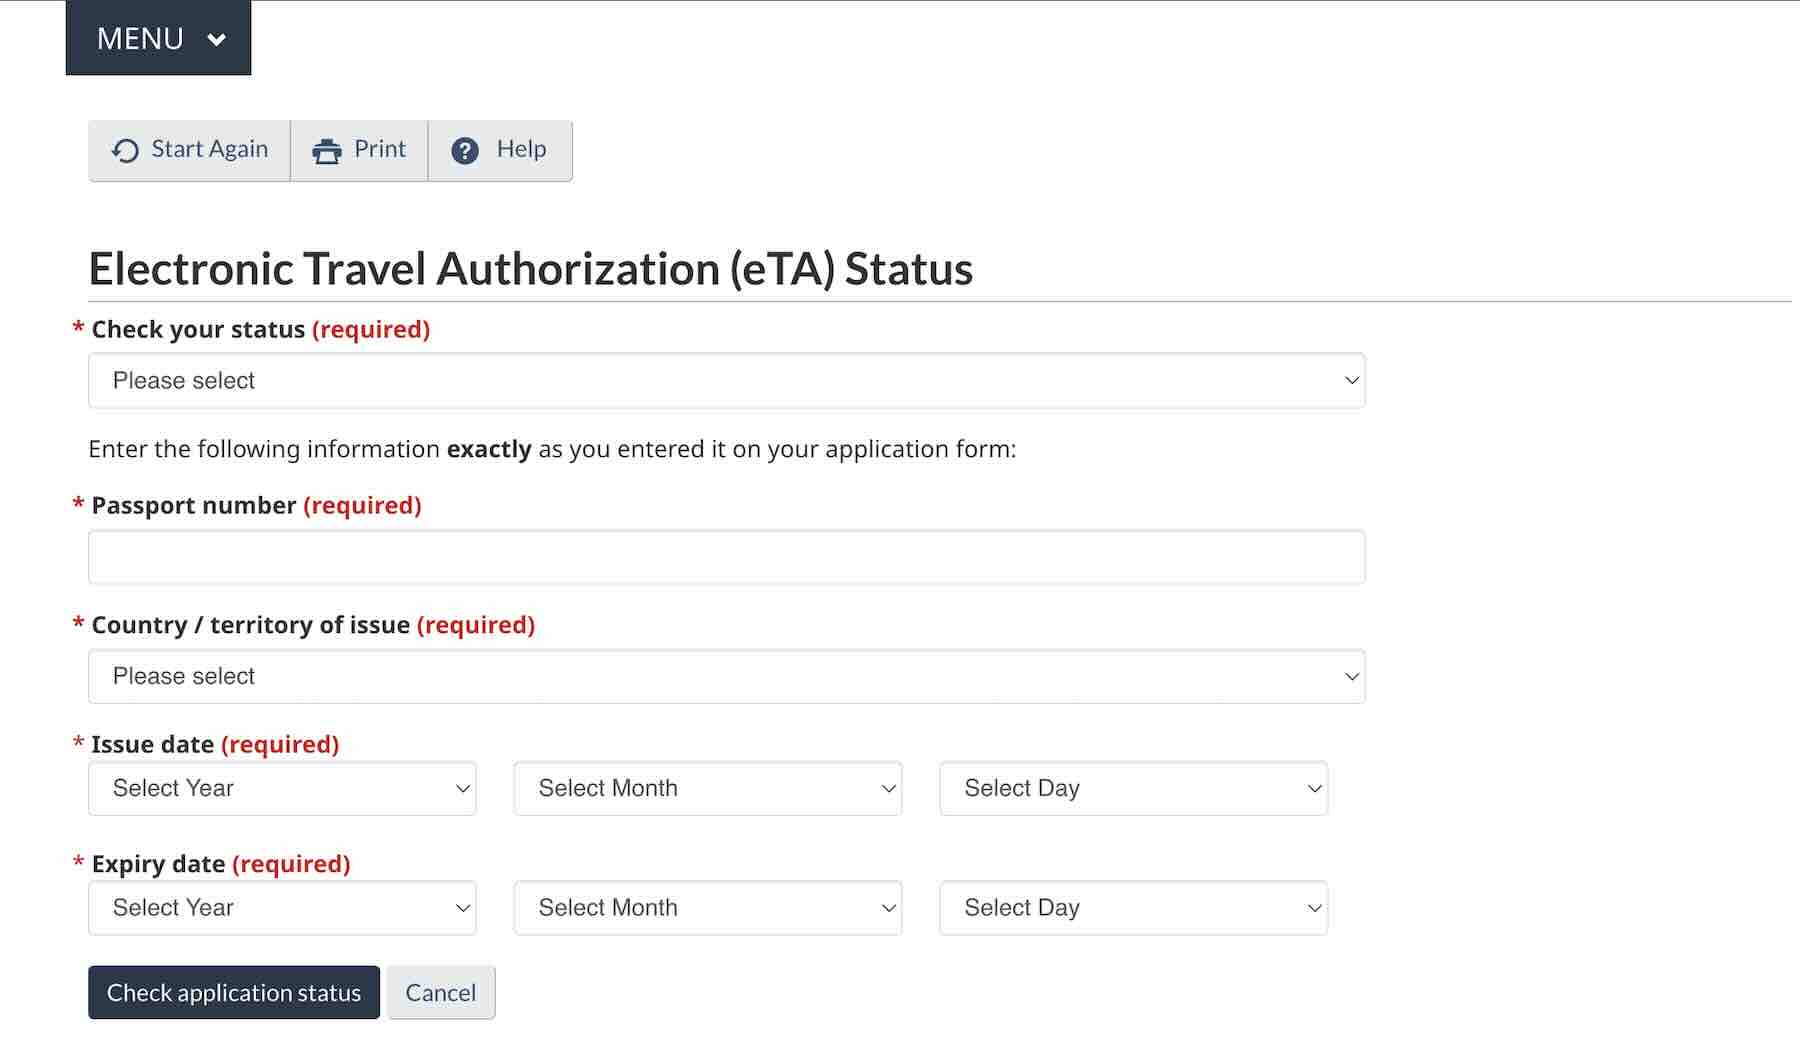
6. Wait for an email about your eTA.
After submitting your application and paying the fee, expect an email from Immigration, Refugees, and Citizenship Canada. According to the Canada eTA website, most eTAs are approved within minutes. If you don’t see anything in your inbox, make sure to check the junk or spam folder too.
If your eTA is approved, the email you will receive will include your eTA number. Make sure to save this number in case you need to contact the IRCC or check the status of your eTA in the future.
If you don’t receive an email right away, your application may be taking longer to process. In such cases, the IRCC will send you an email within 72 hours with instructions for the next steps. After receiving this email, you may use the eTA Check Status tool to check the progress of your application.
Frequently Asked Questions
How much is the Canada eTA?
The Canada eTA costs CAD 7. You can pay the fee online after filling out the application form. Accepted mode of payments are debit and credit cards.
Am I eligible to apply for a Canada eTA?
You can find out if you are eligible to apply for a Canada eTA by visiting this page and answering the questions provided.
Can I apply for a Canada eTA for my family?
Yes. However, a separate eTA application must be submitted for each person.
If you’re applying for eTA for your dependents/family members, make sure to answer “yes” to “Are you applying on behalf of someone?” You will also need to enter your details on the Parent/guardian or representative details section.