Ready to take your photography to the next level? Our expert guide to the best camera accessories will help you narrow down the exact essentials you need to consider.
Once you start getting more and more into photography you quickly realise that there are certain tools that are essential tot make your life easier, and your photos more creative.
Some of these accessories are necessary for your camera to work, and some will simply help you take better photos.
After the success of our popular best travel cameras article (helping over 2 million photographers to date!) we received countless emails from people asking what photo camera accessories we use and recommend.
Whether you’ve bought the best travel camera you can find or are just a hobbyist, trying to choose the best camera accessories is something you seriously need to consider.
Our Expert Guide to the Best Camera Accessories and Essentials
With the thousands of photo camera accessories on the market these days it can be quite overwhelming trying to figure out what every photography actually needs.
Even more confusing is trying to determine how much you should spend on what. How can one SD card be worth $5, while another one is $200? Why do some tripods come in at over $1500?
And camera bags? Don’t even get us started on the different choices in camera bags…
Well never fear, because after working as professional photographers for a decade we have worked our way through the endless options and have now narrowed down the exact camera essentials budding photographers need, right down to the best brands and products!
We’ve put together this camera accessories list, not necessarily just for the professionals out there, but also for the entry-level and amateur photographers who want to know where to start.
All of these are products that we’ve owned, used, or had personal experience with in our journey going from complete amateurs to professional travel photographers.
We don’t recommend something that we wouldn’t use ourselves, or tell our best friend to buy.
If you already know what you are looking for, jump to the top camera accessories you are interested in:
This isn’t a comprehensive list of every single camera attachment on the market. Instead it is mainly for the recommended camera accessories that most photographers would need.
We’ve left out the high-end specialist accessories like microphones (side note, we love the Rode Videomic) sliders, gimbals and light boxes, because these aren’t the kinds of things most photographers need.
But if you are interested in these types of camera equipment leave a comment below and we’ll give you our top recommendations!
Now, let’s dive into the article.
Once you have all the camera accessories you need you can focus on getting out there and taking great photos!
Best SD Memory Cards
In order for digital cameras to save photos, you are going to need to buy memory.
This is the most common camera accessory, and the absolute first thing you should be looking at after you buy your digital camera (along with a SD card reader to import your images).
An SD (Secure Disk) card is the small memory chip that goes into your camera that will store all your photos and videos. Every digital camera on the market needs one of these cards to work.
Where it can get confusing is when you start looking at size and speeds. Let’s start with size to give you an idea of what each memory card can hold, remembering that larger capacity means more photos.
Note – For this assessment we are using a 16 megapixel camera shooting in JPEG mode as the base.
8gb – 1430 images
16gb – 2861 images
32gb – 5722 images
64gb – 11,444 images
128gb – 22,888 images
Now you might look at that and think, “Wow, I would never take 5000 images! A 32gb memory card will last me forever!” and you might be right.
But it’s important to keep in mind that each camera model will have a different size file, and if you shoot video, or photos in RAW card format, then this will chew up your memory faster.
Let us give you an idea of how much memory we use as professional travel photographers – We only shoot in RAW and depending on the camera we use, each file is around 24mb (or 48mb image quality for our Sony A7Riii’s larger camera sensor).
This means we can take about 1333 photos on a 32gb memory card. Seems like a lot? Well, we can easily go through 2 or 3 memory cards on a heavy day of shooting.
One cool thing to consider now is that memory is getting cheaper and cheaper, and a 32g card and SD card reader can be bought for as little as $20 in some places (for a low quality one). So don’t even consider getting anything smaller.
But we don’t necessarily recommend going out to buy a bunch of 128gb (or 256gb) memory cards either, for two reasons:
Not all cameras can read cards that are larger than 32 or 64gb. We made that mistake when we bought 128gb cards for our old GoPro and it couldn’t read them.
If you take all your photos on one large SD card and you lose it/have it stolen/it gets corrupted, then you will lose all your photos in one go.
For that reason alone we recommend buying either 32gb or 64gb memory cards, despite the limited capacity.
Now let’s look at speed and ‘class’ of SD cards.
The transfer speeds of an SD card is measured in mb/s, or megabytes per second, and is properly known as the ‘Maximum Read Speed’.
The class of memory card is actually an outdated metric these days as all newer memory cards will include the transfer speeds as well.
However they still include the number on your SD cards these days, and they come in Class 2,4,6 and 10.
Hot Tip – You will need a class 10 memory card.
Just like storage, speed on memory cards is improving rapidly as cameras come out with better features so let’s look some common write speeds to see what you’ll need as a minimum:
40mb/s – The absolute minimum you should be considering. Fine for taking low number of photos on a beginner camera if shooting in JPEG.
80mb/s – A much better speed that will be fine for taking a couple of photos in a matter of seconds. Ok for shooting in RAW.
90mb/s – Great for taking photos in JPEG if using burst mode, shooting exclusively in RAW, or if you are looking to film video as well.
95mb/s – What you’ll be needing if you shoot exclusively in RAW and hit the shutter frequently. Adequate for shooting in 4K.
150/260/300 or faster – You film cinematic 4K video or are primarily a sports or wildlife photographer. The best of the best. These higher speeds are often found on CF cards, but newer SD cards are matching these speeds now.
Make sure you also get a memory card reader if your computer or laptop doesn’t have a memory card reader built in.
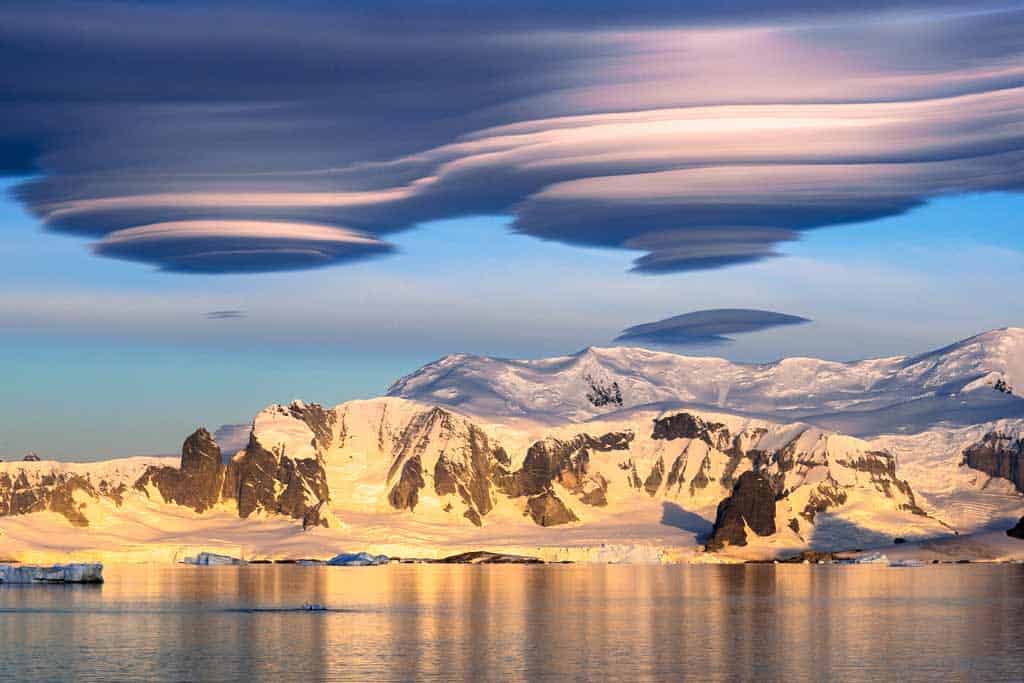
Having lots of extra SD cards is vital if you’re travelling somewhere beautiful, such as Antarctica.
Probably the second most important must have camera accessory you will need after SD cards is spare batteries. Trust us, there’s nothing worse than being out taking pictures and having your battery die on you.
When it comes to extra batteries you have two options – buy native batteries, or buy 3rd party batteries. There’s benefits to both.
Obviously if you own a Sony mirrorless camera, buying Sony batteries or a dedicated battery grip are going to be the best for it.
They are of the highest quality and more importantly you won’t have your warranty voided if for some very unlikely reason they damage your camera.
However native batteries are usually more expensive.
Going for a 3rd party battery is your next best option, and you can often pick up 2 spare batteries for the same price as one without jeopardising battery life.
But when you start to look at 3rd party batteries you can be overwhelmed with all the random brands out there.
So what batteries should you go for in your photography accessories list?
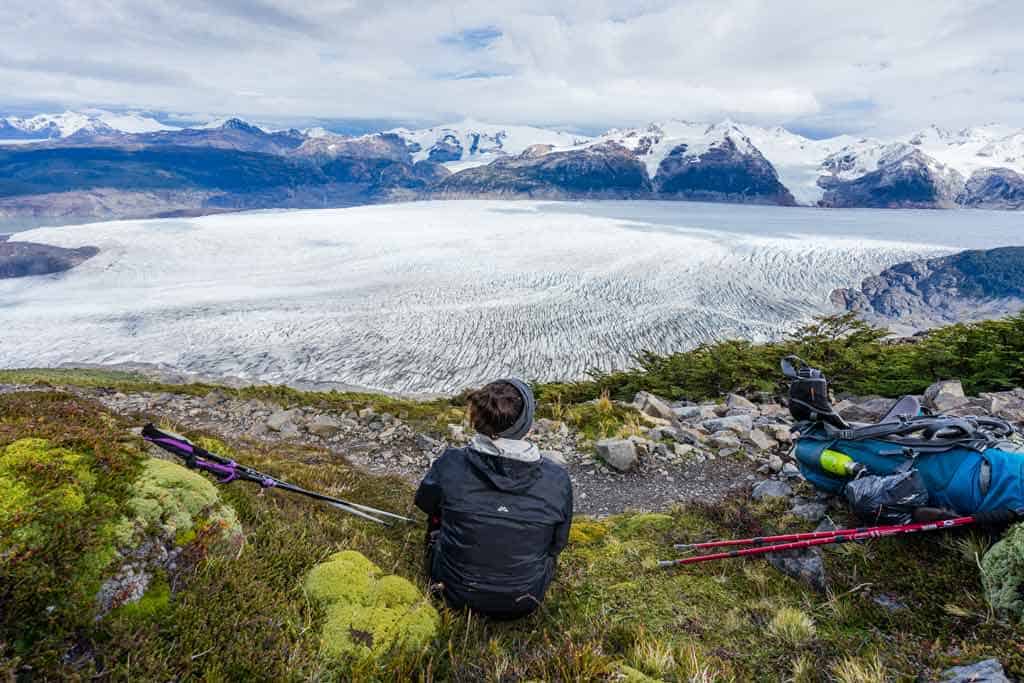
Stopping for a lunch break in Torres del Paine National Park. We trekked and camped for 8 days, so having spare batteries was essential to make sure our cameras lasted the adventure.
Best Tripod for Travel
No list of photographic gear would be complete without one of these!
If you’re getting serious about photography and want an essential camera accessory, then you’ll have to buy a tripod to eliminate camera shake.
Tripods are honestly one of the most essential camera accessories any photographer can own, whether you’re trying to take photos in low light, long exposure shots, do time lapses, do steady filming or even just taking a photo of yourself in a cool location.
This is also one of those photo accessories that can range in price from very, very cheap to very, very expensive.
How much you want to spend really depends on your goal for photography, and your budget.
We’re not going to bombard you with a million different types of tripods (you can do that by reading our ultimate guide to the best travel tripods). Instead we’re going to focus on the best, lightweight and portable mini tripod you should get.
Best Full Size Tripod
If you’re looking for the next step up, are serious about getting excellent landscape shots or shooting astrophotography, then you’re going to need a full-size sturdy tripod – something that’s more heavy duty and can withstand any kind of weather or heavy gear.
This is where tripods get expensive, and it’s not unheard of to see some going for close to $2000!
But don’t worry, you don’t need to spend that much to get something amazing! And having tested out dozens of tripods over the years, we can safely say that our personal recommendation (and what we use) is the Manfrotto BeFree GT XPRO Carbon Fibre.
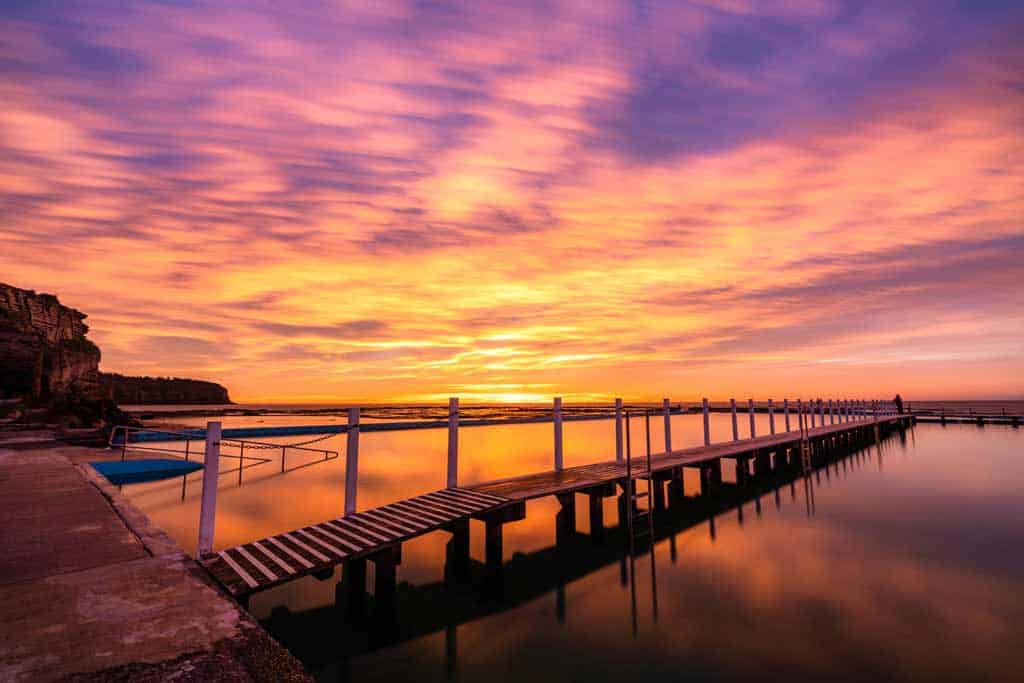
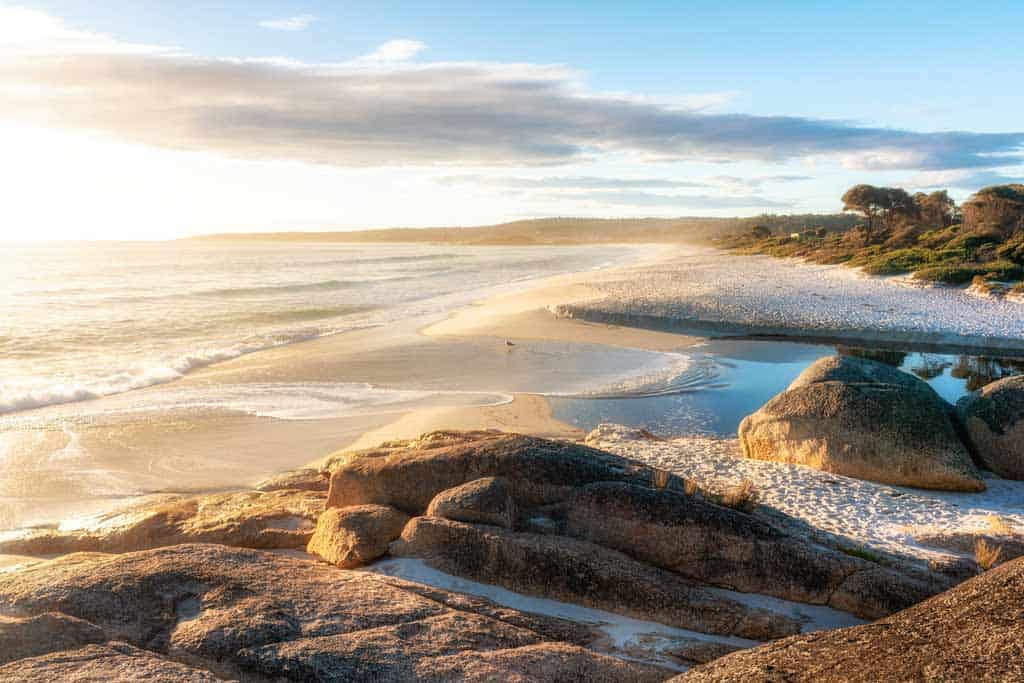
Using a tripod allowed us to take this long exposure photo of Narrabeen rock pool at sunrise.
Best Portable Light
You may be wondering why a portable light would make it onto the list of best camera accessories?
The reason is having a little LED light can help you add a huge amount of creativity and opportunities to your photos!
We use portable lights to mount on top of our camera when vlogging to light up our faces (also perfect when taking photos or people or subjects in dark rooms or at night), to illuminate a backdrop and even to add depth to scenes in low light.
The best ones out there are waterproof, can connect to your phone via Bluetooth and have different colour shields to change white balance.
Having tested a whole bunch of them, we now only use the Lume Cube 2.0
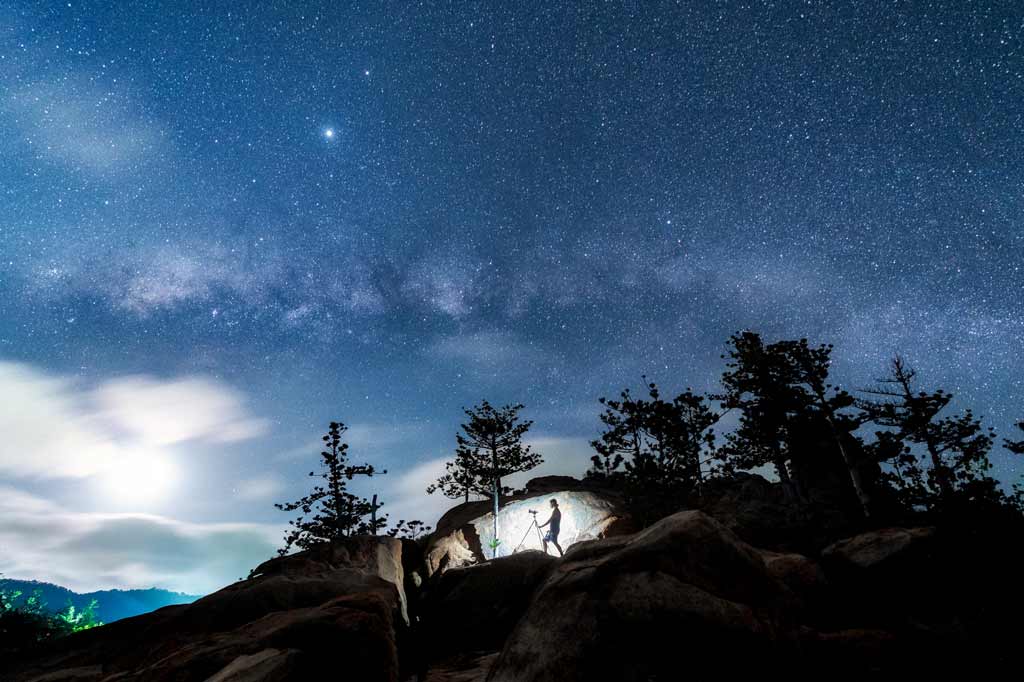
We used our Lume Cube 2.0 to light up the rock behind our buddy Matt so that he stood out in this Milky Way shot.
Best Circular Polarising Filter
Once you start to dive into the world of filters for your camera (no, not the Instagram kind), you’ll quickly become overwhelmed with all the different types there are out there.
Circular polarising filters, neutral density filters, graduated filters, UV filters, infrared light filters – the list seems to be almost never-ending.
But if you’re looking for the top recommendation for the first filter to buy and why, you need to check out CPLs, or circular polarisers.
These fantastic filters screw onto the front of your new lens and act to cut out glare in reflective surfaces, such as water, glass, snow, blue skies, etc.
Seriously, if you’re looking at stepping up your photography game and take better quality photos these are the best camera accessories you should consider.
Especially for landscapes (check out our top landscape photography tips here), a CPL will help make your images pop, even in the middle of the day.
They work by essentially having two neutral density filters screwed together that rotate in opposite directions.
By rotating the front filter it eliminates the rays of light that bounce off these surfaces.
Like most things when it comes to photography, you can either go as cheap or as expensive as you want with filters.
Our best tip though is to not buy a super cheap filter. These will just put a weird colourcast over your entire photo, which could look terrible once you start looking at them on the computer or in print.
Note– Many camera stores will try to sell you a UV filter or clear filters, and tell you that they are good for protecting your camera and lens. If you have any lens that is half decent we do not recommend these. Why would you spend $3000 on a high quality lens to put a $10 piece of crappy glass on the front?
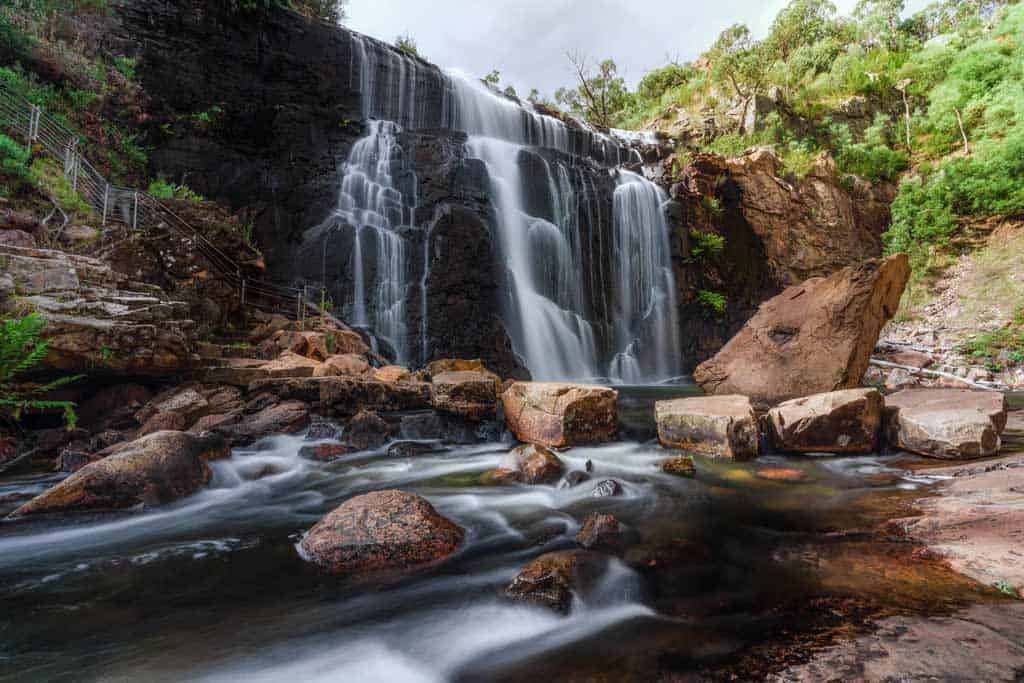
Using a CPL allowed us to cut out the glare of this waterfall, even in the middle of the day.
Best Neutral Density Square Filter Systems
Neutral density filters are the dark pieces of glass that you put on the front of your camera that limit the amount of light hitting the sensor, allowing you to create long exposures and use a slow shutter speed, even in the middle of the day.
Not quite sure what we mean? Ever seen an image of a waterfall where the water is silky smooth?
That’s long exposures, and depending on the ambient light and if it was taken in the middle of the day, then neutral density filters were most likely used.
READ MORE: While you’re at it, check out our expert guide to waterfall photography tips to take your cascade images to another level!
The best way to purchase and use ND filters (or any filters if you’re using a multi-lens set up with different sizes), is by using a square filter kit that screws onto the front of your camera lenses.
The filters come in square glass panels, usually 100x100mm, 100x150mm or 150x150mm, and they slide into a holder that attaches to the front of your camera and lens.
They usually come with adaptors of different sizes meaning you can put one system on any thread size, and have no issues mounting to the front of wide angle lenses.
This falls more into the category of professional camera accessories, as they gives you greater freedom in what levels of density you apply to your photographs. Having larger filters also reduces vignetting in your images.
They are also a lot more expensive than screw-on filters, but if you’re serious about this type of artistic photography then it’s a great investment.
By having a square filter system you can get different stops of NDs (and stack them if you want), and have graduated filters and apply them to different parts of the shot.
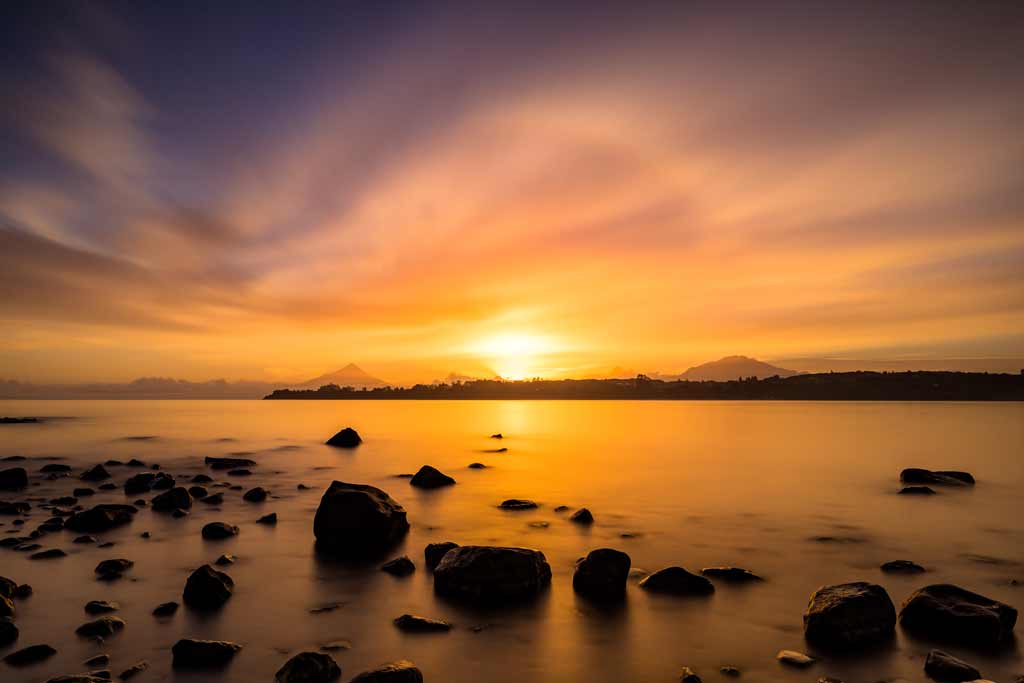
A sunrise in Puerto Varas, Chile. An 80 second exposure using our NISI 10-Stop ND Filter, which allowed us to caputre the cloud movement while smoothing out the water of the lake.
Best Remote Shutter Release/Intervalometer
Having a remote shutter release or an intervalometer is an excellent camera accessory for a whole range of different photography situations.
The first style is cable shutter releases, which plugs into the side of your camera using micro USB or USB C.
You push the button on the remote and it releases the shutter for you, so you can take a picture without disturbing the camera (think long exposure photos) or even if you’re not actually right next to the camera.
Intervalometers do the same thing, but with a few extra features. The most important of these is the ability to set the camera to continuously take photos, which is great for taking time lapse photography.
Both of these also allow for bulb photos, in case you want to do a long exposure past the standard 30 seconds allowed by most cameras.
The third one is for those that love putting themselves in the picture, but perhaps at a far distance – wireless remotes.
A wireless remote usually slides into the hot shoe connection on the top of your camera or connects via USB C.
Then with handheld remote controls you can press the shutter release from as far away as your device allows (sometimes over 100m!).
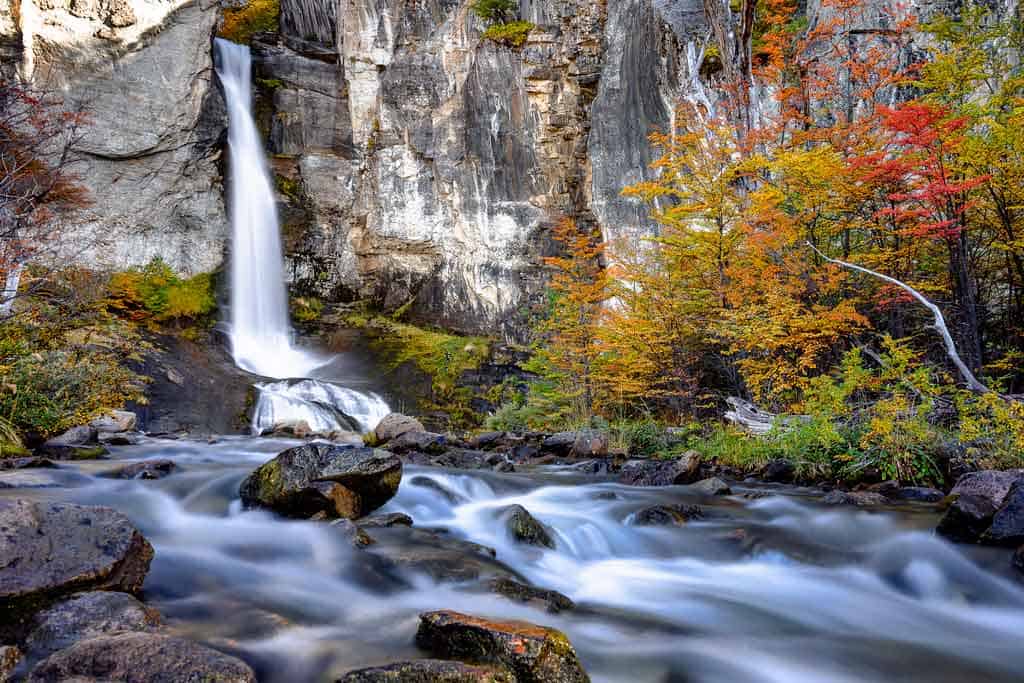
Using a remote shutter release allowed us to set the camera up on some slippery rocks for this shot of a waterfall in El Chalten, Argentina, then step back so we were standing somewhere safer to keep taking pictures.
Best Camera Strap
Most cameras will come with a standard strap that you can hang around your neck, and to begin with this is fine.
But if you want something a bit more comfortable (especially if you have larger cameras), you’re going to want to upgrade your neck strap.
You can get ones that have super thick padding, are worn like a harness or clip to the side of your belt. Some attach to the normal camera strap rings, while others screw into your tripod plate thread.
After using the standard straps for years, and having them dig into our necks and shoulders when being out in the field for hours at a time, we decided it was time to invest in better camera straps, and are glad we did when we found Peak Design!
Having a good camera strap means you can keep your camera around your body, and still have instant access when you want to capture those perfect moments, whether its portrait photography or travel.
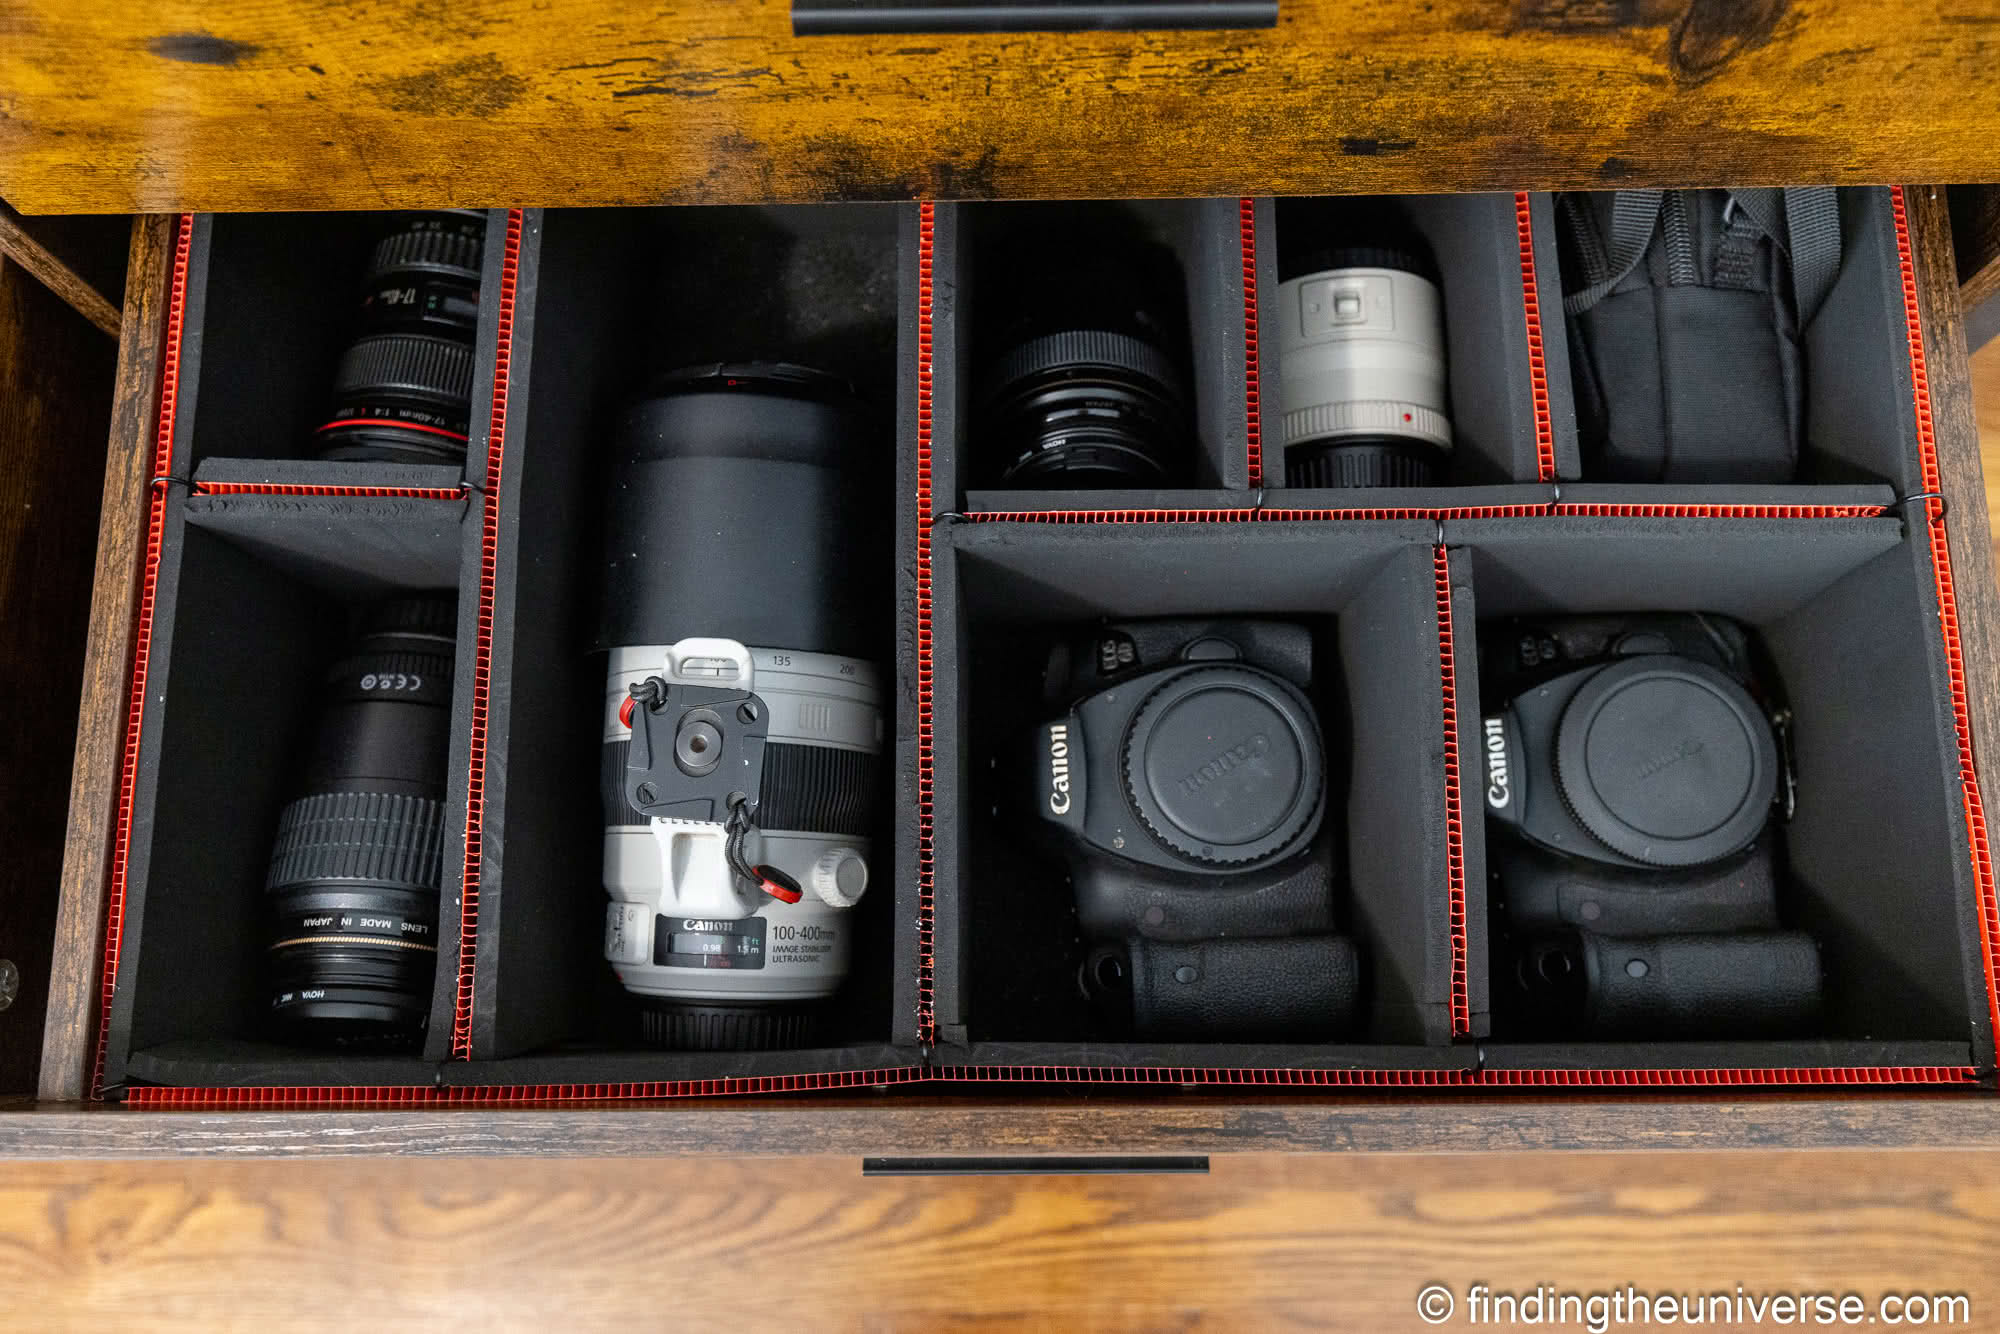
Best Camera Bags
Getting a camera bag is obviously a must have camera accessory that you will buy. Depending on whether you have a small point and shoot, a series of mirrorless cameras or a bunch of different bodies and lenses, you’ll need to get a camera bag to match whatever you’re carrying around.
You’ll have to decide what camera bag is best for you in terms of your activities as well. Do you just carry your gear from the car/house to your photography location, or do you go trekking for days at a time with it?
For us we are always out hiking so need a bag that not only fits all of our camera gear (including a large zoom lens or two), but on the other hand also holds clothes, jackets, snacks, water and more.
A camera bag should also be very durable, water resistant and have lots of padding (both inside and out).
This is quite a personal thing, but in our experience after using (and ditching) close to 20 different bags, there’s one main company you should start your search with.
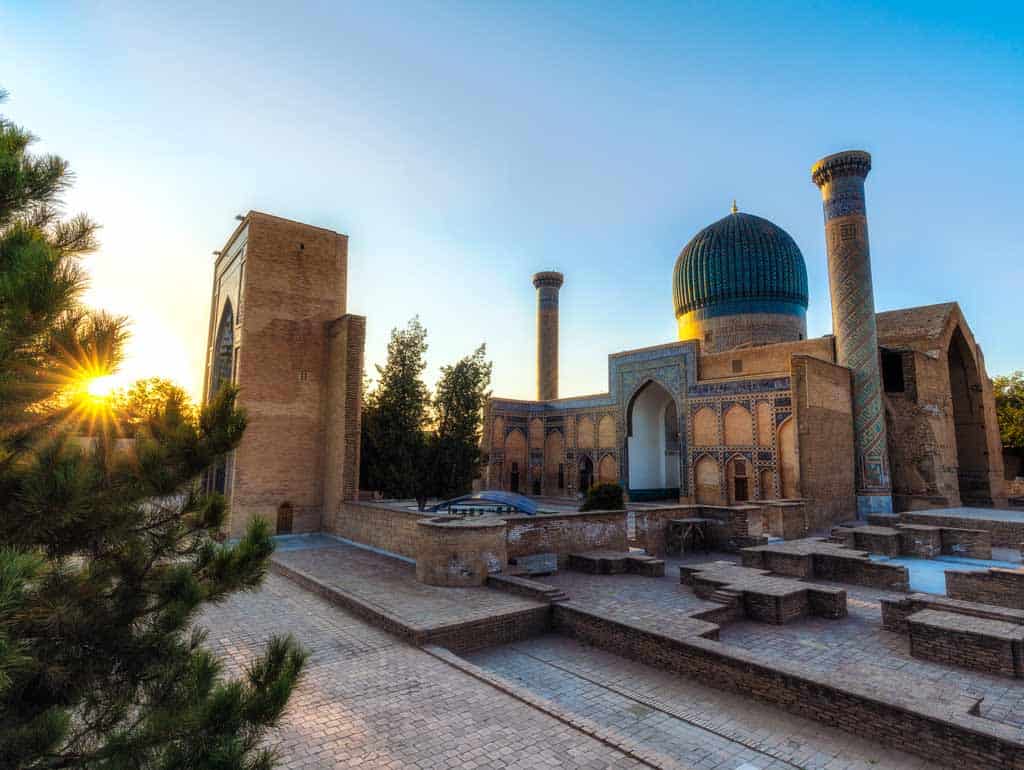
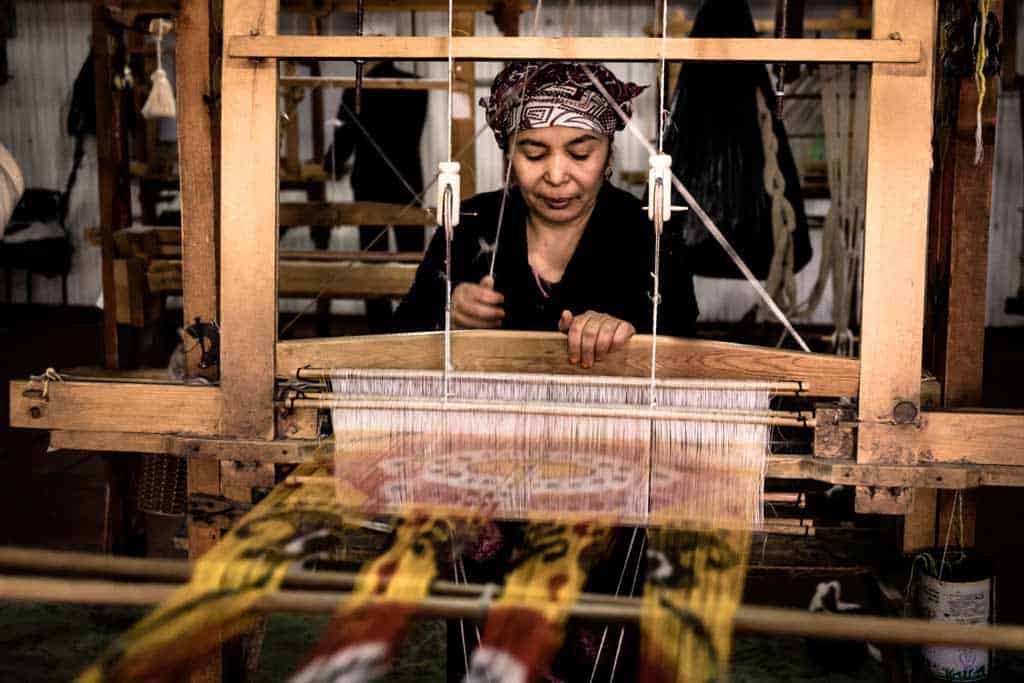
A lady weaving silk in Uzbekistan. Having a good camera bag means we can carry all our lenses with us at all times, allowing us to choose what we want to shoot with in the field.
Cleaning Kit
Keeping your camera clean with the right accessories is very important to have it perform at its best.
Wherever you go bits of dust and dirt will cover the camera, and if you have interchangeable lenses, you’ll probably end up with dust on the camera sensors as well. Not ideal!
Unfortunately there’s nothing you can do to stop every single bit of dirt getting on your camera, unless you decide to never take it out of its case. Instead you just have to get used to cleaning it.
These days you can get decent camera cleaning kits for very cheap. This is especially important when considering the best camera accessories for dSLRs.
You’ll definitely need a blower, microfibre cloth and some other items, so let’s get into it.
IMPORTANT –Whatever you do, don’t attempt to clean your sensor unless you 100% know what you are doing. If you scratch it, your camera is pretty much ruined. Using a blower to get dust specs off it is fine, but even then make sure you are careful. This is not to scare you, it’s just to save you from making a costly mistake. If your sensor is very dirty take it to a camera store to get professionally cleaned.
Keeping your camera clean is very important in the field. This photo had quite a few dust specs across the camera lens, meaning we had to spend a bit of time in post-processing to clean them up.
External Hard Drive
Once you get more and more into photography, you’re going to need a place to store all your photos. Images quickly stack up, and if you’re anything like us you want to make sure you don’t lose them.
Eventually you may get to the level where you need something dedicated like a NAS backup system, but until then external hard drives will be your friend.
You have two options when it comes to external drives – desktop hard drives and portable hard drives. We always suggest getting a desktop hard drive for your home, which you back everything up to, and a portable one for travelling.
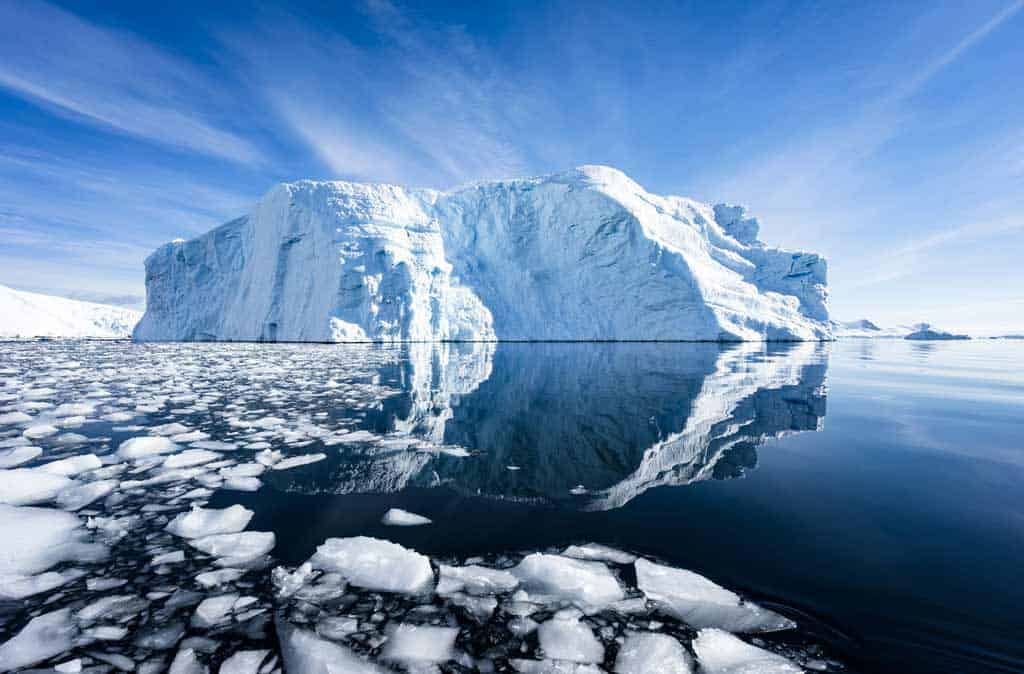
We took over 500gb worth of photos and video in Antarctica. It’s easy to see why.
Conclusion to Our Top Camera Accessories and Essentials
We hope our list of essential camera accessories has been helpful for you. Please feel free to reach out to us if you have any questions or ideas about what we should add to this article as well.
The most important thing, regardless of equipment, is just getting out there to take lots of nice photos! The more and more you practice, the better your images will get.
READ NEXT: Looking for GoPro-specific recommendations? Check out this post on the top GoPro accessories for any photographer!
What else would you recommend people get for the best photo camera accessories? Leave a comment below to let us know.
DISCLAIMER: Some of the links in this article are affiliate links, which means if you book accommodation, tours or buy a product, we will receive a small commission at no extra cost to you. These commissions help us keep creating more free travel content to help people plan their holidays and adventures. We only recommend the best accommodations, tours and products that ourselves or our fantastic editorial team have personally experienced, and regularly review these. Thanks for your support, kind friend!
The BEST Camera Accessories – Photography Essentials [2025]
We’ve spent a decade testing all the best camera accessories on the market, and in our comprehensive guide to the top camera essentials we dive into exactly…
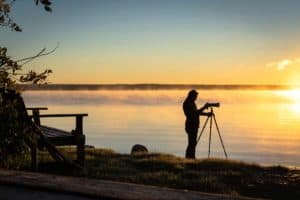
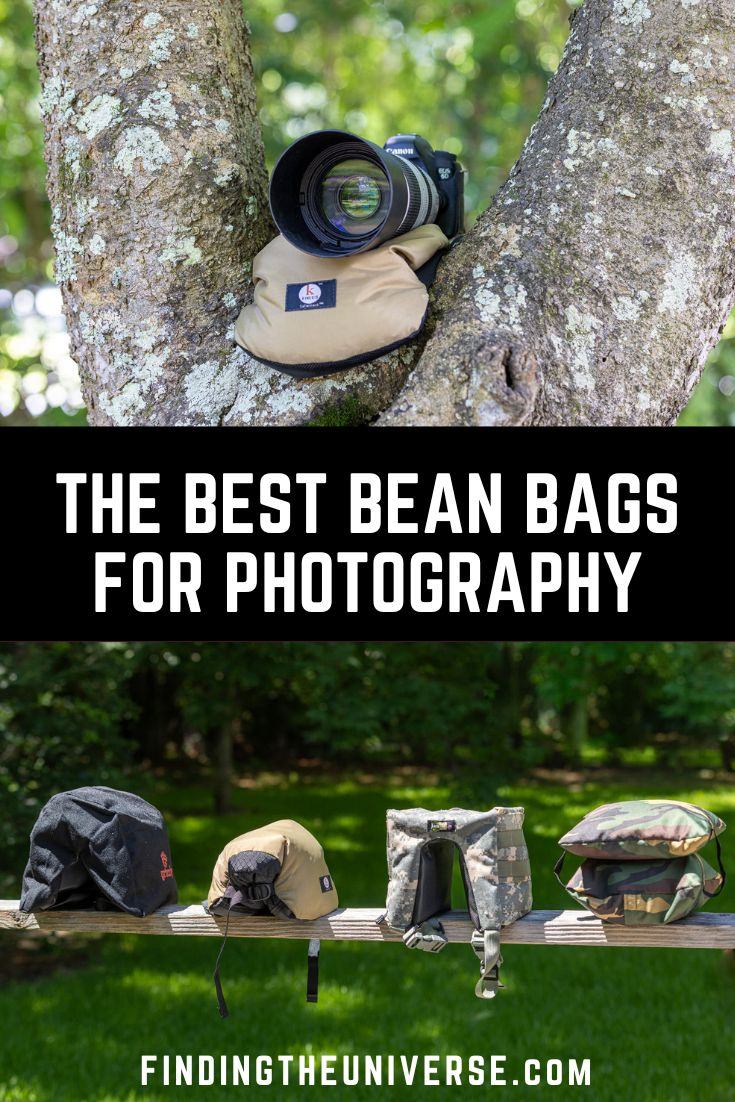
A photography accessory that I find useful for all sorts of things as a professional photographer is a photography bean bag. These are a versatile and highly portable product which can be used for a range of different types of photography.
I first got into using a photography bean bag when Jess and I went on safari several years ago. However, since then we have come to use a photography bean bag for a range of different types of photography, and I personally find them especially useful for wildlife photography.
Whilst I still regularly travel with and use my tripods of course, I have found that there are many times when a photography bean bag is a better option.
I’ve tested a number of photography bean bags in the real world, and I’ll share my favorites with you as well at a range of price points.
I’m also going to share with you everything you need to know about photography bean bags in general, so you can make your own informed choice. From what to look for, to when to use them, to what to fill them with, this guide should help you decide on whether or not a photography bean bag is right for you.
Let’s get started!
What Can You Use a Photography Bean Bag for?
You may be wondering what you need a photography bean bag for. Well, there are actually quite a few uses for a photography bean bag which make it a useful tool for photographers, even if, like me, you already own a tripod.
Personally I have quite a few tripods, but I also own quite a few photography bean bags. I first bought one for a safari, but since then I have found them to be useful for a range of photography.
As a result of research for this guide, I also have quite a few of them now, although most photographers will only need one or two.
Anyway, here are some situations where a photography bean bag will come in useful.
Wildlife photography
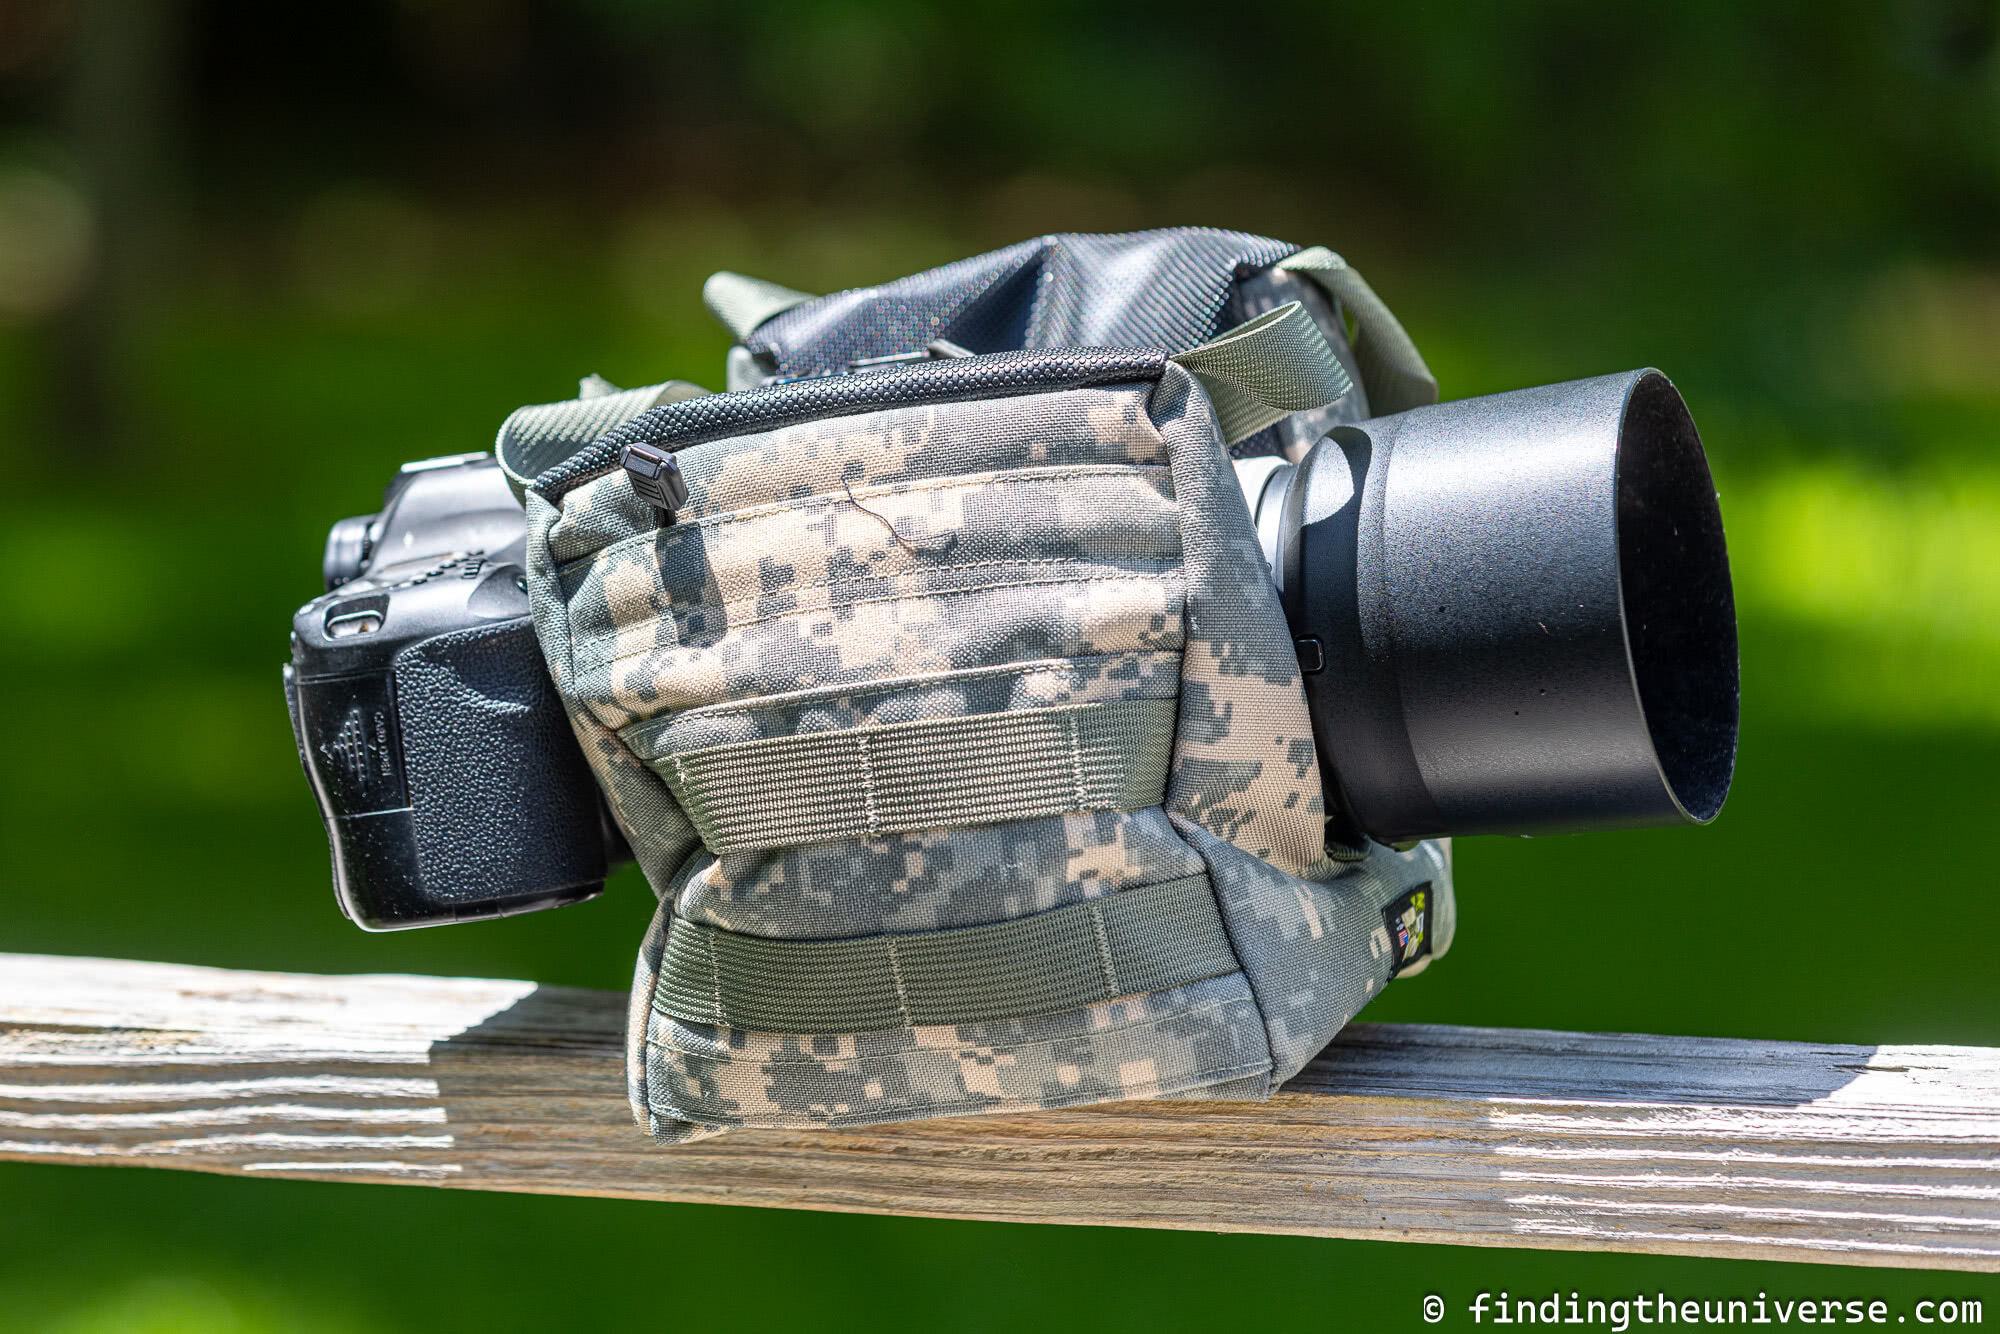
A photography bean bag can be an invaluable tool for wildlife photographers. Wildlife photography often involves sitting or lying still for prolonged periods of time with a long, heavy lens, just waiting for something to happen.
As most of us don’t have arms like Arnold Schwarzenegger, it’s not practical to hold a lens up for hours on end waiting for wildlife to appear.
With a bean bag, you can solve this problem by resting your heavy camera kit on the bean bag while you wait for the action.
Of course, you could use a tripod in this situation as well. However, a bean bag often allows you to get closer to the ground than a tripod, is more portable, and can work in a wide range of situations. It’s also very fast to set up and move, and is much more cost effective.
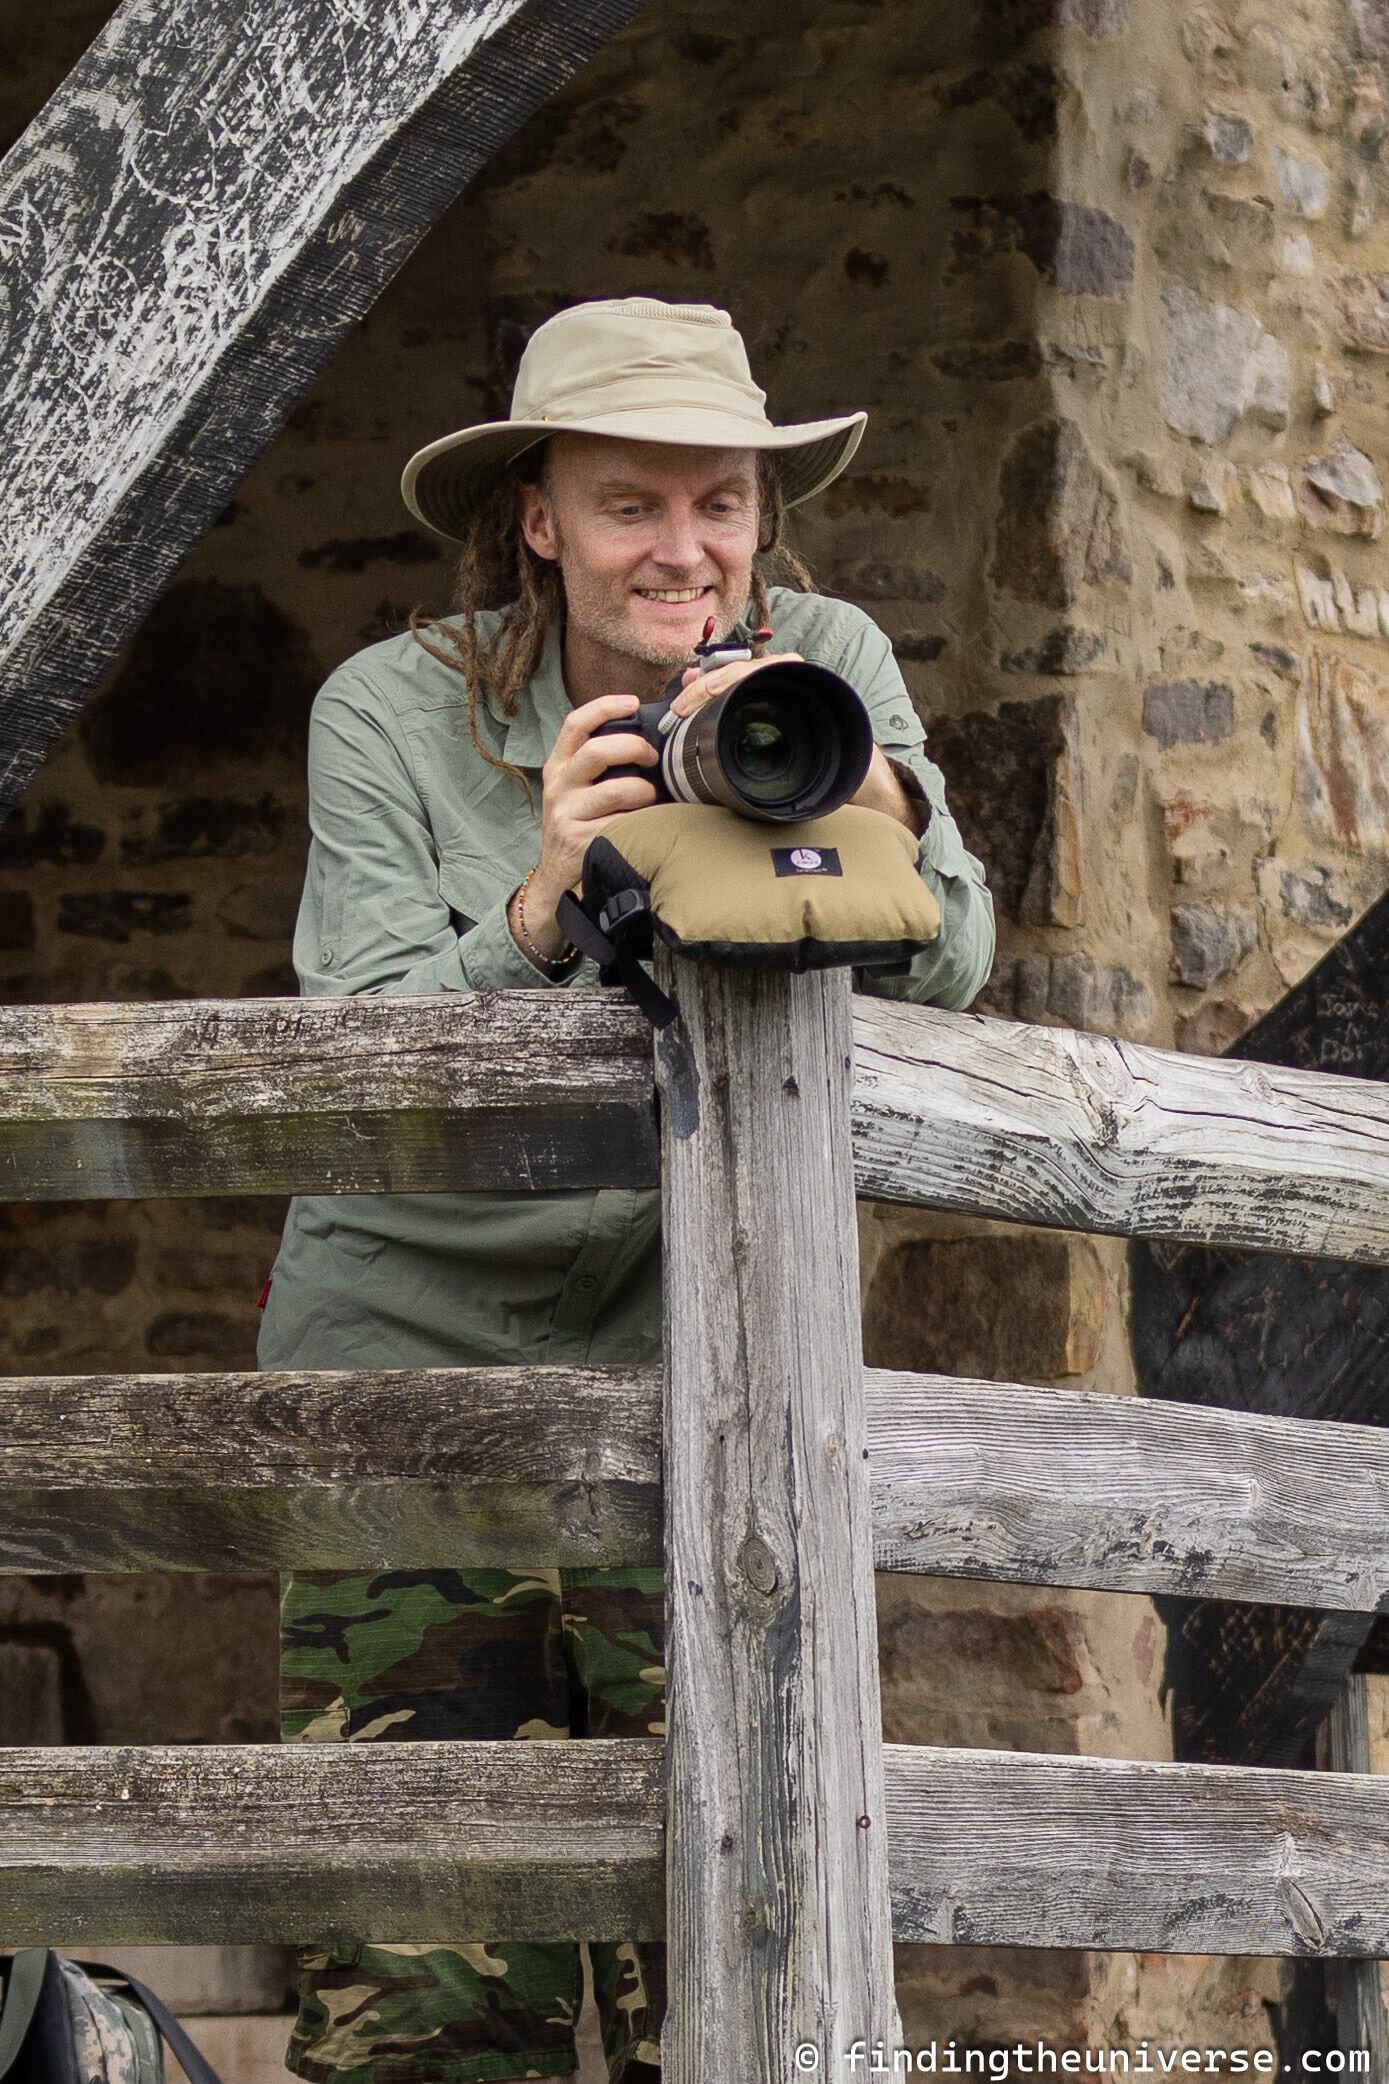
If you are shooting birds from a constructed wooden hide for example, a bean bag can easily be rested on the window ledge of the hide. In these situations, depending on the size of the hide, a tripod can be a bit of an encumbrance where a bean bag is not.
Overall, wildlife photography is an excellent example of when a bean bag make sense for a photographer.
Travel photography
As a travel photographer, I have long been of the opinion that a travel tripod is an essential bit of photography kit.
However, I appreciate that not everyone wants to carry even a lightweight travel tripod with them on a trip. Sometimes it might not even be possible to take a tripod, even a light one, due to luggage allowance restrictions.
So if you don’t want to, or can’t, take a tripod with you on your next trip, but still want to do photography that would benefit from a tripod such as long exposure photography, star photography, northern lights photography, wildlife photography etc., then a bean bag is a great option.
They pack light, especially if you buy the filling in destination, are versatile, and will let you get a range of photos that you wouldn’t have been able to achieve otherwise. In travel photography, a bean bag is the next best thing to a tripod.
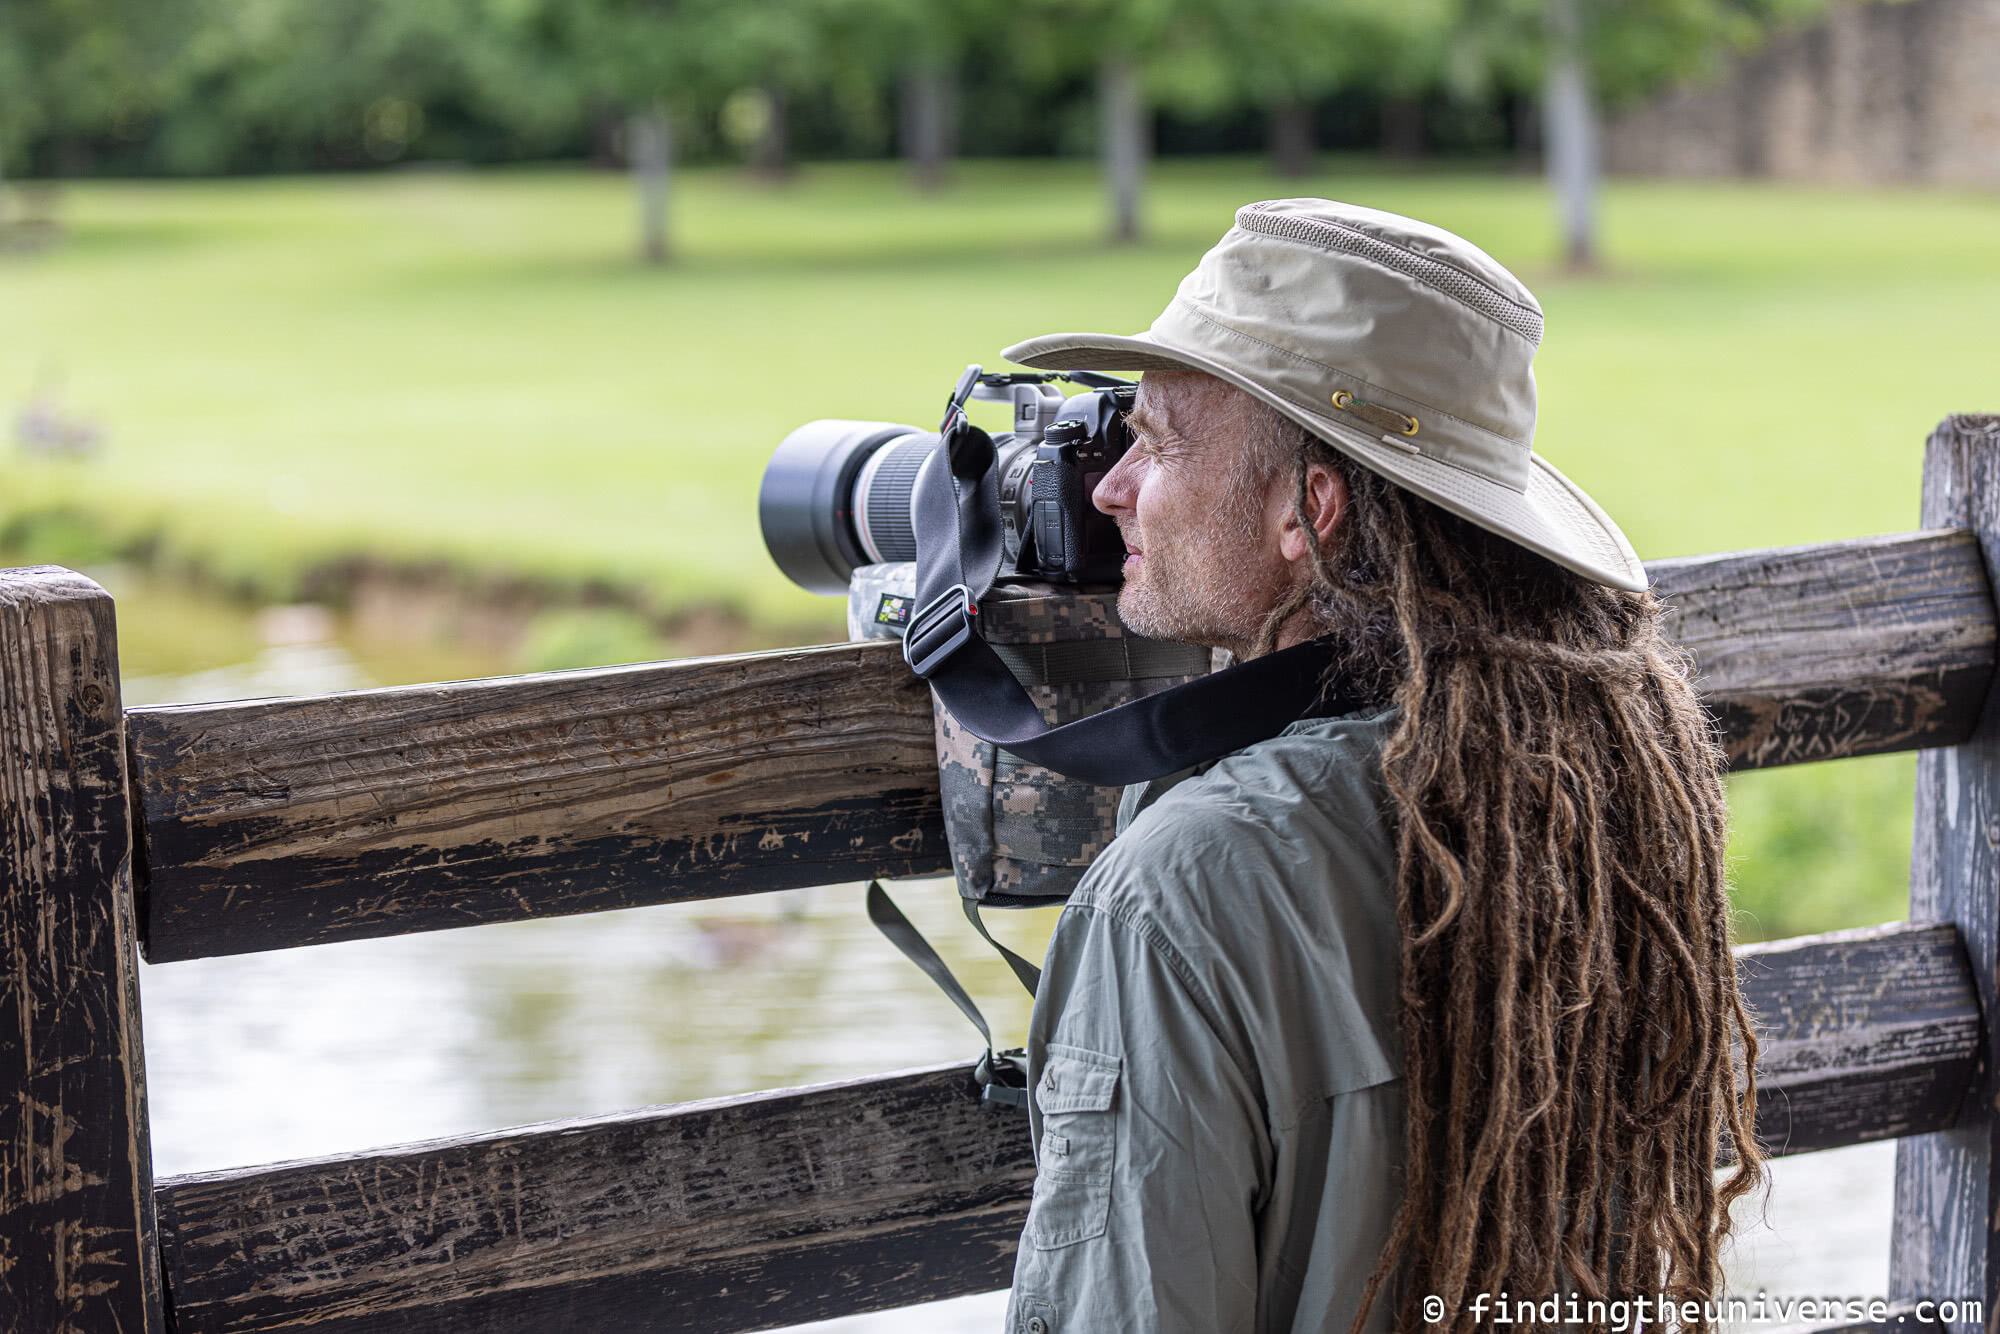
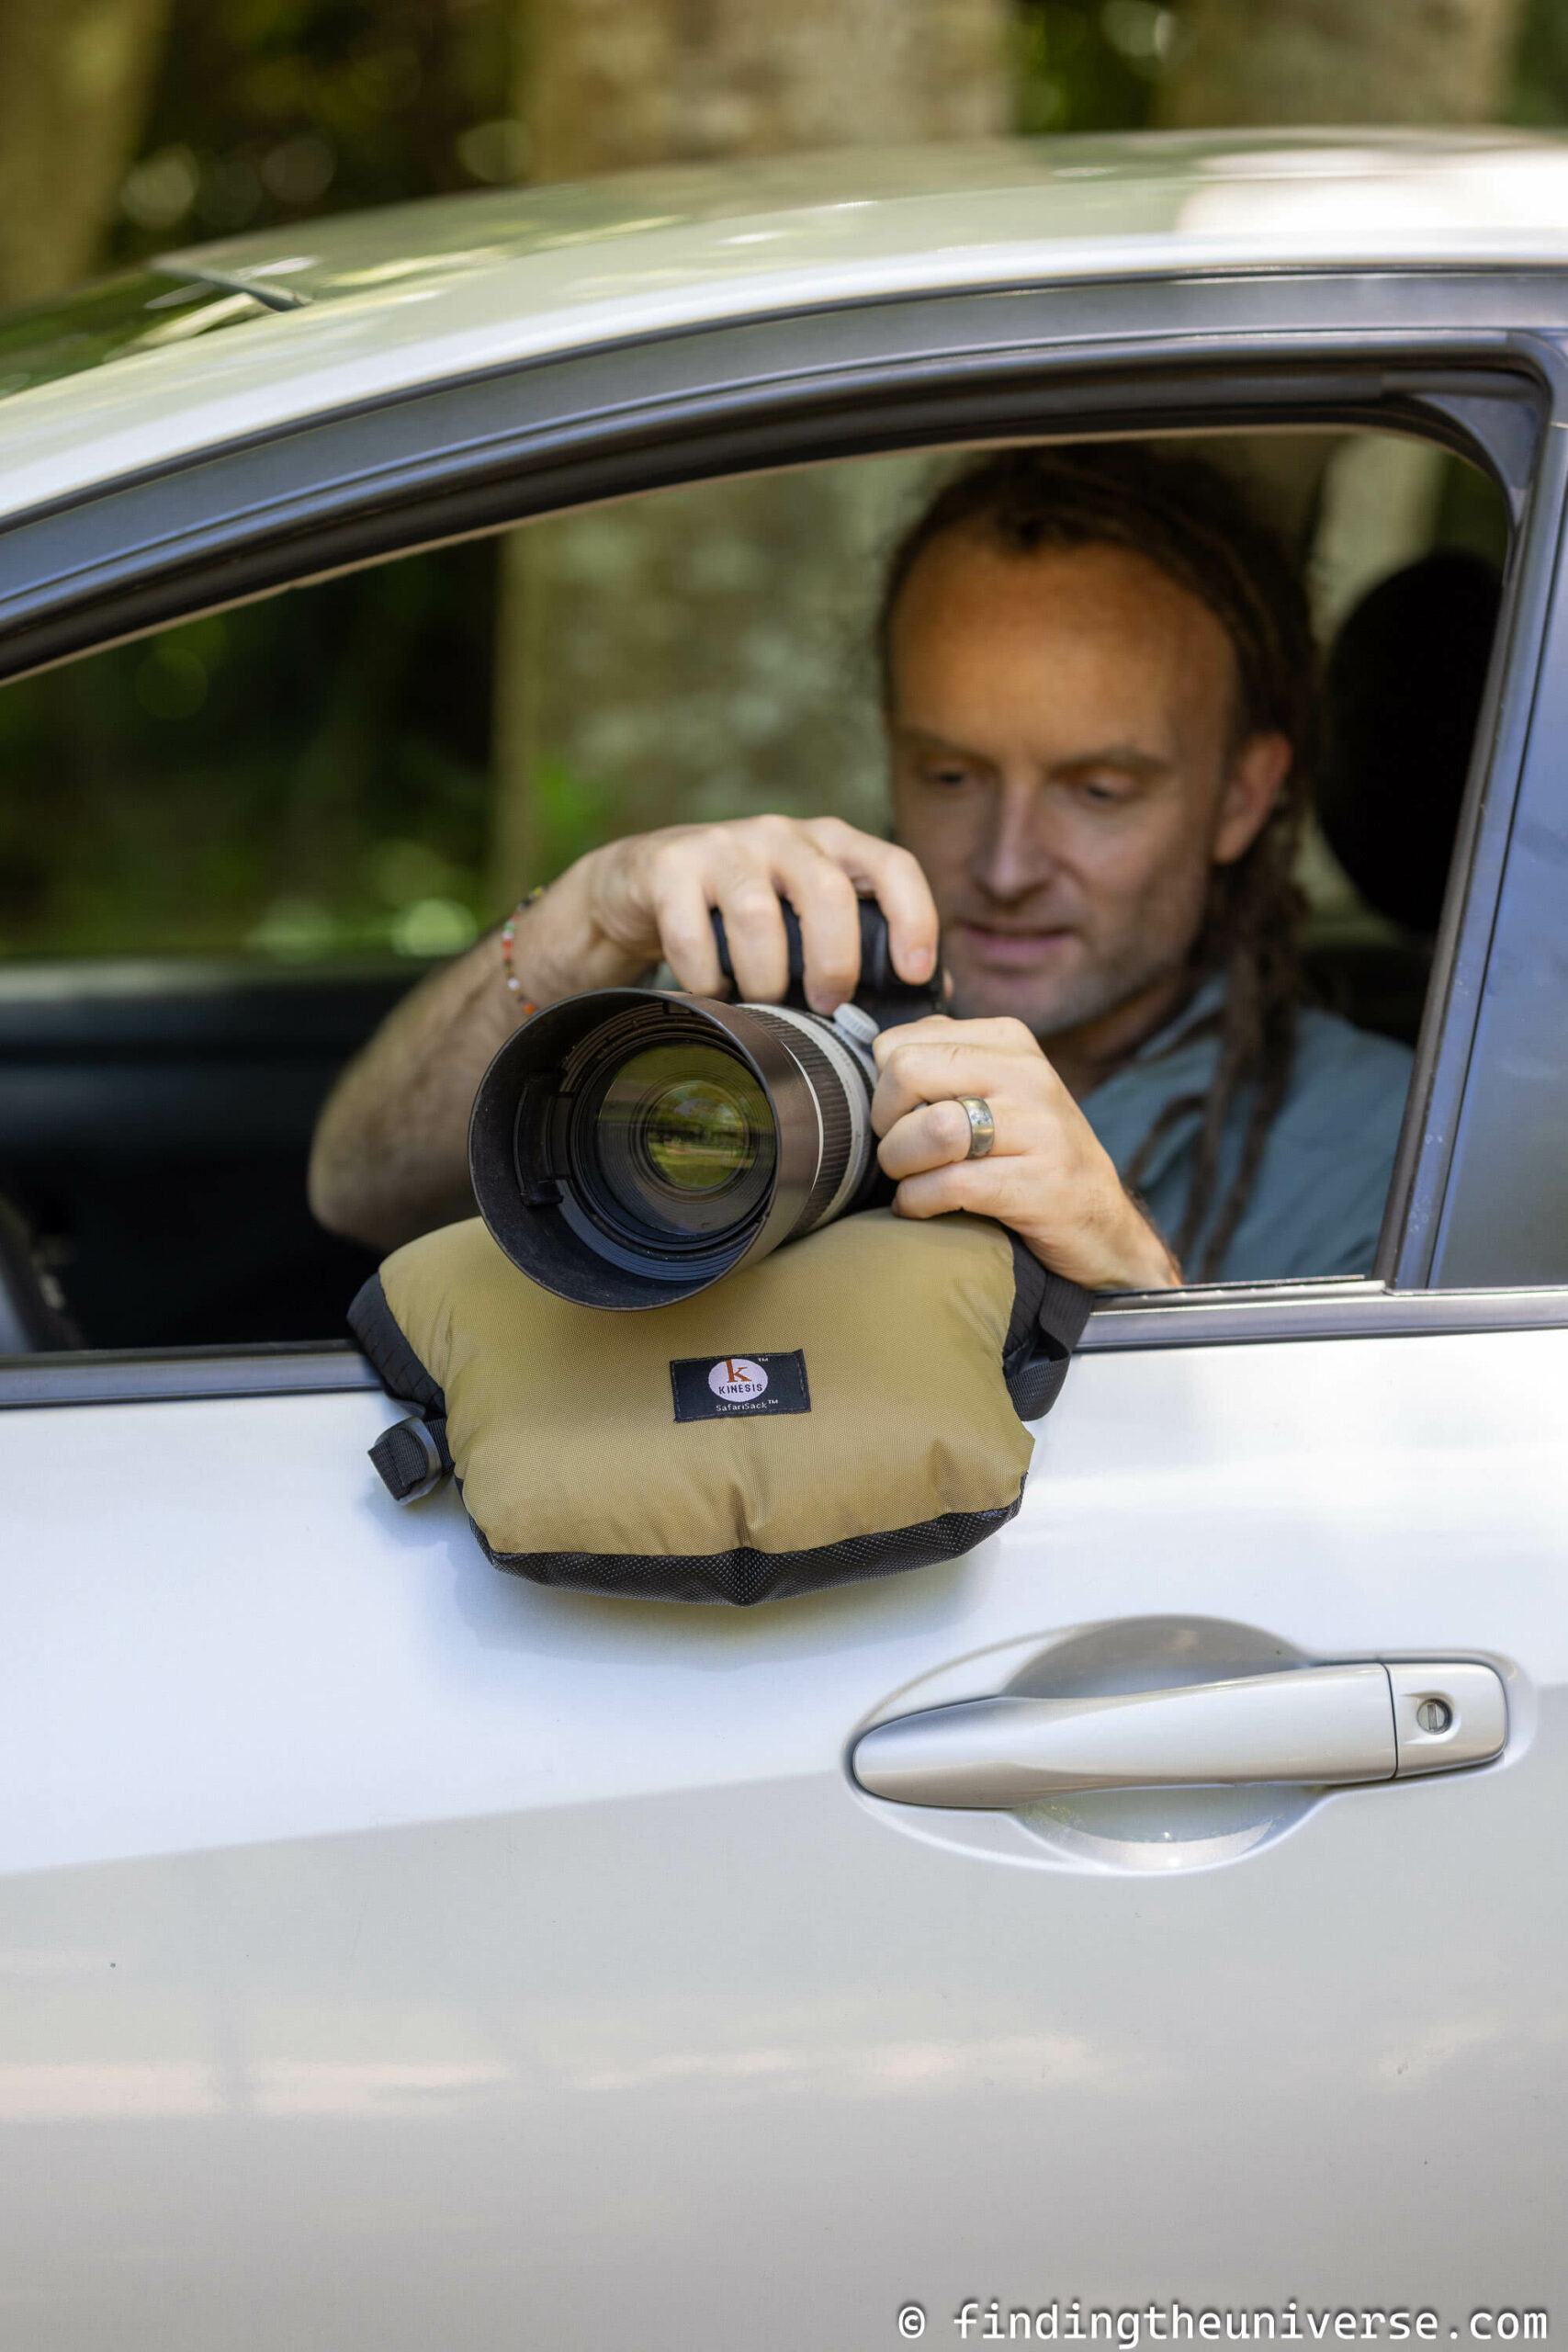
Safari / Vehicle-Based Photography
If you are doing any photography from a vehicle, then a bean bag can make a big difference to your experience.
The classic example of shooting from a vehicle is of course when you are taking photos on safari. However, there are other situations when you might want to take pictures from a vehicle, from visiting a state or national park through to visiting a drive through zoo.
Generally, if you are shooting from a vehicle, even a larger safari type vehicle where you can stand up and move around a bit, a tripod or even a monopod isn’t going to be practical. The legs get in the way, you can’t move them quickly enough to respond to wildlife movements, they won’t let you shoot from every angle, and you’ll just end up frustrated.
A bean bag solves this problem. You can place it almost anywhere, from a windowsill to the edge of a pop-top in a safari vehicle. They are relatively light and portable, and you can use them to support even larger lenses.
Overall, if you are planning a safari or any type of photography that might involve a vehicle, I think a bean bag is an essential addition to your kit.
Tripod Weight
A bean bag can also be really helpful for weighting down a tripod. Many tripods have a system underneath where you can hang ballast to improve stability.
If you have a photography bean bag which has a carry loop or d-ring, and you fill it with heavier fill like sand, beans or Poly Beads, then it can double up as useful ballast for your tripod as well.
What is the Best Filling for a Photography Bean Bag?
The great thing about a photography bean bag is that, despite the name, you can actually fill it with all sorts of things. In fact, many bean bags ship empty so you can make your own decision as to what to fill it with.
The different filling options allow you to choose how heavy or light you want your bean bag to be. A heavier bean bag will generally provide more stability whilst a lighter bean bag is going to be more portable. So you have to choose the option that works best for you.
Here are some filling options to consider and my thoughts on each. These are approximately ordered from lighter to heavier options.
Polystyrene balls. These are a very light and cheap bean bag fill option. Their main advantage is the low weight, although they are probably a bit too light. They can also get everywhere if you are not careful!
Cushion stuffing. You might consider filling your bean bag with the same sort of stuff you would fill a cushion with. This can work, and will be quite light, but can be a little bit too soft and squishy to properly support a camera and lens.
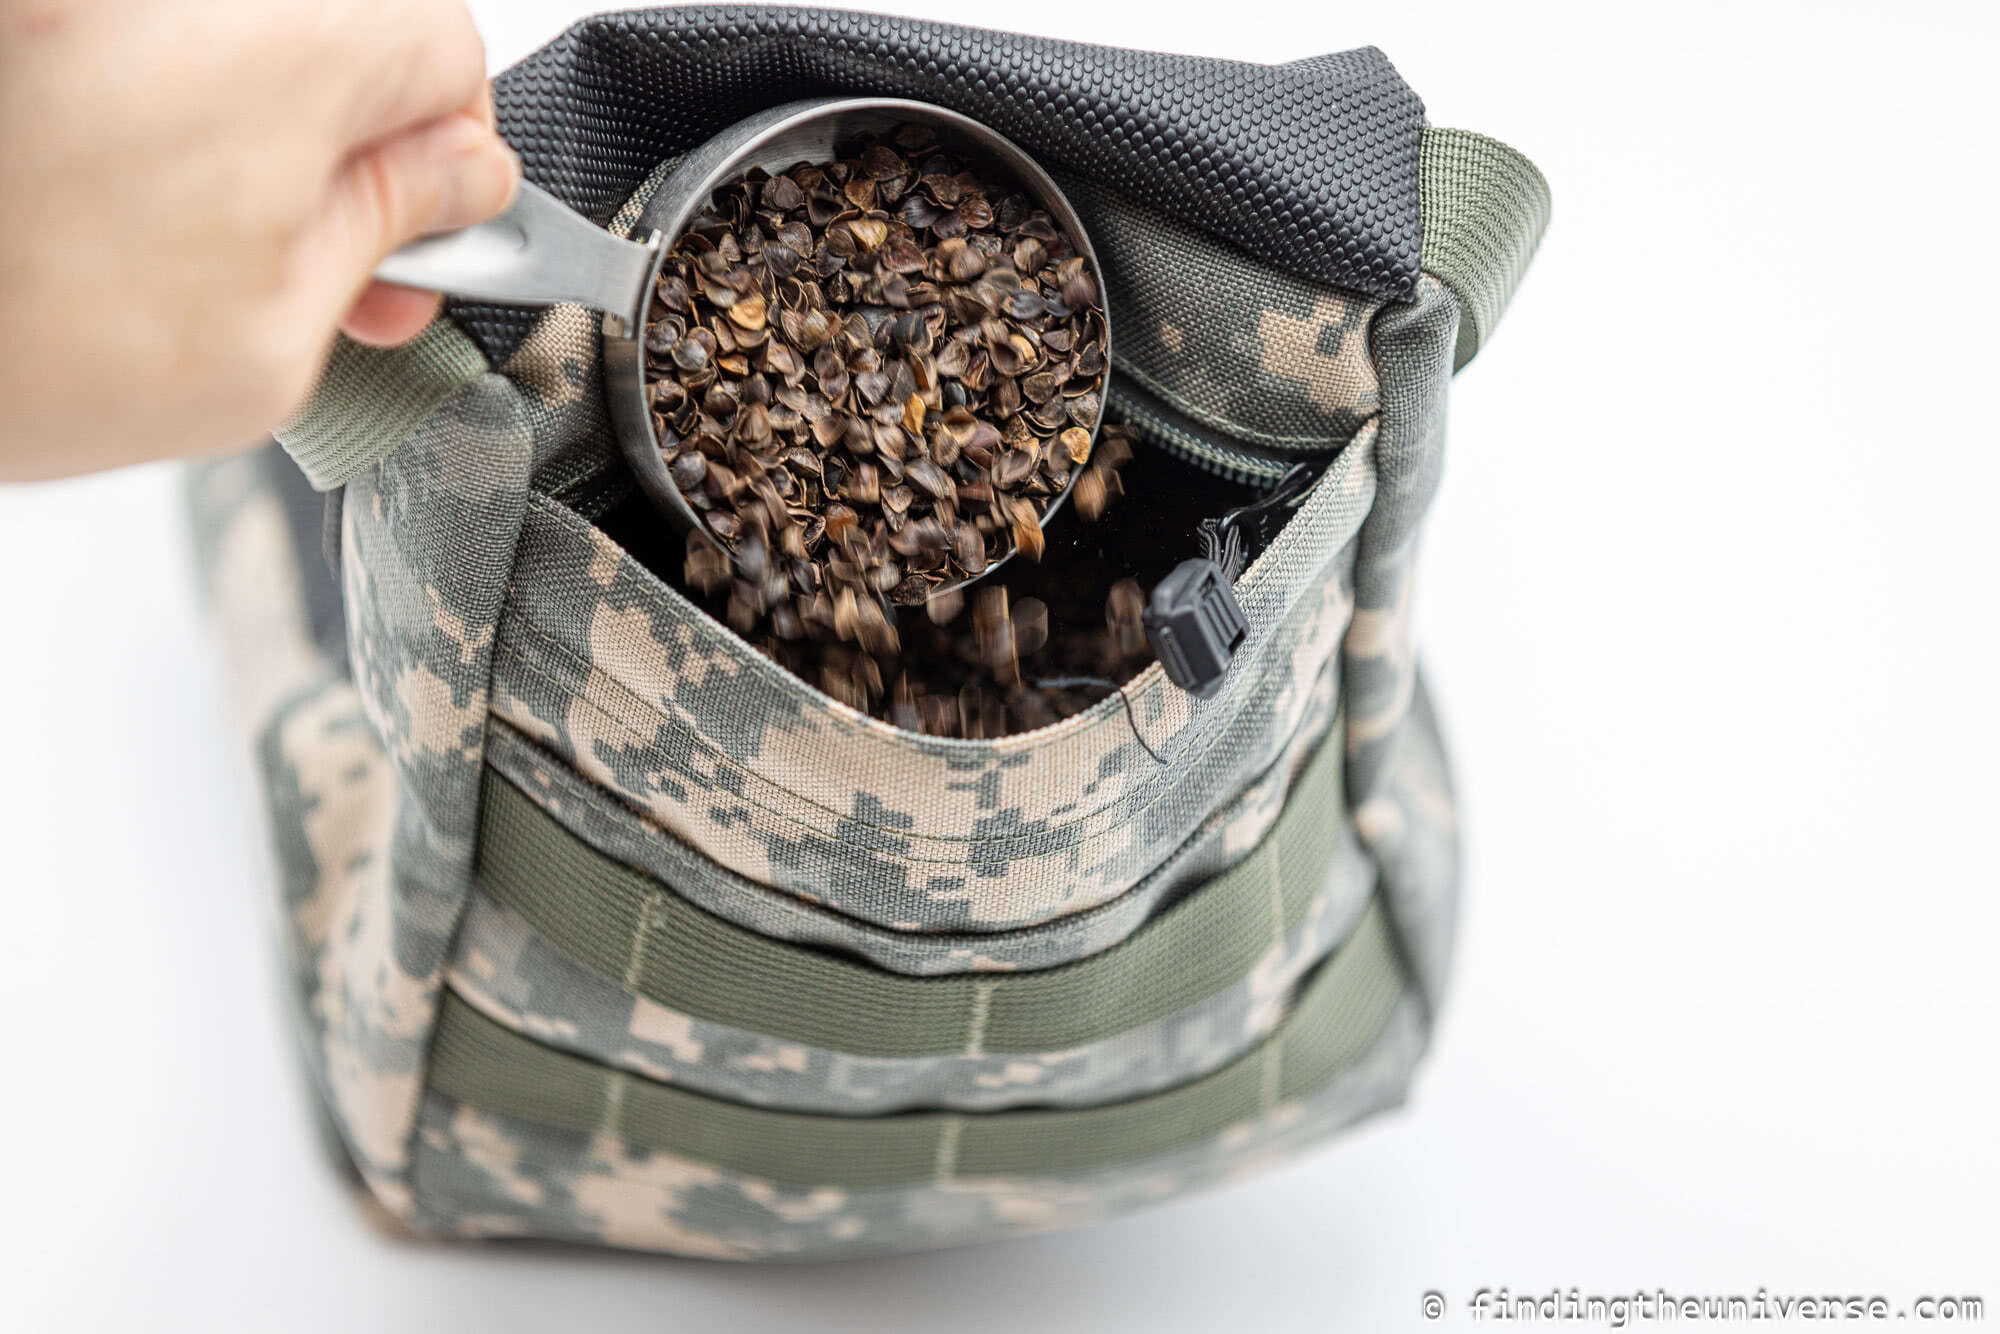
Buckwheat hulls. These are a natural byproduct of buckwheat processing. They are popular as use for filling pillows, and make an excellent photography bean bag fill. They are relatively light but are also quite hard. They are also fairly small, which means the bag will be quite flexible in shape. The main downside is that larger lenses (>200mm) can crush them over time, reducing their usefulness.
Dried seeds (sunflower, bird seed etc.). Dried seeds are a popular choice as a bean bag fill as they are widely available. They are going to be heavier than the previous options on this list, offering a more stable platform. The main downside is that edible seeds can attract wildlife, and being organic they won’t last forever. Seeds also contain oils which can release into your bean bag case.
Dried beans or grains (rice, kidney beans, red beans, black beans etc.). These are similar in weight, performance and availability to dried seeds. I would say they are a slightly better option as they have less oils and will likely last longer. If you are traveling, they are widely available for purchase, making them a great option.
Poly Beads – If you want a heavier, more durable option, then Poly Beads are the way to go. These are made from a hard plastic, so won’t break down, and are generally around five times heavier compared to something like Buckwheat
There are of course lots of other options to choose from. Some people use cat litter or sand to fill their bean bags. But I would say for most people, Buckwheat hulls, dried beans or poly beads are probably going to be the best options.
One tip, if you are going to be using organic materials which might stain or be hard to remove from the bag, is to put the fill in one or more heavy duty Ziploc plastic bags first. Then put those bags full of the fill inside the bean bag. This will protect the bag and the fill and make it easier to remove and clean if necessary.
Some options for filling a photography bean bag. From left to right: black beans, poly beads, buckwheat hulls.
What to Look for in a Photography Bean Bag
I’m now going to cover some of the different features that a photography bean bag can come with. This will help you decide which bean bag is going to be right for your needs.
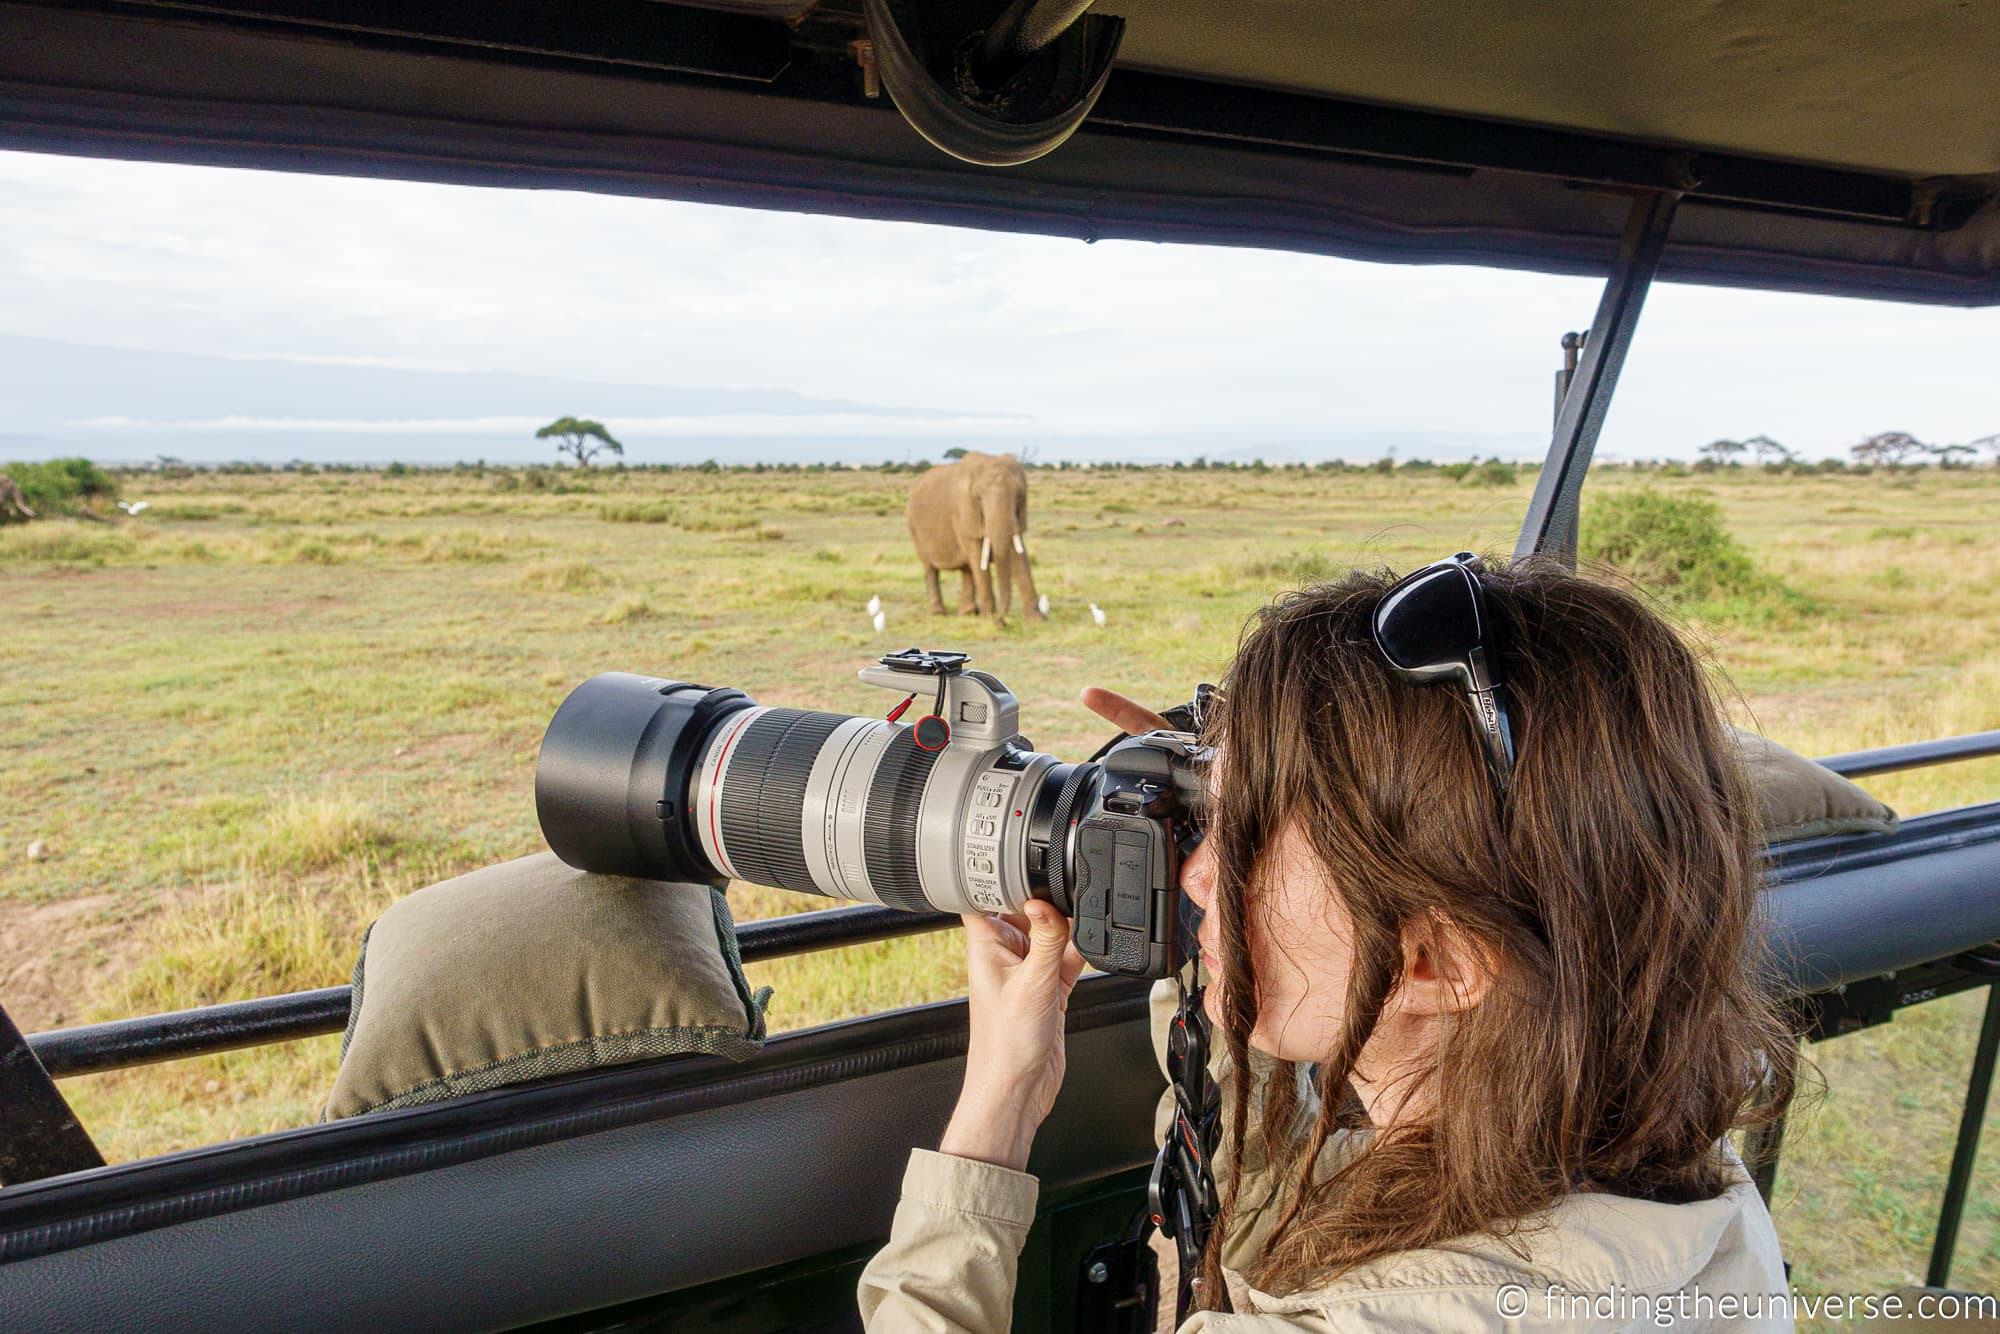
Bean Bag Shape
The first decision to make is what shape photography bean bag you want. The main bean bag shapes are as follows.
Flat – a flat beanbag basically looks like a pillow. It offers versatile placement, but might not mold as well around objects such as a windowsill as some of the other shapes
Double-cushion – a double cushion bean-bag is basically two flat bean bags sewn together in the middle. This offers good versatility, as you can use it like a flat bean bag, balancing the camera on the top, or you can use it on its side, with the camera nestled between the two cushions
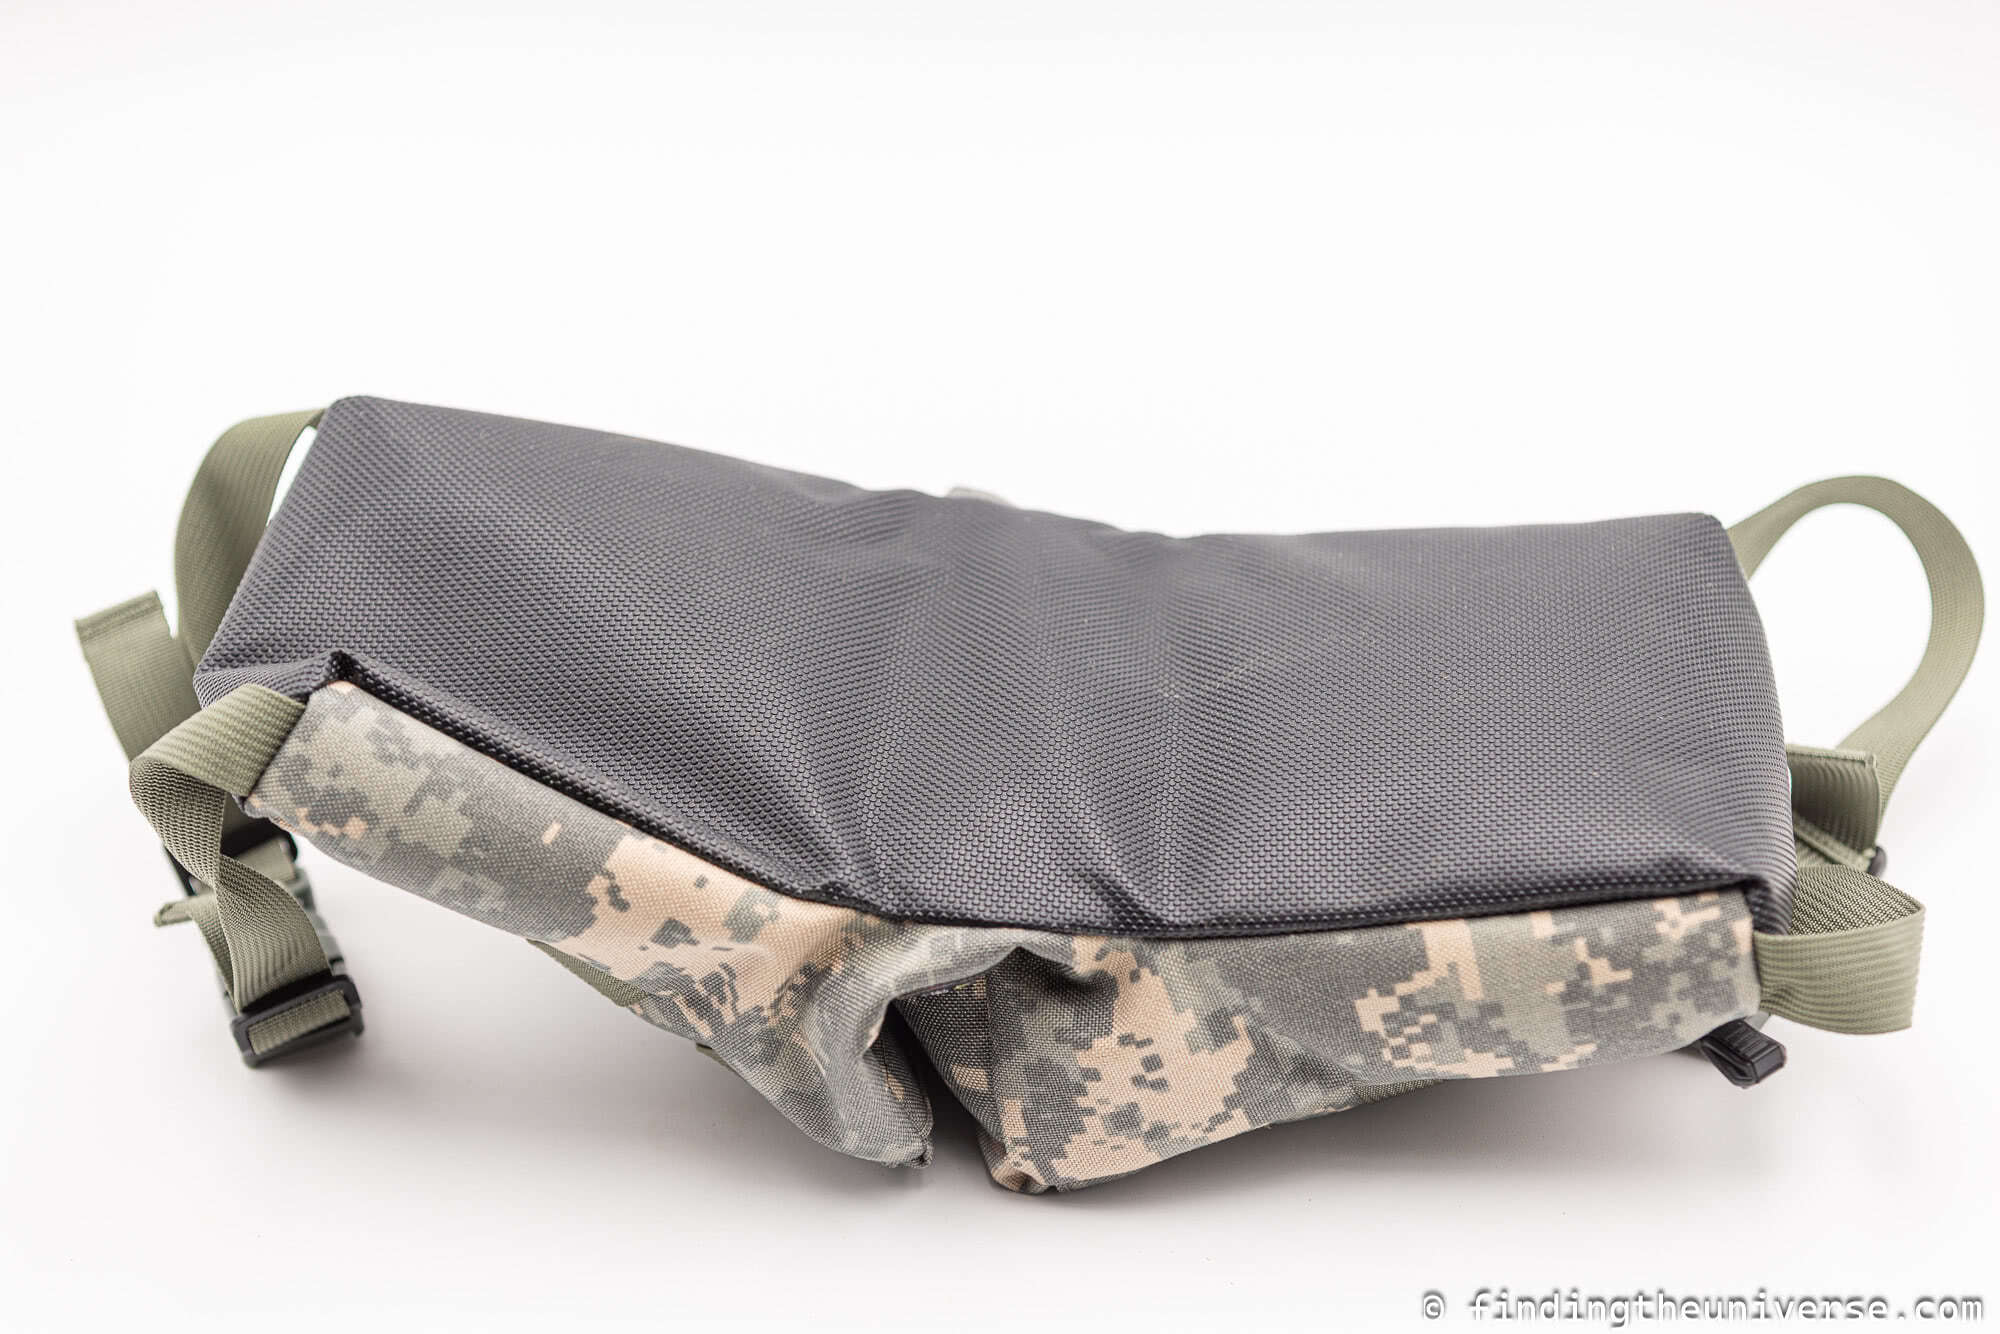
Saddle bag – this bean bag looks like a lower-case letter “n”, or a “u”, depending which way up you have it. You can use it either way up. In the “n” shape you can place each of the legs over a windowsill or other edge for stability. In the “u” shape, you can put the camera lens between the two legs and rest the flat part on the ground.
Each bean bag shape offers advantages and disadvantages. Personally I like the saddle bag shape as it offers a lot of versatility for a range of situations. However, the flat cushion shape also works well in specific situations, such as when shooting on the ground.
Bean Bag Material
Bean bags can be made out of a range of materials which affect the durability and weight of the product.
Different parts of the bean bag may also be made out of different types of material. For example, parts of it may be made out of a water resistant material or a material that features a grippy surface.
Common materials for bean bags to be made from include Cordura, Nylon and Canvas. The main thing is to ensure the materials used offer good quality with high quality stitching. A rubberized grippy base is also a good feature to look for as it offers both waterproofing and additional stability.
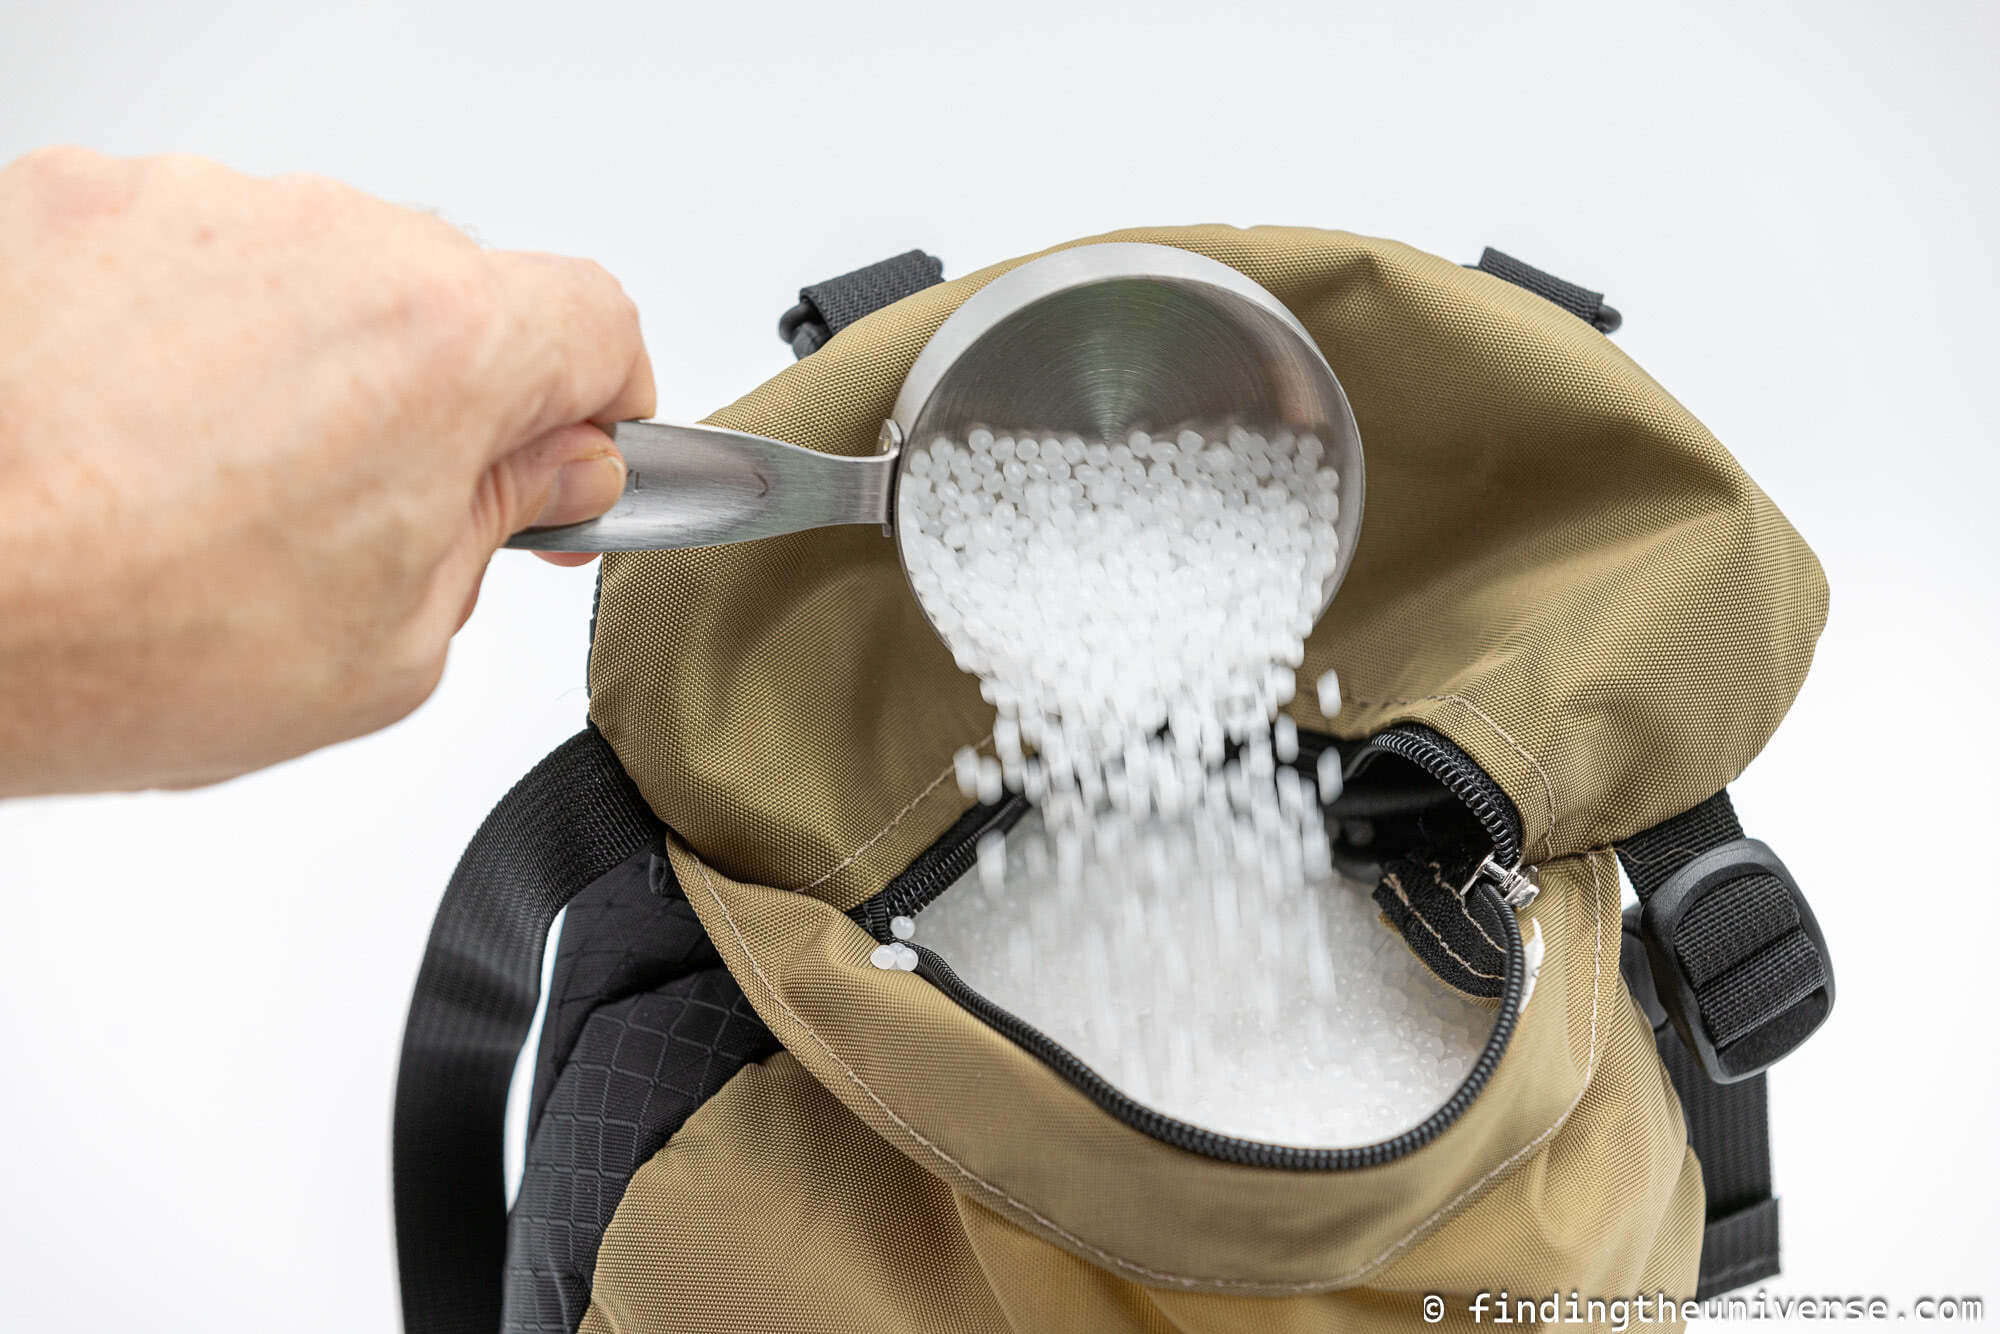
How to Fill Bean Bag
One of the good things about most photography bean bags is that you can remove and change the fill. So, if you are planning a trip where packing weight is a consideration, then you will likely want to empty your bean bag before your trip and fill it in destination.
Different bean bags offer different options for how you actually open them up to access the interior where the filling resides. These can include zippered openings and velcro openings.
Personally, I would recommend a high quality zippered opening. Velcro is not as good as it can come open in the middle of a shoot or in your bag with messy consequences.
Some bean bags offer multiple zippered openings, which can make distributing the fill to different parts of the bean bag easier. With saddlebag designs for example, the zip is often on the leg, so having two zippered openings can be particularly helpful to ensure both legs get an even amount of fill.
Size of Bean Bag
When shopping for a bean bag, you will want to decide on how big you want the bean bag to be. This will affect a few things.
First, a larger bean bag will be able to accommodate a larger lens. If you have a particularly large lens (300mm and up on a full frame camera), you will want to be sure the bean bag is going to be large enough to fully cushion and support it.
Of course, a large bean bag will require more filling, and the final filled weight of the bag will also be heavier (although this is also obviously affected by what you fill it with).
Bean Bag Color
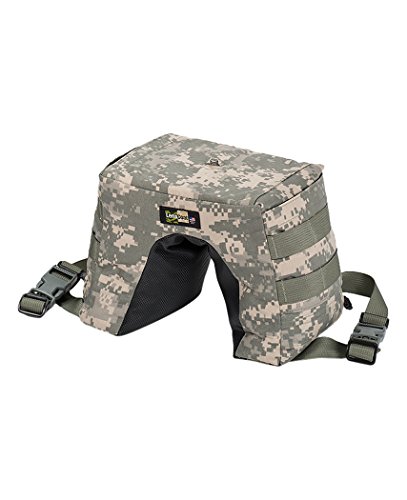
The color of your bean bag is also something to consider. Most bean bags come in wildlife friendly colors, including browns, khakis, greens and black. Some also have a camo style print.
Most colors will work for most uses. However, for specific photography situations, some colors will be better than others. For example, if you are going on safari it is often recommended to avoid colors like black or blue as these can attract tsetse flies. So in this situation, a khaki, green, camo, or sandy color would be good.
If you are planning on using your bean bag for wildlife photography in general, and will be trying to blend in with your surroundings, then a camo style bean bag might be worth considering.
Additional Features
Some manufacturers like to differentiate their bean bags by offering additional features. If you are comparing two similarly priced bean bags and one has extra features that you find useful, then that one might be a better fit for you.
Features I have seen include zippered pockets to hold accessories, grippy bases, straps for carrying, the ability to convert between a pillow shape and a saddle shape, and even tripod thread for mounting tripod heads or gimbals.
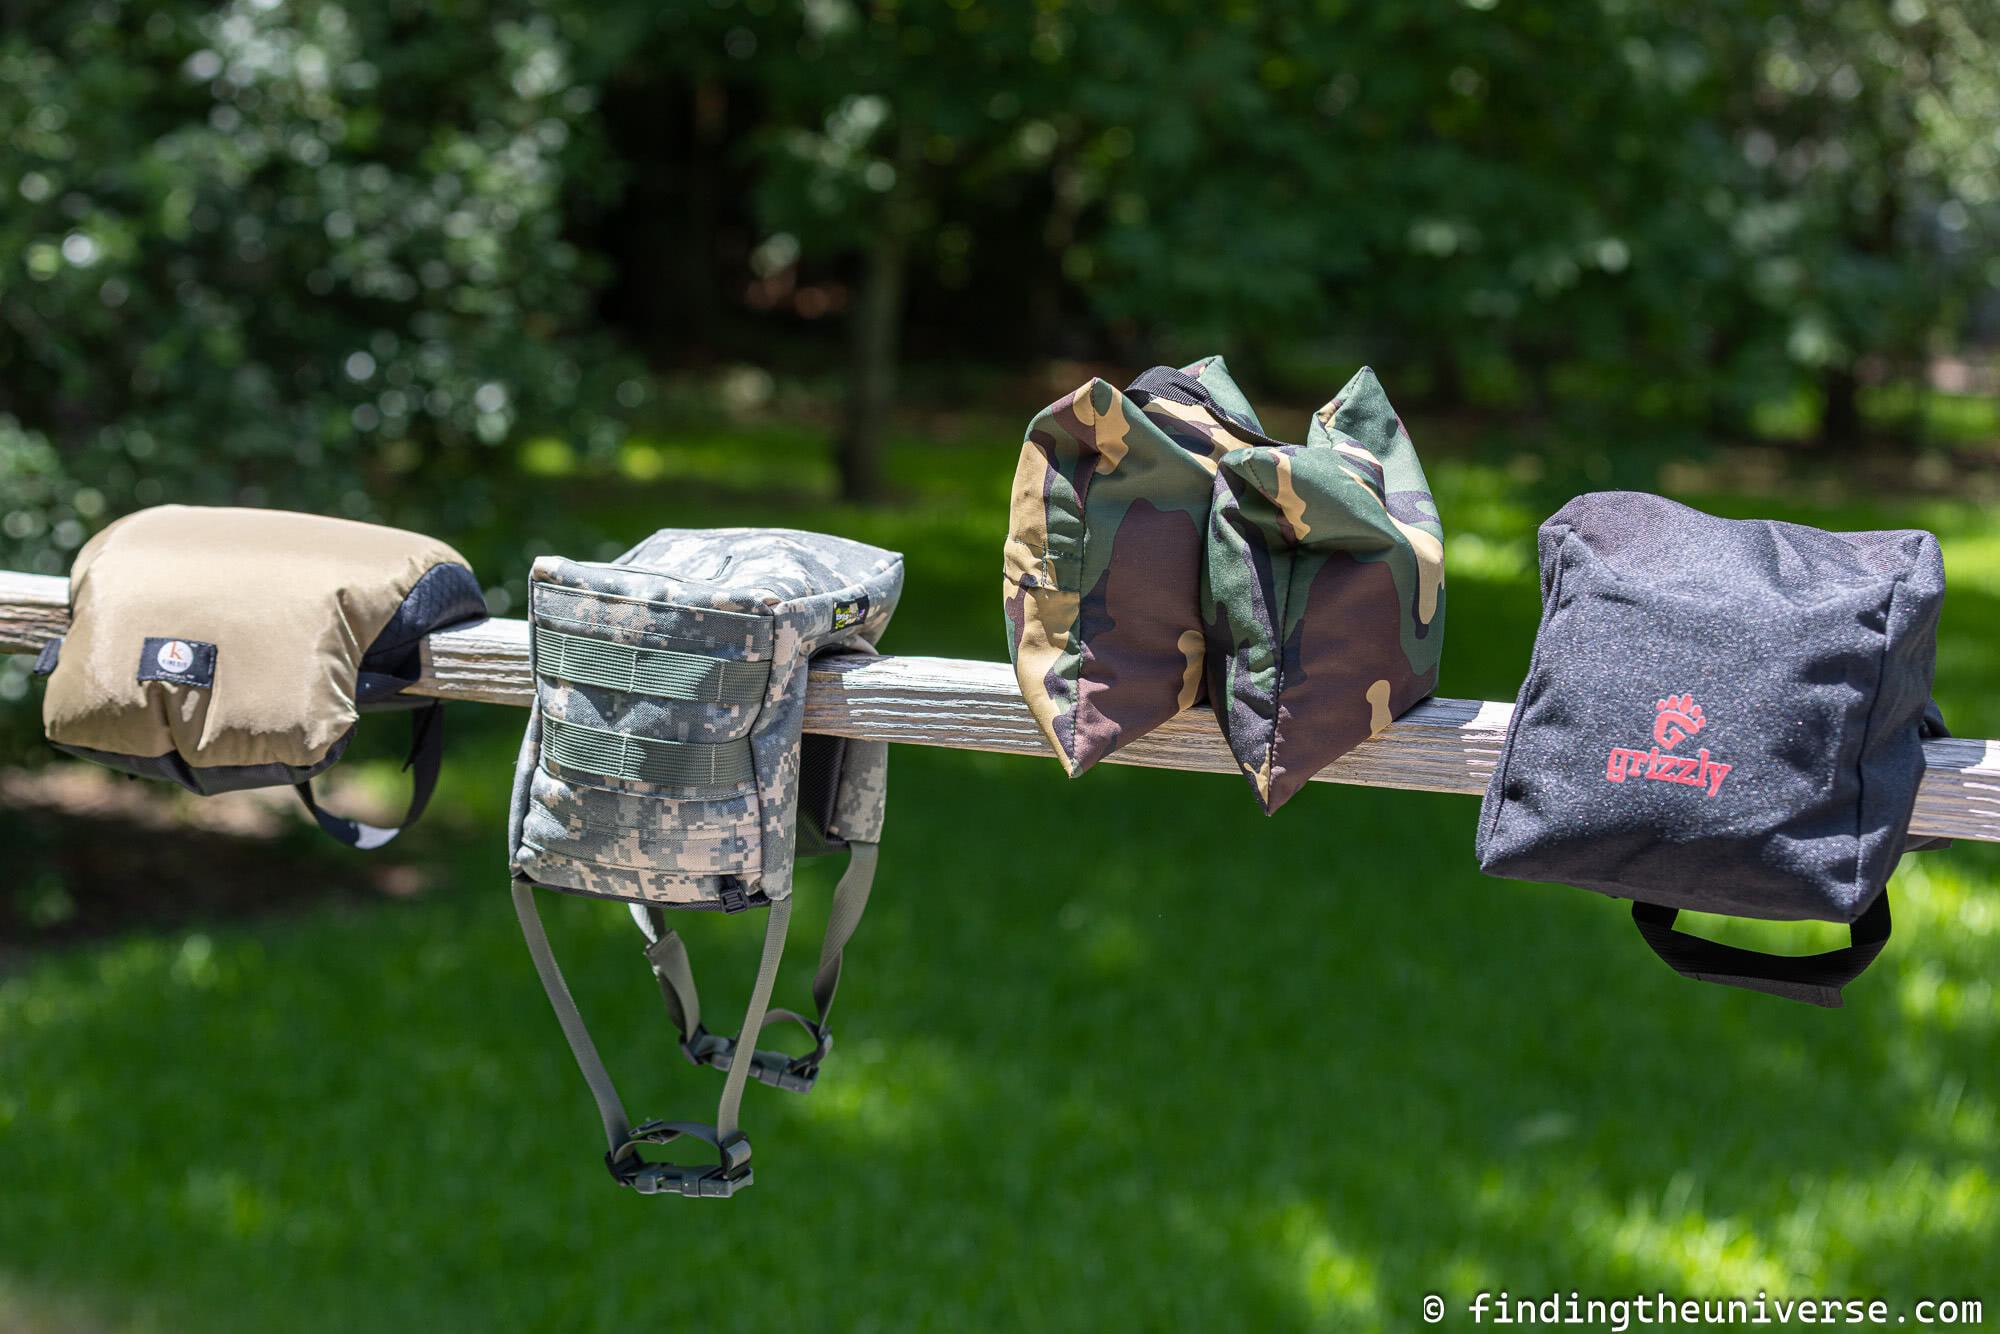
The Best Photography Bean Bags
I’m now going to go through a number of photography bean bags of different styles and at different price points. I have personally tried out the majority of these bean bags myself.
If I haven’t tried a specific model, then I have tried another version from the same brand, and would expect the experience to be similar.
Many brands have multiple bean bag options, with the differentiators being the size of the bean bag and the lenses they can support. Some brands also offer multiple bean bag styles.
These bean bags are ordered approximately by price from lower to higher, but prices always vary so do click through the check the latest price for each model when comparing.
The very first camera bean bag I bought was this budget option called the Grippa Bean Bag.
It is essentially two square bean bags sewn together with an interior join so beans can flow from one side to the other.
Despite its budget nature, it actually worked very well on my safari. When I purchased it prior to a safari trip it came prefilled with very light polystyrene beads, which made it light (if bulky) to travel with. The interior is accessed with a zip which means you can empty it and refill it, and it can also be purchased empty.
Honestly, I’d probably recommend purchasing it empty and filling it with something other than the polystyrene beads. They are a little light, and they also make a bit of noise when you use the bag, which might scare wildlife away.
That said, I had a good experience using this bean bag on safari in East Africa, and if you are in the UK looking for a more budget oriented option, it’s definitely one to consider.
Dimensions: 21.6 x 21.2 x 20.5 cm / 8.5 x 8.3 x 8.1 inches Item Weight: 0.22kg /7.76oz (no fill) Purchase: Check price on Amazon UK here.
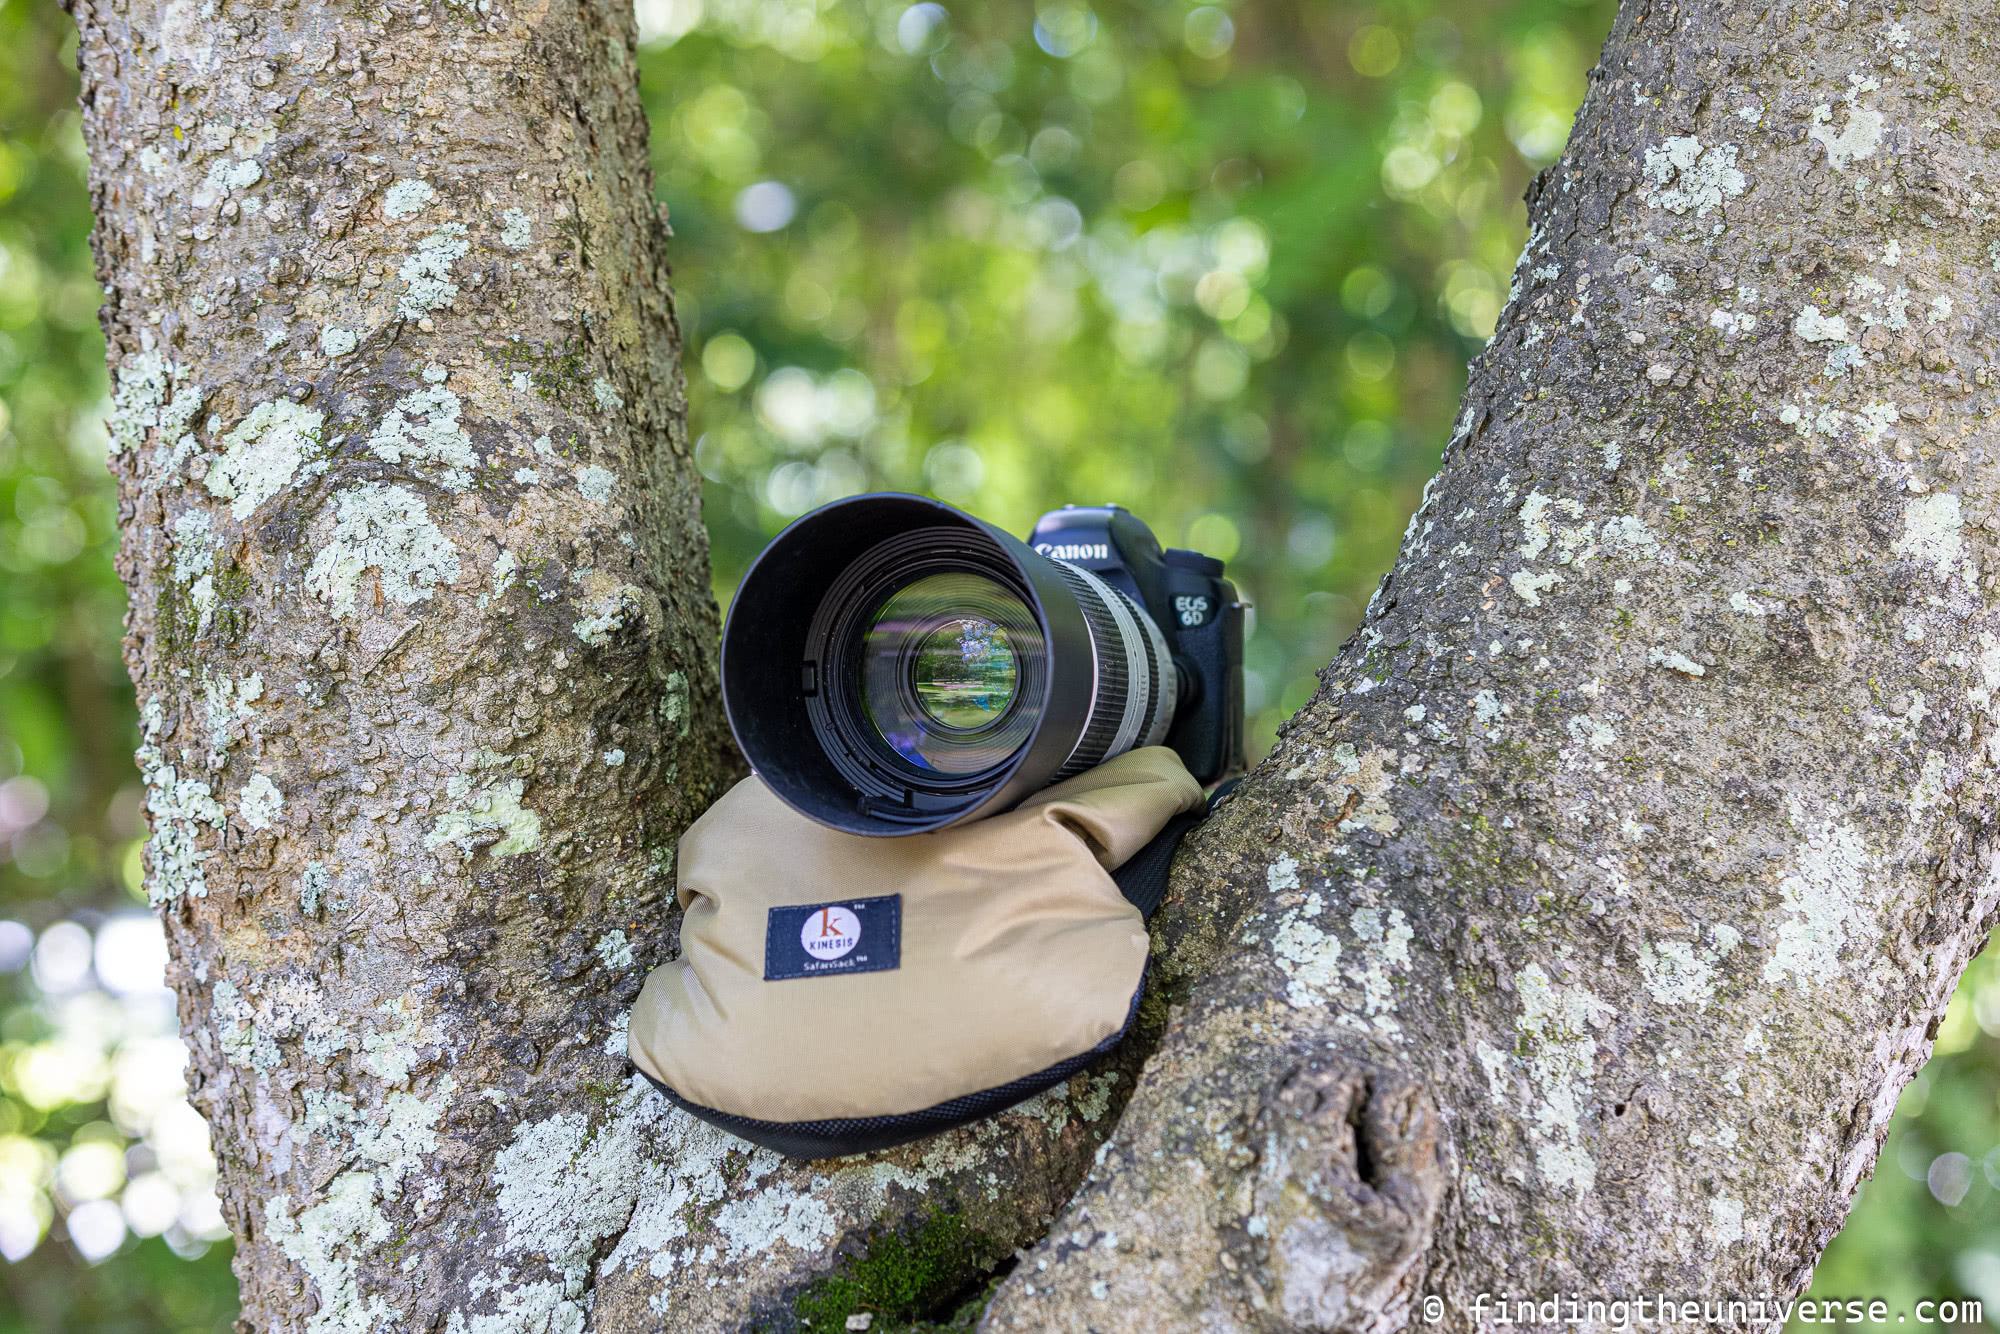
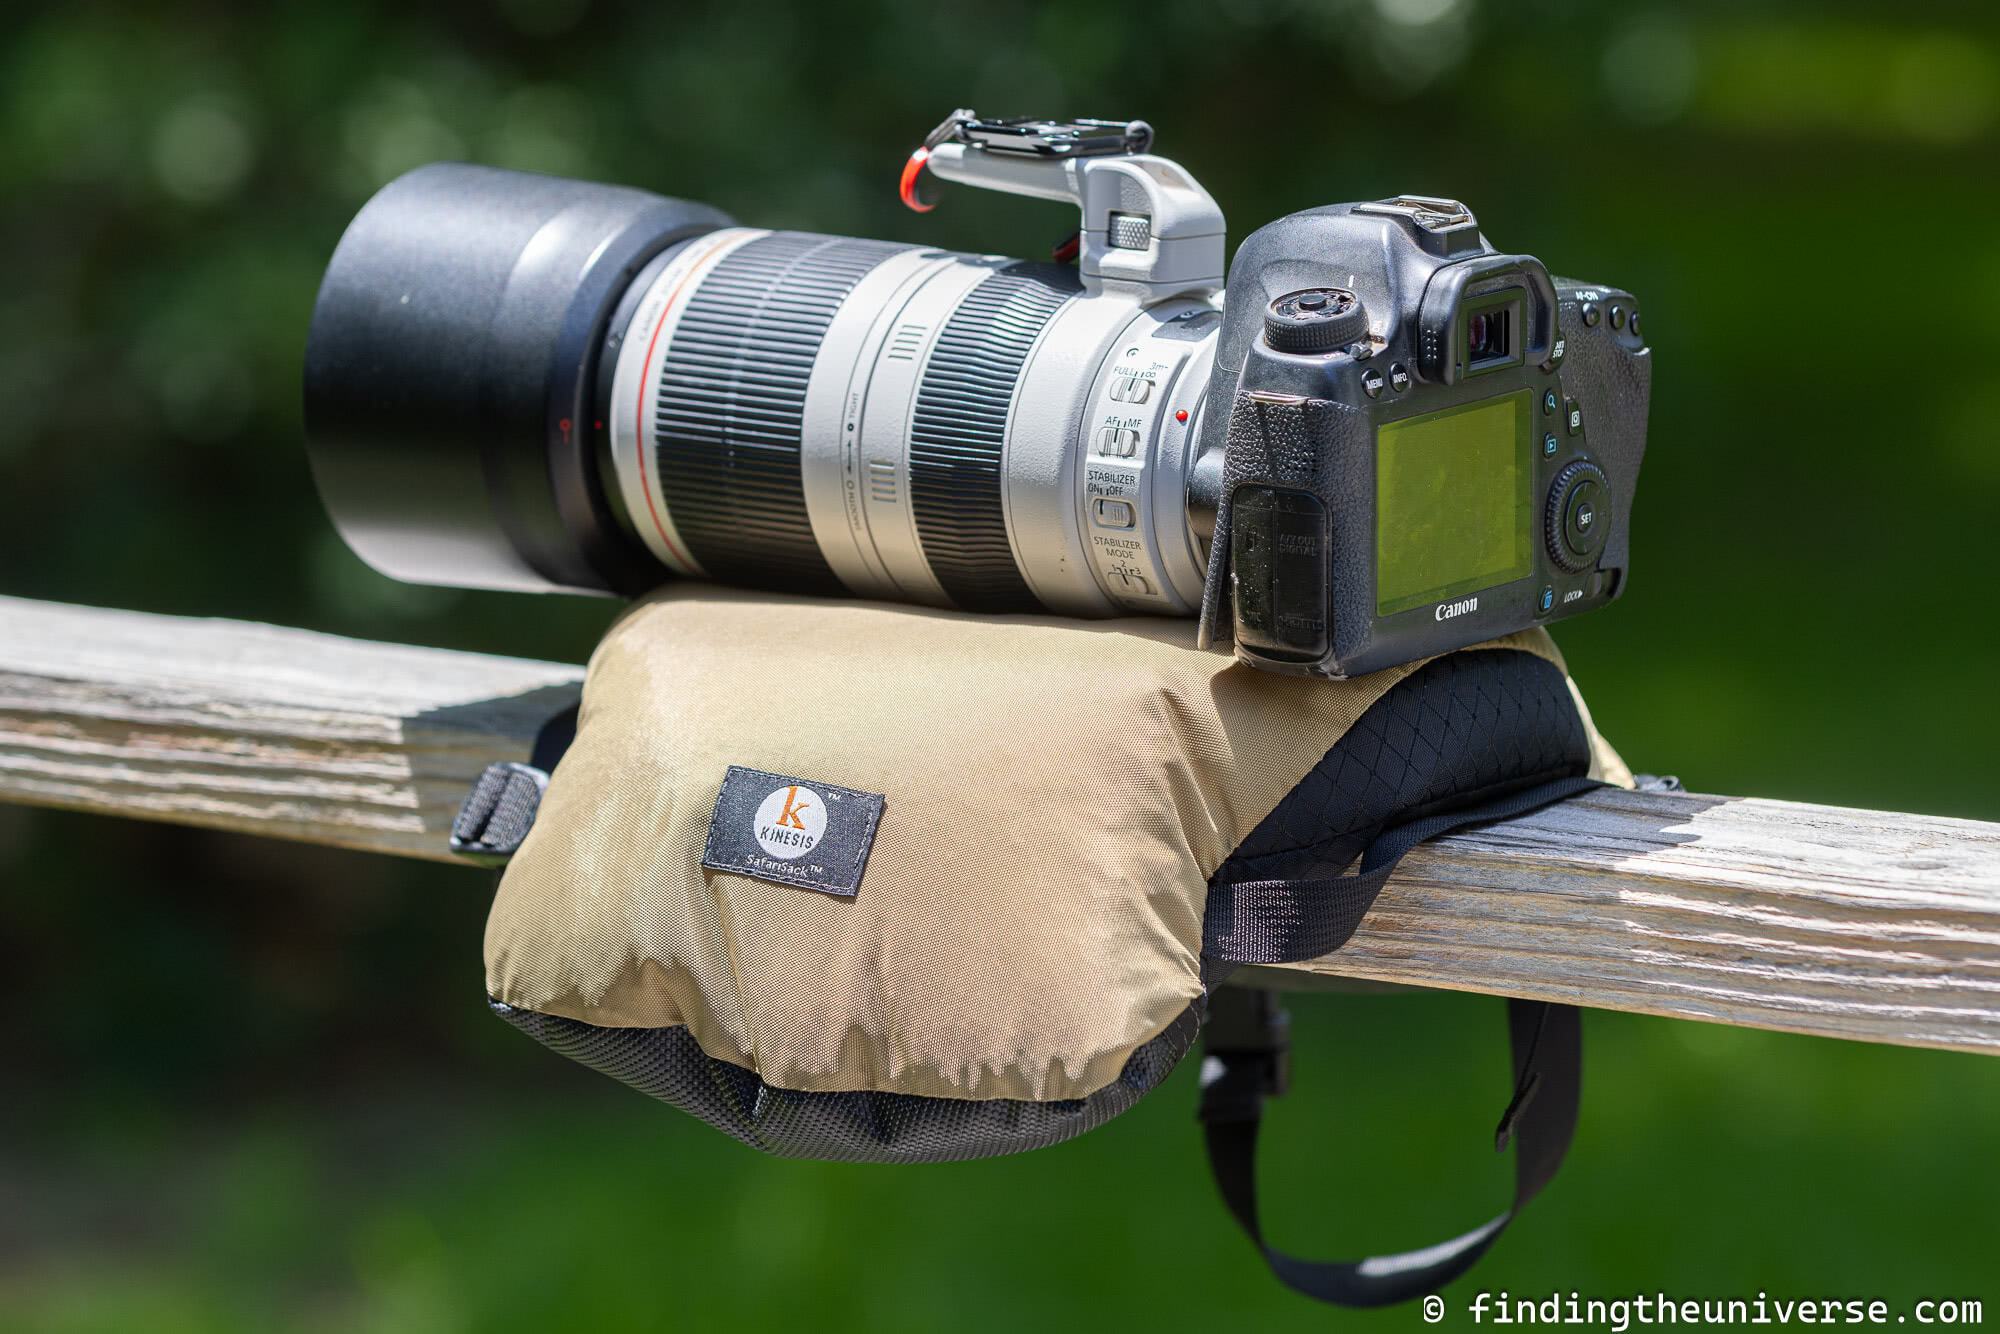
Kinesis makes a range of photography bean bags with a primary focus on bean bags that work well for safari. Of course, their bean bags also work well for all kinds of other uses, but their original mission was to create bean bags specifically for the needs of photographers on safari. Their bags are all made in the USA.
Safari photography often has you taking photos from a vehicle, either through a side window or through a pop-up roof viewing area. You tend to have to move quickly and adjust your position, and there tend to be all sorts of odd bits of metal on a safari truck to work around.
As such, the Kinesis SafariSacks are designed to be flexible and tough to stand up to the rigors of being bumped around and placed over all sorts of shapes.
The Kinesis SafariSack 1.4 is currently their smallest model, designed for lenses up to 200mm in length. It has zippered access to the fill area, and a rubberized base which has grippy sections at each end of the bag.
The bag is made of 400-denier and 420-denier Diamond Ripstop nylon fabrics, and the base is SlipNot, a rubberize-type fabric.
This SafariSack is designed to be used in flat mode. On safari this is generally best for use on top of a vehicle. It also has a quick release strap which can be used to secure the bag, for example to a roof mounted rack, offering additional peace of mind. It can also be used as a carry strap, and extended with an optional accessory for use as a shoulder strap.
Personally, I’d recommend purchasing the version which comes with the optional shoulder strap as it makes it easier to carry.
Kinesis provides estimated weights for the bag when it is filled with different materials. With Buckwheat the weight would be 240g / 8.5oz. With Polybeads, it would be 910g / 2lbs. You can normally purchase the bag empty or with either buckwheat or polybeads supplied.
Personally, I would recommend buying the variant with the buckwheat fill and the Y208 extension strap.
I have a larger Kinesis SafariSack and the build quality of their products is excellent.
Dimensions: 20 x 28 cm (7.9 x 11″) Item Weight: 0.08kg / 2.9oz (no fill) Purchase: Check price on Amazon here and B&H Photo here.
LensCoat are a US based company who have been creating products aimed at wildlife photographers for many years. The company was started by wildlife photographer Scott Elowitz, and their products are all made in the USA.
LensCoat are particularly well known for their LensCoat lens covers. This is a neoprene wrap which goes around a lens, offering thermal protection, waterproofing, and camouflage.
However, they also make a range of photography bean bags.
The LensCoat LensSack Jr. is a flat style bean bag although depending on how you fill it you can shape it in a “v” shape if you prefer. It has a non-slip grippy bottom along the full base of the bean bag and the bag itself is constructed from water-resistant heavy-duty Cordura.
It has a locking zipper for fill compartment access as well as a carry-strap and 4 d-ring securing points.
Compared to the Safari Sack 1.4 this is a slightly larger bean bag which can handle larger lenses, I’d estimate up to 400mm would work fine on this bean bag. It also has the advantage of offering grip along the entire base of the bean bag, which is a nice feature.
If you have a bigger lens or would prefer an even larger flat style bean bag from LensSack, check out the LensCoat LensSack which offers the same features but in a larger size.
I own a saddle bag shaped LensCoat bean bag and have found the product to be well made and durable.
Dimensions: 38 x 20 cm (19.5 x 11.5″) Item Weight: 0.08kg / 2.9oz (no fill) Purchase: Check price on Amazon here and B&H Photo here.
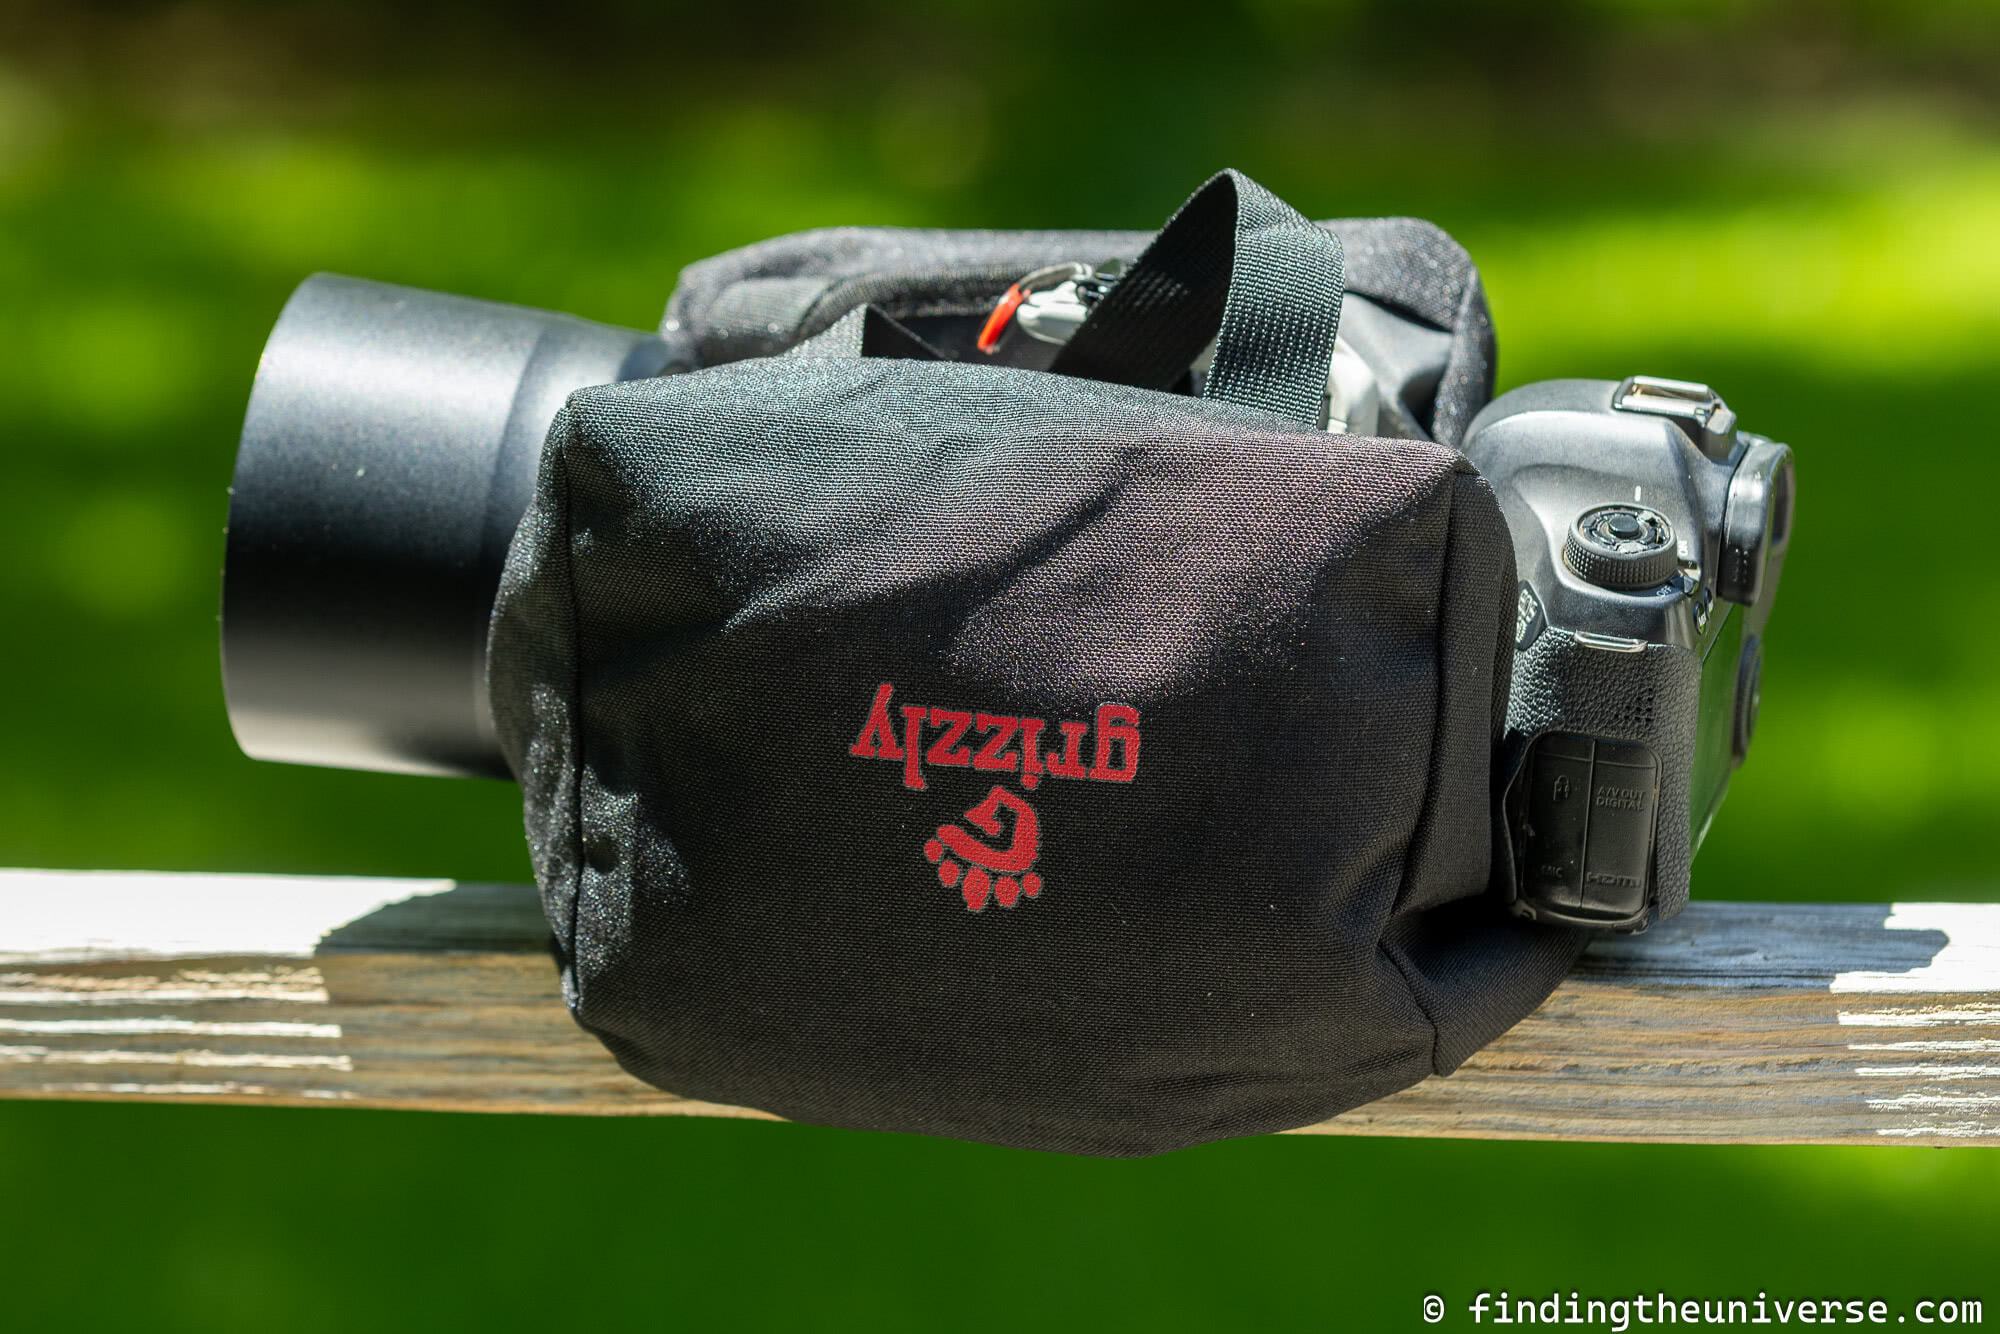
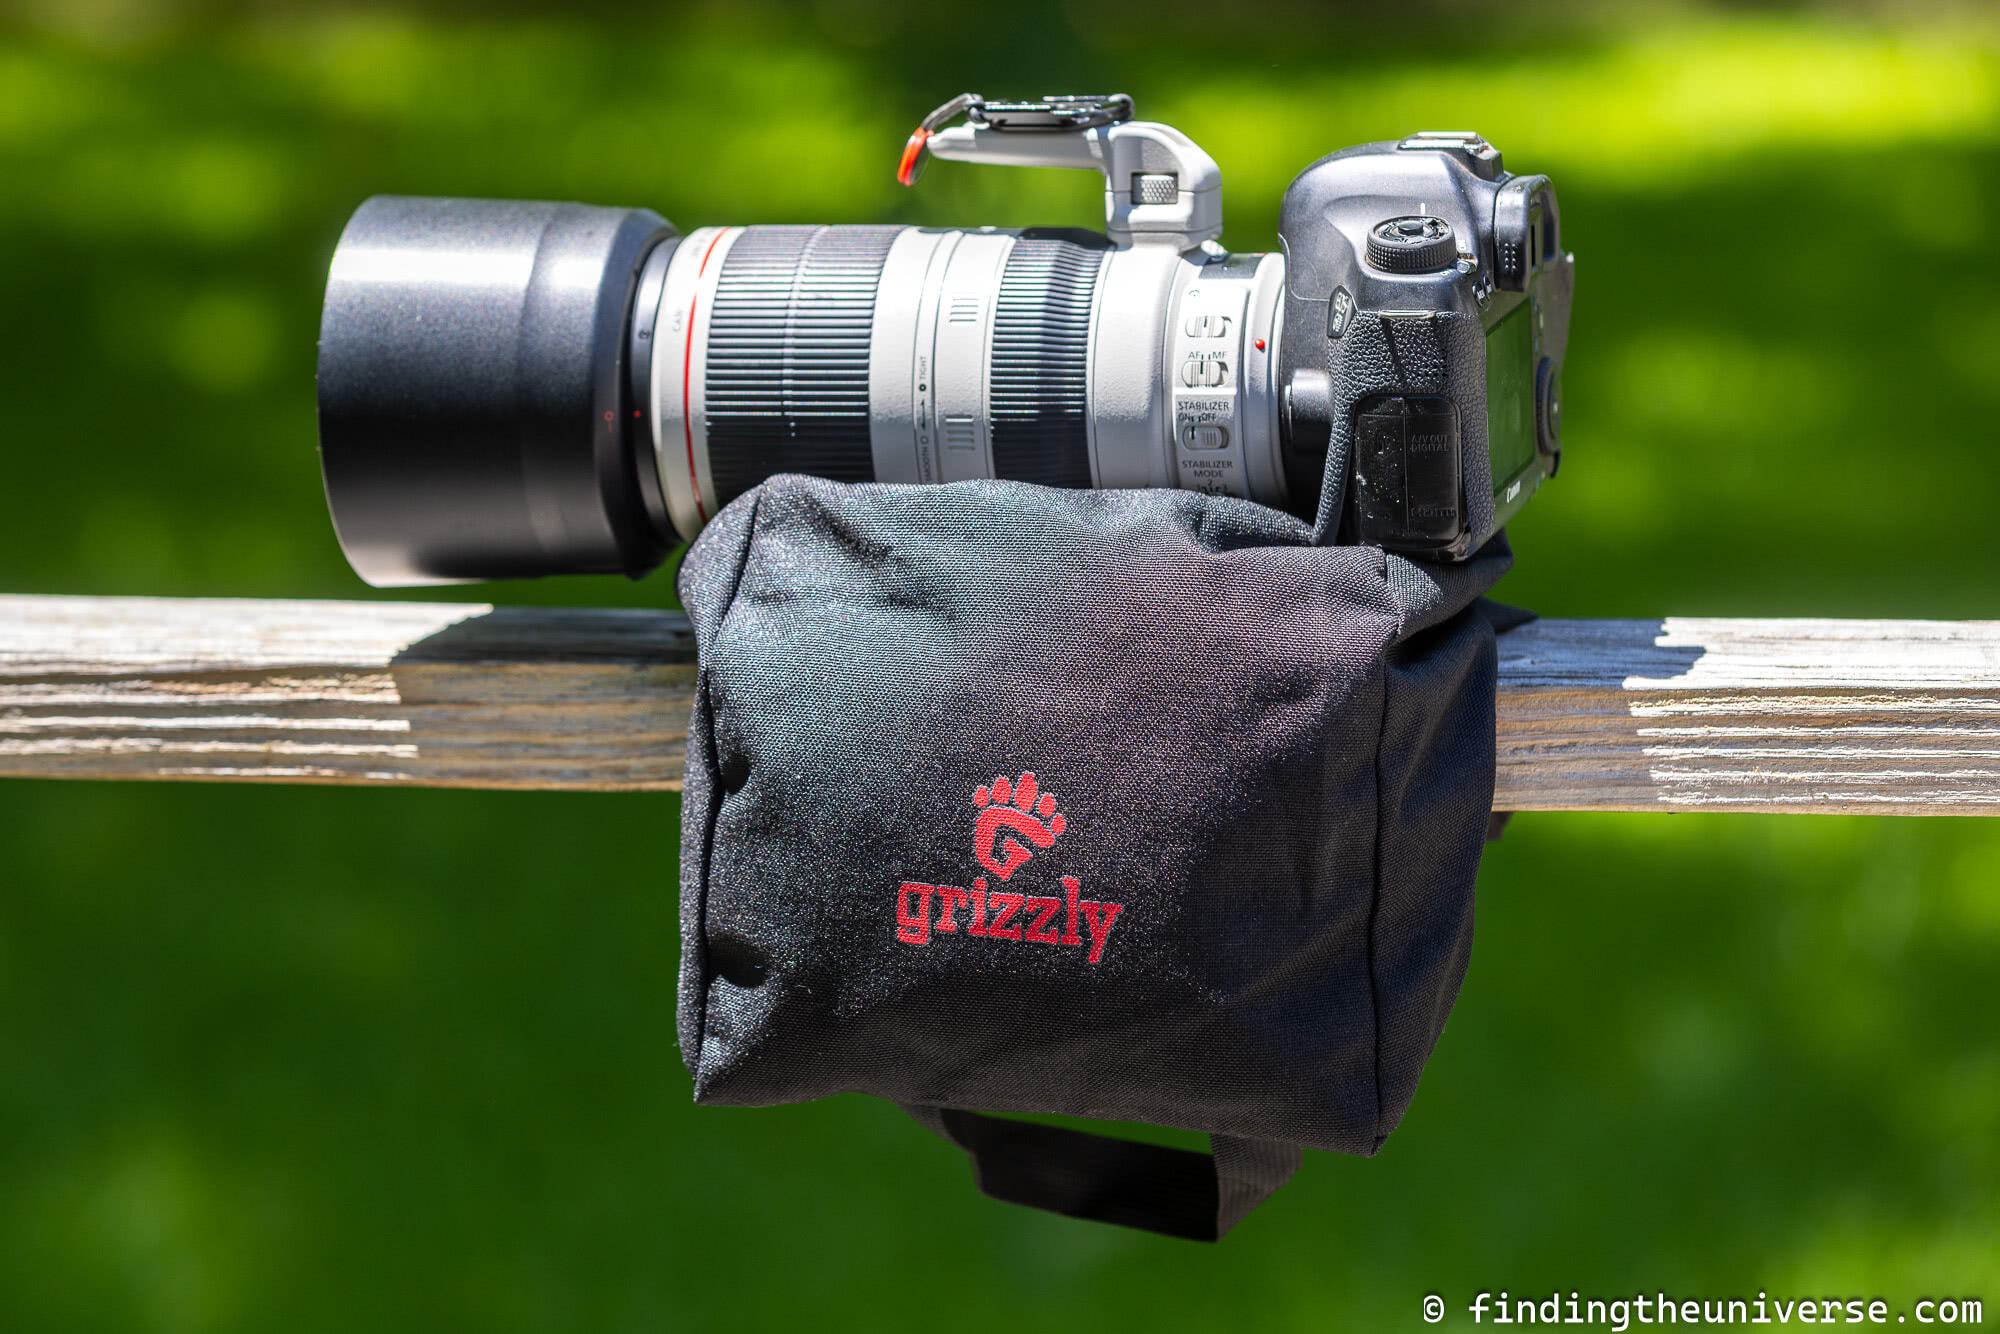
The Grizzly Camera bean bag is a saddlebag style bean bag which offers a no-frills but fairly well-made bean bag product at a good price. I bought this to compare it to some of the more expensive options on the market.
The bag itself is made from 1000 Denier Cordura Nylon which, looks and feels (to my touch) hard wearing. It’s relatively large, able to work with lenses up to 600mm comfortably I would say.
The saddle area which would normally sit over the windowsill, fence post or other support is made from a rubberized coating for waterproofing and durability. This base is a little smooth though, especially compared to the Kinesis or LensCoat products.
It has a single high quality YKK zipper, which is functional if not as handy as having two zippers. There’s also a carry handle.
Overall, for the price, this is a good saddlebag option. You don’t get the extra features and more premium construction of higher end bags but it is certainly good enough for regular use.
Dimensions: 25 x 20 x 20 cm (10 x 8 x 8″) Item Weight: 0.15kg / 5.6oz (no fill) Purchase: Check price on Amazon here and Etsy here.
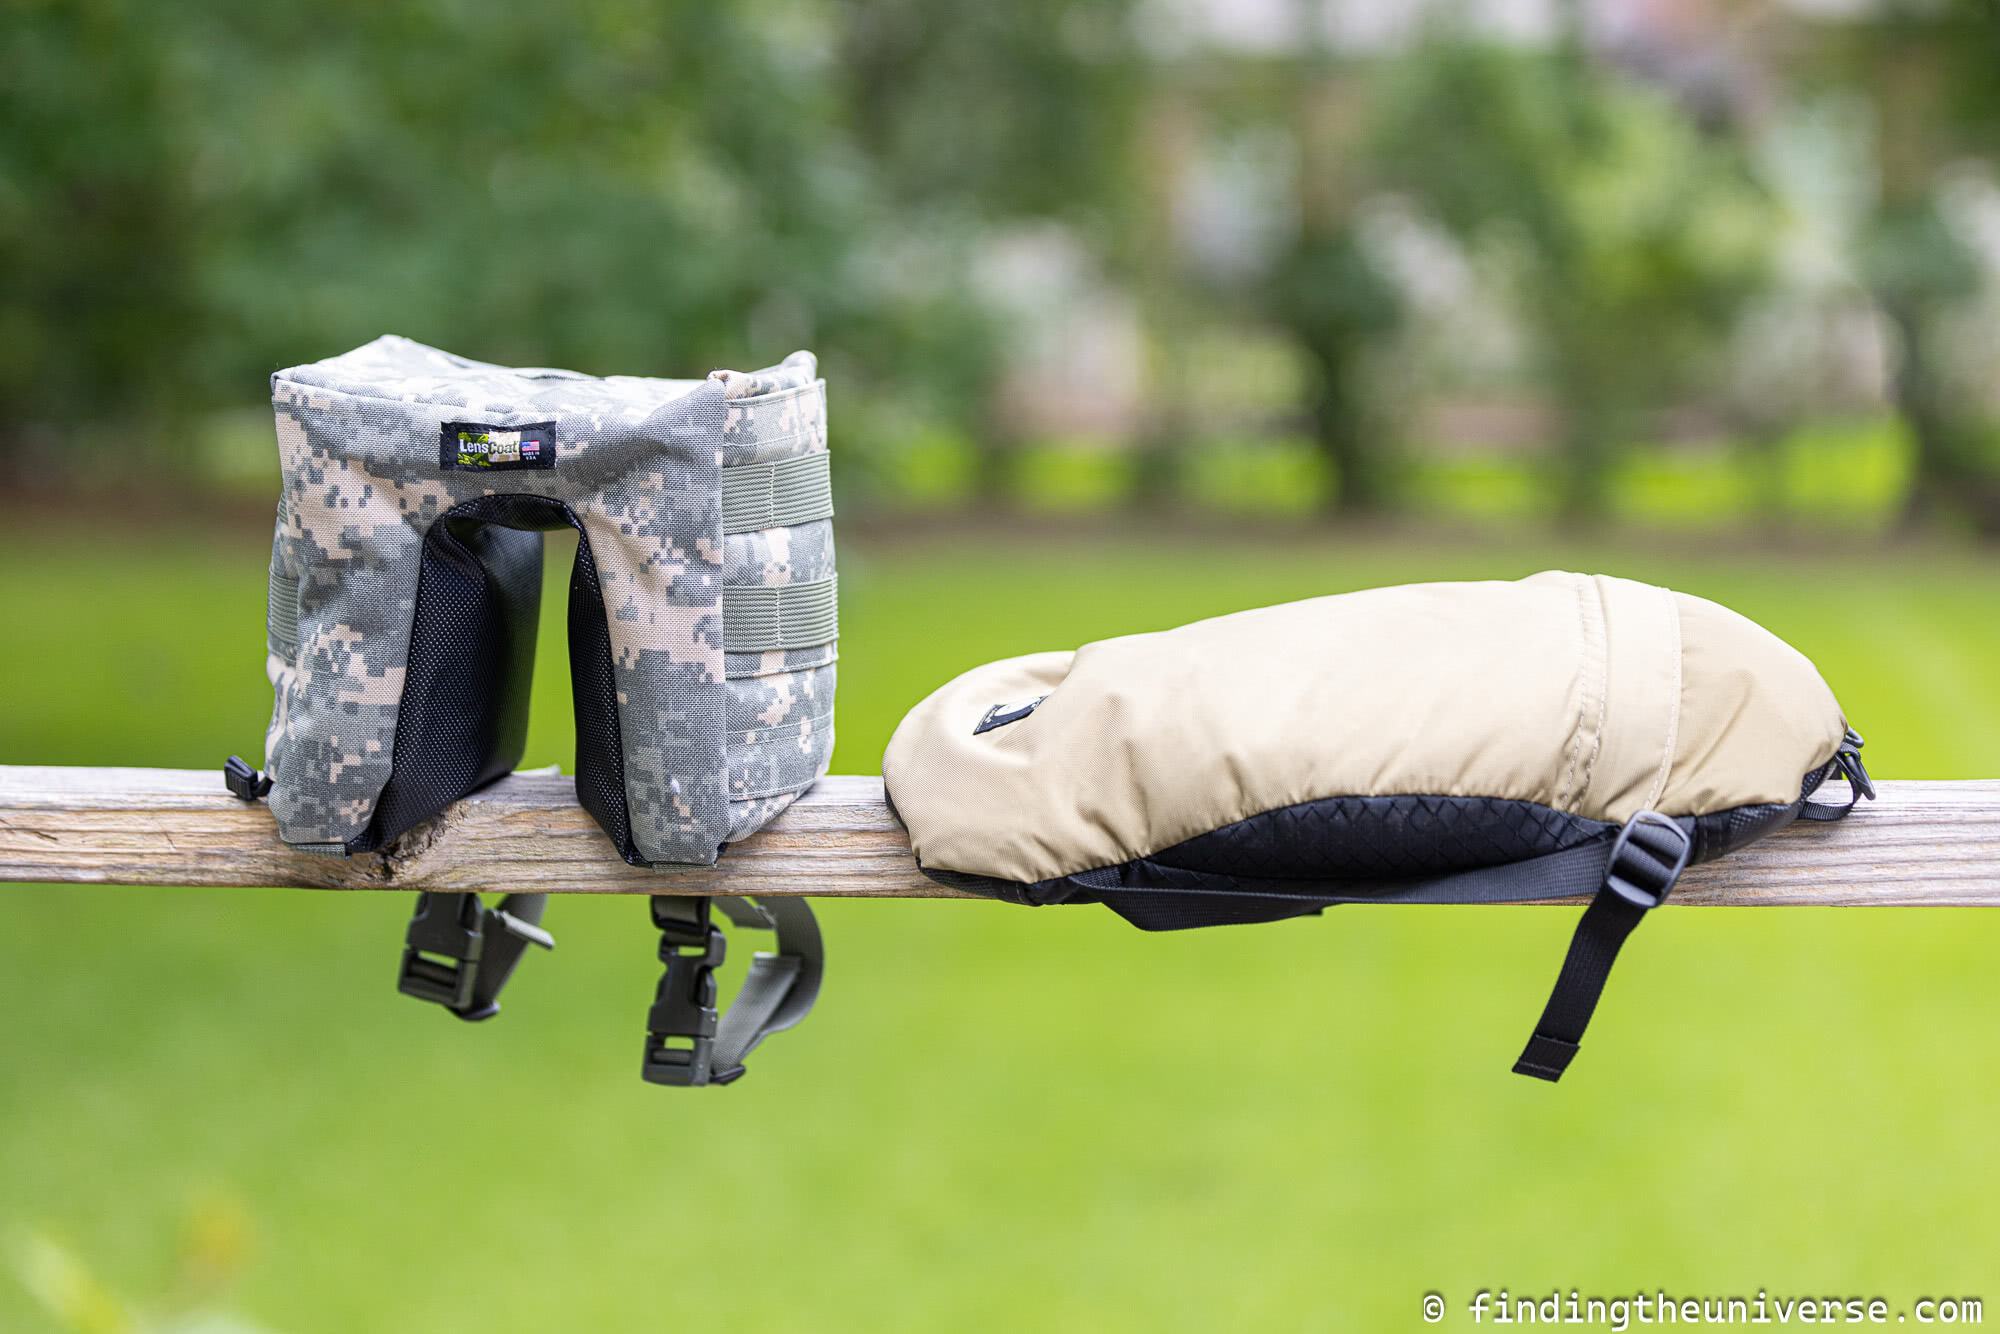
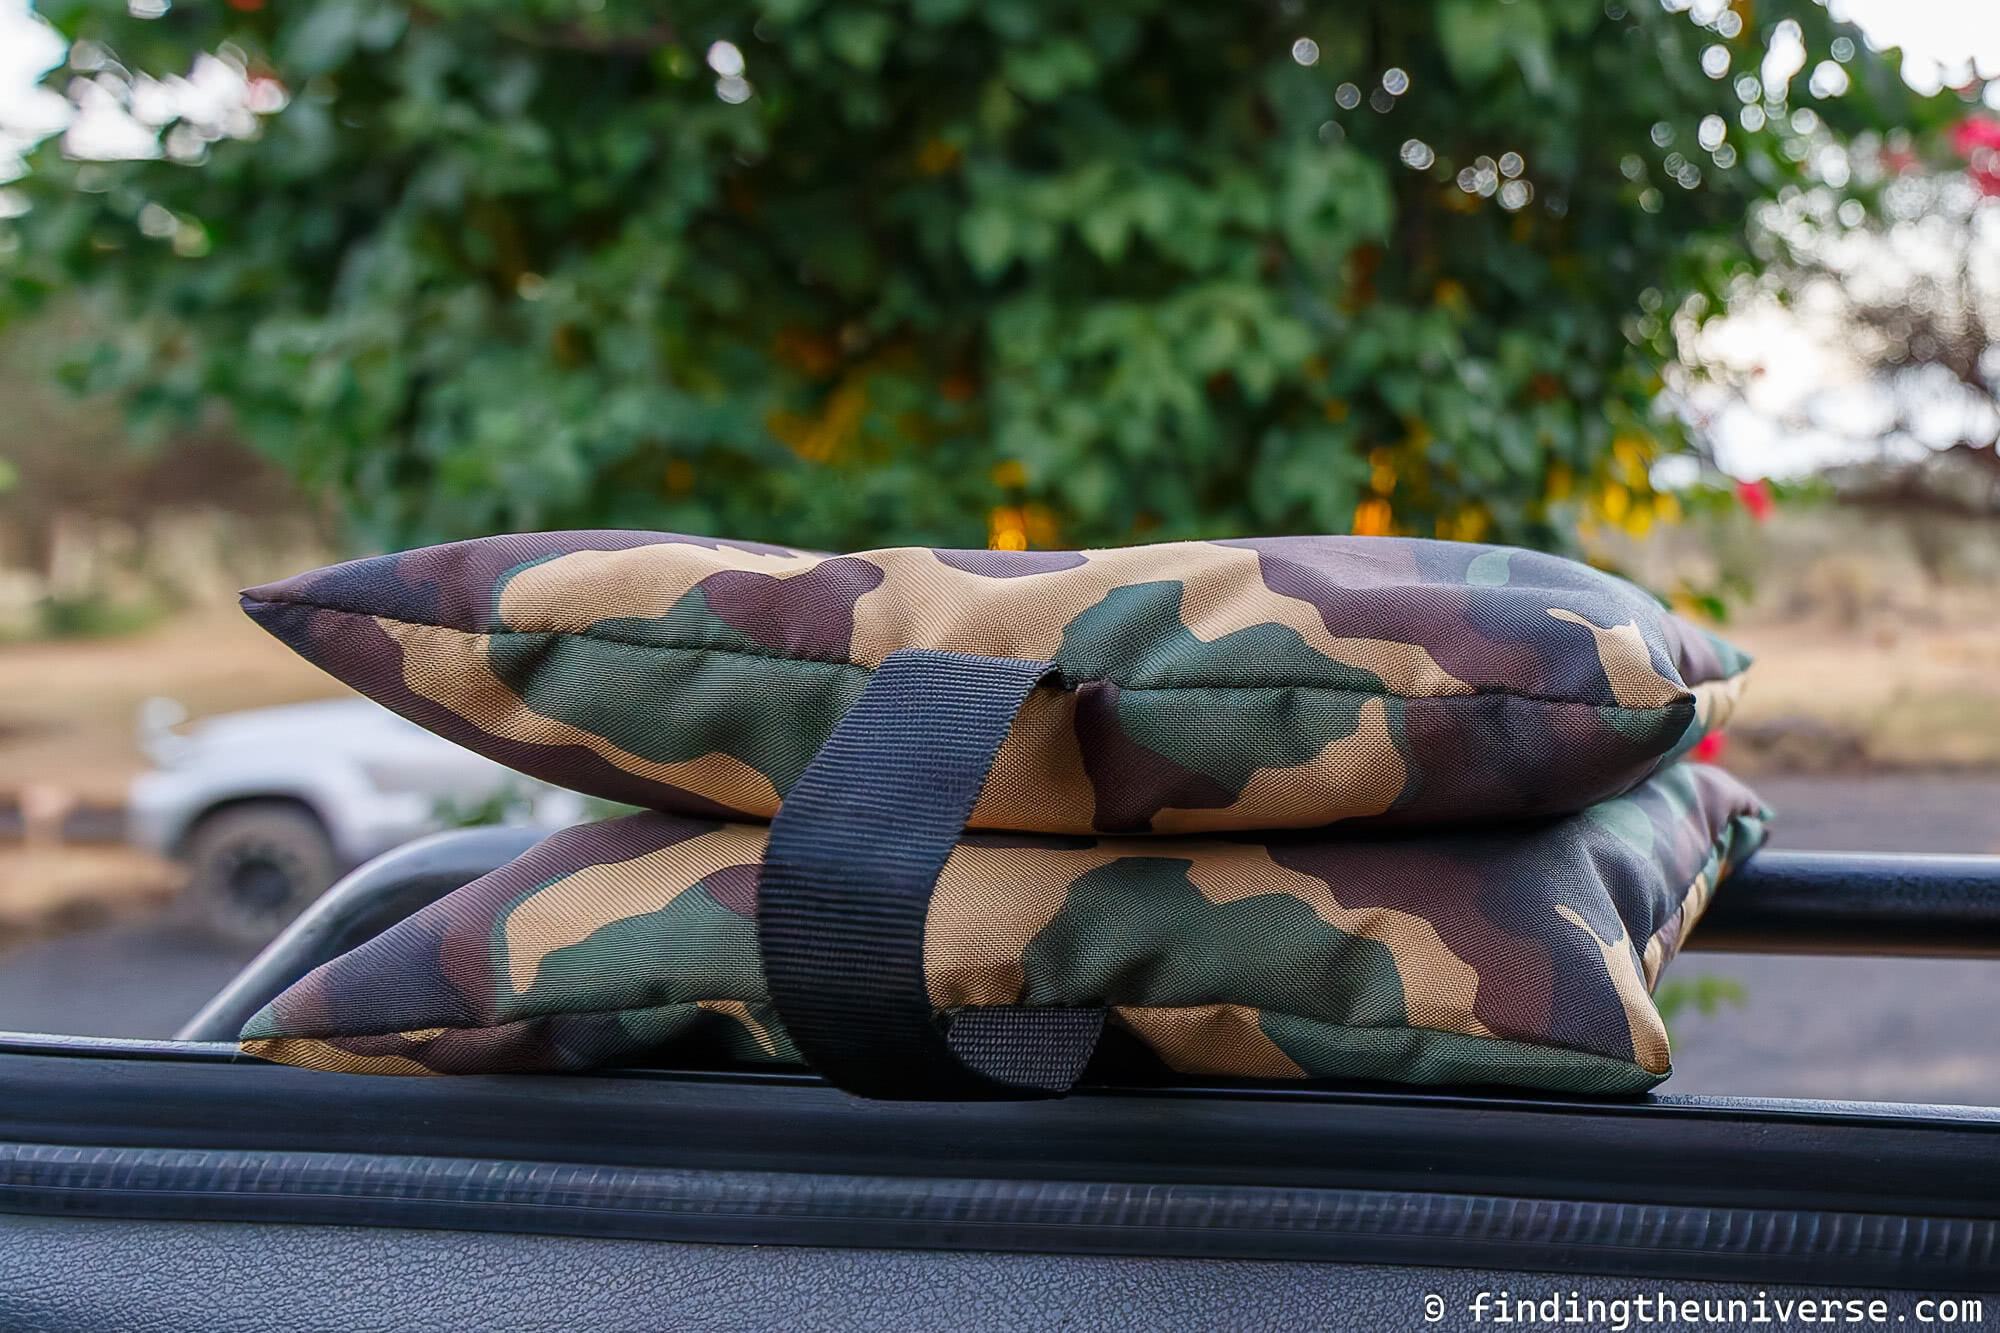
The Kinesis SafariSack is one of my personal favorite photography bean bags that I’ve used, primarily because of its versatility.
It is essentially a larger version of the SafariSack 1.4, which works with longer lenses up to 800mm. However, it does have some key added features that make it worth the upgrade beyond larger lens capacity, even for smaller lenses.
The main differentiating feature it has is that it’s designed to be used as both a flat bag and also in a more saddlebag shape. To achieve the saddlebag shape, you just tighten the two straps underneath the bag which pull the ends together to form the “legs” of the saddle.
It is designed with a gusset in the middle of the bag so that when in saddlebag mode this area has more fill and thus provides more support. That said, Kinesis do recommend filling the bag slightly less than full if planning on using it in saddlebag mode.
Whilst it’s obviously not quite as firm of a shape as a purpose-built saddlebag, I find that it works well and molds well to different surface shapes.
Like the 1.4 model, the 4.2 also has a rubberized bottom, and a carry handle which can be extended into a shoulder strap with the optional Y208 extension strap. I would definitely recommend purchasing the version with the carry strap as it makes it a lot easier to carry around. The carry handle also has d-ring attachments.
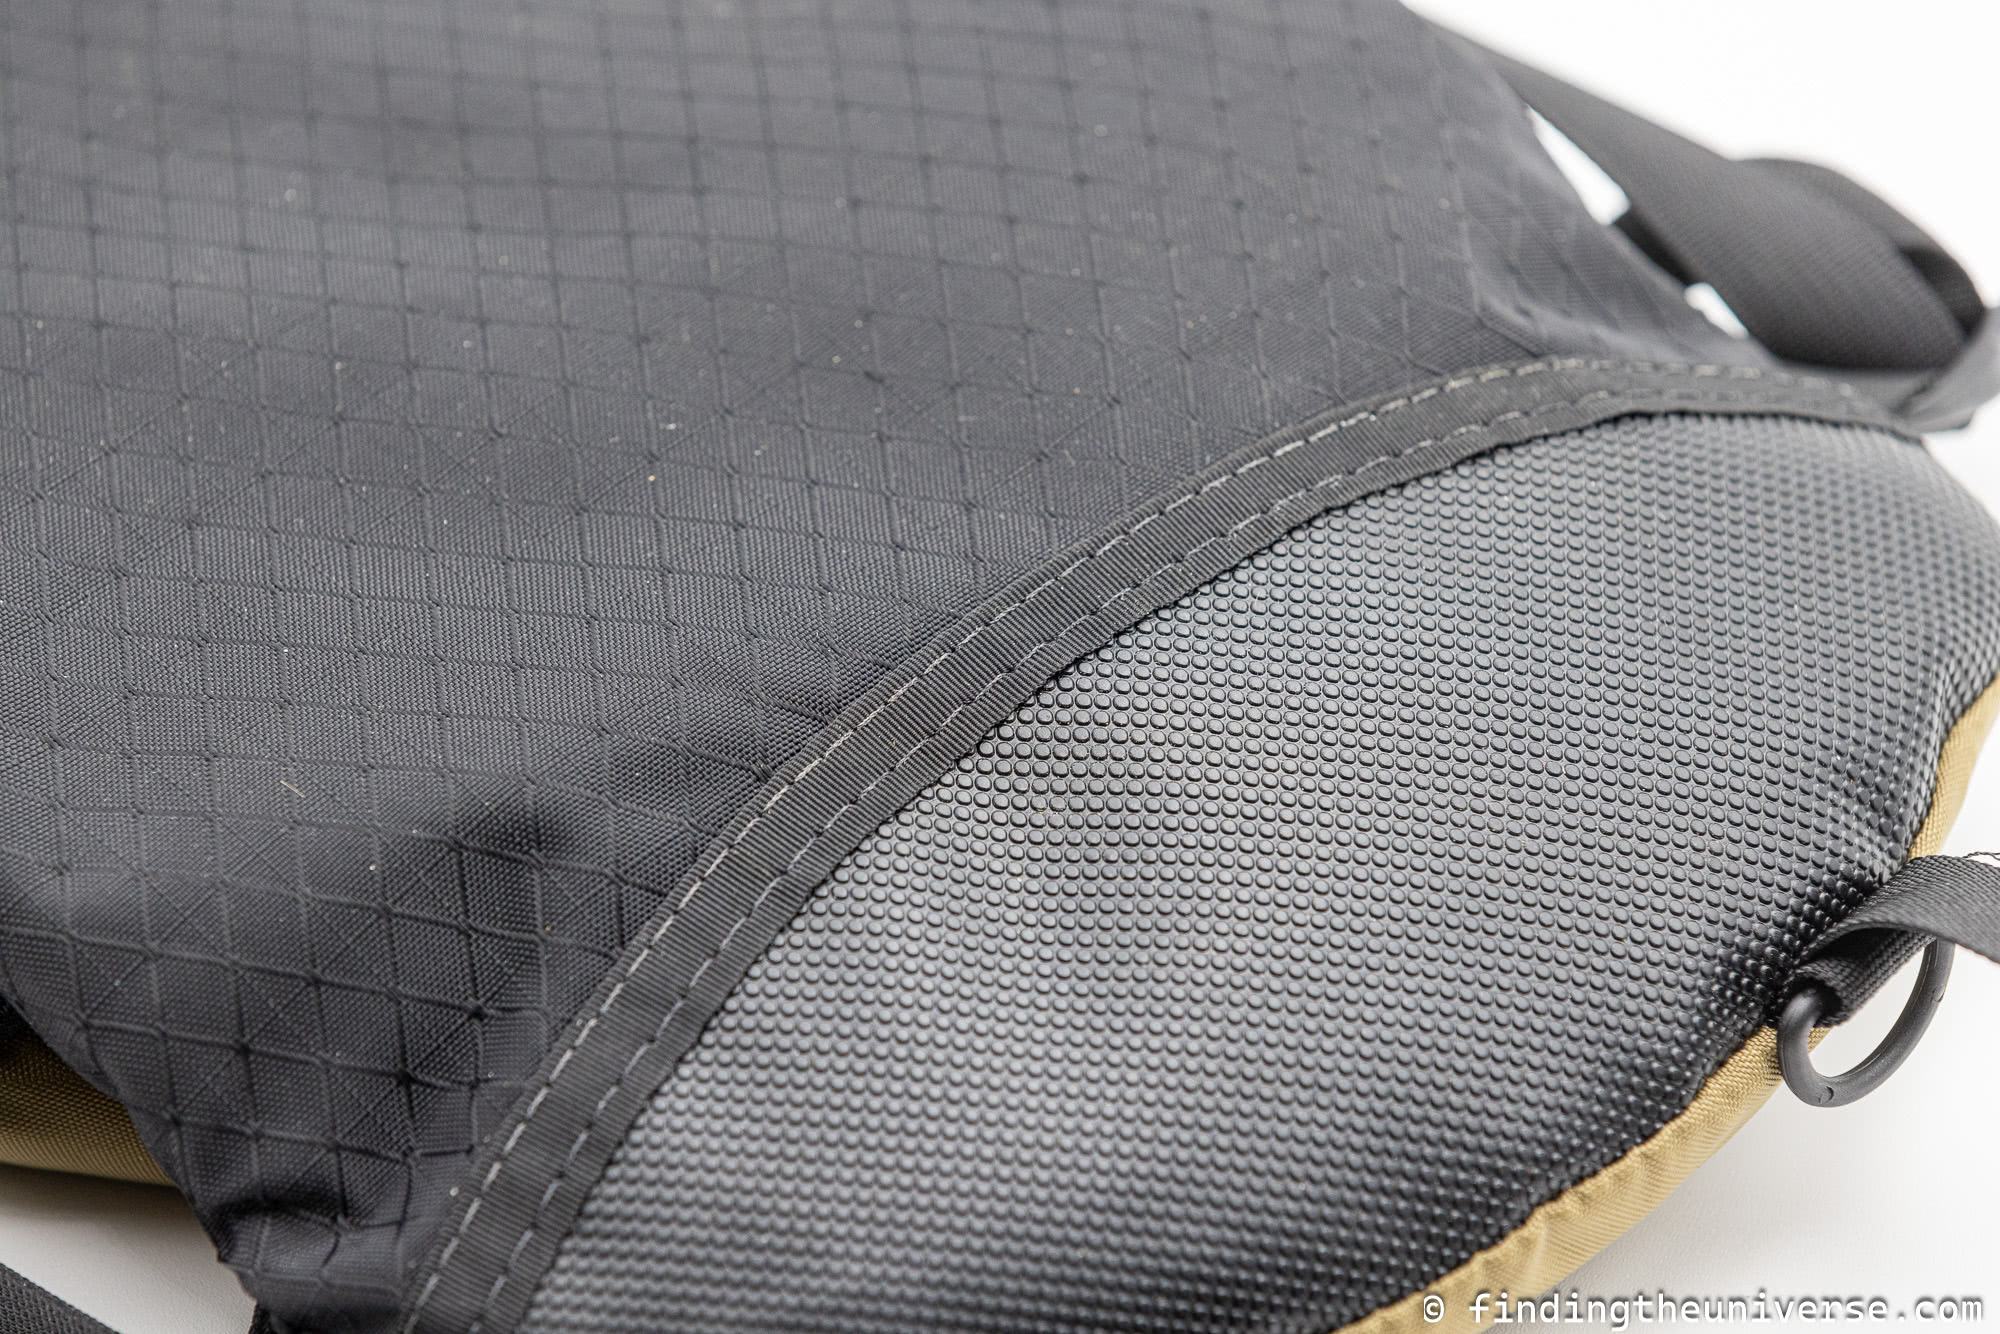
The bag is made of 400-denier and 420-denier Diamond Ripstop nylon fabrics, and the base is SlipNot, a rubberized-type fabric.
Parts of this base at each end of the bag have extra grip, as you can see in the below image, which helps especially when using the bag in a more saddlebag configuration for grip.
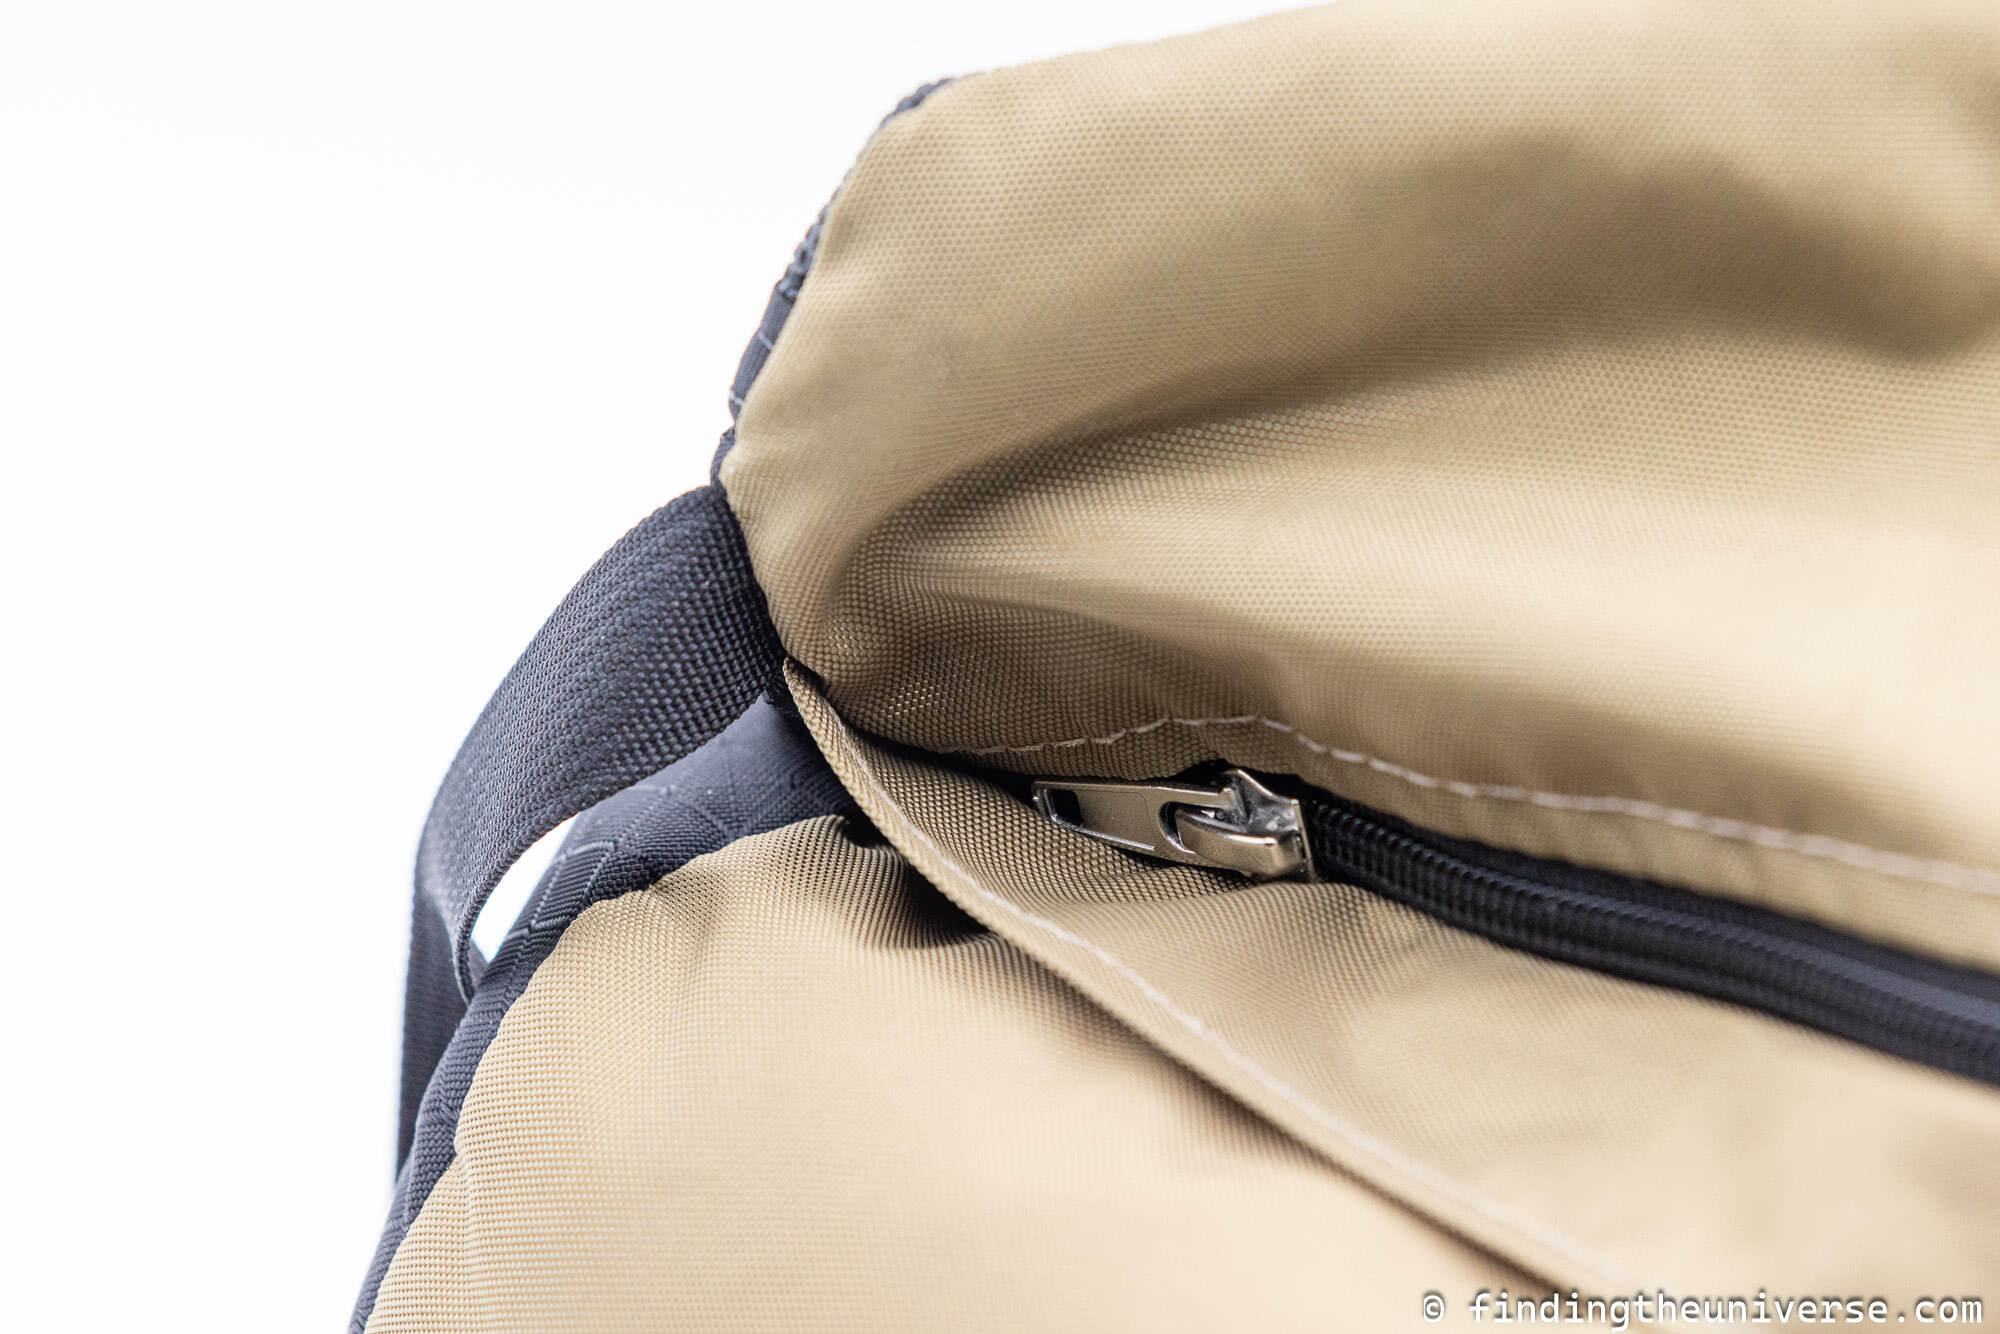
Another thing I like about all the Kinesis SafariSacks is that the fill zipper stops about half an inch from the edge of the bag. This means there is room for the zipper pull to fold over flat up to the edge of the bag. It is then secured under the zipper flap.
This means it’s a lot easier to know when it is properly closed. The other bean bags I’ve used require you to try and push the zipped closed right up to the edge of the bag. This can make it hard to know if it’s properly closed.
A properly closed zipper on a bean bag is really important as otherwise your fill can start to pour out, which is not a good situation to be in.
Kinesis provides estimated weights for the bag when it is filled with different materials. With Buckwheat the weight would be 0.66kg / 1lb 7oz. With Polybeads, it would be 2.5kg / 5lbs 8oz.
You can normally purchase the bag empty or with either buckwheat or polybeads supplied, and with or without the carry strap. I would recommend the version with the Y208 extension strap which will make it easier to secure and carry.
Then, I’d suggest the version with buckwheat if you have a lens up to around 200mm, or plan to travel with it. If weight is not an issue and you have a larger lens, then the Poly Bead option is the best option.
Dimensions: 24 x 40 cm (15.7 x 9.4″) Item Weight: 0.144kg / 5oz (no fill) Purchase: Check price on Amazon here and B&H Photo here.
The LensCoat LensSack Pro Jr. is my favourite saddlebag style “u” shaped photography bean bag that I own. It is really well made and has some unique features that I’ve not seen in other photography bean bags.
First, the basics. It’s made of heavy-duty water resistant Cordura, with a rubberized base and reinforced stitched seams. The base (the inside of the “u”) offers grip across its whole surface, which is a really nice feature for ensuring stability and grip.
The LensSack Pro Jr can support lenses up to 500mm (for larger lenses look at the LensCoat LensSack Pro). It has two YKK locking zippers, one on each leg, making it easy to fill and empty.
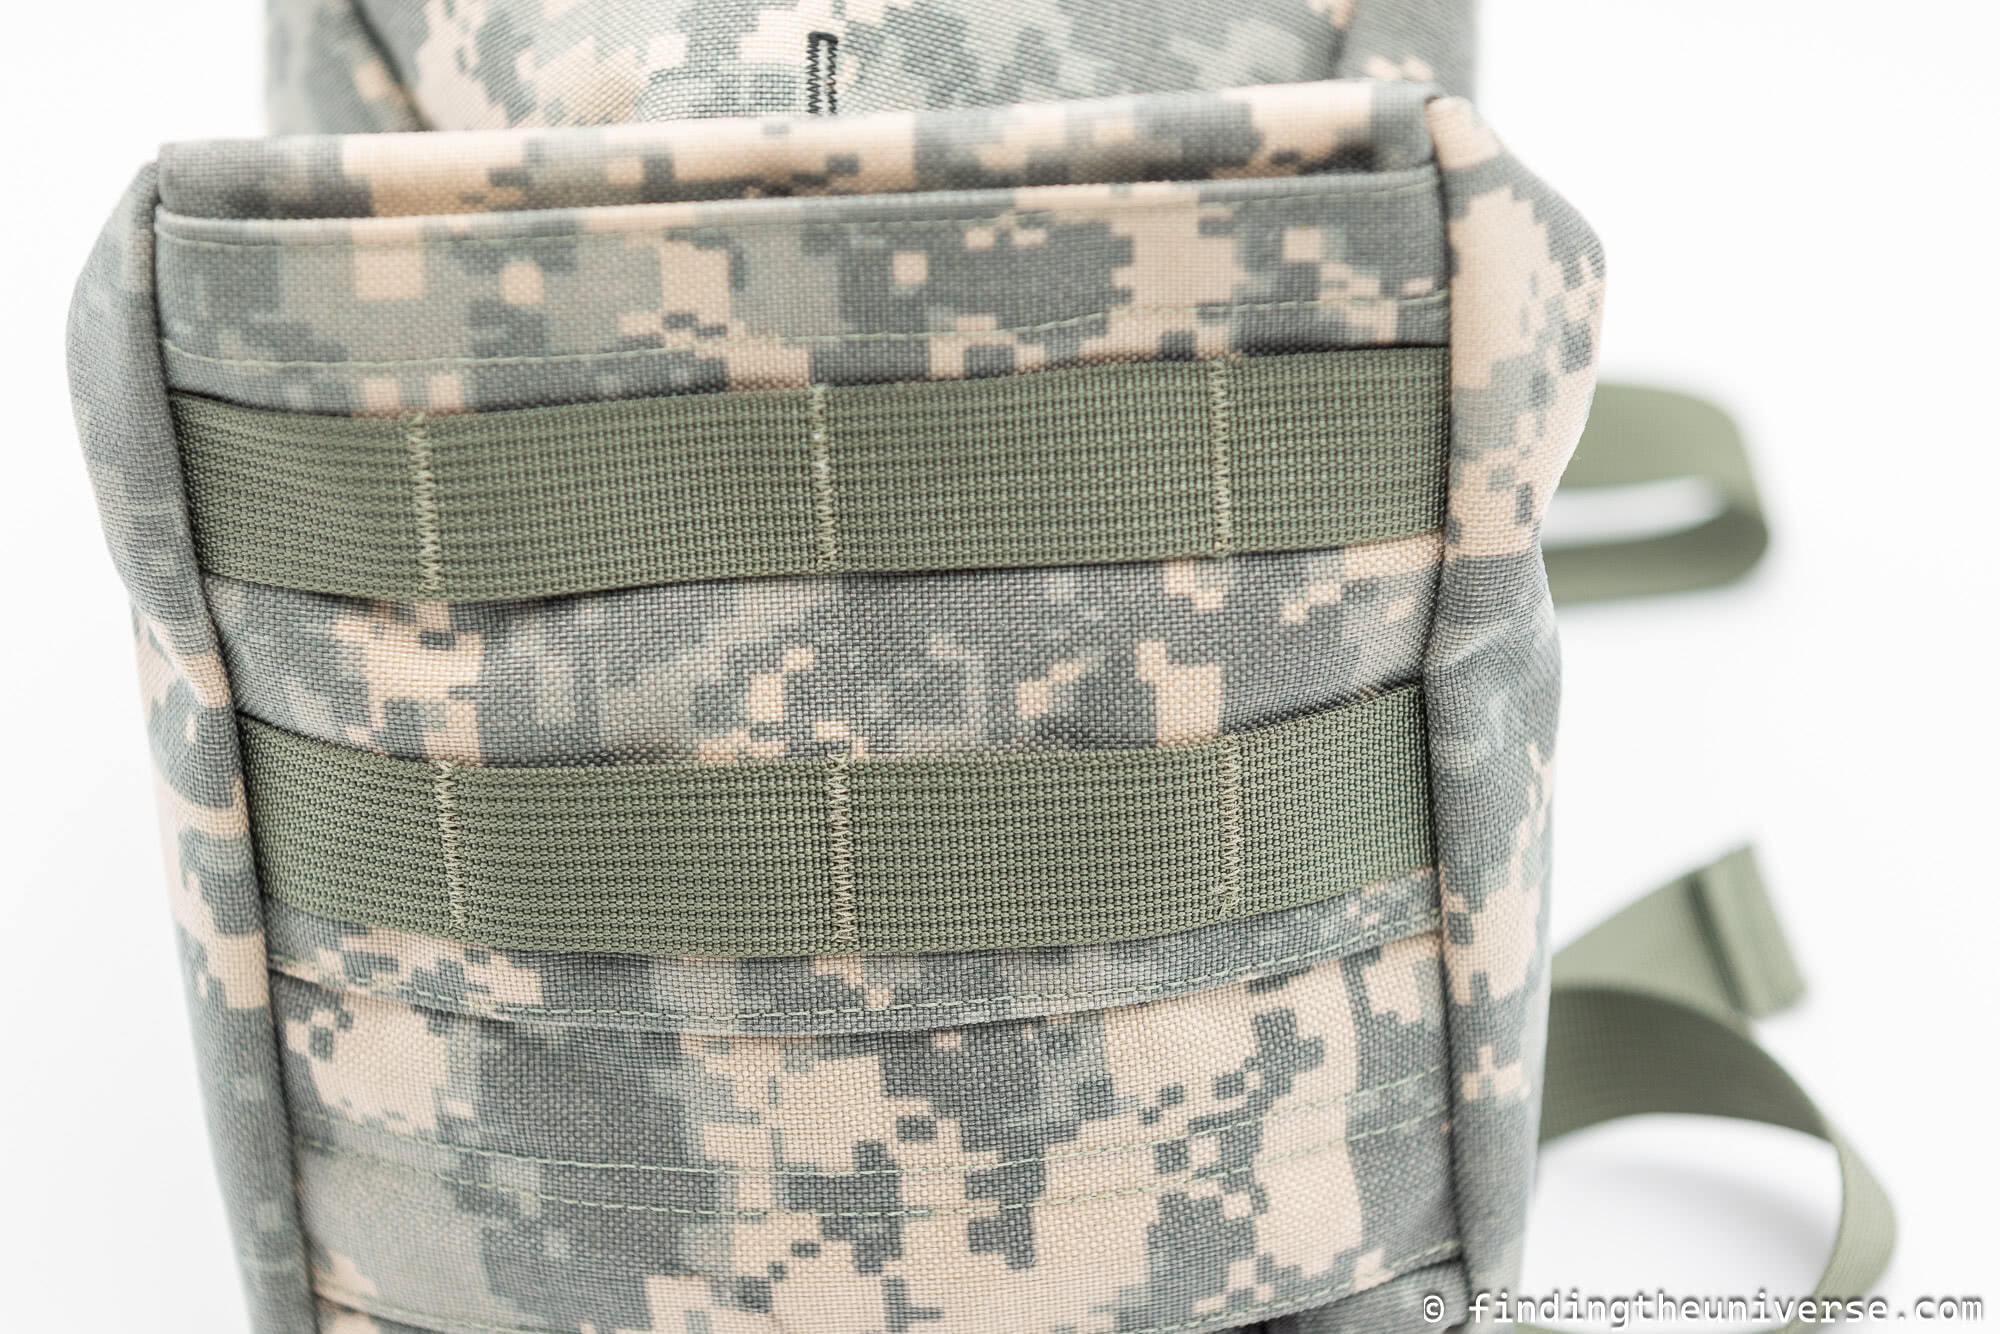
In terms of extra features, you get two adjustable quick release straps at the end of each leg which can be used for carrying and securing the LensSack. There is also a M.O.L.L.E webbing system on the outside of each leg which you can attach pouches and accessories to.
Each leg also has a storage compartment which is secured by Velcro, and is suitable for carrying things like spare batteries, memory cards and so-on.
The real stand out feature though is that it comes with a removable lightweight aircraft grade aluminum plate with a standard 3/8″-16 mounting screw. This is the standard size for a gimbal or ball head, meaning you can actually attach these accessories directly to the bag if you want.
Now, the price of this bag is certainly higher than some of the other options on the list, but I think the products features and premium quality more than justify that price point. It’s also made in the USA.
If you are looking for a high quality, well-made saddle bag style photography bean bag, I would say either the LensCoat LensSack Pro Jr. or Pro (for larger lenses up to 800mm) should definitely be on your short list.
LensCoat provides an estimated weight when filled with sunflower seeds of 2.5kg (5lb 8oz), without the mounting plate.
Dimensions: 17.7 x 16.5 x 19.1 cm (7 x 6.5 x 7.5 “) Item Weight: 0.26kg / 9oz (no fill). Add 0.12kg (4.2oz) if using mounting plate Purchase: Check price on Amazon here and B&H Photo here.
I wanted to include the Kinesis Safari Sack 7.3 in this list as it’s a true saddleback “u” shaped bag from Kinesis. It’s also, at time of writing, the largest photography bean bag that Kinesis make, and the largest in our list.
So, if you need a truly huge photography bean bag for a really big lens (think 600mm and up), then this is a good option. I think for most people this might be just a bit much, but I felt it was worth including so you can see all the options.
In terms of features, you get all the quality you would expect from Kinesis.
To start with, it’s made from the same materials as their other bags, which is a combination of 400-denier and 420-denier Diamond Ripstop nylon fabrics. The base (internal part of the “u”) is coated with SlipNot, a rubber-like fabric, which offers grip. Note the grip is across the whole part of the rubberized area.
Access to the interior is via only one zip, but as the zip is in the saddle part of the bag rather than in the legs, it does make distributing the fill evenly fairly easy.
In terms of additional features, there’s M.O.L.L.E style webbing slots on both sides of the bag for attaching accessories, there are a pair of carry straps sewn in to the top of the bag and there are also straps on the “feet” for easy pick up when it’s inverted.
Overall, if you need a really big photography bean bag I would say it’s a choice between this one and the LensCoat LensSack Pro. They are both great products, you would just need to decide which fits your needs and budget best.
Kinesis suggest using this bean bag with either Poly Beads, or the Git-Lite product. The latter is similar to Poly Beads but is roughly half the weight.
As this bag is designed for larger lenses, a fill like buckwheat is likely to get crushed over time.
With Poly Beads, the total weight of this bag is 9lbs 30z / 4.24kg. With Git-Lite, you’re looking at 4lbs 7oz / 2kg.
Dimensions: 20 x 40 x 22 cm (7.8 x 15.75 x 8.7 “) Item Weight: 0.2kg / 7oz (no fill) Purchase: Check price on Amazon here and B&H Photo here.
Tips for Using a Photography Bean Bag
Now that you have chosen your photography bean bag, I wanted to share a few tips to get the most out of it, based on my experiences.
Invert your tripod collar. If you have a camera with a tripod collar, rotate this so it’s at the top of the camera rather than the bottom, as otherwise it’s going to get in the way of the camera resting fully on the bean bag. Of course, if you are using a product like the LensSack Pro Jr with the ball head, you might be using the tripod collar, so ignore this tip!
Fill you photography bag in destination. If you are traveling, you can save your luggage space by filling the bag in destination rather than travelling with an already full bag
Choose your filling wisely and make sure you have enough of it as your bag will likely hold more than you think. There are multiple options for a filling. For organic materials, I find buckwheat hulls, sunflower seeds, or larger dried beans works well. I would avoid rice as the shape of rice means that is can compact a bit too much and means you can lose some of the flexible shape benefits of a bean bag. Polystyrene balls can be a good option, especially if you need something very lightweight, but they can be too light for some situations, challenging to work with to fill, not to mention environmentally unfriendly. Poly plastic beads are probably best option if you want something heavy, durable, and washable.
If you are using an organic product to fill your bean bag you will want to take care that it doesn’t get wet, and be aware that it might need to be replaced from time to time. A good idea is to put the filling into a Ziploc bag and sealing that, then putting the sealed Ziploc bag into your bean bag. Depending on the shape of the bean bag and the size of the access hole, you may need to use multiple bags.
When it comes to filling your bean bag, patience is the key. Make sure the zippered part is as high as possible relative to the rest of the bag, and pour the filling in carefully and slowly. You don’t want to make a mess everywhere and have to waste time trying to collect errant bits of fill!
Keep your bag secure. If you are planning to use this in vehicles, boats, tree limps, on railings, near cliffs, etc. then you want to make sure you secure you bag so it doesn’t accidentally fall or fly away. You can attach it to an object such as a vehicle hook, roof railing, or fence, secure it to your camera (if your camera is secured to you), or you can secure it around your neck. Most safari bags come with a strap of some kind but if yours don’t you can use something like this photography bag strap.
Further Reading
That’s it for my guide to the best bean bag for photography. If you found this useful, you might enjoy some of my other photography content. Here are some articles to get you started.
I have a detailed guide full of safari photography tips to help you get great photos on safari whatever your camera is
Once you’ve taken all your photos you don’t want to lose them! Read our guide to backing up your photos for an idea of how to keep them all safe.
Wildlife photography can often result in noisy images. See my guide to the best noise reduction software for some ideas on how to get the best out of your photos even when they might be a bit noisy
Knowing how to compose a great photo is a key photography skill. See our guide to composition in photography for lots of tips on this subject
We have a guide to what depth of field is and when you would want to use it.
We are big fans of getting the most out of your digital photo files, and do to that you will need to shoot in RAW. See our guide to RAW in photography to understand what RAW is, and why you should switch to RAW as soon as you can if your camera supports it.
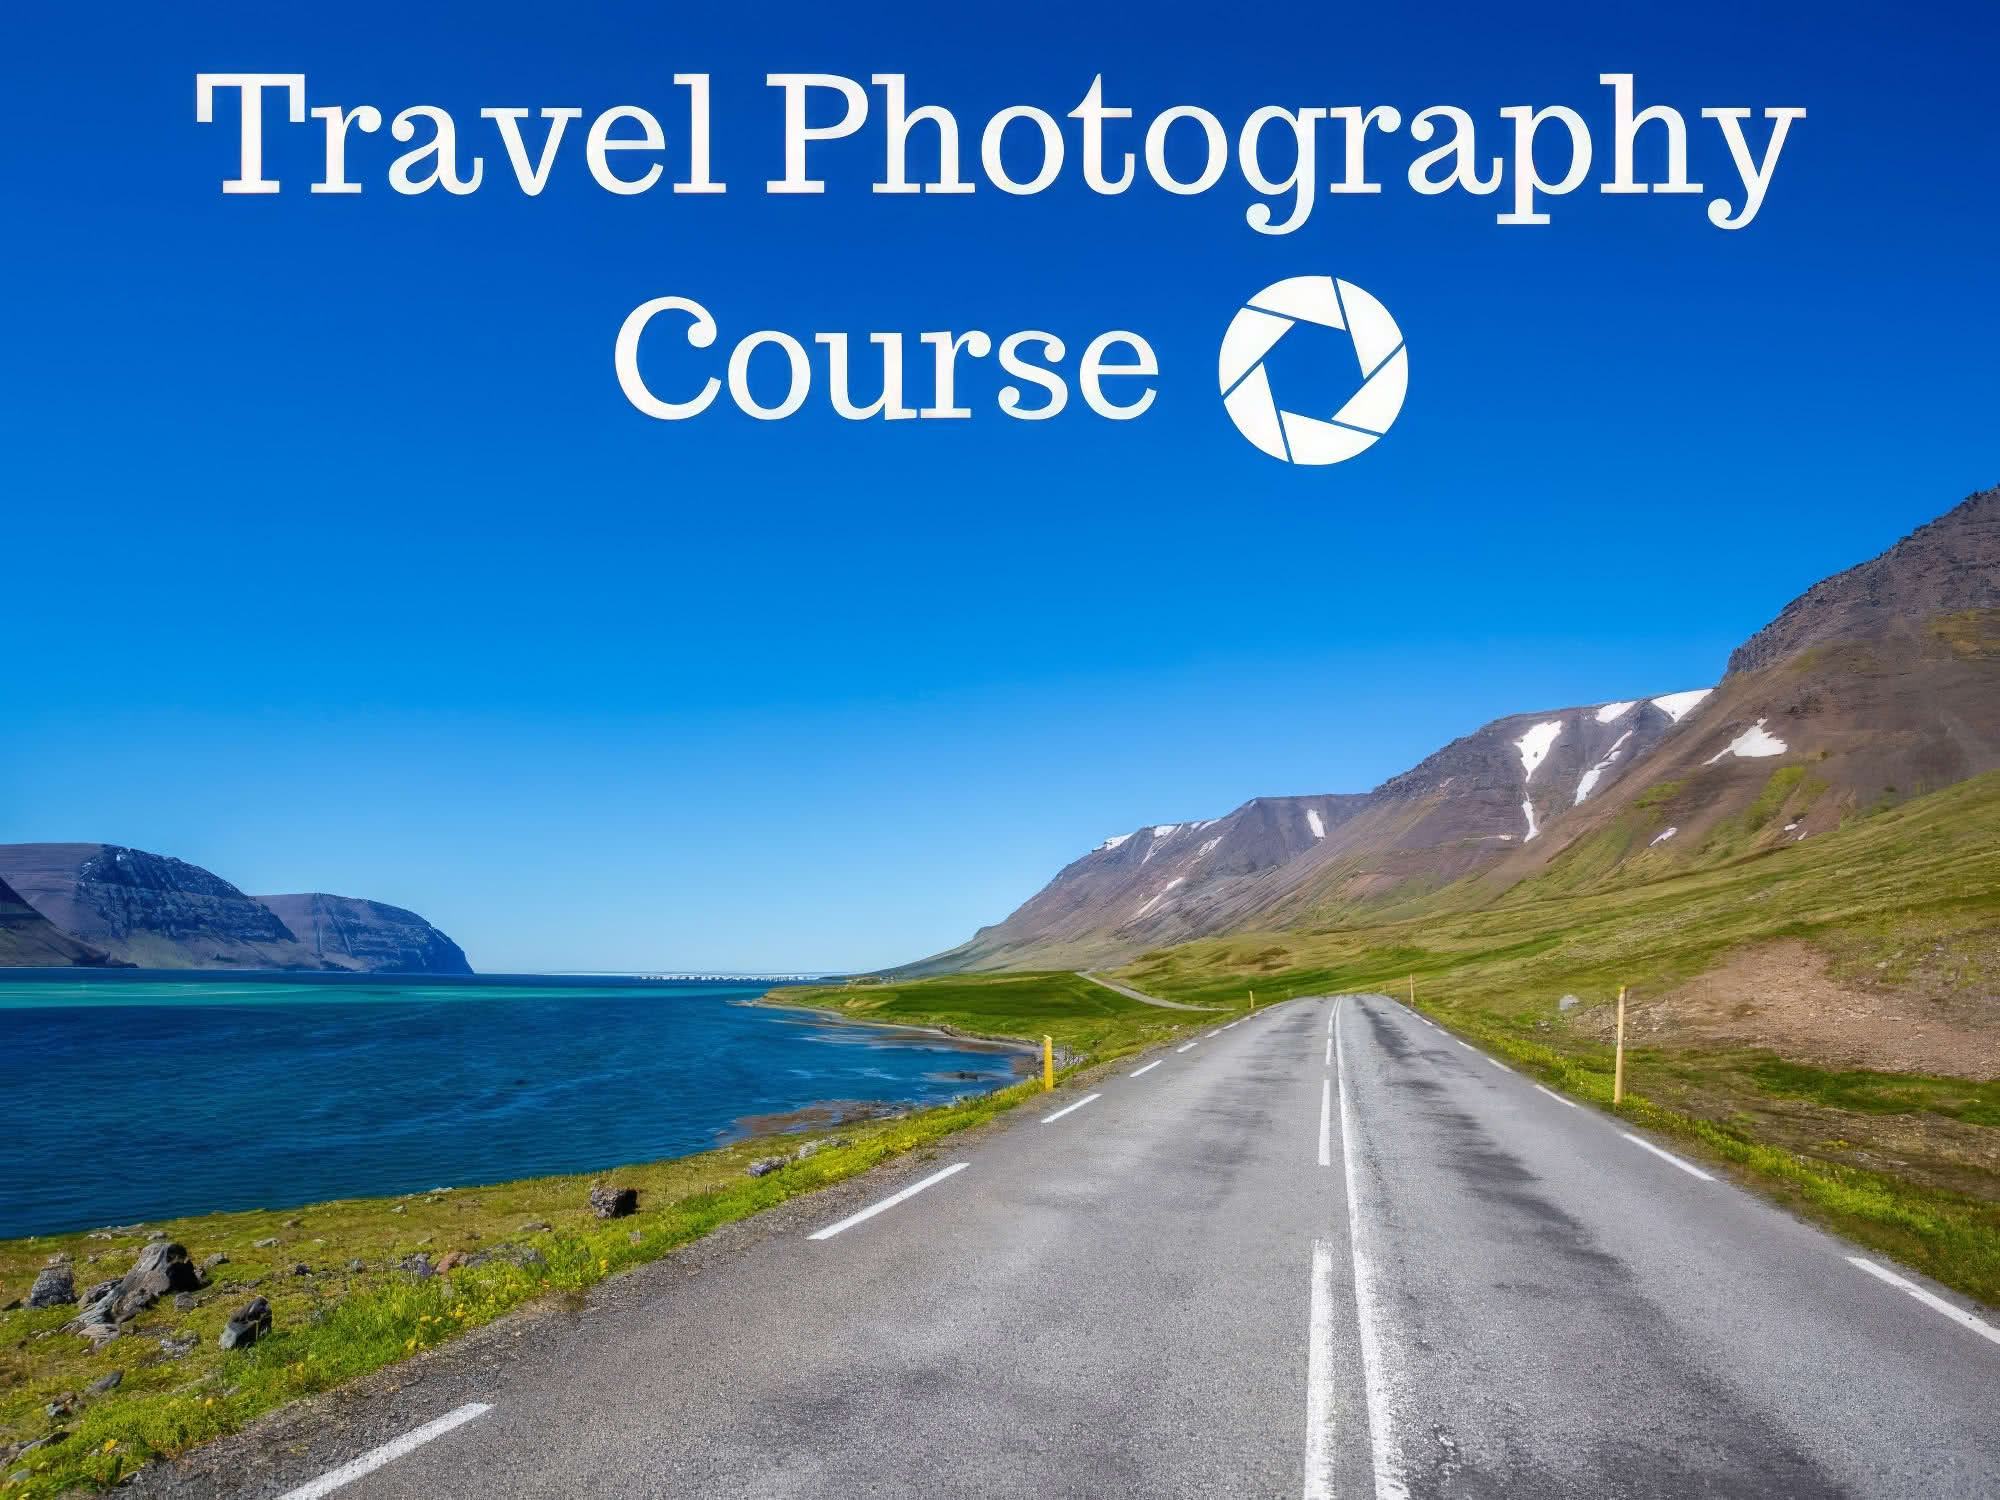
If you found this post helpful, and you want to improve your photography overall, you might want to check out my online travel photography course.
Since launching the course in 2016, I’ve already helped over 2,000 students learn how to take better photos. The course covers pretty much everything you need to know, from the basics of how a camera works, through to composition, light, and photo editing.
It also covers more advanced topics, including astrophotography, long exposure photography, flash photography, and HDR photography.
You get feedback from me as you progress, access to webinars, interviews and videos, as well as exclusive membership of a Facebook group where you can get feedback on your work and take part in regular challenges.
It’s available for an amazing one-off price for lifetime access, and I think you should check it out. Which you can do by clicking here.
And that’s it! I’d love to hear about your thoughts on bean bags for photography, and am happy to answer any questions you have. Just pop them in the comments below and I’ll get back to you as soon as I can.
As a professional photographer who runs a photography business, including an online photography course, I am often asked if I have any tips on how to run a successful photography business.
I also get e-mails from time to time from readers asking me why their photos aren’t selling. Possibly they’ve set up an online photo sales store using a site like SmugMug, but they are struggling to find an audience. They are wondering where they might be going wrong. If that’s you, this guide should help.
I have already written a guide to how to make money as a photographer, which covers the various income streams available to you when you are starting out as an amateur photographer. This guide isn’t going to focus on that. Instead, it’s going to look more at what you need to do to actually succeed with your photography business.
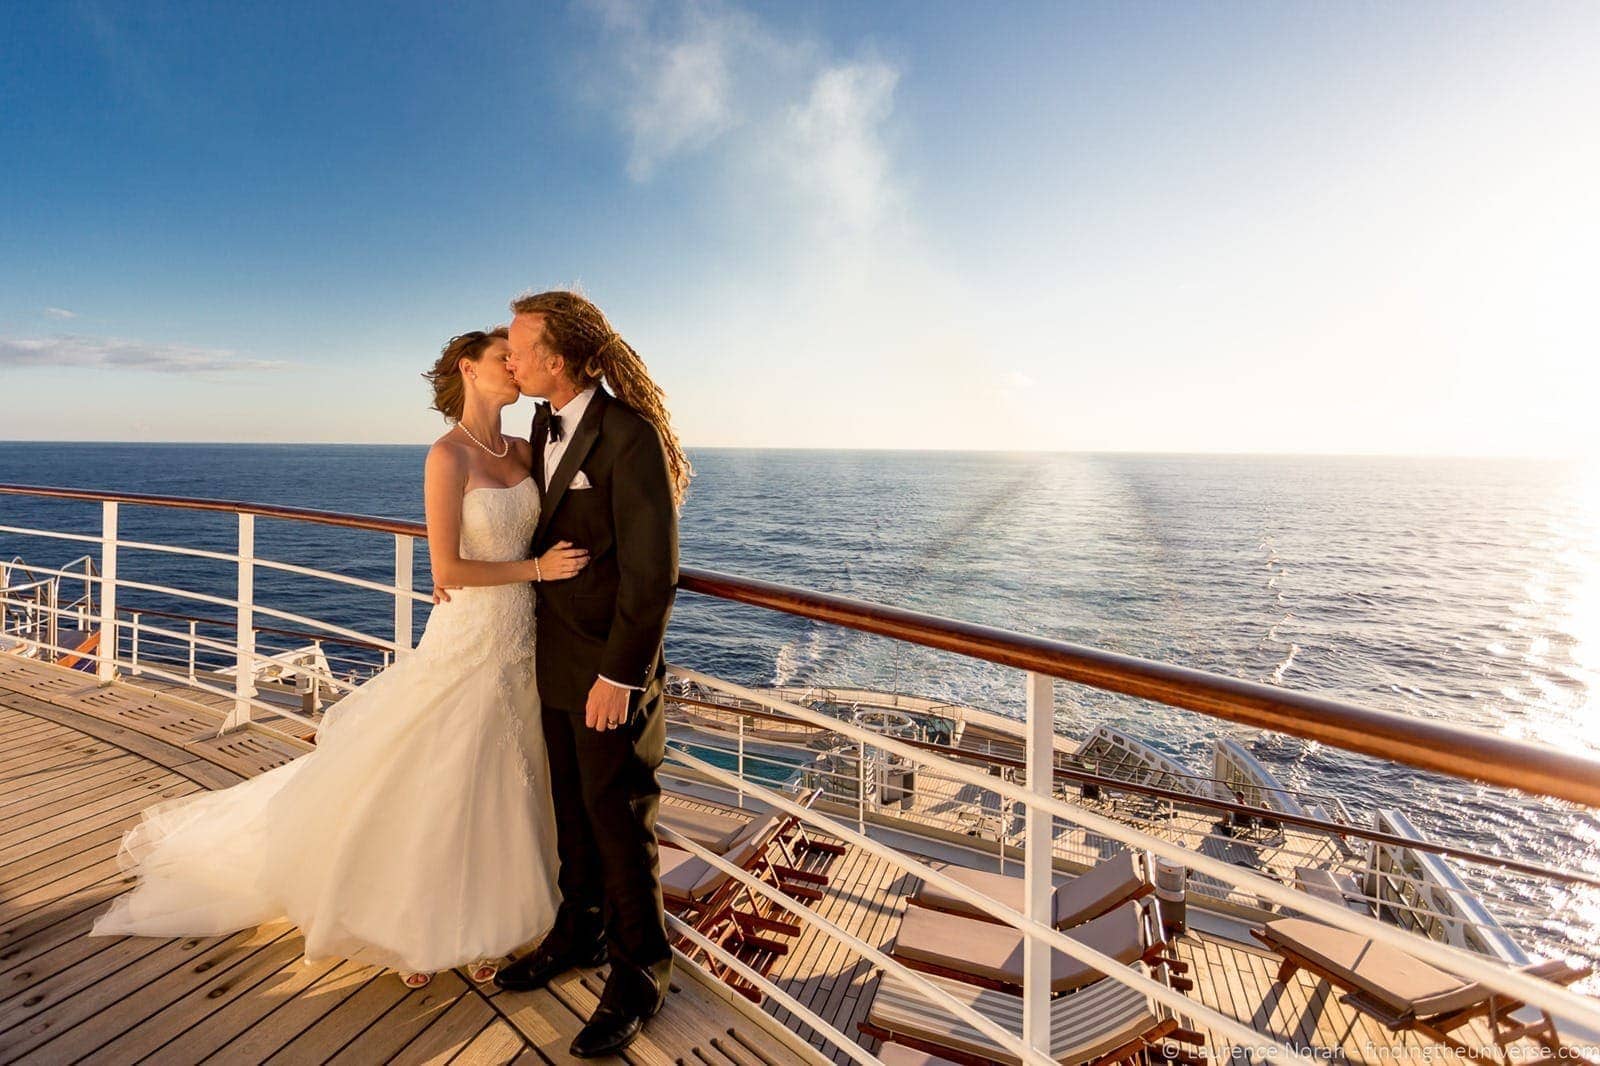
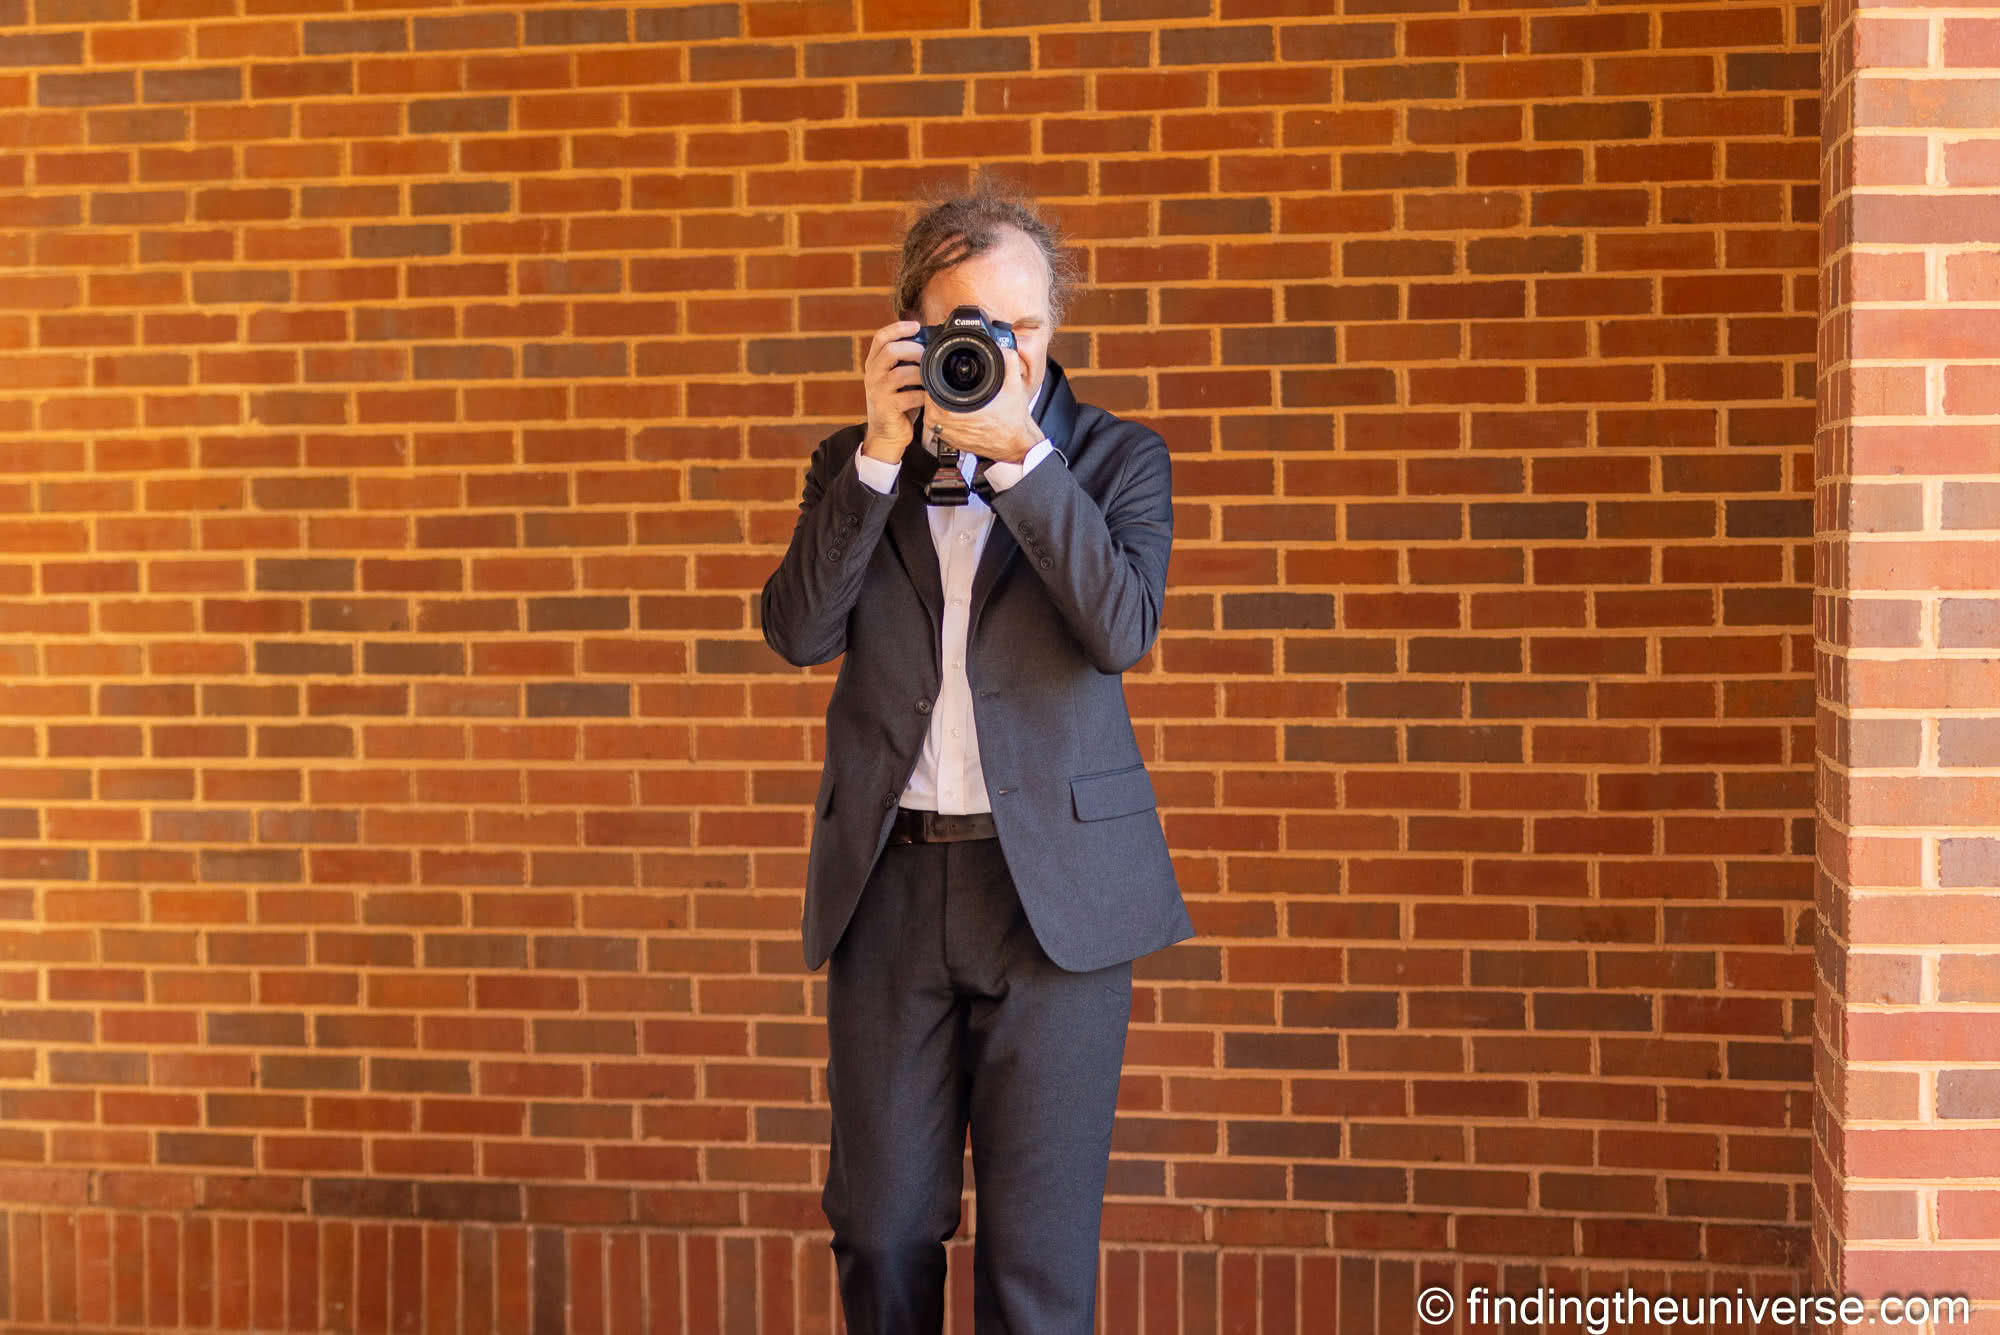
So, whether your photography business is about selling your photos, working as a wedding photographer, running photography tours and workshops or selling stock photos, this guide should help ensure you focus on the right things to get your business running successfully. This is based on my years of actually running a successful photography business and what has worked for me.
10 Tips for Running a Successful Photography Business
I’m now going to go through my tips for running a successful photography business. These are not in any specific order, I’d say they are all equally important to your success!
Craft your Skill
One common mistake I see with aspiring professional photographers, and one which is easy to fall into, is basically trying to run before you can walk.
What I mean by this is that it is really important to ensure that you are actually creating a good enough service or product that people will want to buy from you before trying to make a living from it.
This can be tricky to establish, especially as the initial feedback we get on our photos is likely to be from friends and family. They will tend to offer very positive feedback, which is of course very nice, but unfortunately might not provide the sort of constructive feedback we really need.
Buoyed by all the positive feedback, it can be easy to jump straight into building an online portfolio, uploading a pile of photos, and then sitting back and waiting for the money to roll in. If it does, great! If it doesn’t, it can be a disheartening experience.
It can also be a costly experience, as many online portfolio sites charge a fee, which you need to be able to cover from your income. If you aren’t making an income, you’re going to be operating at a loss, which is not a good place to be.
Even worse would be to set up as a wedding photographer, book your first gig, and then not be able to deliver to your client’s expectations. This can result in anything from disappointed clients to negative reviews to, in a worst-case scenario, being sued for not delivering a quality service.
So, what to do? Well, first you need to spend time actually developing your photography skill. That might mean reading online photography guides, watching photography focused videos, signing up to a photography course, or taking a local photography class. There’s a huge amount of content available for free, and of course there are also paid resources.
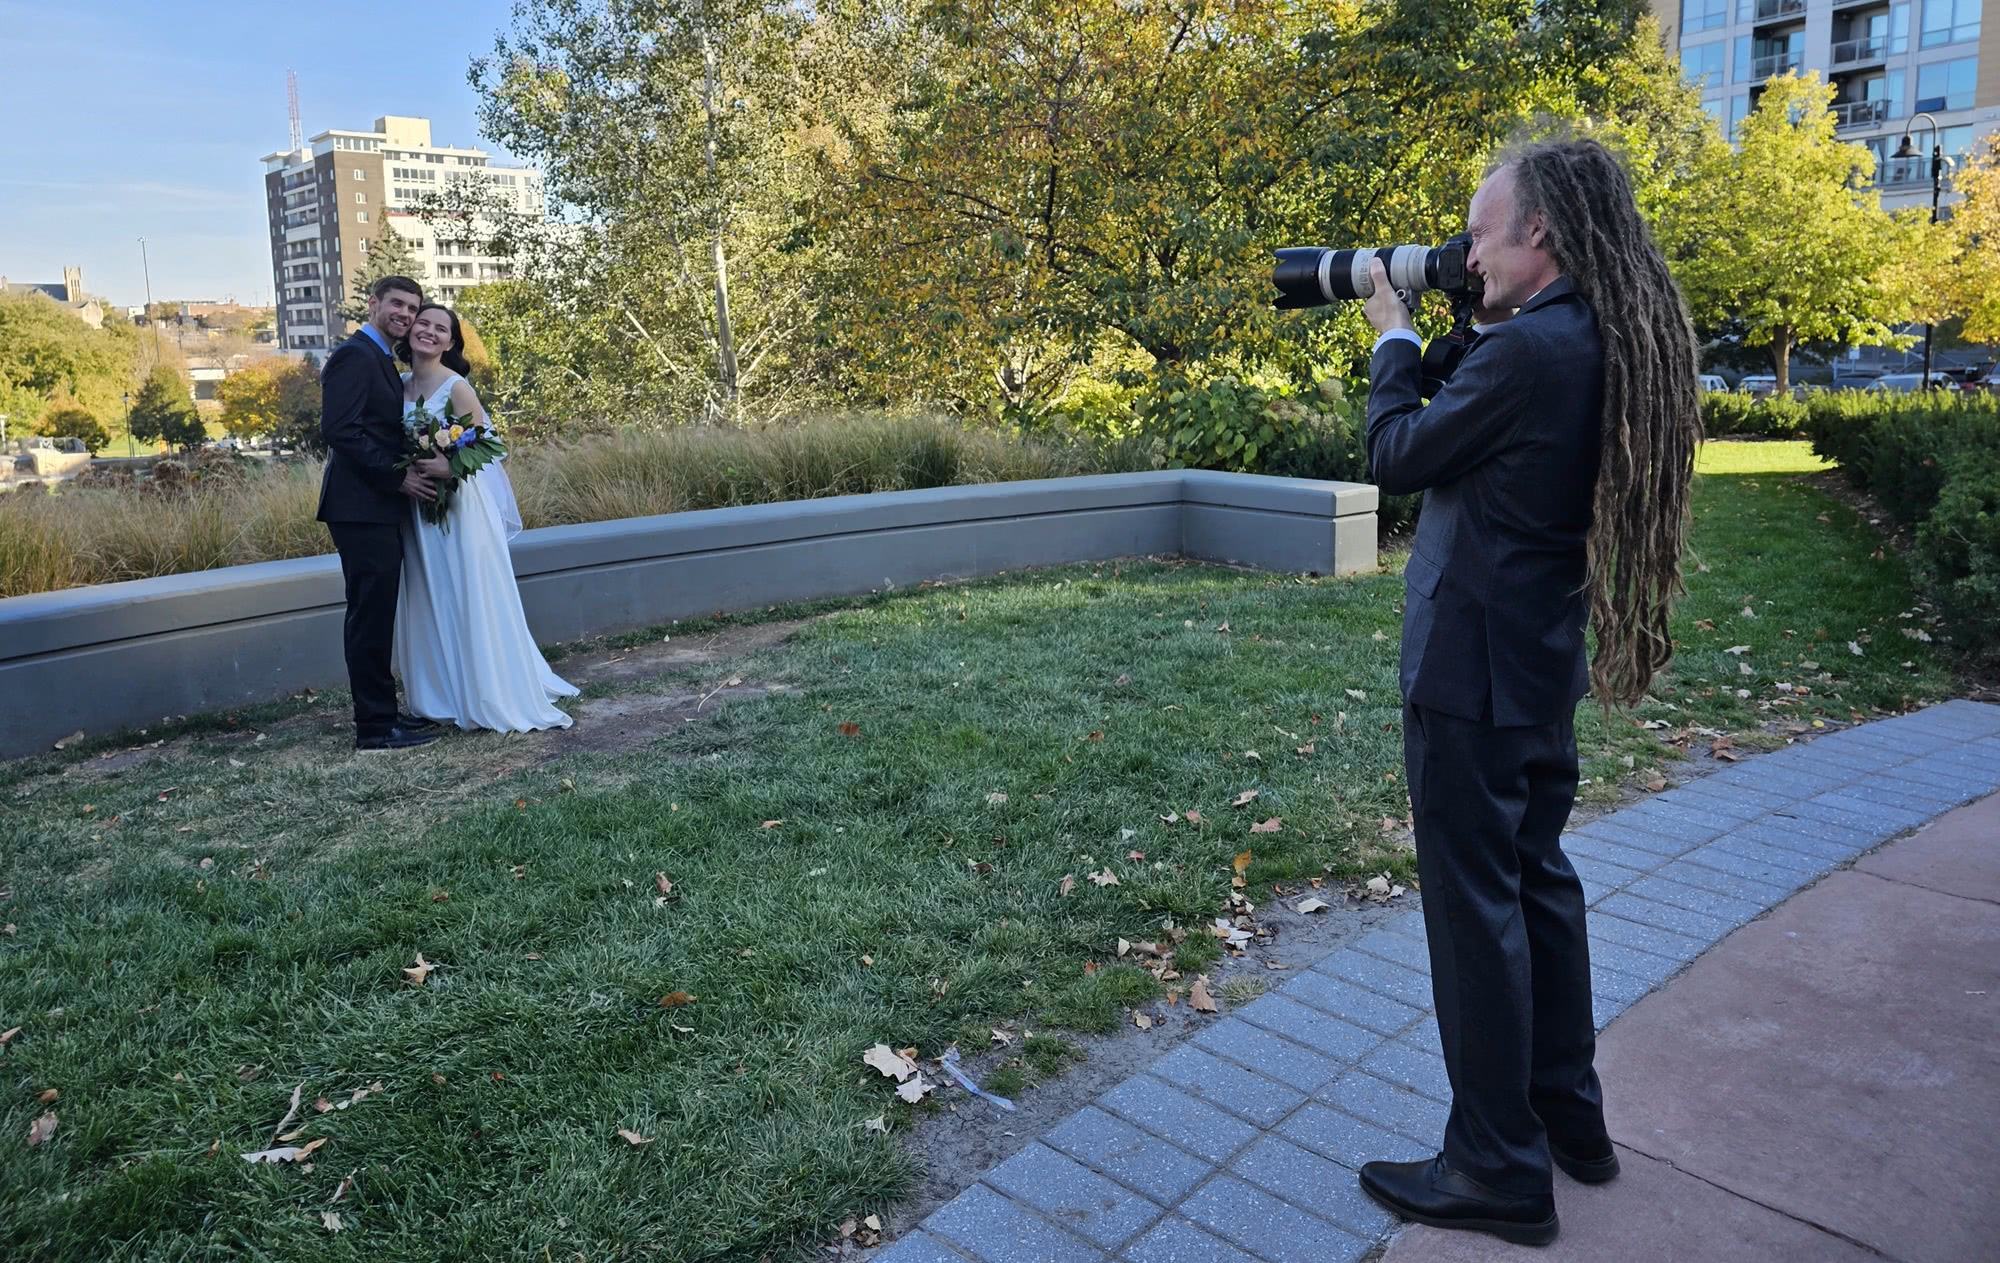
You also need to get out there and practice your photography as much as possible. Photography is a skill, and it is one that can be continuously improved. If you are planning on becoming a wedding photographer for example, you might be able to find an existing photographer who needs a second shooter, and this can be a good way to develop your skills in a real-world environment.
When you are starting out I highly recommend volunteering to assist in doing actual gigs such as being a back-up wedding photographer, interning at a photo studio, shooting at an event as a volunteer, or shadowing a working photographer. Doing a bit of work for free can allow you to get some experience and stretch your wings without the pressure of being the one responsible for the final product.
If you plan to make an income from your photography then I would argue that it’s best to invest up front in your skillset first and foremost. As I said, it can be easy to put the cart before the horse, whether that’s paying for an online e-commerce store or spending thousands on gear. You need to know to use the gear so you can create content good enough to sell in your store, and that should definitely be the priority.
Now, to circle back to my previous point, which is how to know if you are at the point where you are actually creating content that is going to be good enough to sell. Of course, there’s no fixed goal, and a lot will come down to the market you are selling into and the products you are selling. If you’re the only wedding photographer in town for example, then it will likely be easier to find clients even if you are a bit less experienced. However, if you’re competing in an established market, you might have to level up your skills more to be able to compete.
Still, there are ways to know if your work is at the level where it can sell. First is feedback with buyer intent. That means, if people start to contact you, perhaps having seen your work on your social media feed, and ask if they can either buy your work or hire you to do a shoot. Ideally these will be total strangers who have nothing vested in your success. This is a strong indicator that your work really is good enough to start making an income from.
I’d also highly recommend seeking out ways to get constructive feedback on your work. In-person photography clubs, online groups and forums, and photography classes with a homework element can be a good way to get this feedback.
You basically want total strangers to be looking at your work, who aren’t worried about your feelings, to provide input as to what is good about it and what could be improved. A word of warning, this kind of feedback can sometimes be challenging to hear, especially if you have primarily only gotten glowing feedback from friends and family. But it is definitely important to a) help you improve and b) get you the point where you can feel confident in putting your product up for sale.
Finally, another way to get validation of your work is to enter photography competitions which are judged by real people (not social media popularity contests!). There are a lot of these, some paid, some not.
I’d suggest focusing on the free competitions to start with. If you start to place your work in these competitions, this can also be positive validation. It can also be a useful accolade to add to your photography resume.
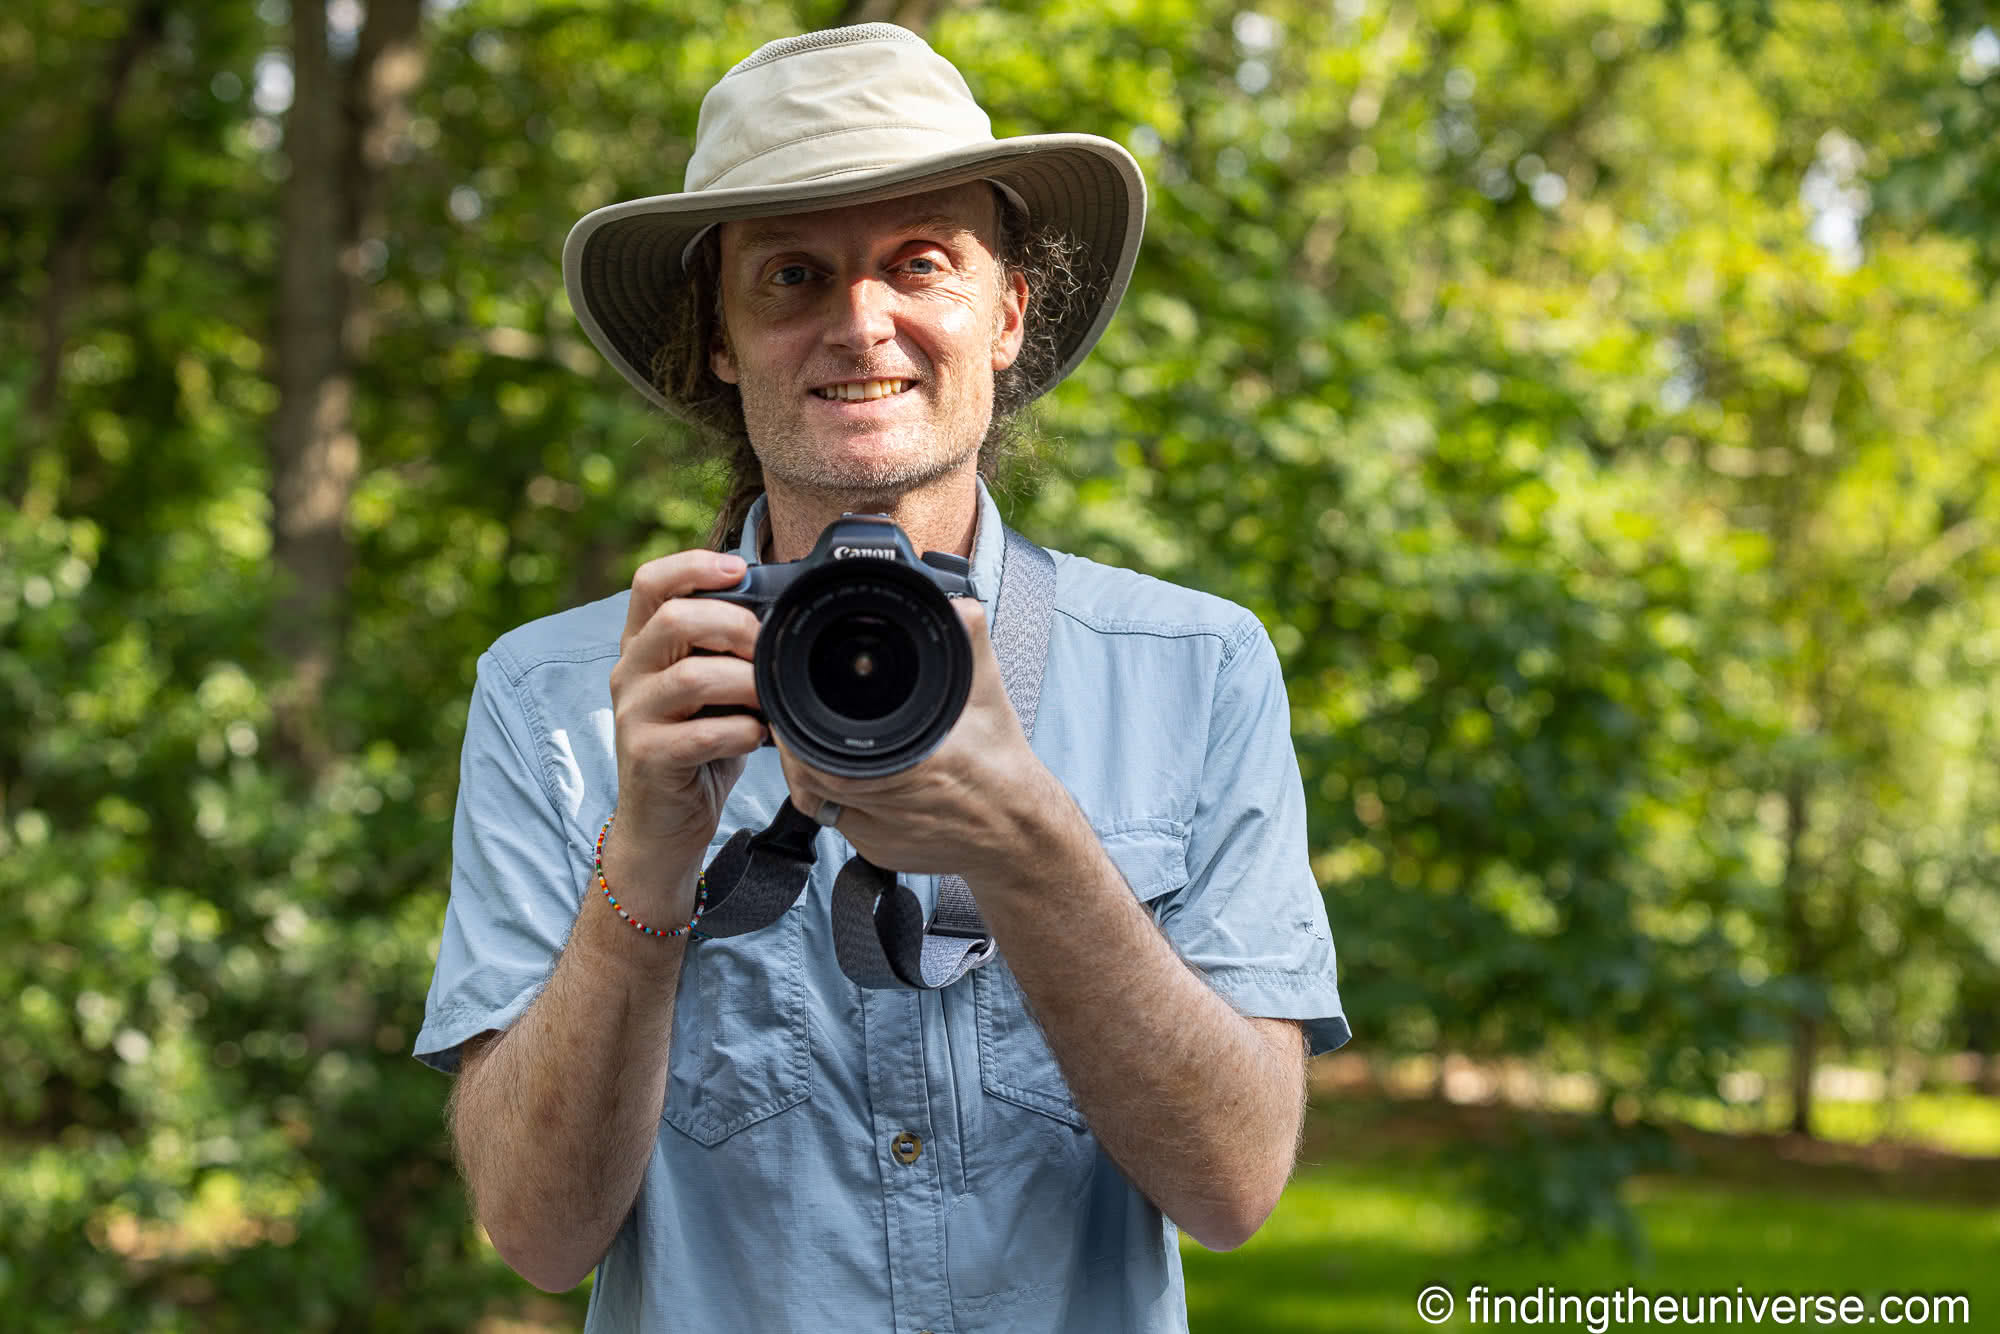
My photography course, which is one of the ways I make an income as a photographer, offers learning opportunities to those starting out in photography
Do your Research on the Type of Photography Business
Before launching a photography business, you will want to do some research into the type of business you plan to run to make sure it’s a feasible business idea.
Selling photos – this can be selling physical prints, digital images, licenses to use an image, canvases, etc.
Selling photo art products – using your photos to create unique products. Photos can be printed on all sorts of things, such as greeting cards, pillowcases, phone cases, fabric, ornaments, clothing, coffee mugs, postcards, wallpaper, tote bags, etc.
Taking portrait studio photos – family photos, student yearbook photos, pet photos, graduation photos, cruise photos, portfolio photos, catalog and fashion photography
Wedding / event photography – engagements, weddings, parties, business conferences, music festivals
Business / product photography – taking photos for business websites, doing product photography, food photography, taking photos of cars, hotel rooms, houses/apartments etc.
Stock photography – taking photos to be sold on stock photo websites. A lot of the most popular are fairly generic photos with wide appeal (e.g., man holding coffee cup while looking surprised at computer, family on sunny beach in California, elderly woman crossing street), but stock photography can also include fine art photos or photos of famous people which can command much greater prices.
Photojournalists – photographers who take photos to be featured in newspapers, online news articles, magazines, TV programs, etc. to go along with news stories.
Education – this can mean running photo workshops, writing about photography, teaching online or in person classes, giving talks etc.
Leading photography tours – taking guests on photography specific tours, either locally or in popular photography destinations
There are of course other ways to make money from photography but those should give you a lot of ideas and most photographers will fit into one of those general areas. Many working photographers make money in a number of different ways and I myself have done work in at least half of those types of photography at one time or another.
I would recommend choosing one or two specific areas you want to start with, and then later you can always expand once you are established and making money in those initial areas.
Once you have chosen how you want to make an income from your photography, you will want to try to figure out what you want to focus on and do the research on what is already out there. You want to understand what kinds of products/services are being offered, and does it match with your skills and interests etc.
So, for example, let’s say you know you want to sell photos. Specifically, you decide you want to take photos and sell them online as either prints or digital images.
Now you have to decide what kind of photos you want to sell as it’s much easier if you are known for a certain type of subject or style. Whether that is fantasy fine art photography, bird photography, NYC street photography, abstract photos, or seascapes, it’s generally important to have a niche you are going to be known for.
Then you have to figure out the best place to sell and market your type of photos. Where and how do other photographers sell the type of photos you like to take?
Another example may be someone who wants to do studio photography focusing on babies and families. Lots of people like to get professional photos when they have babies and young kids.
But studio photography is something that is geographically bound so you want to make sure there is a strong market for this service in your area as renting studio space can be costly. So if you live in an area where most people are older and retired, focusing on baby photography is probably not a great business for your area and you may want to consider either another kind of photography or setting up in another area with a younger demographic.
You will also want to research your competition in the area. Whilst no competition might seem like a good thing, this can also be a warning sign that there is no market for the services you are offering.
Of course, this isn’t always the case, but it is worth bearing in mind. If there are existing businesses offering similar services, you will want to be sure that there is enough market to go around, and that you will be able to effectively compete.
Wedding photographyEvent photography
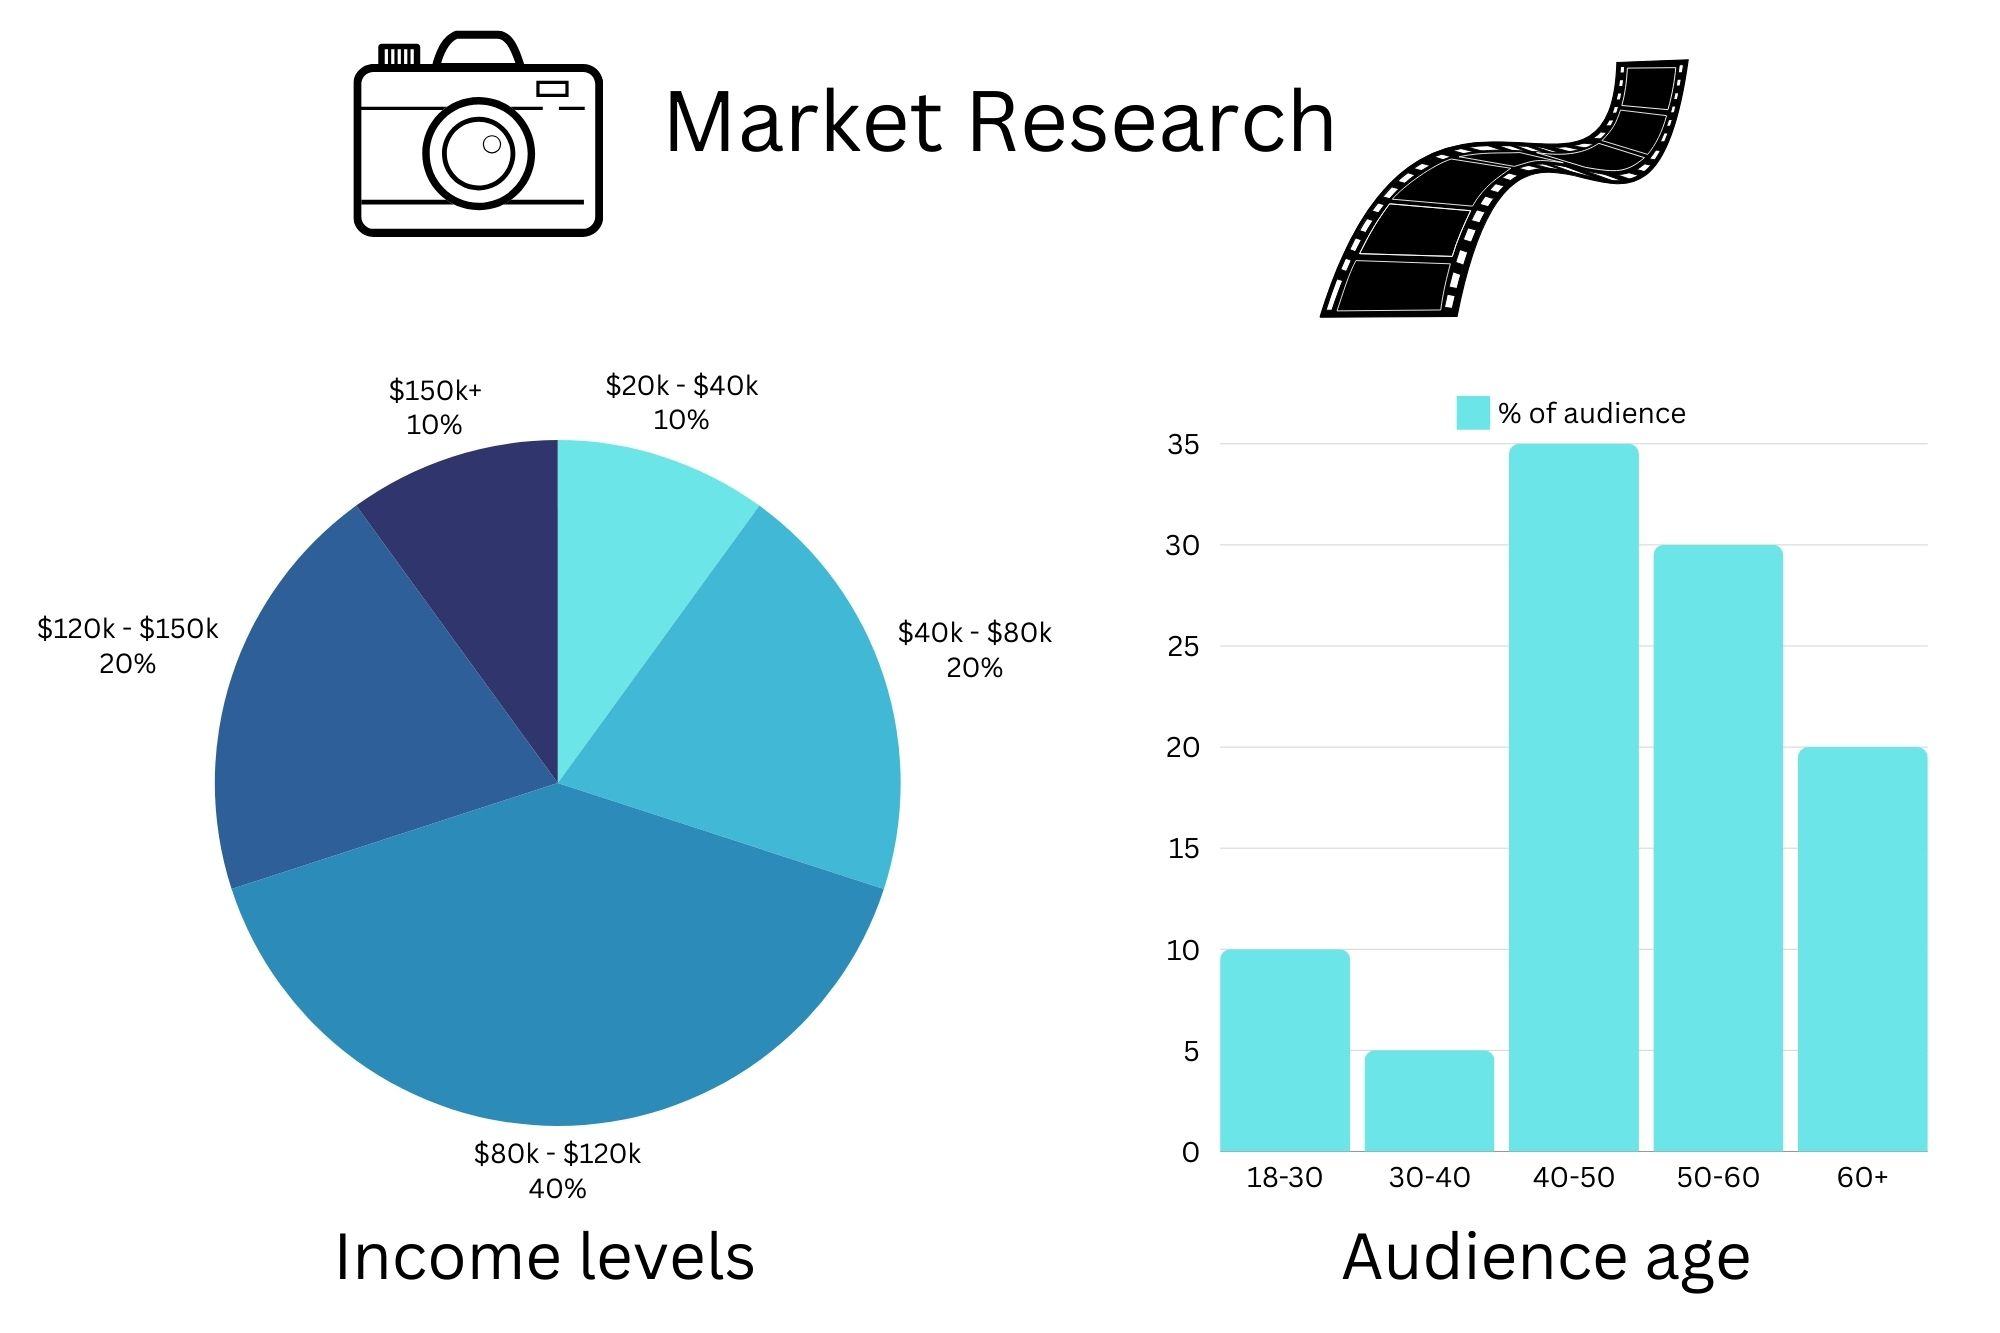
Figure out your Audience and Market
Before you start off, it is best to figure out who is your typical customer. How old are they, where are they from, what are they looking for, what is their budget etc.
If you can get your products and services in front of people who are more likely to want to buy them, it’s going to make your life a lot easier.
For example, if you want to sell photos and mainly take beach landscapes in Florida, your best market is probably people living in coastal Florida and tourists visiting those areas of Florida. A combination of online, gift shops, and local art shops might serve you well as ways to target this audience. There will be an established market, and it should be easier to start selling your work.
In this example you may also want to diversify your offerings to appeal to your target audience across price points. Perhaps you offer larger original framed photos at the local art shops and cheaper smaller prints, greeting cards, and postcards at the local tourist souvenir shops.
If you are a wedding photographer, you’ll want to narrow down your geographical range (unless you plan to travel as a destination wedding photographer). And you’ll want to decide on type of weddings you want focus on and a style of photography so you can build a portfolio. You’ll also want to carefully decide on a pricing model.
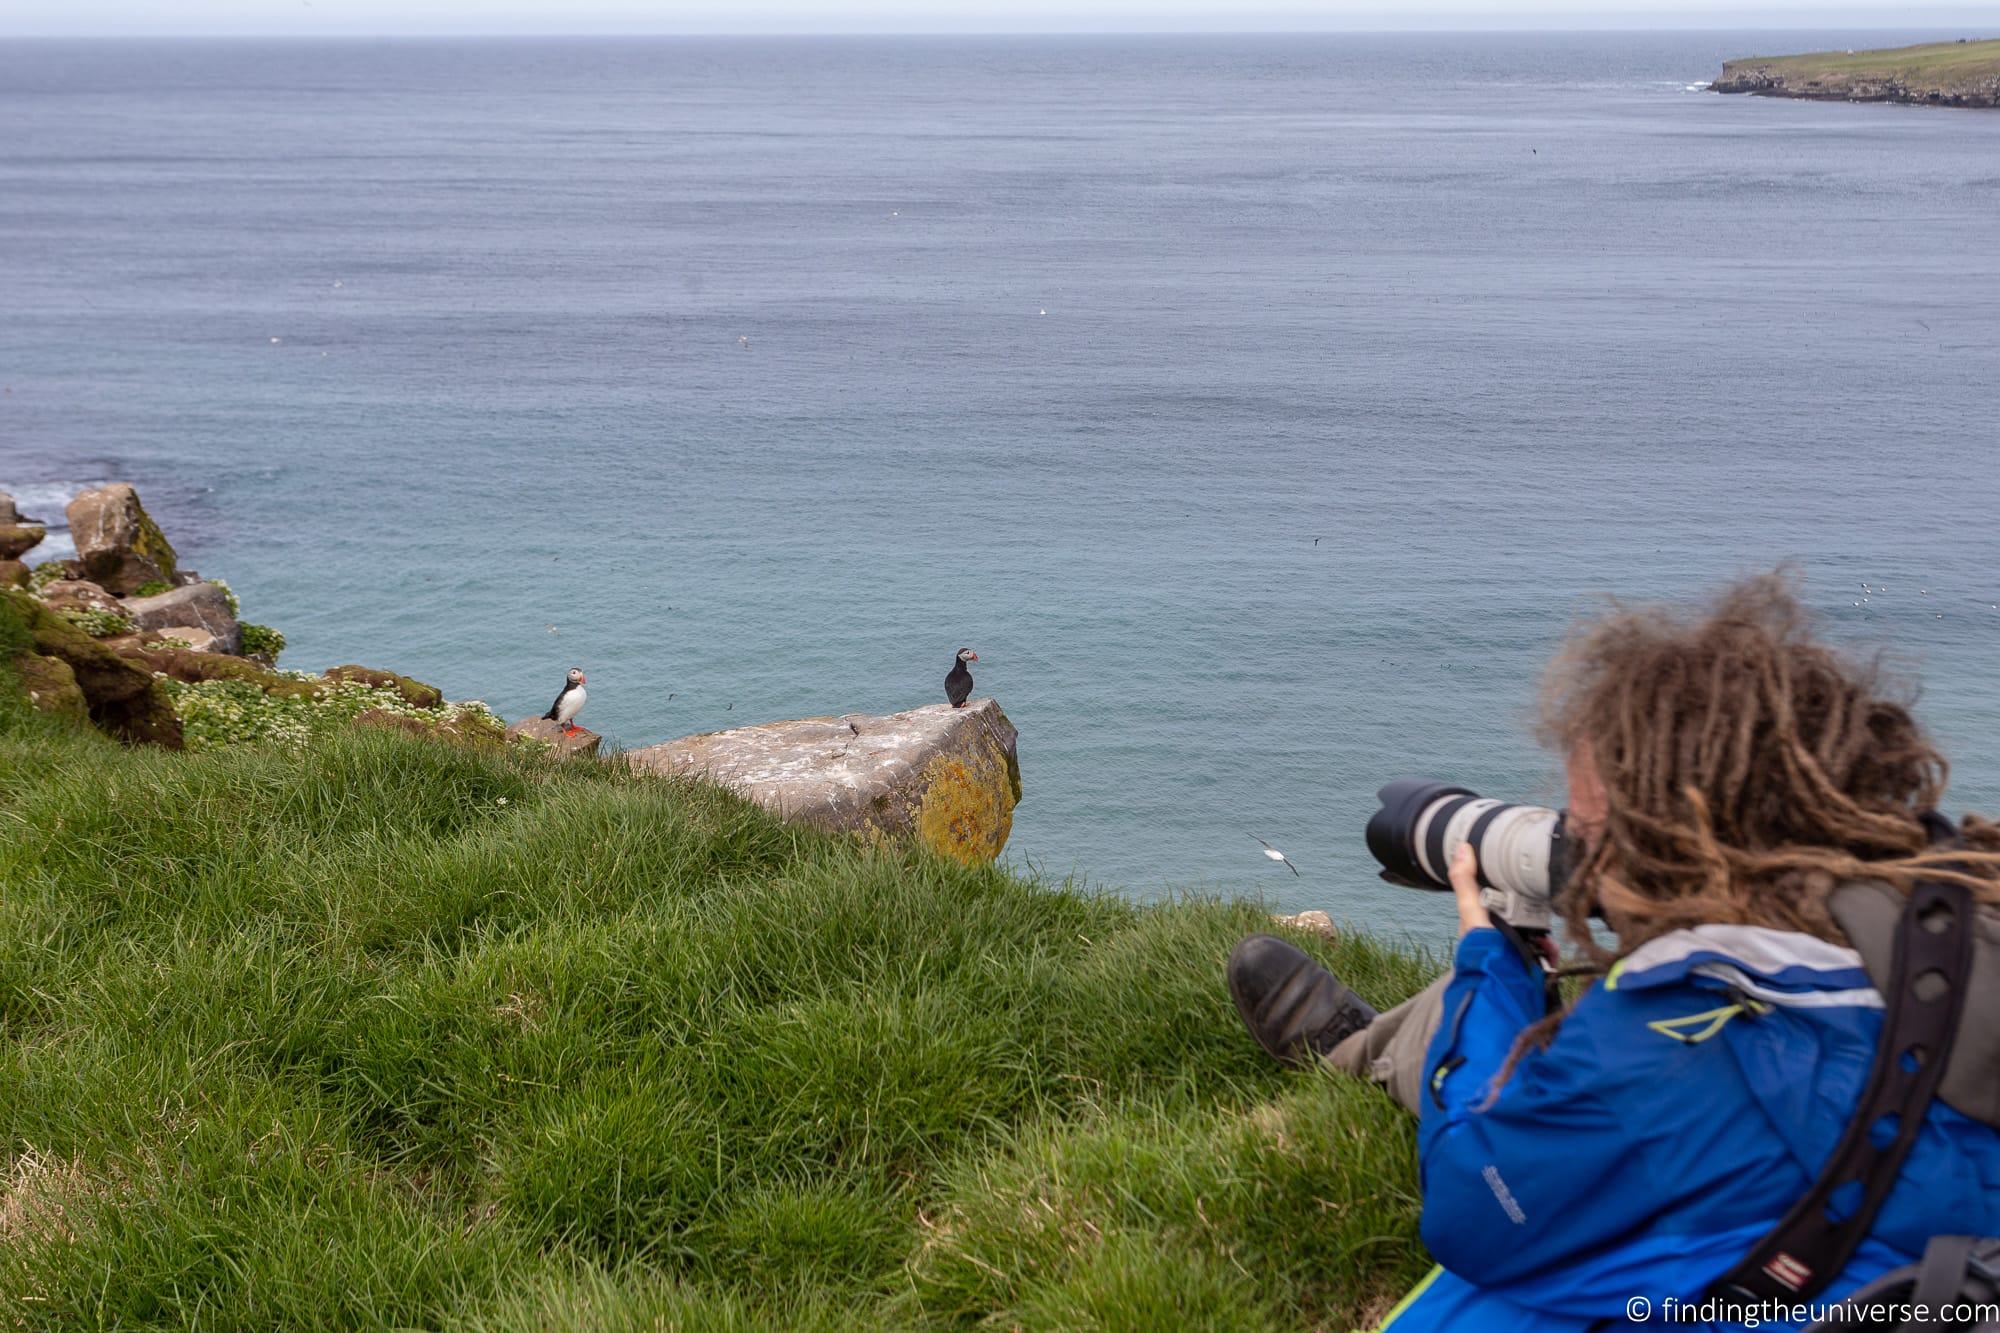
If you are someone offering photo tours in Iceland for example, you’ll want to find ways to reach people planning travels there. An online presence is likely going to be very important, as well as perhaps connecting with travel agents, travel bloggers who write about Iceland, local tour companies in Iceland, etc.
If you are doing tours, you’ll also want to do a lot of ground research and practice, so you are knowledgeable and set up to handle such a tour in the destination.
As you can see, there’s a lot to think about. Ultimately, you want to make sure that an audience exists for the product you want to sell in the place you want to sell it, and that you will be able to reach that audience.
Photographing puffins in Iceland, a popular destination for photography workshops
Run your Numbers
If you are planning on making money as a photographer, you need to treat the business like, well, a business. This might not be the most exciting part of being a professional photographer, but it’s certainly important if you want to run a profitable business.
So what does it mean? Well, you need to sit down with a tool like a spreadsheet and figure out how you’re going to make a profit. That means writing down all the costs associated with running your business, which is called your cost of business.
These costs will vary depending on your business model, but could include anything from the cost of gas getting to and from a shoot, to studio rent, equipment costs, insurance, taxes, marketing, photo editing software subscriptions, any professional fees (accounting etc.), shipping cost of products, printing costs, website costs etc. Some costs will be ongoing, others will be upfront one-off costs. You also want to consider how much you want to pay yourself.
Once you know the costs of doing business in your area, you can then start to put together a pricing model that will allow you to cover all your costs and, hopefully, turn a profit. At its simplest, you want to make more money selling your products and services than it costs you to produce them.
Put together a simple business plan and consider showing it to some trusted family members or friends for advice to see if it makes sense. There are lots of free online templates for business plans you can download for examples to get you started.
You will need to make various estimates when you put your pricing model together. For example, you might need to forecast how many weddings you might shoot in a year, or how many photos you plan to sell. It’s best to be conservative with your estimates when you start out. As you develop your business and build a reputation, you’ll be able to revise your numbers and likely increase your prices.
Whatever model you choose, be it an hourly billing rate as a wedding photographer, or a per product rate for sales, the goal is to put together a plan which makes financial sense and doesn’t have you running at a loss.
Price your Work/Services Accordingly
Speaking of pricing, this is a key consideration. Photography can be a tricky service to price, depending on what type of photography business you are setting up.
If you are offering a service like wedding photography, portrait photography, or a similar service, then you can fairly easily figure out pricing by simply researching other businesses in your general area (or areas with a similar demographic and income level) who might offer similar services.
Fees for these sorts of service tend to fall inside a certain range, and can be priced hourly or on a package basis. As an example, some wedding photographers charge a package price, whilst others might charge an hourly rate and then a fee per photo. A package rate tends to be commonly accepted (and can be easier in terms of knowing your income) but it’s up to you.
When you start off you will likely need to be at the lower end of the range in order to win clients and develop a reputation. As you build your reputation and get positive reviews and feedback, you can start to look at increasing your prices if you feel the market will support it.
If you plan to sell your photos, then you fall more into the world of art. Art is much more subjective, and so pricing can be highly variable. Mostly it comes down to how well established you are as an artist, the specific product you are selling (limited edition vs regular print for example), and the demand for the product you are selling in the location you are selling it.
Again though, I’d advise starting out on the low end of the pricing spectrum. Just make sure to cover your costs. As you develop a name for yourself and build an audience, you can start to think about increasing prices and things like limited edition or one-off prints that command more of a premium.
Your target market will also directly affect your prices. There’s no point setting high prices for prints you are selling locally if this makes your products unaffordable to most of the people in your area. However, if this is the case, you might consider selling online to reach a wider and more affluent market.
Now, while I do recommend starting out low, you want to be sure to increase your prices as you grow more confident in your skills and you become more known in your field. At the end of the day, you need to make sure you are making money once you get yourself established and you don’t want to undersell yourself.
Invest in yourself and your product
As previously mentioned, photography is a skill which we develop over time. There’s always something new to learn, and there’s always new gear to buy.
I am a strong believer in the concept of continuous education. I always feel there’s something new about photography to learn, be that a new style of photography, a new way to edit photos, or a new bit of equipment to learn how to use.
Now, you do want to invest in high quality equipment, especially as you begin to make some money. This doesn’t mean the most expensive equipment but you certainly need to make sure your gear is up to the task. For example, a wedding or portrait photographer is definitely going to get better results with a wide aperture lens and a decent flash. A studio photographer doing things like portraits or animal photography will likely benefit from a good studio lighting setup and backdrop.
As you grow, you will want to make additional investments as needed and as you have the money. Start with the camera and gear you have and save up the money for the gear you think you need to make your photos better or your job easier. Don’t go into debt trying to buy gear you can’t afford!
You also don’t want to fall into the gear acquisition trap. It can be easy to believe that simply upgrading your camera and your camera gear will make you a better photographer.
In some cases, better gear will absolutely yield better results. However, good gear can’t replace skills. So don’t forget to keep investing in yourself. Whether that’s taking trips to new destinations to broaden your portfolio, enrolling in a class to learn new editing techniques, or going on a photography workshop to get new inspiration, investing in yourself is always a good idea.
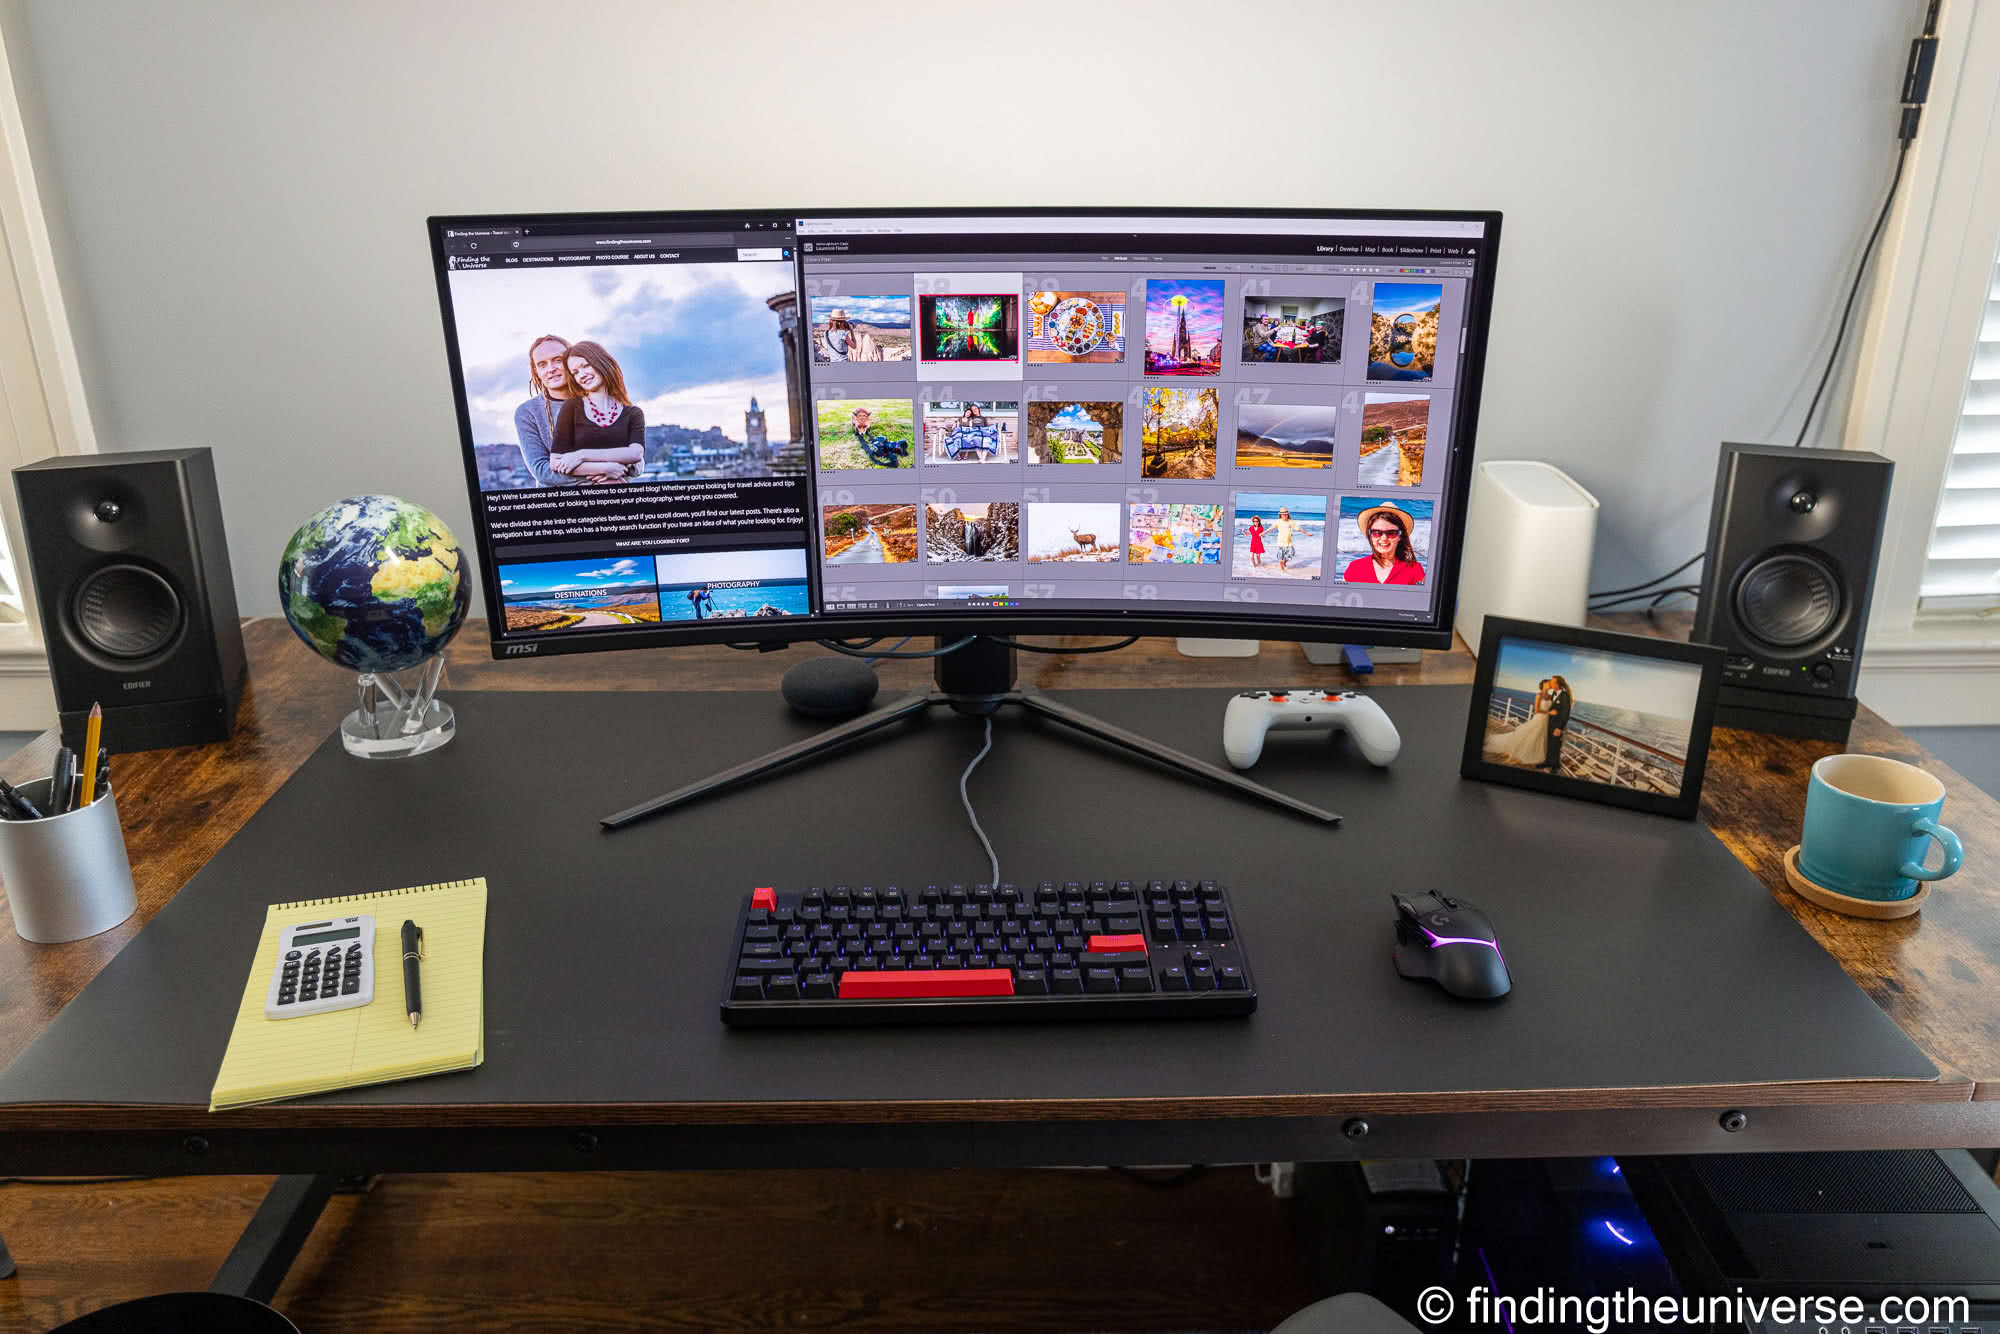
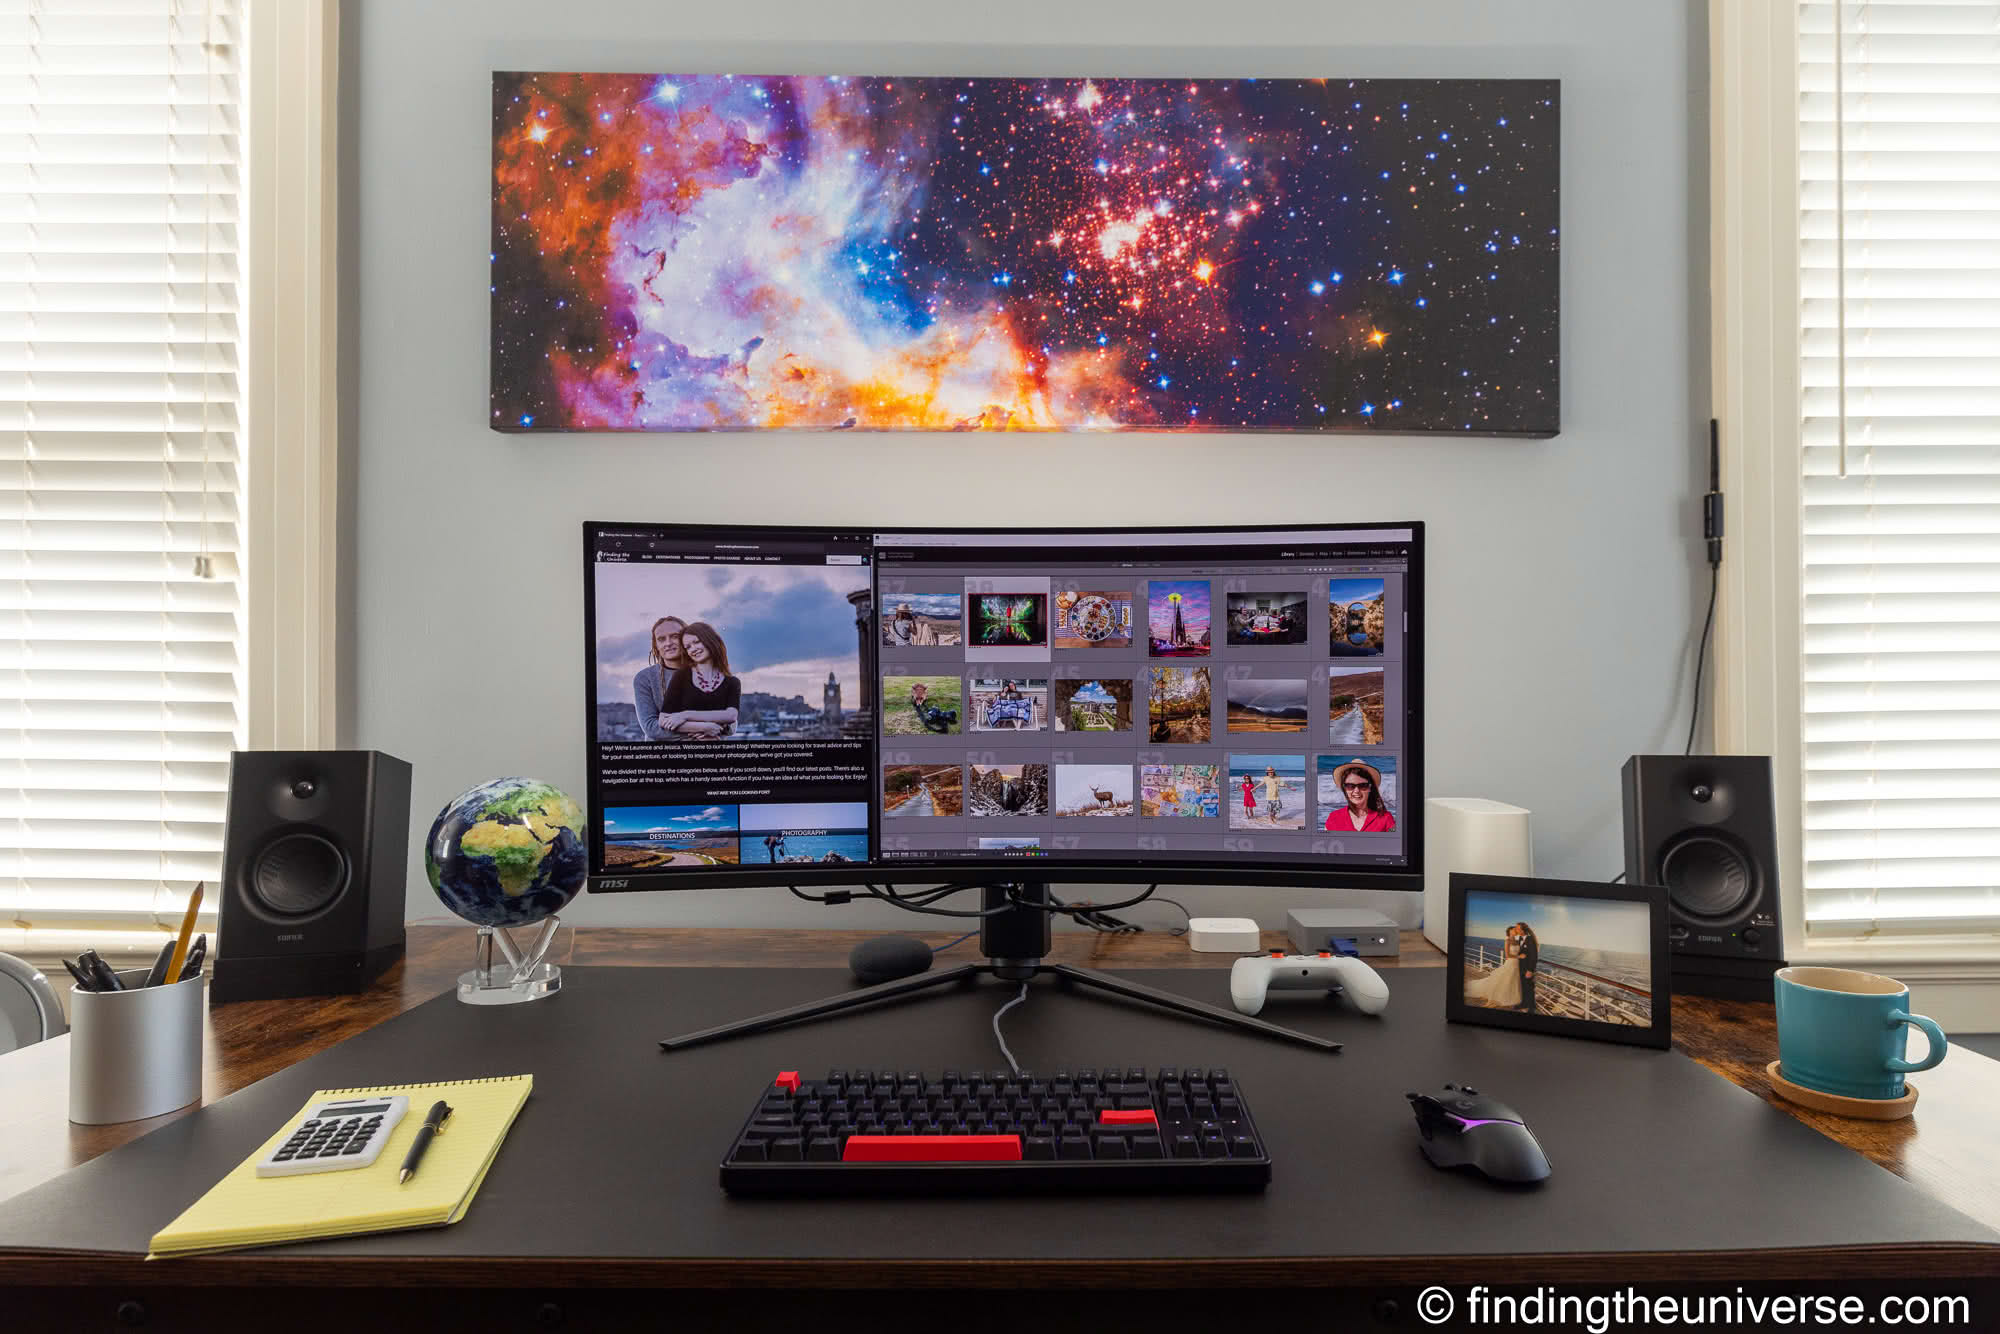
You will also want to invest in your product to make it the best it can be. If you’re offering prints of your work for example, a high quality photo printer might be a sensible long-term investment. If you are going to spend hours editing photos, then a high-end photo editing computer and monitor for photo editing is going to be an excellent investment.
A good monitor and computer make all the difference to photo editing!
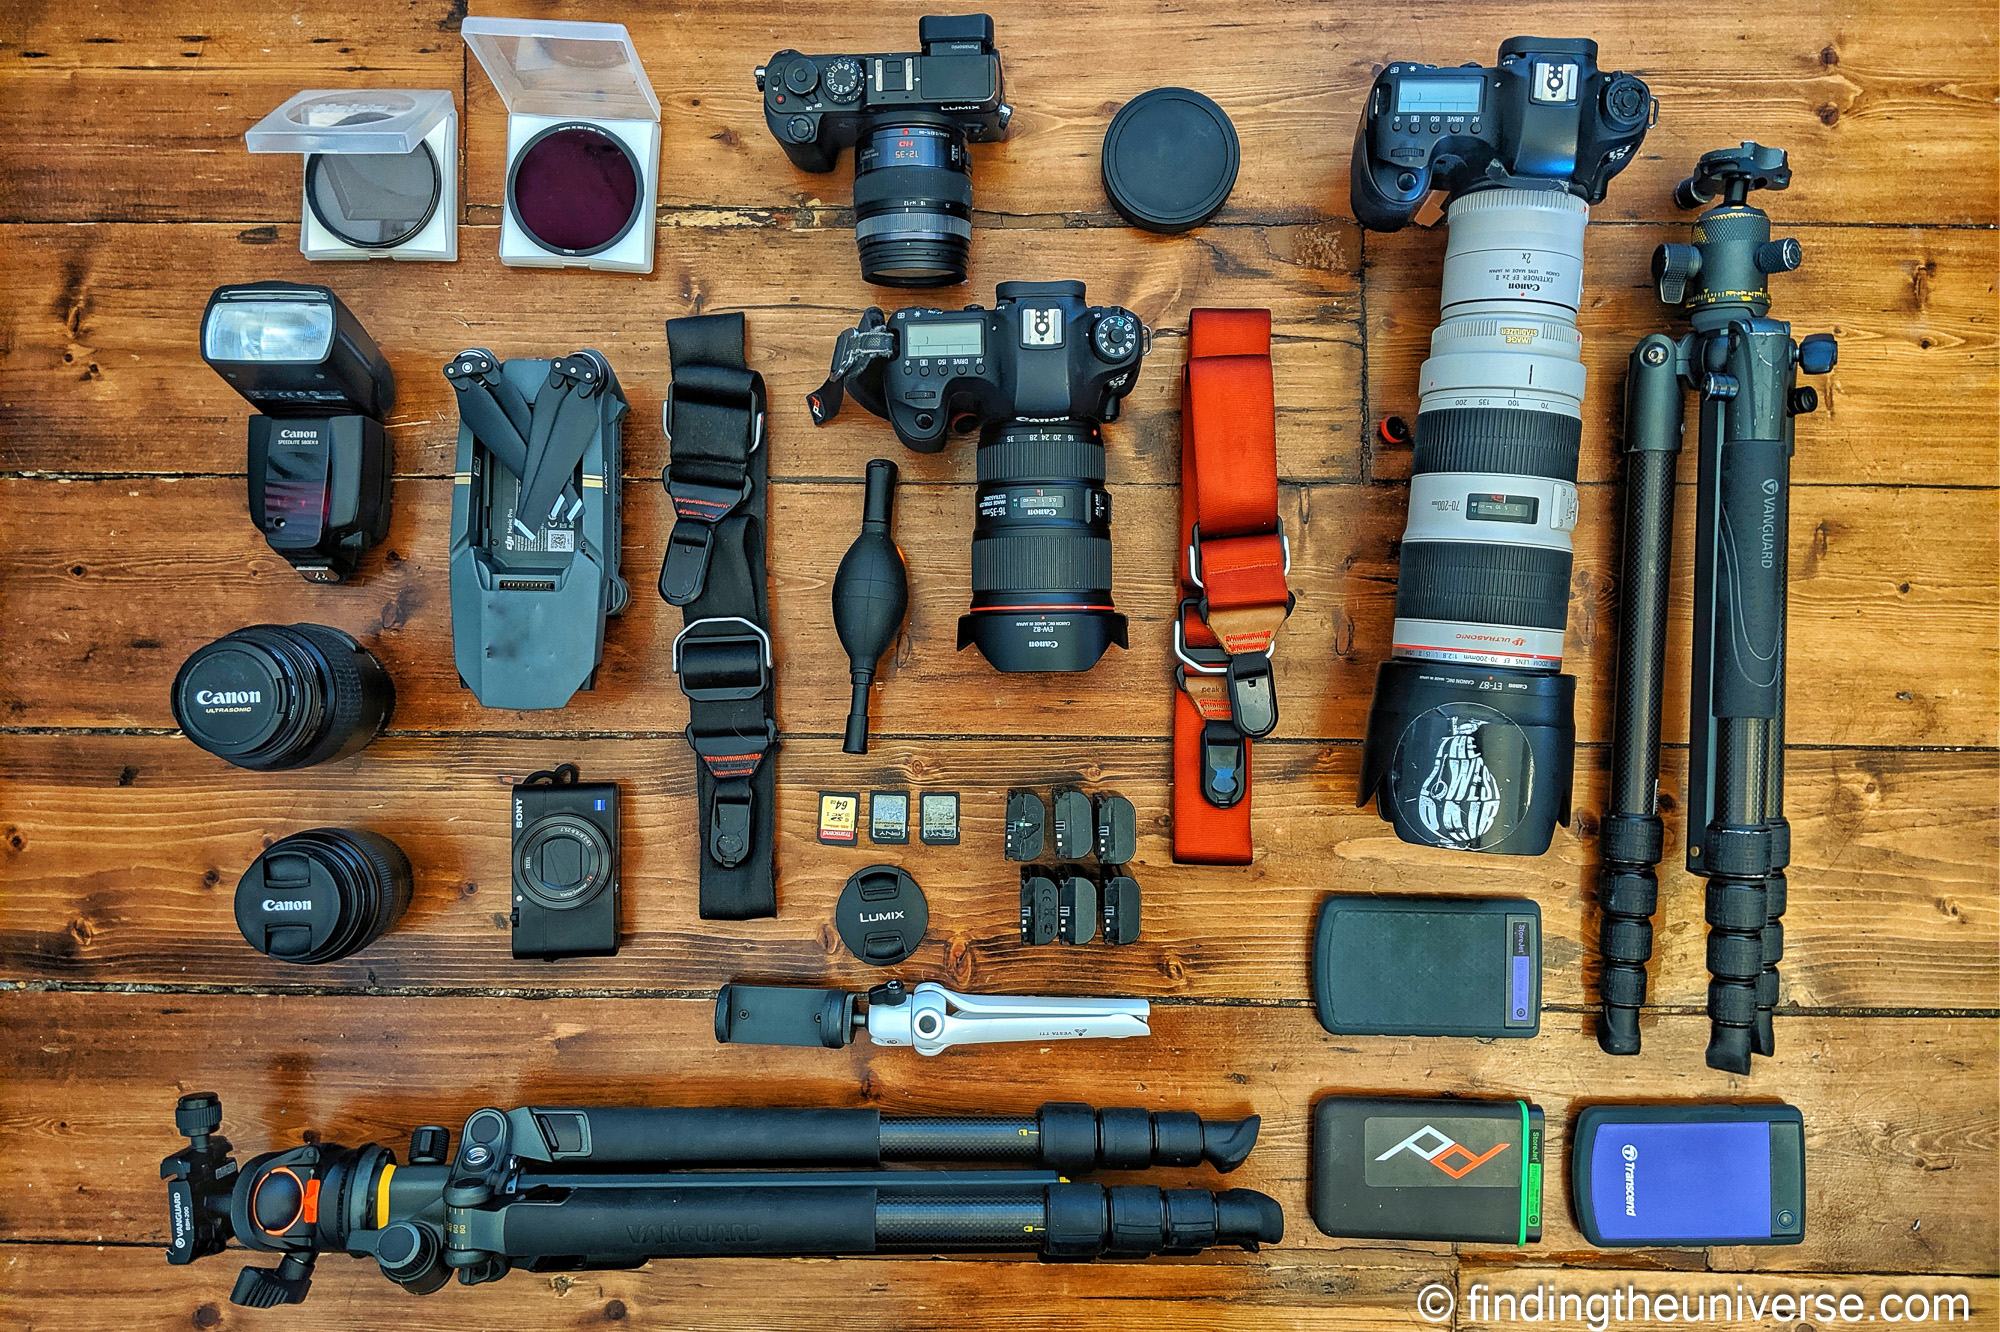
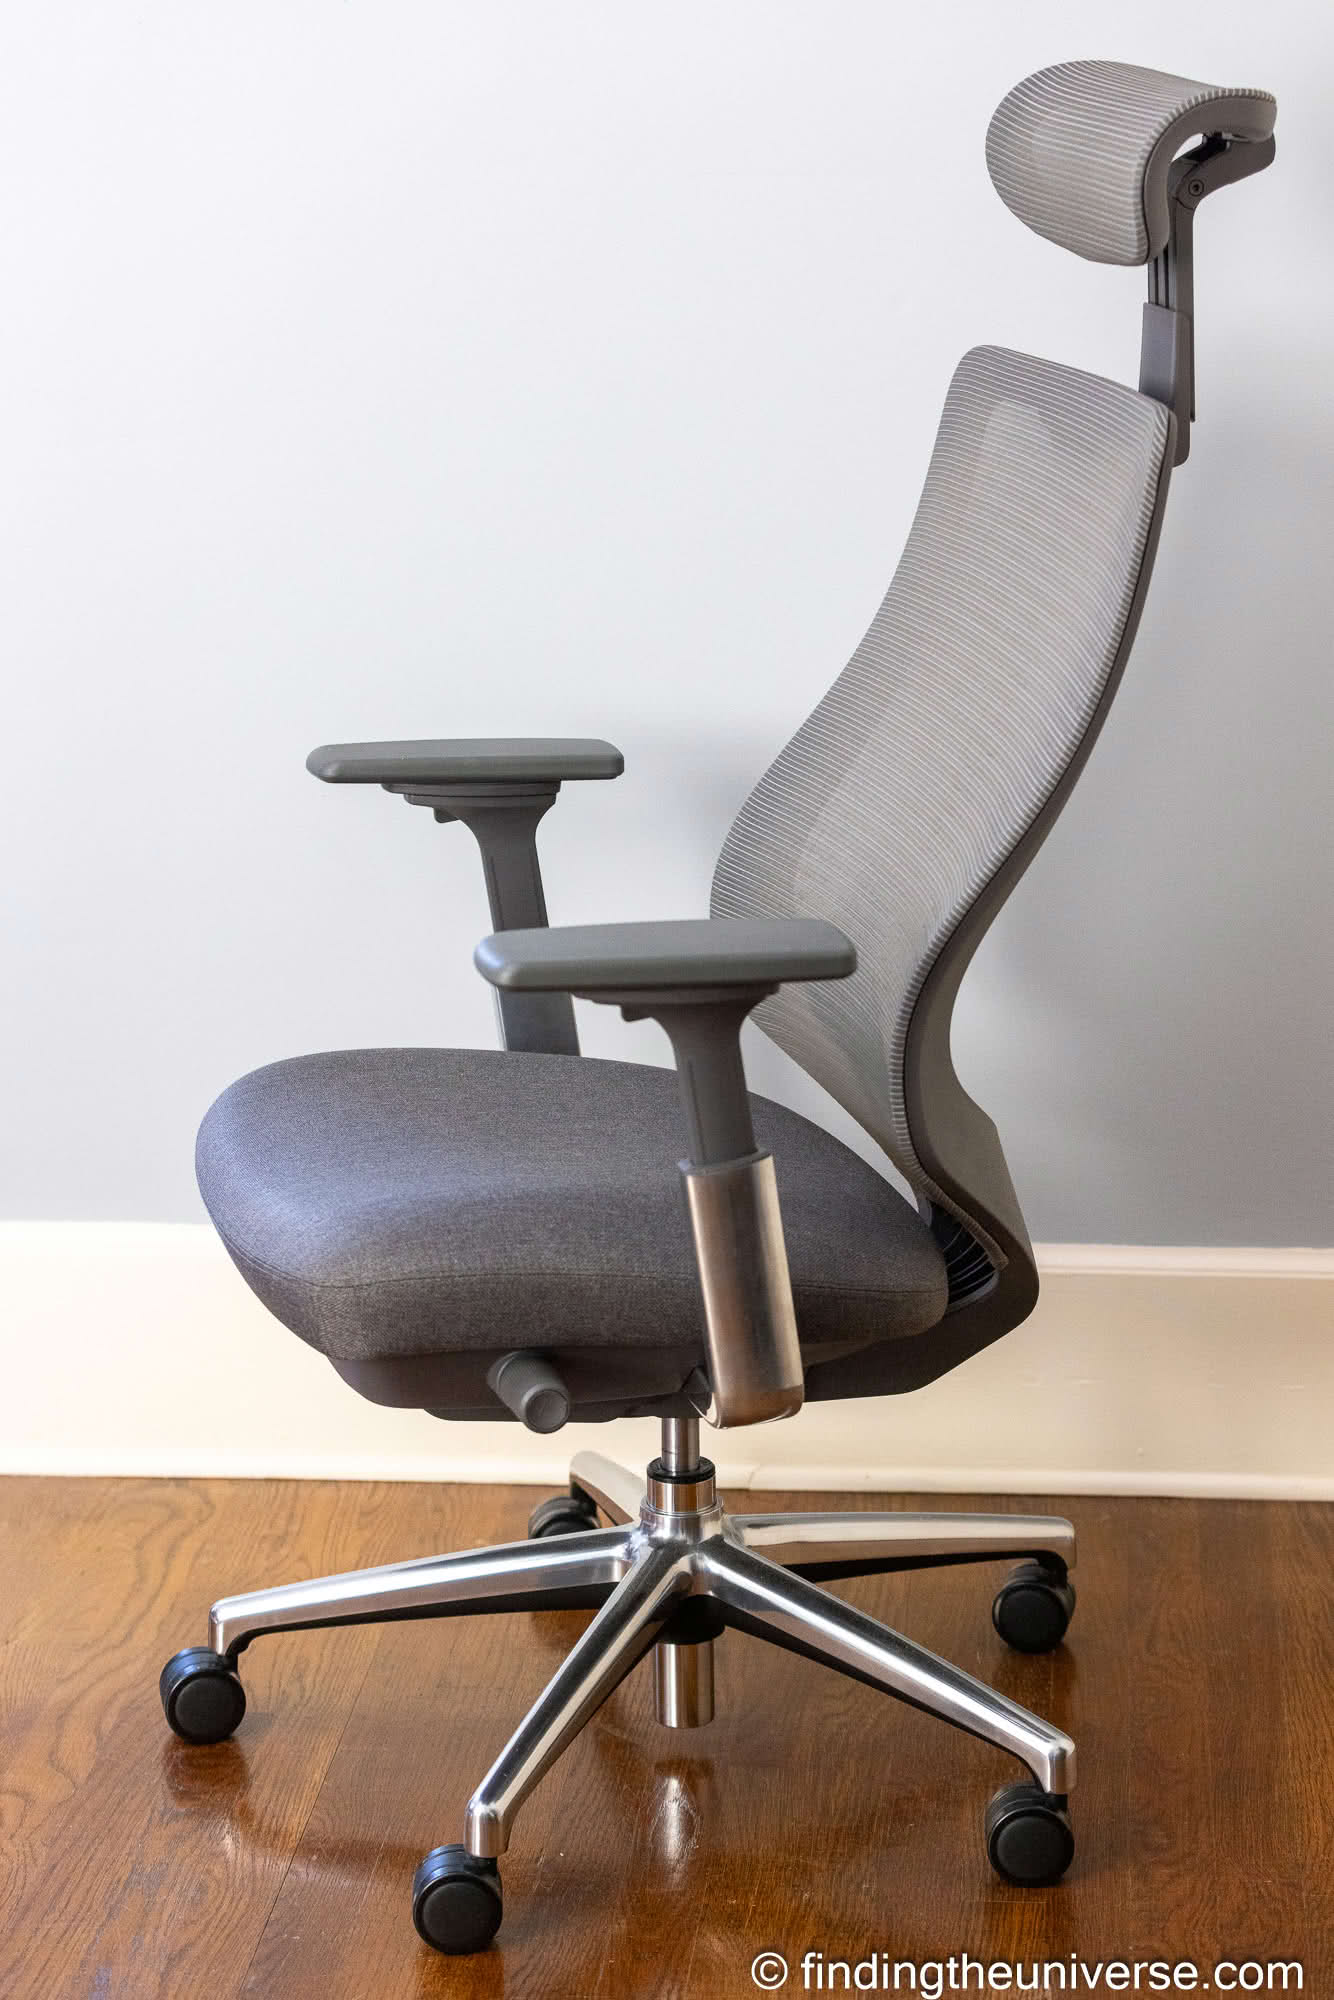
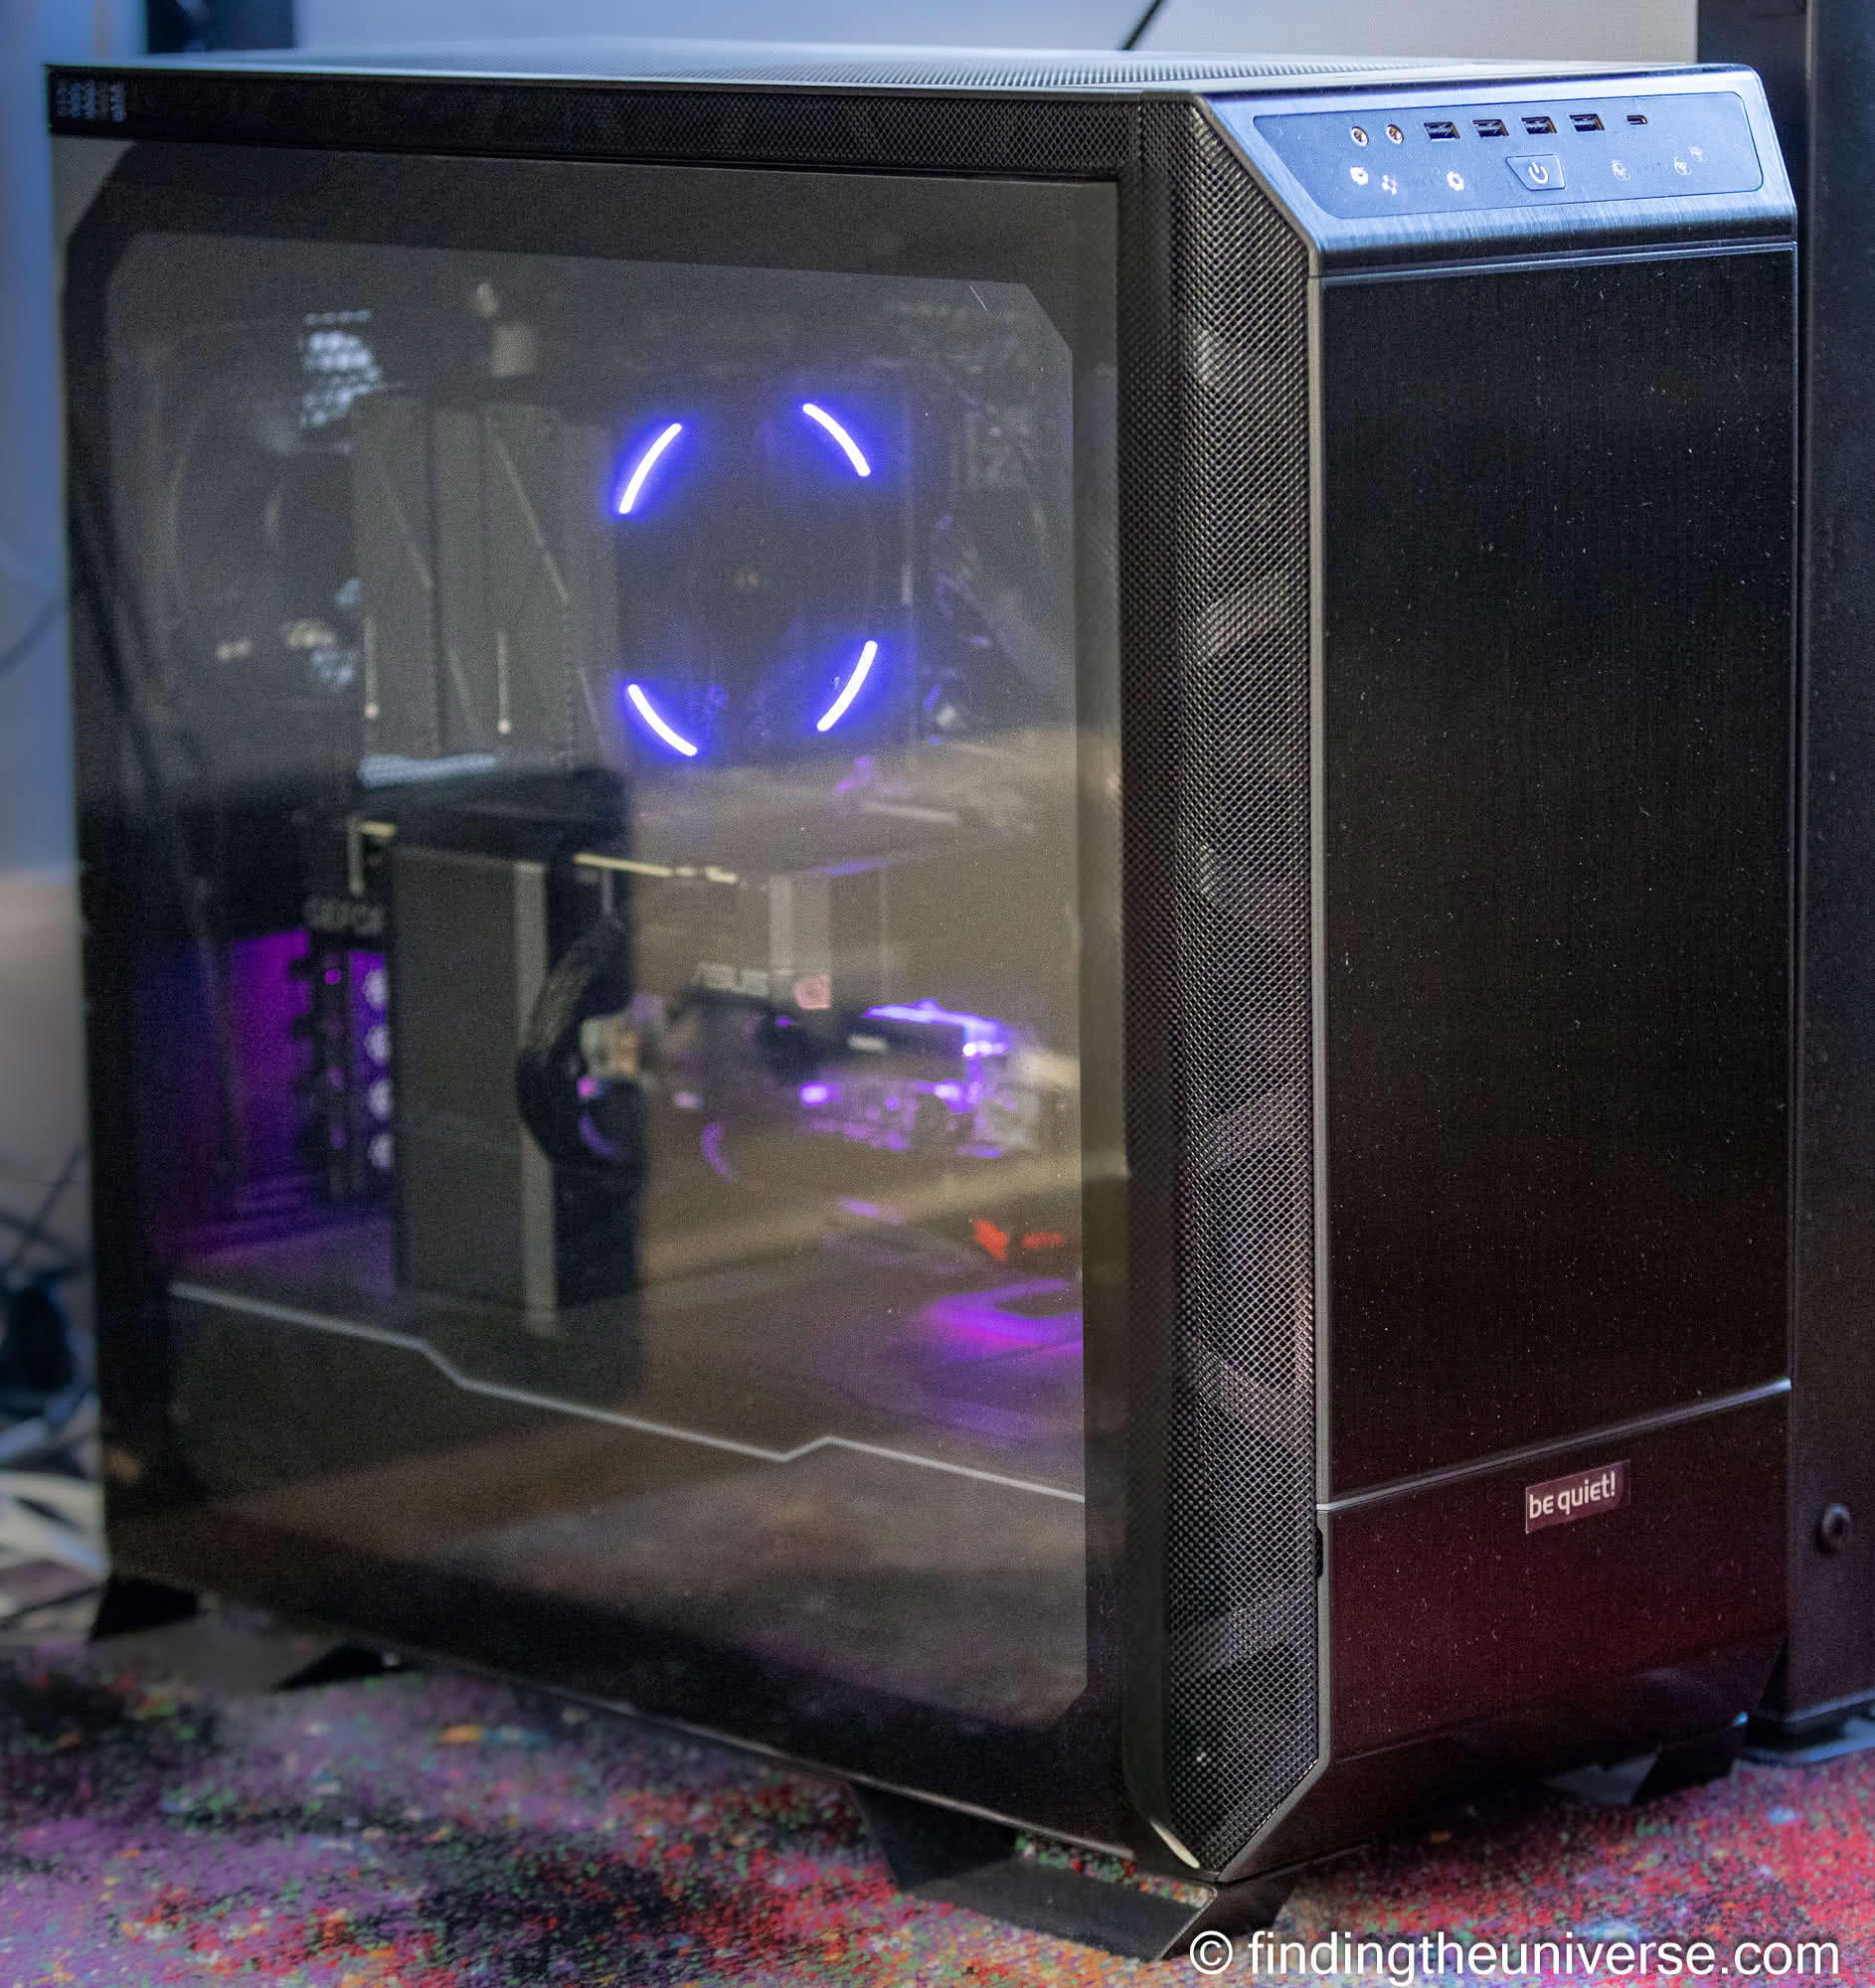
Having the right equipment to cover your photography needs is also important
Be Professional
Your clients’ (and potential clients) impressions of you are very important, and it is key to be as professional as possible in all aspects of your business.
For example, if you have a photography studio or office, this should be clean and professional looking. If you meet clients in person, you should be dressed appropriately and professionally for that situation (especially if doing wedding or corporate photography). If you are selling at an art show booth you should act professionally and have business cards to give out to those interested etc.
If you want to have a successful photography business, you also need a professional online presence. This should take the form of a website at the very least but can also extend to social media channels. If you choose to run a social media channel, you need to commit to regular updates of content, and to interact with any comments you receive. Otherwise, it can seem like the business is inactive. If you can’t do that, it might be better not to do social media.
I would say that a website is the most important online presence to have. This is where clients can find you, see how to contact you, and see what services you offer.
It’s also an opportunity to showcase your work to potential clients, share testimonials from existing clients, and it can be a place to sell photos from directly if that’s something you do.
These days, people are used to professional looking websites that are easy to navigate and look good on mobile. An outdated website can very quickly put clients off. The good news is that once you have set your website up, it will need minimal ongoing work other than refreshing your prices, updating photos and other minor tasks.
I would personally recommend using a service that specializes in creating a nice looking website that matches the service you plan to provide. Whilst you might be able to save a little bit of money by building a website from scratch yourself, the end result is likely not going to look as professional unless you happen to be a professional web designer as well.
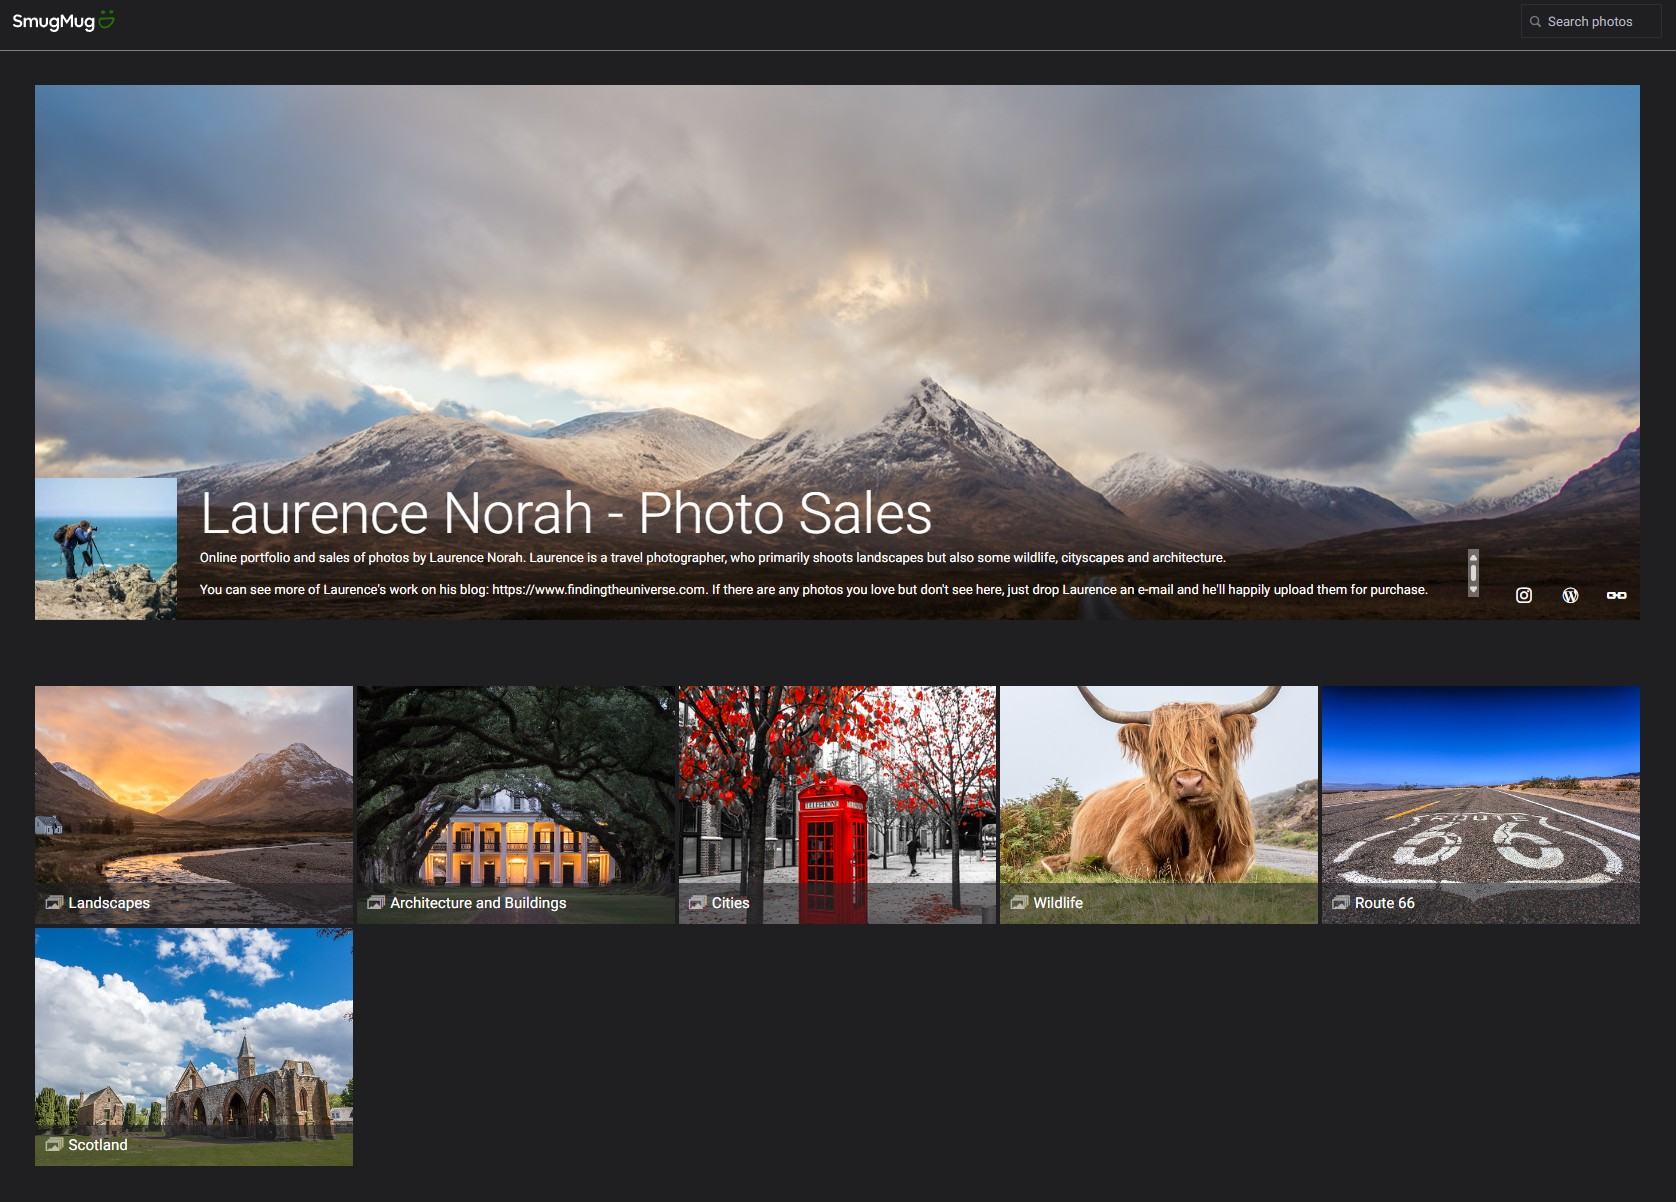
As examples of recommended services to check out, SquareSpace is an excellent system that lets anyone build good looking websites with minimal experience required. SmugMug is a fantastic tool for building an online site for selling your photos (You can get 15% off the plan cost and a 14-day free trial if you use this link).
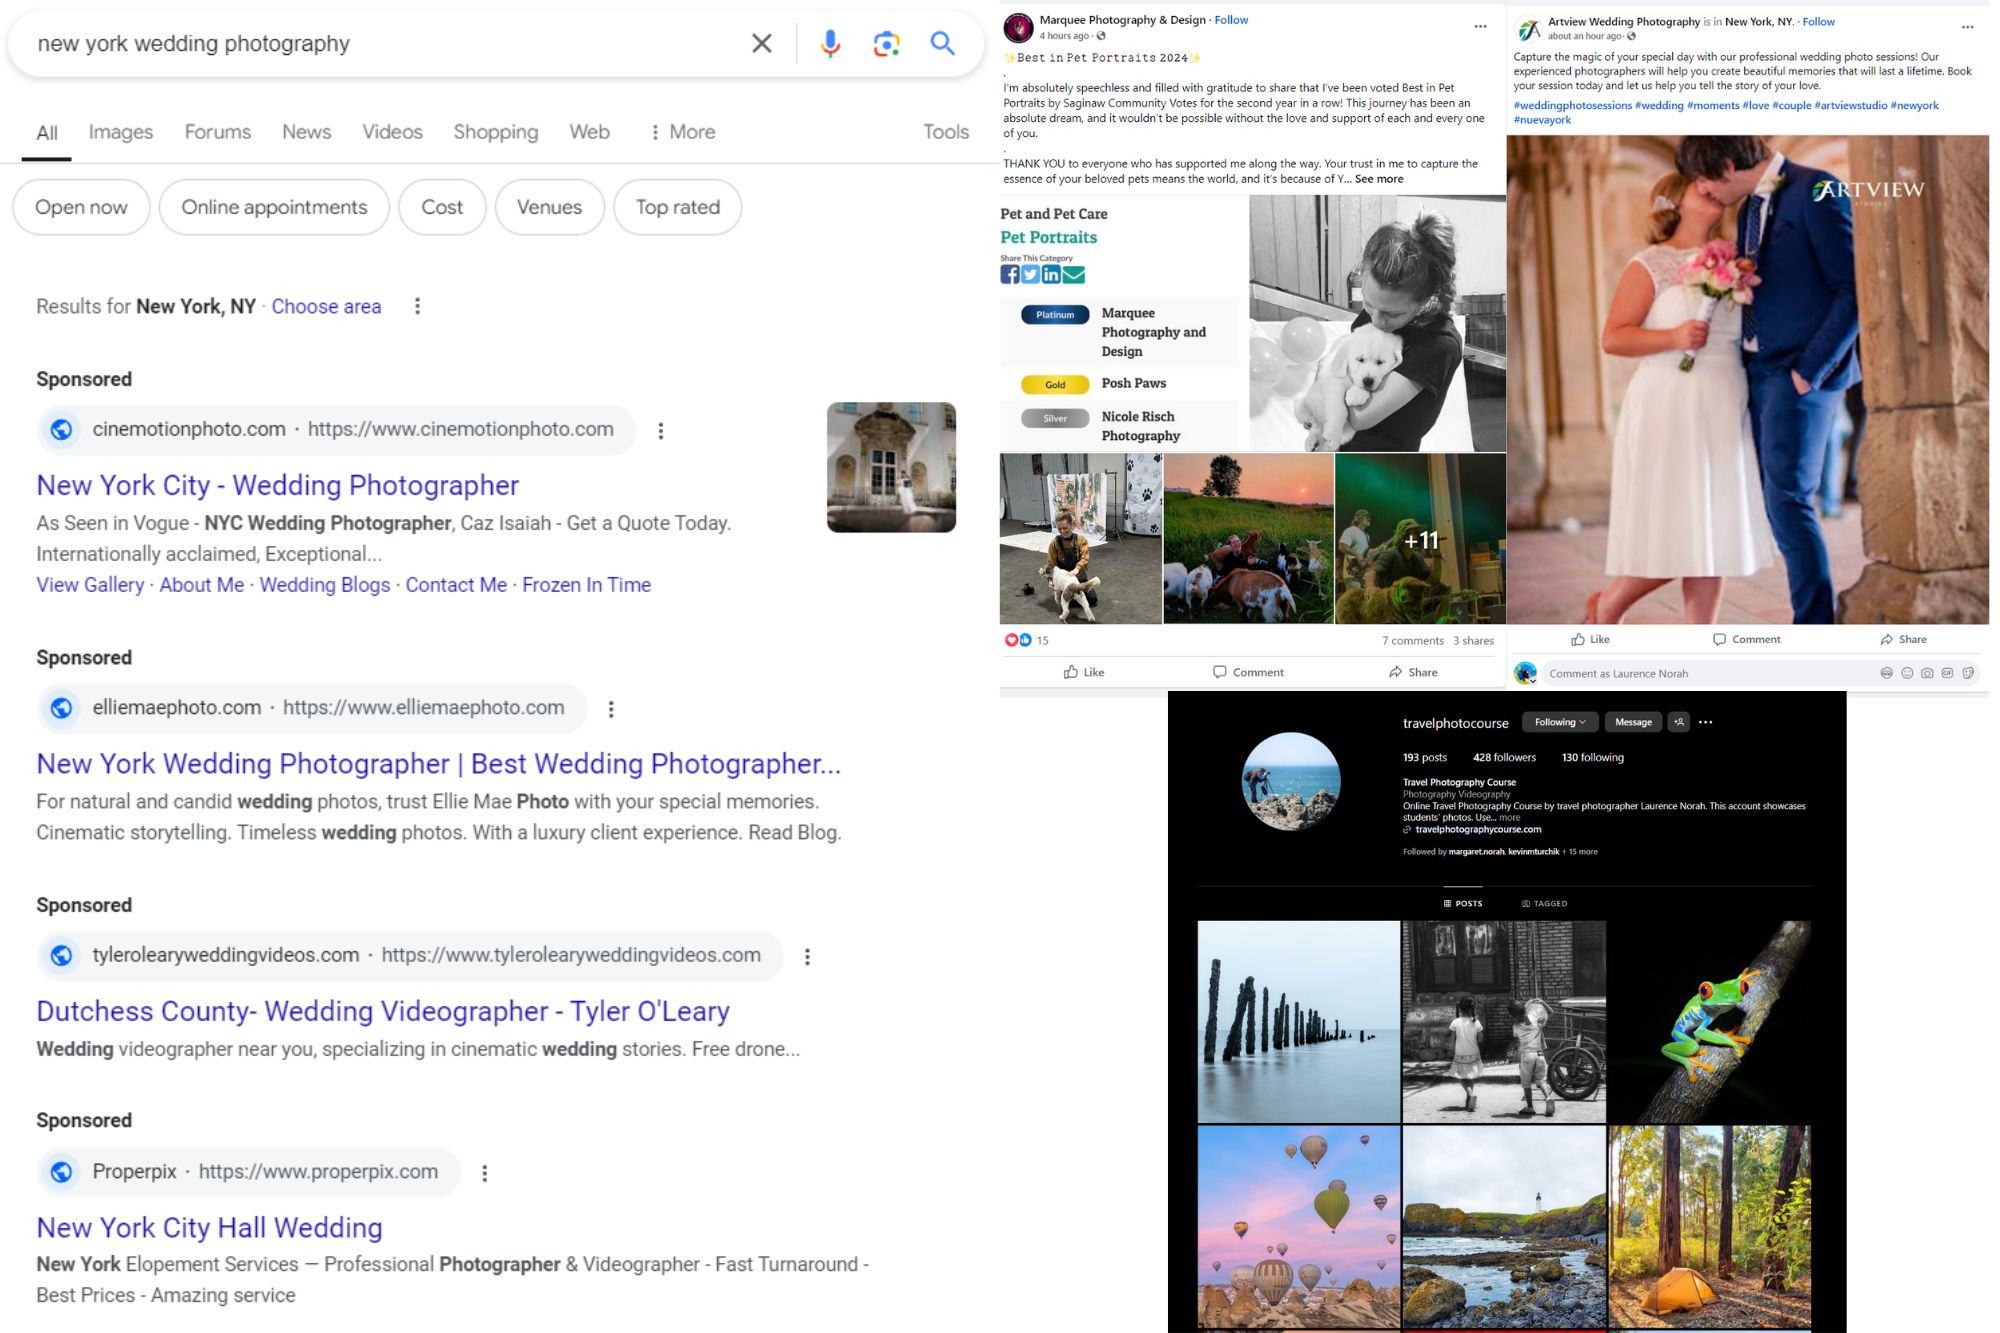
You might be the greatest wedding photographer in the world, or at least, in your part of the world, but if no-one knows you exist, you aren’t going to get any work.
Whatever type of photography service you are offering, marketing is going to be key. There are multiple types of marketing, available at various price points. The key thing is to invest in marketing that is going to reach your audience. There’s no point paying for a marketing campaign that reaches an audience that isn’t relevant to you and your product.
Marketing is also something you want to do after you have set up your website and any social media channels, defined your prices and so on. There’s little point advertising your services if your target audience then has no way to find you and see what you offer.
Some marketing options to consider are as follows:
social media, such as Facebook, Instagram and TikTok. Your marketing efforts can be both paid advertising as well as organic content
offering your services or products for free as a way to grow your portfolio and get word of mouth recommendations as well as testimonials
locally targeted marketing, good for a local service such as a portrait studio which focuses on providing photography services in a local community. This can be anything from advertising in a local newspaper to sponsoring local events, to local bulletin boards and even ads on your local Facebook Marketplace or Craigslist
paid digital search ads such as Google Ads or Facebook Ads. Just note that these can be expensive and difficult to get right if you don’t know what you are doing, and it can be very easy to spend a lot of money with little return
e-mail, which is to say, try to collect e-mail addresses whenever you can from both potential and existing clients. An e-mail list can be a powerful way to reach out to potential clients about what you are offering, promotions and so on
The main takeaway here is that you want to get word about your business out to people who are likely to want to buy your products and services, and a good marketing strategy is how to do that.
Examples of marketing channels
Be a Timely Communicator with Potential Clients
Ok, so you have setup your photography business, you know what you are selling, and you have potential clients. Hurrah!
Now you just need to be sure you convert your potential clients to paid clients. It is really important at this phase of your business that you respond very quickly to any outreach, be that phone call, e-mail, text message, or via social media.
When in the research phase for purchasing a photography product or service, many people will reach out to multiple providers at the same time. You want to always try to respond quickly, as this will give your potential client confidence in your ability to deliver.
If you think about any company you’ve ever contacted, how has it felt if you’ve not had a response in days? These days, with the speed of available communication tools, everyone wants a speedy response to their enquiry.
The worst thing is no response at all. I’ve seen this happen many times, particularly on social media. If someone asks a question on a social media post, you want to be sure to respond.
This is good for that potential lead, but also looks good to anyone else checking out your social media, as they will see you are proactive and responsive. If someone see a question with no response, it makes them wonder if you are still active, or if you care about your customers. Not a good look.
Believe in Yourself
My last tip is a bit more personal in nature. The reality is that photography can be a hard business. It can be a bit lonely as most photographers work alone. So it can be hard to get started and find your footing and your niche, and you might start to feel defeated.
My advice is to believe in yourself and your product, and to keep at it. Many photographers, especially when starting out, do a number of different types of photo gigs to make ends meet. Or they might do it in addition to a regular 9-5 job.
The main this is to know what you want and to go after it in a smart way. Be patient, be realistic, be persistent, believe in yourself.
Finally, don’t let the business of photography get in the way of also just enjoying and loving photography. Turning a hobby into a business can be a challenge, and you don’t want that challenge to overshadow your passion for photography.
Further Reading
That’s it for my guide to running a successful photography business! If you found this useful, you might enjoy some of my other photography related content. Here are some articles to get you started.
Knowing how to compose a great photo is a key photography skill. See our guide to composition in photography for lots of tips on this subject
We have a guide to what depth of field is and when you would want to use it.
We are big fans of getting the most out of your digital photo files, and do to that you will need to shoot in RAW. See our guide to RAW in photography to understand what RAW is, and why you should switch to RAW as soon as you can if your camera supports it.
You’re going to need something to run your photo editing software on. See our guide to the best laptops for photo editing for some tips on what to look for.
If you found this post helpful, and you want to improve your photography overall, you might want to check out my online travel photography course.
Since launching the course in 2016, I’ve already helped over 2,000 students learn how to take better photos. The course covers pretty much everything you need to know, from the basics of how a camera works, through to composition, light, and photo editing.
It also covers more advanced topics, including astrophotography, long exposure photography, flash photography, and HDR photography.
You get feedback from me as you progress, access to webinars, interviews and videos, as well as exclusive membership of a Facebook group where you can get feedback on your work and take part in regular challenges.
It’s available for an amazing one-off price for lifetime access, and I think you should check it out. Which you can do by clicking here.
And that’s it! I’d love to hear about your thoughts and tips on running a successful photography business and as always am happy to answer any questions you have. Just pop them in the comments below and I’ll get back to you as soon as I can.
I wanted to share a guide of how I designed and furnished my home office as a photographer. As a travel photographer, I spend a lot of time out in the world taking photos of beautiful places. On the flip side of that, I also spend a good chunk of time at home sitting in front of a computer screen editing photos and creating content like this.
Jessica and I bought our first house together last year and have been busy fixing it up and trying to make it a home. One of the first rooms I focused on was setting up my home office where I do the vast majority of my blog writing and photography editing.
Sure, it’s possible to work on the road. Personally though, I find that I get better results if I focus on capturing content on the road and creating content at home. Editing photos for example is certainly possible with a good photo editing laptop, but nothing beats a nice big monitor for editing photos, an ergonomic chair, and a powerful desktop computer.
I’ve also found that creating a dedicated home photography office helps separate work time from other time. My office is a place where I can get work done and really focus.
Obviously, function is important, and I wanted to design my office so if would fulfill all my main needs. For me, these included having a comfortable place to edit and organize my photos, an area for camera and photography equipment storage, a mini photography studio area, and a place to file paperwork and business documents.
Still, despite it being an office, where function is important, that doesn’t mean I can’t give it some personality. I spend a fair amount of time here, so it’s nice to make it personal to me, and be a place where I actively want to spend some time.
When we moved internationally, we came with no furniture and little equipment, so I had to start almost from scratch in terms of equipping, furnishing, and decorating my office. So I’ll go through all those decisions, what I chose to do, and some options for different budgets and styles.
In this guide, I’m going to go through what I think are the important things to think about when setting up your own home photography office. This is all based on my personal experience creating a dedicated office space for us in our home.
Whilst some of this content will be specific to working as a photographer, the majority of it will apply to any home office space. With so many of us switching to remote working in the last few years, I hope that you find the content in this useful for helping you set up your own home office space!
Things to Consider
Let’s first go over what you need to think about when planning your dream home photography office.
Size and Layout of the Room
The first thing you’re going to need to know is the size and layout of the room you have to work with. If you are lucky, you might have a choice of rooms in your room where you can setup your home office. However, if you’re like me, you likely aren’t going to have a vast choice of empty rooms to choose from.
In my case, there was a spare bedroom that I was able to utilize as a home office. For many people, turning a spare bedroom into an office can make a lot of sense. Maybe you have kids who have left the house, or you just have a spare guest bedroom that doesn’t get a lot of visitors.
It’s also possible that you don’t have an entire room to dedicate to a home office. Maybe the spare bedroom does get some use, so you have to leave the bed in there, or a sofa bed at the least. Maybe you have more of a hallway office situation going on or need to carve out a space in your family room or dining area.
My one piece of advice is to try to find at least a small dedicated area for yourself to work. Even if this is a small corner area with your own desk and storage, this is often nicer than trying to share a space with others for other purposes such as a kitchen table.
Whatever your situation, my suggestion would be to try to find the best option that works for you and the rest of your household. Once you have found a space, I’d suggest measuring it out. Graph paper can be useful to create a sketch of the space.
Once you know the size and layout you have to work with, you can start to plan things like furniture. After all, there’s no point planning on having a huge desk and dedicated studio area if you won’t have room for it. You’ll also be able to start planning exactly where you want to place different items of furniture in the room. Which leads me on to my next point.
Light Sources
When designing your home photography office, one thing you are going to want to consider is the various light sources, and how you are going to be able to control them.
Most spaces are going to have a number of light sources, which may include windows, overhead lights, lamps, and so on. I recommend having a variety of sources of light other than just an overhead ceiling light such a a floor lamp, desk lamp, and natural light.
Having lots of light is going to be great for lots of type of activities you might want to do in your office and having some natural light can help boost our mood.
However, whilst it may seem like a good idea to always have a nice bright working environment, this can be problematic. First, for photo editing, you are obviously going to be working on a monitor. And the brighter the room you are in, the harder it will be to see the monitor. If you’ve ever tried to work on a laptop outside, you’ve probably quickly realized how hard it can be to see the screen.
If you work in a bright environment, you have to turn the brightness on your monitor up to compensate for it. This can have the unfortunate side effect of you editing your photos on a screen that is too bright, meaning that when other people see your images on their devices, or when you print your images out, they don’t look as you imagined them.
The other issues with lots of light sources is that they can cause annoying reflections on your screen. Even on a monitor with an anti-reflective coating this can create a distracting effect.
Now, I’m not suggesting you move your office to a basement and embark on a troglodytic existence (unless you are also using it as a dark room). Although that will give you lots of control over your lighting!
Instead, think carefully about the light sources in your office and how you can control them. Ideally, you don’t want any bright light sources like a window behind you, as this will likely reflect in your monitor. Having your desk facing the windows if you have any will help cut down reflections, if this is possible.
If it’s not possible, and even if it is, you’ll also want to look at how you can control the light situation. So this will be things like using blinds or windows shades that you can adjust when necessary, allowing you to darken the room as needed. Also, plan the lights in your room so they don’t create reflections.
Noise
When planning your home office, you’ll want to think about what levels of noise you are happy to deal with, and what you can do to mitigate noise. From time to time for example I give video talks and presentations, and like many people who work from home I also have conference calls from my office.
Outside of those, I also prefer to work in a fairly distraction free environment if possible.
If you are choosing between various options for where your home office space is going to be, you will want to factor in the sources of noise in each area and if you think you can work with them. These may be external things like road noise or a neighbor’s dog, or internal noise like a lounge TV, kitchen noises, or your kid’s music.
It’s also worth mentioning that as well as external noise coming into your office, you should consider any noise you will be making and how that might affect the other occupants of your home. If you like to listen to music through speakers, or regularly take part in calls, locating your office in a location which won’t disturb other members of your home will be appreciated.
Storage Requirements
Any home office is going to need storage for things like documents, paper, pens and other office accessories. In my experience, a photographer’s home office also benefits from storage for camera equipment and accessories, from lenses and camera bodies to tripods, lights, batteries, filters, memory cards, chargers, cables, and more.
When planning out your home office and your furniture requirements, take into account everything you would ideally like to keep in your office. Don’t forget you’ll need storage for non-photography items as well, from paperwork to general office supplies. Think about the best options you have for storing everything, which might be drawers, shelves, filing cabinets, or something else.
Getting all your photography equipment stored in your office will make it easy to find and manage. It also moves it out the way of the occupants of the rest of the house, which can be a good thing for peace of mind.
How to Set up the Perfect Photography Home Office
Now I’ve covered the things you want to think about when planning your photography home office, I’m going to share some ideas for the key components you need. I’ll share what you need to think about for these components, as well as some recommended options based on my personal experiences.
Desk
One of the most important parts of any home office set up is the desk. You have a few choices to make when it comes to a desk.
First, and most importantly, the size of the desk. Obviously, this will be largely determined by the size of your room. If you have a larger room, then you’ll be able to fit a larger desk. If you have as smaller room, well, you’ll have to work with what you have.
To get an idea of the size that is best for you, I would write a list of all the things you would ideally want to sit on your desk and their size. This might include your monitor, keyboard, speakers, office organizers, mouse, computer tower, external hard drive, headphones, microphone, framed photos, coffee mug, desk calendar, plants, stapler, etc.
What else would you ideally like to be able to fit on your desk when needed such as your laptop, gaming gear, ring light, filming equipment, planner, or an extra monitor?
To save space, getting a desk where you can store things like your computer tower, speakers, and/or external storage underneath is a good idea. Just be sure when planning that your chair and legs will still have plenty of room.
For a home office I’d generally recommend a desk size that is no smaller than 48 inches wide and 24 inches deep. However, I personally believe that larger is better.
A wider desk will give you more room, so if you need to keep a notepad handy, or use a graphics tablet for example, you won’t be worrying about having enough space.
A deeper desk will allow for larger monitors, and a larger monitor can really benefit photo editing. If you have more than one monitor, then you definitely want to choose a larger desk.
So, if you have the space, I’d recommend looking at a desk that is more like 60 inches by 30 inches. Personally, I have a desk which is 71 inches wide and 35 inches deep and I love how much room I have.
There are also a number of other factors to consider. One of these is whether or not you want a standing desk. These have become very popular, with the idea that you can vary your position through the day from standing to sitting.
There are some downsides to a standing desk though, not least of which is cost, as a standing desk requires additional engineering to build and so obviously costs more. Some standing desks may also be less stable than regular desks and may not accommodate large monitors. You also need to think carefully about cable management with a standing desk and how you will manage the desk changing height with your setup.
You also have to think about if you want storage in your desk and how much you want or need. Drawers can be great for limiting the amount of stuff on your desk as you have places to store your pens, notebooks, paper, office supplies, extra cables, headphones, USB sticks, etc. The downside of a lot of drawers is limited space for storage under your desk. So think about if there are things you would ideally like to sit on the floor under your desk.
I personally chose a desk with no drawers as I wanted to be able to use the space underneath my desk for a large computer tower, Internet box, UPS battery storage tower, my office waste basket, and a bunch of cables. However, ideally I do wish I had at least a pencil drawer.
Finally, there are aesthetic decisions to be made, including what material the desk is made from, desk color, design style, and so on. Desks are available in all sorts of materials, including solid wood, engineered wood, and metal. Different materials will result in different prices, but this is primarily an aesthetic decision rather than a functional one. The main functional concern is to ensure it is a solid desk that will hold all the things you need and that it will hold up over time.
My main priority was getting a really solid desk at a good price. I initially thought I was going to get an IKEA gaming desk but when I went to get it in person I didn’t like the quality as it didn’t seem that solid. I also considered getting a simple vintage solid oak wood desk but there were practical issues given the size and weight of such a large heavy desk and getting it up our stairs.
I spent a lot of time researching desks, and I finally ended up going with this 70.8 x 35.4 Tribesigns desk. It is an engineered wood top set on a powder coated steel frame. It offered a great balance of size, weight, and price. It is a very sturdy desk and I have been pleased with it.
The other desk I seriously considered, and would recommend adding to your shortlist, is the Secretlab MAGNUS Pro. That’s an all metal desk which does include the sit to stand feature. It also has a really neat accessories system which works with magnets and which helps with organizing your desk.
Another popular brand that I looked at and which gets good reviews is the Uplift Standing Desk. They offer a range of standing desks with various options of color and material to choose from.
Finally, you can also get good value desks from somewhere like Ikea. A popular hack is to get a pair of Alex drawers, and then purchase a tabletop separately.
For me, it came down to wanting a slightly larger desk. I also really couldn’t justify the price difference for a more premium desk whose features I might not use that often, deciding instead to invest that money in a more premium monitor rather than the desk the monitor sits on!
Chair
Another important decision you’re going to have to make when putting your home office together is a chair. This is where you are going to be spending a lot of your time, so it’s critical that you choose the right chair.
Having been down the chair rabbit hole myself, I should warn you that there is a lot of choice out there. There are also seemingly endless office chair reviews out there which are going to have you second guessing yourself.
The main things you will want to decide are what material the chair is made of (foam vs mesh are the main decisions), and then things like whether or not the chair has armrests, a headrest, what type of upholstery, and how adjustable it is.
Chairs, like seemingly everything in life, are available at a wide price range, from under $100 through to well in excess of a thousand.
I did a huge amount of research when purchasing an office chair. I concluded I wanted a headrest and armrests, a mesh back for air circulation, adjustable height and back, and a foam base for comfort and longevity. A price sweet spot seemed to be between $200 and $500 for a good chair that would last me a while and offer all the features I need.
In the end I settled on this office chair, which I have been very happy with. The seat is very comfortable, it’s adjustable in all the ways I could want, and it is very well built and solid.
From my research, other chairs that you might consider include the Herman Miller range and Steelcase chairs. Both these manufacturers make excellent chairs but they are definitely more expensive options. The good news is that you can sometimes find them used or refurbished for a better price.
Other well reviewed mid-range options include chairs from Branch, Humanscale and Haworth. At the more budget end of the spectrum, look at brands like Sihoo and Staples. The Staples Hyken chair in particular offers great value.
The main thing to remember when choosing a chair is that everyone is different, and so the perfect chair for me is unlikely to be the perfect chair for you. So keep this in mind when reading reviews and getting advice. In an ideal world, you’ll want to visit a store that actually sells a variety of office chairs so you can try them and see what works.
The next best option is to buy a chair from a store with a no questions asked free returns policy, so you can return a chair if it doesn’t work out for you.
If you are a particularly small, large, or tall person, I would encourage you to pay closer attention to reviews for people of similar size and build. For example, Jess is a tiny person so most office chairs are not particularly comfortable for her as they are built for someone larger and taller than her. Some office chair brands offer some of their chairs in different sizes such as Herman Miller, Haworth, and Steelcase.
From a photography perspective I would say there is nothing specific you need for a photography home office chair compared to a regular home office chair. You just want it to be really comfortable and supportive for long periods of sitting down.
Computer & Monitor
A computer is pretty much an essential item for any home office, but especially so for a home photography office. This is where you are going to be doing all your photo editing, a task which requires a pretty powerful computer and a high quality monitor.
I’ve already put together a guide to the best photo editing monitors, so I won’t replicate that information here. That has everything you need to know to choose a good monitor for your photo editing needs, including the specifications to look for and what is important. It also has a number of recommended models at various price points.
I would also add when choosing a monitor to also consider what else you plan to use it for. If you are going to be using for anything else beyond photo editing, such as watching movies or TV shows, or even gaming, then you might want something that is good across a range of tasks.
As an example, many photo editing monitors have lower refresh rates, say around 60Hz. Whilst this is fine for photo editing, it can result in issues when playing computer games. So, you might consider a monitor with a higher refresh rate that works for both photo editing and gaming.
Size wise, I’d suggest something in the 27″ – 34″ range, although this will depend on the size of your desk.
I ended up going with an MSI 34″ ultrawide OLED monitor, which works well for everything from photo editing to gaming to consuming content.
For the computer itself, I do have a guide to choosing the best laptop for photo editing. I would recommend reading that guide as it covers which specifications are important for a photo editing computer and why. However, rather than buying a laptop, I would personally recommend a desktop computer for home office use.
Desktop computer components are nearly always more powerful than their laptop counterparts, as they don’t have the same size and thermal restrictions as a laptop. However the naming convention is the same, so my laptop guide will still prove useful.
I actually built my own desktop computer from parts as it’s something I enjoy doing (and have a computer science background). However, you can purchase excellent pre-built desktop systems. Just be sure to check that the specifications include a recent processor from Intel or AMD, a discrete graphics card (GPU), at least 32GB of RAM, and a 1 TB SSD. Again, check my guide to the best laptop for photo editing for the specifications that matter.
Lighting is important for any office, but particularly so for a home office where you plan to do photo editing, as outlined previously in this guide. I recommend having your lighting coming from a number of different sources (e.g., floor light, desk lamp, window, overhead light, etc.) and being able to control that light as needed (e.g., dimmable bulbs, blinds, diffusers, etc).
In terms of actual lighting suggestions, I have a couple of ideas. First, I would advise a monitor bias light. This goes behind your monitor and bounces light off the walls around you to create a diffuse light source that will reduce eye strain.
I’d also suggest one or more floor standing lamps. You can place these in strategic places around your office to provide light as required. I’d also highly recommend getting a lightbulb that lets you change it’s color temperature, from warm to cool, and which is also dimmable.
This way you can change the lighting in your room depending on your mood and needs, and to ensure a neutral background light when you are editing your photos. I like these Philips Hue bulbs for this purpose. You can also get bulbs like these which change color across the RGB spectrum but those aren’t really necessary.
For photo editing, you want to ensure that your room lighting is not affecting your color perception, so having lighting in the range of 5000K – 6500K (to match your monitor calibration) is going to be ideal. But you might not want a cooler tone all the time, so having adjustable lightbulbs is a good idea, so you can have a more normal warmer light when not editing.
Useful Accessories
There are a few useful accessories that I have which you might consider for your home photography office. In no particular order, these are:
Desk Pad
A desk pad, as the name suggests, is a large pad that sits on your desk. It’s a bit like a mouse pad, but larger. It can make the working area a bit more comfortable and is a better writing and typing surface. If you have a more budget table like I do or a worn one, a desk pad can also be a clever way to disguise that fact and protect the surface from damage.
Desk pads can also be customized so you can do anything from monogramming it to choosing an artwork you like. They’re also available in all sorts of material, including felt, leather, cork, vegan leather, and wool, and in myriad colors and designs.
Personally, I went with a Grovemade desk pad in natural linoleum with a cork backing. I really love all the material choices they offer including leather, natural linoleum, cork, and wool. I chose a simple black because I already have a pretty dramatic canvas print and rug choice in my office, and didn’t want to go entirely crazy. But as with everything, it’s your office, so go with what makes you happy!
Mouse
I actually think a good mouse is a really important accessory for photo editing at home. I particularly recommend you buy a gaming mouse. The reason for that is because most gaming mice come with lots of extra buttons, which you can assign to keyboard shortcuts. I use these to speed up my photo editing workflow, with common Lightroom shortcuts that I use all the time assigned to specific buttons.
I specifically recommend the Logitech line of gaming mice , which I have been using for many years, with my personal favorite being the G502. This is available in a number of varieties. I prefer the wireless version as I find it easier to move without a cord. But it’s also available corded, and I had the corded version for years.
I’d also add that if you decide against a desk pad, then I can recommend getting a nice mouse pad for your mouse instead, which will improve accuracy and protect your desk surface.
Monitor Calibration Tool
If you are serious about your photo editing, it’s important that your display is correctly calibrated. This is particularly important if you plan on having prints of your work made, as it will ensure that what is printed matches what you see on your monitor.
I have a whole guide to monitor calibration here, but the key takeaway is that for the best results you should use a hardware monitor calibration tool like one of these, which is what I use.
External Hard Drive / Network Attached Storage
A backup system for your photos is an essential part of your home photography office setup. If your computer stops working or a hard drive fails, you don’t want to lose all your images.
I have a complete guide to backing up your photos, but the key takeaway is that you need two backup systems in place. First, you need a cloud backup that stores your digital image files offsite. This will protect you in case of a disaster at home. I use and recommend Backblaze, but there are other options.
You should also have a local backup system in place. This will let you get a quick restore of your image files should a local drive fail. A large external hard drive or network attached storage device is the best solution in this case. Personally I have a large external drive I use for on-site backup.
How to Store Camera Equipment
If you’re anything like me, then you probably have a fair amount of photography equipment to store away. Prior to setting up my home office, my camera gear primarily lived between various photography bags I had. This did keep it protected, but wasn’t an ideal solution as I had to go rooting through bags to find what I needed for any given shoot.
It also meant that if I needed that specific bag, I’d have to move everything out of it. In my research for storing my camera gear at home, I came up with a few options.
Ideally, you will have a more permanent storage area in your home that will keep your cameras and photography gear organized, safe, free of dust, and protect it from damage. You want to keep it out of direct sunlight, away from water and humidity, and in a place with stable normal temperatures.
Using Camera Cases
One thing many photographers have is a camera bag, or, if you’re like me, a variety of camera bags for different scenarios. These might include backpack style bags like these, hard cases like this or this, and roll on bags like these. I happen to own all of these types of photography bags and cases.
For storage I particularly like this hard case which is also highly recommended for storing photography items when moving or doing shoots in rough terrain locations. Personally, I concluded that the case would look a little out of place in my home office. Instead, I use it for storing extraneous gear in a closet, where I also keep other items I don’t need on a regular basis like my photography bean bags, extra tripods, extra cables, photography bags, and so on.
However, if you already have a spare camera bag or two, and you don’t have too much gear to store, then using these can be a good option to store your gear in between shoots.
Cabinets / Drawers
The next option to consider is to use cabinets or drawers to store your photography gear. These look more natural in a home office setting, and they are available in a huge range of sizes and materials.
The downside of using cabinets or drawers is that generally the drawers are not designed to store camera equipment specifically. So the drawers might not be deep, tall, or wide enough for your equipment. Additionally, most drawers are not padded or set up in a way that provides any protection for camera equipment.
Some kind of padding or protection is essential for your gear as you don’t want it moving around or bumping around in a drawer when you open and close it as that could lead to damage. So you will likely have to add some kind of padding and divider system, which will take up additional space in the drawers.
If you do decide to go down the cabinet / drawer route, you will want to consider the size of your equipment and how it will all fit into the solution you purchase.
Other factors to consider are how sturdy and secure drawers are (can they be locked for example?), the material they are made from, and of course the price.
One popular option is to adapt a tool chest for your camera gear. Most tool chests are well made, constructed of durable metal, and can be locked as they are designed to store and protect high value tools. There are many brands available, such as Husky and Kobalt, with a wide range of products available.
Of course, you can also purchase a cabinet or chest of drawers from a furniture store and work with that. Just be sure it is large and sturdy enough to accommodate your storage needs.
My Home Office Camera Storage Solution
For my office, I wanted a solution that would let me store my camera gear in an existing set of drawers. I decided that a set of drawers wouldn’t look out of place in an office, and I was able to find this set of drawers that matched my desk, and were within budget. They are designed for clothing storage and have deep drawers, which meant they had the dimensions I needed to store all my equipment.
However, for this to work I would need a solution that provided protection and prevented equipment from rolling around when the drawer opened, as most drawers are not generally designed to keep camera equipment in.
I really liked the look of the Pelican TrekPak Divider System. However, I calculated that I’d need at least four of them to hold my gear, making the cost somewhat excessive in my opinion. I also looked into using ICU systems like these, but again the cost would end up being a bit higher than I wanted.
My solution was to create my own system. I purchased this neoprene adhesive sponge foam, this corrugated plastic, some 1″ acoustic foam for the base, and some stiff craft wire to create the pins which hold it all together. A few careful hours with a sharp knife and measuring tape later, and I had built my own camera drawer storage system where I can keep all my camera gear and accessories.
As previously mentioned, I also use my existing hard case for storing extra gear out of the way that doesn’t fit in the drawers or is more rarely used.
Filing Cabinet
Whatever you use your home office for, the reality is that you are going to need some kind of storage for paperwork. If you regular print photos, then you’ll probably need a space to store and file them. if you do film photography, you’ll need a safe and clean space to store film and negatives.
Even if you don’t print out your photos often, you’re likely going to have business paperwork and receipts that need filing, as well as bit and pieces of electronic gear and adaptors that need somewhere to live.
If you don’t have much of this, then you might consider getting a desk with a file drawer if that is all you need. But if you think you might need more than one drawer of storage, I’d probably opt for a separate filing unit.
Personally, I like having a filing cabinet to keep all my paperwork filed away neatly. You can pick up filing cabinets online, but they are also an item that can easily be purchased (if you have the right vehicle) at a thrift store or second hand somewhere like Facebook Marketplace. Often, the secondhand models are going to be clearance models from old offices, and will be a pretty high quality.
All that said I ended up getting mine online because my car isn’t big enough to fit in the size of filing cabinet I wanted. I got a locking lateral three drawer filing cabinet which went together pretty easily and does the job.
Light Box / Studio Setup
Depending on the type of photography you do, you may want to incorporate some sort of studio setup in your home office as well so you can take the photos you need.
For example, if you do portrait photography, then putting together a dedicated area to do that would be a good idea if you don’t have a dedicated studio space. You’ll need studio lights and a backdrop against which to shoot. A pull down backdrop can be a good idea if you don’t have a lot of space but have a blank wall.
Personally, as I’m primarily a travel photographer I don’t do a lot of photos that require a home studio setup. However, I do review products from time to time, and being able to take photos of them in a controlled lighting environment is handy. For this purpose, I use a large photography lightbox.
If you plan on printing your photos at home, then you’ll want to invest in a good photo printer. There are a number of options to consider, with key decision points being your budget, and the size of prints you want to print
One thing to bear in mind when purchasing a printer is that you will also have to pay for suitable paper as well as printer ink. Both of those supplies can quickly increase the cost of your print.
Personally, I use a photo lab for printing my photos. It’s more convenient, and it also gives me access to a huge array of print mediums. I generally use SmugMug for my photo needs. I also host my image portfolio with them, and if someone orders a product they handle all the printing and shipping for me. You can see my detailed SmugMug review here.
All that said, I do still have the need to print things out at home from time to time, but these are paperwork rather than images. So I ended up purchasing a wireless black and white Brother Laser Printer. I’ve had one of these for years, first in the UK and then in the USA.
Whilst the upfront cost of a laser printer is a little higher than that of an inkjet, the ink toner cartridges last forever, meaning in the long run it is way more cost effective. I also highly recommend a wireless printer so you can have more flexibility in where you place it in your office.
Other Accessories
There are lots of additional accessories you might consider for your photography home office.
Office supplies and organization tools
If you are running a business like I am or just pursing a passion, you’re still going to want some basic office supplies such as pens, stapler, writing pads, paper clips, printer paper, scissors, surge protectors, and the like.
While not exciting, you are also going to want to keep your office organized so you can easily find things. I found that when I just threw stuff in drawers in the past, I was often losing things or buying duplicates of things I already owned.
So these are things like pen holders, file folders, file organizers, drawer trays, wire organizers and cables, and the like. I would evaluate what all you need in your office and then figure out what type of organization tools would be best for you and your space.
Artwork and personal touches
You are likely going to be spending quite a lot of time in your home office, so you will want to personalize it to your tastes and give it some personality. It is the one room of the house where my wife has given me pretty much free range to decorate how I want.
Some of the things I love are space, travel, science fiction, gaming, and photography, and my favorite color is purple. If you came to my office, you would probably be able to pick up on most of these things pretty quickly.
Personally I’m a big fan of space, so I added a canvas print of a James Webb image (freely available from NASA), as well as this galaxy themed rug under my desk.
If you’re interested in a MOVA globe specifically for your desk, we have been given a 10% off discount code that can be used for any 6 inch or 8.5 inch MOVA globe purchased from their website. Just put in coupon code TRAVELCATS at checkout.
In relation to photography, I have displayed some of my old cameras on the filing cabinet. I also have a framed wedding photo on my desk. I am also likely going to frame some of my photos in the future for one of my blank walls.
Gaming wise I haven’t chosen a particularly strong gamer aesthetic, although my PC case does have a bit of RGB lighting, and I have a game controller within easy reach! The nice thing about building a photo editing PC is that it happens to double up well for gaming as well.
The color purple is scattered throughout the room. I even have a purple dragon door topper peeking from atop of my door.
Of course, you’ll want to personalize your office in a way that suits you, which could mean anything from hanging prints of your own work, to other artwork or decor. If you do want to display your own images, don’t feel restricted to print, it’s amazing what you can put images on these days from coffee mugs to rugs to metal.
The main thing though is to make your office a place where you enjoy spending time.
Plants
I love having some greenery in my office and it can really add some visual interest and naturalness to what can be a pretty utilitarian space. You want to go with hearty plants that don’t require too much maintenance. And ones that can thrive indoors in the amount of light available to you in your office space.
I personally favor spider plants as they have proven difficult to kill, and it is a plant that just keeps giving as I start with one and soon have half a dozen of them. I keep mine in a plant pot that sits on a black metal drink tray stand next to one of my windows.
Now, if you don’t have much light or know that you won’t be able to care for a live plant, then I recommend looking for preserved dried flowers and greenery. These are going to look better than fake ones and don’t require really any maintenance, just occasionally blowing them with some air for dusting. Dried and preserved flowers can last for years in a climate-controlled space.
MOVA Globe
One of the things on my desk which I noted above is a MOVA Globe. We first saw these magical contraptions whilst traveling in Venice, Italy.
They are powered by solar energy and will spin when they have enough natural or artificial light. They are a very fun addition to a desk, especially if you like travel as much as we do.
If you’re interested in purchasing one, we have been given a 5% off discount code that can be used for any 6 inch or 8.5 inch MOVA globe purchased from their website. Just put in coupon code TRAVELCATS at checkout.
Scents
You may also want to work in a place that has your favorite scent. Fresh flowers can be one way to infuse some nice scents to your office. You can also go with candles, potpourri, diffusers, incense, wax melts, etc.
One of my favorite scents in sandalwood so I have one of those scent diffusers on my desk with the little wooden sticks and sandalwood essential oils.
Further Reading
That’s it for my guide to setting up a home photography office! If you found this useful, you might enjoy some of my other photography related content. Here are some articles to get you started.
Knowing how to compose a great photo is a key photography skill. See our guide to composition in photography for lots of tips on this subject
We have a guide to what depth of field is and when you would want to use it.
We are big fans of getting the most out of your digital photo files, and do to that you will need to shoot in RAW. See our guide to RAW in photography to understand what RAW is, and why you should switch to RAW as soon as you can if your camera supports it.
You’re going to need something to run your photo editing software on. See our guide to the best laptops for photo editing for some tips on what to look for.
If you found this post helpful, and you want to improve your photography overall, you might want to check out my online travel photography course.
Since launching the course in 2016, I’ve already helped over 2,000 students learn how to take better photos. The course covers pretty much everything you need to know, from the basics of how a camera works, through to composition, light, and photo editing.
It also covers more advanced topics, including astrophotography, long exposure photography, flash photography, and HDR photography.
You get feedback from me as you progress, access to webinars, interviews and videos, as well as exclusive membership of a Facebook group where you can get feedback on your work and take part in regular challenges.
It’s available for an amazing one-off price for lifetime access, and I think you should check it out. Which you can do by clicking here.
And that’s it! I’d love to hear about your thoughts and tips on what has worked for your home photography office and as always am happy to answer any questions you have. Just pop them in the comments below and I’ll get back to you as soon as I can.
![The BEST Camera Accessories – Photography Essentials [2025]](https://farasar.ir/wp-content/uploads/2025/07/Best-Camera-Accessories.jpg)