![Aurora Expeditions Svalbard Cruise Review [2025 Guide]](https://farasar.ir/wp-content/uploads/2025/09/Aurora-Expeditions-Svalbard-Cruise-Review-Feature-Image.jpg)
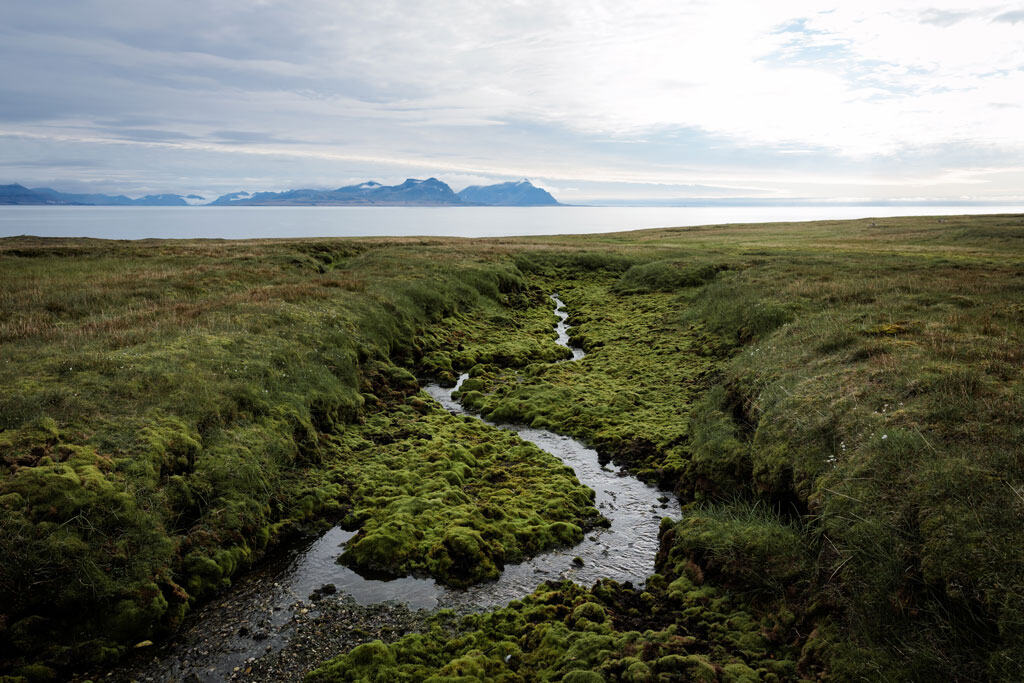
Svalbard sits on the edge of the map, a land of glaciers, polar bears, and remote fjords where the Arctic Ocean meets the pack ice.
At 78° North, this Norwegian archipelago is one of the wildest places on Earth, and joining a Svalbard cruise with Aurora Expeditions is the best way to experience it.
Being fortunate enough to work in the polar regions since 2017, with over 20 expeditions to Antarctica and 5 to the Arctic under our belts, it’s safe to say we have developed a deep passion for the far reaches of the planet.
Yet still the attraction remains stronger than ever, and with Svalbard being arguably the icon of Arctic travel, we couldn’t be more thrilled to finally visit together.
In August 2025 we boarded the Greg Mortimer for their 11-day Svalbard Odyssey voyage through Spitsbergen and the high Arctic, chasing polar bears, walrus, reindeer, ivory gulls, beluga whales, and countless seabirds.
READ MORE: Check out our full Greg Mortimer ship review!
Along the way we explored historic sites like Ny-Ålesund and Virgohamna, cruised beneath towering glaciers such as Lilliehöökbreen and Negribreen, and pushed as far north as 82°39’ into the drifting sea ice.
No two polar expeditions are ever the same. The itinerary in Svalbard changes daily, dictated by weather, ice, and wildlife.
This is our detailed review of the Aurora Expeditions Svalbard itinerary, showcasing the landings, wildlife encounters, and onboard life that made our voyage unforgettable.
If you’re planning a trip to the Arctic and want to know exactly what to expect on a Svalbard cruise with Aurora Expeditions, this guide covers everything: the highlights, the surprises, and the moments that make expedition travel so special.
EXCLUSIVE – We have partnered with the world’s top polar tour operator, Aurora Expeditions, to offer readers of NOMADasaurus a very special deal on any trip to Antarctica or the Arctic! Contact us (hello@nomadasaurus.com) if you’d like to learn more about these exclusive discounts. Or simply mention the code “NOMAD” when booking direct with Aurora to activate the deal.
Quick Facts – Aurora Expeditions Svalbard Cruise
- Operator: Aurora Expeditions
- Ship: Greg Mortimer (130-passenger, purpose-built expedition ship)
- Destination: Svalbard, Norway (Arctic)
- Itinerary: Svalbard Odyssey
- Duration: 12 days
- Start/Finish: Oslo, Norway (includes a charter flight to and from Longyearbyen, Svalbard)
- Focus: Polar bears, glaciers, sea ice, Arctic wildlife, history, and remote landings
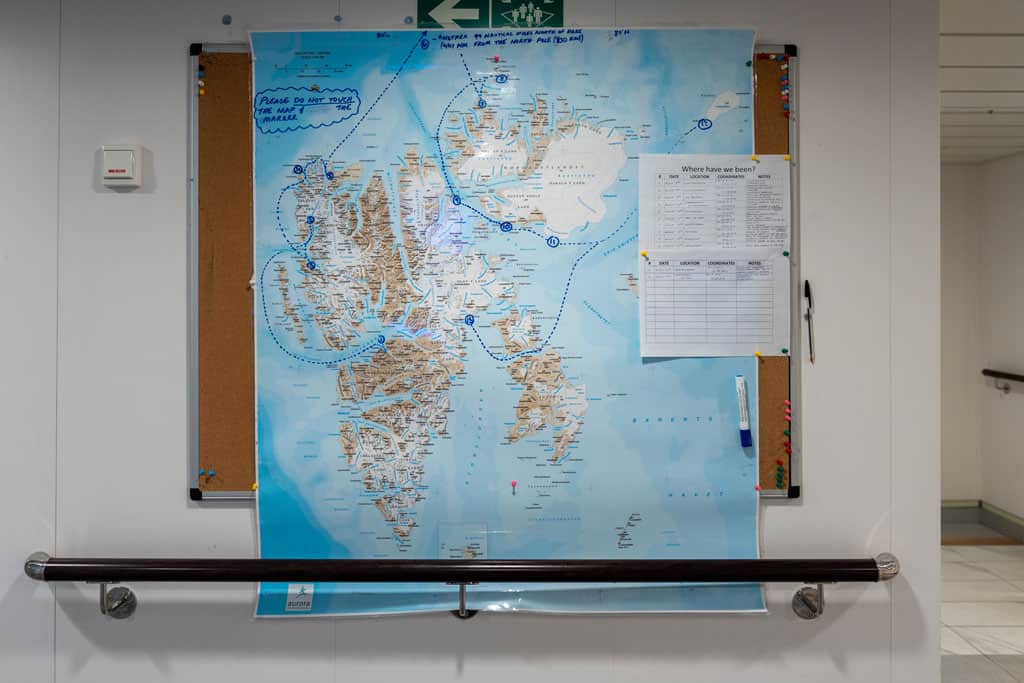
Note: Expedition cruising in Svalbard is highly flexible. Ice, weather, and wildlife dictate where you go each day, so no two voyages are alike. This is a review of our exact journey in August 2025.
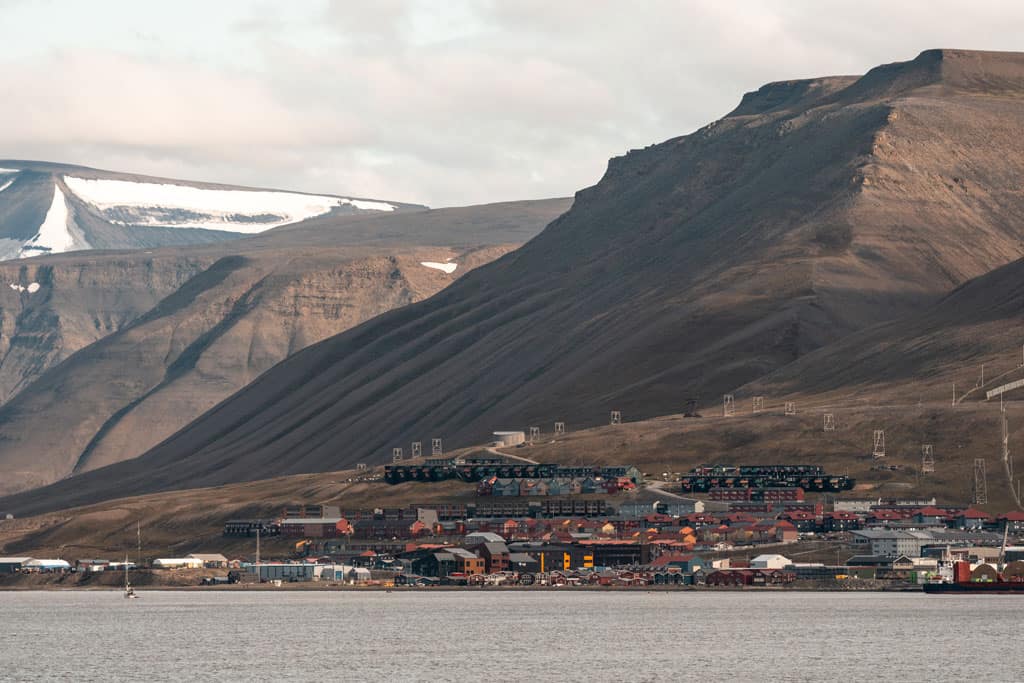
Day 1 – Leaving Longyearbyen Behind
Few places feel like the edge of the world quite like Longyearbyen.
Tucked between sharp peaks and glacial valleys at 78° North, this coal-mining town is a curious mix of frontier grit and Arctic charm.
It’s also the launch point for almost every expedition into Svalbard, and for us it marked the beginning of an adventure we’d been dreaming about for years.
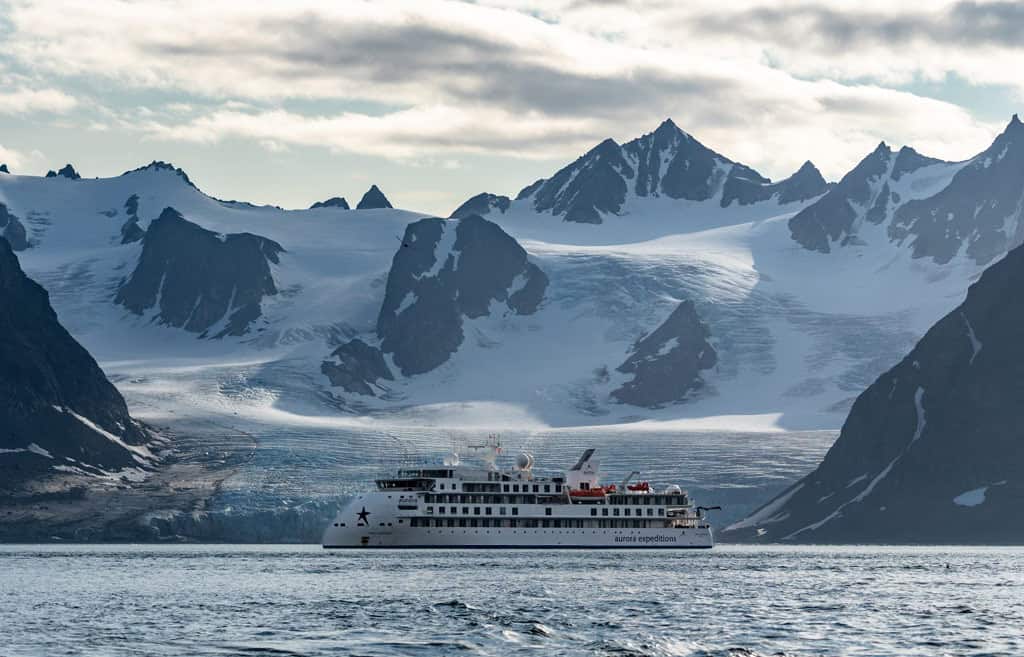
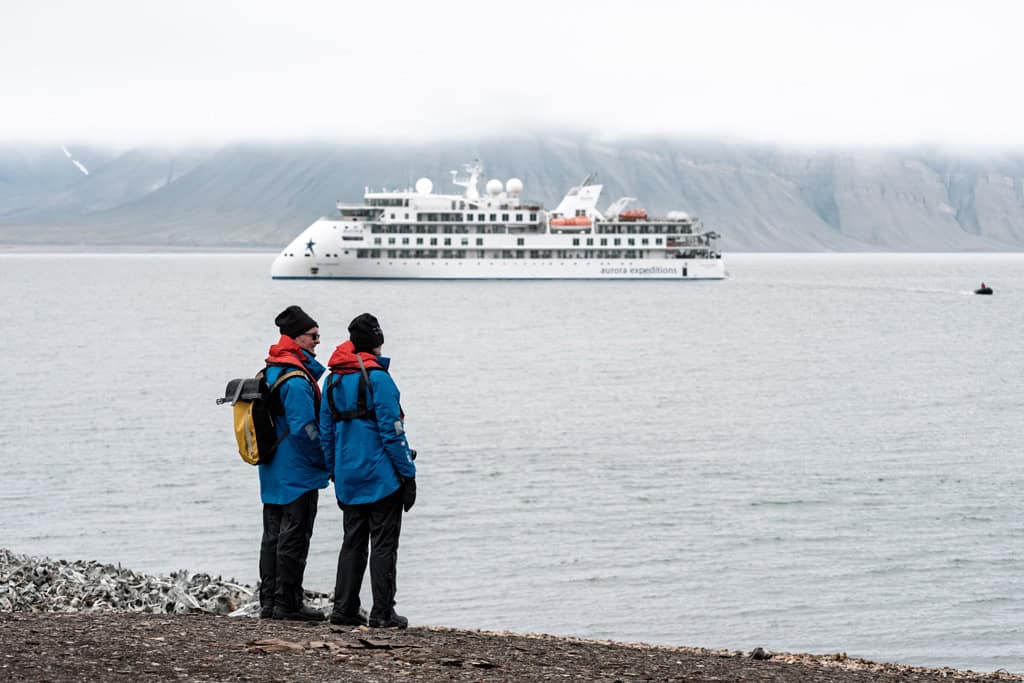
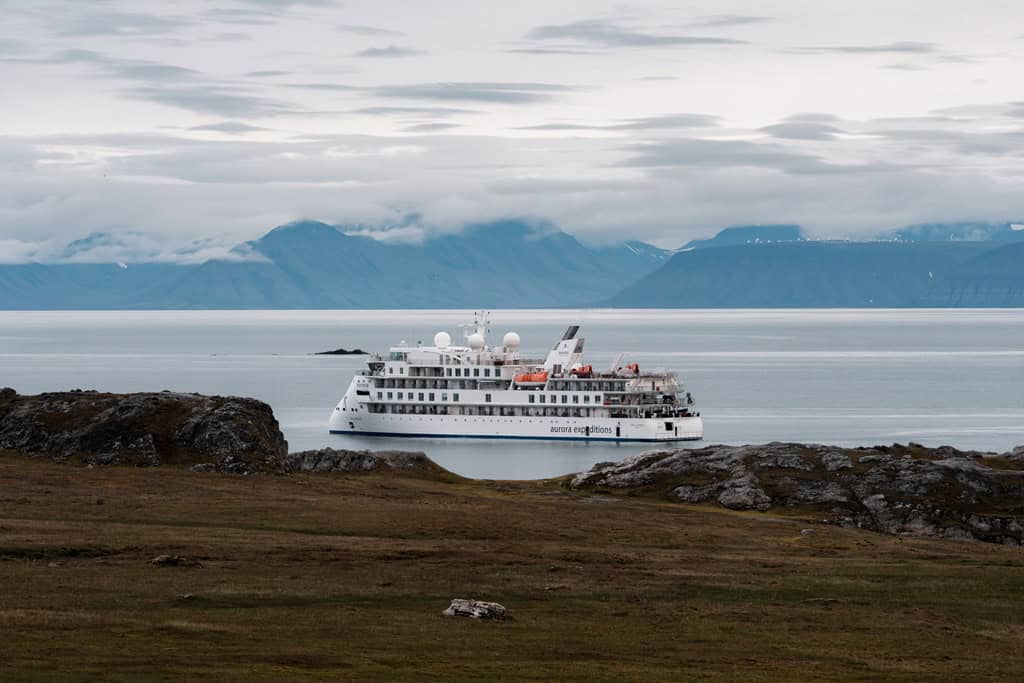
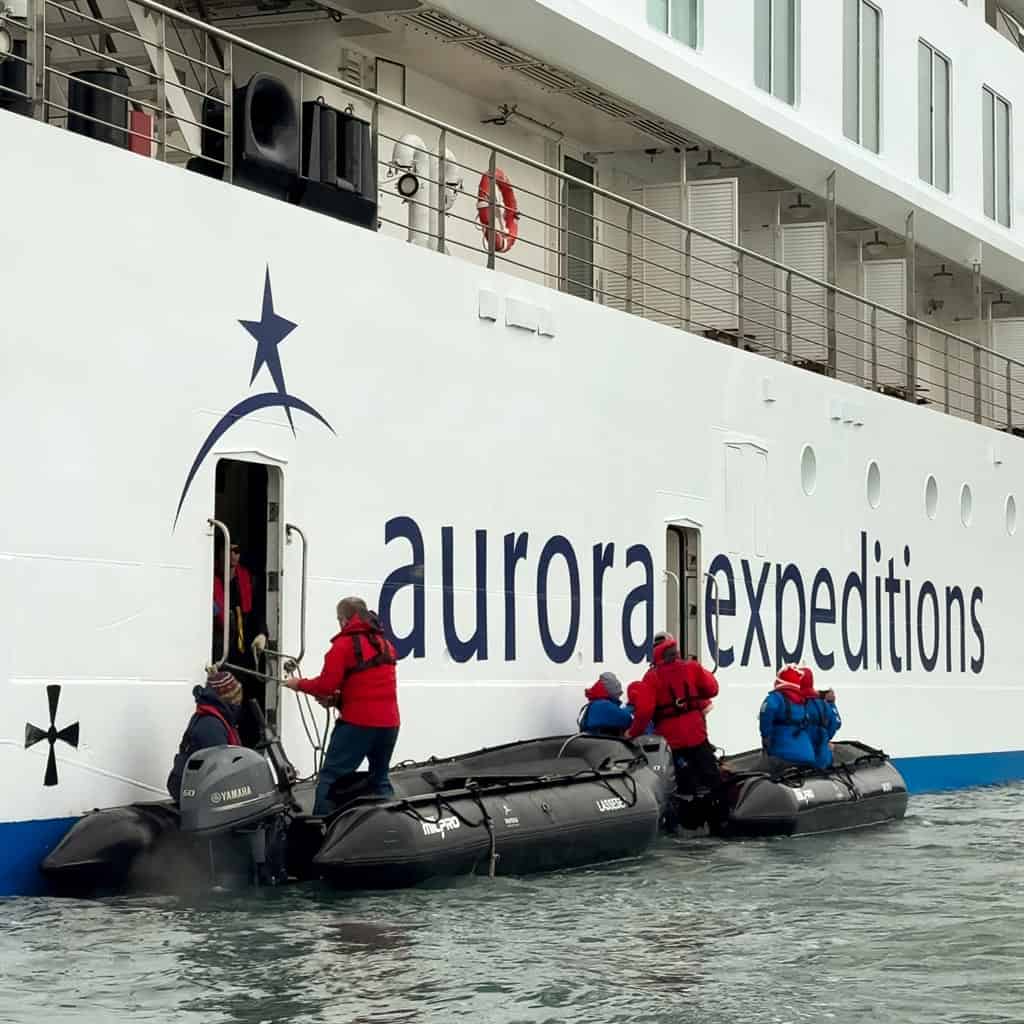
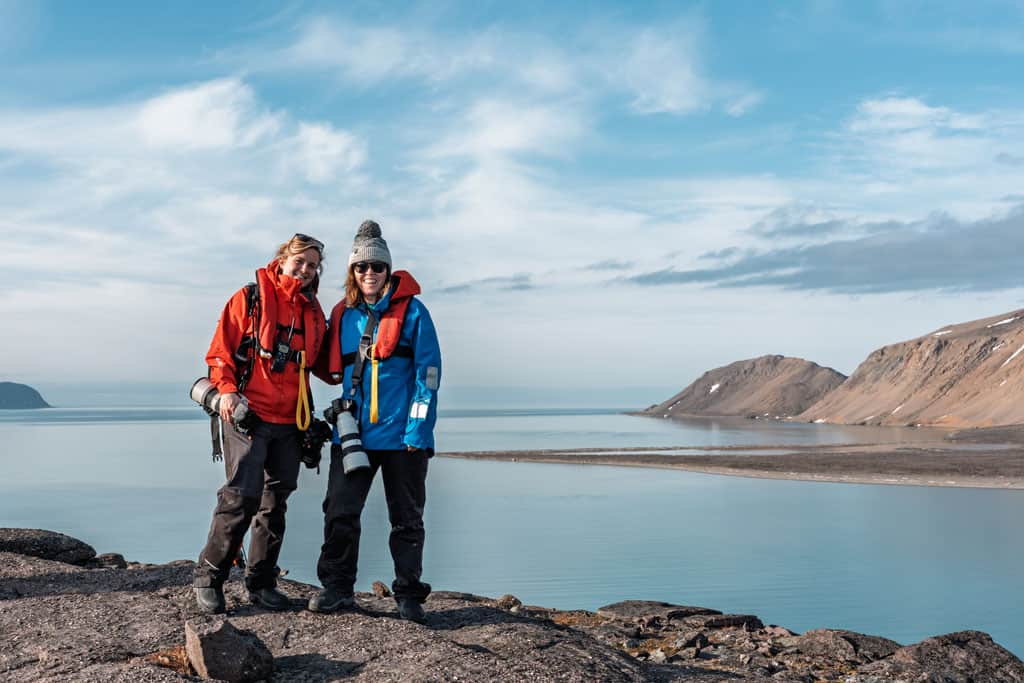
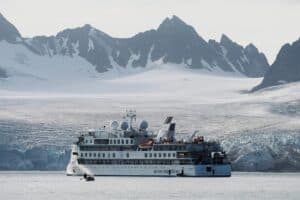
Arriving at the pier there was a buzz of energy. Expedition jackets, tripods, backpacks, and wide-eyed excitement all mingled together as we caught our first glimpse of the Greg Mortimer – the sleek expedition ship that would carry us deep into the Arctic Ocean.
The crew met us at the gangway with warm smiles, inside the hotel staff welcomed the expeditioners with trays of canapés and genuine enthusiasm.
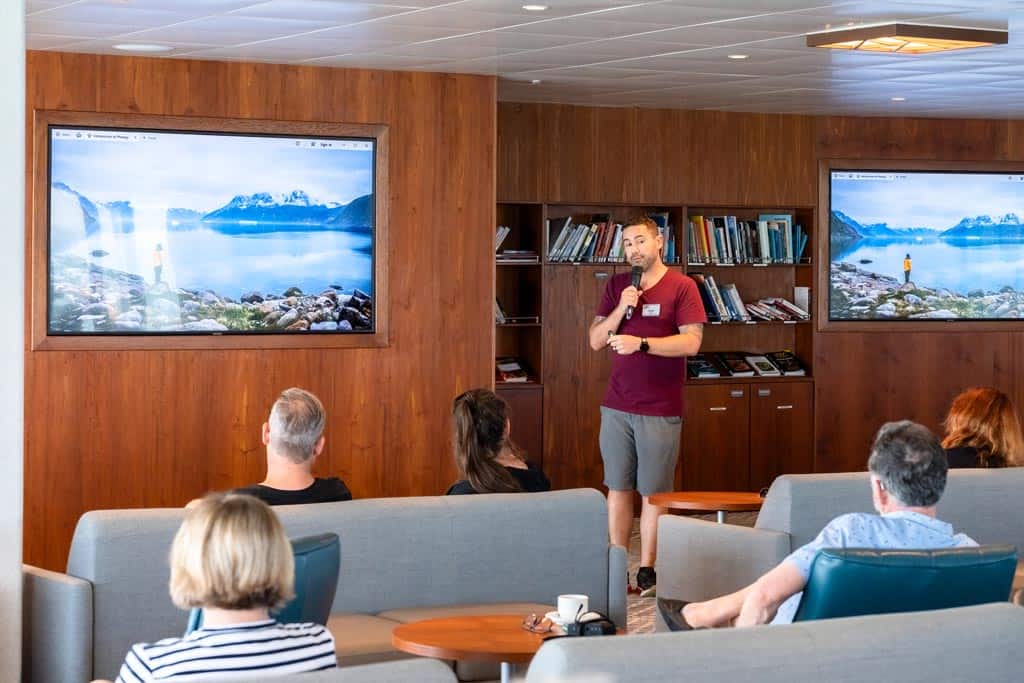
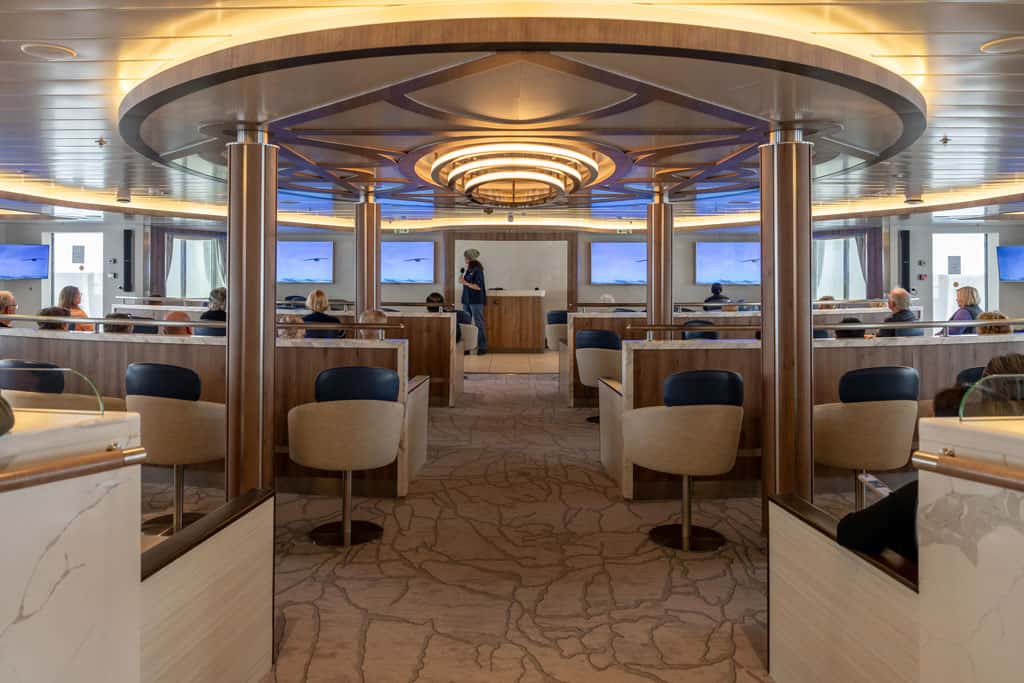
The first hours onboard slipped by in a blur. Bags were dropped into cabins, cameras laid out for the days ahead, and before long we were sitting in the lecture theatre for introductions.
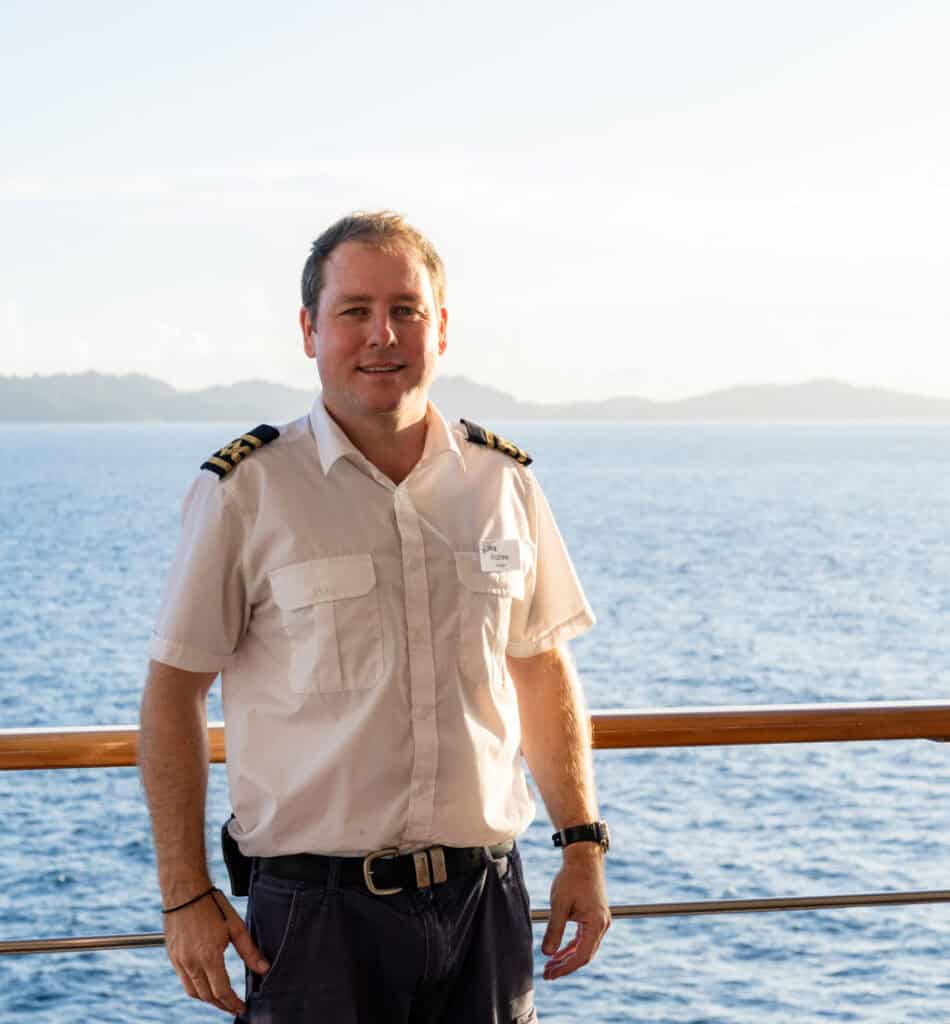
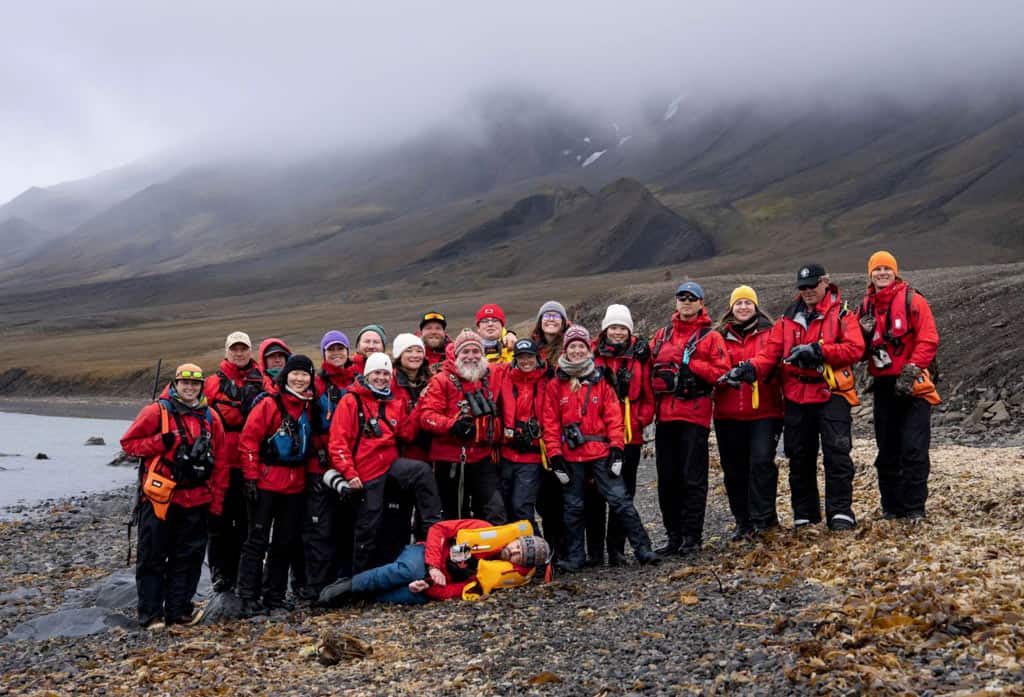
Expedition Leader Isabelle set the tone with calm confidence, introducing her team of guides, historians, scientists, and Zodiac drivers.
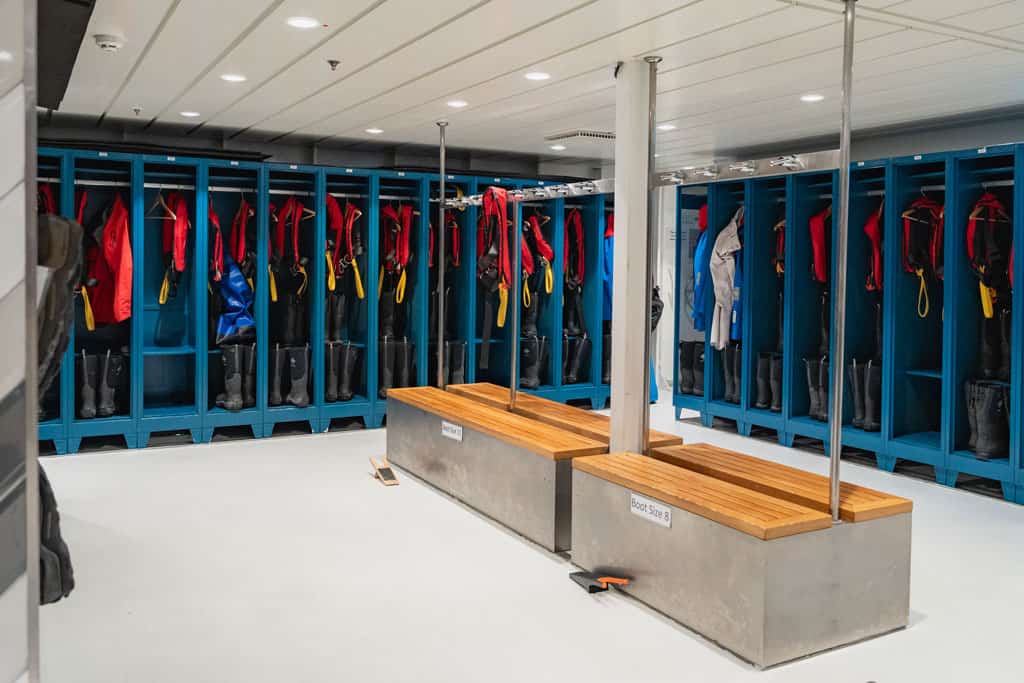
Safety briefings followed, along with fittings for jackets, muck boots, and kayak equipment for those that had signed up.
It was part orientation, part initiation – the moment where the trip stopped being abstract and suddenly became very real.
That evening, as the Greg Mortimer eased away from the dock, Longyearbyen’s colourful houses grew smaller against the mountains until they vanished completely.
Phones were tucked away, chatter quietened, and a hush fell across the decks. The Arctic stretched out ahead – endless, icy, and wild.
Civilisation was behind us now, and in its place was something infinitely more exciting: the unknown.
READ MORE: Find out the whether the north or south is for you with our Antarctica vs the Arctic guide.
Day 2 – Ice and Science at Ny-Ålesund
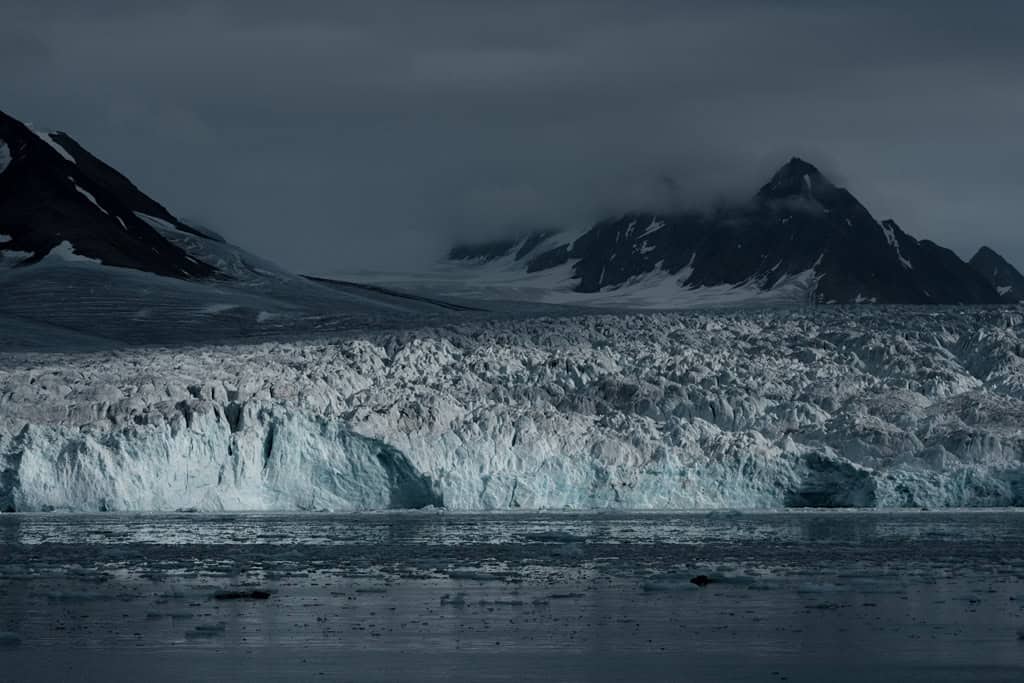
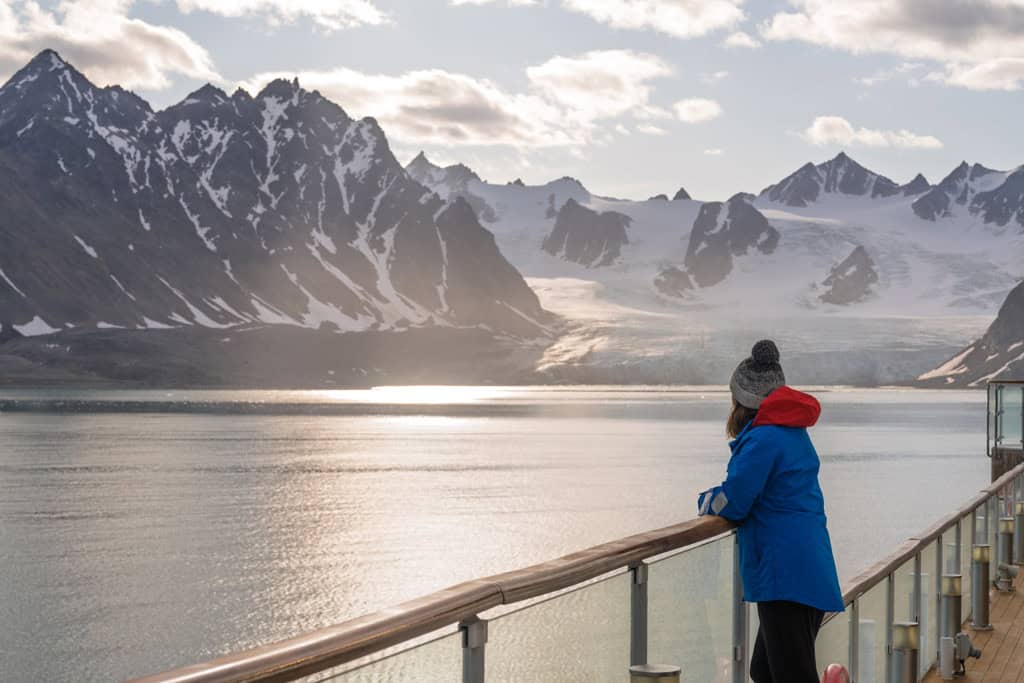
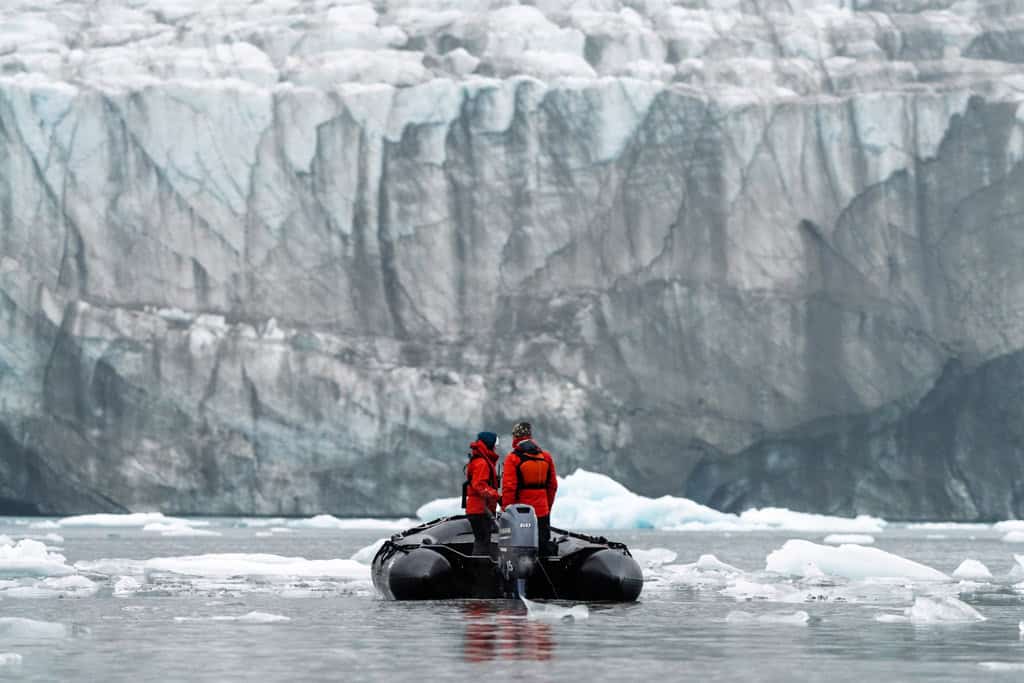
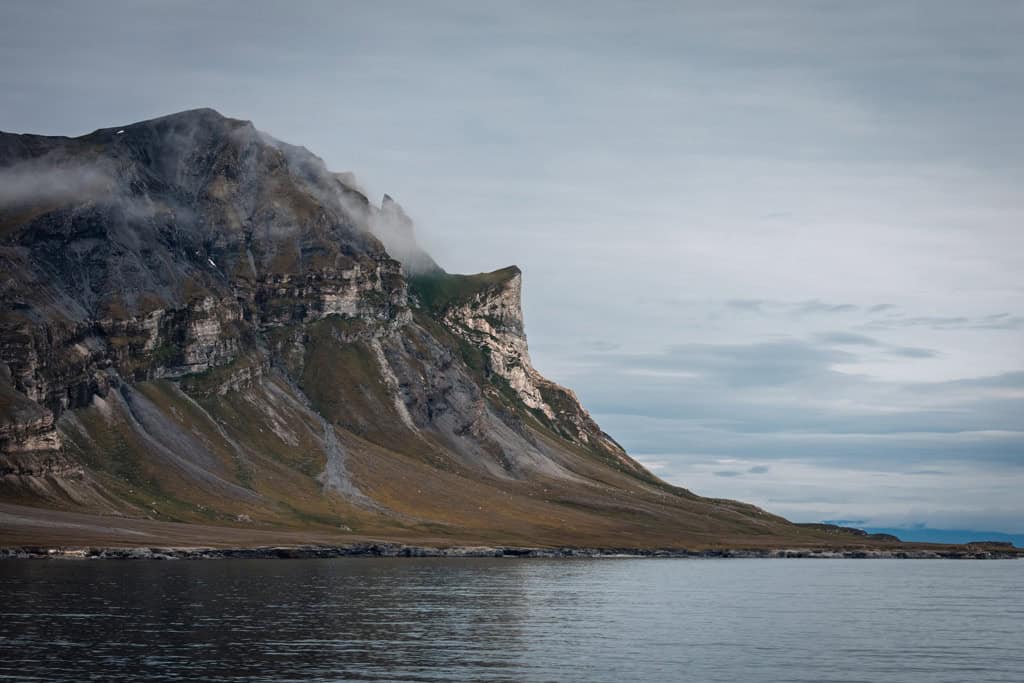
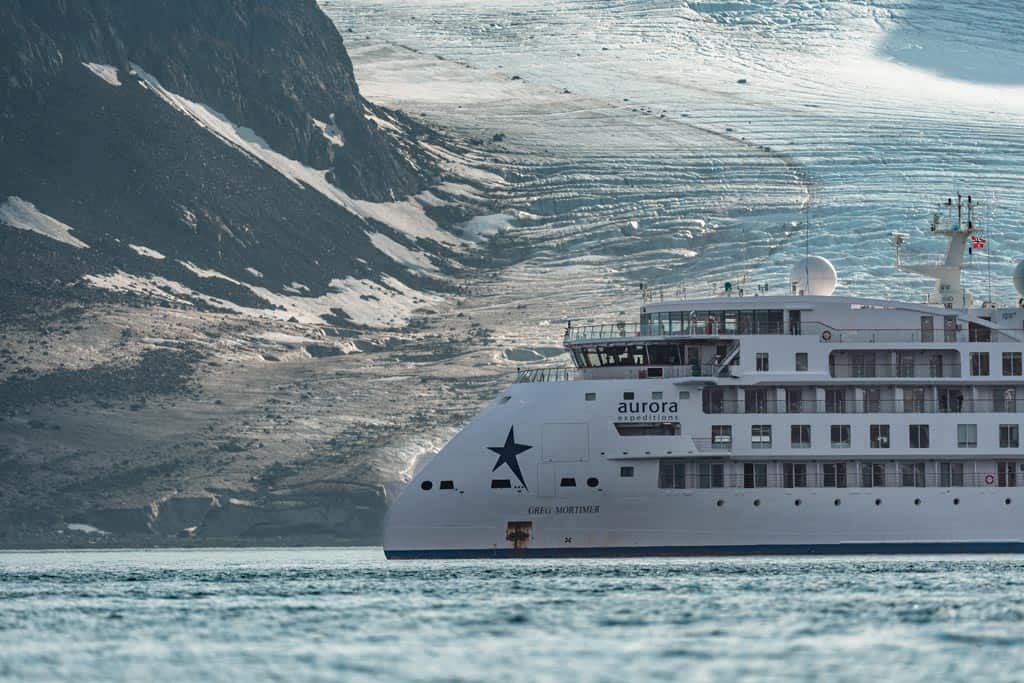
The first full day of our Arctic voyage began with breakfast served against a staggering backdrop – the Lilliehöökbreen Glacier.
Stretching across Krossfjord in a wall of jagged blue, it was our first real taste of the landscapes that define Svalbard.
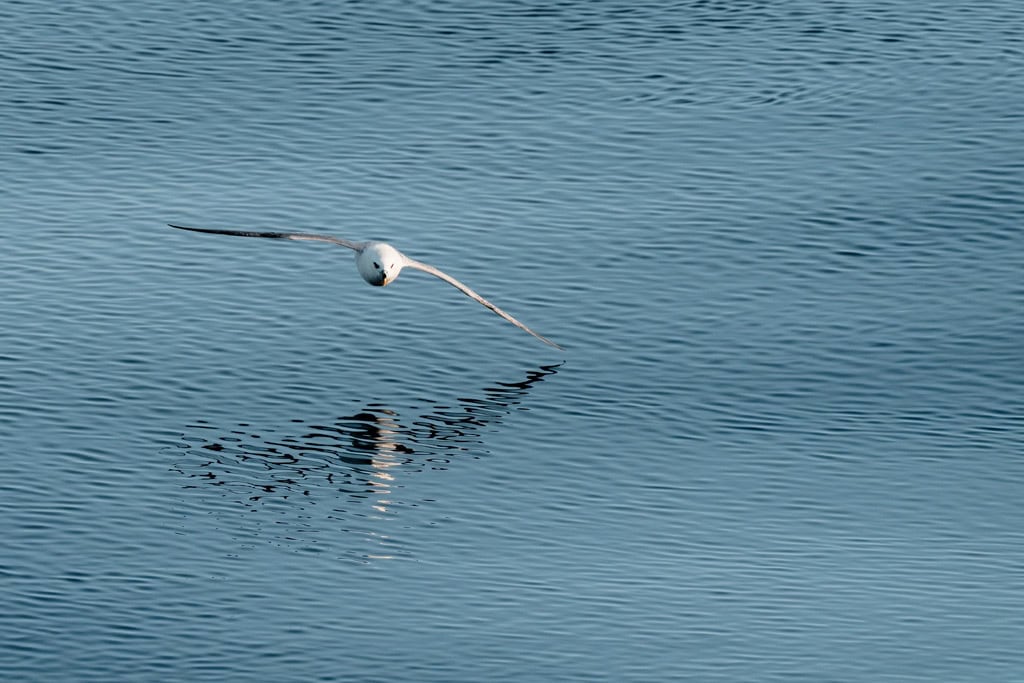
The Greg Mortimer glided slowly past, icebergs drifting silently in the fjord while fulmars skimmed the water’s surface.
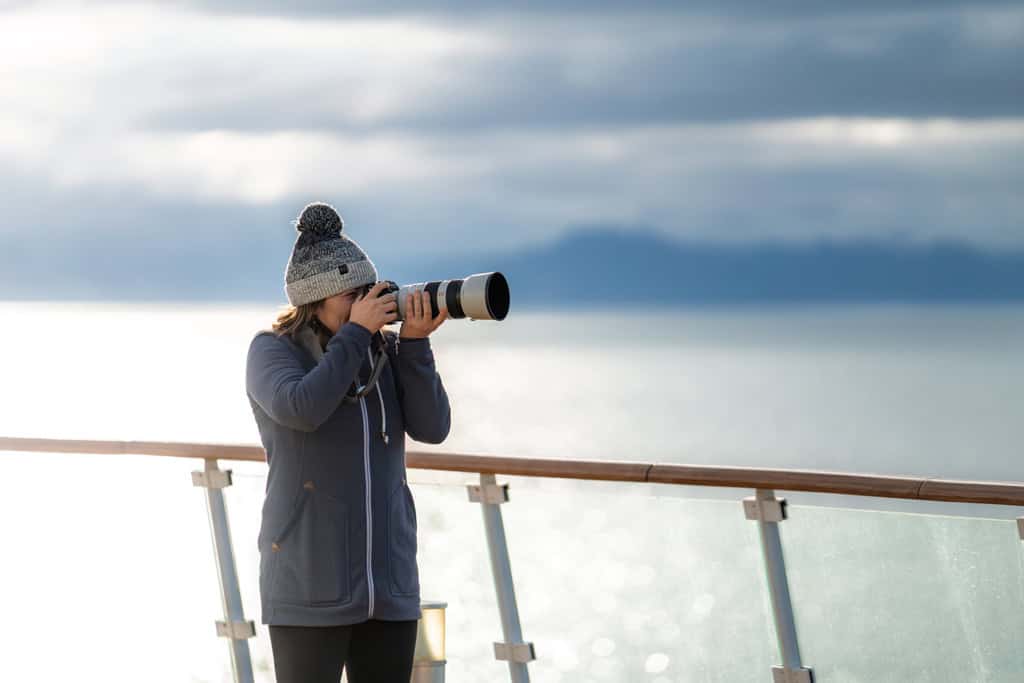
Cameras clicked over coffee cups, and the ship’s railings filled with expeditioners wide-eyed at the scale of it all.

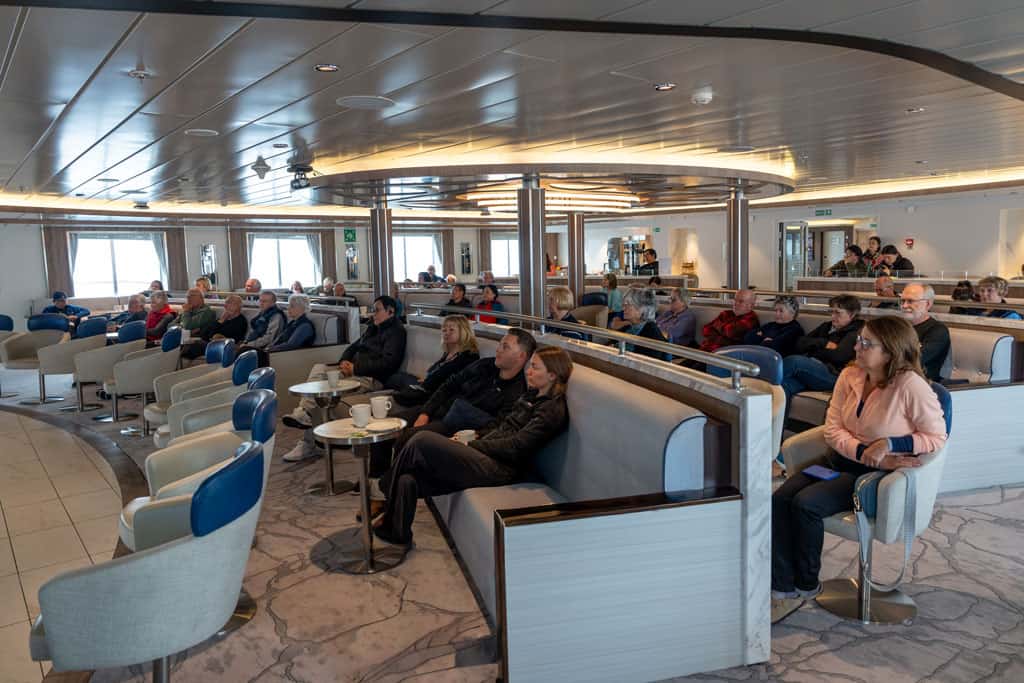
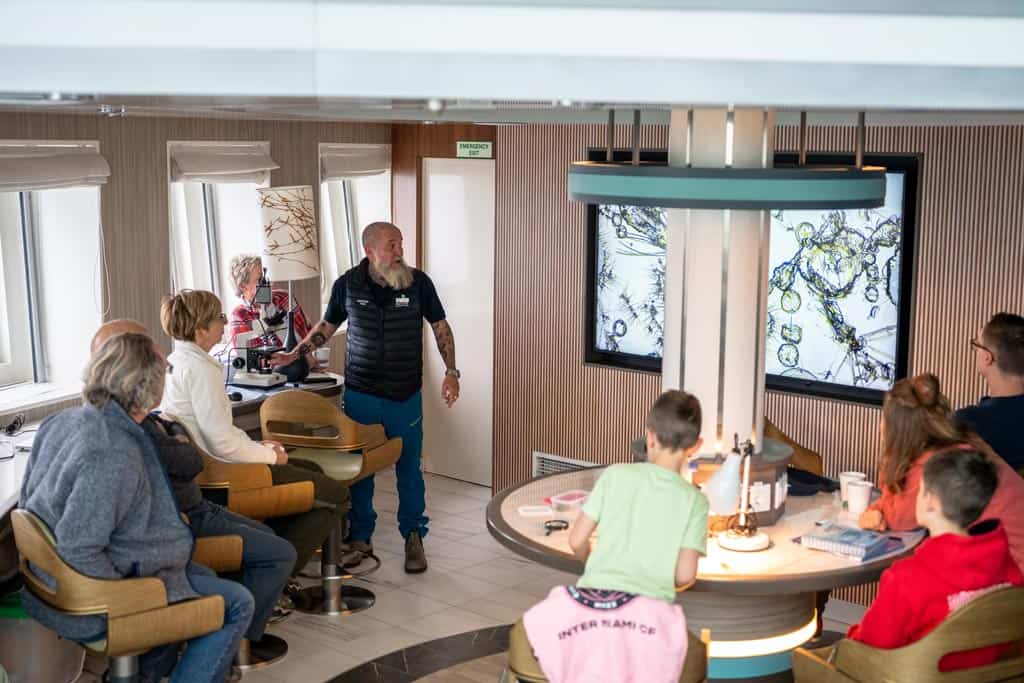
But before anyone could set foot ashore, there was work to do. In the lecture theatre the Expedition Team ran us through the realities of travel in the high Arctic: how to behave in polar bear territory, the ins and outs of Zodiac operations, and the importance of biosecurity.
Every backpack was scrubbed, boots vacuumed, and Velcro checked for seeds – a small but vital ritual to keep Svalbard’s fragile ecosystem intact.
By afternoon the wind was up, but the team had something special planned.
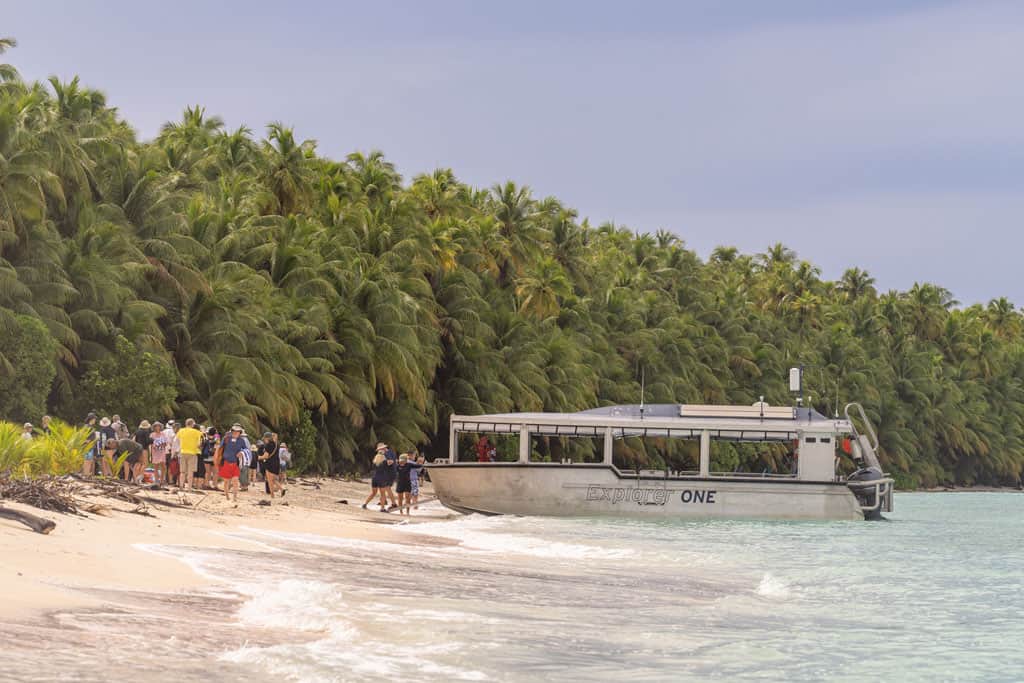
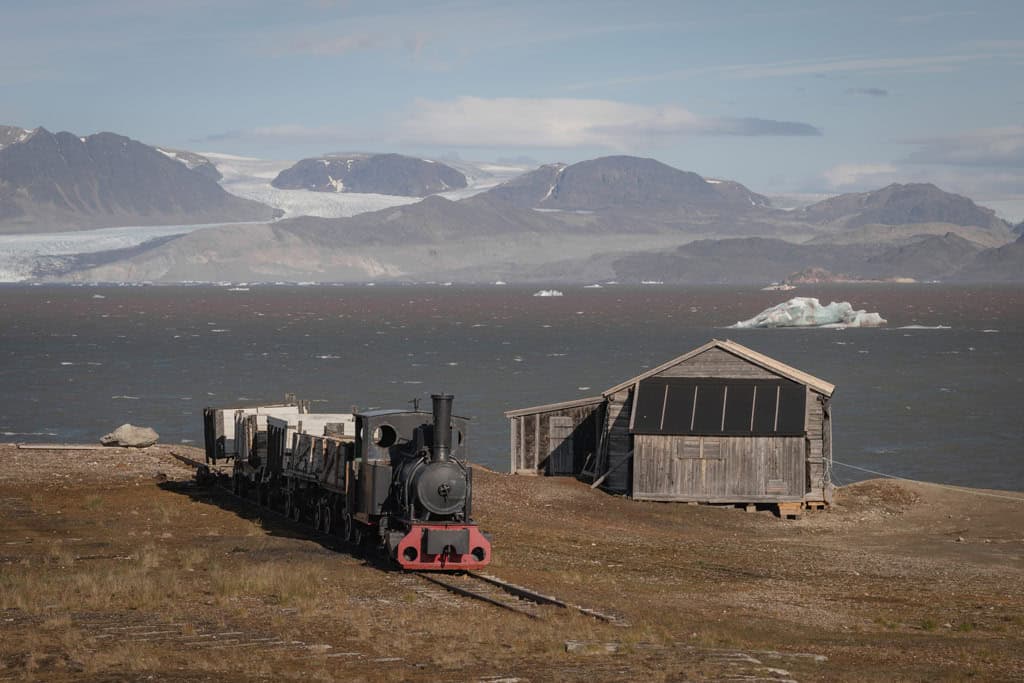
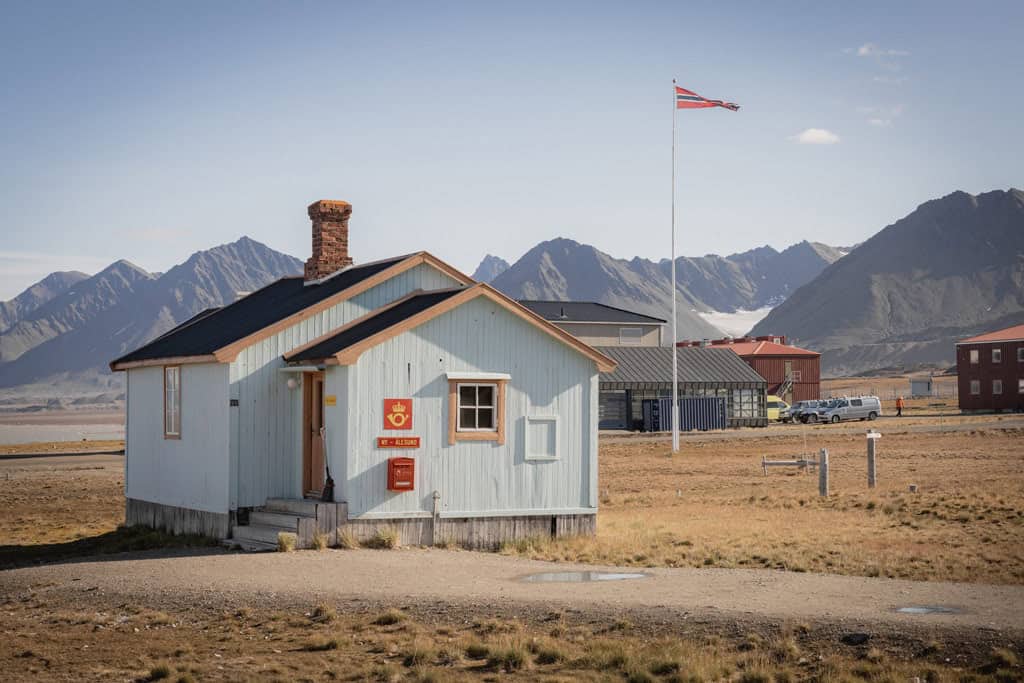
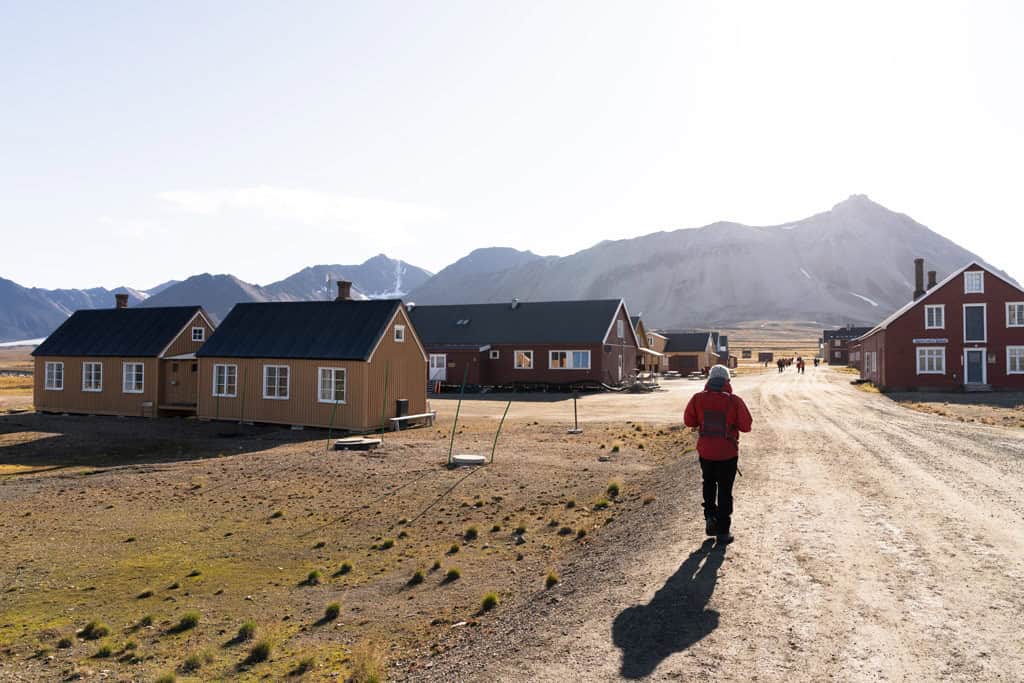
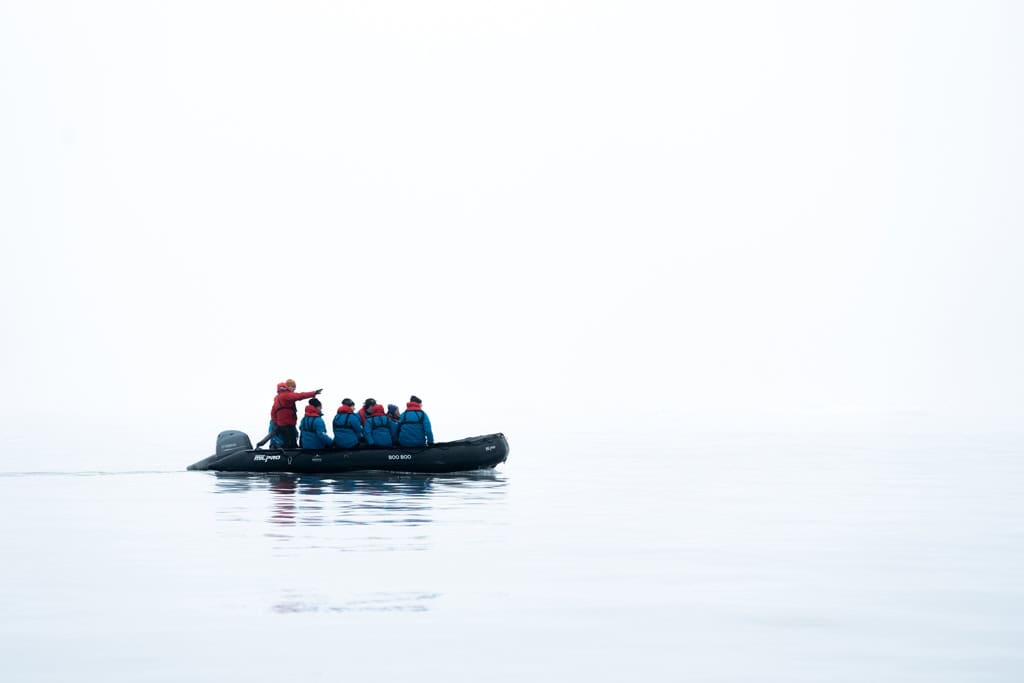
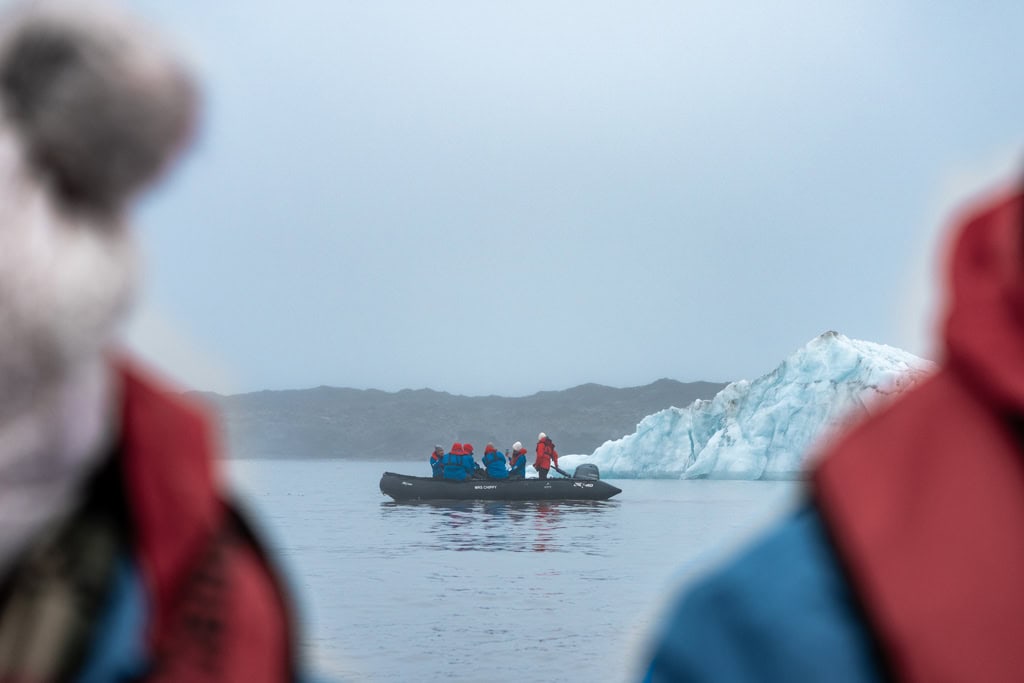
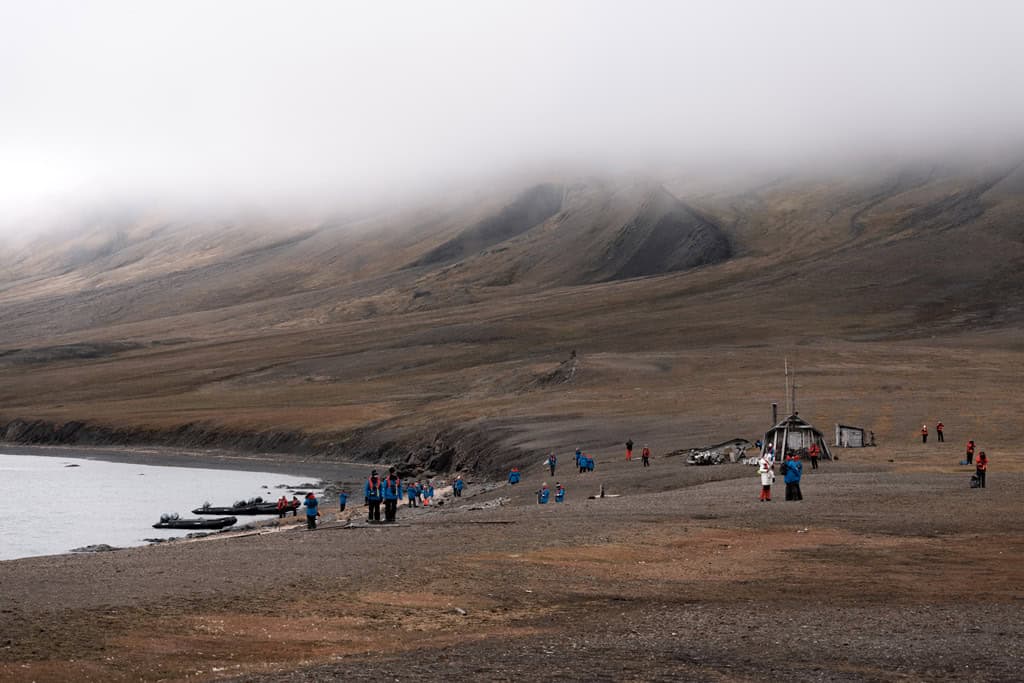
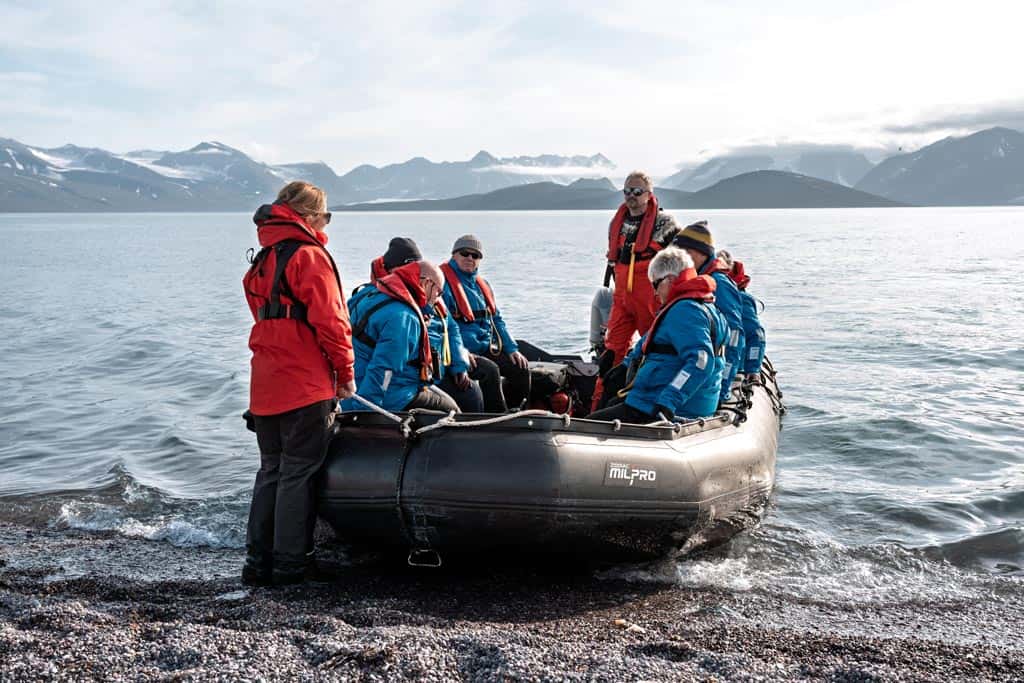
Zodiacs bounced through choppy water into Kongsfjord, landing us at Ny-Ålesund, one of the northernmost communities in the world.
Once a mining settlement, today it’s a hub for international Arctic research. Walking between brightly painted buildings, we learned about the polar expeditions that set off from here – dreams of reaching the North Pole etched into the town’s legacy.
After a guided wander we had time to explore on our own. Some browsed the small museum and shop, while others sent postcards stamped with the magic of the high Arctic.
That evening we gathered back onboard for the Captain’s Welcome Cocktail, glasses raised in celebration.
The ship hummed with stories of glaciers and research towns, and as we toasted to the days ahead, it felt like the expedition had truly begun.
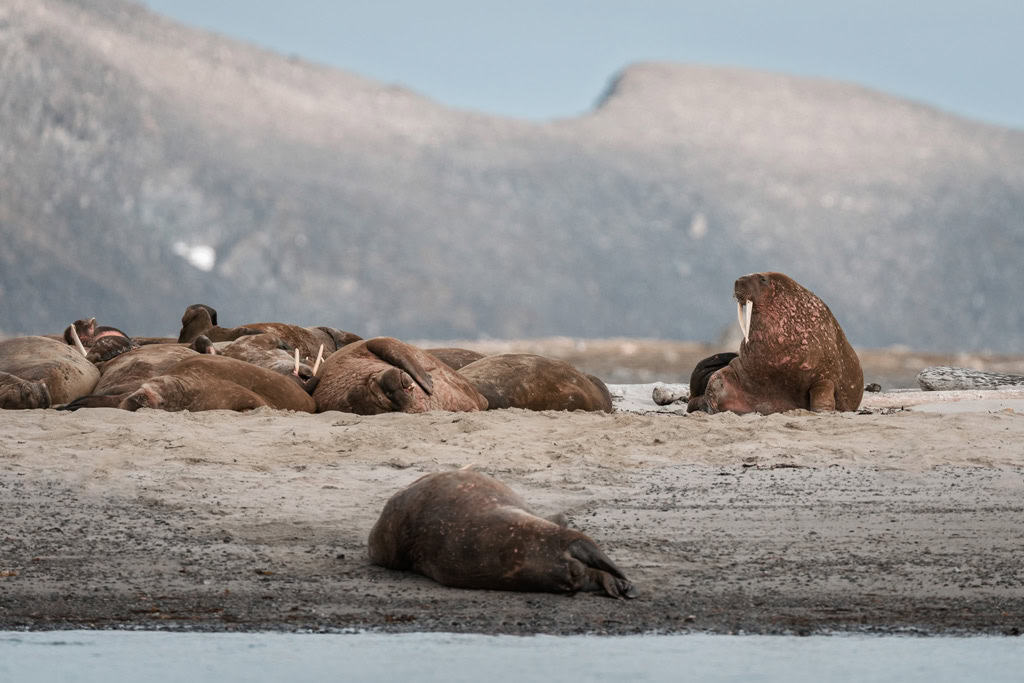
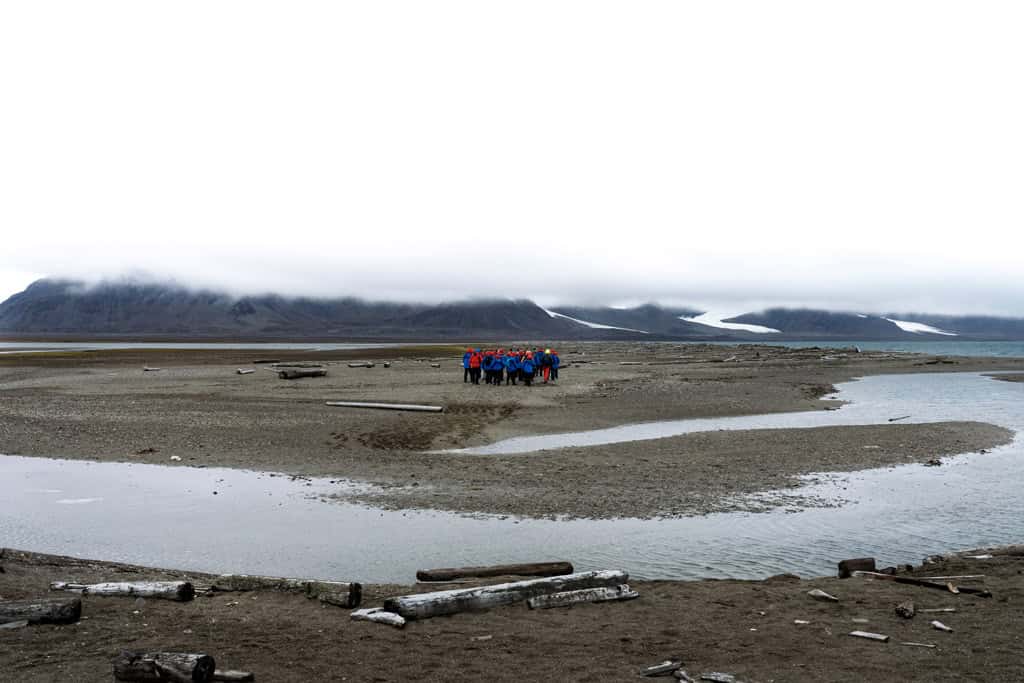
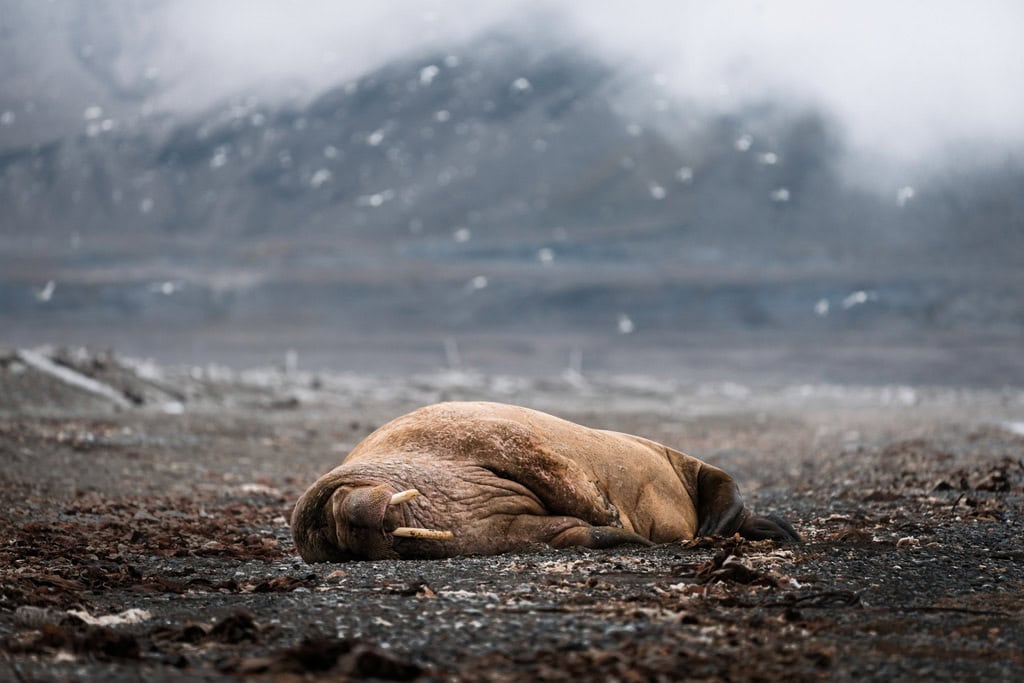
Day 3 – Walrus, Whalers, and Foxes in Raudfjord
By the third morning at sea the Arctic had revealed its rhythm: a quiet breakfast broken by the hum of Zodiacs dropping into the water, cameras slung over shoulders, and the sense that anything could happen once we left the ship.
Our destination was Smeerenburg, once the busiest whaling station in the Arctic and now a lonely spit of land at the top of Spitsbergen.
The name itself translates to “Blubber Town,” and it was here in the 17th century that Dutch whalers rendered countless whales into oil.
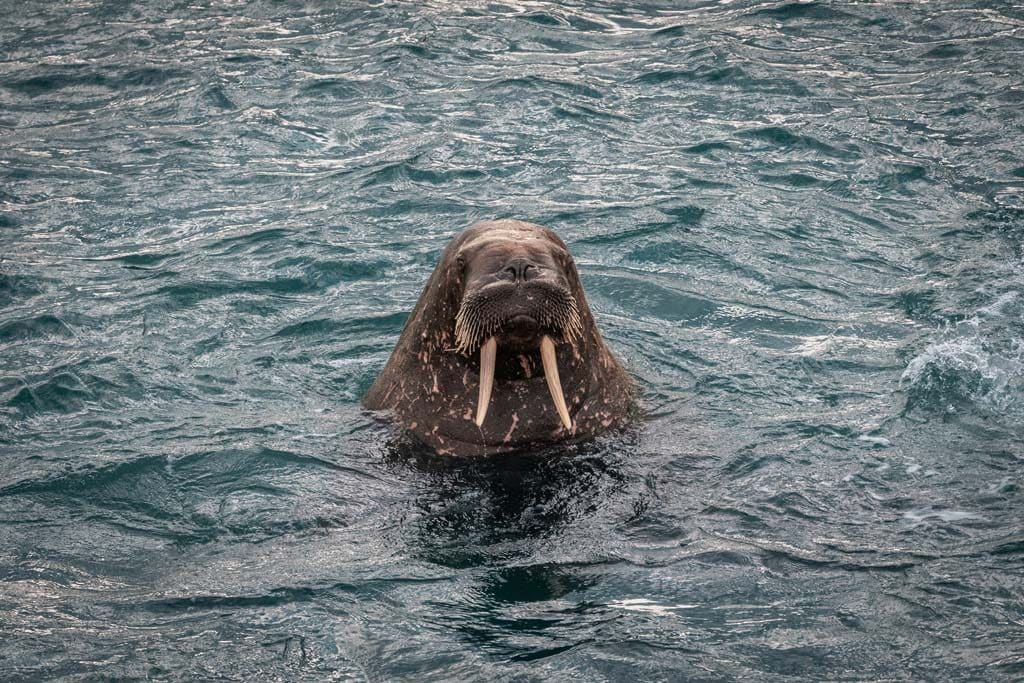
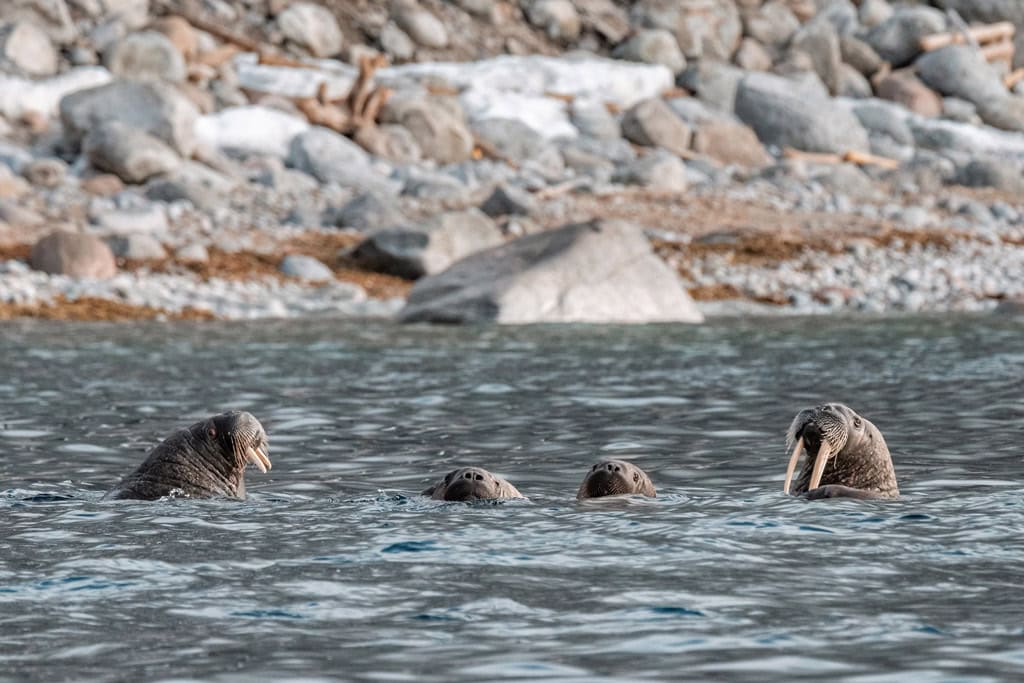
Today the furnaces are long gone, replaced by drifting ice and the heavy forms of walrus sprawled across the beach.
We floated in our Zodiacs just offshore, watching as these enormous pinnipeds rolled over each other, splashed into the shallows, and lifted their tusked heads in lazy acknowledgement of our presence.
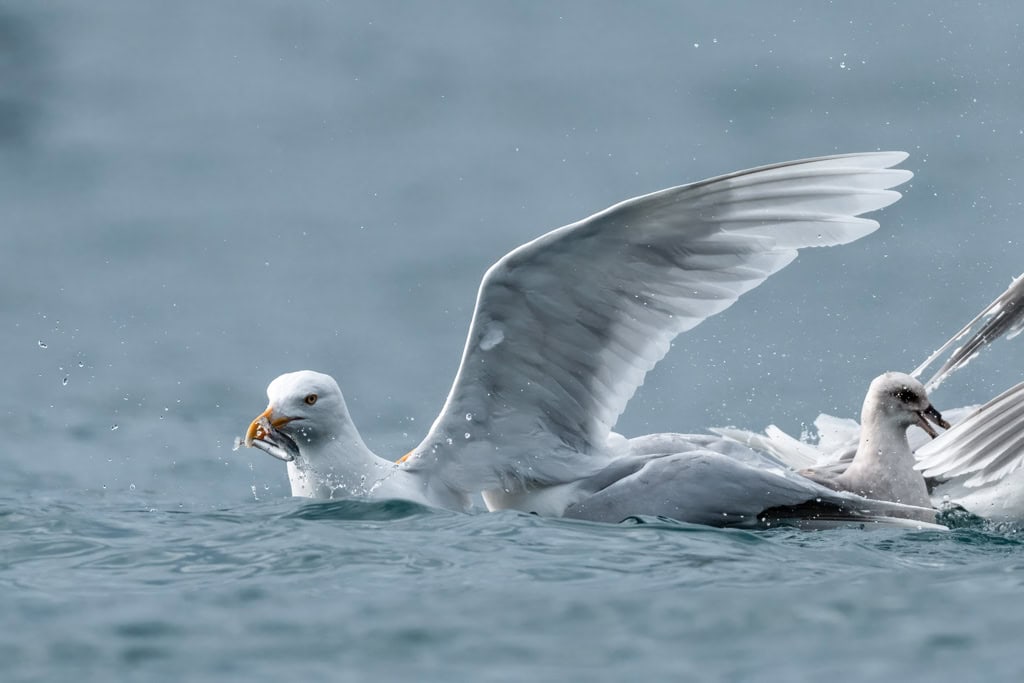
The water was thick with jellyfish and ctenophores, delicate and otherworldly, while Arctic terns and glaucous gulls wheeled overhead.
History may have emptied Smeerenburg of people, but wildlife has reclaimed it in full.

Nearby, at Virgohamna, the ghosts of Arctic exploration lingered.
Here in the early 1900s, adventurers like Salomon August Andrée and Walter Wellman built their bases in a desperate bid to reach the North Pole.
Neither succeeded, and the ruins of their camps remain as weathered reminders of ambition meeting the reality of the Arctic.
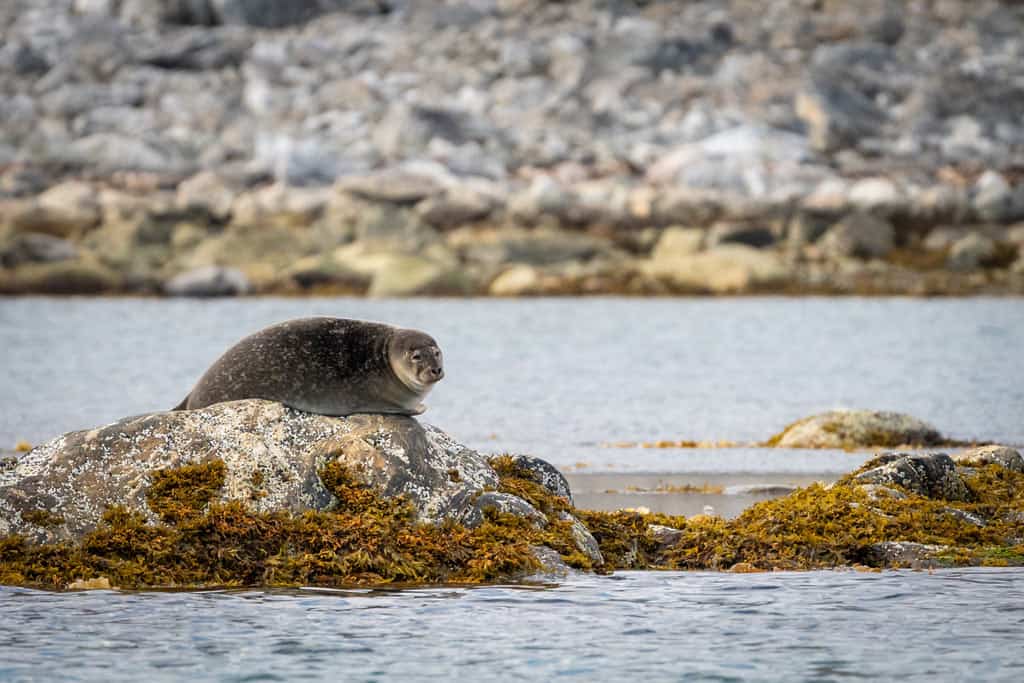
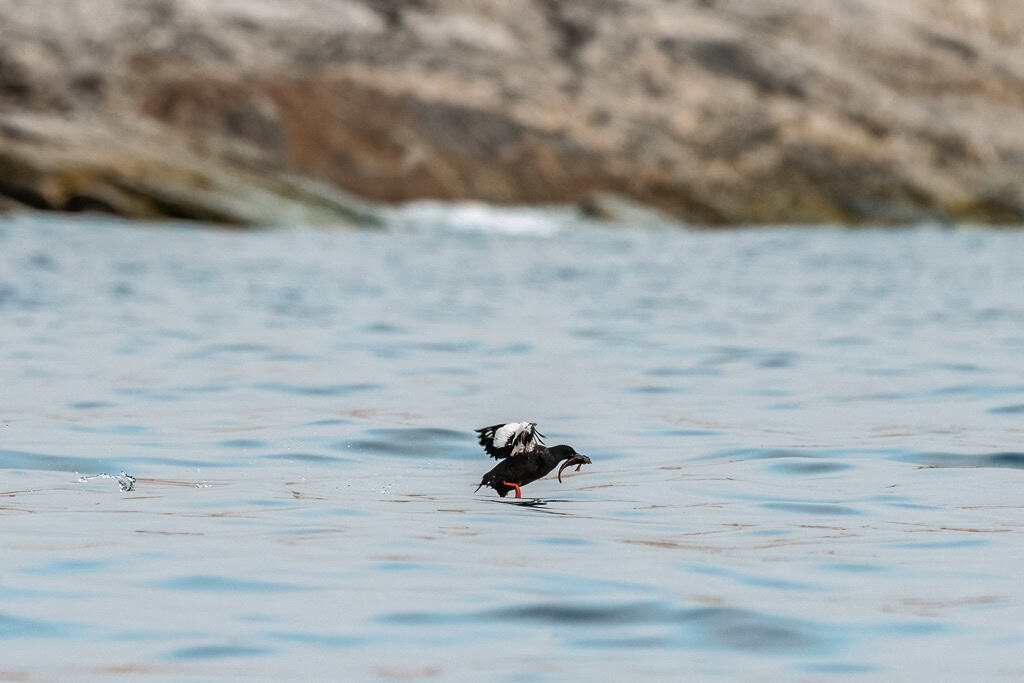
Around the shoreline we spotted harbour seals stretched on rocks, geese picking through the grass, and black guillemots drifting silently on the water.
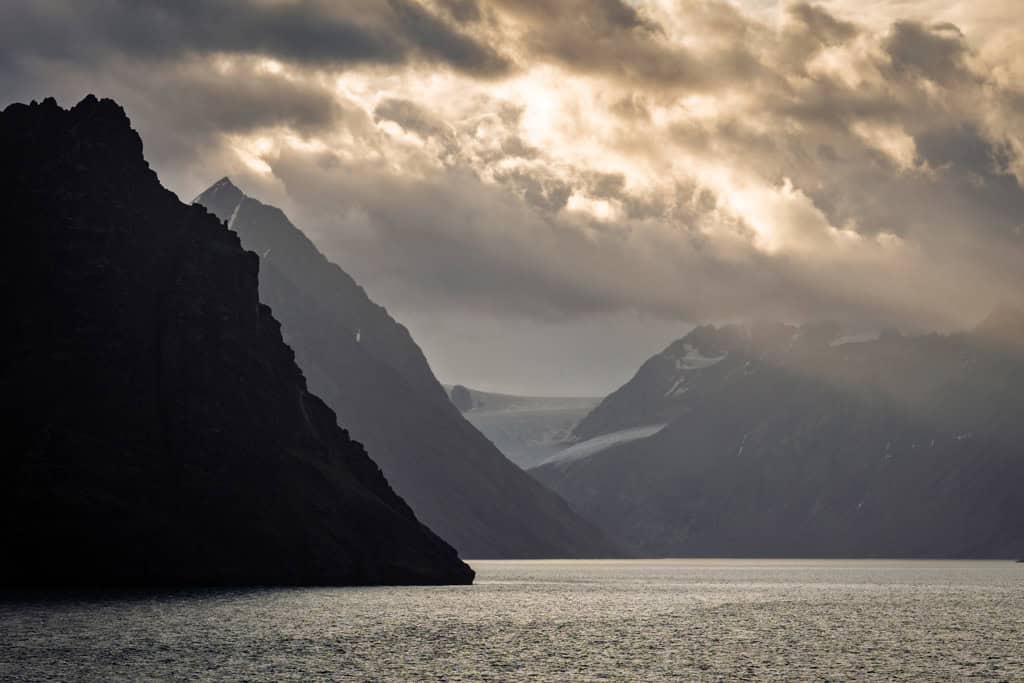
By afternoon the Greg Mortimer nosed into Raudfjord, its peaks reflected on glassy water.
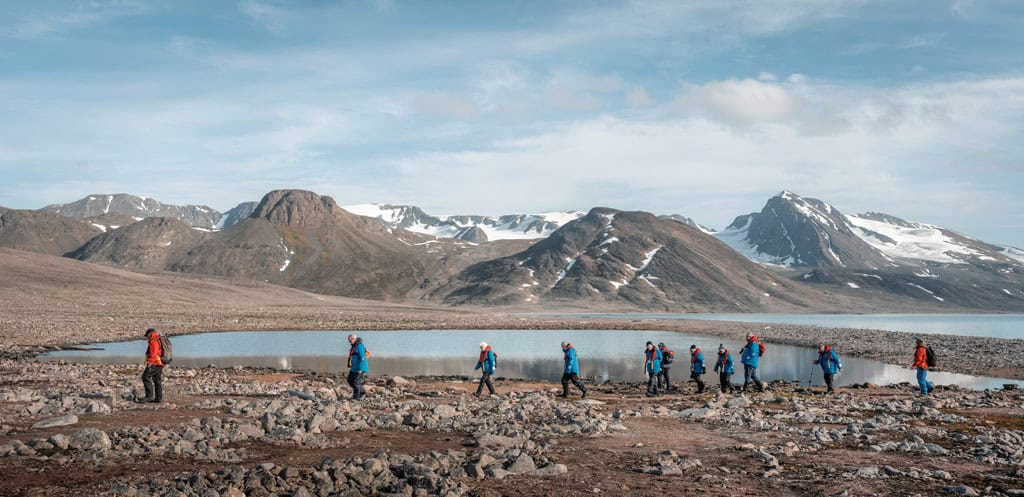
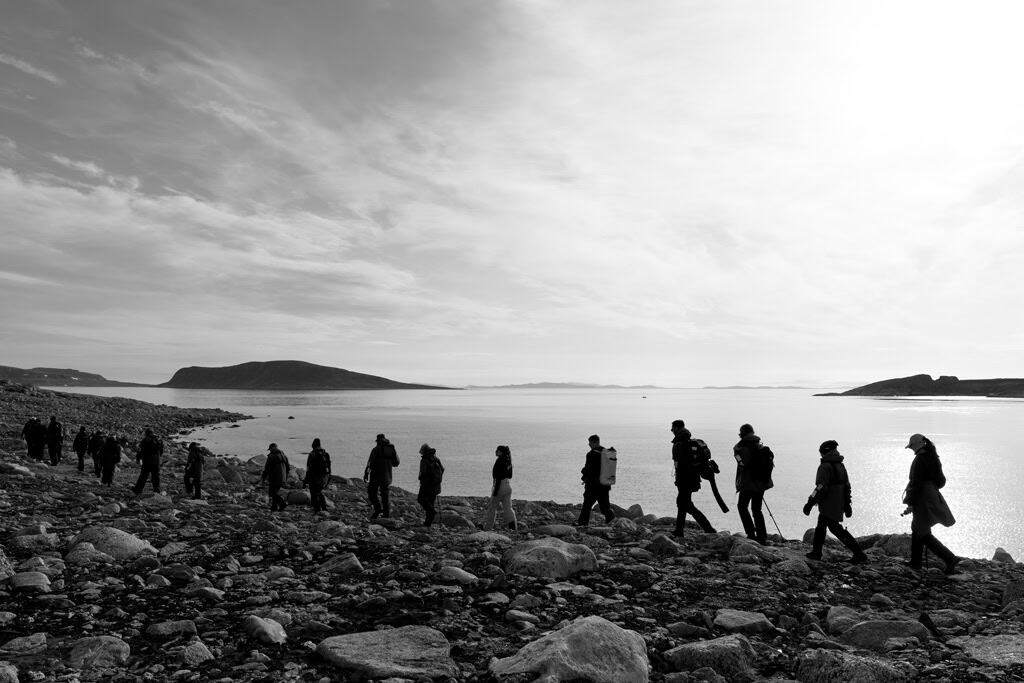
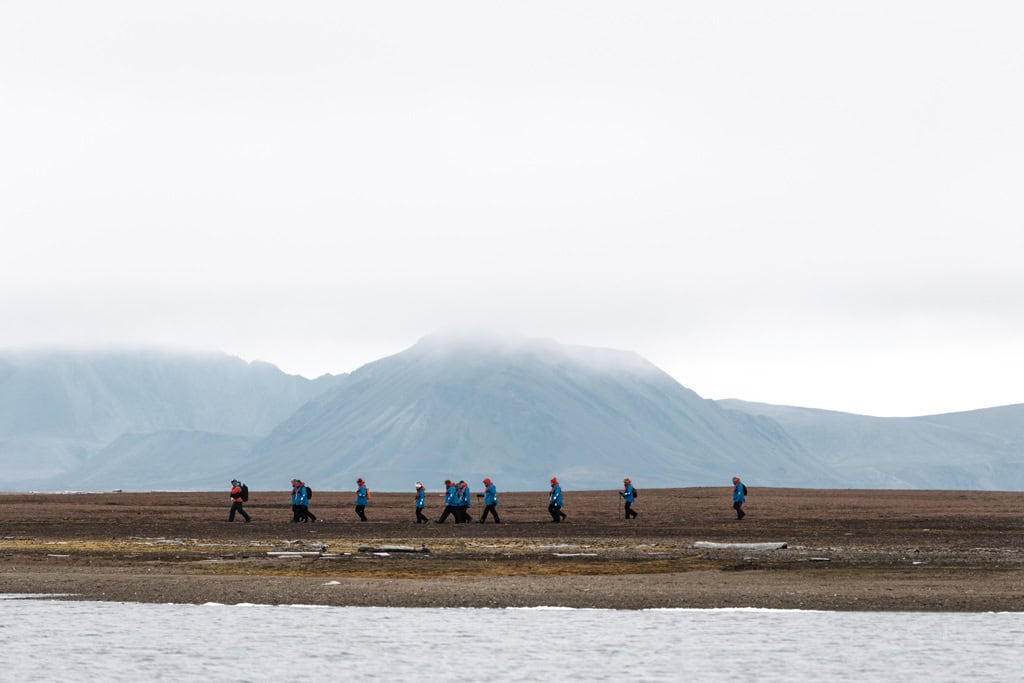
We landed at Alicehamna, splitting into small groups to explore on foot.
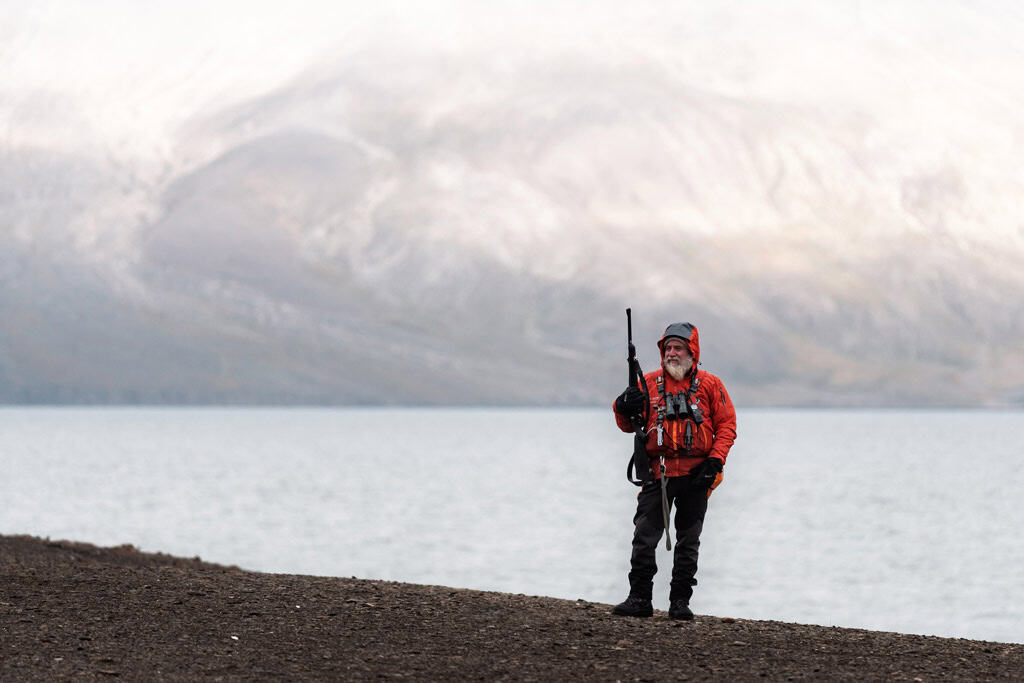
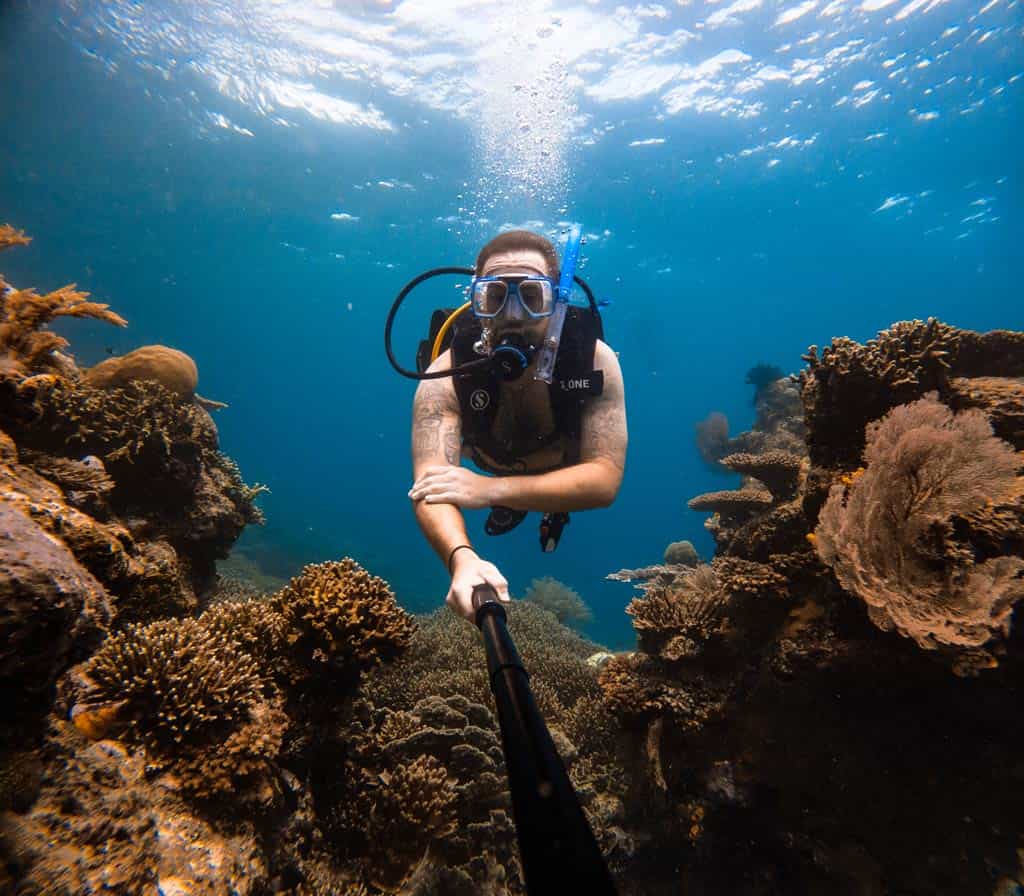
One of the highlights of travelling the Arctic compared to the Antarctic is the ability to really stretch the legs and enjoy long hikes, under the safety of trained polar bear spotters and rifle handlers, of course.
We hiked a few kilometres, stopping along the way to hear the expedition team share details of the flora and fauna that make Alicehamna, and Svalbard, so interesting.
That night, as the ship pointed north toward the ice, conversation over dinner circled back to the day’s sightings.
The Arctic was revealing itself in contrasts: history and survival, silence and abundance, fragility and resilience.
READ MORE: Keen to explore elsewhere in the Arctic? Why not check out a Greenland cruise!

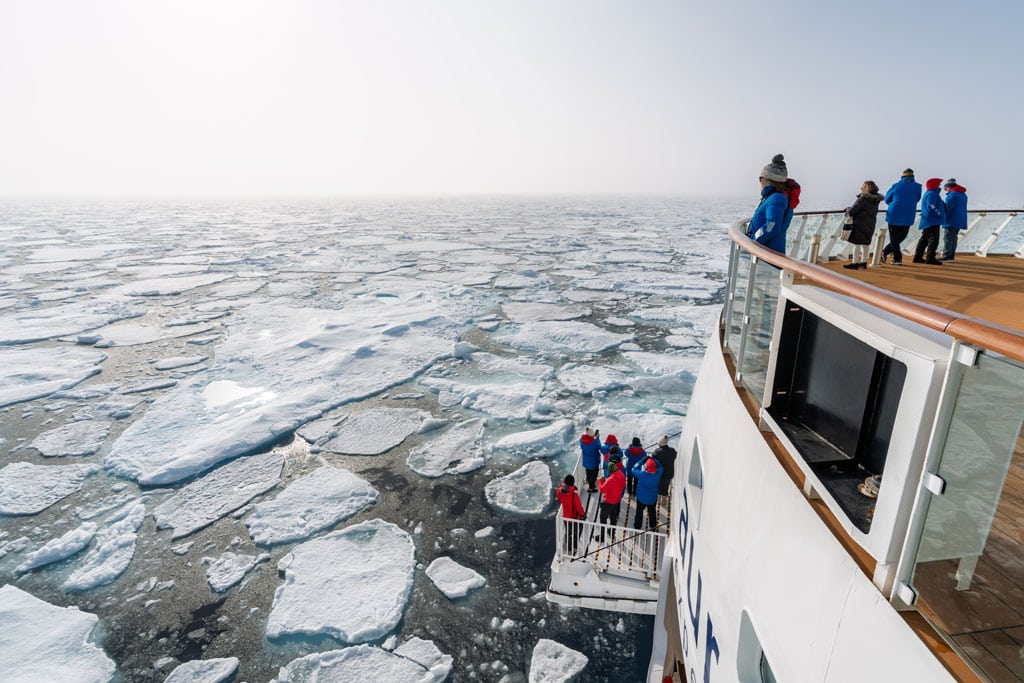
Day 4 – Into the Sea Ice: First Glimpse of the King
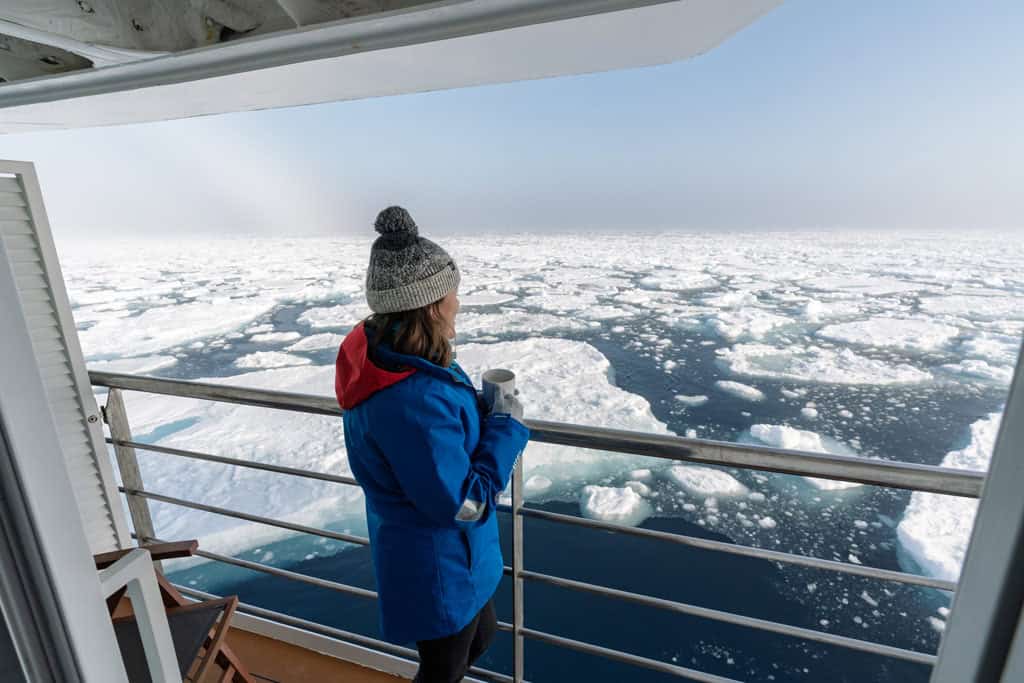
The coastline of Spitsbergen slipped away overnight, and by morning the world outside had transformed.
The Greg Mortimer moved slowly through bands of drifting fog, the sea flat and glassy, the air sharp enough to sting our cheeks.
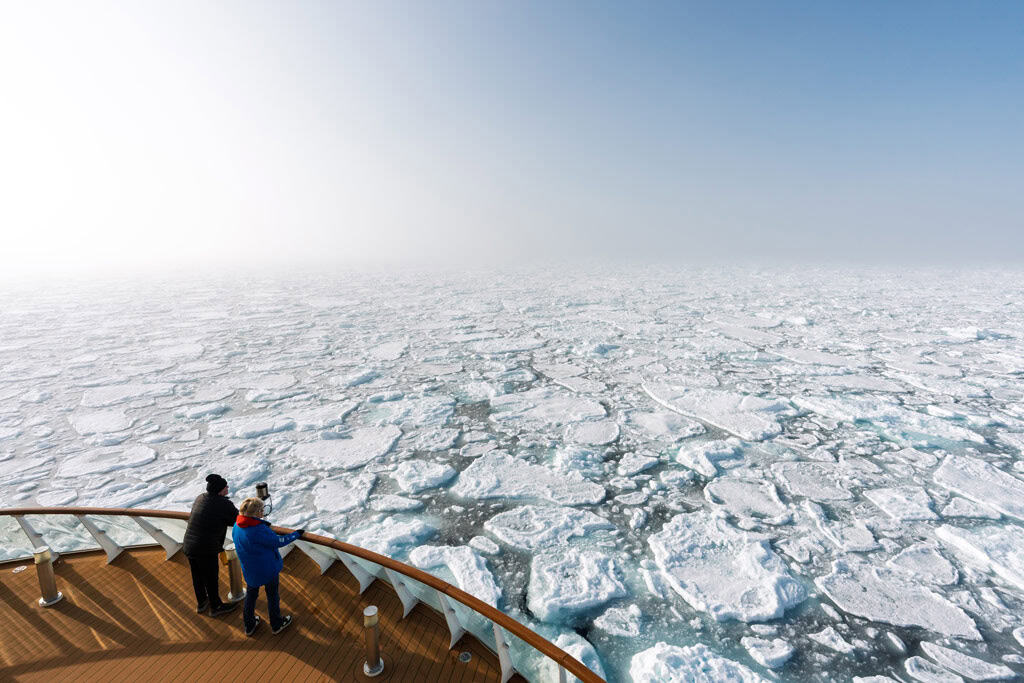
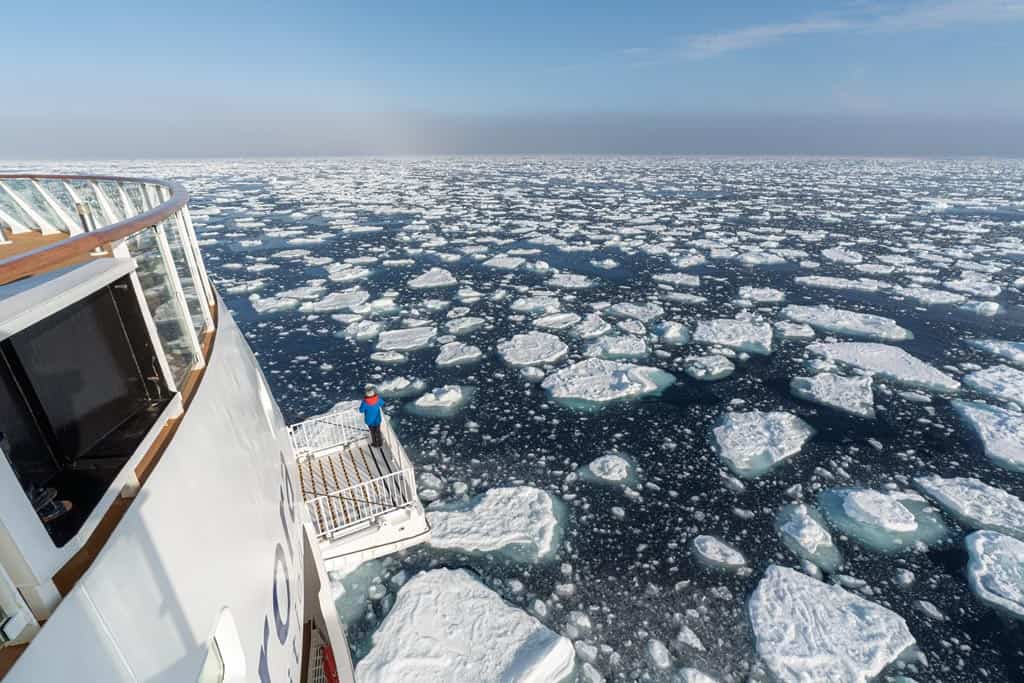
The ship’s coordinates ticked steadily north — 80°, then 81° — each degree a milestone that carried us further from land and deeper into the Arctic.
Outside the oily slick of the ocean started to become peppered with pack ice, remnants of the long Arctic winter that was now retreating back towards the North Pole.
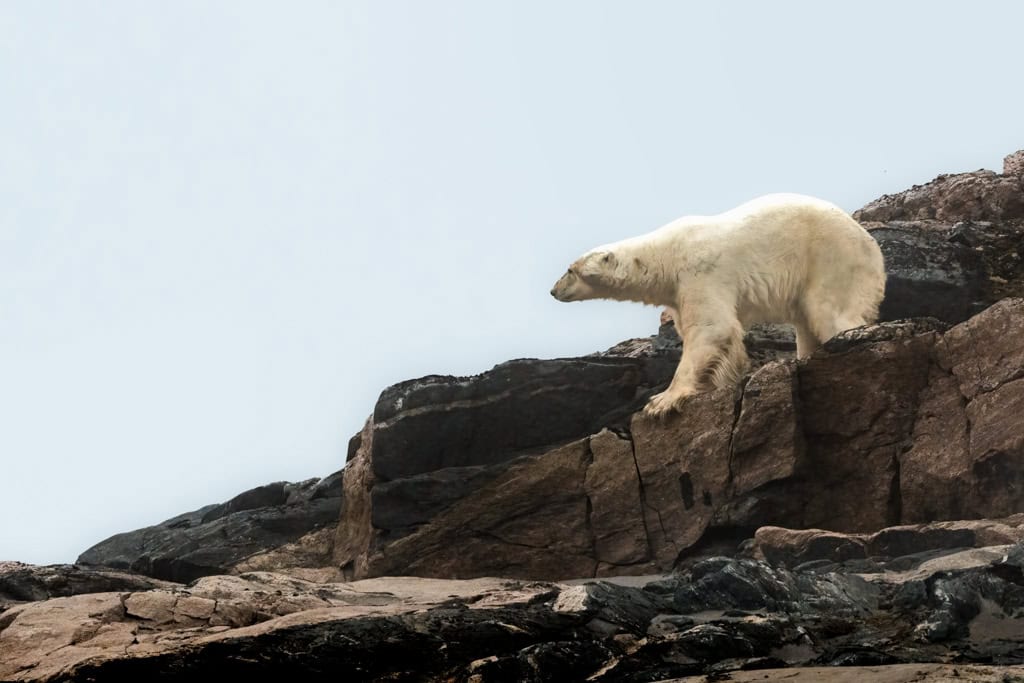
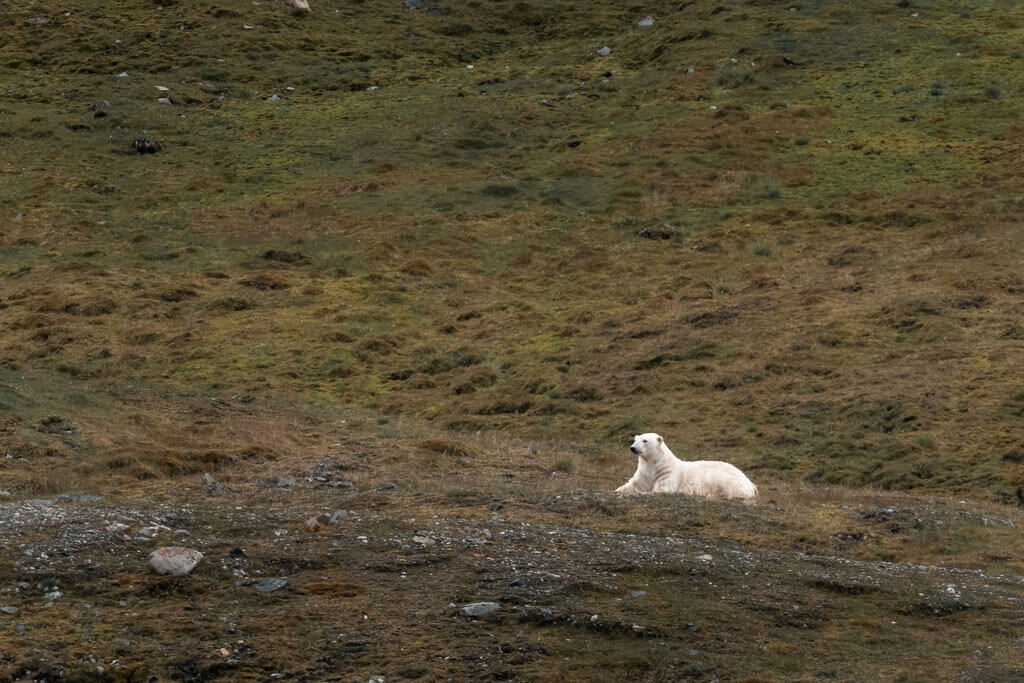
The silence was broken by a shout that rippled through the corridors: “Bear!”
Within moments, the decks were crowded. Cameras and binoculars appeared in every hand, lenses aimed at a single patch of ice where a polar bear wandered around on a floe.
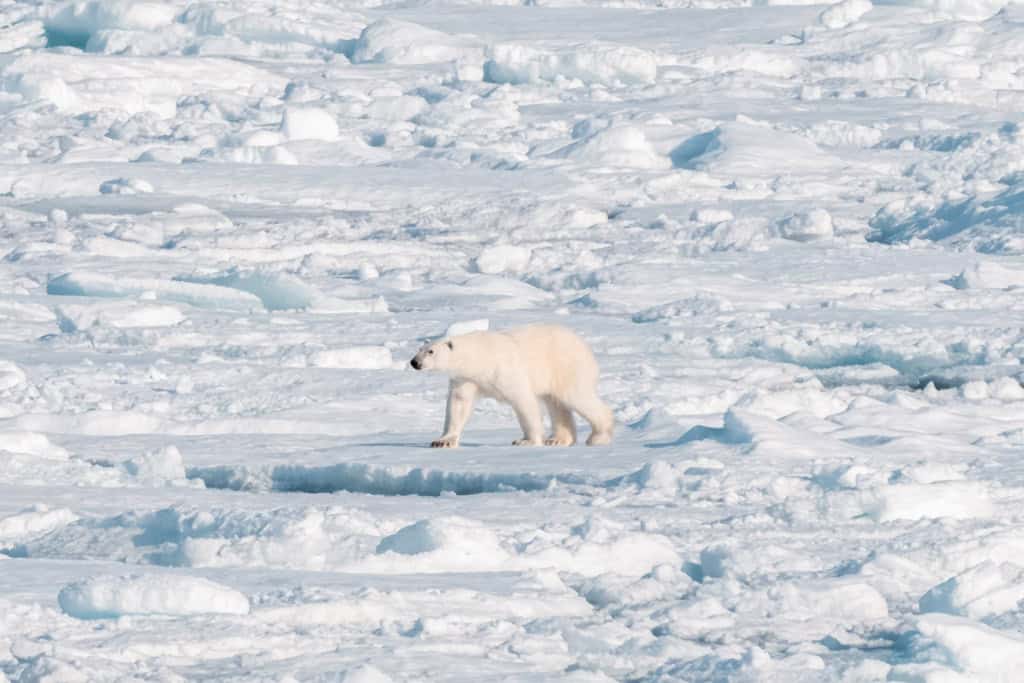
It rolled lazily, paws in the air like it had not a care in the world, before standing and ambling across the ice with powerful, unhurried strides.
For many onboard it was their first encounter with the animal that had drawn them here – a defining moment that would never be forgotten.
Keeping a safe distance and adhering to all responsible wildlife viewing regulations, we enjoyed our time with the bear and then continued our journey north.
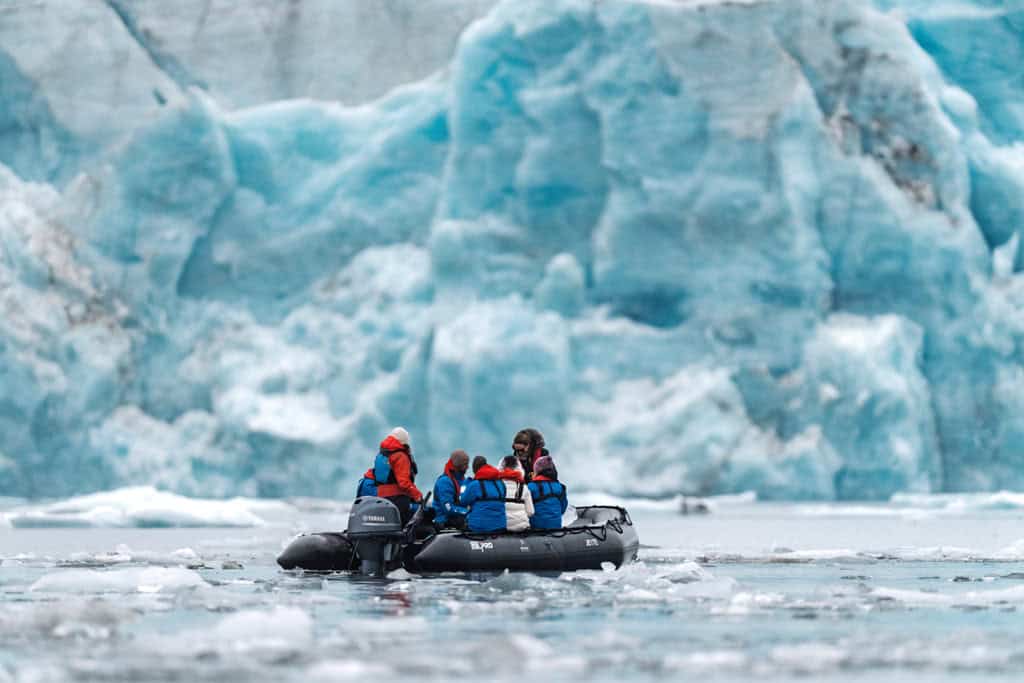
The ship pressed deeper into the pack, floes scraping along the hull with hollow cracks.
By midday we had reached 82°39’ North, our highest latitude of the voyage, and the furthest north the Greg Mortimer had ever reached, surrounded by a frozen jigsaw of white and electric blue.
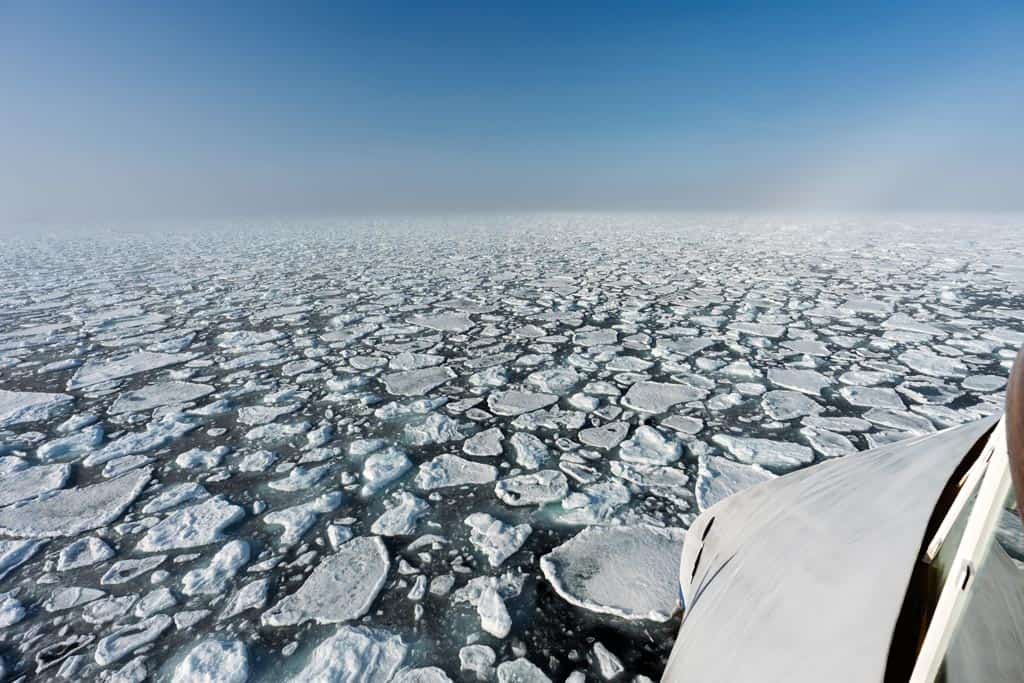
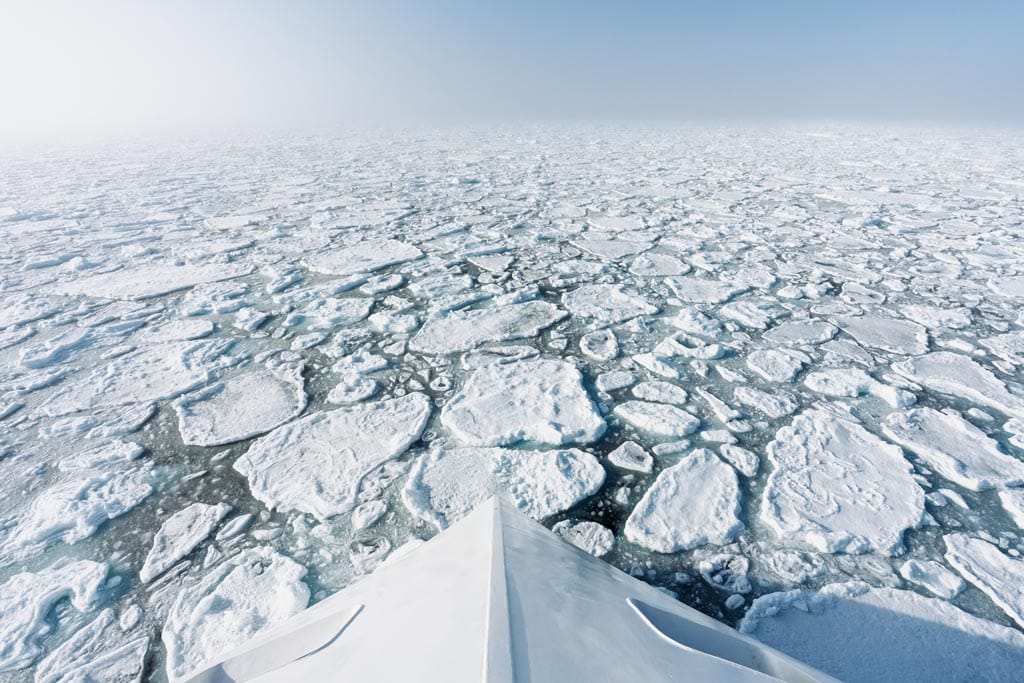
The fog lifted briefly and the sun broke through, lighting the ice as though we had entered another world.
At the bow, passengers gathered for a celebratory photo, cheeks flushed from cold and excitement.
We continued our search for more wildlife, but alas the elusive polar bear did not reappear this time around.
Conversation buzzed as we relived the morning’s sighting, the bear’s movements already etched into memory and we counted our lucky stars that we had seen one, knowing that some trips never have that opportunity.
That night at dinner the story was retold again and again, each version carrying the same awe: the moment the Arctic gave us our first polar bear.


Day 5 – History in Stone, Courage in Ice
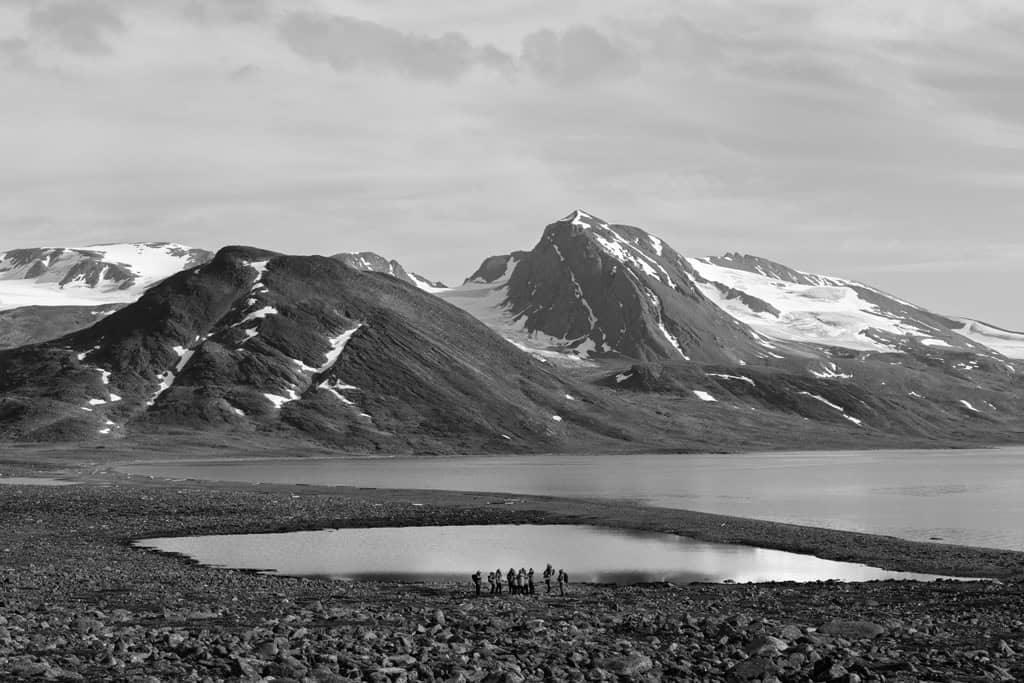
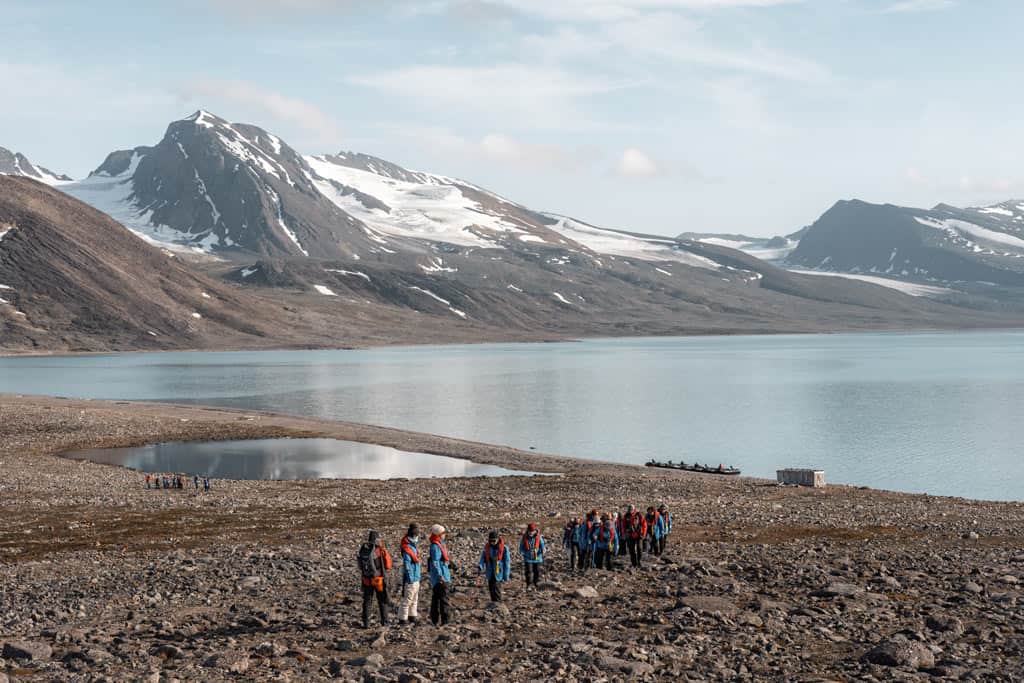
Sunlight poured across the deck as the Greg Mortimer threaded through Beverlysundet, a narrow stretch of water separating Chermsideøya from Nordaustlandet.
From a distance the island looked like little more than a barren rise of rock, but as Zodiacs touched the shore its history came into focus.
Etched into boulders above the landing site were markings left in 1928 by the crew of the Russian icebreaker Krasin, who had sailed north in search of the missing Italian explorer Umberto Nobile.
READ MORE: At the other end of the earth, learn everything you need to know about travelling to Antarctica!

These scratched names and dates, still visible nearly a century later, carried the weight of desperation and hope from an earlier age of polar exploration.
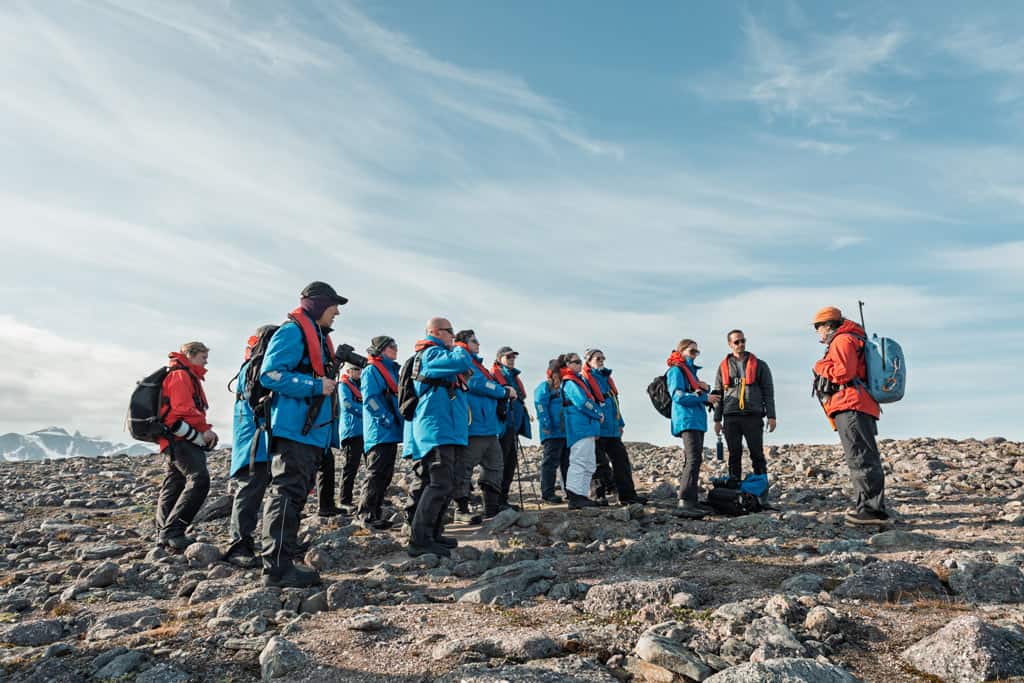
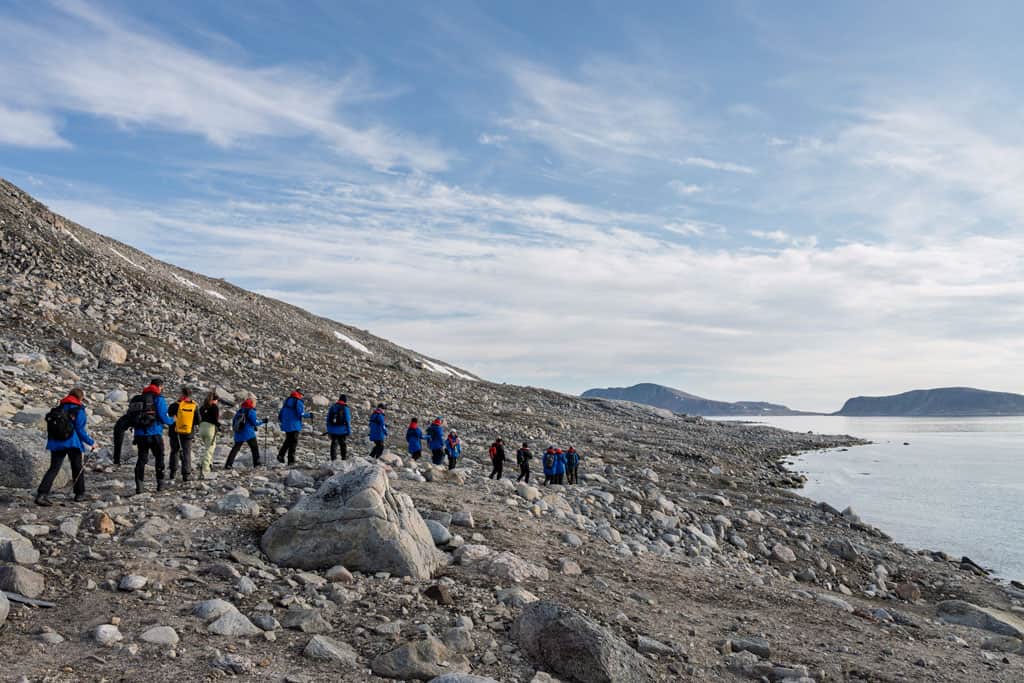
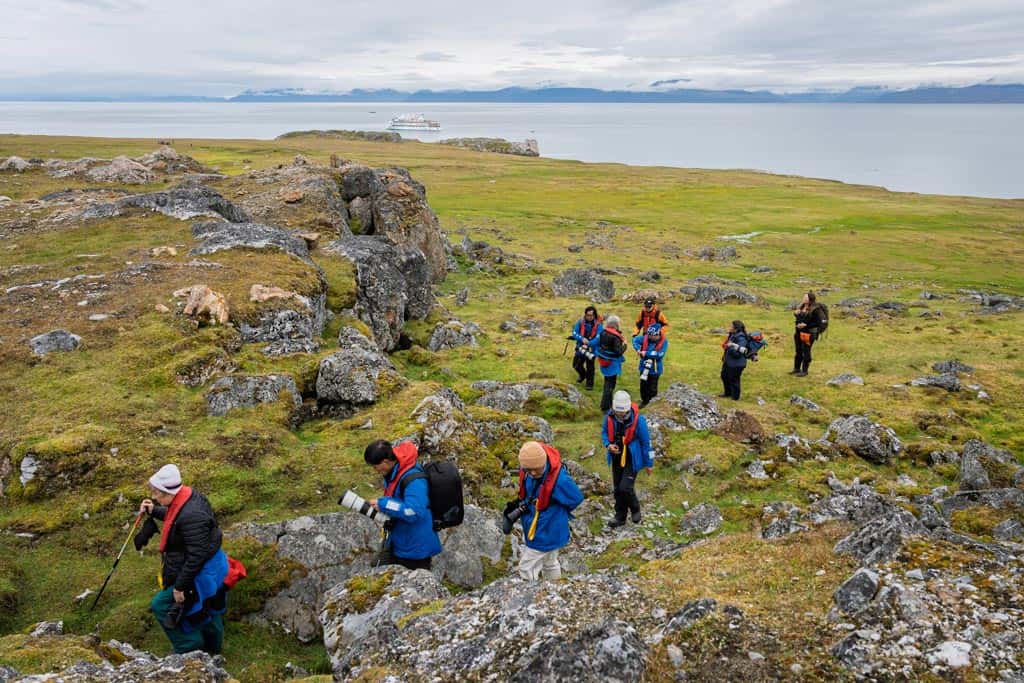
The expedition team offered a variety of hikes for those who wanted to go to shore and wander the tundra under a pale sky – a long, fast walk, a medium pace, and a short stroll for anyone that felt like just sitting on a rock and contemplating the majesty and history around them.
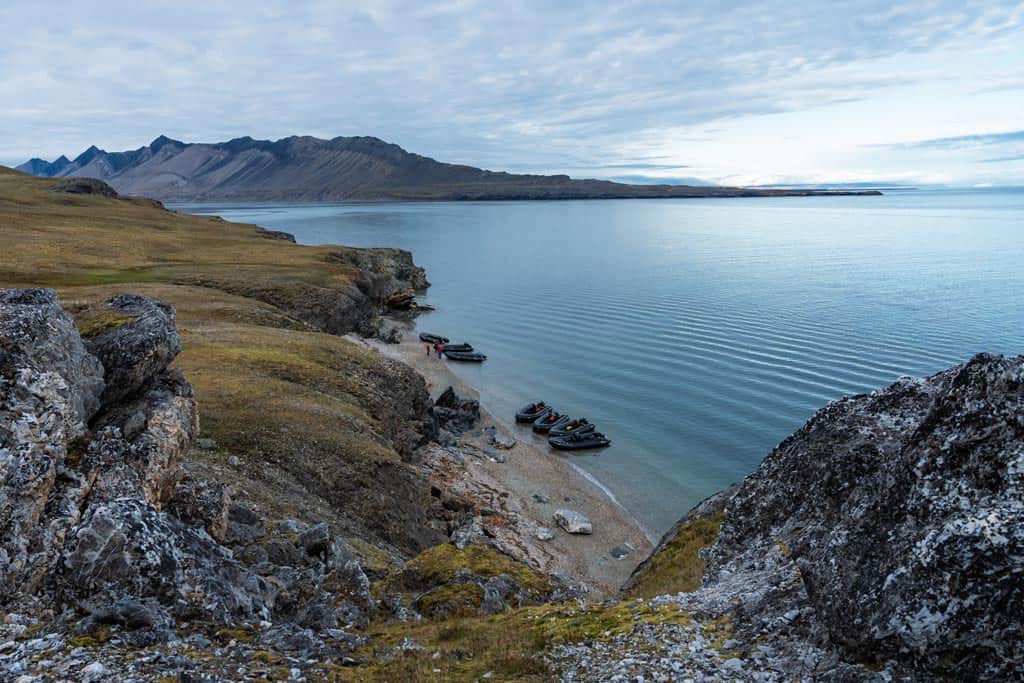
Two hours later our fast group was picked up at the other side of the island and the Zodiacs whisked us back to the Greg Mortimer.
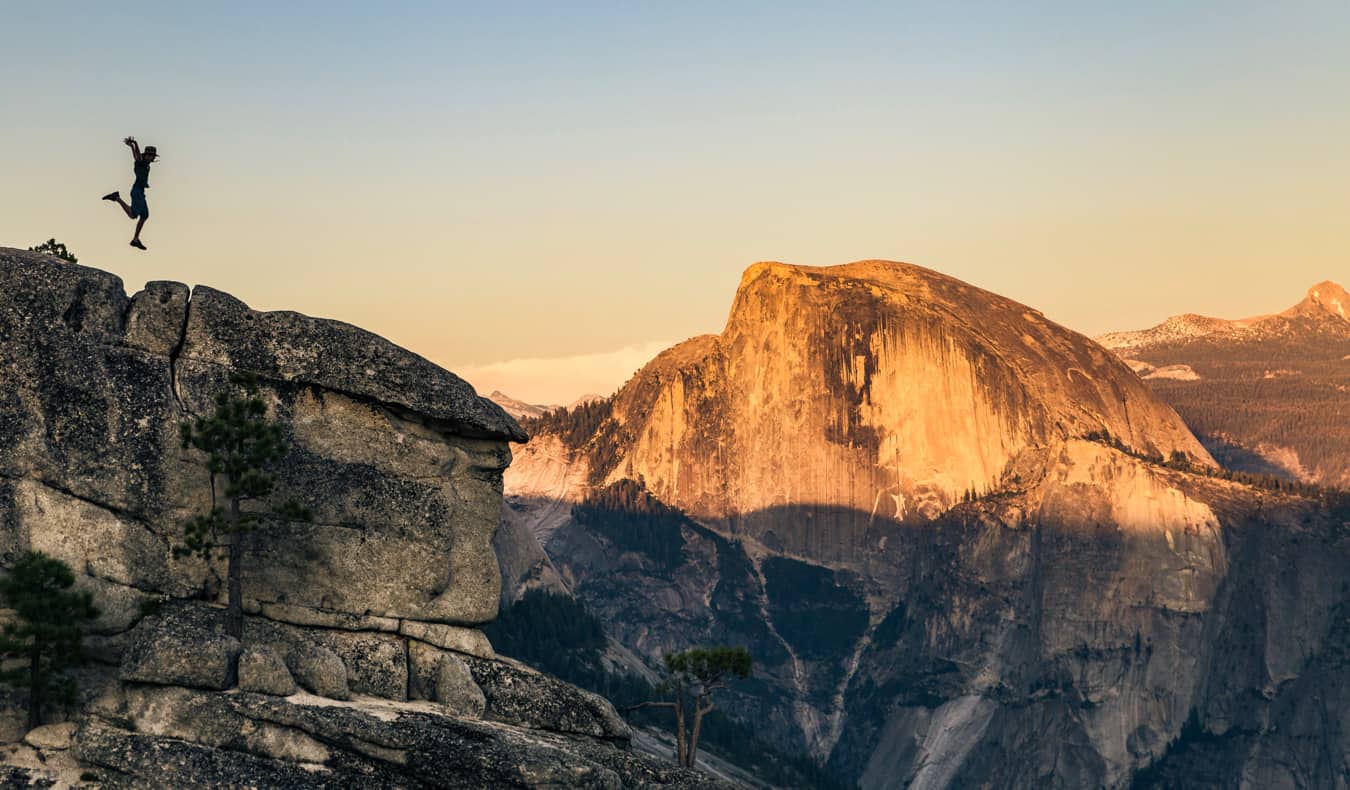
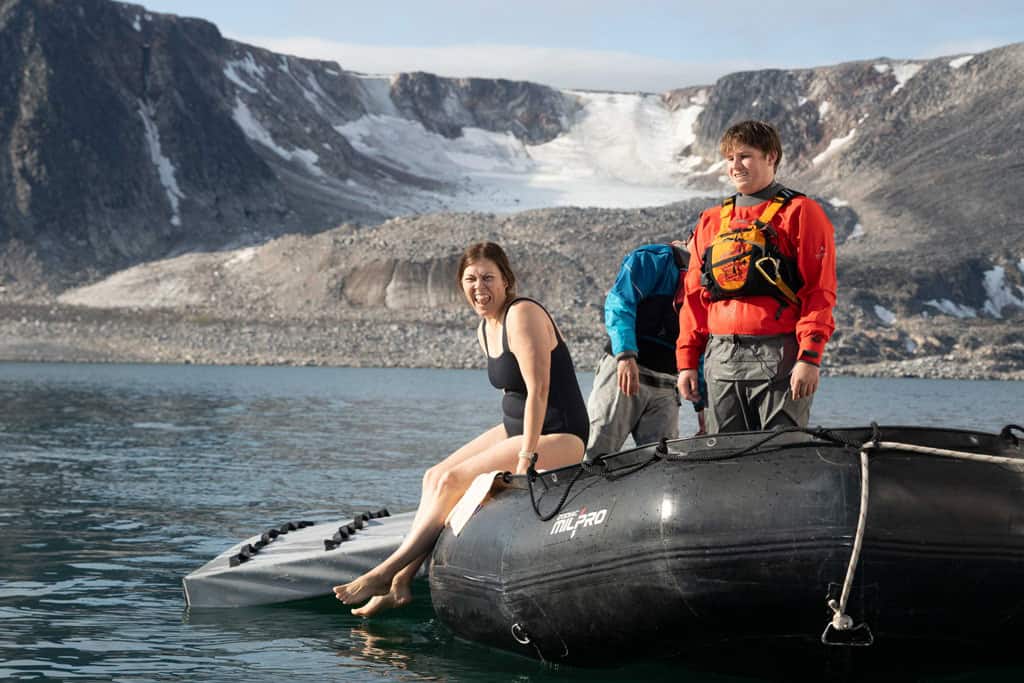
Back onboard the mood shifted from reflective to electric. The call went out for the polar plunge, and more than thirty passengers lined up on the gangway.
One by one they leapt into the Arctic Ocean, shrieking as the 6°C water clamped around them, surfacing with wild grins before scrambling back to the ladders.
The cheers from the railings rang louder than the splash of the waves.
Alesha did the plunge as well, an enormous milestone after her cardiac arrest. Her doctors had originally told her that a polar plunge was something she could never do again, but with her incredible recovery she had been given the approval earlier in the year to do it again, on the condition she slid in, not jump.
And now she can proudly say she has done the polar plunge in both Antartica and the Arctic AFTER suffering a cardiac arrest.
Nothing can stop her!
The afternoon brought a different kind of challenge. The plan was to land at Phippsøya, but the weather closed in fast.
Fog rolled across the sea until Zodiacs could hardly see one another. Instead, we explored by boat around Parryøya, each group vanishing into the white before reappearing like ghosts on the horizon.
Out of the haze came flashes of life: the tusks of walrus breaking the surface, a scatter of eider ducklings, and for one lucky boat, the pale outline of a distant polar bear.
By the time everyone returned to the ship, GPS guiding drivers through the fog, the story of the plunge and the fog-bound cruise filled the dining room.
History etched in stone, adrenaline in icy water, and wildlife emerging from the mist – it had been a day that captured every side of the Arctic.
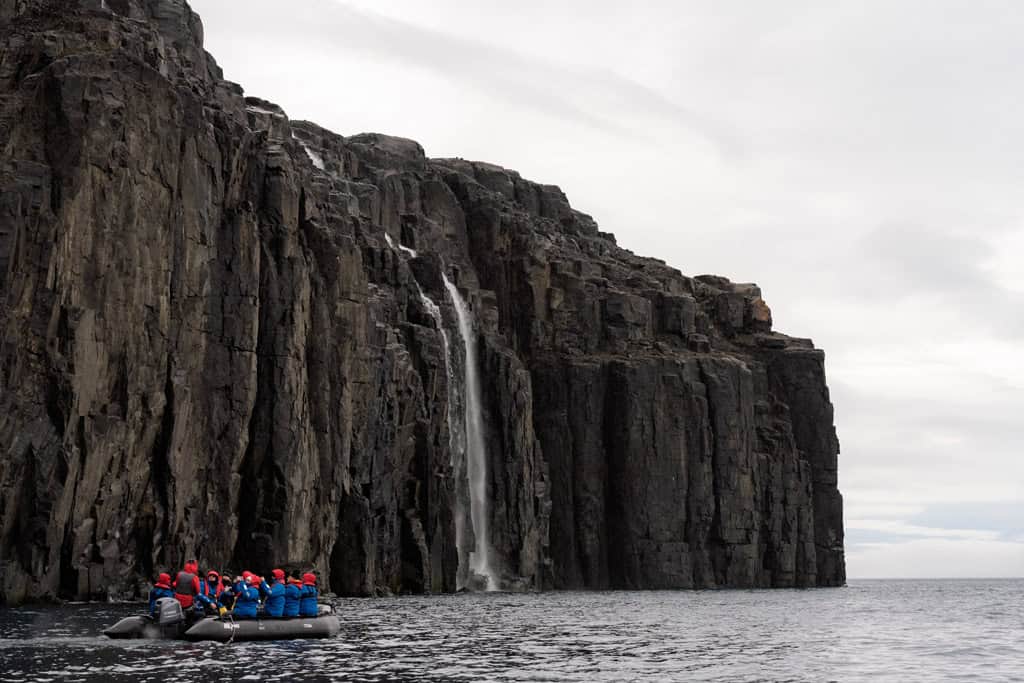
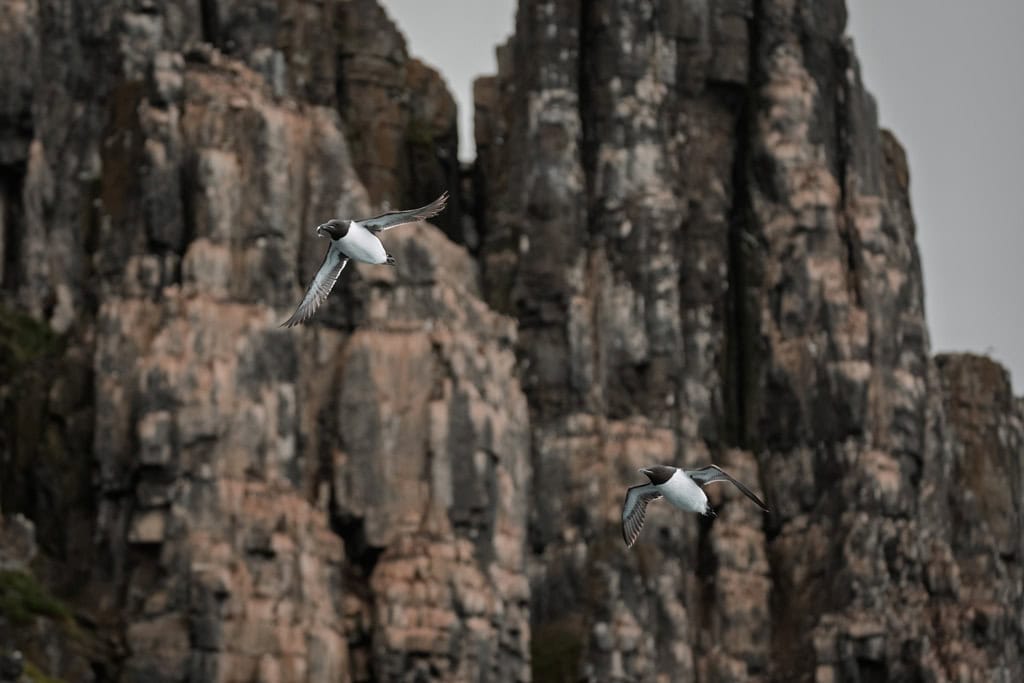
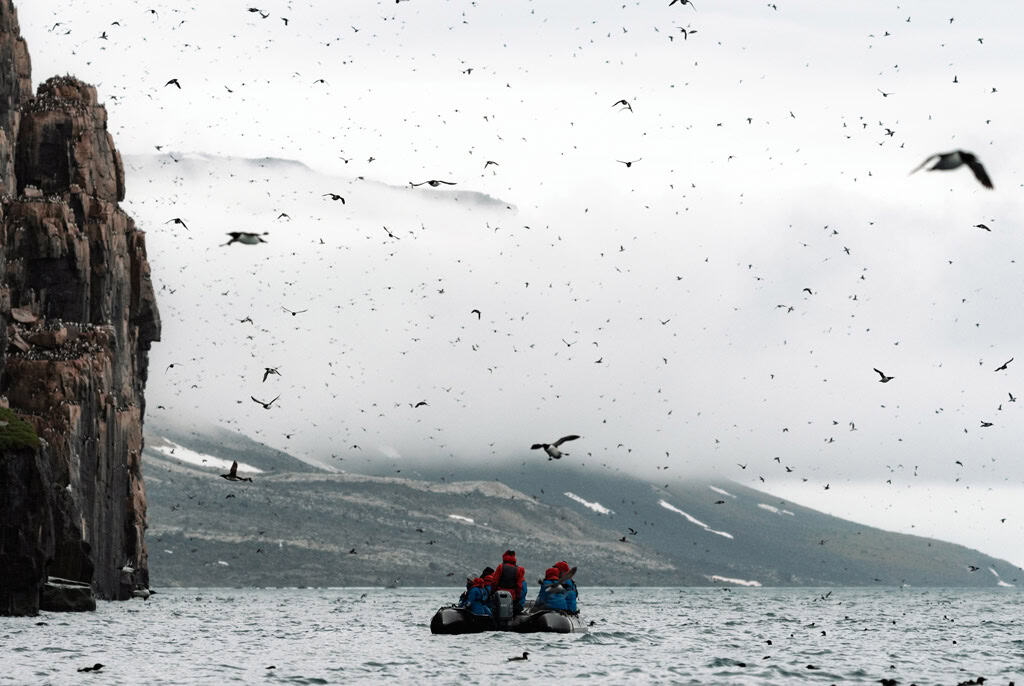
Day 6 – The Bird Cliffs of Alkefjellet
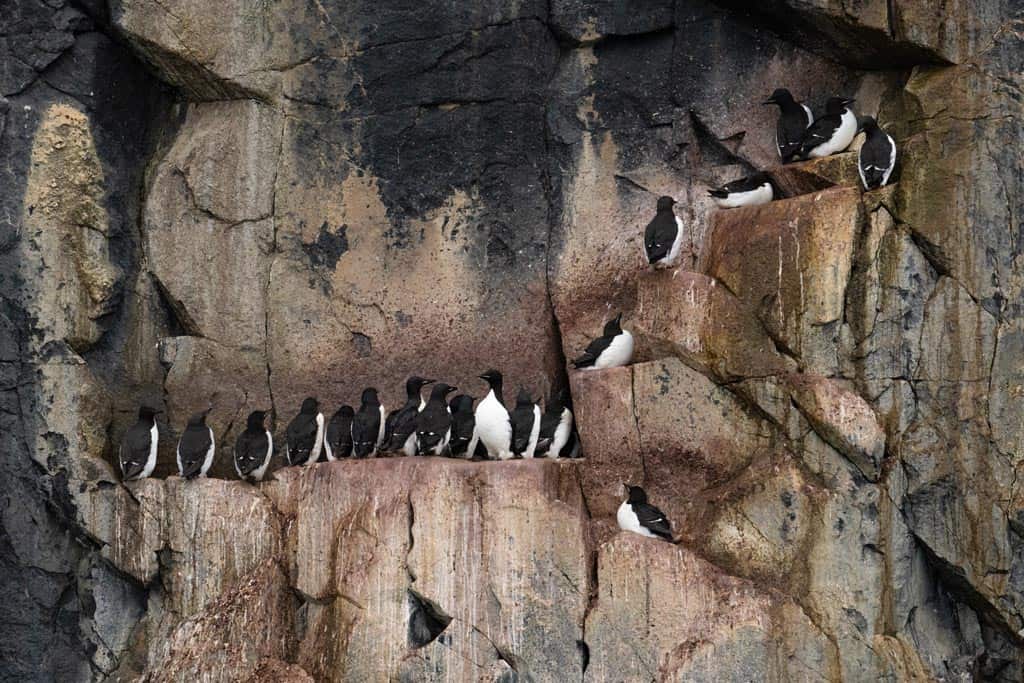
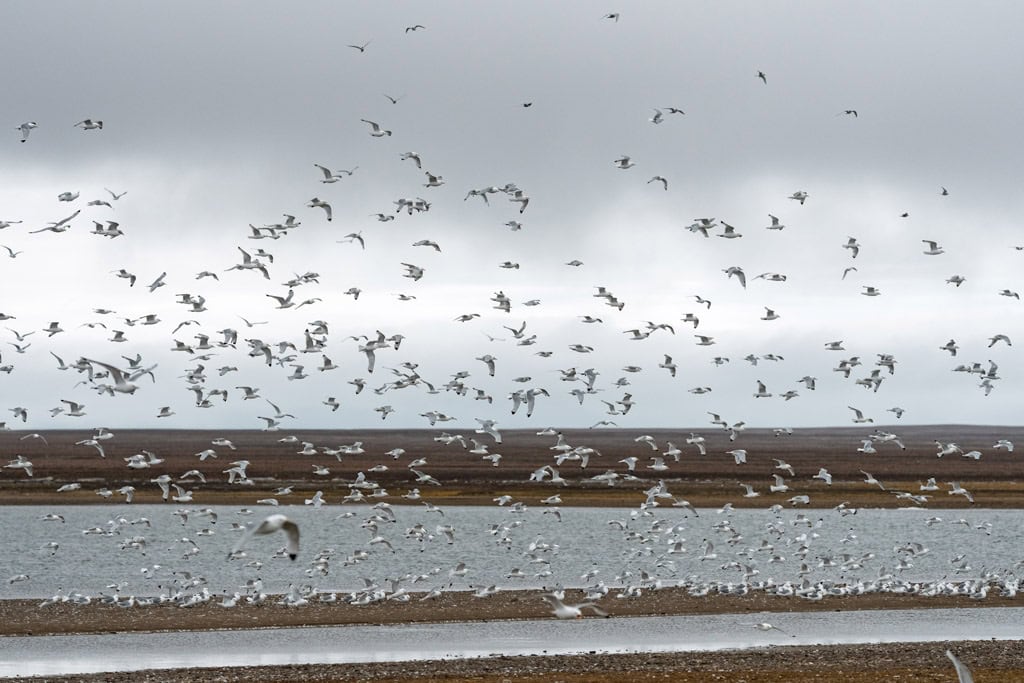
Rain tapped softly on our hoods as Zodiacs skimmed across choppy water toward Alkefjellet, one of the most dramatic seabird colonies in the Arctic.
Dark dolerite cliffs rose sheer from the sea, streaked with moss and guano, and alive with the calls of thousands upon thousands of Brünnich’s guillemots.
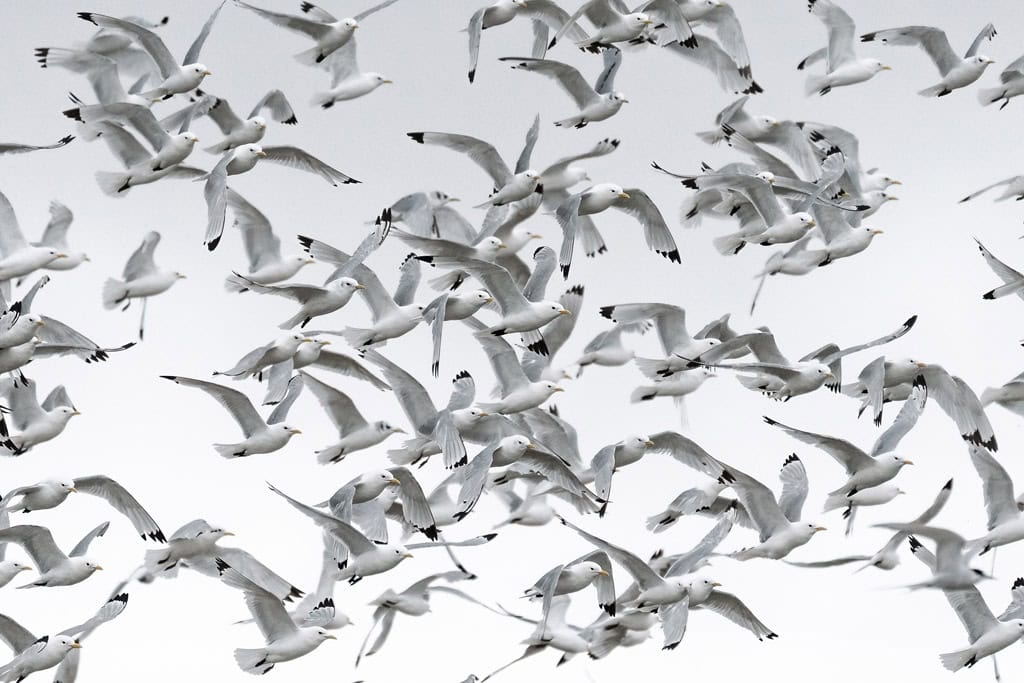
The air was filled with movement – birds wheeling overhead, diving into the waves, or balancing awkwardly on narrow ledges carved into the rock.
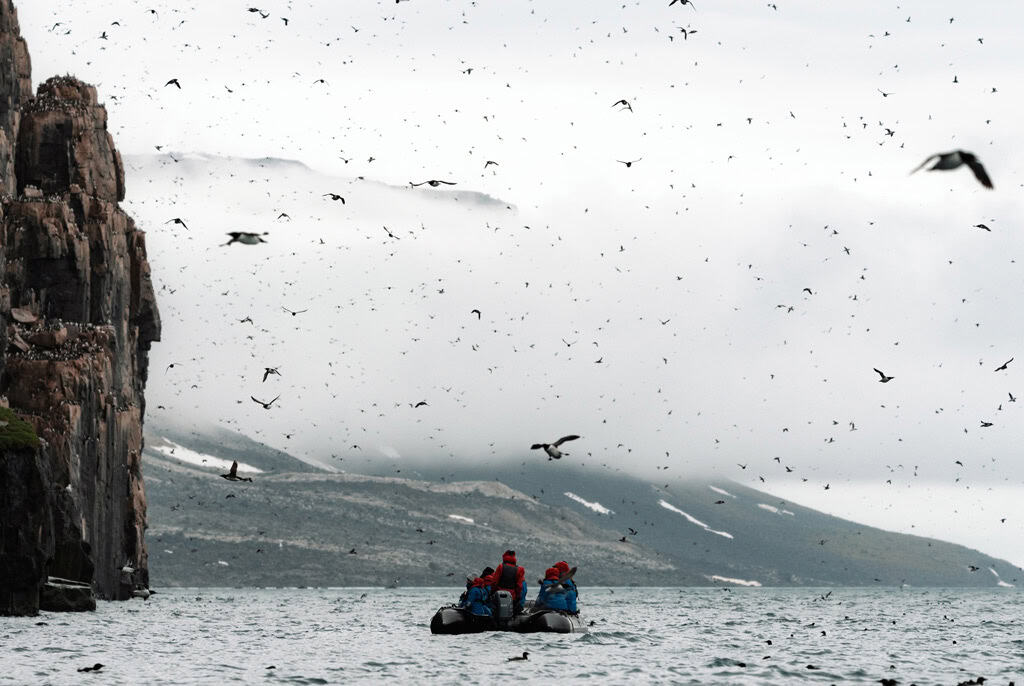
Up close, the cliffs seemed to hum. Every ledge was packed with guillemots chattering in a deafening chorus.
Some chicks had already taken their leap of faith, tiny bundles of fluff paddling beside their fathers on the water.
Others hurled themselves from dizzying heights, wings flapping furiously before splashing into the sea – a rite of passage repeated for millennia.
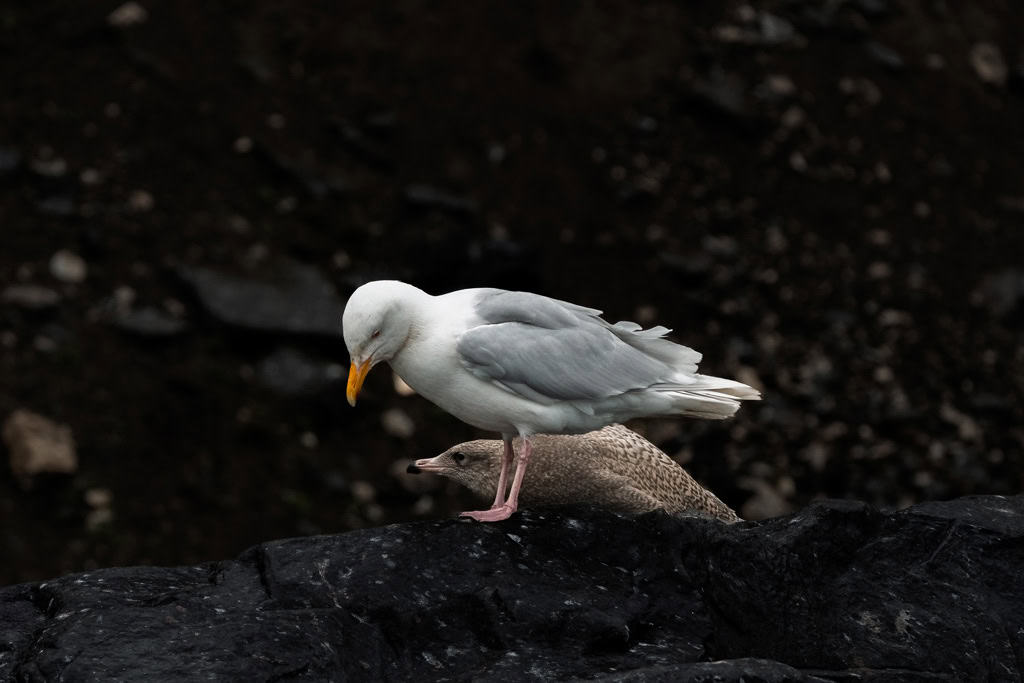
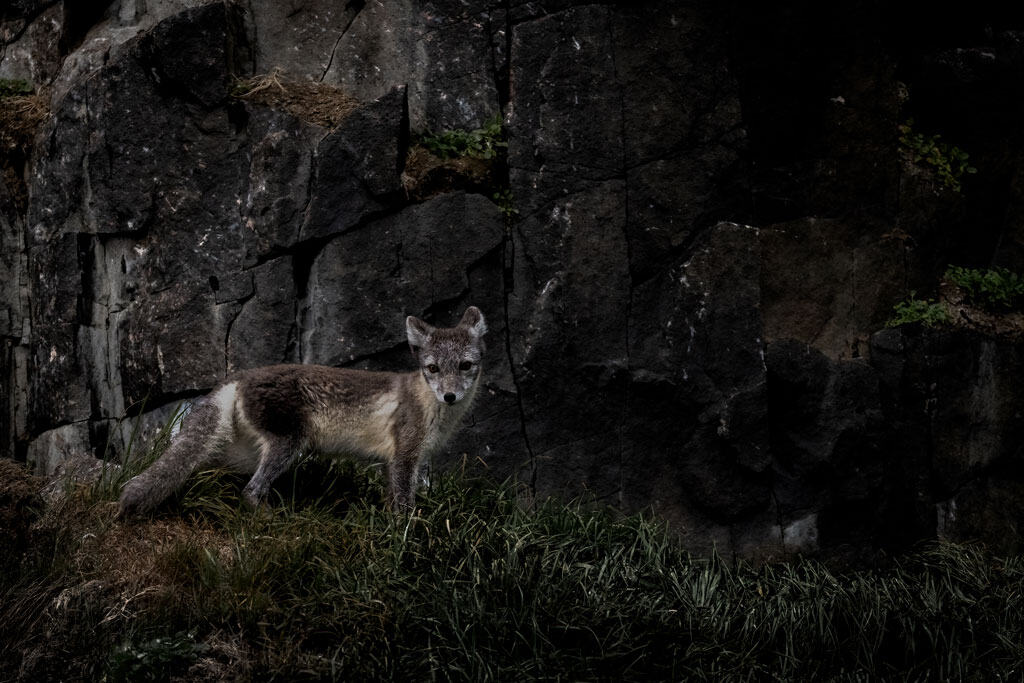
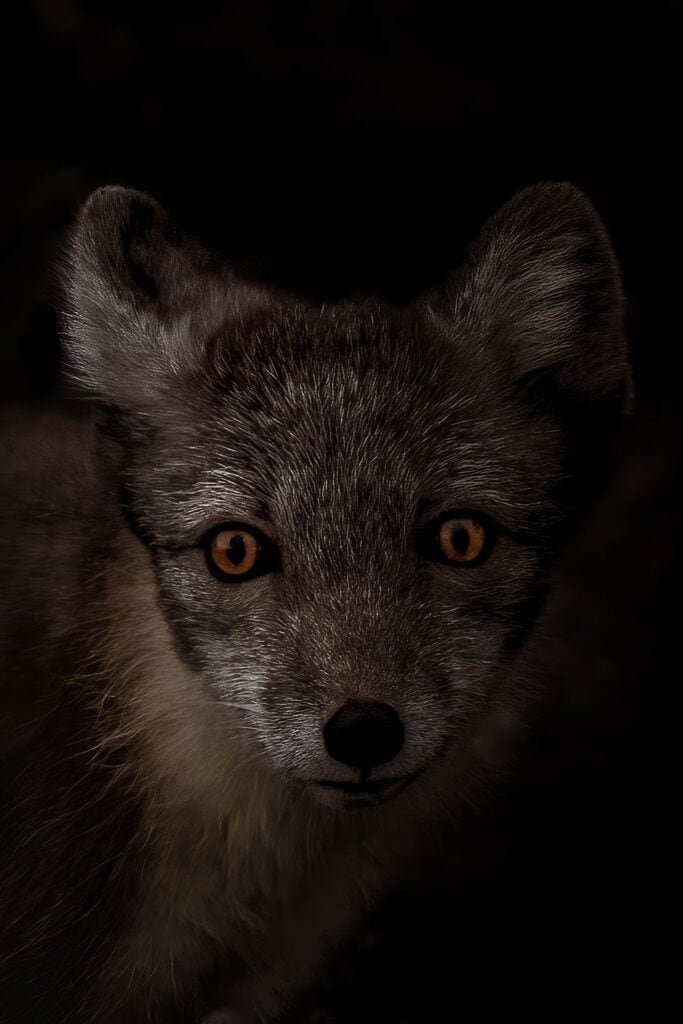
Black-legged kittiwakes soared in the wind, while an Arctic fox darted across the shoreline, searching for any chick unlucky enough to stray.
It was raw, noisy, messy, and utterly captivating.

By afternoon the weather had other ideas. The plan was to land at Torrellneset, often a reliable spot for walrus, but the fog thickened until the coastline disappeared entirely.
Even the Zodiacs could barely keep sight of one another. The decision was made to cancel, a sharp reminder that the Arctic is always in control.
Instead, the day turned inward. Back on the Greg Mortimer, naturalist John delivered a powerful lecture on polar bears, weaving together science, photography, and personal stories of encounters in the wild.
As the fog clung to the ship, his words painted vivid pictures of the King of the Arctic moving across the ice.
That night the crew rolled out a surprise: a barbecue in the main restaurant. Decked out in wigs and funny hats, we all tucked in to a delectable spread of meats, vegetables and salads with music playing over the speakers.
Day 7 – Kvitøya: White Island and the Bear Bonanza
Through the night the Greg Mortimer pressed northeast, swallowed by fog so thick it felt like the ship had been erased from the world.
By morning, the haze hadn’t shifted – a ghostly white pressing in from every side.
Then, just as breakfast ended, the curtain lifted. Out of the mist loomed Kvitøya, or “White Island,” a desolate place almost entirely buried beneath an ice cap.
Few people ever set foot here, and for good reason.
This remote island is tied to one of the Arctic’s most tragic stories – the doomed 1897 balloon expedition of Swedish explorer Salomon August Andrée, who perished with his companions on these very shores.
We had hoped to land at Andreeneset, where a memorial marks the site, but the fog rolled back in, smothering the coastline and dashing the chance.
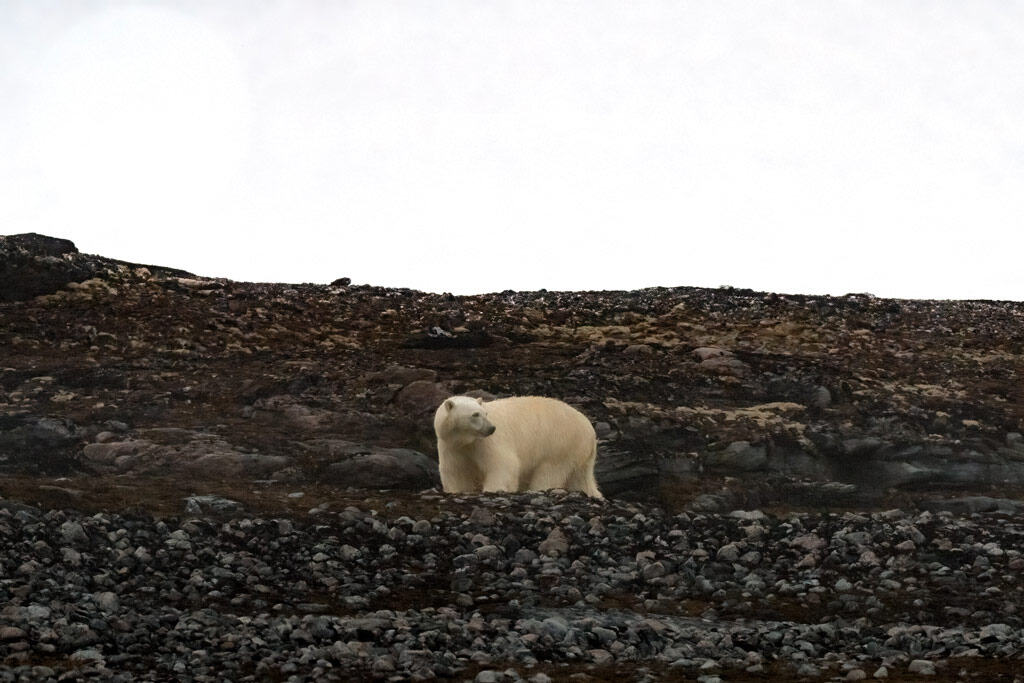
What we found instead was something far rarer, and far greater. Along the beaches and across the ice, polar bears appeared. Over a dozen!
At first it was a shape moving on the shoreline, then another sprawled on a snowbank, then more padding across the rocks.
Before long, whispers of “another one!” rippled across the Zodiacs until we’d counted at least eleven bears in sight.
Some lifted their heads lazily to watch us, others wandered with steady, powerful strides, their creamy fur blending into the fog.
It felt surreal – the Arctic’s top predator, not a distant dream on the horizon but a presence everywhere we looked.
The landing might have been impossible, but no one minded.
This was a once-in-a-lifetime spectacle, the kind of encounter you hope for but never expect.
Back onboard, the afternoon was filled with lectures on sea ice, polar bears, and the ship itself, yet the conversation always circled back to Kvitøya.
That night, the dining room buzzed with a single story, told in different words but always the same at heart: the day the fog lifted, and the Arctic revealed eleven polar bears on a single island.
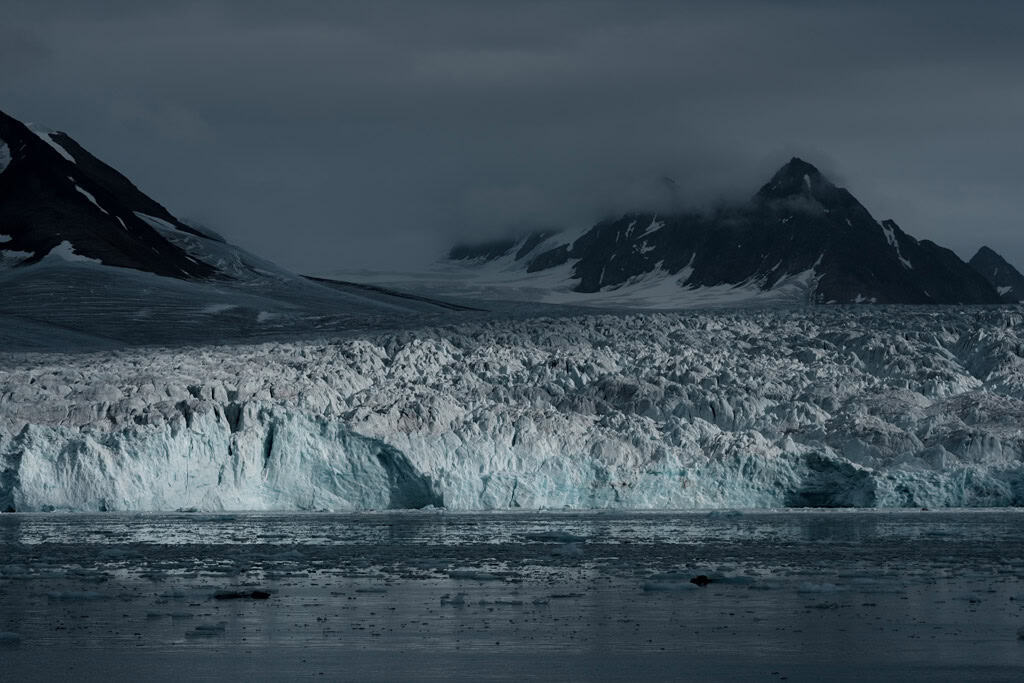
Day 8 – Negribreen: Ghost Birds in the Mist
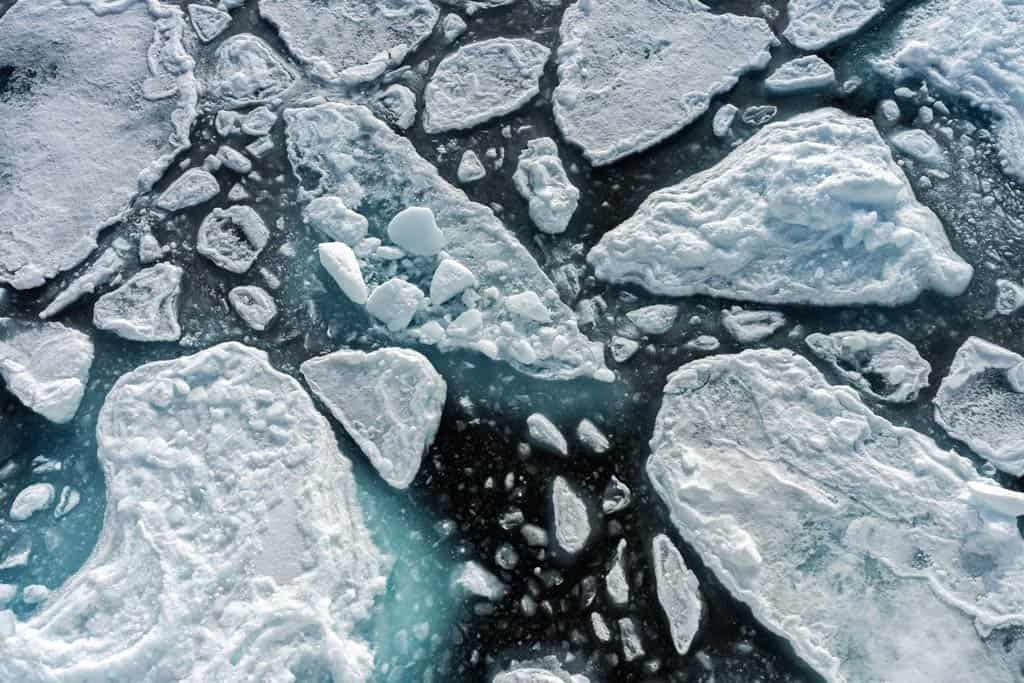
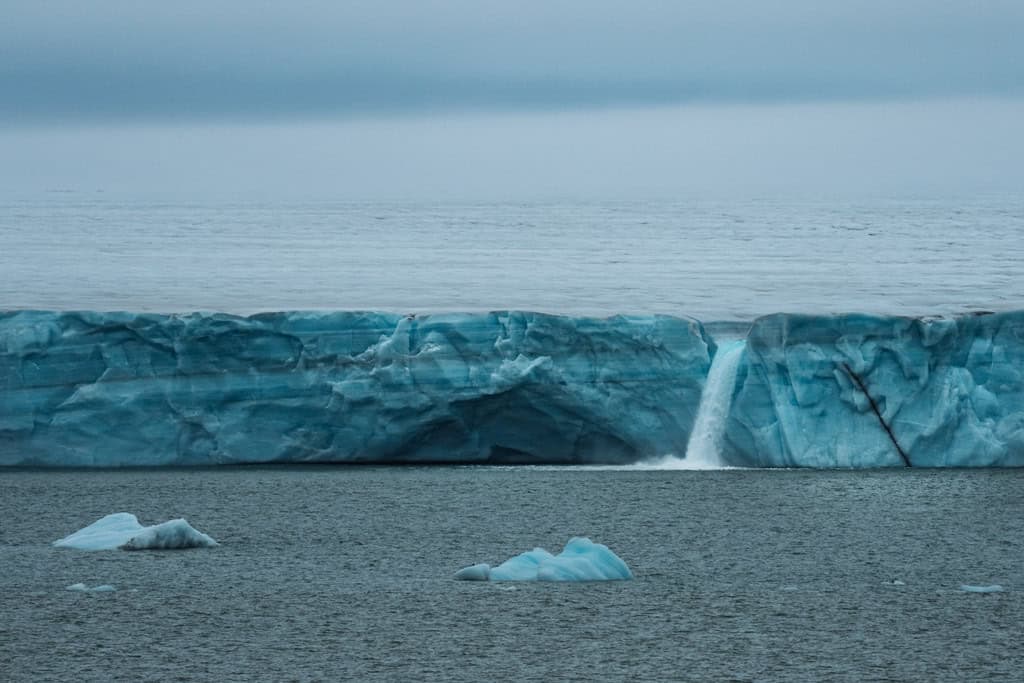
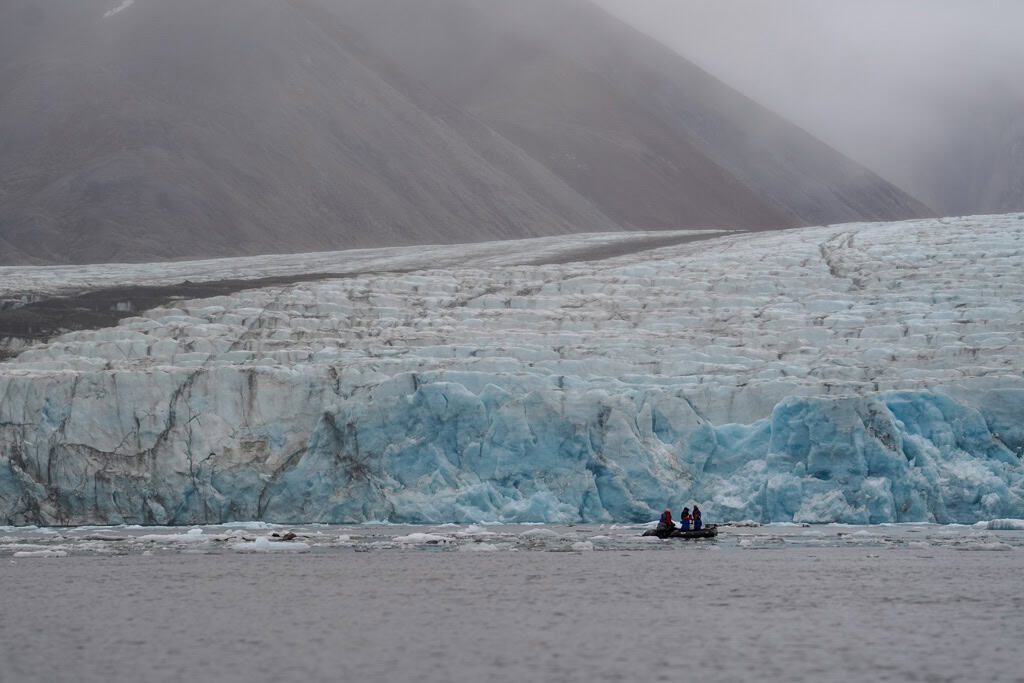
The morning broke in silence. A pale mist hung over Negribreen, one of Svalbard’s largest glaciers, its jagged front spilling icebergs into the fjord.
Zodiacs slipped quietly between glowing blocks of ice, each one a sculpture of shifting blues and greens. The world felt still, muffled by fog, every sound softened by the weight of the ice.
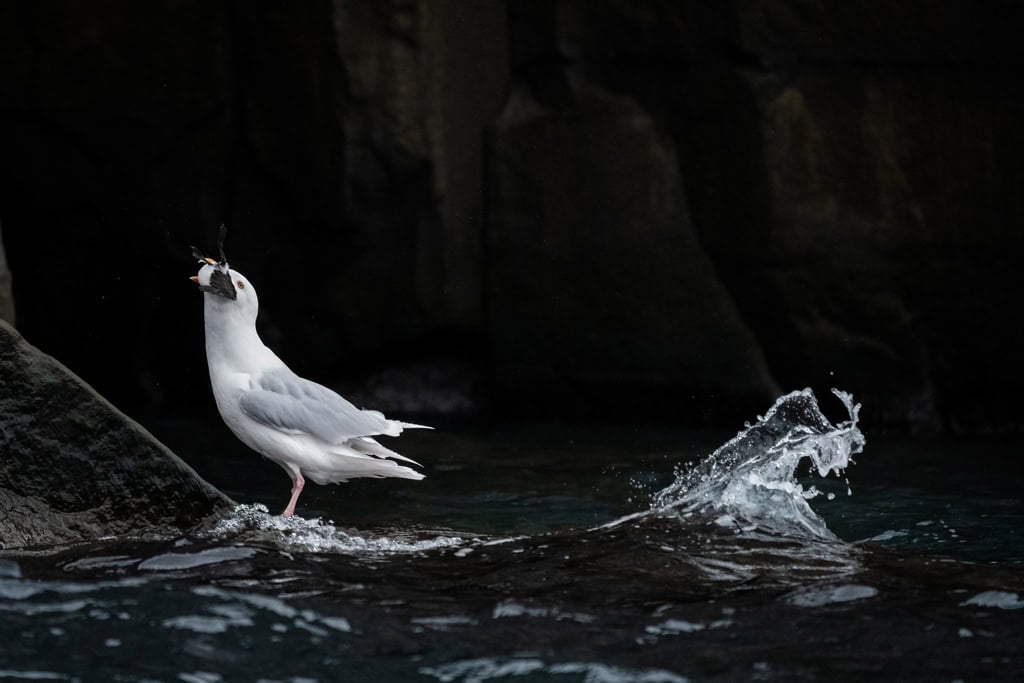
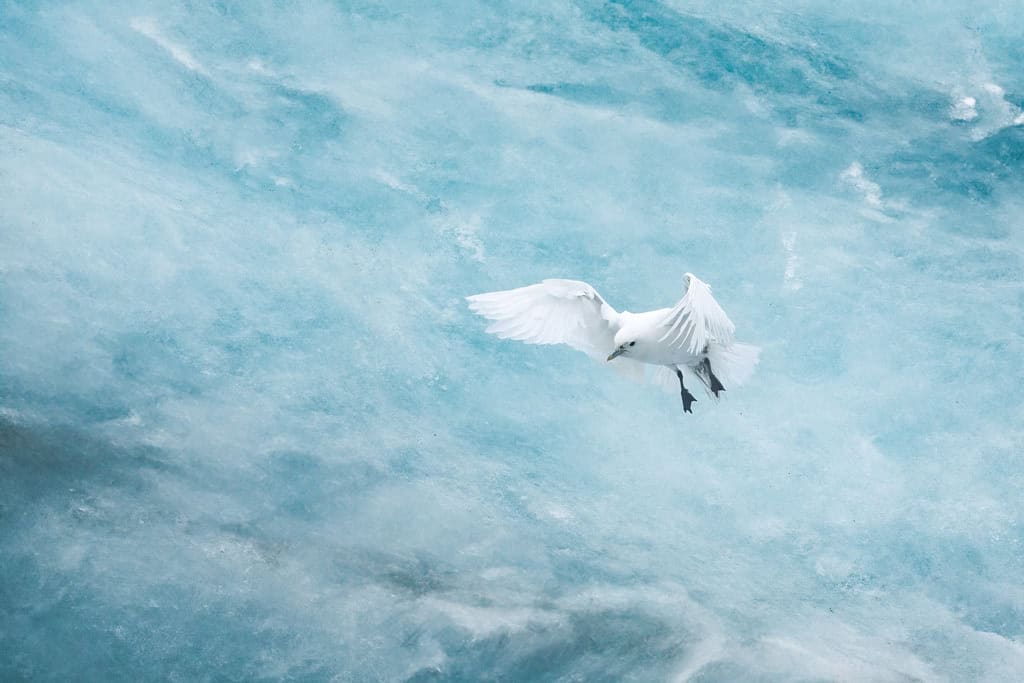
Then came a cry – not from us, but from above. The sharp call of an ivory gull cut through the mist.
Out of the whiteness, a pair appeared, circling a large berg before settling on its crest.

Their snow-white feathers blended perfectly with the glacier, so pure it was hard to distinguish bird from ice.
Moments later, more arrived, until a small flock wheeled above us, their movements ghostlike against the sky.
These elusive gulls are among the rarest seabirds in the Arctic, and seeing them here – so close, so fleeting – felt like witnessing a secret few ever glimpse.
Back onboard, bird expert Meike brought the encounter to life in an engaging lecture, explaining the fragile future of ivory gulls and the challenges Arctic seabirds face across their long migrations.
The morning’s magic turned into knowledge, deepening the experience.
The afternoon brought another change of plans. A landing at Sundneset was cancelled when both reindeer and a polar bear were spotted near the site.
Instead, the Greg Mortimer pushed toward Hornsund, while onboard life filled the hours: I gave a photo-editing workshop, a North Pole tale from historian Jamie, and a lively game run by the Expedition Team.
Evening drinks carried on with stories of foxes, birds, and glaciers, but it was the gulls that lingered. They seemed to embody the Arctic itself — elusive, fragile, and unforgettable.
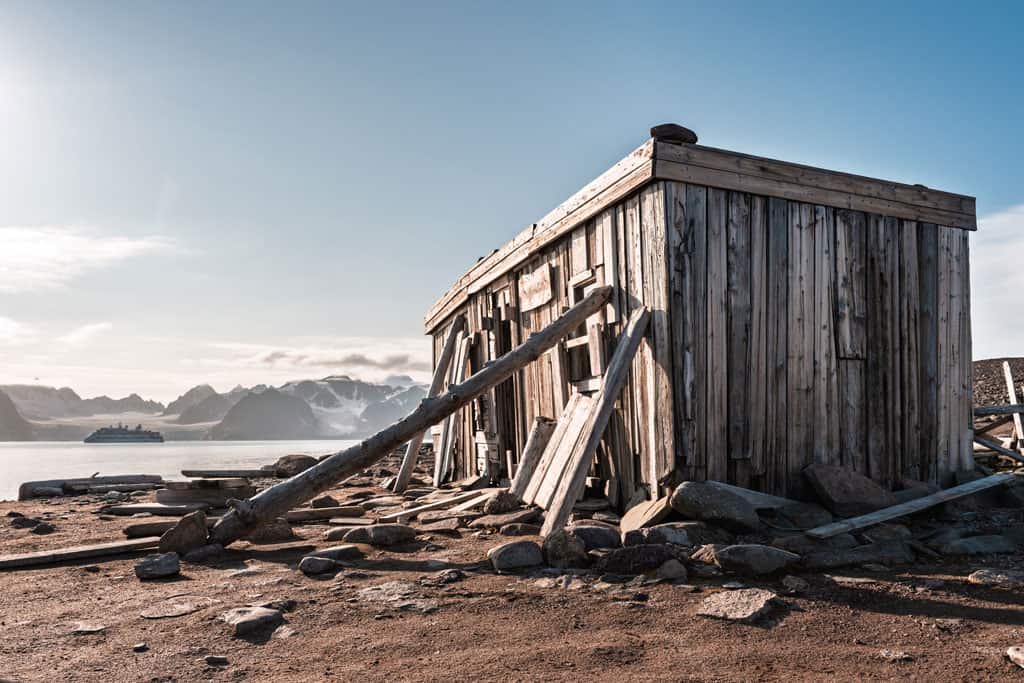
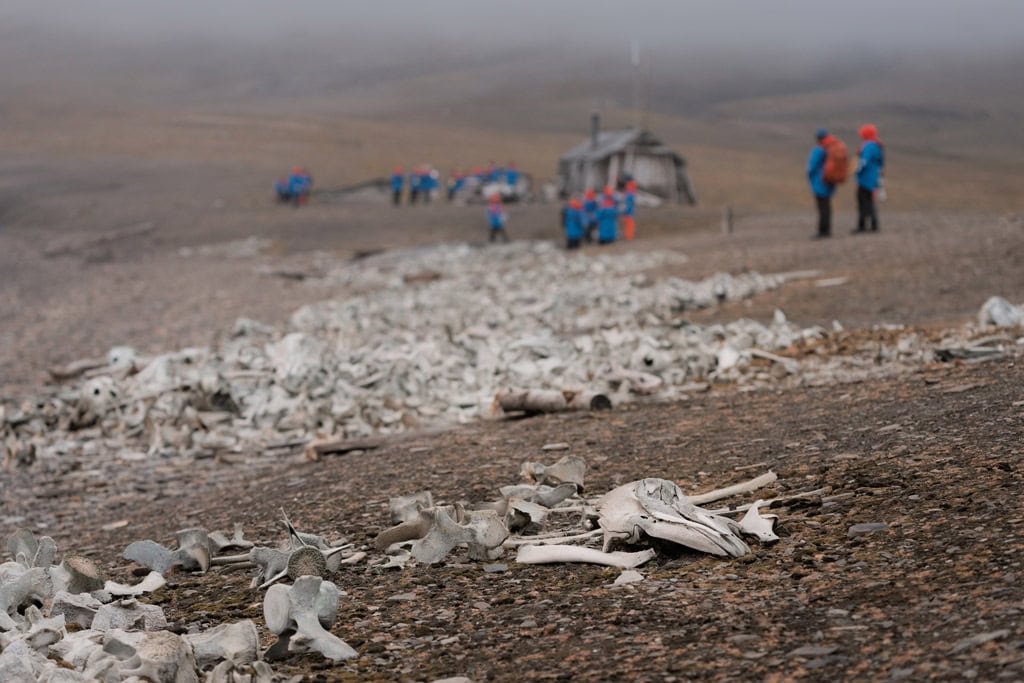
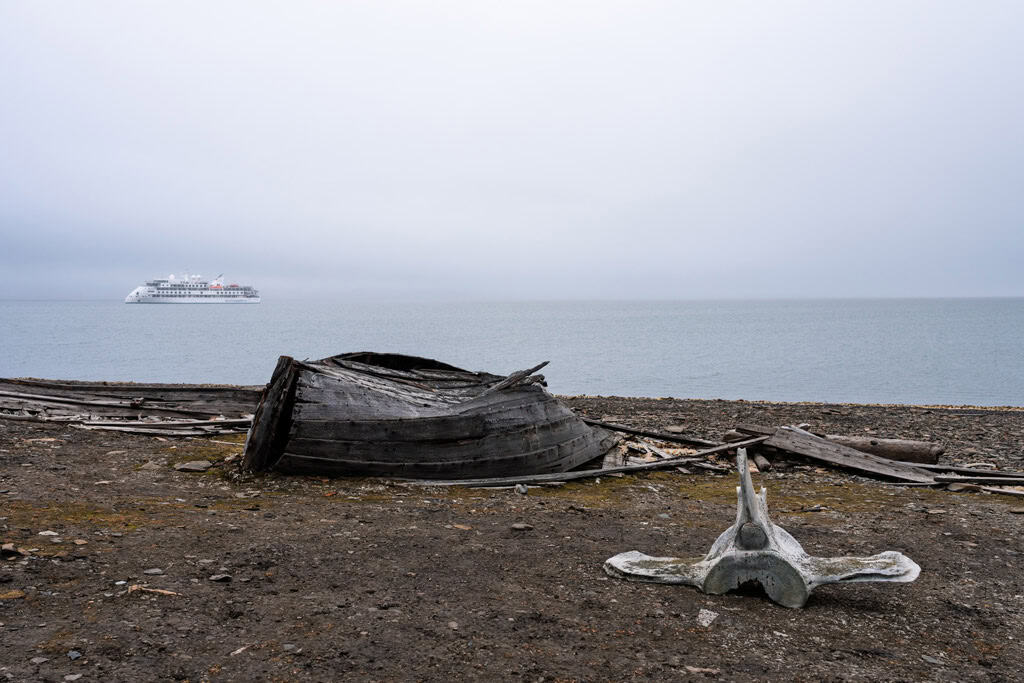
Day 9 – Bamsebu: Bones and Belugas
Fog swallowed our morning once again, forcing the Expedition Team to abandon plans for Calypsobyen and divert to Bamsebu, a lonely beach marked by one small cabin.
From a distance it looked unremarkable – a weathered hut above a seaweed-strewn shore. But as we landed, the truth of the place became clear.
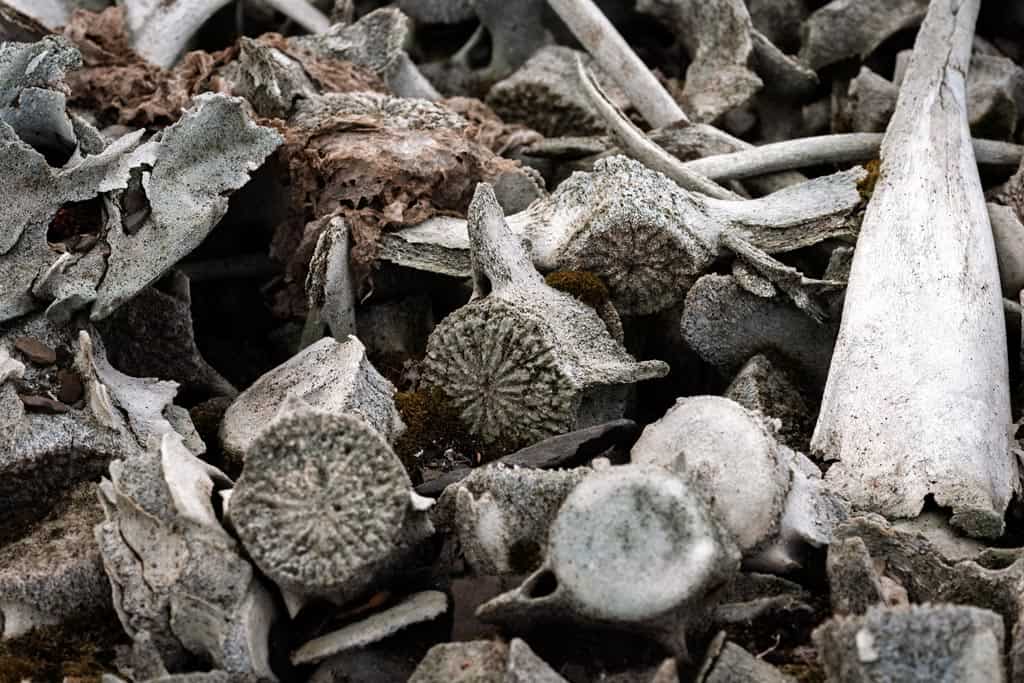
Scattered across the beach were the remains of more than 550 beluga whales, slaughtered in the 1930s when this site served as a whaling station.
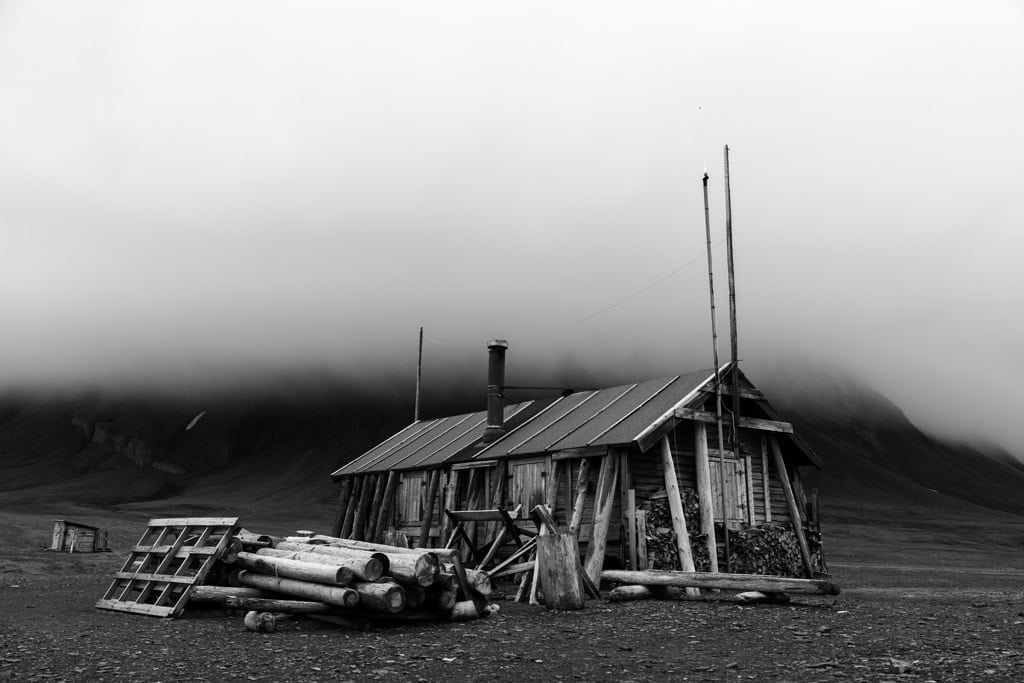
The bones lie there still, bleached by the Arctic sun and tide, a haunting monument to an era when wildlife was nothing more than a commodity.
Walking among them was sobering, a reminder that the Arctic is not only a wilderness of ice and silence, but also a witness to human exploitation.
Yet, as if on cue, the Arctic offered balance.
The fog finally lifted, and the fjord opened into a panorama of mountains and islands.
Kayakers paddled into the wide bay, their bright boats small against the vast landscape. The mood lightened, spirits lifted by the sheer scale of where we stood.

That afternoon, a second attempt at Calypsobyen was thwarted once again by fog, but fortune redirected us into Recherchefjord.
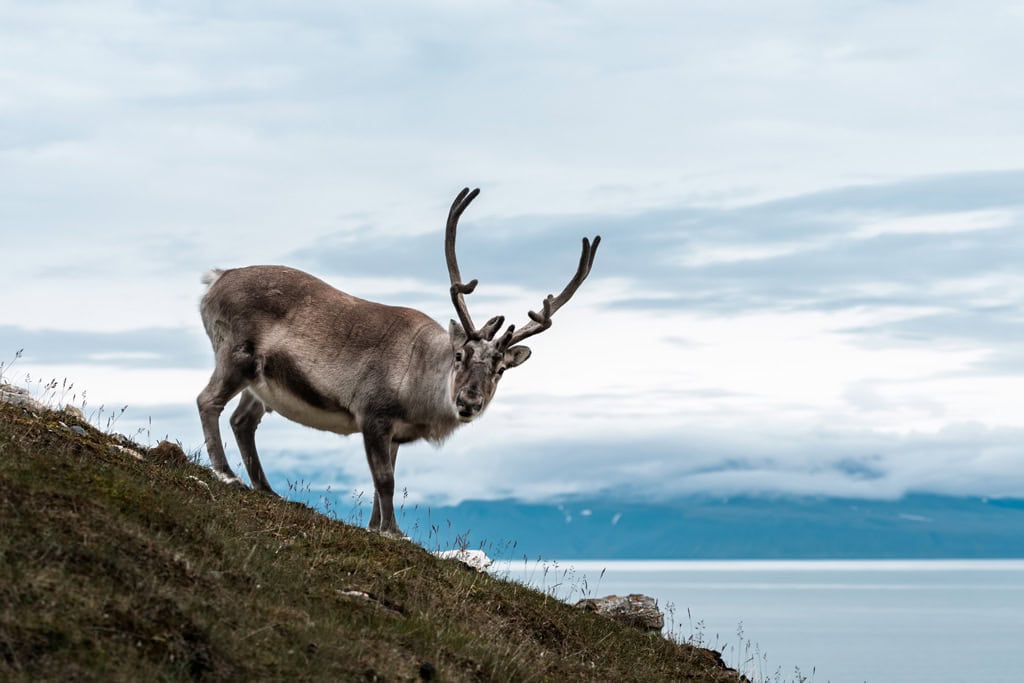
There, a dozing polar bear rested on a hillside while reindeer grazed on the next hill.
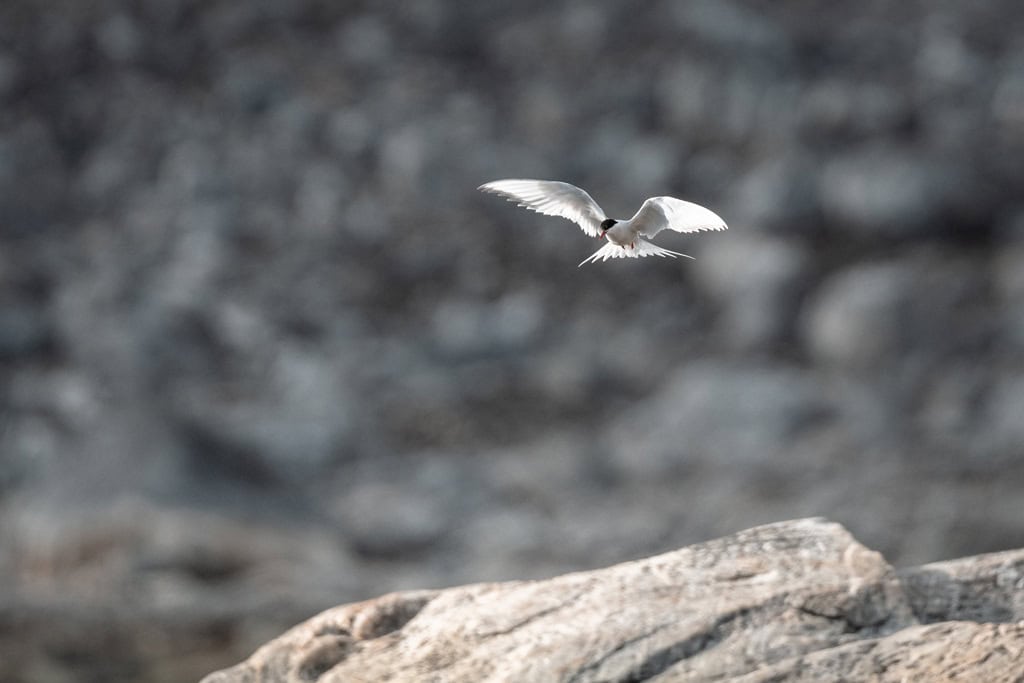
Overhead, an Arctic tern attacked a flock of kittiwakes with fearless fury, defending its nest against birds much larger than itself.
Rene cruised us into a berg-filled bay with a stunning glacier emerging amongst the fog.
The face was active, with small chunks of ice tumbling down and the glacier cracking and groaning as it shifted so slightly into the sea.
Suddenly an enormous piece of ice calved from the glacier, crashing into the bay and sending waves in all directions.
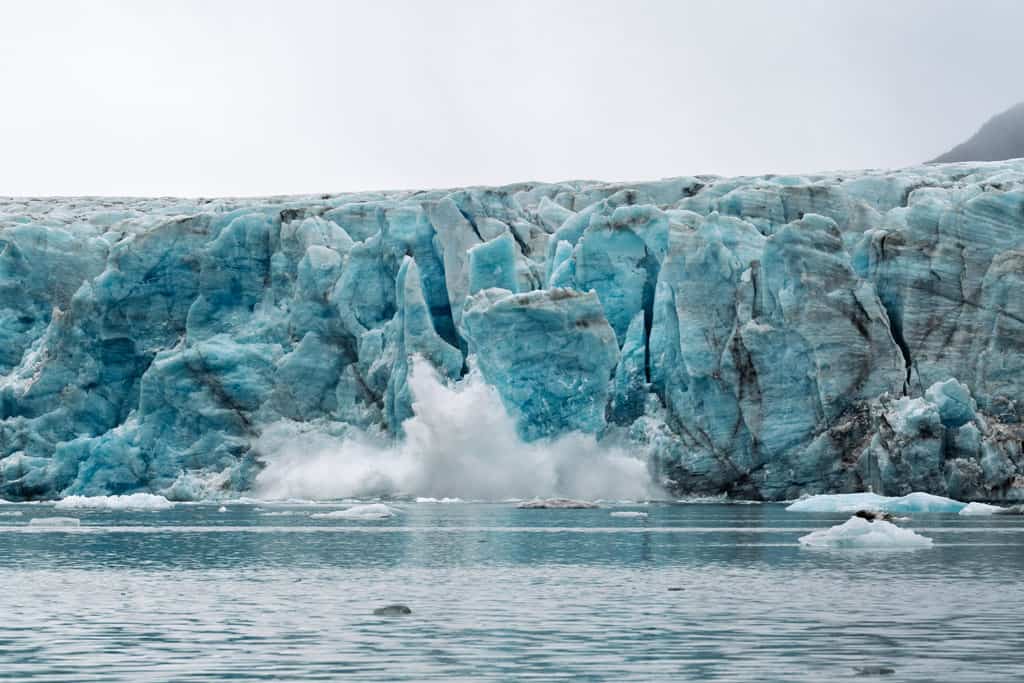
We cheered and basked in the experience, from a safe distance of course, before making our way back towards the Greg Mortimer.
And then came the sight none of us expected: a pod of beluga whales, surfacing in the fjord, some with calves at their side.
Their white backs rolled through the grey water, a living echo to the bones we had seen earlier that day.
From tragedy to resilience, Bamsebu had shown us both the darkest chapter and the most hopeful future of the Arctic.

Day 10 – Poolepynten & Alkhornet: The Last Step
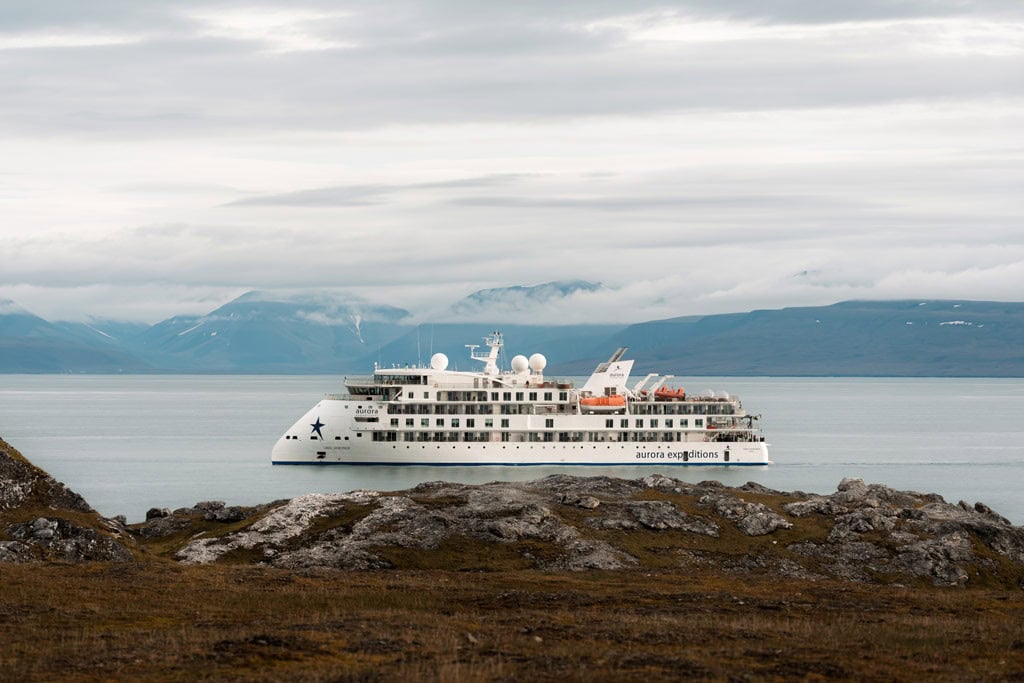
Our final full day in Svalbard dawned clear, the fog that had defined so many mornings finally gone.
The Greg Mortimer anchored off Poolepynten, a low-lying spit known for its walrus haul-outs.
But in true expedition style, the animals weren’t there to greet us. Instead, the beach revealed a different kind of drama.
We walked across soft mosses and driftwood, the air alive with bird calls.
Kittiwakes filled the sky, while Arctic terns dived fearlessly at anyone who strayed too close to their nests.
Along a lake, a sly Arctic fox prowled in plain sight, constantly harassed by furious birds intent on keeping it away from their chicks.
A lonely walrus, weary and battered from an age of battles, dozed on the beach.
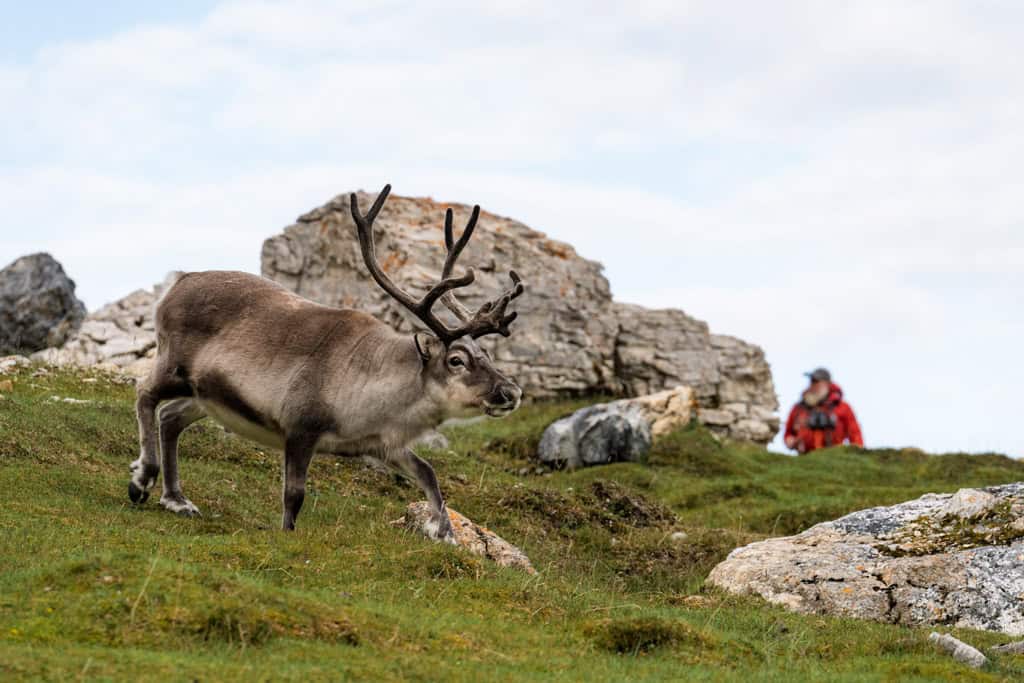
In the distance, reindeer grazed under a low ceiling of clouds, indifferent to our presence. It was a reminder that the Arctic doesn’t always deliver what you expect, but it always delivers something.
By afternoon we sailed into Isfjorden, a sign that civilisation was near.
Yet before Longyearbyen came into view, we had one last landing — Alkhornet.
Beneath its sheer dolomite cliffs, thousands of kittiwakes wheeled in chaotic circles, their calls echoing across the fjord.
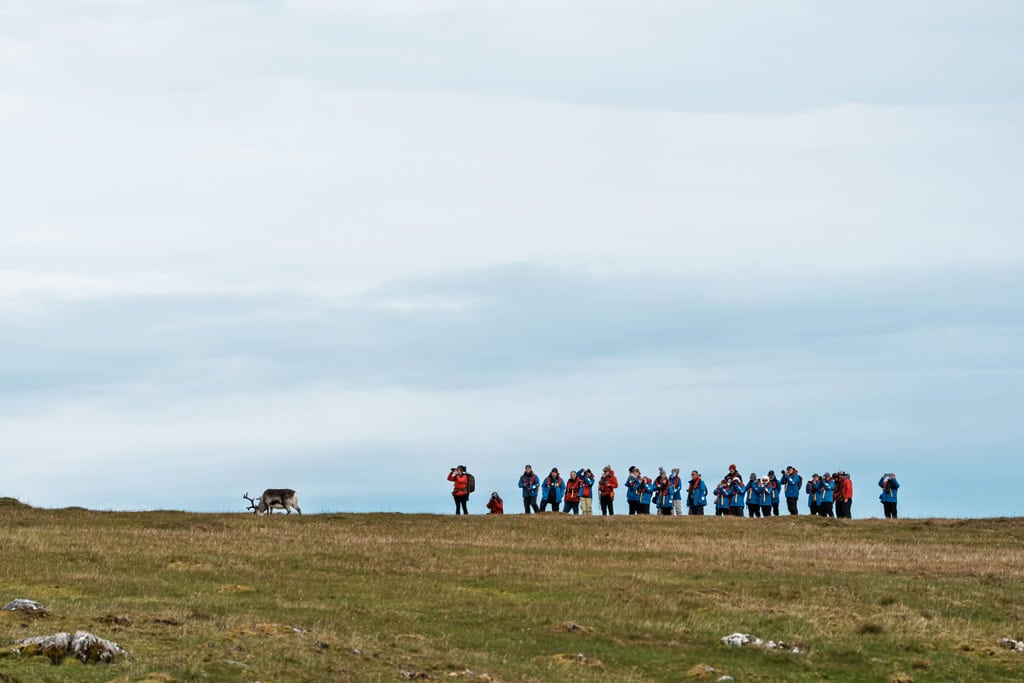
On the tundra below, dozens of reindeer wandered, far more than we had seen all trip.
The abundance was overwhelming, a fitting finale that seemed to sum up the richness of Svalbard in a single view.
As we stood beneath the cliffs, watching the last light soften over the mountains, the journey replayed itself in our minds: walrus sprawled on ancient whaling beaches, guillemot chicks plunging into the sea, ivory gulls circling out of the mist, and polar bears – so many polar bears – etched forever in memory.
The Arctic had given us everything: beauty, unpredictability, and a raw wildness that cannot be tamed. It was the perfect closing chapter.

Day 11 – Longyearbyen: The End of the Road
The mountains of Isfjorden came back into view as the Greg Mortimer eased toward Longyearbyen, the place where it had all begun.
After ten days in the wild, the colourful houses along the shore looked almost surreal, a reminder that civilisation still existed beyond the silence of glaciers and sea ice.
Disembarkation was bittersweet. Bags lined the corridors, jackets were handed back, and friends embraced with promises to stay in touch.
The ship that had become our floating home was suddenly just a vessel again, ready for its next voyage.
But the memories lingered: the first polar bear rising from a floe, the ivory gulls wheeling out of the mist, the walrus sprawled on beaches, and the reindeer grazing beneath Alkhornet’s cliffs.
Svalbard had been more than a destination – it was an experience that had reshaped the way we saw wilderness.
Longyearbyen might have been the end of the road, but the Arctic had already followed us home.
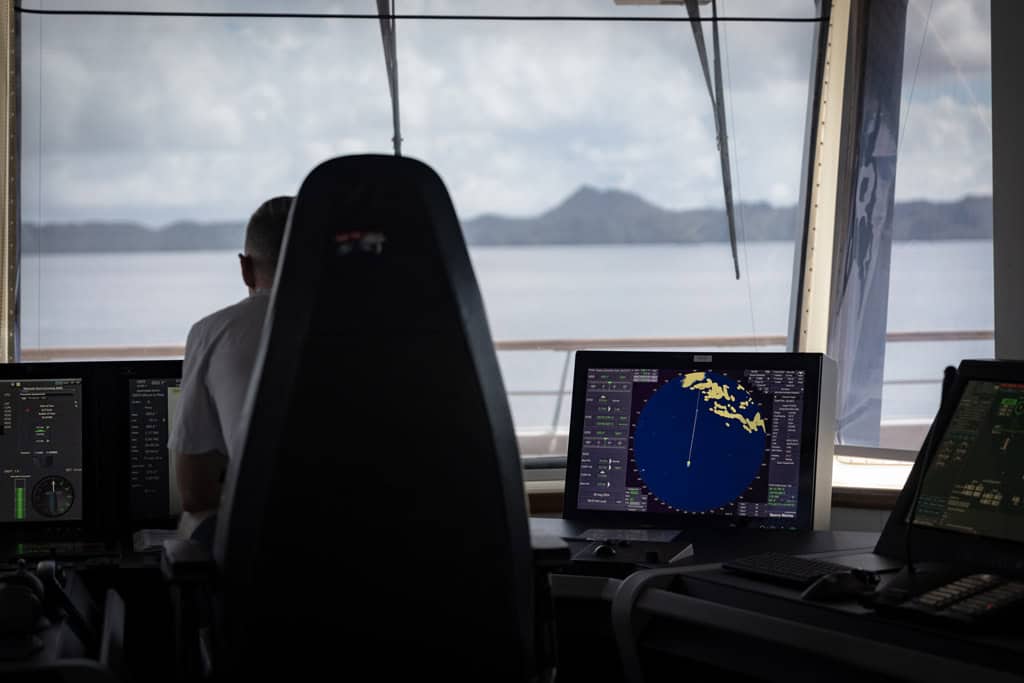
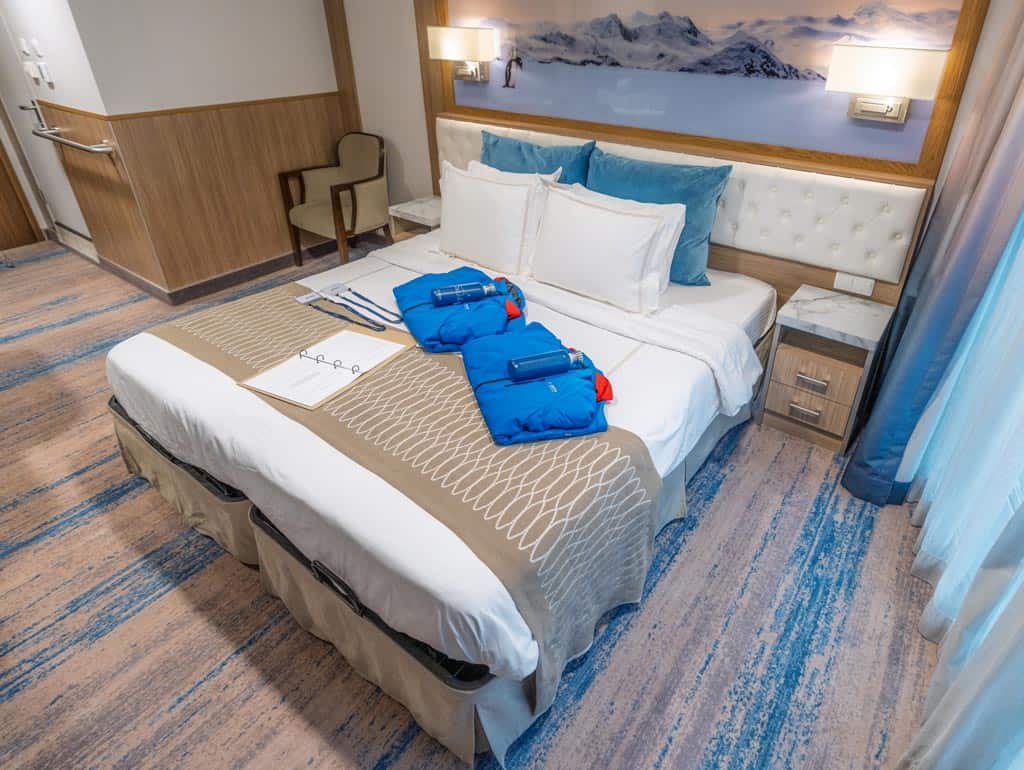
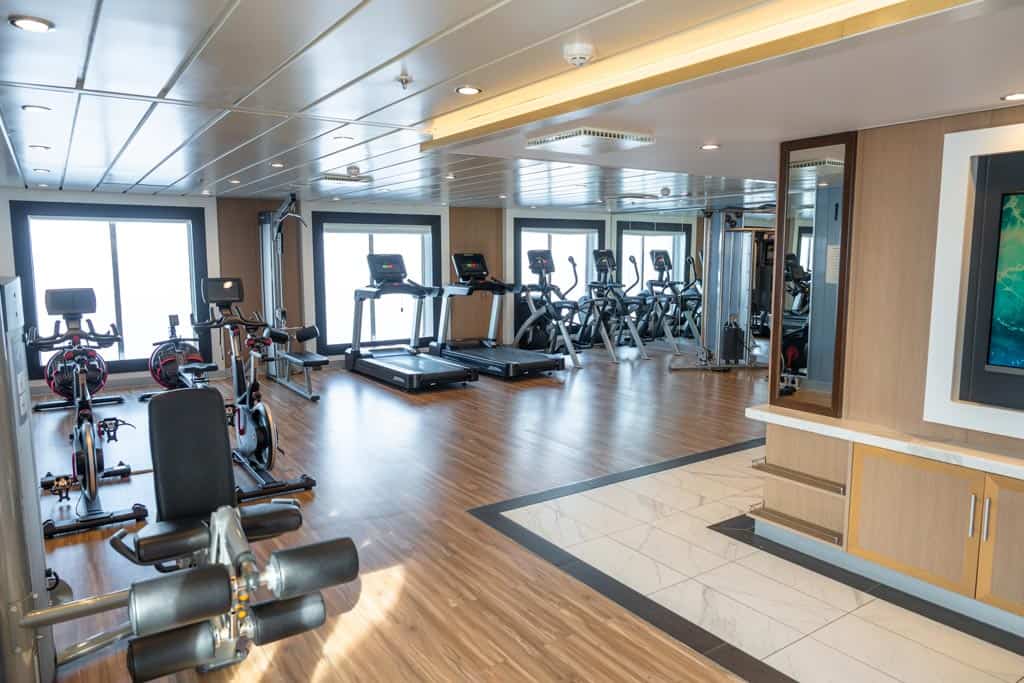
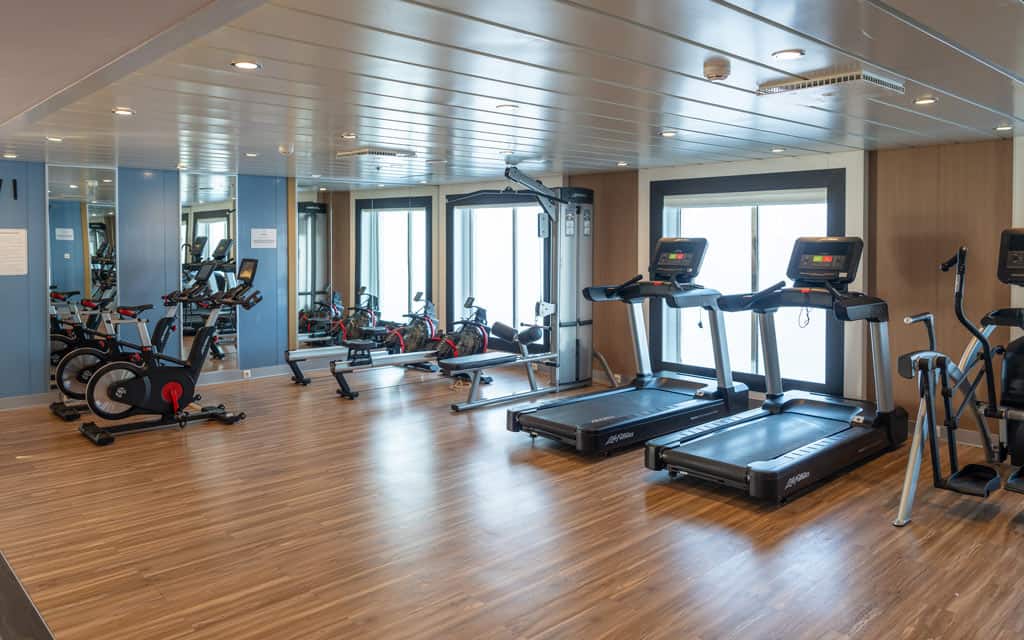
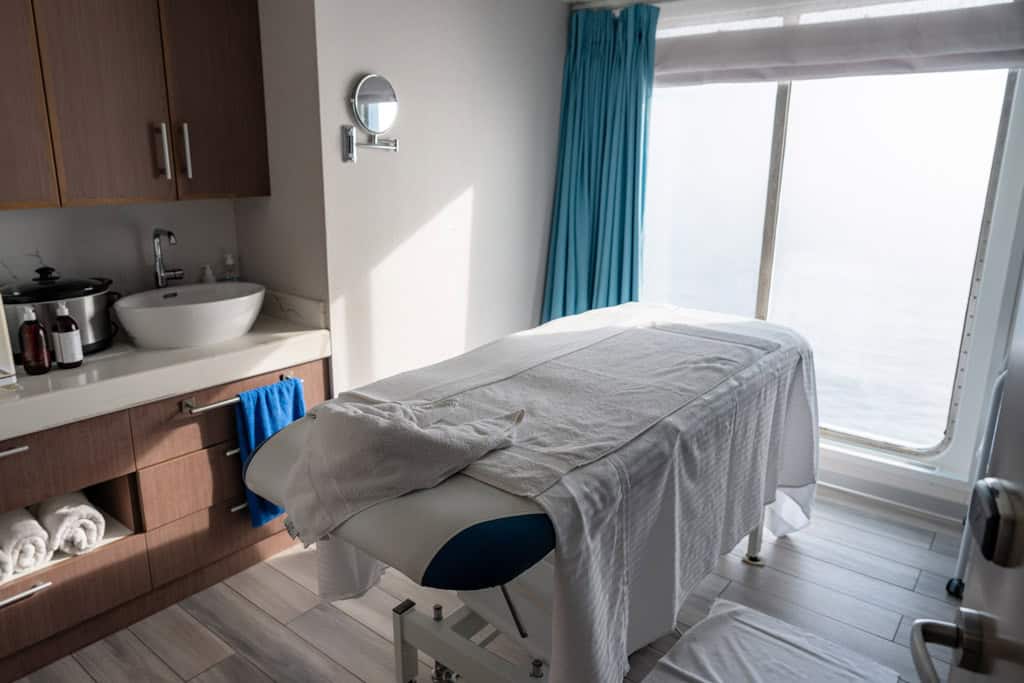
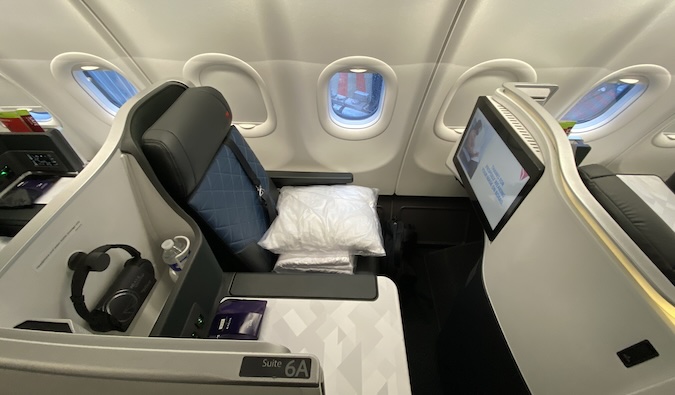
About the Greg Mortimer
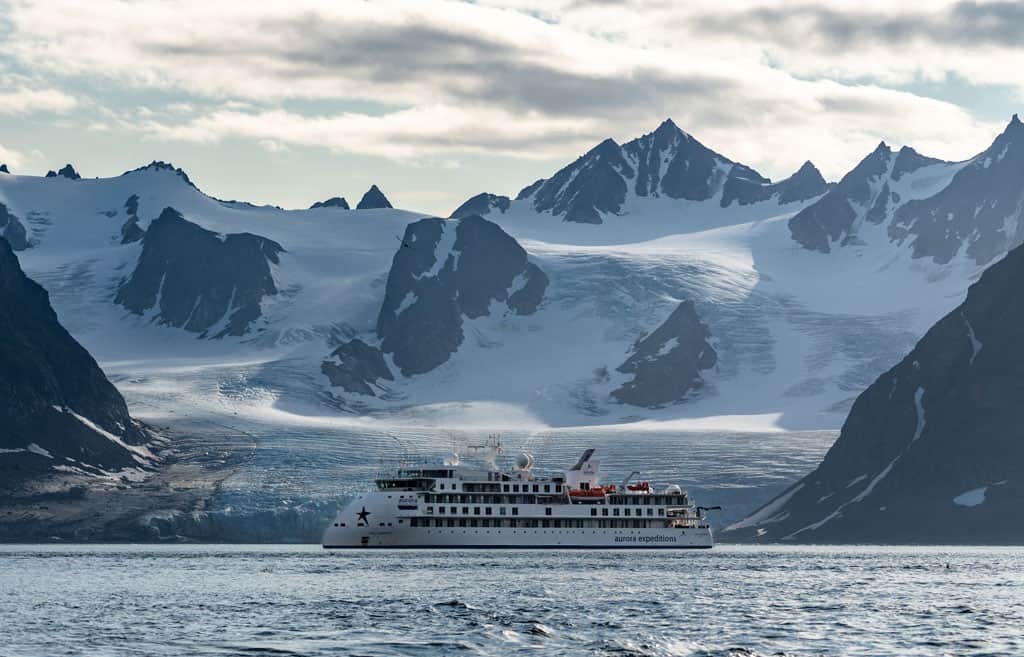
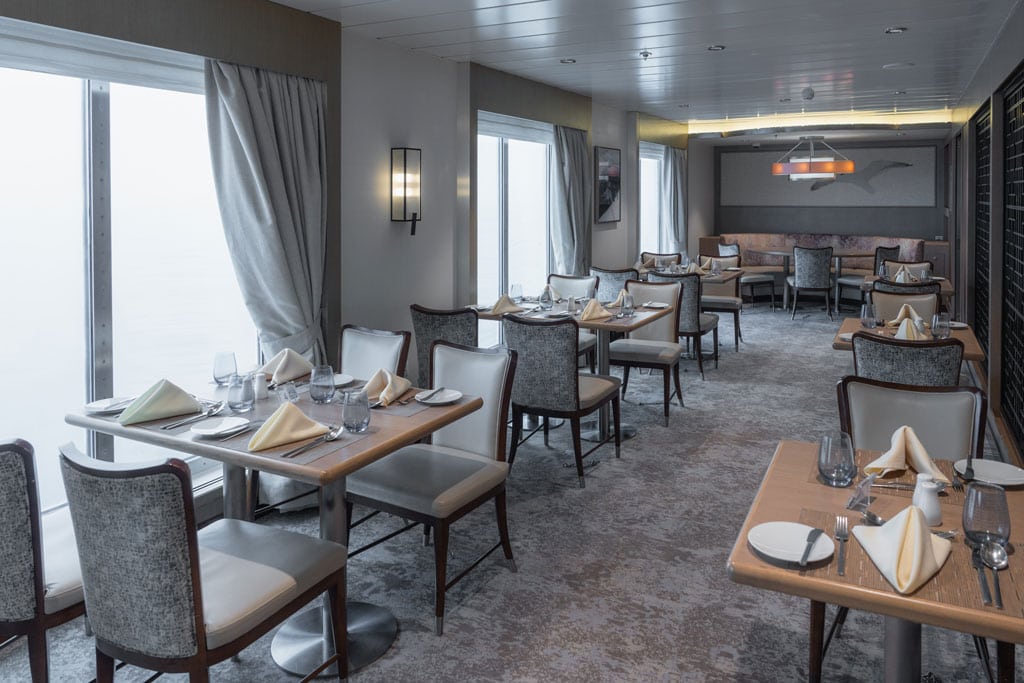
For this voyage we sailed aboard the Greg Mortimer, Aurora Expeditions’ purpose-built expedition ship.
With its innovative X-BOW® design, the vessel handled the open seas with remarkable stability, giving us a smooth ride even when the Arctic threw its weight around.
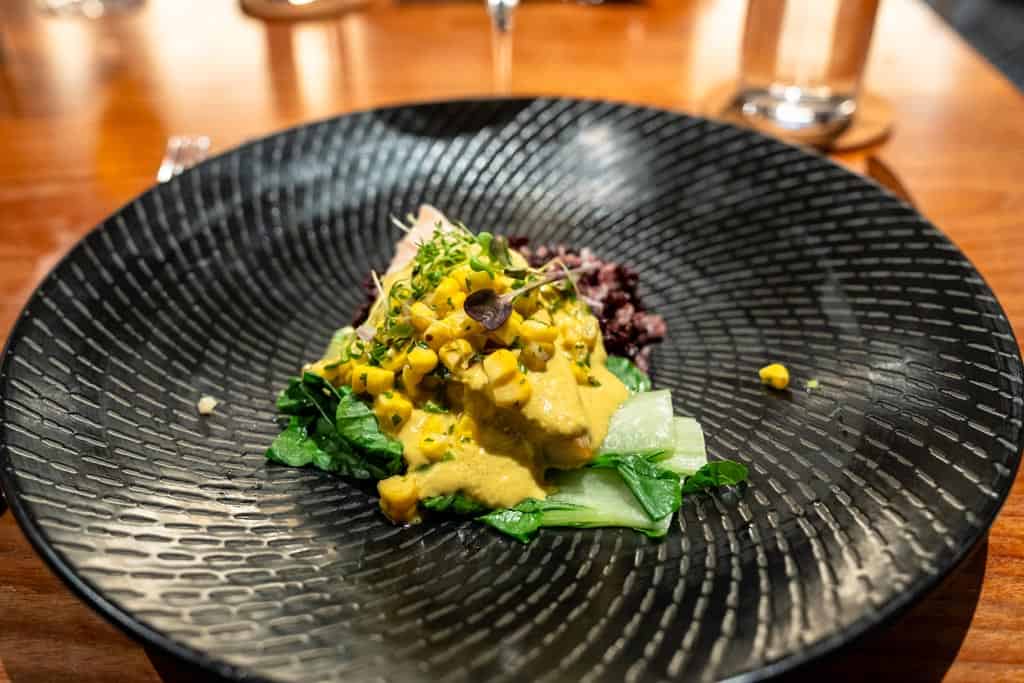
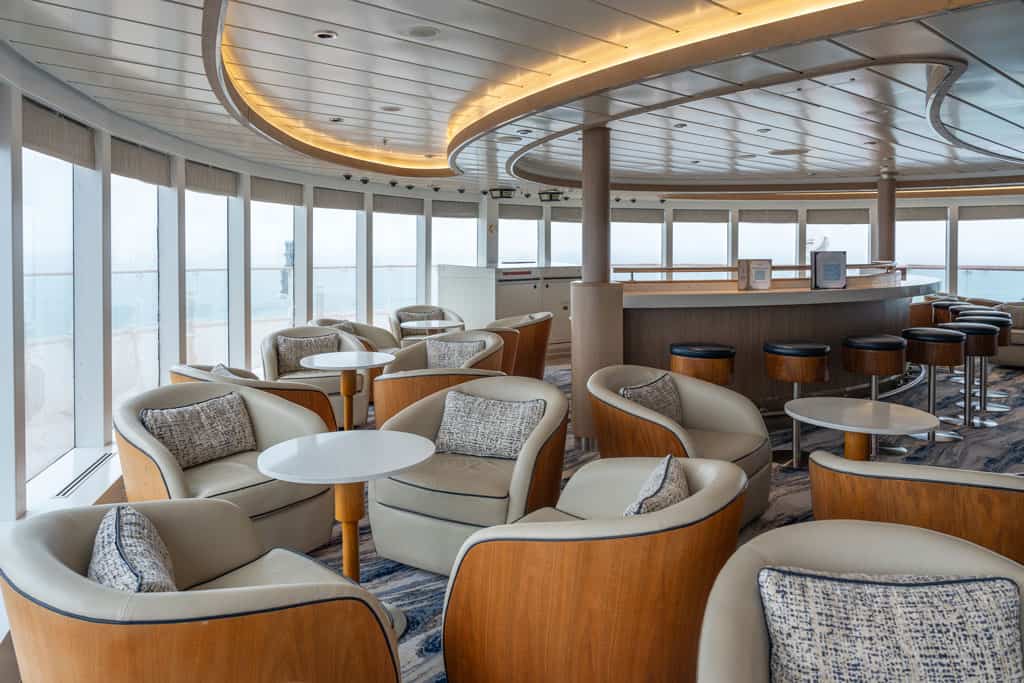
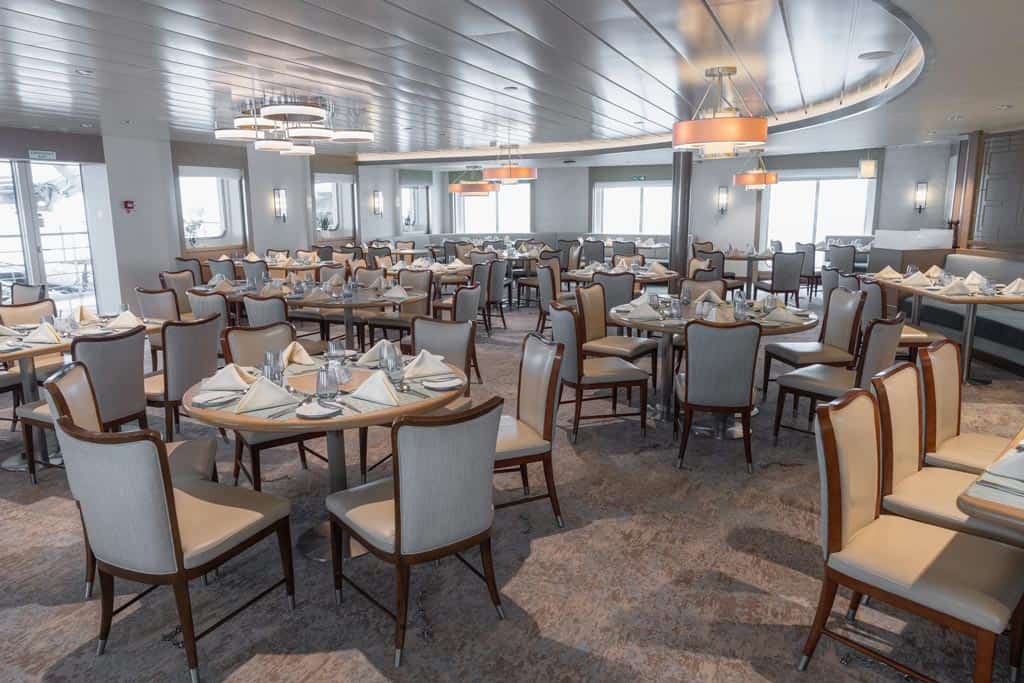
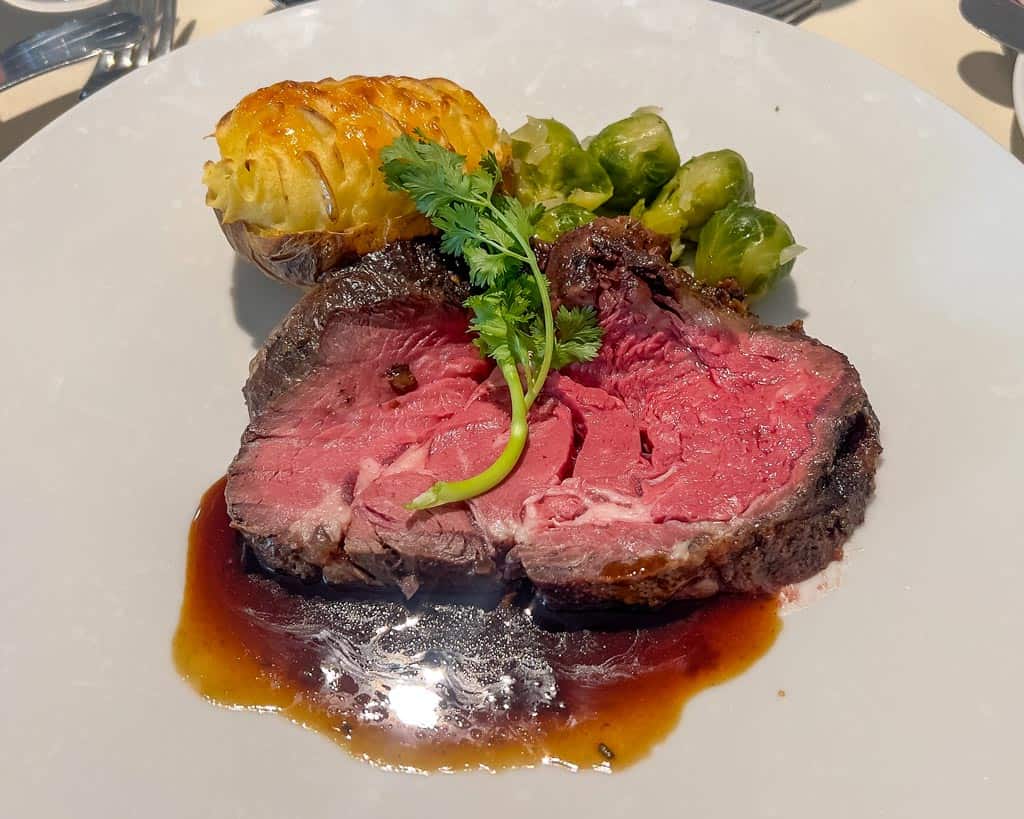
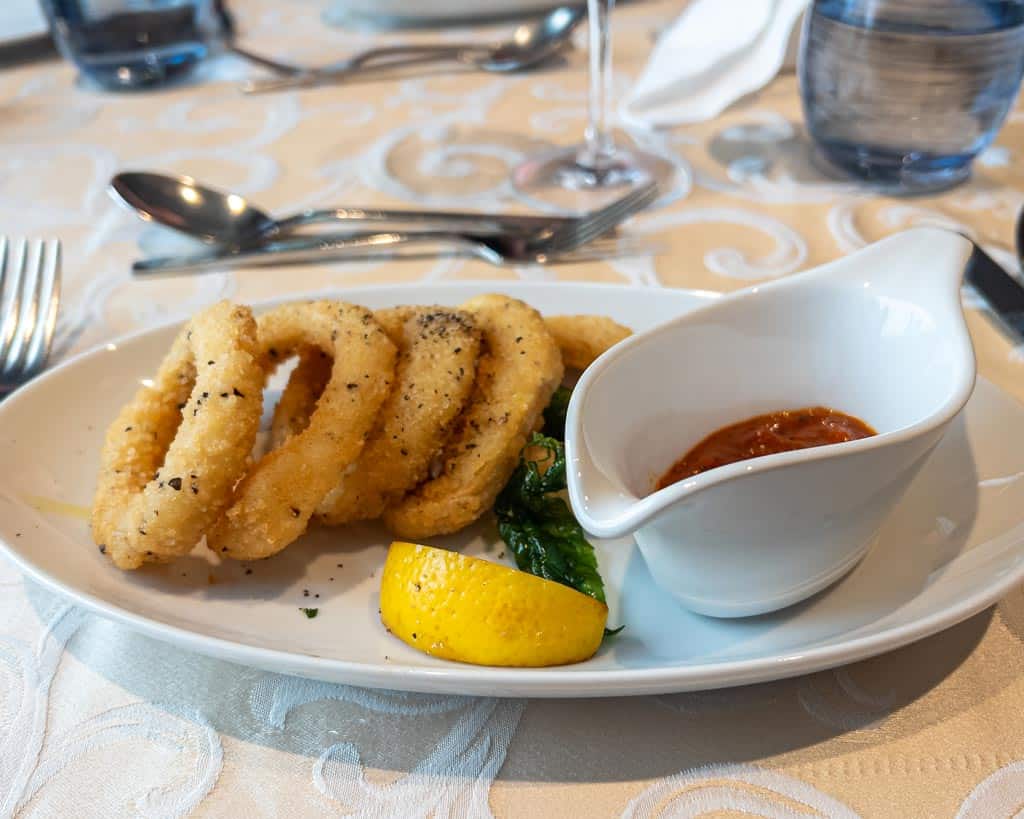
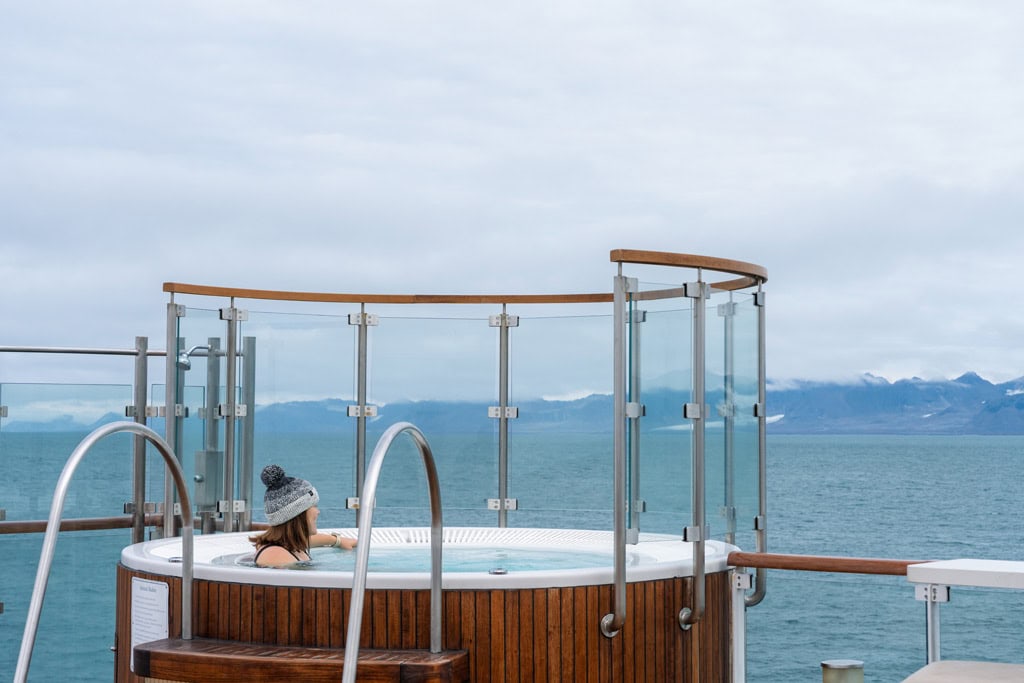
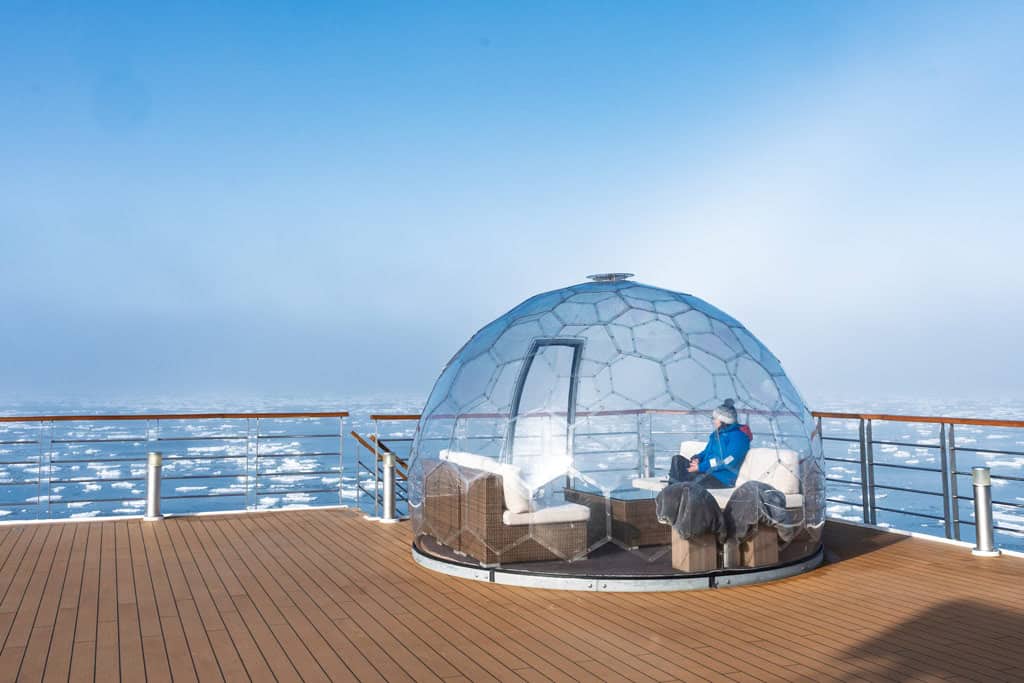
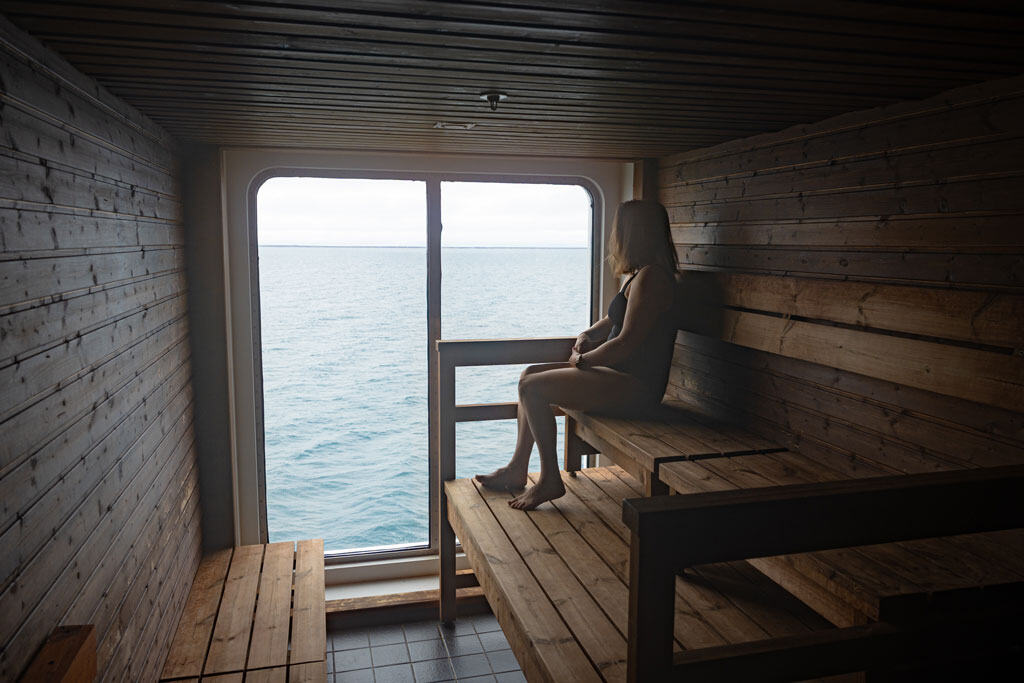
Life onboard was relaxed and welcoming. Days flowed between lectures in the theatre, casual meals in the dining room, quiet moments in the library, and time out on deck watching the scenery roll past.
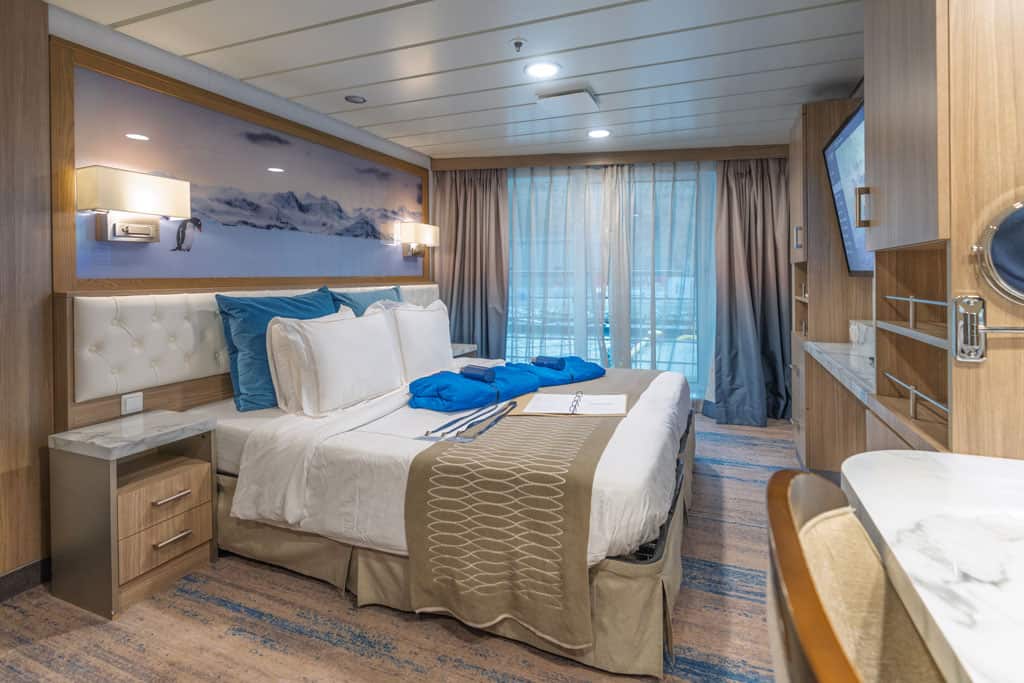
The mudroom made Zodiac operations seamless, and the cabins were comfortable sanctuaries to return to after long days in the field.
We’ve written a full review of the Greg Mortimer, covering the cabins, dining, and onboard experience in more detail — you can read it here: Greg Mortimer Ship Review.
Top 10 Tips for a Svalbard Expedition
Planning a voyage into the High Arctic? Here are our best tips to help you get the most out of your Svalbard expedition cruise:
- Pack Layers, Not Bulk
The weather changes fast – from fog and drizzle to sunshine and snow in the same day. A good base layer, insulating mid-layer, and waterproof shell will cover you for every landing. - Bring a Dry Bag for Your Camera
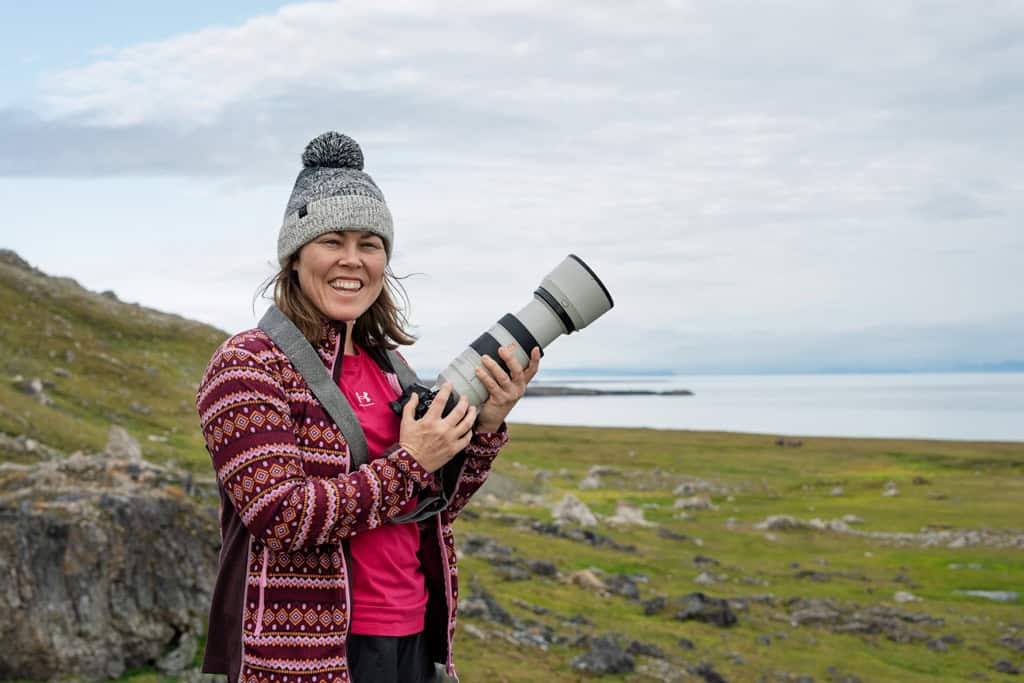
Zodiac spray, sleet, and rain are a constant threat. A simple waterproof dry bag (or even a roll-top backpack liner) will keep your gear safe between ship and shore. - Learn Your Camera Before You Go
Wildlife doesn’t wait while you fumble with settings. Practice at home with your zoom lens, fast shutter speeds, and burst mode so you’re ready when a polar bear steps onto the ice. - Don’t Skip the Biosecurity Checks
Cleaning Velcro and vacuuming gear may seem tedious, but it’s essential. Svalbard’s ecosystem is fragile, and these steps protect the environment you came to see. - Respect Wildlife Distances
The Expedition Team sets strict approach limits for good reason. Staying back ensures both safety and natural behaviour – and with long lenses, you’ll still capture stunning photos. - Expect Plans to Change
Fog, ice, or a wandering bear can cancel a landing in seconds. Embrace the flexibility. Often, the backup plan turns into one of the trip’s highlights. - Take Advantage of the Lectures
The onboard talks are more than filler – they deepen the experience. Learning about Arctic history, geology, or seabirds makes every landing richer. - Get Out on Deck Often
Some of the best wildlife sightings happen while the ship is underway. Whales, seabirds, and even polar bears can appear out of nowhere. Always keep your binoculars handy. - Join the Polar Plunge (If You Dare)
It’s cold. It’s ridiculous. But leaping into the Arctic Ocean is a memory you’ll never forget – and the hot shower afterwards feels like luxury. - Soak It All In
Between cameras, lectures, and logistics, it’s easy to stay busy. But don’t forget to simply stand on deck, breathe the icy air, and watch the Arctic drift by. These moments of stillness often become the most treasured memories.
Verdict – Our Thoughts on Svalbard with Aurora Expeditions
Svalbard is one of those rare places that feels more like another planet than another country.
From the silence of drifting sea ice to the chaos of bird cliffs, from ivory gulls and walrus to the unforgettable thrill of spotting polar bears, every day brought something different – and often something completely unexpected.
What stood out most was not just the landscapes or the wildlife, but the way expedition cruising works in the Arctic.
Plans shifted constantly – landings cancelled, routes adjusted, surprises embraced – yet each change revealed something we might never have experienced otherwise.
That flexibility is the essence of Svalbard, and Aurora Expeditions handled it with skill, safety, and genuine passion.
The Greg Mortimer proved the perfect platform: comfortable, welcoming, and designed to take us deep into the ice without sacrificing the intimacy of a small-ship voyage.
The Expedition Team were exceptional – knowledgeable, approachable, and clearly in love with this wild corner of the world.
Their expertise turned every landing into more than just a visit; it became an education.
Would we recommend it? Absolutely. If you’ve ever dreamed of standing at 82° North watching a polar bear pad across the ice, of drifting beneath seabird cliffs so alive they shake with sound, or of kayaking beneath a glacier face glowing blue in the mist, a Svalbard expedition with Aurora delivers it all — and more.
It’s not just a cruise; it’s an adventure into the unknown, where every day feels like a gift from the Arctic itself.
![Aurora Expeditions’ Greg Mortimer Ship Review [2025]](https://farasar.ir/wp-content/uploads/2025/08/Greg-Mortimer-Ship-Review-Tour-Aurora-Expeditions-Hero-Image.jpg)


![GoPro HERO 13 Review – The Ultimate Camera Guide [2025]](https://farasar.ir/wp-content/uploads/2025/07/GoPro-HERO-13-Black-Review-Feature-Image.jpg)


![Coral Geographer Review | Ultimate Expedition Ship [2025]](https://farasar.ir/wp-content/uploads/2025/07/Coral-Geographer-Review-Coral-Expeditions-Ship.jpg)