If you’re anything like me, learning a new language can feel both exciting and a bit overwhelming.
That’s where FluenDay comes in. I’ve been testing it out for a few weeks, and while it’s not perfect right now, it does offer a fresh approach with its focus on real-world context.
You can dip into short video Clips, follow structured Courses, or even chat with an AI Tutor. Luckily there’s also a mix of eBooks and games to keep things interesting.
Whether you’re planning a trip, needing a new skill for work, or just want to expand your horizons, FluenDay has some useful tools to help you get there.
My FluenDay Review
Learning a new language can be a wild ride – sometimes it’s thrilling, sometimes downright confusing. So, when I came across FluenDay, I was curious to see if it could actually make the process a bit more fun and less of a chore. Spoiler alert! It’s got some cool features, but like any app, it’s not without its quirks.
FluenDay is a language learning app that covers Spanish, French, German, and English speakers. You can use it on your phone (available on Google Play and the App Store) or on the website if you prefer a bigger screen.
With a solid 4.8 rating and 42,000 reviews on Google Play, it’s clear people are liking what FluenDay has to offer. The app focuses on teaching language in context, which is a fancy way of saying you’ll learn how to speak like real people do in real-life situations – not just memorize vocabulary lists.
What’s Included in FluenDay?
When you sign up for FluenDay, you get access to a pretty impressive range of features designed to make language learning as engaging and flexible as possible. Here’s what’s included:
All Languages: No need to pick just one – your membership gives you access to all the languages FluenDay offers. Feel free to dabble in Spanish, French, German and English as much as you want.
All Courses: Progress at your own pace with bite-sized lessons that help you build up your vocabulary and grammar skills step by step.
All Movie Clips: Dive into over 3,000 clips from movies and TV shows, giving you a real-world feel for how languages are used by native speakers.
AI Tutor: Practice speaking in real-life scenarios with the AI Tutor, which gives you personalized feedback to help you improve.
All Games: Learn while having fun with mini-games that reinforce key language concepts like vocabulary and grammar.
All eBooks: Access a selection of popular classics in both text and audio formats, perfect for reading or listening at your own level.
The Features
FluenDay has four main sections: Clips, Courses, an AI Tutor, as well as eBooks and Games. I’ll break them down for you:
FluenDay – Clips
This is hands down my favorite part of FluenDay. The Clips section is packed with over 3,000 short clips from movies and TV shows, which makes learning feel more like binging Netflix than studying. The clips come with context notes, so you’re not just learning what the words mean, but also how they’re used in different situations. Plus, at the end of each lesson, there’s a quick dialogue session where you can try out what you’ve learned. It’s a pretty cool way to practice without feeling like you’re practicing.
FluenDay – Courses
The Courses are where you’ll find more traditional lessons, but they’re still pretty bite-sized and manageable. They walk you through vocabulary and grammar, and if you’re learning English, there’s an AI presenter that reads your answers back to you, which helps with pronunciation. They’ve got flashcards, quizzes, and extra exercises to reinforce what you’ve learned, but if you’re after French or Spanish, you’ll have to wait a bit longer for the AI presenter feature.
FluenDay – AI Tutor
If you’re learning English, the AI Tutor is like having your own personal language partner – minus the awkwardness of talking to a real person. It lets you practice specific dialogues and then gives you feedback on how you did, with tips on how to improve. It’s a cool idea, but right now, it’s only available for English learners. They say more languages are coming, so fingers crossed!
FluenDay – eBooks and Games
This section is where you can indulge your inner bookworm or gamer. There’s a selection of popular classics in their original language, with both text and audio formats. The built-in dictionary is handy for tricky words, and you can save words to review later. The mini-games are fun and are a nice way to reinforce what you’ve learned without feeling like you’re hitting the books.
How Much Does FluenDay Cost?
FluenDay offers a few different subscription options, so you can pick what works best for your budget and commitment level. Here’s the breakdown:
Monthly Plan: $9.99, billed every month. This is great if you’re just testing the waters, but keep in mind you’ll be paying more in the long run.
Annual Plan: Currently 50% off at $49.99, billed once a year after a 7-day free trial. This is a solid choice if you’re planning to stick with it for a while, and it’s easier on the wallet than the monthly plan.
6-Year Plan: $71.99, one-time payment for six years. This is hands down the best value if you’re in it for the long haul. You pay once, and you’re set for six years—basically locking in a super low rate.
Whether you’re committing for the short term or the long run, there’s an option that’ll fit your needs.
Can I Get a Refund?
If you change your mind after purchasing FluenDay, you’re in luck—there’s a 7-day no-questions-asked money-back guarantee for purchases made through the website. This gives you a full week to decide if FluenDay is right for you.
For in-app purchases, the process is a bit different. You’ll need to check out the help section “How do I request a refund?” for specific instructions.
And if you run into any issues or have questions, you can always reach out to their customer support team at support@fluenday.com.
Final Thoughts
Overall, FluenDay is a fun app to use, and I enjoy it as an alternative to the more traditional methods of language learning.
The Clips feature alone makes it worth checking out, in my opinion. It’s not perfect, though no app is, however I’m excited to see how it grows and what new features they roll out. If you’re looking for a fresh way to learn a language, FluenDay might just be what you need to get started.
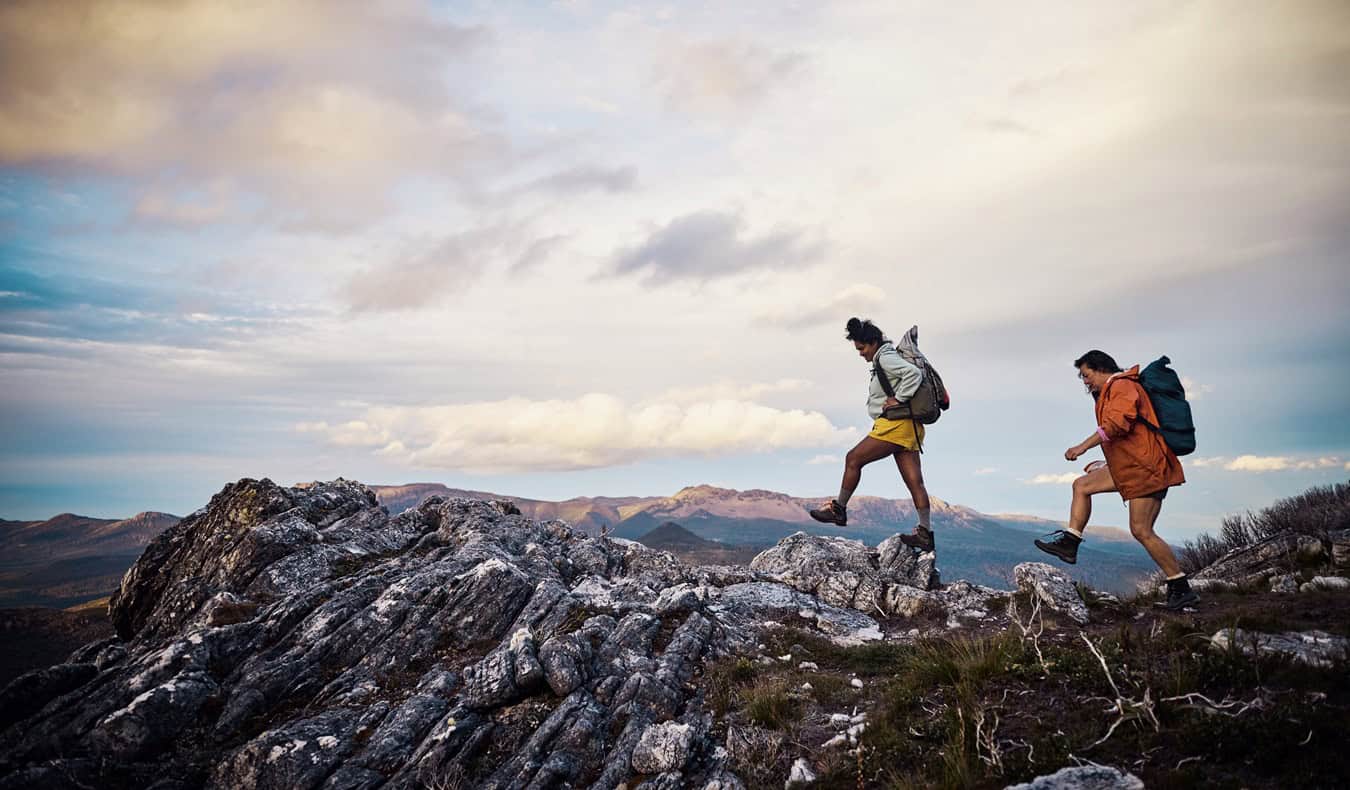
Sunshine, surf, and scenic trails – this Noosa itinerary covers beautiful beaches, breathtaking sights, and the best bites in a grand three-day getaway.
Noosa, set on Queensland’s sunshine coast, is the textbook definition of a resort town. It’s lush, relaxed, and unapologetically beautiful.
A two-hour drive north of Brisbane, Noosa is a suburb of the greater Shire of Noosa. While it’s the top tourist hub, it’s also a fantastic base for exploring nearby attractions like posh Noosaville, sunny Sunshine Beach, and the idyllic Peregian Beach.
Noosa Heads draws all kinds of visitors – families with kids, foodies, beach lovers, surfers, nature enthusiasts, and anyone with good taste.
Need something chic? Stroll along Hastings Street, the town’s main shopping and dining belt. This vibrant strip displays an array of top-end boutiques, gourmet restaurants, alfresco cafes, beachfront resorts, and luxurious day spas.
But if it’s nature you’re after, Noosa never disappoints. The town is packed with natural beauty.
We mean pristine beaches, enchanting fairy pools, a lush hinterland, and coastal trails that will leave you in awe. And if you’re a surfer (or a fan), Noosa is renowned for its lovely waves.
Ready for a sun-soaked escapade? This three-day Noosa itinerary maps out the perfect way to explore one of Australia’s iconic towns.
Get ready for a gorgeous stay in Noosa!
Why is Three Days Enough in Noosa?
As the relaxation capital of Australia, it’s only right that you explore Noosa unhurried. Three days in Noosa Heads hits the spot.
Even if you spend a day hiking the Noosa National Park, surfing the Noosa Main Beach, and shopping on Hastings Street, you’ll still have enough time to see the Noosa Everglades or cruise the Noosa River.
Plus, an extra day to relax on the peaceful Tea Tree Bay or drive into the Noosa Hinterland.
Noosa’s is tailor-made for a luxurious time-out from the daily hustle and bustle. But it doesn’t mean you can’t have a bit of nature and adventure thrown into the mix.
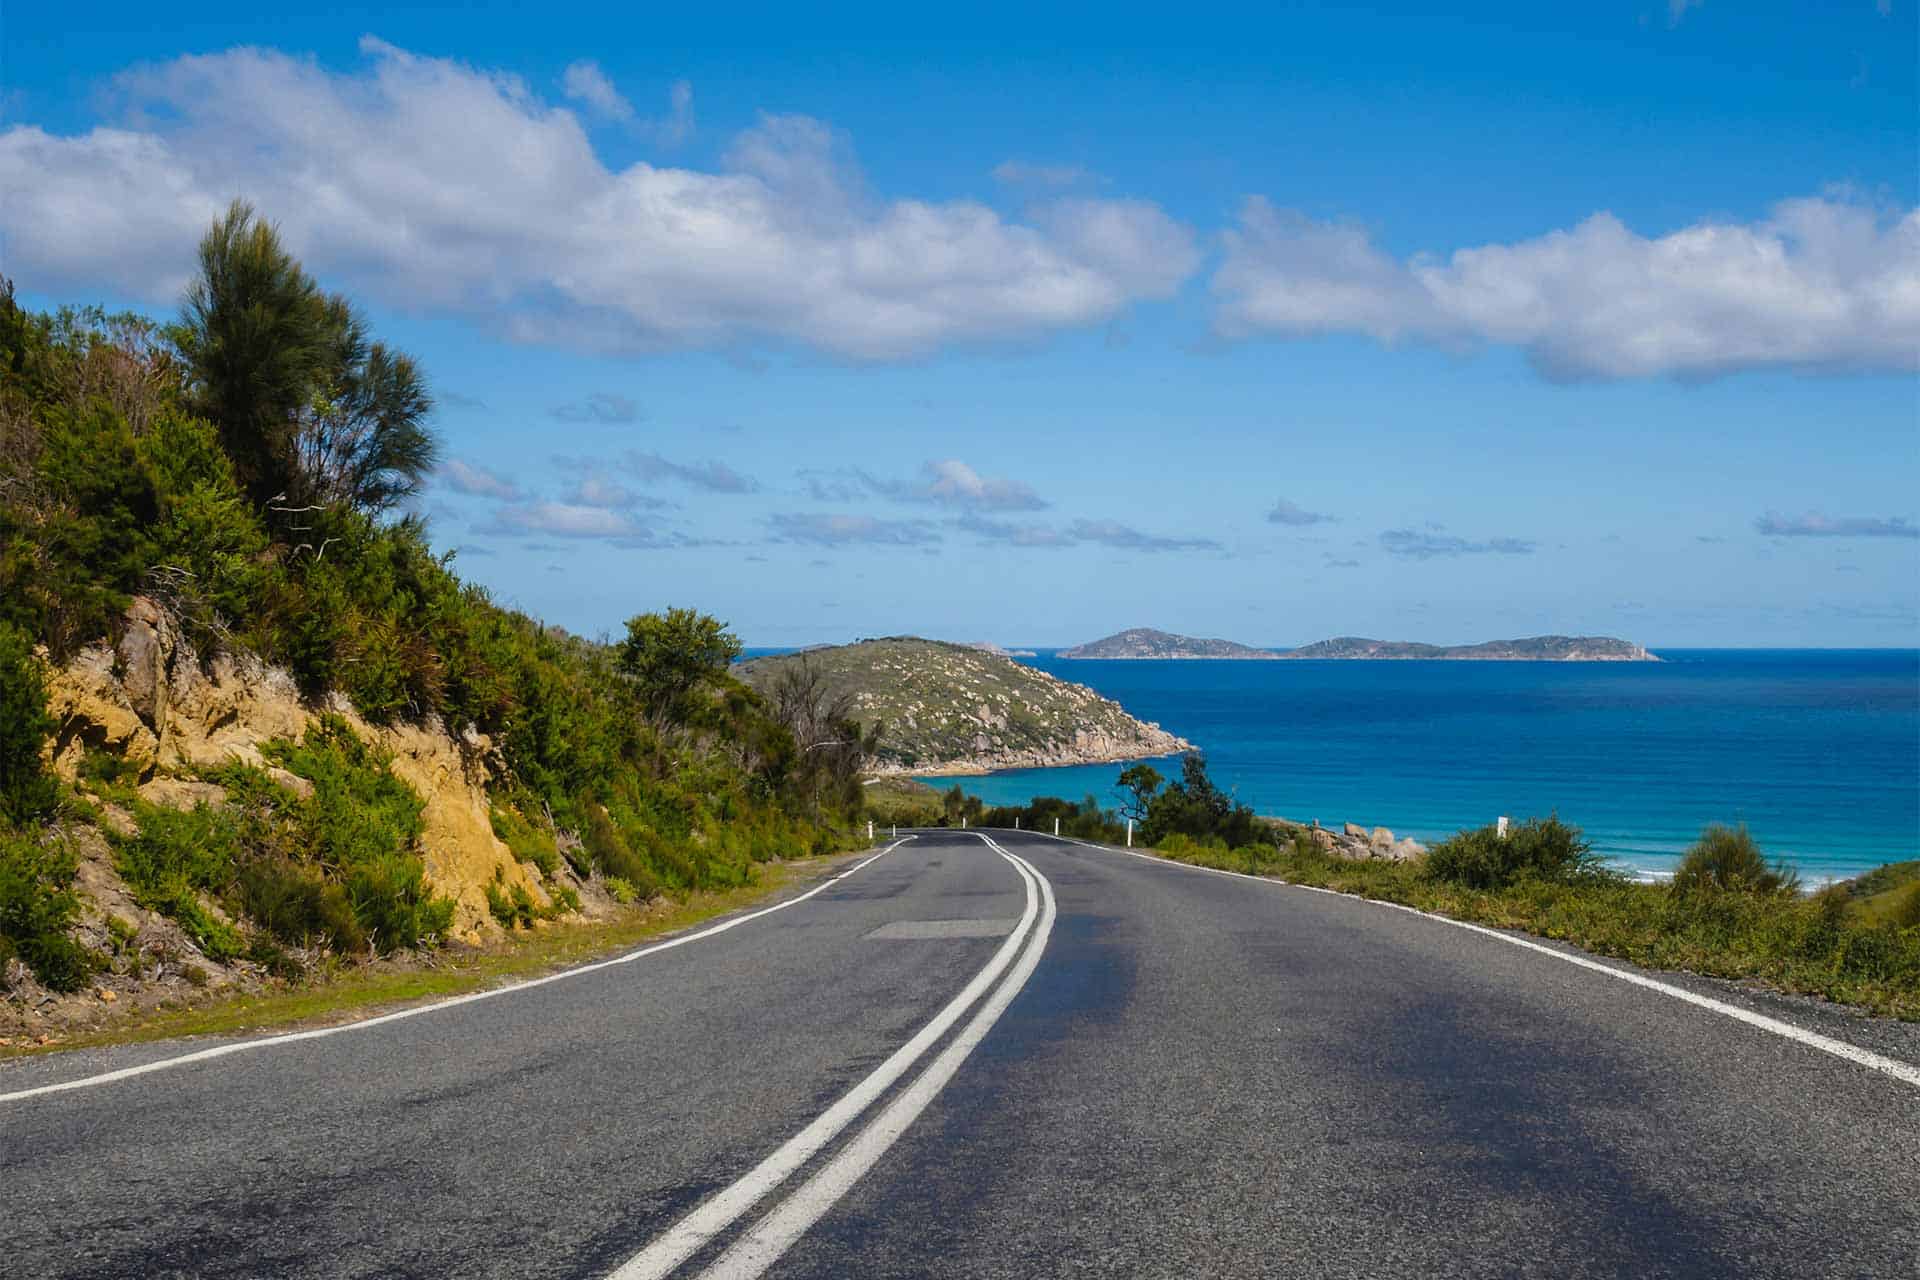
The best way to get around is to rent a car and explore on your own! We recommend Rental Cars, which has the largest range of vehicles for the best value on the market.
Day 1
Spend your first day in Noosa Heads and explore Noosa National Park. Then, add a dash of pizzazz to your Noosa itinerary with a stroll or dinner at the iconic Hastings Street.
Rock pools in Noosa National Park
Morning: Noosa National Park
After a hearty breakfast or some coffee to perk you up, waste no time kicking off your morning with a hike at Noosa National Park.
Head to the southern end of the Noosa Main Beach, past the surf club, until you spot the signpost that says ‘first point.’ The concrete footpath leads into the heart of the park.
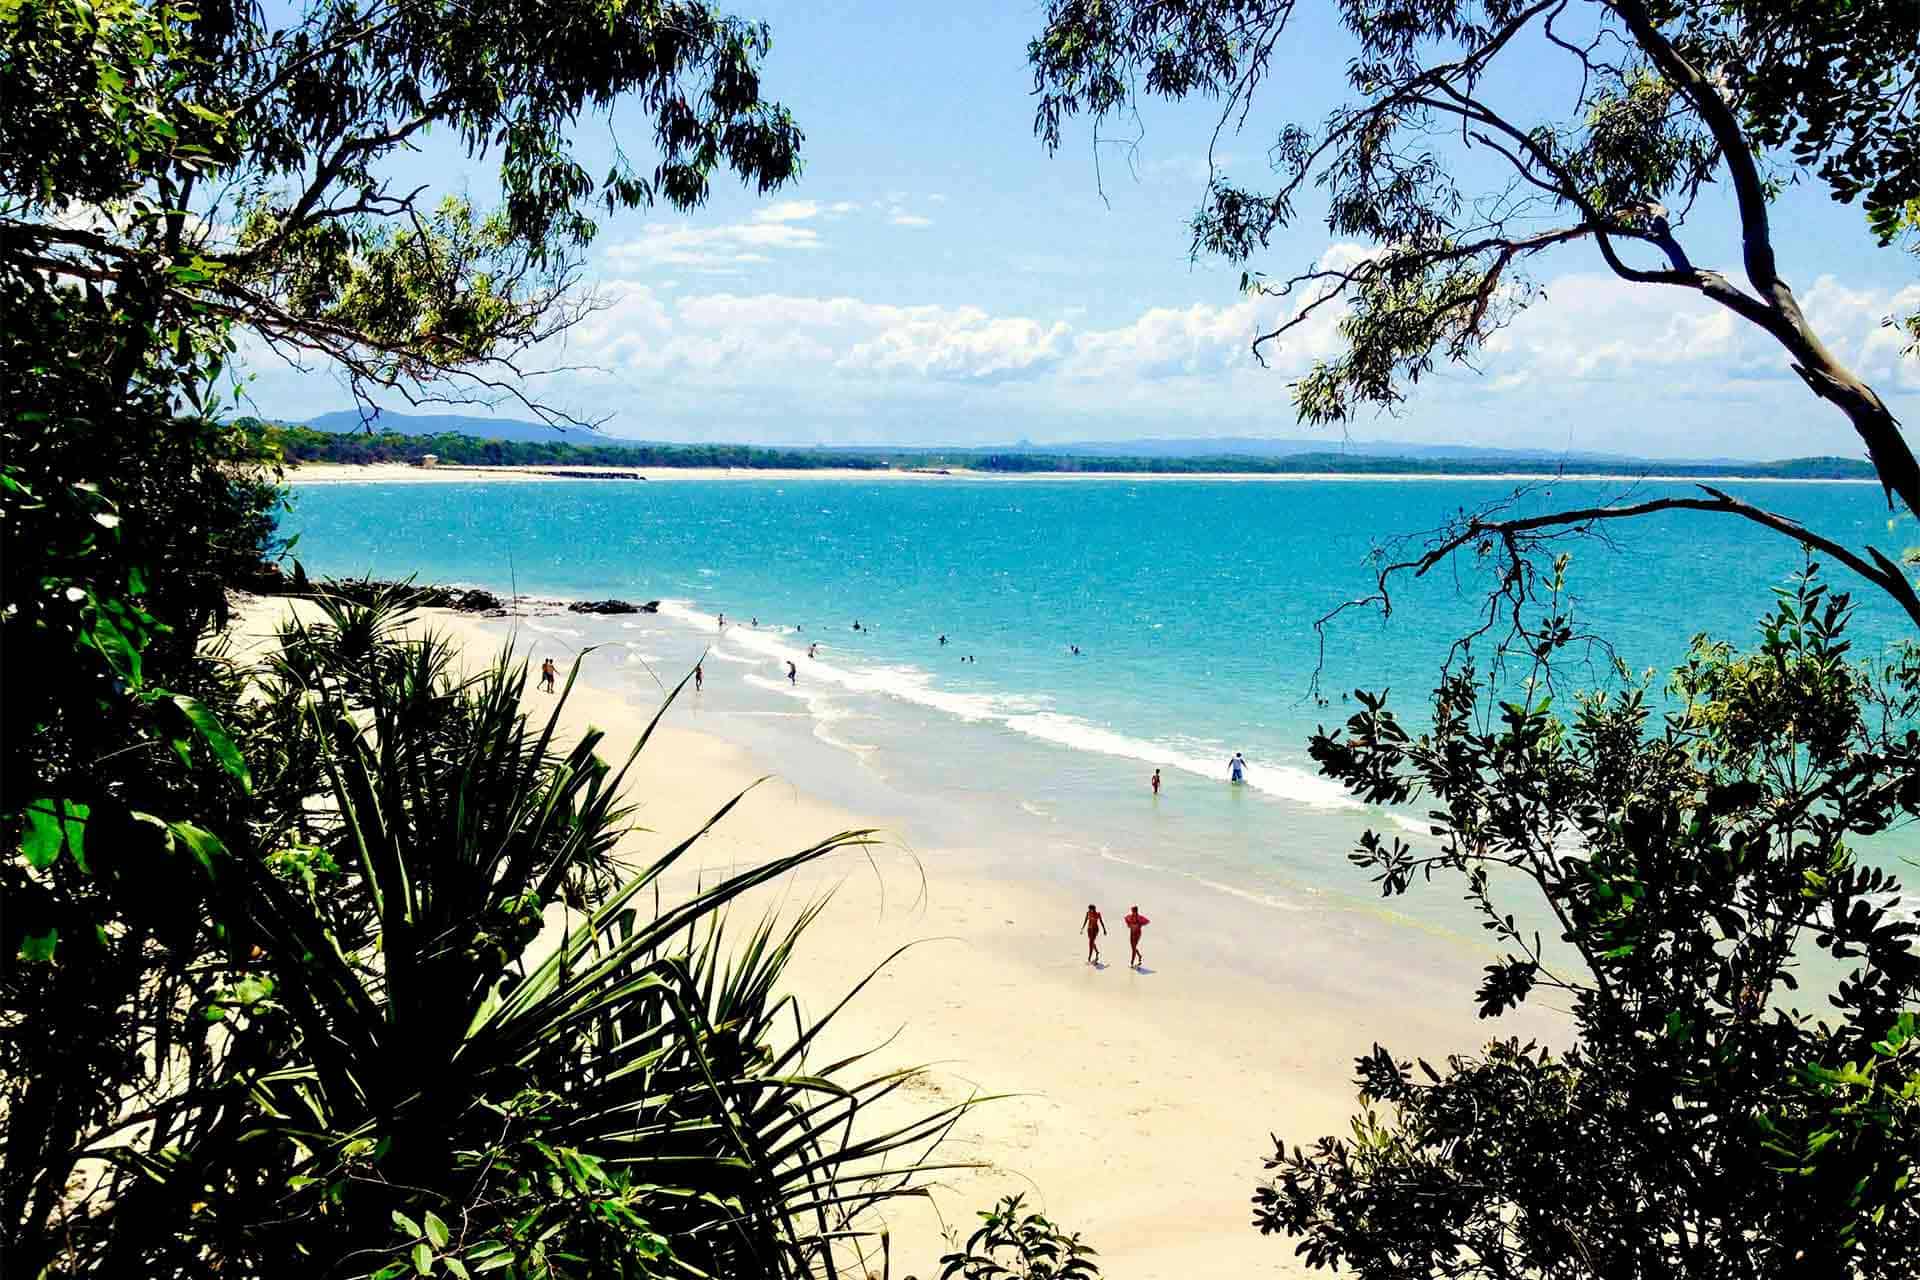
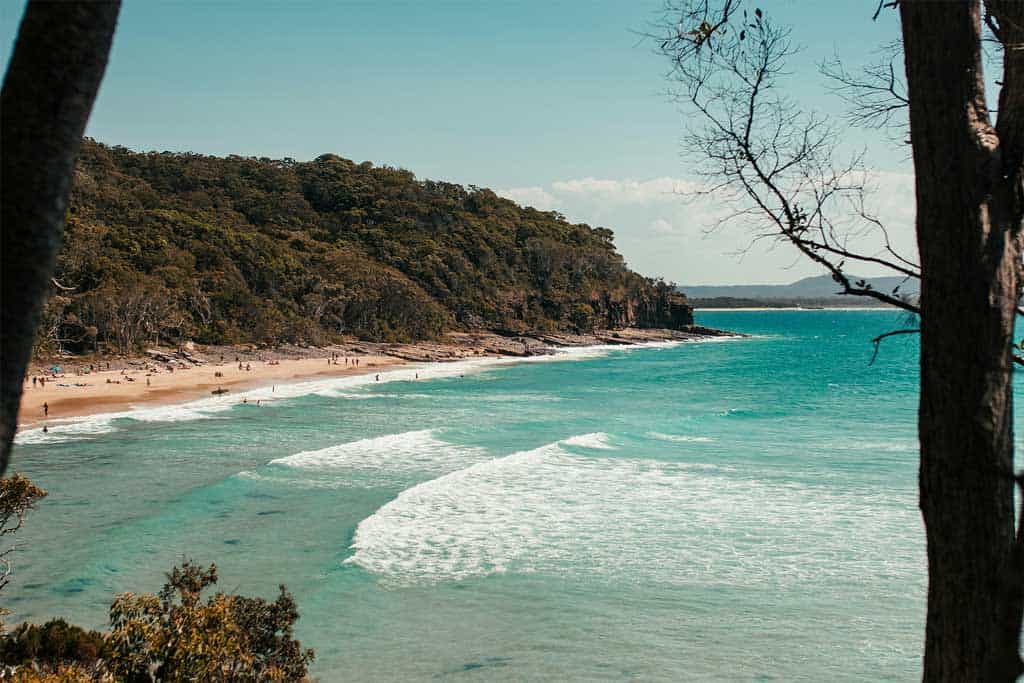
Noosa National Park covers a protected headland overlooking Laguna Bay and a chain of gorgeous beaches, including Peregian Beach, Little Cove Beach, and Sunshine Beach, all perfect for a morning swim.
The best way to explore this secluded paradise is on foot. The park has an extensive network of hiking trails, but the most popular is the coastal walk.
This Noosa National Park trail is a circuit loop stretching 5.4 km each way for an entire length of 10.8 km. It typically takes four hours to complete. We recommend you take your time and enjoy the lookouts, views, and beaches along the track.
The first lookout on the coastal trail is Boiling Pot, set at the end of a eucalyptus forest on the headland. Continue to Tea Tree Bay, one of the prettiest beaches on the Sunshine Coast.
After Tea Tree Bay, push on to Dolphin Point. This lookout is known for frequent sightings of dolphins and turtles. If you drop by between July and October, you might see some whales swim by.
Follow the track opposite the one going to Dolphin Point, and you’ll find the Fairy Pools. These twin tidal pools, tucked between basalt rocks, lie at the far end of Granite Bay.
The only way to access the pools is by climbing down a rocky path on the side of a cliff face. Be very careful, as the track is narrow and slippery.
The next stop is Hell’s Gate, a craggy bluff looking across the coastline and Alexandria Bay.
The coastal walk ends at patrolled Sunshine Beach. Here, you can cool off with a dip in the ocean. Or, unwind on an outdoor sun lounge while sipping a post-walk cocktail.
If you’re done walking for the day, you can take the local bus (route 620 or 627) to Noosa Heads or Noosa Junction. You can also hike back the same way to complete the loop.
Afternoon: Main Beach or Little Cove Beach
After your long hike at the national park, you might want to sit and relax on the beach.
The buzzing Main Beach is fantastic for swimming, surfing, sunbathing, or people-watching. You can watch beginner and pro surfers catch the waves.
For somewhere quieter, head to Little Cove Beach, about 100 metres east of Main Beach.
Kick back at Noosa Main Beach!
Alternative:
Those who want to continue exploring the national park can hike the other trails. These include Tanglewood Walk, Alexandria Bay Walk, Emu Mountain Walk, and Ocean Beach Walk, which will take you to the breathtaking Peregian Beach.
Evening: Dining/Shopping Hastings Street
Enjoy the balmy Queensland evening with a leisurely walk around Hastings Street, the heart of Noosa Heads.
The iconic Hastings Street is more than just a shopping district; it’s a vibe – whether you’re after something chic and glitzy or casual and beachy.
Hungry? Hastings Street never disappoints with its long list of dining options. Check out Noosa’s iconic beachfront restaurant, Bistro C, which serves modern Australian cuisine. Stay on after dinner for some cold beer or cocktail by the beachfront.
Day two of our Noosa itinerary is for discovering the remarkable Noosa Everglades. An everglade is a swampy grassland. Only two exist in the world, and one of these is in Noosa (the other is in Florida).
Morning: Noosa Everglades
One of the best ways to explore Noosa Everglades is to glide along its glassy waters on a kayak or canoe. You can opt for a self-guided excursion (DIY) or join one of the eco-kayaking tours.
To explore the Noosa Everglades without a guide, head to Boreen Point, a 30-minute drive from Noosa Heads. The village lies on the southern edge of Lake Cootharaba, the gateway to the Everglades.
You can rent a kayak or canoe there. The package also includes a life jacket, safety gear, and a map with instructions.
The Everglades is easy to navigate. But if you want someone with local knowledge to help you find hidden spots and explain the flora and fauna, consider looking for an operator that offers eco-kayaking tours.
The Everglades is 60 km long and spans between the Upper River Noosa and the Great Sandy National Park. It may take the entire morning and a better part of the afternoon to explore the waterway.
Alternative: Noosa Everglades Cruise
Not keen on kayaking the Noosa Everglades? You can enjoy the waterway and its wildlife with a relaxing afternoon cruise.
Late Afternoon: Noosa River
There’s no better way to unwind after a long day of adventure than watching the sun set over the Noosa River. You’ll get lovely sundown views at Gympie Terrace, a bustling riverside green space.
The area has several cafes and restaurants if you want to grab something to eat.
Heading south? Explore the iconic Australian city of Brisbane!
Day 3
The Noosa Hinterland, a region of rolling hills, serene lakes, and picturesque towns, is about 30 minutes inland from Noosa Heads. It’s a favourite destination for scenic drives and culinary tours on the Sunshine Coast.
You can access the hinterlands even without a car. Buses have regular trips there. But it’s crucial to check timetables and carefully manage your time.
Want a hassle-free trip without driving or transferring from one bus to another? Go for the Sunshine Coast Hinterland Tour, which combines scenic views, history, and good food.
Morning: Cooroy
Firstly, drop by the Noosa Farmers Market if, by chance, you are in Noosa Heads on a Sunday for breakfast. The market is open from 7:00 am to noon.
After breakfast, start your trip to Cooroy, about 30 minutes from Noosa Heads, by car. Once in Cooroy, you can check out the Butter Factory Arts Centre. This creative hub is free to enter.
Another attraction to visit is the Noosa Botanic Gardens. Perched on the shores of Lake MacDonald, it’s great for a serene stroll.
Getting to Cooroy: Take the bus route 631 from Noosa Heads Station to Cooroy. Travel time is around 40 minutes. The bus departs hourly, but check the timetable for changes.
Trade the beach for the forest in the Noosa Hinterland.
Midday: Pomona
Pomona is the town next to Cooroy. Sprawled across the foot of Mount Cooroora, it’s known as the ‘living heritage town’ of the Sunshine Coast.
That said, the top thing to do in Pomona is to take the Heritage Walk. On this hour-long hike, you’ll see historic landmarks like the old railway, the courthouse, and the Majestic Theatre, the world’s longest-running silent cinema.
End your visit with a tour of the Pomona Distilling Co. and try their signature pink gin. The distillery has a mouthwatering menu, so you might want to enjoy a late lunch there.
Getting to Pomona: Take the bus route 632 from Cooroy Station to Pomona. Travel time is around 10 minutes.
Late Afternoon: Noosa Heads
The rest of the day is at your disposal. You can ride the waves at Little Cove or take surfing lessons on the Noosa Main Beach. If you need to do last-minute shopping, many shops on Hastings Street are open until late.
Return to Noosa Heads: Take the bus route 632 from Station St in Pomona to Noosa Junction. Travel time is 60 minutes.
If you’ve always wanted to try surfing, Noosa is a great place to learn.
Alternative: Dolphin Safari in Noosa Heads
If you prefer the ocean over the mountains, swap the Noosa Hinterland for a dolphin safari around the Noosa Headland and Double Island Point.
Now that you have your Noosa itinerary planned, here’s everything you need to know about the best time to visit, how to get around, and where to stay.
When to Visit Noosa
Noosa is a year-round destination with something unique in store, no matter the season.
For milder weather, a smaller crowd, and lower rates, visit Noosa during the shoulder months, September to November (spring) and March to May (autumn).
However, bear in mind March is the wettest month of the year, and some outdoor activities may not push through due to the rains.
December to February is summer, the peak and busiest season in Noosa. It’s sunny, dry, and warm, with temperatures between 27°C and 30°C. Summer comes with larger crowds and higher rates.
In winter, June to August, the average temperature sits around 20°C but may drop to 10°C at night. Winter is the low season, so it’s less crowded and more affordable.
You can use the efficient bus services to get around Noosa Heads and the popular destinations nearby. Translink is Queensland’s primary public transport company and offers regular trips around Noosa.
You can also walk or cycle around town, including Hastings Street, Main Beach, and Little Cove.
Bikes and electronic scooters are available to rent. They’re a fun and sustainable way to explore Noosa and its neighboring suburbs.
If you plan to explore areas beyond Noosa Heads, such as the Sunshine Coast Hinterland, you can rent a car for convenience and flexibility. You’ll also find taxis and ride-sharing services, but they can be pricey.
If you’re not in a hurry, you can take the Noosa Ferry. It operates from 8:00 AM to 6:00 PM, making seven stops along the river between the Noosa Marina and the Sofitel Jetty at Hastings Street.
It’s easy to get around Noosa!
Where to Stay in Noosa
Whatever your budget and preference is, Noosa has something to offer. Noosa Heads and Noosaville are two of the best areas to stay in this coastal town.
Noosa Heads is fantastic for visitors seeking to stay in the heart of the action. It also has a broader range of options, including budget-friendly bed-and-breakfasts and high-end hotels. Many accommodations boast easy beach access, perfect for a resort-style getaway.
Noosaville, with its picturesque riverfront setting and relaxed atmosphere, is a pleasant alternative for those who want somewhere with a cozy, residential vibe. It’s also just a short ride from and to Noosa Heads.
Here are some of the top places to stay in Noosa.
Best Hostel in Noosa – Halse Lodge Noosa Heads
Built in the 1880s, Halse Lodge is a heritage-listed two-story hostel in the middle of Noosa Heads.
After a complete renovation, the lodge re-opened in 2024 and now features modern dorms and cozy private suites.
Guests can access a shared kitchen, game room with billiards and ping pong tables, yoga deck, tropical gardens, and evening entertainment.
Best Mid-Range Stay in Noosa – Noosa River Retreat Holiday Apartments
This secluded retreat is perfect for a Noosa long weekend or a quick overnight stay.
Each self-contained apartment features a comfy King or Queen-sized bed, a kitchenette, a dining area, and a living area that opens to a patio or balcony. There’s a lush garden and a heated outdoor pool for relaxation.
The property is an 8-minute walk to the riverfront, where you’ll find a host of cafes, bars, restaurants, and the ferry terminal to Noosa Heads.
Best Luxury Hotel in Noosa – Tingirana Noosa
Nestled between Noosa Beach and Hastings Street, Tingirana guarantees ultimate indulgence with its Hamptons luxury accommodations. From your tastefully decorated apartment, you can gaze into the sandy stretches of Main Beach.
The other amenities include two outdoor swimming pools, a spa and wellness centre, and an onsite restaurant.
DISCLAIMER: Some of the links in this article are affiliate links, which means if you book accommodation, tours or buy a product, we will receive a small commission at no extra cost to you. These commissions help us keep creating more free travel content to help people plan their holidays and adventures. We only recommend the best accommodations, tours and products that ourselves or our fantastic editorial team have personally experienced, and regularly review these. Thanks for your support, kind friend!
Join a group of like-minded travelers in our next scheduled tour in Russia on:
September 9th to 16th, 2025 (Russian Caucasus) – APPLY NOW
Sept 18th to 24th, 2025 (Arctic Russia) – APPLY NOW
It’s incredible to see how quickly things have changed when traveling in Russia.
From booking accommodation to accessing the internet or just getting into the country, traveling to Russia is very different from what it used to be like pre-2022.
Russia is a massive country, not only in terms of land, but also in its diversity and complexity. It would be impossible to write down a compelling travel guide in just 3500 words.
However, rather than serving as the ultimate guide to traveling across each region, this Russia travel blog contains all the relevant updated info and recent changes that will help plan your trip to Russia, including how to look for hotels, how to get your visa, how to book domestic flights, and much more.
Until 2022, Russia was a popular destination for travelers, and nobody was ever criticized for traveling there.
Moscow International Airport had connections with pretty much everywhere in the West, embassies across Europe were always packed with travelers trying to secure their visas, and the main language heard in the Hermitage Museum of Saint Petersburg was definitely English.
But today, Western foreigners are a rarity across Russia.
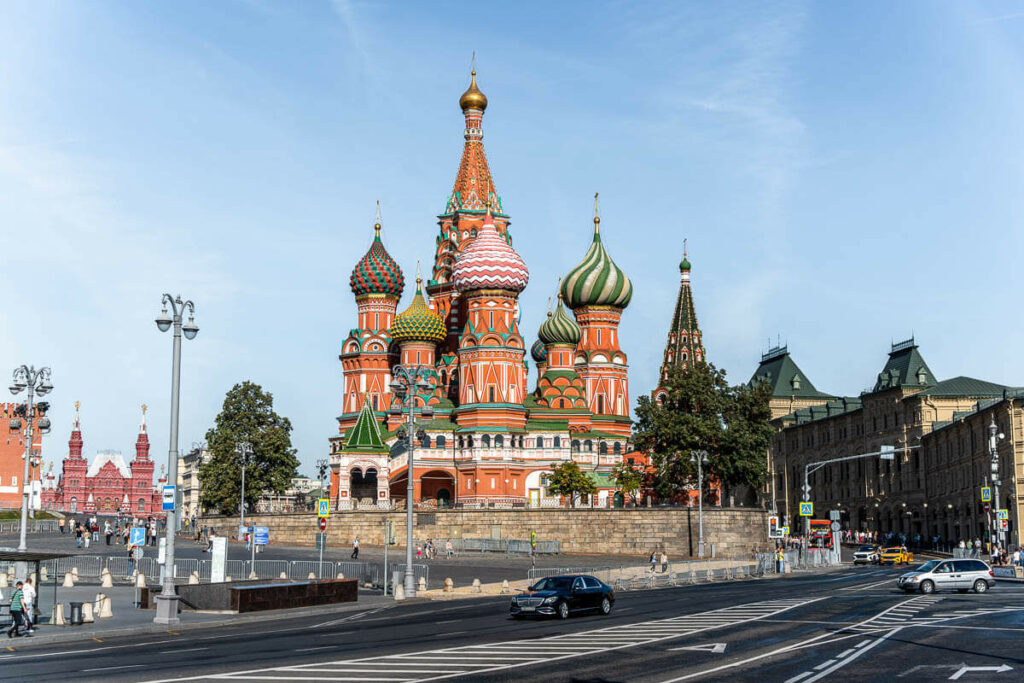
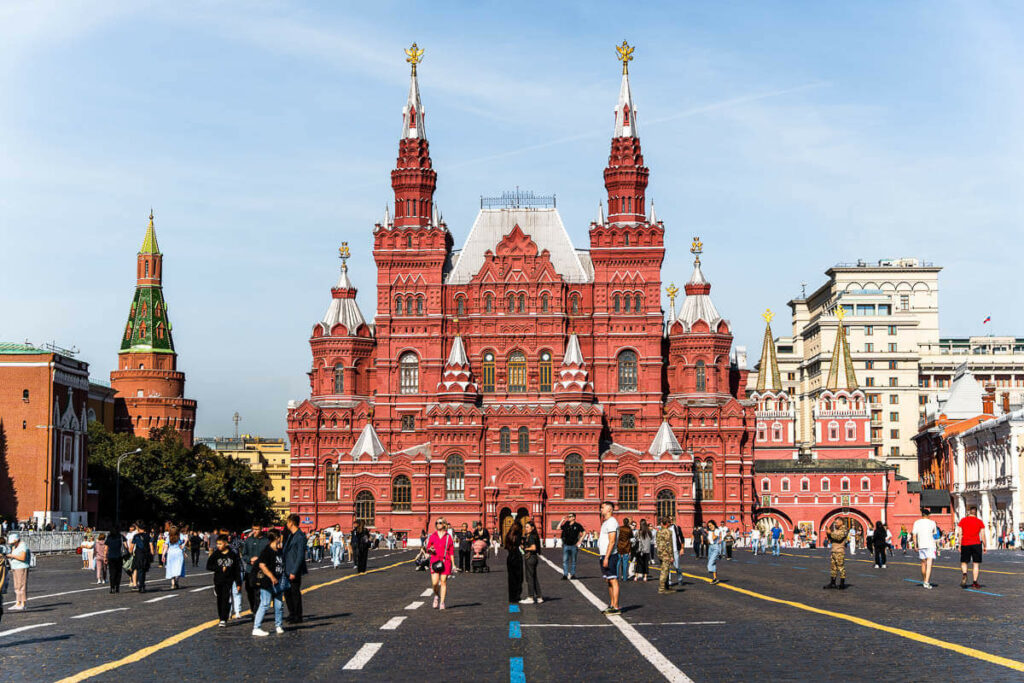
You can still see Asian tourists (mainly groups from China, Malaysia and Iran) in Moscow’s Red Square but the total number of Western tourists I saw after 1 month of traveling across Russia was zero, not a single one.
This made things particularly interesting, especially when meeting English-speaking Russians, who always had plenty of questions on my country’s opinion of Russia.
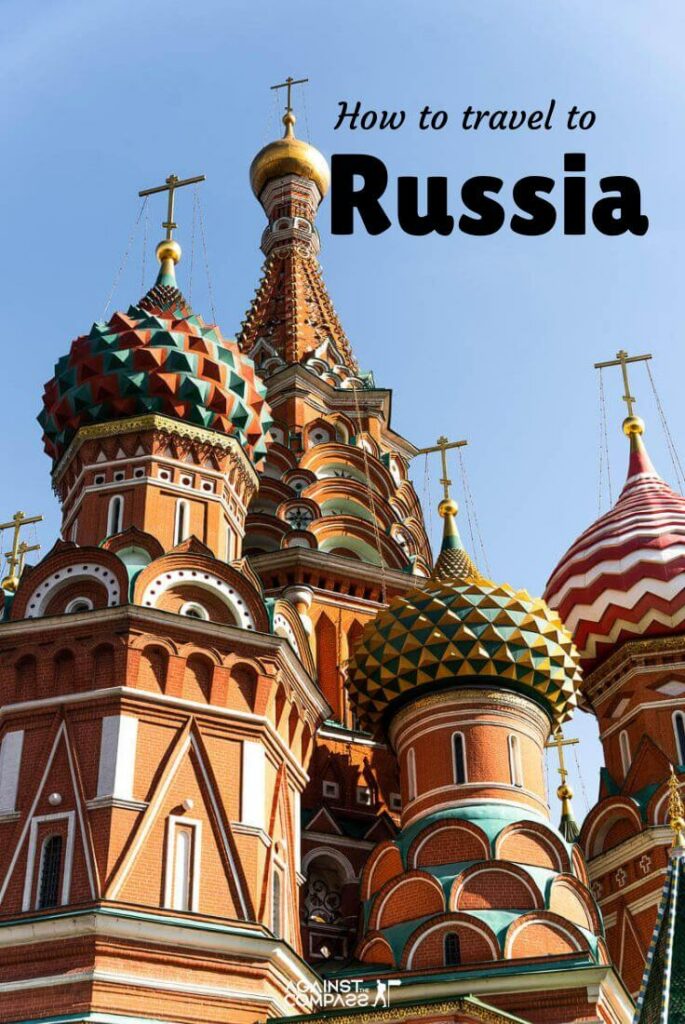
Red Square in Moscow, the most touristic place in all Russia
What do Russians think about the Ukraine war?
The conflict with Ukraine was on the top of my mind but engaging in local politics with Russian people wasn’t really my objective, since I had traveled to Russia to learn about the country and its cultural diversity.
Obviously, I did speak about the current conflict with a few Russians, but the only thing I’ll say is that most people around the world dislike war.
From Syria to Saudi Arabia and Afghanistan, I’ve always been criticised when traveling to certain countries with controversial regimes, and Russia was no exception.
In fact, I don’t think there is any other country in the world which inspires as much rejection as Russia these days.
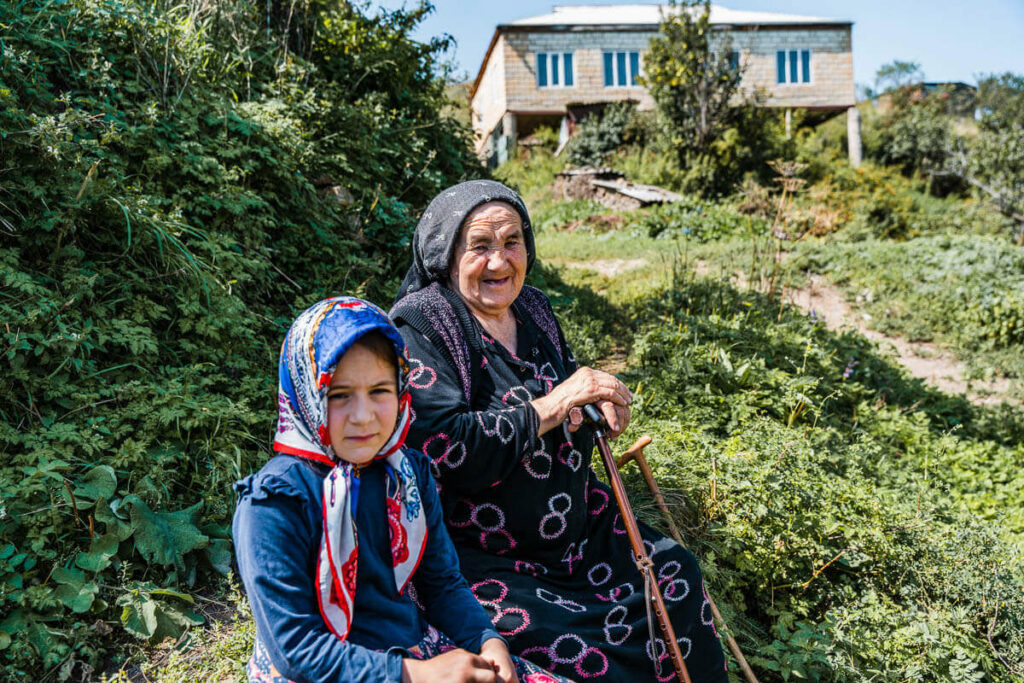
It’s important to remember that we are travelers, not activists, and that local people can never be blamed for their Government’s actions, whatever those actions might be.
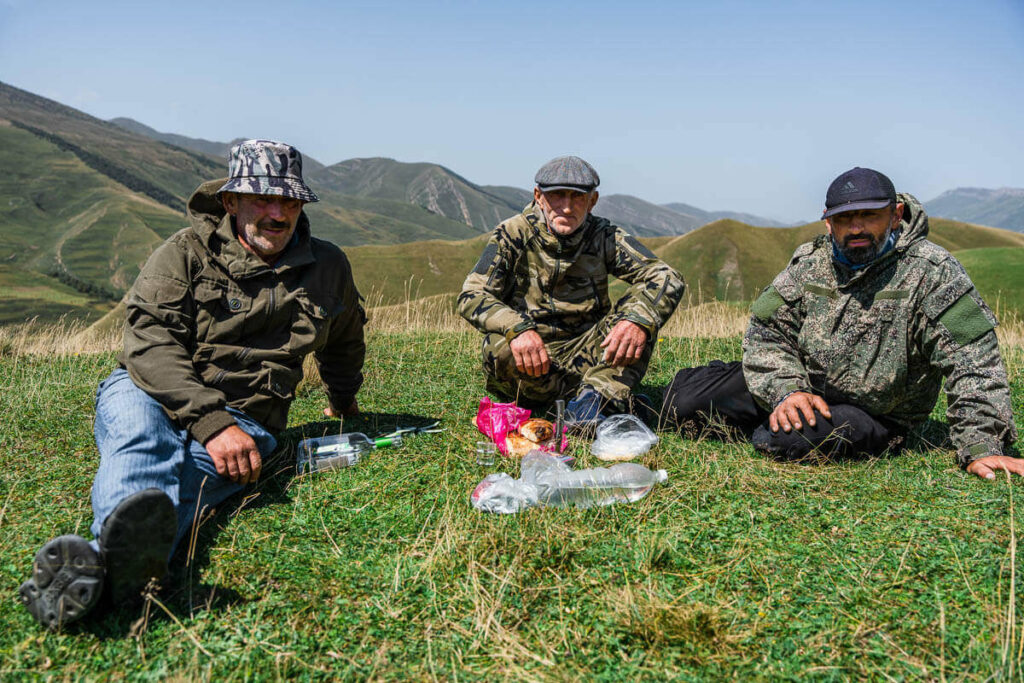
Photo taken in rural Russia. Seriously, do you think these people like Ukraine war
🪪 How to get a visa for Russia
Can you travel to Russia?
Surprisingly, getting a tourist visa for Russia is much easier than it used to be before the war with Ukraine.
In fact, Russian authorities recently introduced the option of applying for an e-visa for visits no longer than 16 days.
Also, most embassies and consulates around the world no longer require an appointment, probably because they aren’t as busy as they used to be.
Here’s what you need to know about how to apply for a Russian tourist visa.
How to apply for an e-visa for Russia
For single-entry visits of up to 16 days, you can apply for a Russian e-visa.
Which countries are eligible for a Russian e-visa?
All EU and Schengen countries, as well as Bahrain, Cambodia, China, Japan, India, Indonesia, Iran, Korea, Kuwait, Malaysia, Mexico, Myanmar, North Macedonia, Oman, Philippines, Saudi Arabia, Serbia, Singapore, Taiwan, Turkey and Vietnam.
How long does it take to get approval?
Around 4 calendar days.
How much does the Russian e-visa cost?
It costs $52.
What’s the e-visa validity?
Once your visa is issued, you have 60 days to enter Russia.
Once you get in, your stay can’t exceed 16 days.
Can I use the e-visa at any entry point?
You can enter Russia via any international airport but with the e-visa, land border crossings are limited.
When should you get an ordinary visa instead of an e-visa?
You plan to travel in Russia for more than 16 days
You need to get a multi-entry visa
Your country is not on the list of countries eligible for an e-visa. This includes the USA, Canada, the United Kingdom and Australia.
Visa requirements for Russia
Russia travel tip: I can’t speak for all Russian embassies and consulates, but I do have recent experience of getting one at the Consulate of Barcelona and, from what I heard, all offer a similar experience. Just check your nearest embassy’s website for specific requirements.
Russian visa typical requirements:
Passport
2 passport photos
Valid travel insurance for traveling in Russia. We recommend Alfa Strakhovanie.
Letter of Invitation (you should get this from a local tour operator)
How much does the visa for Russia cost?
Price varies from embassy to embassy but at the Russian Consulate of Barcelona:
Single entry non-urgent visa: €120
Single entry urgent visa: €195
Multi-entry non-urgent visa: €250
Very expensive!
How long does approval take?
In my case, a non-urgent visa took around 2 weeks, while an urgent one takes 2-3 days.
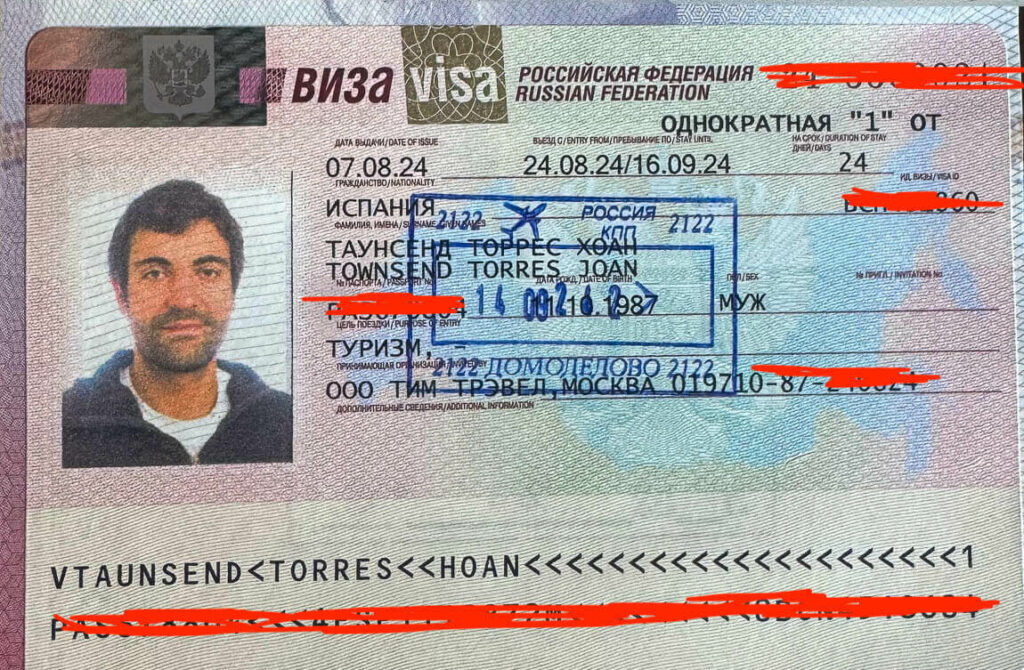
My visa for Russia
✍️ How to sign up for a tour in Russia
Traveling with a group and an expert local guide will make things much easier, and more fun!
In Against the Compass, we have the following expedition scheduled for 2025-2026:
April 12th to 18th, 2025 (Arctic Russia). SOLD OUT
April 21st to 28th, 2025 (Russian Caucasus). SOLD OUT
September 9th to 16th, 2025 (Russian Caucasus). APPLY NOW
September 18th to 24th, 2025 (Arctic Russia). APPLY NOW
November 16th to 22nd, 2025 (Arctic Russia). APPLY NOW
March 31st to April 6th, 2026 (Arctic Russia). APPLY NOW
April 14th to 21st, 2026 (Russian Caucasus). APPLY NOW
🚑 Travel Insurance for Russia
Remember that having valid travel insurance for travel in Russia is a must requirement for getting your visa at the embassy.
Our preferred travel insurance company (IATI Travel Insurance) isn’t covering travel in Russia any longer.
Instead, we recommend Alfa Strakhovanie. It’s a Russian-based insurance company, so they are accepted by the embassies, plus they allow to purchase a policy with a foreign card.
⚠️ Is it safe to travel to Russia?
Many people believe that due to the war with Ukraine, Russia has become an unsafe country.
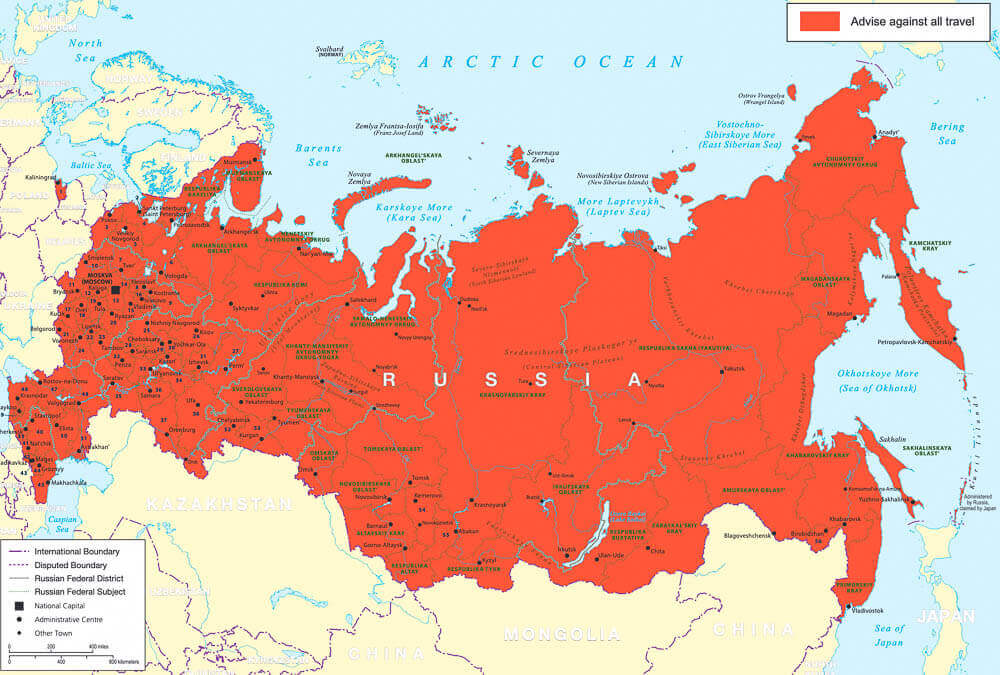
In fact, if we look at the FCDO advice, the largest country in the world is today considered one giant red zone, meaning that even places like Vladivostok, which are nearly 10,000km from Ukraine, are also unsafe for travel due to the Ukraine war.
Russia travel advice according to the FCDO
They also talk about arbitrary detentions and a lack of available flights to return to Europe.
It’s more than obvious that the different foreign ministries don’t want their citizens traveling to Russia, but I’d also like to give my perspective based on my last visit.
Is Russia safe to visit given the war with Ukraine?
As of today, the war with Ukraine is mainly limited to the border areas, up to the region of Kursk.
Outside of those areas, life in Russia is completely normal, just as usual, and the reason is that Russia is just too big for other parts to be affected by it, from a security perspective.
What about the long-distance missiles that hit Moscow?
In September 2024, Ukraine launched a bunch of long-distance missiles that hit some buildings in the suburbs of Moscow, which resulted in the death of one civilian.
Although I’ve never said that the rest of Russia was 100% safe, but I do want to mention that I was in Moscow when that incident happened, and I only found out about it from the Spanish news.
The authorities closed the airport for a few hours but other than that, life went on as always. You also need to remember that there are more than 13 million people living in Moscow.
No country in the world is free of risk, so it’s up to each traveler to assess how much risk they choose to be exposed to when traveling to a certain region or country.
Are arbitrary detentions a risk in Russia?
Arbitrary detentions don’t affect foreign tourists traveling on a valid tourist visa who stick to tourist sites and don’t get involved in politics.
Lack of flights
You can’t fly out direct to Europe, but you can fly to Baku, Dubai, Istanbul, Cairo and many other places around the world.
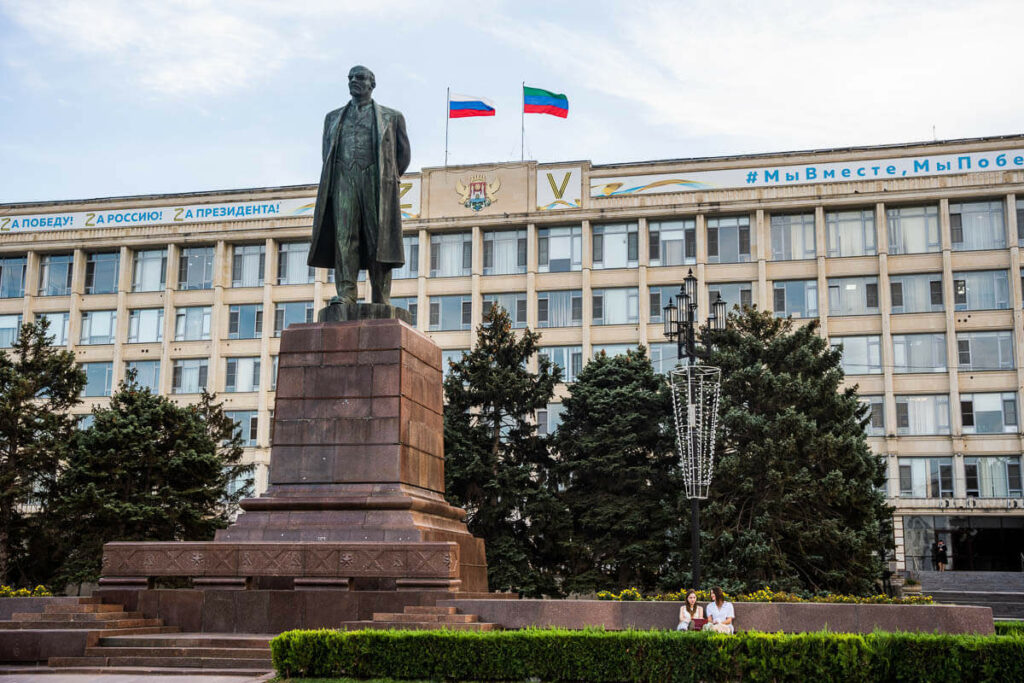
Lenin square in Makhachkala. When traveling in Russia, you will see that even the smallest town has a Lenin square
🛫 How to get in Russia
How to fly to Russia
Because of the sanctions, there are no flights operating between Russia and any Western countries, but you can still fly from many cities around the Middle East and Central Asia.
The most popular connections for flying to Russia are:
Istanbul (Turkish Airlines)
Dubai (Emirates and FlyDubai)
But you can also travel to Russia from:
Can you fly to Russiawith Aeroflot, Ural Airlines, S7 or any other Russian airline?
Yes, you can.
These airlines have connections with all the previously mentioned cities.
However, because of the sanctions, you can’t book flights through their website using a foreign card, although it can be done through Aviasales.com, a search engine for flights that allows international card payments.
How to travel to Russia by land border
Russia has endless border crossings with 14 different countries, so it’s impossible to provide up-to-date information on each and every one of them.
However, we can give you a rough idea of what the situation is like in each of the countries that borders Russia:
Norway: The border is open and, due its remoteness, it doesn’t present many issues.
Finland: The border is closed.
Estonia: The border is open but reports suggest it can take over 12 hours to cross.
Latvia: The border is open but reports suggest it can take over 12 hours to cross.
Lithuania: It borders with the enclave of Kaliningrad. Easy to cross, no more than 2 hours.
Poland: It borders with the enclave of Kaliningrad. Easy to cross, no more than 2 hours.
Belarus: As a foreigner, you can’t cross this border because there aren’t any immigration authorities, since Russians and Belorussians are allowed to cross it freely.
Kazakhstan: The longest border in the world. Most entry points are fully functional and don’t present any major issues.
China: They share a border but there isn’t an actual entry point.
Mongolia: Borders are fully operational.
North Korea: On the e-visa portal, I was surprised to read that the electronic visa is valid for entering from North Korea by train at Khasan. If you happen to be in North Korea, perhaps you could be the first traveler to ever exit through Russia.
Do you get a lot of questions when entering Russia?
It’s hard to say, I guess it depends on your entry point.
If you’re entering from Europe (Estonia, for example), you’ll certainly get a lot of questions, plus the whole immigration process is very slow.
If entering via Moscow International Airport, the chances of being questioned are also high, as travel reports suggest.
Nevertheless, be aware that all this questioning is mere procedure, and that nobody I know has been denied their entry into Russia, as long as they were traveling on a valid tourist visa.
I personally entered from Kazakhstan by train. I did get asked a few questions but they were mostly about the 2 visas for Afghanistan stamped on my passport, no big deal.
They also made me fill in and sign a form with Ukraine-related questions, just to make sure that you had no interest in getting involved in their politics.
💰 Money and budget in Russia
In Russia, they use the Russian Ruble and approximately:
1 USD = 85 RUB
Since the start of the war in Ukraine, there’s been a massive inflation and currency fluctuation, but they’ve managed to stabilise it.
Can you use foreign bank cards when backpacking in Russia?
No, absolutely not.
Because of the sanctions, international credit and debit cards can’t be used anywhere in Russia.
Where can you exchange money?
You can exchange your foreign currency at pretty much any bank, easy.
How much does it cost to travel in Russia?
Overall, Russia is cheap as per European standards but it really depends on what you do.
Budget backpackers will be happy to hear that all towns and cities in Russia have an abundance of budget hostels, and that meals are inexpensive.
Long distance trains aren’t super cheap, but you can cover a lot of terrain, plus you save nights in a hotel.
Here are the prices of the most typical things:
Pint of beer: from 300 RUB
Main course at a local restaurant: 400 RUB
Main course at a nicer restaurant: 1000 RUB
Short taxi rides in Moscow: 600 RUB
Short taxi rides in secondary cities: 300 RUB
Overnight train in third class: 2500 RUB
Overnight train in 4-bed compartment: 4000 RUB
Single room in a hotel: from 4500 RUB
Dorm in a hostel: from 600 RUB
Backpacking budget for traveling in Russia: from 40 USD a day
⛅ Best time to visit Russia
Russia can be visited all year around, even during the freezing winter.
Traveling to Russia in winter
Everyone knows that winter in Russia can be cold but it can be adventurous as well.
You would not be the first person to visit the coldest city in the world (Yakutsk) during the month of January or travel across Siberia on the Trans-Siberian.
Northern Siberia can get pretty cold even during sunny summer days
Traveling to Russia in summer
This can be a great time to visit Russia, especially if you plan to visit the Arctic, Lake Baikal or the Caucasus and Altay regions.
Please be aware that many areas of Russia, and that includes Moscow, have a continental climate with very cold winters, but very hot summers.
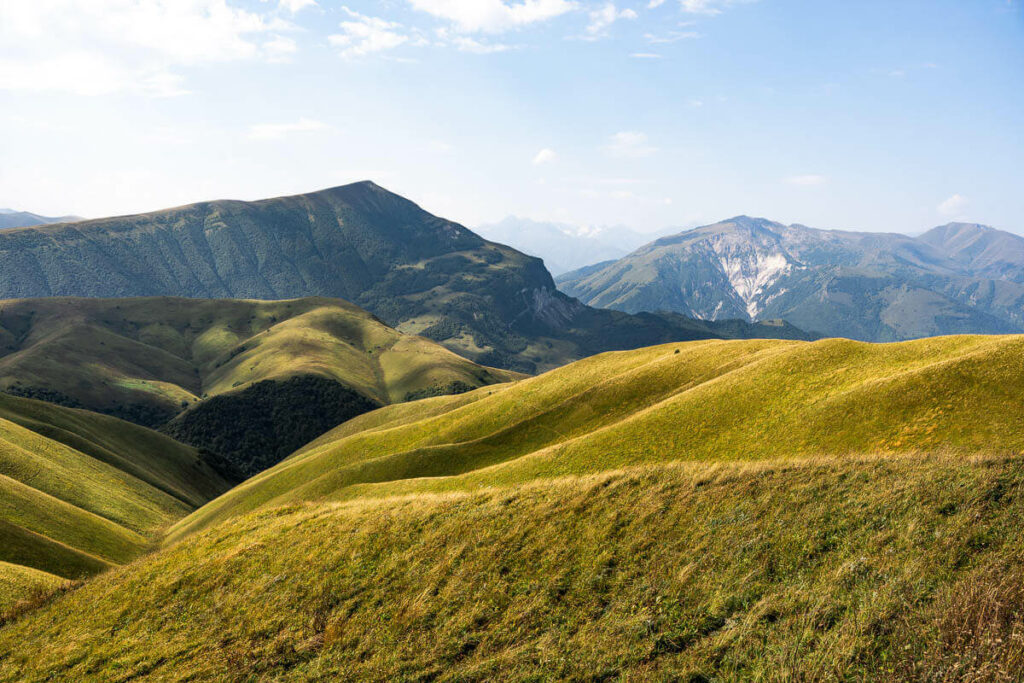
Summer is a great time to visit Russia if you travel to the Caucasus region
Traveling to Russia in spring and autumn
It’s hard to give an accurate answer on this, it depends on where you go and how early or late in autumn or spring you visit Russia.
🛺 How to get around Russia
How to travel around Russia by train
One of the best experiences when traveling in Russia is boarding a Soviet train. It’s a great way to meet local people and also the only way to comprehend the vast size of this country.
You can go by train to pretty much everywhere in the country.
You won’t be able to book train tickets with a foreign bank card, but the site will help you plan your trip.
How to book a train ticket at the station
Once you know your train schedule, head to the train station and before paying for the ticket, make sure to choose your preferred class:
Lyux – 2-bed compartments. The most expensive.
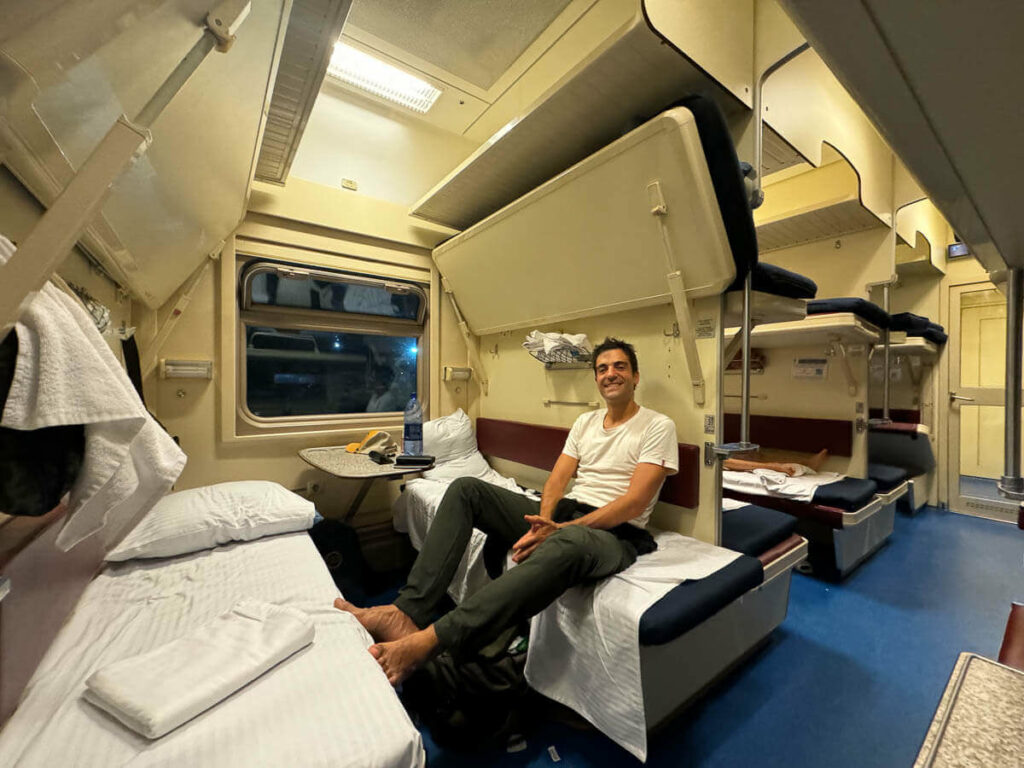
Kupé – 4-bed compartments. Upper-middle class.
Platzkart – The most common, at its most powerful Soviet style. These wagons don’t have compartments but bunk beds placed all over the wagon.
Obshy – Seats, no beds.
This is platzkart class
How to travel around by taxi
When traveling around Russia, you will have to download Yandex GO, the Russian version of Uber.
You can order a taxi using Yandex GO from virtually anywhere in Russia, even in small towns in the extreme north of Russia, such as Salekhard.
Top Russia travel tip: You can only use Yandex GO with a Russian SIM card, so get one of these upon arrival in Russia.
How to travel around by plane
Domestic flights are a good option for travelers with little time who are interested in visiting different regions of Russia.
You can check flight schedules on Aviasales and book them using a foreign bank card.
How to navigate around Russia
In Russia, Google Maps works fine but Yandex Maps is more detailed and accurate.
In fact, I realized that many businesses such as restaurants were not listed on Google Maps but they were on Yandex.
By the way, due to the war in Ukraine, geolocation isn’t working properly in the center of Moscow.
🏨 Where to stay in Russia: accommodation
Russia is packed with hotels of all types.
From budget hostels to expensive 5-star chains, you will never have any issues trying to find a hotel in Russia.
The problem is more about how to book a hotel in Russia, since popular search engines such as booking.com or hostelworld.com are no longer operating in the country.
Instead, you can search and book hotels through ostrovok.ru, and even book and pay with your foreign card. It is 100% reliable.
💻 Internet in Russia
Wi-Fi and internet speed in Russia
From an internet perspective, Russia is a highly developed country.
There will be good reception pretty much anywhere you go.
Getting a SIM card in Russia
Internet data is ridiculously cheap in Russia.
I paid less than 7 USD for a package that included a SIM card with 50GB of data and unlimited calls.
I bought it at the official store in a mall and all they required was my passport.
You can also get yourself one upon arrival at the airport.
Getting an eSIM for Russia
Some eSIM providers such as HolaFly, GoMoWorld or Alosim offer eSIM for Russia but they are way too expensive compared to the local plans, plus you can’t get a local number, which is absolutely vital to be able to use Yandex GO.
Just get a local SIM instead, it’s super simple.
Restricted websites and apps in Russia
Some restricted websites, services and apps include:
I’ve been using ExpressVPN for years but to my surprise, it wasn’t working in Russia.
NordVPN is my back up VPN, but it also didn’t work.
Instead, I used OpenVPN and it worked well. Some Russians told me they use Planet VPN.
Download and configure your VPN before traveling to Russia because their websites are often blocked as well.
Getting hacked in Russia
It is said that the best hackers in the world are Russian, and that getting hacked is not uncommon here.
I am extremely paranoid about the internet, so my advice is to be very careful about the public Wi-Fi networks you connect to.
Always connect using a VPN and if possible, only connect through your mobile data.
Since data packages are so cheap, I always connected my laptop via my mobile hotspot.
🕌 The people, culture and language in Russia
Cultural diversity in Russia
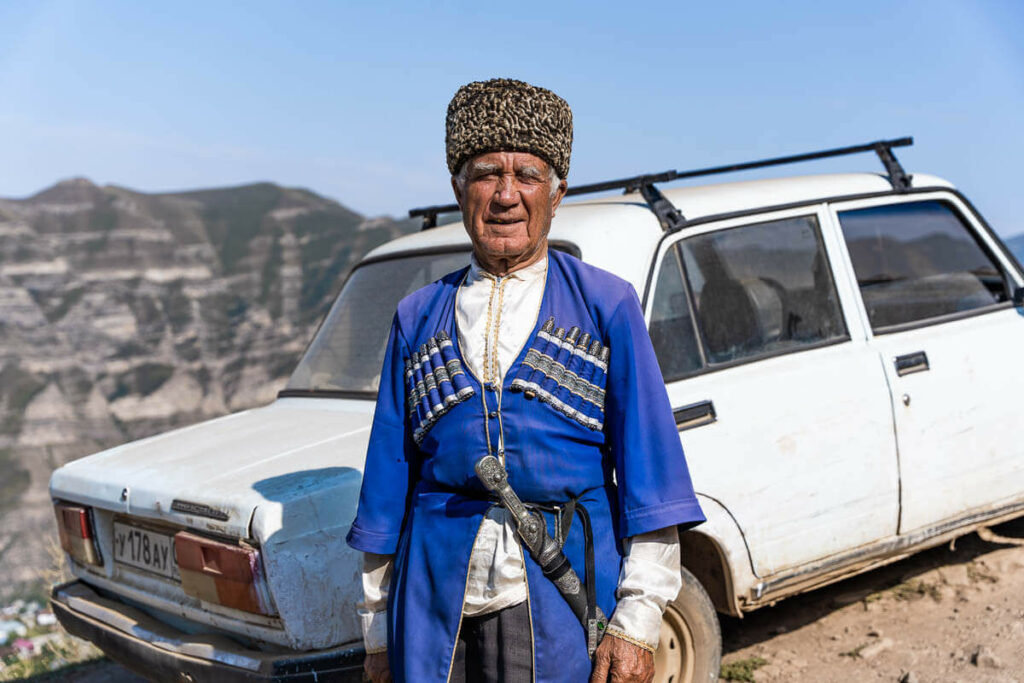
People tend to think of Russia as one massive Slavic nation but you’ll be amazed to know that Russia is home to 190 recognized ethnic groups, making it one of the most diverse countries in the world.
Caucasian people in Chechenya
While it’s true that many of those ethnicities refer to people from former Soviet countries (like Kazakhstan, Tajikistan, Ukraine or Armenia) who for whatever reason moved to the Russian Federation in the past, there are many minorities who are indigenous to a specific region in Russia, such as Tatars, Chechens or Kumyks.
I have personally been to the republics of Dagestan, Chechnya, Ingushetia, North Ossetia and the autonomous region of Yamalia.
Traveling in the different republics of Russia feels like visiting a different country. They have their own rules, religion, habits, food, and culture, and they refer to actual Slavic Russians as if they were from a separate country.
From a traveling perspective, this is Russia’s best asset and the one thing that makes you realize that most travelers have only scratched a tiny bit of the surface of Russia.
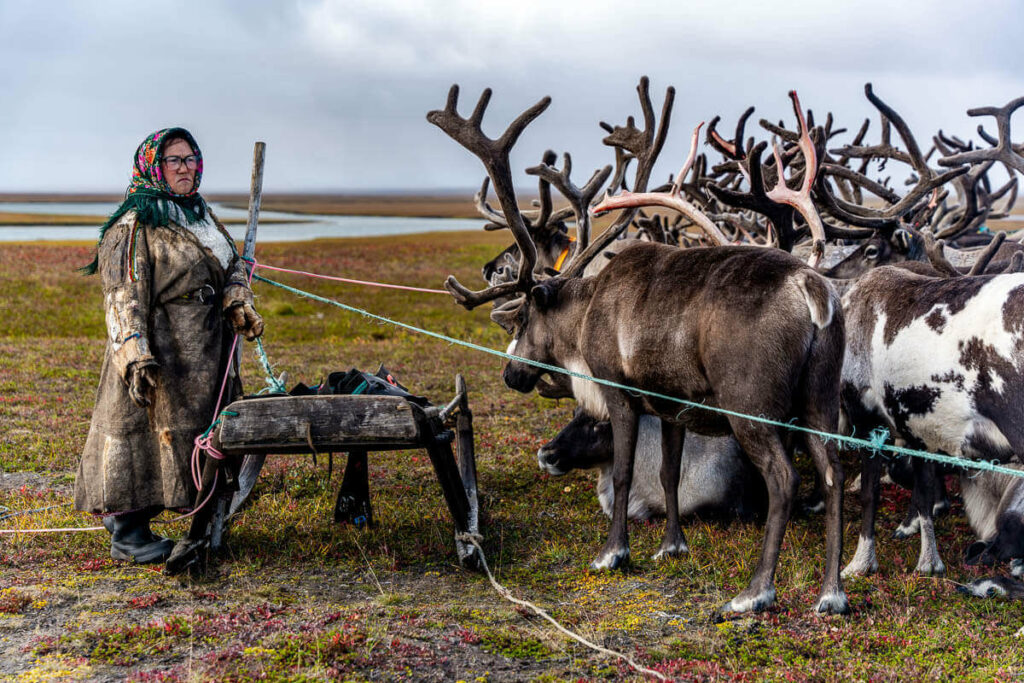
Nenet woman, north Siberia
Language in Russia
Russian is the most widely spoken language in Russia, but there are 25 other official languages and over 100 minority languages, all proof of the broad cultural diversity in Russia.
English in Russia
There is a massive language barrier when backpacking in Russia since very few Russians can speak English.
In fact, most people outside of Moscow don’t even understand very basic English words and sentences, such as numbers.
While it’s true that Google Translate and Google Lens have made our life much easier, traveling in Russia is a bit challenging if you don’t know any Russian, so I strongly recommend learning a few basic words.
Also, learn how to read the alphabet. It’s very easy. It took me one day to learn it back in 2018, when I was traveling in Kyrgyzstan.
When it comes to reading food menus, understanding the alphabet is particularly handy.
🍲 Food and drinks in Russia
I don’t want to go into too much detail in this section.
Russia is a developed country so even in small, remote towns, you’ll be able to find decent food options and nice cafés.
Even in the Arctic town of Salekhard – a very small city which until 2021 was impossible to reach by road – there was a sushi restaurant and a German-style bar with a large selection of beers on tap.
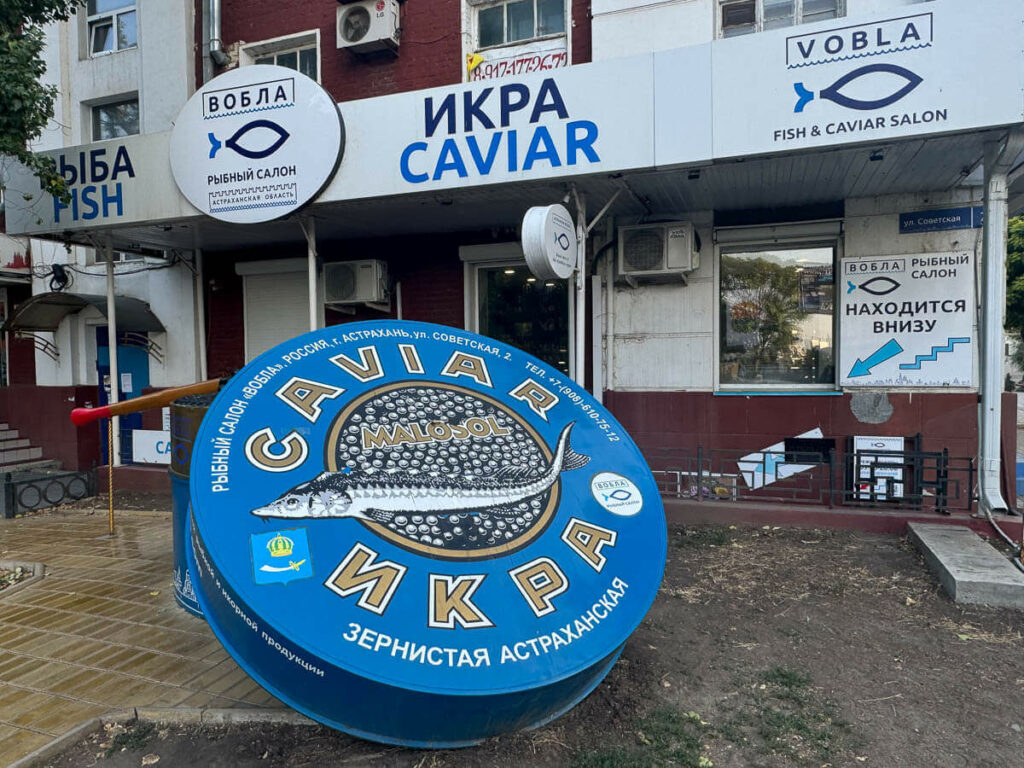
Russian caviar. If you want to learn about caviar when you travel in Russia, I recommend going to Astrakahan
You’ll also find modern Russian restaurants all over the country.
Russian cuisine is, of course, very meat-based but all menus will feature different types of soup and salads.
Borscht (beetroot soup), pelmeni (meat dumplings), or varenniki (potato dumplings) are some of the most common dishes.
For breakfast, I really like sirniki, small but thick pancakes made of cottage cheese, usually served with sour cream.
Additionally, there is a vibrant coffee culture in Russia, so you won’t have any problem finding decent coffee anywhere you go.
❗ More helpful information to visit Russia
📢 In my Travel Resources Page you can find the list of all the sites and services I use to book hotels, tours, travel insurance and more.
All guides and articles for traveling in Russia destination
Hoping to plan the perfect family getaway? Looking for travel ideas for kids, parents and grandparents combined?
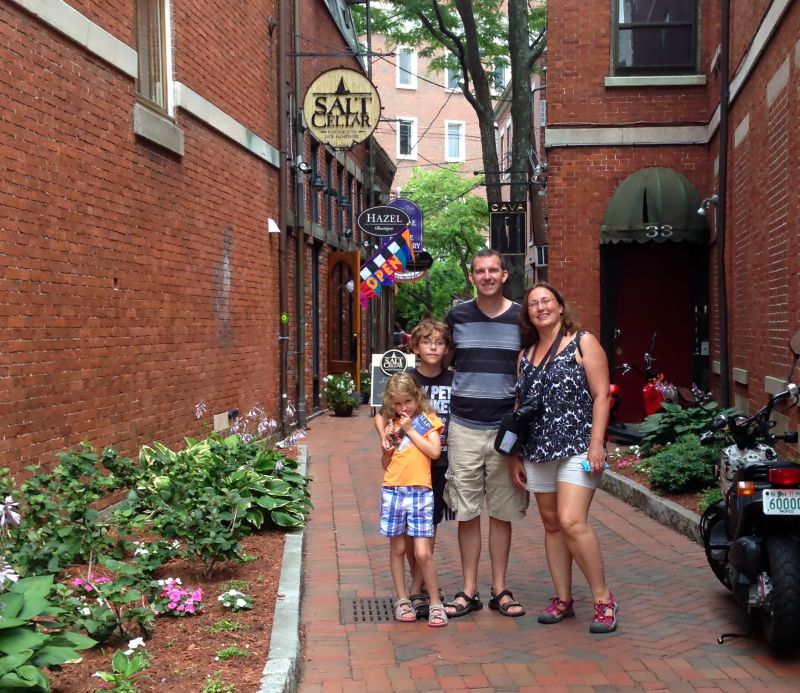
Imagine a trip where grandparents get to see the world through their grandkids’ eyes, parents get a break from their daily grind, and kids create memories with the entire family that they’ll remember forever. Multi-generational family vacations are growing in popularity, and for good reason.
Shared memories can often transcend generations and creating memories the entire family can talk about for decades to come is one of the many reasons to travel with an extended family. In todays busy world, carving out some much needed family time gets harder every year.
However, let’s be honest, balancing the needs of different age groups can feel like juggling flaming torches at times. Seniors often have health and mobility concerns, parents are often over stressed, and kids are either glued to their devices or have so many activities going on in their lives that they often don’t know if they’re coming or going.
The good news? With thoughtful planning and the right destination, you can craft a trip that’s as fun as it is stress-free for every member of your family.
How to Plan the Perfect Family Getaway: Ideas for Kids, Parents, and Grandparents
Step 1: Picking Accommodations That Work for Everyone
Your choice of accommodation can make or break a trip. For multi-generational groups, flexibility and space is key.
All-Inclusive Resorts: These are great for stress-free family travel. All-inclusive resorts provide dining, entertainment, and childcare in one convenient package. Everyone can pick their own adventure while staying within arm’s reach of each other and all of them offer day trips if you want more culture or more excitement on your trip. Find the perfect multi-generational retreat with Escapes.ca’s all-inclusive vacations.
Vacation Rentals: If you’re looking for a home-away-from-home vibe, consider an Airbnb or Vrbo. Shared spaces like kitchens and living rooms make family bonding easy, while separate bedrooms provide much-needed privacy. These can be initially cheaper than all-inclusives but make sure you budget in your meals, alcohol and any activities as those will all cost you extra.
Cruises: A family cruise offers a floating resort experience, with options ranging from kids’ clubs to fine dining. Some cruise lines, like Disney or Royal Caribbean, excel at catering to multi-generational groups though you’ll likely pay handsomely for the privilege.
Why All-Inclusive Resorts Shine for Multi-Generational Travel
All-inclusive resorts take the guesswork out of planning. Here’s why they’re perfect:
Everything in One Place: Dining, entertainment, and activities are all covered, so no one has to stress about logistics.
Customizable Fun: Kids can join supervised clubs, grandparents can lounge by the pool have a spa day, and parents can enjoy activities like yoga or water sports.
Budget-Friendly: Upfront pricing makes it easier to plan and avoid unexpected expenses plus a lot of resorts charge the same per 2 person booking as they do for shared rooms. That means that the grandparents can have their own room down the hall from you and the costs don’t double like staying in a hotel. If you have older kids, they could have theirs as well.
Examples to Consider: Iberos Resorts in Dominican Republic, Bahia Principe or Barcelo resorts in Mexico, or Riu Resorts in Montego Bay Jamaica.
Step 2: Choosing the Right Destination
Picking the perfect destination is crucial to ensuring everyone has a great time. Start by considering:
Accessibility: Choose a destination that’s easy to navigate for grandparents who may have mobility concerns. Think resorts with shuttles, flat walking paths, and minimal stairs.
Family-Friendly Activities: Look for destinations that cater to all interests. For example, a beach destination might offer snorkeling and paddle boarding for the adventurous while providing serene beachfronts for relaxation.
Weather and Season: Consider travel times and seasons that are comfortable for all ages. Not too hot for grandparents and not too cold for young kids. If planning a beachside holiday, make sure that the water is comfortable to swim in but not so busy you regret leaving your room.
Top Picks: Mexico’s family-friendly beaches, Orlando’s theme parks, or European destinations like Italy and Spain, which combine culture with family-friendly attractions.
Step 3: Crafting a Balanced Itinerary
The secret to a successful multi-generational family trip is balance. While it’s tempting to pack your itinerary with activities, it’s better to create a schedule that allows for flexibility.
Group Activities: Plan experiences that everyone can enjoy together, such as a guided walking tour, a family-friendly cooking class, or a wildlife safari. Often a shared experience can transcend the mundane because the whole family got to partake in it.
Age-Specific Activities: Include downtime for grandparents, like spa treatments, while kids burn off energy at a pool or playground.
Dividing When Appropriate: Sometimes separating the group for specific activities can allow everyone to get something from the trip that they can’t as a group. Whether that be ziplining through the jungle or going out for a romantic meal, realize that sometimes giving each person their own time can benefit the family as a whole. If nothing else, it gives the family things to talk about afterwards.
Free Time: Build in periods of free time or down time for everyone to explore independently or simply relax if they’re feeling burnt out. We’ve learnt over our many years of travel with our family that when someone hits the burnt out stage that the entire group suffers. Factor that into your time equations when creating your plans and don’t fret about not doing every single thing a new place offers. The point of the trip is family and sharing and not tired and cranky.
Stress-Free Travel Tips
Book Early: Multi-generational trips often require larger accommodations or group bookings. Planning ahead ensures you get the best options and if you’re planning for an all-inclusive getaway, often the best price is well before things start booking up.
Travel Insurance: Cover everyone with a comprehensive policy. It’s especially useful for families traveling with young kids or older adults. There are cheaper plans that cover larger families so make sure you search them out for better deals.
Meal Planning: All-inclusive resorts simplify meals, but for other trips, choose restaurants with varied menus that accommodate dietary restrictions. if you’re cooking for yourself, make sure that you make something your whole family will enjoy. When away from home and cooking for ourselves, we always try to include a few local flavored meals using local ingredients while also throwing in an occasional tried and true family favorite meal to give a small taste of home.
Delegate Responsibilities: To reduce stress, assign roles, such as one person handling transportation while another manages bookings. This helps spread the load of planning a trip and ensures everyone has their say.
Get Everyone On Board: The more each member of your family shares their input ahead of time, the more likely that they’ll enjoy that same activity when it finally arrives. We’ve learnt to prep our kids for our travels more as they get older so that they feel invested in the trip and have a personal activity they’ve chosen that they get to look forward to. It goes a long way to ensuring that the trip isn’t just what this person or that person wants but that there’s something for every member of the family.
Packing and Preparing for a Multi-Generational Trip
Essentials: Bring medications, snacks for kids, and entertainment for downtime. If it’s a long flight, make sure to bring things to make the flight easier with little ones.
Shared Items: Consider packing communal items like sunscreen, travel-sized games, and books. If you have a pool where you’re staying, packing or buying a few small inflatables when you get there isn’t a bad idea either nor is packing large refillable water bottles so everyone stays hydrated on days spent in the sun or on hikes.
Tech Tools: Use apps like Google Maps or WhatsApp to coordinate schedules and stay connected. Look at getting a shared Wifi device or picking up eSims for data for a few of the group if you think you’ll be splitting up often enough.
Light Packing: Encourage everyone to pack light to leave room for souvenirs. We still travel with only carry-ons but with a large family group, consider checking a few bags so that getting around the airport is easier on everyone and boarding/unboarding the plane remains stress free.
Wrapping Up: Embrace Flexibility and Have Fun
No trip is without its hiccups, but the magic lies in creating shared experiences and lasting memories. Embrace flexibility, focus on the moments that matter, and remember, the best part of a family vacation is being together.
A Mount Rinjani trekking tour is not for novice hikers or casual travellers. But if you’re ready for an epic 3-day journey to the summit of the second highest volcano in Indonesia, here’s everything you need to know before you go in our guide.
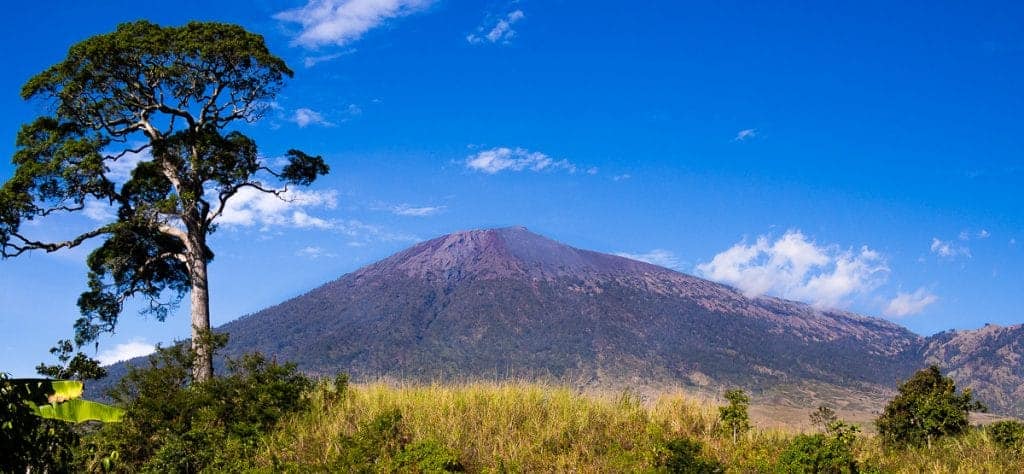
At 3,726 metres above sea level, Mount Rinjani looms large over the entire island of Lombok in Indonesia.
Of the 130 volcanoes in the country, Rinjani is the second-highest (topped only by Mount Kerinci on Sumatra).
Rinjani’s ominous silhouette is a constant reminder of the powerful forces rumbling just beneath the surface of the earth.
That power is what draws hundreds of intrepid hikers to Rinjani every day.
You can see Rinjani from almost everywhere on Lombok.
Why Do a Rinjani Trek?
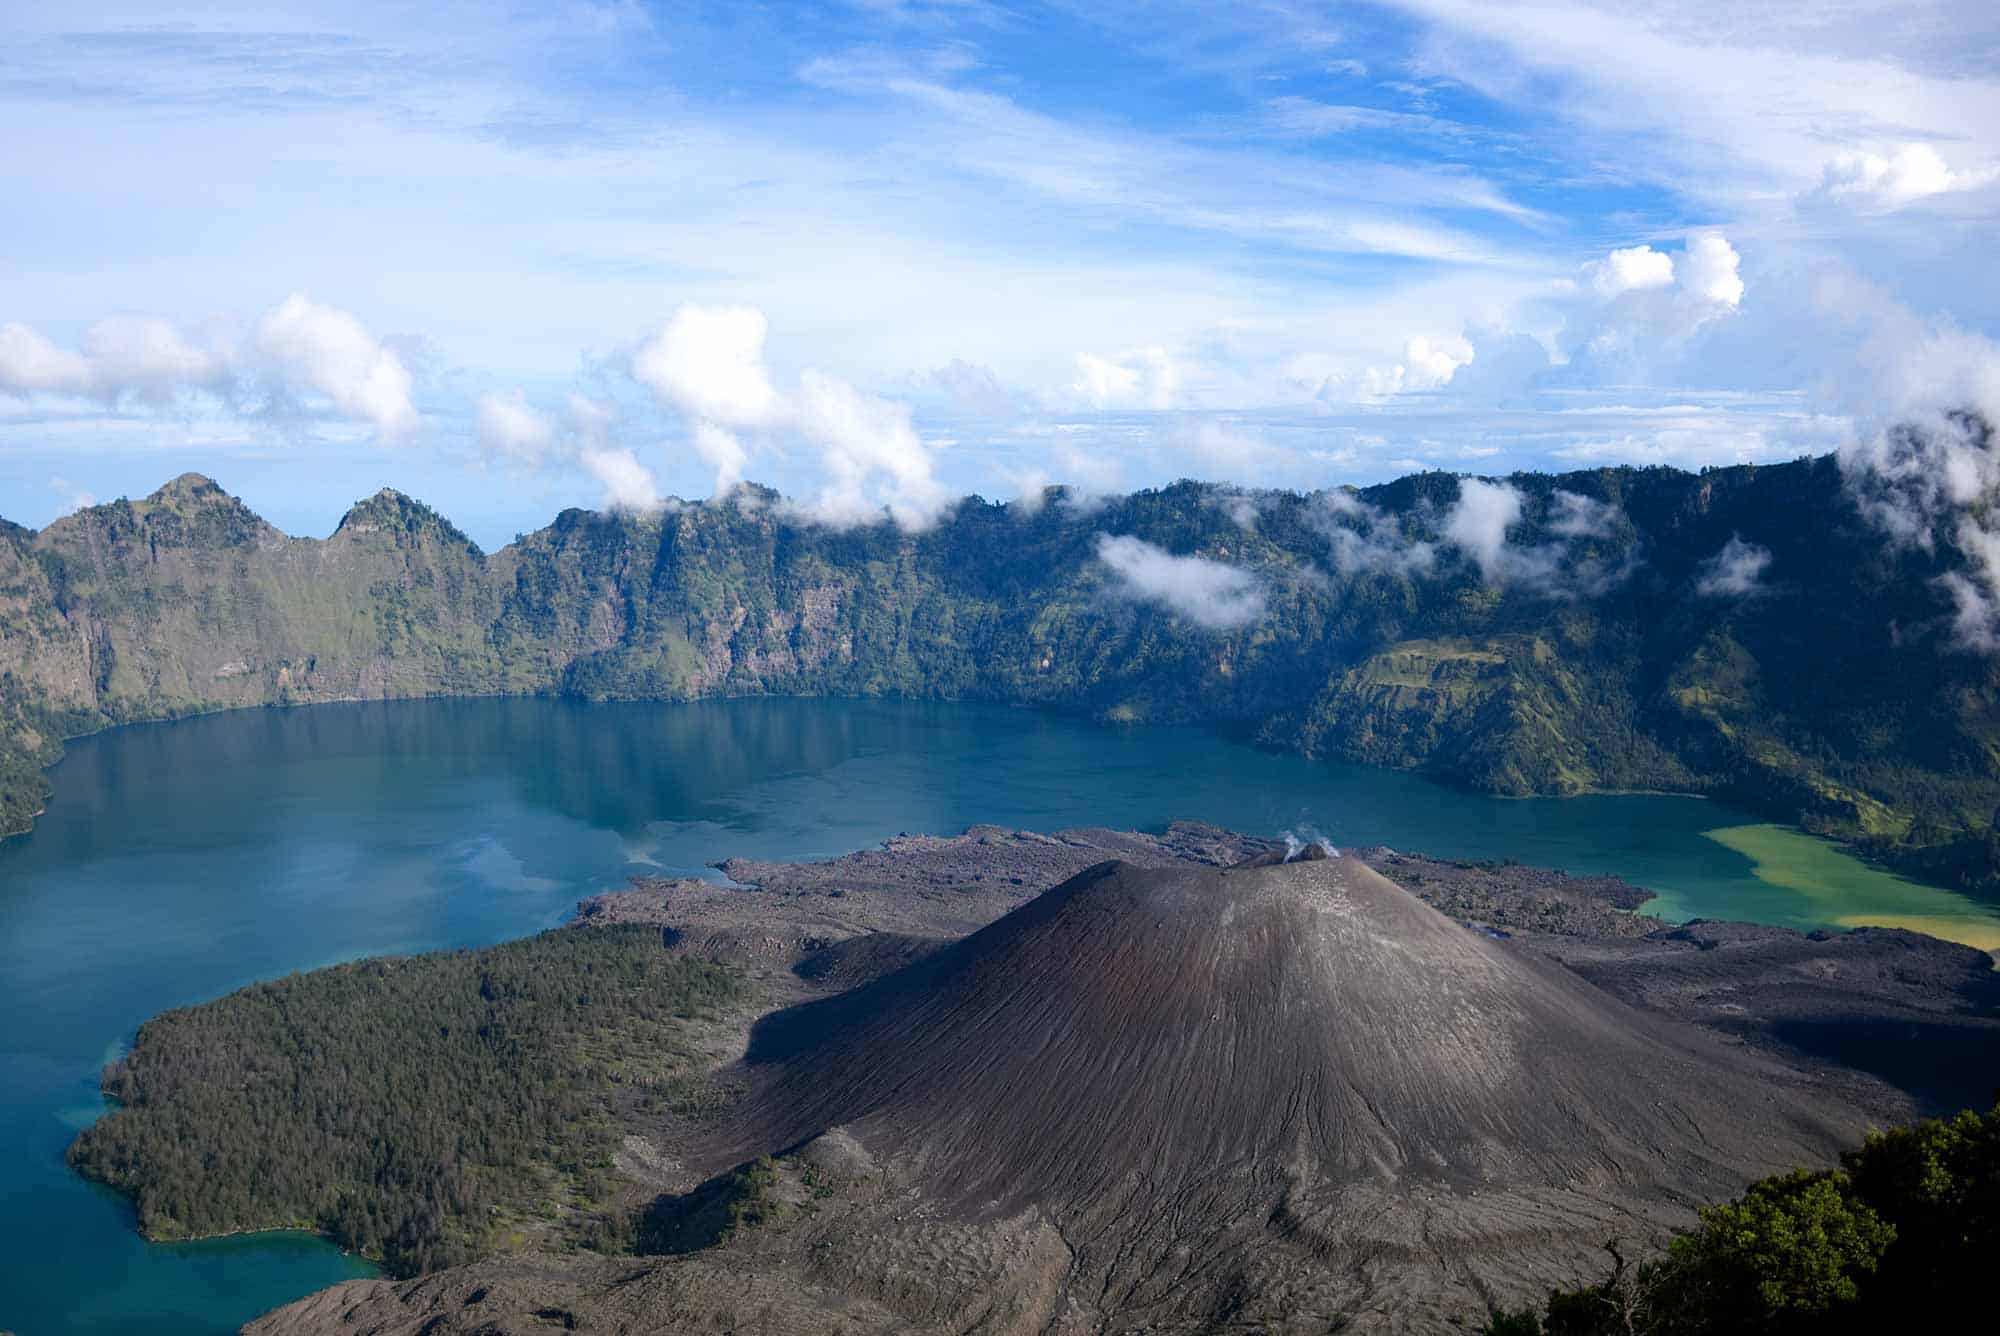
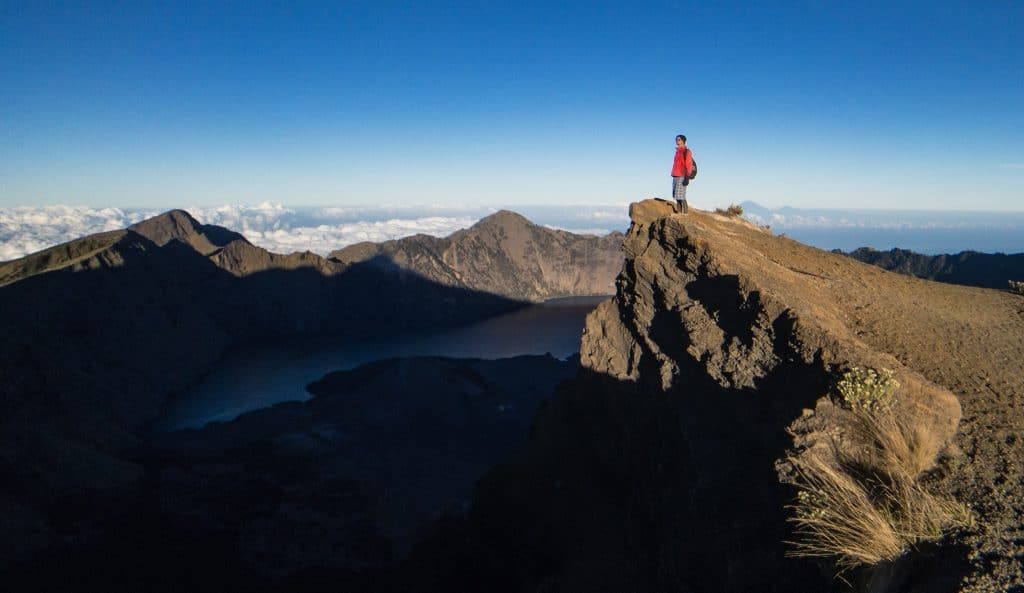
The tough hike to the crater rim is rewarded by absolutely magnificent views.
Rocky black soil at the summit drops off into a lush valley filled with purples so deep and greens so bright they don’t look like they should exist in nature.
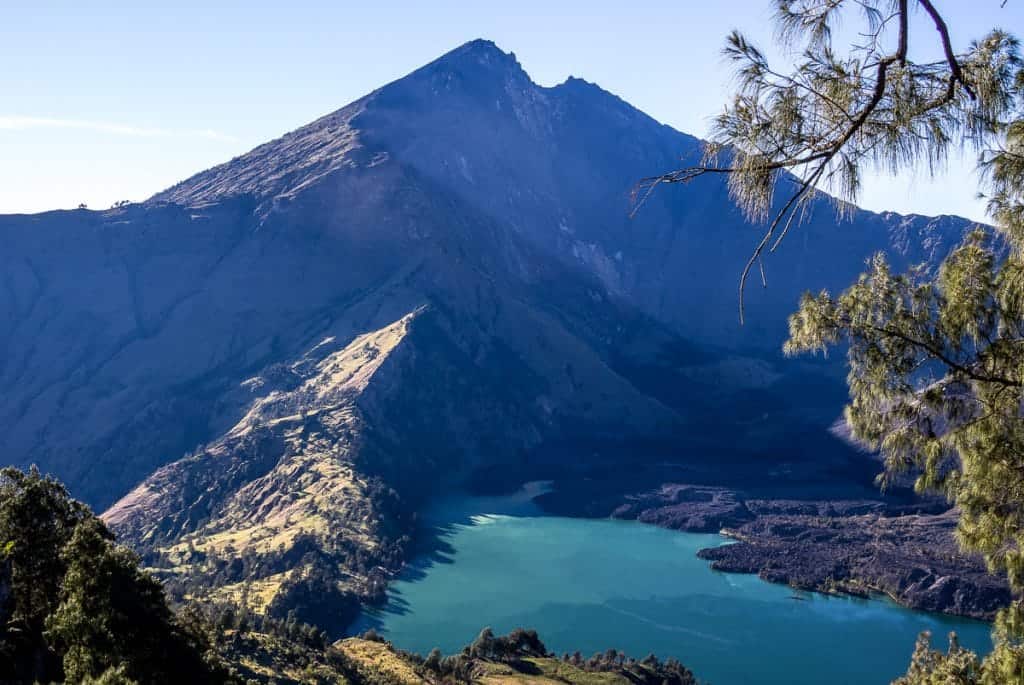
Lake Segara Anak, nestled in the bottom of the gaping crater, is a deep turquoise, echoing the spectacular colour of Lombok’s seas.
On the edge of the lake sits an active volcano, Mount Barujari, which steadily spews threatening clouds of smoke into the air.
Mount Barujari, inside the Rinjani crater, is still active and can erupt at any time.
And at night, the sky is blanketed with stars so thick they look painted on.
While the views inspire awe, the most compelling reason to trek Mount Rinjani is to challenge your body and your mind, leap firmly out of your comfort zone, and be able to shout “Hell yes, I did it!”
If that sounds good to you, read on for everything you need about…
How to Plan Your Epic Mount Rinjani Trekking Adventure
Could You Handle a Rinjani Trek?
I’ll admit, we went into the Mount Rinjani trek with a bit of a cavalier attitude. Sure, we’d read the stories about how hard it was supposed to be, but we’re experienced trekkers with decades of challenging mountain hikes behind us.
How much harder could trekking Mount Rinjani possibly be?
As it turns out, trekking Rinjani is hard. Really freaking hard.
The Rinjani trek starts with a climb of 1500 m over 8 km. Most of that elevation change takes place during in the final 4 km, which take about 4 hours.
Yep, that’s just one measly kilometre an hour.
To make matters more difficult, there is next to no trail maintenance, so the route is sandy, slippery, and ridiculously steep.
Unless you’re a trail running hero or an actual superhero, be prepared to have your will and your body pushed to their limits on your way up Mount Rinjani.
And that’s just the first day.
The second day starts in the middle of the night, so hikers can summit for sunrise. To get the summit, there’s another 1000 m of elevation gain, along a narrow trail of slippery loose scree.
It’s cold up there, too. Even in August, the temperature hovers around freezing.
After all the climbing, the descent should be a relief. Instead, it seems to go on for days, requiring every ounce of hamstring strength you can muster, plus knees of steel, and an excellent sense of humour.
The descent from Mount Rinjani will put your whole body to the test.
If you come away without any scraped knees or sore muscles, you’re definitely part mountain goat!
So, could you handle trekking Rinjani?
If you’ve read all of this and you’re thinking “Hell, yeah! Bring it on!” then keep reading.
There are two main points of entry to Rinjani National Park.
You can ascend from the village of Sembalun or from Senaru. On three- and four-day hikes, you depart from one village and descend to the other.
We highly recommend starting in Sembalun because of the way the trails are configured.
The first day of ascent from Sembalun is steep and sandy. It looks like it would be absolutely brutal going in the opposite direction.
Likewise, the descent to the crater lake is so steep and rugged, that it would be a real leg-breaker going the other way.
If you want a more off-the-beaten track experience, book a private tour and ask about one of the less-used routes, like the trails from Aik Berik or Torean. We wish we had known about them before our trek!
How Many Nights on Rinjani?
Three Days, Two Nights
The most popular option (and the one we recommend) is the 3-day, 2-night trek. This gives you just enough time to climb to the summit and also visit the crater lake and hot springs.
If you’re in no rush, consider the 4-day, 3-night option, which goes to the same locations but provides a little more free time to relax and enjoy Mount Rinjani.
Two Days, One Night
The 2-day, 1-night tour from Sembalun includes the option to summit at sunrise. If you’re in amazing shape and love to punish your machine, go for it!
Otherwise, take pity on your poor body and give yourself more time on the mountain.
The 2-day, 1-night trek from Senbaru takes trekkers to the crater rim opposite the summit. This is the easiest (not to say that it’s easy) of the Mount Rinjani trekking options.
You don’t get near the summit or the lake but it does provide incredible views of the crater. If you think you can’t handle a longer trek but still want to experience Rinjani, this is probably the best option.
BONUS – Booking ahead of time ensures you won’t miss out on the tour, and get the best price too! And just for NOMADasaurus readers, if you use the Klook discount code “NOMADS10” on the website when checking out, you’ll get $10 off your first booking!
The view of the crater lake from the Sembalun side is worth the trek!
Be aware that “one night” or “two nights” refers to number of nights on the mountain. Most Rinjani trekking companies encourage you to spend a night in Senbaru before the tour to get an early start. This hotel is often included in the price, but be sure to check!
Private Tours and Hiking Rinjani Without A Guide
While it is technically possible to trek Mount Rinjani without a tour or a guide, it is actively discouraged both by the government and the community. Unless you are an extremely experienced hiker and have hiked in the tropics before, don’t even consider it. If you’re injured on the mountain without a guide or porters, you’ll be in some serious trouble.
If you do decide to trek Rinjani independently, please sign in at the park office and pay the entrance fee. Though it’s questionable whether the fees are used to maintain Rinjani, signing in is for your own safety.
What’s The Food Like On A Rinjani Trek?
On our day-one lunch break, we were astonished to see full-on camp kitchens being set up by all the guides and porters on the mountain.
In Canada, you’re lucky to get a squashed peanut butter sandwich for lunch on a long hike.
On Rinjani, you get a heaping plate of fried vegetables, tofu and tempeh, a pile of freshly cooked rice crackers, all the rice you can eat, plus a massive fruit plate for dessert. And that’s just the vegetarian option!
Not bad for a camp meal!
This meal was not unusual. Everything we ate on Rinjani, and everything we saw being served to fellow trekkers, was freshly cooked and plentiful. There was so much food, we were rarely able to finish our meals.
Where Do You Sleep On Rinjani?
You’ll sleep snuggled in a tent at a campsite on the crater rim or by the lake.
Our tent was clean and modern, if a little bit short for our long bodies! The sleeping bags had been freshly laundered and the camp pillows were also clean.
You won’t find much solitude at your campsite though, since hundreds of other trekkers will be camping right alongside you.
What Does A Rinjani Trekking Tour Cost?
There’s a huge range of prices for trekking Rinjani, depending on which company you go with, where and when you book, and which tour option you choose. I saw prices quoted anywhere between $80 and $450 US for similar tours.
Avoid the cheapest companies, as many don’t provide essential services like an experienced guide, good sleeping bags, garbage pack-out, and a toilet tent.
You can save money by booking once you’re already on Lombok. Just make sure you know which Rinjani trekking company you’re going with so you can ask the essential questions and check their reviews.
If you don’t have time to wait around on Lombok looking for a tour with availability, it is best to book ahead. Check out some of the tours I’ve linked to on this page.
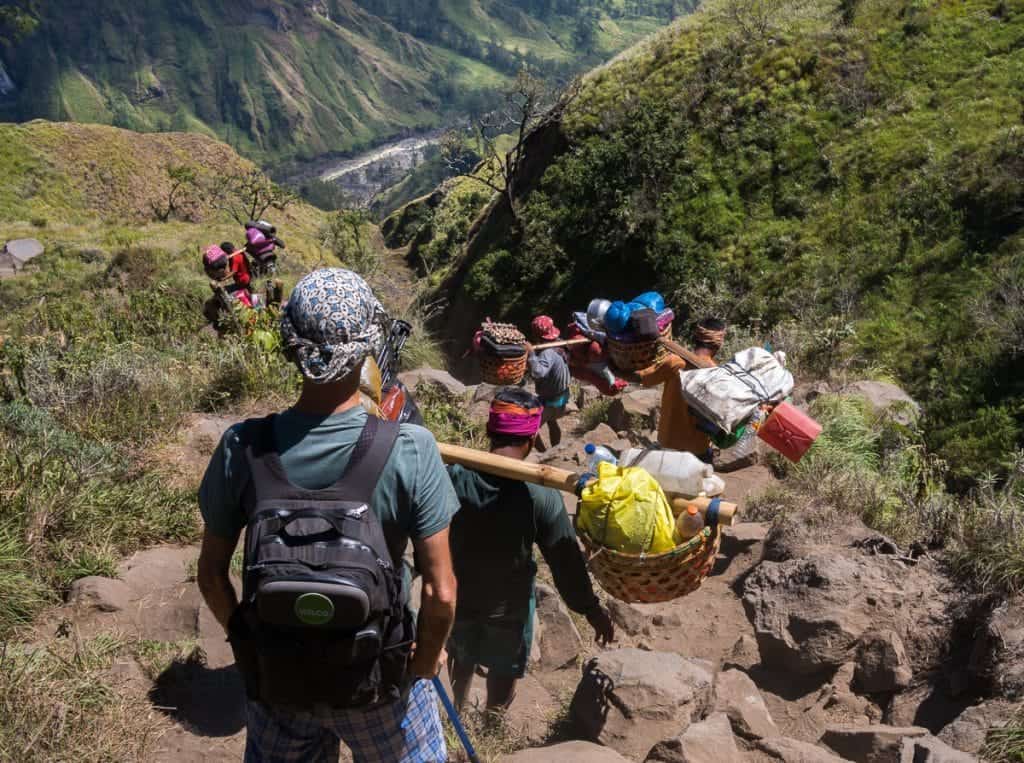
Porters carry around 40kg on bamboo poles. Please tip them!
Budget a little extra for tipping. After you see how hard your porters and guide work, you will be happy to supplement their incomes.
A minimum of 100,000 IDR (around $8 US) per guide/porter from each hiker is a good guideline.
Other Important Things To Know For Your Trek
All visitors are not allowed to bring any plastic that can potentially become waste. So visitors are advised to bring refillable drinking water bottles, food containers to carry food such as snacks, biscuits, bread, and the like.
There are only 400 trekking permits issued a day (240 permits for international hikers and 160 permits for domestic hikers). So make sure you reserve your place in advance!
How To Choose The Best Rinjani Trekking Service
Choose your Mount Rinjani trekking package carefully. Yes, you can pick up el cheapo tours after you arrive in Lombok but you tend to get what you pay for on Mount Rinjani.
I recommend ignoring the cheapest options and spending a little more to ensure you are comfortable and safe on the mountain.
Hajar Trekking took excellent care of us during our Mount Rinjani tour. We can enthusiastically recommend them.
Hajar grew up in Senbaru and he cares deeply about the mountain and the future of tourism there. Our guide, Adi, was funny, informative, and always put our safety first.
He has been up the mountain hundreds of times, knows every rock and tree root on the trail, and was patient with our endless stops for photos and videos.
If you mention the code “NOMAD TO RINJANI” when you contact them via WhatsApp or email they’ll offer you a special discount 🙂
Stephen and our guide, Adi, still smiling after three days with us!
The two porters who took care of us were just amazing, too, working their butts off to lug our camping gear and food up the mountain and to get our campsite set up and perfect before we arrived.
What’s Included On A Mount Rinjani Tour?
These are the things that should be included in your Rinjani trekking package. If they aren’t, look for another company.
Some companies provide a few nice-to-have extras. This is what we got:
A toilet tent allowed us to do our business in private and to bury our waste. Without a toilet tent, you take your chances in the bushes where privacy is very hard to come by.
A camping pillow which helped us get a better night’s sleep.
Two camping chairs that kept us out of the thick Rinjani dust at mealtimes.
Winter jackets to keep us warm at the top of the mountain. Even in August, the summit was around 5 degrees celsius! Brrrr.
Headlamps to make the ascent to the Rinjani summit possible. A headlamp leaves your hands free to carry trekking poles or help you scramble up the steepest sections.
Trekking poles to save your knees on the steep descents and give you extra ability to balance on the often treacherous trails.
Other Essential Questions To Ask About Your Rinjani Trekking Package
What do the porters carry? Usually, hikers carry all their personal items (clothes, toiletries etc) and the porters carry food, water and camping equipment.
What is the group size? We were on a private tour, but if you go with a group, be sure to ask about the group size. The larger groups on the trail tended to be noisy and experience more delays.
What do they do with garbage? You are going to go through a lot of food and water on the trail. Make sure your tour company pays their porters to carry your garbage out, instead of dumping it or burning it on the mountain. There is a lot of garbage on Rinjani – please don’t add to it!
Are there restrictions for what we can bring? To reduce waste on the mountain, visitors are not allowed to bring any plastic. Pack food and drinks accordingly!
Who runs the company? What is their story? We love to travel with private companies run by local people. They tend to care deeply about the environment and the longevity of their business and less about earning a quick buck.
Tips For Trekking Mount Rinjani
Request trekking poles. We had never trekked with poles before but they were indispensable for this trip. They’ll help keep you upright through the sandy, slippery slopes and will save your knees after hours of steep descents.
Be prepared. The trail will probably be harder than you think. Take your time, stopping every few steps to catch your breath if you need to. If you just keeping taking the next step and then the next, you will eventually make it to the top. Read up on our top hiking tips for beginners for more help.
Be OK with not summiting. Don’t be ashamed to say “no” to the sunrise summit trek. Plenty of people don’t go up! If the first day nearly killed you, stay in your tent and rest. There is plenty of exciting hiking to come without risking injury or exhaustion just to see the summit.
Don’t get too cocky on the descent. The trail down is steep and precarious. It’s easy to slip and fall and even easier to injure your knees. Just because the porters are running down the trail in flip-flops doesn’t mean you have to do it too!
Be respectful. Try to stay aware on the trail, even when you’re exhausted. Let faster hikers go by you and always move over for porters. Remember, they are working while you are there for fun!
Don’t add to the Rinjani litter problem. It’s no secret that there is a lot of garbage on Mount Rinjani. Bring a bag with you and please pack out your own toilet paper, baby wipes, cigarette butts and other personal garbage. If you want to do more, bring a garbage bag and pick up rubbish along the trail. You are not allowed to bring plastic!
Rinjani Trekking Packing List
Bring as little as possible. If you think you’ll survive without something, leave it behind! You’ll regret the extra weight when you’re on your 1200th metre of ascent for the day!
Hat, gloves & scarf (it’s very cold at the top)
Good hiking shoes (running shoes are not grippy enough)
Lip sunscreen (our lips got burned – not a good look)
Sunglasses
Socks & undies
Swim suit
Tiny towel
ID and cash for tipping
Optional items:
Base layer (it gets freaking cold at the summit)
Baby wipes (if you pack them in, pack them out)
Soap or hand sanitizer
Flip-flops
That’s everything you need to know before you book your Rinjani trekking tour. If we missed something or if you have questions, ask away in the comments section below!
Disclaimer: We were guests of Hajar Trekking for our Rinjani trip. But we would never recommend something we didn’t love ourselves and you know Jarryd and Alesha wouldn’t let us get away with it either!
Finding the best travel deals is a matter of timing.
A lot of people think travel is just expensive, but in reality, there are incredible deals happening all the time. They often don’t last too long, and you have to act quickly. That can sometimes be a problem when a deal requires jumping on a plane tomorrow (how many people can do that?).
Fortunately, most deals are for months in the future, giving you ample time to plan your schedule.
Often I will book a flight and then figure out my plans.
Since you can usually cancel a flight within 24 hours without incurring a fee, I lock in the deal and then figure out if I can make it work. Sometimes I can (like the $1,200 USD business-class flight from LA to Stockholm round-trip); sometimes I can’t (like the $400 USD New Zealand flights I had to cancel).
I am always looking out for deals.
Today, I want to tell you where I go for travel deals, tips, and expert advice. After all, these resources focus solely on this one aspect of travel, so why not use them? I can’t know everything, so I rely on specialists. If travel were a hospital, I would be your general practitioner.
Here’s a quick look at the top companies I use and suggest:
Quick Overview: Best Travel Deals
Best Cheap Flight Website
For a full breakdown of each company and what they are best for, click on the links below to jump to that section:
Where to Find the Best Flight Deals
When it comes to finding flight deals, I use these four websites for last-minute deals. There are always finding new (and tempting) last minute flights — often for a fraction of what you would pay otherwise.
My go-to website for cheap flight deals is Going.com. Formerly Scott’s Cheap Flights, this is an awesome resource for finding flight deals from the US. They offer free flight alerts, and with a premium membership you get access to even more deals as soon as they find them. (New users can get 20% off Premium with the code NOMADICMATT20.)
Three other great websites to use are:
The Flight Deal – This is a great resource for finding cheap flights from the USA. If you’re based in the States, start your research here!
Secret Flying – This cheap flight website finds “error fares” (when airlines make pricing mistakes) to and from destinations all around the globe.
Holiday Pirates – No matter where you’re based this is a great cheap flight website so be sure to always check here for more deals.
If you’re simply looking to book a flight, check out the search engines below. It’s important to remember that there is no one best online booking website. All the search engine websites have blind spots so it’s important to search a few different places before you book your flight.
Generally, the BEST booking sites are the following:
Skyscanner – I always start my searches with Skyscanner. It’s a very intuitive platform that searches booking websites and airlines all around the world to ensure that no deal is missed. If you’re not 100% sure where you want to go (or when) then start your search with Skyscanner.
Google Flights – A good all-around flight search website to include in your cheap flight arsenal.
Where to Find the Best Points & Miles News
When it comes to finding the latest in airline and frequent flier news, I turn to these sites. They give me the latest on the changes in the industry and loyalty programs, and any points and miles news that might be important:
View from the Wing – This is where I go for airline and frequent flier news.
The Points Guy – A great resource for credit card and points & miles news and information.
One Mile at a Time – This is a great website for credit card, in-flight experiences, and frequent flier news.
As a very, very, very avid traveler (and while I have my own special tricks and tips), when you’re overseas a lot, it’s hard to stay up to date on your own so I use these three sites to keep me in the loop.
READ MORE:
Where to Find the Best Cruise Deals
In my mind, there is only one cruise deal website worth following: CruiseSheet. This site consistently has some of the lowest rates out there, and its interface is beautiful.
If I don’t find anything on CruiseSheet or want to double-check a price, I go to the second-best website, vacationstogo.com.
Where to Find the Best Transportation Deals
If you’re looking for budget transportation, these are the websites you’ll want to check. Cheap buses, trains, and rideshare apps can help keep your transportation costs low, giving you more time on the road. Here are my favorites:
FlixBus – A budget-friendly bus company routes all across Europe and parts of the USA.
Trainline – Offers a variety of discounted train passes for both individual countries as well as entire regions of Europe, including passes for the entire continent.
Rome2Rio – A helpful resource for finding and comparing budget transportation options.
BlaBlaCar – A rideshare app that pairs travelers with local drivers who are looking to pick up passengers for a small fee.
RVShare – A sharing economy platform for renting RVs and camper vans directly from locals.
Turo – A car rental app that enables you to rent cars for short periods of time from locals.
Japan Rail Pass – A budget-friendly train pass exclusively for Japan. Comes in 7, 14, and 21-day passes.
Discover Cars – A comprehensive rental car aggregator for destinations all around the globe. I always find the best car rental deals here.
READ MORE:
Where to Find the Best Accommodation Deals
From hotels to hostels to camping, there are tons of great websites out there to help you find deals and save money. Here are my suggestions to help you get started:
Booking.com – This is the best website for finding hotels no matter where you are in the world. I usually start my search for hotel rooms here.
Campspace – This app connects you with locals renting out plots of land, RVs, cabins, and camper vans ranging from rustic to glamping.
Trusted Housesitters – Helps travelers connect with locals looking for house and pet sitters. Great for slow travelers/long-term travelers.
HomeExchange – A network that facilitates swapping homes with another person or family. They have over 200,000 members with houses in 155 countries, making it an amazing platform for finding house swaps around the globe.
Hostelworld – They are hands-down the best resource for finding budget-friendly hostels around the world. I use them every time I travel and you should too!
HostelPass – This card gives you up to 20% off hostels throughout Europe. It’s a great way to save money and it’s constantly adding new hostels too. I’ve always wanted something like this and so I’m glad it finally exists. Use the code NOMADICMATT to get 25% off too!
READ MORE:
Where to Find the Best Tour Deals
For tours and excursions, I keep an eye on the following companies by subscribing to their emails:
The Nomadic Network (TNN) – I created this global community for travel lovers in 2019. While I no longer run it (they’re now run by Lisa, a long-time TNN community member), they’re great group tours for people who want to travel — not simply vacation!
Intrepid Travel – This is my favorite small-group tour company. They hire local guides and are great for both solo travelers and couples/groups.
Walks – Walks operates small group tours with local guides in some of the best cities around the world.
Devour Food Tours – My go-to food tour company, with tours all around Europe and the US.
EatWith – Allows you to eat home cooked meals with local cooks. Everyone sets their own price (so prices can vary wildly depending on the cook) but this is a great way to do something different, pick a local’s brain, and make a new friend.
Get Your Guide – A huge activity aggregator where you can find and book all kinds of activities, from cooking classes to walking tours to multi-day local excursions.
Worldpackers – Worldpackers organizes group tours centered around volunteer experiences. It’s a great way to meet like-minded travelers while giving back to local communities.
READ MORE:
Where I Find the Best Travel Insurance Deals
I never travel anywhere without travel insurance. After dealing with injuries and emergencies abroad (and knowing plenty of other travelers who have been injured or robbed on the road) I always make sure I have comprehensive medical and travel insurance before I leave home. Here are my recommended companies for finding the best travel insurance:
SafetyWing – This is my go-to travel insurance company. They offer affordable monthly plans with a deductible. Great for digital nomads and frugal travelers!
Insure My Trip – If you’re over 70 and looking for insurance, this is the best place to find it!
Medjet – Medjet is a good option for people who are going to be far from home and want added evacuation coverage. It’s great for solo travelers and super affordable.
World Nomads – The first company I ever got travel insurance with, World Nomads is best for adventurous travelers. They cover a lot of adventure activities that other companies don’t, and now even offer annual travel insurance.
READ MORE:
***
While I think my site is amazing for your on-the-ground tips, tricks, and advice needs, for when you need travel deals to get you to where you want to go, use the companies above. They’re what I use, and they’ve never steered me wrong! They’ll save you the most money!
Book Your Trip: Logistical Tips and Tricks
Book Your Flight Find a cheap flight by using Skyscanner. It’s my favorite search engine because it searches websites and airlines around the globe so you always know no stone is being left unturned.
Book Your Accommodation You can book your hostel with Hostelworld. If you want to stay somewhere other than a hostel, use Booking.com as it consistently returns the cheapest rates for guesthouses and hotels.
Don’t Forget Travel Insurance Travel insurance will protect you against illness, injury, theft, and cancellations. It’s comprehensive protection in case anything goes wrong. I never go on a trip without it as I’ve had to use it many times in the past. My favorite companies that offer the best service and value are:
Want to Travel for Free? Travel credit cards allow you to earn points that can be redeemed for free flights and accommodation — all without any extra spending. Check out my guide to picking the right card and my current favorites to get started and see the latest best deals.
Need a Rental Car? Discover Cars is a budget-friendly international car rental website. No matter where you’re headed, they’ll be able to find the best — and cheapest — rental for your trip!
Need Help Finding Activities for Your Trip? Get Your Guide is a huge online marketplace where you can find cool walking tours, fun excursions, skip-the-line tickets, private guides, and more.
Ready to Book Your Trip? Check out my resource page for the best companies to use when you travel. I list all the ones I use when I travel. They are the best in class and you can’t go wrong using them on your trip.
Summer is simply the perfect season to throw a pool party. What better way is there to beat the heat than to chill in the pool with your loved ones, with delicious food and ice-cold drinks waiting for you nearby?
If it’s your goal to host an epic summer pool party, however, the event should entail more than just jumping in the pool, swimming around for a bit, and then calling it a day. You’ll want to do a little planning to ensure that your pool party is fun and memorable for all guests involved.
Before you put on one of your favorite swimsuits and jump in the pool, here are some things you should do as a host for the kind of pool party people will talk about long after it’s over:
1) Open Your Pool for the Summer
The first step towards hosting the ultimate summer pool party is actually getting the pool ready. At least three weeks before the date, open your pool to ensure that it’s in tip-top condition.
Clean the pool itself, remove any debris, and balance the water’s chemical levels so that it’s 100 percent safe for swimming. If you have no experience opening a pool the right way, consider hiring a professional service to handle any maintenance or repairs that might be needed.
2) Send Out Invitations
With your pool ready for action, it’ll be time to invite your guests. But before you send out the invites, make sure that you’re inviting the right number of people. You’ll want everyone to have enough room to enjoy the water without overcrowding it.
As such, consider the size of your pool and the space you have available when creating your guest list. This way, you’ll be able to get a rough estimate of how many people you can fit into the party area.
After you’ve made the guest list, the next step is to create the invitations. There are two ways to go about this: digital invites or traditional paper invites. If you’re looking for convenience and quick responses, opt for digital invites. But if you’re itching to incorporate some creativity and a personal touch, go ahead and send themed paper invitations.
Whichever you choose, make sure to include all the essential details: the date and time of the party, your address, and any specific instructions like what to bring (e.g., swimsuits, towels, sunscreen, etc.). If your party has a specific theme, such as a tropical barbecue or a retro pool party, mention it in the invitation and suggest attire that fits the theme. This not only makes the event more fun but also gives guests an idea of what to expect and how to prepare. Remember, the more details you provide upfront, the smoother your party will go.
3) Decorate the Party Area
A festive atmosphere will complete the pool party experience, and your choice of a particular theme or color scheme that reflects the vibe you want will make the event even more memorable. Popular themes include tropical paradise, beach bash, or retro summer. Once you have a theme in mind, you can begin decorating accordingly.
Begin with the pool area itself. String up some colorful lights or lanterns around the pool and in nearby trees or bushes. Not only do these add a festive touch, but they also provide necessary lighting as the sun sets. Consider adding a few torches or LED candles for some extra oomph to your ambience.
Next, decorate the surrounding area with themed decorations like beach balls, pool floaties, and tropical flowers. A few strategically placed signs or banners can also enhance the theme. For seating, use bright and colorful cushions or towels on lounge chairs to keep the theme consistent. Don’t forget to set up shaded areas with umbrellas or canopies, and consider adding a few small tables for guests to place their drinks and snacks.
4) Prepare Summer-Themed Drinks, Snacks, and Meals
Food and drinks are central to any successful pool party. Keep things in line with your party’s summer vibe by offering a variety of summer-themed refreshments, snacks, and meals to keep your guests satisfied and enhance the festive atmosphere.
Provide an assortment of alcoholic and non-alcoholic options to cater to all your guests, whether they’ll be drinking or not. You can’t go wrong with classic summer cocktails like lime, strawberry, or margaritas, piña coladas, and minty mojitos. For non-alcoholic options that can be served to kids and guests avoiding alcohol, you can prepare cool iced teas, lemonades, sodas, mocktails, and fruit-infused water. Serve these drinks in fun themed cups or mason jars, and don’t forget to provide plenty of ice.
When it comes to snacks and meals, light and refreshing options are best for a poolside setting. Offer a variety of finger foods and appetizers, like fresh fruit on a platter, veggie bites with dips, and a simple charcuterie board with cheese, crackers, chips, and nuts. Mini sandwiches, sliders, and skewers (both with meat and veggies) will prove convenient and easy to eat.
For the main course, consider a barbecue or a buffet-style setup. Grilled items like burgers, hot dogs, chicken, and veggie kebabs are always crowd-pleasers at pool parties. For a more tropical vibe, you might want to include dishes like coconut shrimp, fish tacos, or a tropical salad with mango and avocado. Finally, for dessert, offer cool treats like popsicles, ice cream sandwiches, and fruit sorbets, all of which are perfect for a hot summer day. If you want to get even more creative, set up a DIY sundae or s’mores station.
5) Give Your Guests Party Favors
Lastly, why not send your guests home with a small token of appreciation? Your party favors don’t have to be extravagant or expensive; thoughtful themed items will leave a lasting impression, no matter how small or humble they are.
Look for practical and fun favors your guests can use during or after the party. Personalized items like custom sunglasses, flip-flops, or beach towels can be both useful and a nice memento of a particularly special event, like a birthday pool party or a poolside anniversary celebration. Small bottles of sunscreen, lip balm with SPF, or mini fans will also be appreciated by guests who intend to spend much of the day out in the sun.
With these tips in mind, you’ll be well on your way to throwing a pool party that will be the highlight of the season. Plan thoughtfully and with love, and you’ll be able to spearhead an event that everyone would love to remember the summer by.
From city trains to scenic ferries, transportation in Australia offers a mix of convenience, sustainability, and stunning views.
Getting around a new destination can be tricky, especially if it’s a country as massive as Australia. But luckily, the public transport system here is efficient, extensive, and well-connected.
Whether you’re new to Australia or a repeat visitor, getting familiar with its transportation methods is essential to making the most of your holiday.
Public transport is the most practical and cost effective way to travel, particularly in sprawling cities like Sydney, Melbourne, Perth, Adelaide, and Brisbane.
And it’s environmentally friendly, too, as it helps reduce carbon footprint in these metropolitan areas.
There is also a convenient network of air travel in Australia. Car rentals are abundant as well for those looking to road trip or explore on a more flexible schedule.
So here is your complete guide to getting around Australia!
Plan your trip to Australia with ease using our transport guide!
Ultimate Guide To Transportation in Australia
In our guide to transportation in Australia, we’ll discuss flights, public transport, driving yourself, and general travel tips. Get ready for a whirlwind adventure Down Under!
Travelling to Australia
Getting into Australia is almost entirely by air. Major international airports in capital cities like Sydney, Melbourne, Perth, and Brisbane welcome travellers from around the globe all year round.
While there are no international train routes, cruise ships periodically dock in Australian ports, such as the Sydney Harbour.
Australia’s major cities serve as key gateways for flights from destinations across Asia, Europe, North America, and beyond. Airlines like Qantas, Virgin Australia, Singapore Airlines, and Emirates operate frequent routes.
Because Australia is an island continent, long-haul flights are the norm. Travellers often have layovers in major hubs like Dubai, Singapore, or Los Angeles.
Sydney Airport in New South Wales is the busiest, followed by Melbourne, Brisbane, Perth, Adelaide, and the Gold Coast Airport.
To score the lowest fares, consider flying outside the peak periods (which vary around the country). You can usually find discounted prices during the shoulder seasons and off seasons..
Use search engines such as Google Flights or Skyscanner for departure dates with the lowest prices.
Entry Requirements
All travellers to Australia must obtain a visa to enter the country.
Australia doesn’t have a visa-on-arrival option, except for citizens of New Zealand. All other visitors must get a visa before leaving their home country.
The standard visa for tourism is the Visitor Visa, which is open to all countries.
You may apply for an Electronic Travel Authority (ETA) or eVisitor Visa if you’re a citizen of one of these eligible countries. Both are quicker to process than the regular Visitor Visa.
The cost of a Visitor Visa depends on the duration and purpose of the stay. The eVisa is free of charge, while the ETA has a service fee of 20 AUD.
Be sure your passport is valid for at least six months from the date of your travel date.
Important Note! Before you book any international trip, we honestly recommend getting travel insurance. You never know when things will go wrong, and medical bills can add up quickly if you get sick or injure yourself overseas.
Our personal recommendation based on our own experience is World Nomads.
Getting Around Australia
The public transportation system in Australia has four main options. These are buses, trains, trams, and ferries.
Trains and trams are the most common way of getting around big cities, but different locations have different modes of transportation.
Also, ferries are limited to the coastal areas, as most cities inland don’t have access to a waterway.
There are several ways to travel across Australia to fit your schedule, budget, and preference. Keep in mind, distances can be massive!
Air Travel
Flying is the fastest and most convenient way to cover great distances.
Most Australian cities are far apart from each other. A flight from Perth to Sydney lasts five hours, while Brisbane to Melbourne takes two hours.
While flying is not always the cheapest, it’s the best option for cross-country travels if you have a tight schedule. Consider flying with budget airlines like Jetstar for lower flight prices.
Views while flying over the famous Sydney Harbour.
Trains
Australia has long-distance rails that connect the metropolitan areas with the outer suburbs and nearby cities.
The downside is most long-haul passenger trains run on a state basis. For example, Queensland Rail only provides services within Queensland, while the NSW TrainLink focuses mainly on New South Wales, with limited trips to Victoria.
Trains are not the best option for interstate travel if you’re short on time.
But if you’re after the experience, not speed, you can enjoy a relaxing tour with Journey Beyond Rail. The company provides luxurious train journeys, including the Indian Pacific (Sydney to Perth) and The Ghan (Adelaide to Alice Springs and Darwin).
Buses
Buses, like Greyhound Australia, are a reliable option for those who want to travel a fair distance without blowing their budget.
Buses take longer than most public transportation, but they cover locations not served by trains, providing access to rural areas.
Long-haul buses are clean and well-maintained, with comfortable seats and ample legroom. Most have charger points, WIFI, toilet, and entertainment on board.
Other bus companies in Australia include Integrity Coach Lines, which operates in Western Australia, Premier Motor Service in New South Wales, and V/Line in Victoria.
Ferries
While ferries are part of Brisbane, Sydney, and Perth’s commuter systems, only a few long-distance ferry services exist due to limited routes.
The most notable ferry service is the Spirit of Tasmania, which sails between Geelong, Victoria and Devonport, Tasmania. Another is SeaLink, which connects mainland Australia to Kangaroo Island.
Vehicle Rentals
Australia is highly dependent on road transport due to its sheer size.
A road trip is a fantastic way to travel across Australia. The roads are not only safe and well-maintained. The scenery is also stunning.
You can find vehicle rentals in major airports and city centres, offering a range of options, from a private car to a 4WD to a campervan.
The best way to get around is to rent a car and explore on your own! We recommend Rental Cars, which has the largest range of vehicles for the best value on the market.
Urban Transportation
Thanks to Australia’s efficient public transportation, getting around the cities is easy. In addition to trains and buses, you can hire a taxi or rent a bike. Then, there’s walking–the most exciting way to explore the bustling city centres!
Trains
Major cities rely heavily on their light rail system and suburban rail networks for daily public transport within urban areas.
In big cities like Adelaide, Perth, and Melbourne, public transportation are partially underground which helps reduce traffic congestion.
Sydney is the only city with a rapid transit system called the Sydney Metro. Like many typical rapid transit systems, the Sydney Metro is fully automated.
Trams and Buses
Trams are an integral part of the public transport system in Australian cities, particularly in Melbourne. The city has the most extensive tram network, covering 24 routes with 1,700 stops.
Buses are also essential in both big cities and smaller towns without access to trains.
Most major cities have dedicated bus lanes to speed up travel time. Additionally, Sydney, Adelaide, and Melbourne have night bus services to help commuters get home safely after midnight when train stations close.
Trams are abundant in Melbourne.
Ferries
Ferries are a popular and relaxing mode of public transportation in cities with waterfronts like Sydney, Perth, and Brisbane.
Sydney Ferries sails around Sydney Harbour, connecting the city centre and suburbs nearby. CityCat provides ferry services across the Brisbane River.
The ferries not only serve commuters but also attract tourists looking for a unique way to explore the city.
Taxis and Rideshare services
Taxis and rideshare services provide the most direct mode of public transport in Australia and are widely available in most cities.
Taxis remain the usual option for quick rides and airport transfers, but they are more expensive compared to other public transportation, including rideshare.
Rideshare services have become popular, mainly because they are cheaper than taxis. Uber is the most prominent rideshare in Australia, but DiDi is a close competitor, followed by Shebah, a female-only option.
Now that you’re familiar with Australia’s public transportation system, here are some tips to help you travel smoothly.
Researching Your Route
Public transport is well-organized in Australian cities, but a little research before will save time. Use Google Maps, Moovit, Citymapper, and city-specific transit apps to plan your journey.
Compare flights, buses, and trains to find the most cost-effective and convenient option.
Consider renting a vehicle and hitting the highway on a road trip for long-haul travel and a more immersive cultural experience!
Use a Travel Pass or a Travel Card
If you plan to visit multiple destinations, consider getting a reloadable travel card. It’s an easy and convenient way to pay for public transport in Australia across different cities.
A travel pass might suit you better if you only visit attractions in a specific area (i.e. Melbourne). Most offer bundled discounts and pre-set packages for certain tourist spots or activities.
Some city-based travel cards include:
Perth has a great public transport system.
Peak Hours and Safety
Major cities can get crowded during peak travel times (7-9 AM and 4-7 PM on weekdays). Avoid the crowds and get a cheaper fare by traveling outside peak times!
Check timetables in advance as services may be less frequent in the evenings. Not all cities have 24-hour bus or train service. You can always hire a taxi or a rideshare, but it will be more expensive.
Public transport in Australia is generally safe. Theft and pickpocketing targeting tourists are almost unheard of.
Still, always be aware of your surroundings and keep an eye on your belongings, especially in busy stations and during rush hour.
Never underestimate the power of technology in enhancing your travel experience.
These apps, combined with your knowledge of transportation in Australia, guarantee straightforward and enjoyable navigation.
Navigation Apps
A reliable navigation tool is crucial for real-time navigation.
Google Maps is the most-used app for navigation. But you can also check out CityMapper to get around cities. For road trips, use Waze to help you find the best routes.
If you’re driving a campervan, use WikiCamps Australia to find caravan parks, petrol stations, and toilets. For a more budget-friendly option, check out CamperMate.
Transportation Apps
Rome2Rio helps you find the best public transportation modes–bus, train, taxi, and more. Don’t forget to download a ridesharing app like Uber or DiDi, in case you need it.
DISCLAIMER: Some of the links in this article are affiliate links, which means if you book accommodation, tours or buy a product, we will receive a small commission at no extra cost to you. These commissions help us keep creating more free travel content to help people plan their holidays and adventures. We only recommend the best accommodations, tours and products that ourselves or our fantastic editorial team have personally experienced, and regularly review these. Thanks for your support, kind friend!
If you are planning to visit some of the Greek Islands and need to decide which ones to include in your itinerary, this post is for you. Our journey takes you to the most popular islands in Greece, which I’m sure you will enjoy as much as we did.
If this is your first trip to the Greek Islands you should definitely include Mykonos and Santorini in your itinerary. Although not my favorite ones, these are two of the most popular Greek Islands and are surely worth a visit. Crete, on the other hand, is an absolute must and you should make it a point not to miss it.
About This Itinerary
Because our Greek Islands itinerary was three weeks long I will not do a day-by-day breakdown. Instead, I will tell you how many days is worth spending on each island and what you can visited there. I’ll also tell you where to stay, what to pack and what’s the best time to visit.
Greek Islands Itinerary map
One thing I need to mention is that we visited these islands independently, not on an organized trip. We traveled to Greece by plane, then rented a car and moved from island to island by ferry. If you are interested in organized trips for the Islands, there are many tour operators who offer them.
Best Time to Visit the Greek Islands
After visiting Greece many times over the years, we strongly believe that the best time to visit the Greek Islands is the fall. September and October enjoy great weather, with very little rain and temperatures in the mid 70s. The water is still warm enough for swimming and the crowds are much smaller. The prices are also lower, which is a big plus.
Fall time in the Greek Islands
However, the months of June, July and August are considered the peak season for the Greek Islands, as most people take their vacations in summer. Many Europeans travel to Greece in summer, despite the high temperatures which are hard to bear, raising sometimes above 100ºF (37-39ºC).
Spring is also considered a good time for visiting the islands. Temperatures are very pleasant for walking and sunbathing, but the water doesn’t warm up for swimming until mid June.
What to Pack for Your Greek Islands Itinerary
Packing for Greece is generally easy as you won’t need any fancy attire or special clothing, like when you pack for Patagonia for instance. But if you travel to Greece in the fall, I recommend packing both summer and autumn clothes, as it may get a little cooler at night at this time of year. So here are some items that shouldn’t be missing from your luggage:
How to dress in the Greek Islands
Swimsuits, sandals, a hat and your snorkeling gear. The water is very warm and you’ll be definitely swimming every day. Lightweight clothes. Greece is just the right place for wearing cotton and linen clothes. If you decide to visit the Greek islands in the fall, make sure to pack a light jacket or even a raincoat. Although temperatures will be in the upper 70s (24-25ºC) during the day, it may get a little cooler in the evening.
How to Travel Between the Islands
While not the only option, the best way to explore the Greek Islands is by car. If you have a car you’ll be able to access secluded beaches, villages, and scenic viewpoints that might be difficult to reach with public transport. That’s especially true for larger islands, like Crete.
For this itinerary, we rented a car in Mykonos then traveled from island to island by ferry. Most ferries allow cars to be brought onboard, which enables you to travel between different islands with your vehicle. Ferries are the fastest and most convenient way to travel between the islands.
The ferry boat is the most convenient way to travel between the Greek islands
However, ferries aren’t cheap in Greece. Sometimes they are even more expensive than airfare tickets. That’s especially true for the Aegean Sea ferries which incur higher sea transportation costs than those in the Ionian Sea. Traveling by plane is more time consuming, so I believe it’s worth paying a little extra for the ferry.
If you come from overseas, you’ll most likely land in Athens which is a big hub for international flights. From Athens we flew to Mykonos where we rented a car and then traveled from island to island by ferry.
Flying is the fastest option to reach Mykonos. It’s a short 45 minute flight from Athens. There is also the option of renting a car in Athens and going to Mykonos by ferry, but that’s a way longer and more complicated route which we do not recommend for this Greek Islands itinerary.
Planning your arrival time in Athens is very important because it has to be coordinate with the departure flight to Mykonos. However, we didn’t find this very difficult as Aegean Airlines has many connections between these two destinations. And you don’t even need to change the terminal.
If you never visited Athens before, you may choose to extend your Greek Islands itinerary by spending a few days in Athens. And if you have more time to spare, there are many interesting day trips from Athens that you can take, one of which is a day trip to Delphi, a very interesting archeological site.
Day 2 – 4: Mykonos
We spent 3 days in Mykonos and felt this was just about the right amount of time for this island.
Beautiful beach in Mykonos
Mykonos is a very small, barren island with a total area of around 85.5 square kilometers (33 square miles). The biggest attraction on the island is Mykonos Town, a charming maze of narrow alleys with blue-white houses, colorful bougainvilleas, and a great array of small luxury boutiques and fancy restaurants.
Mykonos Town
The small neighborhood of Little Venice and the iconic windmills are definitely must-see spots for picturesque views, especially at sunset. Also, the seaside walkway that starts at the Old Port and continues all the way to the windmills is indeed mesmerizing and definitely worth experiencing.
Where to Stay in Mykonos
Despite being a small island, Mykonos has a big concentration of luxury hotels and resorts. Since most of the action takes place around Mykonos Town, travelers prefer to stay in this area. So the decision you’ll have to make is whether to stay in Mykonos Town, where you’ll have easy access to most nightlife, shopping, and restaurants, or book a hotel a little farther away and enjoy more peace a quiet. We opted for the latter option and did not regret it.
St. John Hotel and Resort in Mykonos
We stayed at Saint John Hotel Villas & Spa, a beautiful resort located about 10-15 minutes away from Mykonos Town. This hotel was one of the best deals you could make on this island, considering the luxurious facilities they have, the spectacular grounds and the opulent breakfast they offered. They also have free parking, which on this small island is a big plus.
Ferry from Mykonos to Santorini
The best connection between Mykonos and Santorini is the high speed ferry Worldchampion Jet, departing at 9:50 am from Mikonos and arriving at 11:50 am in Santorini.
Day 5: Delos
After visiting Mykonos we took a day trip to the small island of Delos, which is a very significant archeological site in Greece. The island which is considered the sacred birthplace of Gods Apollo and Artemis, is a very important cultural destination with extensive ancient ruins, temples and mosaics. If you are in Mykonos, make sure you don’t miss this important UNESCO World Heritage Site.
Archeological site in Delos
Most people visit Delos on a day trip from Mykonos. To get to Delos you can take the ferry boat from the old port in Mykonos Town. The journey takes around 30-40 minutes. On the island you can book a guided tour, or you can visit the archeological site independently.
Day 6 – 11: Santorini
We spent days 6 to 11 of our Greek Islands itinerary in Santorini. But in retrospect we believe four full days on this island was too much. Two, or at the most three days would have been more than enough.
Santorini is a volcanic island with a crescent-shaped caldera, half of which is submerged in water. It was created by one of the largest known eruptions around 3,600 years ago. The explosion was so powerful that it wrecked Santorini’s ancient city of Akrotiri and completely destroyed the Minoan civilization, which had settled on the island at the time.
Images from Santorini
The biggest attraction in Santorini is the caldera and the two towns of Oia and Fira perched on its cliffside. Both these towns are very romantic, with luxurious villas and resorts that enjoy breathtaking views.
Santorini, view of the caldera
Pictures and drone footages from Santorini would do some justice to the beauty of the caldera. But when you see it in person you understand why Santorini is on almost every Greek Islands itinerary.
Where to Stay in Santorini
There are many places where you can stay on this island, but I believe choosing a hotel somewhere between Fira and Oia would be the most convenient location. There are many accommodations in the towns of Fira or Oia, because both cities offer stunning views of the caldera and easy access to amenities and attractions.
Santorini hotels
As expected, both these locations are pricier than other parts of the island, but they are also spectacular.
We stayed at Azanti Suites which are located right in the middle of the caldera, about 15 minutes drive to Fira. We had free self parking and free breakfast served in the room. The suites face the caldera and have beautiful terraces with a private pool or jacuzzi.
Ferry from Santorini to Crete
There is only one ferry that connects Santorini to Crete: PowerJet, that departs Santorini at 16:05 and arrives in Heraklion at 17:55. From Heraklion we drove to Agios Nikolaos, which was our base for exploring the eastern side of Crete.
Day 12-20: Crete
Crete is huge! It’s the largest island in Greece and also the fifth largest island in the Mediterranean Sea. It measures about 3,260 square miles (8,450 square kilometers) and is located 62 miles south of the Peloponnese.
Beautiful beach in Crete
Crete is also one of the most varied and beautiful islands that we have ever visited. It has gorgeous beaches, tall mountains, hundreds of canyons and gorges, interesting archeological sites, historic towns and coastal resorts.
Canyon in Crete
Because it’s the biggest Greek island, we decided to divide our itinerary into two parts: we spent the first five days in the eastern part of the island the other five on the western side. This way we didn’t have to drive for more than 1.5-2 hours to reach our points of interest.
How Much Time to Spend in Crete
Because it’s so big and diverse, Crete deserves minimum a week to be able to get a glimpse of some of its marvels. However, we spent 10 days on this island and felt this was not enough. Distances between the different points of interest are huge, so plan at least 7-8 days.
What You Can Do on the East Side Crete
Crete is jam-packed with history – especially around the Bronze Age ‘Minoan civilization’ which originated in Crete and is regarded by many as the oldest in Europe. So you can wander around the Minoan Palace of Zakros, visit the ruins of Knosos Palace, or the remains of the Venetian castle on Spinalonga Island..
Another big point of interest on the east side of Crete is Heraklion, a port city and the island’s capital. Here you’ll find interesting museums, beautiful cathedrals, Knosos Palace and Roca a Mare Fortress.
Knosos Palace
On this side of the island you’ll have many wonderful beaches like Glaros, Vathi, Itanos, or China. Sadly the driving distances between them are big, so depending on how much time you have at hand you’ll have to choose which ones to visit.
If you like hiking, Crete is home to a great array of beautiful canyons and landscapes of stunning scenery. You can hike the Martsallo Gorge, take a journey across the Lasithi Plateau to explore the Cave of Zeus, or wander around the many small fishing villages around this side of the island, like Elounda, Agios Nikolaos, or Plaka.
What to Do on the Western Side of Crete
The western side of Crete is absolutely stunning. While the eastern side is flatter and less visually striking, the western side has a more wild and dramatic appeal, with a rugged coastline, lush green landscapes, and imposing mountains.
Here you’ll find the renowned white sand beaches like Elafonisi, Balos, or Kedrodassos Beach. Also on this side you have the spectacular White Mountains and the famous Samaria Gorge, as well as many charming coastal towns like Chania, Rethymno, or Loutro.
Rethymno town
Where to Stay on the Eastern Side in Crete
Depending on how much time you have for this island, I recommend staying in two or three places. Distances are big here, so the idea is to spend less time driving and more time having fun.
We spent the first five days of our Crete itinerary on the eastern side of Crete, in Agios Nikolaos. This is a very picturesque coastal town with plenty of accommodations for all budgets. We rented an apartment at the Pleiades Luxurious Villas, a beautiful resort that features villas with private pools. We didn’t need all this space, but prices were very affordable in October, so we splurged.
Where to Stay on the Western Side in Crete
The best place to stay on the western side is in Chania, which in my opinion is the most beautiful town in Crete. However, parking as well as getting in and out of this town is rather difficult. If you don’t want to struggle with that, I suggest either looking for a hotel with parking (which are not very many), or staying somewhere else along the coast.
The Old Lighthouse of Chania
We stayed at Belmondo Hotel & Suites which is located on the edge of the water, right across from the Old Lighthouse. But we also discovered a nice resort about 15 minutes drive from Chania, called Zorba’s Beach Village Hotel. This would also be a good place to stay when exploring this part of Crete.
Day 21: Return to Athens
This was our final day of our Greek Islands itinerary. Since it’s a very long trip by ferry (8-13 hours), we chose to fly back to Athens from Chania. There is also the option of flying to Athens from Heraklion, if you are on the eastern part of Crete.
Traveling by plane to Athens
Aegean Airlines has numerous flights between Crete and Athens, but it’s better to take an earlier flight. Also, if your final destinations is in the US, I recommend spending one night in Athens to make sure you won’t miss your final flight in case of delays or cancellations.
A Final Word
This sums up our three-week Greek Islands itinerary. I hope this post gives you an idea of what to expect when visiting this part of Greece.
We absolutely loved these islands, especially Crete, and believe they make a great destination for any type of vacation. Whether you are young or old, a big family with small children or just a couple, be assured that the Greek Islands will not disappoint you.
For coffee lovers, nothing beats the fresh, rich taste of a well-brewed cup of coffee. But finding a portable solution that delivers quality on par with your favorite coffee shop or home setup has always been a challenge.
Enter FinalPress, a portable coffee maker that promises to bring great coffee on the go, wherever you are. But does it live up to its claims? Let’s find out.
Design and Portability
One of the standout features of the FinalPress is its compact, sleek design. The cylindrical shape is both lightweight and easy to hold, making it perfect for slipping into a bag or backpack. Measuring just a few inches in height and width, it’s designed to be ultra-portable, yet sturdy enough to withstand the rigors of travel, whether you’re hiking, commuting, or camping.The coffee maker is made from durable, food-grade materials, ensuring it can handle the bumps of everyday life while keeping your coffee-making process safe. It’s essentially a minimalist brewer with no complicated parts, which makes it an ideal choice for people who are constantly on the move.
Ease of Use
Unlike many portable coffee makers that can be cumbersome or difficult to clean, FinalPress keeps things simple. Here’s how it works:
1. Fill the chamber with ground coffee (you can use any grind, but medium grind seems to work best).2. Attach the filter mechanism and pour hot water through it.3. Press down to filter your coffee, allowing the liquid to drip into your cup.The brewing process is straightforward, taking only a minute or two from start to finish. There are no complex mechanisms, so you don’t have to deal with battery power, electricity, or special pods. This simplicity makes FinalPress a perfect option for anyone looking for a hassle-free coffee-making experience.
Coffee Quality
Of course, the most important aspect of any coffee maker is the quality of the coffee it produces. In the case of the FinalPress, the results are impressive given its size and portability. The mesh filter is fine enough to capture most of the grounds while allowing the coffee’s essential oils and flavors to shine through. The brew you get is akin to a French press or drip-style coffee, but with less sediment, making it smooth and flavorful. While it doesn’t quite reach the bold richness of an espresso machine, it does an excellent job for those who enjoy a clean, medium-bodied cup.It’s also versatile. You can use the FinalPress to brew a strong cup of coffee or a lighter, more tea-like brew by adjusting the amount of coffee grounds and water.
Cleaning and Maintenance
Cleaning the FinalPress is a breeze. Because it doesn’t have any intricate components, it’s as simple as removing the filter, rinsing the coffee grounds away, and giving the device a quick wash. This ease of cleaning makes it convenient for those who don’t want the hassle of dealing with complicated coffee machines or disposable pods while on the go.Pros:
Highly portable and compact. Simple to use with no need for electricity or batteries. Produces good-quality coffee comparable to a French press. Easy to clean and maintain. Versatile in terms of brew strength and grind options.
Cons:
Limited capacity: It’s designed for single servings, so it’s not ideal if you’re making coffee for multiple people. No temperature control: You need to rely on pre-boiled water, as it doesn’t heat the water itself. Doesn’t offer the same richness or crema as espresso-based coffee makers.
The FinalPress portable coffee maker is a fantastic solution for coffee lovers who value simplicity, portability, and good-quality coffee. Whether you’re hiking in the wilderness, commuting to work, or simply looking for an easy way to make coffee at home without the hassle of a large machine, FinalPress gets the job done.
Running at around 40 USD it’s not meant to replace high-end espresso machines, but for its size and purpose, it delivers excellent results.If you’re someone who needs their daily coffee fix but doesn’t want to compromise on flavor while traveling or working remotely, the FinalPress is definitely worth considering. It’s practical, affordable, and most importantly, it makes a good cup of coffee—anytime, anywhere!