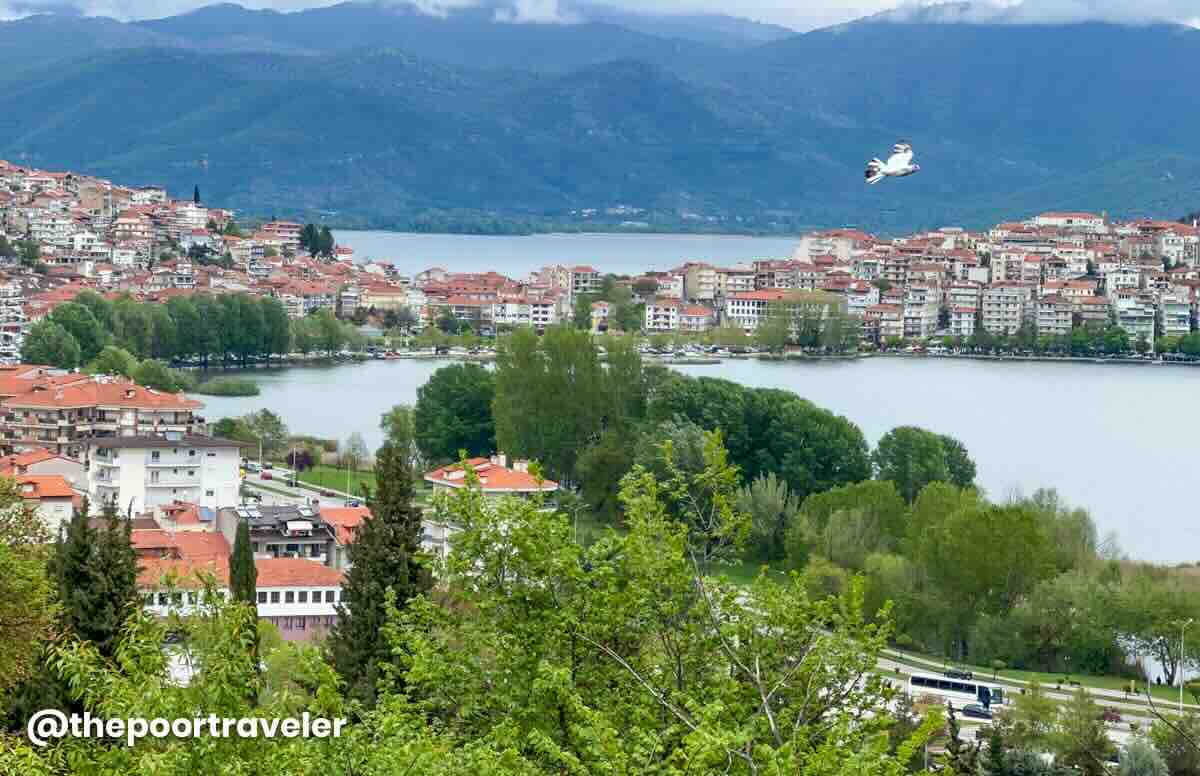
When you think of Greece, what’s the first image that comes to mind? Perhaps it’s the sun-kissed Greek isles, the ancient ruins of Athens, or a scene straight out of Greek mythology. While these iconic destinations are undoubtedly breathtaking, there’s one gem that often gets overlooked, yet it’s one you should definitely add to your travel list — Kastoria.


Nestled in the middle of a picturesque lake, this charming city doesn’t always make it to the top of the list for most travelers. But it should. With its serene beauty, fascinating history, and stunning natural surroundings, Kastoria is a place that promises to captivate those who seek to explore beyond the typical tourist spots. And in this article, we’ll share with you some of the things you need to know about this city, along with some tips. Hopefully, you can fall in love with it the way we did!
Where is Kastoria?
Kastoria can refer to two things: one is the regional unit in Greece, something like a prefecture, and another is its capital city. In this article, we’ll primarily be referring to the city.
Located in the region of Western Macedonia in northern Greece, near the border with Albania, Kastoria sits gracefully in the middle of the stunning Lake Orestiada. In photographs, it might seem like an island, but it’s actually perched on a promontory that juts out into the water.
Kastoria is perhaps best known for its rich collection of Byzantine churches and its once-thriving fur industry, which played a major role in its economy for many years. However, in recent times, the city’s other attractions have started to draw more attention, opening it up to tourism. While some of its wonders may not be traditionally associated with Greek culture, they’re definitely worth experiencing. With its unique charm and historical significance, Kastoria is a destination that should be on every traveler’s radar.

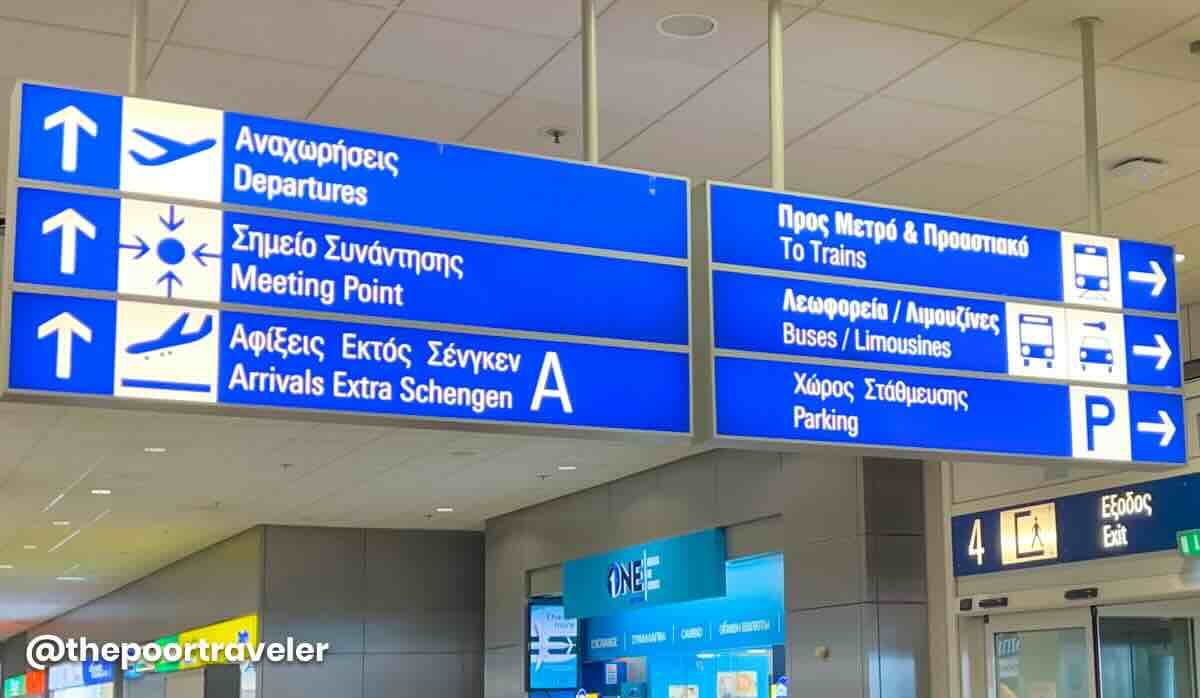
- Language: Greek. Greece has its own alphabet, which can be a bit intimidating at first, especially if you’re not familiar with it. While there may be a slight language barrier, the good news is that many locals speak English well. Additionally, most street signs are written in both Greek and English, so getting around is fairly easy and straightforward.
- Timezone: UTC+02:00 (EET – Eastern European Time). Daylight saving time is observed from the last Sunday in March to last Sunday in October, pushing it an hour ahead (+03:00). So depending on the time of the year, it’s six or five hours ahead of the Philippines, Singapore, and Malaysia.
- Currency: Euro (EUR, €). €1 = 1.17 USD, SGD 1.50, PHP 67
- Modes of Payment: Cash is still the most common, but credit card payments are accepted in some establishments.
- Electricity Info: 230 V, 50 Hz. Power sockets are Type F, which also accept Type C plugs.
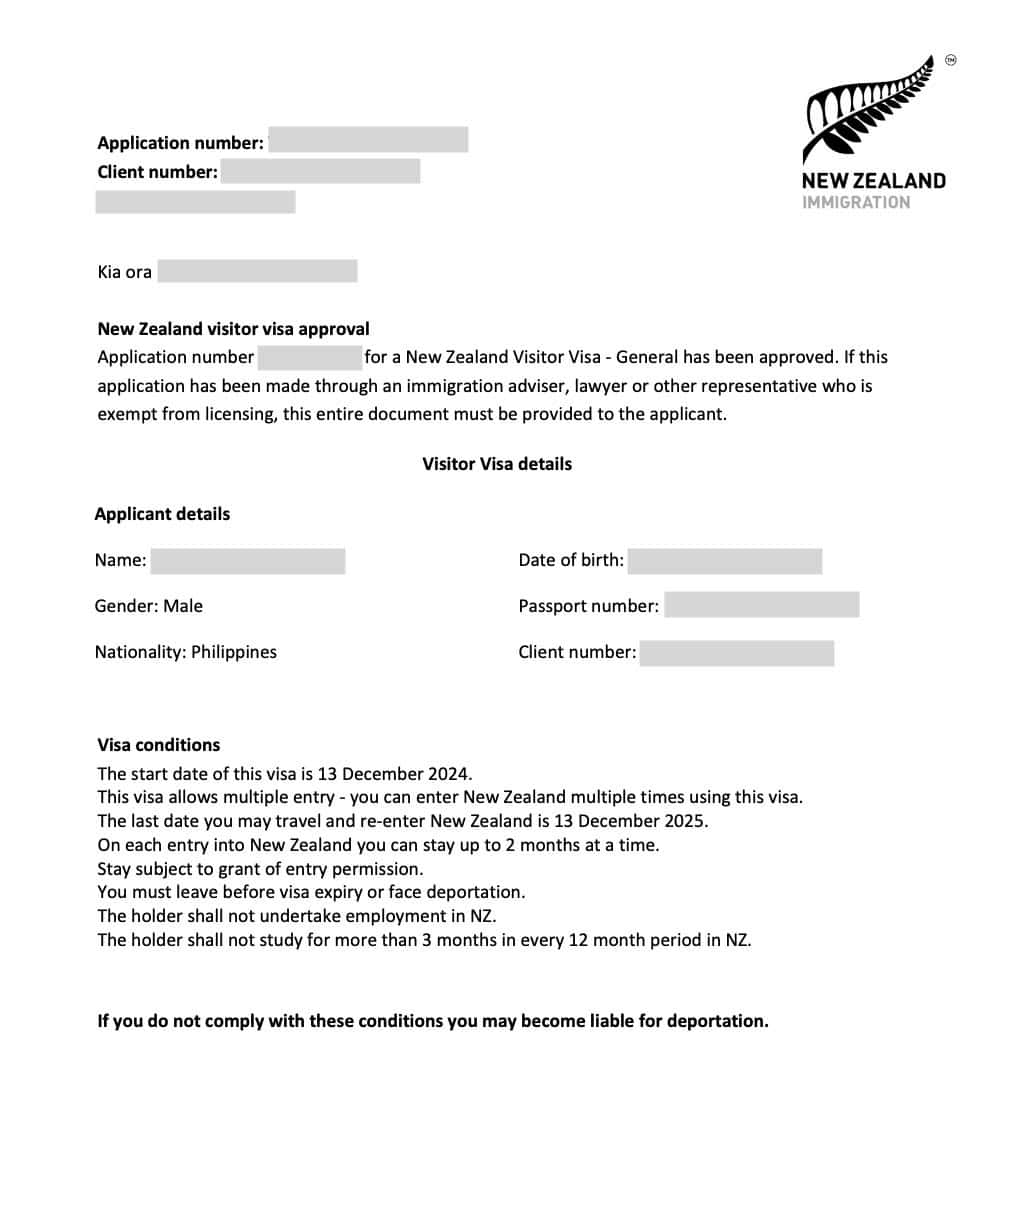
By the way, Greece is part of the Schengen Agreement, which means that travelers from most countries, including the Philippines, will need to secure and present a Schengen Visa to enter. Make sure to plan ahead and get your visa sorted before your trip to avoid any hiccups along the way! We’ll be updating our Schengen Visa article, so make sure to check our website regularly.
Where to Stay in Kastoria
Let’s start by getting familiar with the geography of Kastoria. As mentioned, the city is nestled on a peninsula that extends into Lake Orestiada, almost entirely surrounded by water except for its western part. The easternmost tip is marked by limestone peaks, creating a striking landscape. While the city also spans parts of the mainland, its heart and soul lie on the narrow strip of land near the peninsula’s neck.
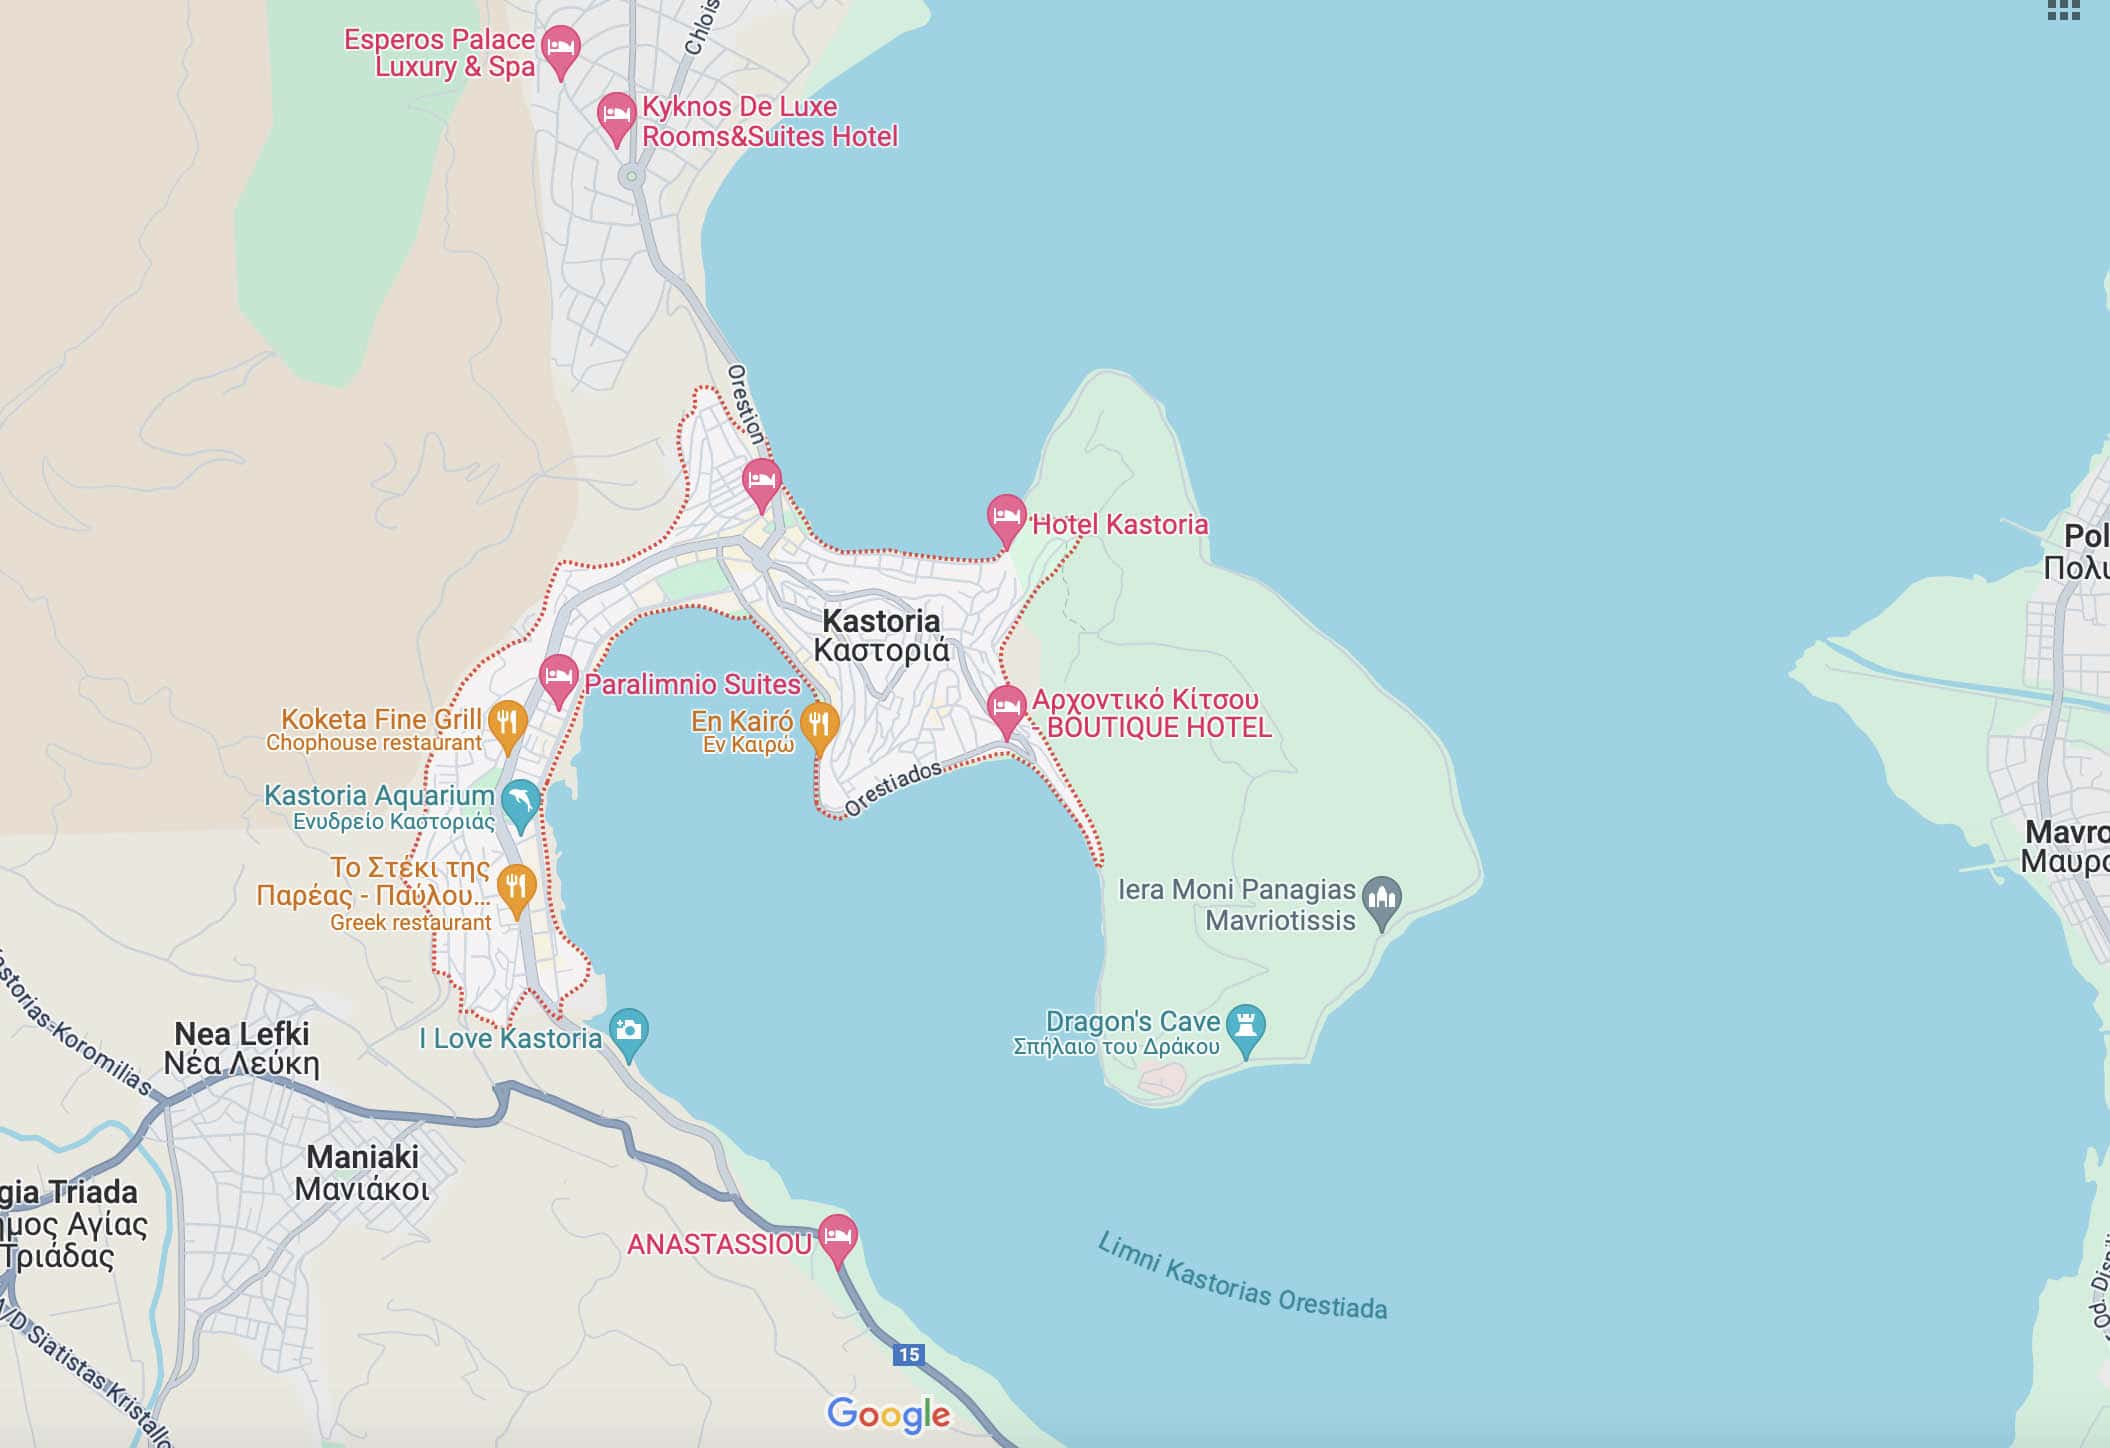
Despite its hilly terrain, Kastoria is a small city, and you can easily walk from one end to the other — whether that’s from coast to coast or north to south. No matter where you stay, you’ll find that most places are within easy walking distance.
Top Hotels in Kastoria
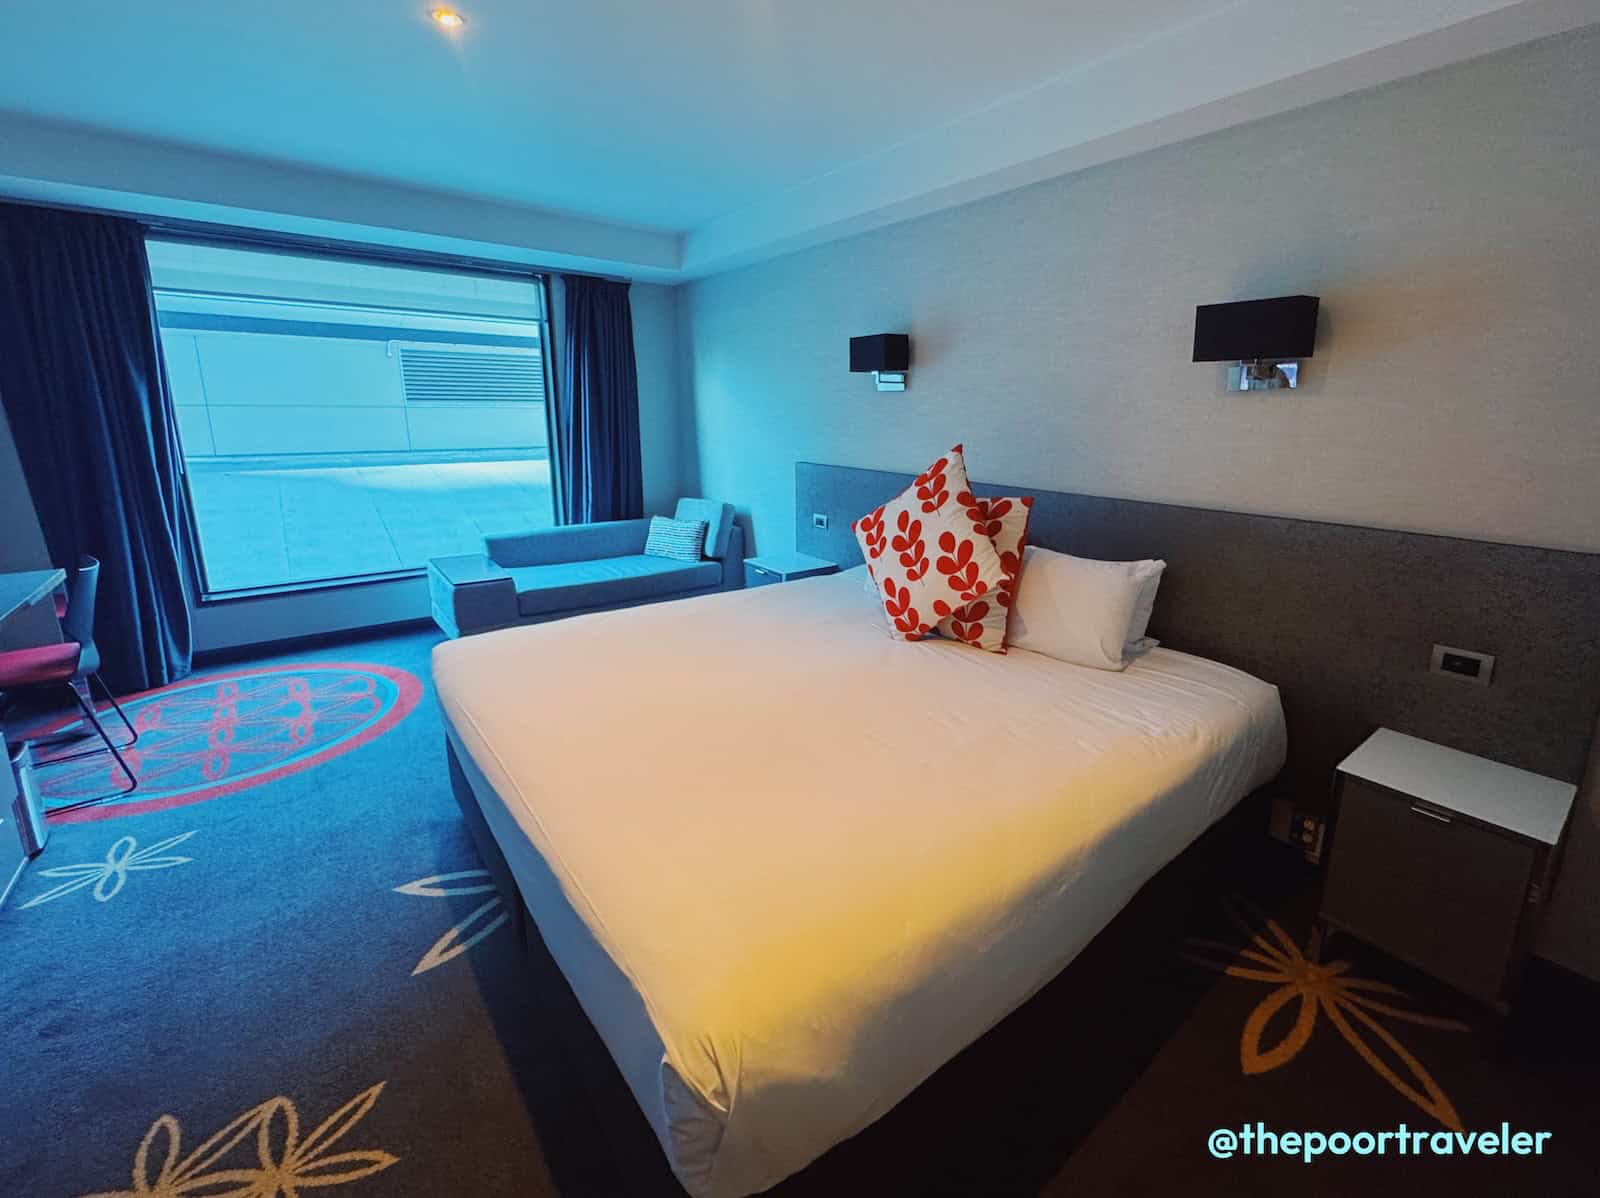
During our time there, we had the chance to visit three remarkable hotels that offer a mix of comfort and unique experiences.
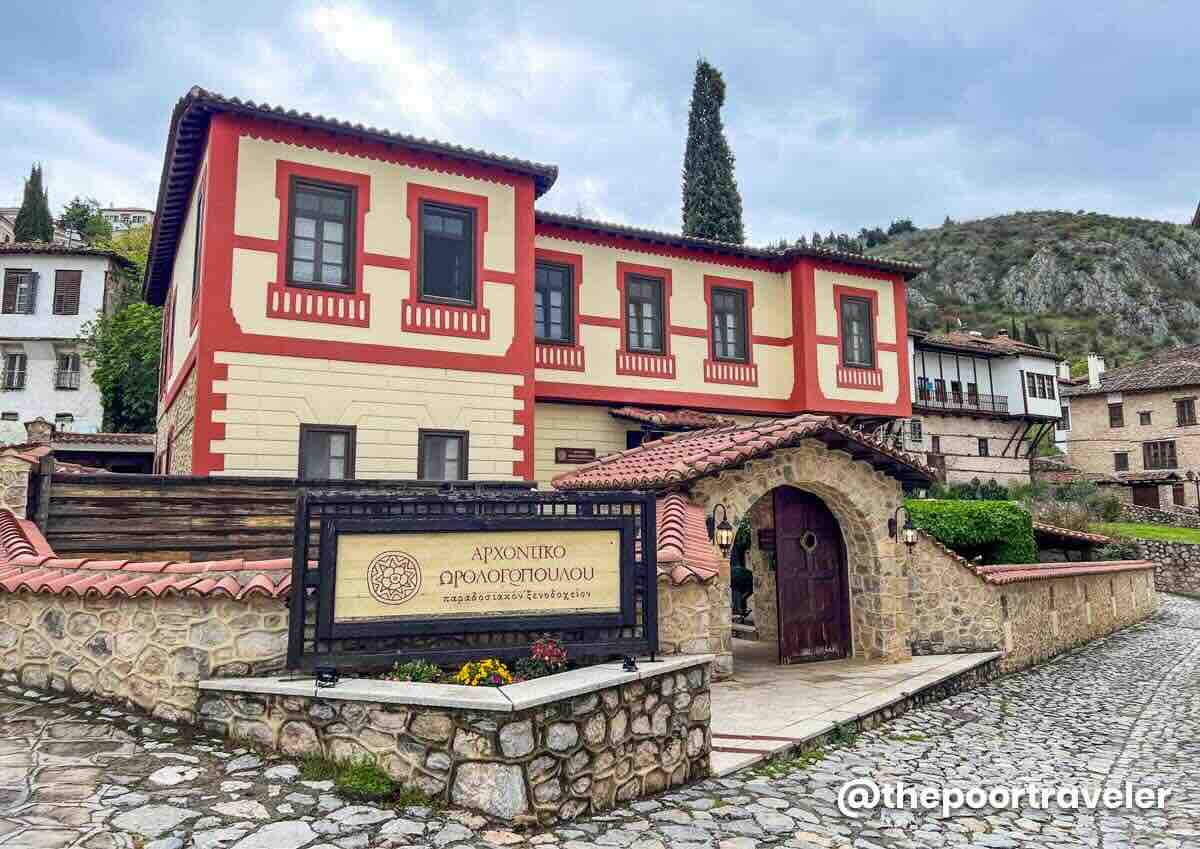
- Hotel Orologopoulou Mansion. Built in the 19th century, this 250-year-old mansion has been transformed into a 9-room hotel that mixes modernity and history. It’s located in the Doltso area, near Doltso Square, in the southeastern side of the city proper, which is very convenient. Around the area are restaurants and cafes, and even the lakeside is just a quick stroll away. A room costs around EUR 89 per night, inclusive of breakfast. Check Rates & Availability! ✅
- Vergoula’s Mansion. One of the oldest hotels in the city, it was constructed around 200 years ago. It is perched on a cliff, overlooking the lake, offering one of the best views in the city. A stay here costs EUR 81 a night, inclusive of breakfast. Check Rates & Availability! ✅
- Esperos Place Luxury and Spa Hotel. Located in the Chloe area, outside the peninsula but still close to key attractions. It is modern, elegant, and grand, housing 54 spotless and spacious rooms, 14 of which are suites, each filled with many conveniences you’d expect from five-star properties — from anatomical beds to fragrant toiletries to bathrobes. Check Rates & Availability! ✅
These three are the properties that our hosts and other locals we talked to sang highest praises for, but there are more options.
- Afkos Grammos Boutique Hotel Resort. If you’re heading to Nestório for the iconic River Party music festival or simply want to explore the area in comfort, this hotel is a great option This four-star gem offers a luxurious retreat with sweeping views of both the Aliakmonas River and the Grammos Mountain. The rooms are tastefully appointed, and the on-site restaurant serves up hearty, traditional Greek dishes. Don’t miss the terrace — it’s the perfect spot to soak in the scenery. Check Rates & Availability! ✅
- Krystal Resort. Kastoria also makes a great stop if you’re on a Balkan adventure! If you’re planning to cross the Greece–Albania border, consider spending a night in the peaceful village of Krystallopigi. Krystal Resort is a great option. The rooms here are spacious and the in-house restaurant is perfect for grabbing a satisfying meal before continuing your journey across the region. Check Rates & Availability! ✅
Top Budget Hotels & Guesthouses in Kastoria
For budget travelers, you’ll find pocket-friendly properties for as low as EUR 40 per night for a double or twin room. Here are some options on Booking.com and Hotels.com.
Search for more Kastoria Hotels!

How to Get to Kastoria
The nearest airport to Kastoria is the Kastoria Airport Aristotle (KSO), located in the nearby town of Argos Orestiko. However, it only serves a limited number of domestic flights, mostly from Athens, and flights aren’t available every day. If you happen to find a flight that fits your schedule, this is the quickest way to get there.
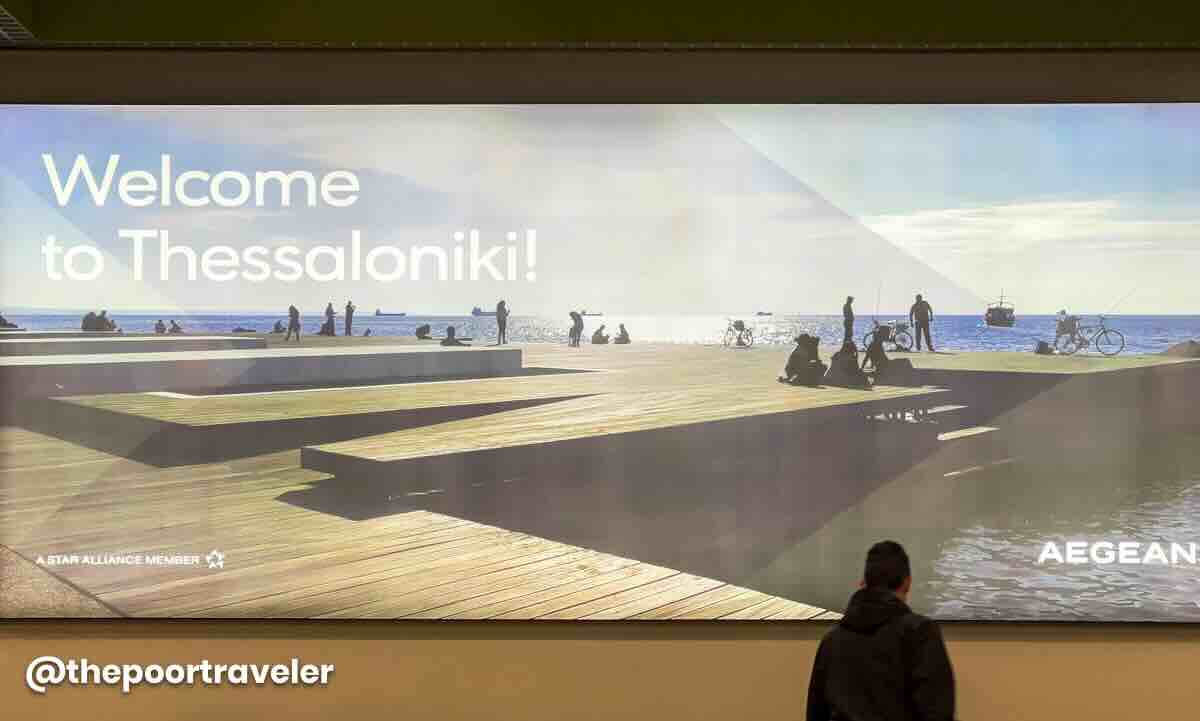
If not, your next best option is Thessaloniki Airport (SKG), located about 145 km away. It’s the closest international airport, offering more flight options and better connectivity.
Thessaloniki Airport to Kastoria
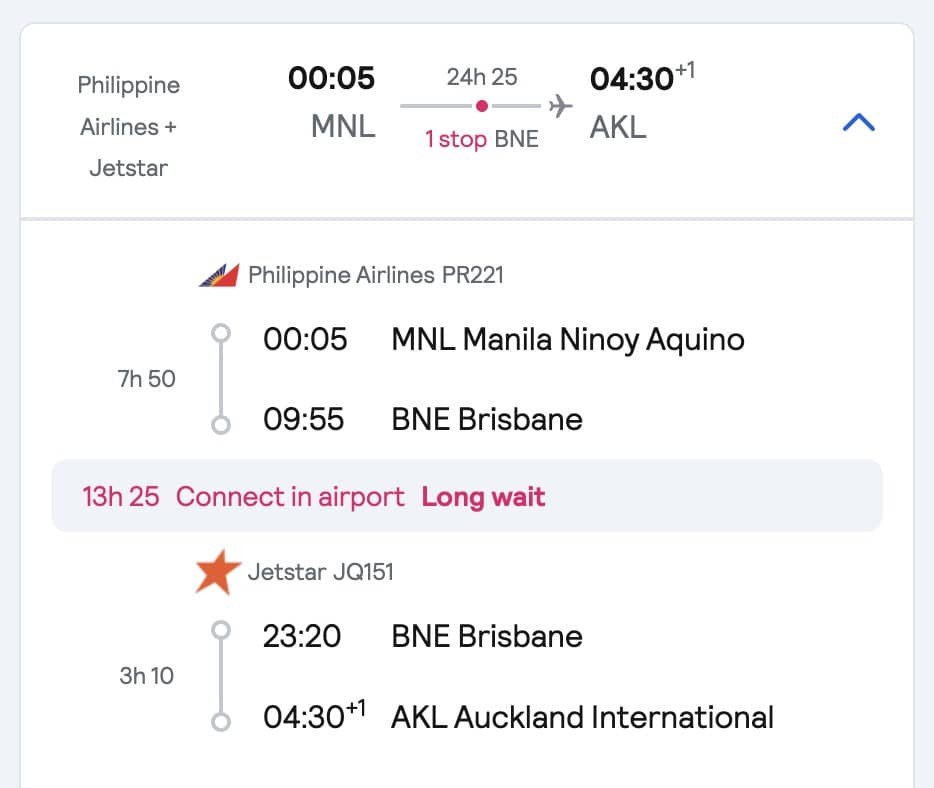
Since we flew in from Manila, we had to make a connection in Athens. From there, we caught a domestic Sky Express flight to Thessaloniki. Our host family kindly arranged a pick-up at the airport, so we didn’t have to worry about transfers. However, if you’re planning to use public transportation, here’s what we found from each agency’s official websites.
- Take Bus 01X or Bus 01XN to the Makedonia Intercity Bus Station (operated by KTEL).
Trip Frequency:
– Bus 01X: Every 20-25 minutes from 6:10 AM to 10:40 PM
– Bus 01N: Every 30 minutes from 11:10 PM to 5:55 AM
Travel Time: 50-55 minutes
Fare: €1.80Double check the schedule at the Thessaloniki Airport website.
- Catch a KTEL bus bound for Kastoria.
Trip Frequency: There are only 5-6 journeys per day. The earliest bus is scheduled at 9:00 AM, and the last bus leaves the station at 8:30 PM on most days, or 9:30 PM on Friday and Sunday.
Travel Time: 3 hours
Fare: €17.60This schedule might change, so double check by visiting KTEL website and click “Itineraries Outside the Prefecture”.
Athens to Kastoria
If you’re coming from Athens, the fastest option is, as mentioned, by taking a flight to Kastoria Airport. However, if flying isn’t an option for you, you can also take the bus as an alternative way to reach Kastoria. You have the option between a direct bus and a bus via Kosani.
DIRECT BUS
- Frequency: Once a day
- Schedule: 9:30 AM
- Travel Time: 12 hours, 30 minutes
- Via/Stops: Lamia, Larissa, Kozani
- Fare: €48.50
BUS VIA KOZANI
This is a much more complicated route since you’ll have to take another bus to Kastoria. You’ll also have to take into consideration the layover waiting time when you take this option because buses are few and far between.
- Athens to Kozani: 7 hours
- Kozani to Kastoria: 75 minutes
Note: Total travel time might still equal the direct bus, depending on your timing.
What are the Top Things to Do in Kastoria
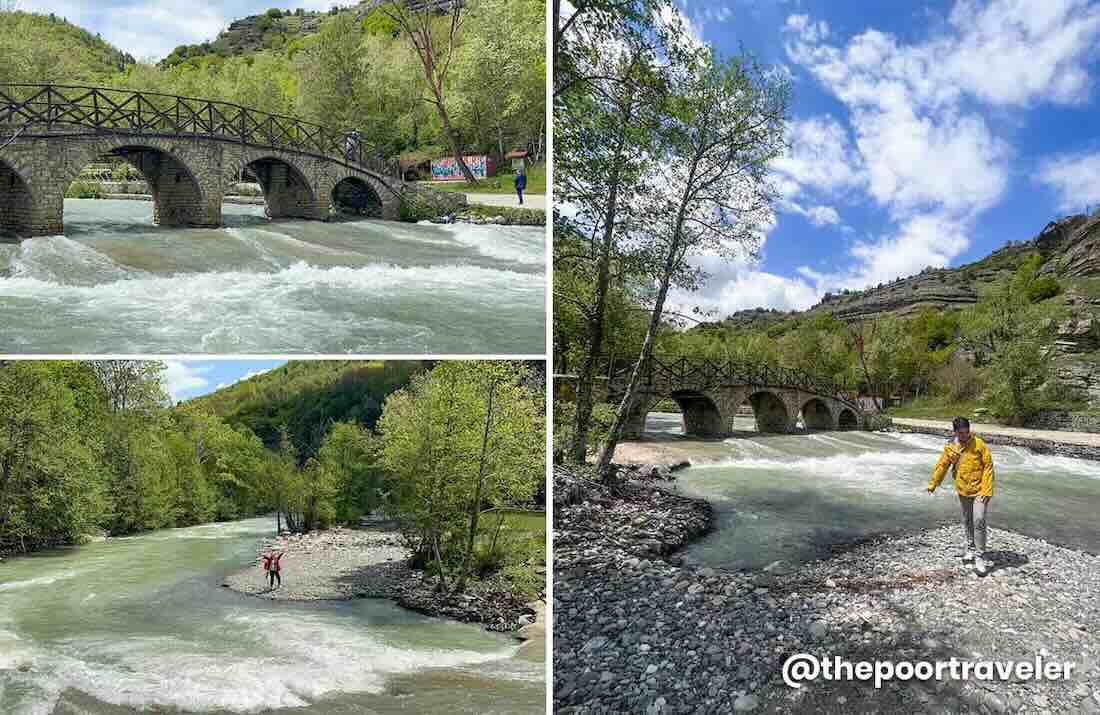
Kastoria is brimming with attractions that are absolutely worth your time and energy! Whether you’re into nature, history, or culture, this enchanting lakeside city has something for you. From mystical limestone caves to panoramic hilltop viewpoints, and from neolithic sites to centuries-old Byzantine churches, Kastoria is a treasure trove waiting to be explored. Every corner seems to whisper a story, and you’ll find yourself constantly discovering something new and fascinating. It’s a small city, yes — but it’s packed with big experiences.
Lake Orestiada
Nestled in the heart of Kastoria, Lake Orestiada, also known as Kastoria Lake, is a natural wonder over 10 million years in the making, fed by springs and rivulets. Rooted in ancient myth, its name comes from the mountain nymphs of Greek legend, and its beauty shifts with the season: fiery foliage in autumn, a frozen wonderland in winter, and tranquil waters in warmer months.
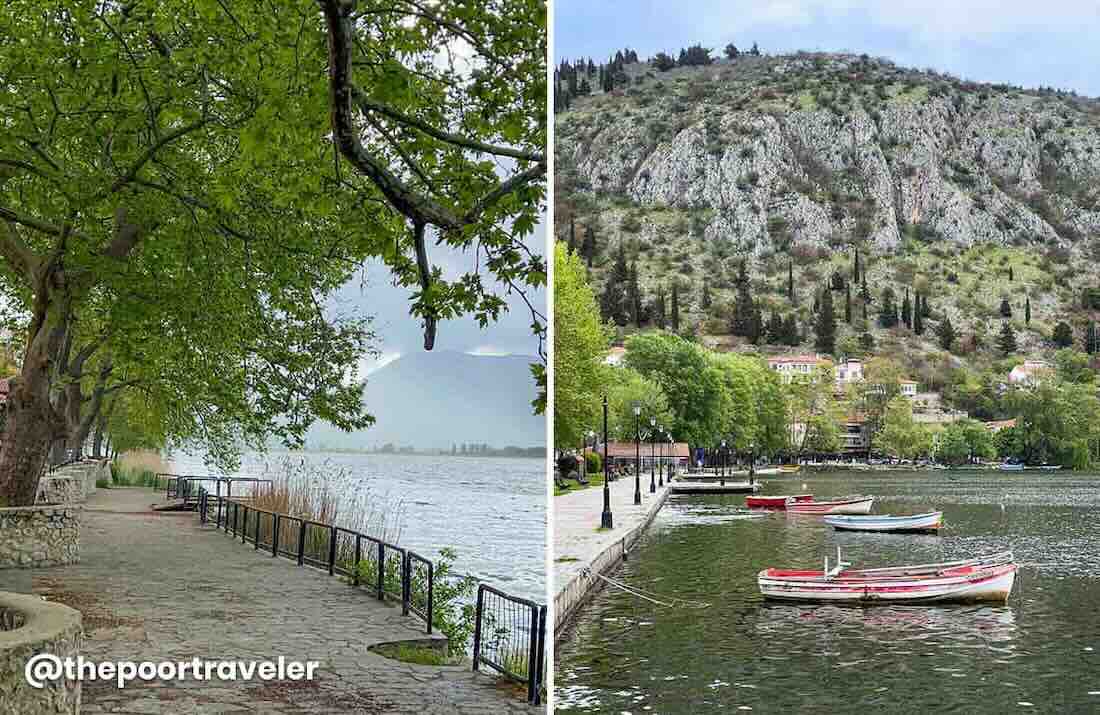
Home to over 200 bird species and edged by scenic walking paths, it’s a haven for birdwatchers and peace-seekers alike. Whether you’re snapping photos, feeding ducks, or sipping coffee by the shore, the magic of Orestiada is impossible to miss.
Dragon’s Cave
One of the most captivating attractions by Lake Orestiada is Dragon’s Cave, a natural wonder steeped in legend and shaped by nature over millions of years. Named after a local myth about a dragon that once lived inside, the cave stretches about 300 meters into the limestone hill by the lake. It features striking rock formations, underground lakes, and chambers lined with stalactites and stalagmites.
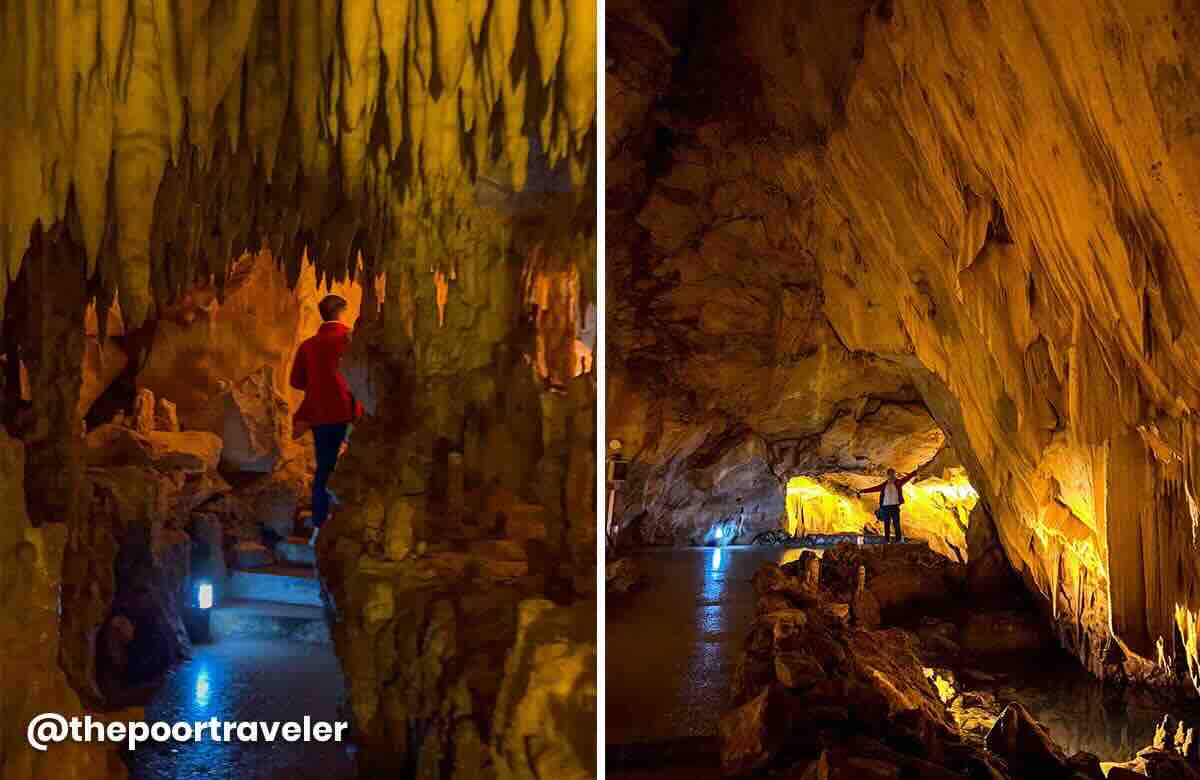
Discovered only in the 1940s, it has revealed ancient secrets, including cave bear bones over 10,000 years old. Easily accessible with a well-maintained trail, it’s a magical, walkable adventure right at the edge of Kastoria.
Location: Sougaridi, Kastoria 521 00, Greece
Official Website: www.spilaiodrakoukast.gr/en/index
Byzantine Churches
When we first drove around Kastoria, it wasn’t the lake or grand mansions that caught our eye. It was the abundance of tiny, timeworn chapels scattered across the city. “Byzantine churches,” our guide said, and as we explored further, they kept appearing — nearly 80 in total, each one telling a story of faith, history, and heritage.
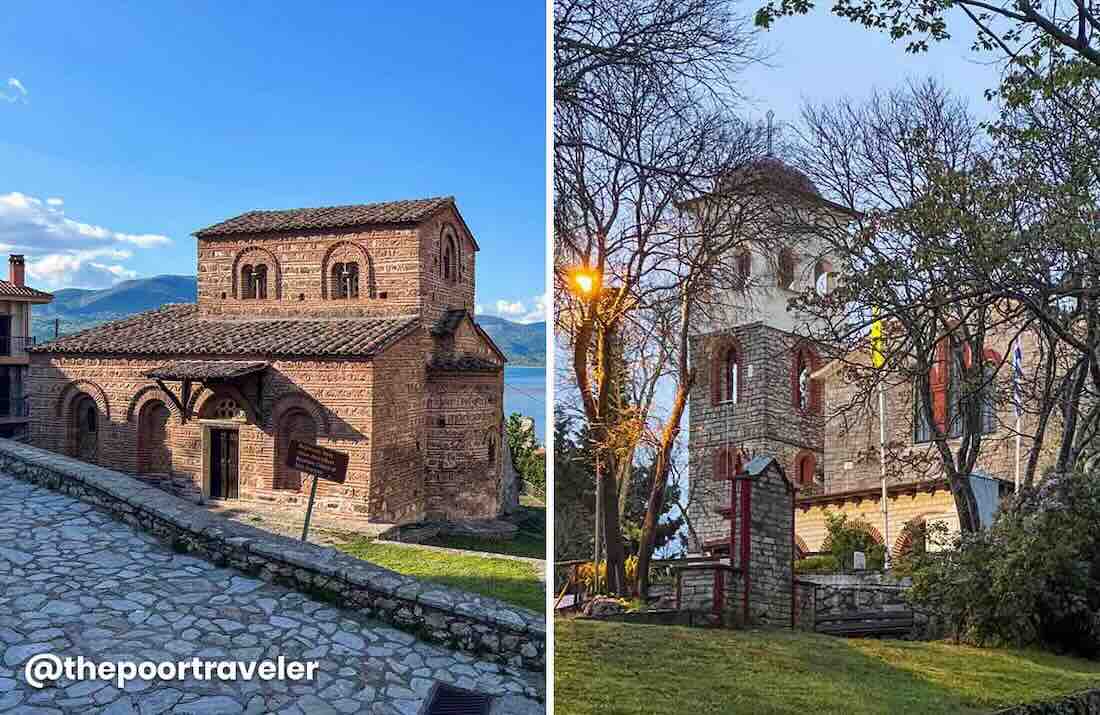
Some are grand and frescoed, others modest and privately cared for, but all are deeply woven into the city’s identity. Highlights include Panagia Koubelidiki, Agios Stefanos, and Agioi Anargyroi, among others. And just outside the center, the newly built Saint Nicanor church adds a modern flourish to this ancient spiritual landscape.
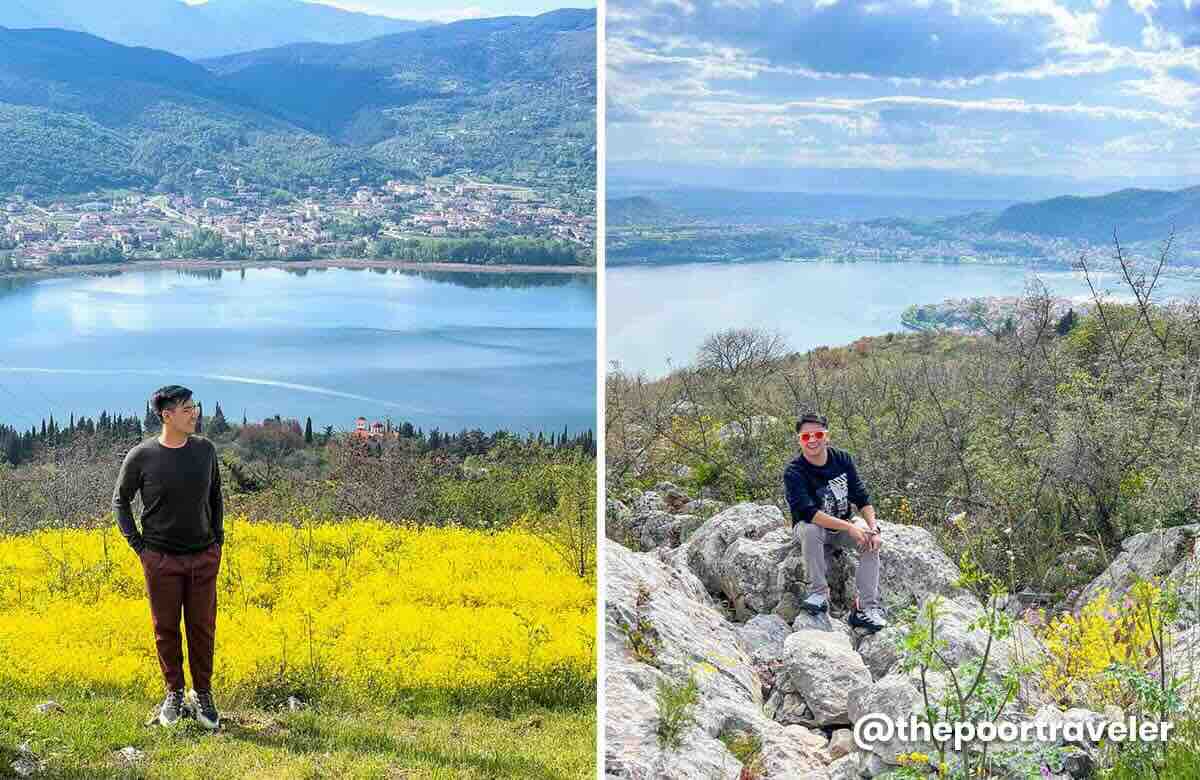
The Hill of Prophet Elias
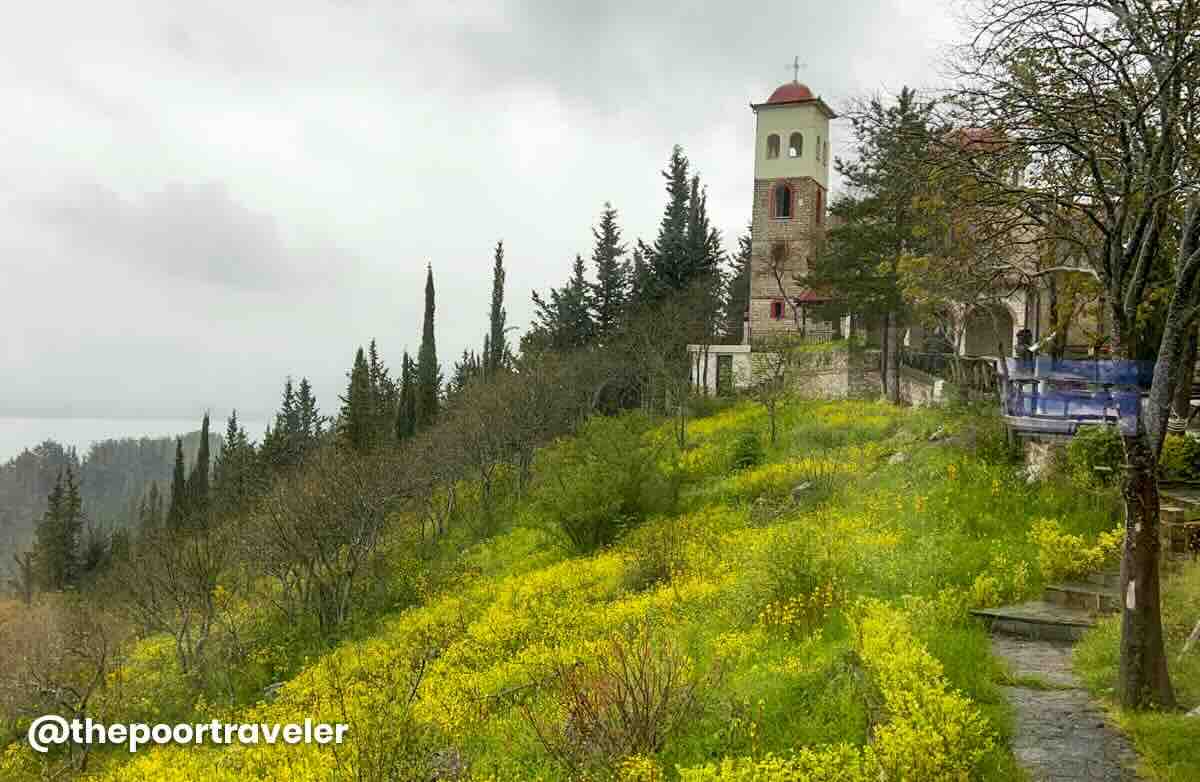
One of the best spots for panoramic views in Kastoria is the Hill of Prophet Elias, home to a peaceful church and the Profitis Ilias Lounge Café. Perched above the city, this cozy café with glass walls and comfy couches offers stunning views of the lake — rain or shine.
We dropped by on a gloomy day, but the misty atmosphere only made it more magical. We warmed up with three kinds of hot chocolate (yes, three!), served with a smile by Kristos, the friendly owner. It’s a must-visit for a quiet escape and a scenic coffee break.
Food Trip
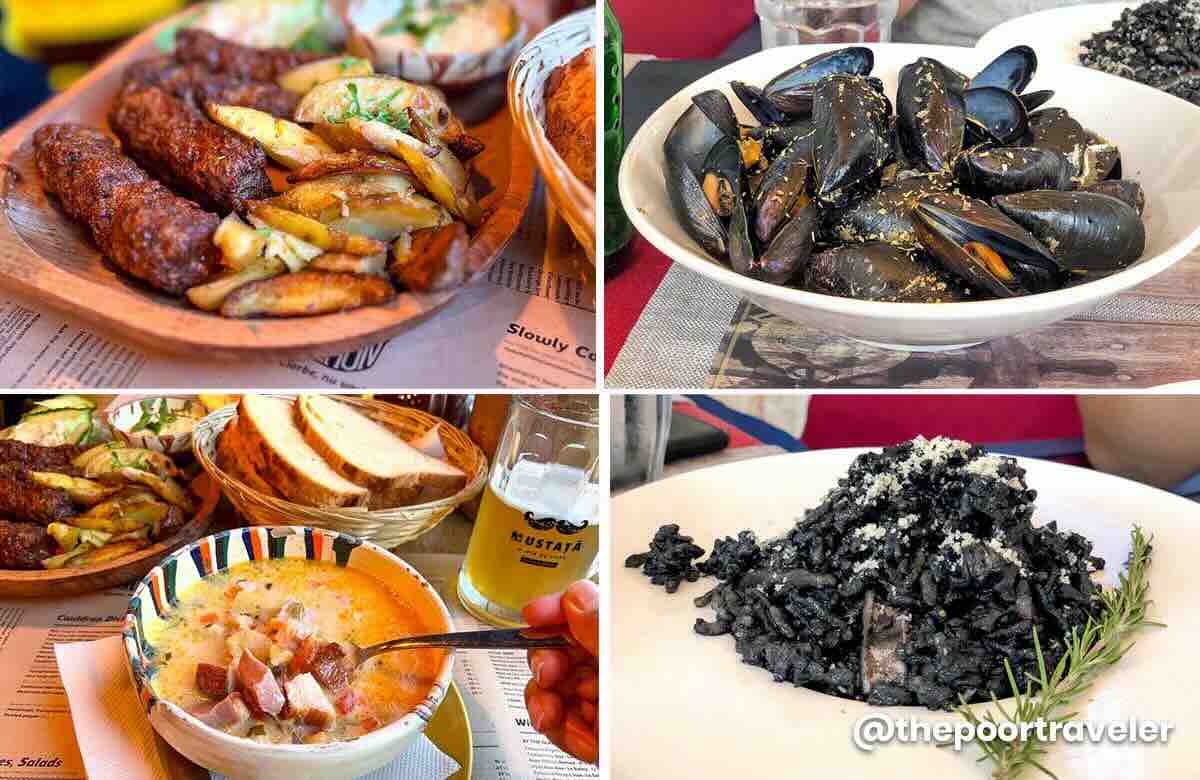
Out of all the Balkan cities we visited, Kastoria stood out for its incredible food. It’s fresh, flavorful, and rooted in tradition. Local staples like sarmades or stuffed pickled cabbage rolls, giant Kastorian beans which are baked in herbs and tomato, and batzo or cheese fried saganaki-style are just the start.
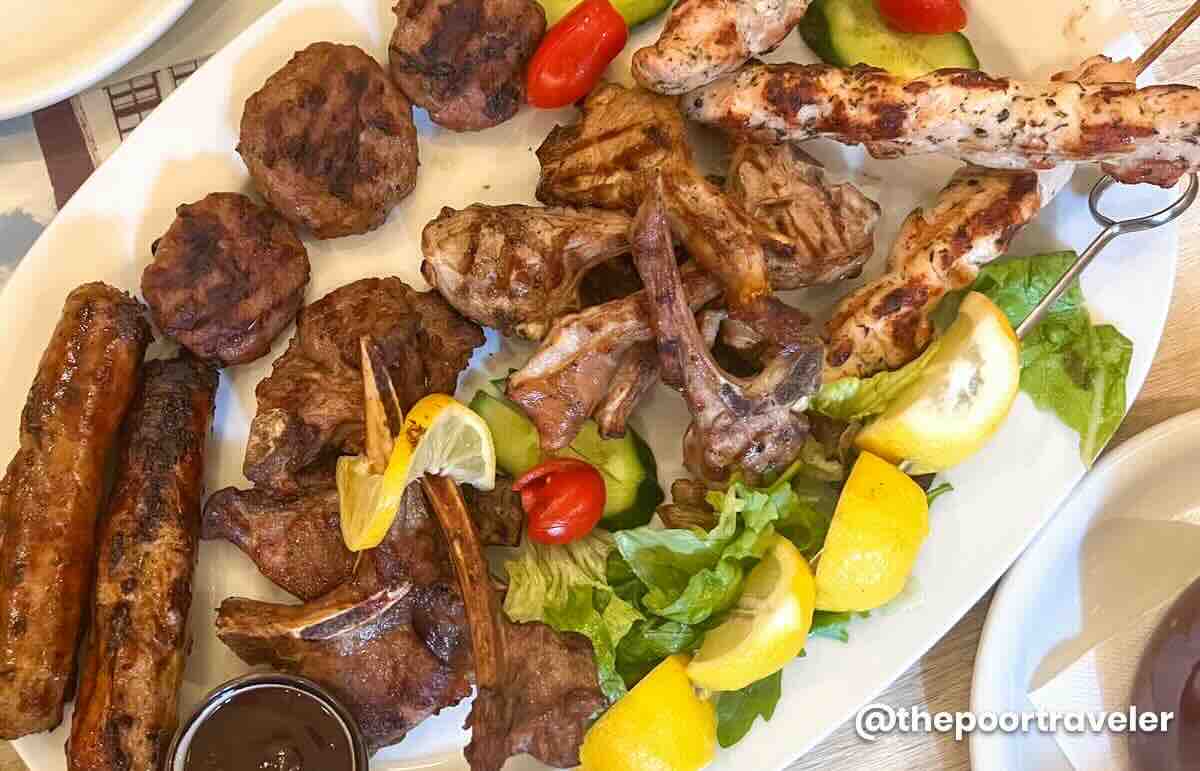
Carnivores will love the grilled meat platters loaded with lamb, pork, beef, and even wild boar. And for dessert? Don’t miss the candied fruits or fruit confit, especially the lime-infused cake we tried in Krystallopigi near the Albanian border — simple, sweet, and unforgettable. We’ll cover the restaurants and food spots we tried in the next section.
These are just some of the highlights. If you want a more detailed post with more suggestions, you can read our Top 12 Things to Do in Kastoria article.
Where to Eat in Kastoria
Kastoria might not be the first place that comes to mind when you think of foodie destinations in Greece, but it should be! Among all the stops on our Balkan trip, this idyllic lakeside city served up some of the most unforgettable meals we had. Every single ingredient — from the famed Florina peppers to the melt-in-your-mouth lamb chops — was bursting with flavor and freshness. The quality? Top-notch.
Here are some of the places you shouldn’t miss when you visit Kastoria. We also included the opening hours as of writing, but make sure to check the updated schedules before you go.
Palia Poli
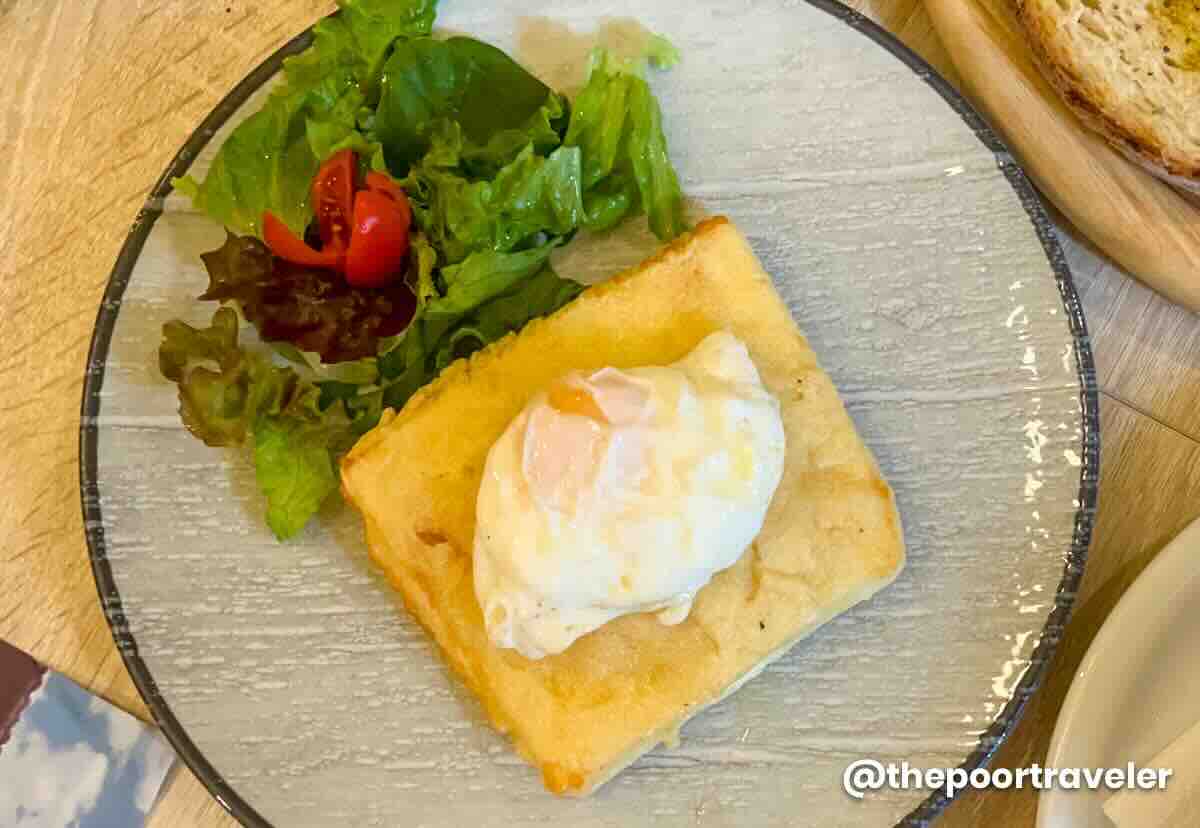
This lovely mansion-turned-restaurant is a hidden gem that blends history, flavor, and a touch of romance. Its cozy courtyard offers the perfect setting for al fresco dining. The menu highlights traditional Kastorian cuisine, starting with comforting classics like sarmades (€5.50), which are pickled cabbage leaves stuffed with minced meat and rice, and Kastorian butter beans (€4.50), baked with herbs, carrots, and tomatoes. Don’t miss the batzo (or bajo) (€5.00), a brined cheese seared saganaki-style and topped with a fried egg.
For something lighter, the Kraneia salad is a refreshing surprise. It’s a vibrant mix of arugula, spinach, and lettuce, with sun-dried tomatoes, pomegranate seeds, and slices of crab apple — all drizzled with a tangy cranberry sauce that ties everything together beautifully.
And as a bonus? The restaurant sits just steps away from the lake, so after your meal, you can stroll along the waterfront and soak in the postcard-worthy views.
Location: 51 Orestiados Street, Kastoria 521 00, Greece
Opening Hours: Daily, 12:30 PM – 12:00 AM
Instagram: palia_poli_kastoria
Profítis Ilías Lounge Cafe
Speaking of stunning views, few spots in Kastoria can compete with the panorama from Prophet Elias Lounge Café. Perched atop a hill, this cozy café boasts plush couches lined up beside expansive glass walls, offering an unobstructed, postcard-perfect view of the entire peninsula. Whether you’re here for a quick caffeine fix or a long, slow afternoon, the setting is nothing short of magical.

This café ticks all the right boxes: great coffee, delectable desserts, and a serene atmosphere. We sampled their strawberry, cookies-and-cream, and classic hot chocolate, each one rich and satisfying. It’s the kind of place that invites you to slow down. Honestly, if we had more time, I would’ve happily spent hours here, with a good book on one hand and a warm drink on the other.
Location: Aristeidi Aggelidi, Kastoria 521 00, Greece
Opening Hours: Daily, 11:00 AM – 12:00 AM
Diacheirós kai sti Ladókolla – Souvlákia
If you’re looking for a delicious yet budget-friendly meal in Kastoria, Diacheiros kai sti Ladokovolla Souvlakia is a must-visit. Believe it or not, many of their mouthwatering skewers, including pork kebab, chicken kebab, and sausage, are just €1 each! Even sides like crispy fries and creamy tzatziki sauce go for just €1 per order.

But don’t let the price fool you. The flavor is anything but cheap. Each bite is packed with savory goodness, making this spot a true hidden gem for foodies on a budget. It’s the perfect place for a quick snack or a satisfying meal that won’t break the bank.
Location: Arti 11, Kastoria 521 00, Greece
Taverna Ammoudara
During our stay in Kastoria, one of the most memorable meals we had was at Taverna Ammoudara, a humble yet exceptional eatery located in the village of Ammoudara, about 20 minutes from the city center. While it’s a bit off the beaten path, it ended up being our favorite meal of the entire trip, mostly because of the authentic, homecooked charm.
The taverna serves traditional northern Greek or Macedonian dishes, but each plate had a little something extra — a heartwarming quality that made the meal feel incredibly special. We started with a cheese-filled pita that was so delicious we could have easily called it a meal on its own. Then came the sarmades (cabbage rolls), which were the best we’d ever tried, a bit more sour than usual.
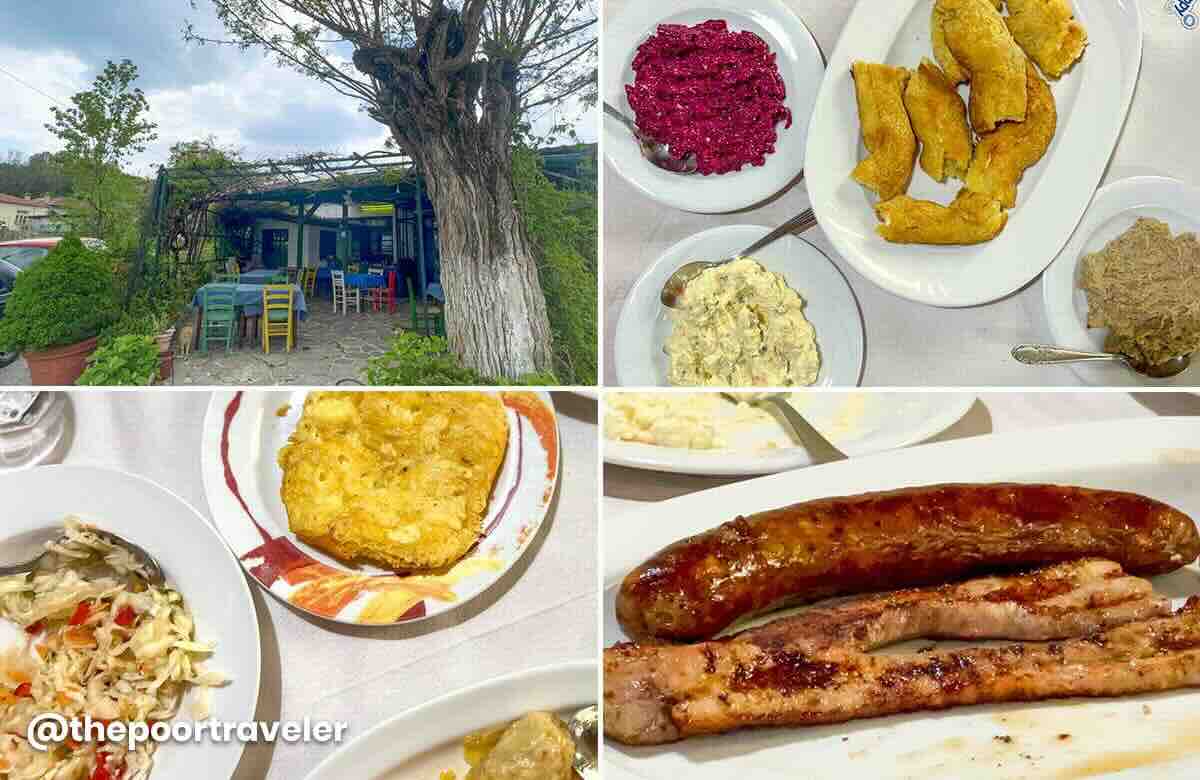
We were also treated to a variety of salads: eggplant salad, Russian salad and beetroot salad with yogurt and walnuts. All three were fantastic. The cabbage salad, which was soaked in salt for months and mixed with bell peppers, celery, and dill, was also refreshing. And for a bit of contrast, we also had batzo, which was a bit oily but wonderfully flaky and crispy.
As if that wasn’t enough, the main course brought a smorgasbord of grilled meats, but the standout was definitely the pancetta — smoky and cooked to perfection. The meatballs were incredibly tender, bursting with fresh flavor and no processed taste. We were also served a unique wild boar sausage, reminiscent of Filipino longganisa with its rich, fatty bite.
All in all, our lunch at Taverna Ammoudara was a standout not only in Kastoria but throughout the entire Balkan region. It was a feast full of heart, flavor, and warmth. Surely, one we’ll never forget!
Location: Ταβέρνα Αμμουδάρα, Epar.Od. Pentalofou – Argous Orestikou, Ammoudara 522 00, Greece
Opening Hours: Monday to Friday, 6:00 PM – 12:00 AM; Saturday, 1:00 PM – 12:00 AM; Sunday, 1:00 PM – 6:30 PM
Nautical Hall
Kastoria might not be known for its wild nightlife, but there are still a few places where you can unwind and enjoy a drink. One of the best spots for this is Nautical Hall, a modern bar-club-restaurant nestled by the lake. This cozy venue blends nostalgic decor with muted lighting, creating a relaxed and intimate atmosphere.

At Nautical Hall, you’ll find an impressive selection of drinks — from wines and beers to their signature cocktails. The bar food is also tasty, though it’s a bit on the pricier side compared to other places in the city. If you want to take in the view, step out onto the terrace and you’ll be treated to a stunning sight of the city lights shimmering on the serene lake below. It’s the perfect place to enjoy a drink and soak in the quiet beauty of Kastoria at night.
Location: Sougaridi 1, Kastoria 521 00, Greece
Opening Hours: Monday to Tuesday, CLOSED; Wednesday to Thursday, 6:00 PM – 12:00 AM; Friday to Sunday, 10:00 AM – 4:00 AM
Facebook: www.facebook.com/NauticalHallKastoria (Nautikos Omilos – Kastoria)
Instagram: nautikos_omilos_kastoria
When is the Best Time to Visit Kastoria
We visited Kastoria in May, and it turned out to be the perfect time for our trip. The weather was lovely, with a comfortable temperature. And since it was before peak season, we enjoyed affordable prices.
We were also lucky enough to witness the glorification ceremony for Saint Sophia, a newly proclaimed saint in the Greek Orthodox Church, held every May 6 at the Moni Panagias Kleisouras Monastery, which has stood for over 700 years.
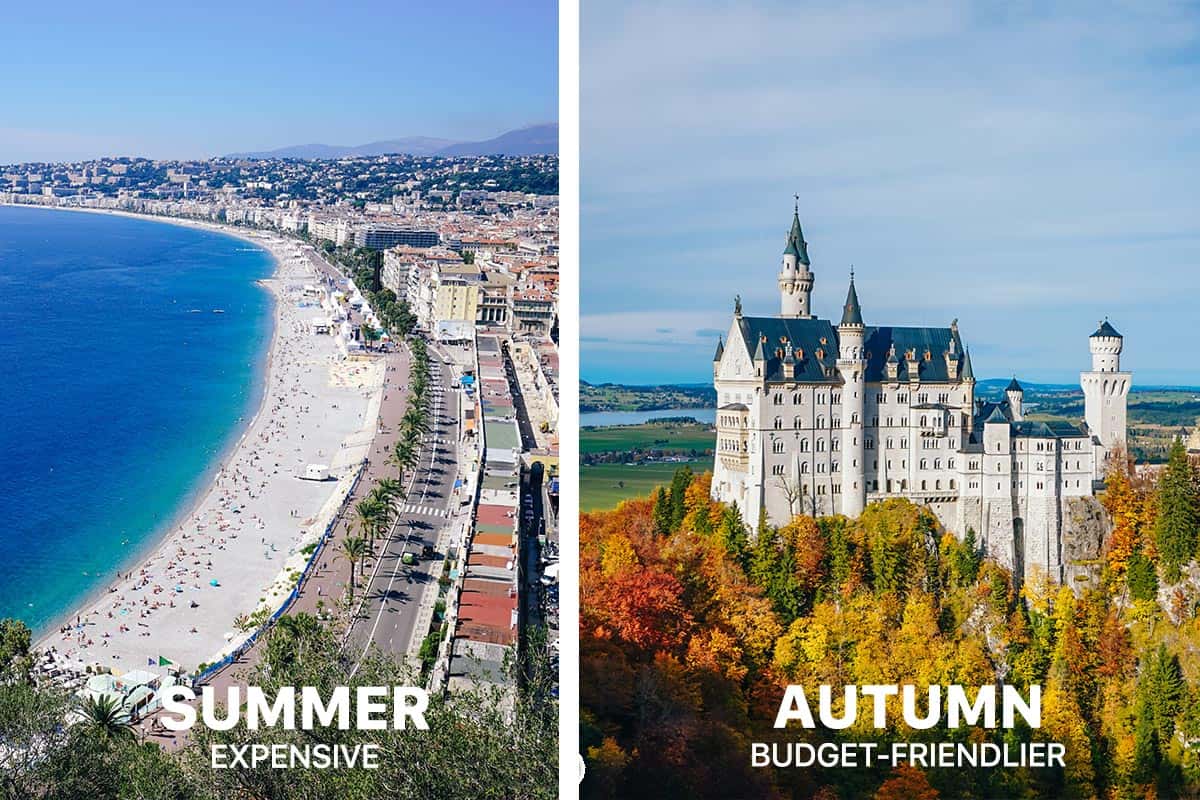
However, locals assured us that Kastoria is a fantastic destination all year round. May is considered a shoulder month leading into the summer season, which, while bringing slightly higher prices and more tourists, still offers a great experience compared to other popular Greek spots.
If you visit during the summer, you’ll also get to experience the River Party in Nestorio, Kastoria’s music festival, where 50,000 people gather for a massive celebration by the river in August.
But Kastoria’s charm doesn’t stop there. While we were strolling around, we couldn’t help but imagine how stunning the city must look in autumn, with maple trees lining the lakeshore and the surrounding hills covered in deciduous forests.
And during winter, the city transforms into a winter wonderland — the lake freezes over, creating a magical scene. For those looking for winter adventures, the Vitsi Ski Resort attracts beginners. There’s also Ragoutzaria, a wild winter festival in early January that celebrates Dionysus, the ancient Greek god of wine, festivity, pleasure, and ecstacy!
It’s clear that Kastoria offers something unique for every season!
Have Peace of Mind While Traveling!
Getting a travel insurance is optional, but we highly recommend this, especially when traveling abroad. Travel can be unpredictable, and though we hope we’ll never use it, having it gives us peace of mind in case of unexpected delays, cancellations, or emergencies.
For international destinations, consider PGA Sompo’s TravelJOY Plus insurance. You can GET IT HERE. Don’t forget to use WORTHIT for a special affordable rate.

Updates Log
2025 8 11 – First uploaded
Written by: Yosh Dimen and Mariah Cruz
Photos by: Yosh Dimen
Edited by: Asta Alvarez