If setting foot on the White Continent is on your bucket list, this Antarctica itinerary will show you what to expect on your trip.
Visiting Antarctica is a real bucket list experience. You have to visit with a registered tour operator, though there is rarely a fixed Antarctica cruise itinerary.
Operators post general schedules and activities, yes. But it’s the Antarctic Continent, and everything is at the mercy of the weather.
That means most Antarctic itineraries are subject to last-minute changes depending on the conditions of the wind, sea, and ice.
This article provides you with a possible Antarctica itinerary. It’s a glimpse into what could take place on your expedition cruise to the least-visited place on the planet.
We’ve also created various Antarctic itineraries to fit your schedule, budget, and sense of adventure.
Plan more with our complete Antarctica travel guide!
How Many Days Do You Need to Explore Antarctica?
A typical Antarctic expedition is 10 days, but it can vary from eight to 30 days or longer.
Ten days is short and sweet. You’ll see the highlights of the Antarctic Peninsula before crossing the Drake Passage back to Ushuaia, where your trip started.
An extended Antarctic expedition, 24 days or more, are perfect for hardcore Antarctic explorers with a flexible schedule. It often includes South Georgia and the Falkland Islands in addition to the Antarctic Peninsula.
For us, 14 days offer an immersive experience without being too costly or too long at sea. You get plenty of shore landings, zodiac cruising, and wildlife sightings. Maybe even cross the Antarctic Circle!
Important Note! Before you book any international trip, we honestly recommend getting travel insurance. You never know when things will go wrong, and medical bills can add up quickly if you get sick or injure yourself overseas.
Our personal recommendation based on our own experience is World Nomads.
10-Day Antarctica Itinerary
This 10-day Antarctica itinerary gives you an idea of what a typical journey to the Antarctic Peninsula might look like. The trip starts in the southernmost city in the world, Ushuaia, Argentina.
This Antarctic expedition features wildlife spotting, stunning landscapes, and unforgettable landings.
Again, due to unpredictable weather and sea ice conditions, every Antarctica cruise itinerary is flexible and different.
Check out our guide to choosing the best Antarctica cruise!
Day 1 – Ushuaia, Argentina
Almost all Antarctic explorers depart for Antarctica from Ushuaia. There are no direct international flights to the city. You’d have to travel to Buenos Aires and then fly to Ushuaia.
Some expeditions include transfers or charter flights from Buenos Aires to Ushuaia.
If you’re traveling to Ushuaia independently, we suggest you arrive a day earlier. As most ships depart for Antarctica in the afternoon, you can spend the morning exploring the city’s waterfront and museums.
Or if time allows, take a half-day trip to Tierra del Fuego National Park, just 47 minutes away from the city.
After lunch, board your expedition ship at Ushuaia’s port. Start your Antarctic adventure sailing through the Beagle Channel.
Days 2 and 3 – Drake Passage
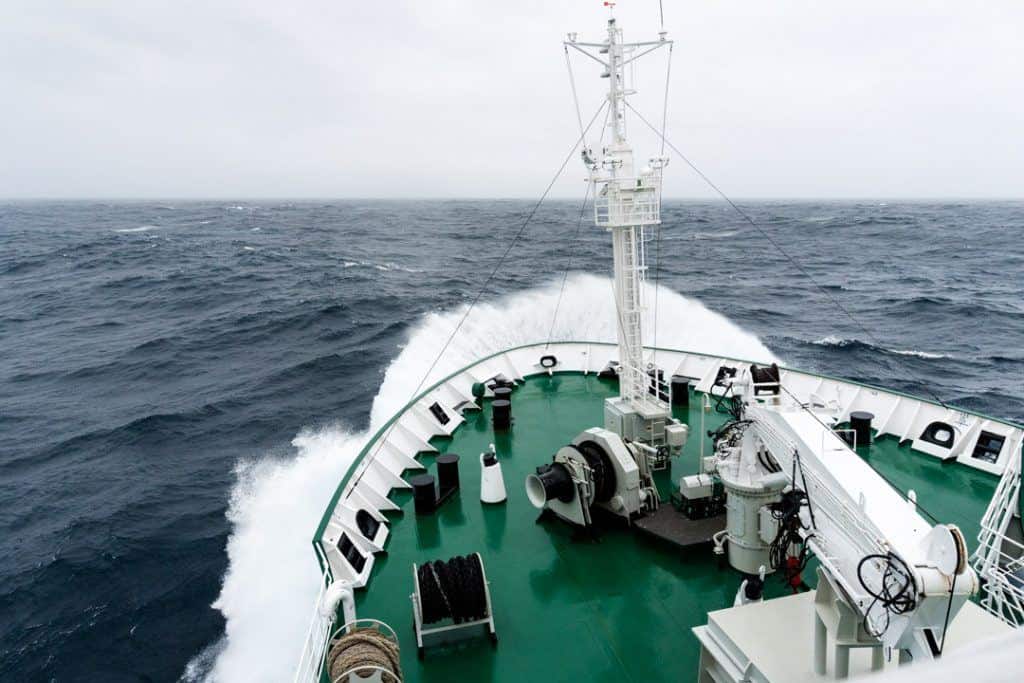
Crossing the infamous Drake Passage is a rite of passage for adventure lovers visiting Antarctica.
This waterway is notorious for its turbulent waters and waves that can reach up to 13 meters. But during the Antarctic summer (November to March), it can be pleasantly calm. It’s also where the Atlantic and Pacific Oceans meet.
Sailing the Drake Passage is probably the only fixed activity in your Antarctica cruise itinerary. Onboard, you can join lectures, safety briefings, and gear fittings (if included in the tour package).
Keep your eyes peeled for albatrosses and early whale sightings as you approach the Antarctic Peninsula.
Learn more with our guide to the Drake Passage!
Day 4 – Half Moon Bay or Aitcho Islands
The South Shetland Islands are your first glimpse of the White Continent. Some of the most popular landing sites here are Half Moon Island and the Aitcho Islands.
Half Moon Island is particularly known for its large colony of chinstrap penguins. It’s also home to other bird species, including kelp gulls and south polar skuas.
It’s small, but it boasts a 2,000-metre trail where you can stroll and get a better look at the wildlife. You may also spot some Antarctic fur seals and elephant seals hauling out on the beach.
The Aitcho Islands are another haven for birdlife. Plus, you may also see seals on the beach.
Note: Every time you land, the expedition team will give you and your fellow travelers a brief orientation about the place, so you’ll know which areas to visit and how to stay safe.

Day 5 – Deception Island
Antarctica has a slew of stunning places to see, and Deception Island is one of our top picks. The good thing is that it’s a staple in almost every Antarctica itinerary.
For the fifth day of your Antarctica cruise, you’ll sail to Deception Island.
Despite its name, Deception isn’t an island, but a horseshoe-shaped caldera. Yes, underneath is an active volcano!
Within Deception is a sheltered harbour called Port Foster, a popular spot for kayaking if the weather allows.
To enter the flooded caldera, you pass through Neptune’s Bellows, a narrow passage flanked by giant cliffs.
There are plenty of cool things to do in Deception. You’ll visit Whaler’s Bay, an abandoned whaling station with ruined buildings and graves. The vibe is eerie, but the view is enchanting.
Your expedition cruise may organize hikes inland to Mount Pond or Baily Head, the best spot on the island for penguin watching.
Another attraction is Pendulum Cove, its shore dotted with hot springs with temps that go up to 70°C. The warm waters are a lovely contrast to the frozen landscape.
A standard in Antarctica cruise itineraries is the polar plunge. Deception is one of the top places to do this daredevil stunt.
Some expedition cruise operators allow participants to walk on the beach, while others just let them jump off the boat. No matter, the polar plunge is a one-of-a-kind experience worth bragging about. Plus, you get a certificate as proof.
Read our complete guide to Deception Island for more info.
Day 6 – Neko Harbor and Paradise Bay
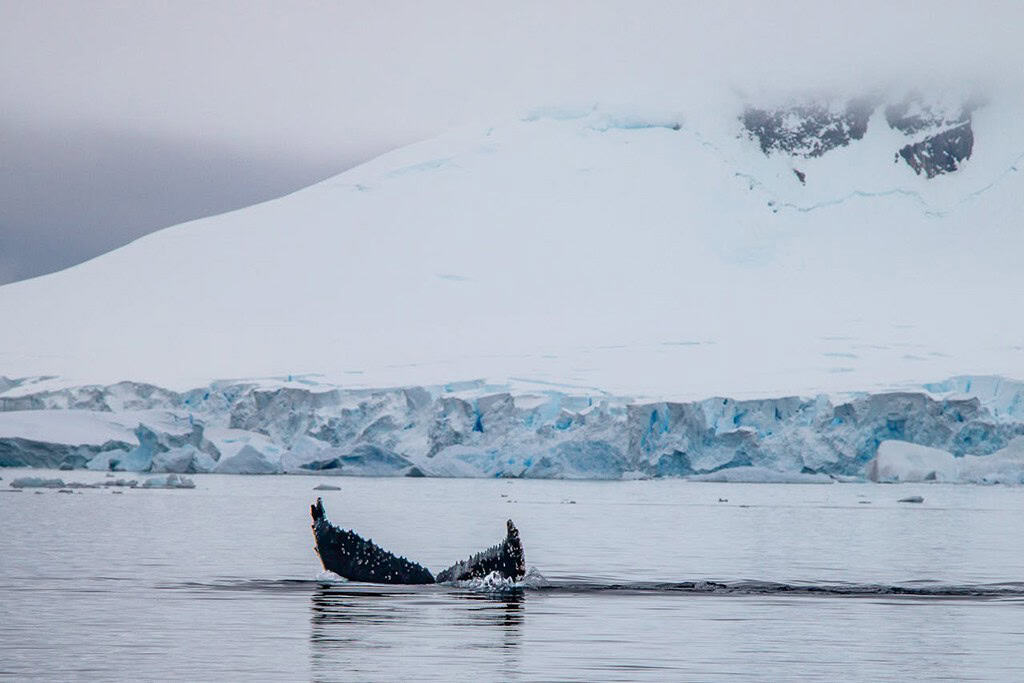
Finally, you’re in the Antarctic Peninsula! The first stop is Neko Harbour, an inlet along the Andvord Bay.
Neko is excellent for wildlife-spotting. You’ll witness sea birds high above and humpback whales feeding in the icy waters. Keep an eye out for penguins perched on massive ice glaciers and seals sleeping on ice floes.
There are guided hikes up a hill overlooking the harbour. Before you reach the peak, you’ll pass penguin highways on the hillside.
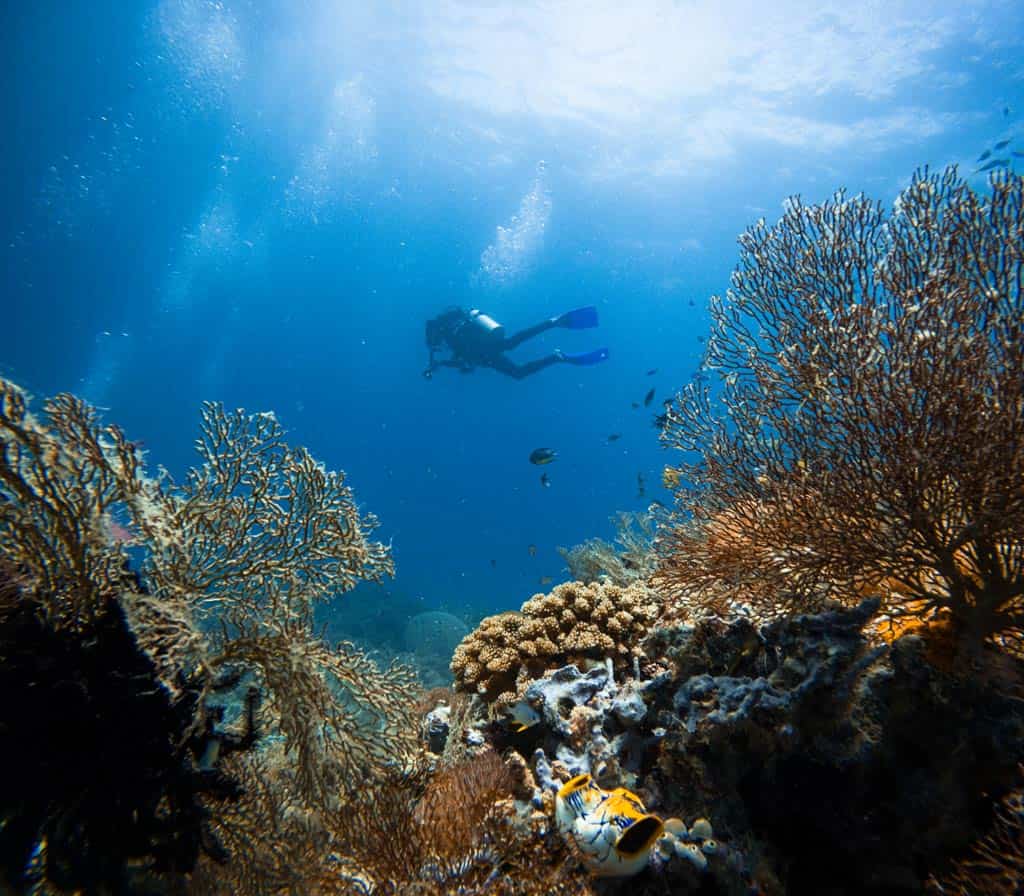
Neko Harbour, with its unique marine life, is a scuba diving hot spot for seasoned cold-water divers. That said, scuba diving is not a regular option in most expedition cruise itineraries.
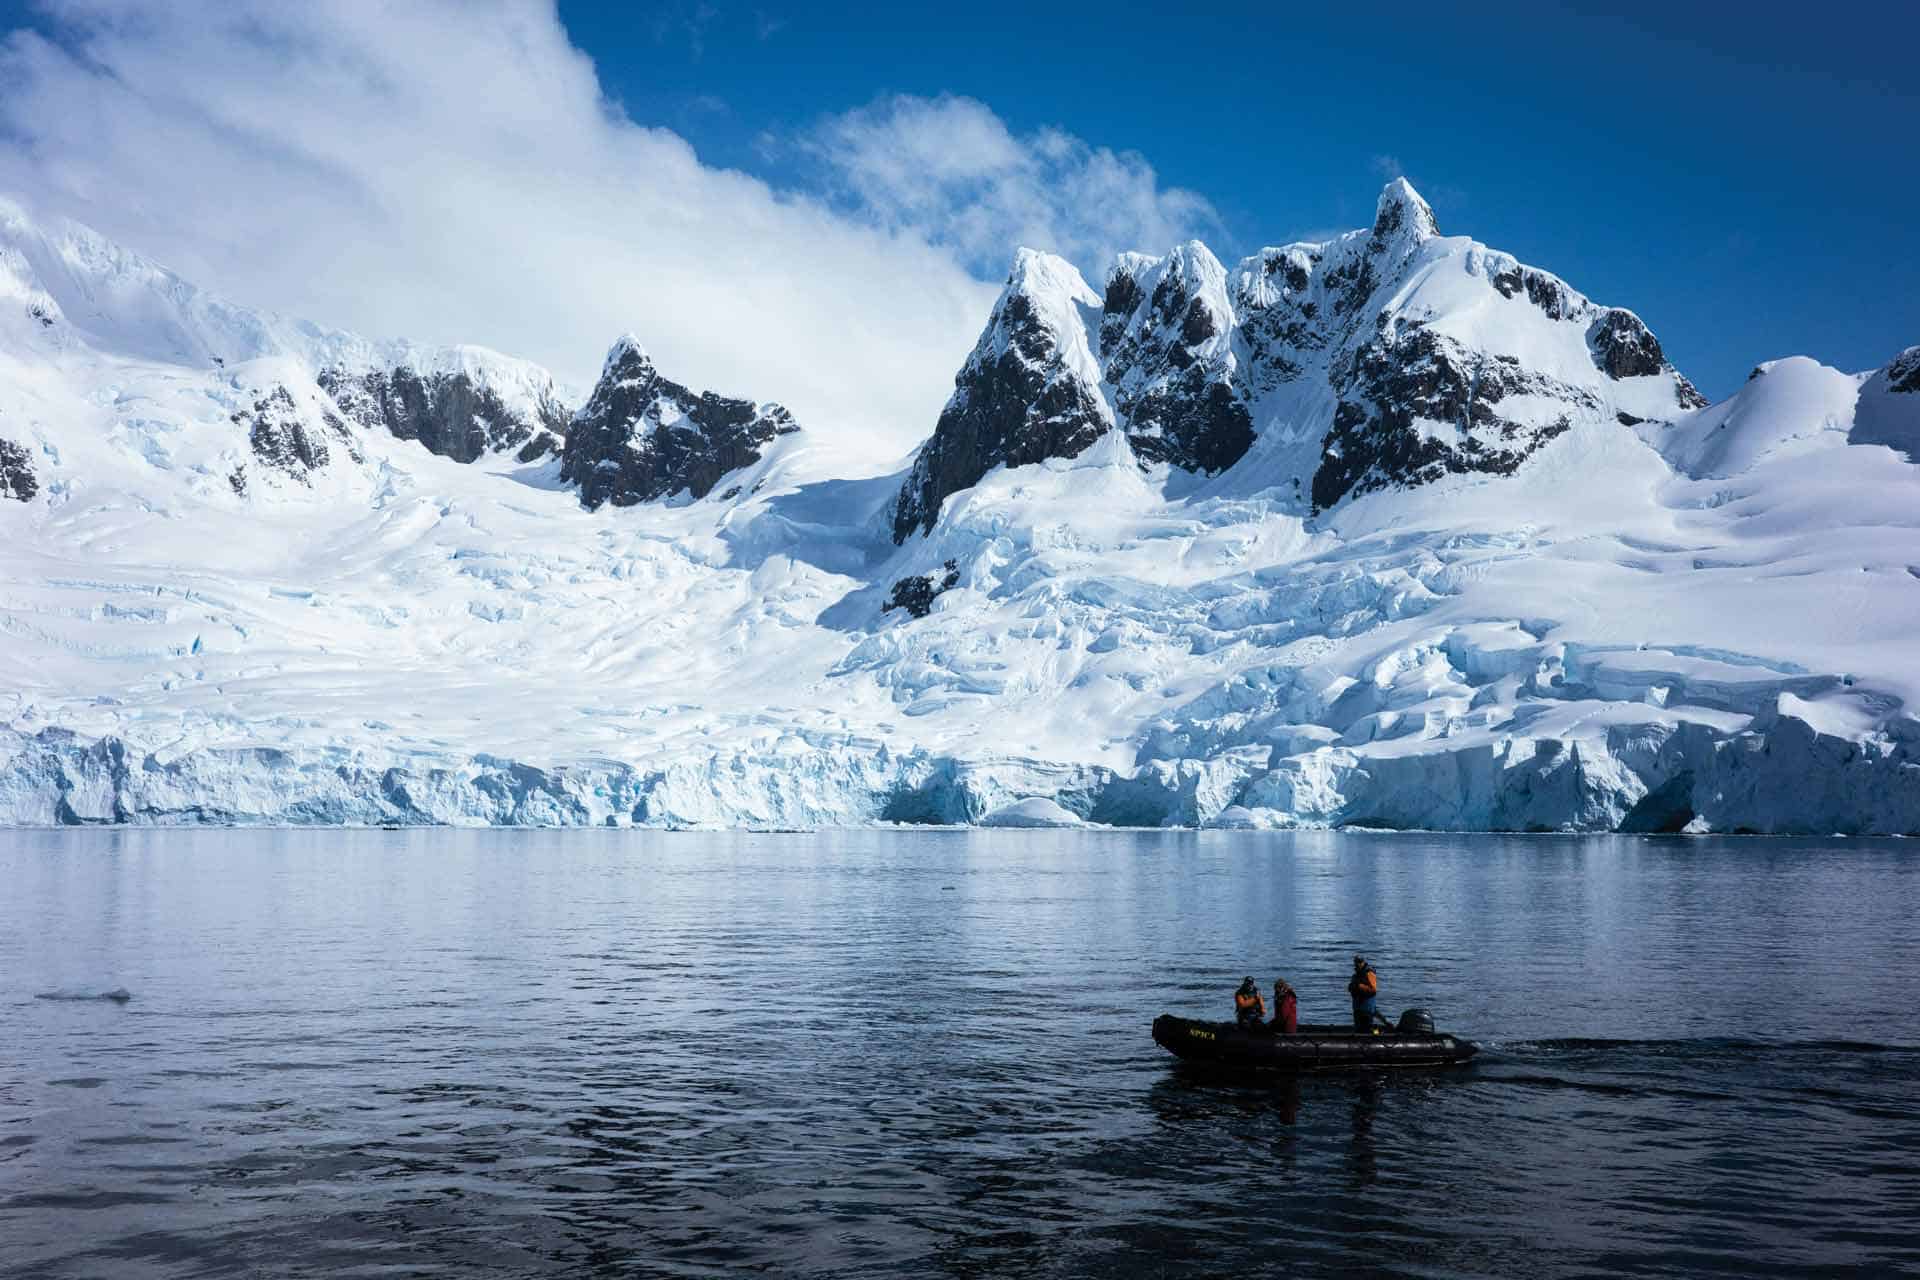
In the afternoon, you’ll cruise to Paradise Bay, a natural harbour about 22 km from Neko. In summer, the bay’s waters are so still, you can see the surrounding icy cliffs reflected on its mirror-like surface.
Paradise Bay is a magnet for wildlife. It has seals, birds, humpback whales, and more Gentoo penguins.
Thanks to its calm waters, the bay is a favorite spot for kayak tours and zodiac cruises. If you’re a photographer (amateur or pro doesn’t matter), you’ll have a blast snapping away image after image of one of the most picturesque places in Antarctica.
Some tour operators offer overnight camping in Paradise Bay when the weather conditions are right.
Day 7 – Cuverville Island and Danco Island
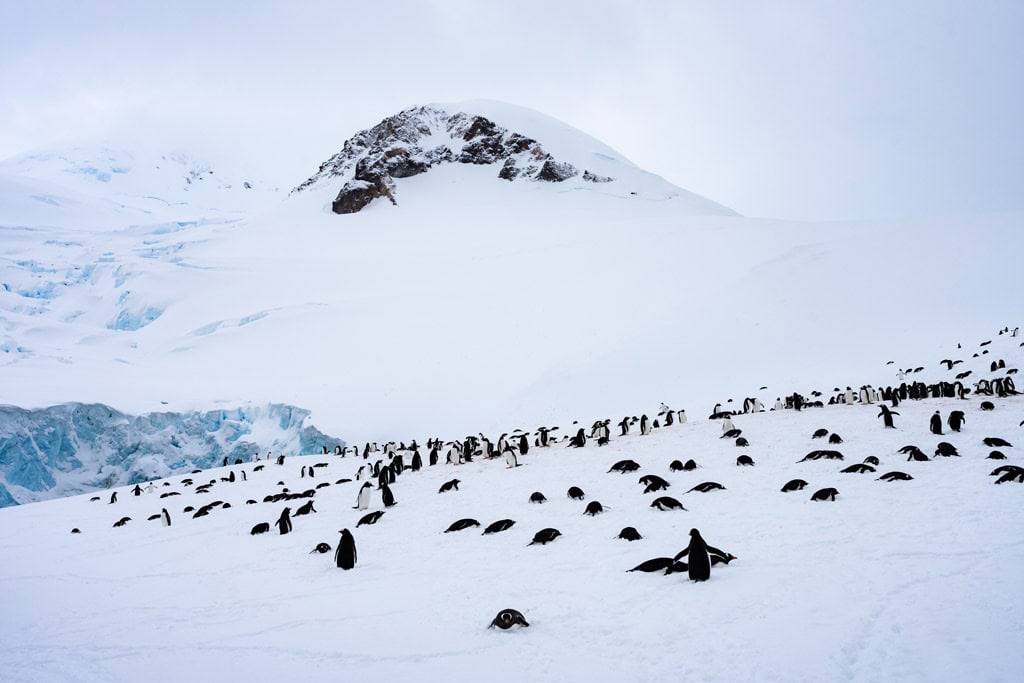
Continue your Antarctic adventure on Cuverville Island. Rugged and rocky, the island is backed by endless white mountains permanently capped with snow.
It’s best known for its colony of Gentoo penguins, the largest one on the Antarctic Peninsula. Naturally, wildlife-spotting is the most popular activity here.
Nearby, in the Errera Channel, is Danco Island. Its frozen terrain is broken occasionally by craggy outcrops.
Just 2 km long, the island hosts a growing colony of Gentoo penguins. Apart from penguins, you’ll also find seals and minke whales.
You can climb to the top of the island, about a kilometer walk, to get a better look at the landscape and the penguin rookery.

Day 8 – Port Lockroy, Lemaire Channel and Petermann Island
First stop is Port Lockroy, one of the most historic sites in Antarctica. It opened as a British base in 1944 and served as a research station until 1962.
Now, it’s a museum with a gift shop and a post office (the southernmost postal service in the world!)
You can send postcards to over 100 countries from Port Lockroy, but delivery could take months. Understandable, considering there are around 70,000 mails sent during the cruise season and only four British ladies running the entire operation.
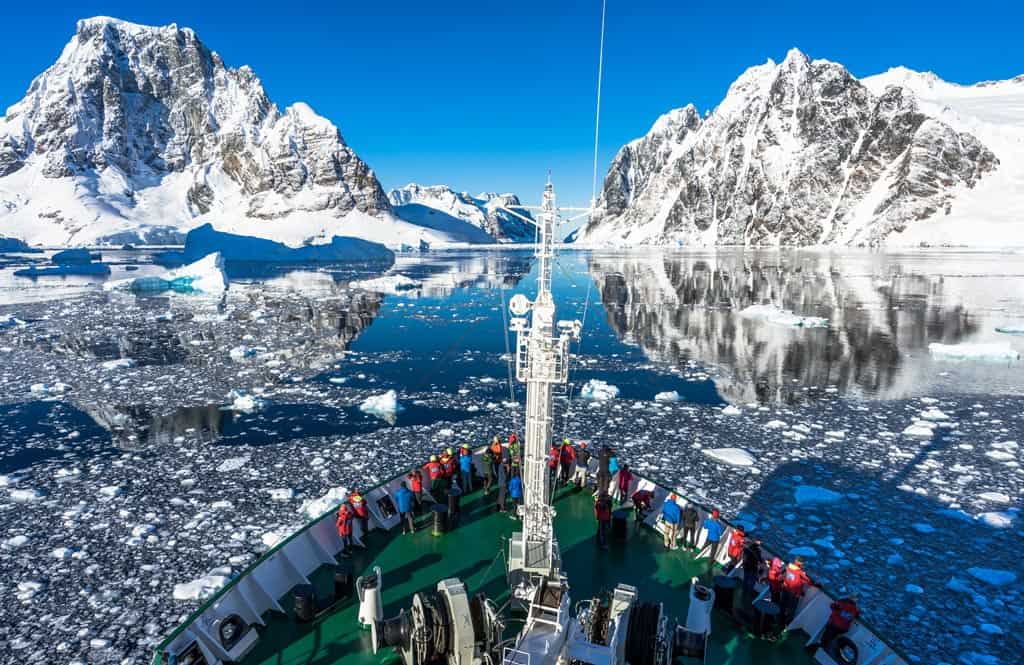
After mailing out postcards, you’ll continue cruising south. In about two hours you’ll reach the surreal Lemaire Channel.
Fringed on both sides by steep glacial cliffs, the channel spans 11 km long and 1600 metres wide. It’s hands down the most photogenic passageway in Antarctica. No wonder it’s nicknamed Kodak Gap.
As you enter the channel from the northern end, you’ll see the Una Peaks, twin ice-capped basalt towers.
Ice floes and icebergs often fill the narrow passage. But in the summer, the best and only time tourists can visit Antarctica, these icy blocks tend to break into smaller pieces.
When the waters are clear and calm, your expedition cruise might allow kayak or zodiac rides.
Be on alert for humpbacks, minkes, and orcas. There are also Weddell, crabeater, and fur seals. You might even see a Gentoo penguin colony on the icy bluffs.
From the channel you’ll exit into Petermann Island. It’s the southernmost point of the Antarctic Peninsula and typically the last stop for many expeditions.
Petermann is rocky and riddled with crevassed icecaps, so be extra cautious when walking.
A guided hike will take you to Megalestris Hill, the island’s highest point. At the summit is a cairn and cross honoring three British Antarctic Survey members who perished in their attempt to cross to the Vernadsky station.
Day 9 and 10 – Drake Passage
You’ll be leaving the Antarctic Peninsula to begin the return journey. If you had the Drake Lake (calm waters) on your first crossing, keep your fingers crossed for the same sea conditions.
But perhaps a little Drake Shake (crazy waters) isn’t too bad after all the wonders you saw on your Antarctica cruise?
Return trips are always great for unwinding (some ships have a spa), sorting photos, and reflecting on the unforgettable adventure. There’ll also be last-minute lectures and a celebratory farewell dinner.
You’ll disembark in Ushuaia, where you can catch a domestic flight back to Buenos Aires.
Read next: Antarctica Vs Arctic Travel Guide
14-Day Antarctica Itinerary with Antarctic Circle Expedition
If you have a few extra days, you can venture farther south of the Antarctic Peninsula to the Antarctic Circle. The aim is to cross this legendary line, a feat only about 100,000 people have achieved.
In this 14-day Antarctica itinerary, you’ll spend seven days sailing the Antarctic Peninsula. Most places, we’ve already mentioned in the 10-day itinerary, so we’ll breeze through them. But we’ve added new places to fill the extra couple of days.
Note: The exact route of your Antarctica cruise is dependent on the weather and sea ice.
Day 1 – Arrival in Buenos Aires, Argentina, South America
Your trip begins in Buenos Aires, where you’ll meet with your Antarctic expedition operator and fellow travelers.
You can spend the evening exploring the city (Tango Show at the Piazzolla, anyone?) or sleep early to store energy for the upcoming Antarctic adventure.
Most expedition cruise companies host a welcome dinner at your designated hotel.
Day 2: Flight to Ushuaia and Embark for Antarctica
It’s wise to pick an Antarctic expedition company that includes a charter flight to Ushuaia for a smooth journey. Most flights are in the morning, usually after an early breakfast at your hotel.
You’ll arrive in Ushuaia in the afternoon. Your tour operator will transfer you from the airport to a ‘waiting lounge’ downtown. Explore the charming port city, but don’t wander too far away.
Late afternoon, your ship will leave for Antarctica, sailing along Beagle Channel, where you’ll pass Tierra del Fuego, the southernmost tip of South America.
Days 3 and 4 – Drake Passage
Hope for calm waters as you cross the passage. Calm waters or not, the crossing is utterly safe.
Don’t miss the lectures, workshops, and safety orientations. On your second day at sea, you typically do gear prep for land excursions.
You’ll see petrels and albatrosses on your trip, maybe whales, too. Feel free to go up the deck for a bit of wildlife spotting. You can also enjoy the ship’s amenities, like the bar or gym.
Days 5 and 6: South Shetland Islands
The South Shetlands are composed of several isles and 11 main islands.
You might stop at King George Island, the gateway to Antarctica. It’s the largest among the South Shetlands. It’s also the most populated, with its nine permanent research stations.
You’ll likely have epic wildlife encounters on the island, as its home to several penguins, mostly Gentoos, but also Adélie and chinstrap.
You can join a guided tour to some of the research stations. There’s also a Russian Orthodox Church, a rare sight in Antarctica.
After, you might sail to the icy and mountainous Livingston Island. Numerous seals and penguins live on there. You’ll see most of them at Hannah Point, a peninsula on the southern coast.
Your Antarctica cruise might offer a guided walk from Hannah Point to the adjacent Walker Bay and Liverpool Beach, a favorite haunt of elephant seals.
At the height of the breeding season, usually in December, Hannah Point and the nearby areas may be closed to visitors to protect the nests and newly hatched penguin chicks.
Half Moon Island is only 1.3 km from Livingston, so you can easily visit it. Deception Island, 18 km away, is often paired with Livingston in many Antarctica cruise expeditions.
Days 7 to 9 – Antarctic Peninsula
The Antarctic Peninsula is one of the top places for a scenic helicopter flight. A few Antarctica cruise operators offer this option.
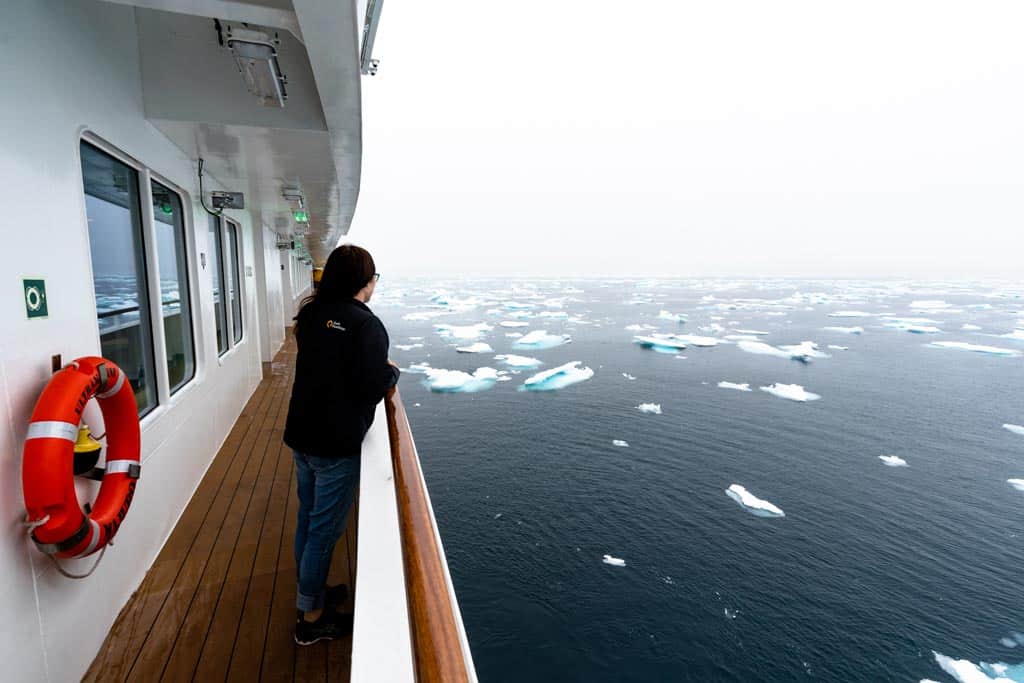
If the conditions are right, you may fly over the Antarctic Sound, at the northeastern end of the Antarctic Peninsula. It’s dubbed the Iceberg Alley because of the tabular icebergs and pack ice congesting its waters.
Some Antarctica cruise expeditions sail to the northeast side of the Antarctic Peninsula. One of the top stops here is Paulet Island.
Just 1.5 km wide, this circular island is a striking sight with a 335-meter volcanic cone rising at its center.
You may land on the island, weather permitting. But visitor numbers are often limited, especially during breeding season.
Your Antarctica cruise will also visit the usual stops: Neko Harbor, Paradise Bay, Cuverville Island, Danco Island, and Port Lockroy.
On the ninth day, you’ll cross Lemaire Channel into Petermann Island. The Antarctic Circle isn’t too far away.
Read our guide to Cuverville Island for more information!
Day 10 – Antarctic Circle and Marguerite Bay
You’ll start your day crossing the Antarctic Circle at 66°33′ South. It’s a moment worth celebrating, considering only 0.001% of the world population will ever get to experience it.
Everyone gathers at the bow of the ship as it approaches the invisible circle. The moment you cross, the captain toots the horn, passengers cheer and raise their cups of coffee or glasses of champagne in a toast.
There are rituals, too, usually presided over by someone dressed up as Neptune, the Roman god of the sea. You may end up kissing a frozen fish, stamped on the forehead with an anchor, or splashed on the head with saltwater.
Congrats! You’re officially an Antarctic Circle Crosser.
The scenery south of the Antarctic Circle doesn’t change much, but it’s colder, icier, and more pristine, if that’s even possible.
You might spend the rest of the day sailing around Marguerite Bay. If the weather allows, you can land on Horseshoe Island.
On the island, you can walk to Station Y, a British research base that dates back to 1955. Keep your eyes peeled for Emperor penguins. They’re a rare sight on the island, but they’ve been sighted since 2023.
Some expedition companies hold their polar plunge on the Antarctic Circle. Others offer scenic helicopter flights over the ice-laden sea and its floating icebergs.
Note: Antarctic Circle crossings are not a guarantee because the sea ice can block the waters, and the winds can get ominously strong. In such cases, the ship may turn back.
Day 11 – Antarctic Peninsula
Today, you’ll head back north and sail along the Antarctic Peninsula. If there are stops you missed, your expedition cruise may organize some final landings.
You may cruise on a zodiac on Wilhelmina Bay and Gerlache Strait for close encounters with whales.
Weather permitting, you may land on Orne Harbour and trek up the steep ridge where a colony of chinstrap penguins lives.
Days 12 and 13 – Drake Passage
The journey back to Ushuaia begins. Take time to relax and reflect on your Antarctic expedition. There’ll also be lectures and orientations onboard.
Days 14 – Ushuaia and Buenos Aires
In the morning, you’ll be in Ushuaia. After enjoying breakfast on the ship, you’ll head to the airport for your flight back to Buenos Aires.
Read next: TRAVEL to ARGENTINA – Tips and Information Guide
23-Day Antarctica Itinerary: Falkland Islands, South Georgia, and the Antarctic Circle
If you’re seeking a more in-depth Antarctica expedition cruise, this 24-day itinerary might be the best one for you.
Not only will you get to explore the Antarctic Peninsula, you’ll also visit the Falkland Islands and South Georgia Island.
Then, you’ll have the opportunity to cross the Antarctic Circle!
Note: We’ve talked about most of the stops in the other itineraries, so we’ll focus on the additions, specifically the Falkland Islands and South Georgia.
Day 1 – Buenos Aires, Argentina
Arrive in the Argentinian capital, then head to your designated hotel. You can explore the city in the evening or relax for the next day’s activities.
Day 2 – Ushuaia
Your expedition operator will transfer your group to the airport for your charter flight to Ushuaia. Because your ship embarks for Antarctica late in the afternoon, you’ll have some time to check out the port city.

Day 3 – South Atlantic Ocean
Your ship will sail east into the remote waters of the South Atlantic Ocean. Onboard, there’ll be workshops, lectures, and orientations facilitated by the expedition team.
Days 4 to 5 – Falkland Islands (Islas Malvinas)
The Falkland Islands are an archipelago composed of 700 islands, including the two main ones, East Falkland and West Falkland.
You’ll make your landing at the capital, Stanley. It’s a quaint port town with a collection of churches, museums, and pubs.
But the real stars on the Falkland Islands are the penguins, five species of them. Your expedition team will organize tours so you can see these birds. Popular stops include Gypsy Cove, Yorke Bay, and Seal Bay.
The Falkland Islands have beautiful beaches, too. You’ll see many of them as your ship cruises along the coast. And you might even get a chance to land on some.
Read next: The Best Time To Visit Antarctica – Month By Month Breakdown
Days 6 and 7 – At Sea
As you leave the Falkland Islands, you’ll sail southeast toward South Georgia. You’ll pass the Antarctic Convergence, an invisible boundary where the Antarctic, Atlantic, Indian, and Pacific Oceans meet. The area abounds with krill, which draws various marine life, including whales.
Days 8 to 11 – South Georgia
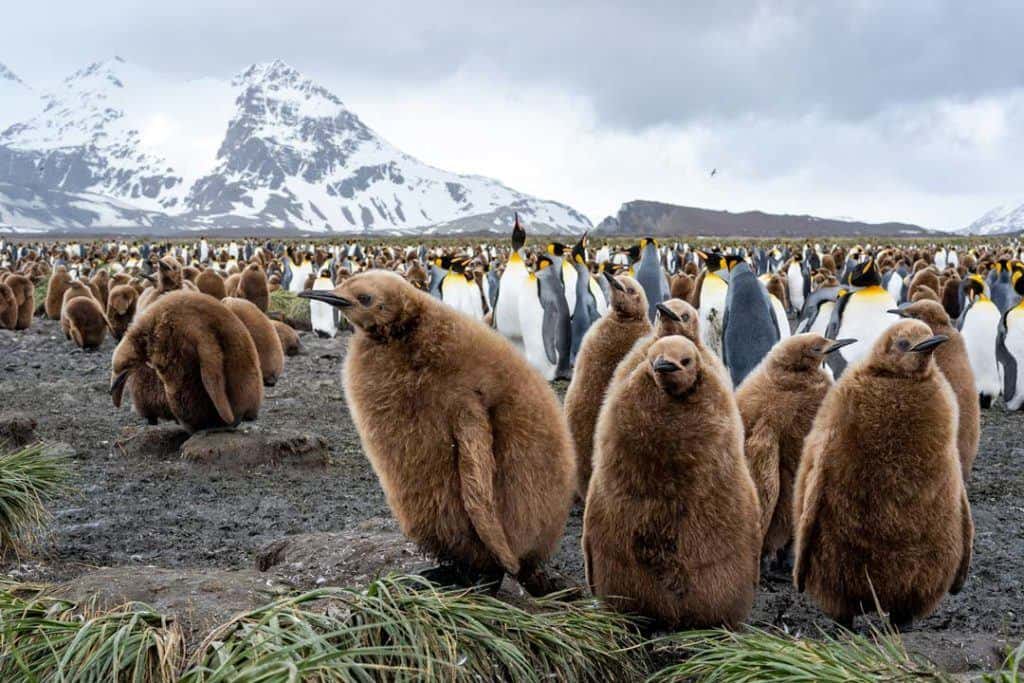
Dubbed the Galapagos of the Poles, South Georgia is stunning, secluded, and bursting at the seams with wildlife. It’s a breeding ground for fur seals, elephant seals, and nearly half a million king penguins.
Seabirds, such as albatrosses, terns, and petrels, nest on the island. It also has two endemic birds, the South Georgia pipit and the South Georgia pintail.
While South Georgia’s wildlife will captivate you, its history will touch you. Between the 18th and 20th centuries, South Georgia was a base for whale and seal hunting. Around the island are abandoned whaling stations and outposts, poignant reminders of the past.
You’ll spend three days exploring South Georgia by land and sea. Like in Antarctica, many spots in South Georgia are only reachable by zodiac. Landings are dependent on the weather. There’s also a strict limitation on the number of visitors.
Grytviken, the largest settlement on the island, is a popular stop. It’s the resting place of Sir Ernest Shackleton, a key figure in Antarctic exploration. You can check out the old whaling station, the well-preserved Norwegian church, and the South Georgia Museum.
If you’re looking for king penguins, you’ll find hundreds of them at Saint Andrew’s Bay or the Salisbury Plains. Apart from the king penguins, you’ll also see elephant seals lounging on the shore.
On the southeastern tip of South Georgia is Drygalski Fjord, a frozen bay flanked by glacial peaks and calving glaciers. The place looks (and feels) otherworldly in a nice way. It’s one of the best places in South Georgia for a cruise.
There are countless things to see in South Georgia. A three-day stop on a cruise may not be enough to enjoy them all. But you can always visit South Georgia another time on a separate expedition from the Falkland Islands.
Days 12 and 13 – Southern Ocean
You’ll leave South Georgia and sail southwest to the Antarctic Peninsula. This route lets you skirt the Drake Passage.
South Georgia lies east of the passage in the South Atlantic Ocean. That means when you sail from South Georgia to the Antarctic Peninsula, you move southwest across the Scotia Sea.
Read next: Antarctica Trip Cost – Ultimate Guide
Days 14 to 16 – South Shetlands and Antarctic Peninsula
Antarctica, finally! You’ll be exploring iconic spots on the South Shetlands, then head to the Antarctic Peninsula. There’ll be penguins, seals, whales, seabirds, and some of the most breathtaking scenery ever.
If the conditions permit, your expedition cruise will organize landings so that you can see wildlife (hopefully) up close.
Other activities include kayaks, hikes, and zodiac cruises. If you’re up to it, go for the polar plunge.
Days 17 and 18 – Antarctic Circle
Crossing the Antarctic Circle is a big exploit, even for the most adventurous travelers. It’s not as simple as traversing an invisible line. It’s also finding the right timing, because the weather can easily wreck your plan.
Down south, everything is more raw and more pack ice. You’ll sail around Marguerite Bay, maybe land on Horseshoe Island.
Days 19 to 20 – Antarctic Peninsula
Your ship heads northward back to the Peninsula. You may be landing or zodiac cruising along locations not yet visited.
Days 21 to 22 – Drake Passage
If it’s your first time crossing this notorious body of water, remember it’s part of the adventure.
As always, there’ll be lectures, presentations, and discussions on board. This trip could give you your final whale sightings, so keep scanning the waves.
Day 23 – Ushuaia and Buenos Aires
You’ll disembark after breakfast, but this may not be the end of your trip. You can stay a bit in Ushuaia or visit the nearby attractions before flying back to Buenos Aires. Some operators offer tours to Tierra del Fuego or even to the Chilean Fjords in Patagonia.
Note: There are also Antarctic expeditions that depart from Hobart, Australia, usually via the Ross Sea. However, these trips have limited availability and are typically longer and more expensive. The appeal is that they often venture into less-visited destinations, such as East Antarctica.
DISCLAIMER: Some of the links in this article are affiliate links, which means if you book accommodation, tours or buy a product, we will receive a small commission at no extra cost to you. These commissions help us keep creating more free travel content to help people plan their holidays and adventures. We only recommend the best accommodations, tours and products that ourselves or our fantastic editorial team have personally experienced, and regularly review these. Thanks for your support, kind friend!


![GoPro HERO 13 Review – The Ultimate Camera Guide [2025]](https://farasar.ir/wp-content/uploads/2025/07/GoPro-HERO-13-Black-Review-Feature-Image.jpg)


![Coral Geographer Review | Ultimate Expedition Ship [2025]](https://farasar.ir/wp-content/uploads/2025/07/Coral-Geographer-Review-Coral-Expeditions-Ship.jpg)


![Climbing Mount Kinabalu – The Ultimate Trekking Guide [2025]](https://farasar.ir/wp-content/uploads/2025/07/Mount-Kinabalu-Climb-Trek-Guide-Featured-Image.jpg)