When people think of Europe, the first destinations that often come to mind are France, Italy, Germany, Spain, and maybe Switzerland. However, Europe is home to dozens of countries, and one of the most underrated regions for travelers is the Balkans. While there’s no universal agreement on which countries belong to the Balkans, the region generally includes Albania, Bosnia and Herzegovina, Croatia, Bulgaria, Greece, Kosovo, Montenegro, North Macedonia, and Serbia, with Romania and Slovenia sometimes considered part of it as well.


Despite being overlooked by many tourists, the Balkans offer stunning landscapes, rich history, and vibrant cultures — all at a fraction of the cost compared to Western Europe. While some places may still be pricey by Filipino standards, they are generally more budget-friendly than their Western European counterparts. If visiting the Balkans is on your travel bucket list, keep reading as we share how we planned our unforgettable Balkan adventure in this article!
1. Secure the right visas.
As mentioned earlier, the Balkan region generally consists of 11 countries. However, not all of them are part of the Schengen Area.
Schengen Balkan Countries
Only five countries in the Balkan region are included in the Schengen Area. These are the following:
- Greece
- Croatia
- Slovenia
- Bulgaria
- Romania
Note: Bulgaria and Romania currently only accept Schengen visas at their sea and air borders.
Among the Schengen countries in the Balkans, Greece is the most practical choice for Filipino travelers. Here are the reasons:
- Greece has its own embassy in the Philippines, making visa processing more straightforward.
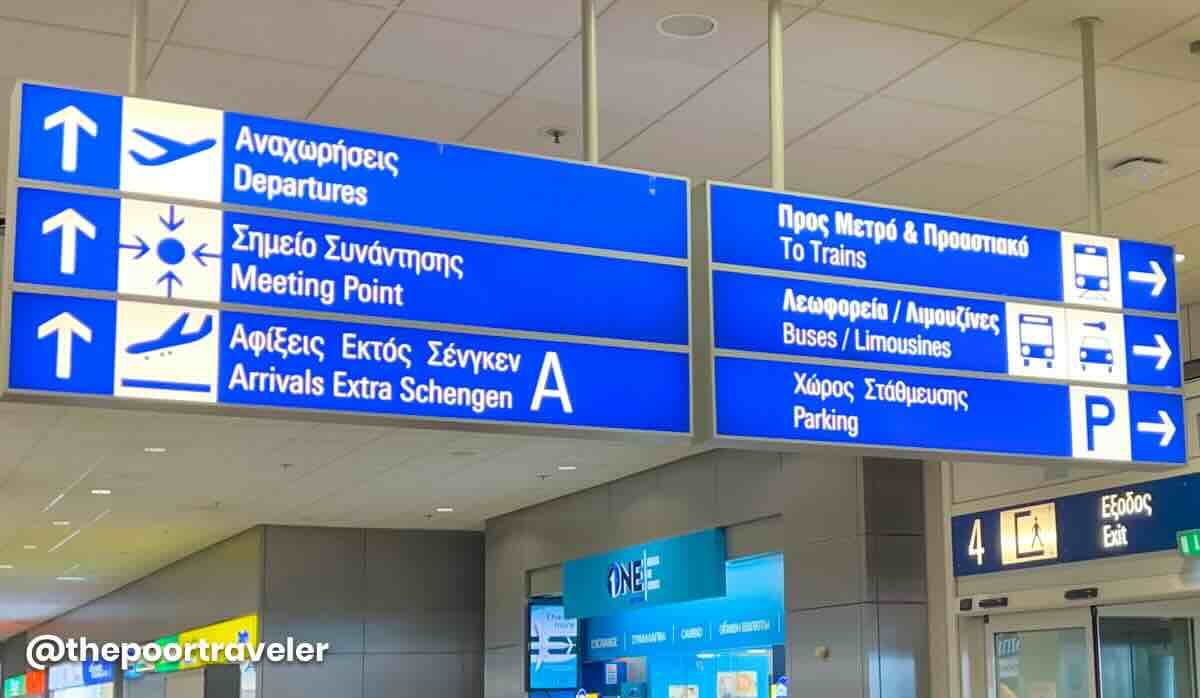
- Athens Airport is well-connected, with affordable flights available from many destinations.
- Greece is a stunning travel destination, so it’s well worth adding to your itinerary!
Alternatively, you can also apply for a Schengen visa through Slovenia, which is processed by the Belgian Embassy in the Philippines.
TIP! Design an itinerary that requires multiple Schengen entries, making your multiple-entry visa application more justifiable. See sample itinerary in the next section.
Non-Schengen Balkan Countries
Here are the Balkan countries outside of the Schengen Area:
- Albania
- Bosnia and Herzegovina
- Kosovo
- Montenegro
- North Macedonia
- Serbia
If you’re traveling to any of these countries, you’ll need a separate visa specific to that country. For instance, if you’re only visiting Albania, you’ll need to apply for an Albanian visa. Fortunately, there’s a workaround: if you have a multiple-entry Schengen visa, you won’t need a separate visa for many Balkan states.
To take advantage of this, you can apply for a multiple-entry Schengen visa through Greece, Croatia, Slovenia, Bulgaria, or Romania — as long as your itinerary justifies multiple entries. Additionally, many non-Schengen Balkan countries accept a used multiple-entry Schengen visa, meaning you must enter a Schengen country at least once before using it to visit other Balkan states.
2. Plan your route wisely.
Careful route planning is essential — not only to save time, money, and energy but also to justify the need for a multiple-entry Schengen visa.
Creating Your Itinerary
As mentioned earlier, only five Balkan countries are part of the Schengen Area, while the rest require separate visas. However, with a multiple-entry Schengen visa, you can enter many non-Schengen Balkan countries without needing additional visas.
This is why the itinerary you submit to the embassy is crucial. Below is a simplified version of our Balkan travel route. It was more complicated in reality, but this gives you an example of how you can plan your itinerary.
- Greece
- Romania
- Bulgaria
- North Macedonia
- Kosovo
- Albania
- Montenegro
- Croatia
- Bosnia and Herzegovina
- Croatia
- Spain
This itinerary required us to enter the Schengen Area three times, which strengthened our justification for a multiple-entry visa.

- First Entry: Arriving in Greece (Schengen).
- Second Entry: Exiting the Schengen Area from Bulgaria to North Macedonia, then re-entering when arriving in Croatia.
- Third Entry: Taking a side trip to Bosnia and Herzegovina and Montenegro, then re-entering Croatia.
With three Schengen entries, a multiple-entry visa was justified, allowing us to travel through the non-Schengen Balkan countries without needing separate visas.
Choosing the Best Mode of Transportation
Beyond visas, planning your route wisely also means considering transportation availability. Google Maps is a great tool to check the most logical route between the countries you want to visit. Researching bus routes can help you avoid unnecessary flights, making your trip more budget-friendly and efficient.

During our Balkan backpacking trip, we primarily traveled by bus. Not only was it the most affordable option, but it also made for a more immersive and adventurous experience.
Checking the Political Landscape
Another critical factor when planning your itinerary is the political landscape of the Balkan region, as some countries have border restrictions due to diplomatic conflicts. For example, Serbia apparently does not allow entry from Kosovo due to conflicts. While this policy may change over time, we took extra precautions when planning our route. Instead of traveling from Kosovo to Serbia, we entered Serbia from Bulgaria first, then later traveled to Kosovo from North Macedonia to avoid potential issues.
By being strategic with your route, you can make your Balkan adventure smoother, more cost-effective, and visa-efficient — all while enjoying the incredible diversity of this fascinating region!
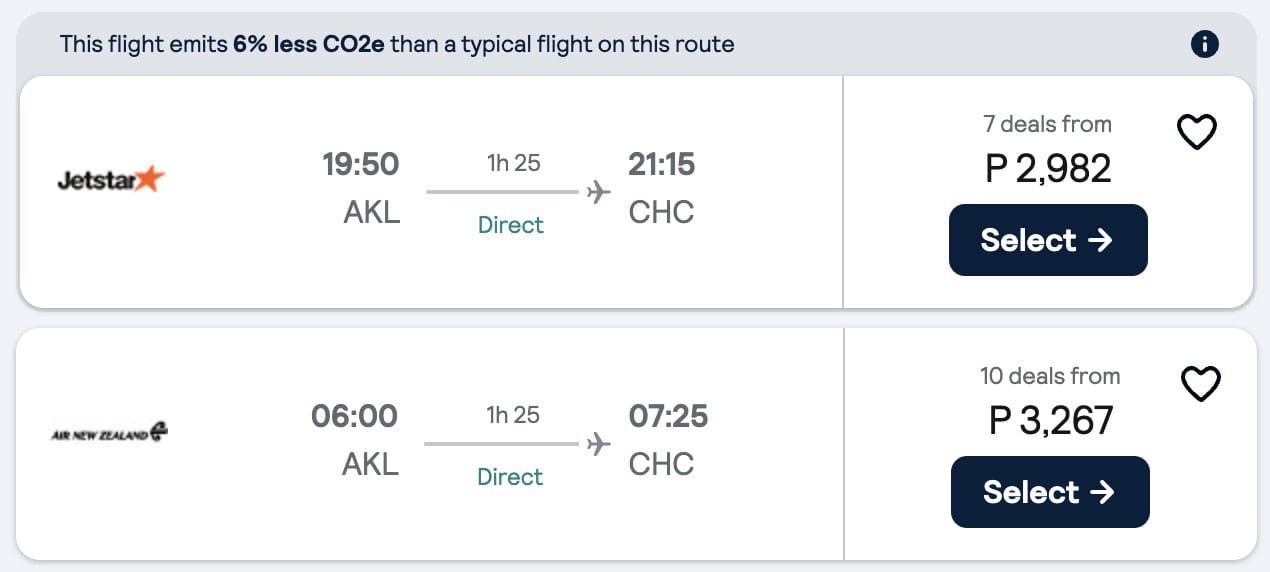
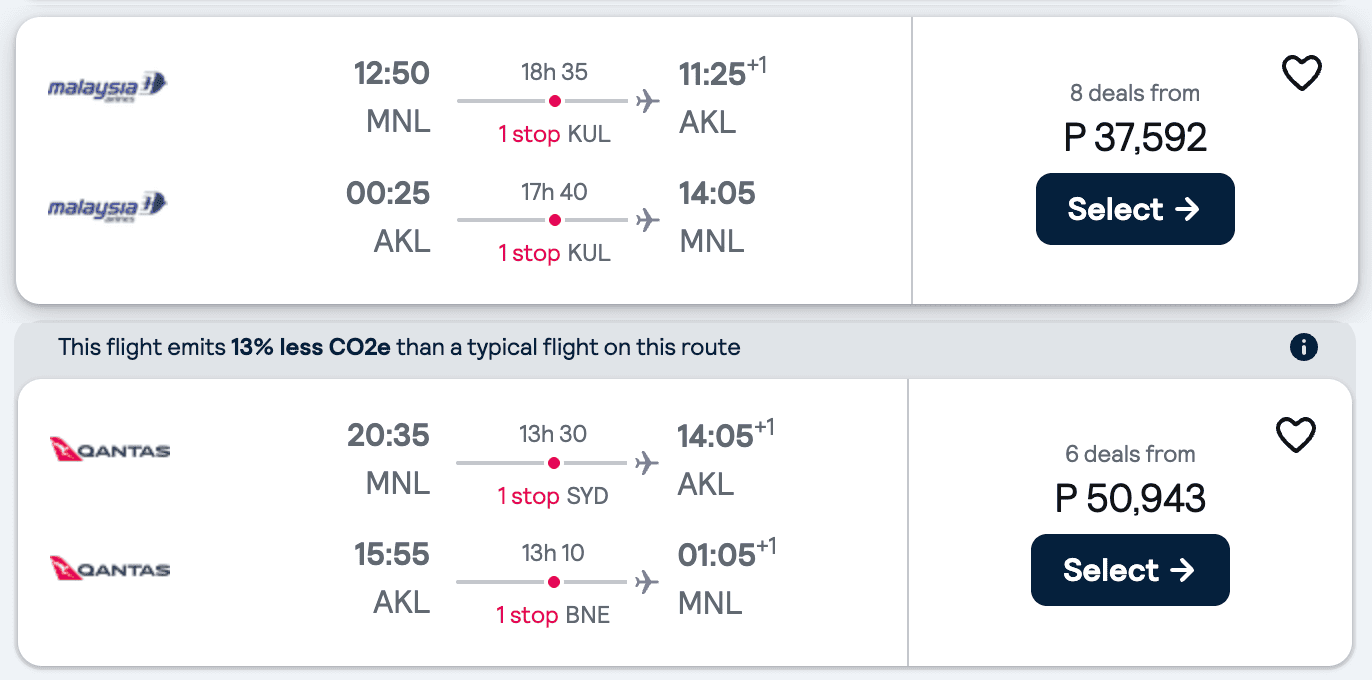
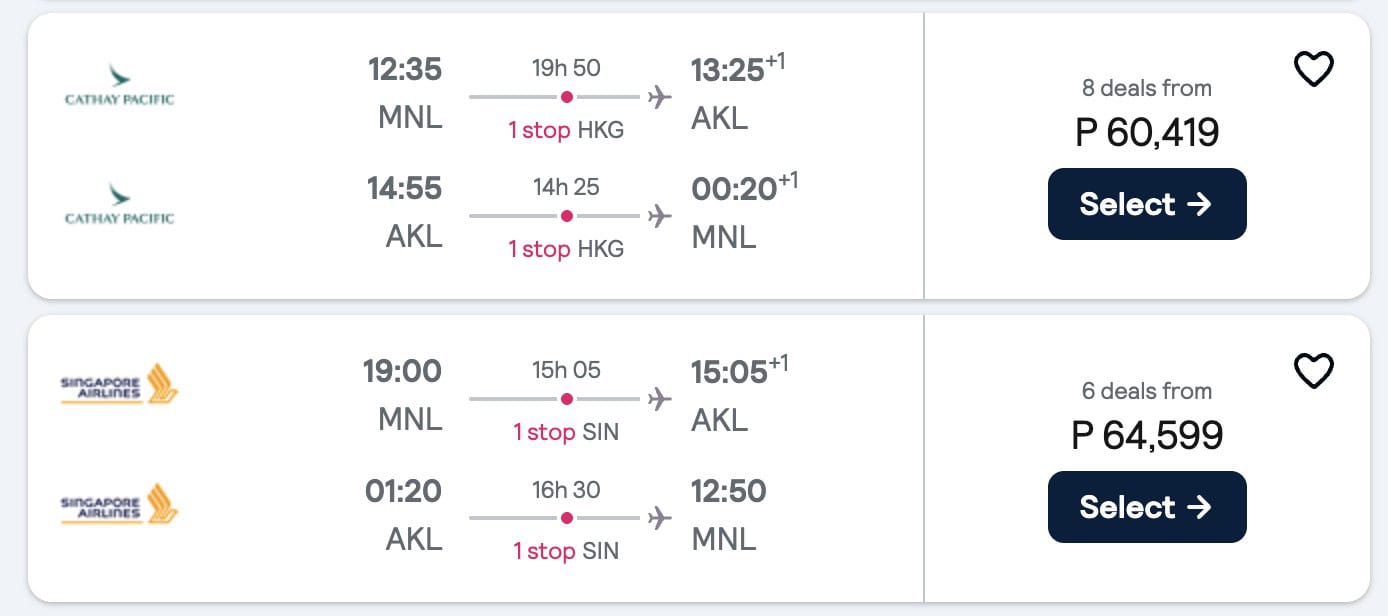
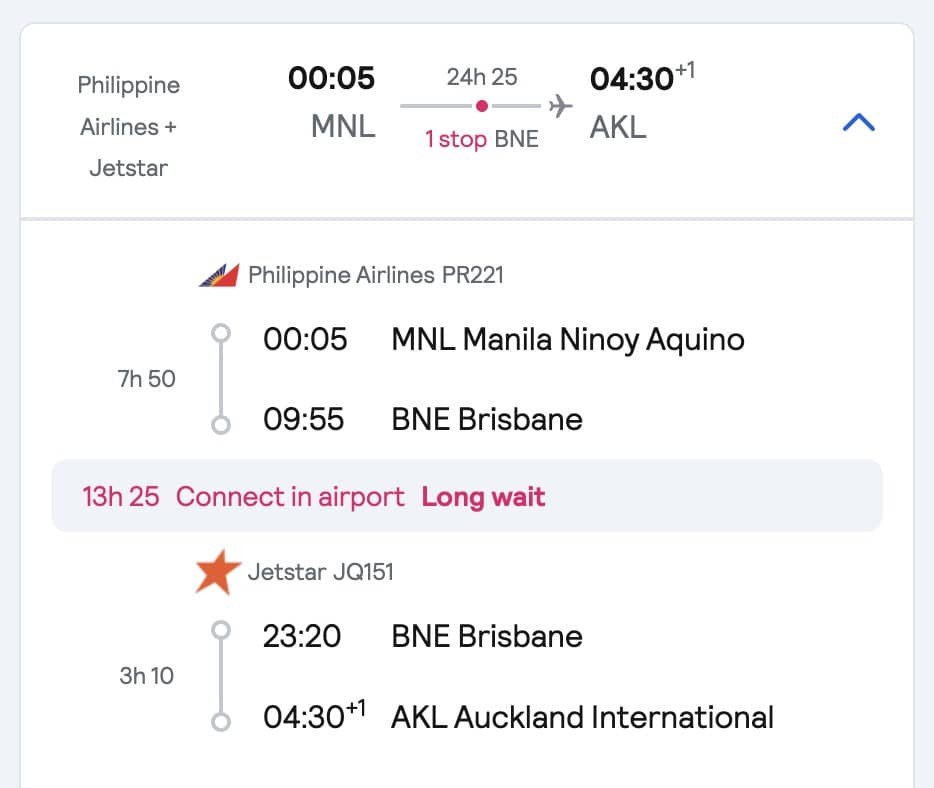
3. Search for affordable flights.
When planning our Balkans trip, we chose Greece as our entry point because it offered the cheapest flights. If you’re booking well in advance or during seat sales, one of the most budget-friendly options from Manila to Athens is SCOOT, which operates flights with a stopover in Singapore. In fact, we’ve flown to Greece with Scoot on previous trips.
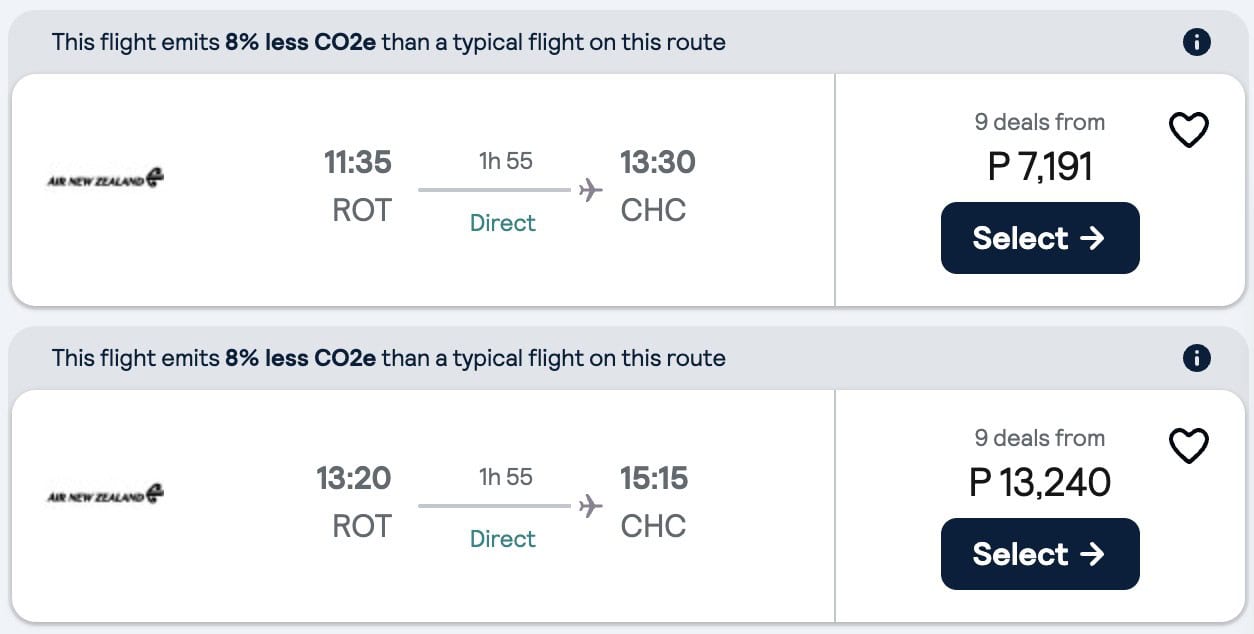
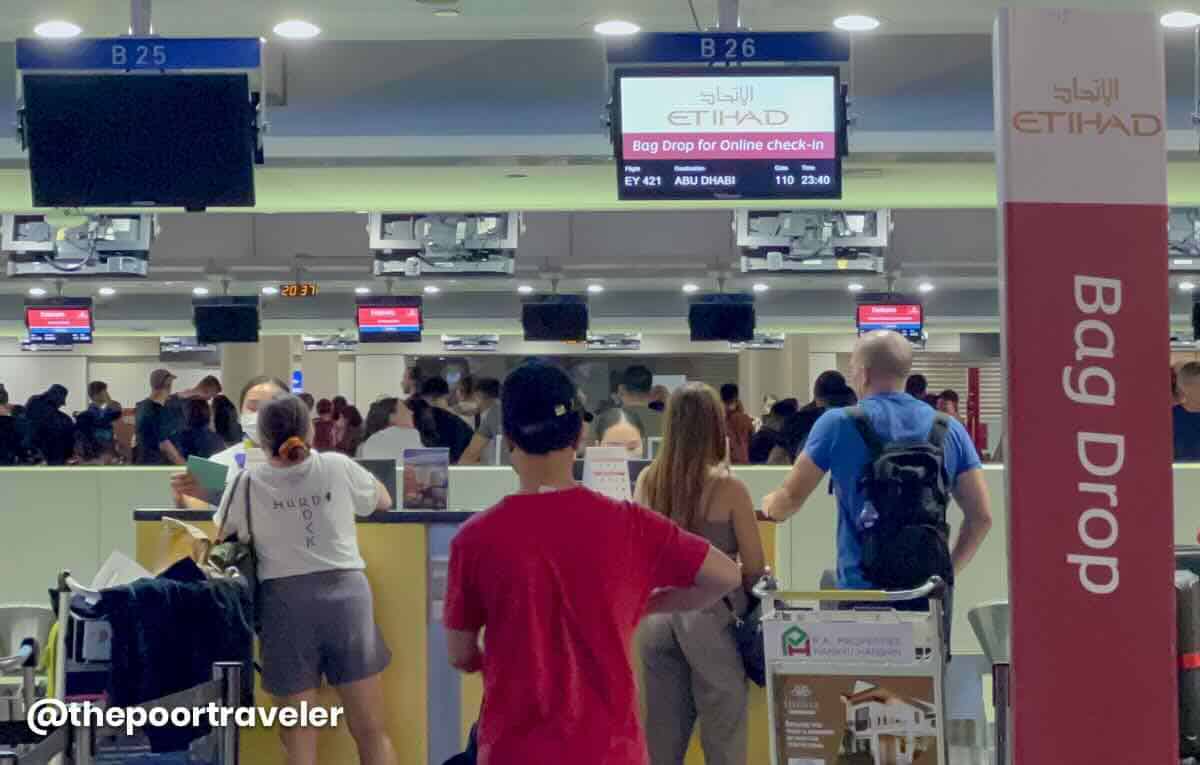
However, don’t limit your search to just budget airlines. It’s always worth checking full-service carriers too. Sometimes, you’ll find flights that are either cheaper or only slightly more expensive than low-cost airlines but come with added benefits. For example, when we booked our flight for our Balkans trip, we chose Etihad with a stop in Abu Dhabi. At the time, it was only about ₱5,000 more expensive than Scoot, but that price already included add-ons.
If you noticed in our sample itinerary, our final stop before returning to the Philippines was Spain, even though it’s not part of the Balkan region. The reason? Flight prices. At the time, the cheapest flight back to Manila was from Barcelona. Even after factoring in the cost of a connecting flight from Croatia to Barcelona, the total expense was still lower than flying directly from the Balkans. That’s why we decided to include Spain in our route!
It’s important to note that when applying for a Schengen visa, you don’t need to book your flights yet. Instead, you’ll need a flight reservation, which serves as a temporary booking without requiring full payment. Some people refer to it as a “dummy ticket”, it sounds phony so we avoid using that term. But whatever you call it, what’s important is that embassies recognize flight reservations.

For our visa applications, we get our flight reservations from Gazelle Travel and Tours. If you need one, you can visit this page, fill out the order form, and check the pricing and turnaround time. Once your visa is approved, you can proceed with finalizing your actual flight booking.
4. Consider the season and the weather.
Timing plays a crucial role when planning a trip to Europe, including the Balkan region. We’ve traveled to the Balkans during late spring to early summer and again from late summer to autumn, and we can confidently say — the difference in price is huge.
The summer months (June to September) are considered peak season, meaning higher prices for flights, accommodations, and tours. For example, when we visited Croatia, we noticed that as soon as October arrived, tour prices dropped significantly. This trend applies to hotels and flights as well.
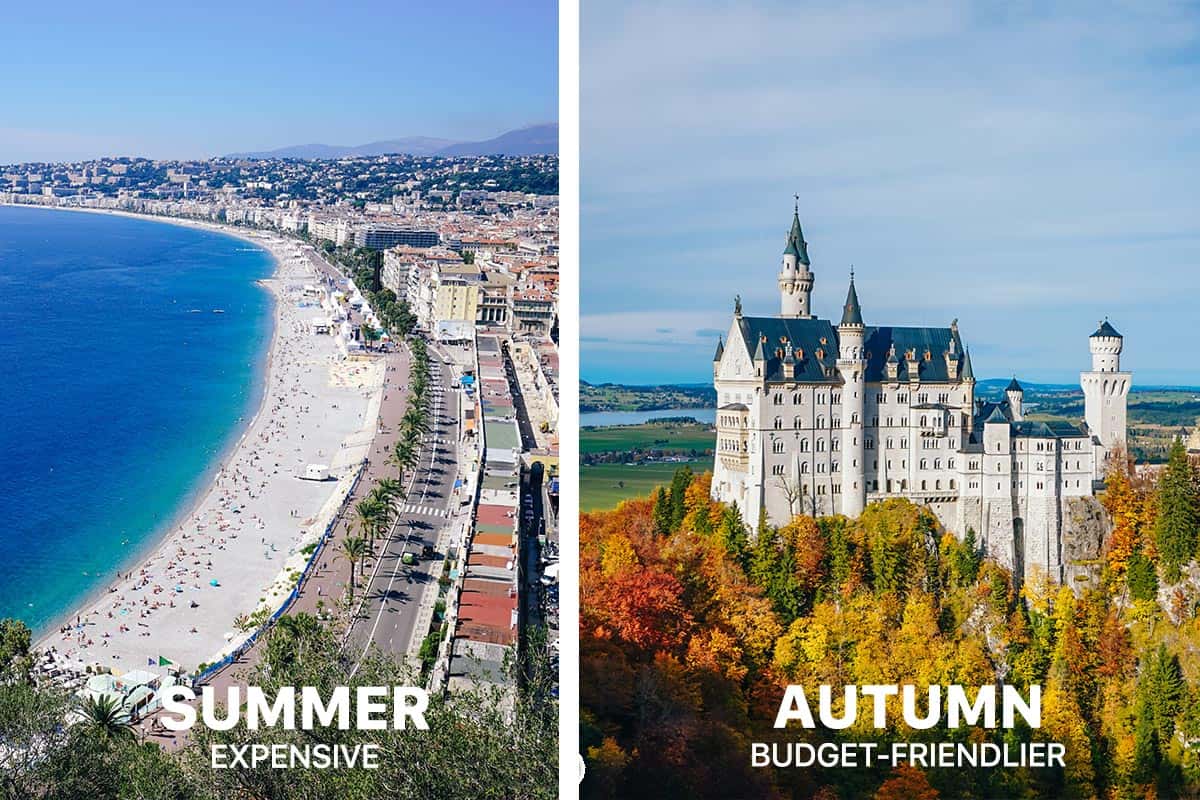
Out of all the seasons we’ve experienced, autumn was the most breathtaking. The weather was comfortably cool — neither too hot nor too cold — and the landscapes were painted in stunning fall colors, making it an unforgettable sight.
Beyond pricing and scenery, seasonal weather also determines what you need to pack. The Balkans have diverse climates, so temperatures can vary greatly depending on where you go. For example, the weather in Romania is different from Croatia’s Dalmatia Region.
Meanwhile, coastal cities along the Adriatic and Aegean Seas — like Split and Dubrovnik in Croatia — have a Mediterranean climate. Inland regions, such as Sofia in Bulgaria and Brașov in Romania, experience a humid continental climate, meaning colder winters and more significant seasonal changes.
If you’re backpacking through multiple countries, expect the weather to shift from place to place. Be sure to research each destination’s climate in advance and pack accordingly to stay comfortable throughout your journey.
5. Don’t assume everything’s the same.
The Balkan region is incredibly diverse, not just in terms of climate but also in culture, language, history, and governance. While there are similarities between countries, each nation has its own distinct identity. The alphabet, religion, political systems, and even cuisines can vary dramatically as you cross borders.
History
This diversity is also reflected in the region’s complex history. Many neighboring countries have long-standing political tensions, which sometimes become evident when speaking with locals. Even historical tours can present conflicting narratives, depending on where you are. For example, North Macedonia and Bulgaria, Serbia and Bulgaria, Serbia and Kosovo, and even Bosnia and Herzegovina all have different perspectives on historical events — and you’ll likely sense this when visiting heritage sites or engaging in conversations.
Cuisine
Each country in the Balkans offers a unique cuisine as well. For example, in Dubrovnik and Montenegro, seafood dominates the cuisine, whereas Romania, Bulgaria, and Serbia favor meat-heavy dishes.

Religion
When it comes to religion, countries like Kosovo and Albania are predominantly Muslim, while Croatia is largely Catholic. Meanwhile, Greece, Bulgaria, Serbia, Montenegro, and Romania follow Eastern Orthodox Christianity, each with their own branches — Greek Orthodox, Bulgarian Orthodox, and Serbian Orthodox.
Language
The linguistic diversity is also fascinating. For example, Romanian is a Latin-based language that uses the Latin alphabet, whereas Bulgarian is a Slavic language that uses the Cyrillic script. Greek, of course, has its own distinct Greek alphabet.
Vibe and Personality
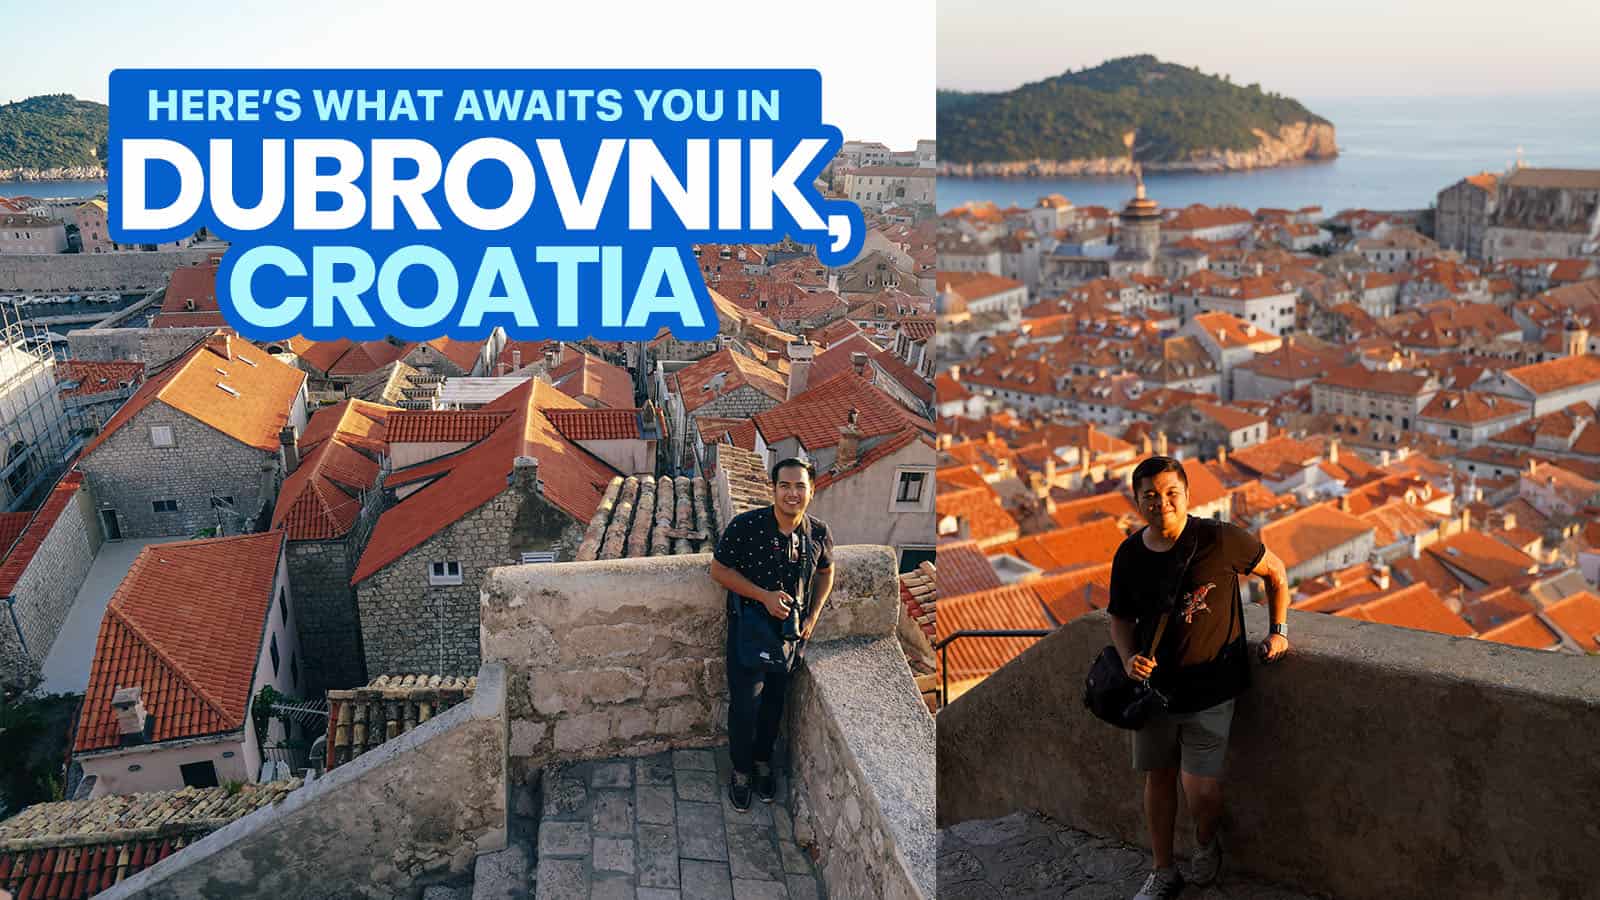
Every destination has its own personality. Beyond cultural differences, each city or town exudes its own unique charm. Brașov (Romania) feels like a quaint, fairy-tale town. Sofia (Bulgaria) and Tirana (Albania) have the bustling energy of big cities. Meanwhile, Split and Dubrovnik (Croatia) are straight out of Game of Thrones, serving serious King’s Landing vibes. And Mostar (Bosnia and Herzegovina) and Prizren (Kosovo) look like giant, open-air museums with their well-preserved historical sites.
Affordability
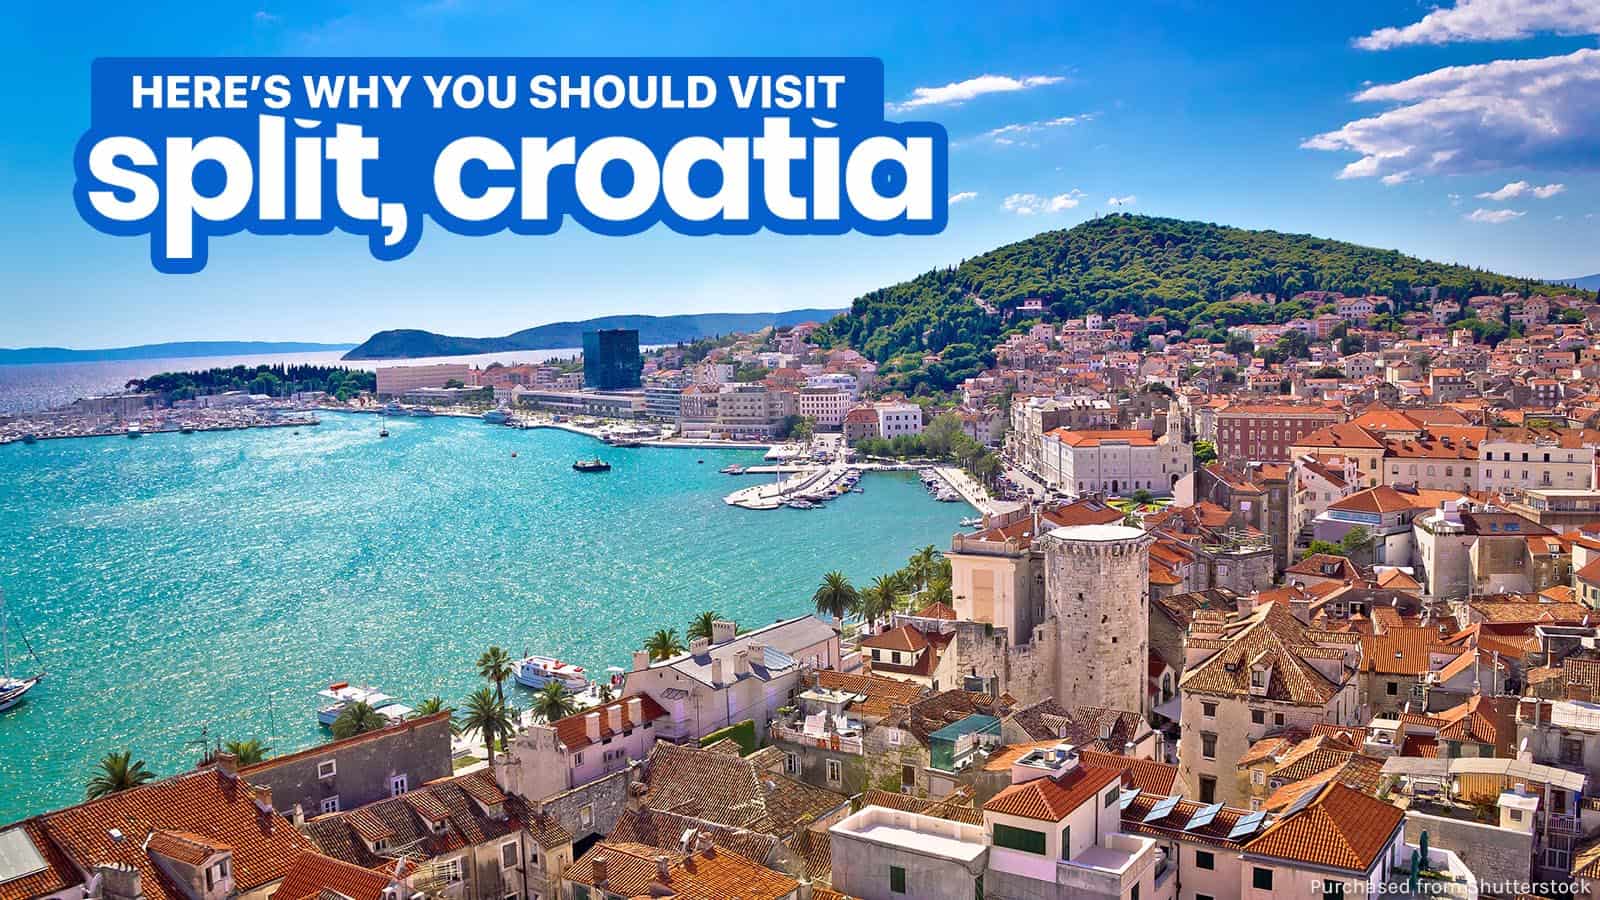
Prices also vary between destinations. While much of the Balkans is known for being budget-friendly, there are notable exceptions. Dubrovnik and Split are among the most expensive cities in the region. When we first visited these parts of Croatia a few years ago, they were already pricey, but during our most recent trip, we noticed prices had skyrocketed, likely due to the influx of tourists. If you plan to visit, be prepared to spend more compared to other Balkan destinations.
The more places you explore, the more you’ll appreciate the region’s incredible diversity. Every stop reveals something new, making the Balkans a truly fascinating place to visit.
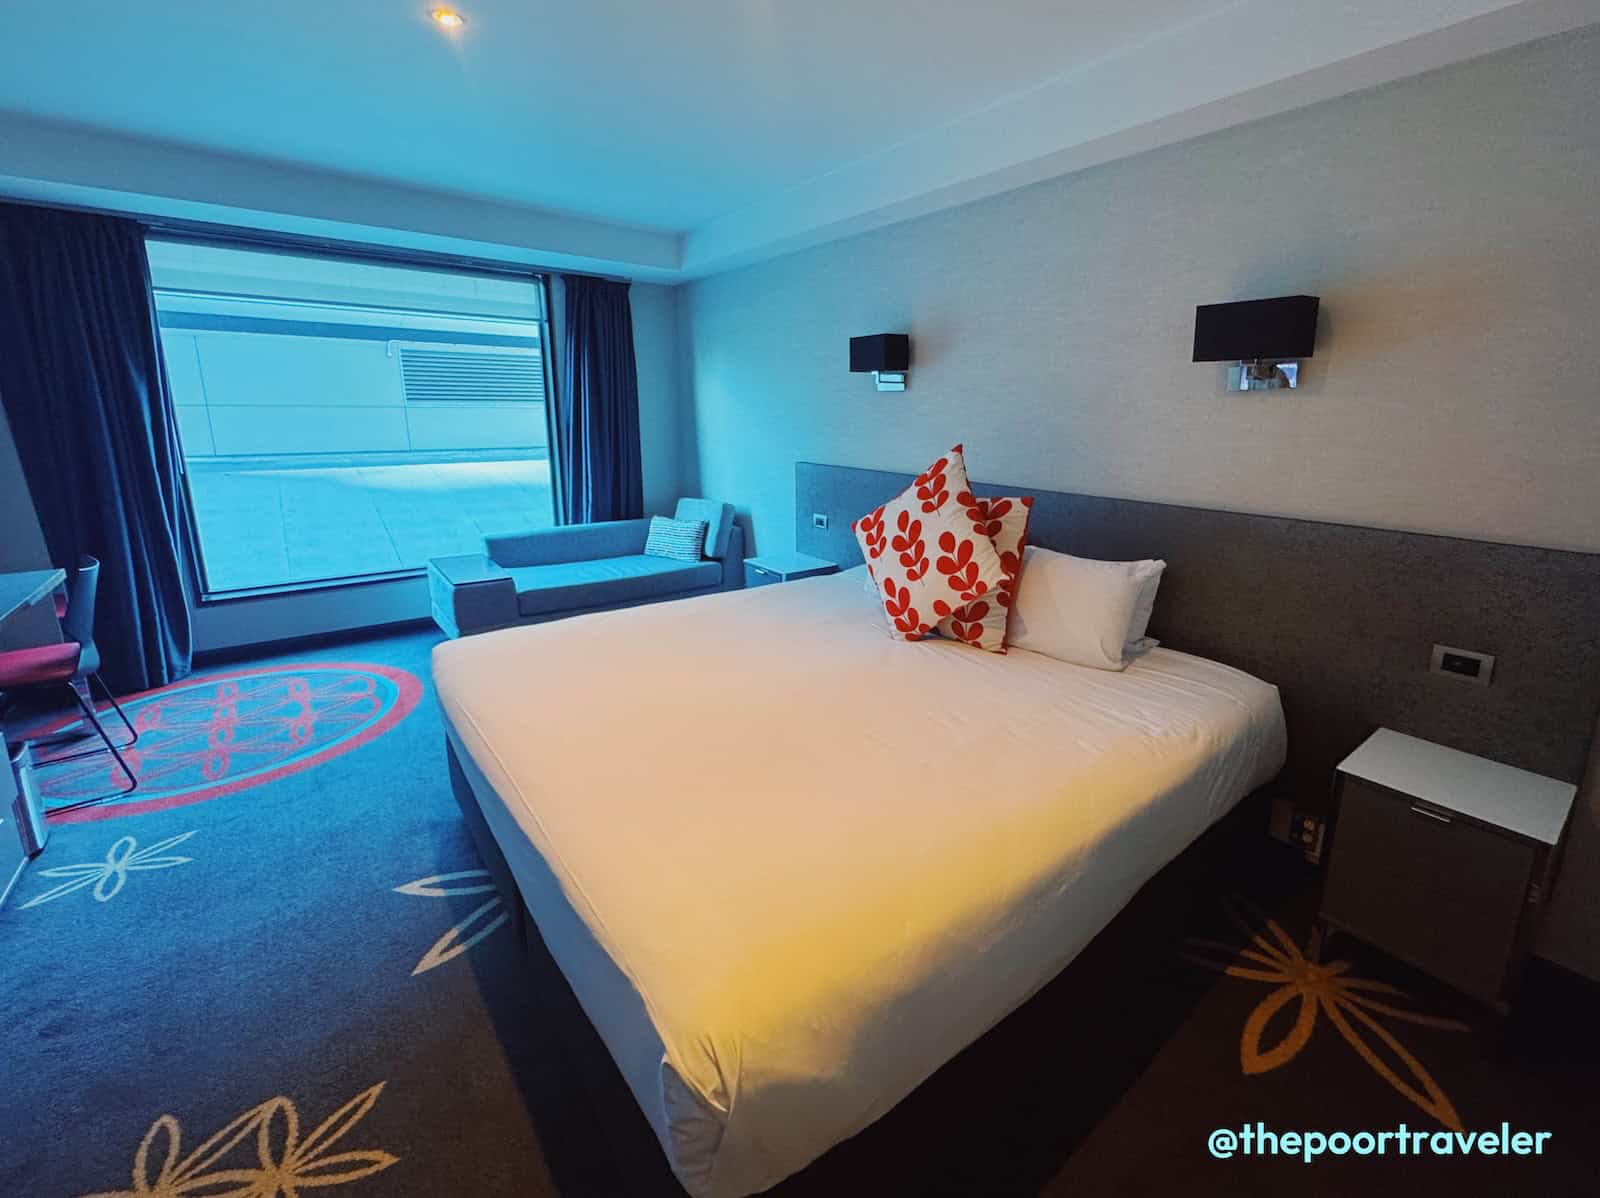
6. Inspect your accommodations online.
One of the best things about traveling in the Balkans is the abundance of budget-friendly accommodations. However, price isn’t the only factor to consider when choosing where to stay. We always use two key criteria when booking: central location and accessibility.
We prefer accommodations near the Old Town or city center, within walking distance of key attractions and starting points for walking tours. It’s also important that our lodging is close to major transportation hubs, such as train stations or bus terminals, for easier transfers between destinations.
Finding accommodations that fit these criteria was fairly easy, except in Dubrovnik, where we faced a unique challenge: most budget-friendly rooms only accommodated two people — we were a group of three. As a result, we ended up booking apartments for most of our stay.
By the way, these are all the promo codes that you can use. We have discounts for hotels, tours, and eSIM for internet connection. We even have special rates for travel insurance, exclusive for TPT subscribers.

Beyond location and affordability, it’s also crucial to check the building’s facilities, especially if you’re staying in an apartment within the Old Town. Some buildings are older and lack elevators, which can be a problem if you’re carrying heavy luggage or have mobility problems.
For example, in Brașov, Romania, we stayed at Zinne Apartments, a charming place just two blocks from the main square. However, it was on the second floor, which is third floor for us Pinoys, and since it was in an older building, there was no elevator. Similarly, in Skopje, North Macedonia, we booked Apartment Emilija, which had an amazing location — we could see the main square right from our window. The unit itself was spacious and comfortable, but it was on the fourth floor, which is fifth floor by our standards, with no elevator.

Before finalizing your accommodation, always check which floor your unit is on and whether the building has an elevator. This small detail can make a big difference in your comfort, especially after a long day of exploring. And, again:
- If Klook is your go-to booking site, please use our promo code THEPOORTRAVELERKLOOK for up to P300 OFF or TPTKLOOK5 for up to P500 OFF. These codes might change in the future so best to just visit thepoortraveler.net/klook to redeem updated discount codes!
- If you prefer to book via AGODA, use our promo code AGODATPT for 10% discount.
7. Beware of scams and secure mandatory travel insurance.
Like many major cities in Europe, scams exist in the Balkans. Although they are not as rampant as in Paris, Barcelona, or Berlin, scams still exist here. The most common type of scam travelers encounter here usually involves taxis.
We personally experienced a taxi scam in North Macedonia. We usually prefer public transportation, but sometimes, especially when arriving late at night, taking a taxi is the only option. Since there were three of us, we figured splitting the fare wouldn’t be too bad.
Before getting in the taxi, we agreed on a price with the driver. However, when we arrived at our destination, he suddenly demanded more money. When we refused, other taxi drivers surrounded us, trying to intimidate us.
Unfortunately, taxi scams happen in other cities too. If you suspect a driver is overcharging, walk away and find another taxi. To avoid this, you can ask your accommodation host for an estimate of the usual fare from the station to your stay. Many hosts even recommend a trusted transfer service to ensure you’re not overcharged. For example, our host in Skopje went the extra mile to personally take us to the bus station so we wouldn’t have to deal with taxi scams.
In our six weeks of traveling in the Balkans, we only encountered two scams and fell for one. However, there are other scams that travelers have reported, such as as the money collector scam and overpriced menu scam. Thankfully, we didn’t encounter these, but researching common scams before your trip can help you recognize and avoid them.
Since we’re talking about safety, remember that when applying for a Schengen visa, having travel insurance is mandatory. Not just any insurance — it must be Schengen-accredited. For reliable coverage, you can book TravelJoy Plus through PGA Sompo. This ensures you’re protected throughout your trip.

Updates Log
2025 7 21 – First uploaded