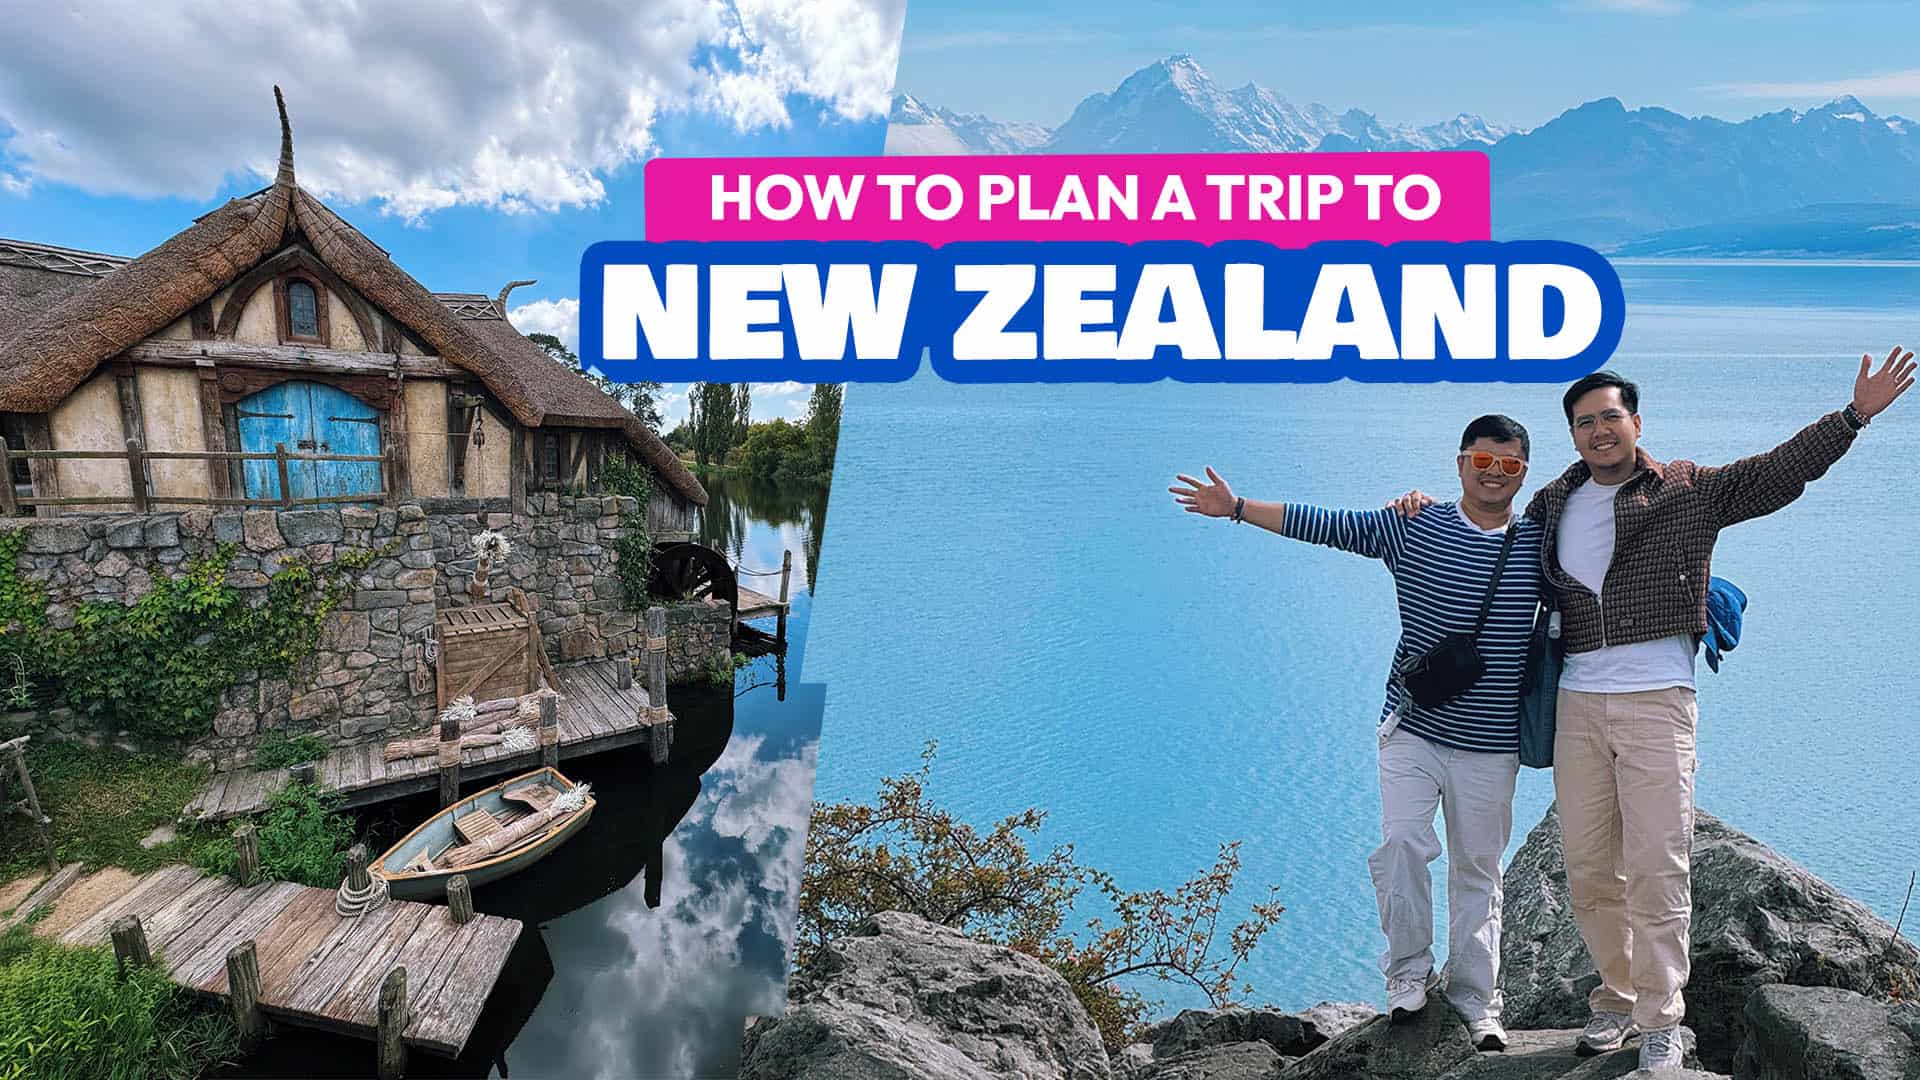
When we first posted on Instagram that we were in New Zealand, two of the first messages we received were “How much should we spend?” and “What’s your itinerary?” And no surprise there, really. New Zealand may be one of the dreamiest and cinematic destinations on earth, but it’s not the most affordable or the easiest to get to.


So, in this article, we’ll walk you through our full New Zealand itinerary and give you a breakdown of all our actual expenses — from transportation and accommodations to food, activities, and the occasional “treat yourself” moment.
DAY 1: AUCKLAND
Arrival
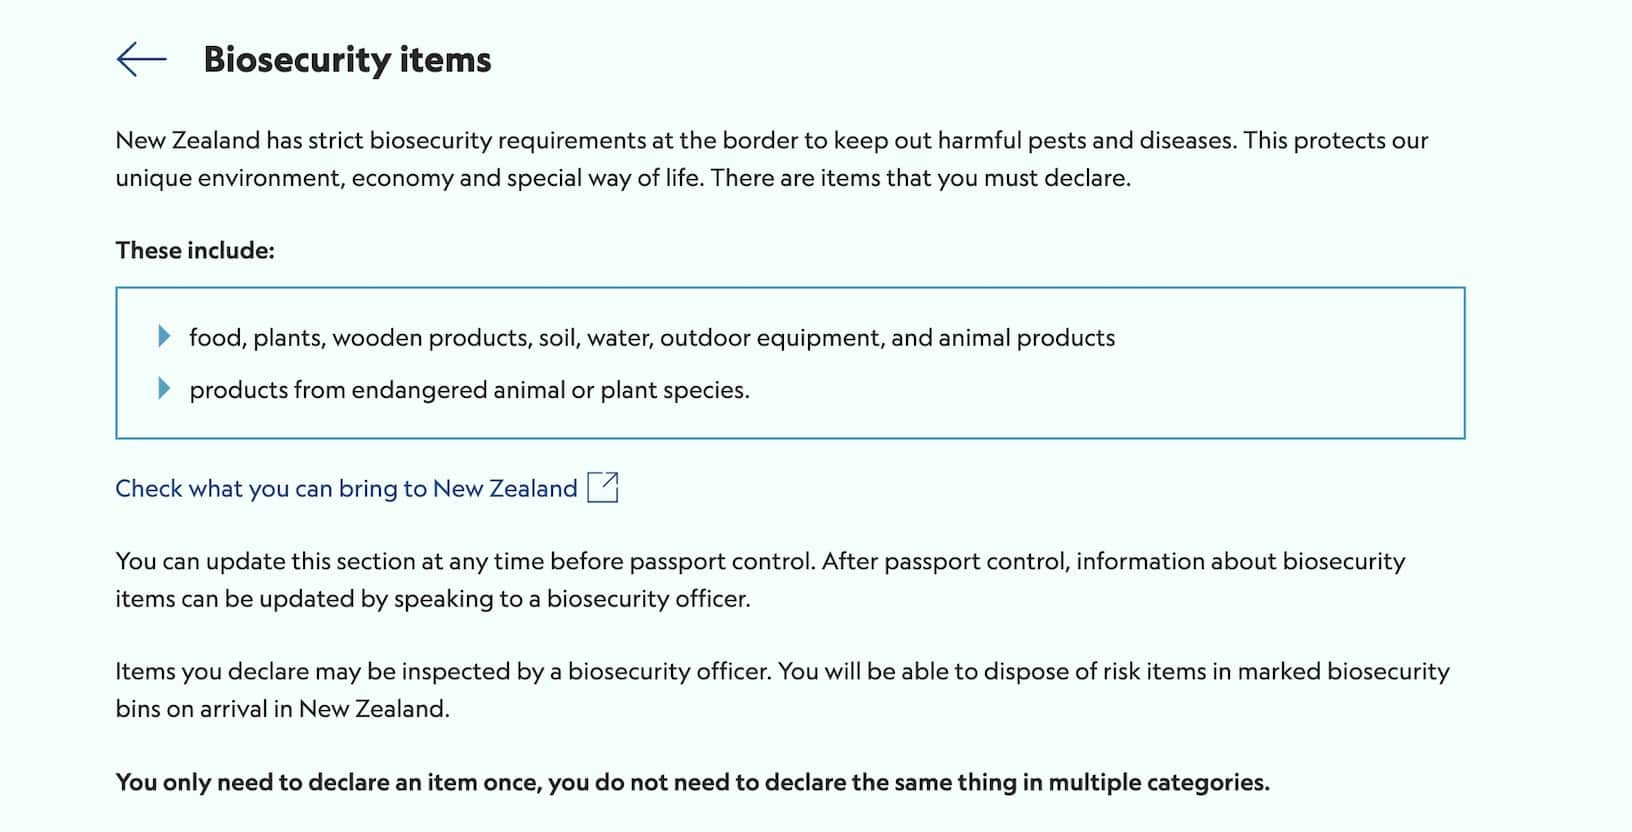
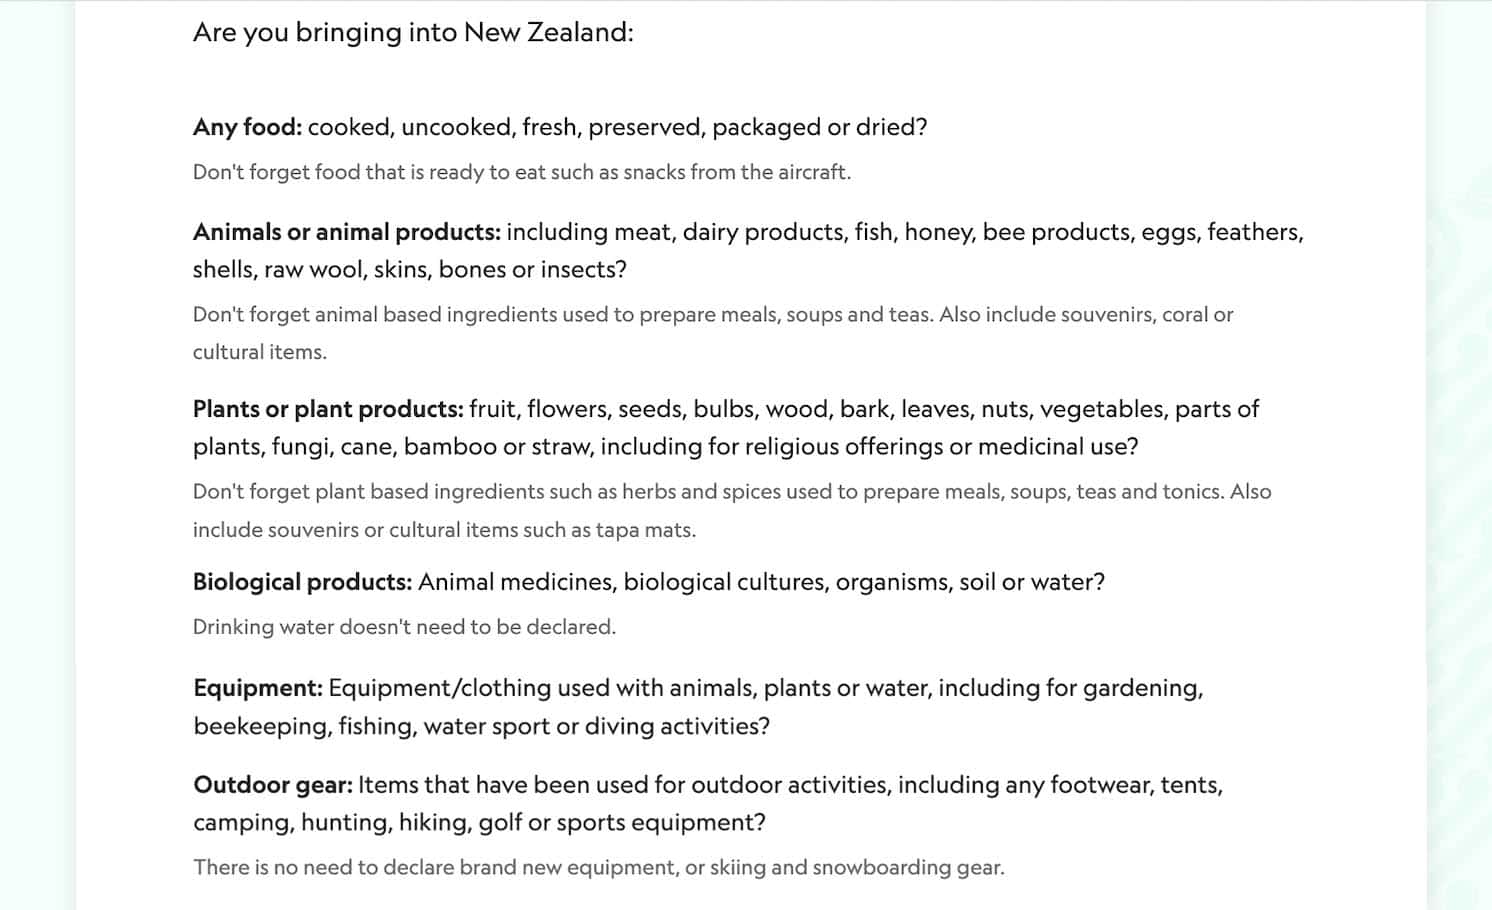
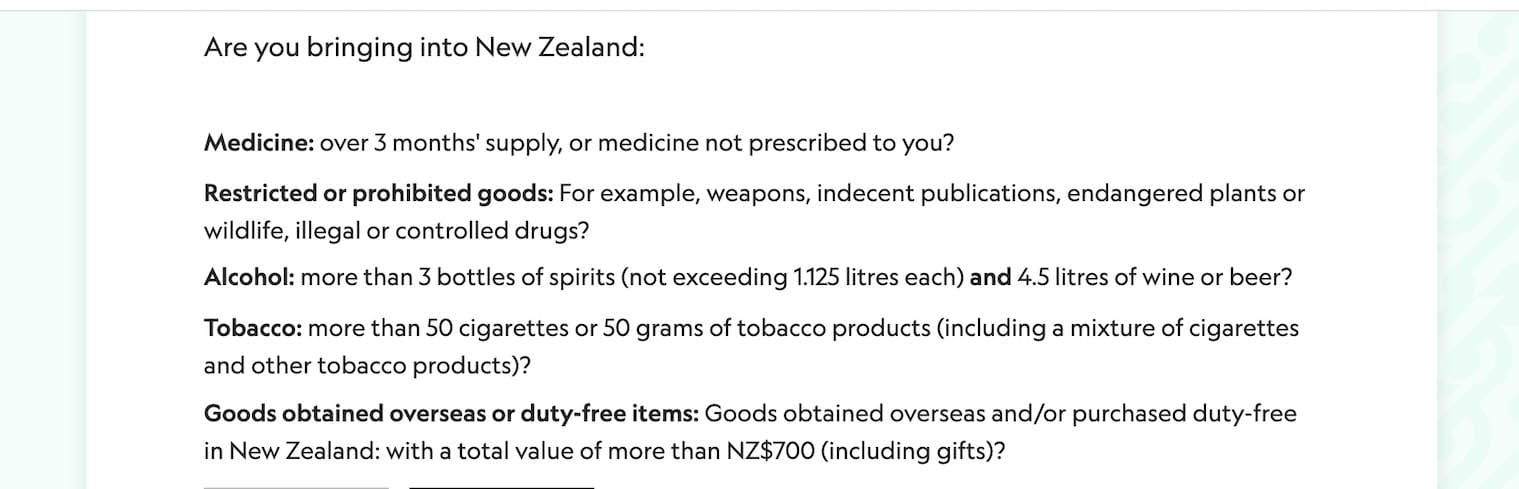
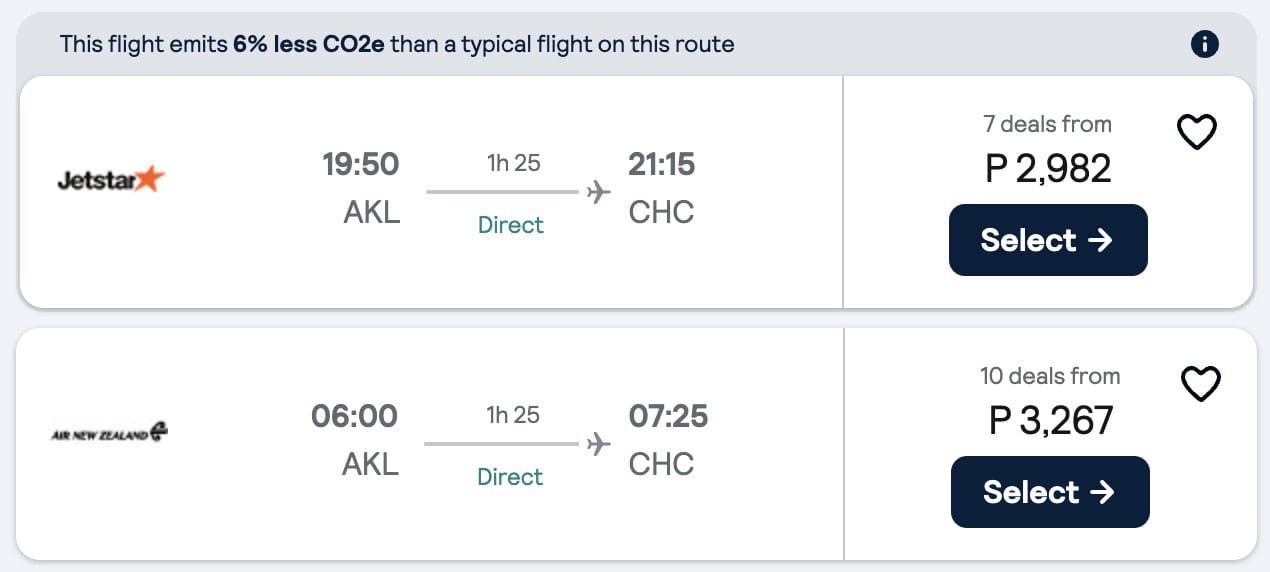
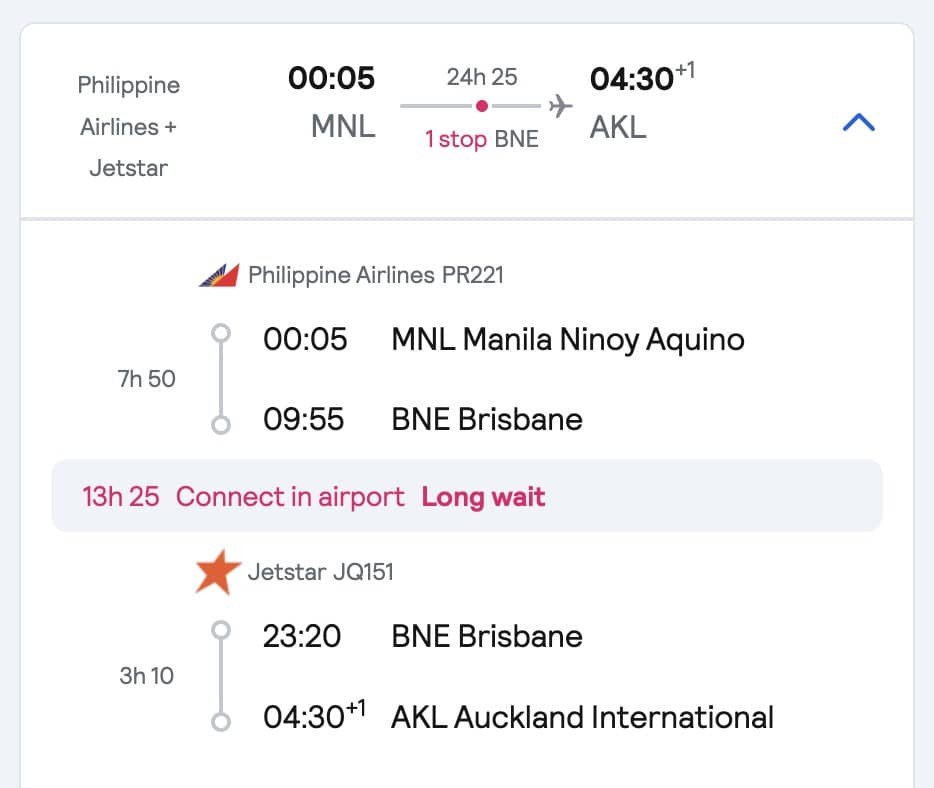
- Go through the airport arrival process. First things first. Before our flight, we made sure to accomplish the New Zealand Traveller Declaration Form, and declared any of the risk items we were bringing in. We flew in from Melbourne with JetStar, and landed at Auckland International Airport at around 5:30 AM. And to be honest, we only had chocolates with us so we breezed through the Customs. The Immigration Officer at the counter was also the friendliest Immigration Officer I had encountered anywhere in the world. So that was a pretty delightful start of our New Zealand journey.
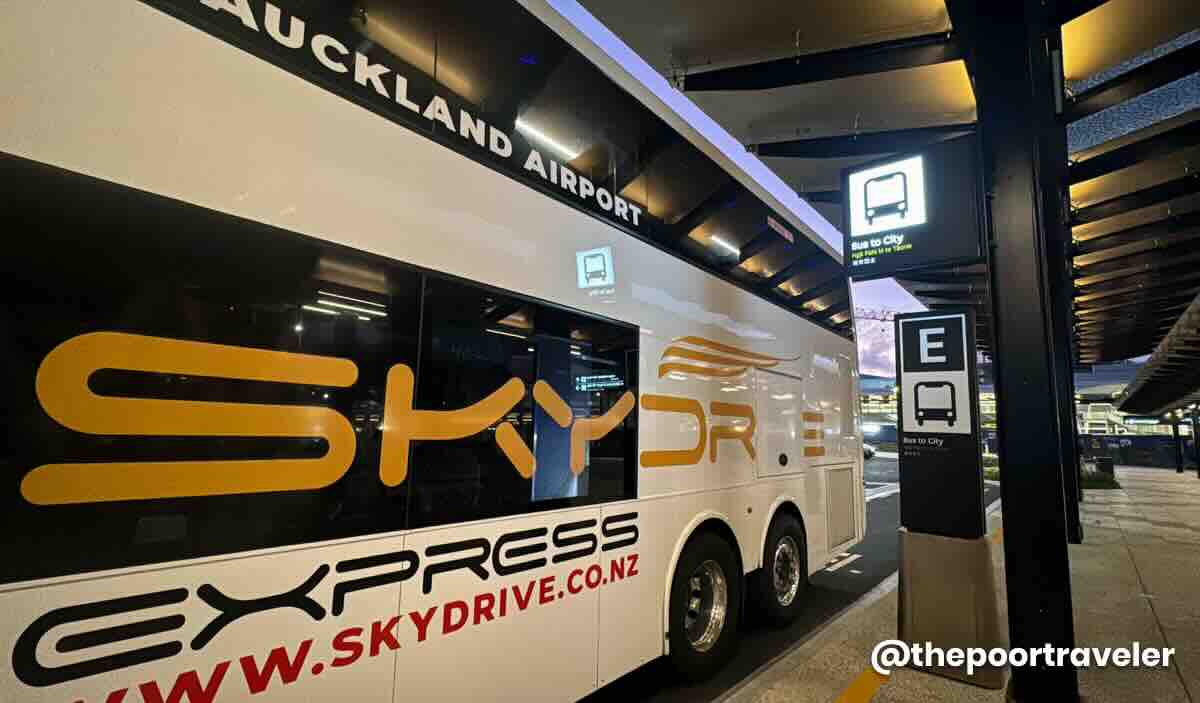
- Travel to the city center. Upon emerging at the Arrival Hall, I withdrew some backup cash, although we didn’t get to use a lot of it because New Zealand is mostly cashless. Just outside the terminal, we looked for Bus Stop E, where we would catch the Sky Drive Airport Bus, which would take us straight to the city center. We struggled to find it at first, but know that when you get out of the terminal building, it should be to your left. According to Google Maps, the Sky Drive bus takes 25-45 minutes to reach downtown, depending on traffic conditions. But because it was pretty early, our bus made in just 20 minutes. The fare is NZD 20 (P678).


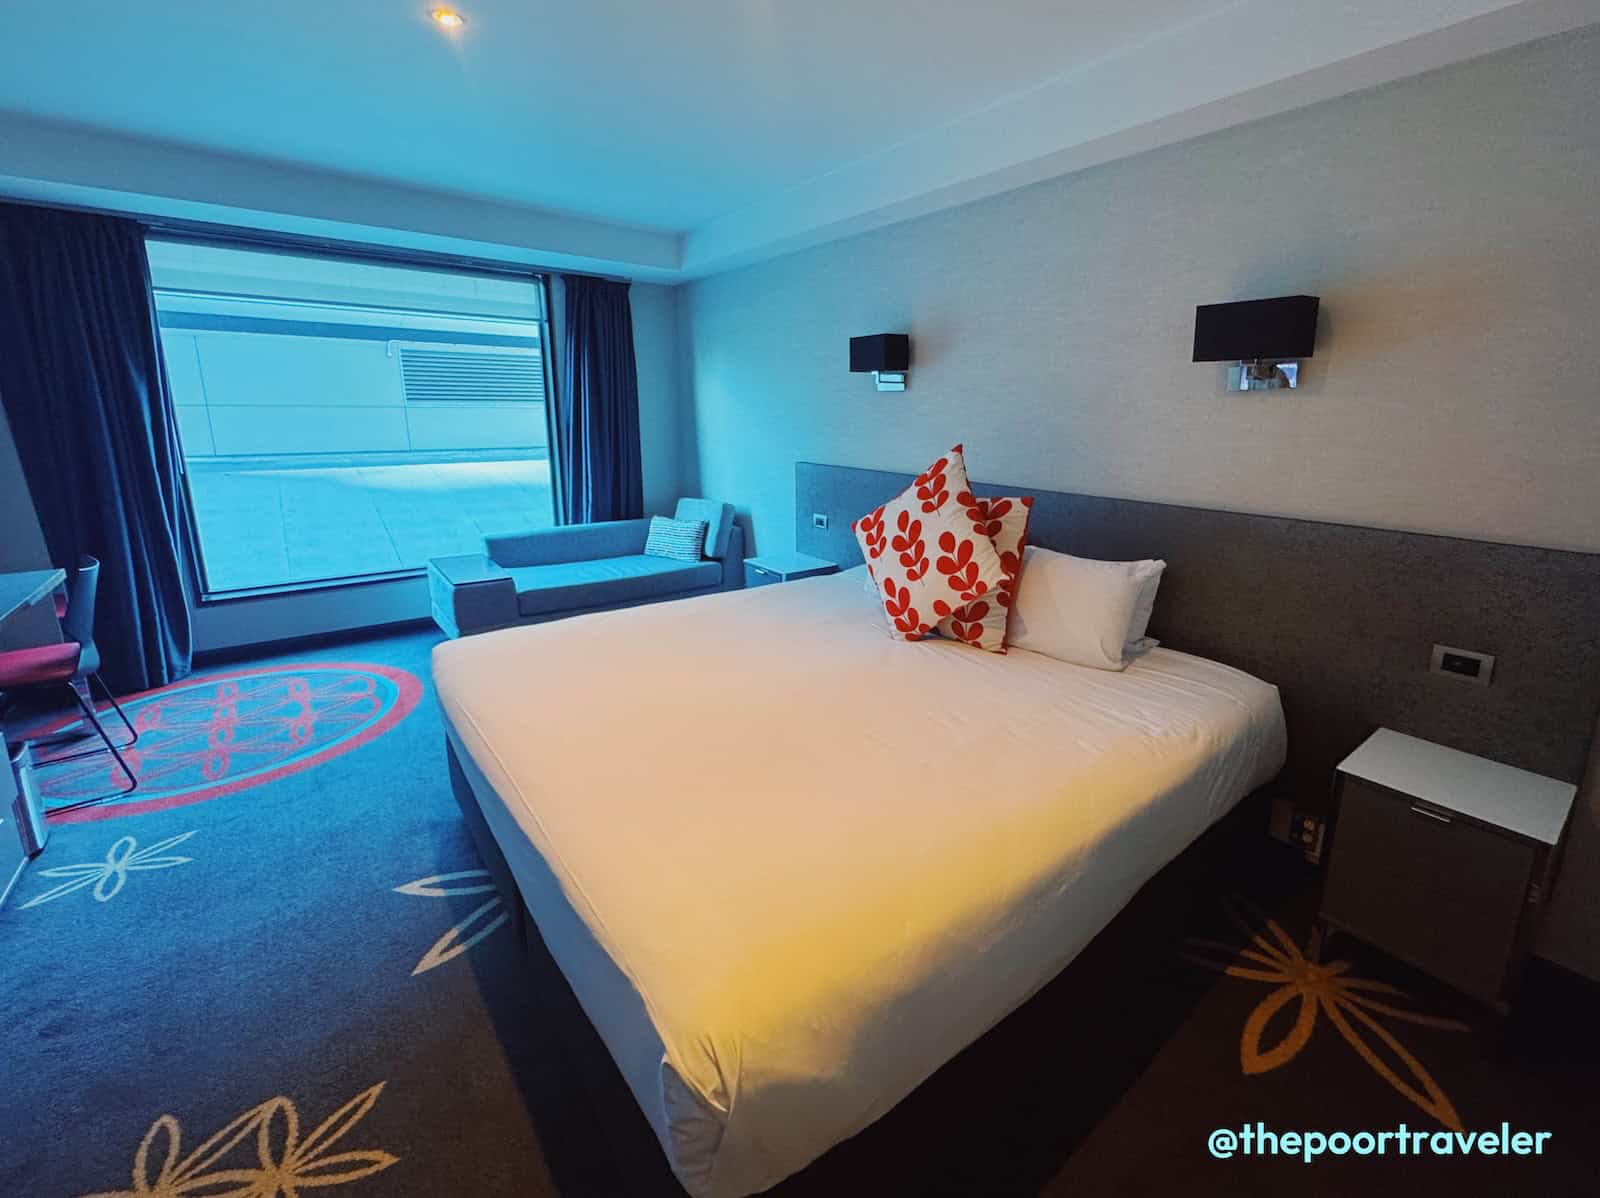
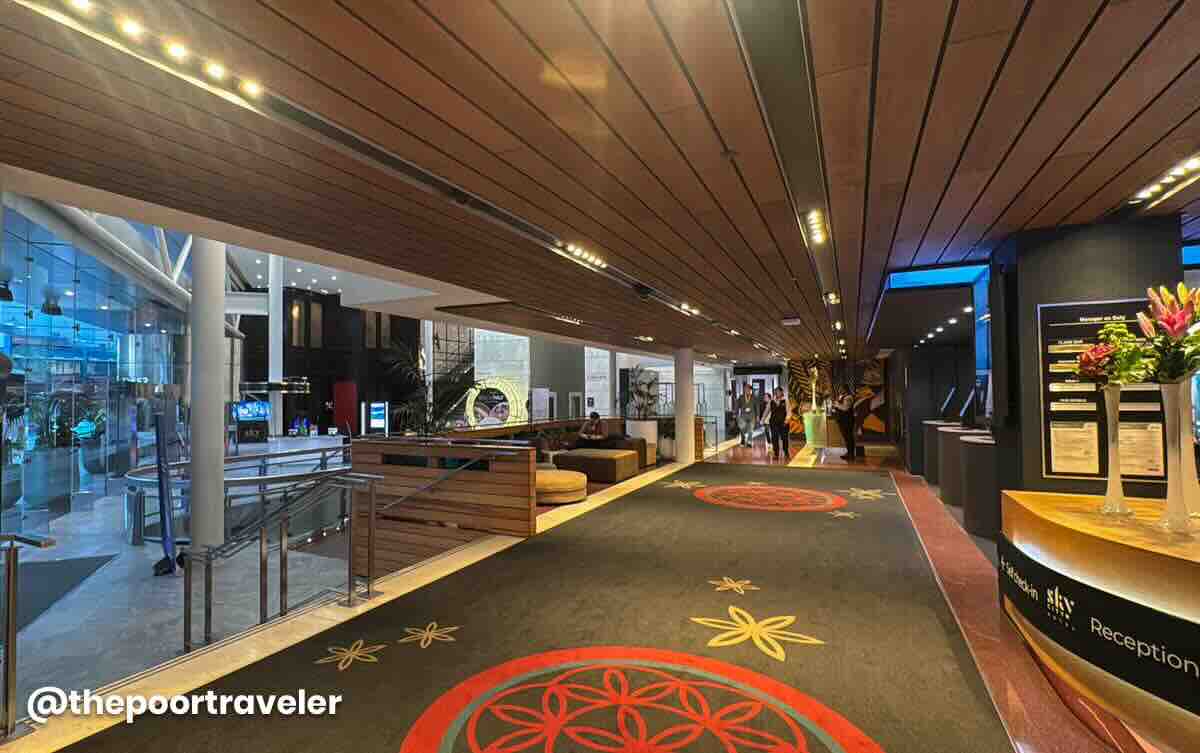
- Check in at our hotel. The hotel we booked was SkyCity Hotel Auckland, just next to the iconic Sky Tower. When we reserved our room, the rate was NZD 170 (USD 102, PHP 5763) per night. Because we arrived hours ahead of the standard check-in time, our room was not ready yet, but they kept our bags while we spend the next hours exploring the city.
Auckland Foreshore Heritage Walking Trail
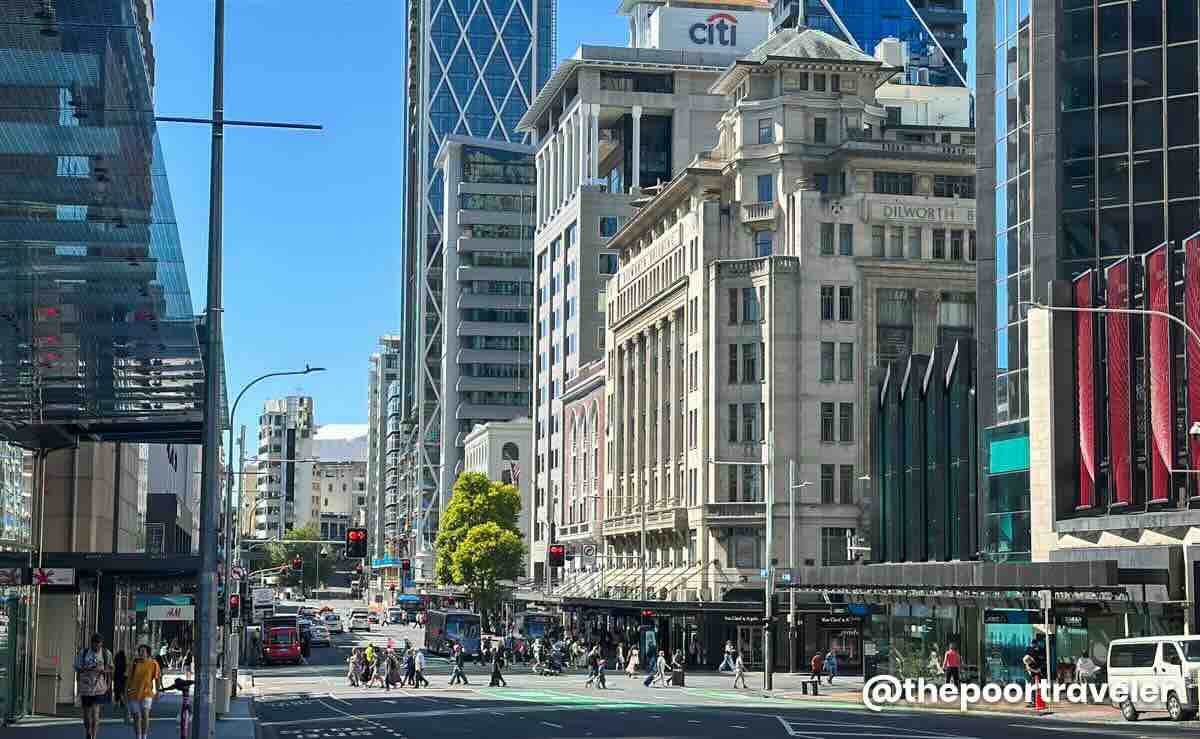
Auckland is New Zealand’s largest city, but it’s not as bustling or as overwhelming as other big cities in other countries. It still retains a pretty laidback atmosphere. For now, we decided to go sightseeing by following a section of Auckland’s foreshore heritage walking trail.
The city’s shoreline has changed a lot after a series of reclamations starting in the 19th century. Today’s seaboard is almost unrecognizable, but you can still trace the original coastline by following this walking trail, punctuated with 25 points of interest from Point Erin in the west all the way to Parnell Baths in the east. Some of these stops include heritage buildings and streets. Don’t worry — these sites are marked with information plaques so you can better appreciate their history and significance. The whole trail takes at least three hours.
Settle In and Recharge
We had a quick lunch before heading back to the hotel to check in. Our room was spacious and clean. We didn’t have a good view, but it was equipped with the usual full-service hotels staples — TV, mini-fridge, heater, air conditioning, working desk, toiletries, and whatnot.
Because we barely had any sleep, we decided to take a nap. Context: We flew in from Melbourne, where we had our week-long wedding trip and toured our families and friends. So yes, this is sort of a honeymoon trip, but with a couple of friends. We’ll have a more proper honeymoon later this year.
With all the wedding preparations and organizing the tours, we were exhausted at this point. So we really need to get some sleep.
By the way, if you also want to book this hotel, you can Check Rates & Availability Here! ✅
- If you book with AGODA, use our promo code AGODATPT for 10% discount.
- If you prefer Klook, please use our promo code THEPOORTRAVELERKLOOK for up to P300 OFF or TPTKLOOK5 for up to P500 OFF. These codes might change in the future, so best to just visit thepoortraveler.net/klook to redeem updated discount codes!
Don’t worry, you don’t need to memorize all these codes and links. We compiled all the NEW ZEALAND TRAVEL ESSENTIALS including a list of all the hotels and hostels we tried in the TPT Masterlist. Just visit and scroll until you see the section about New Zealand. We also have a compilation for other destinations around the world.
Reconnect and Chill
At around 4PM, we got up and prepared to go out. Our original plan was to climb to the observation deck of the Sky Tower, but our Auckland-based friend Jerwin invited us to a rooftop cocktail bar, and of course, we chose shots over sights.
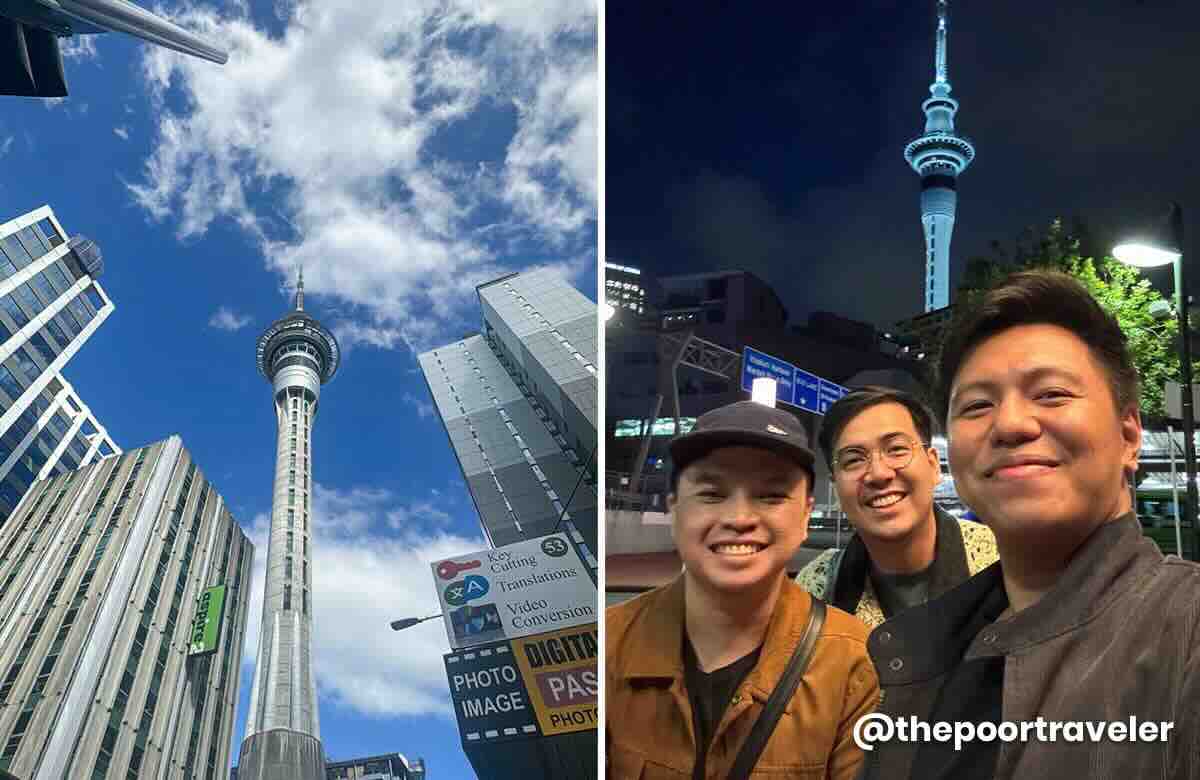
But if you intend to go to the Sky Tower, the entrance fee is NZD 45 if you buy online or NZD 47 for walk-in guests. If you prefer to reserve your ticket via Klook, we found this one.
Sky Tower Auckland
Address: Victoria Street West, Auckland Central, Auckland 1010, New Zealand
Online Ticket: NZD 45 (P1526)
On-site Ticket: NZD 47 (P1594)
After hours of catching up with Jerwin, it was time to meet up with our other friends who will be joining us on this trip across New Zealand: Jax, Ivan, and Krisa. We ended the night with a round of beer at the iconic Shakespeare Hotel, which houses Auckland’s oldest microbrewery pub.
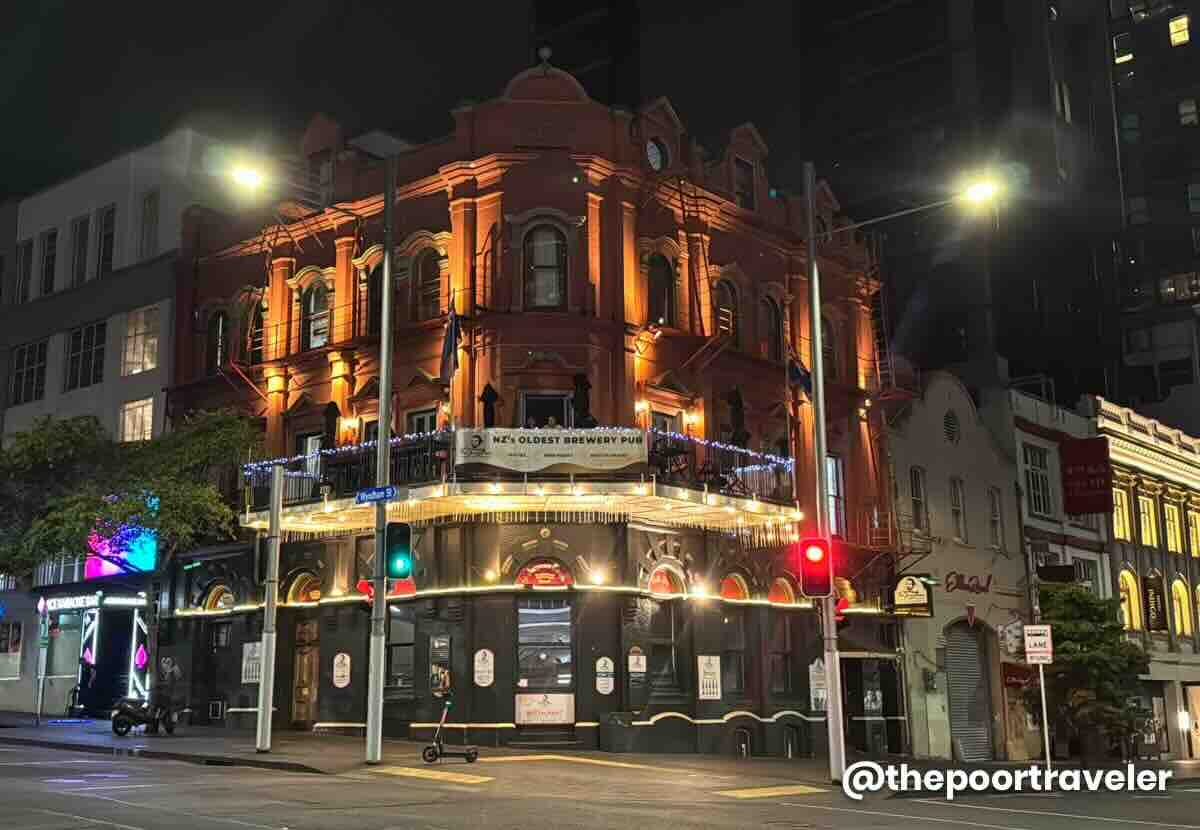
Vins downed a glass of the crisp and clean pilsner nicknamed the Jester, while I, as always, opted with something darker — the Gravedigger, which is a porter beer made from dark malt and had delicious bitter notes of coffee. We then called it a night and headed back to the hotel.
Shakespeare Brewery
Address: Shakespeare Hotel, 61 Albert Street, Auckland Central, Auckland 1010, New Zealand
Shakespeare Beer on Tap: Per Glass, NZD 14.58 (PHP 495)
DAY 2: HOBBITON & REDWOODS
Auckland to Matamata iSite
We started our second day early. Like, really early. That’s because the Hobbiton Movie Set Tour schedule that we got was at 11AM. It was the only slot available when we booked. Hobbiton is two hours from Auckland, and we had yet to secure a car rental, so we were up as early as 6AM just to be on the safe side.
The car we rented was good for five passengers, including the driver and four suitcases, which was perfect because Jax did not bring luggage as he would go back to Auckland after our Hobbiton tour, while the rest of us would head straight to Rotorua.
Europcar Rental
Per Day: NZD 318.87 (PHP 10,816)
Maximum Capacity: Good for 5 pax
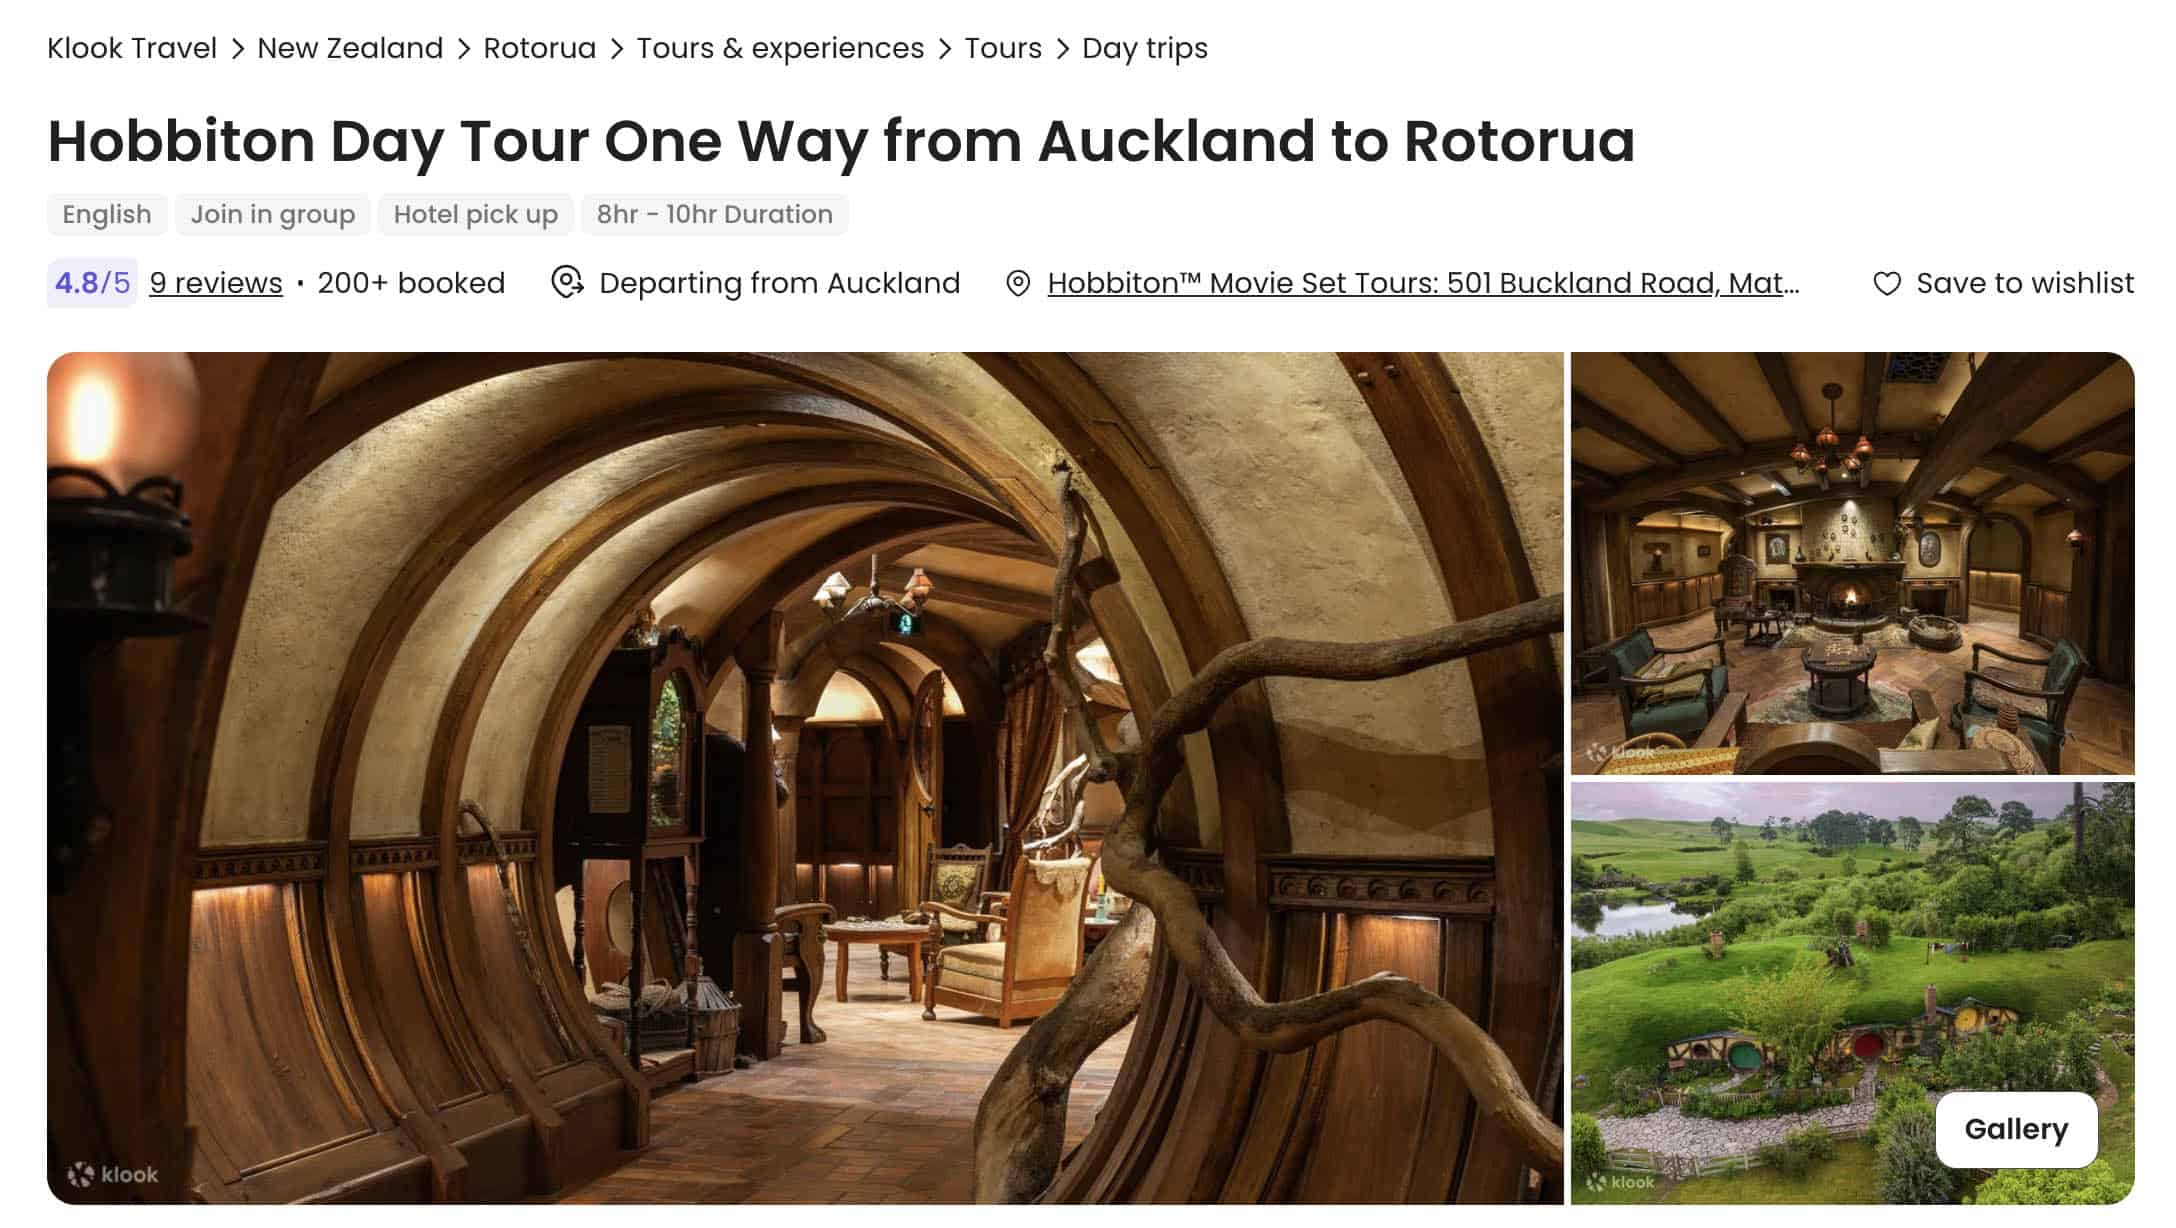
Hobbiton Movie Set Tour
The tour that we booked would be picking up guests at the Matamata iSite. iSite is the term used for official tourist information centers here in New Zealand. Because we arrived early, we decided to grab breakfast from the many food spots along the main road. Jax and Vins shared a pie, while I had meat on skewers.
After a quick photo op with the Hobbiton signage, we boarded the bus to the movie set. On the way there, the TV screen inside the bus showed mini-documentaries about the site. By 11:45 AM, we were at the entrance to the set.
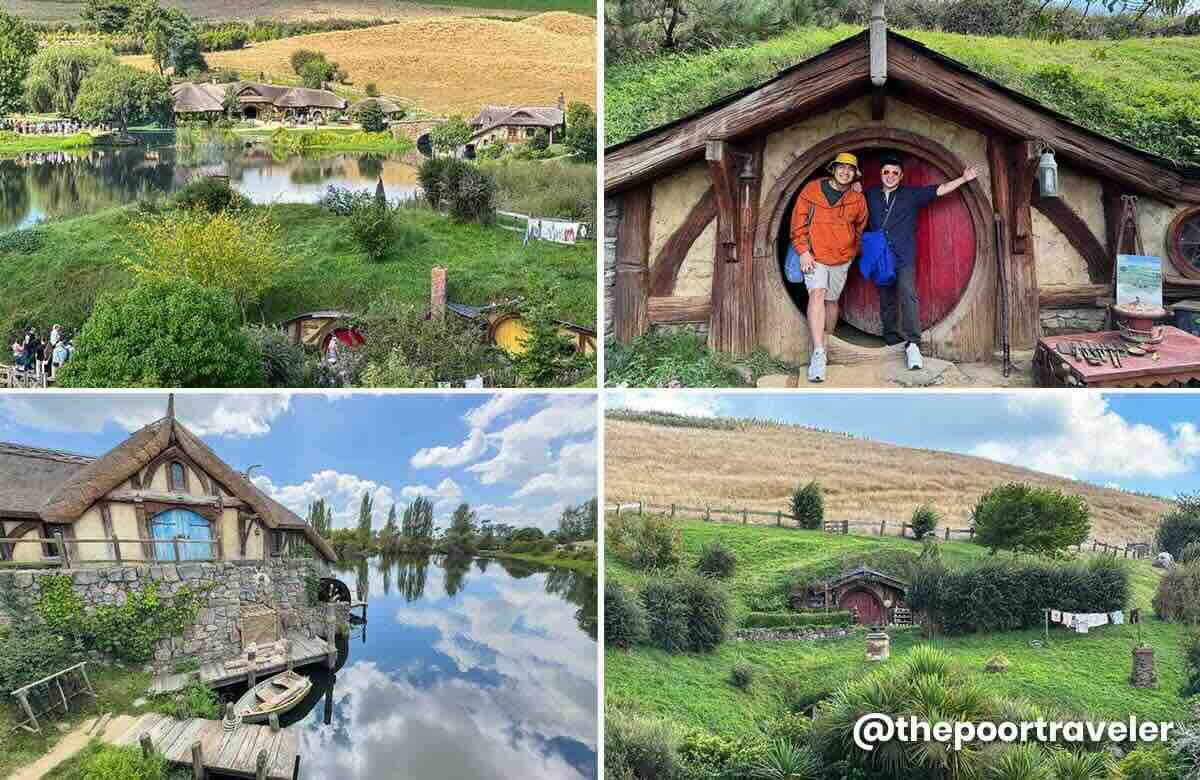
The only way to explore the site is by joining a guided tour, and you must stick to your group all the time. Along the way, the guide would be sharing interesting facts about how the site was chosen and built, and how the films were made. Vins and I had seen both the Lord of the Rings and The Hobbit trilogies multiple times, so we were beyond thrilled to walk on the same ground as Bilbo, Frodo, and Sam.
The site was used for exterior shots only. At the time of filming, all interior scenes were shot in a studio elsewhere. Today, however, there are two hobbit houses that visitors can enter and explore. Think of it as a mini-museum. But these were not used in the movies.
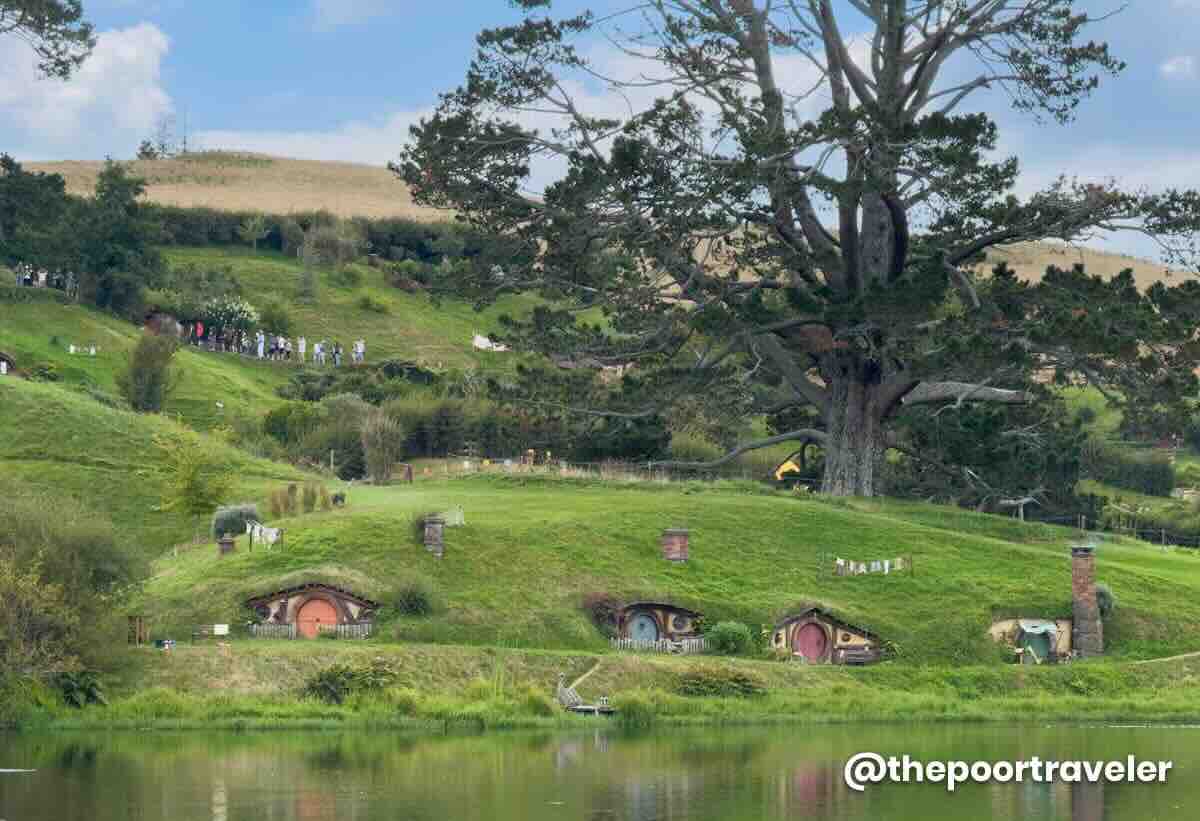
One of the most fascinating bit was that the incredibly cinematic giant oak tree above was completely fake. The trunk and branches were made of fiberglass while the leaves silk. There was also a snack stop in the middle of the tour, where we enjoyed a complimentary drink. This can be a stout, amber ale, apple cider or ginger beer.
After the tour, the bus took us to the Shire’s Rest Café, which was the more usual jump-off point to Hobbiton. They also had a souvenir shop on site.
We then boarded another bus back to Matamata iSite. The tour itself lasted two hours. Including the bus transfers from Matamata iSite and the stop at Shire’s Rest, allow around four hours in your itinerary. At least six hours, if including transfers to and from Auckland or Rotorua.
If you want to secure your slot ahead of time, you can check out packages from Klook! You can choose if you want ticket only or with transfers from Auckland or Rotorua. You can also add a Waitomo Glow Worm Caves stop.
Address: 501 Buckland Road, Hinuera, Matamata 3472, New Zealand
Tour Rate: NZD 120 (PHP 4070)
Rotorua Hostel Check-In
After parting ways with Jax, we then drove to our hostel in Rotorua called Rock Solid Backpackers. It was a no-frills hostel, but we had in the room a table, mini-fridge, and an ensuite toilet and bath. It was a fan room, which wasn’t a problem since New Zealand’s climate is generally relatively mild, even in the summer.
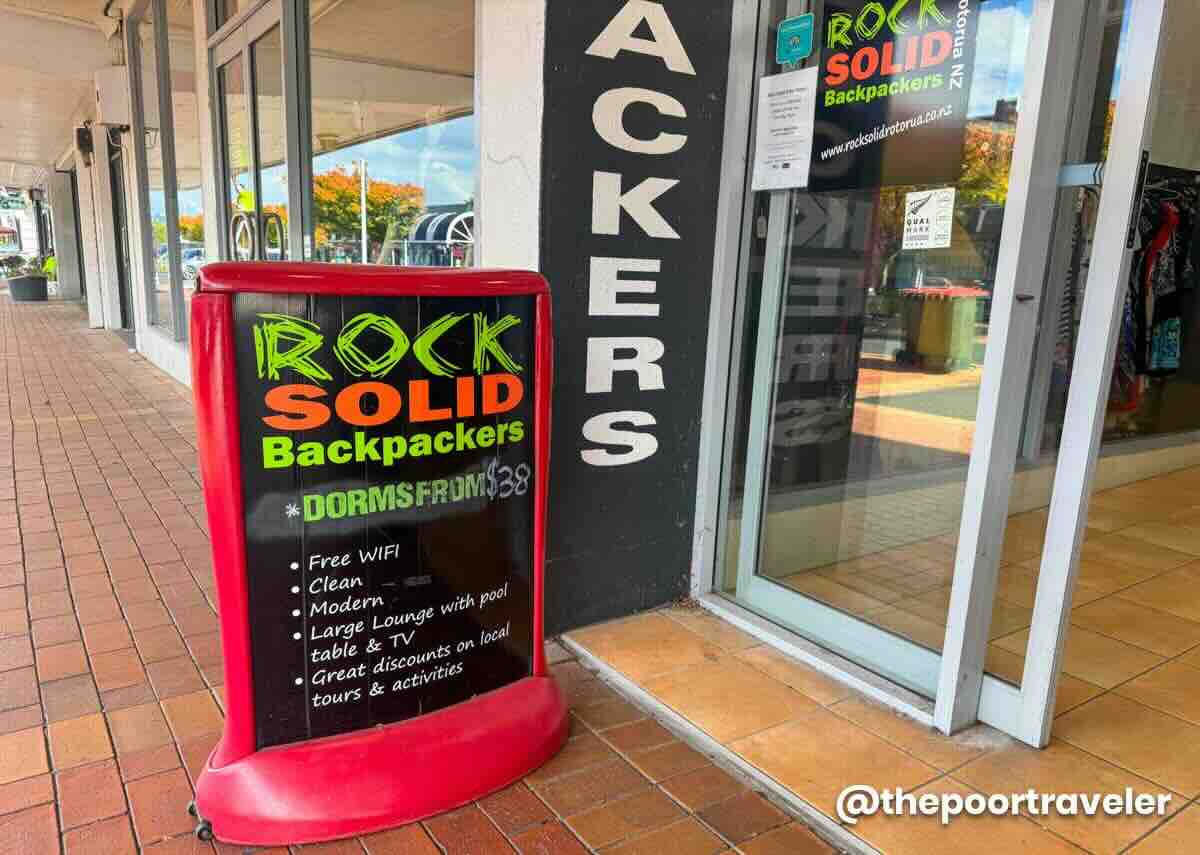
We paid PHP 5466 per night, and we’re staying for two nights. Yes, for a fan room. That’s how expensive rooms are here. For the updated prices, you can Check Rates & Availability Here! ✅
Redwoods Treewalk
After dropping our bags and freshening up a bit, it was time to head to the Whakarewarewa Forest for an elevated hike, literally. This is the Redwoods Treewalk, a collection of 28 suspension bridges spanning 700 meters, making it the longest living tree walk in the world. You must follow the path and you only get one round. You can enjoy it in the daytime or at night, each requiring a separate ticket at NZD 40, unless you avail of the combo ticket which costs NZD 60, giving you a 20-dollar discount.
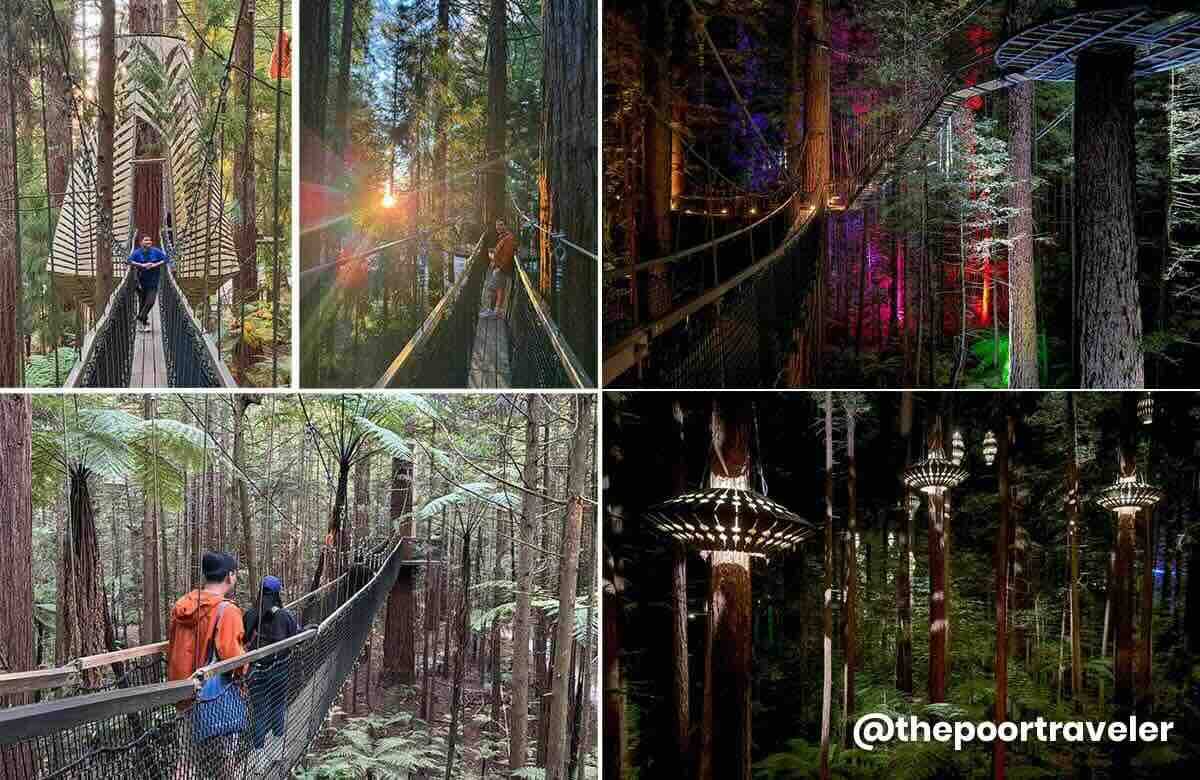
We purchased the combo ticket. Under the daylight and just before sunset, it had this enchanting atmosphere. It was like communing with nature with a bit of excitement. But at night, when the illuminations were on, it gave off a more otherworldly feel.
And oh, don’t miss the ice cream sold on site for NZD 12.15. It was soooo good!
You can book your Redwoods Treewalk experience in advance on Klook! This package includes Altitude, Treewalk Day Tour, and Treewalk Night Tour with Fast Pass entry.
✅ BOOK REDWOODS COMBO TOUR HERE!
Address: 1 Long Mile Road, Tītokorangi Drive access off Tarawera Road, Whakarewarewa, Rotorua 3010, New Zealand
Entrance Fee: Day or Night Ticket, NZD 40 (PHP 1357); Combo Ticket, NZD 60 (PHP 2035)
Redwoods Ice Cream: NZD 12.15 (PHP 412)
DAY 3: ROTORUA TOUR
Eat Streat
For the third day, our original plan was to be amazed by the Waitomo Glowworm Caves. But the night before, we agreed to ditch this plan because Krisa, our designated captain of the car, was not comfortable driving for two and a half hours to the caves. We also took this opportunity to finally get some decent sleep. Although this was only our third day in New Zealand, if you count our stay in Australia, this was already our Day 10 and prior to this, we had never gotten any sleep longer than four hours. And we really took advantage of it.
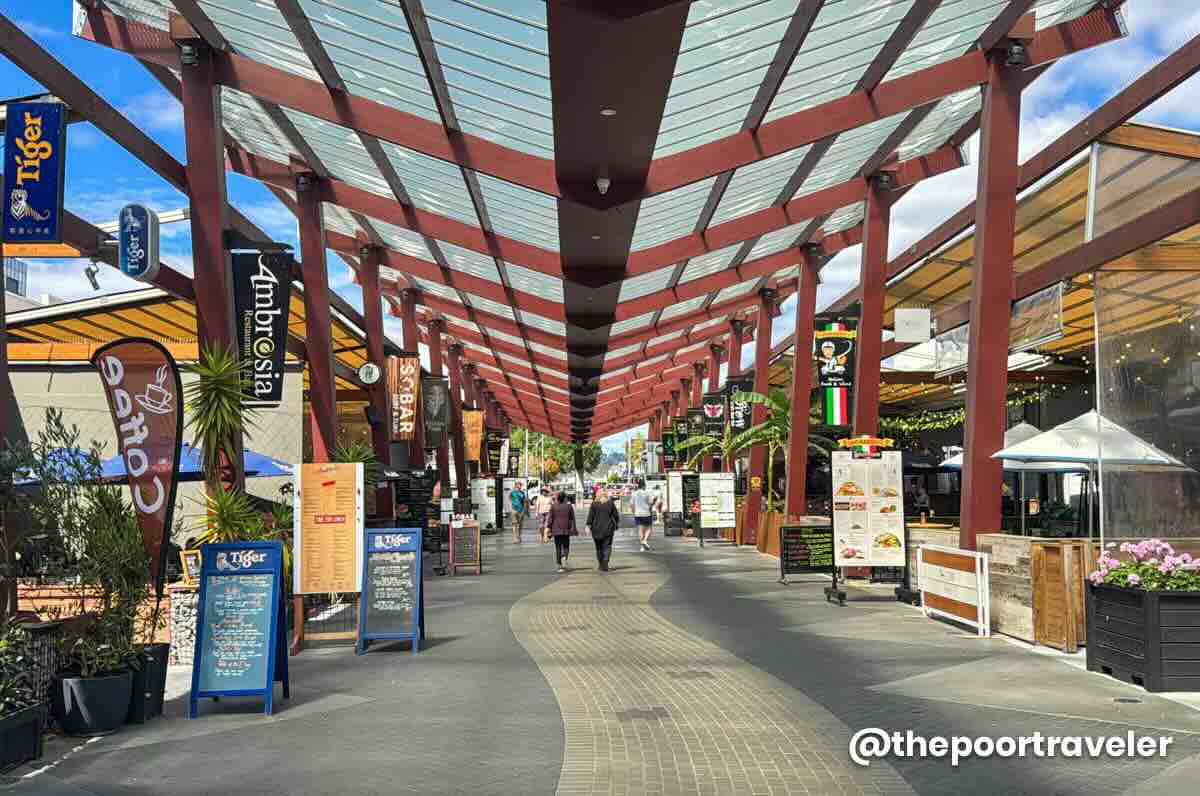
The gang met up for lunch at Eat Streat, a collection of the city’s most popular restaurants. Vins and I shared cuts of lamb chops (NZD 34) and BBQ bourbon pork ribs (NZD 32). New Zealand is famous for its big population of sheep, so lamb was a no-brainer for us. We also ordered pork, just in case the lamb was too gamey for our own taste.
Address: Tutanekai Street, Rotorua 3010, New Zealand
Wai-o-Tapu Geothermal Wonderland
Then, we drove to Wai-o-Tapu Geothermal Wonderland, one of New Zealand’s most colorful and surreal natural attractions. Wai-O-Tapu, which means “Sacred Waters” in Māori, is a volcanic park famous for its bubbling mud pools, steaming craters, and the iconic Champagne Pool. Next to it is the Artist’s Palette, a rainbow-colored terrace that looks like someone spilled watercolors everywhere.
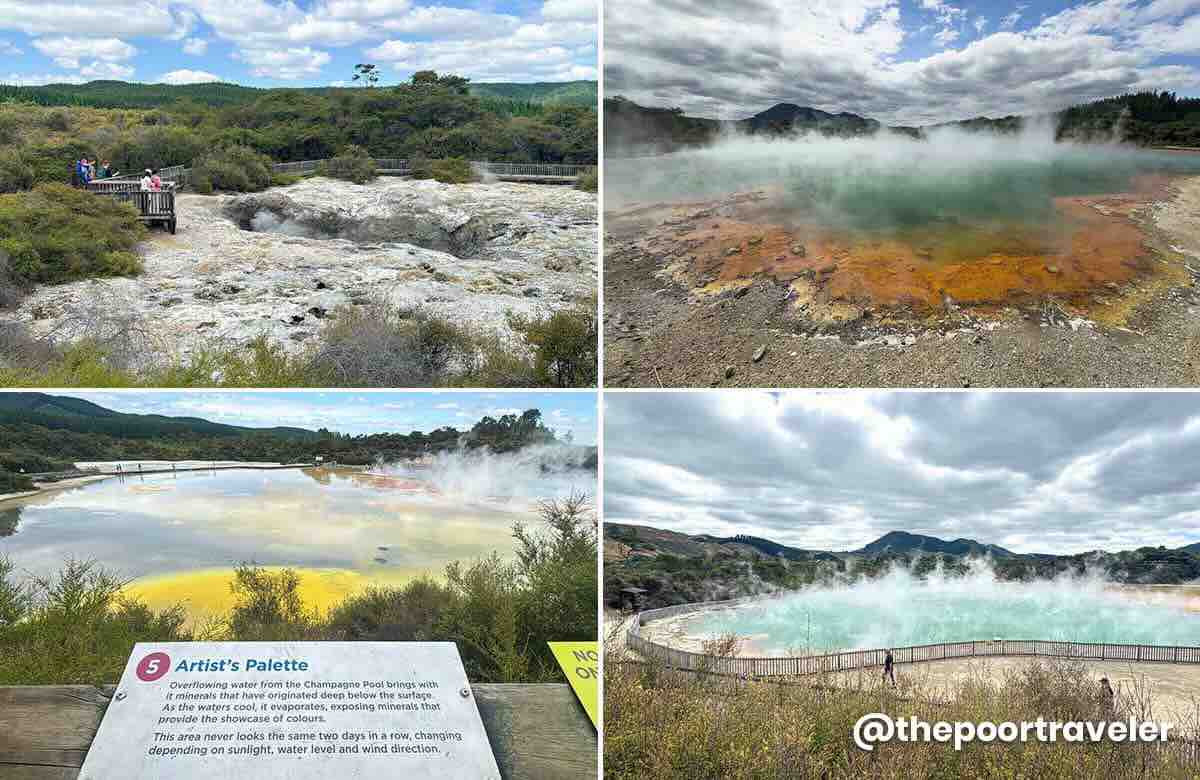
It’s not just pretty, though — it smells like sulfur (think rotten eggs), so come prepared with a strong nose or a sense of humor.
Address: 201 Waiotapu Loop Road, Rotorua 3073, New Zealand
Entrance Fee: NZD 45 (PHP 1526)
Rotorua Lakefront Boardwalk
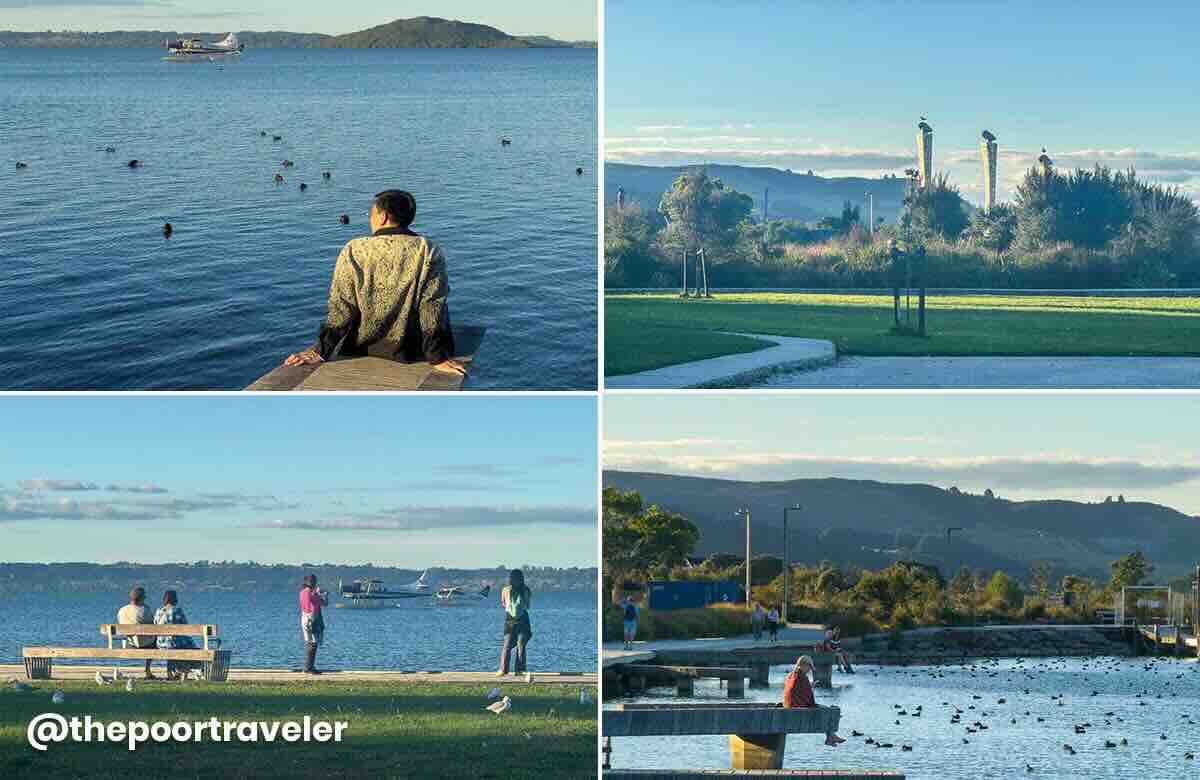
After taking care of something at the Rotorua Airport, we then drove to Rotorua Lakefront Boardwalk on the coast of Lake Rotorua. We spent over an hour here, just relaxing and absorbing the surroundings, before returning to Eat Streat for dinner.
Address: Lakefront Drive, Ohinemutu, Rotorua 3010, New Zealand
Dinnertime
We chose to dine at Atticus Finch this time around. But the real highlight here was the ice cream at Lady Janes. Each of us had double scoop, worth NZD 10.80. The fig and manuka honey flavor was incredible!
Atticus Finch
Address: 3010/1106 Eat Streat, Tutanekai Street, Rotorua 3010, New ZealandLady Janes
Address: 1092 Eat Streat, Tutanekai Street, Rotorua 3010, New Zealand
Price: Double Scoop, NZD 10.80 (PHP 366)
DAY 4: ROTORUA TO CHRISTCHURCH
Christchurch Airport to City Center
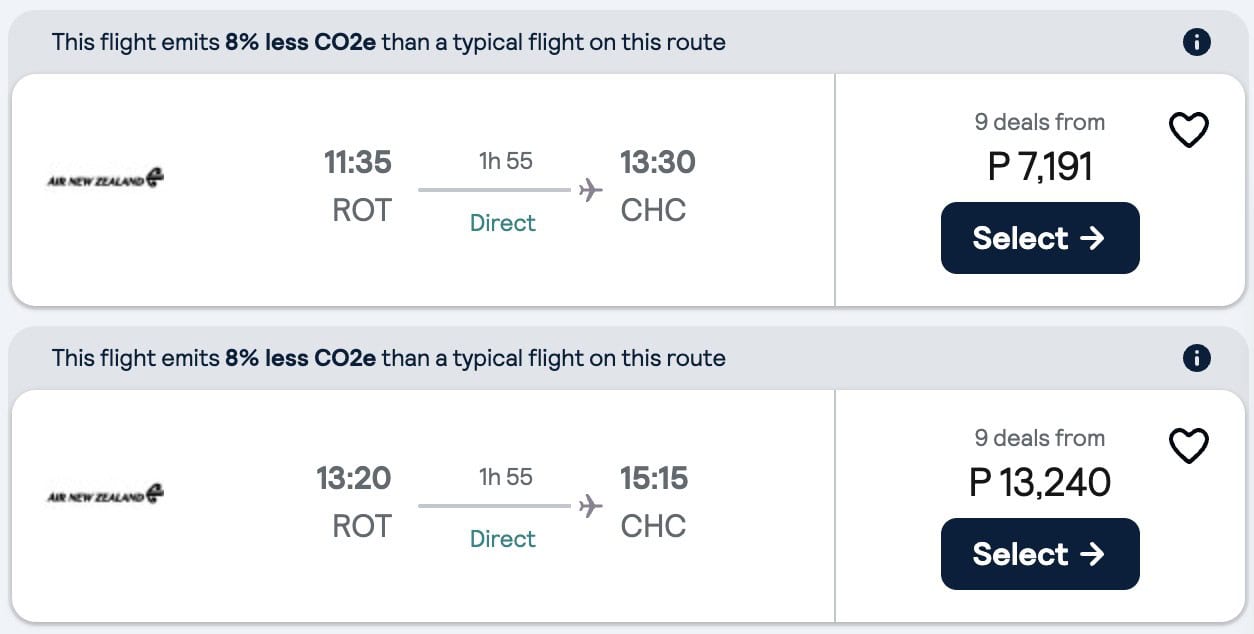
Although Rotorua has its own airport, flights to Christchurch from here are significantly pricier than from Auckland, so we headed back to the big city.
We stopped at a gas station, returned the rental car at Europcar international site, and then walked 1.2 km to the domestic terminal. We grabbed lunch, and then flew to Christchurch.
We arrived in New Zealand’s Garden City at around 5:30 PM. Just outside the airport, we boarded the bus (Bus #8 or #29) to the city center which set us back NZD 4 (PHP 136) per person.
Christchurch Guesthouse Check-In
Here in Christchurch, we’d be spending two nights at Haka House, a 19th century building transformed into a guesthouse. It’s newly renovated so it felt more like a boutique hotel than a hostel. We shelled out PHP 5895 per night for a private room with ensuite toilet and bath. They had no elevator though, so it can be challenging if you have heavy luggage.
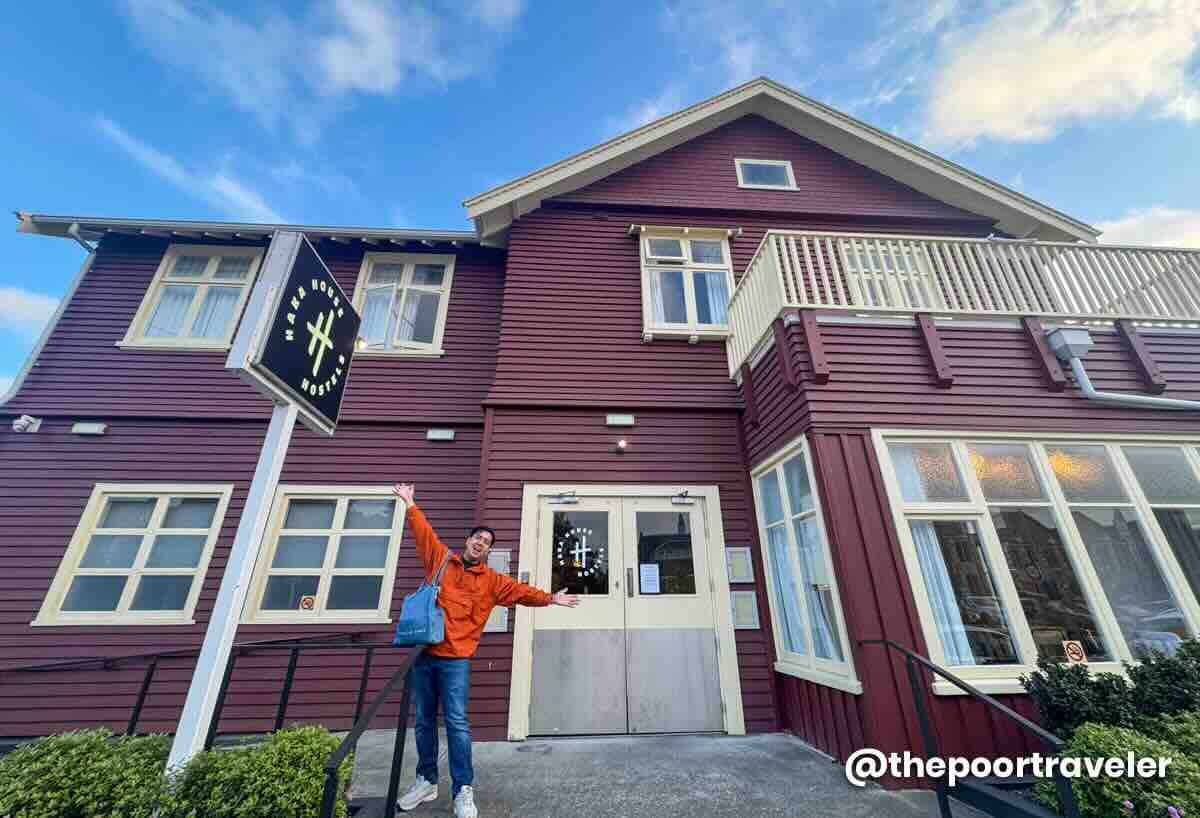
If you want a hotel that is close to most points of interest including the Botanical Garden and Riverside Market, this is a viable option. You can Check Rates & Availability Here! ✅
Riverside Market
We basically just dropped off our bags and immediately went out for dinner at Riverside Market, which is a fantastic, diverse food hall. Category is international cuisine. Vins had Thai, while I had Malaysian.
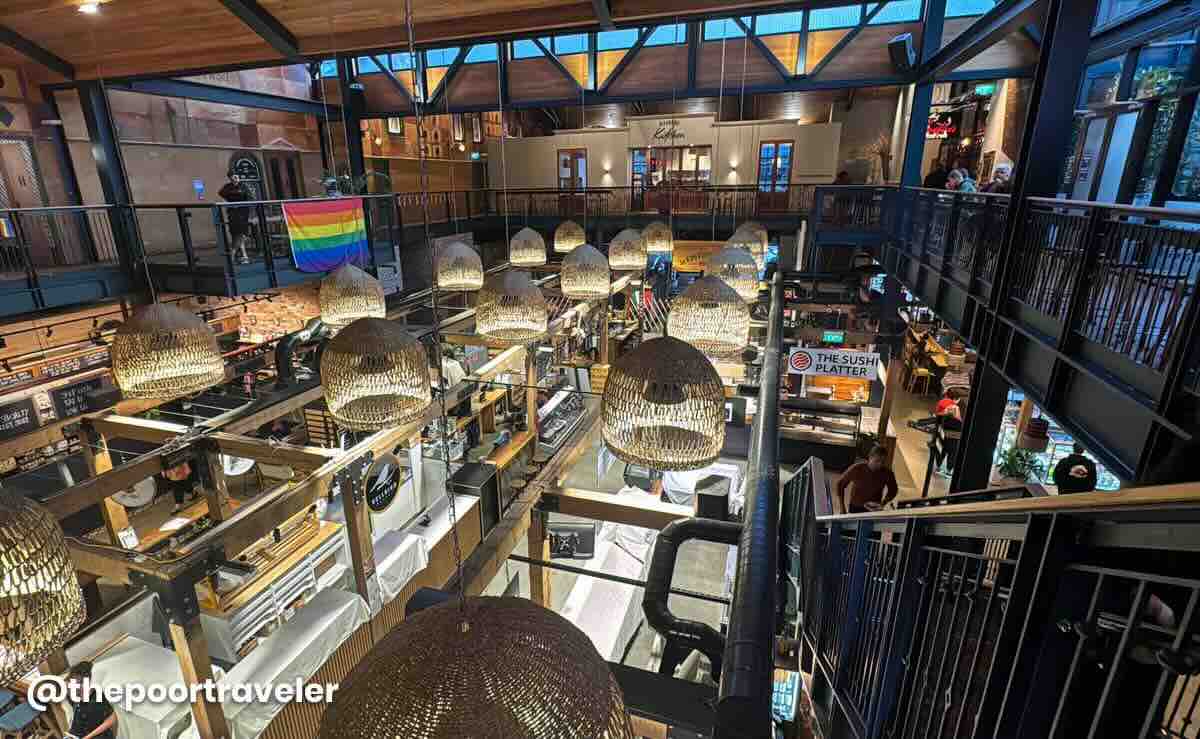
We also had Ben and Jerry Ice Cream here to remind ourselves of the taste of non-New Zealand ice cream, but feel free to skip it since you can find it everywhere.
At this point we had only been in Christchurch for a few hours but we were already liking the vibe. Even at night, we could tell that it was full of charm and character.
Address: 96 Oxford Terrace, Christchurch Central City, Christchurch 8011, New Zealand
DAY 5: CHRISTCHURCH TOUR
Christchurch Walking Tour
Our fifth day was all about Christchurch. At 10AM, we were already at the Christchurch Arts Centre, the starting point of the city walking tour. Our guide was Craig, a local and a prolific traveler himself, and for the next three hours, he showed us around his hometown.

Yes, three hours of walking, hopping from one notable site to another, appreciating heritage buildings, and getting inspired by how the city built itself up after the catastrophic 2011 earthquake.
Needless to say, we were exhausted by the end of it. Good thing, the tour ended at the Canterbury Earthquake National Memorial, which was just a block away from the Riverside Market, where we had lunch. This time, Vins went Mexican and I chose this Indian lunch platter from Dosa Kitchen with two types of curries, rice and naan bread for only NZD 18 (P612).
Christchurch Walking Tour Fee: NZD 25 (PHP 848) per person
Christchurch Gondola
After the walking tour, we really wanted to just chill and take a break from all that galloping, so we set our sights on the Christchurch Gondola. You can take the bus for NZD 4 (or NZD 2 if you have their local card), but since we were a group of four, hailing an Uber wasn’t that bad, which cost us NZD 26 or NZD 6.5 per person.
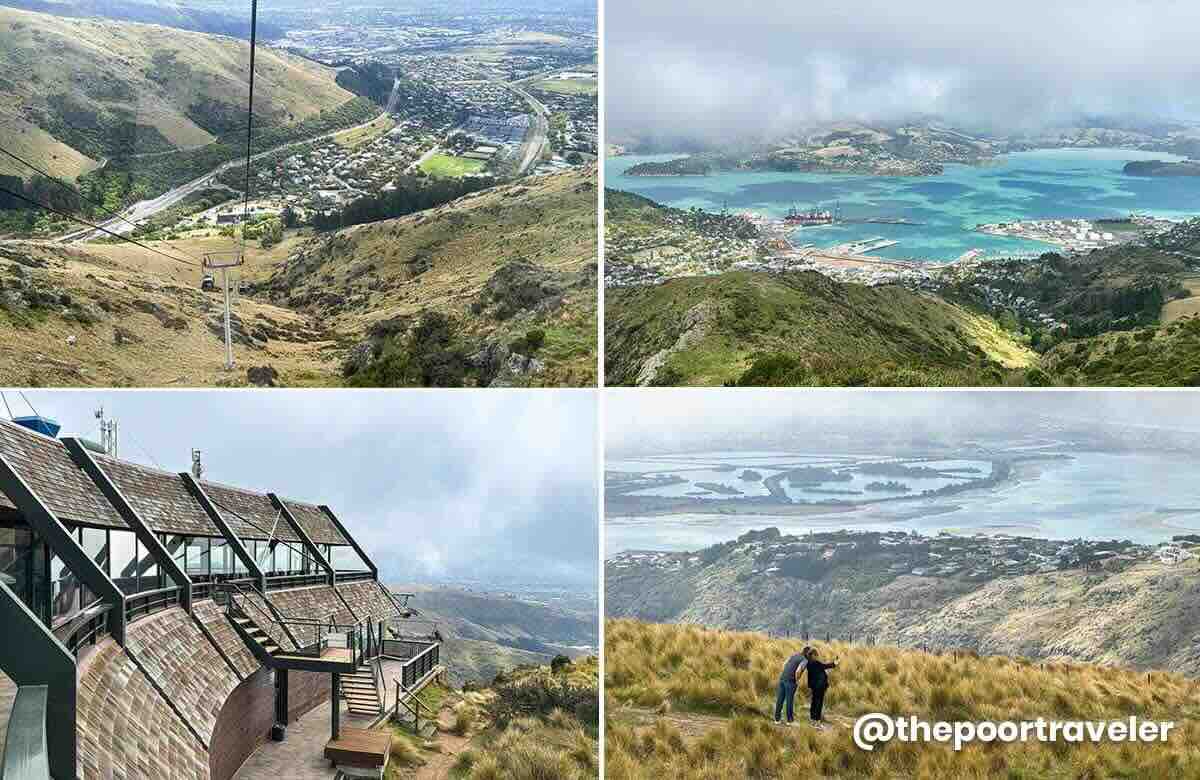
The Christchurch Gondola’s admission ticket is NZD 42 per person. We hopped into a cable car and enjoyed the 10-minute, 1000-meter journey to the top of Mount Cavendish. At 445 meters above sea level, the top station offers breathtaking panoramic views of the city, the Canterbury Plains, the Southern Alps and even the Pacific Ocean.
The building is also home to Red Rock Café. We all decided to get coffee to keep our spirits up. I got myself a flat white for NZD 6.5. And since we had not had dessert yet, Vins and I shared a cookie for NZD 6.
After a couple of hours, we rode the cable car down to the base and boarded Bus #8 back to the city center.
Address: 10 Bridle Path Road, Heathcote Valley, Christchurch 8022, New Zealand
Opening Hours: Daily, 10:00 AM – 4:00 PM
Entrance Fee: NZD 42 (PHP 1427)
Botanic Gardens
This time, we were to explore the Botanic Gardens. You can join a guided tour onboard a caterpillar shuttle. But we decided to explore it on foot and on our own instead.
Address: Rolleston Avenue, Christchurch Central City, Christchurch 8013, New Zealand
Opening Hours: Daily, 7:00 AM – 6:30 PM
New Regent Street
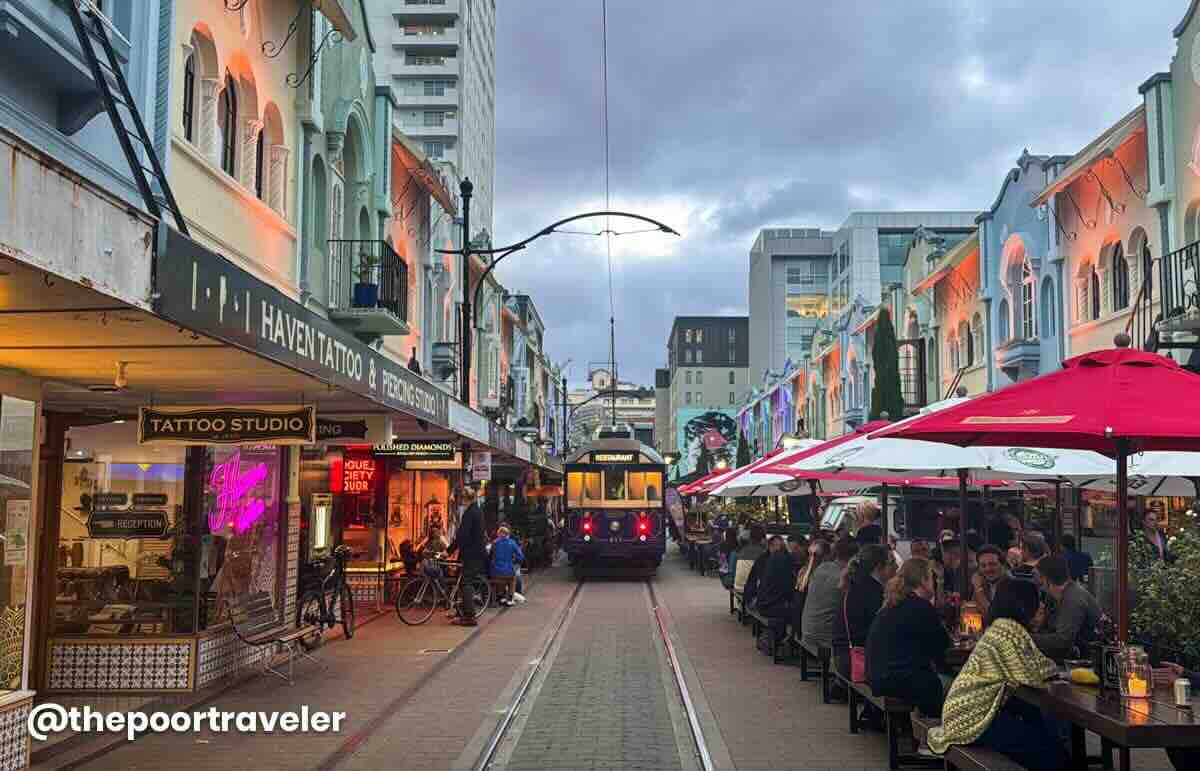
For dinner, we opted to return to New Regent Street. We passed through the area during the walking tour and we wanted to burn more time here. We also had another dose of ice cream, this time from Rollickin’, a local favorite. I had a scoop of Biscoff the Charts and Hokey Tokey Pokey.
Rollickin’
Address: 35 New Regent Street, Christchurch Central City, Christchurch 8011, New Zealand
Gelato Price: Single Scoop, NZD 7.20 (PHP 244); Double Scoop, NZD 10.50 (PHP 356)
DAY 6: LAKE TEKAPO & MOUNT COOK
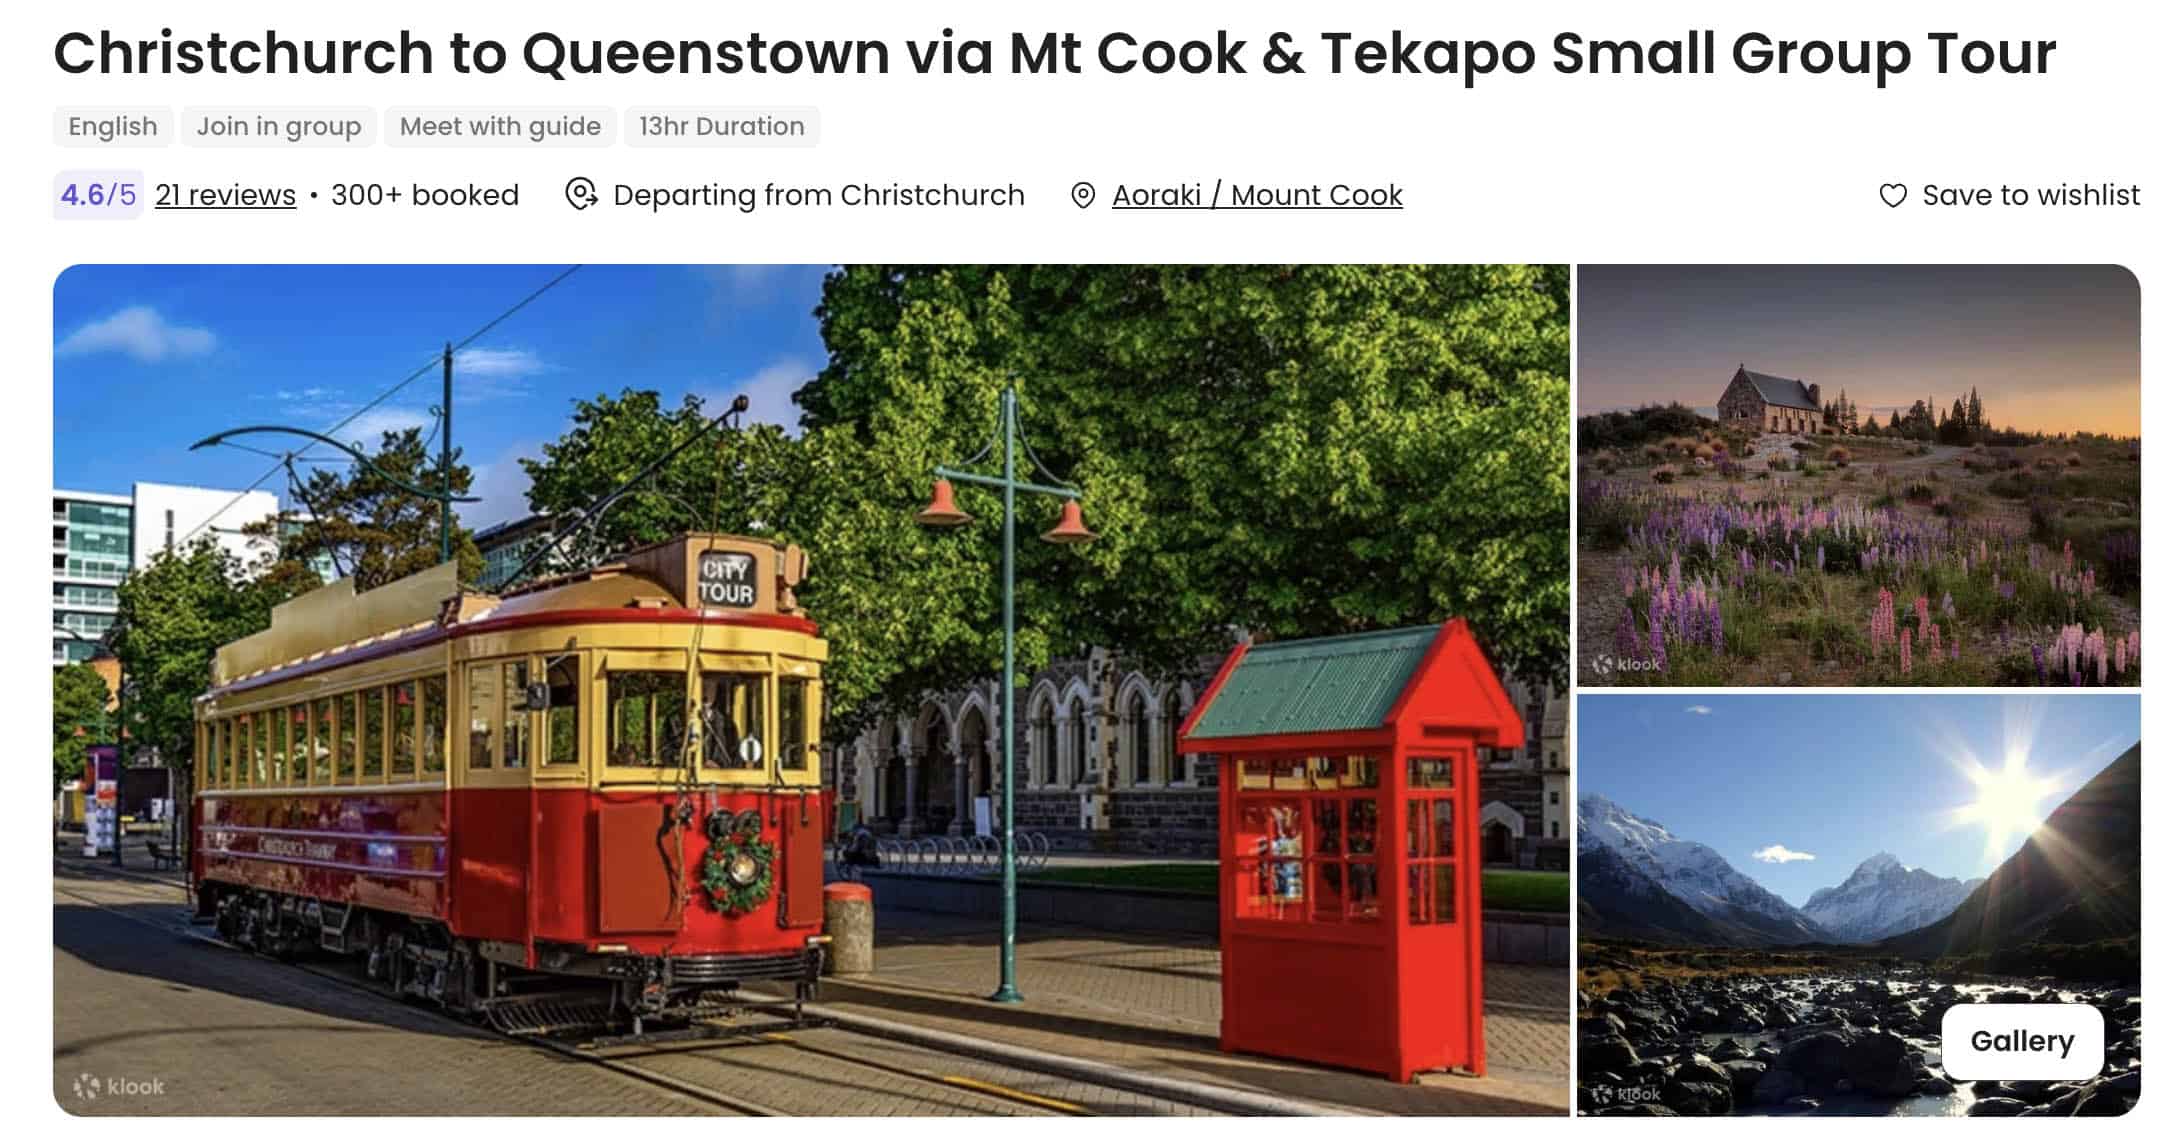
Christchurch-Queenstown One-Way Tour
It’s time to head to Queenstown. But instead of flying or taking a direct bus, we opted to join a one-way tour instead.
When you book a one-way tour, the shuttle will pick you up in one city and the tour will end in another, making stops along the way. In our case, we were picked up in Christchurch at 6:30 AM, toured the Lake Tekapo and Mount Cook areas, and then dropped us off in Queenstown. It’s like tour and transfer in one. The vehicle also had a trailer for luggage. Packed lunch is also included. The journey usually takes 13-14 hours.
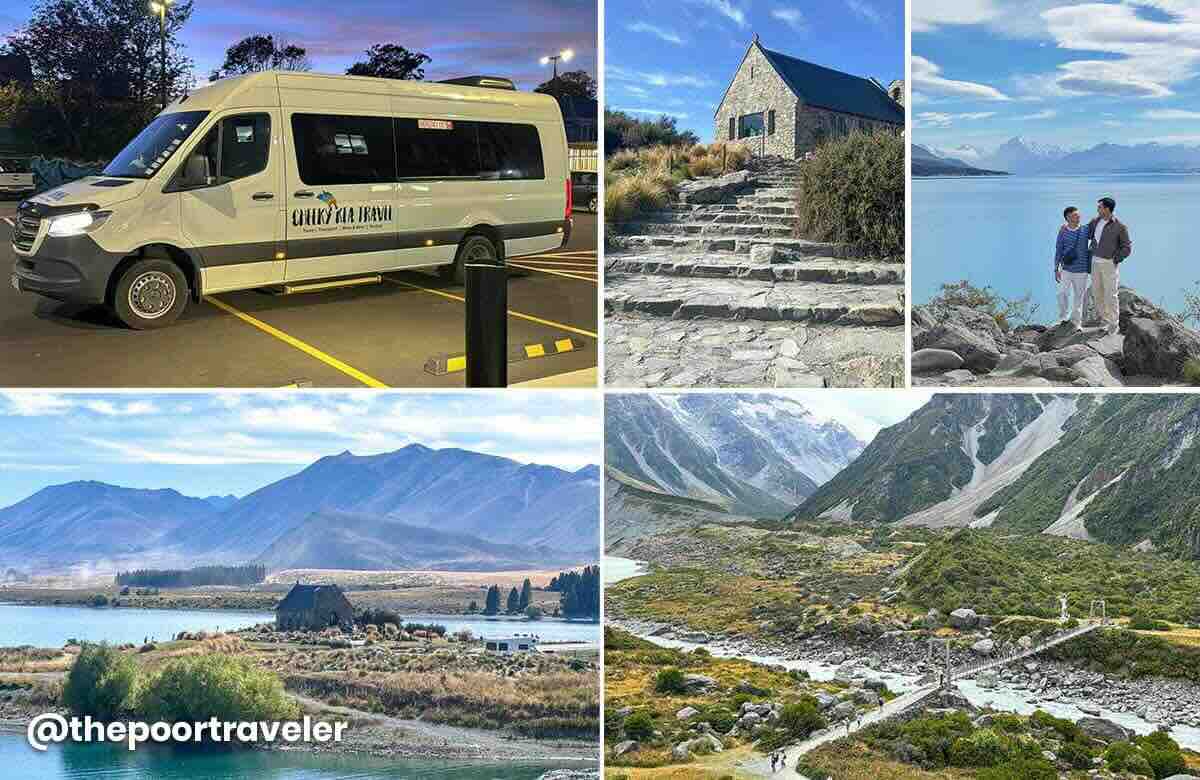
We stopped at Geraldine for coffee and breakfast, admired the quaint Church of the Good Shepherd standing next to Lake Tekapo, sampled salmon dishes at High Country Salmon and fruit ice cream at Jackson Orchards, and marveled at stunning roadside views of Lindis Pass, took plenty of photos at Lake Pukaki, and hiked along the Hooker Valley Trail. We only got to reach the bridge because of the limited time, but we still had a blast.
In case you’re wondering, yes — this tour is available on Klook!
Queenstown Hostel Check-In
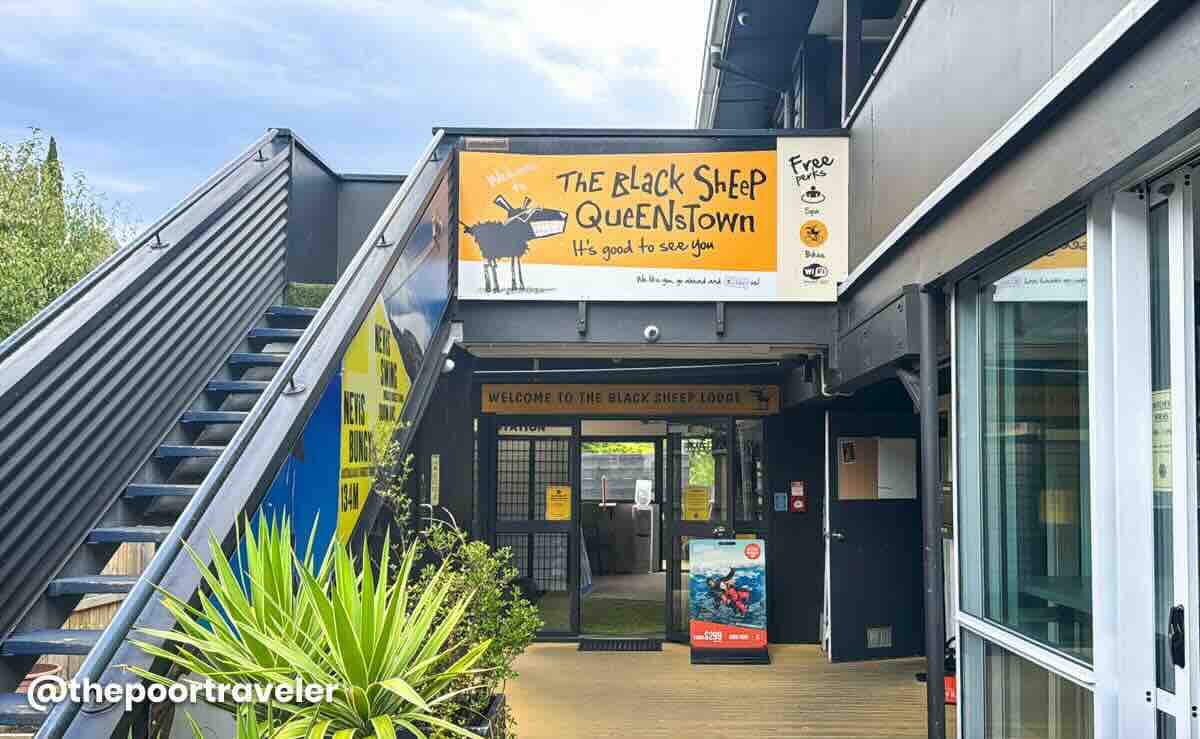
They dropped us off at our lodge, the Black Sheep Backpackers Hostel, where we would be spending the next four nights at around NZD 215 (USD 128, PHP 7293) per night. And that’s for a private fan room without its own toilet and bath. But this was the cheapest accommodation we found at the time. You can Check Rates & Availability Here! ✅
Fergburger
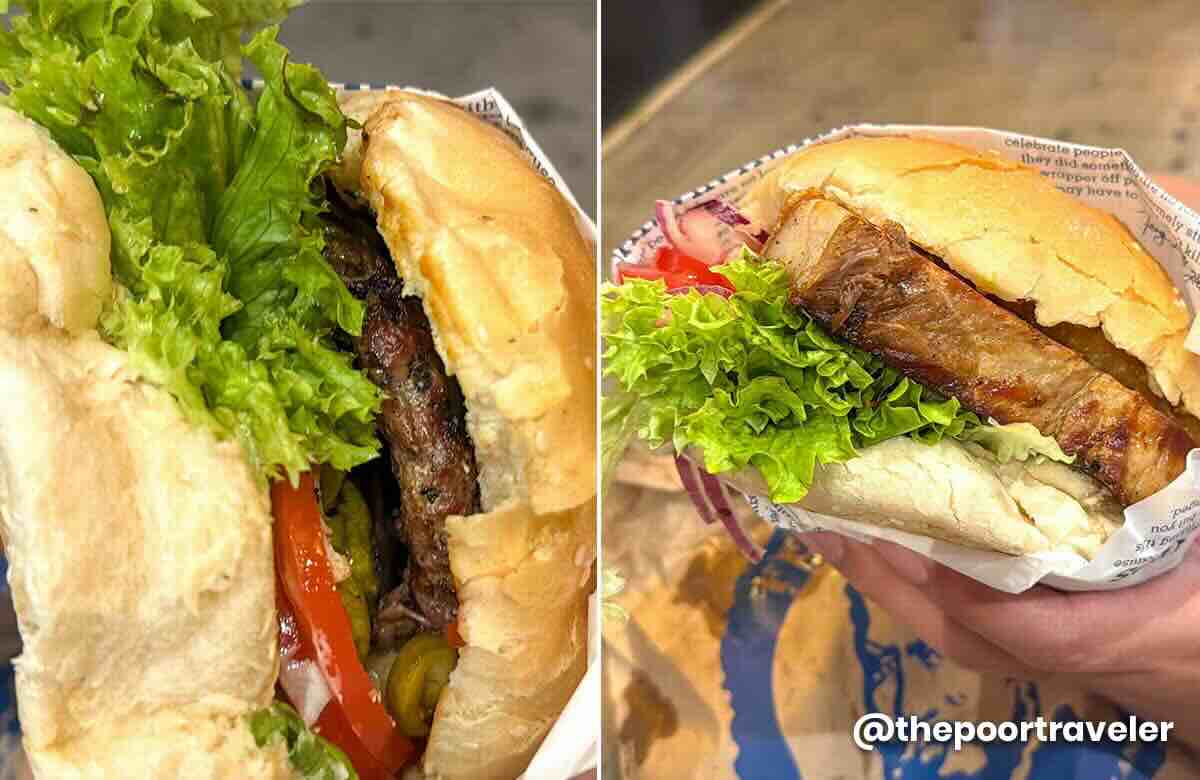
After checking in and dropping our bags in the room, we immediately went out for dinner. The most famous food spot here is probably Fergburger. We ordered its signature burger with beef patty and something more offbeat — a pork belly burger. And truth be told, to me, the signature burger was just alright, but the pork belly one was absolutely delicious. Servings were humongous, too.
Address: 42 Shotover Street, Queenstown 9300, New Zealand
Prices: Signature Burger, NZD 16.50; Chief Wiggum (Pork belly burger), NZD 19.90
DAY 7: QUEENSTOWN ADVENTURES
Skydiving
I wouldn’t call myself a daredevil and I don’t really describe myself as adventurous. But we’re jumping off a plane on our seventh day. Yes, I went skydiving in New Zealand! There were three main reasons why I decided to finally do it here in Queenstown. First, my friend Krisa really wanted to do it and she needed a companion. Both Ivan and Vins won’t ever do it even if you put a gun to their heads.
Second, because it’s relatively affordable here. Emphasis on relatively. Skydiving is generally expensive. In Siquijor and in Cebu, you’ll be shelling out PHP 24,500 per person, including photos and videos. In Switzerland, the cheapest we found was CHF 450 (PHP 30,200). In Namibia, it’s NAD 4700 (PHP 14,200), excluding video documentation. In Cape Town, it’s ZAR 3950 (PHP 12,200) without video. In Australia, it’s AUD 389 (PHP 13,950) without video. In Dubai, it can set you back AED 2199 (PHP 33,300), including video.
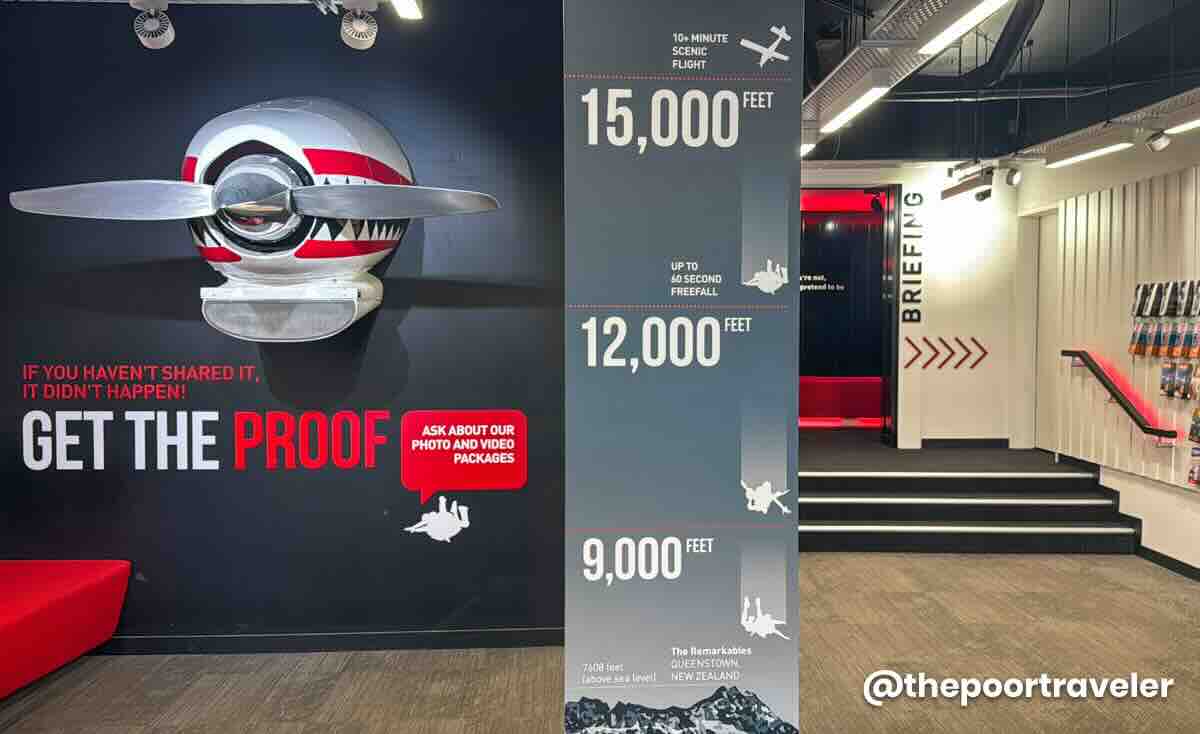
Here in Queenstown, the most budget-friendly option is 9000-ft, which costs NZD 345 (PHP 11,400). If you’re just after the experience, you can totally go for just that. If you want to capture the experience, their photo and video package costs NZD 209 (PHP 6890). So that’s a total of NZD 554 (PHP 18,290). Still cheaper than most options out there.
You can reserve your skydiving slot via Klook!
And the third reason, I thought it was quite fitting to go skydiving in a destination that many regard as the “Adventure Capital of the World”. It’s a nickname that the city has earned and deserved. First, this is where you’ll find the world’s first permanent commercial bungee jumping site — at Kawarau Gorge Suspension Bridge. And over the years, it became a venue for more and more extreme sports.

Anyway, the meetup place was at the NZONE office in the city center, just within walking distance of our hostel. At the last minute, Krisa and I decided to upgrade to 12,000 feet (NZD 430; PHP 14,200).
After a short briefing, we were then transferred to the drop zone, where I stepped into a jumpsuit and met Elliot, who would be diving with me. For the next several minutes, my life was in his hands.
It was glorious! I don’t think I’ll be doing it again in the near or distant future, but it was a hell lot of fun.
Patagonia Ice Creamery and Chocolaterie
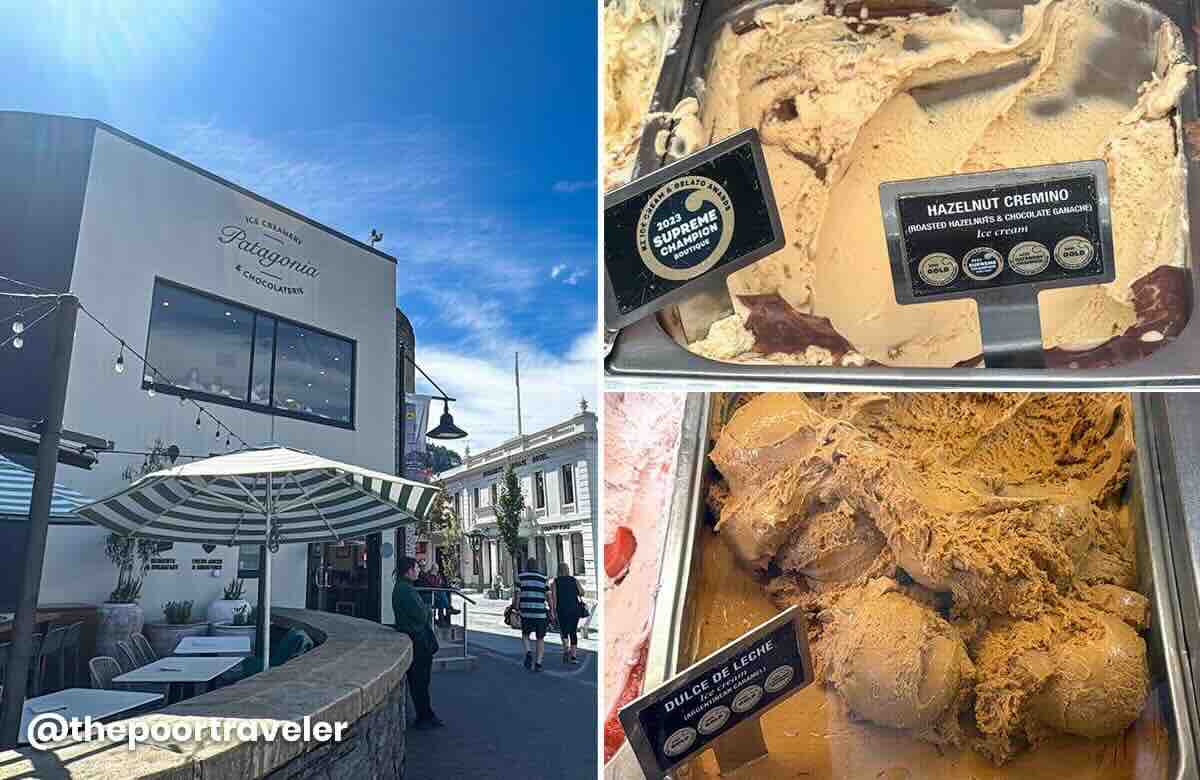
After lunch, we had dessert at the famous Patagonia Ice Creamery and Chocolaterie, where I had its signature and award-winning hazelnut cremino, but the flavor that really won me over was its dulce de leche.
Address: 2 Rees Street, Corner of the Mall, Queenstown 9300, New Zealand
Prices: Single Scoop, NZD 7.50 (P254); Double Scoop, NZD 11 (P372)
Skyline Queenstown
We then walked to Skyline Queenstown to ride a cable car to a lookout which affords awesome views of the city, Lake Wakatipu, and the surrounding areas.
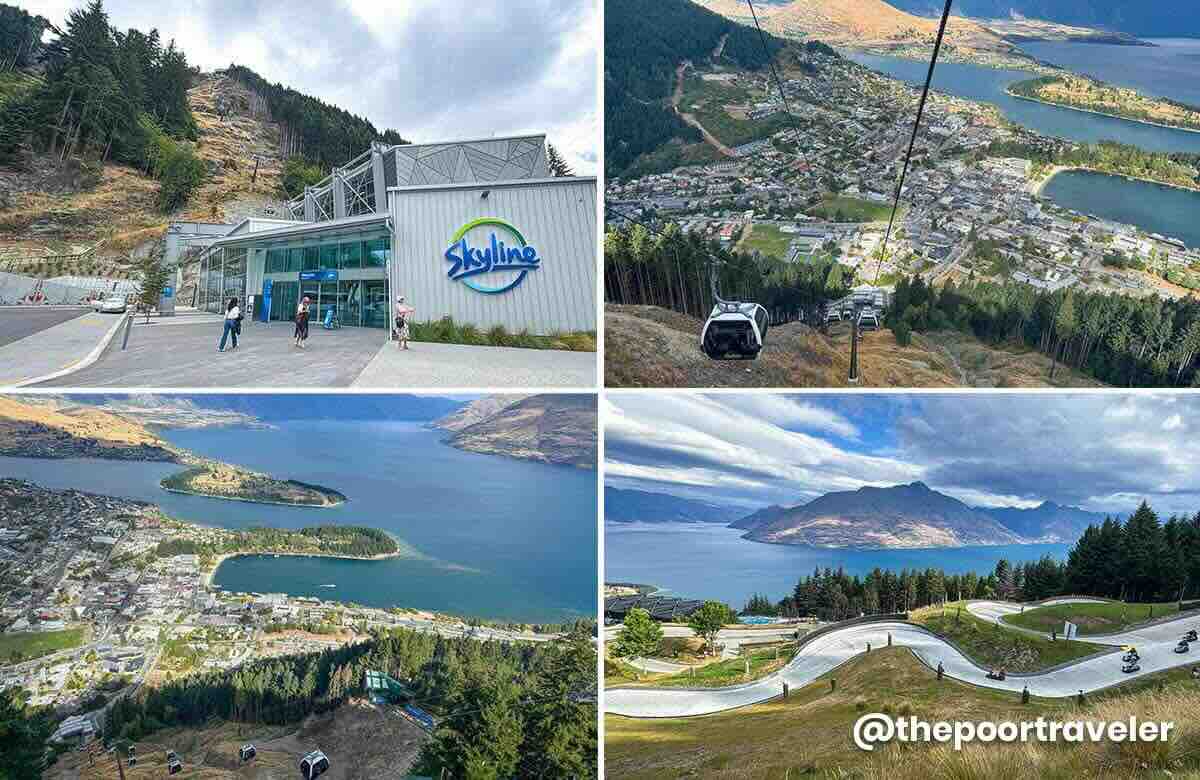
This wasn’t our first luge ride. We’d tried it in Singapore and at Misibis Bay, but this was definitely the most scenic and exhilarating. The view alone as you zoom down the slope and negotiate the curves was phenomenal! We did it three times, but we felt like we should have booked the six-ride package instead.
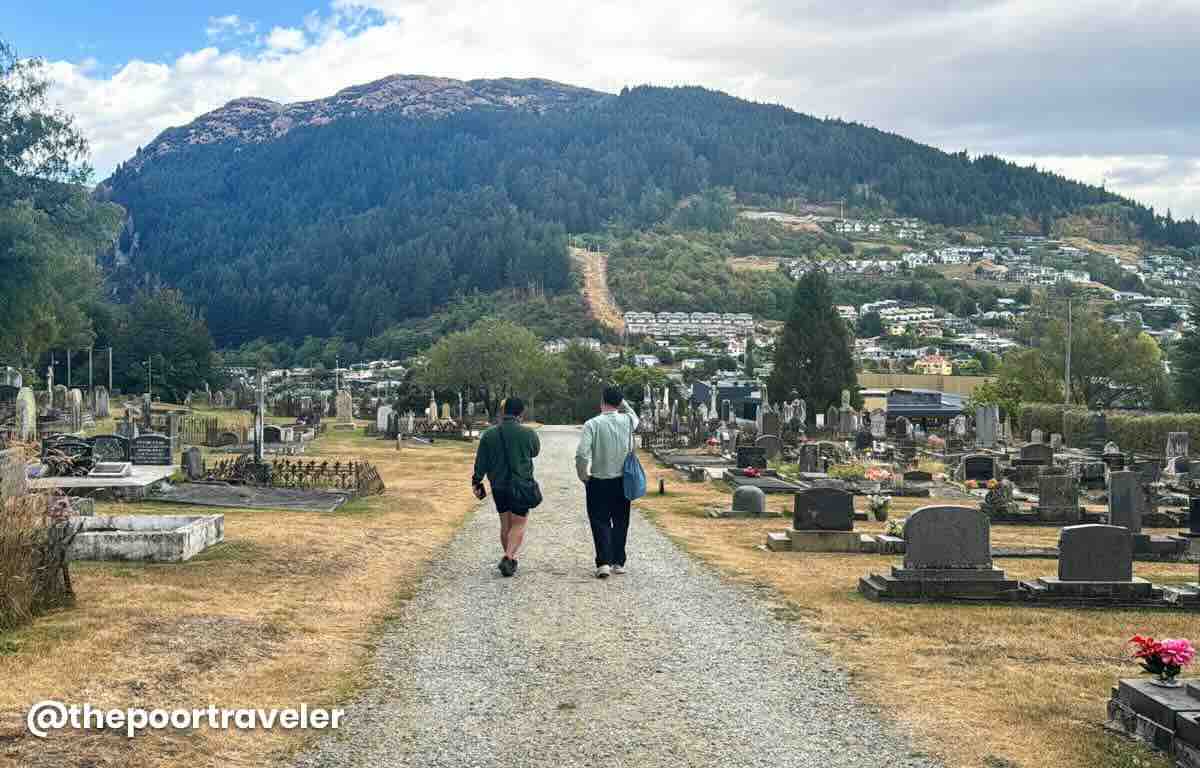
We boarded the gondola back down, and along the way, we passed by a cemetery. I love cemeteries so I convinced Ivan to check it out and explore with me. Apparently, this also marked the start of the popular Tiki Hiking Trail.
Address: 53 Brecon Street, Queenstown 9300, New Zealand
Opening Hours: Daily, 10:00 AM – 9:00 PM
Gondola + Three-Ride Luge: Adult, NZD 89 (PHP 3010); Child, NZD 62 (PHP 2097)
Flame Bar and Grill
Back at the Steamer Wharf, after checking out souvenir shops and trying to get a table at the city’s top restaurants (most of which were fully booked that night), we ended up here at Flame Bar and Grill, which serves local New Zealand and also South African dishes. Its bestseller is the sticky ribs.
We ordered its Flame Mixed Grill platter. It was composed of signature ribs, sirloin steak, rotisserie peri-peri chicken and homemade Boerewors sausage.
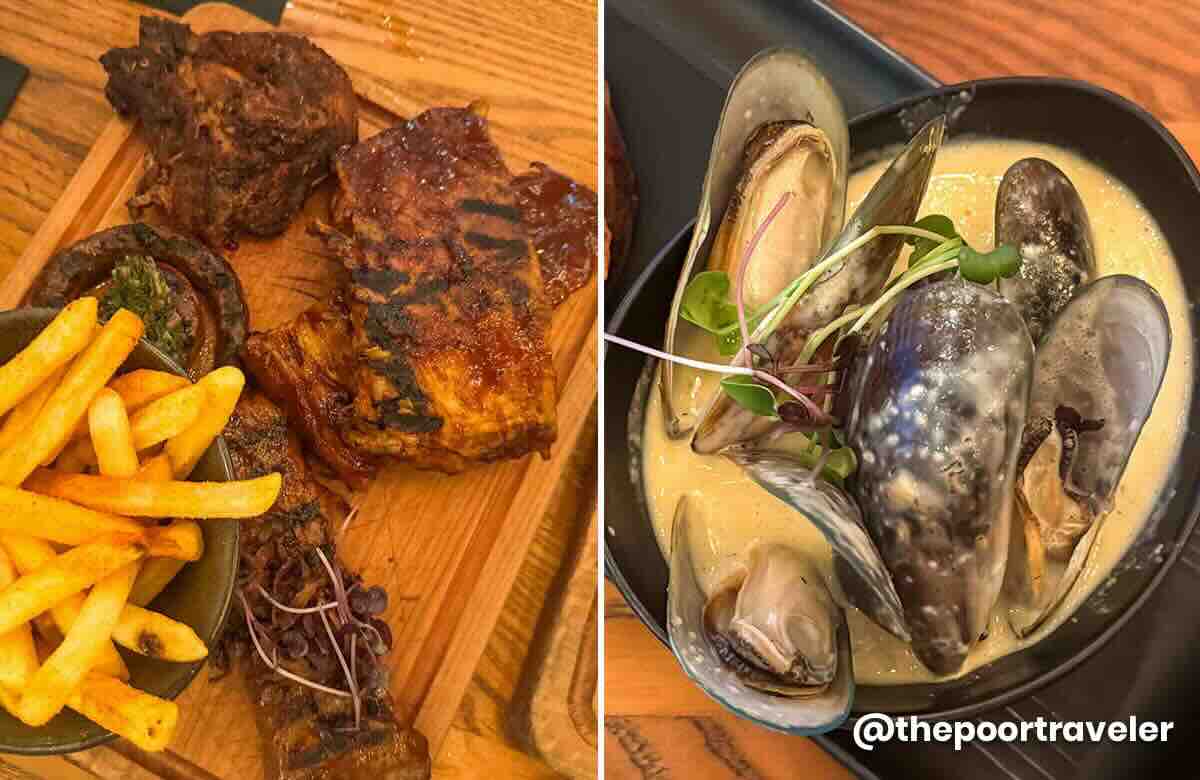
Now, it was marked as good for one person, but I had a feeling it was too much for a single soul. So even if this restaurant had a one-meal-per-person policy, we asked if Vins and I could just share instead, and the staff said OK since I also added a small bowl of New Zealand’s native green-lipped mussels as appetizer.
At this point we had gotten used to the large serving sizes here in New Zealand, but we weren’t prepared for this one. It was a feast! Vins and I shared, right? But we still struggled to finish it all. We did finish, but the struggle was real. But it was our best meal in New Zealand. Every single thing on the table, even Krisa’s Mozambique prawns, was delectable.
Address: Steamer Wharf Street Level/88 Beach Street, Queenstown 9300, New Zealand
Prices: Flame Mixed Grill Platter, NZD 67 (PHP 2266); Native Green-Lipped Mussels, NZD 25 (PHP 846)
DAY 8: MILFORD SOUND
Milford Sound Day Tour
This was the day we’d all been waiting for! Milford Sound is probably South Island’s most talked-about attraction, and we were really excited to finally see it. We joined a group tour which used a bus with glass ceiling for full appreciation of the scenery.
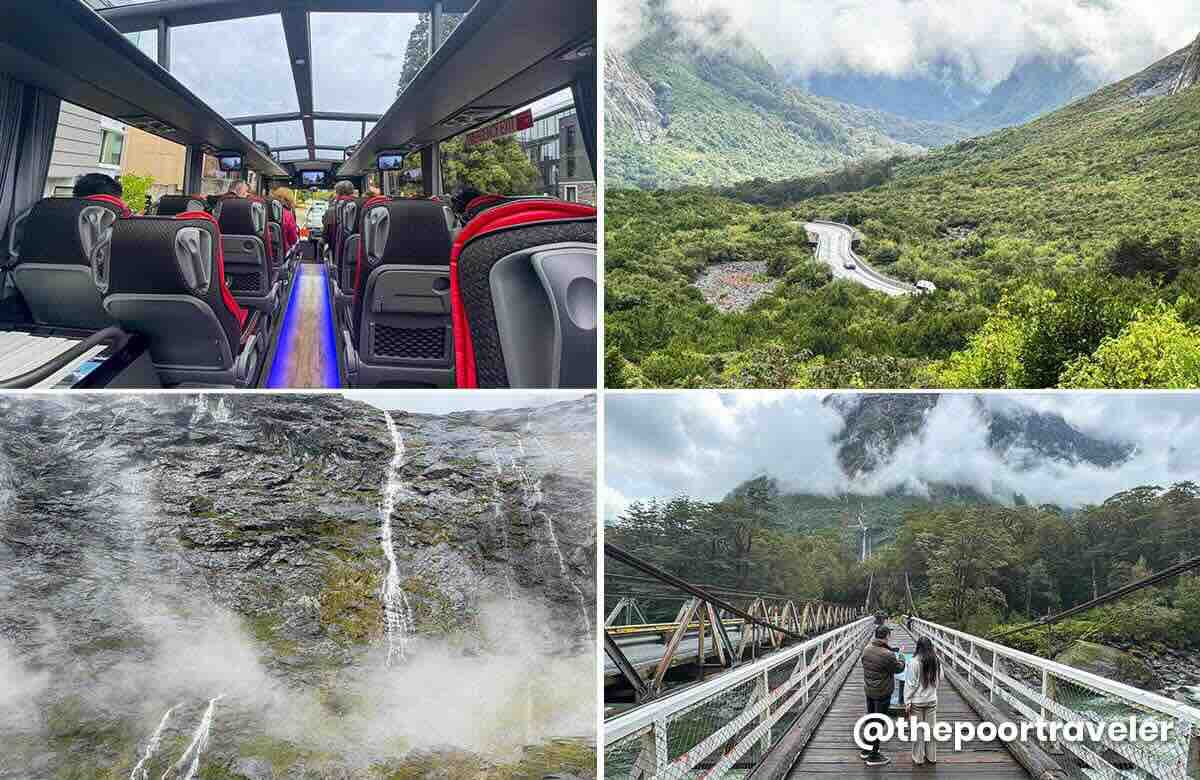
Milford Sound is part of the Fiordland National Park and is roughly four hours away from Queenstown. So yes, we spent a lot of time on the bus, but with several stops along the way, including Tutoko Suspension Bridge, with a view of Mount Tutoko. But I think my favorite was the Hundred Falls at the Milford Valley Lookout. It was my first time to be surrounded by countless cascades all around. It was so surreal and magical.
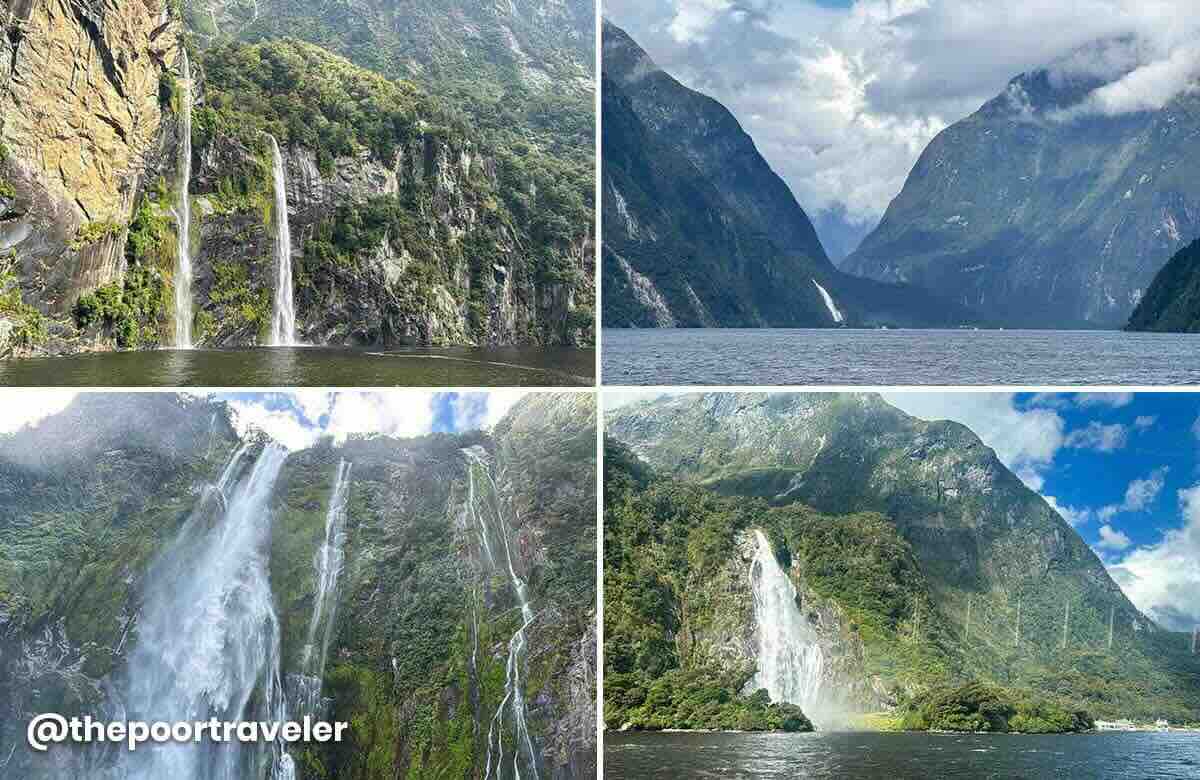
Way past noon, we finally arrived at the Visitor Center by the pier, where we boarded a boat and began our cruise along the fjord, bombarding us with waterfall after waterfall after waterfall. At first we stayed on the top deck for the view, but when things got splashy, we decided to climb down to the cafeteria, where we had lunch, which was included in the package.
The whole cruise lasted almost two hours, from boarding to disembarkation. As soon as we hit land again, we were herded back to the bus to start our journey back to Queenstown.
We booked this on Klook. Below is the exact tour we booked.
✅ BOOK MILFORD SOUND DAY TOUR HERE!
Mapo88 Korean Dining Bar

It took us some time to find a dinner place because most restaurants were packed, but we ended up here at Mapo 88, a Korean restaurant tucked in one of the inner alleys. We had kimchi fried rice, honey soy chicken, and rabokki. Everything was for sharing, so we split the bill.
Address: 3 Searle Lane, Queenstown 9300, New Zealand
Prices: Spam Kimchi Fried Rice, NZD 26 (P880); Honey Soy Chicken, NZD 28 (P947); Rose Rabokki, NZD 24 (PHP 812)
DAY 9: QUEENSTOWN FOOD TRIP
Kiwi Park
It’s our last full day in Queenstown, and today it’s just Vins and I. Krisa and Ivan had flown out earlier this morning. Our itinerary was more laidback today.
We realized, after nine days, we still had not seen any kiwi, which is perhaps New Zealand’s biggest icon. This morning, our main attraction is the Kiwi Park, which is just beside the Skyline Gondola Station. If you have fewer days, you can visit both Kiwi Park and Skyline within the same day. We didn’t do it that way because we were a bit hesitant as we’re not big fans of animal attractions. But in the end, we decided to still check it out.
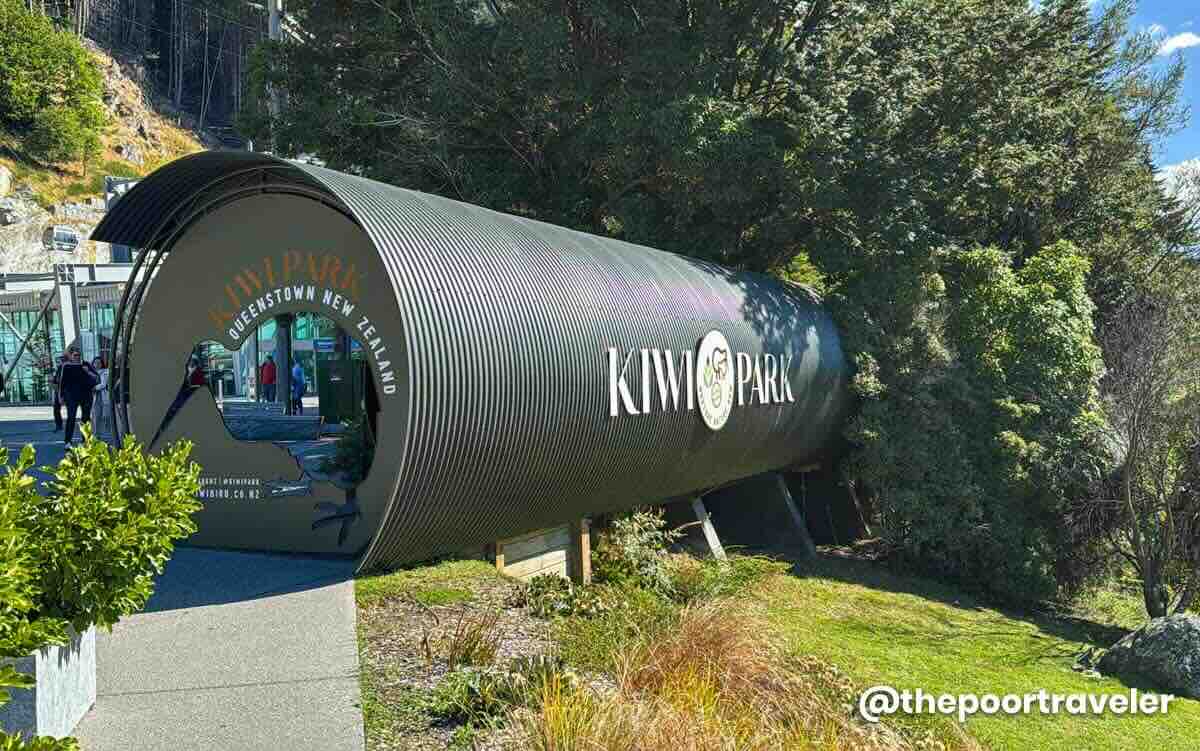
Kiwi Park is a family-owned wildlife center. Established in 1986 on what was once an unofficial rubbish tip, the park has been transformed into a lush, five-acre haven. According the staff, the center is dedicated to the conservation of New Zealand’s unique native species, including, but not limited to, the kiwi.
There was a 30-minute conservation show, introducing some of its resident birds. But the kiwis were sheltered in a blacked-out building where photography was prohibited, so we didn’t have any pics or footage. Some of the birds were kept in enclosures, so if you don’t like animals in captivity, this might not be for you. But the place was informative and insightful.
Address: 51 Brecon Street, Queenstown 9300, New Zealand
Opening Hours: Daily, 9:30 AM – 5:00 PM
Entrance Fee: NZD 60 (PHP 2030)
Queenstown Mall
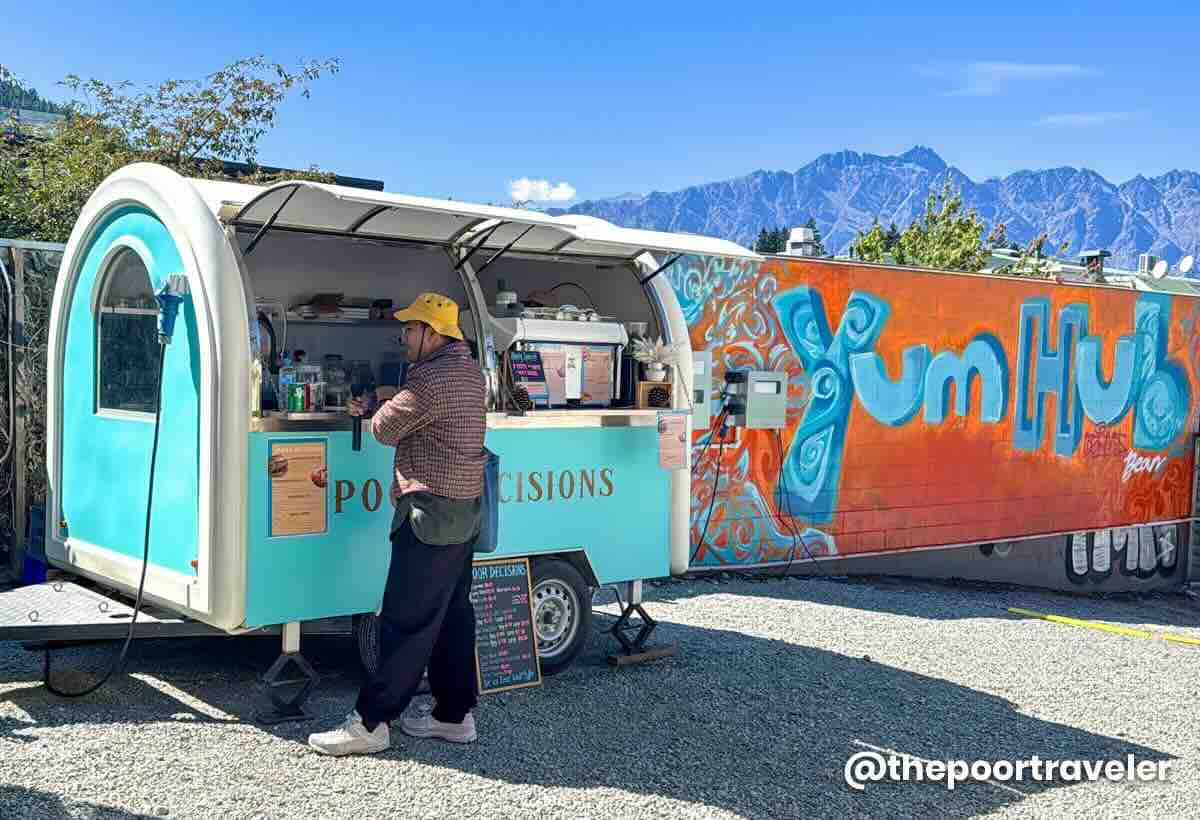
We then spent the rest of the day walking around the Queenstown Mall, shopping for souvenirs, and pigging out at the Yum Hub, which is a collection of parked food trucks serving diverse international plates. We tried FOGO (a Brazilian BBQ spot), Yonder (a popular café and restaurant), Cookie Time (a snack bar famous for its, well, cookies and hot chocolate).
We also returned to Patagonia to try another flavor of their famous ice cream.
Address: Rees Street and Camp Street, Queenstown 9300, New Zealand
DAY 10: DEPARTURE
Our flight out of New Zealand was scheduled at 7:00 AM, so we were up and about as early as 3AM. The airport terminal didn’t open until 4:00 AM, so we had to wait a bit before we could enter. The whole check in, immigration, and boarding processes were all so smooth and uneventful.
NEW ZEALAND BUDGET BREAKDOWN
So, how much did we spend? By this time, you’ve probably noticed that it’s really expensive in New Zealand. I expected the cost of travel to be high, but I was still surprised because I didn’t think it would be this high.
For this itinerary, we spent a total of around P172,000 per person, inclusive of flights, hotels, tours, meals, and transfers. This was for 10 days, covering four cities and three additional day trips to other destinations. So, it was quite a packed schedule.
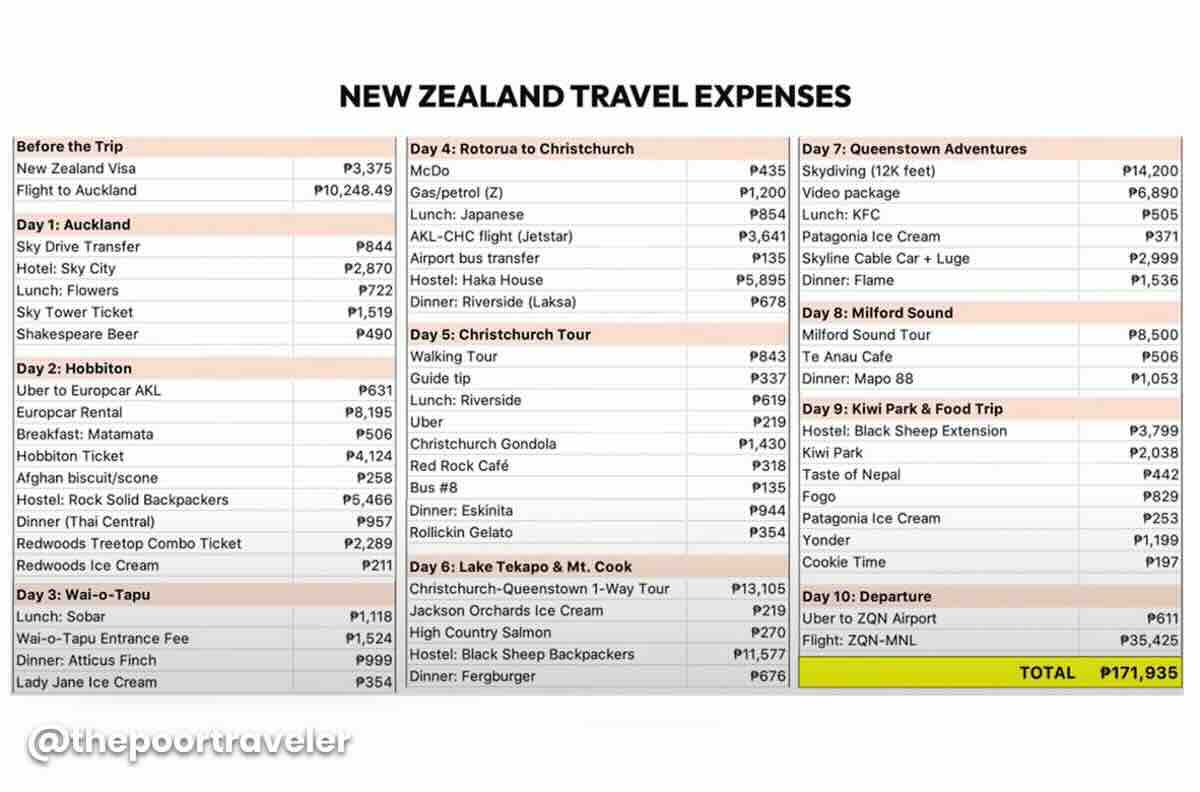
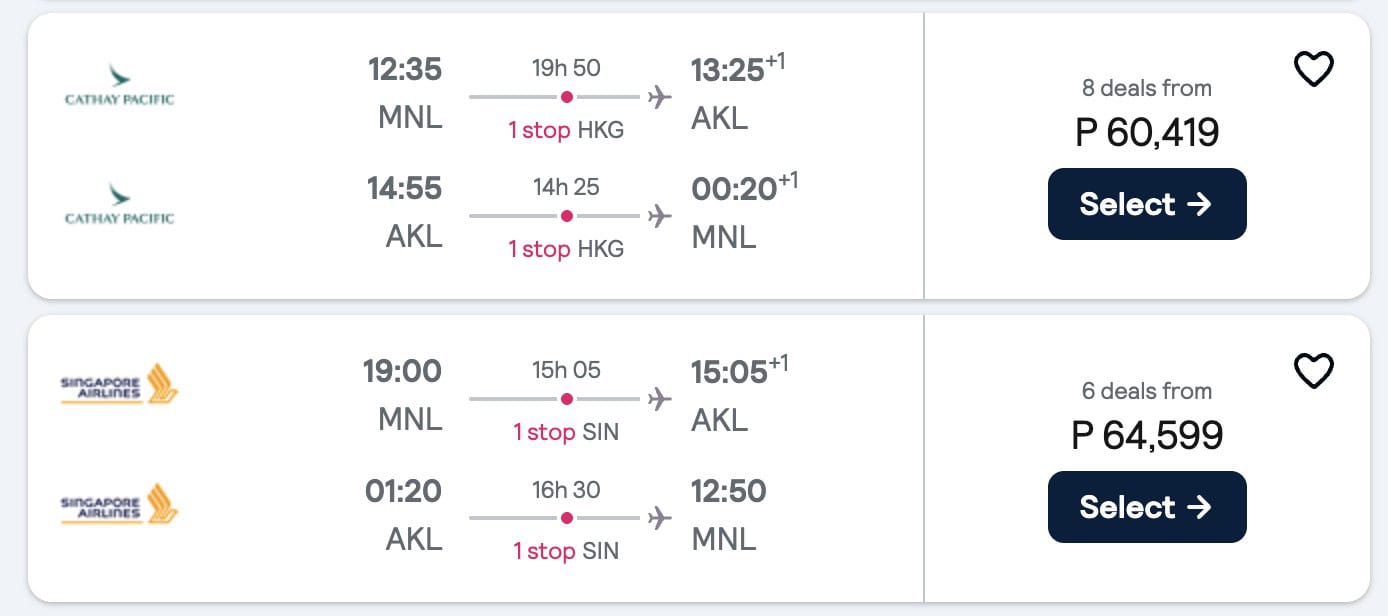
Almost P50,000 went to flights or airfares, and nearly P30,000 went to hotels. Again, this is per person. So, for hotels, we booked rooms for two and then split the cost between Vins and me.
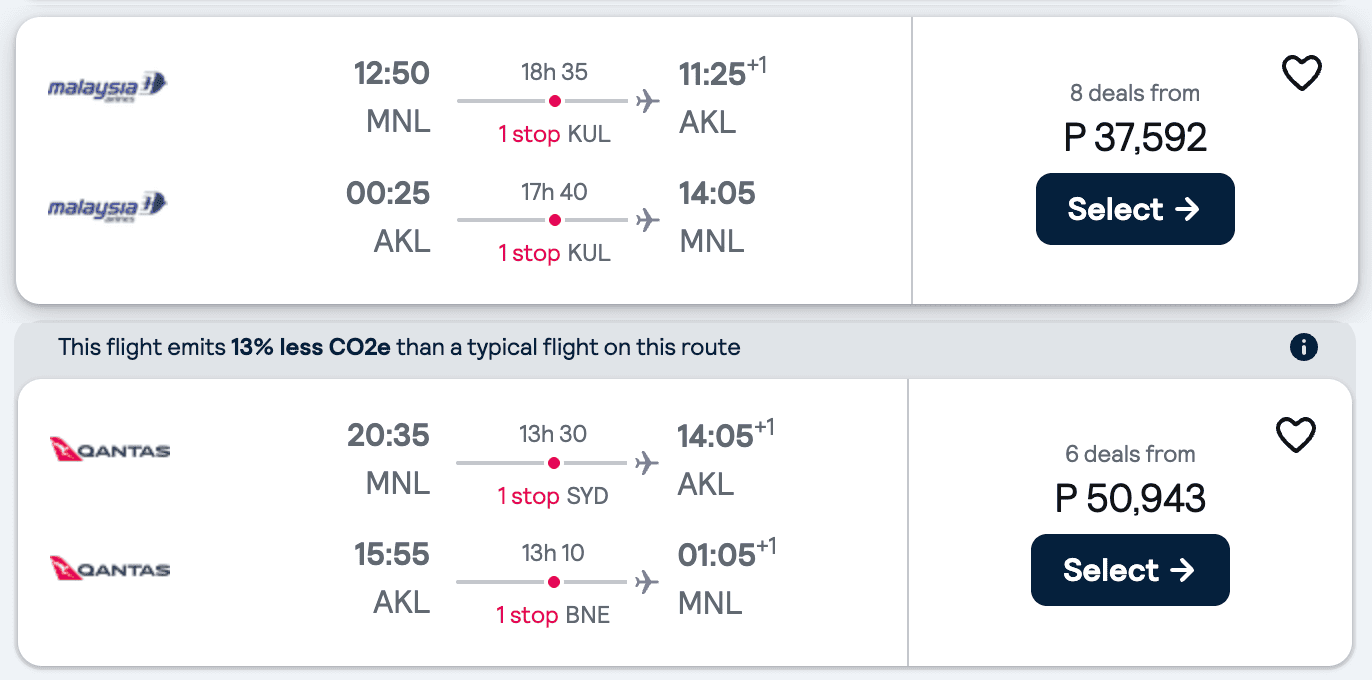
Meanwhile, our friend Ivan had a different computation and ended up spending more because there were hotels where he didn’t have anyone to split the cost with. Also, we had different flights — his was MANILA-NEW ZEALAND-MANILA, which cost around P75,000. Ours, on the other hand, was MELBOURNE-NEW ZEALAND-MANILA since this trip was part of a greater Australia-New Zealand trip itinerary, so our flights only cost P49,000. But if we had taken the same route and flights as Ivan, our total would have been around P198,000, which is more expensive because our stay was also one day longer.
By the way, the conversions we’re showing you vary because we used different cards for our expenses — some were on Vin’s credit card, some on mine, and sometimes on my GCash. Whatever conversion rate we were charged, that’s what we recorded. When we couldn’t find the exchange rate, we used 33.7 to convert.
We also didn’t include souvenirs and alcoholic drinks in the computation. Hahaha! If you are a drinker, then you might want to add more to your budget.
You might have noticed too that we ate out often because there were a lot of restaurants we wanted to try. If you’re on a budget, you can still cut costs by sticking to cheaper dining options, buying food from the supermarkets, or grabbing quick eats from convenience stores.
Again, all the tours and hotels we booked and recommend are compiled in the TPT Masterlist for your easy reference. Just visit www.thepoortraveler.net/masterlist.
Have Peace of Mind While Traveling!
Getting a travel insurance is optional, but we highly recommend this, especially when traveling abroad. Travel can be unpredictable, and though we hope we’ll never use it, having it gives us peace of mind in case of unexpected delays, cancellations, or emergencies.
For international destinations, consider PGA Sompo’s TravelJOY Plus insurance. You can GET IT HERE. Don’t forget to use WORTHIT for a special affordable rate.

2025 8 15 – First uploaded